├── documentation
├── authorA
│ ├── author_meta.json
│ ├── mock-article-1.md
│ └── mock-article-2.md
├── authorB
│ ├── author_meta.json
│ ├── mock-article-4.md
│ └── mock-article-3.md
├── categories.md
├── catalog-content.md
├── tags.md
└── content-standards.md
├── content
├── deyemiobaa
│ ├── author_meta.json
│ ├── creating-queues-using-javascript.md
│ └── building-a-todolist-with-rails.md
├── goku-kun
│ ├── author_meta.json
│ ├── adt.png
│ ├── queue-adt.png
│ ├── stack-adt.png
│ ├── node-linked-list.png
│ ├── abstract-data-type-usage.png
│ └── introduction-to-adts-in-javascript.md
├── smyja
│ ├── author_meta.json
│ ├── droplets.png
│ ├── website.png
│ ├── app-market.jpg
│ ├── cpu-choice.png
│ ├── force-https.png
│ ├── root-domain.png
│ ├── set-domain.png
│ ├── caprover-app.png
│ ├── enable-https.png
│ ├── enable-token.png
│ ├── container-port.png
│ ├── remote-registry.png
│ ├── docker-registeries.png
│ ├── caprover-marketplace.png
│ ├── caprover-quick-access.png
│ ├── gh-actions-settings.png
│ ├── created-caprover-droplet.png
│ ├── nextjs-deployment-with-caprover-and-github-actions.md
│ └── how-to-use-graphql-with-django.md
├── brandondusch
│ ├── author_meta.json
│ ├── github.gif
│ └── build-a-3d-environment-with-three-js.md
├── caupolicandiaz
│ ├── author_meta.json
│ └── web-scrape-with-selenium-and-beautiful-soup.md
├── christine_yang
│ ├── author_meta.json
│ └── build-a-discord-bot-with-node-js.md
├── kyrathompson
│ ├── author_meta.json
│ └── how-to-convert-css-to-scss.md
├── stevenswiniarski
│ ├── author_meta.json
│ ├── stack.png
│ └── create-a-stack-in-python.md
├── christine_belzie
│ ├── author_meta.json
│ ├── step1-of-slug.png
│ ├── step2-of-slug.png
│ ├── step3-of-slug.png
│ └── create-a-url-using-slugs.md
└── francineblanc
│ ├── author_meta.json
│ ├── git-init.png
│ ├── git-add-and-status.png
│ ├── git-status-untracked-files.png
│ ├── git-status-untracked-with-ignore.png
│ └── how-to-use-git-for-beginners.md
├── .gitignore
├── .github
├── workflows
│ └── validate_repo_content.yml
└── CONTRIBUTING.md
├── .tests
├── go.mod
├── go.sum
└── repo_validation_test.go
└── README.md
/documentation/authorA/author_meta.json:
--------------------------------------------------------------------------------
1 | {
2 | "ccID": "ABCD1234"
3 | }
--------------------------------------------------------------------------------
/documentation/authorB/author_meta.json:
--------------------------------------------------------------------------------
1 | {
2 | "ccID": "ZYXW9876"
3 | }
--------------------------------------------------------------------------------
/content/deyemiobaa/author_meta.json:
--------------------------------------------------------------------------------
1 | {
2 | "ccId": "5e768b8c7bd19555c4f26b45"
3 | }
--------------------------------------------------------------------------------
/content/goku-kun/author_meta.json:
--------------------------------------------------------------------------------
1 | {
2 | "ccId": "5f5735c6bfbe245a4f4f90f4"
3 | }
--------------------------------------------------------------------------------
/content/smyja/author_meta.json:
--------------------------------------------------------------------------------
1 | {
2 | "ccId": "61b2615d5d8f7d15c439ef34"
3 | }
4 |
--------------------------------------------------------------------------------
/content/brandondusch/author_meta.json:
--------------------------------------------------------------------------------
1 | {
2 | "ccID": "53ad6728c660e4eb130002e5"
3 | }
--------------------------------------------------------------------------------
/content/caupolicandiaz/author_meta.json:
--------------------------------------------------------------------------------
1 | {
2 | "ccID": "56f6d56e4c432ce4d1000701"
3 | }
--------------------------------------------------------------------------------
/content/christine_yang/author_meta.json:
--------------------------------------------------------------------------------
1 | {
2 | "ccId": "610d6b838f6bbe7014931336"
3 | }
--------------------------------------------------------------------------------
/content/kyrathompson/author_meta.json:
--------------------------------------------------------------------------------
1 | {
2 | "ccId": "53d18876fed2a851f8000029"
3 | }
--------------------------------------------------------------------------------
/content/stevenswiniarski/author_meta.json:
--------------------------------------------------------------------------------
1 | {
2 | "ccId": "60cbc2d1011b910740680cbd"
3 | }
--------------------------------------------------------------------------------
/content/christine_belzie/author_meta.json:
--------------------------------------------------------------------------------
1 | {
2 | "ccID": "6387373022f84400176c733a"
3 | }
4 |
--------------------------------------------------------------------------------
/content/francineblanc/author_meta.json:
--------------------------------------------------------------------------------
1 | {
2 | "ccID": "5e9efc026224f2238a02481a"
3 | }
4 |
--------------------------------------------------------------------------------
/content/goku-kun/adt.png:
--------------------------------------------------------------------------------
https://raw.githubusercontent.com/Codecademy/ugc/HEAD/content/goku-kun/adt.png
--------------------------------------------------------------------------------
/content/smyja/droplets.png:
--------------------------------------------------------------------------------
https://raw.githubusercontent.com/Codecademy/ugc/HEAD/content/smyja/droplets.png
--------------------------------------------------------------------------------
/content/smyja/website.png:
--------------------------------------------------------------------------------
https://raw.githubusercontent.com/Codecademy/ugc/HEAD/content/smyja/website.png
--------------------------------------------------------------------------------
/content/smyja/app-market.jpg:
--------------------------------------------------------------------------------
https://raw.githubusercontent.com/Codecademy/ugc/HEAD/content/smyja/app-market.jpg
--------------------------------------------------------------------------------
/content/smyja/cpu-choice.png:
--------------------------------------------------------------------------------
https://raw.githubusercontent.com/Codecademy/ugc/HEAD/content/smyja/cpu-choice.png
--------------------------------------------------------------------------------
/content/smyja/force-https.png:
--------------------------------------------------------------------------------
https://raw.githubusercontent.com/Codecademy/ugc/HEAD/content/smyja/force-https.png
--------------------------------------------------------------------------------
/content/smyja/root-domain.png:
--------------------------------------------------------------------------------
https://raw.githubusercontent.com/Codecademy/ugc/HEAD/content/smyja/root-domain.png
--------------------------------------------------------------------------------
/content/smyja/set-domain.png:
--------------------------------------------------------------------------------
https://raw.githubusercontent.com/Codecademy/ugc/HEAD/content/smyja/set-domain.png
--------------------------------------------------------------------------------
/content/brandondusch/github.gif:
--------------------------------------------------------------------------------
https://raw.githubusercontent.com/Codecademy/ugc/HEAD/content/brandondusch/github.gif
--------------------------------------------------------------------------------
/content/goku-kun/queue-adt.png:
--------------------------------------------------------------------------------
https://raw.githubusercontent.com/Codecademy/ugc/HEAD/content/goku-kun/queue-adt.png
--------------------------------------------------------------------------------
/content/goku-kun/stack-adt.png:
--------------------------------------------------------------------------------
https://raw.githubusercontent.com/Codecademy/ugc/HEAD/content/goku-kun/stack-adt.png
--------------------------------------------------------------------------------
/content/smyja/caprover-app.png:
--------------------------------------------------------------------------------
https://raw.githubusercontent.com/Codecademy/ugc/HEAD/content/smyja/caprover-app.png
--------------------------------------------------------------------------------
/content/smyja/enable-https.png:
--------------------------------------------------------------------------------
https://raw.githubusercontent.com/Codecademy/ugc/HEAD/content/smyja/enable-https.png
--------------------------------------------------------------------------------
/content/smyja/enable-token.png:
--------------------------------------------------------------------------------
https://raw.githubusercontent.com/Codecademy/ugc/HEAD/content/smyja/enable-token.png
--------------------------------------------------------------------------------
/content/francineblanc/git-init.png:
--------------------------------------------------------------------------------
https://raw.githubusercontent.com/Codecademy/ugc/HEAD/content/francineblanc/git-init.png
--------------------------------------------------------------------------------
/content/smyja/container-port.png:
--------------------------------------------------------------------------------
https://raw.githubusercontent.com/Codecademy/ugc/HEAD/content/smyja/container-port.png
--------------------------------------------------------------------------------
/content/smyja/remote-registry.png:
--------------------------------------------------------------------------------
https://raw.githubusercontent.com/Codecademy/ugc/HEAD/content/smyja/remote-registry.png
--------------------------------------------------------------------------------
/content/stevenswiniarski/stack.png:
--------------------------------------------------------------------------------
https://raw.githubusercontent.com/Codecademy/ugc/HEAD/content/stevenswiniarski/stack.png
--------------------------------------------------------------------------------
/content/smyja/docker-registeries.png:
--------------------------------------------------------------------------------
https://raw.githubusercontent.com/Codecademy/ugc/HEAD/content/smyja/docker-registeries.png
--------------------------------------------------------------------------------
/content/goku-kun/node-linked-list.png:
--------------------------------------------------------------------------------
https://raw.githubusercontent.com/Codecademy/ugc/HEAD/content/goku-kun/node-linked-list.png
--------------------------------------------------------------------------------
/content/smyja/caprover-marketplace.png:
--------------------------------------------------------------------------------
https://raw.githubusercontent.com/Codecademy/ugc/HEAD/content/smyja/caprover-marketplace.png
--------------------------------------------------------------------------------
/content/smyja/caprover-quick-access.png:
--------------------------------------------------------------------------------
https://raw.githubusercontent.com/Codecademy/ugc/HEAD/content/smyja/caprover-quick-access.png
--------------------------------------------------------------------------------
/content/smyja/gh-actions-settings.png:
--------------------------------------------------------------------------------
https://raw.githubusercontent.com/Codecademy/ugc/HEAD/content/smyja/gh-actions-settings.png
--------------------------------------------------------------------------------
/content/christine_belzie/step1-of-slug.png:
--------------------------------------------------------------------------------
https://raw.githubusercontent.com/Codecademy/ugc/HEAD/content/christine_belzie/step1-of-slug.png
--------------------------------------------------------------------------------
/content/christine_belzie/step2-of-slug.png:
--------------------------------------------------------------------------------
https://raw.githubusercontent.com/Codecademy/ugc/HEAD/content/christine_belzie/step2-of-slug.png
--------------------------------------------------------------------------------
/content/christine_belzie/step3-of-slug.png:
--------------------------------------------------------------------------------
https://raw.githubusercontent.com/Codecademy/ugc/HEAD/content/christine_belzie/step3-of-slug.png
--------------------------------------------------------------------------------
/content/francineblanc/git-add-and-status.png:
--------------------------------------------------------------------------------
https://raw.githubusercontent.com/Codecademy/ugc/HEAD/content/francineblanc/git-add-and-status.png
--------------------------------------------------------------------------------
/content/smyja/created-caprover-droplet.png:
--------------------------------------------------------------------------------
https://raw.githubusercontent.com/Codecademy/ugc/HEAD/content/smyja/created-caprover-droplet.png
--------------------------------------------------------------------------------
/content/goku-kun/abstract-data-type-usage.png:
--------------------------------------------------------------------------------
https://raw.githubusercontent.com/Codecademy/ugc/HEAD/content/goku-kun/abstract-data-type-usage.png
--------------------------------------------------------------------------------
/.gitignore:
--------------------------------------------------------------------------------
1 | .DS_Store
2 | node_modules
3 | package-lock.json
4 | npm-debug.log*
5 | yarn-debug.log*
6 | yarn-error.log*
7 | *.swp
8 | *.swo
9 | tmp
--------------------------------------------------------------------------------
/content/francineblanc/git-status-untracked-files.png:
--------------------------------------------------------------------------------
https://raw.githubusercontent.com/Codecademy/ugc/HEAD/content/francineblanc/git-status-untracked-files.png
--------------------------------------------------------------------------------
/content/francineblanc/git-status-untracked-with-ignore.png:
--------------------------------------------------------------------------------
https://raw.githubusercontent.com/Codecademy/ugc/HEAD/content/francineblanc/git-status-untracked-with-ignore.png
--------------------------------------------------------------------------------
/documentation/categories.md:
--------------------------------------------------------------------------------
1 | # Categories
2 |
3 | Here are the categories, slugs for both Languages and Subjects, which can be found on the left side of the [Articles hub page](https://www.codecademy.com/articles).
4 |
5 | Subjects' slugs:
6 |
7 | ```
8 | code-foundations
9 | computer-science
10 | cybersecurity
11 | data-science
12 | data-visualization
13 | developer-tools
14 | game-development
15 | machine-learning
16 | math
17 | mobile-development
18 | web-design
19 | web-development
20 | ```
21 |
22 | Languages' slugs:
23 |
24 | ```
25 | bash
26 | c-sharp
27 | c-plus-plus
28 | go
29 | html-css
30 | java
31 | javascript
32 | kotlin
33 | php
34 | python
35 | r
36 | ruby
37 | sql
38 | swift
39 | ```
40 |
--------------------------------------------------------------------------------
/.github/workflows/validate_repo_content.yml:
--------------------------------------------------------------------------------
1 | # This is a basic workflow to help you get started with Actions
2 |
3 | name: validate_repo_content
4 |
5 | # Controls when the workflow will run
6 | on:
7 | pull_request:
8 | branches: [ main ]
9 |
10 | # A workflow run is made up of one or more jobs that can run sequentially or in parallel
11 | jobs:
12 | # This workflow contains a single job called "build"
13 | validate:
14 | runs-on: ubuntu-latest
15 | steps:
16 | - uses: actions/checkout@v2
17 |
18 | - name: Set up Go
19 | uses: actions/setup-go@v2
20 | with:
21 | go-version: 1.17
22 |
23 | - name: Test
24 | env:
25 | AUTHORS_URL: ${{ secrets.AUTHORS_URL }}
26 | run: cd ./.tests && go test -failfast -v
27 |
--------------------------------------------------------------------------------
/.tests/go.mod:
--------------------------------------------------------------------------------
1 | module github.com/codecademy/ugc
2 |
3 | go 1.17
4 |
5 | require (
6 | github.com/adrg/frontmatter v0.2.0
7 | github.com/go-playground/validator v9.31.0+incompatible
8 | github.com/machinebox/graphql v0.2.2
9 | github.com/stretchr/testify v1.7.0
10 |
11 | )
12 |
13 | require (
14 | github.com/BurntSushi/toml v0.3.1 // indirect
15 | github.com/davecgh/go-spew v1.1.0 // indirect
16 | github.com/go-playground/locales v0.14.0 // indirect
17 | github.com/go-playground/universal-translator v0.18.0 // indirect
18 | github.com/leodido/go-urn v1.2.1 // indirect
19 | github.com/matryer/is v1.4.0 // indirect
20 | github.com/pkg/errors v0.9.1 // indirect
21 | github.com/pmezard/go-difflib v1.0.0 // indirect
22 | gopkg.in/go-playground/assert.v1 v1.2.1 // indirect
23 | gopkg.in/yaml.v2 v2.3.0 // indirect
24 | gopkg.in/yaml.v3 v3.0.0 // indirect
25 | )
26 |
--------------------------------------------------------------------------------
/documentation/authorB/mock-article-4.md:
--------------------------------------------------------------------------------
1 | ---
2 | Title: "[MOCK] The Primary Reasons To Love Primary Keys"
3 | Description: "SQL tables sometimes have a column that uniquely identifies each row of that table. These special columns are called primary keys."
4 | DatePublished: "2022-01-29"
5 | Categories:
6 | - "computer-science"
7 | - "data-science"
8 | Tags:
9 | - "Comments"
10 | - "Documentation"
11 | CatalogContent:
12 | - "learn-sql"
13 | - "paths/analyze-data-with-sql"
14 | ---
15 |
16 | SQL tables sometimes have a column that uniquely identifies each row of that table. These special columns are called primary keys.
17 |
18 | A primary key column has a few requirements:
19 |
20 | - None of the values can be `NULL`.
21 | - Each value must be unique (i.e., you can’t have two customers with the same `customer_id` in the `customers` table).
22 | - A table can not have more than one primary key column.
23 |
24 | Here's an `orders` table where the `order_id` is its primary key:
25 |
26 | | order_id | customer_id | total_cost | purchase_date |
27 | | -------- | ----------- | ---------- | ------------- |
28 | | 1 | 1001 | 13.99 | 2022-01-01 |
29 | | 2 | 1294 | 61.42 | 2022-01-01 |
30 | | 3 | 1001 | 23.45 | 2022-01-02 |
31 |
32 | ## Syntax
33 |
34 | `PRIMARY KEY` columns can be used to uniquely identify the row. Attempts to insert a row with an identical value to a row already in the table will result in a _constraint violation_ which will not allow you to insert the new row.
35 |
36 | The statement below sets a `PRIMARY KEY` on the `students` table:
37 |
38 | ```sql
39 | CREATE TABLE students (
40 | id INTEGER PRIMARY KEY,
41 | name TEXT,
42 | grade INTEGER,
43 | age INTEGER
44 | );
45 | ```
46 |
47 | ## Foreign Keys
48 |
49 | When the primary key for one table appears in a different table, it is called a foreign key.
50 |
51 | Why is this important? The most common types of joins will be joining a foreign key from one table with the primary key from another table. For instance, when we join the `orders` table and the `customers` table, we join on the `customer_id` column, which is a foreign key in `orders` and the primary key in `customers`.
52 |
--------------------------------------------------------------------------------
/documentation/catalog-content.md:
--------------------------------------------------------------------------------
1 | # Catalog Content (To Be Updated)
2 |
3 | The [metadata](https://github.com/Codecademy/docs/blob/main/documentation/content-standards.md#standards-metadata) which go at the top of the file, should include **two** slugs. Preferably:
4 |
5 | - A free course
6 | - A Pro course/Path
7 |
8 | These slugs may vary for different topics.
9 |
10 | Feel free to add suggestions for new slugs to the lists as part of your PR! Be sure to insert them alphabetically.
11 |
12 | ### C
13 |
14 | ```
15 | - "learn-c"
16 | - "paths/computer-science"
17 | ```
18 |
19 | ### C++
20 |
21 | ```
22 | - "learn-c-plus-plus"
23 | - "paths/computer-science"
24 | ```
25 |
26 | ### CSS
27 |
28 | ```
29 | - "learn-css"
30 | - "paths/front-end-engineer-career-path"
31 | ```
32 |
33 | ### Emojicode
34 |
35 | ```
36 | - "learn-emojicode"
37 | - "paths/computer-science"
38 | ```
39 |
40 | ### Git
41 |
42 | ```
43 | - "learn-git"
44 | - "learn-the-command-line"
45 | - "paths/computer-science"
46 | ```
47 |
48 | ### Go
49 |
50 | ```
51 | - "learn-go"
52 | - "paths/back-end-engineer-career-path"
53 | - "paths/computer-science"
54 | ```
55 |
56 | ### HTML
57 |
58 | ```
59 | - "learn-html"
60 | - "paths/front-end-engineer-career-path"
61 | ```
62 |
63 | ### Java
64 |
65 | ```
66 | - "learn-java"
67 | - "paths/computer-science"
68 | ```
69 |
70 | ### JavaScript
71 |
72 | ```
73 | - "introduction-to-javascript"
74 | - "paths/front-end-engineer-career-path"
75 | ```
76 |
77 | ### Markdown
78 |
79 | ```
80 | - "learn-html"
81 | - "paths/front-end-engineer-career-path"
82 | ```
83 |
84 | ### PHP
85 |
86 | ```
87 | - "learn-php"
88 | - "paths/computer-science"
89 | ```
90 |
91 | ### Python
92 |
93 | ```
94 | - "learn-python-3"
95 | - "paths/computer-science"
96 | ```
97 |
98 | ### React
99 |
100 | ```
101 | - "react-101"
102 | - "paths/front-end-engineer-career-path"
103 | ```
104 |
105 | ### Ruby
106 |
107 | ```
108 | - "learn-rails"
109 | - "learn-ruby"
110 | - "paths/full-stack-engineer-career-path"
111 | ```
112 |
113 | ### SQL
114 |
115 | ```
116 | - "learn-sql"
117 | - "paths/analyze-data-with-sql"
118 | ```
119 |
120 | ### Swift
121 |
122 | ```
123 | - "learn-swift"
124 | - "paths/build-ios-apps-with-swiftui"
125 | ```
126 |
127 | ### TypeScript
128 |
129 | ```
130 | - "learn-typescript"
131 | - "paths/full-stack-engineer-career-path"
132 | ```
133 |
--------------------------------------------------------------------------------
/README.md:
--------------------------------------------------------------------------------
1 |
2 |
📝 Community Articles
3 | A library of technical articles on anything code.
4 | Written by the Codecademy community.
5 |
6 |
7 |
8 | ## What are Community Articles?
9 |
10 | Community articles are user-generated content (UGC) written by the Codecademy community, available to developers all over the world! Here are some examples:
11 |
12 | - [Web Scrape with Selenium and Beautiful Soup](https://www.codecademy.com/article/caupolicandiaz/web-scrape-with-selenium-and-beautiful-soup) by Paul Daiz
13 | - [Build a Discord Bot with Node.js](https://www.codecademy.com/article/christine_yang/build-a-discord-bot-with-node-js) by Christine Yang
14 | - [Build a 3D Environment with Three.js](https://www.codecademy.com/article/brandondusch/build-a-3d-environment-with-three-js) by Brandon Dusch
15 | - [How to Convert CSS to SCSS](https://www.codecademy.com/article/kyrathompson/how-to-convert-css-to-scss) by Kyra Thompson
16 | - [Create a Stack in Python](https://www.codecademy.com/article/stevenswiniarski/create-a-stack-in-python ) by Steven Swiniarski
17 |
18 | ## Why write articles?
19 |
20 | - Establish your online presence as a developer and content creator.
21 | - The best way to understand a concept is to explain it to someone else.
22 | - Pay it forward: Share your learnings with the community as you level up.
23 |
24 | ## What stage of development are we in right now?
25 |
26 | This is currently the beta phase of Community Articles. We are aiming to release 20 articles written by beta authors/Codecademy superusers. Let us know what you think!
27 |
28 | ## How do I contribute?
29 |
30 | There are many ways to contribute to articles:
31 |
32 | - Submit a Pull Request to edit an existing article.
33 | - Submit a Pull Request to create a new article of your choice.
34 | - Take a look in [GitHub Issues](https://github.com/Codecademy/ugc/issues) to get inspirations for your article.
35 | - Join the [#CodecademyCommunity](https://twitter.com/search?q=%23CodecademyCommunity&src=typed_query&f=live) discussion on Twitter.
36 |
37 | Whether you are a code newbie or a seasoned hacker, there's something for you!
38 |
39 | Please read through the [Contribution Guide](https://github.com/Codecademy/ugc/blob/main/.github/CONTRIBUTING.md) ✨. There you'll find a write-up of our content standards and style guide, as well as templates for creating your entries.
40 |
41 | ## Additional Notes
42 |
43 | Remember, if you ever have any questions at all, we're always here to help in the [Codecademy Forums](https://discuss.codecademy.com/) and [Codecademy Discord](https://discord.com/invite/codecademy).
44 |
--------------------------------------------------------------------------------
/documentation/authorA/mock-article-1.md:
--------------------------------------------------------------------------------
1 | ---
2 | Title: "[MOCK] Flexin' with Generics In TypeScript"
3 | Description: "In TypeScript, generics are used to assign multiple types to a function or variable without the value losing that specific type information upon return."
4 | DatePublished: "2022-01-14"
5 | Categories:
6 | - "web-development"
7 | Tags:
8 | - "Generics"
9 | - "Types"
10 | CatalogContent:
11 | - "learn-typescript"
12 | - "paths/full-stack-engineer-career-path"
13 | ---
14 |
15 | In TypeScript, generics are used to assign multiple types to a function or variable without the value losing that specific type information upon return. The `any` keyword is similar in that it accomodates any and all types. However, it will not retain specific type information.
16 |
17 | ## Syntax
18 |
19 | Generics are defined with `<` `>` brackets surrounding name(s) of the generic type(s), like `Array` or `Map`.
20 |
21 | ```ts
22 | interface MyType {
23 | value: GenericValue;
24 | }
25 |
26 | let myVar: MyType = { value: "Hello, World!" };
27 | ```
28 |
29 | Generic types can be used with the following:
30 |
31 | - Classes
32 | - Functions
33 | - Interfaces
34 | - Type aliases
35 |
36 | ## Example of Using Generics
37 |
38 | In the following snippet, `Box` is a generic `interface` that with a generic `Value` type within. Next, two variables, `numberBox` and `stringBox`, are explicitly declared to be of type `Box` and `Box`, respectively:
39 |
40 | ```ts
41 | interface Box {
42 | value: Value;
43 | }
44 |
45 | let numberBox: Box = { value: 7 };
46 | let stringBox: Box = { value: "Marathon" };
47 | ```
48 |
49 | ## Inferring Generic Types
50 |
51 | Generics can be inferred from usage when not explicitly provided.
52 |
53 | Here, `logAndReturnValue` is inferred first to have a generic `Value` of type `Date`:
54 |
55 | ```ts
56 | function logAndReturnValue(value: Value): Value {
57 | console.log(value);
58 | return value;
59 | }
60 |
61 | const result = logAndReturnValue(new Date("2021-12-21")); // Type: Date
62 | ```
63 |
64 | Here, the `KeyValueStore` class instance is inferred to have generic ``, and its `makePair()`, therefore, returns type `[string, number]`:
65 |
66 | ```ts
67 | class KeyValueStore {
68 | #key: Key;
69 | #value: Value;
70 |
71 | constructor(key: Key, value: Value) {
72 | this.#key = key;
73 | this.#value = value;
74 | }
75 |
76 | makePair(): [Key, Value] {
77 | return [this.#key, this.#value];
78 | }
79 | }
80 |
81 | const store = new KeyValueStore("year", 2794);
82 | const pair = store.makePair(); // Type: [string, number]
83 | ```
84 |
--------------------------------------------------------------------------------
/.tests/go.sum:
--------------------------------------------------------------------------------
1 | github.com/BurntSushi/toml v0.3.1 h1:WXkYYl6Yr3qBf1K79EBnL4mak0OimBfB0XUf9Vl28OQ=
2 | github.com/BurntSushi/toml v0.3.1/go.mod h1:xHWCNGjB5oqiDr8zfno3MHue2Ht5sIBksp03qcyfWMU=
3 | github.com/adrg/frontmatter v0.2.0 h1:/DgnNe82o03riBd1S+ZDjd43wAmC6W35q67NHeLkPd4=
4 | github.com/adrg/frontmatter v0.2.0/go.mod h1:93rQCj3z3ZlwyxxpQioRKC1wDLto4aXHrbqIsnH9wmE=
5 | github.com/davecgh/go-spew v1.1.0 h1:ZDRjVQ15GmhC3fiQ8ni8+OwkZQO4DARzQgrnXU1Liz8=
6 | github.com/davecgh/go-spew v1.1.0/go.mod h1:J7Y8YcW2NihsgmVo/mv3lAwl/skON4iLHjSsI+c5H38=
7 | github.com/go-playground/locales v0.14.0 h1:u50s323jtVGugKlcYeyzC0etD1HifMjqmJqb8WugfUU=
8 | github.com/go-playground/locales v0.14.0/go.mod h1:sawfccIbzZTqEDETgFXqTho0QybSa7l++s0DH+LDiLs=
9 | github.com/go-playground/universal-translator v0.18.0 h1:82dyy6p4OuJq4/CByFNOn/jYrnRPArHwAcmLoJZxyho=
10 | github.com/go-playground/universal-translator v0.18.0/go.mod h1:UvRDBj+xPUEGrFYl+lu/H90nyDXpg0fqeB/AQUGNTVA=
11 | github.com/go-playground/validator v9.31.0+incompatible h1:UA72EPEogEnq76ehGdEDp4Mit+3FDh548oRqwVgNsHA=
12 | github.com/go-playground/validator v9.31.0+incompatible/go.mod h1:yrEkQXlcI+PugkyDjY2bRrL/UBU4f3rvrgkN3V8JEig=
13 | github.com/leodido/go-urn v1.2.1 h1:BqpAaACuzVSgi/VLzGZIobT2z4v53pjosyNd9Yv6n/w=
14 | github.com/leodido/go-urn v1.2.1/go.mod h1:zt4jvISO2HfUBqxjfIshjdMTYS56ZS/qv49ictyFfxY=
15 | github.com/machinebox/graphql v0.2.2 h1:dWKpJligYKhYKO5A2gvNhkJdQMNZeChZYyBbrZkBZfo=
16 | github.com/machinebox/graphql v0.2.2/go.mod h1:F+kbVMHuwrQ5tYgU9JXlnskM8nOaFxCAEolaQybkjWA=
17 | github.com/matryer/is v1.4.0 h1:sosSmIWwkYITGrxZ25ULNDeKiMNzFSr4V/eqBQP0PeE=
18 | github.com/matryer/is v1.4.0/go.mod h1:8I/i5uYgLzgsgEloJE1U6xx5HkBQpAZvepWuujKwMRU=
19 | github.com/pkg/errors v0.9.1 h1:FEBLx1zS214owpjy7qsBeixbURkuhQAwrK5UwLGTwt4=
20 | github.com/pkg/errors v0.9.1/go.mod h1:bwawxfHBFNV+L2hUp1rHADufV3IMtnDRdf1r5NINEl0=
21 | github.com/pmezard/go-difflib v1.0.0 h1:4DBwDE0NGyQoBHbLQYPwSUPoCMWR5BEzIk/f1lZbAQM=
22 | github.com/pmezard/go-difflib v1.0.0/go.mod h1:iKH77koFhYxTK1pcRnkKkqfTogsbg7gZNVY4sRDYZ/4=
23 | github.com/stretchr/objx v0.1.0/go.mod h1:HFkY916IF+rwdDfMAkV7OtwuqBVzrE8GR6GFx+wExME=
24 | github.com/stretchr/testify v1.6.1/go.mod h1:6Fq8oRcR53rry900zMqJjRRixrwX3KX962/h/Wwjteg=
25 | github.com/stretchr/testify v1.7.0 h1:nwc3DEeHmmLAfoZucVR881uASk0Mfjw8xYJ99tb5CcY=
26 | github.com/stretchr/testify v1.7.0/go.mod h1:6Fq8oRcR53rry900zMqJjRRixrwX3KX962/h/Wwjteg=
27 | golang.org/x/text v0.3.6/go.mod h1:5Zoc/QRtKVWzQhOtBMvqHzDpF6irO9z98xDceosuGiQ=
28 | golang.org/x/tools v0.0.0-20180917221912-90fa682c2a6e/go.mod h1:n7NCudcB/nEzxVGmLbDWY5pfWTLqBcC2KZ6jyYvM4mQ=
29 | gopkg.in/check.v1 v0.0.0-20161208181325-20d25e280405 h1:yhCVgyC4o1eVCa2tZl7eS0r+SDo693bJlVdllGtEeKM=
30 | gopkg.in/check.v1 v0.0.0-20161208181325-20d25e280405/go.mod h1:Co6ibVJAznAaIkqp8huTwlJQCZ016jof/cbN4VW5Yz0=
31 | gopkg.in/go-playground/assert.v1 v1.2.1 h1:xoYuJVE7KT85PYWrN730RguIQO0ePzVRfFMXadIrXTM=
32 | gopkg.in/go-playground/assert.v1 v1.2.1/go.mod h1:9RXL0bg/zibRAgZUYszZSwO/z8Y/a8bDuhia5mkpMnE=
33 | gopkg.in/yaml.v2 v2.3.0 h1:clyUAQHOM3G0M3f5vQj7LuJrETvjVot3Z5el9nffUtU=
34 | gopkg.in/yaml.v2 v2.3.0/go.mod h1:hI93XBmqTisBFMUTm0b8Fm+jr3Dg1NNxqwp+5A1VGuI=
35 | gopkg.in/yaml.v3 v3.0.0-20200313102051-9f266ea9e77c/go.mod h1:K4uyk7z7BCEPqu6E+C64Yfv1cQ7kz7rIZviUmN+EgEM=
36 | gopkg.in/yaml.v3 v3.0.0 h1:hjy8E9ON/egN1tAYqKb61G10WtihqetD4sz2H+8nIeA=
37 | gopkg.in/yaml.v3 v3.0.0/go.mod h1:K4uyk7z7BCEPqu6E+C64Yfv1cQ7kz7rIZviUmN+EgEM=
38 |
--------------------------------------------------------------------------------
/documentation/authorA/mock-article-2.md:
--------------------------------------------------------------------------------
1 | ---
2 | Title: "[MOCK] Operators in R? Psh, R you kiddin' me?"
3 | Description: "Operators are used to perform various operations on variables and values."
4 | DatePublished: "2022-01-25"
5 | Categories:
6 | - "computer-science"
7 | - "data-science"
8 | Tags:
9 | - "Operators"
10 | - "Arithmetic"
11 | - "Comparison"
12 | - "Logical"
13 | CatalogContent:
14 | - "learn-r"
15 | - "paths/computer-science"
16 | ---
17 |
18 | Operators are used in R to perform various operations on variables and values. Among the most commonly used ones are arithmetic and assignment operators.
19 |
20 | ## Syntax
21 |
22 | The following R code uses an arithmetic operator for multiplication, `*`, to calculate the product of two numbers, along with the assignment operator, `<-` to store the result in the variable `x`.
23 |
24 | ```r
25 | # Store five times three in variable x
26 | x <- 5 * 3
27 | ```
28 |
29 | Operators in R can be organized into the following groups:
30 |
31 | - Arithmetic operators for traditional mathematical evaluations such as addition and subtraction.
32 | - Assignment operators for assigning values to variables.
33 | - Comparison operators for testing equality between values.
34 | - Logical operators for evaluating the "truthiness" of values against one another.
35 | - Miscellaneous operators for various tasks including vectors and sequencing.
36 |
37 | ## Arithmetic operators
38 |
39 | R supports the following arithmetic operators:
40 |
41 | - Addition, `+`, which returns the sum of two numbers.
42 | - Subtraction, `-`, which returns the difference between two numbers.
43 | - Multiplication, `*`, which returns the product of two numbers.
44 | - Division, `/`, which returns the quotient of two numbers.
45 | - Exponents, `^`, which returns the value of one number raised to the power of another.
46 | - Modulus, `%%`, which returns the remainder of one number divided by another.
47 | - Integer Division, `%/%`, which returns the integer quotient of two numbers.
48 |
49 | ## Assignment operators
50 |
51 | R uses the following assignment operators:
52 |
53 | - `<-` assigns a value to a variable from right to left.
54 | - `->` assigns a value to a variable left to right.
55 | - `<<-` is a global version of `<-`.
56 | - `->>` is a global version of `->`.
57 | - `=` works the same way as `<-`, but its use is discouraged.
58 |
59 | ## Comparison operators
60 |
61 | R has the following comparison operators:
62 |
63 | - Equal, `==`, which returns `TRUE` if two values are equal.
64 | - Not equal, `!=`, which returns `TRUE` if two values are not equal.
65 | - Less than, `<`, which returns `TRUE` if left value is less than right value.
66 | - Less than or equal to, `<=`, which returns `TRUE` if left value is less than or equal to right value.
67 | - Greater than, `>`, which returns `TRUE` if left value is greater than right value.
68 | - Greater than or equal to, `>=`, which returns `TRUE` if left value is greater than or equal to right value.
69 |
70 | ## Logical operators
71 |
72 | R has the following logical operators:
73 |
74 | - Element-wise AND, `&`, for comparing each element and returning `TRUE` if both elements are `TRUE`.
75 | - Logical AND, `&&`, which returns `TRUE` if both values are `TRUE`, only evaluates as many elements as necessary.
76 | - Element-wise OR, `|`, for comparing each element and returning `TRUE` if either element is `TRUE`.
77 | - Logical OR, `||`, which returns `TRUE` if either value is `TRUE`, only evaluates as many elements as necessary.
78 | - Logical NOT, `!`, which returns `TRUE` if the associated statement is `FALSE`.
79 |
80 | Note: The long form of AND and OR (`&&` and `||`) are preferred for `if` statements as the short form can produce a vector value.
81 |
82 | ## Miscellaneous operators
83 |
84 | R uses the following miscellaneous operators:
85 |
86 | - The `:` operator creates a sequence of numbers from the left argument to the right one.
87 | - The `%in%` operator returns `TRUE` if the left argument is in the vector to the right.
88 | - The `%*%` operator performs matrix multiplication on two matrices.
89 |
--------------------------------------------------------------------------------
/documentation/tags.md:
--------------------------------------------------------------------------------
1 | # Tags
2 |
3 | Tags in metadata are used for recommending related entries and for the home page search bar. Use Command + F to search this list.
4 |
5 | Feel free to add suggestions for new tags to the list as part of your PR! Be sure to insert them alphabetically.
6 |
7 | ```
8 | Accessibility
9 | AI
10 | Algorithms
11 | Alias
12 | Anchor
13 | Android
14 | Angular
15 | Animation
16 | APIs
17 | Arguments
18 | Arithmetic
19 | Arrays
20 | ASP.NET
21 | Asymptotic Notation
22 | Async Await
23 | Attributes
24 | Azure
25 | A-Frame
26 | Background
27 | Bash/Shell
28 | Beautiful Soup
29 | Best Practices
30 | Binary Search
31 | Binary Tree
32 | Block
33 | Blockchain
34 | Body
35 | Booleans
36 | Bootstrap
37 | Borders
38 | Box Model
39 | Box Plot
40 | Browser Compatibility
41 | Browsers
42 | Bubble Sort
43 | Catch
44 | Characters
45 | Chatbots
46 | Cryptocurrency
47 | Classes
48 | Code Editors
49 | Colors
50 | Combinators
51 | Command Line
52 | Comments
53 | Comparison
54 | Components
55 | Computer Vision
56 | Concatenation
57 | Conceptual
58 | Const
59 | Constructors
60 | Control Flow
61 | CRUD
62 | CSV
63 | Cybersecurity
64 | D3
65 | Data Structures
66 | Data Types
67 | Database
68 | Date
69 | Debugging
70 | Decorators
71 | Deep Learning
72 | Dependency
73 | Developer Tools
74 | Development
75 | DFS
76 | Dictionary
77 | Dijkstra's
78 | Display
79 | Distance
80 | Distinct
81 | Div
82 | Django
83 | Docker
84 | Documentation
85 | DOM
86 | Doubly Linked Lists
87 | Dplyr
88 | Dynamic Programming
89 | Effects
90 | Elements
91 | Else
92 | Encapsulation
93 | Encoding
94 | Enum
95 | Error Handling
96 | Errors
97 | ES6
98 | Events
99 | Exceptions
100 | Expo
101 | Express
102 | Files
103 | Finance
104 | Firebase
105 | Flask
106 | Flexbox
107 | Flutter
108 | Fonts
109 | For
110 | Foreign Key
111 | Form
112 | Frameworks
113 | Functions
114 | Functional Programming
115 | Ggplot2
116 | Git
117 | GitHub
118 | Graphics
119 | Graphs
120 | Graph Search
121 | Grid
122 | Handlebars
123 | Hash Maps
124 | Hashes
125 | Head
126 | Headings
127 | Heap
128 | Heroku
129 | Histograms
130 | HTTP
131 | Id
132 | IDE
133 | If
134 | Images
135 | Index
136 | Inheritance
137 | Input
138 | Integers
139 | Interface
140 | iOS
141 | Iterators
142 | JavaScript
143 | Join
144 | jQuery
145 | JSON
146 | JSK
147 | K-Nearest Neighbors
148 | Kotlin
149 | Kubernetes
150 | Laravel
151 | Let
152 | Libraries
153 | Linear Algebra
154 | Linear Regression
155 | Link
156 | Linked Lists
157 | Linux
158 | Lists
159 | Logic
160 | Logical
161 | Logistic Regression
162 | Loops
163 | Map
164 | Margin
165 | MATLAB
166 | Matplotlib
167 | Media Queries
168 | Memory
169 | Metadata
170 | Methods
171 | Middleware
172 | Models
173 | Modules
174 | MySQL
175 | Naive Bayes
176 | Natural Language Processing
177 | Netlify
178 | Networking
179 | NLP
180 | Node
181 | NPM
182 | Numbers
183 | NumPy
184 | Objects
185 | OOP
186 | Operators
187 | Optionals
188 | Output
189 | p5
190 | Packages
191 | Padding
192 | Pandas
193 | Paragraph
194 | Parameters
195 | Phaser
196 | Physics
197 | Pointers
198 | Positioning
199 | PostgreSQL
200 | Primary Key
201 | Print
202 | Probability
203 | Promise
204 | Properties
205 | Queries
206 | Queues
207 | Quicksort
208 | Rails
209 | Random
210 | Range
211 | React
212 | React Native
213 | Readr
214 | Recursion
215 | Redux
216 | References
217 | Regular Expressions
218 | Requests
219 | Responsive
220 | Rest Parameter
221 | Ruby
222 | Ruby on Rails
223 | Sass
224 | Schema Design
225 | Scikit-learn
226 | Scope
227 | Script
228 | Seaborn
229 | Search
230 | Selectors
231 | Selenium
232 | Semantic
233 | Servers
234 | Sets
235 | Socket.IO
236 | Sort
237 | Span
238 | Specificity
239 | Spread
240 | SQLite
241 | Stacks
242 | Statistics
243 | Stringr
244 | Strings
245 | Structure
246 | Style
247 | SwiftUI
248 | Switch
249 | Symbol
250 | Syntax
251 | Tables
252 | Tags
253 | Target
254 | Technical Interviews
255 | Templates
256 | TensorFlow
257 | Three.js
258 | Tidyr
259 | Title
260 | Transitions
261 | Transpilation
262 | Trees
263 | Try
264 | Tuples
265 | Types
266 | Type Guard
267 | Type Narrowing
268 | Typography
269 | Union
270 | Unicode
271 | Units
272 | Unix
273 | URL
274 | Validation
275 | Values
276 | Variable Types
277 | Variables
278 | Vectors
279 | Version Control
280 | Video
281 | Views
282 | Vim
283 | Visibility
284 | VR
285 | Vue
286 | Web3
287 | WebRTC
288 | While
289 | Whiteboarding
290 | World Wide Web
291 | Xcode
292 | ```
293 |
--------------------------------------------------------------------------------
/documentation/authorB/mock-article-3.md:
--------------------------------------------------------------------------------
1 | ---
2 | Title: "[MOCK] The Gopher Whisperer - How I Communicate with Gophers Using Their Native Data Types"
3 | Description: "Classifications of data used in everyday programming. In Go, there are seven fundamental data types: Numbers, Strings, Booleans, Arrays, Structs, Slices, and Pointers."
4 | DatePublished: "2022-01-23"
5 | Categories:
6 | - "code-foundations"
7 | - "computer-science"
8 | Tags:
9 | - "Data Types"
10 | - "Variables"
11 | CatalogContent:
12 | - "learn-go"
13 | - "paths/back-end-engineer-career-path"
14 | ---
15 |
16 | Data types are the classifications given to the different kinds of values used in everyday programming. In Go, there are seven fundamental data types: Numbers, Strings, Booleans, Arrays, Structs, Slices, and Pointers.
17 |
18 | ## Numbers
19 |
20 | In Go, any number is regarded as number, but there are three sub-categories:
21 |
22 | - Integers (signed and unsigned)
23 | - Floating-point numbers
24 | - Complex numbers
25 |
26 | ### Integers
27 |
28 | Integers are number-types that are either:
29 |
30 | - Signed (`int`) integers that can be positive or negative.
31 | - Unsigned (`uint`) integers ranging from 0 to positive infinity.
32 |
33 | Each integer value comes in 4 different memory sizes.
34 |
35 | - 8-bit: `int8`/`uint8`
36 | - 16-bit: `int16`/`uint16`
37 | - 32-bit: `int32`/`uint32`
38 | - 64-bit: `int64`/`uint64`
39 | - 32- or 64-bit based on system architecture: `int`/`uint`
40 | - Synonym for int32: `rune`
41 | - synonym for int8: `byte`
42 |
43 | ### Floating-Point Numbers
44 |
45 | Floating-point numbers can contain a decimal point. There are two different sizes.
46 |
47 | - 32-bit: `float32`
48 | - 64-bit: `float64`
49 |
50 | ### Complex Numbers
51 |
52 | Complex numbers are composed of a real number and an imaginary number. The real number is either a float. There are two different sizes:
53 |
54 | - 32-bit float + imaginary number: `complex64`
55 | - 64-bit float + imaginary number: `complex128`
56 |
57 | ```golang
58 | // Initialize with complex() taking 2 arguments: a float and a complex number
59 | var complex complex64 = complex(1, 2) // Equals 1 + 2i
60 | ```
61 |
62 | Variables can also be initialized with a shorthand:
63 |
64 | ```golang
65 | complex := 1 + 2i
66 | ```
67 |
68 | ## Strings
69 |
70 | A string represents a sequence of characters. Strings are immutable; once they are created they can't be modified.
71 |
72 | ```golang
73 | var s string
74 |
75 | s = "Hello, World!"
76 | ```
77 |
78 | ## Booleans
79 |
80 | A boolean can hold one of two possible values, either `true` or `false`.
81 |
82 | ```golang
83 | var isValid bool
84 |
85 | isValid = true
86 | isValid = false
87 | ```
88 |
89 | ## Arrays
90 |
91 | Arrays are list with static capacity. They can't change their capacity after the declaration.
92 |
93 | ```golang
94 | // Declare and initialize an arraz of capacity 5 and fill it with elements
95 | someArray := [5]int{0, 2, 3, 4, 5}
96 | ```
97 |
98 | ## Slices
99 |
100 | Slices can change their capacity dynamically even after their declaration. Under the hood a slice references an array. If the array changes, so does the slice.
101 |
102 | ```golang
103 | // Copy the elements from index 0 until (excluding) index 3 into a slace
104 | var slice []int = someArary[0:3]
105 | ```
106 |
107 | ## Structs
108 |
109 | In Go, a struct is a more complex type that can contain custom fields. It's similar to an [object in JavaScript](https://www.codecademy.com/resources/docs/javascript/objects) or a [dictionary in Python](https://www.codecademy.com/resources/docs/python/dictionaries). The fields of a struct can be accessed with a dot `.`.
110 |
111 | ```golang
112 | // Declaration with "type ... struct" keywords
113 | type Box struct {
114 | X int
115 | Y int
116 | }
117 | ```
118 |
119 | Structs are initialized by:
120 |
121 | 1. Referencing the name of the struct
122 | 2. Passing zero, any or all of the fields of the struct.
123 |
124 | The fields without a value will be initialized with zero-values by default.
125 |
126 | ```golang
127 | // Initialization
128 | b := Box{1, 2}
129 | ```
130 |
131 | ## Pointers
132 |
133 | Pointers contain the memory address of the variable they are based on. Pointers used `*`.
134 |
135 | ```golang
136 | // Declaration of a pointer with *
137 | var p *int
138 | ```
139 |
140 | ```golang
141 | someInteger := 42
142 |
143 | // Create pointer from variable using "&"
144 | p = &someInteger
145 | ```
146 |
--------------------------------------------------------------------------------
/content/christine_belzie/create-a-url-using-slugs.md:
--------------------------------------------------------------------------------
1 | ---
2 | Title: "Create a URL Using Slugs"
3 | Description: "Step-by-Step guide on creating a slug with URL."
4 | DatePublished: "2023-07-10"
5 | Categories:
6 | - "web-development"
7 | Tags:
8 | - "World Wide Web"
9 | - "Link"
10 | CatalogContent:
11 | - "introduction-to-the-web"
12 | - "paths/web-development"
13 | ---
14 |
15 | [https://downshiftology.com/recipes/gluten-free-chocolate-chip-cookies/]: https://downshiftology.com/recipes/gluten-free-chocolate-chip-cookies/
16 | [URL]: https://www.codecademy.com/resources/docs/general/url
17 | [slugify.online]: https://slugify.online/
18 |
19 | ## Introduction
20 |
21 | Picture this. You're scrolling through the internet, find a cookie recipe, and click on the "Share" button to send this link to your friend:
22 | [https://downshiftology.com/recipes/gluten-free-chocolate-chip-cookies/]
23 |
24 | You see `gluten-free-chocolate-chip-cookies` after the backslash (`/`) and at the end of the web address. This is called a **slug**. Slugs are a vital part of a [URL] that helps identify a particular page on a website in a user-friendly manner. Essentially, slugs identify the content found on the page. In this article, you will learn the importance of slugs in SEO strategy, how to create them, and strategies you can use to make your URL slugs effective.
25 |
26 | ## Why Are Slugs Important to SEO Strategy?
27 |
28 | Even though slugs won't have a direct impact on how your content ranks on the web, they do influence a visitor's decision on whether to view your content or not. Here's how:
29 |
30 | 1. **Increases Search Ranking:** Cannibalization is a common issue for content creators. It's when most of the blog posts, articles, and other pieces of content on a website share the same keyword. This makes it difficult for people to find them on your site. Slugs solve this issue by putting a unique name like a title or heading, thus, making it easier for people to find a person's work. Think of this as the names of the folders on your Google Drive or OneDrive account.
31 |
32 | 2. **Improves Shareability:** Adding slugs to your content's URLs makes them shorter, thus, making it easier for your viewers to copy, paste, and send them to other people.
33 |
34 | Now, let's create a slug!
35 |
36 | ## How To Create a Slug
37 |
38 | ### Method 1: Manually
39 |
40 | 1. **Think of a short yet descriptive name:** When it comes to creating the name for your URL slug, we recommend keeping it under 2,000 characters. According to [John Mueller from Google](https://www.seroundtable.com/google-url-characters-18219.html), the website favors URLs that meet this amount. Also, we recommend basing the name of your URL's slug on the page's content and using lowercase characters so that Google and other search engines rank it in the query your content belongs to. For example, let's say a person wanted to create a slug for a tutorial on creating issue requests on GitHub. The description could be, "how to make your issue requests come true."
41 |
42 | 2. **Place hyphens ("-") in between the parts of your name:** Normally, spaces appear between a title to make things clear. In the case of URLs however, spaces are often replaced with "%20", which is not very legible. Hyphens, on the hand, don't get replaced, which makes your URL slug easier to read. For example, the URL slug, `how-to-make-your-issue-requests-come-true` is easier to understand than `how%20to%20%make%20%your%20issue%20requests%20come%true`.
43 |
44 | Your URL is now SEO-Friendly!
45 |
46 | ### Method 2: Use a URL Slug Generator
47 |
48 | Creating a URL slug for your content can be time-consuming, so we suggest using a tool like [slugify.online] to help you finish quickly:
49 |
50 | 1. Type your content's title in the textbox titled **INPUT STRING**. Make sure that the **Separate with a dash (-)** option is highlighted.
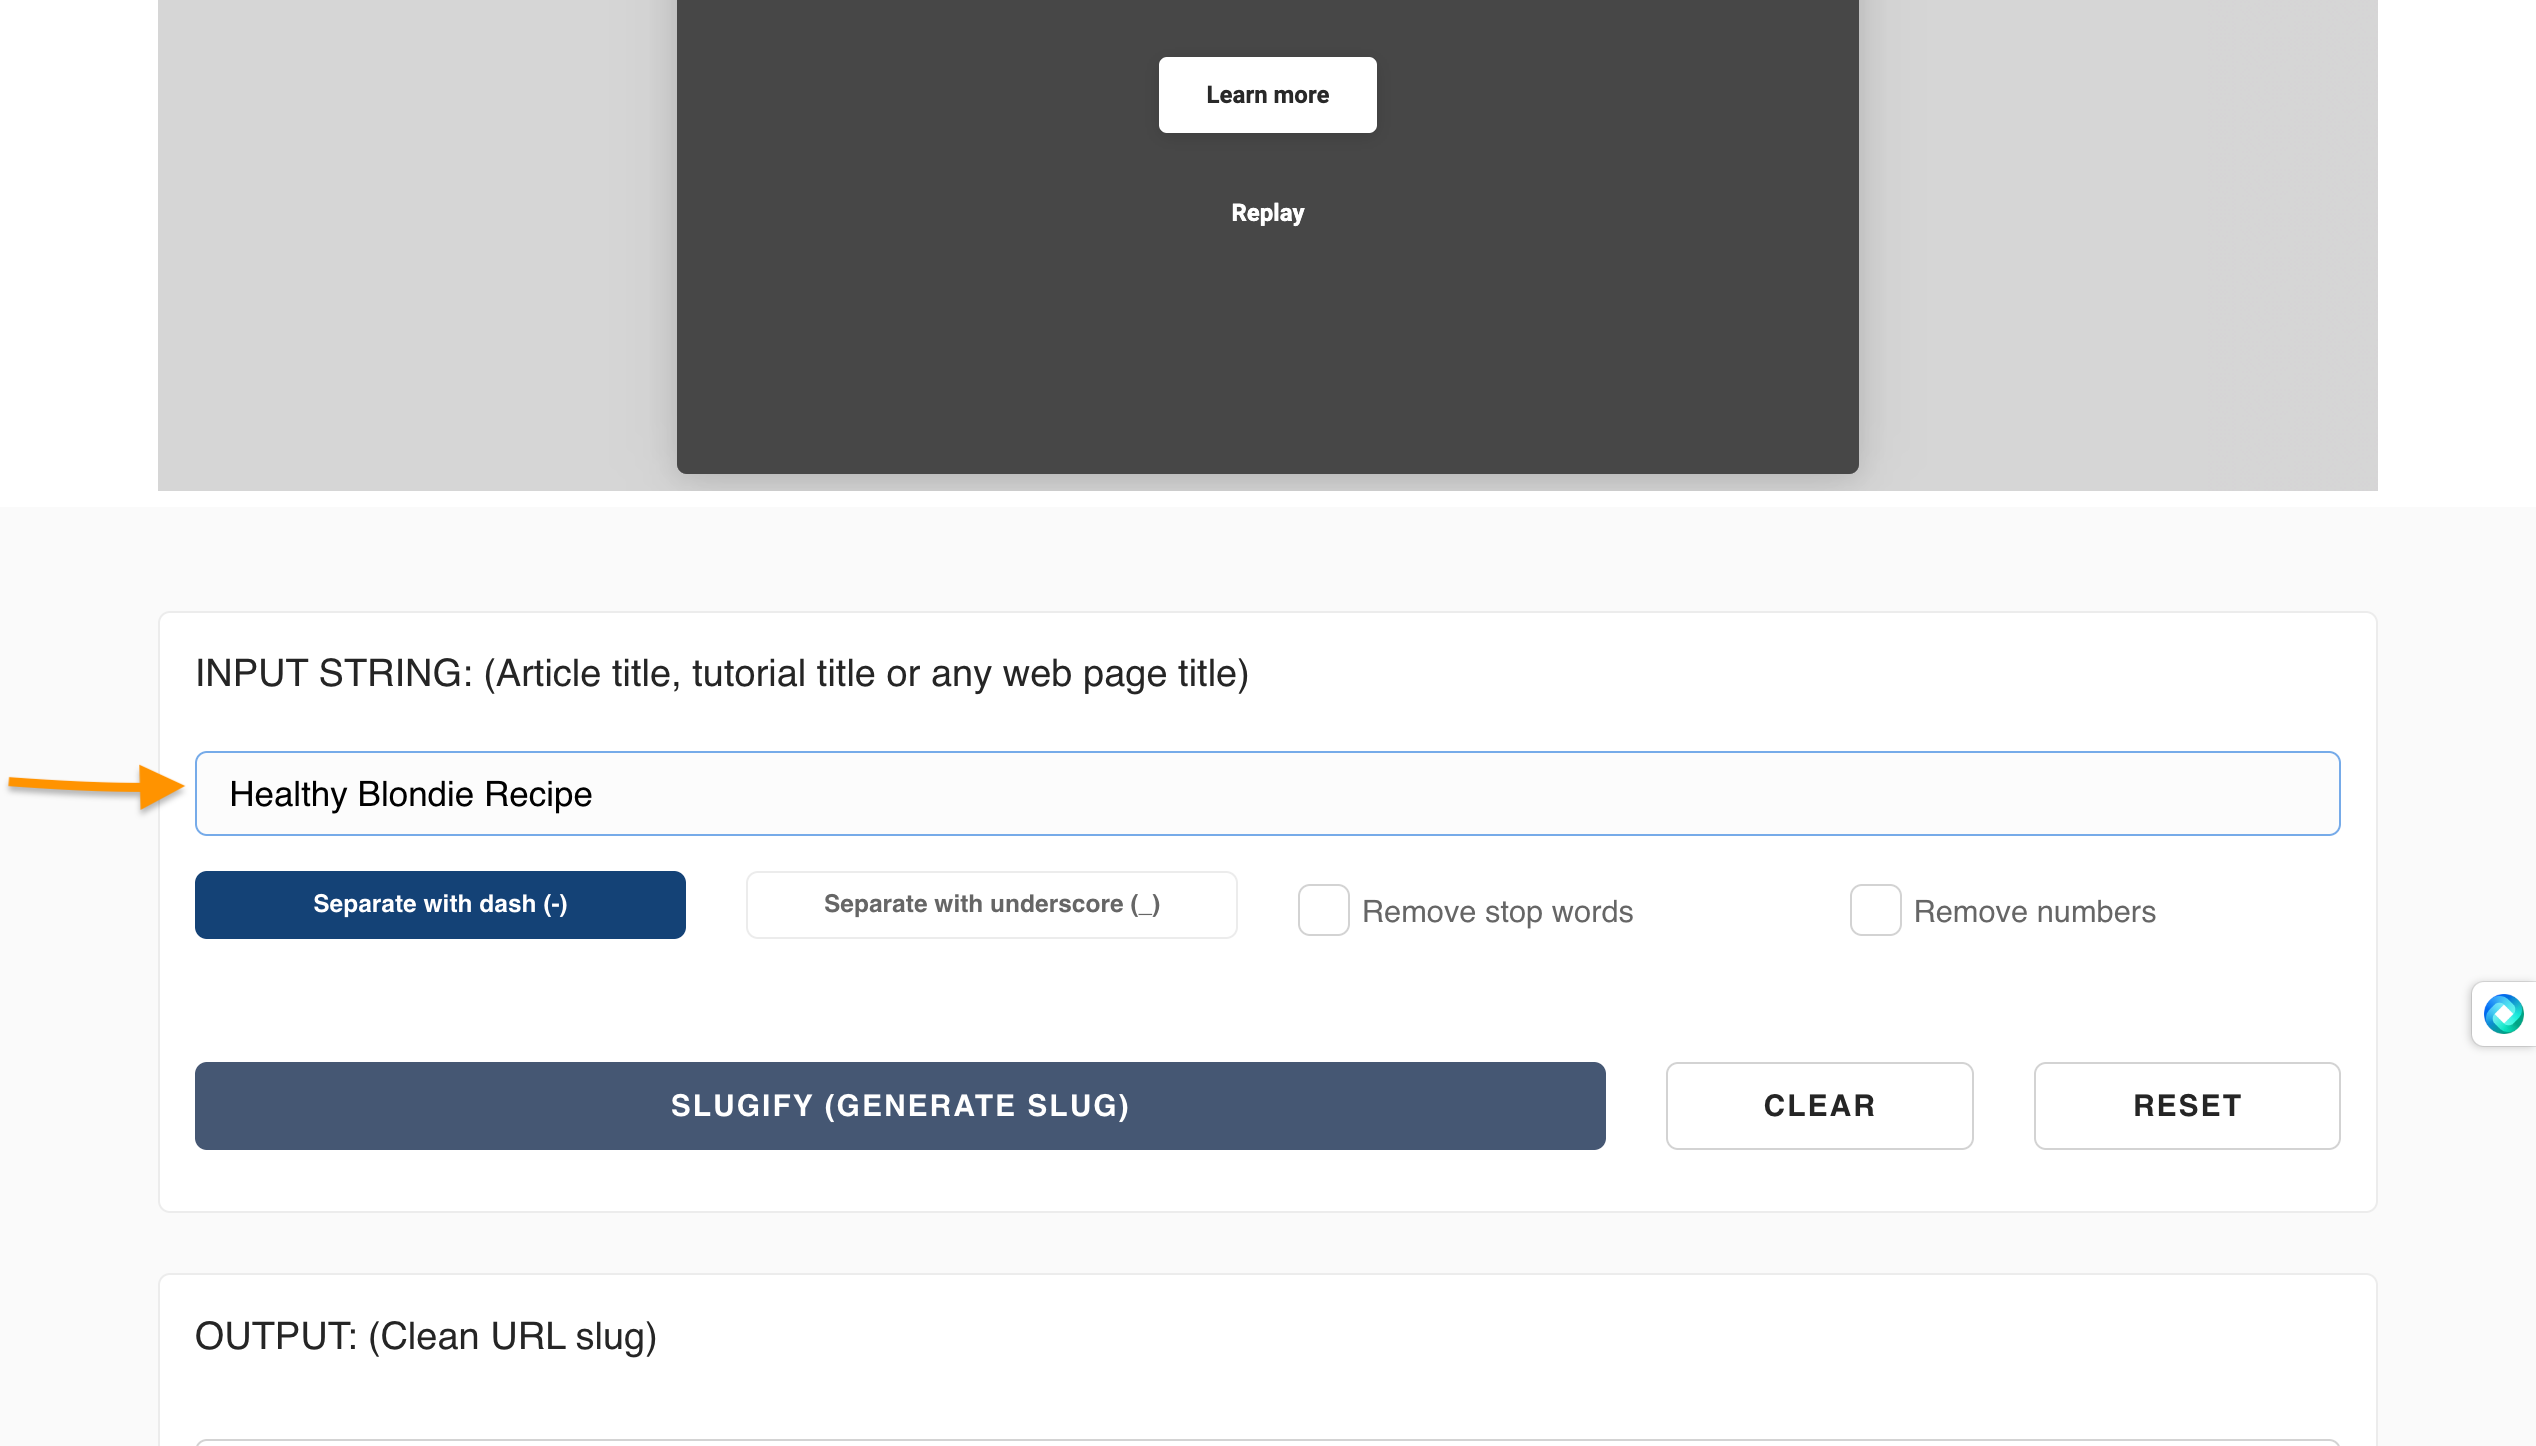
51 |
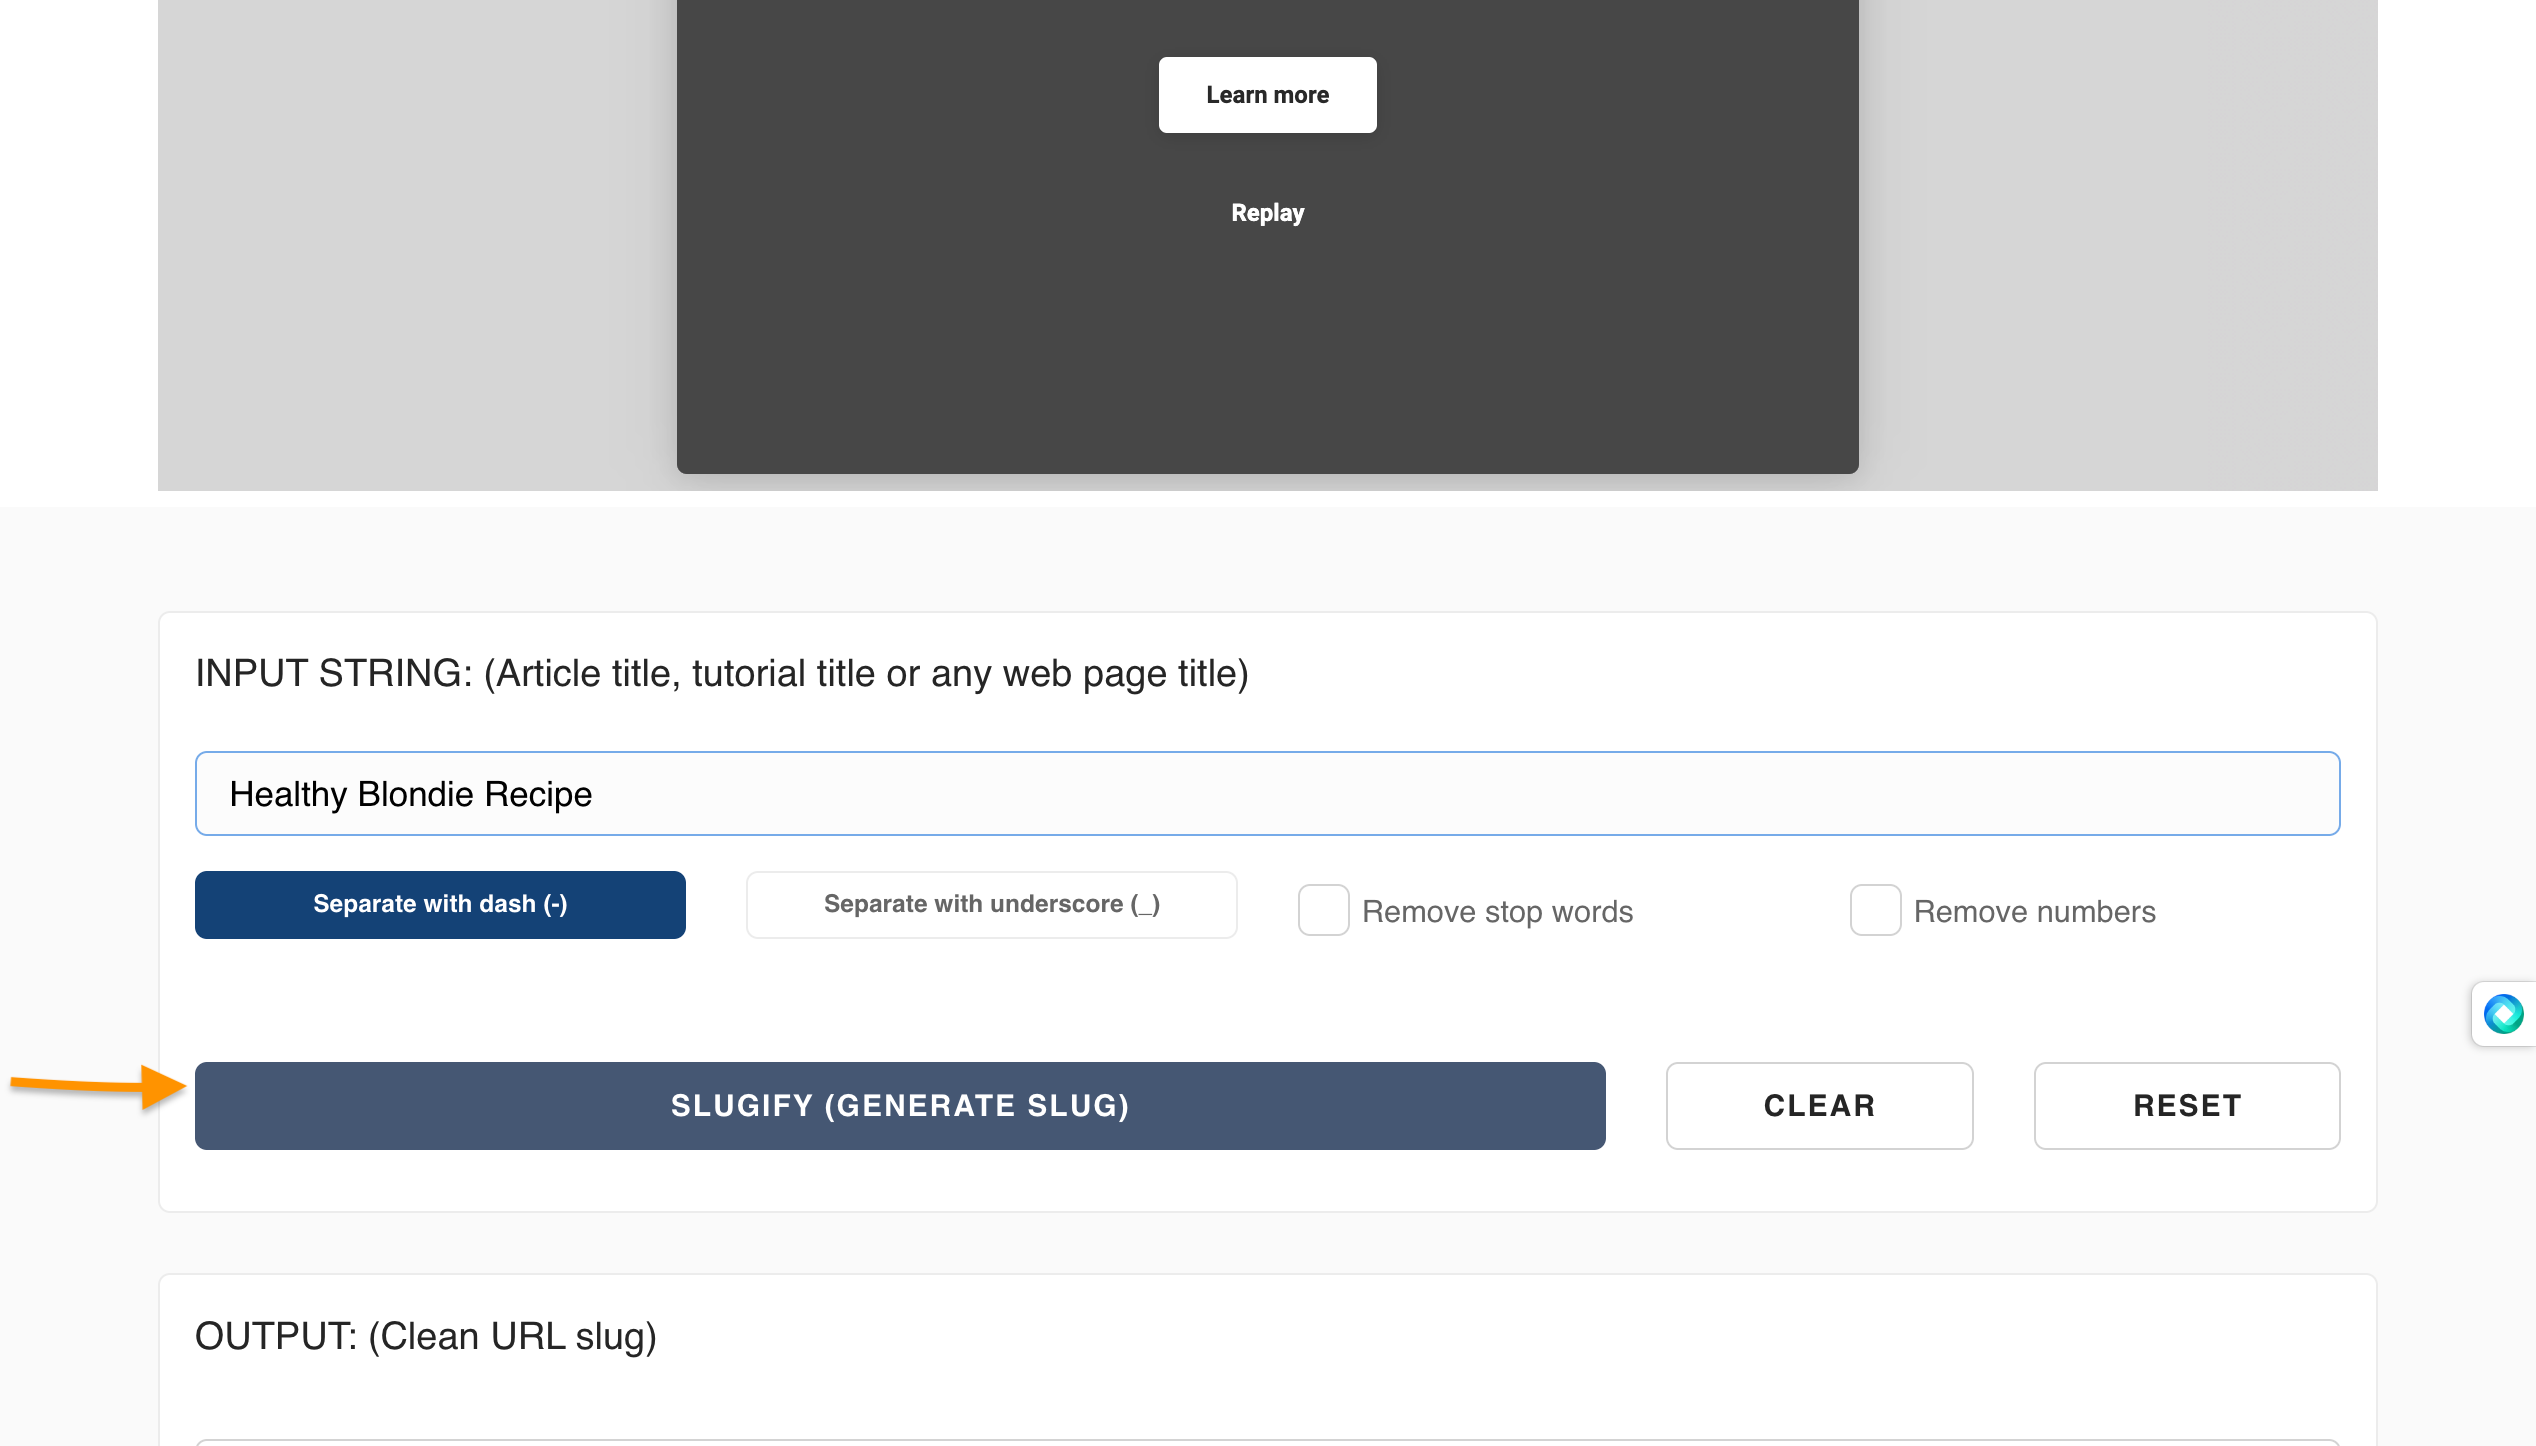
52 | 2. Click on **Slugify(Generate Slug)**
53 |
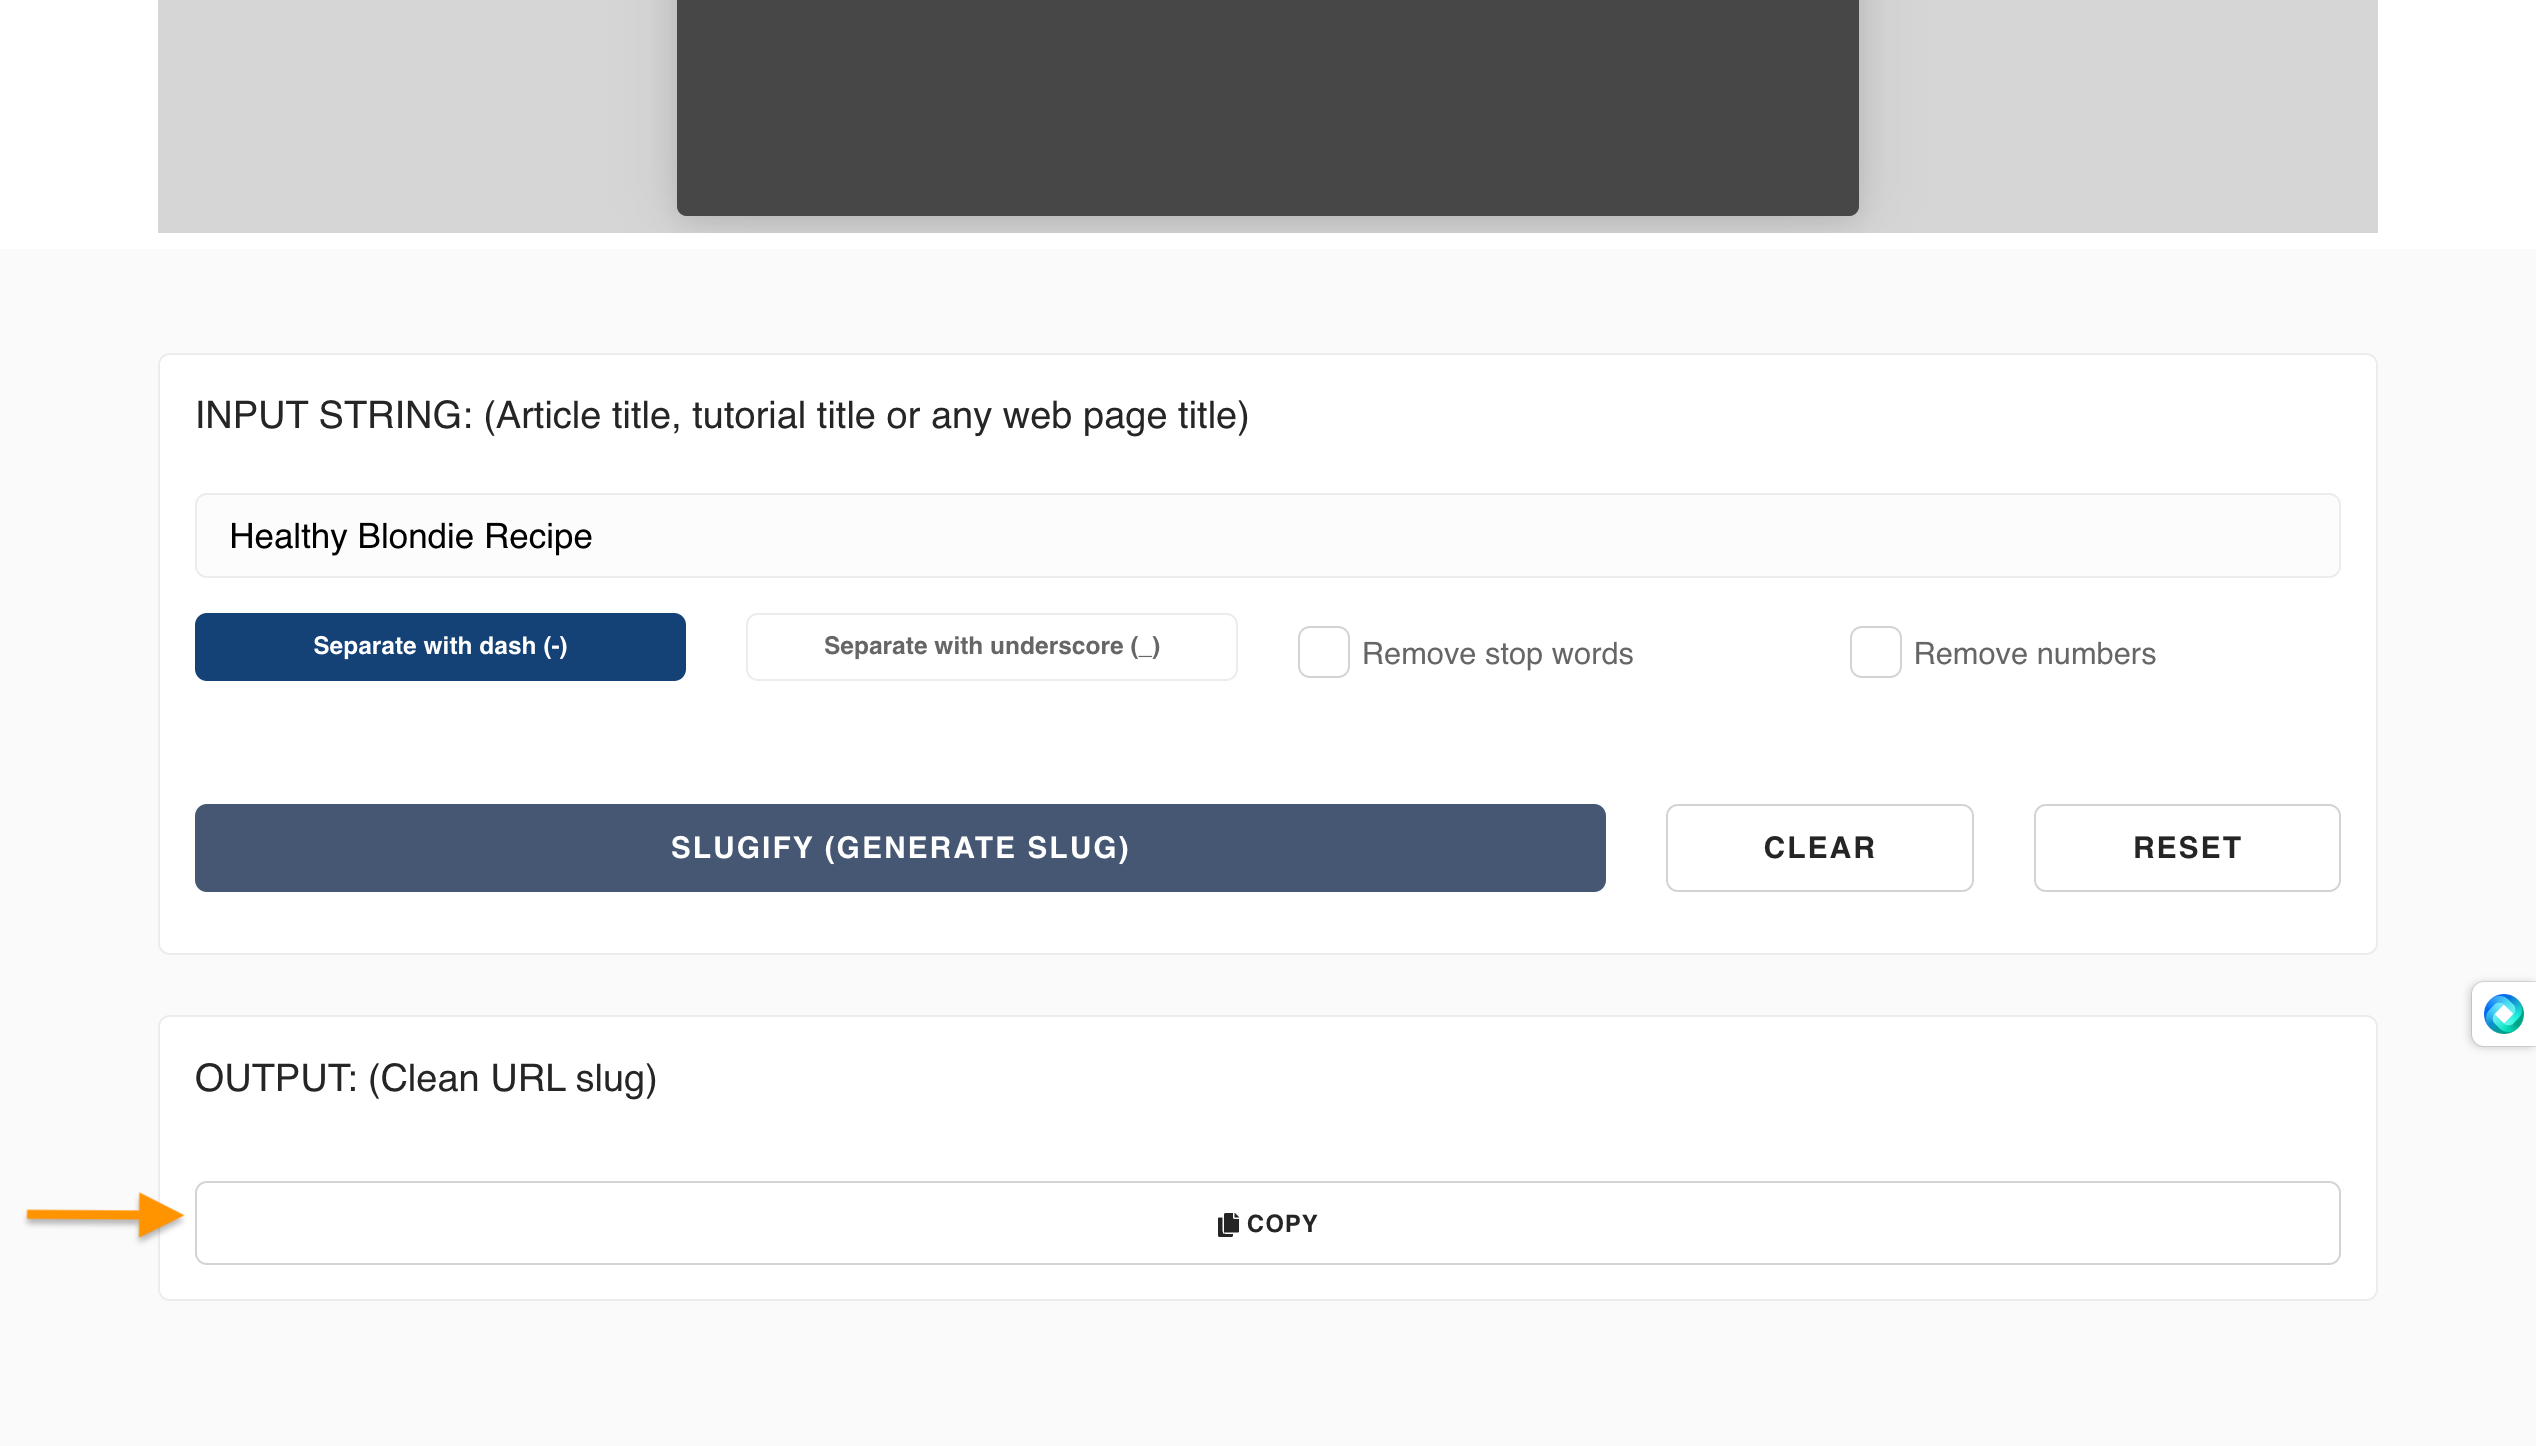
54 | 3. Click on **Copy**. Then, add it to your website's URL.
55 |
56 | ## Conclusion
57 |
58 | As peculiar as the name is, URL slugs are an important part of the internet in identifying websites. They help people find your content and can even make someone laugh. So next time you're creating a URL slug, make sure it is clear and easy to remember. You'll never know, it might be the very thing that helps you land the job of your dreams.
59 |
--------------------------------------------------------------------------------
/.github/CONTRIBUTING.md:
--------------------------------------------------------------------------------
1 | # Community Articles: Contribution Guide 👩🏻💻👨🏾💻👩🏼💻
2 |
3 | Welcome to the Codecademy Community Articles GitHub repo!
4 |
5 | We are an inclusive and passionate team of technologists and life-long learners around the world building free programming resources for a better tomorrow. All the content in UGC articles are written by amazing creative developers like yourself.
6 |
7 | If you have some interesting learnings to share with the community, we'd love to have you contribute. 💖
8 |
9 | ## How do I contribute?
10 |
11 | There are many ways to contribute to UGC articles:
12 |
13 | - Submit a Pull Request to edit an existing article (typo/bug).
14 | - Submit a Pull Request to create a new article of your choice.
15 | - Take a look in [GitHub Issues](https://github.com/Codecademy/ugc/issues) to get inspirations for your article.
16 | - Join the [#CodecademyUGC](https://twitter.com/search?q=%23CodecademyUGC&src=typed_query&f=live) discussion on Twitter.
17 |
18 | If you're new to UGC articles and contributing for the first time, it is recommended that you visit the [Issues](https://github.com/Codecademy/docs/issues) section and ask to be assigned to an open issue that interests you. Otherwise, feel free to submit a [PR](https://www.codecademy.com/resources/docs/git/pull-requests) by creating a new [branch](https://www.codecademy.com/resources/docs/general/git/branch) in your fork to create a new article or edit an existing one.
19 |
20 | ## What do I need to do before creating a new article?
21 |
22 | Before creating your first article, poke around the [/content](https://github.com/Codecademy/ugc/tree/main/content) folder. This is where all the content is stored.
23 |
24 | ```
25 | .
26 | ├── ...
27 | ├── content # Content files
28 | │ ├── author
29 | | | ├── author_meta.json
30 | | | ├── article1.md
31 | | | ├── article2.md
32 | │ └── ...
33 | ├── documentation # Documentation files
34 | └── ...
35 | ```
36 |
37 | And here, templates for creating your new articles:
38 |
39 | | Template | GitHub Example | Article Example |
40 | | -------------------------------------------------------------------------------------------------------- | ----------------------------------------------------------------------------------------------------------------------------------------------------------------------------------------------------------------------------------- | ----------------------------------------------------------------------- |
41 | | [Article Template](https://github.com/Codecademy/ugc/blob/main/documentation/authorA/mock-article-1.md) | [web-scrape-with-selenium-and-beautiful-soup.md](https://github.com/Codecademy/ugc/blob/main/content/caupolicandiaz/web-scrape-with-selenium-and-beautiful-soup.md) ([Raw](https://raw.githubusercontent.com/Codecademy/ugc/main/content/caupolicandiaz/web-scrape-with-selenium-and-beautiful-soup.md)) | [Web Scrape with Selenium and Beautiful Soup](https://www.codecademy.com/article/caupolicandiaz/web-scrape-with-selenium-and-beautiful-soup) |
42 | | [Author Template](https://github.com/Codecademy/ugc/blob/main/documentation/authorA/author_meta.json) | [author_meta.json](https://github.com/Codecademy/ugc/blob/main/content/caupolicandiaz/author_meta.json) | N/A |
43 |
44 | Please read through the following in the [/documentation](https://github.com/Codecademy/docs/tree/main/documentation) folder. In these links, you'll find a write-up of our standards for content and style:
45 |
46 | - [Content Standards](https://github.com/Codecademy/ugc/blob/main/documentation/content-standards.md)
47 | - [Categories List](https://github.com/Codecademy/ugc/blob/main/documentation/categories.md)
48 | - [Tags List](https://github.com/Codecademy/ugc/blob/main/documentation/tags.md)
49 |
50 |
51 | ### Codecademy Username and Profile Pic
52 |
53 | As a UGC article content creator, you have the opportunity to have your Codecademy username and avatar displayed on the article!
54 |
55 | ## How do I submit a Pull Request (PR)?
56 |
57 | Contributing follows this workflow:
58 |
59 | 1. Fork [this project repository](https://github.com/codecademy/ugc).
60 | 2. Clone the forked repository to your computer.
61 | 3. Create and switch into a new branch.
62 | 4. Edit or create an article and commit the changes.
63 | 5. Make a PR to merge your fork with this repo.
64 |
65 | If you haven't gone through this workflow before, you can check out [this GitHub tutorial](https://github.com/firstcontributions/first-contributions#readme) (highly recommend) or [this YouTube video](https://www.youtube.com/watch?v=rgbCcBNZcdQ) to learn about how to make a PR from a fork using Git.
66 |
67 | Alternatively, if you'd prefer to keep things to the GitHub UI, you can follow the instructions in that video up to 1:18 to fork this repo. After that, you can create your article in your fork using the UI and then make a PR by pressing this handy button:
68 |
69 |  70 |
71 | If you are uncomfortable using Git, you can also check out [this YouTube video](https://youtu.be/RPagOAUx2SQ) to do this all using the GitHub Desktop app.
72 |
73 | ## Any tips for a Pull Request?
74 |
75 | - Before making a PR, make sure you pushed your changes from a branch other than `main`.
76 | - Name the new branch after the changes being pushed to the PR.
77 | - Keep your PRs byte-sized. 1 article per PR!
78 | - All contributors must sign the Contributor License Agreement (CLA).
79 | - All required [status checks](https://docs.github.com/en/github/collaborating-with-pull-requests/collaborating-on-repositories-with-code-quality-features/about-status-checks) are expected to pass in each PR.
80 | - For Beta, we currently require at least one round of reviews from the [content team members](https://github.com/codecademy/docs#-content-team). Make sure to make the changes within 5 days.
81 | - Requested changes must be resolved before merging.
82 | - Your article will be deployed within the hour after it's merged!
83 |
84 | ## What do we check for?
85 |
86 | - Technical accuracy
87 | - Formatting standards
88 | - Typos/bugs
89 | - Plagiarism
90 |
91 | ## Additional Resources
92 |
93 | Remember, if you ever have any questions at all, we're always here to help in the [Codecademy Forums](https://discuss.codecademy.com/) and [Codecademy Discord](https://discord.com/invite/codecademy).
94 |
--------------------------------------------------------------------------------
/documentation/content-standards.md:
--------------------------------------------------------------------------------
1 | # Content Standards
2 |
3 | ## Components of an Article
4 |
5 | All UGC entries are Markdown files and should consist of three parts:
6 |
7 | - The **file name**, with the **.md** extension.
8 | - The **metadata** about the content, written in YAML, which appears at the top of the article file.
9 | - The **content**, written in Markdown.
10 |
11 | We'll describe the standards for each of these components separately.
12 |
13 | ### File Name
14 |
15 | All article file names use the **.md** format along with the following standards:
16 |
17 | - They must match the title of the article. (e.g. "Build a 3D Environment with Three.js" -> **build-a-3d-environment-with-three-js.md**)
18 | - It must be separated by dashes, where appropriate. (e.g. "Data Types" -> **data-types.md**, "HashTable" -> **hashtable.md**)
19 | - The file name should always be lowercase. (e.g. "Array" -> **array.md**, "HTML" -> **html.md**)
20 | - Punctuation must not be included in the file name, even if it exists in the article name. (e.g. "Moore's Law" -> **moores-law.md**, "Three.js" -> "**three-js.md**)
21 |
22 |
23 | ### Metadata
24 |
25 | | Variable Name | Description | Example |
26 | | ---------------- | --------------------------------------------------------------------------------------------------------------------------------------------------------------------------------------------------------------------------------------------------------------------------------------------------------------------------------------------------------------------------------------------------------------------------------------------------- | --------------------------------------------------------------------------------------------------- |
27 | | `Title` | The title of the article. This will be displayed on the page at the top. | Title: "Build a 3D Environment with Three.js" |
28 | | `Description` | A brief description (ideally under 150 characters) used in search engine results and content previews | Description: "Step-by-step tutorial about how to build a 3D environment with Three.js and render/move 3D objects." |
29 | | `DatePublished` | The date published on GitHub in `YYYY-MM-DD` format. | DatePublished: "2022-02-28" |
30 | | `Categories` | Slugs of Codecademy languages and subjects. We're storing all of our Catloris in the [categories.md file](https://github.com/Codecademy/ugc/blob/main/documentation/categories.md). Please only use Categories from that list.
70 |
71 | If you are uncomfortable using Git, you can also check out [this YouTube video](https://youtu.be/RPagOAUx2SQ) to do this all using the GitHub Desktop app.
72 |
73 | ## Any tips for a Pull Request?
74 |
75 | - Before making a PR, make sure you pushed your changes from a branch other than `main`.
76 | - Name the new branch after the changes being pushed to the PR.
77 | - Keep your PRs byte-sized. 1 article per PR!
78 | - All contributors must sign the Contributor License Agreement (CLA).
79 | - All required [status checks](https://docs.github.com/en/github/collaborating-with-pull-requests/collaborating-on-repositories-with-code-quality-features/about-status-checks) are expected to pass in each PR.
80 | - For Beta, we currently require at least one round of reviews from the [content team members](https://github.com/codecademy/docs#-content-team). Make sure to make the changes within 5 days.
81 | - Requested changes must be resolved before merging.
82 | - Your article will be deployed within the hour after it's merged!
83 |
84 | ## What do we check for?
85 |
86 | - Technical accuracy
87 | - Formatting standards
88 | - Typos/bugs
89 | - Plagiarism
90 |
91 | ## Additional Resources
92 |
93 | Remember, if you ever have any questions at all, we're always here to help in the [Codecademy Forums](https://discuss.codecademy.com/) and [Codecademy Discord](https://discord.com/invite/codecademy).
94 |
--------------------------------------------------------------------------------
/documentation/content-standards.md:
--------------------------------------------------------------------------------
1 | # Content Standards
2 |
3 | ## Components of an Article
4 |
5 | All UGC entries are Markdown files and should consist of three parts:
6 |
7 | - The **file name**, with the **.md** extension.
8 | - The **metadata** about the content, written in YAML, which appears at the top of the article file.
9 | - The **content**, written in Markdown.
10 |
11 | We'll describe the standards for each of these components separately.
12 |
13 | ### File Name
14 |
15 | All article file names use the **.md** format along with the following standards:
16 |
17 | - They must match the title of the article. (e.g. "Build a 3D Environment with Three.js" -> **build-a-3d-environment-with-three-js.md**)
18 | - It must be separated by dashes, where appropriate. (e.g. "Data Types" -> **data-types.md**, "HashTable" -> **hashtable.md**)
19 | - The file name should always be lowercase. (e.g. "Array" -> **array.md**, "HTML" -> **html.md**)
20 | - Punctuation must not be included in the file name, even if it exists in the article name. (e.g. "Moore's Law" -> **moores-law.md**, "Three.js" -> "**three-js.md**)
21 |
22 |
23 | ### Metadata
24 |
25 | | Variable Name | Description | Example |
26 | | ---------------- | --------------------------------------------------------------------------------------------------------------------------------------------------------------------------------------------------------------------------------------------------------------------------------------------------------------------------------------------------------------------------------------------------------------------------------------------------- | --------------------------------------------------------------------------------------------------- |
27 | | `Title` | The title of the article. This will be displayed on the page at the top. | Title: "Build a 3D Environment with Three.js" |
28 | | `Description` | A brief description (ideally under 150 characters) used in search engine results and content previews | Description: "Step-by-step tutorial about how to build a 3D environment with Three.js and render/move 3D objects." |
29 | | `DatePublished` | The date published on GitHub in `YYYY-MM-DD` format. | DatePublished: "2022-02-28" |
30 | | `Categories` | Slugs of Codecademy languages and subjects. We're storing all of our Catloris in the [categories.md file](https://github.com/Codecademy/ugc/blob/main/documentation/categories.md). Please only use Categories from that list.
- We aim to include an average of 1-2 subjects (and always at least 1!) with every article. | Categories:
- "web-development"
- "game-development"
- "javascript"
- "html-css" |
31 | | `Tags` | Key words that are relevant to the article. We're storing all of our Tags in the [tags.md file](https://github.com/Codecademy/ugc/blob/main/documentation/tags.md). Please only use Tags from that list, but if that list feels insufficient, feel free to create a new Tag and add it to tags.md in your PR!
- We aim to include an average of 3-4 tags with every article. | Tags:
- "Three.js"
- "Animation"
- "Node.js"
|
32 | | `CatalogContent` | Slugs of Codecademy course and Path landing pages that relate to the article. We're storing all of our slugs in the [catalog-content.md file](https://github.com/Codecademy/ugc/blob/main/documentation/catalog-content.md).
- Please avoid linking to individual content items, because their URLs may change and some are gated by Pro membership.
- We aim to include 2 slugs with every article (1 free course and 1 Pro course/Path). | CatalogContent:
- "introduction-to-javascript"
- "paths/front-end-engineer-career-path" |
33 |
34 |
35 | ### Content
36 |
37 | - All text should be written in Markdown language. For more details on Markdown, see Codecademy's [Curriculum Markdown Style Guide](http://curriculum-documentation.codecademy.com/content-guidelines/markdown-style-guide/).
38 | - Each subsection should begin with a heading of size h2 (i.e. preceded by `##`).
39 | - Titles should be title case and subheaders (`##`, `###`, etc) should be sentence case.
40 | - All in-line code should be delineated by single backticks (`).
41 |
42 | #### Code Blocks
43 |
44 | All code blocks should be delineated by triple backticks (```)
45 |
46 | - C: ```c
47 | - C#: ```cs
48 | - C++: ```cpp
49 | - CSS: ```css
50 | - Error: ```error
51 | - Emojicode: ```emojic
52 | - Golang: ```go
53 | - HTML: ```html
54 | - Java: ```java
55 | - JavaScript: ```js
56 | - Markdown: ```md
57 | - PHP: ```php
58 | - Plaintext: ```plaintext
59 | - Pseudo: ```pseudo
60 | - Python: ```py
61 | - R: ```r
62 | - Ruby: ```rb
63 | - Sass: ```scss
64 | - Scheme: ```scheme
65 | - Shell/Program Output: ```shell
66 | - SQL: ```sql
67 | - Swift: ```swift
68 |
69 | #### General Writing Tips
70 |
71 | - Avoid referencing information that isn't strictly related to the topic of the article. As a rule, you want to assume as little pre-existing knowledge as possible.
72 | - Avoid using first- and second-person pronouns (e.g. I, we, you) if possible.
73 | - Brevity without sacrificing clarity. Make every word count.
74 | - If the concept is hard, make it easy. If it's dry, make it fun. If it's simple, keep it simple.
75 | - 90% of writing is rewriting.
76 |
77 | #### Images and Source Code
78 |
79 | If you'd like to include an image, video, GIF, or other file in your article, please upload it to the same article folder. That way we'll never have any broken links!
80 |
81 | **Note:** Each image/video/GIF should be < 1MB.
82 |
83 | ### I've read all the content standards. Now what?
84 |
85 | Check out the [entry template](https://github.com/Codecademy/docs/blob/main/documentation/entry-template.md) and [term entry template](https://github.com/Codecademy/docs/blob/main/documentation/term-entry-template.md) in this folder. And take a look at [GitHub Issues](https://github.com/Codecademy/docs/issues) to see where help is needed!
86 |
87 | For a refresher on how to make a Pull Request, head back to the [Contribution Guide](https://github.com/Codecademy/docs/blob/main/.github/CONTRIBUTING.md). 🎒
88 |
--------------------------------------------------------------------------------
/.tests/repo_validation_test.go:
--------------------------------------------------------------------------------
1 | package repo_validation
2 |
3 | import (
4 | "context"
5 | "encoding/json"
6 | "fmt"
7 | "io/fs"
8 | "io/ioutil"
9 | "os"
10 | "path/filepath"
11 | "regexp"
12 | "strings"
13 | "sync"
14 | "testing"
15 | "time"
16 |
17 | "github.com/adrg/frontmatter"
18 | "github.com/go-playground/validator"
19 | "github.com/machinebox/graphql"
20 | "github.com/stretchr/testify/suite"
21 | )
22 |
23 | // end point for checking author data
24 | var authorsURL = "https://www.codecademy.com/graphql"
25 |
26 | // size limit for non markdown files (1mb)
27 | const byteLimit int64 = 1000000
28 | const contentRoot = "./.."
29 |
30 | // validation regex for markdown files
31 | var kebabCaseRE = regexp.MustCompile("^[a-z0-9]+(-[a-z0-9]+)*$")
32 |
33 | const (
34 | CONTENT_DIR_NAME string = "content"
35 | AUTHOR_META_FILENAME string = "author_meta.json"
36 | )
37 |
38 | type monolithQueryResponse struct {
39 | AuthorProfiles []monolithProfileData `json:"profiles"`
40 | }
41 |
42 | type monolithProfileData struct {
43 | CcId string `json:"id"`
44 | AvatarUrl string `json:"profileImageUrl"`
45 | Username string `json:"username"`
46 | }
47 |
48 | type authorMeta struct {
49 | CcId string `json:"ccID"`
50 | }
51 |
52 | var (
53 | validate = validator.New() // needed for article metadata YAML validation
54 | )
55 |
56 | type dateToISO struct {
57 | time.Time
58 | }
59 |
60 | type articleMeta struct {
61 | Title string `yaml:"Title" validate:"required"`
62 | Description string `yaml:"Description" validate:"required"`
63 | DatePublished dateToISO `yaml:"DatePublished" validate:"required"`
64 | Categories []string `yaml:"Categories" validate:"required"`
65 | Tags []string `yaml:"Tags" validate:"required"`
66 | CatalogContent []string `yaml:"CatalogContent" validate:"required"`
67 | }
68 |
69 | type unitTestSuite struct {
70 | suite.Suite
71 | authorIds []string
72 | contentBasePath string
73 | ccIdsLock sync.Mutex
74 | tagsFileBody string
75 | categoryFileBody string
76 | }
77 |
78 | func TestRepoValidationSuite(t *testing.T) {
79 | ts := new(unitTestSuite)
80 | suite.Run(t, ts)
81 | }
82 |
83 | func (suite *unitTestSuite) SetupSuite() {
84 | body, err := ioutil.ReadFile("../documentation/categories.md")
85 | suite.Assert().Nil(err)
86 | suite.categoryFileBody = string(body)
87 |
88 | body, err = ioutil.ReadFile("../documentation/tags.md")
89 | suite.Assert().Nil(err)
90 | suite.tagsFileBody = string(body)
91 | }
92 |
93 | /**
94 | TestValidateRepo walks the authors content folders and verifies the following requirements:
95 |
96 | 1. each top level author directory has a author_meta.json with a "ccID" field
97 | 2. each "ccId" is unique across the entire repo
98 | 3. each "ccId" exists in an Authors DB
99 | 4. markdown files should be named in kebab case and lowercase letters
100 | 5. markdown files contain frontmatter and includes all required fields fields
101 | 6. markdown frontmatter "categories" and "tags" are found in the documented passlists (./documentation/(categories|tags).md)
102 | 7. non-markdown files should not exceed 1MB
103 | */
104 | func (s *unitTestSuite) TestValidateRepo() {
105 | contentDirPath := filepath.Join(contentRoot, CONTENT_DIR_NAME)
106 |
107 | contentDir, err := os.ReadDir(contentDirPath)
108 | s.Assert().Nil(err, "Unable to parse content directory")
109 |
110 | dirWg := new(sync.WaitGroup)
111 | s.contentBasePath, _ = filepath.Abs(contentDirPath)
112 |
113 | for _, item := range contentDir {
114 | // only process dirs
115 | if item.IsDir() {
116 | dirWg.Add(1)
117 | // validate contents of directory for author
118 | go s.validateAuthorDir(item, dirWg)
119 | } else {
120 | s.Fail("Non directory found in top level content path")
121 | }
122 | }
123 |
124 | // wait until all author directories are parsed so that s.authorIds is set
125 | dirWg.Wait()
126 |
127 | // assert there are no duplicate parsed author ids
128 | duplicateAuthorIds := hasDuplicates(s.authorIds)
129 | s.Assert().False(duplicateAuthorIds, "List of author IDs is not unique")
130 |
131 | // assert all author ids map to valid users in the production monolith
132 | authorData := s.fetchAuthors(s.authorIds)
133 | s.Assert().Equal(len(authorData.AuthorProfiles), len(s.authorIds), "Monolith did not return expected count of authors")
134 | }
135 |
136 | // validateAuthorDir runs validations on an author's directory by checking for a valid author_meta.json,
137 | // valid articles, and that non articles do not exceed the size limit
138 | func (s *unitTestSuite) validateAuthorDir(dir fs.DirEntry, dirWg *sync.WaitGroup) {
139 | defer dirWg.Done()
140 |
141 | authorDirPath := filepath.Join(s.contentBasePath, dir.Name())
142 | metaFilePath := filepath.Join(authorDirPath, AUTHOR_META_FILENAME)
143 |
144 | // verify this dir has an author_meta.json file
145 | authorMetaFile, err := os.ReadFile(metaFilePath)
146 | s.Assert().Nil(err, "No author_meta.json file found")
147 |
148 | // verify author meta file format is parsable and a CcId exists
149 | var author authorMeta
150 | err = json.Unmarshal(authorMetaFile, &author)
151 | s.Assert().Nil(err, "Could not parse author_meta.json")
152 | s.Assert().NotNil(author.CcId, "No CcId found in author_meta.json")
153 |
154 | // save this CCID for later fetching of profile data from the monolith
155 | s.ccIdsLock.Lock()
156 | s.authorIds = append(s.authorIds, author.CcId)
157 | s.ccIdsLock.Unlock()
158 |
159 | // wait until all articles in dir are processed
160 | articleWg := new(sync.WaitGroup)
161 | filepath.Walk(authorDirPath, func(path string, info os.FileInfo, err error) error {
162 | // skip the root dir while walking
163 | if !info.IsDir() {
164 | if strings.HasSuffix(path, ".md") {
165 | articleWg.Add(1)
166 | go s.validateMarkdownFile(path, articleWg)
167 | } else {
168 | // assert the size is below the limit for non markdown files
169 | fmt.Printf("- validating non-markdown file: %v \n", path)
170 | s.Assert().Less(info.Size(), byteLimit, "File is too large")
171 | }
172 | }
173 |
174 | return err
175 | })
176 |
177 | articleWg.Wait()
178 | }
179 |
180 | // validateMarkdownFile runs validations on the provided markdown file path by making sure front matter is parsable and whitelisted
181 | // and that the file name is in lowercase kebab case
182 | func (s *unitTestSuite) validateMarkdownFile(path string, wg *sync.WaitGroup) {
183 | defer wg.Done()
184 | fmt.Printf("- validating markdown file: %v \n", path)
185 |
186 | // validate markdown file name
187 | ss := strings.Split(path, "/")
188 | lastSegment := ss[len(ss)-1]
189 | strippedSegment := strings.TrimSuffix(lastSegment, filepath.Ext(lastSegment))
190 | isKebab := kebabCaseRE.MatchString(strippedSegment)
191 | s.Assert().True(isKebab, "The file name is not in kebab case")
192 |
193 | // validate markdown front matter
194 | f, _ := os.OpenFile(path, os.O_RDONLY, 0655)
195 | defer f.Close()
196 |
197 | var meta articleMeta
198 | _, err := frontmatter.MustParse(f, &meta)
199 | s.Assert().Nil(err, "Error parsing frontmatter")
200 |
201 | // make sure input is valid
202 | err = validate.Struct(meta)
203 | s.Assert().Nil(err, "Frontmatter fails validation")
204 |
205 | // ensure categories and tags are in allowlist
206 | for _, item := range meta.Categories {
207 | s.Assert().Contains(s.categoryFileBody, item+"\n", "Category was not found in documentation/categories.md")
208 | }
209 |
210 | for _, item := range meta.Tags {
211 | s.Assert().Contains(s.tagsFileBody, item+"\n", "Tag was not found in documentation/tags.md")
212 | }
213 | }
214 |
215 | //fetchAuthors retrieves data for the given ccIds from the monolith
216 | func (s *unitTestSuite) fetchAuthors(ccIds []string) monolithQueryResponse {
217 | graphqlClient := graphql.NewClient(authorsURL)
218 | graphqlRequest := graphql.NewRequest(`
219 | query ($ccIds: [String!]!){
220 | profiles(ccIds: $ccIds) {
221 | id
222 | profileImageUrl
223 | username
224 | }
225 | }`)
226 |
227 | graphqlRequest.Var("ccIds", ccIds)
228 | graphqlResponse := monolithQueryResponse{}
229 | err := graphqlClient.Run(context.Background(), graphqlRequest, &graphqlResponse)
230 | if err != nil {
231 | panic(err)
232 | }
233 |
234 | return graphqlResponse
235 | }
236 |
237 | // hasDuplicates checks if the provided slice contains any duplicates
238 | func hasDuplicates(items []string) bool {
239 | m := make(map[string]bool)
240 | for _, item := range items {
241 | if m[item] == false {
242 | m[item] = true
243 | } else {
244 | return true
245 | }
246 | }
247 |
248 | return false
249 | }
250 |
251 | // UnmarshalYAML allows conversion of date string to time.Time.
252 | func (t *dateToISO) UnmarshalYAML(unmarshal func(interface{}) error) error {
253 | var buf string
254 | err := unmarshal(&buf)
255 | if err != nil {
256 | return err
257 | }
258 |
259 | tt, err := time.Parse("2006-01-02", strings.TrimSpace(buf))
260 | if err != nil {
261 | return err
262 | }
263 | t.Time = tt
264 | return nil
265 | }
266 |
--------------------------------------------------------------------------------
/content/deyemiobaa/creating-queues-using-javascript.md:
--------------------------------------------------------------------------------
1 | ---
2 | Title: "Creating Queues Using JavaScript"
3 | Description: "Creating a queue and implementing several of its operations using JavaScript."
4 | DatePublished: "2022-04-28"
5 | Categories:
6 | - "computer-science"
7 | Tags:
8 | - "Algorithms"
9 | - "Arrays"
10 | - "ES6"
11 | - "Classes"
12 | CatalogContent:
13 | - "introduction-to-javascript"
14 | - "linear-data-structures"
15 | ---
16 |
17 | _**Prerequisites:** JavaScript_
18 | _**Versions:** ECMAScript 2015 (ES6)_
19 |
20 | ## Introduction
21 |
22 | During conversations about data structures in the programming world, the term queue is heard quite often. A queue is a linear data structure that follows the first-in-first-out (FIFO) pattern, i.e., removal takes place at the front, and addition takes place at the end. Think of it as the checkout point at a grocery store. Customers who get to the checkout counter first get attended to first. They can only join the queue from the back of the line, and after they get attended to, they leave from the front of the line.
23 |
24 | ## Linear data structures
25 |
26 | Linear data structures are types of data structures in which elements are stored sequentially. The elements are organized in such a way that each element is directly linked to its previous and next element. However, the first element is only linked to its previous element and the last element is only linked to the next element.
27 |
28 | Queues follow this arrangement pattern, and we can see that by referring to our grocery store checkout counter analogy. Each customer that walks to the checkout counter represents an element. The first customer has a link to the previous customer, the last customer has a link to the next customer and every other customer in-between has a link to a previous and next customer.
29 |
30 | ## Use cases for queues
31 |
32 | There are several use cases for queues in the programming and real world. Some of them include the following.
33 |
34 | ### A desk printer
35 |
36 | When you send documents to the printer, they are printed in the same order in which they are sent, and this is very useful when you're trying to print documents that follow a specific order. The printer makes sure the pages don't get mixed up.
37 |
38 | ### Updating a music player queue
39 |
40 | Sometimes, while we are working on a task, we have our go-to songs to keep the momentum going. The queue function of the music player makes sure you listen to your song selections just the way it is arranged.
41 |
42 | ### Customer service lines
43 |
44 | If you go to a bank to file a complaint, they make you wait in lines and the next person in line won't be called unless the issue of the current customer has been resolved.
45 |
46 | ### File sharing between two processes
47 |
48 | When transferring files from one device to another, the files are received on the other end in the same order they were sent, irrespective of the time it takes for any of them to get completed.
49 |
50 | ## Implementation of queues
51 |
52 | Queues can be implemented in any programming language, but our focus is on how to create them using JavaScript. In JavaScript, it can also be implemented in two ways: arrays and linked lists. For this article, we will implement queues using arrays.
53 |
54 | ## Operations in queues
55 |
56 | These are some basic operations that are performed on queues:
57 |
58 | - Enqueue
59 | - Dequeue
60 | - Peek
61 | - Reversing a queue
62 |
63 | For the implementation of the above operations, we’d use an [ES6 class](https://developer.mozilla.org/en-US/docs/Web/JavaScript/Reference/Classes) and have the various operations as methods.
64 |
65 | ## Creating a queue with its operations
66 |
67 | The first step is to initialize our class with its own storage (an array where our queue elements would be stored):
68 |
69 | ```js
70 | class Queue {
71 | constructor() {
72 | this.queue = [];
73 | }
74 | }
75 | ```
76 |
77 | The code block above represents the creation of a class named `Queue`. The [`constructor()`](https://www.codecademy.com/resources/docs/javascript/constructors) method is a special method of a class that is used to create an object instance of that class. It can be used to initialize any object that would be used across the class methods. The [`this`](https://www.codecademy.com/resources/docs/javascript/this) keyword serves as a regular object within this context. It can be used to initialize any value.
78 |
79 | Next up, we add each queue operation as a method of the class.
80 |
81 | ### Enqueue
82 |
83 | This term refers to adding a new element to the queue. Since we're implementing our queue with an array, we can use the `.push()` array method to add new elements to the queue.
84 |
85 | ```js
86 | class Queue {
87 | constructor() {
88 | this.queue = [];
89 | }
90 |
91 | enqueue(element) {
92 | this.queue.push(element);
93 | }
94 | }
95 | ```
96 |
97 | The added lines to our code block represent a method of class `Queue`. It handles one operation which adds a new item to the array object that is initialized using the `constructor` method.
98 |
99 | The `.enqueue()` method accepts one argument `element` and then adds it to `this.queue` using the [`.push()`](https://www.codecademy.com/resources/docs/javascript/arrays/push) array method.
100 |
101 | ### Dequeue
102 |
103 | This term refers to removing a new element from the queue. Again, the [`.shift()`](https://www.codecademy.com/resources/docs/javascript/arrays/shift) array method takes care of this for us easily.
104 |
105 | ```js
106 | class Queue {
107 | constructor() {
108 | this.queue = [];
109 | }
110 |
111 | enqueue(element) {
112 | this.queue.push(element);
113 | }
114 |
115 | dequeue() {
116 | return this.queue.shift();
117 | }
118 | }
119 | ```
120 |
121 | We added a new method `.dequeue()`. This method deoesn't accept any arguments unlike the previous method. It returns an element from the front of the queue and also removes it using the `.shift()` array method.
122 |
123 | ### Peek
124 |
125 | We use the `peek()` method to check for the element at the front of the queue, without removing it:
126 |
127 | ```js
128 | class Queue {
129 | constructor() {
130 | this.queue = [];
131 | }
132 |
133 | enqueue(element) {
134 | this.queue.push(element);
135 | }
136 |
137 | dequeue() {
138 | return this.queue.shift();
139 | }
140 |
141 | peek() {
142 | return this.queue[0];
143 | }
144 | }
145 | ```
146 |
147 | The `.peek()` method checks for the value at the front of the queue by accessing the first index of the queue.
148 |
149 | ### Reversing a Queue
150 |
151 | As the title implies, we are simply trying to change the order of the queue from back to front. The `.reverse()` method is handled using a [while loop](https://www.codecademy.com/resources/docs/javascript/loops) and the [`.pop()`](https://www.codecademy.com/resources/docs/javascript/arrays/pop) array method.
152 |
153 | ```js
154 | class Queue {
155 | constructor() {
156 | this.queue = [];
157 | }
158 |
159 | enqueue(element) {
160 | this.queue.push(element);
161 | return this.queue;
162 | }
163 |
164 | dequeue() {
165 | return this.queue.shift();
166 | }
167 |
168 | peek() {
169 | return this.queue[0];
170 | }
171 |
172 | reverse() {
173 | // Declare an empty array
174 | const reversed = [];
175 |
176 | // Iterate through the array using a while loop
177 | while (this.queue.length > 0) {
178 | reversed.push(this.queue.pop());
179 | }
180 | // Set queue using the new array
181 | this.queue = reversed;
182 | return this.queue;
183 | }
184 | }
185 | ```
186 |
187 | ## Usage
188 |
189 | To see how our code works, we are going to test out each method of our `Queue` class.
190 |
191 | First, we need to create a new instance of our class. Then, we will use it to access our methods:
192 |
193 | ```js
194 | // Creating a new instance of our class
195 | const result = new Queue();
196 |
197 | // Adding elements
198 | result.enqueue(5);
199 | result.enqueue(3);
200 | result.enqueue(4);
201 | result.enqueue(7);
202 | console.log("After adding elements:", result.queue);
203 |
204 | // Removing an element
205 | result.dequeue();
206 | console.log("After removing an element:", result.queue);
207 |
208 | // Checking the first element in the queue
209 | console.log("After peeking:", result.peek());
210 |
211 | // Reversing the queue
212 | console.log("After reversing the queue:", result.reverse());
213 | ```
214 |
215 | After multiple operations are performed on our `result` queue, we get the following output in the console:
216 |
217 | ```shell
218 | After adding elements: [ 5, 3, 4, 7 ]
219 | After removing an element: [ 3, 4, 7 ]
220 | After peeking: 3
221 | After reverse: [ 7, 4, 3 ]
222 | ```
223 |
224 | ## Conclusion
225 |
226 | Here is a summary of what was covered in this article:
227 |
228 | - We explained the concept of queues (FIFO) and how they are applied in the real world.
229 | - We created a class and performed various queue operations (enqueue, dequeue, peek, reverse).
230 |
231 | That’s it, folks. We’ve successfully implemented a queue and its basic operations using JavaScript.
232 |
--------------------------------------------------------------------------------
/content/goku-kun/introduction-to-adts-in-javascript.md:
--------------------------------------------------------------------------------
1 | ---
2 | Title: "An Introduction to Abstract Data Types in JavaScript"
3 | Description: "An introduction to ADTs in JavaScript."
4 | DatePublished: "2022-04-25"
5 | Categories:
6 | - "code-foundations"
7 | - "computer-science"
8 | Tags:
9 | - "Data Structures"
10 | - "Classes"
11 | - "OOP"
12 | CatalogContent:
13 | - "introduction-to-javascript"
14 | - "paths/computer-science"
15 | ---
16 |
17 | 
18 |
19 | ## Introduction
20 |
21 | An **Abstract Data Type** (ADT), as the name suggests, is an abstract understanding of a data structure. An ADT is defined through its behavior and characteristics, particularly in terms of what data can be stored into it, the operations that can be performed on this data, and the behavior of these operations. For example, stacks and queues can be internally implemented using linked-lists made up of nodes or [arrays](https://www.codecademy.com/resources/docs/javascript/arrays). However, the primary function of a stack is to be a last in, first out (LIFO) data structure and the primary function of a queue is to be a first in, first out (FIFO) data structure. The behavior, from the point of the user, remains intact, regardless of the internal implementation either using linked-lists or arrays. If the user was interacting with a stack, the user will simply worry about pushing data onto the stack or popping data off the stack. The user won't need to have the knowledge of how that stack is working internally.
22 |
23 | In contrast to the data structures, which are specific and detailed implementations that deal with how the data structure does its job, an ADT focuses on _what it does_ and not how it does its job. In short, the ADT defines what that particular data construct must do and the data structure is the concrete implementation of that construct.
24 |
25 | An analogy to explain ADTs in terms of web development would be [CRUD](https://www.codecademy.com/resources/docs/general/http) (abbreviated as create, read, update and delete) APIs. The user of any CRUD API has to simply know what request method (GET, POST, PUT/PATCH, or DELETE) should they send, and if they followed the rules of the API, the API server would send data back. The user didn't have to worry about the internal workings of the API server. They simply had to know the rules of interactions and behavior of a CRUD API. In this case, the CRUD API is functioning as an ADT _from the perspective of the user_.
26 |
27 | There are no specific rules which force the implementation of particular methods and operations in a particular ADT. This is decided based on the requirements in a use-case scenario and ultimately by design choice.
28 |
29 | ## Why use ADTs?
30 |
31 | There are 3 general advantages of using ADTs, listed as follows:
32 |
33 | ### Encapsulation
34 |
35 | An ADT will provide certain methods and properties. And the knowledge of these methods and properties is all the user will need to successfully operate with the ADT.
36 |
37 | ### Compartmentalization
38 |
39 | The code that is using the ADT will not have to be changed even if the internal workings of the ADT have been changed. The change in the ADT is isolated and compartmentalized.
40 |
41 | ### Adaptability
42 |
43 | Real world programs continue to evolve with ever changing requirements and new constraints. Differently implemented ADTs, with all the same properties and methods, can thus be used interchangeably. For example, consider a linked list created using arrays that contained names of the patients in a hospital. It's later decided to include all the information about the patient in the linked list. Then, a linked list implemented using class based nodes with all the necessary fields would serve as a much better replacement as compared to the linked list that is simply using arrays. Therefore, ADTs can adapt to the situation in which they're used.
44 |
45 | ## General operations supported by ADTs
46 |
47 | ADTs support the follow operations:
48 |
49 | - **Traversing**, which allows each element in the ADT to be accessed once for processing.
50 | - **Searching**, which allows the user to look for a specific element in the ADT.
51 | - **Inserting**, which allows the user to insert an element at a particular index/space in the ADT.
52 | - **Deleting**, which allows the user to either delete a particular element or delete an element at a particular location.
53 | - **Sorting**, which allows the elements to be ordered in ascending or descending order, depending on the preference.
54 |
55 | ## How ADTs coexist with other programs
56 |
57 | Each ADT supports specific operations which can be leveraged in a particular situation. Some ADTs can provide better speeds at looking up data while others can save space. But, these ADTs work in conjunction with other programs to track, store, retrieve, and manipulate the data. The user is the one that decides which particular ADT would best serve their requirements.
58 |
59 | 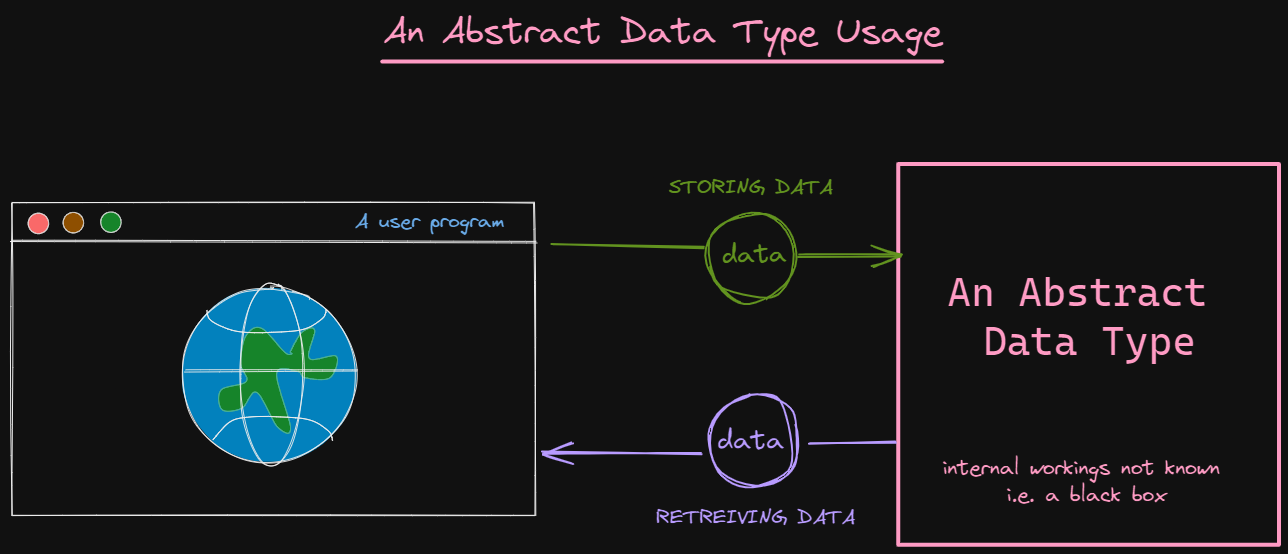
60 |
61 | ## Linked-lists as an ADT
62 |
63 | Linked-lists are made up of a sequence of elements (called nodes, refer the left note below), which may or may not be stored sequentially in memory. For a simple linked-list, each node has the ability to store some data and the link to the next node in the linked-list. Every linked-list begins at the head node which is then linked to the next node.
64 |
65 | 
66 |
67 | Linked-list ADTs would support the following operations:
68 |
69 | ```js
70 | // General operations
71 | getHead(); // Returns back head node
72 | getSize(); // Return the current size of the linked-list
73 | isEmpty(); // Returns true if the linked-list is empty
74 |
75 | // Insert and replace operations
76 | insertBeginning(element); // Inserts new element at the beginning of the linked-list
77 | insertEnd(element); // Inserts new element at the end of the linked-list
78 | insertAtPosition(element, index); // Inserts new element at the given positional index
79 | replaceAtPosition(element, index); // Replaces the element at give index with the new element
80 |
81 | // Delete operations
82 | deleteBeginning(); // Removes the first element and returns its element
83 | deleteEnd(); // Removes the last element and returns its element
84 | deleteAtPosition(index); // Removes node from the given positional index and returns its element
85 |
86 | // Traverse, sort, and search operations
87 | traverse(); // Goes through all the elements once in the linked list and prints them
88 | search(element); // Searches given element and returns true if the element is found in linked-list
89 | sort(order); // Sorts the linked-list in the given order (ascending/descending)
90 | retrieve(index); // Returns the element stored at the given index location
91 | ```
92 |
93 | ## Stack ADTs
94 |
95 | **Stacks** are linear data structures in which data is entered and removed from _only a single point_. This point is called the **top** of the stack. It follows the last-in, first-out (LIFO) format for storing and discarding data. This means that the last element added to the top of the stack is the first element that will be removed from the stack. There is no other way to access other elements in the stack but the element that is at the top of the stack.
96 |
97 | 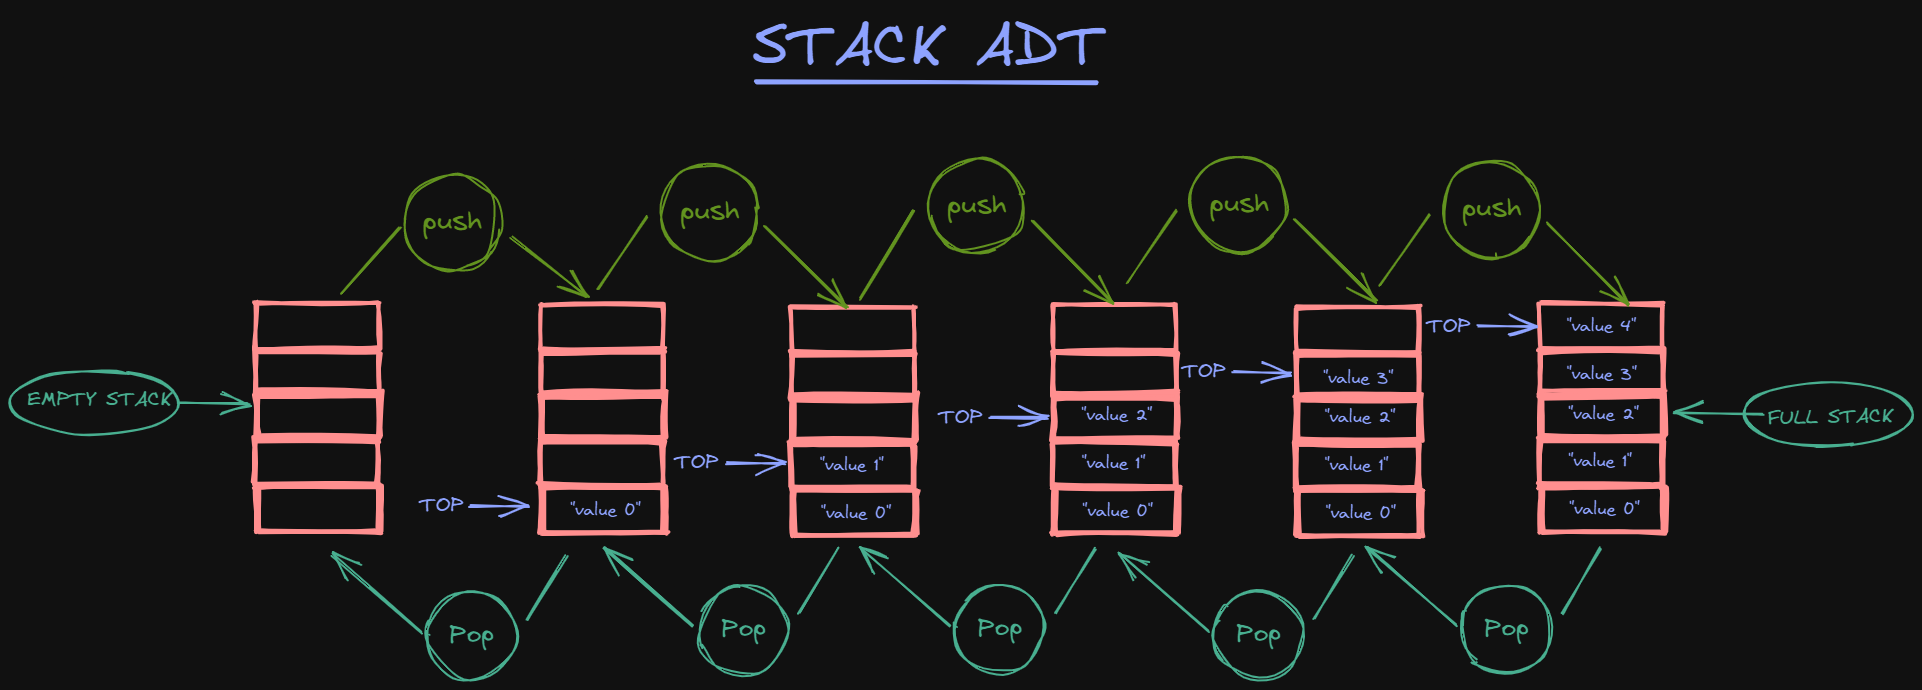
98 |
99 | A stack ADT supports the following operations:
100 |
101 | ```js
102 | push(element); // Inserts a new element at the top of the stack
103 | pop(); // Removes the element stored at the top of the stack and returns it
104 | peek(); // Returns the top element without removing it from the stack
105 | ```
106 |
107 | ## Queue ADTs
108 |
109 | **Queues** are linear data structures, in which data is inserted from one end and removed from the other end. The place where the data is inserted in the queue is called the **rear** end of the queue and this insertion operation is called **enqueue**. Data can be removed from the **front** of the queue and this deletion operation is called **dequeue**. It follows the first-in, first-out (FIFO) configuration for storing and removing data. This means that the data that was first to enter the queue is also first to leave the queue.
110 |
111 | 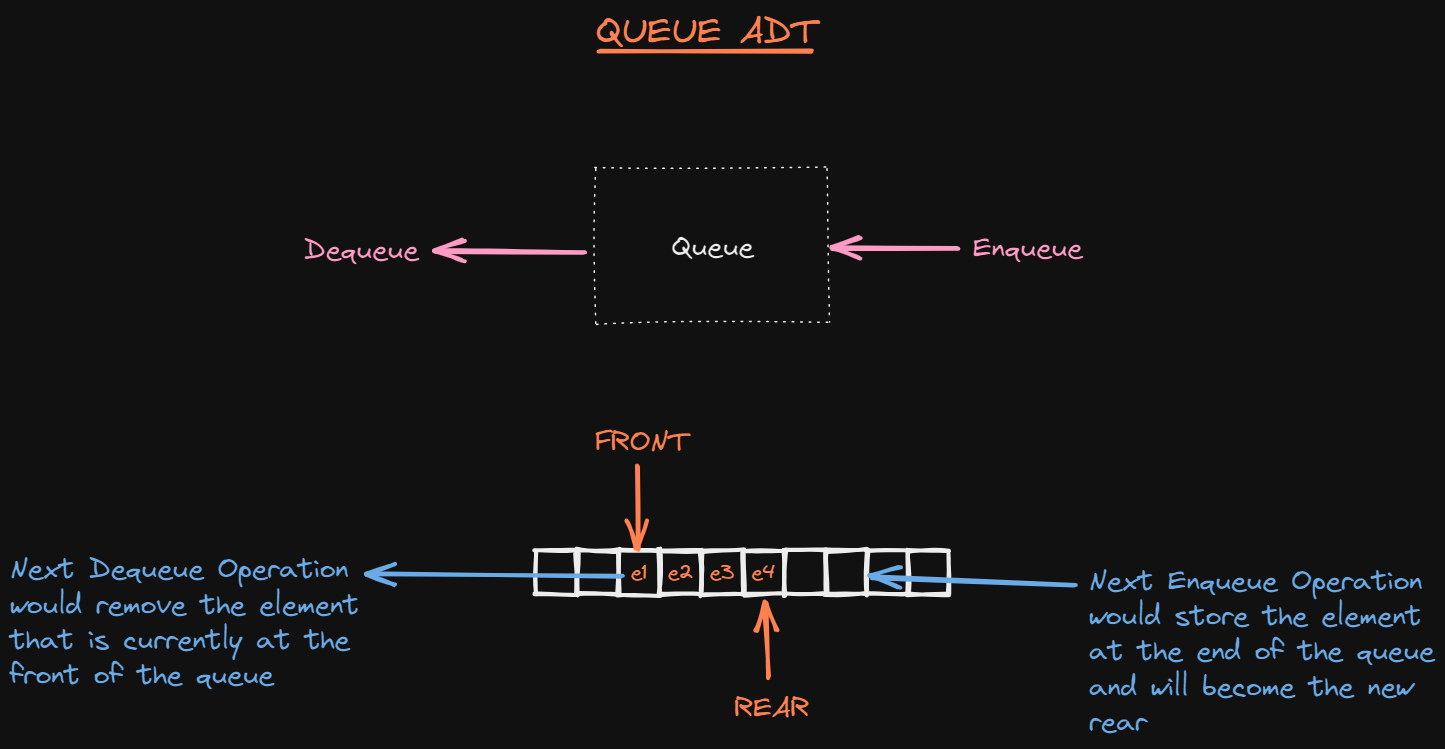
112 |
113 | A Queue ADT supports the following operations:
114 |
115 | ```js
116 | enqueue(element); // Inserts a new element at the rear of the queue
117 | dequeue(); // Removes the element at the front of the queue and returns it
118 | ```
119 |
120 | ## Conclusion
121 |
122 | ADTs fulfill a very important role in everyday programming tasks. This article talked about how ADTs are used in application development. It also showed how ADTs offer encapsulation, compartmentalization, and adaptability. Finally, the article discussed about some basic ADTs such as linked-lists, stacks and queues.
123 |
--------------------------------------------------------------------------------
/content/christine_yang/build-a-discord-bot-with-node-js.md:
--------------------------------------------------------------------------------
1 | ---
2 | Title: "Build a Discord Bot with Node.js"
3 | Description: "Step-by-step tutorial about how to build a Discord Bot with Node.js."
4 | DatePublished: "2022-02-28"
5 | Categories:
6 | - "machine-learning"
7 | - "developer-tools"
8 | - "bash"
9 | - "javascript"
10 | Tags:
11 | - "Chatbots"
12 | - "Node"
13 | CatalogContent:
14 | - "learn-node-js"
15 | - "paths/build-chatbots-with-python"
16 | ---
17 |
18 | [Discord]: https://discord.com/
19 | [Node.js]: https://www.codecademy.com/resources/docs/general/node-js
20 | [Developer Portal]: https://discord.com/developers/applications
21 | [OAuth2]: https://discord.com/developers/docs/topics/oauth2
22 | [Visual Studio Code]: https://code.visualstudio.com/
23 | [npm]: https://www.codecademy.com/resources/docs/javascript/npm
24 | [Discord.js]: https://www.npmjs.com/package/discord.js
25 | [dotenv]: https://www.npmjs.com/package/dotenv
26 | [node packages/modules]: https://www.npmjs.com/
27 |
28 | [Gif of Bot replying "Hello" to user]: https://github.com/Codecademy/articles/blob/main/build-a-discord-bot-with-node-js/discord_bot_reply.gif?raw=true
29 | [Discord Developer Portal to create new applications]: https://github.com/Codecademy/articles/blob/main/build-a-discord-bot-with-node-js/discord_developer_portal.jpg?raw=true
30 | [Form modal to create an application with a name input]: https://github.com/Codecademy/articles/blob/main/build-a-discord-bot-with-node-js/create_discord_app_modal.png?raw=true
31 | [Application’s general information page with a customizable icon image and an About Me section]: https://github.com/Codecademy/articles/blob/main/build-a-discord-bot-with-node-js/general_info_bot.png?raw=true
32 | [Application’s bot page with an add bot button]: https://github.com/Codecademy/articles/blob/main/build-a-discord-bot-with-node-js/discord_dev_bot.png?raw=true
33 | [After adding a bot to the application, a hidden authorization token is generated]: https://github.com/Codecademy/articles/blob/main/build-a-discord-bot-with-node-js/a_wild_bot.png?raw=true
34 | [OAuth2 page with the bot option checked and an auto-generated URL bar]: https://github.com/Codecademy/articles/blob/main/build-a-discord-bot-with-node-js/oauth2_scopes.png?raw=true
35 | [OAuth2 page bot permissions selected for a messaging bot]: https://github.com/Codecademy/articles/blob/main/build-a-discord-bot-with-node-js/oauth2_bot_permissions.png?raw=true
36 | [Discord message letting us know a bot has joined the server]: https://github.com/Codecademy/articles/blob/main/build-a-discord-bot-with-node-js/bot_hops_into_server.png?raw=true
37 |
38 | _**Prerequisites:** Understanding of Discord, JavaScript, Node.js, Visual Studio Code_
39 | _**Versions:** Node.js 16.6_
40 |
41 | ## Introduction
42 |
43 | [Discord] is a popular instant messaging application consisting of servers and channels. Servers are synonymous with group chats. Inside of servers, users may text, voice, or video chat. Channels belong to servers and are typically named according to their purpose. For example, you may have a server named "Gaming Group" with an "#announcements" channel to post announcements for users on that server.
44 |
45 | If you’re familiar with Discord, you may have noticed the presence of a Bot. Bots can help automate tasks such as playing music or moderating chats.
46 |
47 | In this article, we will set up a Discord Bot using [Node.js], which allows us to write JavaScript outside of the browser.
48 |
49 | ![Gif of Bot replying "Hello" to user]
50 |
51 | ## Create our Discord Application
52 |
53 | Let’s first head over to Discord [Developer Portal]. This is where we will create a new application.
54 |
55 | ![Discord Developer Portal to create new applications]
56 |
57 | When we click the top right button labeled "New Application," a modal form will prompt us to create an application by first entering a name.
58 |
59 | ![Form modal to create an application with a name input]
60 |
61 | After creating our application, we’ll be brought over to the general information tab where we can customize our bot’s profile icon and description.
62 |
63 | ![Application’s general information page with a customizable icon image and an About Me section]
64 |
65 | In the bot tab, we will add our bot user to the application with a click of the "Add Bot" button.
66 |
67 | ![Application’s bot page with an add bot button]
68 |
69 | We should see a message that says, “A wild bot has appeared!”
70 | Our bot has a _secret token_ to share with us. Let’s copy and save it for a later step.
71 |
72 | ![After adding a bot to the application, a hidden authorization token is generated]
73 |
74 | Over on the settings tab, we can select the [OAuth2] tab. This is where we can obtain the client ID and client secret to authenticate our application.
75 |
76 | In the scopes section near the bottom of the page, we can generate a URL to authorize our application. Let’s check off the bot box.
77 |
78 | ![OAuth2 page with the bot option checked and an auto-generated URL bar]
79 |
80 | When we choose the bot scope, we are then prompted to check off any permissions we wish to give our bot.
81 |
82 | ![OAuth2 page bot permissions selected for a messaging bot]
83 |
84 | After selecting the desired permissions, we will copy and paste the URL into a new window or tab.
85 |
86 | ### Add Bot to Server
87 |
88 | The URL should take us to a private Discord page where we can add our bot to an existing server.
89 |
90 | After selecting a server, we will follow the prompts. Once our bot is authorized and we are ready to close the window/tab, we'll hop over to the Discord server to confirm the action was a success.
91 |
92 | ![Discord message letting us know a bot has joined the server]
93 |
94 | ## Build Discord Bot
95 |
96 | Now that we have created our Discord Bot Application and added it to a server, we can start building out our bot’s functionality. You may use a text editor of choice; in this tutorial, we will be using [Visual Studio Code].
97 |
98 | ### Step 1: Create Project Directory
99 |
100 | Let’s open our terminal to where we wish our project to live and run the following commands to create our project directory and files:
101 |
102 | ```bash
103 | $ mkdir discord-bot
104 | $ cd discord-bot
105 | $ touch discordbot.js .env
106 | ```
107 |
108 | ### Step 2: Add Auth Token and Node Packages
109 |
110 | The **discordbot.js** file will hold the code for our bot’s functionality and the **.env** file will securely store the _secret token_ copied over from the previous section.
111 |
112 | ```pseudo
113 | // .env
114 |
115 | CLIENT_TOKEN=PasteYourTokenHere
116 | ```
117 |
118 | Node allows us to incorporate open-source code packages in our projects via [npm]. There are tons of great npm packages.
119 |
120 | We will install two packages: [Discord.js] is what allows us to interact with the Discord API and [dotenv] allows us to load environment variables from the **.env** file we created. It’s better to use an **.env** file in this situation because we want to keep our token secure.
121 |
122 | ```bash
123 | $ npm install discord.js dotenv
124 | ```
125 |
126 | Our project should now have the two files we originally created in addition to the three folder/file(s) generated from the node package manager installation:
127 |
128 | - **node_modules** folder
129 | - **package.json** file
130 | - **package-lock.json** file
131 |
132 | ### Step 3: Log In Bot and Add Functionality
133 |
134 | We will now create some functionality for our bot. In order to do so, we need to first require and initialize the modules we installed via npm.
135 |
136 | In **discordbot.js**:
137 |
138 | ```js
139 | // Initialize dotenv
140 | require('dotenv').config();
141 |
142 | // Discord.js versions ^13.0 require us to explicitly define client intents
143 | const { Client, Intents } = require('discord.js');
144 | const client = new Client({ intents: [Intents.FLAGS.GUILDS, Intents.FLAGS.GUILD_MESSAGES] });
145 |
146 | client.on('ready', () => {
147 | console.log(`Logged in as ${client.user.tag}!`);
148 | });
149 |
150 | // Log In our bot
151 | client.login(process.env.CLIENT_TOKEN);
152 | ```
153 |
154 | If we run **discordbot.js** in our terminal, our bot should come online in the discord server, and we should see the following message logged to the console (bot number will vary):
155 |
156 | ```bash
157 | $ node discordbot.js
158 | Logged in as discordBot#0000!
159 | ```
160 |
161 | ### Add Functionality to Discord Bot
162 |
163 | Let’s set up a bot reply for whenever a user types "Hello".
164 |
165 | ```js
166 | client.login(process.env.CLIENT_TOKEN);
167 |
168 | client.on('messageCreate', msg => {
169 | // You can view the msg object here with console.log(msg)
170 | if (msg.content === 'Hello') {
171 | msg.reply(`Hello ${msg.author.username}`);
172 | }
173 | });
174 | ```
175 |
176 | In the newly added lines of code, the bot is listening for a message on the server. If the content of that message equals the string "Hello," our bot will reply "Hello" back with the author’s username.
177 |
178 | Let’s relaunch our bot with `node discordbot.js` and type "Hello" into the Discord chat.
179 |
180 | ![Gif of Bot replying "Hello" to user]
181 |
182 | ## Conclusion
183 |
184 | We created a Discord Bot using Discord’s Developer Portal and Node.js. We used the `discord.js` module to interact with the Discord API and used `dotenv` to read **.env** files. Other [node packages/modules] can be utilized to upgrade the functionality of our bot. While the bot we created today has only one function, the possibilities are endless!
185 |
186 | Here is the source code:
187 |
188 | * https://github.com/Codecademy/articles/tree/main/build-a-discord-bot-with-node-js/discord-bot
189 |
--------------------------------------------------------------------------------
/content/kyrathompson/how-to-convert-css-to-scss.md:
--------------------------------------------------------------------------------
1 | ---
2 | Title: 'How to Convert CSS to SCSS'
3 | Description: 'Guide on converting CSS to SCSS syntax.'
4 | DatePublished: "2022-02-28"
5 | Categories:
6 | - 'web-development'
7 | - 'web-design'
8 | - 'html-css'
9 | Tags:
10 | - 'Sass'
11 | - 'Style'
12 | CatalogContent:
13 | - 'learn-css'
14 | - 'paths/front-end-engineer-career-path'
15 | ---
16 |
17 |  18 |
18 |
19 |
20 | _**Prerequisites:** HTML, CSS_
21 | _**Versions:** SASS 1.38_
22 |
23 | [SCSS](https://sass-lang.com) is the syntax used for the scripting language SASS, or Syntactically Awesome Style Sheet. This syntax can be used to significantly improve the readability of CSS code. It offers many advanced features that will make it easier for you to shorten your code. Since it is more advanced than CSS, it is sometimes coined as Sassy CSS. In this article, we’re going to learn more about what makes this style sheet so sassy.
24 |
25 | ## Getting Started With SASS
26 |
27 | Depending on your preference, SASS can be installed in many different ways. There are several free applications that allow you to have SASS up and running in no time. It can also be installed directly from the command line. If you don’t have SASS already installed, then take some time to explore your options here: [SASS Install Guide](https://sass-lang.com/install).
28 |
29 | ## Variables
30 |
31 | SCSS makes use of variables. Unlike CSS, where you have to call a `var()` function to make a variable, SCSS allows you to make variables directly. This is great for keeping track of things like fonts, colors, and sizing that you know you’re going to use over and over again.
32 |
33 | The syntax for SASS variables is as follows:
34 |
35 | ```css
36 | $variableName: value;
37 | ```
38 |
39 | Let’s take this piece of code for example:
40 |
41 | ```css
42 | body {
43 | color: #000000;
44 | font: 100% Helvetica, sans-serif;
45 | font-size: 50px;
46 | font-weight: lighter;
47 | }
48 | ```
49 |
50 | If we know we’re going to be using the color black and font Helvetica often in our code, then we can set them to variables using SCSS. We can do this as follows:
51 |
52 | ```css
53 | $black: #000000;
54 | $font-type: Helvetica, sans-serif;
55 |
56 | body {
57 | color: $black;
58 | font: 100% $font-type;
59 | font-size: 50px;
60 | font-weight: lighter;
61 | }
62 | ```
63 |
64 | We initiated a variable named black and font-type using the symbol, `$`, and defined each with the desired output value. We then were able to call each variable by calling its name starting with `$`.
65 |
66 | When our code becomes more lengthy, it can become tedious to keep track of things. Variables are a great way to store items that we would like to have for later use. They can be a container for many things including strings, booleans, numbers, colors, and more. Storing these commonly used items in variables can make your code shorter and easier to read.
67 |
68 | ## Nesting
69 |
70 | When defining rules in CSS, they must be defined one after another. CSS does not allow nesting. However, this can be done in SCSS.
71 |
72 | Take this CSS code for a navigation bar as an example:
73 |
74 | ```css
75 | nav ul {
76 | margin: 2;
77 | padding: 2;
78 | list-style: none;
79 | }
80 |
81 | nav li {
82 | display: inline-block;
83 | }
84 |
85 | nav a {
86 | display: block;
87 | padding: 12px 24px;
88 | text-decoration: none;
89 | }
90 | ```
91 |
92 | We can nest this in SCSS:
93 |
94 | ```css
95 | nav {
96 | ul {
97 | margin: 2;
98 | padding: 2;
99 | list-style: none;
100 | }
101 | li {
102 | display: inline-block;
103 | }
104 | a {
105 | display: block;
106 | padding: 12px 24px;
107 | text-decoration: none;
108 | }
109 | }
110 | ```
111 |
112 | Each child element is nested inside the parent element of `nav`. The hierarchical structure in SCSS makes finding and changing elements much easier.
113 |
114 | ## Importing Files
115 |
116 | SCSS has a major upgrade for importing files. In CSS, when a file is imported, an HTTP request is made each time the file is called. SCSS eliminates this by directly including the file into the CSS code. This improves the runtime and performance of your code.
117 |
118 | The syntax for importing files is as follows:
119 |
120 | ```css
121 | @import "filename";
122 | ```
123 |
124 | When using SASS, there is no need to include the file extension in the file name. SASS automatically assumes you’re importing a file of **.sass** or **.scss**.
125 |
126 | Let’s say you have a file called **default.scss** that contains the following code:
127 |
128 | ```css
129 | html,
130 | body,
131 | ul,
132 | li {
133 | margin: 2;
134 | padding: 2;
135 | }
136 | ```
137 |
138 | You can import this file into another file by including the import line at the very top of your file, like so:
139 |
140 | ```css
141 | @import "default";
142 |
143 | p {
144 | text-align: center;
145 | line-height: 1.8;
146 | font-size: 25px;
147 | display: block;
148 | margin: 30px 0 10px;
149 | }
150 | ```
151 |
152 | ## Mixins
153 |
154 | SASS includes a feature called mixins that allows you to reuse snippets of CSS code wherever you want. Once you create a mixin, you can use it by calling it. The syntax for creating a mixin is as follows:
155 |
156 | ```css
157 | @mixin name {
158 | property: value;
159 | property: value;
160 | property: value;
161 | …
162 | }
163 | ```
164 |
165 | If we wanted to create a mixin to highlight a piece of text we think is important, we can make one like this:
166 |
167 | ```css
168 | @mixin highlight-text{
169 | color: blue;
170 | font-size: 50px;
171 | font-weight: bold;
172 | }
173 | ```
174 |
175 | Then we can call it anywhere we want. Let’s try this by pretending we have a class called `.highlight` and we want to use our mixin inside of it. We can write the following:
176 |
177 | ```css
178 | .highlight {
179 | @include highlight-text;
180 | background: yellow;
181 | }
182 | ```
183 |
184 | The CSS will compile like this:
185 |
186 | ```css
187 | .highlight {
188 | color: blue;
189 | font-size: 50px;
190 | font-weight: bold;
191 | background: yellow;
192 | }
193 | ```
194 |
195 | The use of mixins eliminates the need to repeat yourself, resulting in cleaner code.
196 |
197 | ## Extend/Inheritance
198 |
199 | With the built-in feature `@extend`, SASS allows you to share CSS properties to multiple selectors. For example, if we have a basic button with the following properties:
200 |
201 | ```css
202 | .button-basic {
203 | border: none;
204 | padding: 25px 35px;
205 | text-align: center;
206 | font-size: 28px;
207 | cursor: pointer;
208 | }
209 | ```
210 |
211 | We can extend these properties to other buttons we want to create:
212 |
213 | ```css
214 | .button-back {
215 | @extend button-basic;
216 | color: white;
217 | background: blue;
218 | }
219 |
220 | .button-next {
221 | @extend button-basic;
222 | color: red;
223 | background: green;
224 | }
225 | ```
226 |
227 | The CSS will compile like this:
228 |
229 | ```css
230 | .button-basic, .button-back, .button-next {
231 | border: none;
232 | padding: 25px 35px;
233 | text-align: center;
234 | font-size: 28px;
235 | cursor: pointer;
236 | }
237 |
238 | .button-back {
239 | color: white;
240 | background: blue;
241 | }
242 |
243 | .button-next {
244 | color: red;
245 | background: green;
246 | }
247 | ```
248 |
249 | The `@extend` allows for selectors to inherit properties from each other which eliminates the need to write multiple classes.
250 |
251 | ## Operators
252 |
253 | SASS allows you to make use of math operators like `/`, `*`, `%`, `+`, and `-` to make calculations. Here is an example of calculations in use:
254 |
255 | ```css
256 | .container {
257 | width: 520px / 800px * 100%;
258 | }
259 | ```
260 |
261 | The following will compile in CSS as follows:
262 |
263 | ```css
264 | .container {
265 | width: 65.0%;
266 | }
267 | ```
268 |
269 | Having operators at your fingertips makes it a lot easier to calculate sizing for margins, widths, and padding.
270 |
271 | ## Functions
272 |
273 | To define complex computations that we wish to use multiple times, we can use functions to simplify the process.
274 |
275 | A function in SASS uses the `@function` at-rule and is declared as follows:
276 |
277 | ```pseudo
278 | @function () {
279 | ...
280 | }
281 | ```
282 |
283 | If we needed a function that multiplies a list of numbers we can write the following:
284 |
285 | ```css
286 | @function mult($numbers...) {
287 | $mult: 1;
288 | @each $num in $numbers {
289 | $mult: $mult * $num;
290 | }
291 | @return $mult;
292 | }
293 | ```
294 |
295 | **Note:** The use of `...` at the end of a function declaration allows for the function to take any number of arguments. Any extra arguments will be passed into the function as a list. This is known as an argument list.
296 |
297 | We can then use our `mult` function:
298 | ```css
299 | .increase {
300 | size: mult(2px, 4px, 5px, 8px);
301 | }
302 | ```
303 | Functions are very useful when creating complex calculations. Try making an `exponent` function that can calculate 3 to the power of 18.
304 |
305 | **Hint:** SASS has a `@for` rule that allows for executing through expressions. It's written as follows:
306 |
307 | ```css
308 | /* Exclude last expression or value using to */
309 | @for from to { ... }
310 |
311 | /* Include last value using through */
312 | @for from through { ... }
313 | ```
314 |
315 | ## Conclusion
316 |
317 | SASS allows you to make sophisticated style sheets faster. It keeps your code from being repetitive by having features specifically made for code reuse. By incorporating SASS in your code, you’ll find your code to be cleaner and more readable.
318 |
319 | - Solution code: [conversion.scss](https://github.com/Codecademy/articles/blob/main/convert-css-to-scss/conversion.scss)
320 | - Documentation of SASS: https://sass-lang.com/documentation
321 |
--------------------------------------------------------------------------------
/content/stevenswiniarski/create-a-stack-in-python.md:
--------------------------------------------------------------------------------
1 | ---
2 | Title: "Create a Stack in Python"
3 | Description: "A hands-on tutorial building a stack implementation in Python."
4 | DatePublished: "2022-02-28"
5 | Categories:
6 | - "computer-science"
7 | - "python"
8 | Tags:
9 | - "Data Structures"
10 | - "Classes"
11 | - "Lists"
12 | CatalogContent:
13 | - "learn-python-3"
14 | - "paths/computer-science"
15 | ---
16 |
17 | [depth-first search]: https://en.wikipedia.org/wiki/Depth-first_search
18 | [stack]: https://en.wikipedia.org/wiki/Stack_(abstract_data_type)
19 | [exception]: https://www.codecademy.com/resources/docs/python/errors
20 | [Python class]: https://www.codecademy.com/resources/docs/python/classes
21 | [`.pop()` method]: https://www.codecademy.com/resources/docs/python/lists/pop
22 | [`str()` function]: https://www.codecademy.com/resources/docs/python/built-in-functions/str
23 | [Stack Image]: https://raw.githubusercontent.com/Codecademy/ugc/main/content/stevenswiniarski/stack.png
24 |
25 | _**Prerequisites:** Python_
26 | _**Versions:** Python 3.8_
27 |
28 | ## Introduction
29 |
30 | In computer science, a [stack] is a data structure represented by a collection of items that utilizes a last-in-first-out (LIFO) model for access.
31 |
32 | There are two operations that are fundamental to this data structure:
33 |
34 | * A `.push()` function that adds an item to the stack.
35 | * A `.pop()` function that removes the most recently added item to the stack.
36 |
37 | In this way, this type of collection is analogous to a stack of items such as dinner plates, where the topmost item must be removed to access the items underneath. Stacks are useful in implementing actions such as a [depth-first search]. This article will explore the process of implementing a stack in Python.
38 |
39 | ![Stack Image]
40 |
41 | ## Planning our stack implementation
42 |
43 | Before we begin, we need to decide what kind of capabilities we want in our stack implementation. The `.push()` and `.pop()` functions fulfill the minimum requirements. But we also might want the following:
44 |
45 | * Python's `len()` function to let us know how many items are in the stack, and to warn us when the stack is empty. It’s good practice to check for an empty stack when using one in a program.
46 | * A `.peek()` function to tell us the value of the top item on the stack without removing it.
47 |
48 | Lastly, we want to decide how the `.peek()` or `.pop()` methods behave when they are called on an empty stack. We could return something like `NaN`, but that might lead to subtle errors down the line, especially if a `NaN` value is added to the stack. A better practice in this scenario is to raise an [exception] when we try to use these functions on an empty stack. That way, such an event can get caught during testing and the code using the stack can be updated appropriately.
49 |
50 | ## Starting to build the stack class
51 |
52 | Our stack is going to be a [Python class]. Once we declare our class, the first thing we want to add is a container to hold the items in our stack. To do this we create an internal variable:
53 |
54 | ```py
55 | class stack:
56 | def __init__(self):
57 | self.__index = []
58 | ```
59 |
60 | Upon initialization of our `stack` class, it will initialize the `__index` variable as an empty list. This list will hold the items in our stack.
61 |
62 | ## Setting up the `len()` function
63 |
64 | We’ll set up the `len()` function for our class first, since we’ll want to check it before using our `.pop()` and `.peek()` methods. We’ll do this by implementing a “magic” method, also called a Dunder (double-underscore) method. Dunder methods allow us to override the behavior of built-in Python operations. For our stack we can leverage the `len()` Dunder method to institute the “length” behavior we need:
65 |
66 | ```py
67 | class stack:
68 | def __init__(self):
69 | self.__index = []
70 |
71 | def __len__(self):
72 | return len(self.__index)
73 | ```
74 |
75 | Now, when we call `len(stack_instance)`, it will return the number of items in our `__index` variable.
76 |
77 | ```py
78 | >>> s = stack()
79 | >>> # some additional stack operations go here
80 | >>> len(s) # fetch number of items in the stack
81 | 2
82 | ```
83 |
84 | ## Setting up the `.push()` method
85 |
86 | Next, we want to set up our `.push()` method that will place items in our `__index` variable. Since `__index` is a list, our main decision will be at which “end” of the list we should insert our items.
87 |
88 | The first impulse might be to append items to our `__index` list, since we usually think of the highest-indexed item to be the “top”. However, this approach can be problematic for our purposes. This is because our reference, the “top” index, will always be changing as we perform operations on our stack. Additionally, this value would need to be recalculated every time we referenced it.
89 |
90 | It is more efficient to add and remove items from the “beginning” of our list, since the index of the “beginning” never changes. It will always be zero. Therefore, our `__index` variable will be ordered with the “top” item as the first item of our list. Since we are working with a Python list, this can be done with the built-in `.insert()` method:
91 |
92 | ```py
93 | class stack:
94 | def __init__(self):
95 | self.__index = []
96 |
97 | def __len__(self):
98 | return len(self.__index)
99 |
100 | def push(self,item):
101 | self.__index.insert(0,item)
102 | ```
103 |
104 | ## Setting up the `.peek()` method
105 |
106 | The `.peek()` method is pretty straightforward. It returns the "top" value of the stack, which refers to the first item in our list, `__index[0]`. However, we need to take into account the possibility that our list is empty. We will want to check our stack with the `len()` function and throw an exception if we’re trying to use `.peek()` on an empty stack:
107 |
108 | ```py
109 | class stack:
110 | def __init__(self):
111 | self.__index = []
112 |
113 | def __len__(self):
114 | return len(self.__index)
115 |
116 | def push(self,item):
117 | self.__index.insert(0,item)
118 |
119 | def peek(self):
120 | if len(self) == 0:
121 | raise Exception("peek() called on empty stack.")
122 | return self.__index[0]
123 | ```
124 |
125 | ## Setting up the `.pop()` method
126 |
127 | The `.pop()` method is exactly the same as the `.peek()` method with the further step of removing the returned item from the stack. Like `.peek()`, we’ll want to check for an empty list before trying to return a value:
128 |
129 | ```py
130 | class stack:
131 | def __init__(self):
132 | self.__index = []
133 |
134 | def __len__(self):
135 | return len(self.__index)
136 |
137 | def push(self,item):
138 | self.__index.insert(0,item)
139 |
140 | def peek(self):
141 | if len(self) == 0:
142 | raise Exception("peek() called on empty stack.")
143 | return self.__index[0]
144 |
145 | def pop(self):
146 | if len(self) == 0:
147 | raise Exception("pop() called on empty stack.")
148 | return self.__index.pop(0)
149 | ```
150 |
151 | It's important to note that a Python list has its own [`.pop()` method], which behaves almost the same as our stack `.pop()` method, except that the list-version can take an index and “pop” an item from anywhere in the list.
152 |
153 | ## Setting up the `str()` function
154 |
155 | An additional thing we can do is tell Python how we want our stack printed with the [`str()` function]. At the moment, using it yields the following results:
156 |
157 | ```py
158 | >>> s = stack()
159 | >>> print(str(s))
160 | '<__main__.stack object at 0x000002296C8ED160>'
161 | ```
162 |
163 | In order to understand the contents of our stack we’ll want something a little more useful. This is where the `__str__()` Dunder method comes in handy:
164 |
165 | ```py
166 | class stack:
167 | def __init__(self):
168 | self.__index = []
169 |
170 | def __len__(self):
171 | return len(self.__index)
172 |
173 | def push(self,item):
174 | self.__index.insert(0,item)
175 |
176 | def peek(self):
177 | if len(self) == 0:
178 | raise Exception("peek() called on empty stack.")
179 | return self.__index[0]
180 |
181 | def pop(self):
182 | if len(self) == 0:
183 | raise Exception("pop() called on empty stack.")
184 | return self.__index.pop(0)
185 |
186 | def __str__(self):
187 | return str(self.__index)
188 | ```
189 |
190 | This will return the contents of our stack, just like printing out the items of a generic list.
191 |
192 | ## Using the `stack` class
193 |
194 | We now have a usable `stack` class. The code below highlights all of the functionality we’ve implemented in our custom class:
195 |
196 | ```py
197 | >>> s = stack()
198 | >>> s.peek() # stack = []
199 | Exception: peek() called on empty stack.
200 | >>> len(s)
201 | 0
202 | >>> s.push(5) # stack = [5]
203 | >>> s.peek()
204 | 5
205 | >>> s.push('Apple') # stack = ['Apple',5]
206 | >>> s.push({'A':'B'}) # stack = [{'A':'B'},'Apple',5]
207 | >>> s.push(25) # stack = [25,{'A':'B'},'Apple',5]
208 | >>> len(s)
209 | 4
210 | >>> str(s)
211 | "[25, {'A': 'B'}, 'Apple', 5]"
212 | >>> s.pop() # stack = [{'A':'B'},'Apple',5]
213 | 25
214 | >>> s.pop() # stack = ['Apple',5]
215 | {'A': 'B'}
216 | >>> str(s)
217 | "['Apple', 5]"
218 | >>> len(s)
219 | 2
220 | ```
221 |
222 | ## Conclusion
223 |
224 | We’ve now learned how to implement the core functions of a stack class in Python. We could definitely add more functions to this implementation if we wanted. Some examples may include:
225 |
226 | * Refactoring `.peek()` to look at any item in the stack by index.
227 | * Support for appending the contents of lists as a series of items within our stack.
228 | * Adding a `.clear()` method to empty the stack.
229 | * Defining an upper limit to the stack size, which could be valuable in production use to prevent runaway operations from repeatedly adding items to the stack and causing an “Out of Memory” exception.
230 |
231 | With this as a basis, we are well on our way to developing our own stack implementation.
232 |
--------------------------------------------------------------------------------
/content/caupolicandiaz/web-scrape-with-selenium-and-beautiful-soup.md:
--------------------------------------------------------------------------------
1 | ---
2 | Title: "Web Scrape with Selenium and Beautiful Soup"
3 | Description: "A hands-on tutorial in web scraping featuring two popular libraries, Beautiful Soup and Selenium."
4 | DatePublished: "2022-02-28"
5 | Categories:
6 | - "data-science"
7 | - "python"
8 | - "html-css"
9 | Tags:
10 | - "Selenium"
11 | - "Beautiful Soup"
12 | CatalogContent:
13 | - "learn-python-3"
14 | - "learn-web-scraping"
15 | ---
16 |
17 | _**Prerequisites:** Python, HTML, CSS_
18 | _**Versions:** Selenium 3.141, Beautiful Soup 4.9.3, Python 3.8_
19 |
20 | [FiveThirtyEight]: https://fivethirtyeight.com/features/american-women-stole-the-show-in-tokyo/
21 | [Olympedia.org]: http://www.olympedia.org
22 | [CSV]: https://www.codecademy.com/resources/docs/general/what-is-csv
23 | [Selenium]: https://selenium-python.readthedocs.io/index.html
24 | [Beautiful Soup]: https://www.crummy.com/software/BeautifulSoup/bs4/doc/#
25 |
26 | [538 figure one]: https://raw.githubusercontent.com/Codecademy/articles/main/web-scrape-with-beautiful-soup-and-selenium/figure_one.png
27 | [538 figure two]: https://raw.githubusercontent.com/Codecademy/articles/main/web-scrape-with-beautiful-soup-and-selenium/figure_two.png
28 | [Olympedia site]: https://raw.githubusercontent.com/Codecademy/articles/main/web-scrape-with-beautiful-soup-and-selenium/olympedia_header.png
29 | [Inspect Browser]: https://raw.githubusercontent.com/Codecademy/articles/main/web-scrape-with-beautiful-soup-and-selenium/inspect_element_view.png
30 | [Data View]: https://raw.githubusercontent.com/Codecademy/articles/main/web-scrape-with-beautiful-soup-and-selenium/olympic_table_brdr.png
31 | [Plotly Chart]: https://raw.githubusercontent.com/Codecademy/articles/main/web-scrape-with-beautiful-soup-and-selenium/olympic_chart.svg
32 |
33 | ## Introduction
34 |
35 | The Internet is a wondrous resource, just about anything we might hope to find lives there. If we exercise some patience and a pioneering mentality, the opportunities are limitless. However, frequently what we're looking for isn't accessible in the neat little package we'd like.
36 |
37 | It may often be the case that we find the information we want, but in many instances it will be arrayed across a number of pages and tables, impeding our access. In these circumstances, web scraping libraries can serve as the Australian cattle dog strategically drawing together the piecemeal information we're trying to corral into one pen.
38 |
39 | ## The Example
40 |
41 | In the coverage recapping the 2020 Tokyo Olympics, [FiveThirtyEight] published an article, detailing the incredible success of the American women and how their participation and achievements have evolved over the history of the games. The piece includes a pair of visualizations illustrating the percentage of medals won over time and the number of athletes participating by gender. All of the data for the article was sourced from a single site, [Olympedia.org].
42 |
43 | ![538 figure one]
44 | (Figure 1)
45 |
46 | ![538 figure two]
47 | (Figure 2)
48 |
49 | A cursory review of Olympedia reveals a comprehensive and curated view of statistics for the Olympic games. Unfortunately, all of the information is mediated through nested links and filters that reveal only narrow slices of the data. In order to recreate the FiveThirtyEight visualizations, or to create others based on that data, we must aggregate that data independently.
50 |
51 | To meet this challenge we have a pair of tools, [Selenium] and [Beautiful Soup], that in concert can automate the process of walking webpages and parsing HTML to cull our data into a single file. In this tutorial, we'll put together a Python script for automating our data collection, anchored by these two libraries. For the sake of brevity, the code here will be focused on the specifics of acquiring the data for figure one, similar techniques can be adapted to retrieve any other data we may wish to collect.
52 |
53 |
54 | ## The Plan
55 |
56 | Our goal is to assemble data from the disparate tables of Olympedia into one concise [CSV], housing all the stats we require and nothing more. In broad strokes we will need to:
57 |
58 | - Identify the page(s) with the information we want and review the source code.
59 | - Outline a path for navigating the pages and forms to access the data we’re targeting.
60 | - Implement the Selenium methods to navigate the course we've chosen.
61 | - Pass the content of each page to Beautiful Soup to parse.
62 | - Export all the data we've collected with the `csv` standard Python library.
63 |
64 | ## The Territory
65 |
66 | The [Olympedia.org] site has a fairly simple layout structured around a navigation bar at the top, as the main wayfinding element, with dropdowns for several categories such as "Athletes" and "Countries".
67 |
68 | ![Olympedia site]
69 |
70 | Under the "Statistics" dropdown we can select "Medals by Country", which leads us to a page with a table of medal counts by country for every Olympic games ever contested. Above the table are several dropdowns that we can use to filter the results (e.g. Olympic year, discipline, gender, etc).
71 |
72 | By selecting the year of a given Olympics, and a gender, we can highlight the total medals won as well as the breakdown by medal type for that year. To collect the data required for our chart we must extract the values for team USA for every summer Olympics, by gender. In other words, we must select each (summer Olympic) year from the dropdown in turn to update the table with the medal information for that event, for both the men and women.
73 |
74 | ## Navigating a Webpage
75 |
76 | [Selenium] is fundamentally an automation library: it provides tools for interacting with webpages and their elements hands-free. The first step of our data collection script is to create a driver object, an instance of a browser that we can manipulate with Selenium methods.
77 |
78 | We start with our `import` statements:
79 |
80 | ```python
81 | from selenium import webdriver
82 | from selenium.webdriver import Safari
83 | ```
84 |
85 | **Note:** In this example, we use Safari but there are drivers available for other browsers, such as Firefox.
86 |
87 | Next, we instantiate a driver object and assign the URL for the medals page:
88 |
89 | ```python
90 | driver = Safari()
91 |
92 | driver.get('http://www.olympedia.org/statistics/medal/country')
93 | ```
94 |
95 | With these simple lines of code, we've launched a new Safari window, primed for automation.
96 |
97 | ## Retrieving Form Elements
98 |
99 | Once we have our driver instantiated and pointed at our target, we must locate the elements and options necessary to update the table. The Selenium library has many tools for locating elements, circumstances may dictate a preferred path in some cases, but often there are several ways to achieve any objective. Here we've chosen to employ the `.find_element_by_id()` method, which allows us to identify an element by its "id" string.
100 |
101 | We can examine the source code of the page to identify an "id", "class name" or any other feature by right-clicking the page in the browser window and selecting "inspect element".
102 |
103 | ![Inspect Browser]
104 |
105 | In this view, we can navigate through all the elements and identify the "id"s we need. The dropdowns for the Olympic year and gender are labeled `edition_select` and `athlete_gender` respectively. We assign those elements to variables with the following lines:
106 |
107 | ```python
108 | year_dd = driver.find_element_by_id('edition_select')
109 |
110 | gender_dd = driver.find_element_by_id('athlete_gender')
111 | ```
112 |
113 | The next step, is to collect the options for those dropdowns, and we can do so with another locate method:
114 |
115 | ```python
116 | year_options = year_dd.find_elements_by_tag_name('option')
117 |
118 | gender_options = gender_dd.find_elements_by_tag_name('option')
119 | ```
120 |
121 | ## The Handoff
122 |
123 | So far we've identified the page and the form elements we need to update the tables we're targeting. We've set up our automated browser window and assigned variables to the elements in question. Now, we're in the transition phase and we're passing the baton to the Beautiful Soup library.
124 |
125 | In the code below, we structure this handoff within a set of nested loops, cycling through men and women first, and on the interior loop, clicking through the years for every summer games. We execute each selection by simply looping each of our option lists and calling the `.click()` method on the option object to submit that form selection.
126 |
127 | ```python
128 | for gender in gender_options[1:]: # index 0 is omitted because it contains placeholder txt
129 | gender.click()
130 |
131 | for year in year_options[2:]: # skipping first two options to start with 1900
132 | year.click()
133 | ```
134 |
135 | Once we've made our selections we can pass the page source to Beautiful Soup by calling the `.page_source` attribute on our driver object to parse the content of this iteration of the page:
136 |
137 | ```python
138 | the_soup = BeautifulSoup(driver.page_source, 'html.parser')
139 | ```
140 |
141 | ## Parsing the Source
142 |
143 | With the page content in hand we must now locate the table elements of interest, so we can copy only those items to our output file. In order to isolate this content, we utilize two versions of Beautiful Soup's search methods. First, we can grab the start of the row containing team USA results with the `.find()` method. In this instance, we use a regular expression as an argument to ensure we get the correct object. Next, we can use another variation of a search method, `.find_all_next()` to extract the medal counts. This method allows us to pull all of the objects that follow any other, and an optional `` argument gives us the flexibility to specify how many elements (beyond our reference) we're interested in capturing.
144 |
145 | ```python
146 | head = the_soup.find(href=re.compile('USA'))
147 |
148 | head.find_all_next('td', limit=5)
149 | ```
150 |
151 | ## Organizing Our Data
152 |
153 | At this point, we've completed the scaffolding for our browser automation and with the `head.find_all_next('td', limit=5)` object we have access to the medal counts for each medal type as well as the overall total for that year. Now, all that remains is to bundle our data and set up our export pipeline. First, we process the data we've sourced by calling the `.string` attribute on the elements we've captured and assigning the result to a variable, `medals_lst`. Then we supplement the medal values with the year and gender values and append the entire thing to a list.
154 |
155 | ```python
156 | try:
157 | year_val = year.get_attribute('text')
158 | head = the_soup.find(href=re.compile('USA'))
159 |
160 | medal_values = head.find_all_next('td', limit=5)
161 | val_lst = [x.string for x in medal_values[1:]] # the first index is the link with the country abbreviation and flag
162 |
163 | except:
164 | val_lst = ['0' for x in range(4)] # we address years team USA did not compete with this option
165 |
166 | val_lst.append(gender_val)
167 | val_lst.append(year_val)
168 |
169 | usa_lst.append(val_lst)
170 | ```
171 | Having completed our data collection we can close out the browser with:
172 |
173 | ```python
174 | driver.quit()
175 | ```
176 | Finally, we can loop through all of our compiled data, `usa_lst`, and write it out to a CSV. A basic export can be modeled as follows:
177 |
178 | ```python
179 | output_f = open('output.csv', 'w', newline='')
180 | output_writer = csv.writer(output_f)
181 |
182 | for row in usa_lst:
183 | output_writer.writerow(row)
184 |
185 | output_f.close()
186 | ```
187 | ![Data View]
188 |
189 | ## Notes
190 |
191 | The automated actions generated with Selenium are subject to the same buffering and rendering complications that we experience in a browser first hand. Therefore, it's important to be aware of how the processing of our script may be impacted by this behavior. In this case we've added a buffer at two junctures (after each of our option selections) to ensure that the page source is current with the form information we've submitted. Without these allowances we can potentially end up capturing data that reflects an earlier state of the page.
192 |
193 | We have chosen to use an explicit pause in our script with the `time.sleep()` call but we can also leverage Selenium’s wait class in these cases to set implicit and explicit pauses that can also be conditional for a range of page actions.
194 |
195 | ```python
196 | for gender in gender_options[1:]:
197 | gender.click()
198 | time.sleep(2)
199 | ```
200 |
201 | ## The Closing Ceremony
202 |
203 | We've made it to the end! Now, with our tidy data in hand, we can import our CSV into our data application of choice (Excel, Power BI, Jupyter) and create a visualization. In the example below we've emulated the FiveThirtyEight figure with the Plotly Python library.
204 |
205 |
206 | ![Plotly Chart]
207 |
208 | ## Conclusion
209 |
210 | Web scraping can initially seem like an intimidating endeavor, but with a little patience and time, we can leverage powerful tools to achieve a lot. For more information on the libraries we used here please review the documentation at the links below.
211 |
212 | - Solution code: [olympic_data.py](https://github.com/Codecademy/articles/blob/main/web-scrape-with-beautiful-soup-and-selenium/olympic_data.py)
213 | - Selenium: https://selenium-python.readthedocs.io/index.html
214 | - Beautiful Soup: https://www.crummy.com/software/BeautifulSoup/bs4/doc
215 |
--------------------------------------------------------------------------------
/content/smyja/nextjs-deployment-with-caprover-and-github-actions.md:
--------------------------------------------------------------------------------
1 | ---
2 | Title: "NextJs Deployment with Caprover and Github Actions"
3 | Description: "A guide on how to deploy Nextjs on Caprover using Github Actions"
4 | DatePublished: "2023-06-13"
5 | Categories:
6 | - "javascript"
7 | - "computer-science"
8 | Tags:
9 | - "GitHub"
10 | - "JavaScript"
11 | CatalogContent:
12 | - "introduction-to-javascript"
13 | - "paths/front-end-engineer-career-path"
14 | ---
15 |
16 | _**Prerequisites:** Understanding of JavaScript._
17 | _**Versions:** Node v18.12.1_
18 |
19 | ## Introduction
20 |
21 | Next.js is an open-source React framework that enables you to create server-rendered, static generated, and hybrid web applications. It provides a number of features that make it easy to build high-performance web applications, including:
22 |
23 | - Static site generation: Next.js can be used to generate static websites that are served directly from the browser. This can improve performance and SEO.
24 | - Server-side rendering: Next.js can also be used to render pages on the server. This can improve performance for search engines and users who are not using JavaScript.
25 | - Hybrid rendering: Next.js can also be used to combine server-side rendering and static site generation. This gives you the best of both worlds: performance and SEO.
26 | - Automatic routing: Next.js provides automatic routing that makes it easy to create complex web applications with nested routes.
27 | - Data fetching: Next.js provides a number of ways to fetch data from APIs, including asynchronous async/await and the fetch() API.
28 | - Deployment: Next.js can be deployed to a variety of hosting services, including Vercel, Netlify, and AWS Amplify, DigitalOcean.
29 |
30 | This tutorial will cover the creation of a NextJs app and Deploying it on Caprover(Opensource Platform as a service) using DigitalOcean and Github actions.
31 |
32 | ## What is Caprover?
33 |
34 | CapRover is a free and open-source platform that simplifies the deployment and management of applications. It supports a wide range of programming languages, databases, and web servers, making it a versatile solution for developers of all levels. CapRover is also a cost-effective alternative to other popular platforms, such as Heroku and Microsoft Azure.
35 |
36 | ## What is Github actions
37 |
38 | GitHub Actions is a tool that allows you to automate tasks and processes in your GitHub repository. You can define workflows as code, which means that you can use GitHub Actions to automate anything that you can do with code.
39 |
40 | Workflows are triggered by events, such as code pushes, pull requests, or scheduled intervals. When a workflow is triggered, it will run a series of steps that you have defined. These steps can be used to perform any task that you need to automate, such as building your code, running tests, or deploying your application.
41 |
42 | ## Why use Next.js, Caprover, and Github Actions together?
43 |
44 | Next.js, Caprover, and GitHub Actions are all powerful tools that can be used together to create and deploy web applications. Indiehackers often use these tools because they are:
45 | - Efficient: These tools can help indiehackers save time and resources by automating tasks and making it easy to deploy applications.
46 | - Scalable: These tools can be scaled to handle large traffic loads.
47 | - Cost-effective: These tools are often free or low-cost, making them a good option for indiehackers with limited budgets.
48 |
49 | ### Setting up Caprover on Digital Ocean
50 |
51 | Sign up on [Digital Ocean](https://digitalocean.com) if you don't have an account yet.
52 |
53 | > **Note:** In order to complete the signup process, Digital Ocean requires a payment method to be set up in order to verify the identity of new members.
54 |
55 | Once you have signed up, create a droplet.
56 |
57 | 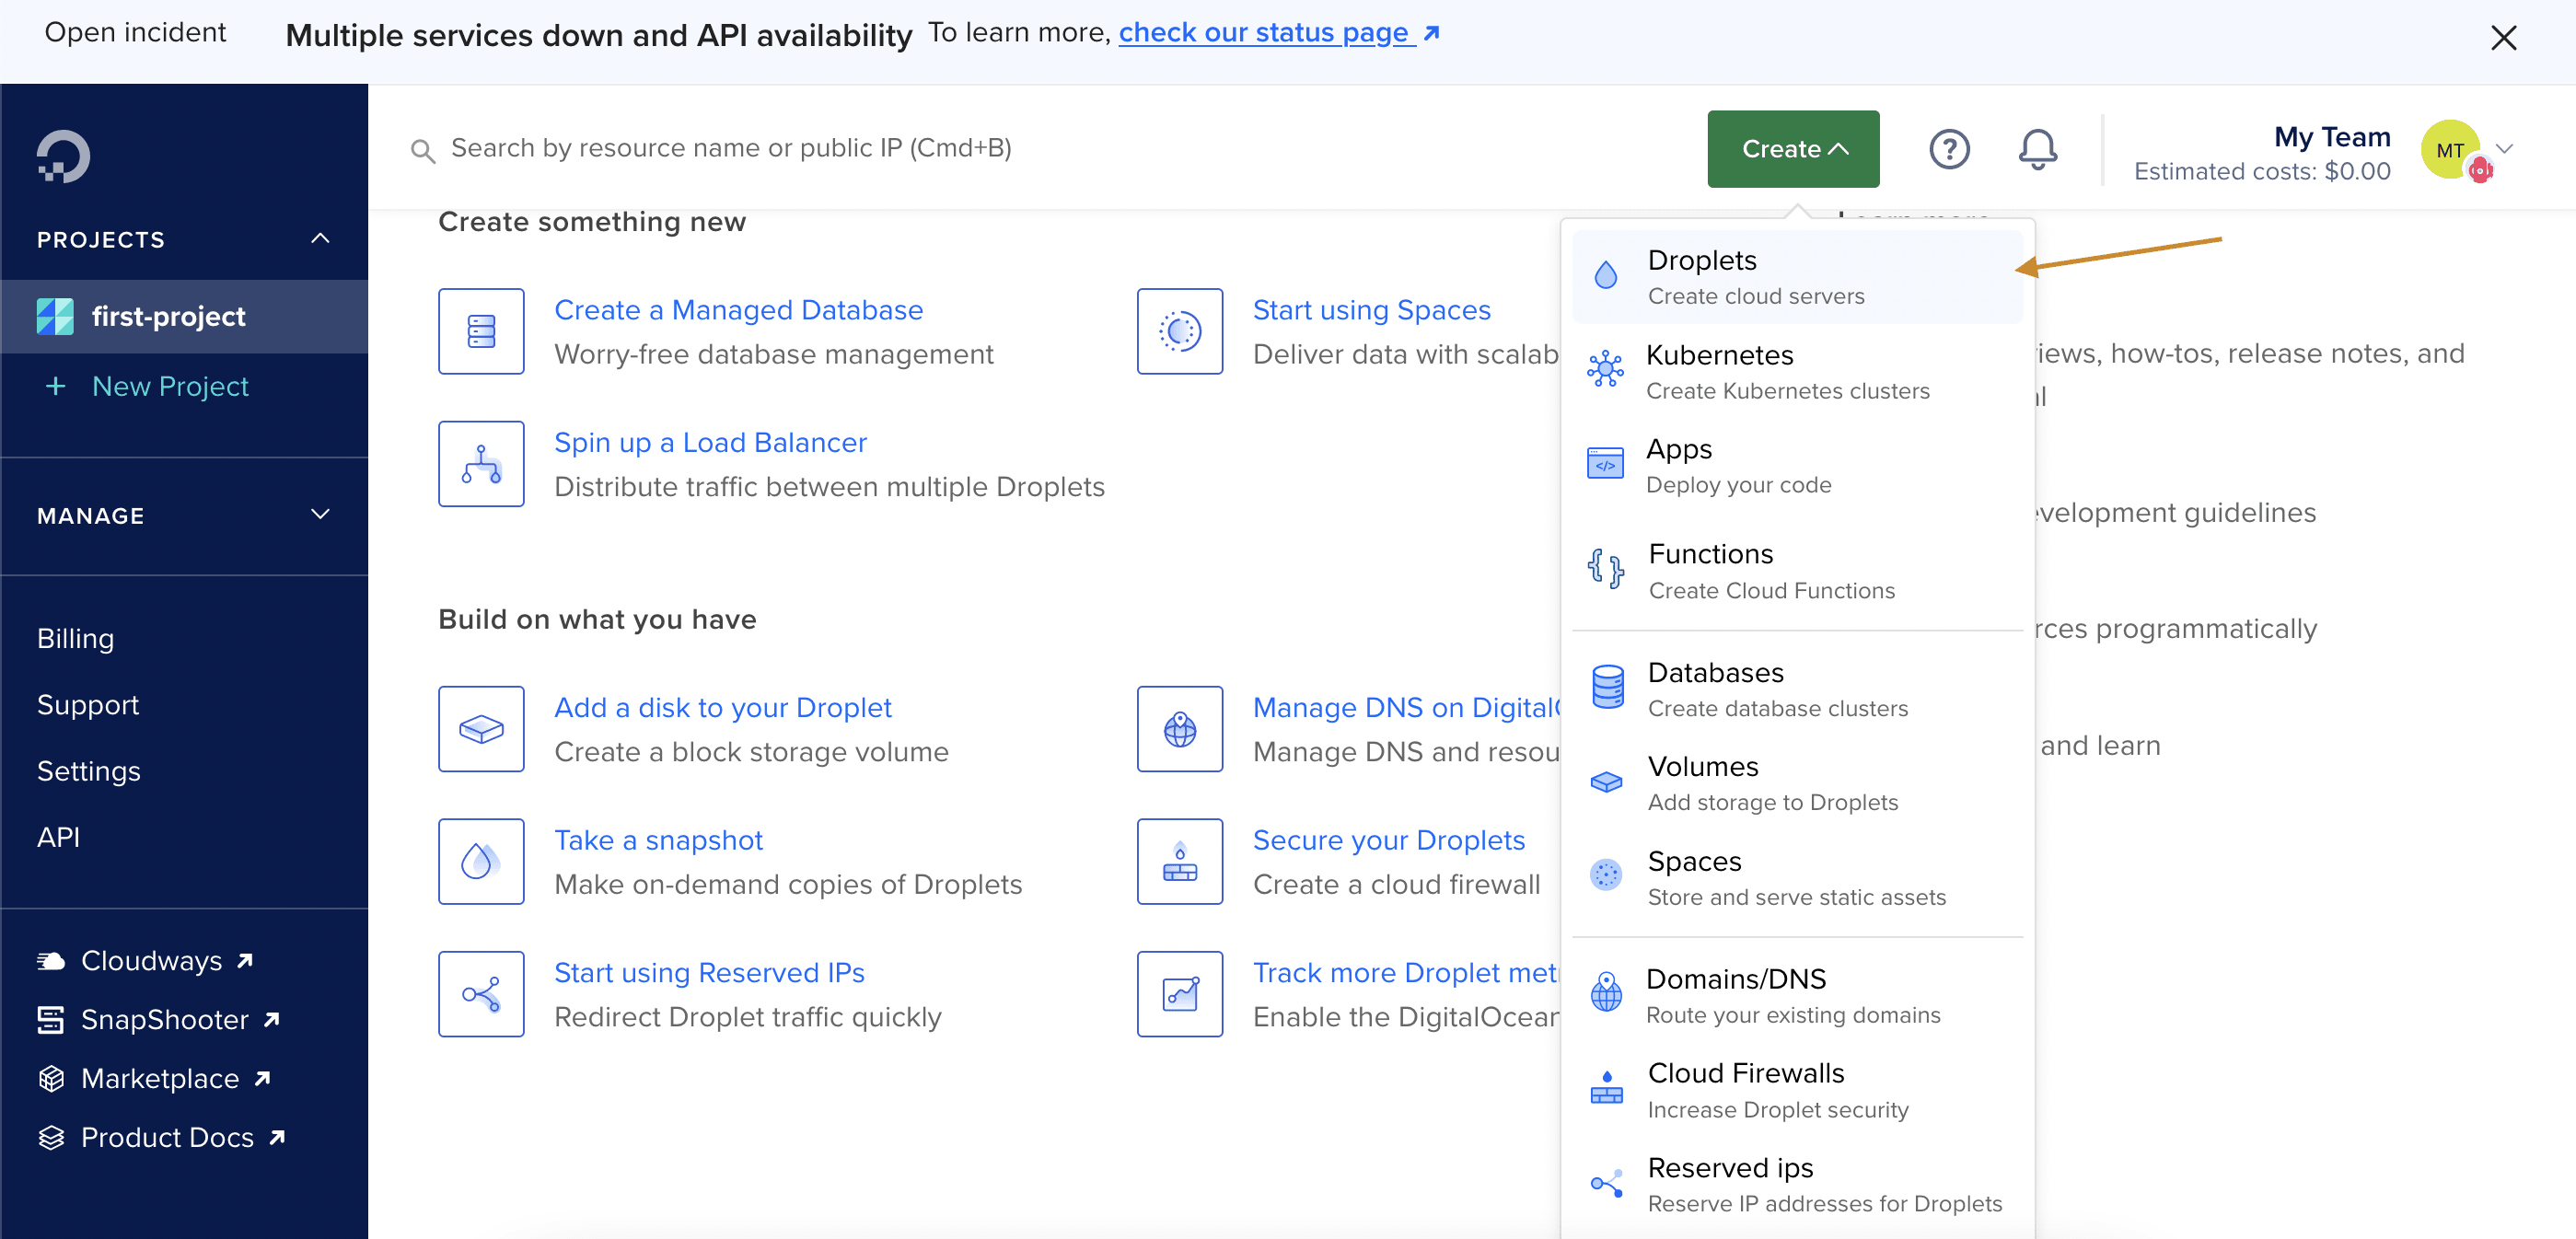
58 |
59 | Next, select CapRover from the marketplace.
60 |
61 | 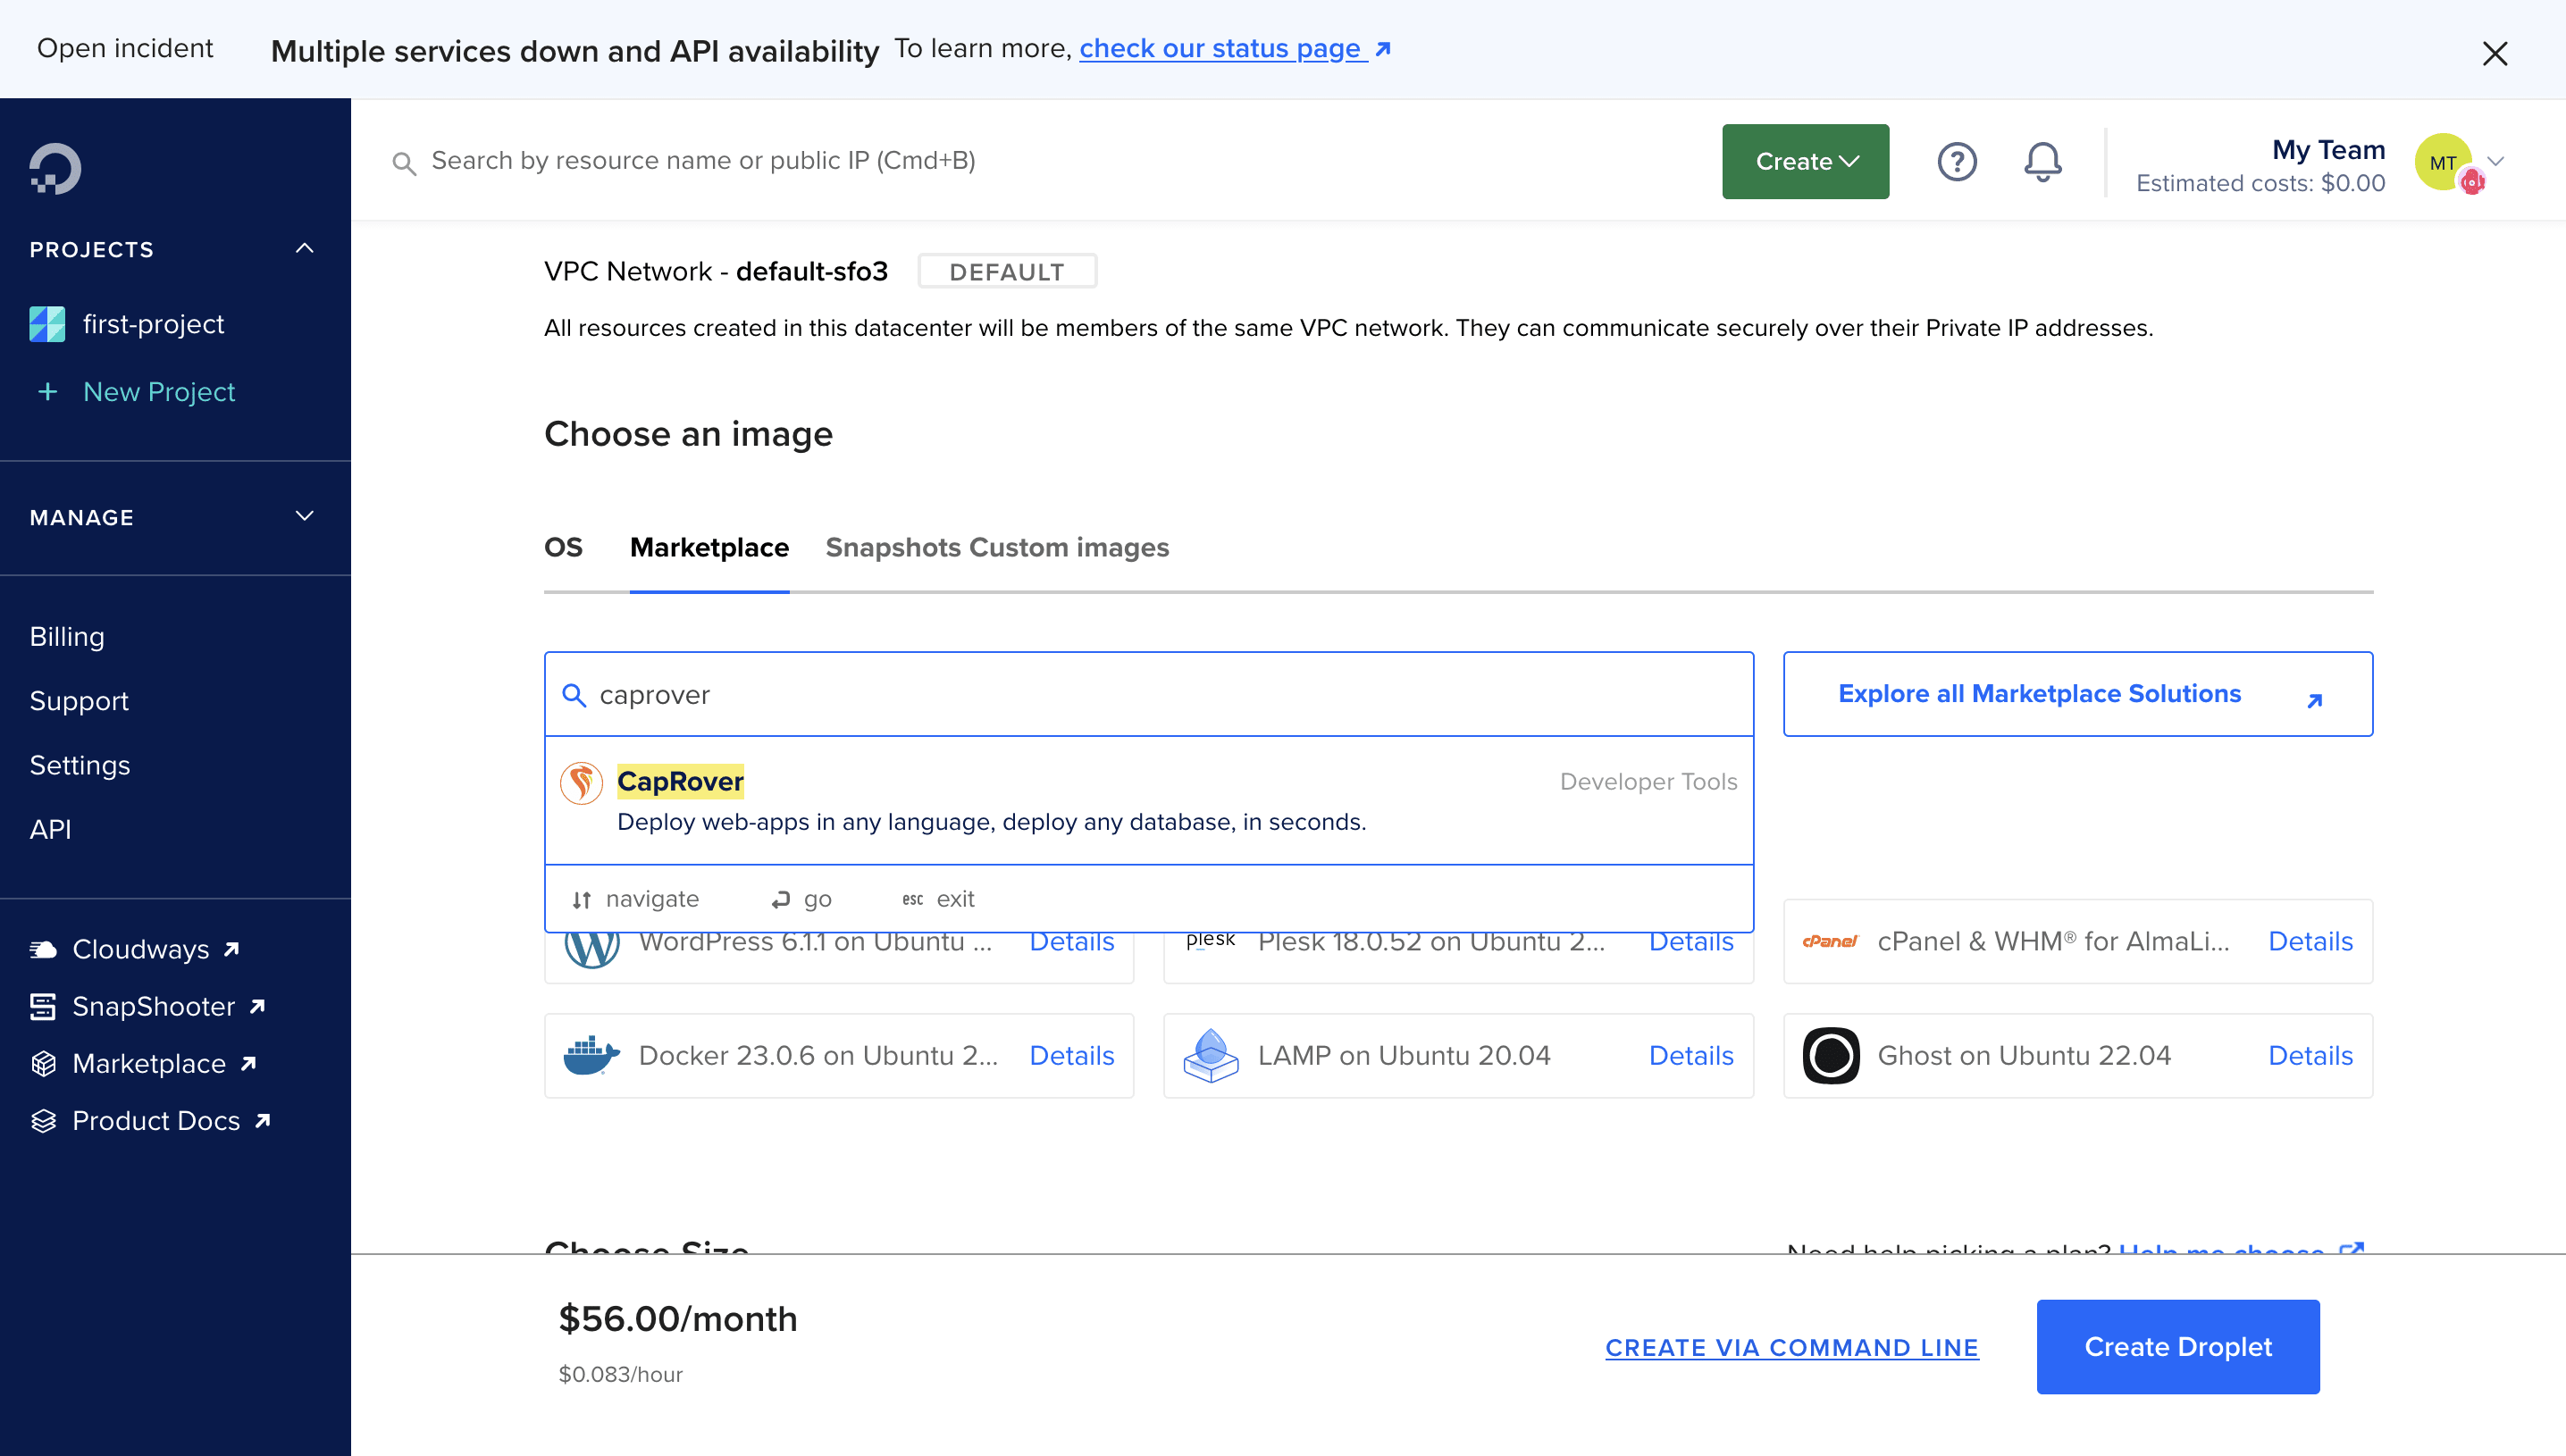
62 |
63 | Choose a region, specify the CPU as 1GB RAM, you can always upgrade it to a higher RAM.
64 |
65 | 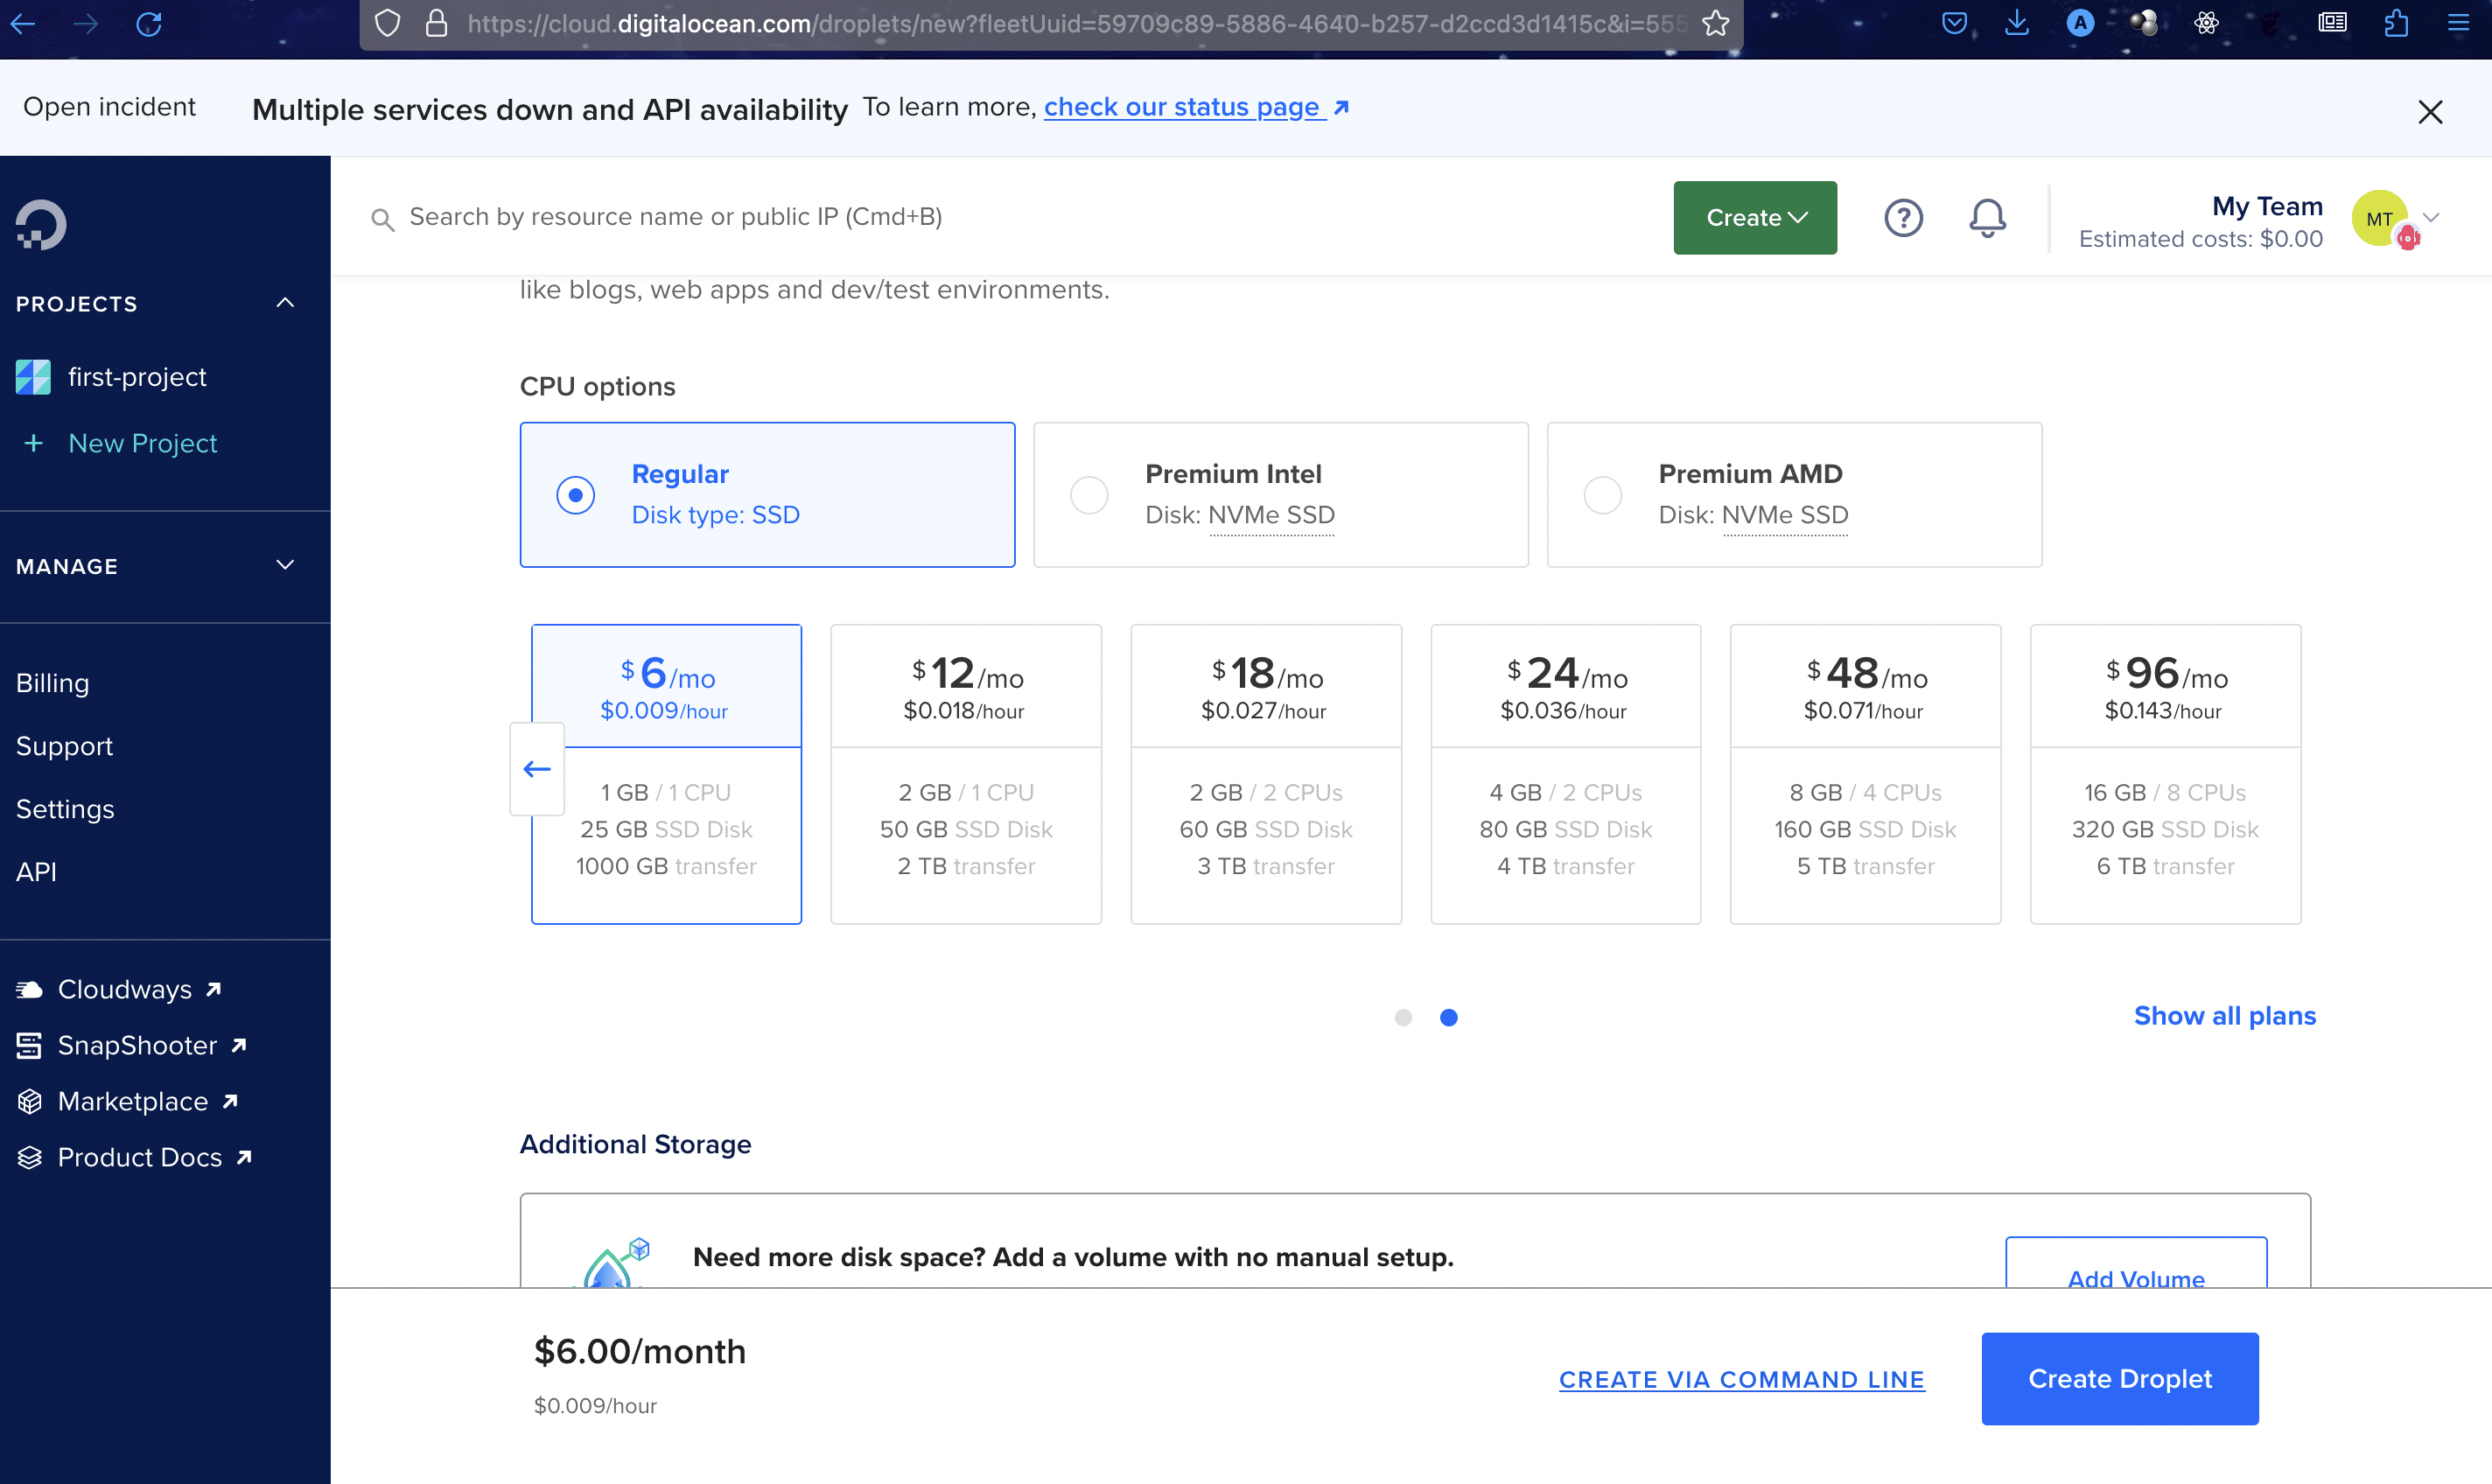
66 |
67 | Once the droplet has been created, you can access the caprover dashboard by visiting http://YOUR_IP_ADDRESS:3000 or click the `Get started` link ,then the Quick access to Caprover console.
68 |
69 | 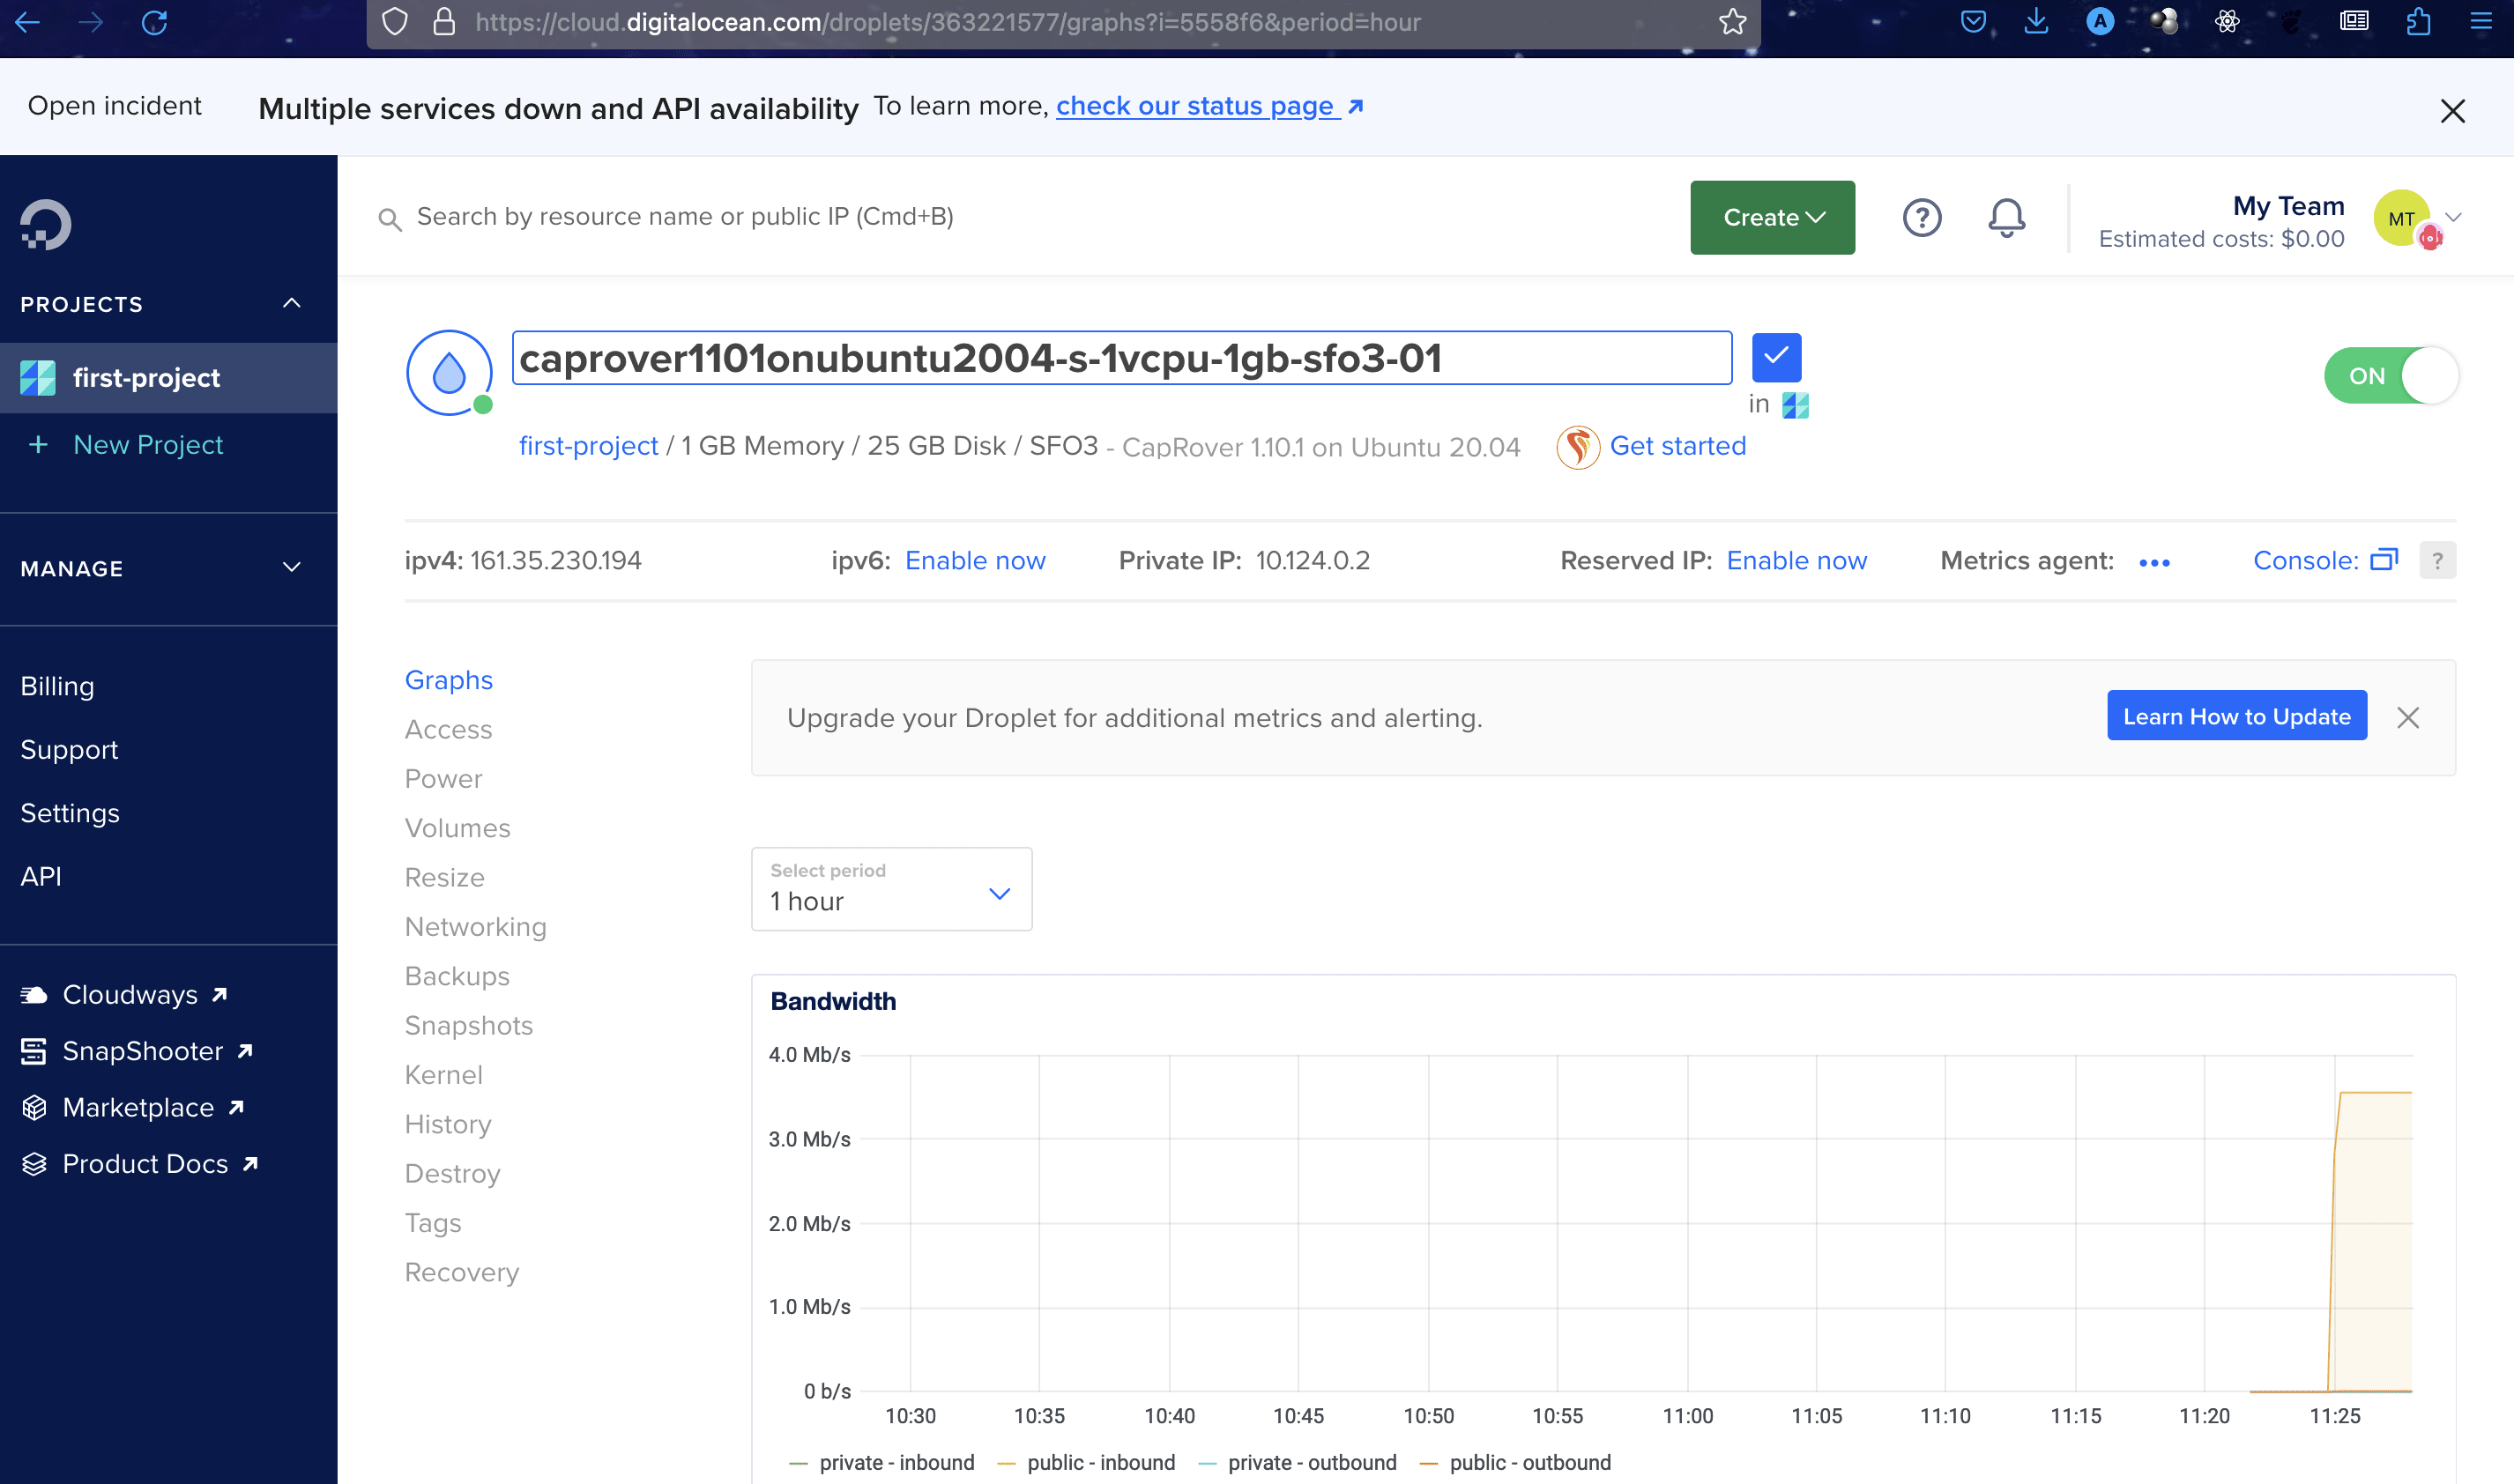
70 |
71 | The quick access button can be found here.
72 | 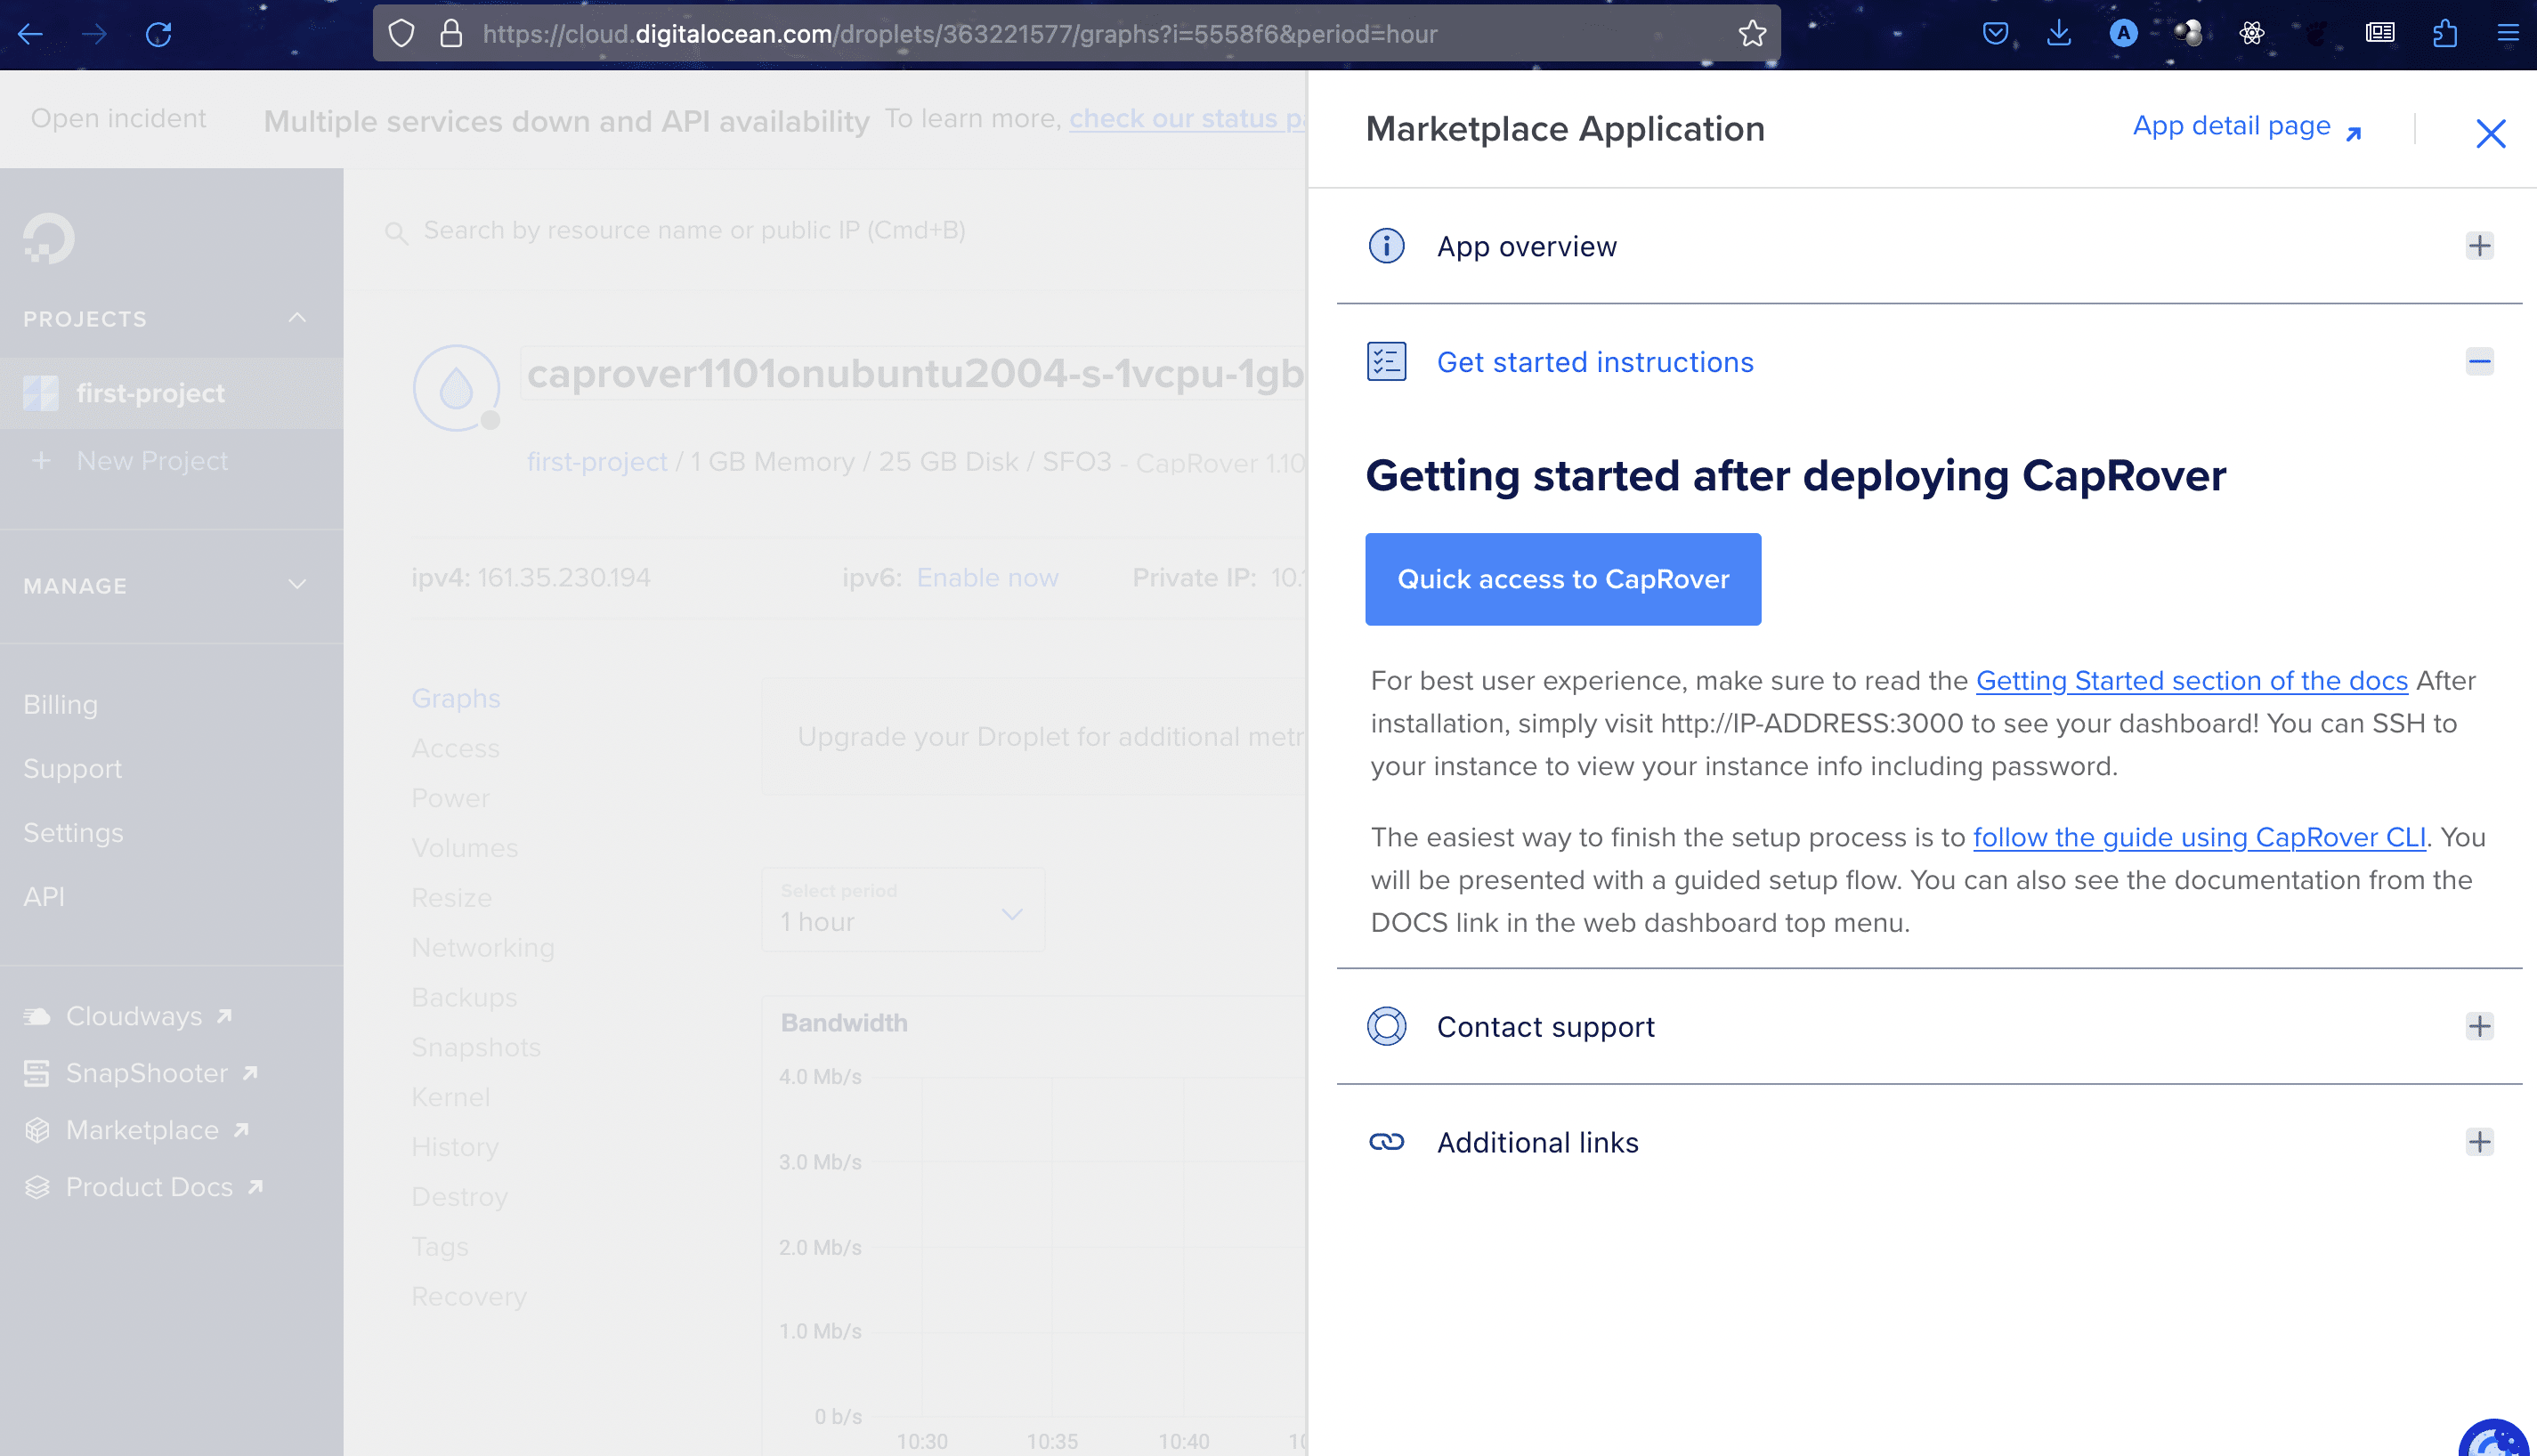
73 |
74 | The default login for CapRover apps is `captain42`, ensure you change it from your dashboard settings.
75 |
76 | After logging in, create an app. Give it any name.
77 | 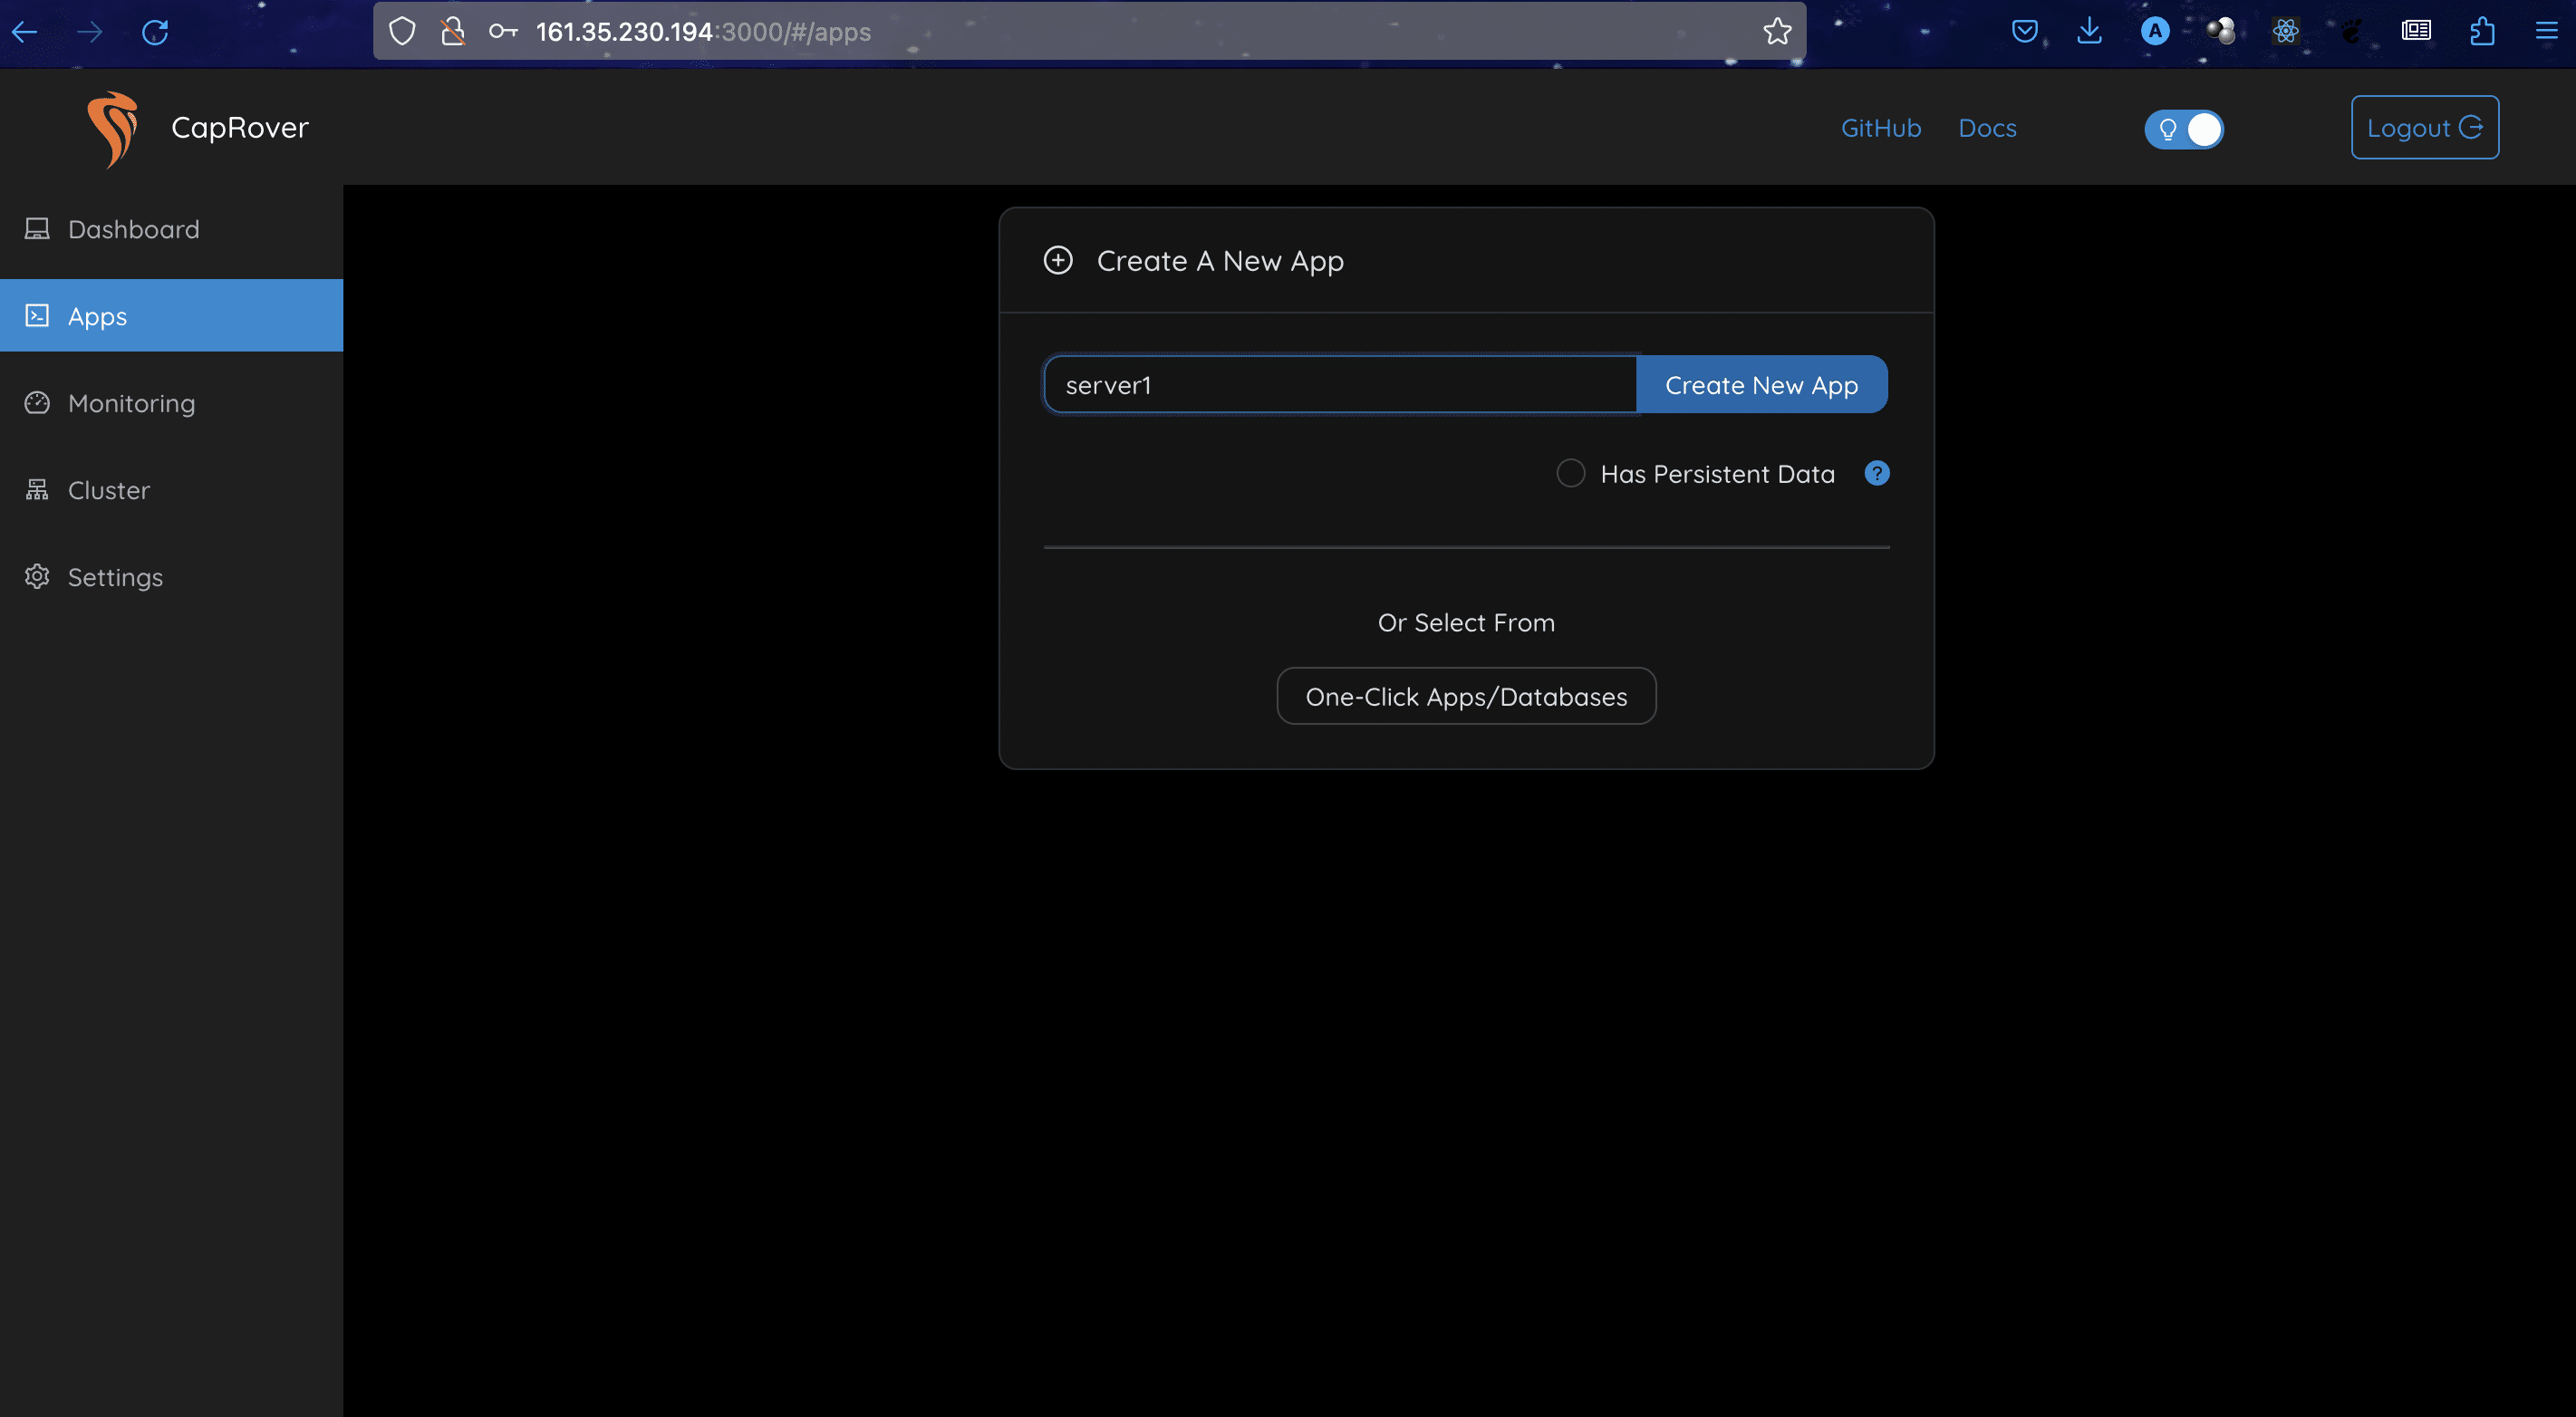
78 |
79 | Caprover has a marketplace of apps that can be created with one click including postgres, supabase and more.
80 | 
81 |
82 | Next, add a domain name to your app. You should log in to your domain registrar and point the domain name to the droplet/server's IP address. I am using a subdomain on Namecheap, here's what that looks like:
83 | 
84 |
85 | Now, add a wildcard to your domain. The wildcard domain is needed so we can change the CapRover server link from an IP address to a domain name.
86 | 
87 |
88 | Select force HTTPS and click the "save and update" button. This redirects HTTP traffic to HTTPS.
89 | 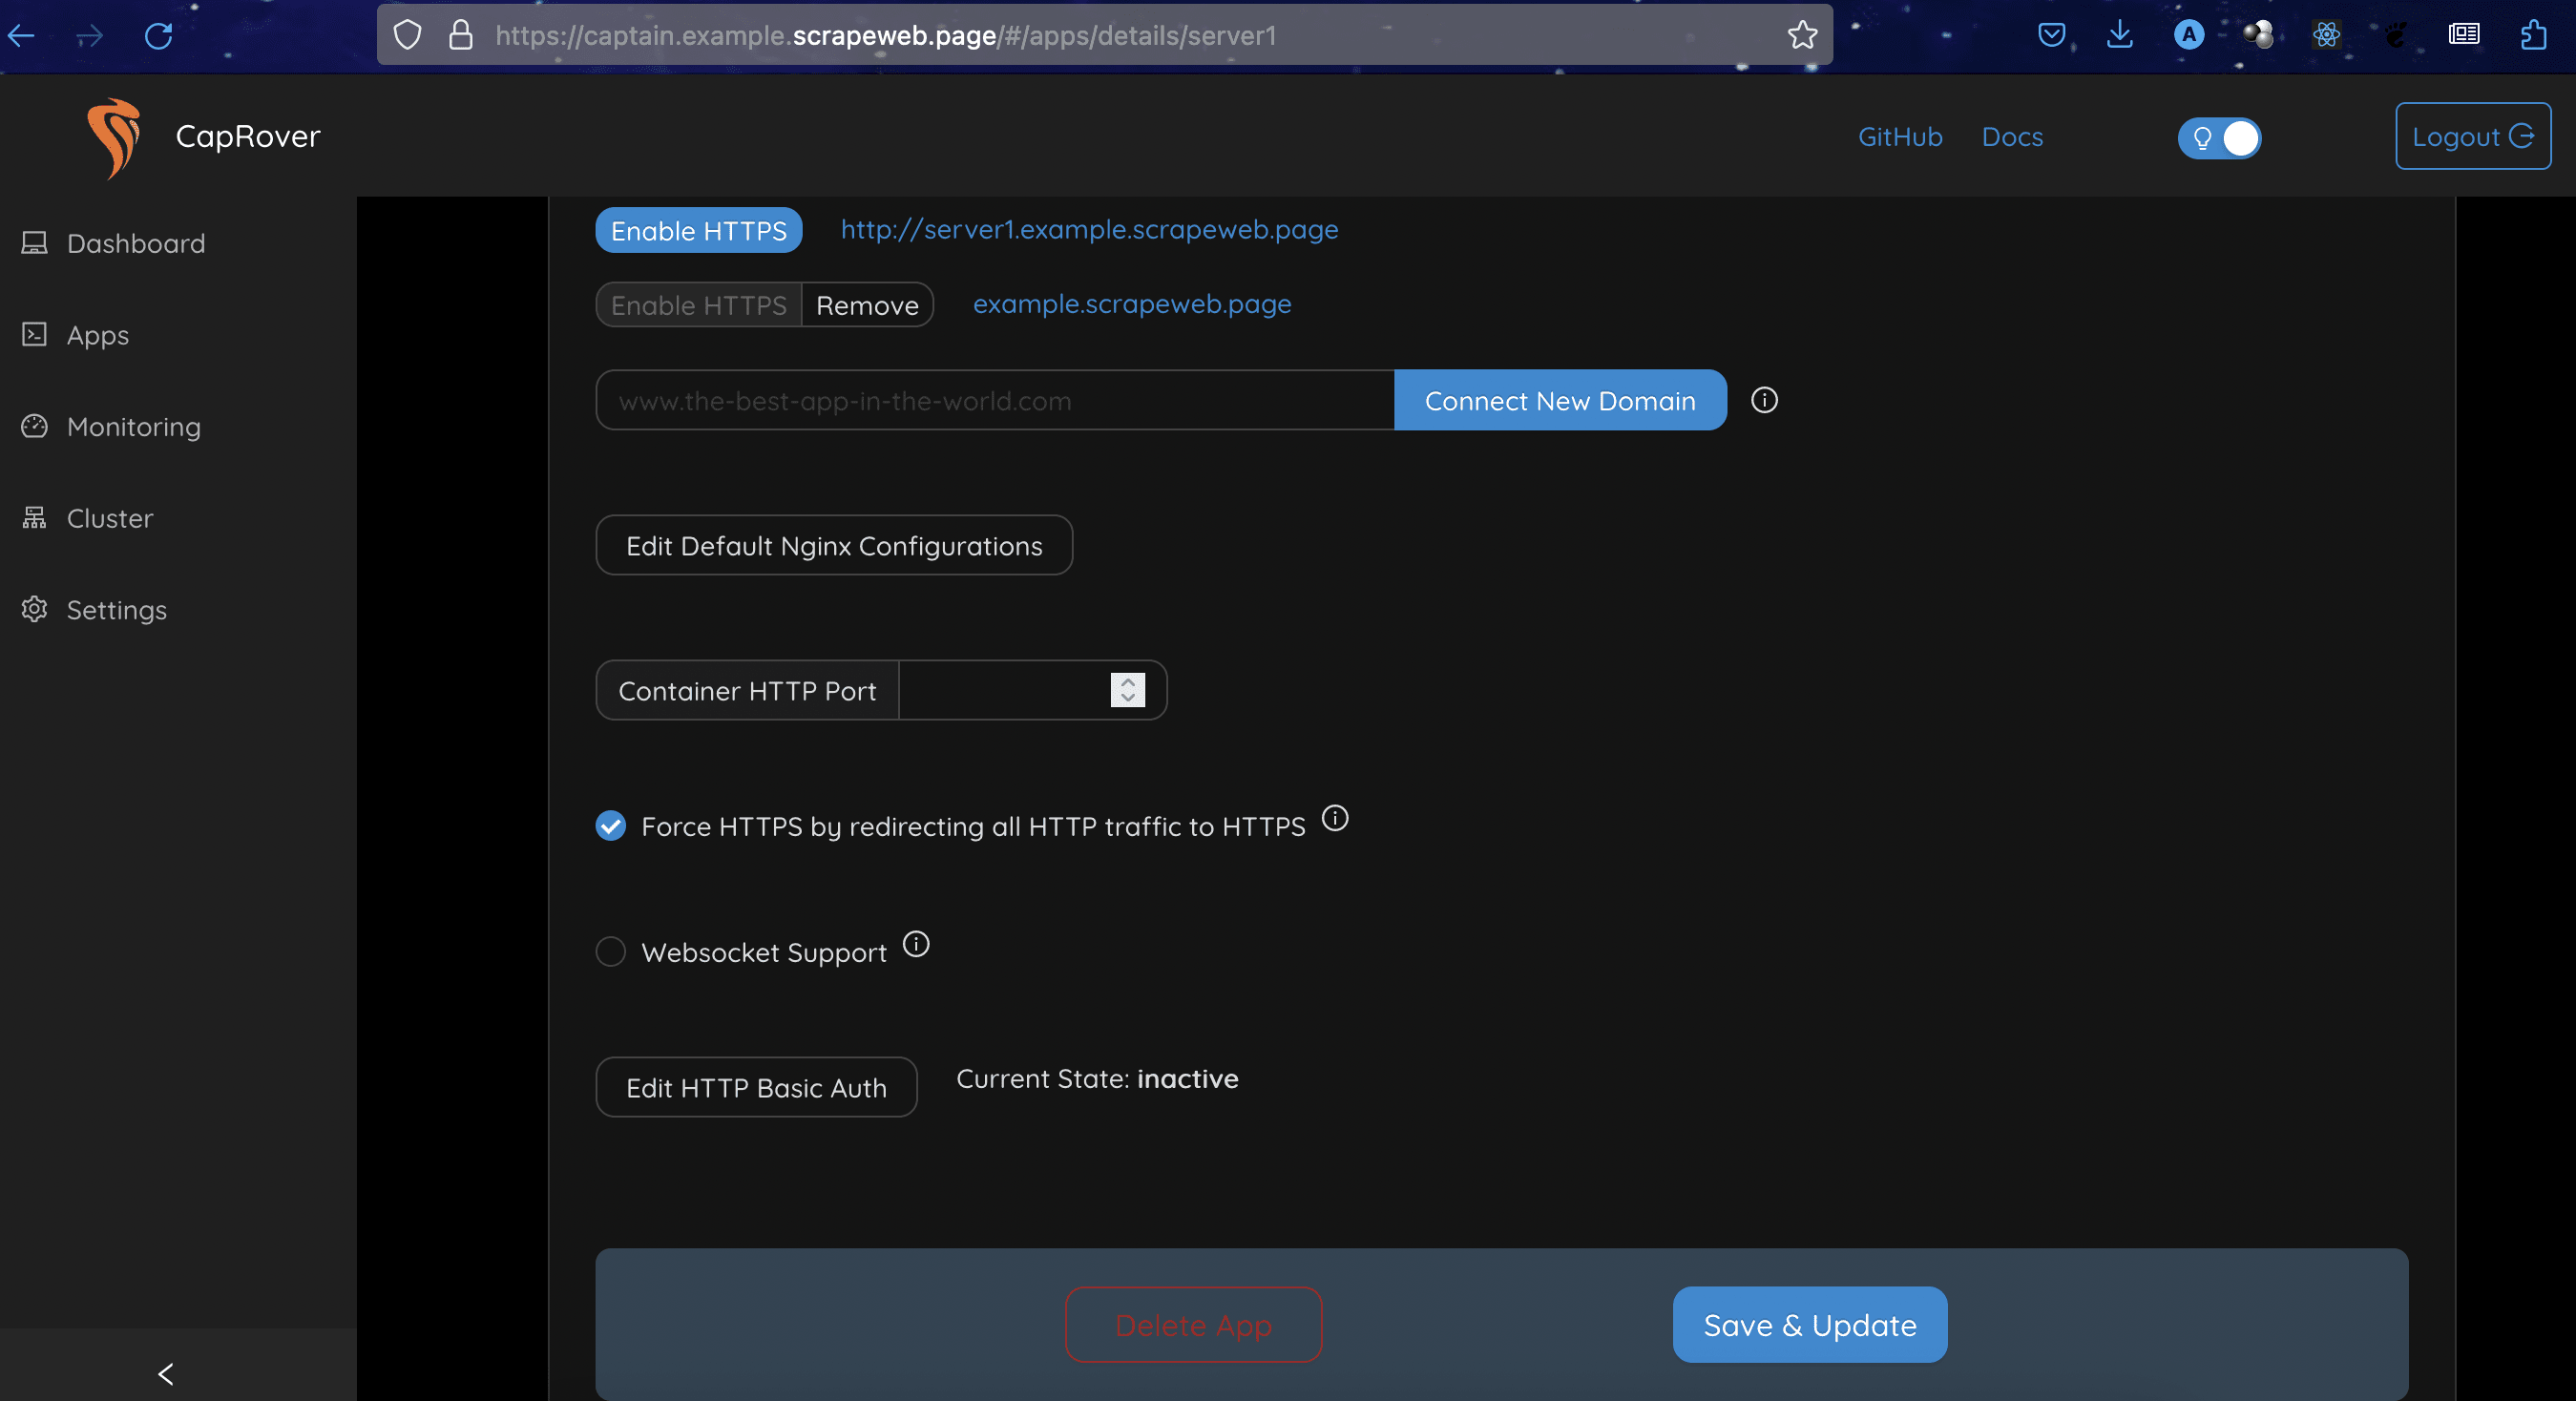
90 |
91 | Enable HTTPS for your domain. CapRover issues lets encrypt the certificate for domains.
92 | 
93 |
94 | Our website is live now, this is the default page for CapRover.
95 |
96 | 
97 |
98 | ### Setting up a NextJs app
99 |
100 | Follow the guide on [Next.js Docs](https://nextjs.org/docs/getting-started/installation) to create a Next.js app.
101 | Once that's setup, we will create a cluster for the app.
102 | 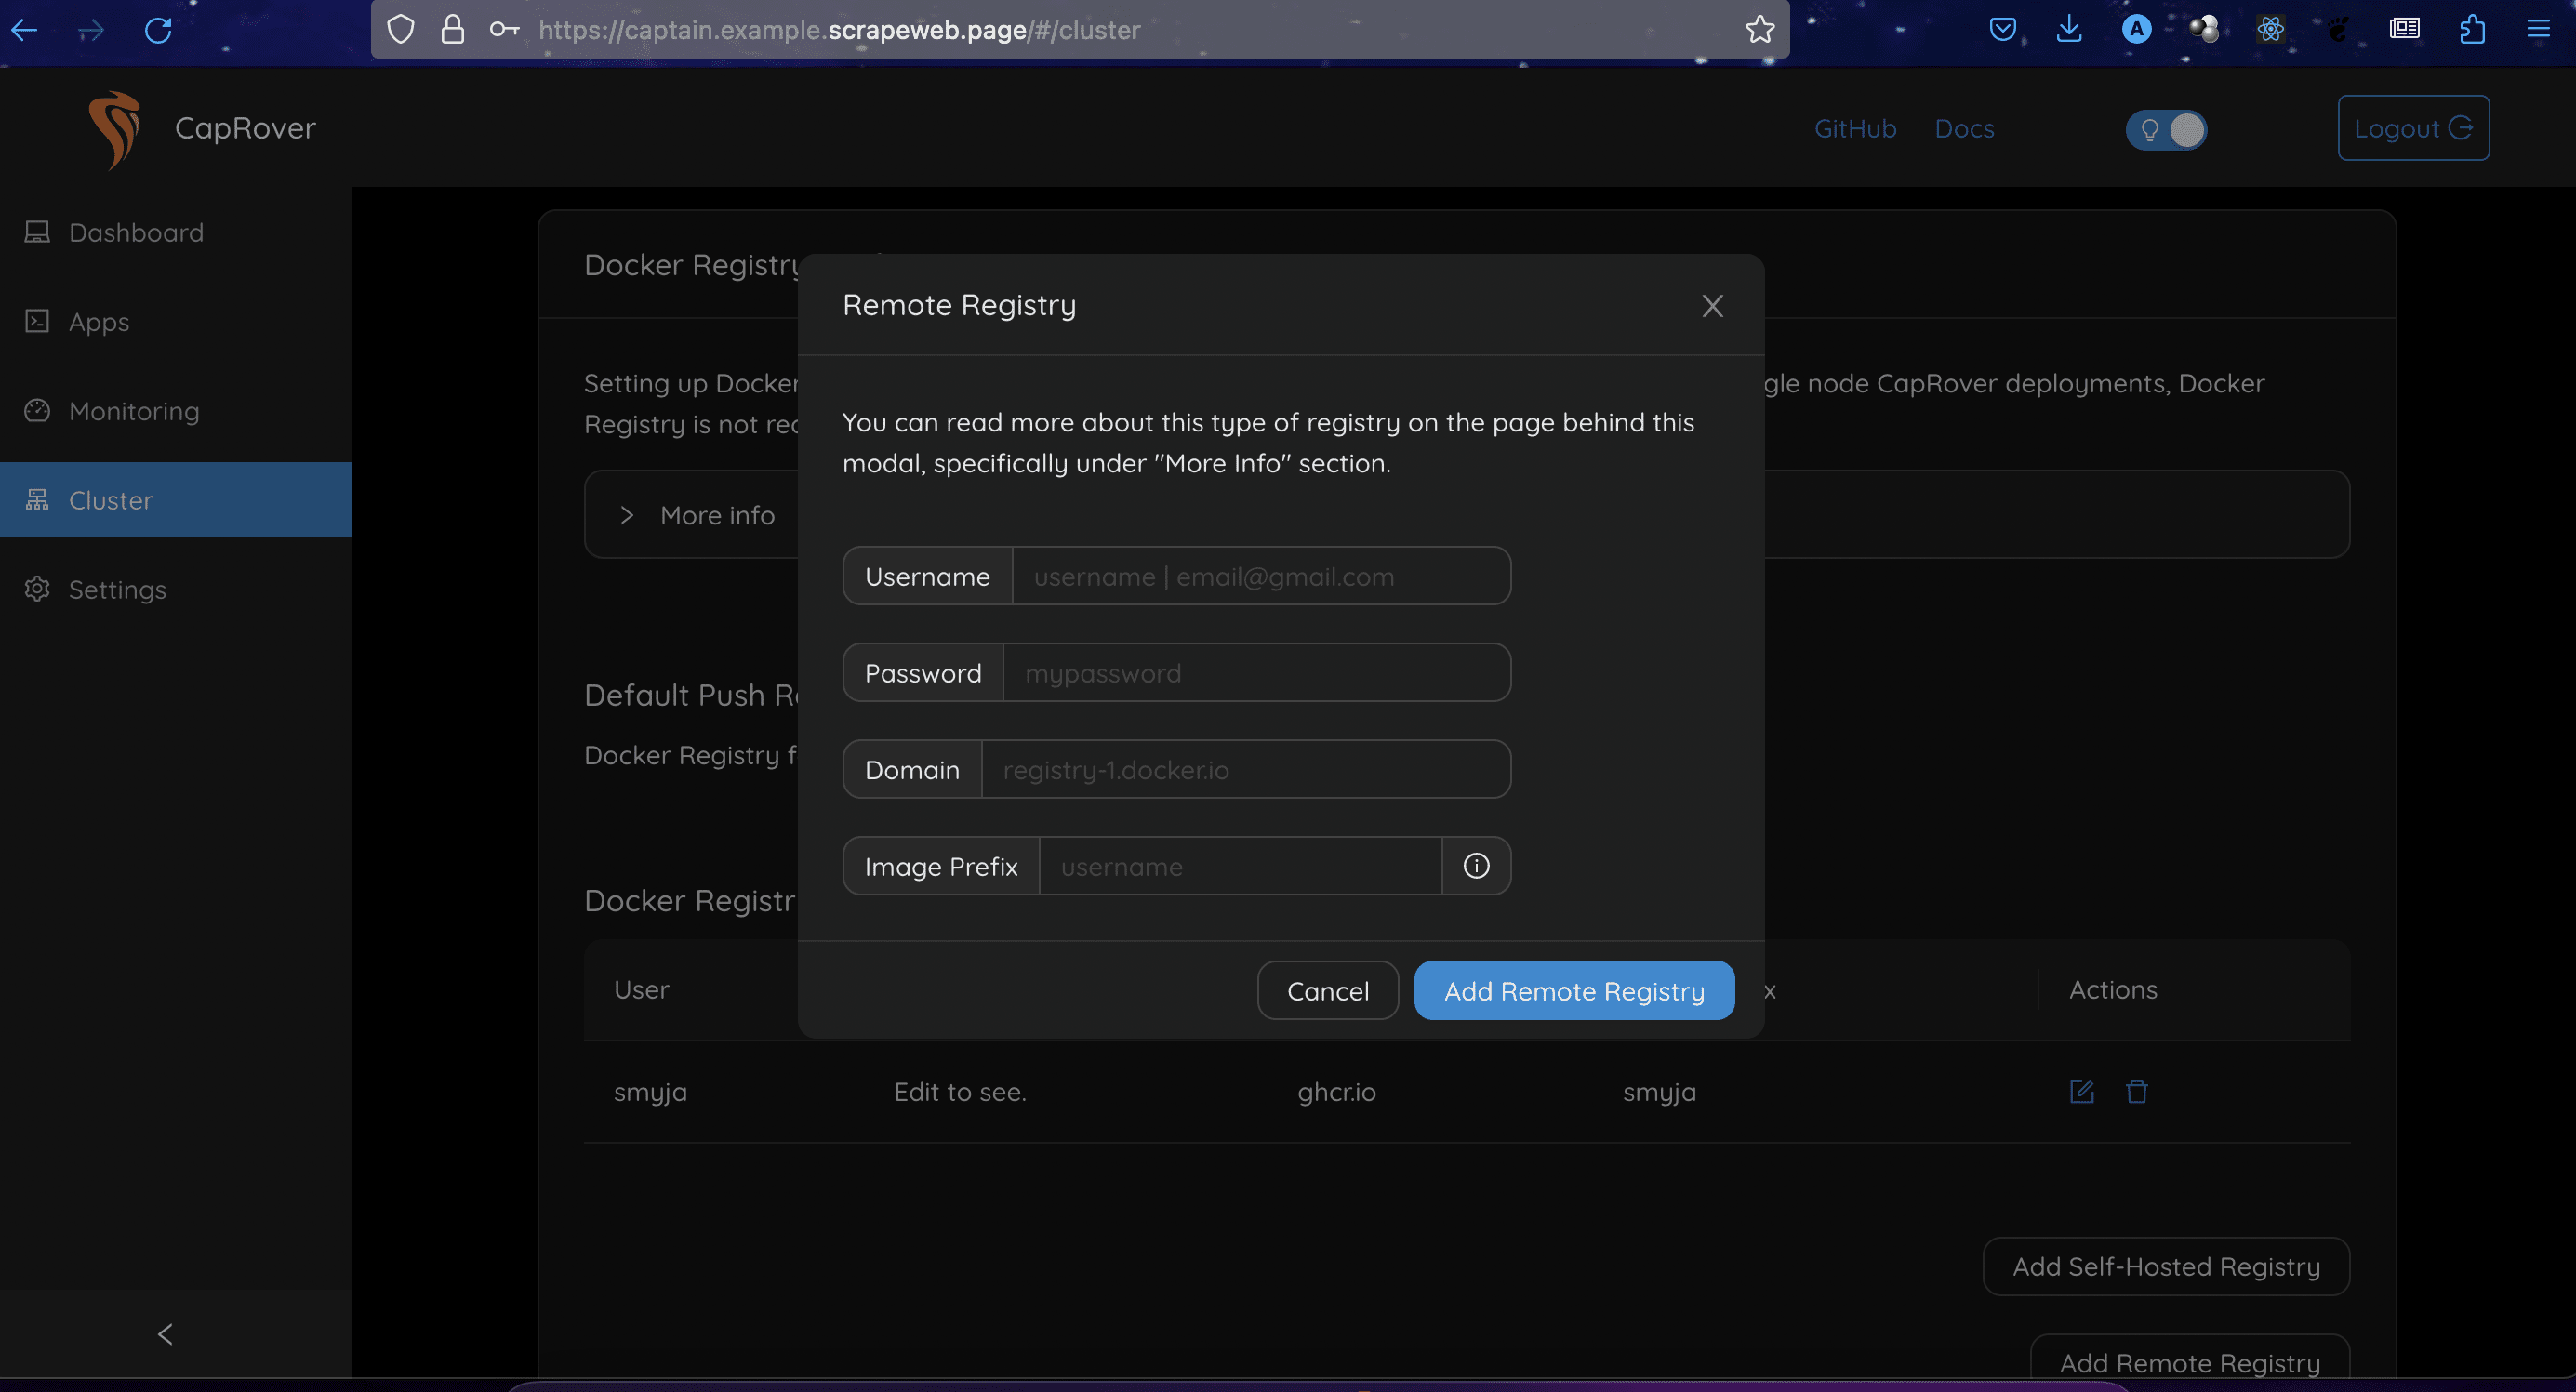
103 |
104 | To add a private Docker registry to CapRover, you must provide your username, personal access token (begins with ghp_), domain, and image prefix. We will be using the GitHub Container Registry (ghcr.io), your username will be your GitHub username, your password will be a personal token that you create with read package access, your domain will be ghcr.io, and your image prefix will be your GitHub username.
105 |
106 | If your Docker images are stored in the format `your-username/your-image`, then you should use your GitHub username as your image prefix. Otherwise, if your images are stored in the format `my-org/my-image`, where `my-org` is your GitHub organization, then you should use `my-org` as your image prefix.
107 |
108 | Once you have provided these credentials, CapRover will be able to pull images from your private Docker registry.
109 |
110 | Your created registry would show:
111 |
112 | 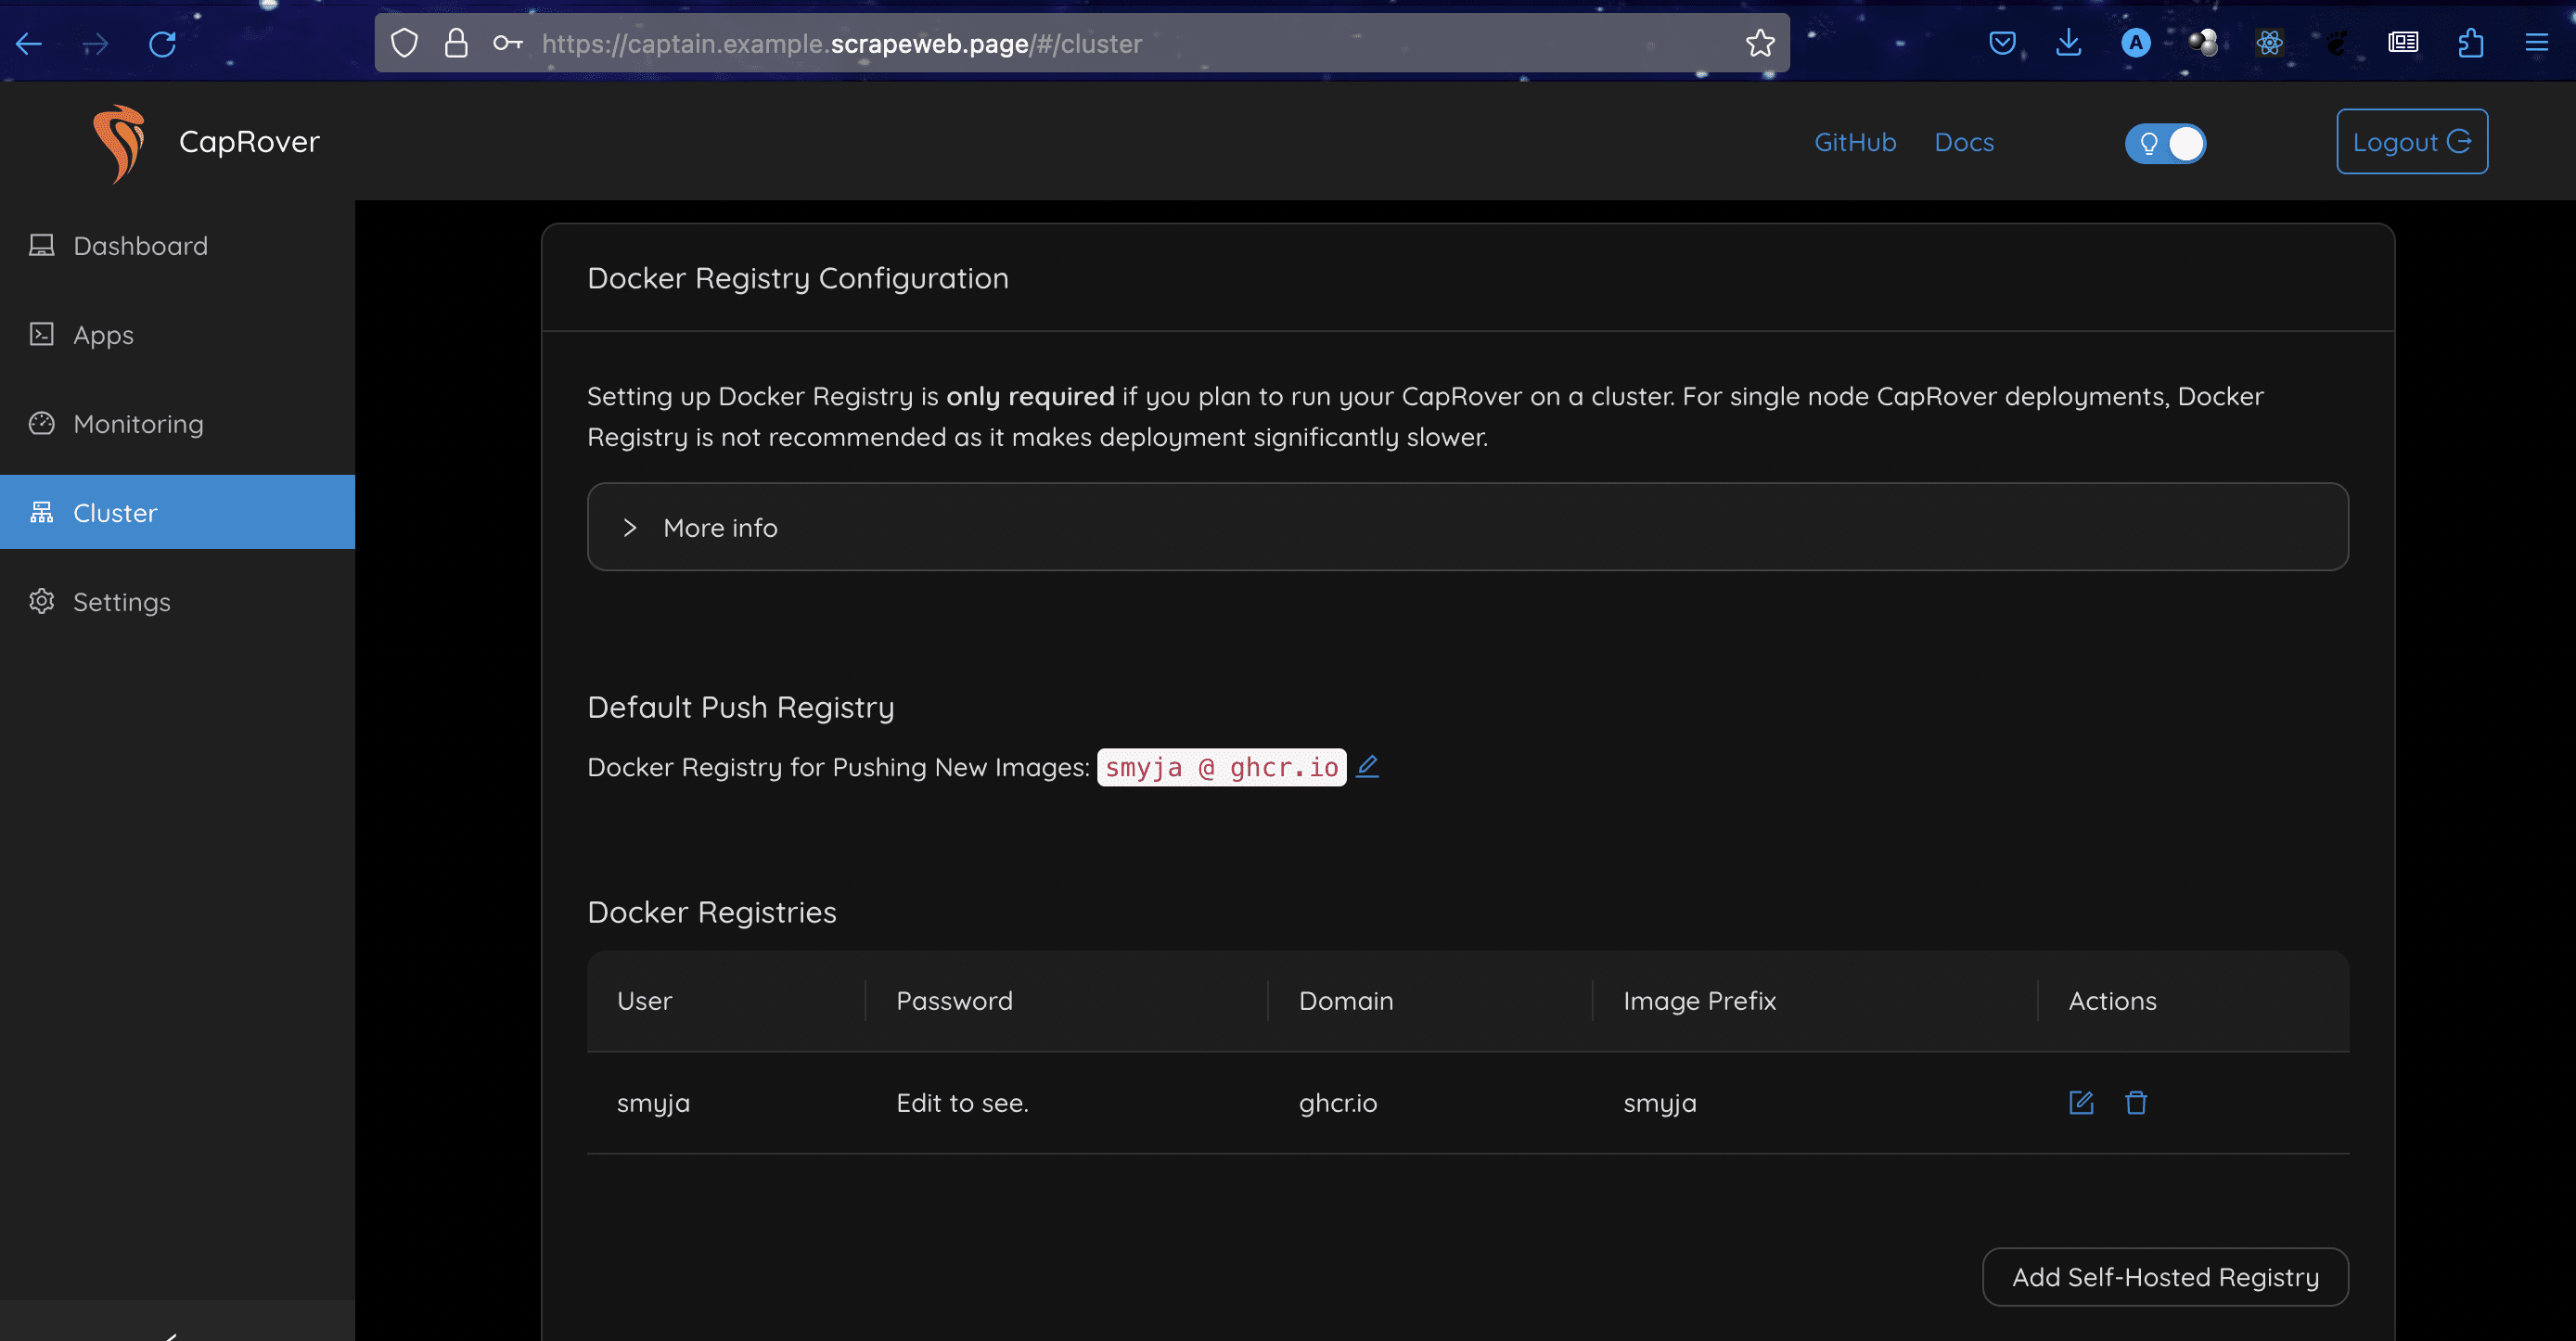
113 |
114 | Navigate to the deployments tab and enable app token, the token generated will be needed for this deployment.
115 |
116 | 
117 |
118 | CapRover uses Docker to create apps, to deploy our Next.js app we will create a Dockerfile
119 |
120 | ```docker
121 | FROM node:16-alpine
122 |
123 | # Set working directory
124 |
125 | ENV NODE_ENV=production
126 | # Copy package.json and package-lock.json (if available)
127 | COPY package*.json ./
128 |
129 |
130 | # Copy the built application files
131 |
132 | COPY ./.next ./.next
133 | COPY ./next.config.js ./next.config.js
134 | COPY ./public ./public
135 | COPY ./.next/static ./_next/static
136 | COPY ./node_modules ./node_modules
137 | # Expose the desired port (e.g., 3000)
138 |
139 | EXPOSE 3000
140 |
141 | # Start the Node.js server
142 | CMD ["npm", "run", "start"]
143 | ```
144 |
145 | The first stage of the build uses the `node:16-alpine` image as a base. This image is a lightweight version of Node.js that is optimized for production use. The `ENV NODE_ENV=production` line sets the environment variable `NODE_ENV` to production. This tells Next.js to use its production build configuration.
146 |
147 | The second stage of the build copies the application files into the image. The `COPY package*.json ./` line copies the `package.json` and `package-lock.json` files into the image. These files are used to install the application's dependencies. The `COPY ./.next ./.next` line copies the built application files into the image. These files are the static files that are served by the Next.js server.
148 |
149 | The `EXPOSE 3000` line exposes port 3000 on the image. This is the port that the Next.js server will listen on.
150 |
151 | The `CMD ["npm", "run", "start"]` line tells Docker to run the `npm start` command when the container is started. This command will start the Next.js server.
152 |
153 | Now, we need to specify the `PORT` on Caprover as 3000
154 |
155 | 
156 |
157 | Caprover also uses a `captain-definition` file which specifies the path to the Dockerfile. For our Next.js app, the `captain-definition` file and the Dockerfile are to be placed at the root of our app along with the `package.json` file.
158 |
159 | ```json
160 | {
161 | "schemaVersion": 2,
162 | "dockerfilePath": "Dockerfile"
163 | }
164 | ```
165 |
166 | To ensure every change we make to our Next.js app through commits automatically shows on the live website, we will need a workflow file with GitHub actions. Create a `.github` folder and a subfolder `workflows` with `release.yaml` file in this subfolder.
167 | The yaml file should contain the below code.
168 |
169 | ```yaml
170 | # GitHub Actions workflow for deploying a Docker image to CapRover
171 | name: Deploy to caprover instance.
172 |
173 | # Global environment variables used throughout the workflow
174 | env:
175 | CONTEXT_DIR: './' # Directory context for Docker
176 | IMAGE_NAME: ${{ github.repository }} # Docker image name derived from the GitHub repository name
177 | DOCKERFILE: ./Dockerfile # Path to Dockerfile
178 | DOCKER_REGISTRY: ghcr.io # Docker registry to which the image will be pushed
179 |
180 | # Trigger the workflow on push to the main branch
181 | on:
182 | push:
183 | branches:
184 | - main
185 |
186 | # Define the jobs in the workflow
187 | jobs:
188 | # Job to handle building, testing, and publishing of the Docker image
189 | build-and-publish:
190 | runs-on: ubuntu-latest # Use the latest Ubuntu runner
191 | permissions:
192 | contents: read
193 | packages: write
194 | steps:
195 | # Check out the repository code to the runner
196 | - uses: actions/checkout@v1
197 |
198 | # Cache dependencies for faster subsequent builds
199 | - name: Cache
200 | uses: actions/cache@v2
201 | with:
202 | path: |
203 | ~/.npm
204 | ${{ github.workspace }}/.next/cache
205 | key: ${{ runner.os }}-nextjs-${{ hashFiles('**/package-lock.json') }}-${{ hashFiles('**/*.[jt]s', '**/*.[jt]sx') }}
206 | restore-keys: |
207 | ${{ runner.os }}-nextjs-${{ hashFiles('**/package-lock.json') }}-
208 |
209 | # Set up the Node.js environment for the runner
210 | - name: Use Node.js ${{ matrix.node-version }}
211 | uses: actions/setup-node@v3
212 | with:
213 | node-version: ${{ matrix.node-version }}
214 | cache: "npm"
215 |
216 | # Install project dependencies
217 | - run: npm ci
218 |
219 | # Build the project
220 | - run: npm run build --if-present
221 |
222 | # Run tests if they are available
223 | - run: npm run test --if-present
224 |
225 | # Log into the specified Docker registry
226 | - name: Log in to the Container registry
227 | uses: docker/login-action@f054a8b539a109f9f41c372932f1ae047eff08c9
228 | with:
229 | registry: ${{ env.DOCKER_REGISTRY }}
230 | username: ${{ github.actor }}
231 | password: ${{ secrets.GITHUB_TOKEN }}
232 |
233 | # Extract metadata for the Docker image
234 | - name: Extract metadata (tags, labels) for Docker
235 | id: meta
236 | uses: docker/metadata-action@v4
237 | with:
238 | images: ${{ env.DOCKER_REGISTRY }}/${{ env.IMAGE_NAME }}
239 |
240 | # Build the Docker image and push it to the specified registry
241 | - name: Build and push Docker image
242 | uses: docker/build-push-action@v3
243 | with:
244 | context: .
245 | push: true
246 | tags: ${{ steps.meta.outputs.tags }}
247 | labels: ${{ steps.meta.outputs.labels }}
248 |
249 | # Deploy the Docker image to the CapRover instance
250 | - name: Deploy to CapRover
251 | uses: caprover/deploy-from-github@d76580d79952f6841c453bb3ed37ef452b19752c
252 | with:
253 | server: ${{ secrets.CAPROVER_SERVER }} # CapRover server URL
254 | app: ${{ secrets.APP_NAME }} # CapRover app name
255 | token: '${{ secrets.APP_TOKEN }}' # CapRover app token
256 | image: ${{ steps.meta.outputs.tags }} # Docker image to deploy
257 |
258 | ```
259 |
260 | The code provided is a GitHub Actions workflow file for deploying a Docker image to a CapRover instance. CapRover is a multi-purpose deployment tool that simplifies the process of deploying applications to your own servers.
261 |
262 | This workflow will trigger a build, test, and deployment whenever a push event occurs on the `main` branch. The Docker image will be built and pushed to the specified container registry, and then it will be deployed to the CapRover instance.
263 | You will need to set up the necessary secrets in your GitHub repository to provide the CapRover server URL, application name, and application token. Make sure you have the CapRover server up and running and the required secrets configured correctly.
264 |
265 | To configure your secrets, navigate to your Github repository's settings and click the Secrets and variables
266 |
267 | 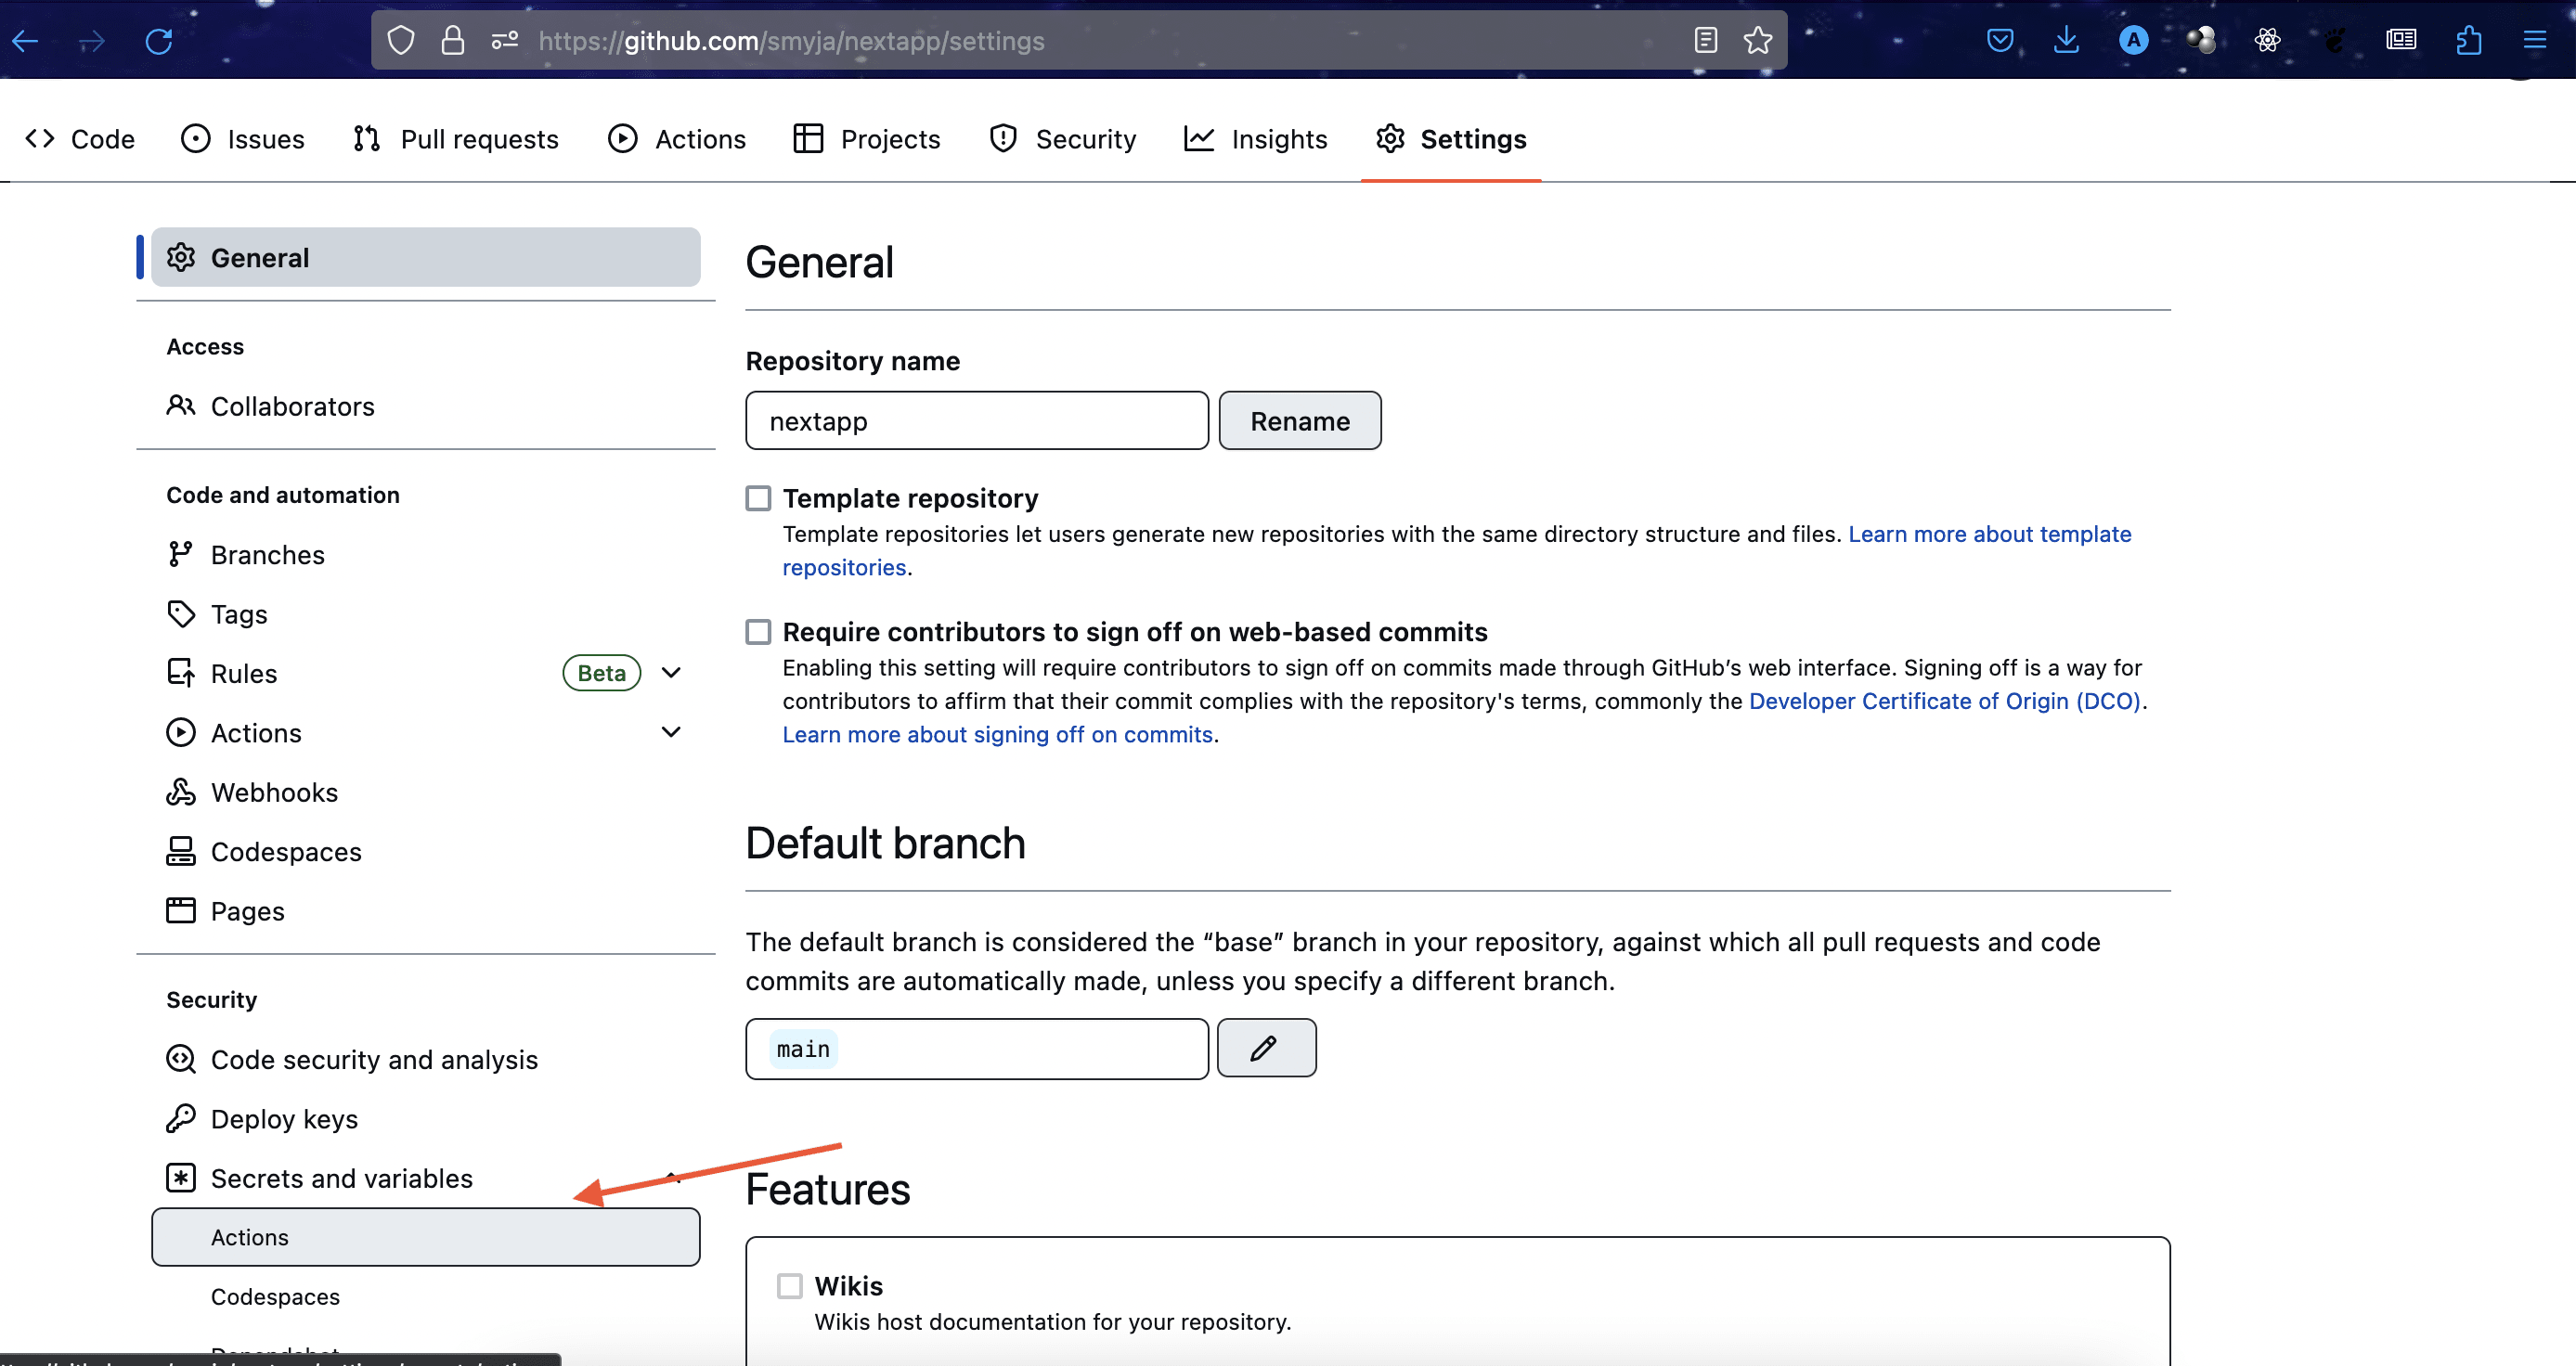
268 |
269 | Your `CAPROVER_SERVER` should be similar to this` https://captain.example.scrapeweb.page`
270 | `APP_NAME` is `server1`, the name you specified when creating the app.
271 | `APP_TOKEN` is the Token generated when we enabled app token on the dashboard.
272 |
273 | ## Conclusion
274 |
275 | We’ve now learned how to deploy a Next.js app with Caprover and connect a domain to it.
276 |
277 | Source code: https://github.com/smyja/nextapp
278 |
--------------------------------------------------------------------------------
/content/smyja/how-to-use-graphql-with-django.md:
--------------------------------------------------------------------------------
1 | ---
2 | Title: "How To Use GraphQL With Django"
3 | Description: "A guide on how to use GraphQL with Django."
4 | DatePublished: "2022-07-18"
5 | Categories:
6 | - "python"
7 | - "web-development"
8 | - "computer-science"
9 | Tags:
10 | - "APIs"
11 | - "Django"
12 | - "Queries"
13 | CatalogContent:
14 | - "python-for-programmers"
15 | - "paths/full-stack-engineer-career-path"
16 | ---
17 |
18 | _**Prerequisites:** Understanding of Python, the Command Line, and Django._
19 | _**Versions:** Django 4.0.4, Python 3.8.10, virtualenv 20.15.1_
20 |
21 | ### Introduction
22 |
23 | [GraphQL](https://www.codecademy.com/resources/docs/general/graphql) is a query language for [APIs](https://www.codecademy.com/resources/docs/general/api) and a runtime for fulfilling those queries with existing data. Unlike a REST API, GraphQL APIs do not require verbs (`PUT`, `POST`, `GET`, `PATCH`, and `DELETE`) for requests, nor do they need multiple endpoints. They have just one endpoint and making a query to that endpoint is all that's needed.
24 |
25 | This tutorial will cover the creation of a CRUD (create, read, update, and delete) GraphQL API with Django providing a list of restaurants.
26 |
27 | ## Properties of GraphQL
28 |
29 | The following terms are often used when interacting with GraphQL. Knowing them can be helpful, though we won't be covering all of them in this tutorial.
30 |
31 | - **Schema**: Describes the functionality available to the client applications that connect to it.
32 | - **Query**: A schema type that represents the `GET` request and defines the operations that can be used for reading or fetching data.
33 | - **Nesting**: Queries can be nested inside of other queries.
34 | - **Mutation**: A schema type that defines the kind of operations that can be done to modify data.
35 | - **Subscription**: Notifies the client server in real time about updates to the data.
36 | - **Resolver**: Functions that return values for fields associated with existing schema types.
37 |
38 | ## Step 1: setting up our virtual environment
39 |
40 | First, we are going to create and launch a virtual environment for our project with the `virtualenv` package (which can be [installed via `pip`](https://virtualenv.pypa.io/en/latest/installation.html#via-pip). While not necessary for starting a new Django project, working in separate environments is generally a best practice that mitigates conflicts between sites. Let's open a [terminal](https://www.codecademy.com/resources/docs/general/terminal) and create a new environment named `my_env` by running the following:
41 |
42 | ```bash
43 | virtualenv my_env
44 | ```
45 |
46 | Next, we will activate our new environment `my_env` with either of the following commands:
47 |
48 | ```bash
49 | # Linux/macOS
50 | source my_env/bin/activate
51 |
52 | # Windows
53 | source my_env/scripts/activate
54 | ```
55 |
56 | Let's go to the next step.
57 |
58 | ## Step 2: creating our Django project
59 |
60 | Next, if we haven't already, let's [install](https://docs.djangoproject.com/en/4.0/topics/install/#how-to-install-django) the `Django` package.
61 |
62 | Once we've done that, let's create a new project called `restaurant_graphql_api` and change into it:
63 |
64 | ```bash
65 | django-admin startproject restaurant_graphql_api
66 | cd restaurant_graphql_api
67 | ```
68 |
69 | Next, we're going to create a new application within our project called `my_app` by running the following:
70 |
71 | ```bash
72 | python manage.py startapp my_app
73 | ```
74 |
75 | Then, we'll add `my_app` to our list of `INSTALLED_APPS` in our `settings.py` file under the `restaurant-graphql_api/` directory:
76 |
77 | ```py
78 | INSTALLED_APPS = [
79 | 'my_app',
80 | 'django.contrib.admin',
81 | 'django.contrib.auth',
82 | # ...
83 | ]
84 | ```
85 |
86 | ## Step 3: using GraphQL with `graphene-django`
87 |
88 | To use GraphQL with Django, we will need to install the [`graphene-django`](https://docs.graphene-python.org/projects/django/en/latest/) package.
89 |
90 | ```bash
91 | pip install graphene-django
92 | ```
93 |
94 | This will add GraphQL functionality to our restaurant Django app such as resolvers and mutations. Next, let's add `'graphene_django'` to the list of `INSTALLED_APPS` in our `settings.py` file:
95 |
96 | ```py
97 | INSTALLED_APPS = [
98 | 'graphene_django',
99 | 'my_app',
100 | 'django.contrib.admin',
101 | # ...
102 | ]
103 | ```
104 |
105 | Now, let's go to the `models.py` file in our project and then define a new `Restaurant` class:
106 |
107 | ```py
108 | from django.db import models
109 |
110 | class Restaurant(models.Model):
111 | name = models.CharField(max_length=100)
112 | address = models.CharField(max_length=200)
113 |
114 | def __str__(self):
115 | return self.name
116 | ```
117 |
118 | Inside the `Restaurant` class model above, we've defined a few fields, `name` and `address`, along with a `__str__()` [dunder method](https://www.codecademy.com/resources/docs/python/dunder-methods) that returns the `name` of the restaurant.
119 |
120 | Next, let's register our new `Restaurant` model in the `admin.py` file of our application:
121 |
122 | ```py
123 | from django.contrib import admin
124 | from . import models
125 |
126 | admin.site.register(models.Restaurant)
127 | ```
128 |
129 | It is now time to create and perform a migration for this new data. This will allow our `Restaurant` model to be referenced in a GraphQL schema (which we will define later on). To make the migration, we can run `python manage.py makemigrations`; to apply the migrations, let's run `python manage.py migrate`.
130 |
131 | By now, we may encounter the following error:
132 |
133 | ```shell
134 | ImportError: cannot import name 'force_text' from 'django.utils.encoding'
135 | ```
136 |
137 | The `ImportError` is due to Django 4.0 not supporting the `force_text` variable (which the `graphene` package uses with earlier versions of Django). To resolve this, we can add the following to our `settings.py` file:
138 |
139 | ```py
140 | import django
141 | from django.utils.encoding import force_str
142 |
143 | django.utils.encoding.force_text = force_str
144 | ```
145 |
146 | Alternatively, we can downgrade our Django version to 3.2.x.
147 |
148 | After this, it would be good to run `python manage.py runserver` and check `http://127.0.0.1:8000` on a browser to ensure our application starts properly.
149 |
150 | Let's now create a `urls.py` in the `my_app` directory (for our _application_, not our overall Django project) and add the following:
151 |
152 | ```py
153 | from graphene_django.views import GraphQLView
154 | from django.views.decorators.csrf import csrf_exempt
155 | from django.urls import path
156 |
157 | urlpatterns = [
158 | path("graphql", csrf_exempt(GraphQLView.as_view(graphiql=True))),
159 | ]
160 | ```
161 |
162 | With the help of `import` statements, we added a `"graphql"` route to our list of `urlpatterns` that will automatically open the [GraphiQL](https://graphiql-test.netlify.app/typedoc/) API browser for testing our queries and mutations. This is done with the `graphiql` parameter of the `GraphQLView.as_view()` method. However, it can be switched off by setting `graphiql` to `False`. Django's `csrf_exempt` decorator is used to allow API clients to POST to the graphql endpoint we have created.
163 |
164 | Next, let's import the `include()` function to add the app urls to our `restaurants_graphql_api/urls.py` file (for our entire Django _project_):
165 |
166 | ```py
167 | from django.urls import path, include
168 |
169 | urlpatterns = [
170 | path("admin/", admin.site.urls),
171 | path("", include("my_app.urls")),
172 | ]
173 | ```
174 |
175 | ## Step 4: building a GraphQL schema
176 |
177 | Let's create a new file in our `my_app` directory called `schema.py`. Inside, we'll define a new type for the `Restaurant` model we previously created:
178 |
179 | ```py
180 | import graphene
181 | from graphene_django import DjangoObjectType
182 | from my_app.models import Restaurant
183 |
184 | class RestaurantType(DjangoObjectType):
185 | class Meta:
186 | model = Restaurant
187 | fields = ("id", "name", "address")
188 | ```
189 |
190 | Our `RestaurantType` class borrows from the `DjangoObjectType` class. The inner-`Meta` class is where general type attributes like `model` and `fields` are defined.
191 |
192 | Next, let's create a `Query` type class for the `Restaurant` model:
193 |
194 | ```py
195 | class Query(graphene.ObjectType):
196 | """
197 | Queries for the Restaurant model
198 | """
199 | restaurants = graphene.List(RestaurantType)
200 |
201 | def resolve_restaurants(self, info, **kwargs):
202 | return Restaurant.objects.all()
203 | ```
204 |
205 | The `Query` type contains a resolver function for the `restaurants` field (e.g., `resolve_restaurants()`). This resolver returns all the restaurants in the database.
206 |
207 | Next, at the end of our `schema.py` file, we will pass in our `Query` type into the `graphene.Schema()` function. This will allow our schema to be exportable to other files:
208 |
209 | ```py
210 | schema = graphene.Schema(query=Query)
211 | ```
212 |
213 | The entire `schema.py` file should look like this:
214 |
215 | ```py
216 | import graphene
217 | from graphene_django import DjangoObjectType
218 | from my_app.models import Restaurant
219 |
220 | class RestaurantType(DjangoObjectType):
221 | class Meta:
222 | model = Restaurant
223 | fields = ("id", "name", "address")
224 |
225 | class Query(graphene.ObjectType):
226 | """
227 | Queries for the Restaurant model
228 | """
229 | restaurants = graphene.List(RestaurantType)
230 |
231 | def resolve_restaurants(self, info, **kwargs):
232 | return Restaurant.objects.all()
233 |
234 |
235 | schema = graphene.Schema(query=Query)
236 | ```
237 |
238 | Let's now import the `schema` variable into the `my_app/urls.py` file and pass it to the Graphql view as seen below:
239 |
240 | ```py
241 | from my_app.schema import schema
242 |
243 | url_patterns = [
244 | path("graphql", csrf_exempt(GraphQLView.as_view(graphiql=True, schema=schema))),
245 | ]
246 | ```
247 |
248 | Let's run the Django server with `python manage.py runserver` then visit the `/graphql` route to see the GraphiQL browser, which should look like this:
249 |
250 | 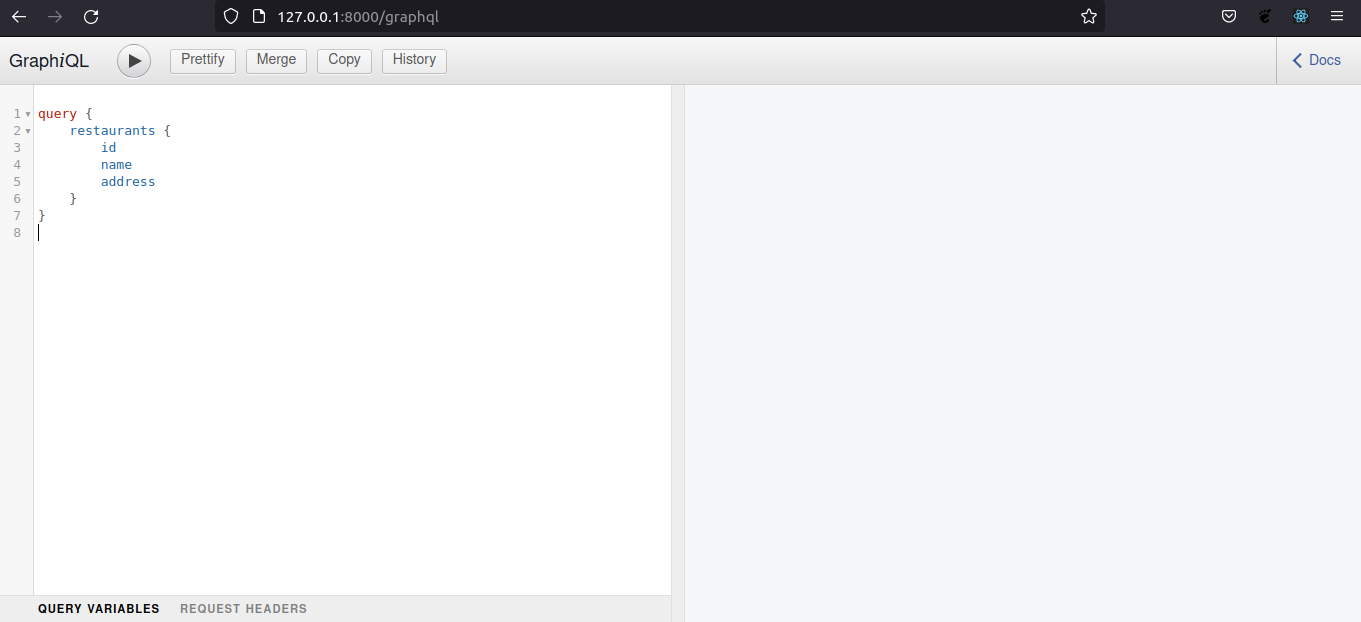
251 |
252 | Let's quickly test our query by doing the following:
253 |
254 | 1. Create a superuser account by running `python manage.py createsuperuser` in the terminal window, and following the prompts to create a username and password.
255 | 2. Log into our application as an admin by visiting the `"/admin"` URL in the browser.
256 | 3. Add restaurants to the database by interacting with the admin dashboard.
257 |
258 | To get the list of restaurants with specific data like `name` and `address`, we can type and run the following query on the browser:
259 |
260 | ```graphql
261 | query {
262 | restaurants {
263 | id
264 | name
265 | address
266 | }
267 | }
268 | ```
269 |
270 | The output should look like this:
271 |
272 | 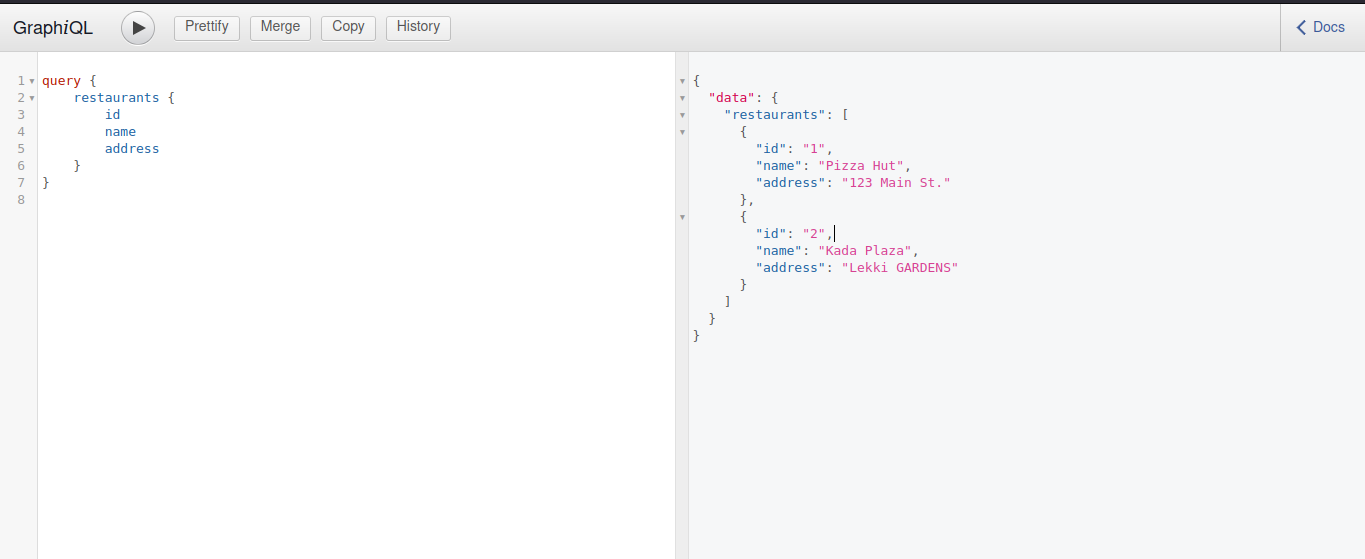
273 |
274 | ## Step 5: mutating the database
275 |
276 | To modify any data in our GraphQL database we need to create a mutation. In this step, we're going to build three mutations for creating, updating, and deleting data in our database.
277 |
278 | Below is the `CreateRestaurant` mutation, which we will add to the `schema.py` file:
279 |
280 | ```py
281 | class CreateRestaurant(graphene.Mutation):
282 | class Arguments:
283 | name = graphene.String()
284 | address = graphene.String()
285 |
286 | ok = graphene.Boolean()
287 | restaurant = graphene.Field(RestaurantType)
288 |
289 | def mutate(self, info, name, address):
290 | restaurant = Restaurant(name=name, address=address)
291 | restaurant.save()
292 | return CreateRestaurant(ok=True, restaurant=restaurant)
293 | ```
294 |
295 | The `CreateRestaurant` mutation takes in the model fields as arguments within the inner-`Argument` class. The `mutate()` function is where the database change happens using Django's object-relational mapper (ORM).
296 |
297 | Next, let's create a `Mutation` class and initialize it with the schema at the end of the file:
298 |
299 | ```py
300 | class Mutation(graphene.ObjectType):
301 | create_restaurant = CreateRestaurant.Field()
302 |
303 | ```
304 |
305 | After adding the mutation, let's pass the mutation to the schema at the end of the `schema.py` file.
306 |
307 | ```py
308 | schema = graphene.Schema(query=Query, mutation=Mutation)
309 | ```
310 |
311 | Start the server and run a mutation with the GraphQL API browser by using this:
312 |
313 | ```graphql
314 | mutation {
315 | createRestaurant(name: "Kada Plaza", address: "Lekki GARDENS") {
316 | ok
317 | restaurant {
318 | id
319 | name
320 | address
321 | }
322 | }
323 | }
324 | ```
325 |
326 | The mutation returns a restaurant object with the fields that were passed in.
327 |
328 | Let's now define a `DeleteRestaurant` mutation that removes a single restaurant from our database. We'll add it to our `schema.py` file between our `CreateRestaurant` and `Mutation` classes:
329 |
330 | ```py
331 | class DeleteRestaurant(graphene.Mutation):
332 | class Arguments:
333 | id = graphene.Int()
334 |
335 | ok = graphene.Boolean()
336 |
337 | def mutate(self, info, id):
338 | restaurant = Restaurant.objects.get(id=id)
339 | restaurant.delete()
340 | return DeleteRestaurant(ok=True)
341 | ```
342 |
343 | Next, we'll add the `DeleteRestaurant` mutation to the `Mutation` class:
344 |
345 | ```py
346 | class Mutation(graphene.ObjectType):
347 | create_restaurant = CreateRestaurant.Field()
348 | delete_restaurant = DeleteRestaurant.Field()
349 | ```
350 |
351 | Next, let's run the mutation on the browser to delete a restaurant from our GraphQL database:
352 |
353 | ```graphql
354 | mutation {
355 | deleteRestaurant(id: 1) {
356 | ok
357 | }
358 | }
359 | ```
360 |
361 | We pass the restaurant id as an argument to the mutation as shown above. The output should look like this:
362 |
363 | ```json
364 | {
365 | "data": {
366 | "deleteRestaurant": {
367 | "ok": true
368 | }
369 | }
370 | }
371 | ```
372 |
373 | **Note**: We should run a query to get the list of restaurants again to see the change.
374 |
375 | Lastly, let's make an `UpdateRestaurant` mutation that modifies data for a single restaurant. This will be added to our `schema.py` file, above our `Mutation` class:
376 |
377 | ```py
378 | class UpdateRestaurant(graphene.Mutation):
379 | class Arguments:
380 | id = graphene.Int()
381 | name = graphene.String()
382 | address = graphene.String()
383 |
384 | ok = graphene.Boolean()
385 | restaurant = graphene.Field(RestaurantType)
386 |
387 | def mutate(self, info, id, name, address):
388 | restaurant = Restaurant.objects.get(id=id)
389 | restaurant.name = name
390 | restaurant.address = address
391 | restaurant.save()
392 | return UpdateRestaurant(ok=True, restaurant=restaurant)
393 | ```
394 |
395 | Let's add the `UpdateRestaurant` mutation to the `Mutation` class:
396 |
397 | ```py
398 | class Mutation(graphene.ObjectType):
399 | create_restaurant = CreateRestaurant.Field()
400 | delete_restaurant = DeleteRestaurant.Field()
401 | update_restaurant = UpdateRestaurant.Field()
402 | ```
403 |
404 | We'll now run the mutation on the browser like so:
405 |
406 | ``` graphql
407 | mutation {
408 | updateRestaurant(id: 2, name: "Kada Plaza Ltd", address: "Lekki Gardens") {
409 | ok
410 | restaurant {
411 | id
412 | name
413 | address
414 | }
415 | }
416 | }
417 | ```
418 |
419 | The output should look like this:
420 |
421 | ```json
422 | {
423 | "data": {
424 | "updateRestaurant": {
425 | "ok": true,
426 | "restaurant": {
427 | "id": 2,
428 | "name": "Kada Plaza Ltd",
429 | "address": "Lekki Gardens"
430 | }
431 | }
432 | }
433 | }
434 | ```
435 |
436 | ### Conclusion
437 |
438 | GraphQL allows us to make requests from our database without creating separate endpoints for each request. In this article, we built a CRUD application with Django using GraphQL queries and mutations.
439 |
440 | Source code for this article: [https://github.com/Smyja/codecademy](https://github.com/Smyja/codecademy)
441 |
--------------------------------------------------------------------------------
/content/brandondusch/build-a-3d-environment-with-three-js.md:
--------------------------------------------------------------------------------
1 | ---
2 | Title: "Build a 3D Environment with Three.js"
3 | Description: "Step-by-step tutorial about how to build a 3D environment with Three.js and render/move 3D objects."
4 | DatePublished: "2022-02-28"
5 | Categories:
6 | - "web-development"
7 | - "game-development"
8 | - "javascript"
9 | - "html-css"
10 | Tags:
11 | - "Three.js"
12 | - "Animation"
13 | - "Node"
14 | CatalogContent:
15 | - "learn-node-js"
16 | - "learn-a-frame"
17 | ---
18 |
19 | [three.js]: https://threejs.org
20 | [webgl]: https://get.webgl.org/
21 | [github homepage]: https://github.com
22 | [frustum]: https://en.wikipedia.org/wiki/frustum
23 | [field of view]: https://en.wikipedia.org/wiki/Field_of_view
24 | [width:height ratio]: https://en.wikipedia.org/wiki/Aspect_ratio_(image)
25 | [range of viewable space]: https://en.wikipedia.org/wiki/Viewing_frustum
26 | [terminal]: https://www.codecademy.com/resources/docs/general/terminal
27 | [installing three.js]: https://threejs.org/docs/index.html#manual/en/introduction/Installation
28 | [npm]: https://www.codecademy.com/resources/docs/javascript/npm
29 | [cdn link]: https://www.codecademy.com/resources/docs/general/cdn
30 | [via cdn]: https://cdnjs.com/libraries/three.js/r128
31 | [perspective projection]: https://en.wikipedia.org/wiki/Perspective_(graphical)
32 | [official website]: https://threejs.org/
33 | [learn a-frame]: https://www.codecademy.com/learn/learn-a-frame
34 | [github gif of rotating three.js globe]: https://raw.githubusercontent.com/Codecademy/articles/main/build-3d-environment-with-three-js/github.gif?token=ABGEO3RHPAZJER45E463TLDBCK6KA
35 | [completed 3d environment with rotating cube]: https://raw.githubusercontent.com/Codecademy/articles/main/build-3d-environment-with-three-js/completed_3d_environment.gif
36 | [rendered page with full-sized body]: https://raw.githubusercontent.com/Codecademy/articles/main/build-3d-environment-with-three-js/rendered_page_full_body.png?token=ABGEO3RHPAZJER45E463TLDBCK6KA
37 | [rendered page with cube]: https://raw.githubusercontent.com/Codecademy/articles/main/build-3d-environment-with-three-js/rendered_page_cube.png?token=ABGEO3TNG23SPGEGLFBXJKTBCK6LK
38 |
39 | _**Prerequisites:** HTML, CSS, JavaScript_
40 | _**Versions:** Three.js r128_
41 |
42 | ## Introduction
43 |
44 | [Three.js] is a JavaScript library that features 3D objects and views rendered on a web page. It builds on top of [WebGL] by adding functionality for visual aesthetics including:
45 |
46 | - Effects such as lights and shadows.
47 | - Materials for building shapes.
48 | - Textures for adding details to those shapes.
49 |
50 | Since its release in 2010, Three.js has been used by many developers and companies alike. Below is the [GitHub homepage], which uses Three.js to render a globe. It rotates and emits interesting connections between different points. We can even change it's rotation with our mouse!
51 |
52 | ![GitHub GIF of rotating Three.js globe]
53 |
54 | In this article, we are going to learn how to build a 3D environment with Three.js. Inside of this environment, we will render a cube that rotates at a modest speed. Below is what our completed environment will look like:
55 |
56 | ![Completed 3D environment with rotating cube]
57 |
58 | ### The `renderer`, `Scene`, and `Camera`
59 |
60 | It should be noted that the Three.js API uses a considerable amount of stage and camera projection terms to name classes, functions and parameters.
61 |
62 | The `renderer` object is the root of a Three.js program and carries two parameters:
63 |
64 | - A `Scene` object that contains 3D objects, lights, cameras, etc.
65 | - A `Camera`, which is an object-based abstraction of a camera view that exists both inside and outside of scenes.
66 |
67 | Scenes and their child elements make up the _scenegraph_, a tree-like representation of the parent/child-relationship between objects in the scene. Scenegraphs can also contain zero or more cameras.
68 |
69 | Cameras use methods that utilize parameters named after terms in camera projection. The following terms define the observable "shape" (or [frustum]) of the camera:
70 |
71 | - `fov` stands for [field of view], which is the range of the observable world from a (camera’s) perspective at a given moment in time, measured in degrees.
72 | - `aspect` describes the [width:height ratio]() of the to-be-rendered `