├── .vscode
├── temp.sql
└── settings.json
├── LICENSE
├── README.md
├── Mac OS X Development Tutorial for Beginners Part 2 - OS X App Anatomy.md
├── How to Use NSTouchBar on macOS.md
├── macOS Development for Beginners - Part 1.md
├── Unit Testing on macOS - Part 1:2.md
└── Menus and Popovers in Menu Bar Apps for macOS.md
/.vscode/temp.sql:
--------------------------------------------------------------------------------
1 |
--------------------------------------------------------------------------------
/.vscode/settings.json:
--------------------------------------------------------------------------------
1 | // 将设置放入此文件中以覆盖默认值和用户设置。
2 | {
3 | }
--------------------------------------------------------------------------------
/LICENSE:
--------------------------------------------------------------------------------
1 | MIT License
2 |
3 | Copyright (c) 2017 Developer.Lx
4 |
5 | Permission is hereby granted, free of charge, to any person obtaining a copy
6 | of this software and associated documentation files (the "Software"), to deal
7 | in the Software without restriction, including without limitation the rights
8 | to use, copy, modify, merge, publish, distribute, sublicense, and/or sell
9 | copies of the Software, and to permit persons to whom the Software is
10 | furnished to do so, subject to the following conditions:
11 |
12 | The above copyright notice and this permission notice shall be included in all
13 | copies or substantial portions of the Software.
14 |
15 | THE SOFTWARE IS PROVIDED "AS IS", WITHOUT WARRANTY OF ANY KIND, EXPRESS OR
16 | IMPLIED, INCLUDING BUT NOT LIMITED TO THE WARRANTIES OF MERCHANTABILITY,
17 | FITNESS FOR A PARTICULAR PURPOSE AND NONINFRINGEMENT. IN NO EVENT SHALL THE
18 | AUTHORS OR COPYRIGHT HOLDERS BE LIABLE FOR ANY CLAIM, DAMAGES OR OTHER
19 | LIABILITY, WHETHER IN AN ACTION OF CONTRACT, TORT OR OTHERWISE, ARISING FROM,
20 | OUT OF OR IN CONNECTION WITH THE SOFTWARE OR THE USE OR OTHER DEALINGS IN THE
21 | SOFTWARE.
22 |
--------------------------------------------------------------------------------
/README.md:
--------------------------------------------------------------------------------
1 | # macOS 开发教程翻译
2 | ---
3 | #### [原文地址](https://www.raywenderlich.com/category/macos) 翻译:[DeveloperLx](http://weibo.com/DeveloperLx)
4 |
5 |
6 |
30 |
31 |
32 | 入门
33 |
34 |

36 |
37 | 入门最好的方式,是从我们的Mac OS X 初学者开发教程系列开始。
38 |
40 | 第一部分
41 |
42 |
43 |
44 | 这个系列将教给你OS X开发最基础的东西。你可以接下来了解更多关于OS X的
45 |
46 | 核心控件
47 |
48 | ,例如labels, combo boxes, 和buttons.
49 |
50 |
107 |
108 | Windows, Views, 和View Controllers
109 |
110 |

113 |
114 | 一旦你通过了基础,你应该了解windows, views, 和view controllers在OS X中如何工作, 以及一些在你每天的开发中用到的关键的view controllers和views。
115 |
116 |
163 |
164 | 其它OS X的开发教程
165 |
166 |

169 |
170 | 稍等,还有!在这部分,你将了解到怎么制作运行在命令行的专业的app(执行其它命令行程序的app),甚至是主要都在菜单栏中的app。
171 |
172 |
219 |
220 |
6 |
7 |
10 |
11 |
12 | 欢迎回到我们三个部分的Mac OS X新手开发教程系列!
13 |
14 |
15 | -
16 | 在
17 |
19 | 第一部分
20 | part 1
21 |
22 | 你学到了怎样获取你需要的用来OS X开发的工具。接下来,使用了一个你下载的app作为例子,你进行了一次OS X的游览,发现了怎么执行app,编辑代码,设计UI和调试它。
23 |
24 | -
25 | 在第二部分,你将从Xcode退回一步来了解一下构成OS X app的组件。从一个app怎么启动,到UI怎么构建,直到处理用户的交互
26 |
27 | -
28 | 在最后一部分, 你将亲自动手(get your hands dirty)- 构建你史无前例的第一个OS X app。从一无所有开始,你将很快地拥有一个简单的app,并运行在你的mac上!
30 |
31 |
32 |
33 | 这篇文章是定位于那些完成了这个系列
34 |
36 | part one
37 | 第一部分
38 |
39 | ,或拥有使用Xcode经验的人。它假设你没有或很少关于OS X app的知识,并且如果你早已熟悉OS X app的架构,你可以略过这里直到
40 |
42 | 最后一部分
43 |
44 | 之前。
45 |
46 |
47 | 到这篇文章最后的时候,你将有一个对于OS X app不同的部分怎么配合到一起的很好的掌控,尽管不必理解他们中的每一个都是怎么工作的。
48 |
49 |
50 |
51 |
52 | 注意:
53 |
54 | 系列的这一部分,仅仅是你需要知道的OS X app怎么工作的背景信息;不涉及到写代码。
55 |
56 |
57 | 休息一下,放松,然后学习 - 你将在下一个,也是这个系列的最后一部分,回到编码并制作你的第一个OS X app!
58 |
59 |
60 |
61 | OS X App怎么启动?
62 |
63 |
64 | 你的OS X app旅程已开始 - 着眼于一个app实际上上是怎么
65 |
66 | 启动
67 |
68 | 的。
69 |
70 |
71 | 当考虑到OS X app启动进程时,你需要考虑到三个组件:
72 |
73 |
113 |
114 | 启动一个app比这要
115 |
116 | 稍
117 |
118 | 复杂些。但这三个地方解释了,你可以在什么地方交互和配置你的app的启动。现在你建立起了你的app,并运行起来,是时候来看一个重要的方面了 - 它的用户交互。
119 |
120 |
121 | 用户界面
122 |
123 |
124 | 你早已认识到UI可以由storyboard提供这个事实,但这实际上意味着什么?在这个部分你将cover到不同的UI组件 - 他们代表什么及它们怎么配合在一起。
125 |
126 |
127 |  130 |
130 |
131 |
132 | Window
133 |
134 |
135 | 你的app的UI将被一个或多个window对象包含。这些表现了你的app,负责提供UI的屏幕上的区域。操作系统会执行一个window管理器来处理移动和缩放这些window,在用户做出改变时更新你的app。
136 |
137 |
138 | 除了可视化你的app之外,window对象也处理传递通过用户和鼠标键盘交互到你的app中而触发的事件。
139 |
140 |
141 | 尽管你可以直接和window对象交互,但通常它们是被window controller控制的 - 尤其当结合storyboard使用的时候。
142 |
143 |
144 | window controller负责加载它自己的window,让你能够hook贯穿于window生命周期的不同的事件。
145 |
146 |
147 | 一个storyboard会包含至少一个window controller,就像下面这样:
148 |
149 |
150 |  153 |
153 |
154 |
155 |
156 |             NSWindowController
157 |
158 | 这个类代表了Window controller,因此当你需要配置不同的window时,你通常就需要创建不同的子类来管理它们各自的行为。
159 |
160 |
161 | Views
162 |
163 |
164 | window指定了你的app在屏幕上负责绘制的区域,但不是要绘制的东西。这就是view的主要职责之一 - 为你提供在屏幕上绘制的功能。
165 |
166 |
167 | View是矩形的,由
168 |
169 |             NSView
170 |
171 | 来表示。View存在在层级中 - 也就是说,任何view都可以包含0个或多个subview - 让你能够用更简单,可重用的view组件来构成复杂的布局。
172 |
173 |
174 | View Controllers
175 |
176 |
177 | 就如同window在storyboard中是被一个window controller来管理的,view是被window controller类来管理的。这就使用模型层通过直接操作property,或通过Cocoa绑定来连接了view的层级。
178 |
179 |
180 | 在一个典型的应用中,view controller是一个可重用的组件,当对一个特定的类型提供了模型的对象,就会更新所有构成它的view,来表现相关的模型对象的值。
181 |
182 |
183 | 例如,在之前的教程中,你“闲逛”(poke around)了
184 |
185 | HubEvent
186 |
187 | 这个app。
188 |
189 |
190 | 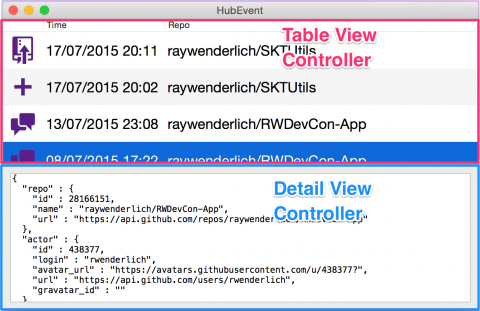 193 |
193 |
194 |
195 | 在上面的截图中,你可以看到它是由两个主要的view controller构成的 - 一个管理在顶部的table view,另一个管理详细的text view。当你的table view中选择一行,它设置了模型对象在较低细节的view controller,然后更新text view去展示了正确的JSON。
196 |
197 |
198 | View controller是由
199 |
200 |             NSViewController
201 |
202 | 来表现的,它提供了全范围的生命周期的事件 - 允许你在不同的时刻执行定制的动作。例如你可以在当view将要出现在屏幕上时,用这个方法
203 |
204 |             viewWillAppear()
205 |
206 | 来启动动画,或在view的层次已正确地装载时,使用填数据充相关的view在这个方法中
207 |
208 |             viewDidLoad()
209 |
210 | 。
211 |
212 |
213 | 你的app有可能是由一系列
214 |
215 |             NSViewController
216 |
217 | 定制的子类来构成的,每一个都负责window中不同的部分。它们是一个app中非常重要的一方面 - 形成允许你展示基础的(underlying)数据给用户的连接。
218 |
219 |
220 | View组件
221 |
222 |
223 | 你已知道了view是用来被绘制到屏幕上的 - 但它实际上是怎么实现的?在最低层你可以创建一个
224 |
225 |             NSView
226 |
227 | 定制的子类并重写
228 |
229 |             drawRect()
230 |
231 | 方法来手动地绘制你的view的内容。
232 |
233 |
234 | 这是极其强大的 - 允许你创建完全定制的view,如果你不得不绘制一些文本到屏幕上去,将会非常费劲!
235 |
236 |
237 | 幸运的是,你不必这么做。AppKit包含一系列常用的
238 |
239 |             NSView
240 |
241 | 的子类,可以用来在屏幕上展示内容。
242 |
243 |
244 | 一些最有用的例子是:
245 |
246 |
247 | -
248 |
249 | Label
250 |
251 | :展示静态的文本。配置字体和外观
252 |
253 | 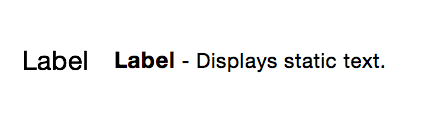 255 |
255 |
256 | -
257 |
258 | Text Field
259 |
260 | :用户可编辑的文本控制器。用来从用户那里手机字符串。
261 |
262 | 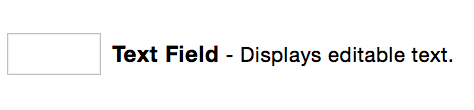 264 |
264 |
265 | -
266 |
267 | Image View
268 |
269 | :绘制一副图像 - 由
270 |
271 |                 NSImage
272 |
273 | 对象提供。
274 |
275 |  277 |
277 |
278 | -
279 |
280 | Push Button
281 |
282 | :是众多按钮类型中的一种 - 相应用户点击事件的那个。
283 |
284 |  286 |
286 |
287 | -
288 |
289 | Table View
290 |
291 | :一个用来展示不止
292 |
293 | 一
294 |
295 | 个数据对象,而是展示它们的集合的例子,它是view的很多子类中的一个。
296 |
297 |  300 |
300 |
301 |
302 |
303 | 这些只是几个不同的对你可用的view的子类,你可以用来构建你的app的用户界面。在Interface Builder,你可以在对象库中发现所有的子类:
304 |
305 |
306 |  309 |
309 |
310 |
311 | raywenderlich.com OS X教程团队也将在未来几个月中,打造一个快速的对于不同UI组建的参考指南 - 所以请确保回来查阅。
312 |
313 |
314 | Viewing collections
315 |
316 |
317 | 你经常想要你的app的UI同时展示多个模型对象 - 例如一个即将到来的约会的列表,或一个相册中照片的集合。
318 |
319 |
320 | OS X提供两个不同的view用来展示模型对象的集合 - 以table view的形式和collection view的形式。
321 |
322 |
323 | 如同它的名字,table view用来展示扁平的数据,使用行来表示个体的数据模型,列来表示那些对象的属性。
324 |
325 |
326 |  329 |
329 |
330 |
331 | Table view由可以在被滚入和滚出屏幕时,可以被回收利用的cell构成。数据可以通过数据源协议或使用Cocoa Bindings来提供。
332 |
333 |
334 | Table支持排序,编辑和定制cell,给你一个强有力的view来展示数据。
335 |
336 |
337 | 更通用的collection view也是由cell的集合构成的,但这次,每个cell代表全部的模型对象。这些cell的布局是完全可定制的。
338 |
339 |
340 |  343 |
343 |  346 |
346 |
347 |
348 | 类似table view,collection view可以通过数据源或Cocoa Bindings来提供。它的cell也是可以回收利用的 - 当它们从view中消失的时候,以此减少内存的占用。
349 |
350 |
351 | Collection view内置了cell选择的支持,带动画的重新排序,以及将cell分组到部分中。
352 |
353 |
354 | 处理用户交互
355 |
356 |
357 | 对于任何OS X,一个关键的部分就是通过鼠标、触控板、键盘和任何其它大量的输入设备来进行用户交互。为了帮助设计用户的输入到你的app,OS X提供了一个统一的事件派发模型,构建于一个响应者链的概念下。
358 |
359 |
360 | 生成自键盘的事件称作
361 |
362 | Key Events
363 |
364 | ,这些会跟随一个相当复杂的路径到达你的app。一些键的点击甚至不会将事件传递给你的app - 它们被拦截在操作系统的层级上(例如:电源按钮,屏幕亮度,音量)。
365 |
366 |
367 | 键的事件可以表示一个单独的键,或一个键的组合 - 当事件到达你的app时,它们会首先被检查是不是一个对应于菜单项的快捷键。
368 |
369 |
370 | 如果不是的话,它们就会被检查是不是用来引导你的app的用户交互的 - 例如:在输入框之间切换。如果这个不是这种情况,window会在传递键事件前,确定出哪个view当前是活跃的(所谓的第一响应者)。这些可以被打断作为每个视图的命令,或作为字符来插入。
371 |
372 |
373 | 键盘输入确实相当复杂,因为它可以影响到很多层的系统和app架构,但OS X走了一大段路来帮助这个处理。在很多情形下,你会发现它表现的就像你期望的一样的“开箱即用”(out of the box)。
374 |
375 |
376 | 类鼠标事件(mouse-like event)传递到你的应用中,在传递它们到你定制的子类,使你能够恰当地操作它们之前,确立它们执行在哪个window和相应view上。响应者类(view继承自的)包含你可以重写的,在点击或移动鼠标时会调用的方法。
377 |
378 |
379 | 触控板相对于传统的鼠标,提供了很多额外的手势,因此gesture recognizer的概念是从iOS借来的。这些可以用来将一系列的多指触控解释为一个语义上的动作,例如移动和旋转。
380 |
381 |
382 | Gesture recognizer对类鼠标事件提供了更高水平的解释,它们被关联到view,并拦截所有关联到那个view的类鼠标事件。
383 |
384 |
385 | 在OS X中,事件处理架构相当地复杂,但默认走了一大段路来处理很多共同的情形。相应者链的力量使其在最高水平的可能上,让操纵事件变得容易。
386 |
387 |
388 | Menus
389 |
390 |
391 | Menus是关联到你的app的不同动作的集合。Menus可以出现在不同的地方,包括:
392 |
393 |
394 | -
395 |
396 | Menu Bar
397 |
398 | 这是沿着屏幕顶部的“条”
399 |
400 |  403 |
403 |
404 | -
405 |
406 | Context Menus(交互菜单)
407 |
408 | 出现在用户右击时
409 |
410 |  413 |
413 |
414 | -
415 |
416 | Dock Menu
417 |
418 | 当用户长按dock的图标时
419 |
420 |  423 |
423 |
424 |
425 |
426 | 所有的menus可以在Interface Builder中被配置,允许你配置它们的外观,它们出现的层级,和每一项关联的动作。
427 |
428 |
429 |  432 |
432 |
433 |
434 | 数据层
435 |
436 |
437 | 用户界面是你OS X app的一个巨大的部分,但它大概不是你app的
438 |
439 | 全部
440 |
441 | 。大多app提供一个用户界面,来让用户可以和背后的数据模型交互。
442 |
443 |
444 | 数据模型高度依赖于你的app存在的域(domain) - 并没有魔术的办法来build一个数据层。事实上,通常的情形是,你会使用Swift中可用的,面向对象语言的特性来创建一套模拟你app的域(domain)的对象。
445 |
446 |
447 | 让数据层和用户界面分类是极其重要的,让你的软件更易维护和不易出错。OS X通过Cocoa Bindings支持这种架构 - 一种接通模型对象到UI,并确保它们自动保持互相同步的技术。
448 |
449 |
450 | 你可以穿件一个完全隔离的动态framework来包含你的数据层 - 完全和UI隔离。这可以让相同的数据层在多个app中被使用 - 甚至再OS X和iOS app之间,增强可测试性。
451 |
452 |
453 | 尽管你可以创建你自己的数据层,苹果提供了一个名叫Core Data的框架。这是一个综合框架,用来创建对象图(object graph)来完成你全部数据层的模型。它支持持久化到磁盘,数据校验,撤销等。
454 |
455 |
456 | Core Data很好地支持了Cocoa Bindings,意味着整合你的模型编辑UI和Core Data后端真的容易,这使得build你大部分的app相当得快。
457 |
458 |
459 | 其它有用的Cocoa功能
460 |
461 |
462 | 这篇文章给了你一些可以被用到每个OS Xapp的Cocoa概念的非常简短的概述。这仅仅触碰到了这个非常丰富的平台的表面。
463 |
464 |
465 | 一些Cocoa的其它突出的部分,在build强大的OS X app时也是非常有用的:
466 |
467 |
468 | -
469 |
470 | Networking
471 |
472 | :除了访问最底层的网络功能,OS X提供了一个更高层的API来处理HTTP请求。networking构建在一个异步的session上 - 无缝地将上传和下载处理成一个任务的列表。
473 |
474 | -
475 |
476 | Location
477 |
478 | :你可能主要在移动设备上关联到基于位置的服务,但你有完全的访问权限,来通过Core Location访问很多关于位置的强大的功能,并使用MapKit处理地图。
479 |
480 | -
481 |
482 | WebKit
483 |
484 | :Safari是顶级的web浏览器之一,你可以通过WebKit来整合强有力的渲染引擎(rendering engine)到你自己的app中。它也包含了与内容交互的能力,并可以从一系列的来源中渲染HTML的内容。
485 |
486 |
487 |
488 | 从这儿去向哪里?
489 |
490 |
511 |
512 | 这篇文章给了你OS X的app怎么配合在一起的概述,但它没有给你你改怎么实际地使用这些来启动创建app的好主意。不要担心 - 这恰是这个引导性系列中
513 |
515 | 下一篇文章
516 |
517 | 的目标。
518 |
519 |
520 | 如果你想学习更多关于build OS X app理论方面的内容,苹果提供了一个好的Cocoa app的引导作为文档引导的一部分。它在实际build app上并不是特别有用,但是你如果全部读过它,你将对Cocoa拥有可怕的知识!
521 |
522 |
6 |
7 |  10 |
10 |
11 |
12 | After years of waiting and rumors, Apple finally released a set of new
13 | MacBook Pros. One of the new exciting things announced was the inclusion
14 | of a touch screen. Well… sort of.
15 |
16 |
17 | The new Touch Bar replaces the traditional function keys found on all
18 | MacBooks in the past for a dynamic, multi-touch screen. And the best part
19 | is it’s fully open to developers, so you can use it to offer new ways to
20 | interact with your macOS applications.
21 |
22 |
23 | If you’re a macOS developer, you’ll want to take full advantage of this
24 | new technology right away. In this tutorial, I’ll show you how you can
25 | use the new
26 |
 27 |             NSTouchBar
 28 |
29 | API to easily create a dynamic touch bar for your macOS app.
30 |
31 |
32 |
33 |
34 | Note:
35 |
36 | This tutorial requires Xcode version 8.1 or later. You will also need
37 | to ensure that you have macOS 10.12.1, build 16B2657 installed on your
38 | computer first. If you do not have this version, you will not be able to
39 | show the Touch Bar Simulator. To check, go to
40 |
41 | > About This Mac
42 |
43 | , and click where you see 10.12.1. This will then show your build number.
44 |
45 |
46 |  50 |
50 |
51 |
52 | If you do not see 16B2657, you can download the update from
53 |
54 | Apple
55 |
56 | .
57 |
58 |
59 |
60 | What is the Touch Bar?
61 |
62 |
63 | As mentioned, the Touch Bar is a small touch screen that allows users
64 | to interact with apps (and their computer) in a whole new way.
65 |
66 |
67 |  71 |
71 |
72 |
73 | There are three default sections on the Touch Bar:
74 |
75 |
76 | -
77 |
78 | System Button
79 |
80 | : Depending on context, this will show a system level button, like Esc.
81 |
82 | -
83 |
84 | App Region
85 |
86 | : The default area provided for your app to show items.
87 |
88 | -
89 |
90 | Control Strip
91 |
92 | : This is a replacement of your familiar keys that you’d use to control
93 | screen brightness, volume, or music playback.
94 |
95 |
96 |
97 | As with every new technology from Apple, there are a set of Human Interface
98 | Guidelines that you should follow when working with the Touch Bar. You
99 | should familiarize yourself with them
100 |
102 | here
103 |
104 | , as they are very important to maintaining a consistent pattern to your
105 | users.
106 |
107 |
108 | Very briefly, here are a few sections of the guide that really stand out:
109 |
110 |
111 | -
112 |
113 | Don’t expose functionality just in the Touch Bar
114 |
115 | : This isn’t the place to keep things secret from users that haven’t upgraded
116 | their hardware yet. If you’re going to put it in the Touch Bar, make sure
117 | you can perform the action somewhere else in your app. Apple says that
118 | the Touch Bar can even be disabled, so don’t count on your users to always
119 | see it.
120 |
121 | -
122 |
123 | The Touch Pad is an extension of the Keyboard and Trackpad, not a display
124 |
125 | : Yes, it’s a screen, but it’s not a secondary display. Don’t distract
126 | the user with scrolling content or alerts.
127 |
128 | -
129 |
130 | Respond Immediately
131 |
132 | : When users tap a key on the keyboard, they expect immediate results.
133 | Similarly, when someone taps a virtual button on the touch bar, they also
134 | expect immediate results.
135 |
136 |
137 |
138 | How Do I Support the Touch Bar?
139 |
140 |
141 | To add support for the TouchBar in your apps, you use some new classes
142 | provided by Apple:
143 |
144 |             NSTouchBar
145 |
146 | and
147 |
148 |             NSTouchBarItem
149 |
150 | (and its subclasses).
151 |
152 |
153 | Some of the
154 |
155 |             NSTouchBarItem
156 |
157 | subclasses include features like:
158 |
159 |
160 | -
161 |
162 | Slider
163 |
164 | : Adjusts a value
165 |
166 | -
167 |
168 | Popover
169 |
170 | : Hide more functionality behind another item.
171 |
172 | -
173 |
174 | Color Picker
175 |
176 | : Pretty much says it all (a color picker if you didn’t catch it ;] ).
177 |
178 | -
179 |
180 | Custom
181 |
182 | : This is probably going to be your go-to item for a lot of things. It
183 | allows you to add simple labels, buttons, and all sorts of other controls.
184 |
185 |
186 |
187 | You can customize your items quite a bit. From text size and color, to
188 | images, you can offer your users a modern approach to the keyboard that
189 | hasn’t been available before. Just remember the guidelines, and you should
190 | be good to go.
191 |
192 |
193 | Getting Started
194 |
195 |
196 | You’re probably ready to get started! To follow along, download this sample
197 | project
198 |
200 | here
201 |
202 | .
203 |
204 |
205 | The application is a very simple Travel Log, that only does what is needed
206 | for the purposes of our tutorial. With the project open, go to
207 |
208 | Window > Show Touch Bar
209 |
210 | . You’ll now see the Touch Bar Simulator on your screen.
211 |
212 |
213 |  217 |
217 |
218 |
219 | Build and run the app, you’ll notice the Touch Bar is empty, aside from
220 | the System Button and Control Strip.
221 |
222 |
223 |  227 |
227 |
228 |
229 |  233 |
233 |
234 |
235 | Before you can add anything to the Touch Bar, you’ll need to tell the
236 | system your application can customize the Touch Bar. Open
237 |
238 | AppDelegate.swift
239 |
240 | , and paste the following into
241 |
242 |             applicationDidFinishLaunching(\_:)
243 |
244 | :
245 |
246 |
247 |
248 |
249 |
250 |
251 |
252 |                             func applicationDidFinishLaunching(_ aNotification: Notification) { if
253 |                             #available(OSX 10.12.1, *) { NSApplication.shared().isAutomaticCustomizeTouchBarMenuItemEnabled
254 |                             = true } }
255 |
256 | |
257 |
258 |
259 |
260 |
261 |
262 | This takes care of all the necessary validations and activation of your
263 | Touch Bar menu items for you. At the time of this writing the current version
264 | of Xcode does not have macOS 10.12.1 available as a deployment target,
265 | so you will need to place
266 |
267 |             #available(OS X 10.12.1, *)
268 |
269 | around code or extensions dealing with the Touch Bar. Luckily, Xcode will
270 | give you a friendly error if you forget ;]
271 |
272 |
273 | Open
274 |
275 | WindowController.swift
276 |
277 | , and look at
278 |
279 |             makeTouchBar()
280 |
281 | . This method is checking if
282 |
283 |             ViewController
284 |
285 | has a Touch Bar that can be returned. If so, it will send that Touch Bar
286 | to the
287 |
288 | Window
289 |
290 | , and be presented to the user. Right now, there is no Touch Bar being
291 | created, so nothing is shown.
292 |
293 |
294 | Before you can go making your own touch bars, and touch bar items, you
295 | need to be aware that instances of these classes all require unique identifiers.
296 | Open
297 |
298 | TouchBarIdentifiers.swift
299 |
300 | to see how these have been created for this project. There are extensions
301 | for both
302 |
303 |             NSTouchBarCustomizationIdentifier
304 |
305 | , and
306 |
307 |             NSTouchBarItemIdentifier
308 |
309 | .
310 |
311 |
312 | Go to
313 |
314 | ViewController.swift
315 |
316 | , and add the following at the end of the file, where the
317 |
318 | TouchBar Delegate
319 |
320 | is marked:
321 |
322 |
323 |
324 |
325 |
326 |
327 |
328 |                             @available(OSX 10.12.1, *) extension ViewController: NSTouchBarDelegate
329 |                             { override func makeTouchBar() -> NSTouchBar? { // 1 let touchBar =
330 |                             NSTouchBar() touchBar.delegate = self // 2 touchBar.customizationIdentifier
331 |                             = .travelBar // 3 touchBar.defaultItemIdentifiers = [.infoLabelItem] //
332 |                             4 touchBar.customizationAllowedItemIdentifiers = [.infoLabelItem] return
333 |                             touchBar } }
334 |
335 | |
336 |
337 |
338 |
339 |
340 |
341 | Here, you override
342 |
343 |             makeTouchBar()
344 |
345 | , which is required for your view or window to create a touch bar. You
346 | also did the following:
347 |
348 |
349 | -
350 | Create a new
351 |
352 |                 TouchBar
353 |
354 | and set the delegate.
355 |
356 | -
357 | Set the customizationIdentifier. Remember, every
358 |
359 |                 TouchBar
360 |
361 | and
362 |
363 |                 TouchBarItem
364 |
365 | need to have unique identifiers.
366 |
367 | -
368 | Set the Touch Bar’s default item identifiers. This tells the Touch Bar
369 | what items it will contain.
370 |
371 | -
372 | Here, you set what order the items should be presented to the user.
373 |
374 |
375 |
376 | You’re still not quite ready to see anything in your Touch Bar yet. You’ll
377 | need to tell the Touch Bar what the
378 |
379 |             .infoLabelItem
380 |
381 | should look like. In the same extension, add the following:
382 |
383 |
384 |
385 |
386 |
387 |
388 |
389 |                             func touchBar(_ touchBar: NSTouchBar, makeItemForIdentifier identifier:
390 |                             NSTouchBarItemIdentifier) -> NSTouchBarItem? { switch identifier { case
391 |                             NSTouchBarItemIdentifier.infoLabelItem: let customViewItem = NSCustomTouchBarItem(identifier:
392 |                             identifier) customViewItem.view = NSTextField(labelWithString: "\u{1F30E}
393 |                             \u{1F4D3}") return customViewItem default: return nil } }
394 |
395 | |
396 |
397 |
398 |
399 |
400 |
401 | By implementing
402 |
403 |             touchBar(\_:makeItemForIdentifier:)
404 |
405 | , you can customize your touch bar items anyway you’d like. Here, you’ve
406 | created a simple
407 |
408 |             NSCustomTouchBarItem
409 |
410 | , and set its
411 |
412 |             view
413 |
414 | to an
415 |
416 |             NSTextField
417 |
418 | . Build and run your application, and you’ll now see the Touch Bar has
419 | a new item.
420 |
421 |
422 |  424 |
424 |
425 |
426 | Yay! You got a… label. That’s not super helpful, though. It’s time to
427 | add some controls.
428 |
429 |
430 |  434 |
434 |
435 |
436 | Text Fields and Scrubbers
437 |
438 |
439 | In
440 |
441 |             makeTouchBar()
442 |
443 | , change the
444 |
445 |             defaultItemIdentifiers
446 |
447 | to the following:
448 |
449 |
450 |
451 |
452 |
453 |
454 |
455 |                             touchBar.defaultItemIdentifiers = [.infoLabelItem, .flexibleSpace, .ratingLabel,
456 |                             .ratingScrubber]
457 |
458 | |
459 |
460 |
461 |
462 |
463 |
464 | This will allow the Touch Bar to show three new items: a label and a scrubber.
465 | You’ve also added a
466 |
467 |             .flexibleSpace
468 |
469 | . This is a dynamically sized space put in the Touch Bar to keeps things
470 | grouped together nicely. You can also take advantage of
471 |
472 |             .fixedSpaceSmall
473 |
474 | , and
475 |
476 |             .fixedSpaceLarge
477 |
478 | for more static sized spacing.
479 |
480 |
481 | You’ll still need to customize these items, just like the label you added.
482 | Add the following
483 |
484 |             cases
485 |
486 | to the
487 |
488 |             switch
489 |
490 | in
491 |
492 |             touchBar(\_:makeItemForIdentifier:)
493 |
494 | :
495 |
496 |
497 |
498 |
499 |
500 |
501 |
502 |                             case NSTouchBarItemIdentifier.ratingLabel: // 1 let customViewItem = NSCustomTouchBarItem(identifier:
503 |                             identifier) customViewItem.view = NSTextField(labelWithString: "Rating")
504 |                             return customViewItem case NSTouchBarItemIdentifier.ratingScrubber: //
505 |                             2 let scrubberItem = NSCustomTouchBarItem(identifier: identifier) let scrubber
506 |                             = NSScrubber() scrubber.scrubberLayout = NSScrubberFlowLayout() scrubber.register(NSScrubberTextItemView.self,
507 |                             forItemIdentifier: "RatingScrubberItemIdentifier") scrubber.mode = .fixed
508 |                             scrubber.selectionBackgroundStyle = .roundedBackground scrubber.delegate
509 |                             = self scrubber.dataSource = self scrubberItem.view = scrubber scrubber.bind("selectedIndex",
510 |                             to: self, withKeyPath: #keyPath(rating), options: nil) return scrubberItem
511 |
512 | |
513 |
514 |
515 |
516 |
517 |
518 | Step by step:
519 |
520 |
521 | -
522 | A new item was created to show a label for ratings.
523 |
524 | -
525 | Here, a custom item is created to hold an
526 |
527 |                 NSScrubber
528 |
529 | . This is a new control introduced for the Touch Bar. They behave similar
530 | to a slider, but can be customized specifically for working in the bar.
531 | Since scrubbers require a delegate to handle events, all you need to do
532 | here is set the
533 |
534 |                 delegate
535 |
536 | , which
537 |
538 | ViewController
539 |
540 | already has implemented for you.
541 |
542 |
543 |
544 | Build and run, and you’ll now see two new items in your Touch Bar. Notice
545 | that when you select an item from the scrubber, it will adjust the value
546 | in the app’s window.
547 |
548 |
549 |  553 |
553 |
554 |
555 | Segmented Controls
556 |
557 |
558 | Next, you’re going to add a segmented control to the application. Since
559 | this doesn’t work using the delegate pattern, you’ll get a chance to see
560 | how to set up a
561 |
562 | Target-Action
563 |
564 | within the Touch Bar. Back in
565 |
566 |             makeTouchBar()
567 |
568 | , you’ll need to add the last three items to
569 |
570 |             defaultItemIdentifiers
571 |
572 | :
573 |
574 |
575 |
576 |
577 |
578 |
579 |
580 |                             touchBar.defaultItemIdentifiers = [.infoLabelItem, .flexibleSpace, .ratingLabel,
581 |                             .ratingScrubber, .flexibleSpace, .visitedLabelItem, .visitedItem, .visitSegmentedItem]
582 |
583 | |
584 |
585 |
586 |
587 |
588 |
589 | And add the last three
590 |
591 |             cases
592 |
593 | to
594 |
595 |             touchBar(\_:makeItemForIdentifier:)
596 |
597 | :
598 |
599 |
600 |
601 |
602 |
603 |
604 |
605 |                             case NSTouchBarItemIdentifier.visitedLabelItem: // 1 let customViewItem
606 |                             = NSCustomTouchBarItem(identifier: identifier) customViewItem.view = NSTextField(labelWithString:
607 |                             "Times Visited") return customViewItem case NSTouchBarItemIdentifier.visitedItem:
608 |                             // 2 let customViewItem = NSCustomTouchBarItem(identifier: identifier)
609 |                             customViewItem.view = NSTextField(labelWithString: "--") customViewItem.view.bind("value",
610 |                             to: self, withKeyPath: #keyPath(visited), options: nil) return customViewItem
611 |                             case NSTouchBarItemIdentifier.visitSegmentedItem: // 3 let customActionItem
612 |                             = NSCustomTouchBarItem(identifier: identifier) let segmentedControl = NSSegmentedControl(images:
613 |                             [NSImage(named: NSImageNameRemoveTemplate)!, NSImage(named: NSImageNameAddTemplate)!],
614 |                             trackingMode: .momentary, target: self, action: #selector(changevisitedAmount(\_:)))
615 |                             segmentedControl.setWidth(40, forSegment: 0) segmentedControl.setWidth(40,
616 |                             forSegment: 1) customActionItem.view = segmentedControl return customActionItem
617 |
618 | |
619 |
620 |
621 |
622 |
623 |
624 | For each step:
625 |
626 |
627 | -
628 | This creates a simple label, just like in previous steps.
629 |
630 | -
631 | Here, you create another label, but you
632 |
633 | bind
634 |
635 | the value of the text to a property. Just like the scrubber, binding values
636 | to make updating Touch Bar items very easy.
637 |
638 | -
639 | Finally, you create a segmented control to be displayed in a touch bar
640 | item. You can see that setting up a target and action is just the same
641 | as it always is.
642 |
643 |
644 |
645 | Build and run, and you’ll see that you can interact with not only the
646 | scrubber, but the segmented control as well. Not only that, values changed
647 | in the Touch Bar are reflected in the window, and vice-versa.
648 |
649 |
650 |  654 |
654 |
655 |
656 | Colored Buttons
657 |
658 |
659 | Finally, it would be nice to give the user a chance to save using the
660 | Touch Bar. Since this button has a different outcome from the others, you’ll
661 | take advantage of the new
662 |
663 |             bezelColor
664 |
665 | property of
666 |
667 |             NSButton
668 |
669 | to give it some color.
670 |
671 |
672 | To do this, open
673 |
674 | TouchBarIdentifiers.swift
675 |
676 | , and in the
677 |
678 |             NSTouchBarItemIdentifier
679 |
680 | extension, add the following to the end:
681 |
682 |
683 |
684 |
685 |
686 |
687 |
688 |                             static let saveItem = NSTouchBarItemIdentifier("com.razeware.SaveItem")
689 |
690 | |
691 |
692 |
693 |
694 |
695 |
696 | This creates a new identifier from scratch, which will allow you to add
697 | a new button to the Touch Bar.
698 |
699 |
700 | Go back to
701 |
702 | ViewController.swift
703 |
704 | , and add a new
705 |
706 |             .flexSpace
707 |
708 | and
709 |
710 |             .saveItem
711 |
712 | to the touch bar’s
713 |
714 |             defaultItemIdentifiers
715 |
716 | :
717 |
718 |
719 |
720 |
721 |
722 |
723 |
724 |                             touchBar.defaultItemIdentifiers = [.infoLabelItem, .flexibleSpace, .ratingLabel,
725 |                             .ratingScrubber, .flexibleSpace, .visitedLabelItem, .visitedItem, .visitSegmentedItem,
726 |                             .flexibleSpace, .saveItem]
727 |
728 | |
729 |
730 |
731 |
732 |
733 |
734 | You’re almost done – all you have left is to handle configuring the new
735 | item. In
736 |
737 |             touchBar(\_:makeItemForIdentifier:)
738 |
739 | , add a final
740 |
741 |             case
742 |
743 | before
744 |
745 |             default
746 |
747 | :
748 |
749 |
750 |
751 |
752 |
753 |
754 |
755 |                             case NSTouchBarItemIdentifier.saveItem: let saveItem = NSCustomTouchBarItem(identifier:
756 |                             identifier) let button = NSButton(title: "Save", target: self, action:
757 |                             #selector(save(\_:))) button.bezelColor = NSColor(red:0.35, green:0.61,
758 |                             blue:0.35, alpha:1.00) saveItem.view = button return saveItem
759 |
760 | |
761 |
762 |
763 |
764 |
765 |
766 | Everything here should look pretty familiar to this point. All that is
767 | new is setting the
768 |
769 |             bezelColor
770 |
771 | to a familiar green :].
772 |
773 |
774 | Build and run, and you’ll see that you have a nice green button, and it
775 | has the same behavior as the
776 |
777 | Save
778 |
779 | button in the window.
780 |
781 |
782 |  786 |
786 |
787 |
788 | Where To Go From Here?
789 |
790 |
810 |
811 | You can download the final sample project
812 |
814 | here
815 |
816 | .
817 |
818 |
819 | That’s it for learning the basics of the Touch Bar. It should be pretty
820 | clear Apple wanted to make this easy for you to get started to quickly
821 | make these features available to your users.
822 |
823 |
824 | In this tutorial, you learned the following:
825 |
826 |
827 | -
828 | How to setup your app to show a Touch Bar
829 |
830 | -
831 | How to present static labels in a Touch Bar
832 |
833 | -
834 | How to add dynamic labels in a Touch Bar using binding
835 |
836 | -
837 | How to add controls to a Touch Bar, and handle their events
838 |
839 |
840 |
841 | Don’t stop with these examples! There are plenty of exciting features
842 | to be found within
843 |
844 |             NSTouchBar
845 |
846 | and
847 |
848 |             NSTouchBarItem
849 |
850 | . Try adding a popover to your Touch Bar, or see how easy it is to format
851 | text in your app. You can also check out creating Touch Bars in Interface
852 | Builder.
853 |
854 |
855 | If you have any questions, comments, or want to just want to rave (or
856 | complain) about the new MacBook Pro, please join the forum discussion below!
857 |
858 |
6 |
7 |
8 |  12 |
13 |
12 |
13 |
14 |
15 | Do you want to learn how to develop your own apps for macOS?
16 |
17 |
18 | Good news! Apple makes developing for macOS incredibly easy, and in this
19 | tutorial series you’ll learn how. You’ll learn how to create your first
20 | app for macOS — even if you’re a complete beginner.
21 |
22 |
23 | -
24 | In this first part you’ll first learn about how to obtain the tools you
25 | need to develop for macOS. Then, while creating a simple “Hello, World!”
26 | app, you’ll take a tour of Xcode, discovering how to run an app, edit code,
27 | design the UI and debug your code.
28 |
29 | -
30 | In Parts 2 & 3 of this series, you’ll create a more complex Egg Timer
31 | app and learn about the components that make up a macOS app, from how an
32 | app starts, to constructing the UI, all the way to handling user interaction.
33 |
34 |
35 |
36 | So what are you waiting for? The world of desktop apps awaits!
37 |
38 |
39 |
40 |
41 | Note:
42 |
43 | Here’s some guidance of where to begin with this series:
44 |
45 |
46 | -
47 | If you are new to Swift, this series assumes some Swift knowledge, so
48 | first check out our
49 |
50 | Swift tutorials
51 |
52 | to get a great introduction.
53 |
54 | -
55 | If you already have iOS experience, this first part of the series will
56 | be a review. Take a quick look through the topics to make sure and then
57 | skip straight ahead to the next part of the series.
58 |
59 | -
60 | Otherwise, keep reading. This series is for complete beginners – no experience
61 | of developing for iOS or macOS is required!
62 |
63 |
64 |
65 |
66 | Getting Started
67 |
68 |
69 | To become a macOS developer, you will need two things:
70 |
71 |
72 | -
73 | A Mac running macOS Sierra: The macOS operating system only runs on Apple
74 | computers, so you need a Mac both to develop and run macOS apps.
75 |
76 | -
77 | Xcode: This is the IDE used to create macOS apps. You’ll learn how to
78 | install this later in this section.
79 |
80 |
81 |
82 | Once you’ve built your app, if you want to upload it to the App Store
83 | for distribution, you’ll also need to pay for an Apple developer account.
84 | But this is not a requirement until you are ready to send your app out
85 | to the world, and even then, only if you want to distribute through the
86 | Mac App Store. If you already have a developer account for distributing
87 | iOS apps, then you are all set – Apple has merged the developer accounts
88 | so that you only need a single account to distribute apps for any Apple
89 | devices.
90 |
91 |
92 | Unlike some other platforms, developing for macOS requires the installation
93 | of just one tool: Xcode. Xcode is an IDE (Integrated Development Environment)
94 | that includes everything you need to develop macOS, iOS, watchOS and tvOS
95 | apps.
96 |
97 |
98 | If you don’t have Xcode already, click on the Apple icon in the upper
99 | left of your menu and select
100 |
101 | App Store…
102 |
103 | to open the Mac App Store. You will need an App Store account to download
104 | Xcode even though Xcode is free.
105 |
106 |
107 |  111 |
111 |
112 |
113 | Search for Xcode and click the
114 |
115 | Install
116 |
117 | button to start the download. Once it has downloaded and installed (which
118 | may take a while – it is quite large) open it from your
119 |
120 | Applications
121 |
122 | folder. The first time you run Xcode, and after every major update, it
123 | will ask you for permission to install additional components. Enter your
124 | password and allow Xcode to install these components.
125 |
126 |
127 |  131 |
131 |
132 |
133 | Hello World!
134 |
135 |
136 | Following the long-standing tradition when learning a new programming
137 | language or platform, you are going to start by creating a Hello World!
138 | app for macOS.
139 |
140 |
141 | Open Xcode if it is not already running. You should see a Welcome to Xcode
142 | window – if you don’t see it, choose
143 |
144 | Welcome to Xcode
145 |
146 | from the
147 |
148 | Window
149 |
150 | menu.
151 |
152 |
153 |  157 |
157 |
158 |
159 | Click
160 |
161 | Create a new Xcode project
162 |
163 | and when the next dialog appears, choose
164 |
165 | macOS
166 |
167 | from the tabs across the top. Select
168 |
169 | Cocoa Application
170 |
171 | from inside the
172 |
173 | Application
174 |
175 | section and click
176 |
177 | Next
178 |
179 | .
180 |
181 |
182 |  186 |
186 |
187 |
188 | Give your new app a name –
189 |
190 | HelloWorld
191 |
192 | – make sure that the language is set to
193 |
194 | Swift
195 |
196 | and that
197 |
198 | Use Storyboards
199 |
200 | is checked. Uncheck all the other options.
201 |
202 |
203 |  207 |
207 |
208 |
209 | Click
210 |
211 | Next
212 |
213 | and
214 |
215 | Create
216 |
217 | to save your new app project.
218 |
219 |
220 | Running Your App
221 |
222 |
223 | Xcode has created the basic template for your app with all the required
224 | files. At this stage, it is fun to run the app and see how much you get
225 | for free.
226 |
227 |
228 | Click the
229 |
230 | Play
231 |
232 | button in the toolbar to run the app or use the
233 |
234 | Command-R
235 |
236 | shortcut. Xcode will now compile all of the code into machine code, bundle
237 | up the resources required by the app and then execute it.
238 |
239 |
240 |  244 |
244 |
245 |
246 |
247 |
248 | Note:
249 |
250 | The first time you ever build and run an app in Xcode, you might be asked
251 | whether you want to
252 |
253 | Enable Developer Mode on this Mac
254 |
255 | . You’re safe to select
256 |
257 | Enable
258 |
259 | , at which point you may have to enter your password. Developer mode allows
260 | Xcode to attach a debugger to running processes – which will be extremely
261 | useful when building your application!
262 |
263 |
264 |
265 | You should now see a blank window but don’t be disappointed – have a look
266 | at what you can already do:
267 |
268 |
269 | -
270 | The window is resizable, it can be minimized and made full screen.
271 |
272 | -
273 | There is a complete set of menus, many of which already work without you
274 | doing anything.
275 |
276 | -
277 | The Dock icon has the usual menus.
278 |
279 |
280 |
281 |  285 |
285 |
286 |
287 | But now it’s time for you to make the display a bit more interesting,
288 | so quit the app and go back to Xcode.
289 |
290 |
291 | The Xcode Interface
292 |
293 |
294 | Xcode packs a lot of features into a small package, so not everything
295 | is visible at one time. To be an efficient Xcode user, you need to know
296 | where everything is — and how to get to it.
297 |
298 |
299 | When you open a new project in Xcode, you have a window with a toolbar
300 | and three main panels.
301 |
302 |
303 |  307 |
307 |
308 |
309 | The left panel is the
310 |
311 | Navigator
312 |
313 | panel and has 8 display options across the top. The one you will mostly
314 | use is the first one –
315 |
316 | Project
317 |
318 | – which lists all the files in your project and allows you to click on
319 | any one to edit it.
320 |
321 |
322 | The center panel is the
323 |
324 | Editor
325 |
326 | panel and will display whatever you have selected from the
327 |
328 | Project Navigator
329 |
330 | .
331 |
332 |
333 | The right panel is the
334 |
335 | Utilities
336 |
337 | panel and it will vary depending on what you are looking at in the
338 |
339 | Editor
340 |
341 | panel.
342 |
343 |
344 | Adding the UI
345 |
346 |
347 | You design the user interface using a Storyboard. Your app already has
348 | a storyboard, so go to the
349 |
350 | Project Navigator
351 |
352 | and click on
353 |
354 | Main.storyboard
355 |
356 | to show it in the Editor panel.
357 |
358 |
359 | Your display has just changed dramatically! In the Editor panel, you can
360 | now see the Document Outline and the visual editor for the UI.
361 |
362 |
363 | Have a look at the things you can see in the visual editor. There are
364 | three main areas, each of which also has a textual representation in the
365 | Document Outline:
366 |
367 |
368 | -
369 |
370 | Application Scene
371 |
372 | : The menu bar and items.
373 |
374 | -
375 |
376 | Window Controller Scene
377 |
378 | : Configures how the window will behave.
379 |
380 | -
381 |
382 | View Controller Scene
383 |
384 | : Where your UI elements will go.
385 |
386 |
387 |
388 | In the
389 |
390 | Utilities
391 |
392 | panel, you see a top section with 8 tabs and a bottom section with 4 tabs.
393 |
394 |
395 | The bottom section switches between various things you can insert into
396 | your project. Right now you want to insert UI elements, so select the
397 |
398 | Object library
399 |
400 | which is the third from the left.
401 |
402 |
403 | In the filter at the bottom, type “text” to reduce the number of choices,
404 | and drag a
405 |
406 | Text Field
407 |
408 | into your
409 |
410 | View Controller Scene
411 |
412 | .
413 |
414 |
415 |  419 |
419 |
420 |
421 | Now filter for “button” and drag a
422 |
423 | Push Button
424 |
425 | into the
426 |
427 | View Controller Scene
428 |
429 | . Finally, add a
430 |
431 | Label
432 |
433 | .
434 |
435 |
436 | Now, build and run the app using the
437 |
438 | Play
439 |
440 | button or
441 |
442 | Command-R
443 |
444 | . You will see these 3 UI elements. Try typing in the text field – it
445 | already supports all the standard editing shortcuts: copy, paste, cut,
446 | select all, undo, redo and so on. But the button does nothing, and the
447 | label just shows “Label”, so it is time to make things more interactive.
448 |
449 |
450 |  454 |
454 |
455 |
456 | Configuring the UI
457 |
458 |
459 | Go back to
460 |
461 | Main.storyboard
462 |
463 | and click on the button to select it. In the
464 |
465 | Utilities
466 |
467 | panel on the right, make sure the
468 |
469 | Attributes Inspector
470 |
471 | is showing – the 4th button across the top.
472 |
473 |
474 | Change the title of the button to “Say Hello”. The button may not be wide
475 | enough to show all the text, so go to the
476 |
477 | Editor
478 |
479 | menu and select
480 |
481 | Size to Fit Content
482 |
483 | which should fix that. (If Size to Fit Content is disabled, click somewhere
484 | to de-select the button, then re-select it and try again.)
485 |
486 |
487 |  491 |
491 |
492 |
493 | Now click in the text field to select it. For this app, the user is going
494 | to type their name in here, and when they click the button, the app will
495 | show “Hello name-goes-here!” in the label. To help the users, add some
496 | placeholder text to the text field using the
497 |
498 | Attributes Inspector
499 |
500 | .
501 |
502 |
503 | Stretch the text field out a bit to allow for long names and position
504 | the button to the right of it. When dragging objects around in the
505 |
506 | View Controller Scene
507 |
508 | , blue lines will appear to help you align and position the objects based
509 | on Apple’s Human Interface Guidelines.
510 |
511 |
512 |  516 |
516 |
517 |
518 | Position the label below the text field and button. Since the label is
519 | going to be important, make it use a larger font. Select the label and
520 | in the
521 |
522 | Attributes Inspector
523 |
524 | , change the font to
525 |
526 | System Regular 30
527 |
528 | .
529 |
530 |
531 |  535 |
535 |
536 |
537 | How about making the text red to add even more excitement?
538 |
539 |
540 |  544 |
544 |
545 |
546 | You can’t tell how long a name a user might enter, so resize the field
547 | to fit the height of that font and to almost fill the width of the window.
548 |
549 |
550 | Build & run the app to check that your UI changes have taken effect.
551 | Once you are happy with the look of the text in the label, delete the label’s
552 |
553 | Title
554 |
555 | so that the label starts off empty.
556 |
557 |
558 |  562 |
562 |
563 |
564 | Connecting the UI to the code
565 |
566 |
567 | Your app still doesn’t do what you want, but in order for that to work,
568 | you need to start adding code and that code has to be able to communicate
569 | with the UI. To make those linkages, you are going to use Xcode’s
570 |
571 | Assistant Editor
572 |
573 | . With the
574 |
575 | Main.storyboard
576 |
577 | visible, option-click on
578 |
579 | ViewController.swift
580 |
581 | in the
582 |
583 | Project Navigator
584 |
585 | . This will create a second editor panel containing the ViewController
586 | code.
587 |
588 |
589 | Depending on the size of your monitor, things may be looking a bit cramped
590 | now, so use the rightmost button in the Toolbar to hide the Utilities.
591 | If you need even more space, hide the Navigator.
592 |
593 |
594 |  598 |
598 |
599 |
600 | Select the text field. Hold down the Control key and drag from the text
601 | field into the top of the
602 |
 603 |             ViewController
 604 |
605 | class definition. Let go and enter
606 |
 607 |             nameField
 608 |
609 | in the name box of the popup, then click
610 |
611 | Connect
612 |
613 | .
614 |
615 |
616 |  620 |
620 |
621 |
622 | Do the same with the label, naming it
623 |
 624 |             helloLabel
 625 |
626 | .
627 |
628 |
629 | Looking at the code that Xcode has generated, you see that these are both
630 | marked with
631 |
 632 |             @IBOutlet
 633 |
634 | . This is short for Interface Builder Outlet and is how you tell the storyboard
635 | editor that these object names are available for linking to a visual object.
636 |
637 |
638 | For the button, the code does not need to have a name for it, but it does
639 | need to know when a user clicks the button. This calls for an
640 |
 641 |             @IBAction
 642 |
643 | instead of an
644 |
 645 |             @IBOutlet
 646 |
647 | .
648 |
649 |
650 | Select the button and Control-Drag into
651 |
652 | ViewController.swift
653 |
654 | as before. This time, change the
655 |
656 | Connection
657 |
658 | popup to
659 |
660 | Action
661 |
662 | and set the name to
663 |
 664 |             sayButtonClicked
 665 |
666 | . This creates the function that will be called when the button is clicked.
667 |
668 |
669 |  673 |
673 |
674 |
675 | Everything is now in place to edit the code. Close the
676 |
677 | Assistant Editor
678 |
679 | using the X in the top right corner and switch to
680 |
681 | ViewController.swift
682 |
683 | . If you had hidden the
684 |
685 | Navigator
686 |
687 | , click the toggle button in the top right, or press
688 |
689 | Command-1
690 |
691 | to jump directly to the
692 |
693 | Project Navigator
694 |
695 | .
696 |
697 |
698 | Enter the following code into
699 |
 700 |             sayButtonClicked
 701 |
702 | .
703 |
704 |
705 |
706 |
707 |
708 |
709 |
 710 |                             var name = nameField.stringValue if name.isEmpty { name = "World" } let
 711 |                             greeting = "Hello \(name)!" helloLabel.stringValue = greeting
 712 |
713 | |
714 |
715 |
716 |
717 |
718 |
719 | The complete code in
720 |
721 | ViewController.swift
722 |
723 | now looks like this (after deleting the usual copyright notices at the
724 | top). The blobs beside the line numbers indicate a connection to the interface
725 | in the storyboard.
726 |
727 |
728 |  732 |
732 |
733 |
734 | Build and run the app.
735 |
736 |
737 | Click the
738 |
739 | Say Hello
740 |
741 | button without entering anything and you will see “Hello World!”. Now
742 | type in your name and click the button again to see your own personal greeting.
743 |
744 |
745 |  749 |
749 |
750 |
751 | Debugging
752 |
753 |
754 | Sometimes, we programmers make mistakes – hard to believe I know, but
755 | trust me, it happens. And when it does, we need to be able to debug our
756 | code. Xcode allows us to stop the code at any point and step through line
757 | by line, checking the values of the variables at each point so that we
758 | can find the error.
759 |
760 |
761 | Go to
762 |
 763 |             sayButtonClicked
 764 |
765 | in
766 |
767 | ViewController.swift
768 |
769 | and click on the line number beside the
770 |
 771 |             var name =
 772 |
773 | line. A blue pointed rectangle will appear. This is an active breakpoint
774 | and when you click the button, the debugger will stop here. Click it again
775 | and it will turn pale blue. It is now an inactive breakpoint and will not
776 | stop the code and start the debugger. To remove the breakpoint completely,
777 | drag it out of the line numbers gutter.
778 |
779 |
780 |  784 |
784 |
785 |
786 | Add the breakpoint again and run the app. Click the
787 |
788 | Say Hello
789 |
790 | button. Xcode will come to the front with the breakpoint line of code
791 | highlighted. In the bottom of the
792 |
793 | Editor
794 |
795 | panel, there will now be two new sections:
796 |
797 | Variables
798 |
799 | and
800 |
801 | Console
802 |
803 | . The
804 |
805 | Variables
806 |
807 | section shows the variables used in this function as well as
808 |
 809 |             self
 810 |
811 | – the View Controller, and
812 |
 813 |             sender
 814 |
815 | – the button.
816 |
817 |
818 |  822 |
822 |
823 |
824 | Above the
825 |
826 | Variables
827 |
828 | display is a set of buttons for controlling the debugger. Mouse over each
829 | one and read the tooltop to see what it does. Click the
830 |
831 | Step Over
832 |
833 | button to move to the next line.
834 |
835 |
836 | In the
837 |
838 | Variables
839 |
840 | display, you can check that
841 |
 842 |             name
 843 |
844 | is an empty string, so click
845 |
846 | Step Over
847 |
848 | twice more. The debugger will move into and through the
849 |
 850 |             if
 851 |
852 | statement and set the
853 |
 854 |             name
 855 |
856 | variable to “World”.
857 |
858 |
859 | Select the
860 |
 861 |             name
 862 |
863 | variable in the
864 |
865 | Variables
866 |
867 | display and click the
868 |
869 | Quick Look
870 |
871 | button below to see the contents. Now click the
872 |
873 | Print Description
874 |
875 | button to see the information printed in the
876 |
877 | Console
878 |
879 | . If the “World” value had not been set correctly, you would have been
880 | able to see that here and work out how to fix your code.
881 |
882 |
883 |  887 |
887 |
888 |
889 | When you have checked the contents of the name variable, click the
890 |
891 | Continue program execution
892 |
893 | button to stop debugging and let the program move on. Use the button in
894 | the top right to hide the Debug area.
895 |
896 |
897 | Images
898 |
899 |
900 | In addition to code and user interfaces, your app will also need some
901 | artwork. Due to the different screen types (Retina and non-Retina), you
902 | often need to provide multiple versions of each asset. To simplify this
903 | process, Xcode uses
904 |
905 | Asset Libraries
906 |
907 | to store and organize the assets that accompany the app.
908 |
909 |
910 | In the
911 |
912 | Project Navigator
913 |
914 | , click on
915 |
916 | Assets.xcassets
917 |
918 | . The only item there so far is
919 |
920 | AppIcon
921 |
922 | which will contain the various images needed to display the app icon in
923 | all the required resolutions. Click on
924 |
925 | AppIcon
926 |
927 | – you can see that it wants 10 different images to cover all the possibilities,
928 | but if you supply any one of these, Xcode will use it as best it can. This
929 | is not good practice, as you should supply all the required icon sizes,
930 | but for this tutorial one icon will be sufficient.
931 |
932 |
933 | Download the
934 |
935 | sample icon
936 |
937 | which is a 512 x 512 pixel image. Drag it into the
938 |
939 | Mac 512pt 1x
940 |
941 | box.
942 |
943 |
944 |  948 |
948 |
949 |
950 | Build and run the app to see the icon in the Dock menu. If you still see
951 | the default app icon, quit the HelloWorld app, go back to Xcode and choose
952 |
953 | Clean
954 |
955 | from the
956 |
957 | Product
958 |
959 | menu, then run the app again.
960 |
961 |
962 |  964 |
964 |
965 |
966 | Getting Help
967 |
968 |
969 | As well as being an editor, Xcode also contains all the documentation
970 | you will need for writing macOS apps.
971 |
972 |
973 | Go to the
974 |
975 | Help
976 |
977 | menu and choose
978 |
979 | Documentation and API Reference
980 |
981 | . Search for
982 |
983 | NSButton
984 |
985 | . Make sure Swift is the selected language, then click the top search
986 | result so that you can read all the details about buttons and button properties.
987 |
988 |
989 |  993 |
993 |
994 |
995 | There is also a way to get to relevant documentation directly from your
996 | code. Go back to
997 |
998 | ViewController.swift
999 |
1000 | and find the first line in
1001 |
1002 |             sayButtonClicked
1003 |
1004 | .
1005 |
1006 | Option-click
1007 |
1008 | on the word
1009 |
1010 |             stringValue
1011 |
1012 | . A popup appears with a short description. At the bottom of the popup
1013 | is a link to
1014 |
1015 | Property Reference
1016 |
1017 | . Click this link and the documentation will open to show more information.
1018 |
1019 |
1020 |  1024 |
1025 |
1026 |
1027 | Option-clicking
1028 |
1029 | is often a really good way to learn, and you can even add documentation
1030 | to your own functions so that it shows up in the same way.
1031 |
1032 |
1033 | The
1034 |
1035 | Help
1036 |
1037 | menu also includes
1038 |
1039 | Xcode Help
1040 |
1041 | for specific information about the Xcode environment.
1042 |
1043 |
1044 | Where to Go From Here?
1045 |
1046 |
1066 |
1067 | In the
1068 |
1069 | next part
1070 |
1071 | of this tutorial series, you will start to create a more complicated app.
1072 | Hope to see you there!
1073 |
1074 |
1075 | If you have any questions or comments on this tutorial series, please
1076 | join the discussion below!
1077 |
1078 |
6 |
7 |
9 |  13 |
14 |
13 |
14 |
15 |
16 | 单元测试是我们都深深知道需要去做的事之一,但看起来非常得困难和无聊,是一个很辛苦的工作。
17 |
18 |
19 | 编写代码去完成令人激动的事情是多么得有趣,为何人们要花费一半的时间编写代码只是为了进行测试?
20 |
21 |
22 | 为了
23 |
24 | 把握性
25 |
26 | !在本教程中,你将学习如何测试你的代码,以此增强对代码能够正确完成你所期望事情,适应变化,不造成问题的把握力。
27 |
28 |
29 | 入门
30 |
31 |
32 | 本项目使用Swift 3语言,Xcode 8 beta 6以上版本。下载
33 |
35 | 起始项目
36 |
37 | 并打开。
38 |
39 |
40 | 假如你已完成过raywenderlich.com中这里的其它教程,你可能会期望拿到这里运行。但这次不会去测试这些。点击
41 |
42 | Product
43 |
44 | 菜单并选择
45 |
46 | Test
47 |
48 | 。注意快捷键 —
49 |
50 | Command-U
51 |
52 | — 你将在本教程中使用多次。
53 |
54 |
55 | 当你运行测试时,Xcode将构建app,你会看到几秒钟app的窗口,然后才给出信息“Test Succeeded”。在左侧的
56 |
57 | Navigator
58 |
59 | 面板中,选择
60 |
61 | Test navigator
62 |
63 | 。
64 |
65 |
66 |  70 |
70 |
71 |
72 | 这里展示了默认添加的三个测试;每个的旁边都有一个绿色的标记,表示该测试已通过。要查看包含这些测试的文件,可以点击
73 |
74 | Test Navigator
75 |
76 | 中的第二行
77 |
78 | High RollerTests
79 |
80 | ,它带有一个大写T的图标,表示其层级更高。
81 |
82 |
83 |  87 |
87 |
88 |
89 | 这里有一些很重要的事值得注意:
90 |
91 |
92 | -
93 | 导入的
94 |
95 | XCTest
96 |
97 | 是由Xcode提供的测试框架。
98 |
  99 |                 @testable import High_Roller
 100 |
101 | 则让代码可以访问
102 |
 103 |                 High_Roller
 104 |
105 | 模块中的所有代码。每个测试文件都需要这样的两个导入。
106 |
107 | -
108 |
 109 |                 setup()
 110 |
111 | 和
112 |
 113 |                 tearDown()
 114 |
115 | :两个方法会在:
116 |
117 | 每个单个的
118 |
119 | 测试方法被调用之前和之后调用。
120 |
121 | -
122 |
 123 |                 testExample()
 124 |
125 | 和
126 |
 127 |                 testPerformanceExample()
 128 |
129 | :实际的测试。第一个测试功能,第二个则测试性能。每个测试方法的名称都必须以:
130 |
 131 |                 test
 132 |
133 | 开头,这样才能被Xcode识别为一个测试的方法去执行。
134 |
135 |
136 |
137 | 神马是单元测试?
138 |
139 |
140 | 在你开始编写你的测试之前,我们需要进行一个简短的讨论,单元测试到底是什么,你为何应当使用它。
141 |
142 |
143 | 单元测试是用来测试你的一段代码的功能。它并不包含在你的app之中,但可以在开发期间测试代码是否符合你的期望。
144 |
145 |
146 | 对于单元测试,常见的第一反应是:“你要我写
147 |
148 | 两次
149 |
150 | 的代码?一次为了app本身,
151 |
152 | 另一次
153 |
154 | 则用来测试这个方法?”实际上有可能比这更糟 — 一些项目的测试代码可能会比产品本身的代码
155 |
156 | 更多
157 |
158 | 。
159 |
160 |
161 | 首先,看起来这非常浪费时间和精力 — 但当一个测试捕捉到了你之前未注意过的问题,或警告你出现了副作用的时候,你就会明白它是一个多么棒的工具了。慢慢地,你就会感到一个没有单元测试的项目是多么得脆弱,你做出任何的改动都会顾虑重重,因为你无法确定将会发生什么。
162 |
163 |
164 | 测试驱动开发
165 |
166 |
167 | 测试驱动开发(Test Driven Development TDD)是单元测试的一个分支,你会从这里开始测试,且只编写测试所需求的代码。这一开始看起来是个非常奇怪的处理方式,且会产生一些非常奇怪的代码。但最终你会发现,它可以在你编码之前帮助你思考编码的目的。
168 |
169 |
170 | TDD有三个重复的步骤:
171 |
172 |
173 | -
174 |
175 | 红色
176 |
177 | :编写一个失败的测试。
178 |
179 | -
180 |
181 | 绿色
182 |
183 | :编写可以使测试通过的最小代码集。
184 |
185 | -
186 |
187 | 重构
188 |
189 | :可选的步骤;如果一个任何的app或测试代码可以通过重构来让它变得更好,那就这么做。
190 |
191 |
192 |
193 | 对于有效的TDD,顺序是非常重要和关键的。修复一个失败的测试,可以帮助你了解代码到底在做什么。如果你的测试在没有任何新编写代码的情况下,第一次就通过了,你就无法确知下一阶段的开发该做些什么。
194 |
195 |
196 | 开始,你将使用TDD编写一系列测试和伴随的代码。
197 |
198 |
199 |  203 |
203 |
204 |
205 | 测试项目
206 |
207 |
208 | 这个项目是棋盘玩家的投骰子工具。有过和家人坐在一起玩游戏,但发现骰子却被狗吃了的经历么?这个App可以帮助你解决烦恼。如果有人说“我不相信计算机不会作弊!”你就可以自豪地说这个app已通过了单元测试,证明它可以正确地工作。这一定会给你的家人留下深刻的印象 — 让你们今晚的游戏可以继续下去。:]
209 |
210 |
211 | 这个app的model包含两个主要的对象类型:一个是
212 |
 213 |             Dice
 214 |
215 | ,它包含一个
216 |
 217 |             value
 218 |
219 | property和一个用来生成任意值的方法;另一个是
220 |
 221 |             Roll
 222 |
223 | ,它含有一个
224 |
 225 |             Dice
 226 |
227 | 对象的集合,并附有一起滚动骰子,计算总值等等的方法。
228 |
229 |
230 | 第一个测试类针对的是
231 |
 232 |             Dice
 233 |
234 | 对象类型。
235 |
236 |
237 | Dice测试类
238 |
239 |
240 | 在Xcode中切到
241 |
242 | File Navigator
243 |
244 | 并选择
245 |
246 | High RollerTests
247 |
248 | 组。选择
249 |
250 | File/New/File…
251 |
252 | ,然后点击
253 |
254 | macOS/Unit Test Case Class
255 |
256 | 。点击
257 |
258 | Next
259 |
260 | 并将类命名为
261 |
 262 |             DiceTests
 263 |
264 | 。语言设为Swift。点击
265 |
266 | Next
267 |
268 | 及
269 |
270 | Create
271 |
272 | 。
273 |
274 |
275 | 选择类内部的全部代码并删除。添加下列的代码到
276 |
277 | DiceTests.swift
278 |
279 | 中,就在
280 |
 281 |             import XCTest
 282 |
283 | 这行的下方:
284 |
285 |
@testable import High_Roller
 286 |
287 |
288 | 现在你就可以删除
289 |
290 | HighRollerTests.swift
291 |
292 | 了,因为你不再需要默认的测试。
293 |
294 |
295 | 第一件要测试的事是
296 |
 297 |             Dice
 298 |
299 | 对象可否被创建。
300 |
301 |
302 | 你的第一个测试
303 |
304 |
305 | 在
306 |
307 | DiceTests
308 |
309 | 类中,添加下列的测试方法:
310 |
311 |
  func testForDice() {
 312 |     let _ = Dice()
 313 |   }
 314 |
315 |
316 | 在你运行测试之前,这里会爆出一个编译错误:
317 |
 318 |             "Use of unresolved identifier 'Dice'"
 319 |
320 | 。在TDD中,一个未能编译通过的测试会被认做是失败的测试,因此你现在只是完成了TDD顺序中的第一步。
321 |
322 |
323 | 要用最少的代码使这里的代码测试通过,切到
324 |
325 | File Navigator
326 |
327 | ,并在主
328 |
329 | High Roller
330 |
331 | 组中选择
332 |
333 | Model
334 |
335 | 组。点击
336 |
337 | File/New/File…
338 |
339 | 创建一个新的Swift文件并命名为
340 |
341 | Dice.swift
342 |
343 | 。
344 |
345 |
346 | 添加下列的代码到文件中:
347 |
348 |
struct Dice {
 349 |
 350 | }
 351 |
352 |
353 | 回到
354 |
355 | DiceTests.swift
356 |
357 | ,在下次构建之前,错误并不会消失。然而,你现在可以以几种不同的方式来运行测试。
358 |
359 |
360 | 如果你点击测试方法旁边的菱形,就
361 |
362 | 只会运行这一个测试
363 |
364 | 。现在尝试一把,菱形就会变成绿色的勾,表示这个测试已通过。
365 |
366 |
367 | 任何时候,你都可以点击这个绿色的标记(或表示失败测试的红色标记)来运行测试。这时在类名旁边就会出现另一个绿色的标记。点击它就会运行
368 |
369 | 在这个类中的
370 |
371 | 所有测试。此刻点击它和运行单个测试还没有什么区别,但很快就会发生变化。
372 |
373 |
374 | 测试你代码的最后一种方式就是运行所有的测试。
375 |
376 |
377 |  381 |
381 |
382 |
383 | 按下
384 |
385 | Command-U
386 |
387 | 键就可以运行全部的测试,然后切到
388 |
389 | Test Navigator
390 |
391 | ,你就可以在High RollerTests部分看到你单个的测试。可能你需要将此部分展开才能看到。绿色的勾会出现在每个测试的旁边。如果你将鼠标指针在列表中上下移动,你就会看到出现了小小的播放按钮,你可以点击它来运行任意测试或测试的集合。
392 |
393 |
394 | 在
395 |
396 | Test Navigator
397 |
398 | 中,你看到
399 |
400 | High RollerUITests
401 |
402 | 也会被运行。带有UI测试的问题是会变慢。你希望你的测试能够尽可能地快,以便频繁地进行测试。要解决这个问题,就需要编辑scheme来使得UI测试不会自动运行。
403 |
404 |
405 | 在工具栏scheme的弹出菜单中选择
406 |
407 | Edit scheme…
408 |
409 | 。点击左侧面板中的. Click
410 |
411 | Test
412 |
413 | ,然后取消勾选
414 |
415 | High RollerUITests
416 |
417 | 。关闭scheme的窗口,然后按
418 |
419 | Command-U
420 |
421 | 键再次运行你的测试。这时在
422 |
423 | Test Navigator
424 |
425 | 中,你就会发现UI测试不会再被自动执行了,但仍然可以手动地让它执行。
426 |
427 |
428 |  432 |
432 |
433 |
434 | 选择运行哪个测试
435 |
436 |
437 | 我们应当选择哪个方法来运行测试?单个,类中,或是全部?
438 |
439 |
440 | 如果你正基于某一个测试工作,通常就选择测试它本身或所在的整个类。通过一个测试后,检查它是否对其它的东西造成了破坏就变得非常关键,因此你应当在这时执行一次完整的测试。
441 |
442 |
443 | 为了进展得更容易些,在
444 |
445 | primary editor
446 |
447 | 中打开
448 |
449 | DiceTests.swift
450 |
451 | ,而在
452 |
453 | assistant editor
454 |
455 | 中打开
456 |
457 | Dice.swift
458 |
459 | 。这是一个非常方便的工作方式,便于完成TDD的序列。
460 |
461 |
462 | 这就完成了TDD序列的第二个步骤。由于没有进行过重构,因此现在就应当返回步骤一,来编写另一个失败的测试。
463 |
464 |
465 | 测试nil
466 |
467 |
468 | 每个
469 |
470 | Dice
471 |
472 | 对象都有一个
473 |
 474 |             value
 475 |
476 | ,当
477 |
478 | Dice
479 |
480 | 被初始化时,它的值应当为
481 |
 482 |             nil
 483 |
484 | 。
485 |
486 |
487 | 添加下列的测试到
488 |
489 | DiceTests.swift
490 |
491 | 中:
492 |
493 |
494 | func testValueForNewDiceIsNil() {
495 | let testDie = Dice()
496 |
497 | XCTAssertNil(testDie.value, "Die value should be nil after init")
498 | }
499 |
500 |
501 | 上述的测试:
502 |
503 |
504 | -
505 | 方法的名称以
506 |
 507 |                 'test'
 508 |
509 | 开头,而剩余的部分则表明测试什么。
510 |
511 | -
512 | 本测试使用
513 |
 514 |                 XCTAssert
 515 |
516 | 方法之一来确认value是
517 |
 518 |                 nil
 519 |
520 | 。
521 |
 522 |                 XCTAssertNil()
 523 |
524 | 方法的第二个参数是一个可选的字符串,当测试失败的时候,用来提供错误信息。我通常偏好使用描述性较强的方法名称,而将这个参数置空,来保持实际测试的代码整洁易读。
525 |
526 |
527 |
528 | 这个测试代码会产生一个编译错误:
529 |
 530 |             “Value of type 'Dice' has no member 'value'”
 531 |
532 | 。
533 |
534 |
535 | 为修复这个错误,在
536 |
537 | Dice.swift
538 |
539 | 中添加下列的property声明到
540 |
 541 |             Dice
 542 |
543 | 的结构体中:
544 |
545 |
  var value: Int?
 546 |
547 |
548 | 在app构建之前,
549 |
550 | DiceTests.swift
551 |
552 | 中的编译错误并不会消失。按下
553 |
554 | Command-U
555 |
556 | 键来构建app并运行测试,这时测试就应该通过了。此时这里就没有需要重构的地方了。
557 |
558 |
559 | 每个
560 |
 561 |             Dice
 562 |
563 | 对象都应该可以“滚动”并生成它的value。添加下一个测试到
564 |
565 | DiceTests.swift
566 |
567 | 中:
568 |
569 |
  func testRollDie() {
 570 |     var testDie = Dice()
 571 |     testDie.rollDie()
 572 |     XCTAssertNotNil(testDie.value)
 573 |   }
 574 |
575 |
576 | 这个测试使用了
577 |
 578 |             XCTAssertNotNil()
 579 |
580 | 方法来替换之前测试中的
581 |
 582 |             XCTAssertNil()
 583 |
584 | 。
585 |
586 |
587 | 由于Dice结构体还没有
588 |
 589 |             rollDie()
 590 |
591 | 方法,此时必然就会出现另一个编译错误。为了修复它,切回到
592 |
593 | Assistant Editor
594 |
595 | 中,并添加下列代码到
596 |
597 | Dice.swift
598 |
599 | 中:
600 |
601 |
  func rollDie() {
 602 |
 603 |   }
 604 |
605 |
606 | 运行测试,你会看到一个警告,关于使用
607 |
 608 |             var
 609 |
610 | 来替换
611 |
 612 |             let
 613 |
614 | ,以及一个
615 |
 616 |             XCTAssert
 617 |
618 | 这次将会失败的提示。这是讲得通的,因为
619 |
 620 |             rollDie()
 621 |
622 | 到现在还未做任何事。将
623 |
 624 |             rollDie()
 625 |
626 | 修改为如下的代码:
627 |
628 |
  mutating func rollDie() {
 629 |     value = 0
 630 |   }
 631 |
632 |
633 | 现在你已明白了TDD如何产生一些奇怪的代码。你很清楚
634 |
 635 |             Dice
 636 |
637 | 结构体最终产生的是随机的值,但由于目前为止,你还没有编写测试来验证这点,因此这个方法还是能够通过目前测试的最小代码集。再次运行测试来证明这点。
638 |
639 |
640 | Developing to Tests
641 |
642 |
643 | 拓宽你的思路 — 接下来的几个测试旨在塑造你代码的组织方式。开始你会感到是不又要返工了,但实际上这是让你可以聚焦在你代码真实意图的强有力的方式。
644 |
645 |
646 | 一个标准的骰子有6个面,因此任意一次滚动得出的值都应该在一和六之间。切到
647 |
648 | DiceTests.swift
649 |
650 | 并添加下列的测试,现在又引入了两个
651 |
 652 |             XCTAssert
 653 |
654 | 方法:
655 |
656 |
  func testDiceRoll_ShouldBeFromOneToSix() {
 657 |     var testDie = Dice()
 658 |     testDie.rollDie()
 659 |     XCTAssertTrue(testDie.value! >= 1)
 660 |     XCTAssertTrue(testDie.value! <= 6)
 661 |     XCTAssertFalse(testDie.value == 0)
 662 |   }
 663 |
664 |
665 |  667 |
667 |
668 |
669 | 运行测试,现在两个断言都会失败。修改
670 |
 671 |             rollDie()
 672 |
673 | 方法,将
674 |
 675 |             value
 676 |
677 | 设置为1。这次就可以通过测试了,但这样的骰子仍没神马用处!:]
678 |
679 |
680 | 换一个思路,我们何不测试滚动骰子多次,然后统计生成的每种value的个数?可能无法做到完美,但一个足够大的样本数量应该可以足够接近你的测试意图。
681 |
682 |
683 | 在
684 |
685 | DiceTests.swift
686 |
687 | 中添加另一个测试:
688 |
689 |
func testRollsAreSpreadRoughlyEvenly() {
690 | var testDie = Dice()
691 | var rolls: [Int: Double] = [:]
692 |
693 | let rollCounter = 600.0
694 | for _ in 0 ..< Int(rollCounter) {
695 | testDie.rollDie()
696 | guard let newRoll = testDie.value else {
697 |
698 | XCTFail()
699 | return
700 | }
701 |
702 | if let existingCount = rolls[newRoll] {
703 | rolls[newRoll] = existingCount + 1
704 | } else {
705 | rolls[newRoll] = 1
706 | }
707 | }
708 |
709 | XCTAssertEqual(rolls.keys.count, 6)
710 |
711 | for (key, roll) in rolls {
712 | XCTAssertEqualWithAccuracy(roll,
713 | rollCounter / 6,
714 | accuracy: rollCounter / 6 * 0.3,
715 | "Dice gave \(roll) x \(key)")
716 | }
717 | }
718 |
719 |
720 | 上述的测试代码:
721 |
722 |
723 | -
724 |
 725 |                 rollCounter
 726 |
727 | 指示骰子将被滚动的次数。我们认为相应于每个期望的数字滚动100次是一个大致合理的样本数量。
728 |
729 | -
730 | 如果任何一次循环后value没有值,测试会失败并立刻退出。
731 |
 732 |                 XCTFail()
 733 |
734 | 类似于一个断言,它永远都不会通过,非常适合于
735 |
 736 |                 guard
 737 |
738 | 语句搭配使用。
739 |
740 | -
741 | 每次滚动之后,你都将结果保存到一个字典中。
742 |
743 | -
744 | 这个断言确定字典中有六个key,它们都是滚动骰子所期望得到的数字。
745 |
746 | -
747 | 这个测试使用了一个新的断言:
748 |
 749 |                 XCTAssertEqualWithAccuracy()
 750 |
751 | ,它可以进行不精确的比较。由于
752 |
 753 |                 XCTAssertEqualWithAccuracy()
 754 |
755 | 会被调用非常多次,因此用可选的信息来表示哪一部分的循环失败了。
756 |
757 |
758 |
759 | 运行测试,如你所料,测试因为每次滚动都得到的是1失败了。切到
760 |
761 | Issue Navigator
762 |
763 | 可以查看更多详细的错误信息。
764 |
765 |
766 |  770 |
770 |
771 |
772 | 最后,添加随机数字生成器到
773 |
 774 |             rollDie()
 775 |
776 | 中。在
777 |
778 | Dice.swift
779 |
780 | 中,将该方法修改成如下的样子:
781 |
782 |
  mutating func rollDie() {
 783 |     value = Int(arc4random_uniform(UInt32(6))) + 1
 784 |   }
 785 |
786 |
787 | 上述代码使用了
788 |
 789 |             arc4random_uniform()
 790 |
791 | 产生一个1到6之间的数字。看起来非常得简单,但仍然需要进行测试!再次按下
792 |
793 | Command-U
794 |
795 | 键,所有的测试都通过了。你现在就可以确信
796 |
 797 |             Dice
 798 |
799 | 结构体大致是以你所期望的比例产生数字了。如果有人说你的app作弊,你就可以把测试结果给它们看说不是的!
800 |
801 |
802 | 完工大吉了!
803 |
 804 |             Dice
 805 |
806 | 结构体已完成,喝茶时间...
807 |
808 |
809 | 如果你有这样的朋友,他玩过很多的角色扮演游戏,说你的app不支持多种类型的骰子:四面的,8面的,12面的,20面的甚至100面的...该怎么办?
810 |
811 |
812 | 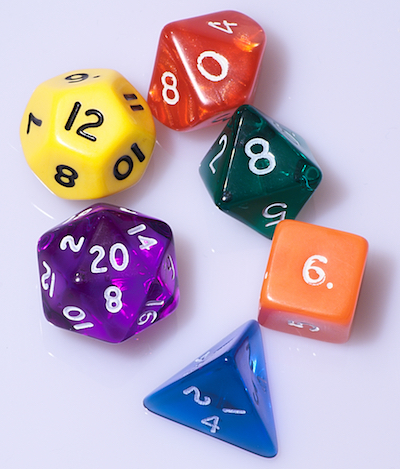 816 |
816 |
817 |
818 | 修改代码
819 |
820 |
821 | 你不想让你的朋友扫兴,因此回到
822 |
823 | DiceTests.swift
824 |
825 | 并添加另一个测试:
826 |
827 |
  func testRollingTwentySidedDice() {
 828 |     var testDie = Dice()
 829 |     testDie.rollDie(numberOfSides: 20)
 830 |     XCTAssertNotNil(testDie.value)
 831 |     XCTAssertTrue(testDie.value! >= 1)
 832 |     XCTAssertTrue(testDie.value! <= 20)
 833 |   }
 834 |
835 |
836 | 编译器会抱怨说
837 |
 838 |             rollDie()
 839 |
840 | 不可以传任何参数。切到
841 |
842 | assistant editor
843 |
844 | 并在
845 |
846 | Dice.swift
847 |
848 | 中修改
849 |
 850 |             rollDie()
 851 |
852 | 的声明,来添加一个
853 |
 854 |             numberOfSides
 855 |
856 | 的形参:
857 |
858 |
  mutating func rollDie(numberOfSides: Int) {
 859 |
860 |
861 | 但这会导致之前的测试失败,因为它们并没有提供参数。你
862 |
863 | 可以
864 |
865 | 将它们全部修改,但大多数的骰子都是6个面的(无需告知你角色扮演的朋友这点)。那么何不给
866 |
 867 |             numberOfSides
 868 |
869 | 参数一个默认值?
870 |
871 |
872 | 将
873 |
 874 |             rollDie(numberOfSides:)
 875 |
876 | 的声明修改为:
877 |
878 |
  mutating func rollDie(numberOfSides: Int = 6) {
 879 |
880 |
881 | 现在所有的测试就都通过了,但你还在处在之前相同的位置:测试并不会检查当20个面的骰子滚动的时候,产生的值是1到20之间的。
882 |
883 |
884 | 因此现在需要写另一个类似于
885 |
 886 |             testRollsAreSpreadRoughlyEvenly()
 887 |
888 | 的测试了,但针对的是20个面的骰子。
889 |
890 |
  func testTwentySidedRollsAreSpreadRoughlyEvenly() {
 891 |     var testDie = Dice()
 892 |     var rolls: [Int: Double] = [:]
 893 |     let rollCounter = 2000.0
 894 |     for _ in 0 ..< Int(rollCounter) {
 895 |       testDie.rollDie(numberOfSides: 20)
 896 |       guard let newRoll = testDie.value else {
 897 |         XCTFail()
 898 |         return
 899 |       }
 900 |       if let existingCount = rolls[newRoll] {
 901 |         rolls[newRoll] = existingCount + 1
 902 |       } else {
 903 |         rolls[newRoll] = 1
 904 |       }
 905 |     }
 906 |     XCTAssertEqual(rolls.keys.count, 20)
 907 |     for (key, roll) in rolls {
 908 |       XCTAssertEqualWithAccuracy(roll,
 909 |                                  rollCounter / 20,
 910 |                                  accuracy: rollCounter / 20 * 0.3,
 911 |                                  "Dice gave \(roll) x \(key)")
 912 |     }
 913 |   }
 914 |
915 |
916 | 这个测试给出了7个失败:key的数量只有6个,且它们的分布并不相等。使用
917 |
918 | Issue Navigator
919 |
920 | 来查看全部的细节。
921 |
922 |
923 |  927 |
927 |
928 |
929 | 你应当期望:
930 |
 931 |             rollDie(numberOfSides:)
 932 |
933 | 还不使用
934 |
 935 |             numberOfSides
 936 |
937 | 参数。
938 |
939 |
940 | 用
941 |
 942 |             numberOfSides
 943 |
944 | 来替换
945 |
 946 |             arc4random_uniform()
 947 |
948 | 中的6,然后再次按下
949 |
950 | Command-U
951 |
952 | 键。
953 |
954 |
955 | 成功了!所有的测试都通过了 - 甚至包括之前调用了你刚修改过的方法的那些测试。
956 |
957 |
958 | 重构测试
959 |
960 |
961 | 你有一些很值得去重构的代码。
962 |
 963 |             testRollsAreSpreadRoughlyEvenly()
 964 |
965 | 和
966 |
 967 |             testTwentySidedRollsAreSpreadRoughlyEvenly()
 968 |
969 | 中的代码非常相似,因此你可以将其分离出来作为一个私有方法。
970 |
971 |
972 | 添加下列的extension到
973 |
974 | DiceTests.swift
975 |
976 | 文件的尾部,要在类的外部:
977 |
978 |
extension DiceTests {
 979 |
 980 |   fileprivate func performMultipleRollTests(numberOfSides: Int = 6) {
 981 |     var testDie = Dice()
 982 |     var rolls: [Int: Double] = [:]
 983 |     let rollCounter = Double(numberOfSides) * 100.0
 984 |     let expectedResult = rollCounter / Double(numberOfSides)
 985 |     let allowedAccuracy = rollCounter / Double(numberOfSides) * 0.3
 986 |     for _ in 0 ..< Int(rollCounter) {
 987 |       testDie.rollDie(numberOfSides: numberOfSides)
 988 |       guard let newRoll = testDie.value else {
 989 |         XCTFail()
 990 |         return
 991 |       }
 992 |       if let existingCount = rolls[newRoll] {
 993 |         rolls[newRoll] = existingCount + 1
 994 |       } else {
 995 |         rolls[newRoll] = 1
 996 |       }
 997 |     }
 998 |     XCTAssertEqual(rolls.keys.count, numberOfSides)
 999 |     for (key, roll) in rolls {
1000 |       XCTAssertEqualWithAccuracy(roll,
1001 |                                  expectedResult,
1002 |                                  accuracy: allowedAccuracy,
1003 |                                  "Dice gave \(roll) x \(key)")
1004 |     }
1005 |   }
1006 |
1007 | }
1008 |
1009 |
1010 | 这个方法的名称并不以
1011 |
1012 |             test
1013 |
1014 | 开头,因此不会被当做一个测试去运行。
1015 |
1016 |
1017 | 回到主
1018 |
1019 |             DiceTests
1020 |
1021 | 类,并将
1022 |
1023 |             testRollsAreSpreadRoughlyEvenly()
1024 |
1025 | 和
1026 |
1027 |             testTwentySidedRollsAreSpreadRoughlyEvenly()
1028 |
1029 | 方法替换为下列的代码:
1030 |
1031 |
  func testRollsAreSpreadRoughlyEvenly() {
1032 |     performMultipleRollTests()
1033 |   }
1034 |
1035 |   func testTwentySidedRollsAreSpreadRoughlyEvenly() {
1036 |     performMultipleRollTests(numberOfSides: 20)
1037 |   }
1038 |
1039 |
1040 | 再次运行所有的测试,来证实上述重构正确。
1041 |
1042 |
1043 | 使用 #line
1044 |
1045 |
1046 | 为了演示另一项非常有用的测试技术,切回
1047 |
1048 | Dice.swift
1049 |
1050 | 并撤销你在
1051 |
1052 |             rollDie(numberOfSides:)
1053 |
1054 | 中做的有关于20面的骰子的改动:将调用
1055 |
1056 |             arc4random_uniform()
1057 |
1058 | 中的
1059 |
1060 |             numberOfSides
1061 |
1062 | 替换为
1063 |
1064 |             6
1065 |
1066 | 。现在再次运行测试。
1067 |
1068 |
1069 |
1070 |             testTwentySidedRollsAreSpreadRoughlyEvenly()
1071 |
1072 | 失败了,但错误信息却位于
1073 |
1074 |             performMultipleRollTests(numberOfSides:)
1075 |
1076 | 中 — 不是一个非常有用的地点。
1077 |
1078 |
1079 | Xcode可以帮助你解决这个问题。当定义一个助手方法的时候,你可以提供一个带有特定默认值
1080 |
1081 |             #line
1082 |
1083 | 的参数 - 它会包含调用这个方法时的代码的行序号。这个行序号就可以被用到
1084 |
1085 |             XCTAssert
1086 |
1087 | 方法中,使得错误的信息更有价值。
1088 |
1089 |
1090 | 在
1091 |
1092 |             DiceTests
1093 |
1094 | 的extension中,将方法的定义
1095 |
1096 |             performMultipleRollTests(numberOfSides:)
1097 |
1098 | 修改为如下的代码:
1099 |
1100 |
fileprivate func performMultipleRollTests(numberOfSides: Int = 6, line: UInt = #line) {
1101 |
1102 |
1103 | 将
1104 |
1105 |             XCTAsserts
1106 |
1107 | 修改为如下的样子:
1108 |
1109 |
XCTAssertEqual(rolls.keys.count, numberOfSides, line: line)
1110 |
1111 | for (key, roll) in rolls {
1112 |   XCTAssertEqualWithAccuracy(roll,
1113 |                              expectedResult,
1114 |                              accuracy: allowedAccuracy,
1115 |                              "Dice gave \(roll) x \(key)",
1116 |                              line: line)
1117 | }
1118 |
1119 |
1120 | 你无需修改调用
1121 |
1122 |             performMultipleRollTests(numberOfSides:line:)
1123 |
1124 | 方法的代码,因为新的参数会被默认值自动地填充。再次运行测试,你就会发现现在错误的记号位于调用
1125 |
1126 |             performMultipleRollTests(numberOfSides:line:)
1127 |
1128 | 方法这行了 - 而不是在助手方法之中。
1129 |
1130 |
1131 | 将
1132 |
1133 |             rollDie(numberOfSides:)
1134 |
1135 | 方法恢复原状,然后按
1136 |
1137 | Command-U
1138 |
1139 | 键确认一切工作正常。
1140 |
1141 |
1142 | 给自己点个赞吧 - 你已学会了如何使用TDD来开发一个经过完整测试的model类。
1143 |
1144 |
1145 |  1147 |
1148 |
1149 | 添加单元测试到已存在的代码中
1150 |
1151 |
1152 | TDD在开发新的代码时很棒,但你经常会不得不在之前已有的代码中加入测试。步骤和之前基本相同,除了你现在是编写测试,来确认已存在的代码如同期望中的方式工作。
1153 |
1154 |
1155 | 要学习该怎么做,你要为
1156 |
1157 |             Roll
1158 |
1159 | 结构体添加测试。在这个app中,
1160 |
1161 |             Roll
1162 |
1163 | 包含了一个
1164 |
1165 |             Dice
1166 |
1167 | 的数组和一个
1168 |
1169 |             numberOfSides
1170 |
1171 | 的property。它用来处理滚动所有的筛子及统计滚动的结果。
1172 |
1173 |
1174 | 回到
1175 |
1176 | File Navigator
1177 |
1178 | ,选择
1179 |
1180 |             Roll.swift
1181 |
1182 | 。将全部占位的代码替换为如下内容:
1183 |
1184 |
struct Roll {
1185 |
1186 |   var dice: [Dice] = []
1187 |   var numberOfSides = 6
1188 |
1189 |   mutating func changeNumberOfDice(newDiceCount: Int) {
1190 |     dice = []
1191 |     for _ in 0 ..< newDiceCount {
1192 |       dice.append(Dice())
1193 |     }
1194 |   }
1195 |
1196 |   var allDiceValues: [Int] {
1197 |     return dice.flatMap { $0.value}
1198 |   }
1199 |
1200 |   mutating func rollAll() {
1201 |     for index in 0 ..< dice.count {
1202 |       dice[index].rollDie(numberOfSides: numberOfSides)
1203 |     }
1204 |   }
1205 |
1206 |   mutating func changeValueForDie(at diceIndex: Int, to newValue: Int) {
1207 |     if diceIndex < dice.count {
1208 |       dice[diceIndex].value = newValue
1209 |     }
1210 |   }
1211 |
1212 |   func totalForDice() -> Int {
1213 |     let total = dice
1214 |       .flatMap { $0.value }
1215 |       .reduce(0) { $0 - $1 }
1216 |     return total
1217 |   }
1218 |
1219 | }
1220 |
1221 |
1222 | (发现错误了么?现在先忽略它,这就是我们将要测试的地方。:])
1223 |
1224 |
1225 | 在
1226 |
1227 | File Navigator
1228 |
1229 | 中选择
1230 |
1231 | High RollerTests
1232 |
1233 | 组,并使用
1234 |
1235 | File/New/File…
1236 |
1237 | 中的
1238 |
1239 | macOS/Unit Test Case Class
1240 |
1241 | 来添加一个叫做
1242 |
1243 |             RollTests
1244 |
1245 | 的类。删除其中所有的测试代码。
1246 |
1247 |
1248 | 添加下列的import到
1249 |
1250 | RollTests.swift
1251 |
1252 | 中:
1253 |
1254 |
@testable import High_Roller
1255 |
1256 |
1257 | 在assistant editor中打开
1258 |
1259 | Roll.swift
1260 |
1261 | ,你将在其中编写更多的测试。
1262 |
1263 |
1264 | 首先,你想去测试
1265 |
1266 |             Roll
1267 |
1268 | 可否被创建,且可以添加
1269 |
1270 |             Dice
1271 |
1272 | 到
1273 |
1274 |             dice
1275 |
1276 | 数组中。测试使用5个骰子。
1277 |
1278 |
1279 | 添加测试到
1280 |
1281 | RollTests.swift
1282 |
1283 | 中:
1284 |
1285 |
  func testCreatingRollOfDice() {
1286 |     var roll = Roll()
1287 |     for _ in 0 ..< 5 {
1288 |       roll.dice.append(Dice())
1289 |     }
1290 |     XCTAssertNotNil(roll)
1291 |     XCTAssertEqual(roll.dice.count, 5)
1292 |   }
1293 |
1294 |
1295 | 运行测试。目前一切都好 - 第一个测试通过了。和TDD不同,一个失败的测试并非是基本的第一步,因为代码(理论上)早已可以正常地工作。
1296 |
1297 |
1298 | 接下来,使用下列的测试,来检查在滚动之前,点数的总数为0:
1299 |
1300 |
  func testTotalForDiceBeforeRolling_ShouldBeZero() {
1301 |     var roll = Roll()
1302 |     for _ in 0 ..< 5 {
1303 |       roll.dice.append(Dice())
1304 |     }
1305 |     let total = roll.totalForDice()
1306 |     XCTAssertEqual(total, 0)
1307 |   }
1308 |
1309 |
1310 | 再次成功了,但看起来似乎需要进行一些重构。每个测试的第一部分都设置了一个
1311 |
1312 |             Roll
1313 |
1314 | 对象,并使用5个骰子来填充它。如果将它移到
1315 |
1316 |             setup()
1317 |
1318 | 方法中,它就会在每个测试前执行。
1319 |
1320 |
1321 | 不仅如此,
1322 |
1323 |             Roll
1324 |
1325 | 有一个方法来改变自身数组中
1326 |
1327 |             Dice
1328 |
1329 | 的个数,因此测试也可以使用和测试这里。
1330 |
1331 |
1332 | 将
1333 |
1334 |             RollTests
1335 |
1336 | 类的内容替换为:
1337 |
1338 |
  var roll: Roll!
1339 |
1340 |   override func setUp() {
1341 |     super.setUp()
1342 |     roll = Roll()
1343 |     roll.changeNumberOfDice(newDiceCount: 5)
1344 |   }
1345 |
1346 |   func testCreatingRollOfDice() {
1347 |     XCTAssertNotNil(roll)
1348 |     XCTAssertEqual(roll.dice.count, 5)
1349 |   }
1350 |
1351 |   func testTotalForDiceBeforeRolling_ShouldBeZero() {
1352 |     let total = roll.totalForDice()
1353 |     XCTAssertEqual(total, 0)
1354 |   }
1355 |
1356 |
1357 | 按照惯例,再次运行测试,来检查一切是否正常工作。
1358 |
1359 |
1360 | 在6面骰子的情况下,最小的总数应当是5,而最大的总数则应是30,因此添加下列的测试来验证总数是否处于这个范围之中:
1361 |
1362 |
  func testTotalForDiceAfterRolling_ShouldBeBetween5And30() {
1363 |     roll.rollAll()
1364 |     let total = roll.totalForDice()
1365 |     XCTAssertGreaterThanOrEqual(total, 5)
1366 |     XCTAssertLessThanOrEqual(total, 30)
1367 |   }
1368 |
1369 |
1370 | 运行测试 - 它失败了!看起来测试已经发现了一个代码中的bug。问题应该是在
1371 |
1372 |             rollAll()
1373 |
1374 | 或
1375 |
1376 | totalForDice()
1377 |
1378 | 中,因为这个测试中只调用过这两个方法。如果
1379 |
1380 | rollAll()
1381 |
1382 | 失败的话,总数应该是0.然而,返回的总数是一个负值,因此让我们来看一看
1383 |
1384 | totalForDice()
1385 |
1386 | 方法。
1387 |
1388 |
1389 | 问题就在这里:
1390 |
1391 | reduce
1392 |
1393 | 是减而不是加value。将减号改为加号:
1394 |
1395 |
func totalForDice() -> Int {
1396 | let total = dice
1397 | .flatMap { $0.value }
1398 |
1399 | .reduce(0) { $0 + $1 }
1400 | return total
1401 | }
1402 |
1403 |
1404 | 再次运行你的测试 - 现在一切都完美地运行了。
1405 |
1406 |
1407 | 从这儿去向哪里?
1408 |
1409 |
1430 |
1431 | 你可以在
1432 |
1434 | 这里
1435 |
1436 | 下载本教程中,这一部分的完整的测试。
1437 |
1438 |
1439 | 请继续阅读
1440 |
1442 | 单元测试:2/2部分
1443 |
1444 | ,来学习更多优秀的特性,包括交互测试,网络测试,性能测试和代码覆盖。希望可以在这里看到你!:]
1445 |
1446 |
6 |
7 |
8 |
9 | 更新日志:
10 |
11 | 本教程已由Warren Burton更新至支持Xcode 9及Swift 4的版本。
12 |
14 | 原教材
15 |
16 | 由Mikael Konutgan撰写。
17 |
18 |
19 |
20 |
22 |  25 |
25 |
26 |
27 | 学习如何使用popover来制作一个macOS app的菜单栏!
28 |
29 |
30 |
31 | 菜单栏app长期以来都是macOS中的主打项。很多app例如
32 |
33 | 1Password
34 |
35 | 和
36 |
37 | Day One
38 |
39 | 都有着相应的菜单栏app。其它app诸如
40 |
41 | Fantastical
42 |
43 | 甚至仅仅存在于macOS的菜单栏中。
44 |
45 |
46 | 在本教程中,你将会构建一个菜单栏app,它会在一个popover中展示鼓舞人心的名言。你会在其中学到:
47 |
48 |
49 | -
50 | 如何创建一个菜单栏的图标
51 |
52 | -
53 | 如何让app仅仅存在于菜单栏中
54 |
55 | -
56 | 如何为用户添加菜单
57 |
58 | -
59 | 如何让popover按照需求展示和隐藏 - 也就是说事件监视
60 |
61 |
62 |
73 |
74 | 入门
75 |
76 |
77 | 打开Xcode。点击
78 |
79 | File/New/Project…
80 |
81 | ,然后选择
82 |
83 | macOS/Application/Cocoa App
84 |
85 | 模板并点击
86 |
87 | Next
88 |
89 | 。
90 |
91 |
92 | 在下一屏中,输入
93 |
94 | Quotes
95 |
96 | 作为
97 |
98 | Product Name
99 |
100 | ,选择你的
101 |
102 | Organization Name
103 |
104 | 和
105 |
106 | Organization Identifier
107 |
108 | 。然后选择
109 |
110 | Swift
111 |
112 | 编程语言,选中
113 |
114 | Use Storyboards
115 |
116 | 。确保
117 |
118 | Create Document-Based Application
119 |
120 | ,
121 |
122 | Use Core Data
123 |
124 | ,
125 |
126 | Include Unit tests
127 |
128 | 和
129 |
130 | Include UI Tests
131 |
132 | 均不选中。
133 |
134 |
135 |
137 |  141 |
142 |
141 |
142 |
143 |
144 | 最后,再次点击
145 |
146 | Next
147 |
148 | ,选择一个地方来保存项目,并点击
149 |
150 | Create
151 |
152 | 。
153 |
154 |
155 | 设置完成新项目之后,打开
156 |
157 | AppDelegate.swift
158 |
159 | 并添加下列的property到类中:
160 |
161 |
let statusItem = NSStatusBar.system.statusItem(withLength:NSStatusItem.squareLength)
162 |
163 |
164 | 这就创建了一个
165 |
166 | Status Item
167 |
168 | - 也就是说app的icon - 带有一个固定的长度并放置在菜单栏中,用户能够看到并使用它。
169 |
170 |
171 | 接下来,你需要为status item关联一个图像,让你的app能够在菜单栏中易于识别。
172 |
173 |
174 | 在project navigator中周到
175 |
176 | Assets.xcassets
177 |
178 | ,下载图片
179 |
181 | StatusBarButtonImage@2x.png
182 |
183 | 并将它拖拽到asset目录中。
184 |
185 |
186 | 选择图片并打开attributes inspector。将
187 |
188 | Render As
189 |
190 | 选项改变为Template Image。
191 |
192 |
193 |
195 |  199 |
200 |
199 |
200 |
201 |
202 | 如果你想使用自己的图片,请确保它是黑白图片,并将它配置为template image。这样Status Item才能在亮色和暗色主题下的菜单栏中都看起来比较不错。
203 |
204 |
205 | 回到
206 |
207 | AppDelegate.swift
208 |
209 | ,添加下列的代码到
210 |
211 | applicationDidFinishLaunching(\_:)
212 |
213 | 中
214 |
215 |
if let button = statusItem.button {
216 | button.image = NSImage(named:NSImage.Name("StatusBarButtonImage"))
217 | button.action = #selector(printQuote(_:))
218 | }
219 |
220 |
221 | 这会把你刚刚添加的图片作为icon配置到status item的上面,然后配置了一个当你点击这个item时会发生的动作。现在这里会出现一个错误,但你很快就会修复它。
222 |
223 |
224 | 在类中添加下列的代码:
225 |
226 |
@objc func printQuote(_ sender: Any?) {
227 | let quoteText = "Never put off until tomorrow what you can do the day after tomorrow."
228 | let quoteAuthor = "Mark Twain"
229 |
230 | print("\(quoteText) — \(quoteAuthor)")
231 | }
232 |
233 |
234 | 这个方法将会把名言直接打印到控制台中。
235 |
236 |
237 | 注意
238 |
239 | @objc
240 |
241 | 这个标记。它会把这个方法暴露给Objective-C的运行时,来让按钮响应这里的动作。
242 |
243 |
244 | 运行app,你就会看到新的菜单栏app了。你办到了!
245 |
246 |
247 |
249 |  253 |
254 |
253 |
254 |
255 |
256 |
258 |  262 |
263 |
262 |
263 |
264 |
265 |
266 |
267 | 注意
268 |
269 | :如果菜单栏中的app太多了,可能你会无法看到这个按钮。可以切换到一个比Xcode的菜单少的app(例如Finder),你应该就可以看到它了。
270 |
271 |
272 |
273 | 每次你点击菜单栏的icon的时候,你就会看到名言被打印到了Xcode的控制台上。
274 |
275 |
276 | 隐藏Dock中的Icon和主窗口
277 |
278 |
279 | 在你完成完整功能的菜单栏app之前,还有两件小事需要做一下。
280 |
281 |
282 | -
283 | 禁用dock中的icon。
284 |
285 | -
286 | 移除主窗口。
287 |
288 |
289 |
290 | 要禁用dock icon,只需打开
291 |
292 | Info.plist
293 |
294 | ,添加一个新的key
295 |
296 | Application is agent (UIElement)
297 |
298 | 并将它的值设为
299 |
300 | YES
301 |
302 | 。
303 |
304 |
305 |  307 |
307 |
308 |
309 |
310 | 注意:
311 |
312 | 如果你是一个编辑plist editor的专家,你可以随意地使用
313 |
314 | LSUIElement
315 |
316 | 键来进行设置。
317 |
318 |
319 | 现在该来处理主窗口了。
320 |
321 |
322 | -
323 | 打开
324 |
325 | Main.storyboard
326 |
327 |
328 | -
329 | 选择Window Controller场景并删除它。
330 |
331 | -
332 | 只留下View Controller场景。你很快就会用到它。
333 |
334 |
335 |
336 |
338 |  342 |
343 |
342 |
343 |
344 |
345 | 运行项目。你就会看到这个app已经没有主窗口了,也没有讨厌的dock icon,只有一个简单的status item放在菜单栏中。为自己庆祝一下吧
346 | :]
347 |
348 |
349 | 添加一个菜单到Status Item上
350 |
351 |
352 | 通常,点击它只有可怜兮兮的一个动作,是不值得成为一个菜单栏的app的。为你的app添加更多功能,最简单的办法就是添加菜单了。因此添加下列的方法到
353 |
354 | AppDelegate
355 |
356 | 的尾部。
357 |
358 |
func constructMenu() {
359 | let menu = NSMenu()
360 |
361 | menu.addItem(NSMenuItem(title: "Print Quote", action: #selector(AppDelegate.printQuote(_:)), keyEquivalent: "P"))
362 | menu.addItem(NSMenuItem.separator())
363 | menu.addItem(NSMenuItem(title: "Quit Quotes", action: #selector(NSApplication.terminate(_:)), keyEquivalent: "q"))
364 |
365 | statusItem.menu = menu
366 | }
367 |
368 |
369 | 然后在
370 |
371 | applicationDidFinishLaunching(\_:)
372 |
373 | 的尾部添加对它的调用
374 |
375 |
376 | constructMenu()
377 |
378 |
379 | 你在这里创建了一个
380 |
381 | NSMenu
382 |
383 | ,并添加了三个
384 |
385 | NSMenuItem
386 |
387 | 的实例,然后把status item的菜单设置为这个新的菜单。
388 |
389 |
390 | 这里有一些事值得去关注:
391 |
392 |
393 | -
394 | menu item的title是将会出现在菜单中的文本。如果需要的话,这里是实现本地化的一个好地方。
395 |
396 | -
397 | 动作,类似于按钮或者其它控件的动作,是当你在点击菜单项的时候将会调用的方法。
398 |
399 | -
400 |
401 | keyEquivalent
402 |
403 | 是用来激活菜单项的键盘快捷键。小写的字母将使用
404 |
405 | Cmd
406 |
407 | 作为修饰键,而大写的字母则使用
408 |
409 | Cmd+Shift
410 |
411 | 作为修饰键。这里的键盘快捷键只有当app位于应用的最前方且被激活的时候才会work。因此,在这个case中,这个菜单或其它的窗口必须在可见的情况下,键盘快捷键才可以使用,因为我们的app没有dock的icon。
412 |
413 | -
414 |
415 | separatorItem
416 |
417 | 则是一个不活动的菜单项,它只会表现为其它菜单项之间的一条灰色的线。我们可以用它来对菜单中的功能进行分组。
418 |
419 | -
420 |
421 | printQuote:
422 |
423 | 动作是你早已定义在
424 |
425 | AppDelegate
426 |
427 | 中的方法,而
428 |
429 | terminate:
430 |
431 | 动作则是定义在
432 |
433 | NSApplication
434 |
435 | 中的方法。
436 |
437 |
438 |
439 | 运行项目,然后点击status item,你就会看到一个菜单。庆祝一下进展吧!
440 |
441 |
442 |
444 |  446 |
447 |
446 |
447 |
448 |
449 | 试验一下你的选项吧 - 选择
450 |
451 | Print Quote
452 |
453 | 会在Xcode的控制台中打出一句名言,而选择
454 |
455 | Quit Quotes
456 |
457 | 则会退出app。
458 |
459 |
460 | 给Status Item添加一个Popover
461 |
462 |
463 | 你已经看到了,使用代码来创建菜单是多么得容易,但在Xcode的控制台中展示名言,显然是无法被大多数你的终端用户所接受的。接来下,我们就会使用一个简单的view
464 | controller,来替代菜单展示名言。
465 |
466 |
467 |
469 |  475 |
476 |
475 |
476 |
477 |
478 | 点击
479 |
480 | File/New/File…
481 |
482 | ,选择
483 |
484 | macOS/Source/Cocoa Class
485 |
486 | 模板并点击
487 |
488 | Next
489 |
490 | 。
491 |
492 |
493 | -
494 | 将这个类命名为
495 |
496 | QuotesViewController
497 |
498 | 。
499 |
500 | -
501 | 将它成为
502 |
503 | NSViewController
504 |
505 | 的子类。
506 |
507 | -
508 | 确保
509 |
510 | Also create XIB file for user interface
511 |
512 | 未被勾选。
513 |
514 | -
515 | 将语言设置为
516 |
517 | Swift
518 |
519 | 。
520 |
521 |
522 |
523 | 最后,再次点击
524 |
525 | Next
526 |
527 | ,选择一个位置来保存文件(在项目目录下的
528 |
529 | Quotes
530 |
531 | 子目录是一个不错的地方),然后点击
532 |
533 | Create
534 |
535 | 。
536 |
537 |
538 | 现在打开
539 |
540 | Main.storyboard
541 |
542 | 。展开
543 |
544 | View Controller场景
545 |
546 | 并选择
547 |
548 | View Controller
549 |
550 | 实例。
551 |
552 |
553 |
555 |  560 |
561 |
560 |
561 |
562 |
563 | 首选选择
564 |
565 | Identity Inspector
566 |
567 | 并将Class修改为
568 |
569 | QuotesViewController
570 |
571 | ,将
572 |
573 | Storyboard ID
574 |
575 | 设置为
576 |
577 | QuotesViewController
578 |
579 |
580 |
581 | 下面添加下列的代码到
582 |
583 | QuotesViewController.swift
584 |
585 | 的尾部
586 |
587 |
extension QuotesViewController {
588 |
589 | static func freshController() -> QuotesViewController {
590 |
591 | let storyboard = NSStoryboard(name: NSStoryboard.Name(rawValue: "Main"), bundle: nil)
592 |
593 | let identifier = NSStoryboard.SceneIdentifier(rawValue: "QuotesViewController")
594 |
595 | guard let viewcontroller = storyboard.instantiateController(withIdentifier: identifier) as? QuotesViewController else {
596 | fatalError("Why cant i find QuotesViewController? - Check Main.storyboard")
597 | }
598 | return viewcontroller
599 | }
600 | }
601 |
602 |
603 | 上述代码...
604 |
605 |
606 | -
607 | 获取到对
608 |
609 | Main.storyboard
610 |
611 | 的引用。
612 |
613 | -
614 | 创建一个能够匹配你刚设定的identifier的
615 |
616 | Scene identifier
617 |
618 | 。
619 |
620 | -
621 | 实例化
622 |
623 | QuotesViewController
624 |
625 | 并返回。
626 |
627 |
628 |
629 | 创建了这个方法之后,其它用到
630 |
631 | QuotesViewController
632 |
633 | 的东西就不需要了解如何去实例化它了。直接调用它就阔以了:]
634 |
635 |
636 | 注意位于
637 |
638 | guard
639 |
640 | 语句中的
641 |
642 | fatalError
643 |
644 | 。使用它或
645 |
646 | assertionFailure
647 |
648 | ,来让自己或团队其它的成员知晓这里出现了问题,是一个非常好的习惯。
649 |
650 |
651 | 现在返回到
652 |
653 | AppDelegate.swift
654 |
655 | 。添加一个新的property声明到类中:
656 |
657 |
let popover = NSPopover()
658 |
659 |
660 | 现在,使用下列的方法替换
661 |
662 | applicationDidFinishLaunching(\_:)
663 |
664 | :
665 |
666 |
func applicationDidFinishLaunching(_ aNotification: Notification) {
667 | if let button = statusItem.button {
668 | button.image = NSImage(named:NSImage.Name("StatusBarButtonImage"))
669 | button.action = #selector(togglePopover(_:))
670 | }
671 | popover.contentViewController = QuotesViewController.freshController()
672 | }
673 |
674 |
675 | 现在你已把按钮的动作替换为
676 |
677 | togglePopover(\_:)
678 |
679 | ,接下来我们就会实现它,用popover去展示存在于QuotesViewController中的内容。
680 |
681 |
682 | 添加下面的三个方法到
683 |
684 | AppDelegate
685 |
686 | 中
687 |
688 |
@objc func togglePopover(_ sender: Any?) {
689 | if popover.isShown {
690 | closePopover(sender: sender)
691 | } else {
692 | showPopover(sender: sender)
693 | }
694 | }
695 |
696 | func showPopover(sender: Any?) {
697 | if let button = statusItem.button {
698 | popover.show(relativeTo: button.bounds, of: button, preferredEdge: NSRectEdge.minY)
699 | }
700 | }
701 |
702 | func closePopover(sender: Any?) {
703 | popover.performClose(sender)
704 | }
705 |
706 |
707 |
708 | showPopover()
709 |
710 | 方法会向用户展示popover。你只需要提供一个源rect,macOS会基于此来展示popover和箭头,这样看起来popover就像是从菜单栏中的icon中弹出来的。
711 |
712 |
713 |
714 | closePopover()
715 |
716 | 会把popover关闭掉,而
717 |
718 | togglePopover()
719 |
720 | 则会基于当前的状态,来确定是打开还是关闭popover。
721 |
722 |
723 | 运行项目,然后点击菜单栏中的icon,来查看展示空popover和关闭它的效果。
724 |
725 |
726 |
728 |  734 |
735 |
734 |
735 |
736 |
737 | 你的popover已能够正常地工作,但那些令人鼓舞的内容在哪里?你看到的只有一个空空的view,没有名言。猜猜看接下来该做什么了?
738 |
739 |
740 | 实现Quote View Controller
741 |
742 |
743 | 首先,你需要一个model来储存名言和属性。点击
744 |
745 | File/New/File…
746 |
747 | 并选择
748 |
749 | macOS/Source/Swift File
750 |
751 | 模板,然后点击
752 |
753 | Next
754 |
755 | 。将文件命名为
756 |
757 | Quote
758 |
759 | 并点击
760 |
761 | Create
762 |
763 | 。
764 |
765 |
766 | 打开
767 |
768 | Quote.swift
769 |
770 | 并添加下列代码到文件中:
771 |
772 |
struct Quote {
773 | let text: String
774 | let author: String
775 |
776 | static let all: [Quote] = [
777 | Quote(text: "Never put off until tomorrow what you can do the day after tomorrow.", author: "Mark Twain"),
778 | Quote(text: "Efficiency is doing better what is already being done.", author: "Peter Drucker"),
779 | Quote(text: "To infinity and beyond!", author: "Buzz Lightyear"),
780 | Quote(text: "May the Force be with you.", author: "Han Solo"),
781 | Quote(text: "Simplicity is the ultimate sophistication", author: "Leonardo da Vinci"),
782 | Quote(text: "It’s not just what it looks like and feels like. Design is how it works.", author: "Steve Jobs")
783 | ]
784 | }
785 |
786 | extension Quote: CustomStringConvertible {
787 | var description: String {
788 | return "\"\(text)\" — \(author)"
789 | }
790 | }
791 |
792 |
793 | 上述代码定义了一个简单的名言结构体,其中包含一个静态的property来返回全部的名言。同时,你让
794 |
795 | Quote
796 |
797 | 遵循
798 |
799 | CustomStringConvertible
800 |
801 | 协议,这样你就能够很轻松地获得一个准备好的字符串。
802 |
803 |
804 | 你已经取得了很大的进展,但你现在需要一些方法,来在UI中展示全部的名言。
805 |
806 |
807 | 设置View Controller的UI
808 |
809 |
810 | 打开
811 |
812 | Main.storyboard
813 |
814 | 并拖拽三个
815 |
816 | Push Button
817 |
818 | ,一个
819 |
820 | Multiline Label
821 |
822 | 到view controller中。
823 |
824 |
825 | 把按钮和标签拖拽成就像下面的样子。蓝色的虚线会帮助你去定位到正确的位置去进行布局:
826 |
827 |
828 |
830 |  834 |
835 |
834 |
835 |
836 |
837 | 你可以独自完成添加自动布局的约束,来适配用户的交互么?在查看下面的详解之前,可以首先自己进行一下尝试。如果成功的话,就可以略过下面这部分了,你可以直接奖励给自己一颗星星。
838 |
839 |
840 | 解决方案
841 |
842 |
843 | 下列是获取正确布局所需的约束:
844 |
845 |
846 | 将左侧的按钮固定到距左边20,且竖直居中的位置。
847 |
848 |
849 | 将右侧的按钮固定到距右边20,且竖直居中的位置。
850 |
851 |
852 | 将底部的按钮固定到距底部20,且水平居中的位置。
853 |
854 |
855 | 将标签固定到距离左右两边均为20,且竖直居中的位置。
856 |
857 |
858 |
860 |  864 |
865 |
864 |
865 |
866 |
867 | 你会发现出现了一些布局的错误,因为没有足够的信息以确定布局。
868 |
869 |
870 | 因此将label的
871 |
872 | Horizontal Content Hugging Priority
873 |
874 | 设置为249,以允许label恰当地增长。
875 |
876 |
877 |
879 |  883 |
884 |
883 |
884 |
885 |
886 | 在得到满意的布局之后:
887 |
888 |
889 | -
890 | 设置左侧按钮的图片为
891 |
892 | NSGoLeftTemplate
893 |
894 | ,并删除title。
895 |
896 | -
897 | 设置右侧按钮的图片为
898 |
899 | NSGoRightTemplate
900 |
901 | ,并删除title。
902 |
903 | -
904 | 设置下侧按钮的title为
905 |
906 | Quit Quotes
907 |
908 | 。
909 |
910 | -
911 | 设置label的对齐方式为居中对齐。
912 |
913 | -
914 | 设置label的
915 |
916 | Line Break
917 |
918 | 模式为
919 |
920 | Word Wrap
921 |
922 | 。
923 |
924 |
925 |
926 | 现在,打开
927 |
928 | QuotesViewController.swift
929 |
930 | ,并添加下列的代码到
931 |
932 | QuotesViewController
933 |
934 | 类的实现中:
935 |
936 |
@IBOutlet var textLabel: NSTextField!
937 |
938 |
939 | 添加下列的extension到类的实现之后。现在在
940 |
941 | QuotesViewController.swift
942 |
943 | 中你会有两个extension。
944 |
945 |
946 |
947 | extension QuotesViewController {
948 | @IBAction func previous(_ sender: NSButton) {
949 | }
950 |
951 | @IBAction func next(_ sender: NSButton) {
952 | }
953 |
954 | @IBAction func quit(_ sender: NSButton) {
955 | }
956 | }
957 |
958 |
959 | 你现在已为label添加了一个outlet,你将会用这个label来展示鼓舞人心的名言。还添加了三个动作,你将把它们分别连接到三个按钮上。
960 |
961 |
962 | 将代码连接到Interface Builder上
963 |
964 |
965 | 你会注意到源码编辑器的左侧已出现了一些小小的圆形。只要你使用
966 |
967 | @IBAction
968 |
969 | 和
970 |
971 | @IBOutlet
972 |
973 | 关键字,这些原型就会出现。
974 |
975 |
976 |
978 |  982 |
983 |
982 |
983 |
984 |
985 | 现在,你就会使用它们来将代码和UI进行连接。
986 |
987 |
988 | 在project navigator中按住
989 |
990 | alt
991 |
992 | 点击
993 |
994 | Main.storyboard
995 |
996 | ,就会把storyboard打开到Assistant Editor的右侧,而源码位于左侧。
997 |
998 |
999 | 拖拽靠近
1000 |
1001 | textLabel
1002 |
1003 | 的小圆形到interface builder中的label上。并用相同的方式把previous,next和quit动作连接到相应的按钮上。
1004 |
1005 |
1006 |
1008 |  1012 |
1013 |
1012 |
1013 |
1014 |
1015 |
1016 |
1017 | 注意
1018 |
1019 | :如果你在上面的步骤中遇到了困难,请参考我们的
1020 |
1022 | macOS教程
1023 |
1024 | ,你会在这里找到macOS开发的引导性的教程,涉及到其中的方方面面,包括在interface builder中添加view和约束,以及连接outlets和actions。
1025 |
1026 |
1027 |
1028 | 站起来伸一下懒腰吧,做一个胜利的手势,你已成功地完成了一堆interface builder的工作。
1029 |
1030 |
1031 | 运行项目,你的popover现在应该看起来是下面这个样子了:
1032 |
1033 |
1034 |
1036 |  1040 |
1041 |
1040 |
1041 |
1042 |
1043 | 你对上面的popover采取了view controller的默认尺寸。如果你想要一个更小或更大的popover,只需在storyboard中调整view controller即可。
1044 |
1045 |
1046 | 关于交互的部分现在已完成了,但还并没有实现。这些按钮现在正等着你去实现,当你点击它们的时候,该做些什么事情 - 不要把它们挂在那里。
1047 |
1048 |
1049 | 为按钮创建动作
1050 |
1051 |
1052 | 如果你尚未使用
1053 |
1054 | Cmd-Return
1055 |
1056 | 或
1057 |
1058 | View > Standard Editor > Show Standard Editor
1059 |
1060 | 来关闭Assistant Editor
1061 |
1062 |
1063 | 打开
1064 |
1065 | QuotesViewController.swift
1066 |
1067 | 并添加下列的property到类的实现中:
1068 |
1069 |
let quotes = Quote.all
1070 |
1071 | var currentQuoteIndex: Int = 0 {
1072 | didSet {
1073 | updateQuote()
1074 | }
1075 | }
1076 |
1077 |
1078 |
1079 | quotes
1080 |
1081 | property会持有所有的名言,而
1082 |
1083 | currentQuoteIndex
1084 |
1085 | 则持有着当前的名言。
1086 |
1087 | currentQuoteIndex
1088 |
1089 | 同时会作为一个property的观察器,他会在序号发生变化的时候,使用新的名言来更新文本标签。
1090 |
1091 |
1092 | 接下来,添加下列的方法到类中:
1093 |
1094 |
override func viewDidLoad() {
1095 | super.viewDidLoad()
1096 | currentQuoteIndex = 0
1097 | }
1098 |
1099 | func updateQuote() {
1100 | textLabel.stringValue = String(describing: quotes[currentQuoteIndex])
1101 | }
1102 |
1103 |
1104 | 当这个view被加载的时候,你就会把当前名言的序号设置为0,相应地来更新UI。
1105 |
1106 | updateQuote()
1107 |
1108 | 会根据
1109 |
1110 | currentQuoteIndex
1111 |
1112 | 确定的当前选择的名言来更新文本的标签。
1113 |
1114 |
1115 | 要把它们到绑定到一起,更新三个方法,就像下面这样:
1116 |
1117 |
@IBAction func previous(_ sender: NSButton) {
1118 | currentQuoteIndex = (currentQuoteIndex - 1 + quotes.count) % quotes.count
1119 | }
1120 |
1121 | @IBAction func next(_ sender: NSButton) {
1122 | currentQuoteIndex = (currentQuoteIndex + 1) % quotes.count
1123 | }
1124 |
1125 | @IBAction func quit(_ sender: NSButton) {
1126 | NSApplication.shared.terminate(sender)
1127 | }
1128 |
1129 |
1130 | 在
1131 |
1132 | next()
1133 |
1134 | 和
1135 |
1136 | previous()
1137 |
1138 | 中,你会循环遍历全部的名言。而
1139 |
1140 | quit
1141 |
1142 | 则会退出当前的app。
1143 |
1144 |
1145 | 再次运行项目,
1146 |
1147 | 现在
1148 |
1149 | 你就可以循环地浏览名言及退出app了!
1150 |
1151 |
1152 |
1154 |  1158 |
1159 |
1158 |
1159 |
1160 |
1161 | 事件监听
1162 |
1163 |
1164 | 你的用户会在你小小的谦逊的菜单栏app上期待一个特性,就是当你点击app之外的任何地方,让popover自动地关闭。
1165 |
1166 |
1167 | 菜单栏的app应当在点击它的时候打开UI,而当用户移动到下一个项目的时候就消失。因此,你需要一个macOS的全局事件监听器。
1168 |
1169 |
1170 | 接下来我们就会创建一个时间监听器,它可以复用到你所有的项目上,例如当展示popover的时候就可以用到它。
1171 |
1172 |
1173 | 我赌你早已变得更聪明了!
1174 |
1175 |
1176 |  1180 |
1181 |
1182 | 创建一个Swift文件并将它命名为
1183 |
1184 | EventMonitor
1185 |
1186 | ,然后用下列的类定义来替换它的内容:
1187 |
1188 |
import Cocoa
1189 |
1190 | public class EventMonitor {
1191 | private var monitor: Any?
1192 | private let mask: NSEvent.EventTypeMask
1193 | private let handler: (NSEvent?) -> Void
1194 |
1195 | public init(mask: NSEvent.EventTypeMask, handler: @escaping (NSEvent?) -> Void) {
1196 | self.mask = mask
1197 | self.handler = handler
1198 | }
1199 |
1200 | deinit {
1201 | stop()
1202 | }
1203 |
1204 | public func start() {
1205 | monitor = NSEvent.addGlobalMonitorForEvents(matching: mask, handler: handler)
1206 | }
1207 |
1208 | public func stop() {
1209 | if monitor != nil {
1210 | NSEvent.removeMonitor(monitor!)
1211 | monitor = nil
1212 | }
1213 | }
1214 | }
1215 |
1216 |
1217 | 你会通过传递一个待监听事件类型的标记来初始化这个类的实例 - 事件诸如按键,滚动鼠标,单击左键等 - 以及一个事件处理者。
1218 |
1219 |
1220 | 当你准备好开始监听的时候,
1221 |
1222 | start()
1223 |
1224 | 就会调用
1225 |
1226 | addGlobalMonitorForEventsMatchingMask(\_:handler:)
1227 |
1228 | ,它会返回一个可以让你持有的对象。任何时候只有指定的事件发生,系统就会调用你的处理方法。
1229 |
1230 |
1231 | 要移除全局事件的监听器,可以调用
1232 |
1233 | stop()
1234 |
1235 | 中的
1236 |
1237 | removeMonitor()
1238 |
1239 | 方法,并通过将其设置为nil,删除返回的对象。
1240 |
1241 |
1242 | 现在剩下的工作,就只有在需要的时候调用
1243 |
1244 | start()
1245 |
1246 | 和
1247 |
1248 | stop()
1249 |
1250 | 方法了。是不是很容易?当然这个类也会在它的析构器中调用
1251 |
1252 | stop()
1253 |
1254 | 方法来实现清理自己。
1255 |
1256 |
1257 | 连接事件监听器
1258 |
1259 |
1260 | 最后一次打开
1261 |
1262 | AppDelegate.swift
1263 |
1264 | ,并为其添加一个新的property声明:
1265 |
1266 |
var eventMonitor: EventMonitor?
1267 |
1268 |
1269 | 然后,在
1270 |
1271 | applicationDidFinishLaunching(\_:)
1272 |
1273 | 的尾部添加下列代码来配置事件监听器:
1274 |
1275 |
eventMonitor = EventMonitor(mask: [.leftMouseDown, .rightMouseDown]) { [weak self] event in
1276 | if let strongSelf = self, strongSelf.popover.isShown {
1277 | strongSelf.closePopover(sender: event)
1278 | }
1279 | }
1280 |
1281 |
1282 | 上述代码会监听系统的鼠标左键和有件按下的事件,当这些事件发生的时候,就会将popover关闭。注意,发送到你的自己app上的事件,这里是不会响应的。这就是为何当你点击popover中的内容时,它并不会消失的原因。:]
1283 |
1284 |
1285 | 你使用了一个指向self的
1286 |
1287 | weak
1288 |
1289 | 引用以避免
1290 |
1291 | AppDelegate
1292 |
1293 | 和
1294 |
1295 | EventMonitor
1296 |
1297 | 之间潜在的
1298 |
1299 | 循环引用
1300 |
1301 | 。在本例中它并非是必要的,因为这里只有一次循环,但这却是一个值得在你自己的代码中关注的地方,尤其是你在两个对象之间使用block处理回调的时候。
1302 |
1303 |
1304 | 添加下列的代码到
1305 |
1306 | showPopover(\_:)
1307 |
1308 | 的尾部:
1309 |
1310 |
eventMonitor?.start()
1311 |
1312 |
1313 | 这样就会在popover出现的时候启动事件监听器。
1314 |
1315 |
1316 | 然后添加下列的代码到
1317 |
1318 | closePopover(\_:)
1319 |
1320 | 的尾部:
1321 |
1322 |
eventMonitor?.stop()
1323 |
1324 |
1325 | 这样当popover关闭的时候,就会停止事件监听器的监听。
1326 |
1327 |
1328 | 全部都搞定了!再次运行项目。点击菜单栏的icon来展示popover,然后点击外面的任意地方来关闭它。Awesome!
1329 |
1330 |
1331 | 从这儿去向哪里?
1332 |
1333 |
1354 |
1355 | 这里是
1356 |
1358 | 最终的项目
1359 |
1360 | ,包含了上述教程中你所开发的所有的代码。
1361 |
1362 |
1363 | 你已经明白了如何在你菜单栏的status items上设置菜单和popovers – 为何不尝试下使用属性字符创或多个label来美化名言,或是连接web的后端来拉群新的名言。也许你还可以找到使用键盘快捷键去循环浏览名言的方法。
1364 |
1365 |
1366 | 一个寻找其它可能性的很棒的地方,就是阅读苹果的官方文档,如
1367 |
1369 |
1370 | NSMenu
1371 |
1372 |
1373 | ,
1374 |
1376 |
1377 | NSPopover
1378 |
1379 |
1380 | 和
1381 |
1383 |
1384 | NSStatusItem
1385 |
1386 |
1387 | 。
1388 |
1389 |
1390 | 需要考虑的一件事是你希望你的用户把你的app当做一个非常珍贵的屏幕上的不动产,因此当你感觉在状态栏上有一个item很酷的时候,可能你的用户并不这么认为。很多的app会提供偏好选项来让用户确定是打开还是隐藏这个item。你可以把它作为自己的一个进阶的练习。
1391 |
1392 |
1393 | 感谢你抽出时间来学习如何为macOS打造一个很酷的popover菜单的app。它相当得简单,但可以看出来,你所学到的这些概念将会成为你开发各种app的绝佳基础。
1394 |
1395 |
 88 |
88 | 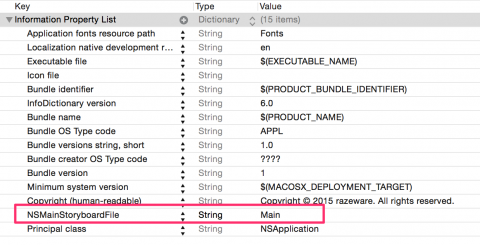 103 |
103 | 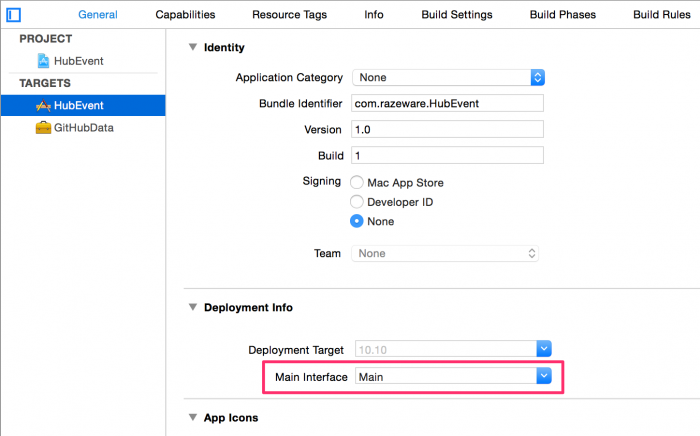 110 |
110 |  497 |
497 |  797 |
797 |  12 |
12 |  13 |
13 | 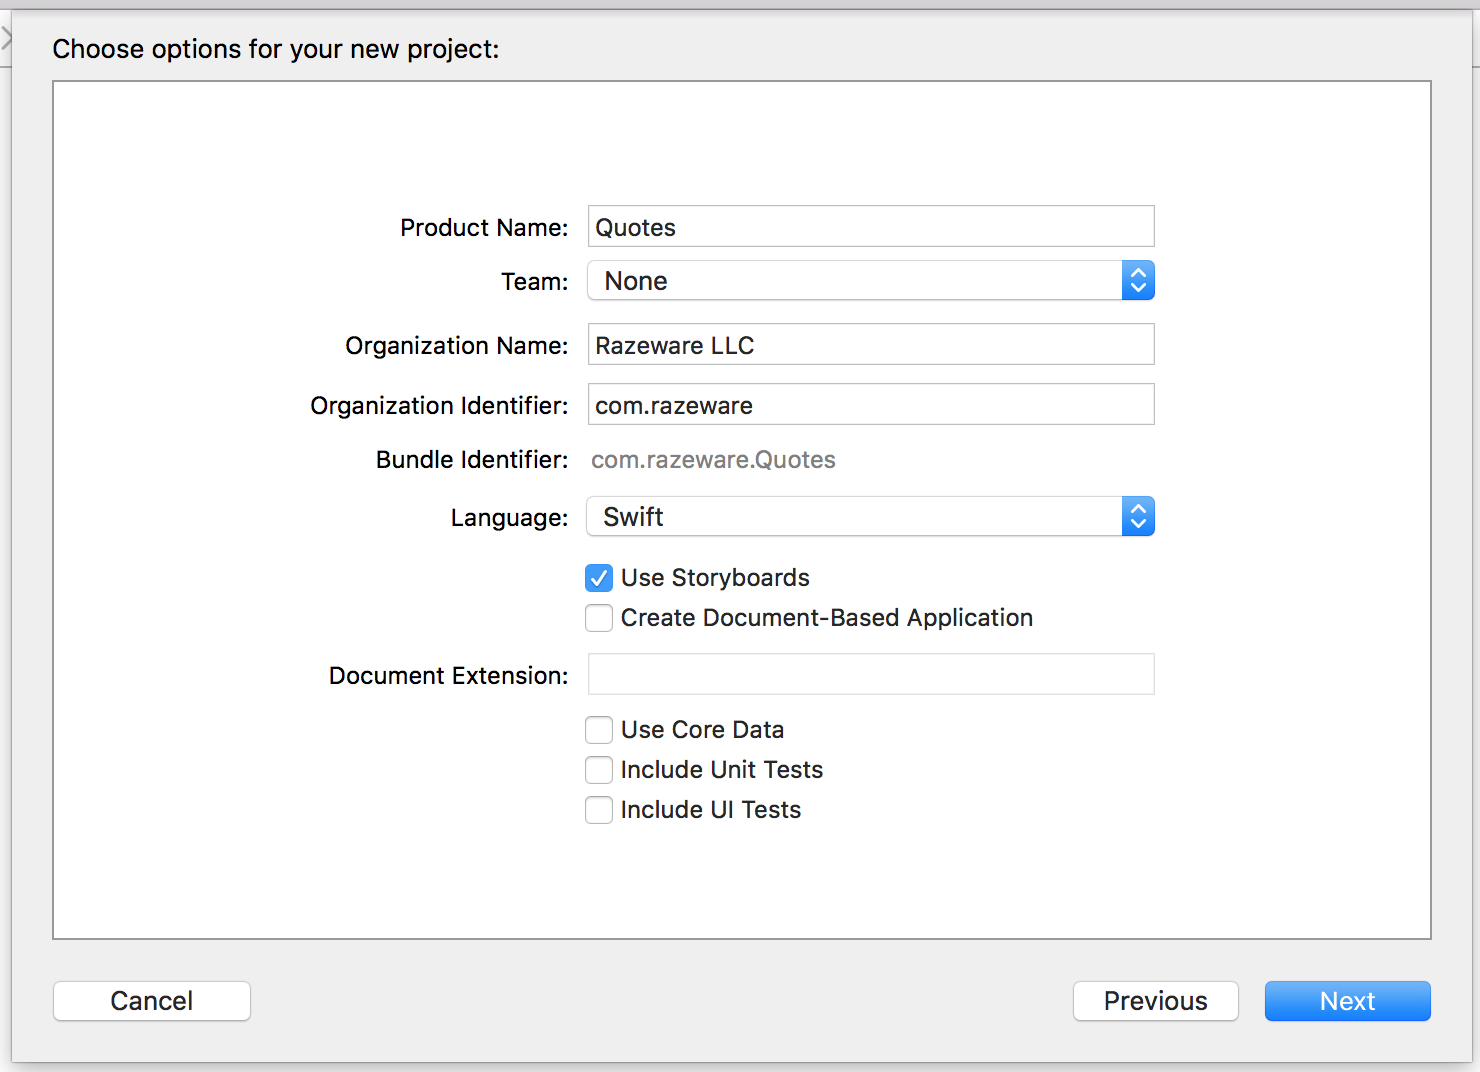 141 |
141 |  199 |
199 |  342 |
342 | 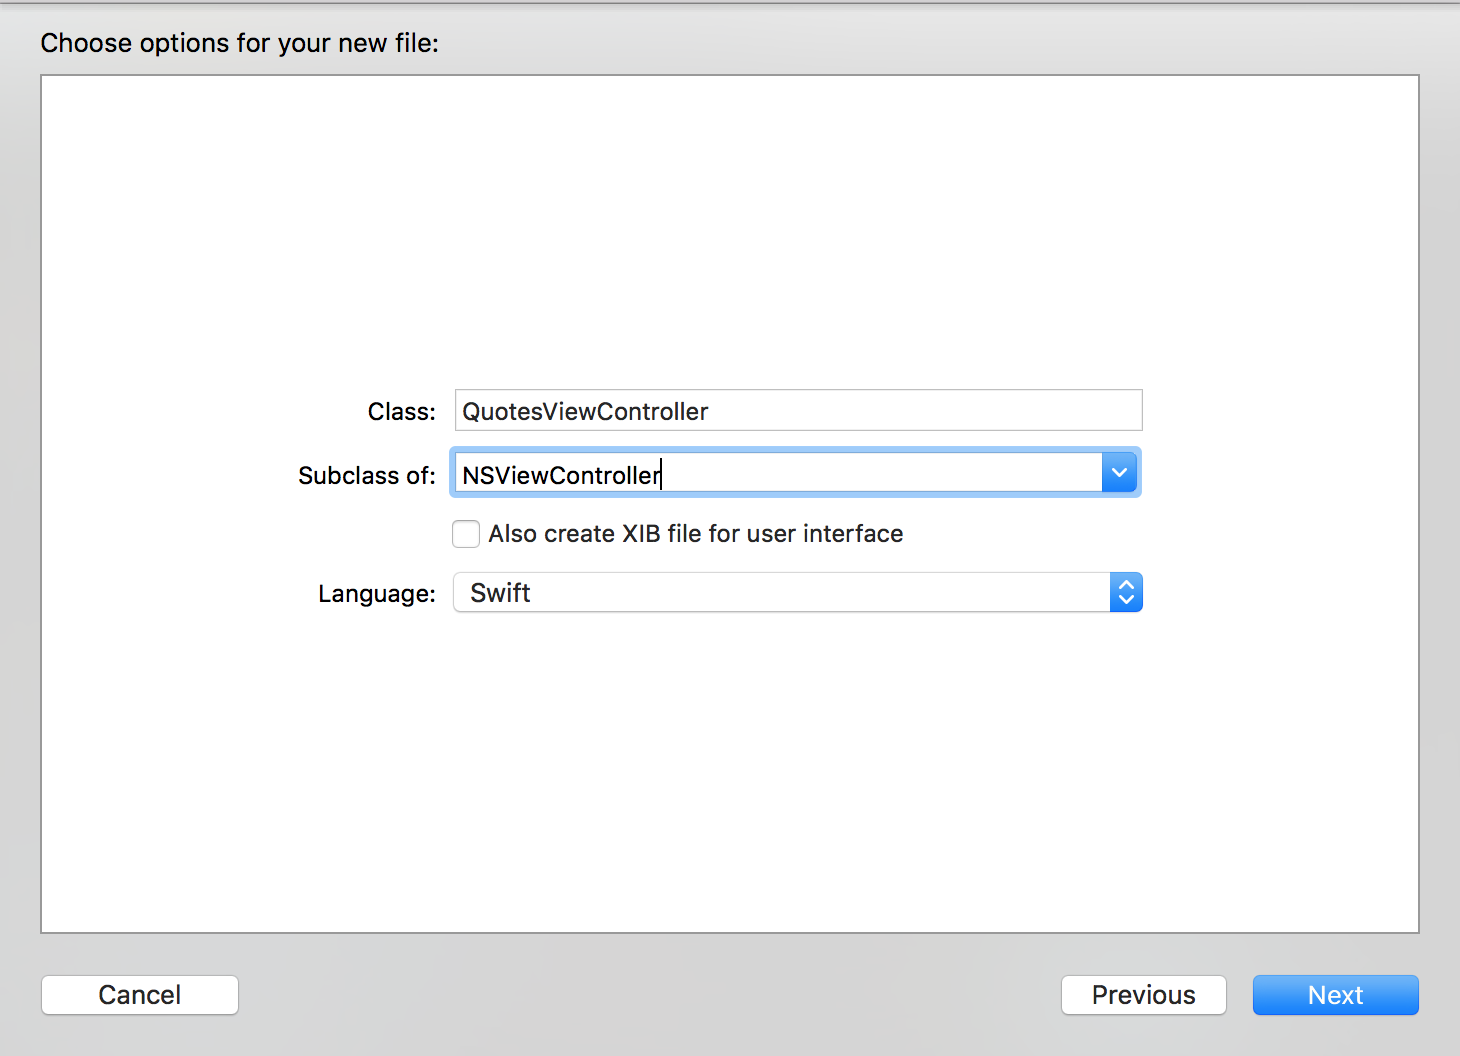 475 |
475 |  560 |
560 |  734 |
734 | 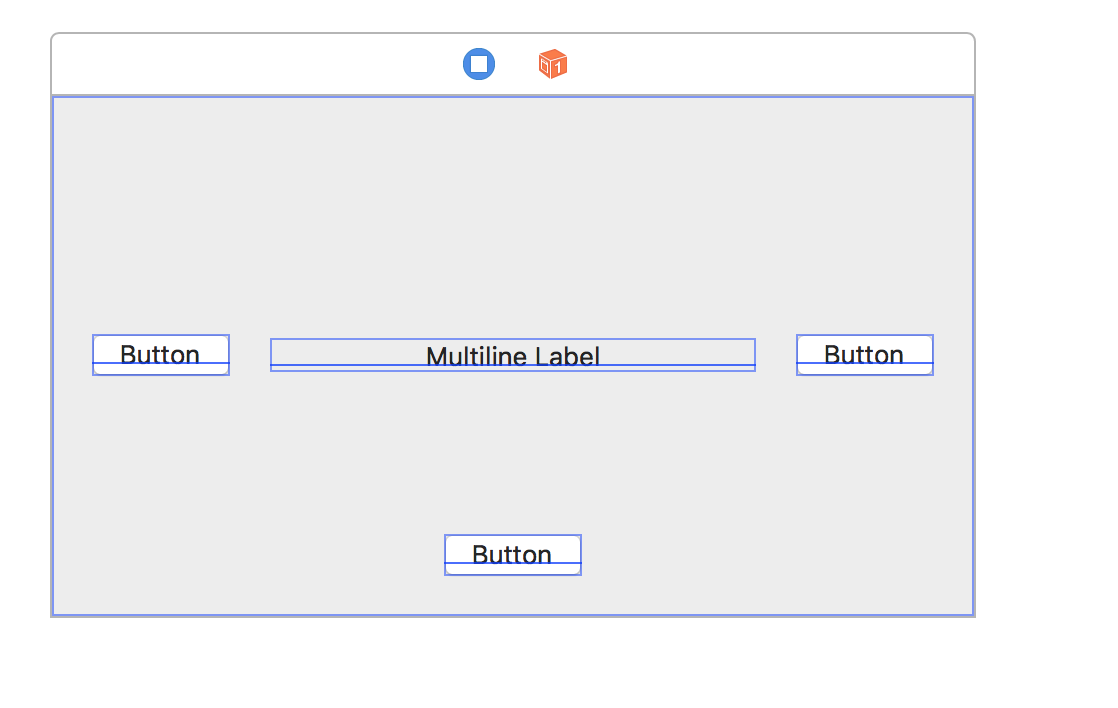 834 |
834 |  864 |
864 | 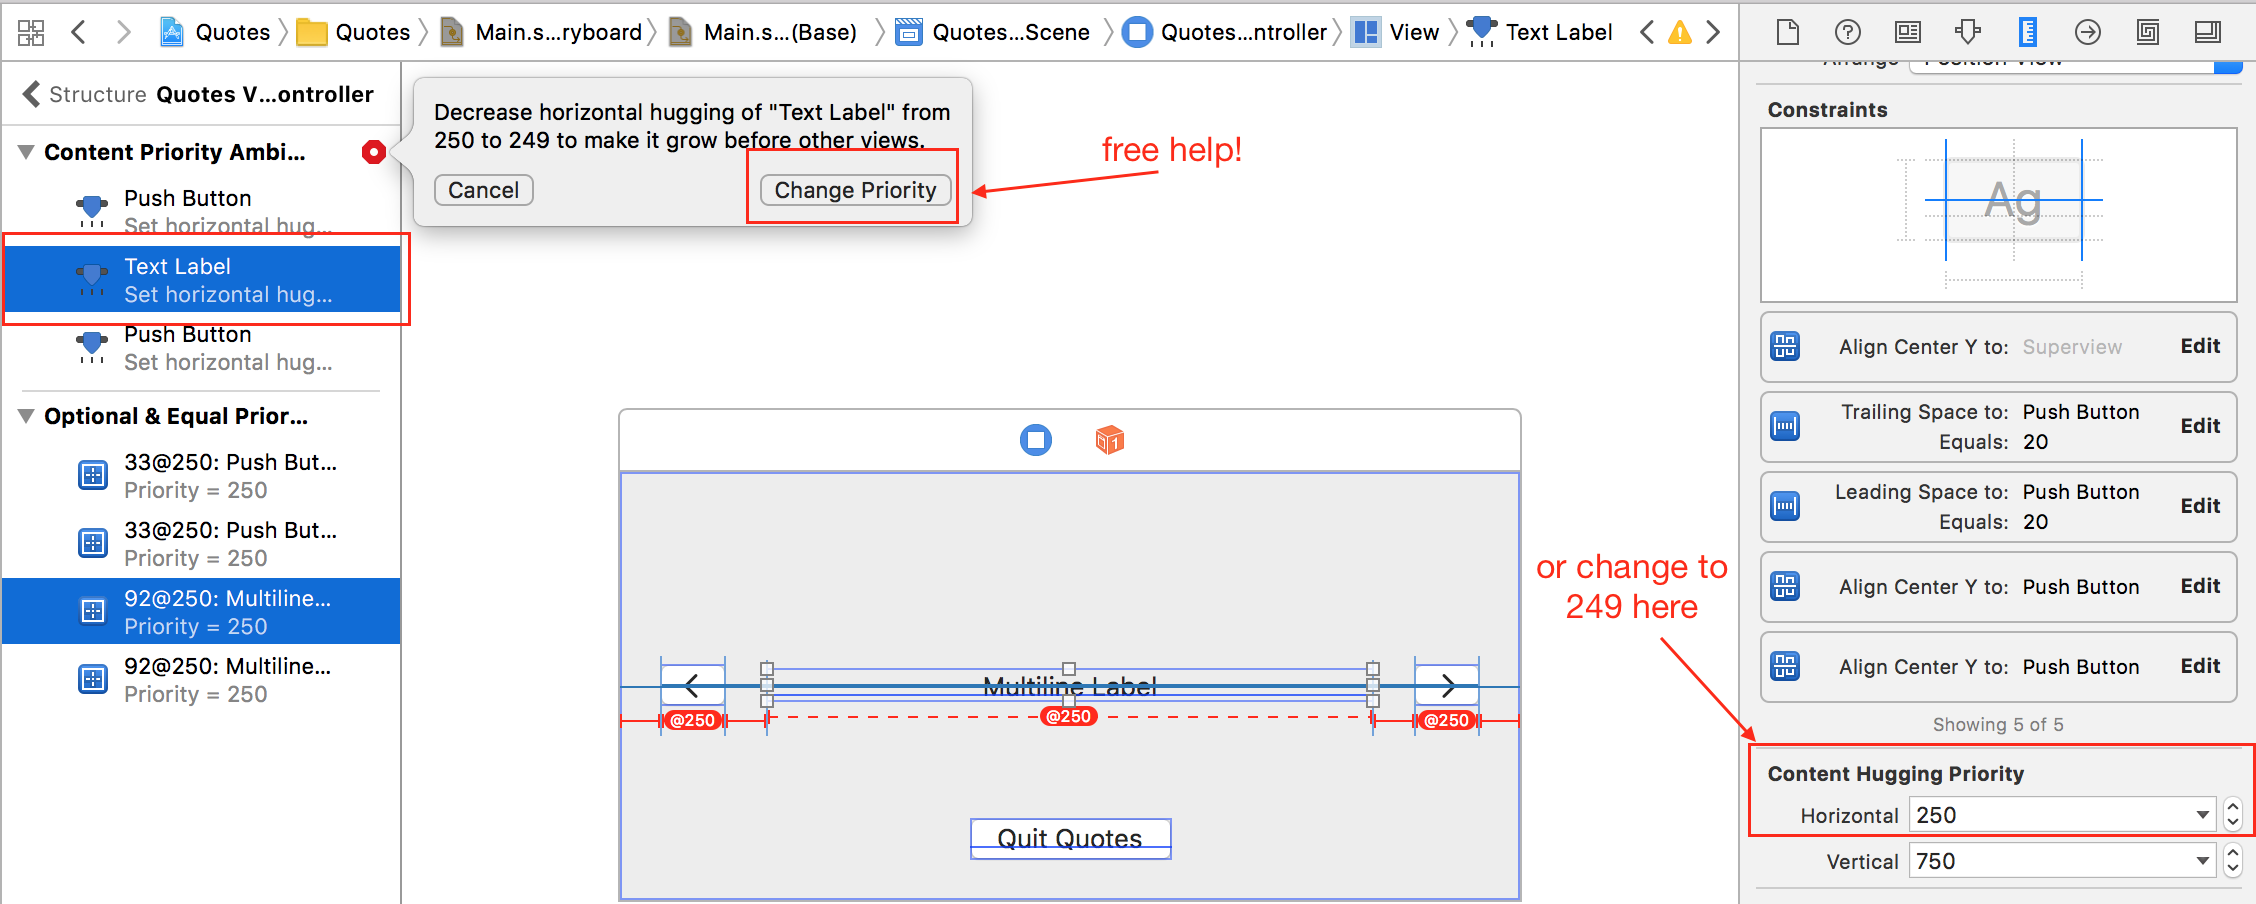 883 |
883 |  982 |
982 |  1012 |
  1040 |
  1158 |