├── .github
└── workflows
│ └── main.yml
├── .gitignore
├── .nojekell
├── LICENSE
├── README.md
├── docs
├── .pages
├── API
│ ├── .pages
│ ├── REST_API_InternalDoc.md
│ └── REST_API_PublicDoc.md
├── About
│ ├── .pages
│ ├── FAQ.md
│ ├── FeaturesCompared.md
│ ├── Manifesto.md
│ ├── PubServer.md
│ ├── architecture
│ │ ├── .pages
│ │ ├── FlockOfParrots.md
│ │ ├── cot_domain.md
│ │ ├── cot_hierarchy.md
│ │ ├── cot_table.md
│ │ └── mil_std_2525.md
│ └── why_fts.md
├── HowToHelp
│ ├── .pages
│ ├── DevSetupMambaPyCharm.md
│ ├── DevSetupPipVScode.md
│ ├── FTSConfig.yaml
│ ├── GettingStartedAsHelper.md
│ ├── WriteDocumentation.md
│ ├── fts-dev-env.yml
│ ├── fts-doc-env.yml
│ └── images
│ │ ├── github-pages-actions.png
│ │ └── github-pages-branch.png
├── Installation
│ ├── .pages
│ ├── InfrastructurePlanning.md
│ ├── Tools.md
│ ├── Video_Guides.md
│ ├── images
│ │ ├── configure_fts.png
│ │ ├── std_deploy.png
│ │ ├── std_deploy_rpi.png
│ │ ├── std_deploy_uas.png
│ │ ├── std_deploy_video.png
│ │ ├── zero-touch-deply-default.png
│ │ └── zero-touch-summary.png
│ ├── mechanism
│ │ ├── .pages
│ │ ├── Ansible
│ │ │ ├── .pages
│ │ │ └── ZeroTouchInstall.md
│ │ ├── Docker
│ │ │ ├── .pages
│ │ │ ├── CLI.md
│ │ │ ├── Debian.md
│ │ │ ├── Multiple_Servers
│ │ │ │ └── multiple.md
│ │ │ ├── Quick_Start.md
│ │ │ ├── Raspberry_Pi.md
│ │ │ ├── Upgrade
│ │ │ │ └── Upgrade.md
│ │ │ └── overview.md
│ │ └── Manual
│ │ │ ├── .pages
│ │ │ ├── Installation.md
│ │ │ └── Manual.md
│ └── platform
│ │ ├── .pages
│ │ ├── Android
│ │ ├── .pages
│ │ ├── Android.md
│ │ └── installUIOnAndroid.md
│ │ ├── Cloud
│ │ ├── .pages
│ │ ├── AWS.md
│ │ ├── DigitalOcean.md
│ │ └── overview.md
│ │ ├── Linux
│ │ ├── .pages
│ │ ├── installation_native.md
│ │ └── installation_vm.md
│ │ ├── RaspberryPi
│ │ ├── .pages
│ │ ├── Installation.md
│ │ ├── belena-etcher-flashing.png
│ │ ├── rpi-imager-general-settings.png
│ │ ├── rpi-imager-ssh-settings.png
│ │ └── rpi-imager.png
│ │ └── Windows
│ │ ├── .pages
│ │ ├── COT_error_Wireshark.jpg
│ │ ├── CotError.png
│ │ ├── FTS_windows.gif
│ │ ├── MainConfig.py
│ │ ├── StartFreeTAKServer.bat
│ │ ├── Windows_Ansible_Install.md
│ │ ├── Windows_Manual_Install.md
│ │ ├── advanced.jpg
│ │ ├── config.py
│ │ ├── features.jpg
│ │ ├── flask-run.jpg
│ │ ├── pythoninstall.png
│ │ ├── requirements.txt
│ │ └── start-fts.jpg
├── Troubleshooting
│ ├── .pages
│ ├── InstallationCheck.md
│ ├── ManualConfiguration.md
│ ├── Running.md
│ ├── Service.md
│ ├── SocketIssue.md
│ ├── Update.md
│ ├── fts-core-server.md
│ ├── fts-hub-server.md
│ ├── fts-ui-server.md
│ ├── fts-ui.service
│ ├── fts.service
│ ├── mediamtx.service
│ ├── troubleshooting_faq.md
│ ├── video-server.md
│ ├── voip-server.md
│ └── webmap-server.md
├── Usage
│ ├── .pages
│ ├── Connecting_ATAK.md
│ ├── Connecting_WinTAK.md
│ ├── ExCheck.md
│ ├── VideoManagement.md
│ ├── images
│ │ ├── atak_dialog_import_type.png
│ │ ├── atak_dialog_select_import.png
│ │ ├── atak_menu_main_import.png
│ │ ├── wintak_dialog_main_settings.png
│ │ ├── wintak_dialog_network_prefs.png
│ │ ├── wintak_dialog_server_connect.png
│ │ ├── wintak_dialog_server_connected.png
│ │ ├── wintak_menu_main.png
│ │ ├── wintak_menu_main_import.png
│ │ └── wintak_menu_main_select_settings.png
│ └── tools
│ │ ├── .pages
│ │ ├── FreeTAKMumla.md
│ │ ├── FreeTAKUAS.md
│ │ ├── Manuals
│ │ ├── ATAK_Data_Sync_User_Guide_Version_1.3_ATAK_4.8.pdf
│ │ ├── ATAK_ExCheck_User_Guide_1.1_ATAK_4.8.pdf
│ │ ├── Mumble Server Installation Guide.pdf
│ │ ├── TAK Voice User Guide.pdf
│ │ └── UserGuides.md
│ │ ├── UASTool.md
│ │ ├── images
│ │ ├── atak_video_listing.png
│ │ ├── atak_video_locate.png
│ │ ├── atak_video_notification.png
│ │ ├── atak_video_stream_play.png
│ │ ├── wintak-atak-mgr-device-profiles-menu.png
│ │ └── wintak-export-profile-to-atak.png
│ │ ├── rtsp.md
│ │ └── takICU.md
├── administration
│ ├── .pages
│ ├── CLI.md
│ ├── FTS_Certifications_structure.png
│ ├── FTS_UI_Documention.pdf
│ ├── Operation
│ │ ├── .pages
│ │ ├── fts-config.md
│ │ └── fts-service-mgmt.md
│ ├── SSL.md
│ ├── Web_Admin.md
│ ├── brokered
│ │ ├── .pages
│ │ ├── Integration
│ │ │ ├── NodeRedInstallation.md
│ │ │ └── node-red.service
│ │ ├── Video
│ │ │ ├── Installation.md
│ │ │ ├── howtoStartOnPi.md
│ │ │ └── mediamtx.service
│ │ ├── VideoChecker
│ │ │ └── VideoCheck.md
│ │ ├── Voice
│ │ │ └── VoiceServer.md
│ │ └── WebMap
│ │ │ ├── Installation.md
│ │ │ └── webmap.service
│ └── usingConsole.md
├── assets
│ ├── FTSLOGOv2.png
│ ├── FTS_Circle.png
│ ├── FreeTAKserverIcon.ico
│ ├── favicon_original.png
│ └── fts-official-pub.zip
├── diagrams
│ ├── include
│ │ └── themes
│ │ │ ├── dark.puml
│ │ │ ├── general.puml
│ │ │ └── light.puml
│ └── src
│ │ ├── content_goals.puml
│ │ ├── net-deploy-rpi.puml
│ │ └── sequence.puml
├── index.md
├── stylesheets
│ ├── extra.css
│ └── images
│ │ ├── current.svg
│ │ ├── todo.svg
│ │ ├── trashcan.svg
│ │ └── warning.svg
└── versions.json
├── mkdocs.yml
├── overrides
└── main.html
└── resources
├── FTSLOGOSquare.png
├── FTSLOGOUI.png
├── FTSLOGOv2.png
├── FTSShield.png
└── main.md
/.github/workflows/main.yml:
--------------------------------------------------------------------------------
1 | # https://squidfunk.github.io/mkdocs-material/publishing-your-site/#github-pages
2 |
3 | name: Build and Publish User Docs
4 | on:
5 | push:
6 | branches:
7 | - main
8 | - mkdocs
9 | permissions:
10 | contents: write
11 | jobs:
12 | deploy:
13 | runs-on: ubuntu-latest
14 | steps:
15 | - uses: actions/checkout@v4
16 | - name: Configure Git Credentials
17 | run: |
18 | git config user.name github-actions[bot]
19 | git config user.email 41898282+github-actions[bot]@users.noreply.github.com
20 | - uses: actions/setup-python@v5
21 | with:
22 | python-version: 3.x
23 | - run: echo "cache_id=$(date --utc '+%V')" >> $GITHUB_ENV
24 | - uses: actions/cache@v4
25 | # https://github.com/actions/cache
26 | with:
27 | key: mkdocs-material-${{ env.cache_id }}
28 | path: .cache
29 | restore-keys: |
30 | mkdocs-material-
31 | - run: >-
32 | pip install mkdocs-material mkdocs-awesome-pages-plugin
33 | mkdocs-section-index mkdocs-toc-sidebar-plugin mike
34 | markdown-include mkdocs-pdf-export-plugin
35 | mkdocs-mermaid2-plugin
36 | httplib2
37 | mkdocs_build_plantuml_plugin
38 | mkdocs-exclude mkdocs-minify-plugin mkdocs-versioning
39 | # https://www.mkdocs.org/user-guide/cli/#mkdocs-gh-deploy
40 | - run: mkdocs gh-deploy --force
41 |
--------------------------------------------------------------------------------
/.gitignore:
--------------------------------------------------------------------------------
1 | .idea/
2 | site/
3 | docs/site/
--------------------------------------------------------------------------------
/.nojekell:
--------------------------------------------------------------------------------
https://raw.githubusercontent.com/FreeTAKTeam/FreeTAKServer-User-Docs/0db9cacf4a575734097484a7a4761b872751edf0/.nojekell
--------------------------------------------------------------------------------
/README.md:
--------------------------------------------------------------------------------
1 | # FreeTAKServer-User-Docs
2 | FreeTAKServer documentation for end users
3 |
4 |
5 |
6 | ## Notes for documentation updates
7 |
8 | ### `awesome-pages`
9 |
10 | The documentation uses the `awesome-pages` plugin which allows a
11 | finer control of the document navigation.
12 | The official documentation for `awesome-pages` is located in the [project repo](https://github.com/lukasgeiter/mkdocs-awesome-pages-plugin).
13 |
14 | In short, one may create a `.pages` file with in the directory hierarchy
15 | to manipulate how the navigation structure is created.
16 | This file should contain the `nav:` structure for just that directory.
17 | If the `.pages` file does not exist
18 | then `mkdocs` will generate the navigation according to its internal rules.
19 | Generally, a `.pages` should be provided and not fall to the internal rules.
20 |
21 | This plugin won't do anything if the `mkdocs.yml` defines a `nav` or `pages` entry.
22 |
23 | ### `mike`
24 | The documentation uses the `mike` plugin to provide support for multiple versions.
25 | The official documentation for `mike` is located in the [project repo](https://github.com/jimporter/mike/).
26 |
27 | Use of `mike` is not yet fully enabled.
28 | Advice as to its proper use is appreciated.
29 |
30 |
31 | ### `section-index`
32 | The documentation uses the `section-index` plugin which enables clickable sections leading to an index page.
33 | The official documentation for `section-index` is located in the [project repo](https://github.com/oprypin/mkdocs-section-index/).
34 |
35 |
36 | ### `search`
37 | The documentation uses the `search` built in plugin which allows your users to search your documentation.
38 | The official documentation for `search` is located in the [project repo](https://squidfunk.github.io/mkdocs-material/plugins/search/#configuration).
39 |
40 |
41 | ### `pdf-export`
42 | The documentation uses the `pdf-export` plugin which constructs a PDF file of the documentation.
43 | The official documentation for `pdf-export` is located in the [project repo](https://github.com/zhaoterryy/mkdocs-pdf-export-plugin).
44 |
45 | This only happens if the `ENABLE_PDF_EXPORT` environment variable it true.
46 |
47 |
48 | ### `markdown-include`
49 | The documentation uses the `markdown-include` plugin which constructs a PDF file of the documentation.
50 | The official documentation for `markdown-include` is located in the [project repo](https://github.com/cmacmackin/markdown-include).
51 |
52 | This reduces errors when text is to be injected into the document.
53 | For example, here is an excerpt from the LICENSE file.
54 | ```text
55 | {!LICENSE!lines=1 3 8-10 2}
56 | ```
57 |
58 |
59 | ### `attr_list`
60 | The documentation uses the `attr_list` extension which
61 | adds a syntax to define attributes on the various HTML elements in markdown’s output.
62 | The official documentation for `attr_list` is located in the [project repo](https://python-markdown.github.io/extensions/attr_list/).
63 |
64 | Some uses:
65 |
66 | * resizing images
67 | * associating classes with elements
68 |
69 |
70 | ### `mkdocs-mermaid2-plugin`
71 | The documentation uses Mermaid2 to make network-deployment-diagrams.
72 |
73 | ### `mkdocs_build_plantuml`
74 | The documentation uses PlantUML to make network-deployment-diagrams.
75 | https://github.com/quantorconsulting/mkdocs_build_plantuml
76 | This tooling supports more of C4 and UML.
77 |
78 |
79 |
--------------------------------------------------------------------------------
/docs/.pages:
--------------------------------------------------------------------------------
1 | nav:
2 | - Overview: index.md
3 | - About: About
4 | - Try Me: Usage
5 | - Installation: Installation
6 | - Troubleshooting: Troubleshooting
7 | - Administration: administration
8 | - How to Help: HowToHelp
9 | - API: API
--------------------------------------------------------------------------------
/docs/API/.pages:
--------------------------------------------------------------------------------
1 | nav:
2 | - REST API:
3 | - Public API: REST_API_PublicDoc.md
4 | - Internal API: REST_API_InternalDoc.md
--------------------------------------------------------------------------------
/docs/About/.pages:
--------------------------------------------------------------------------------
1 | nav:
2 | - Frequently Asked Questions: FAQ.md
3 | - Feature Comparison: FeaturesCompared.md
4 | - Free TAK Manifesto: Manifesto.md
5 | - Why a Free TAK Server: why_fts.md
6 | - Public Server: PubServer.md
7 | - Architecture: architecture
--------------------------------------------------------------------------------
/docs/About/FAQ.md:
--------------------------------------------------------------------------------
1 |
2 | # Frequently Asked Questions (FAQ) about FreeTAKServer (FTS)
3 |
4 | ## What is FTS?
5 | FTS is a TAK server written in Python that connects all your TAK devices.
6 |
7 | ## Is FTS really 'Free'?
8 | We released our software under the "Eclipse Public License" allowing not only private usage but also commercial products built on top of it.
9 |
10 | ## TAK clients on the same network can communicate directly! So, why should I use a server?
11 | There are many reasons for using a server, including the availability of a centralized repository of information (data packages),
12 | the administration of users and security (SSL),
13 | server-side functions (e.g., `ExCheck`, Data Sync),
14 | and integration with other non-TAK systems (e.g., video, audio, Telegram) using the FTS API.
15 |
16 | ## There are other servers for TAK. Why should I use FTS?
17 | FTS is not only powerful–it's also more user-friendly when [compared](FeaturesCompared.md) to other systems.
18 | Also, FTS is a community-driven Open Source project at its core.
19 | Under the covers, FTS is based on a [domain model](architecture/cot_domain.md),
20 | so it is the only TAK server that can provide analysis and interpretation
21 | of the information it collects–not just receive requests from clients
22 | and provides the requested data or perform the requested actions.
23 | Other TAK servers, on the other hand, act only as information brokers:
24 | they are services that collect, organize, and disseminate information.
25 | The bottom line is that FTS is "smarter" than other TAK servers.
26 |
27 | # How can I install FTS?
28 | For information on how to set up FTS,
29 | please see one of the [Installation Guides](../Installation/Tools.md).
30 |
31 | # When logging in I get "FTS Server is Not Reachable At x.x.x.x"
32 |
33 | A step was missed during the installation.
34 | Probably an appropriate IP address was not supplied.
35 | You can either reinstall
36 | [reinstalling and supplying the missing IP address](../Installation/mechanism/Ansible/ZeroTouchInstall.md)
37 | using an `explicit-ip-address`,
38 | or [correct the configuration](../administration/Operation/fts-config.md).
39 |
40 |
--------------------------------------------------------------------------------
/docs/About/FeaturesCompared.md:
--------------------------------------------------------------------------------
1 |
2 | # FreeTAKServer Compared
3 |
4 | Users have spoken: FTS is the best TAK server on GitHub!
5 |
6 | ## GitHub Star History
7 |
8 | [](https://star-history.com/#FreeTAKTeam/FreeTakServer&TAK-Product-Center/Server&tkuester/taky&Date)
9 |
10 | ## Functional Comparison
11 |
12 | *Legend*
13 |
14 | * X: Not Supported
15 | * Ø : 50%
16 | 1. Partial: Only covers basic / base functions.
17 | 2. Initial: Prototype Demonstrator
18 | * O:
19 | 1. Full: 100% implementation of the specs
20 | 2. Extended: > 100% the functions exceed the original Specification
21 |
22 | | Function | FTS 1.9 | TAKServer | FTS 2.X | Other |
23 | |:-------------------------:|:-------------------------:|:-------------:|:---------------------------:|:-------------:|
24 | | Web Administration | O (Single Page Web App) | O | O (Extended Multi Server) | X |
25 | | WebUI Configuration | O | O | O (Full) | X |
26 | | Federation Service | Ø (No Group) | O (Full) | O (Extended) | X |
27 | | Data Package | O | O | O | O |
28 | | Data Sync | X | O | O | X |
29 | | Easy Certificate | O | X | O | X |
30 | | CoT Database Recording | O | O | O | O |
31 | | KML Generation | O | O | O | X |
32 | | ExCheck Support | O | O | O | X |
33 | | SSL Encryption | O | O | O | O |
34 | | REST API | O (Full) | Ø | O (Extended) | X |
35 | | XML CoT | O | O | O | O |
36 | | Protobuf CoT | X | O | O | X |
37 | | WebMAP | O | O | O | X |
38 | | Video Server | O | X | O | X |
39 | | Voice Server | O | X | O | X |
40 | | FTP Server | X | O | O | X |
41 | | ZeroTouch Installer | Ø | X | O (Multi-Server) | X |
42 | | Telegram Integration | Ø | X | O | X |
43 | | LDAP / AD support | X | O | O | X |
44 | | Replay History | X | O | O | X |
45 | | Geo SQL query | X | O | O | X |
46 |
47 | ## Technology
48 |
49 | | Technology | FTS 1.9 | TAKServer | FTS 2.X | Other |
50 | |:-------------------:|:------------:|:-------------:|:-----------------:|:-------------:|
51 | | Data Sync | X | O | X | X |
52 | | Android Edition | Ø | X | O (Extended) | X |
53 | | Cloud Support | O | X | O (Extended) | X |
54 | | Recommended OS | Ubuntu 22.04 | CentOS | Ubuntu 22.04 | ??? |
55 | | Language | Python 3.8 | Java | Python 3.11 | ??? |
56 |
57 |
58 | ## Past stars history
59 |
60 |
61 |
--------------------------------------------------------------------------------
/docs/About/Manifesto.md:
--------------------------------------------------------------------------------
1 |
2 | # Manifesto for FreeTAKTeam
3 |
4 | We are FreeTAKTeam, a group of individuals passionate about democratizing Situational Awareness through the power of technology.
5 | We believe that access to situational awareness software should be available to everyone, regardless of their technical expertise or financial resources.
6 | Our mission is to create open-source software that is user-friendly, intuitive, and based on the latest and most advanced technologies.
7 | We strive to make our software accessible to anyone who needs it, whether it be first responders, humanitarian aid workers, or military personnel.
8 | We believe that by democratizing Situational Awareness, we can make the world a safer and more connected place.
9 | Our software is designed to be interoperable, allowing different organizations and agencies to share critical information in real-time, across multiple platforms and devices.
10 |
11 | We are committed to constantly improving our software and keeping it up-to-date with the latest advances in technology.
12 | We believe in the power of community and welcome feedback, contributions, and collaboration from anyone who shares our vision.
13 |
14 | Join us in our mission to democratize Situational Awareness and create a safer and more connected world.
15 | Together, we can make a difference.
16 |
--------------------------------------------------------------------------------
/docs/About/PubServer.md:
--------------------------------------------------------------------------------
1 |
2 | ## Connecting to FTS Public Server
3 |
4 | [](https://www.digitalocean.com/?refcode=f107fe7b7131&utm_campaign=Referral_Invite&utm_medium=Referral_Program&utm_source=badge)
5 |
6 | We support a public instance of FTS hosted by DigitalOcean.
7 |
8 | The Public server (PUB) is an instance of FTS made available for you to test and play with.
9 | We are not going to spy on you, but keep in mind that information will be shared with all the connected users.
10 | For production consider to install your own instance.
11 |
12 | ### FTS Public Instance Server Rules
13 |
14 | * Please be respectful of others.
15 | * This is a free service, but that cost money, do NOT upload huge data packages
16 | * We will use PUB to test new features, that means it can not be accessible during certain periods
17 | * Failure to respect those rules will be punished by our Killer Pirate Parrot (FreeTAKServer Developers), YOU HAVE BEEN WARNED.
18 |
19 | ### Configure `ATAK` for FreeTakServer (FTS) on the public server
20 |
21 | Download required files
22 |
23 | The easiest way is to open this article in your Android phone, so that all the files will be already available there.
24 |
25 | * Download and Install `ATAK` from the [TAK Product Center](https://www.tak.gov/) or [Mirror](https://7n7.us/civtak)
26 | * Download the Server Configuration File - [FTS Server Configuration File](../assets/fts-official-pub.zip)
27 | * Download the Basic Mapsources - [Basic Mapsources](https://drive.google.com/file/d/1u6xADO_kYolguf9-rXGZHtRgu-Cx_il4/view?usp=sharing)
28 | * Optional: Download Additional Maps - [Additional TAK Mapsources](https://drive.google.com/file/d/1Ltdp2U7ItEu6b380u9BYswVHLSD9F-vn/view?usp=sharing)
29 |
30 | ### Configure using Import Manager
31 |
32 | * Start `ATAK` on Android
33 | * Tap the "..." (Three-dot-Menu) on the Upper Right of the `ATAK` Screen.
34 | * Tap Import Manager
35 | * Tap "Local SD"
36 | * Go to the place where you have downloaded the files
37 | * Select "Google_Mapsources.zip" and "fts-official-pub.zip"
38 | * Optionally select "MOBAC-Maps-master.zip"
39 | * Click OK
40 | * A message will appear to inform you that you are connected to the FTS Official (Public) Server
41 |
42 |
43 | ### Configure using Settings
44 |
45 | * Tap ...
46 | * Tap the "..." (Three-dot-Menu) on the Upper Right of the `ATAK` Screen.
47 | * Go to Settings
48 | * Select "TAK Servers"
49 | * Tap the "..." and Click "Add"
50 | * Click Advanced Options
51 | * Select TCP as Streaming Protocol
52 | * Use this address: 137.184.101.250
53 | * Server port : 8087
54 | * Leave the rest unchecked. Username or Password are not required.
55 |
--------------------------------------------------------------------------------
/docs/About/architecture/.pages:
--------------------------------------------------------------------------------
1 | nav:
2 | - Cursor On Target:
3 | - CoT Domain: cot_domain.md
4 | - CoT Class Hierarchy: cot_hierarchy.md
5 | - CoT Table: cot_table.md
6 | - Common Warfighting Symbology 2525: mil_std_2525.md
--------------------------------------------------------------------------------
/docs/About/architecture/FlockOfParrots.md:
--------------------------------------------------------------------------------
1 | # Flock of Parrots Concept
2 | ``` mermaid
3 | graph TD;
4 | MasterParrot --> FTS1;
5 | MasterParrot --> FTS2;
6 | TAK_client_9 --> FTS2;
7 | TAK_client_2 --> FTS1;
8 | TAK_client_3 --> FTS1;
9 | TAK_client_1 --> FTS1;
10 | TAK_client_4 --> FTS2;
11 | TAK_client_6 --> FTS2;
12 | TAK_client_5 --> FTS2;
13 | FTS1 --> TAK_client_3;
14 | FTS1 --> TAK_client_2;
15 | FTS1 --> TAK_client_1;
16 | FTS2 --> TAK_client_4;
17 | FTS2 --> TAK_client_6;
18 | FTS2 --> TAK_client_5;
19 | FTS2 --> TAK_client_9;
20 | ```
21 |
22 |
23 |
--------------------------------------------------------------------------------
/docs/About/why_fts.md:
--------------------------------------------------------------------------------
1 |
2 | I want to emphasize a key principle:
3 | "Before you ask, ask yourself what you can give."
4 | Now, you might wonder, why should you give?
5 | As the authors of FTS, here are our top 10 reasons for creating this software for you:
6 |
7 | ## WHY FTS IS BETTER
8 |
9 | 1. Since 2020, FreeTAKServer (FTS) has been a labor of love,
10 | supported by dozens of volunteers dedicating their free time, including Sundays.
11 | 2. FTS boasts a modern, scalable architecture, completely revamped for the 2.X series.
12 | 3. It's nurtured by a dedicated community that stands up to giants.
13 | 4. Extensive documentation supports users at every step.
14 | 5. FTS is incredibly versatile, capable of running on a wide range of platforms (and no, this don't mean that ANYBOBY can run FTS on everything!) .
15 | 6. It intelligently "understands" COT messages, paving the way for innovative developments.
16 | 7. Our public roadmap invites community involvement and contribution towards a shared vision.
17 | 8. FTS embodies true open-source principles, welcoming everyone to contribute and benefit. we are not hiding behind secrecy and limited access
18 | 9. Installation is straightforward compared to the convoluted process for TAK Server.
19 | 10. We believe in the power of community and open-source development. FTS is not just "our software"; it's a collaborative effort that benefits all users.
20 |
21 | ## WHY WE DO NOT LIKE TAK Server
22 |
23 | 1. TAK Server OG is based on ancient (20+ years) J2EE architecture with a lot of spaghetti code.
24 | 2. It's notoriously difficult to install—historically requiring specialized personnel funded by the USG.
25 | 3. The user interface is far from user-friendly.
26 | 4. It's maintained by a mega-corporation charging exorbitant fees for minimal service.
27 | 5. The documentation is either sparse or non-existent.
28 | 6. It demands significant machine resources to operate.
29 | 7. It acts merely as a "broker" without any understanding of the messages it handles.
30 | 8. There's no public roadmap.
31 | 9. Though recently open-sourced, TAK Server lacks a true open-source spirit, focusing mainly on military applications without community engagement.
32 | 10. Pressure from our project contributed to making TAK server publicly available, highlighting its previous exclusivity.
33 |
34 | Join us in supporting and contributing to FTS, and let's continue to make it even better together. You can start by giving FTS a star in GitHub:
35 | On https://github.com/FreeTAKTeam/FreeTakServer, in the top-right corner of the page, click Star.
--------------------------------------------------------------------------------
/docs/HowToHelp/.pages:
--------------------------------------------------------------------------------
1 | title: How to Help
2 |
3 | nav:
4 | - Getting Started: GettingStartedAsHelper.md
5 | - Developer:
6 | - Set Up:
7 | - VS Code and PIP: DevSetupPipVScode.md
8 | - PyCharm and Mamba: DevSetupMambaPyCharm.md
9 | - Write Documentation: WriteDocumentation.md
--------------------------------------------------------------------------------
/docs/HowToHelp/DevSetupMambaPyCharm.md:
--------------------------------------------------------------------------------
1 |
2 | # Setup a development environment for FTS
3 | ## introduction
4 | this tutorial assumes that you are working under windows (tested under 11)
5 |
6 | # Tools Installation
7 |
8 | ## Get the IDE: PyCharm
9 | As an integrated Development Environment (IDE) some people use PyCharm.
10 |
11 | [Download PyCharm from here](https://www.jetbrains.com/pycharm/)
12 |
13 | ## Clone the Project Repositories
14 |
15 | Clone from the [FreeTAKTeam/repositories](https://github.com/orgs/FreeTAKTeam/repositories) group
16 | `FreeTakServer` and `DigitalPy` repositories locally.
17 | This can be done from within `PyCharm`.
18 |
19 | It can also be done from the command line.
20 |
21 | ```shell
22 | git clone https://github.com/FreeTAKTeam/FreeTakServer.git fts
23 | git clone https://github.com/FreeTAKTeam/DigitalPy dipy
24 | ```
25 |
26 | Some other optional repositories:
27 | ```shell
28 | git clone https://github.com/FreeTAKTeam/FreeTAKServer-User-Docs fts-docs
29 | git clone https://github.com/FreeTAKTeam/UI.git fts-ui
30 | ```
31 |
32 | # Create a virtual Environment
33 |
34 | Here we [use a `conda` variant, `micromamba`](https://mamba.readthedocs.io/en/latest/user_guide/micromamba.html).
35 |
36 | Detailed installation instructions can be found [here](https://mamba.readthedocs.io/en/latest/installation/micromamba-installation.html).
37 |
38 | With `micromamba` installed we can set up a virtual environment:
39 |
40 | ```shell
41 | mamba env create -y -f fts_user/docs/HowToHelp/fts-dev-env.yml
42 | ```
43 |
44 | This environment definition is not seminal.
45 | The dependencies used here are copied from the following sources:
46 |
47 | FreeTakServer
48 |
49 | * [FreeTakServer/pyproject.toml](https://github.com/FreeTAKTeam/FreeTakServer/pyproject.toml)
50 | * [FreeTakServer/setup.py](https://github.com/FreeTAKTeam/FreeTakServer/setup.py)
51 | * [FreeTAKServer/.../mission/test-requirements.txt](https://github.com/FreeTAKTeam/FreeTakServer/FreeTAKServer/components/extended/mission/test-requirements.txt)
52 | * [FreeTAKServer/.../mission/requirements.txt](https://github.com/FreeTAKTeam/FreeTakServer/FreeTAKServer/components/extended/mission/requirements.txt)
53 | * [FreeTakServer/requirements.txt](https://github.com/FreeTAKTeam/FreeTakServer/requirements.txt)
54 |
55 | DigitalPy
56 |
57 | * [DigitalPy/pyproject.toml](https://github.com/FreeTAKTeam/DigitalPy/pyproject.toml)
58 |
59 | ```yaml
60 | {!HowToHelp/fts-dev-env.yml!}
61 | ```
62 |
63 | Activate the virtual environment
64 | ```
65 | mamba activate fts-dev
66 | ```
67 | # Install FTS Locally
68 |
69 | Install dependencies and DigitalPy as package
70 | ```
71 | pushd dipy
72 | pip install -e .
73 | popd
74 | ```
75 |
76 | # Configure PyCharm
77 |
78 | ### FTS YAML File
79 | In the folder containing the FreeTakServer working repository create a file.
80 |
81 | Populate that file, `FTSConfig.yaml`, with the following:
82 | ```yaml
83 | {!HowToHelp/FTSConfig.yaml!}
84 | ```
85 |
86 | 1. Adjust paths to point to point to dir structure
87 | 2. Create a certs folder at the same level
88 | 3. Adjust FTS_CERTS_PATH to point to the newly created dir
89 | 4. Create new directory for the FreeTakServerLogs
90 | 5. Adjust FTS_LOGFILE_PATH to point to the newly created dir
91 |
92 | # you're Ready to Help!
93 |
94 |
95 |
--------------------------------------------------------------------------------
/docs/HowToHelp/DevSetupPipVScode.md:
--------------------------------------------------------------------------------
1 |
2 | # Setup a development environment for FTS
3 | ## introduction
4 | this tutorial assumes that you are working under windows (tested under 11)
5 |
6 | # Tools Installation
7 | ## Install Python
8 | Download python-3.11.1-amd64.exe from the [source](https://www.python.org/downloads/release/python-3111/)
9 |
10 | ## Get the IDE: VisualStudio Code
11 | As an integrated Development Environment (IDE) we use VisualStudio Code.
12 | Visual Studio Code is integrated with GitHub, in fact you can start editing any file directly in the browser for committing lightweight code changes.
13 |
14 | For a more serious collaboration you should install the desktop version:
15 | https://code.visualstudio.com/Download
16 | with the following plugins:
17 |
18 | 
19 |
20 | we use the **Setting Sync** plugin to keep the team setting aligned,
21 | ask us for the coordinates of the settings.
22 |
23 | ## Install visual-cpp-build-tools
24 | Get [Microsoft C++ Build Tools](https://visualstudio.microsoft.com/visual-cpp-build-tools/)
25 | 
26 |
27 | ensure that you have "Desktop development with C++" installed
28 | 
29 |
30 |
31 | ## Install a source code manager: TortoiseGit
32 | install a source code manager like [TortoiseGit](https://tortoisegit.org/)
33 |
34 | Clone from the `https://github.com/orgs/FreeTAKTeam/repositories` group
35 | `FreeTakServer` and `DigitalPy` repositories locally.
36 | 
37 | ```shell
38 | git clone https://github.com/FreeTAKTeam/FreeTakServer.git fts
39 | git clone https://github.com/FreeTAKTeam/DigitalPy dipy
40 | ```
41 |
42 | Some other optional repositories:
43 | ```shell
44 | git clone https://github.com/FreeTAKTeam/FreeTAKServer-User-Docs fts-docs
45 | git clone https://github.com/FreeTAKTeam/UI.git fts-ui
46 | ```
47 |
48 | # Configuration
49 | ## create a virtual Environment
50 | * open a command prompt and navigate to the FreeTakServer repo
51 | * Type:
52 | ```powershell
53 | py -m venv venv
54 | ```
55 |
56 | Having set up a virtual environment
57 | you now take a look inside the directory of your venv.
58 | You will see something like this (on Windows):
59 | ```
60 | .
61 | ├── Include
62 | ├── Lib
63 | │ └── site-packages
64 | ├── pyvenv.cfg
65 | └── Scripts
66 | ├── activate
67 | ├── activate.bat
68 | ├── Activate.ps1
69 | ├── deactivate.bat
70 | ├── pip3.10.exe
71 | ├── pip3.exe
72 | ├── pip.exe
73 | ├── python.exe
74 | └── pythonw.exe
75 | ```
76 | Activate the virtual environment
77 | ```
78 | # In cmd.exe
79 | venv\Scripts\activate.bat
80 | # In PowerShell
81 | venv\Scripts\Activate.ps1
82 | ```
83 | # Install FTS locally
84 | show installed packages
85 | ```
86 | pip list
87 | ```
88 | output
89 |
90 | 
91 |
92 | * now install dependencies and FreeTAKServer as package
93 | ```
94 | pip install -e .
95 | ```
96 |
97 | change directory to DigitalPy dir
98 | ```
99 | cd .../DigitalPy
100 | ```
101 | install dependencies and DigitalPy as package
102 | ```
103 | pip install -e .
104 | ```
105 |
106 | # Configure VS Code
107 | open VS Code Explorer to the location of the FreeTAKServer project
108 |
109 | 
110 |
111 | * change the VSCODE Python Interpreter (ctrl + shift + p).
112 | * Look for "Python: Select Interpreter".
113 | * Select the one in your `venv/scripts/python.exe`
114 | * Go to "Run and Debug"
115 | * Select "Create launch.json" file
116 | * copy this configuration over the created file and configure `[YOURPATH]` with your actual path
117 | ```json
118 | {
119 | "version": "0.2.0",
120 | "configurations": [
121 | {
122 | "name": "FTS",
123 | "type": "python",
124 | "request": "launch",
125 | "program": "C:\\[YOURPATH]\\src\\FreeTakServer\\FreeTAKServer\\controllers\\services\\FTS.py",
126 | "console": "integratedTerminal",
127 | "justMyCode": false,
128 | "env": {
129 | "FTS_CONFIG_PATH": "C:\\[YOURPATH]\\src\\FreeTakServer\\FreeTAKServer\\FTSConfig.yaml",
130 | "FTS_FIRST_START": "false",
131 | "PYTHONTRACEMALLOC": "25"
132 | }
133 | }
134 | ]
135 | }
136 | ```
137 |
138 | 
139 |
140 |
141 | ### FTS YAML File
142 | In the folder containing the FreeTakServer repo create a file:
143 | `FTSConfig.yaml`
144 |
145 |
146 |
147 | Copy the example FTSConfig.yaml into the file just created
148 | ```yaml
149 | {!HowToHelp/FTSConfig.yaml!}
150 | ```
151 |
152 | 1. Adjust paths to point to point to dir structure
153 | 2. Create a certs folder at the same level
154 | 3. Adjust FTS_CERTS_PATH to point to the newly created dir
155 | 4. Create new directory for the FreeTakServerLogs
156 | 5. Adjust FTS_LOGFILE_PATH to point to the newly created dir
157 |
158 | # you're Done!
159 | Hit `[F5]` to run debug
160 |
161 |
--------------------------------------------------------------------------------
/docs/HowToHelp/FTSConfig.yaml:
--------------------------------------------------------------------------------
1 | System:
2 | #FTS_DATABASE_TYPE: SQLite
3 | FTS_CONNECTION_MESSAGE: Welcome to FreeTAKServer FreeTAKServer-2.X alpha.
4 | The Parrot is not dead. It’s just resting
5 | #FTS_OPTIMIZE_API: True
6 | #FTS_MAINLOOP_DELAY: 1
7 | Addresses:
8 | #FTS_COT_PORT: 8087
9 | #FTS_SSLCOT_PORT: 8089
10 | FTS_DP_ADDRESS: 192.168.100.105
11 | FTS_USER_ADDRESS: 192.168.100.105
12 | #FTS_API_PORT: 19023
13 | #FTS_FED_PORT: 9000
14 | #FTS_API_ADDRESS: 0.0.0.0
15 | FTS_FIRST_START: false
16 | Filesystem:
17 | FTS_DB_PATH: [PATH]\\FreeTakServer\\FreeTAKServer.db
18 | #FTS_COT_TO_DB: True
19 | FTS_MAINPATH: [PATH]\\FreeTakServer\\FreeTAKServer
20 | FTS_CERTS_PATH: [PATH]\\FreeTakServer\\FreeTAKServerCerts
21 | FTS_EXCHECK_PATH: [PATH]\\FreeTakServer\\ExCheck
22 | FTS_EXCHECK_TEMPLATE_PATH: [PATH]\\FreeTakServer\\ExCheck\\template
23 | FTS_EXCHECK_CHECKLIST_PATH: [PATH]\\FreeTakServer\\ExCheck\\checklist
24 | FTS_DATAPACKAGE_PATH: [PATH]\\FreeTakServer\\FreeTAKServerDataPackageFolder
25 | FTS_LOGFILE_PATH: [PATH]\\FreeTakServer\\FreeTakServerLogs
26 | FTS_CORE_COMPONENTS_PATH: \\home\\ariel\\Workspace\\FTAK\\FreeTakServer\\FreeTAKServer\\components\\core
27 | FTS_EXTERNAL_COMPONENTS_PATH: [PATH]\\FreeTakServer\\components\\extended
28 | FTS_CLIENT_PACKAGES: [PATH]\\FreeTakServer\\FreeTAKServerCerts\\clientPackages
29 | Certs:
30 | FTS_SERVER_KEYDIR: [PATH]\\FreeTakServer\\FreeTAKServerCerts\\server.key
31 | FTS_SERVER_PEMDIR: [PATH]\\FreeTakServer\\FreeTAKServerCerts\\server.pem
32 | FTS_TESTCLIENT_PEMDIR: [PATH]\\FreeTakServer\\FreeTAKServerCerts\\Client.pem
33 | FTS_TESTCLIENT_KEYDIR: [PATH]\\FreeTakServer\\FreeTAKServerCerts\\Client.key
34 | FTS_UNENCRYPTED_KEYDIR: [PATH]\\FreeTakServer\\FreeTAKServerCerts\\server.key.unencrypted
35 | FTS_SERVER_P12DIR: [PATH]\\FreeTakServer\\FreeTAKServerCerts\\server.p12
36 | FTS_CADIR: [PATH]\\FreeTakServer\\FreeTAKServerCerts\\ca.pem
37 | FTS_CAKEYDIR: [PATH]\\FreeTakServer\\FreeTAKServerCerts\\ca.key
38 | FTS_FEDERATION_CERTDIR: [PATH]\\FreeTakServer\\FreeTAKServerCerts\\server.pem
39 | FTS_FEDERATION_KEYDIR: [PATH]\\FreeTakServer\\FreeTAKServerCerts\\server.key
40 | FTS_CRLDIR: [PATH]\\FreeTakServer\\FreeTAKServerCerts\\FTS_CRL.json
41 | FTS_FEDERATION_KEYPASS: demopassfed
42 | FTS_CLIENT_CERT_PASSWORD: demopasscert
43 | FTS_WEBSOCKET_KEY: YourWebsocketKey
--------------------------------------------------------------------------------
/docs/HowToHelp/GettingStartedAsHelper.md:
--------------------------------------------------------------------------------
1 |
2 | # How to help
3 | Depending on your skill-set and passion you can participate in the project in different ways.
4 | Jump to the proper Section to get the instructions,
5 | this page is structured so that the basic instructions applies to more advanced roles.
6 |
7 | * Hobby User
8 | * Professional User / SME
9 | * Unix Admin / DevOps
10 | * Developer
11 | * Modeler / Digital Engineer
12 |
13 | ## Hobby User
14 | As a Hobby user you want to install and use the FTS-TAK platform.
15 | ### getting started as a Hobby User
16 | * Connect to our Public server to familiarize your self
17 | * Read the user manual in GitHub, if you find inconsistencies submit a change request
18 | * Install FTS on your environment
19 | * give us a Star in GitHub
20 | * Donate to the project
21 |
22 | ## Professional User / SME
23 | ### getting started as Professional User / SME
24 | * Create a GitHub user
25 | * Submit issues to GitHub
26 |
27 | ## Unix Admin / DevOps
28 | You are familiar with installing and configuring complex applications using the console,
29 | you understand network configuration
30 |
31 | ### getting started as an Admin / DevOps
32 | * Help Other users on our Discord and Discourse with installation and configuration issues
33 | * Submit tutorials on how to deploy FTS in different environments (different clouds, different OS and so on)
34 |
35 | ## Developer
36 | As a developer you have code experience in one or many of the languages we use (Python, JavaScript).
37 |
38 | ### getting started as a Developer
39 | A good way to start helping is to pick a task.
40 |
41 | * Select a candidate task
42 | * from the current issues that we have [open](https://github.com/FreeTAKTeam/FreeTakServer/issues?q=is%3Aissue+is%3Aopen+is%3Aissue+is%3Aopen+label%3Abug_normal%2Cbug_minor%2Cbug_Fatal)
43 | * look in the planned [features](https://github.com/FreeTAKTeam/FreeTakServer/issues?q=is%3Aissue+is%3Aopen+label%3Aenhancement)
44 | * Fork the [appropriate repository](https://github.com/orgs/FreeTAKTeam/repositories)
45 | * Try to perform the task
46 | * to set up your machine for "VisualStudio Code" and "Pip" use [this tutorial](DevSetupPipVScode.md)
47 | * to set up your machine for "PyCharm" and "Mamba" use [this tutorial](DevSetupMambaPyCharm.md)
48 | * Make a GutHub pull request (PR)
49 | * work with an FTS committer to get the PR accepted
50 |
51 | While selecting or working on a task you can get guidance at the
52 |
53 | - The [FTS Discord](https://discord.gg/m8cBzQM2te) Server
54 |
55 | ### writing documentation
56 |
57 | [Improve the documentation](WriteDocumentation.md)
58 |
59 |
60 | ## Modeler / Digital Engineer
61 | You are an architect or a very experienced developer with
62 | deep understanding of Object-Oriented thinking, patterns and Models.
63 |
64 | #### get the digital environment
65 | we use Sparx ™ Enterprise Architect as modeling tool.
66 |
--------------------------------------------------------------------------------
/docs/HowToHelp/WriteDocumentation.md:
--------------------------------------------------------------------------------
1 |
2 | # Write Documentation
3 |
4 | This project houses the FreeTakServer (FTS) documentation.
5 | It is written in Markdown and mkdirs.
6 |
7 | ## Procedure
8 |
9 | ### Fork the Main Repository
10 |
11 | You will need a `github` account.
12 |
13 | Fork into your own account.
14 | Clone your forked repository onto your development environment.
15 |
16 | It will probably be useful to have two remotes,
17 | one (upstream) for merging in upstream commits,
18 | and one (origin) for your forked repository.
19 |
20 | ### Discuss on the FreeTAK Forum
21 |
22 | FTS provides a Discord server where we can provide a consistent experience,
23 | free from kindergarten dramas and with a lot of sense of humor
24 | (keep in mind our tagline – "The parrot's not dead! It’s just resting").
25 | You can join the FTS Discord Server here: .
26 | While Discord is cool for live interaction, it can be very inconsistent.
27 | The forum is organized thematically, where it’s easier to stay on topic.
28 | This will include a knowledge library of problems and solutions.
29 | While other places may exist were enthusiast discuss our software,
30 | the new platform is what we, the developers, will actively support.
31 |
32 |
33 | ### Make Changes
34 |
35 | See Documentation Patterns below.
36 |
37 |
38 | ### Verify Processing
39 |
40 | !!! Warning
41 | The following description is only partially correct.
42 |
43 | #### GitHub Pages
44 |
45 | GitHub provides the ability to publish generated documentation.
46 | FTS makes use of this capability.
47 |
48 | You should generate the documentation with your changes to make sure nothing was inadvertently broken.
49 | The following shows you an example of how to set up `gh-pages` for your project repository.
50 |
51 | 
52 |
53 | The important thing here is to select `[GitHub Actions]`.
54 |
55 |
56 |
57 | #### GitHub Action
58 |
59 | The documentation is built via GitHub actions.
60 | Here is the `.github/workflows/main.yml` action:
61 | ```yaml
62 | {!../.github/workflows/main.yml!}
63 | ```
64 | name
65 | : The name of the workflow
66 |
67 | on push branches main
68 | : The event and branch which triggers this workflow
69 |
70 | jobs deploy steps run
71 | : Install dependencies and build the target
72 |
73 | If the GitHub Page does not show up after a few minutes,
74 | go to the settings of your repository and ensure that the publishing source branch for your GitHub Page is set to `gh-pages`.
75 |
76 | ### Make a Pull Request (PR)
77 |
78 | Once you are satisfied with your changes make a GitHub pull request.
79 |
80 | Announce your PR on the discord `Development / doc-dev` channel.
81 | (You have been discussing your changes there, right?)
82 |
83 | Any changes you make to the branch associated with
84 | the PR will be included until it is approved and merged.
85 |
86 | ## Working Locally
87 |
88 | While you will ultimately verify your work as outlined above,
89 | it will probably be useful to work locally.
90 |
91 | ### Dependencies
92 |
93 | Here are the packages it uses:
94 | These packages are available for `conda`.
95 |
96 | ```shell
97 | mamba env create -y -f docs/docs/HowToHelp/fts-doc-env.yml
98 | ```
99 | This environment includes the packages needed to construct the document products.
100 | ```yaml
101 | {!HowToHelp/fts-doc-env.yml!}
102 | ```
103 |
104 | ### Preview Document
105 |
106 | Start a service to view the resulting document.
107 | ```shell
108 | mkdocs serve
109 | ```
110 |
111 | ## Documentation Patterns
112 |
113 | ### Mkdocs and Material Theme
114 |
115 | The markdown files are coordinated and supplemented by `mkdocs` and its plugins.
116 | Some of the more important features of those plugins are presented here.
117 |
118 | `mkdocs` is configured via the `mkdocs.yml` file.
119 |
120 | ### Awesome Pages
121 |
122 | Each document directory should contain a `.pages`.
123 | These `.pages` distribute the `nav:` element across the document
124 | rather than collecting them in the `mkdocs.yml` file.
125 | This implies that `mkdocs.yml` should not contain a `nav:` element.
126 |
127 | ### Markdown Includes
128 |
129 | This file contains a typical example.
130 | The `fts-doc-env.yml` file mentioned above is itself included using this facility.
131 |
132 | i.e.
133 | \```yml
134 | {\!HowToHelp/fts-doc-env.yml\!}
135 | \```
136 |
137 | ### Mike (multi-version support)
138 |
139 | The `fts_user/docs/versions.json` is used to define the versions.
140 |
141 | TODO: Explain how this is to be used.
142 |
143 | ### Mermaid
144 |
145 | For simple diagrams we use `Mermaid`.
146 |
147 | https://mermaid.js.org/
148 |
149 |
150 | ### PlantUML
151 |
152 | There are some cases where `Mermaid` is not sufficient such as making `Network Deployment Diagrams`.
153 | When that happens we use `PlantUML`.
154 |
155 | https://github.com/plantuml-stdlib/C4-PlantUML/blob/master/README.md
156 |
157 |
158 |
159 | ## Writing Good Markdown
160 |
161 | * https://docs.github.com/en/get-started/writing-on-github/getting-started-with-writing-and-formatting-on-github/basic-writing-and-formatting-syntax
162 | * https://github.com/ikatyang/emoji-cheat-sheet/blob/master/README.md
163 |
164 | ### Ventilated Prose
165 |
166 | Prefer ventilated prose in composition.
167 |
168 | * https://writetheasciidocs.netlify.app/ventilated-prose
169 | * https://vanemden.wordpress.com/2009/01/01/ventilated-prose/
170 | * https://mattwidmann.net/notes/using-markdown-effectively/
171 |
172 | Ventilated prose dates back to the 1930s,
173 | when Buckminster Fuller first coined the term.
174 |
175 | The main benefit in using ventilated prose is
176 | that it works well with tools like `git`.
177 | `git` defaults to using `diff` which compares lines of text.
178 | (This `git` default is seldom changed.)
179 | This implies that ideas should be confined to lines of text,
180 | which is precisely what ventilated code.
181 |
182 | ### Apply Style Judiciously
183 |
184 | It may be that a captured image is too large.
185 | It may be tempting to resize the image.
186 | However, if a reader wants to see the detail in the image this will lose that detail.
187 | Instead, apply a style to the image to make it smaller.
188 | ```text
189 | {: style="height:200px;width:150px" }
190 | ```
191 |
--------------------------------------------------------------------------------
/docs/HowToHelp/fts-dev-env.yml:
--------------------------------------------------------------------------------
1 | name: fts-dev
2 | channels:
3 | - conda-forge
4 | dependencies:
5 | - coverage>=7.3.2
6 | - coveralls>=1.8.0
7 | - email-validator>=2.1.0.post1
8 | - flake8>=6.1.0
9 | - flake8-print>=5.0.0
10 | - flask>=3.0.0
11 | - flask-login>=0.6.3
12 | - flask-migrate>=4.0.5
13 | - flask-wtf>=1.2.1
14 | - flask-testing>=0.8.0
15 | - lxml>=4.9.3
16 | - nose>=1.3.7
17 | - pluggy>=1.3.0
18 | - pathlib>=1.0.1
19 | - pep8-naming>=0.13.3
20 | - platformdirs>=4.0.0
21 | - pycairo>=1.25.1
22 | - python=3.11
23 | - selenium>=4.15.2
24 | - setuptools>=68.2.2
25 | - tabulate>=0.9.0
26 | - tox>=4.11.4
27 | - vim>=9.0.2059
28 | - waitress>=2.1.2
29 | - pytest>=7.4.3
30 | - pytest-pep8>=1.0.6
31 | - pytest-cov>=4.1.0
32 | - pip>=23.3.1
33 | - pip:
34 | - pytak>=6.2.0
35 | - randomize>=0.14
--------------------------------------------------------------------------------
/docs/HowToHelp/fts-doc-env.yml:
--------------------------------------------------------------------------------
1 | name: fts-doc
2 | channels:
3 | - conda-forge
4 | dependencies:
5 | - python=3.11
6 | - mkdocs
7 | - mkdocs-material
8 | - mkdocs-material-extensions
9 | - mike
10 | # - mkdocs-jupyter
11 | - markdown-include
12 | - pip
13 | - pip:
14 | - mkdocs-awesome-pages-plugin
15 | - mkdocs-section-index
16 | - mkdocs-pdf-export-plugin
17 | - mkdocs-mermaid2-plugin
18 | - mkdocs_puml
--------------------------------------------------------------------------------
/docs/HowToHelp/images/github-pages-actions.png:
--------------------------------------------------------------------------------
https://raw.githubusercontent.com/FreeTAKTeam/FreeTAKServer-User-Docs/0db9cacf4a575734097484a7a4761b872751edf0/docs/HowToHelp/images/github-pages-actions.png
--------------------------------------------------------------------------------
/docs/HowToHelp/images/github-pages-branch.png:
--------------------------------------------------------------------------------
https://raw.githubusercontent.com/FreeTAKTeam/FreeTAKServer-User-Docs/0db9cacf4a575734097484a7a4761b872751edf0/docs/HowToHelp/images/github-pages-branch.png
--------------------------------------------------------------------------------
/docs/Installation/.pages:
--------------------------------------------------------------------------------
1 | title: Installation
2 |
3 | nav:
4 | - Infrastructure Planning: InfrastructurePlanning.md
5 | - Target Platforms: platform
6 | - Installation Mechanisms: mechanism
7 | - Tools you need: Tools.md
8 | - Video Guides: Video_Guides.md
9 |
--------------------------------------------------------------------------------
/docs/Installation/Tools.md:
--------------------------------------------------------------------------------
1 |
2 | ## Helpful Tools
3 |
4 | ### Secure Shell
5 | Allows you to remotely connect and manage your Linux devices (e.g. RaspPi).
6 | Helpful for being able to copy/paste from the documentation into the Terminal CLI.
7 |
8 | #### OpenSSH
9 | Best used from the command line.
10 | OpenSSH is available on many platforms:
11 |
12 | * [Windows 11](https://learn.microsoft.com/en-us/windows-server/administration/openssh/openssh_install_firstuse?tabs=gui)
13 | * Ubuntu `sudo apt install openssh-client`
14 |
15 | #### PuTTy
16 | PuTTy has a GUI that some people prefer.
17 |
18 | 1. Download PuTTY
19 | - [https://www.chiark.greenend.org.uk/~sgtatham/putty/latest.html](https://www.chiark.greenend.org.uk/~sgtatham/putty/latest.html)
20 | 2. To set up: Under Host Name, enter your RaspPi IP address and select SSH for the Connection type
21 |
22 | #### WinSCP
23 | A GUI-type file manager.
24 | Helpful for basic file management and understanding the RaspPi’s file structure.
25 | You can also start Putty from a WinSCP
26 |
27 | 1. Download WinSCP
28 | - [https://winscp.net/eng/download.php](https://winscp.net/eng/download.php)
29 | 2. To set up:
30 | 1. Click `New Site`
31 | 2. Select SCP for File protocol
32 | 3. Enter RaspPi’s IP address for Host name
33 | 4. Click Advanced button
34 | 5. Select `Shell` under environment,
35 | changing shell setting from Default to ```sudo su -```
36 | (this will allow your changes to have Root privileges)
37 | 3. Click `OK` and then `Save` (if desired)
38 |
39 | ### ZeroTier
40 | A software-defined wide area networking infrastructure that
41 | allows you to create a virtual network that is relatively secure and under your control.
42 | Allows clients to have static IPs that can be accessed
43 | regardless of location on the internet and can be toggled on/off instantly.
44 |
45 | 1. Download ZeroTier
46 | - [https://www.zerotier.com/download/](https://www.zerotier.com/download/)
47 |
--------------------------------------------------------------------------------
/docs/Installation/Video_Guides.md:
--------------------------------------------------------------------------------
1 |
2 | ## Official FreeTAKTeam channel
3 | [FreeTAKTeam](https://www.youtube.com/channel/UCJJOterycd1UuulmQGEV8Iw/featured) `youtube` channel
4 |
5 | ## RPiFTS Series
6 | GHOST_DA-B6 has created a set of videos on `youtube` detailing how to install and set up 1.5 FTS on raspberry pi single board computers.
7 | This is not updated to the current version of FTS
8 | You can view his RPiFTS video series on his [channel](https://www.youtube.com/channel/UC--WpY--HV7PymMWLgfflZA).
9 |
--------------------------------------------------------------------------------
/docs/Installation/images/configure_fts.png:
--------------------------------------------------------------------------------
https://raw.githubusercontent.com/FreeTAKTeam/FreeTAKServer-User-Docs/0db9cacf4a575734097484a7a4761b872751edf0/docs/Installation/images/configure_fts.png
--------------------------------------------------------------------------------
/docs/Installation/images/std_deploy.png:
--------------------------------------------------------------------------------
https://raw.githubusercontent.com/FreeTAKTeam/FreeTAKServer-User-Docs/0db9cacf4a575734097484a7a4761b872751edf0/docs/Installation/images/std_deploy.png
--------------------------------------------------------------------------------
/docs/Installation/images/std_deploy_rpi.png:
--------------------------------------------------------------------------------
https://raw.githubusercontent.com/FreeTAKTeam/FreeTAKServer-User-Docs/0db9cacf4a575734097484a7a4761b872751edf0/docs/Installation/images/std_deploy_rpi.png
--------------------------------------------------------------------------------
/docs/Installation/images/std_deploy_uas.png:
--------------------------------------------------------------------------------
https://raw.githubusercontent.com/FreeTAKTeam/FreeTAKServer-User-Docs/0db9cacf4a575734097484a7a4761b872751edf0/docs/Installation/images/std_deploy_uas.png
--------------------------------------------------------------------------------
/docs/Installation/images/std_deploy_video.png:
--------------------------------------------------------------------------------
https://raw.githubusercontent.com/FreeTAKTeam/FreeTAKServer-User-Docs/0db9cacf4a575734097484a7a4761b872751edf0/docs/Installation/images/std_deploy_video.png
--------------------------------------------------------------------------------
/docs/Installation/images/zero-touch-deply-default.png:
--------------------------------------------------------------------------------
https://raw.githubusercontent.com/FreeTAKTeam/FreeTAKServer-User-Docs/0db9cacf4a575734097484a7a4761b872751edf0/docs/Installation/images/zero-touch-deply-default.png
--------------------------------------------------------------------------------
/docs/Installation/images/zero-touch-summary.png:
--------------------------------------------------------------------------------
https://raw.githubusercontent.com/FreeTAKTeam/FreeTAKServer-User-Docs/0db9cacf4a575734097484a7a4761b872751edf0/docs/Installation/images/zero-touch-summary.png
--------------------------------------------------------------------------------
/docs/Installation/mechanism/.pages:
--------------------------------------------------------------------------------
1 | title: Installation Mechanism
2 |
3 | nav:
4 | - Ansible Zero Touch Install: Ansible
5 | - Container (Docker): Docker
6 | - Manual: Manual
7 |
--------------------------------------------------------------------------------
/docs/Installation/mechanism/Ansible/.pages:
--------------------------------------------------------------------------------
1 | title: Ansible
2 |
3 | nav:
4 | - Zero Touch: ZeroTouchInstall.md
--------------------------------------------------------------------------------
/docs/Installation/mechanism/Docker/.pages:
--------------------------------------------------------------------------------
1 | title: Container (Docker)
2 |
3 | collapse_single_pages: true
4 |
5 | nav:
6 | - Quick Start Guide: Quick_Start.md
7 | - Overview: overview.md
8 | - Raspberry Pi: Raspberry_Pi.md
9 | - Command Line Interface: CLI.md
10 | - Debian Linux: Debian.md
11 | - Multiple Servers: Multiple_Servers
12 | - Upgrading Container: Upgrade
13 |
--------------------------------------------------------------------------------
/docs/Installation/mechanism/Docker/CLI.md:
--------------------------------------------------------------------------------
1 |
2 | # CLI Access
3 |
4 | ## Accessing the CLI
5 | With the docker container isolating the running instance you also need to use docker to access the cli.
6 | ```bash
7 | docker exec -it fts python3 -m FreeTAKServer.views.CLI
8 | ```
9 | This will open a CLI instance attached to the process running in the container.
10 |
11 | With the CLI open in your terminal you can view supported commands by running `help`.
12 |
--------------------------------------------------------------------------------
/docs/Installation/mechanism/Docker/Debian.md:
--------------------------------------------------------------------------------
1 |
2 | # Debian
3 | This is assuming a fresh installation of Debian 10.
4 | ## Install Docker
5 | ```bash
6 | sudo apt-get install curl
7 | curl https://releases.rancher.com/install-docker/19.03.sh | sh
8 | ```
9 | Or follow the docker installation guide.
10 |
11 |
12 | ## Run the Container
13 | ```bash
14 | docker volume create fts_data
15 |
16 | docker run -d -p 8080:8080/tcp -p 8087:8087/tcp -e FTS_CONNECTION_MESSAGE="Server Connection Message" -e FTS_SAVE_COT_TO_DB="True" -v fts_data:/host/system/folder --name fts --restart unless-stopped freetakteam/freetakserver:1.1.2
17 | ```
18 |
19 | Alternatively, you can use the example `docker-compose.yml` [available here](https://github.com/FreeTAKTeam/FreeTAKServer-Docker/blob/main/docker-compose.yml)
20 | by copying `docker-compose.yml` into a directory and
21 | then doing `docker-compose up` or `docker-compose up -d` to bring the container up,
22 | and in the background, respectively.
23 | The `docker-compose.yml` uses a bind mount to `./data`.
--------------------------------------------------------------------------------
/docs/Installation/mechanism/Docker/Multiple_Servers/multiple.md:
--------------------------------------------------------------------------------
1 |
2 | # Multiple Servers on Single Host
3 |
4 | It is possible to run FreeTakServer multiple times on a single host by changing the port numbers.
5 |
6 | If you follow an installation guide for your target platform
7 | and have a container running named `fts` using the default ports,
8 | this will explain how to run a second server on non default ports.
9 |
10 | ## Limitations
11 | Currently due to a bug in the `ATAK` client you will need to share packages
12 | across all FTS servers on the same host.
13 | The additional servers will use the first server,
14 | using the default port of 8080 for data packages.
15 |
16 | ## Running an additional container
17 |
18 | ```bash
19 | docker volume create fts_data2
20 |
21 | docker run -d -p 8088:8087/tcp -e FTS_CONNECTION_MESSAGE="Server 2" -e FTS_SAVE_COT_TO_DB="True" -v fts_data2:/host/system/folder --name fts2 --restart unless-stopped freetakteam/freetakserver:1.1.2
22 | ```
23 |
24 | We can use this command as a template to run as many FTS server instances
25 | as we would like on a single host
26 | by changing the name of the container and the ports FTS is running on.
27 | So long as we avoid collisions on ports and names,
28 | if we have the resources we can run multiple servers with ease.
29 |
--------------------------------------------------------------------------------
/docs/Installation/mechanism/Docker/Quick_Start.md:
--------------------------------------------------------------------------------
1 |
2 | # Container Quick-Start
3 | Please use this guide if you have never used containers before.
4 | If you are familiar with container infrastructure then you may wish to simply view the [sample compose file](https://github.com/FreeTAKTeam/FreeTAKHub-Installation/blob/main/containers/example-compose.yaml) that we provide.
5 |
6 |
7 | ## Runtimes
8 | A runtime is what runs the container or containers you install.
9 |
10 | There are two main runtimes: Podman and Docker.
11 |
12 | Docker is the original runtime and is widely supported but has some issues with security, such as running containers by default in a root-ful way.
13 |
14 | Podman is a newer runtime that is shipped by default on RHEL/Fedora/CentOS systems. Containers in this runtime are by default run root-less, preventing many security issues.
15 |
16 | Our containers are made and tested to be compatible with Podman, which is the more restrictive runtime. As a result these containers should function on either choice. The most important part is to choose a runtime and use the correct invocations for it.
17 |
18 | If you are on RHEL/Fedora/CentOS and similar family of systems, then you can likely invoke podman without additional installation.
19 |
20 | If your system does not already have a runtime, install it with your package manager.
21 |
22 | Check which one you have installed by running
23 | ```shell
24 | podman --version
25 | docker --version
26 | ```
27 | If you have both, CHOOSE ONE and STICK WITH IT for the duration of the guide.
28 |
29 | ## Host expectations
30 | The host is the computer/server/VM inside of which your runtime actually runs.
31 |
32 | FreeTAKServer is, as the name suggests, **server software**, and should be treated as such. Installation onto a normal desktop environment requires additional effort and configuration that is typically useful only for development purposes.
33 |
34 | The use of Linux is highly encouraged. This is the industry standard host OS for containers.
35 |
36 | **WE WILL NOT SUPPORT RUNNING CONTAINERS ON DOCKER DESKTOP ON YOUR WINDOWS PC.**
37 |
38 | Your Windows computer is not a good choice for hosting a server of any kind.
39 |
40 | ## Container Repository
41 | A container repository is a location where you can obtain pre-built containers.
42 |
43 | Some examples are docker.io and ghcr.io.
44 |
45 | Please find all of our container images on [the GitHub Container Repository.](https://github.com/orgs/FreeTAKTeam/packages)
46 |
47 | You can obtain the latest images of the server and web UI by running the following commands:
48 | ```shell
49 | podman pull ghcr.io/freetakteam/freetakserver:latest
50 | podman pull ghcr.io/freetakteam/ui:latest
51 |
52 | OR
53 |
54 | docker pull ghcr.io/freetakteam/freetakserver:latest
55 | docker pull ghcr.io/freetakteam/ui:latest
56 | ```
57 |
58 | Please note that we use GHCR instead of the more common dockerhub.
59 |
60 | ## Setup
61 | ### Installation Directory
62 | Create a new directory in your home folder for this guide.
63 | ```shell
64 | mkdir container
65 | cd container
66 | ```
67 |
68 | ### Compose
69 | A compose file is a way to automate the operation of one or many containers. In this case we have a [sample compose file](https://github.com/FreeTAKTeam/FreeTAKHub-Installation/blob/main/containers/example-compose.yaml) file with just the server and UI.
70 |
71 | Download this file to your working directory.
72 | ```shell
73 | wget https://raw.githubusercontent.com/FreeTAKTeam/FreeTAKHub-Installation/refs/heads/main/containers/example-compose.yaml -o compose.yaml
74 | ```
75 |
76 | Open this file in the text editor of your choice
77 | ```shell
78 | nano compose.yaml
79 | ```
80 |
81 | and update some select configuration items with the indicated item
82 | ```yaml
83 | FTS_IP: YOUR EXTERNAL URL HERE
84 | ```
85 | Your external URL is your HOST COMPUTER'S EXTERNAL IP ADDRESS unless you have a very advanced configuration.
86 |
87 | If you are running this behind your personal all-in-one cable modem/router/accesspoint combo then you probably need to do some port forwarding, however this is out of scope for this guide.
88 |
89 | Once the configuration in your compose.yaml is to your liking, you can then simply run your compose file.
90 | ```shell
91 | podman-compose -f compose.yaml up -d
92 |
93 | OR
94 |
95 | docker compose -f compose.yaml up -d
96 | ```
97 |
98 | You can check how your containers are doing by running
99 | ```shell
100 | podman logs freetakserver
101 | podman logs freetakserver-ui
102 |
103 | OR
104 |
105 | docker logs freetakserver
106 | docker logs freetakserver-ui
107 | ```
108 |
109 | When done, you can stop everything by running
110 | ```shell
111 | podman-compose -f compose.yaml down
112 |
113 | OR
114 |
115 | docker compose -f compose.yaml down
116 | ```
117 | ## Persistent Data
118 |
119 | All persistent data is stored in the [volumes](https://docs.docker.com/engine/storage/volumes/) that are explicitly created in the sample compose file.
120 |
121 | You can access it in your runtime volume store if needed, however you should probably NOT do this while the server is running.
122 |
--------------------------------------------------------------------------------
/docs/Installation/mechanism/Docker/Raspberry_Pi.md:
--------------------------------------------------------------------------------
1 |
2 | # Raspberry Pi 4/Raspberry Pi 3
3 | It is recommended to use a Raspberry Pi 4 with 4GB or 8GB of ram.
4 |
5 | This guide assumes that you have a clean installation of Raspberry Pi OS or Raspbian.
6 | You may also use the 64 bit Ubuntu 22.04 server prepared for the Raspberry Pi 4.
7 |
8 | #### Install Docker
9 | ```bash
10 | sudo apt-get update && sudo apt-get upgrade
11 | sudo apt-get install curl
12 | curl -fsSL https://get.docker.com -o get-docker.sh
13 | sudo sh get-docker.sh
14 | ```
15 | #### Run the Container
16 | ```bash
17 | docker volume create fts_data
18 |
19 | docker run -d -p 8080:8080/tcp -p 8087:8087/tcp -e FTS_CONNECTION_MESSAGE="Server Connection Message" -e FTS_SAVE_COT_TO_DB="True" -v fts_data:/host/system/folder --name fts --restart unless-stopped freetakteam/freetakserver:1.1.2
20 | ```
21 |
22 | Alternatively, you can use the example `docker-compose.yml` [available here](https://github.com/FreeTAKTeam/FreeTAKServer-Docker/blob/main/docker-compose.yml)
23 | by copying `docker-compose.yml` into a directory and
24 | then doing `docker-compose up` or `docker-compose up -d` to bring the container up,
25 | and in the background, respectively.
26 | The `docker-compose.yml` uses a bind mount to `./data`.
27 |
28 | # Older Pi's
29 | Raspberry Pi's prior to the Pi3 have not been tested, and would not be recommended for use.
30 |
--------------------------------------------------------------------------------
/docs/Installation/mechanism/Docker/Upgrade/Upgrade.md:
--------------------------------------------------------------------------------
1 |
2 | # Upgrading Existing Container
3 | To upgrade the container to a new version you simply
4 | stop the container running the version you wish to upgrade from,
5 | and start a container running the version you want to upgrade to.
6 | To have data transferred between versions you need to have used a volume during the initial set up.
7 |
8 | ```bash
9 | docker stop fts
10 | docker rm fts
11 | docker run -d -p 8080:8080/tcp -p 8087:8087/tcp -e FTS_CONNECTION_MESSAGE="Server Connection Message" -e FTS_SAVE_COT_TO_DB="True" -v fts_data:/data --name fts --restart unless-stopped freetakteam/freetakserver:{New FTS version}
12 | ```
13 |
14 | If using the `docker-compose.yml` file, perform the following:
15 |
16 | ```bash
17 | docker-compose pull
18 | docker-compose down
19 | docker-compose up
20 | # alternatively, use docker-compose up -d to run in the background
21 | ```
--------------------------------------------------------------------------------
/docs/Installation/mechanism/Docker/overview.md:
--------------------------------------------------------------------------------
1 |
2 | # Install
3 |
4 | The official Docker image for FreeTAKServer.
5 |
6 | ## Usage
7 | When using this docker container we suggest
8 | that you use the `--restart unless-stopped` flag as shown in the examples.
9 | This will ensure that the service automatically starts with the host
10 | and will restart if it encounters an error and crashes.
11 | The port mappings in the examples are required to make the service accessible to hosts.
12 | All environment variables are optional.
13 | All data is stored in a single directory for ease of persistent data between container versions.
14 |
15 | {!Installation/mechanism/Docker/Quick_Start.md!}
16 |
17 | ### Ports
18 | The docker image runs the ports on the same defaults as FreeTAKServer.
19 | You can use the `-e` flag to map these ports to different ports
20 | or to run multiple FreeTAKServer's concurrently on the same host.
21 |
22 | ### Environment Variables
23 | All environment variables will apply to FTS.
24 | However, these are some additional ones specific to this docker image.
25 |
26 | | Variable Name | Definition |
27 | |-------------------------|-------------------------------------------------------------------------------------------|
28 | | FTS_CONNECTION_MESSAGE | The text of the message sent upon connection |
29 | | FTS_COT_TO_DB | A boolean indicating ? |
30 | | APPPORT | Allows hosting FTS UI from a different port |
31 | | APIIP | Allows the FTS UI to specify a different API port. Defaults the `IP` environment variable |
32 | | APIPORT | Allows the FTS UI to specify a different API port |
33 | | APIPROTOCOL | Allows the FTS UI to specify a different API protocol |
34 | | WEBMAPIP | Allows the FTS UI to specify a different webmap IP |
35 | | WEBMAPPORT | Allows the FTS UI to specify a different webmap port |
36 | | WEBMAPPROTOCOL | Allows the FTS UI to specify a different webmap protocol |
37 |
38 | ### Storage
39 | All data in this container is stored in `/data`.
40 | This directory will need to be stored to a volume if you wish to persist data between updates.
41 |
42 | If you use a storage volume you may need to inspect the docker volume to find where it saved the data.
43 | ```bash
44 | docker inspect fts_data
45 | ````
46 | It will return something similar to this:
47 | ```json
48 | [
49 | {
50 | "CreatedAt": "2020-11-12T03:32:53Z",
51 | "Driver": "local",
52 | "Labels": {},
53 | "Mountpoint": "/var/lib/docker/volumes/fts_data/_data",
54 | "Name": "fts_data",
55 | "Options": {},
56 | "Scope": "local"
57 | }
58 | ]
59 | ```
60 |
61 | The `docker-compose.yml` example utilizes a bind mount to `./data` in the same directory.
62 |
63 | ## Additional Architectures
64 | Currently, the container is being cross compiled for `linux/amd64`, `linux/arm64` and `linux/arm/v7`.
65 | If additional processor architectures are needed please open an issue and request a new one.
66 |
67 | ## Docker Hub Page
68 | [https://hub.docker.com/r/freetakteam/freetakserver](https://hub.docker.com/r/freetakteam/freetakserver)
69 |
--------------------------------------------------------------------------------
/docs/Installation/mechanism/Manual/.pages:
--------------------------------------------------------------------------------
https://raw.githubusercontent.com/FreeTAKTeam/FreeTAKServer-User-Docs/0db9cacf4a575734097484a7a4761b872751edf0/docs/Installation/mechanism/Manual/.pages
--------------------------------------------------------------------------------
/docs/Installation/mechanism/Manual/Manual.md:
--------------------------------------------------------------------------------
1 |
2 | # Manual Configuration
3 |
4 | ### Configure FreeTAKServer
5 |
6 | Depending on the linux distro your config file for FTS will be in a python version dependant location.
7 | You can use pip to discover the location. Type:
8 | ```
9 | sudo python3 -m pip show FreeTAKServer
10 | ```
11 |
12 | If you are running python 3.11
13 |
14 | ```text
15 | /usr/local/lib/python3.11/dist-packages/FreeTAKServer/controllers/configuration/MainConfig.py
16 | ```
17 |
18 | You can edit the file via nano with the following command
19 |
20 | ```
21 | sudo nano /usr/local/lib/python3.11/dist-packages/FreeTAKServer/controllers/configuration/MainConfig.py
22 | ```
23 |
24 | To exit nano `ctrl+x` and then enter `y` to save and hit enter.
25 |
26 | #### DBFilePath
27 | OPTIONAL this should not be necessary since FTS 1.5
28 | you need to change the `DBFilePath` value to something valid,
29 | if you are running as root, `/root` is a good choice.
30 |
31 | Original Value
32 | ```python
33 | # this should be set before startup
34 | DBFilePath = str(r'/opt/fts/FTSDataBase.db')
35 | ```
36 |
37 | As roots Home Folder
38 |
39 | ```python
40 | # this should be set before startup
41 | DBFilePath = str(r'/root/FTSDataBase.db')
42 | ```
43 | ### MySQL database
44 | FTS supports an abstraction layer, so it's easy to use a different database like MySQL.
45 | MYSQL is still experimental support, so use at your own risk.
46 | To switch to a MySQL database
47 | ```python
48 | # this should be set before startup
49 | DBFilePath = str('user:pass@localhost/dbname')
50 | ```
51 |
52 | And then under
53 | ```
54 | sudo nano /usr/local/lib/python3.11/dist-packages/FreeTAKServer/controllers/configuration/DatabaseConfiguration.py
55 | ```
56 |
57 | Change
58 | ```python
59 | DataBaseType = str('sqlite:///')
60 | ```
61 | To
62 | ```python
63 | DataBaseType = str('mysql://')
64 | ```
65 |
--------------------------------------------------------------------------------
/docs/Installation/platform/.pages:
--------------------------------------------------------------------------------
1 | title: Target Platforms
2 |
3 | nav:
4 | - Cloud: Cloud
5 | - Linux Generic: Linux
6 | - Raspberry Pi: RaspberryPi
7 | - Windows: Windows
8 | - Android: Android
9 |
--------------------------------------------------------------------------------
/docs/Installation/platform/Android/.pages:
--------------------------------------------------------------------------------
1 | title: Android
2 |
3 | nav:
4 | - Install UI on Android: installUIOnAndroid.md
5 | - Android: Android.md
--------------------------------------------------------------------------------
/docs/Installation/platform/Android/Android.md:
--------------------------------------------------------------------------------
1 |
2 | # FTS Installation with Android
3 | FTS 1.6 supports Android deployment.
4 | The following instructions refers to an initial version (1.6.6),
5 | you install it at your own risk.
6 | This has been tested with Android 9, 10, 11 and Samsung S7, S8 and S9.
7 |
8 | - download the APK installation package from GitHub to your phone
9 | - start the installation using Android
10 | - **open the configuration of the APP and allow storage rights: in the app icon, click on the info, scroll down to "permission", and allow storage. Failure to do so will stop the APP to work!!!!**
11 | - Start the FTS app
12 | - set your devices IP in the text box
13 | - Set the slider to "ON"
14 | - In the notifications you will see that FTS is running as a service in background
15 | - Open your network connection and note your IP (e.g. 192.168.1.25)
16 | - On a separate phone, open `ATAK` and create a new connection
17 | - Set connection to TCP, to the previously noted IP and port **15777**
18 |
19 | ## UI Setup
20 | FTS Android Edition has a minimal user interface,
21 | allowing to start and stop the FTS (including all the services).
22 | For advanced management you will need to install the web UI.
23 | since 1.6 you can now run the UI independently of the backend.
24 | This allows you to install your web UI centrally and to manage several instances of FTS.
25 |
26 | - install the UI with this command
27 | ```
28 | sudo python3 -m pip install FreeTAKServer-UI=0.1.6.5
29 | ```
30 | - to find where your UI is installed you run
31 | ```pip show FreeTAKServer-UI```
32 | - in `[INSTALLPATH]/config.py` set line 29 IP as device IP. e.g. REMEMBER THAT THIS IP MUST BE VISIBLE TO THE UI MACHINE
33 | ```
34 | # this IP will be used to connect with the FTS API
35 | IP = '192.168.1.25'
36 | ```
37 | - start UI server
38 | ```sudo FLASK_APP=/usr/local/lib/python3.11/dist-packages/FreeTAKServer-UI/run.py python3 /usr/local/lib/python3.11/dist-packages/FreeTAKServer-UI/run.py```
39 | - Open a browser to `[UIIP]:5000`
40 | - login with default creds(admin, password)
41 | - you can now control your FTS Android Edition from this UI
42 |
43 |
44 | # Troubleshooting
45 | if FTS crashes at the start, please check out the following
46 |
47 | 1. ensure you have the following paths on your phone
48 | ```/FreeTAKServer/certs/ClientPackages
49 | /FreeTAKServer/logs
50 | ```
51 | 2. ensure once again that storage permissions are enabled
52 |
53 | # Notes
54 | * Dynamic DP IP changing in UI currently isn't functional
55 | * Federation as the server isn't functional,
56 | you can still connect your Android Edition instance as a client to another regular FTS.
57 |
58 | # changes:
59 | - runs now as a service
60 | - UI improved with sliders and spy
61 | - Icon added
62 | - Splashscreen added
63 |
--------------------------------------------------------------------------------
/docs/Installation/platform/Android/installUIOnAndroid.md:
--------------------------------------------------------------------------------
1 |
2 | # FTS-UI Installation with Android
3 | FTS-UI is installed with python's pip.
4 | One way to get pip on Android is with Pydroid3,
5 | available here: .
6 |
7 | If you've installed Pydroid3 open the App and navigate to the terminal:
8 | - In the upper right corner of Pydroid3, touch the 3 horizontal bars.
9 | - Select "Terminal"
10 | - Enter the following commands:
11 | ```
12 | pip3 install FreeTAKServer-UI==0.1.6.5
13 | pip3 install SQLAlchemy==1.3.23
14 | pip3 install requests
15 | pip3 install eventlet
16 | pip3 show eventlet
17 | ```
18 |
19 | After eventlet installs we need to update a file to hardcode
20 | the tcp/udp protocol numbers due to incompatibilities with Android
21 | - The output of `pip3 show eventlet` Location should be similar to `/data/user/0/ru.iiec.pydroid3/files/arm-linux-androideabi/lib/python3.11/site-packages`
22 | - The file we need to update with the tcp/udp protocol numbers is located in `dns/rdtypes/IN/WKS.py`
23 | - The full path of the file to edit using the eventlet Location output:
24 | `/data/user/0/ru.iiec.pydroid3/files/arm-linux-androideabi/lib/python3.11/site-packages/dns/rdtypes/IN/WKS.py`
25 |
26 | Now edit `WKS.py` and update as indicated below:
27 |
28 | BEFORE:
29 | ```
30 | _proto_tcp = socket.getprotobyname('tcp')
31 | _proto_udp = socket.getprotobyname('udp')
32 | ```
33 |
34 | AFTER:
35 | ```
36 | _proto_tcp = 6
37 | _proto_udp = 17
38 | ```
39 |
40 | FTS-UI `config.py` assumes a Linux environment,
41 | we need to update this for Android by replacing the appropriate paths with `/sdcard` for the following:
42 | - `SQLALCHEMY_DATABASE_URI`
43 | - `certpath`
44 | - If you are not running FTS and FTS-UI on the same device you will need to update `IP`
45 | - The config file is located here: `/data/user/0/ru.iiec.pydroid3/files/arm-linux-androideabi/lib/python3.11/site-packages/FreeTAKServer-UI/config.py`
46 |
47 | Now edit `config.py` and update as indicated below:
48 |
49 | BEFORE:
50 | ```
51 | # This will connect to the FTS db
52 | SQLALCHEMY_DATABASE_URI = 'sqlite:///' + '/root/FTSDataBase.db'
53 |
54 | # certificates path
55 | certpath = "/usr/local/lib/python3.11/dist-packages/FreeTAKServer/certs/"
56 | ```
57 |
58 | AFTER:
59 | ```
60 | # This will connect to the FTS db
61 | SQLALCHEMY_DATABASE_URI = 'sqlite:///' + r'/sdcard/FTSDataBase.db'
62 |
63 | # certificates path
64 | certpath = "/sdcard/FreeTAKServer/certs/"
65 | ```
66 |
67 | # Run FTS-UI
68 | - Make sure your FTS is already up and running.
69 | - From the pydroid3 terminal
70 | ```
71 | FLASK_APP=/data/user/0/ru.iiec.pydroid3/files/arm-linux-androideabi/lib/python3.11/site-packages/FreeTAKServer-UI/run.py nohup python3 /data/user/0/ru.iiec.pydroid3/files/arm-linux-androideabi/lib/python3.8/site-packages/FreeTAKServer-UI/run.py
72 | ```
73 |
74 | Now open your web browser and navigate to
75 | and login with the default creds `(admin/password)`.
76 |
77 | # Troubleshooting
78 |
79 | Error: `ImportError: cannot import name '_ColumnEntity' from 'sqlalchemy.orm.query'`
80 | Solution: You didn't downgrade SQLAlchemy correctly
81 |
82 | Error: `Protocol not found`
83 | Solution: You didn't update `WKS.py` correctly
84 |
85 | # Notes
86 | * All testing was performed with a RaspPi4 8GB running LineageOS 18.1 32bit and Pydroid3
87 | * These instructions assume you are running FTS and FTS-UI on the same device
88 | * We downgrade SQLAlchemy because versions 1.4+ were not compatible with SQLAlchemy-utils
89 | * You need root access to update the tcp/udp protocol numbers (if you are using a RaspPi4 and LineageOS it is trivial to enable)
90 |
--------------------------------------------------------------------------------
/docs/Installation/platform/Cloud/.pages:
--------------------------------------------------------------------------------
1 | title: Cloud Provider
2 |
3 | nav:
4 | - Overview: overview.md
5 | - Amazon Web Service (AWS): AWS.md
6 | - Digital Ocean: DigitalOcean.md
7 |
--------------------------------------------------------------------------------
/docs/Installation/platform/Cloud/AWS.md:
--------------------------------------------------------------------------------
1 |
2 | # AWS
3 |
4 | * Select EC2 as the service from the AWS Console
5 | * Click "Launch Instance"
6 | * Enter a name for your instance, e.g., "FreeTAK-AWS-001".
7 | * Under the Application and OS Images menu, select Ubuntu, then from the dropdown select Ubuntu Server 22.04 LTS (HVM) SSD Volume Type
8 |
9 | 
10 |
11 |
12 | * Under instance type, select the instance type appropriate for your deployment size. For testing servers a `t2.micro` is sufficient.
13 | * Under Key Pair, select a key pair in your account. If you do not have one, create one.
14 | * Under Network Settings, select a security group that has the necessary ports configured inbound for both SSH and FreeTAK server operations.
15 |
16 | ## FTS Ports (FTSConfig.yaml)
17 | * 8087 - TCP CoT (FTS_COT_PORT)
18 | * 8089 - SSL CoT (FTS_SSLCOT_PORT)
19 | * 19023 - API (FTS_API_PORT)
20 |
21 | ## FTS UI Ports (config.py)
22 | * 5000 - Web UI (APPPort)
23 | * 1880 - Webmap (WEBMAPPORT)
24 |
25 | ## [MediaMTX](https://github.com/bluenviron/mediamtx) - Video Server
26 | * 9997 - REST API
27 | * 9998 - Metrics Listener
28 |
29 | 
30 |
31 |
32 |
33 | * Under storage configuration, for testing an 8GiB GP2 volume will be sufficient.
34 | * Once complete, select launch instance.
35 | * Once ready to connect to the instance, use powershell / ssh client
36 | ```bash
37 | sudo apt-get update && sudo apt-get upgrade -y
38 | ```
39 | * now
40 |
41 | ```bash
42 | sudo reboot
43 | ```
44 |
45 | * reconnect via ssh
46 | ```bash
47 | ip a
48 | ```
49 |
50 | * confirm ethernet adapter name (i.e. ens33)
51 | ```text
52 | grab $[publicip] from your instance details page
53 | ```
54 |
55 | * add the Public IP to ethernet adapter by using the following command
56 | ```bash
57 | sudo ip addr add $publicip dev $ethernetadapter
58 | ```
59 |
60 | * run zero touch installer
61 | ```bash
62 | wget -qO - bit.ly/ftszerotouch | sudo bash
63 | ```
64 |
65 | ## Troubleshooting
66 | If anything fails, check IP values in the following files:
67 |
68 | ### config.py
69 |
70 | ZTI installs this file in /opt/fts.venv/lib/python3.11/site-packages/FreeTAKServer-UI/config.py
71 |
72 | * APPIP: Internal IP
73 | * IP: Public IP
74 | * WEBMAPIP: Public IP
75 |
76 | ### FTSConfig.yaml
77 | * FTS_DP_ADDRESS: Public IP
78 | * FTS_USER_ADDRESS: Public IP
79 | * FTS_API_ADDRESS: 0.0.0.0
80 |
--------------------------------------------------------------------------------
/docs/Installation/platform/Cloud/DigitalOcean.md:
--------------------------------------------------------------------------------
1 |
2 | # DigitalOcean
3 |
4 | This installation has only been tested on Ubuntu 22.04.
5 |
6 | Other operating systems may work, but are untested.
7 |
8 | ## Step 1. Create admin user
9 |
10 | The later executions will require admin privileges.
11 |
12 | Create an `adminuser` first:
13 |
14 | ```console
15 | sudo adduser adminuser
16 | ```
17 |
18 | Add `passwordless` to `adminuser`.
19 |
20 | First type:
21 |
22 | ```console
23 | sudo visudo
24 | ```
25 |
26 | Then add at the bottom:
27 |
28 | ```console
29 | adminuser ALL=(ALL) NOPASSWD: ALL
30 | ```
31 |
32 | To save and quit in the `nano` editor:
33 |
34 | 1. Press `CTRL + O` then `ENTER` to save.
35 | 2. Then press `CTRL + X` to exit.
36 |
37 | ## Step 2. Download Ansible
38 |
39 | In the Ubuntu console:
40 |
41 | ```console
42 | sudo apt update
43 | ```
44 |
45 | ```console
46 | sudo apt install -y software-properties-common gnupg curl git
47 | ```
48 |
49 | ```console
50 | sudo add-apt-repository -y --update ppa:ansible/ansible
51 | ```
52 |
53 | ```console
54 | curl -fsSL https://apt.releases.hashicorp.com/gpg | sudo apt-key add -
55 | ```
56 |
57 | ```console
58 | sudo apt-add-repository "deb [arch=amd64] https://apt.releases.hashicorp.com $(lsb_release -cs) main"
59 | ```
60 |
61 | ```console
62 | sudo apt install -y ansible
63 | ```
64 |
65 | ## Step 3. Clone the `FreeTAKHub-Installation` Git repository
66 |
67 | Go to the home directory:
68 |
69 | ```console
70 | cd ~
71 | ```
72 |
73 | ```console
74 | git clone https://github.com/FreeTAKTeam/FreeTAKHub-Installation.git
75 | ```
76 |
77 | Go to the `FreeTAKTeam/FreeTAKHub-Installation` directory:
78 |
79 | ```console
80 | cd FreeTAKTeam/FreeTAKHub-Installation
81 | ```
82 |
83 | ## Step 4. Generate a public/private key pair
84 |
85 | For the default, enter (and keep pressing enter):
86 |
87 | ```console
88 | ssh-keygen
89 | ```
90 |
91 | Print out the public key for the next step.
92 |
93 | If you did the default, the command will be:
94 |
95 | ```console
96 | cat ~/.ssh/id_rsa.pub
97 | ```
98 |
99 | ## Step 5. Add your public key to your Digital Ocean project
100 |
101 | See:
102 |
103 | ## Step 6. Generate a Digital Ocean Personal Access Token
104 |
105 | See:
106 |
107 | ## Step 7. Execute
108 |
109 | You will then be prompted for your DigitalOcean Token and private key path:
110 |
111 | ```console
112 | var.digitalocean_token
113 | Enter a value:
114 |
115 | var.private_key_path
116 | ABSOLUTE path to private key, for example: /home/adminuser/.ssh/id_rsa
117 |
118 | Enter a value: /home/adminuser/.ssh/id_rsa
119 | ```
120 |
--------------------------------------------------------------------------------
/docs/Installation/platform/Cloud/overview.md:
--------------------------------------------------------------------------------
1 |
2 | # Configure and Connect to your cloud server
3 | In this example we will use the provider Digital Ocean
4 |
5 | ## Creates target machines
6 | in this example we will use Digital ocean.
7 |
8 | 1. create a DO account
9 | 
10 |
11 | 2. create a new droplet
12 | 
13 |
14 | 3. Select Ubuntu 22.04 (LTS) x64
15 | 4. Plan basic
16 | 5. Recommended the $15 / mo plan (it would work with the $5 / mo plan but very slow).
17 | 6. For heavy production (50-100 Concurrent users) you may want to use 8 CPUS and 32 MB RAM
18 | 
19 |
20 | 7. Select the region that is the closest to you
21 | 
22 |
23 | 8. Generate a new SSH key and download it.
24 | It will download 2 files 1 with PEM extension and the second without extension
25 | 9. Select project (FTYS)
26 | 10. Press "create droplet"
27 |
28 | ### Setup you access to the VM
29 | - download [winSCP and Putty](../../Tools.md)
30 | - open `Puttygen`
31 |
32 | #### Web
33 | - you can use a console directly in your web browser.
34 | - this is not the best approach for long term management, but it works
35 | - press the button
36 | 
37 | - run any command
38 |
39 |
40 | #### SSH (Mac/Linux)
41 | - Copy .PEM file to the machine from which you are going to connect.
42 | - Make sure permissions on .PEM file are appropriate (```chmod 600 file.pem```)
43 | - Connect with ssh command:
44 | ```ssh vcloud@ipaddress –i privkey.pem ```
45 |
46 | #### Putty (Windows)
47 | - Download [Putty](https://www.chiark.greenend.org.uk/~sgtatham/putty/latest.html) and puttygen
48 | - Use puttygen to convert file without extension to .PPK file.
49 | - Start puttygen and select "Load"
50 | - Select your file without extension
51 | - Putty will convert format to .PPK format. enter image description here
52 | - Select "Save Private Key" A passphrase is not required but can be used if additional security is required.
53 | - Connect with Putty.
54 | - Launch Putty and enter the host IP address. If connecting to the 10.X private address you must first establish an SSL VPN connection.
55 | - Navigate to Connection/SSH/Auth
56 | - Click "Browse" and select the .PPK file you exported from puttygen. enter image description here
57 |
58 | #### WinSCP (Windows)
59 | WinSCP can be used on the top of Putty to make browsing and editing of files more conformable.
60 |
61 | - Download [WInSCP](https://winscp.net/eng/download.php)
62 | - Open WinSCP and create a new site
63 |
64 | 
65 |
66 | 
67 |
68 |
69 | ## Install FTS on the Cloud
70 |
71 | You should now have an active SSH terminal on the cloud.
72 |
73 | You can now install FTS using the [ZeroTouch-Installer](../../mechanism/Ansible/ZeroTouchInstall.md).
74 | !!! tip
75 | You can probably accept the implicit IP address.
76 | However, setting the `--ip-addr` will not be wrong.
77 |
78 | [Installation can also be done manually](../../mechanism/Manual/Installation.md),
79 | but it is best to leave that until you have some experience.
80 |
81 | ## Getting Support
82 |
83 | Support is provided on the [FTS Discord server](https://discord.gg/m8cBzQM2te) by volunteers.
84 |
85 | Use the Discord `#installation-support-cloud` Support channel.
86 |
--------------------------------------------------------------------------------
/docs/Installation/platform/Linux/.pages:
--------------------------------------------------------------------------------
1 | title: Linux
2 |
3 | nav:
4 | - Installation on an Ubuntu VM: installation_vm.md
5 | - Installation on an Ubuntu Natively: installation_native.md
6 |
--------------------------------------------------------------------------------
/docs/Installation/platform/Linux/installation_native.md:
--------------------------------------------------------------------------------
1 |
2 | # FreeTAK Server Installation on Native Ubuntu
3 |
4 | !!! warning
5 | Before installing FTS natively you should install it in a virtual machine as an exercise.
6 |
7 | This guide will walk you through installing FreeTAKServer 2.x in a python virtual environment.
8 | These instructions are on preparing an Ubuntu OS suitable for using the FTS Zero Touch Installer.
9 |
10 | ## Install FTS on Native Ubuntu
11 |
12 | Yow will probably need to install with an explicit IP address.
13 |
14 | The [complete ZTI instructions are here](../../mechanism/Ansible/ZeroTouchInstall.md).
--------------------------------------------------------------------------------
/docs/Installation/platform/Linux/installation_vm.md:
--------------------------------------------------------------------------------
1 |
2 | # FreeTAK Server Installation on an Ubuntu Virtual Machine
3 |
4 | This guide will walk you through installing FreeTAKServer 2.x on an Ubuntu virtual machine.
5 | These instructions are on preparing an Ubuntu VM suitable for using the FTS Zero Touch Installer.
6 |
7 | Obviously, the ZTI can be installed in a clean native Ubuntu environment.
8 | However, cleanly setting up such an environment can consume time.
9 | So, while running FTS on dedicated hardware may be a more performant choice
10 | in a production environment it is more convenient with a virtual machine.
11 |
12 | ## Setting up the Virtual Machine
13 |
14 | Thankfully, Canonical has provided tooling to make setting up an Ubuntu VM easy.
15 |
16 | [Multipass Tutorials](https://multipass.run/docs/tutorials)
17 |
18 | * [Multipass Windows](https://multipass.run/docs/windows-tutorial)
19 | * [Multipass Linux](https://multipass.run/docs/get-started-with-multipass-linux)
20 | * [Multipass MacOS](https://multipass.run/docs/mac-tutorial)
21 |
22 | Any of these are suitable for testing.
23 |
24 | We will want to specify a specific Ubuntu version.
25 | ```shell
26 | multipass find
27 | ```
28 | Of the choices available we want `v22.04`.
29 | ```shell
30 | multipass launch 22.04 --name fts-test --memory 4G --disk 10G --cpus 2
31 | ```
32 | We can verify the image.
33 | ```shell
34 | multipass exec fts-test -- lsb_release -a
35 | ```
36 |
37 | Open a shell on the new VM.
38 | ```shell
39 | multipass shell fts-test
40 | ```
41 |
42 | ## Install FTS on the VM
43 |
44 | Yow will probably need to install with an explicit IP address.
45 |
46 | The [complete ZTI instructions are here](../../mechanism/Ansible/ZeroTouchInstall.md).
47 |
48 |
49 | ## Getting Support
50 |
51 | Support is provided on the [FTS Discord server](https://discord.gg/m8cBzQM2te) by volunteers.
52 |
53 | Use the Discord `#development-support` Support channel.
54 | The Linux support is primarily for developers.
55 |
--------------------------------------------------------------------------------
/docs/Installation/platform/RaspberryPi/.pages:
--------------------------------------------------------------------------------
1 | title: Raspberry Pi
2 |
3 | nav:
4 | - Installation: Installation.md
5 |
--------------------------------------------------------------------------------
/docs/Installation/platform/RaspberryPi/Installation.md:
--------------------------------------------------------------------------------
1 |
2 | # Raspberry Pi
3 |
4 | this procedure Installs FTS + UI + video Server onto a Raspberry Pi
5 |
6 | ## Hardware requirements
7 | you need a RaspPi with at least 4 GB RAM
8 |
9 | ## Procedure
10 |
11 | ### Prepare an SD Card
12 | Start with new installation of ubuntu 22.04 server for RaspPi 64.
13 | FTS 2.x expects [Ubuntu 22.04 (64 bit)](https://ubuntu.com/download/raspberry-pi/thank-you?version=22.04.3&architecture=server-arm64+raspi).
14 |
15 | You will need an imager.
16 |
17 | * [Raspberry Pi Imager](https://www.raspberrypi.com/software/) (you may also use [BalenaEtcher Imager](https://www.balena.io/etcher))
18 |
19 | Follow the instructions to prepare an SD card with the appropriate image.
20 |
21 | 
22 |
23 | The `rpi-imager` provides a means for setting an `ssh` authorized key
24 | and default `username` and `password`.
25 |
26 | {: style="height:200px;width:150px" }
27 | {: style="height:200px;width:150px" }
28 |
29 | I construct an ssh key-pair specifically for working with compute nodes.
30 | Construction of such key-pairs is done with [ssh keygen](https://www.ssh.com/academy/ssh/keygen).
31 | Presume that the key-pair thus generated is `~/.ssh/fts_rsa` and `~/.ssh/fts_rsa.pub`.
32 |
33 | ### Setup Hardware
34 |
35 | * insert the prepared SD card into the Raspberry Pi.
36 | * connect a keyboard
37 | * connect a monitor
38 | * connect to an ethernet network
39 |
40 | ### Update the OS
41 |
42 | The initial setup takes ~5 minutes on a RaspPi 4
43 | Login with `fts` / `ubuntu` (or whichever user you selected)
44 |
45 | If the RaspPi is connected to your router,
46 | when it boots it will display the IP grabbed from DHCP server.
47 | Write down the IP address, we will need it later.
48 |
49 | ```bash
50 | sudo apt update -y
51 | sudo apt upgrade -y
52 | ```
53 | You may be prompted during the upgrade.
54 | Generally, accepting the defaults is appropriate.
55 |
56 | In some cases you need to run:
57 | ```sudo apt full-upgrade``` or ```sudo apt-get dist-upgrade```.
58 |
59 | It is generally easier to communicate with your server via `ssh`.
60 | You will need the IP address (you should write the address down for later reference).
61 | ```bash
62 | sudo apt install -y net-tools
63 | ```
64 | ```bash
65 | ip addr show
66 | ```
67 | Here is representative fragment from an output.
68 | ```text
69 | 2: eth0: mtu 1500 qdisc mq state UP group default qlen 1000
70 | link/ether d8:3a:dd:5f:27:24 brd ff:ff:ff:ff:ff:ff
71 | inet 10.2.118.237/24 metric 100 brd 10.2.118.255 scope global dynamic eth0
72 | valid_lft 53818sec preferred_lft 53818sec
73 | inet6 fe80::da3a:ddff:fe5f:2724/64 scope link
74 | valid_lft forever preferred_lft forever
75 | ```
76 | The IP address in this case is `10.2.118.237`.
77 | This is the same address you may have captured earlier during initial boot.
78 |
79 | Multiple `reboot` may be required to get the OS fully updated.
80 | ```bash
81 | sudo reboot
82 | ```
83 |
84 | From here on it should be possible to connect via `ssh`.
85 | Here is an example with the IP address obtained previously and `fts` user.
86 | ```bash
87 | ssh fts@10.2.118.237
88 | ```
89 | I generally update the `~/.ssh/config` file with this information:
90 | ```config
91 | Host fts-rp1
92 | HostName 10.2.118.237
93 | User fts
94 | IdentityFile ~/.ssh/fts_rsa
95 | ```
96 |
97 | ### Update Prerequisites
98 |
99 | Verify the following packages are installed.
100 | ```bash
101 | sudo apt install -y wget curl
102 | ```
103 |
104 | ## Install FTS on the Raspberry Pi
105 |
106 | Yow will probably need to install with an explicit IP address.
107 |
108 | The [complete ZTI instructions are here](../../mechanism/Ansible/ZeroTouchInstall.md).
109 |
110 |
111 | ## Getting Support
112 |
113 | Support is provided on the [FTS Discord server](https://discord.gg/m8cBzQM2te) by volunteers.
114 |
115 | Use the Discord `#installation-support-pi` Support channel.
116 |
117 | ## RPiFTS Series
118 |
119 | GHOST_DA-B6 has created a set of videos on `youtube` detailing how to install
120 | and set up FTS on raspberry pi `SBC's`.
121 |
122 | You can view his RPiFTS video series on
123 | [his channel](https://www.youtube.com/channel/UC--WpY--HV7PymMWLgfflZA).
124 |
125 |
--------------------------------------------------------------------------------
/docs/Installation/platform/RaspberryPi/belena-etcher-flashing.png:
--------------------------------------------------------------------------------
https://raw.githubusercontent.com/FreeTAKTeam/FreeTAKServer-User-Docs/0db9cacf4a575734097484a7a4761b872751edf0/docs/Installation/platform/RaspberryPi/belena-etcher-flashing.png
--------------------------------------------------------------------------------
/docs/Installation/platform/RaspberryPi/rpi-imager-general-settings.png:
--------------------------------------------------------------------------------
https://raw.githubusercontent.com/FreeTAKTeam/FreeTAKServer-User-Docs/0db9cacf4a575734097484a7a4761b872751edf0/docs/Installation/platform/RaspberryPi/rpi-imager-general-settings.png
--------------------------------------------------------------------------------
/docs/Installation/platform/RaspberryPi/rpi-imager-ssh-settings.png:
--------------------------------------------------------------------------------
https://raw.githubusercontent.com/FreeTAKTeam/FreeTAKServer-User-Docs/0db9cacf4a575734097484a7a4761b872751edf0/docs/Installation/platform/RaspberryPi/rpi-imager-ssh-settings.png
--------------------------------------------------------------------------------
/docs/Installation/platform/RaspberryPi/rpi-imager.png:
--------------------------------------------------------------------------------
https://raw.githubusercontent.com/FreeTAKTeam/FreeTAKServer-User-Docs/0db9cacf4a575734097484a7a4761b872751edf0/docs/Installation/platform/RaspberryPi/rpi-imager.png
--------------------------------------------------------------------------------
/docs/Installation/platform/Windows/.pages:
--------------------------------------------------------------------------------
1 | title: Windows
2 |
3 | nav:
4 | - Manual Installation: Windows_Manual_Install.md
5 | - Automatic Installation: Windows_Ansible_Install.md
6 |
--------------------------------------------------------------------------------
/docs/Installation/platform/Windows/COT_error_Wireshark.jpg:
--------------------------------------------------------------------------------
https://raw.githubusercontent.com/FreeTAKTeam/FreeTAKServer-User-Docs/0db9cacf4a575734097484a7a4761b872751edf0/docs/Installation/platform/Windows/COT_error_Wireshark.jpg
--------------------------------------------------------------------------------
/docs/Installation/platform/Windows/CotError.png:
--------------------------------------------------------------------------------
https://raw.githubusercontent.com/FreeTAKTeam/FreeTAKServer-User-Docs/0db9cacf4a575734097484a7a4761b872751edf0/docs/Installation/platform/Windows/CotError.png
--------------------------------------------------------------------------------
/docs/Installation/platform/Windows/FTS_windows.gif:
--------------------------------------------------------------------------------
https://raw.githubusercontent.com/FreeTAKTeam/FreeTAKServer-User-Docs/0db9cacf4a575734097484a7a4761b872751edf0/docs/Installation/platform/Windows/FTS_windows.gif
--------------------------------------------------------------------------------
/docs/Installation/platform/Windows/MainConfig.py:
--------------------------------------------------------------------------------
1 | # -*- encoding: utf-8 -*-
2 |
3 | import os
4 | from pathlib import Path
5 |
6 | currentPath = os.path.dirname(os.path.abspath(__file__))
7 |
8 |
9 | class MainConfig:
10 | """
11 | this is the main configuration file and is the only one which
12 | should need to be changed
13 | """
14 | # this is the port to which clients will connect
15 | CoTServicePort = int(8087)
16 |
17 | SSLCoTServicePort = int(8089)
18 |
19 | # this needs to be changed for private data packages to work
20 | DataPackageServiceDefaultIP = str("0.0.0.0")
21 |
22 | # User Connection package IP needs to be set to the IP which is used when creating the connection in your tak device
23 | UserConnectionIP = str("0.0.0.0")
24 |
25 | # python_version = 'python3.8'
26 |
27 | # userpath = '/usr/local/lib/'
28 |
29 | # api port
30 | APIPort = 19023
31 |
32 | # Federation port
33 | FederationPort = 9000
34 |
35 | # api IP
36 | APIIP = '0.0.0.0'
37 |
38 | # allowed ip's to access CLI commands
39 | AllowedCLIIPs = ['127.0.0.1']
40 |
41 | # IP for CLI to access
42 | CLIIP = '127.0.0.1'
43 |
44 | # whether to save CoT's to the DB
45 | SaveCoTToDB = bool(True)
46 |
47 | # this should be set before startup
48 | DBFilePath = str(r'C:\\Software\\python\\Lib\\site-packages\\FreeTAKServer\\FTSDataBase.db')
49 |
50 | # the version information of the server (recommended to leave as default)
51 | version = 'FreeTAKServer-1.5.12 RC1'
52 |
53 | MainPath = str(Path(fr'C:\\Software\\python\\Lib\\site-packages\\FreeTAKServer'))
54 |
55 | ExCheckMainPath = str(Path(fr'{MainPath}\\ExCheck'))
56 |
57 | ExCheckFilePath = str(Path(fr'{MainPath}\\ExCheck\\template'))
58 |
59 | ExCheckChecklistFilePath = str(Path(fr'{MainPath}\\ExCheck\\checklist'))
60 |
61 | DataPackageFilePath = str(Path(fr'{MainPath}\\FreeTAKServerDataPackageFolder'))
62 |
63 | # format of API message header should be {Authentication: Bearer 'TOKEN'}
64 | from uuid import uuid4
65 | id = str(uuid4())
66 |
67 | nodeID = f"FreeTAKServer-{id}"
68 |
69 | # set to None if you don't want a message sent
70 | ConnectionMessage = f'Welcome to FreeTAKServer {version}. The Parrot is not dead. It’s just resting'
71 |
72 | keyDir = str(Path(fr'{MainPath}\\certs\\pubserver.key'))
73 |
74 | pemDir = str(Path(fr'{MainPath}\\certs\\pubserver.pem')) # or crt
75 |
76 | unencryptedKey = str(Path(fr'{MainPath}\\certs\\pubserver.key.unencrypted'))
77 |
78 | p12Dir = str(Path(fr'{MainPath}\\certs\\pubserver.p12'))
79 |
80 | CA = str(Path(fr'{MainPath}\\certs\\ca.pem'))
81 | CAkey = str(Path(fr'{MainPath}\\certs\\ca.key'))
82 |
83 | federationCert = str(Path(fr'{MainPath}\\certs\\pubserver.pem'))
84 | federationKey = str(Path(fr'{MainPath}\\certs\\pubserver.key'))
85 | federationKeyPassword = str('defaultpass')
86 |
87 | # location to back up client packages
88 | clientPackages = str(Path(fr'{MainPath}\\certs\\ClientPackages'))
89 |
90 | password = str('defaultpass')
91 |
92 | websocketkey = "YourWebsocketKey"
93 |
--------------------------------------------------------------------------------
/docs/Installation/platform/Windows/StartFreeTAKServer.bat:
--------------------------------------------------------------------------------
1 | ::START THE SERVER
2 | ECHO ON
3 | start cmd /k python -m FreeTAKServer.controllers.services.FTS
4 | ::WHEN RUNNING THE SCRIPT FROM A DIFFERENT DRIVE ADD THE `/D` SWITCH TO YOUR CD COMMAND
5 | CD C:\Software\python\Lib\site-packages\FreeTAKServer-UI
6 | set FLASK_APP=run.py
7 | flask run
8 | pause
--------------------------------------------------------------------------------
/docs/Installation/platform/Windows/Windows_Ansible_Install.md:
--------------------------------------------------------------------------------
1 |
2 | # Install FreeTAKHub with Ansible
3 |
4 | Ansible is an Infrastructure-As-Code (IAC) tool used for managing and monitoring local or remote FTS servers.
5 |
6 | This repository includes Ansible roles to:
7 |
8 | - create the target nodes.
9 | - install FTS and additional modules.
10 | - configure FTS.
11 |
12 | ## Windows Prerequisites
13 |
14 | Below is required for Windows machines.
15 |
16 | The machine must be running:
17 | Windows 10 Version 2004 or higher (Build 19041 or higher) or Windows 11.
18 |
19 | For Windows installations:
20 |
21 | 1. Install WSL2.
22 |
23 | See:
24 |
25 | See also:
26 |
27 | See also:
28 |
29 | 2. Install the WSL Ubuntu 22.04 distribution.
30 |
31 | See:
32 |
33 | ## Step 1. Clone the `FreeTAKHub-Installation` repository
34 |
35 | In the console:
36 |
37 | ```console
38 | sudo apt update
39 | ```
40 |
41 | Make sure you have `git` installed:
42 |
43 | ```console
44 | sudo apt install -y git
45 | ```
46 |
47 | Go to the home directory:
48 |
49 | ```console
50 | cd ~
51 | ```
52 |
53 | Clone the `FreeTAKHub-Installation` repository:
54 |
55 | ```console
56 | git clone https://github.com/FreeTAKTeam/FreeTAKHub-Installation.git
57 | ```
58 |
59 | Go to the top-level directory of the FreeTAKHub-Installation repository:
60 |
61 | ```console
62 | cd FreeTAKHub-Installation
63 | ```
64 |
65 | If you have previously cloned the repository, update the repository:
66 |
67 | ```console
68 | git pull
69 | ```
70 |
71 | ## Step 2. Install Ansible
72 |
73 | ### Automated Ansible Installation
74 |
75 | At the top-level directory of the `FreeTAKHub-Installation` repository, enter:
76 |
77 | ```console
78 | ./scripts/init.sh
79 | ```
80 |
81 | Optional (But Recommended!): Activate the Python virtual environment:
82 |
83 | ```console
84 | activate
85 | ```
86 |
87 | To deactivate the Python virtual environment:
88 |
89 | ```console
90 | deactivate
91 | ```
92 |
93 | To learn more about Python virtual environments and why they are a good idea, see:
94 |
95 |
96 |
97 | ### Manual Ansible Installation
98 |
99 | The manual installation allows more control.
100 |
101 | In the console, enter:
102 |
103 | ```console
104 | sudo apt update
105 | ```
106 |
107 | ```console
108 | sudo apt -y install software-properties-common
109 | ```
110 |
111 | ```console
112 | sudo add-apt-repository --y --update ppa:ansible/ansible
113 | ```
114 |
115 | ```console
116 | sudo apt install -y ansible
117 | ```
118 |
119 | See:
120 |
121 | ## Step 3. Install FreeTAKServer and Components
122 |
123 | Go to the top-level directory of the `FreeTAKHub-Installation` repository:
124 |
125 | ```console
126 | cd ~/FreeTAKHub-Installation
127 | ```
128 |
129 | Run the Ansible playbook to install FreeTAKServer and components:
130 |
131 | ```console
132 | sudo ansible-playbook install_all.yml
133 | ```
134 |
135 | ## Step 4. Check Installation
136 |
137 | Directions to check installation [here](../../../Troubleshooting/InstallationCheck.md).
138 |
--------------------------------------------------------------------------------
/docs/Installation/platform/Windows/advanced.jpg:
--------------------------------------------------------------------------------
https://raw.githubusercontent.com/FreeTAKTeam/FreeTAKServer-User-Docs/0db9cacf4a575734097484a7a4761b872751edf0/docs/Installation/platform/Windows/advanced.jpg
--------------------------------------------------------------------------------
/docs/Installation/platform/Windows/config.py:
--------------------------------------------------------------------------------
1 | # -*- encoding: utf-8 -*-
2 | """
3 | License: MIT
4 | Copyright (c) 2019 - present AppSeed.us
5 | """
6 |
7 | import os
8 | from os import environ
9 |
10 |
11 | class Config(object):
12 | basedir = os.path.abspath(os.path.dirname(__file__))
13 |
14 | SECRET_KEY = 'key'
15 |
16 | # This will connect to the FTS db
17 | SQLALCHEMY_DATABASE_URI = 'sqlite:///' + 'C:\\Software\\python\\Lib\\site-packages\\FreeTAKServer\\FTSDataBase.db'
18 |
19 | # certificates path
20 | certpath = "C:\\Software\\python\\Lib\\site-packages\\FreeTAKServer\\certs\\"
21 |
22 | # crt file path
23 | crtfilepath = f"{certpath}pubserver.pem"
24 |
25 | # key file path
26 | keyfilepath = f"{certpath}pubserver.key.unencrypted"
27 |
28 | # this IP will be used to connect with the FTS API
29 | IP = '127.0.0.1'
30 |
31 | # Port the UI uses to communicate with the API
32 | PORT = '19023'
33 |
34 | # the public IP your server is exposing
35 | APPIP = '127.0.0.1'
36 |
37 | # this port will be used to listen
38 | APPPort = 5000
39 |
40 | # the webSocket key used by the UI to communicate with FTS.
41 | WEBSOCKETKEY = 'YourWebsocketKey'
42 |
43 | # the API key used by the UI to communicate with FTS. generate a new system user and then set it
44 | APIKEY = 'Bearer token'
45 |
46 | # For 'in memory' database, please use:
47 | # SQLALCHEMY_DATABASE_URI = 'sqlite:///:memory:'
48 |
49 | SQLALCHEMY_TRACK_MODIFICATIONS = False
50 |
51 | # THEME SUPPORT
52 | # if set then url_for('static', filename='', theme='')
53 | # will add the theme name to the static URL:
54 | # /static//filename
55 | # DEFAULT_THEME = "themes/dark"
56 | DEFAULT_THEME = None
57 |
58 |
59 | class ProductionConfig(Config):
60 | DEBUG = False
61 |
62 | # Security
63 | SESSION_COOKIE_HTTPONLY = True
64 | REMEMBER_COOKIE_HTTPONLY = True
65 | REMEMBER_COOKIE_DURATION = 3600
66 |
67 | # PostgreSQL database
68 | SQLALCHEMY_DATABASE_URI = 'postgresql://{}:{}@{}:{}/{}'.format(
69 | environ.get('APPSEED_DATABASE_USER', 'appseed'),
70 | environ.get('APPSEED_DATABASE_PASSWORD', 'appseed'),
71 | environ.get('APPSEED_DATABASE_HOST', 'db'),
72 | environ.get('APPSEED_DATABASE_PORT', 5432),
73 | environ.get('APPSEED_DATABASE_NAME', 'appseed')
74 | )
75 |
76 |
77 | class DebugConfig(Config):
78 | DEBUG = True
79 |
80 |
81 | config_dict = {
82 | 'Production': ProductionConfig,
83 | 'Debug': DebugConfig
84 | }
85 |
--------------------------------------------------------------------------------
/docs/Installation/platform/Windows/features.jpg:
--------------------------------------------------------------------------------
https://raw.githubusercontent.com/FreeTAKTeam/FreeTAKServer-User-Docs/0db9cacf4a575734097484a7a4761b872751edf0/docs/Installation/platform/Windows/features.jpg
--------------------------------------------------------------------------------
/docs/Installation/platform/Windows/flask-run.jpg:
--------------------------------------------------------------------------------
https://raw.githubusercontent.com/FreeTAKTeam/FreeTAKServer-User-Docs/0db9cacf4a575734097484a7a4761b872751edf0/docs/Installation/platform/Windows/flask-run.jpg
--------------------------------------------------------------------------------
/docs/Installation/platform/Windows/pythoninstall.png:
--------------------------------------------------------------------------------
https://raw.githubusercontent.com/FreeTAKTeam/FreeTAKServer-User-Docs/0db9cacf4a575734097484a7a4761b872751edf0/docs/Installation/platform/Windows/pythoninstall.png
--------------------------------------------------------------------------------
/docs/Installation/platform/Windows/requirements.txt:
--------------------------------------------------------------------------------
1 | flask
2 | flask_login
3 | flask_migrate
4 | flask_wtf
5 | flask_sqlalchemy
6 | email_validator
7 | gunicorn
8 | coveralls
9 | coverage
10 | pytest
11 | flake8
12 | flake8-print
13 | pep8-naming
14 | selenium
--------------------------------------------------------------------------------
/docs/Installation/platform/Windows/start-fts.jpg:
--------------------------------------------------------------------------------
https://raw.githubusercontent.com/FreeTAKTeam/FreeTAKServer-User-Docs/0db9cacf4a575734097484a7a4761b872751edf0/docs/Installation/platform/Windows/start-fts.jpg
--------------------------------------------------------------------------------
/docs/Troubleshooting/.pages:
--------------------------------------------------------------------------------
1 | title: Troubleshooting
2 |
3 | nav:
4 | - FAQ: troubleshooting_faq.md
5 | - Installation Check: InstallationCheck.md
6 | - Socket SSL Issue: SocketIssue.md
7 | - FTS Servers:
8 | - FTS Main Server (FTS) : fts-core-server.md
9 | - FTS UI : fts-ui-server.md
10 | - Web Map : fts-webmap-server.md
11 | - 3rd Party Servers:
12 | - Video Server: video-server.md
13 | - Voice Server: voip-server.md
14 | - FTS Hub (FTH) : fts-hub-server.md
15 | - Revert to Manual:
16 | - Stepwise installation: ManualConfiguration.md
17 | - Running from Terminal: Running.md
18 | - Running as a Service: Service.md
19 | - Upgrading: Update.md
20 |
--------------------------------------------------------------------------------
/docs/Troubleshooting/InstallationCheck.md:
--------------------------------------------------------------------------------
1 |
2 | # Checking Your Installation
3 |
4 | ## Check FreeTAKServer, FreeTAKServer-UI, and WebMap
5 |
6 | Open a web browser to:
7 |
8 | `http://[YOUR_IP_ADDRESS]:5000/`
9 | default
10 |
11 | - login with your credentials
12 | - by default is user: `admin`, password: `password`
13 | - you should promptly change the login credentials
14 | - [change profile password](../administration/Web_Admin.md) , or
15 | - [create a new user and delete `admin`](../administration/Web_Admin.md)
16 | - check whether services are OK (blue)
17 | 
18 | - connect a client to the server
19 | - click on the WEBMAP button
20 | - confirm the client is connected in the WEBMAP
21 |
22 | ## Check The Video Server
23 |
24 | Open a web browser to:
25 |
26 | `http://[YOUR_IP_ADDRESS]:9997/v1/config/get`
27 | default
28 |
29 | Confirm the configuration (which is in `json` format):
30 |
31 | ```json
32 | {
33 | "logLevel": "info",
34 | "logDestinations": [
35 | "stdout"
36 | ],
37 | "logFile": "mediamtx-server.log",
38 | "readTimeout": "10s",
39 | "writeTimeout": "10s",
40 | "readBufferCount": 512,
41 | "api": true,
42 | "apiAddress": "[YOUR_IP_ADDRESS]:9997",
43 | "metrics": false,
44 | "metricsAddress": "127.0.0.1:9998",
45 | "pprof": false,
46 | "pprofAddress": "127.0.0.1:9999",
47 | "runOnConnect": "",
48 | "runOnConnectRestart": false,
49 | "rtspDisable": false,
50 | "protocols": [
51 | "multicast",
52 | "tcp",
53 | "udp"
54 | ],
55 | "encryption": "no",
56 | "rtspAddress": ":8554",
57 | "rtspsAddress": ":8555",
58 | "rtpAddress": ":8000",
59 | "rtcpAddress": ":8001",
60 | "multicastIPRange": "224.1.0.0/16",
61 | "multicastRTPPort": 8002,
62 | "multicastRTCPPort": 8003,
63 | "serverKey": "server.key",
64 | "serverCert": "server.crt",
65 | "authMethods": [
66 | "basic",
67 | "digest"
68 | ],
69 | "readBufferSize": 2048,
70 | "rtmpDisable": false,
71 | "rtmpAddress": ":1935",
72 | "hlsDisable": false,
73 | "hlsAddress": ":8888",
74 | "hlsAlwaysRemux": false,
75 | "hlsSegmentCount": 3,
76 | "hlsSegmentDuration": "1s",
77 | "hlsAllowOrigin": "*",
78 | "paths": {
79 | "~^.*$": {
80 | "source": "publisher",
81 | "sourceProtocol": "automatic",
82 | "sourceAnyPortEnable": false,
83 | "sourceFingerprint": "",
84 | "sourceOnDemand": false,
85 | "sourceOnDemandStartTimeout": "10s",
86 | "sourceOnDemandCloseAfter": "10s",
87 | "sourceRedirect": "",
88 | "disablePublisherOverride": false,
89 | "fallback": "",
90 | "publishUser": "",
91 | "publishPass": "",
92 | "publishIPs": [],
93 | "readUser": "",
94 | "readPass": "",
95 | "readIPs": [],
96 | "runOnInit": "",
97 | "runOnInitRestart": false,
98 | "runOnDemand": "",
99 | "runOnDemandRestart": false,
100 | "runOnDemandStartTimeout": "10s",
101 | "runOnDemandCloseAfter": "10s",
102 | "runOnPublish": "",
103 | "runOnPublishRestart": false,
104 | "runOnRead": "",
105 | "runOnReadRestart": false
106 | }
107 | }
108 | }
109 | ```
110 |
111 | ## Check the FreeTAKHub Server (or Node-RED Server)
112 |
113 | Open a web browser to:
114 |
115 | `http://[YOUR_IP_ADDRESS]:1880/`
116 | default
117 |
118 | - login with your credentials
119 | - by default is user: `admin`, password: `password` (you should promptly change the default password)
120 | - these are the same credentials used previously
121 |
122 | see [NodeRed](../administration/brokered/Integration/NodeRedInstallation.md) for more information
123 |
124 | ## Check Voice server
125 | connect a client to `[YOUR_IP_ADDRESS]:64738`
126 |
--------------------------------------------------------------------------------
/docs/Troubleshooting/ManualConfiguration.md:
--------------------------------------------------------------------------------
1 |
2 | # Manual Configuration
3 |
4 | ### Configure FreeTAKServer < 1.9
5 | 
6 |
7 | Depending on the linux distro your config file for FTS will be in a python version dependant location.
8 | you can use pip to discover the location. Type:
9 | ```
10 | sudo python3 -m pip show FreeTAKServer
11 | ```
12 |
13 | If you are running python 3.11 you would get
14 | ```
15 | /usr/local/lib/python3.11/dist-packages/FreeTAKServer/controllers/configuration/MainConfig.py
16 | ```
17 |
18 | You can edit the file via nano with the following command
19 |
20 | ```
21 | sudo nano /usr/local/lib/python3.11/dist-packages/FreeTAKServer/controllers/configuration/MainConfig.py
22 | ```
23 |
24 | To exit nano `ctrl+x` and then enter `y` to save and hit enter.
25 |
26 | #### DBFilePath
27 | OPTIONAL this should not be necessary since FTS 1.5
28 | you need to change the `DBFilePath` value to something valid,
29 | if you are running as root, `/root` is a good choice.
30 |
31 | Original Value
32 | ```python
33 | # this should be set before startup
34 | DBFilePath = str(r'/opt/fts/FTSDataBase.db')
35 | ```
36 |
37 | As roots Home Folder
38 |
39 | ```python
40 | # this should be set before startup
41 | DBFilePath = str(r'/opt/fts/FTSDataBase.db')
42 | ```
43 | ### MySQL database
44 | FTS supports an abstraction layer, so it's easy to use a different database like MySQL.
45 | MYSQL is still experimental support, so use at your own risk.
46 | To switch to a MySQL database
47 | ```python
48 | # this should be set before startup
49 | DBFilePath = str('user:pass@localhost/dbname')
50 | ```
51 |
52 | And then under
53 | ```
54 | sudo nano /usr/local/lib/python3.11/dist-packages/FreeTAKServer/controllers/configuration/DatabaseConfiguration.py
55 | ```
56 |
57 | Change
58 | ```python
59 | DataBaseType = str('sqlite:///')
60 | ```
61 | To
62 | ```python
63 | DataBaseType = str('mysql://')
64 | ```
65 |
--------------------------------------------------------------------------------
/docs/Troubleshooting/Running.md:
--------------------------------------------------------------------------------
1 |
2 | If you have not installed FreeTAKServer please follow the [installation](../Installation/platform/Linux/installation_vm) guide first.
3 |
4 | ## Run FTS in the Console
5 |
6 | ```bash
7 | sudo python3 -m FreeTAKServer.controllers.services.FTS
8 | ```
9 | If you have FTS running in the terminal how you like;
10 | it is time to move on to running FTS as a [service](Service.md).
11 |
12 | ## Legacy Parameters
13 | those parameters were supported in previous version of FTS
14 |
15 | | Flag | Default | Description |
16 | |---------------------|---------|--------------------------------------------------------------------------|
17 | | -AutoStart | | Weather the full server start or just the RestAPI, must be True or False |
18 | | -CoTIP | | Your Server IP |
19 | | -CoTPort | 8087 | The port you want clients to connect to |
20 | | -SSLCoTIP | | Your SSL Server IP |
21 | | -SSLCoTPort | 8089 | The port you want SSL clients to connect to |
22 | | -DataPackageIP | 0.0.0.0 | The IP where data packages are served from |
23 | | -DataPackagePort | 8080 | The port you want Data Packages to be sent and received on |
24 | | -SSLDataPackageIP | 0.0.0.0 | The IP where data SSL packages are served from |
25 | | -SSLDataPackagePort | 8443 | The port you want SSL Data Packages to be sent and received on |
26 |
27 |
--------------------------------------------------------------------------------
/docs/Troubleshooting/Service.md:
--------------------------------------------------------------------------------
1 |
2 | Running FreeTAKServer as a service on your Linux server can be achieved in multiple ways.
3 |
4 | ## Cron
5 | Cron or Crontab is a basic scheduler that ships with most linux distributions.
6 |
7 | We can use this to get a very basic service running with minimal effort.
8 |
9 | ### Edit Crontab
10 | ```bash
11 | sudo crontab -e
12 | ```
13 |
14 | Add this line to the bottom of the file
15 |
16 | ```text
17 | @reboot nohup sudo python3 -m FreeTAKServer.controllers.services.FTS &
18 | ```
19 |
20 | You will need to add any start parameters to the crontab file such as `-DataPackageIP`.
21 |
22 | ## Systemd
23 |
24 | ### Introduction
25 | Systemd is nearly unavoidable.
26 | It has permeated so many aspects of the Linux ecosystem
27 | that it is necessary for any Linux admin to know at least the basics of how it works.
28 | One of the major selling points of systemd is the ease of writing service files.
29 | They aren't scripts.
30 | Instead, they're basic configuration files.
31 | While they can grow to be complex, they are usually very simple.
32 | ### background
33 | The main directive is ExecStart, which specifies the command that should be run when the service is started. The command is
34 | ```bash
35 | /usr/bin/python3 /opt/fts.venv/lib/python3.11/site-packages/FreeTAKServer-UI/run.py.
36 | ```
37 | Here's what each part of the command does:
38 |
39 | /usr/bin/python3
40 | : This specifies the Python interpreter that should be used to run the code.
41 |
42 | -m
43 | : This option tells Python to run a module as a script.
44 |
45 | /opt/fts.venv/lib/python3.11/site-packages/FreeTAKServer-UI/run.py
46 | : This is the path to the Python module that should be run as a script.
47 |
48 | So when the service is started,
49 | the Python interpreter will run the `run.py` module
50 | located in the `/opt/fts.venv/lib/python3.11/site-packages/FreeTAKServer-UI/` directory.
51 |
52 | This code above is running `FreeTAKServer-UI`,
53 | which is a user interface for `FreeTAKServer`.
54 | When the Systemd service is started,
55 | it will start the `FreeTAKServer-UI` interface,
56 | allowing users to interact with the `FreeTAKServer` software through a web browser.
57 |
58 | !!! note
59 | You will need create two separate systemd files, if you're using Web UI
60 | - fts.service
61 | - fts-ui.service
62 |
63 |
64 | ### Create The File
65 | Systemd services exist at
66 | ```/etc/systemd/system.```
67 | or
68 | ```
69 | /usr/lib/systemd/system/
70 | ```
71 | Any `.service` file that you create in that directory can be run as a service,
72 | if you construct it properly.
73 | Create a file that you would like with the `.service` extension.
74 | In our case,
75 | to create a file as `/etc/systemd/system/FreeTAKServer.service` with the following content:
76 | (modify the parameters as needed)
77 |
78 | ```ini
79 | {!Troubleshooting/fts.service!}
80 | ```
81 |
82 | And reload systemd, so it will load new unit file:
83 | ```
84 | sudo systemctl daemon-reload
85 | ```
86 |
87 | ### Start the `fts.service`
88 | ```
89 | sudo systemctl start fts.service
90 | ```
91 |
92 | ### Get the Status of the `fts.service`
93 | ```
94 | sudo systemctl status fts.service
95 | ```
96 |
97 | ### Stop the `fts.service`
98 | ```
99 | sudo systemctl stop fts.service
100 | ```
101 |
102 | ### Start the `fts.service` with the system
103 | ```
104 | sudo systemctl enable fts.service
105 | ```
106 |
107 | ## UI Service
108 | similarly the UI service can be created with `/etc/systemd/system/fts-ui.service`
109 | ```ini
110 | {!Troubleshooting/fts-ui.service!}
111 | ```
112 |
113 | started
114 |
115 | see also [ZeroTouchInstall Services section](../Installation/mechanism/Ansible/ZeroTouchInstall.md)
116 | to see the complete list of the services created by the installer
117 |
--------------------------------------------------------------------------------
/docs/Troubleshooting/SocketIssue.md:
--------------------------------------------------------------------------------
1 |
2 | # SSL Issue: Regenerate Certificate Revocation List
3 | Currently, there is a known issue of a socket leak, causing SSL to stop working after a period of time.
4 | Even restarting the server OS would not help,
5 | documented under:
6 |
7 | The cause is that Certificate Revocation List (CRL) is expired.
8 | A Certificate Revocation List (CRL) is a type of security feature used in public key infrastructure (PKI) systems.
9 | It is a list of digital certificates that have been revoked by the certificate authority (CA) before their scheduled expiration date.
10 | This list contains information about the certificate serial numbers, the revocation dates, and the reason for revocation.
11 | Since FTS version 1.9, when you delete a user that has a certificate, the certificate will be revoked.
12 | We have now created a script that will fix the issue re-creating the CRL.
13 |
14 | Please follow the steps below.
15 |
16 | !!! note
17 | If you are trying to use this with 2.x.y the first step is not necessary
18 |
19 | 1. Install DigitalPy>=0.3.9.1 (the version where CRL regeneration support was added) with the following command:
20 | ```shell
21 | pip install DigitalPy>=0.3.9.1
22 | ```
23 | 2. Now execute the CRL-Regen utility. The location of the certs would under /path/to/fts/certs/ca.pem typically would be /opt/fts/certs:
24 | ```shell
25 | python3 -m digitalpy.core.security.crl_regen --ca-pem-path /opt/fts/certs/ca.pem --ca-key-path /opt/fts/certs/ca.key --crl-path /opt/fts/certs/FTS_CRL.json
26 | ```
27 | 3. Now stop FTS:
28 | ```shell
29 | sudo systemctl stop fts && sudo pkill python
30 | ```
31 | 4. Finally, restart your system for good measure (not required but recommended to ensure CRL updates are applied)
32 | ```shell
33 | sudo reboot -n
34 | ```
35 |
36 | !!! note
37 | The FTS certs directory can generally be found at
38 | ```shell
39 | /opt/fts.venv/lib/python3.11/site-packages/FreeTAKServer/certs
40 | ```
41 |
42 | # SSL issue: Change the Number of max file open
43 | If you have an issue with SSL probably depends on a limited amount of socket files you can open on the machine.
44 | in a console type
45 |
46 | ```bash
47 | ulimit -n
48 | ```
49 | If you get 1024 or less you will need to increase the allowed file descriptors for the user.
50 |
51 | The procedure on Ubuntu 20.04 and 22.04 is this:
52 |
53 | ```bash
54 | sudo sed -i 's/DefaultLimitNOFILE=1024/DefaultLimitNOFILE=1048576 /g' /etc/systemd/system.conf
55 | ```
56 |
57 |
58 | ```bash
59 | grep NOFILE /etc/systemd/system.conf DefaultLimitNOFILE=1048576
60 | ```
61 | or
62 | open the file with an editor
63 | ```bash
64 | vi /etc/systemd/system.conf
65 | ```
66 |
67 | open the file with an editor and edit line 61
68 | Uncomment DefaultLimitNOFILE and set your limit there, e.
69 |
70 | Restart with:
71 |
72 | ```bash
73 | shutdown -r 0
74 | ```
75 | Then, check the user file descriptor limit again:
76 |
77 | ```bash
78 | ulimit -n
79 | ```
80 |
81 | Before:
82 |
83 | ```bash
84 | ulimit -n
85 | ulimit -Sn
86 | ulimit -Hn
87 | ```
88 | ```text
89 | 1024
90 | 1024
91 | 1024
92 | ```
93 |
94 | After:
95 |
96 | ```bash
97 | ulimit -n
98 | ulimit -Sn
99 | ulimit -Hn
100 | ```
101 | ```text
102 | 1048576
103 | 1048576
104 | 1048576
105 | ```
106 |
107 | The limits can be controlled by systemd and this is what we do here
108 | — instruct systemd to set it to 100k.
109 | Note that this setting will apply to all users
110 |
111 | by increasing the soft limit for no file here
112 | `/etc/security/limits.conf`
113 |
114 | you should be able to increase this time,
115 | try 20000 and in theory the time should multiply 20x.
116 | so, you should be able to run for about 40 hours uninterrupted
117 | the file may also be under the path `/etc/limits.conf`
118 | also add this line:
119 |
120 | ```text
121 | fs.file-max = 65536
122 | ```
123 | to this file: `/etc/sysctl.conf`
124 | then restart and check file limits with this
125 |
126 | ```bash
127 | ulimit -Sn
128 | ```
129 |
--------------------------------------------------------------------------------
/docs/Troubleshooting/Update.md:
--------------------------------------------------------------------------------
1 |
2 | # Update
3 | in **certain cases**, if you already installed FTS with pip you can use
4 | ```shell
5 | pip install --upgrade FreeTAKServer[UI]
6 | ```
7 | this is **not** warranted to work with version 1.9.9,
8 | often the best way is to delete the installation (saving first the data) and start from zero.
9 |
10 | To remove your installation
11 | ```shell
12 | sudo rm -r /usr/local/lib/python3.11/FreeTAKServer
13 | ```
14 |
15 |
--------------------------------------------------------------------------------
/docs/Troubleshooting/fts-core-server.md:
--------------------------------------------------------------------------------
1 |
2 | # Free TAK Server : core
3 |
4 | 
5 |
6 |
7 | ## Components
8 |
9 | The core consists of several logical components.
10 | They are all TCP ports, some encrypted via SSL and some in the clear.
11 |
12 | Note:: The indicated ports are default values.
13 |
14 | ### Application Programming Interface (API) Service
15 |
16 | * REST instance (port 19023)
17 | * websocket instance (port 19023)
18 |
19 | ### Digital Py (DP) Service
20 |
21 | * SSL instance (port 8443)
22 | * Clear instance (port 8080)
23 |
24 | ### Federation Service
25 |
26 | * Clear instance (port 9000)
27 |
28 | ## CoT Service
29 |
30 | * SSL instance (port 8089)
31 | * Clear instance (port 8087)
32 |
33 | ## Reconfiguration
34 |
35 | The `ZeroTouch` installer makes assumptions configuring the system.
36 | There are corner cases which `ZeroTouch` will miss.
37 | For example, `ZTI` acquires the IP address by, effectively using:
38 | ```bash
39 | curl https://ifconfig.me/ip
40 | ```
41 | In several environments this produces the desired result.
42 | In the case where the server is not on the public internet,
43 | this result will be incorrect.
44 | The following is more likely to provide the IP address you want.
45 | ```bash
46 | ip addr
47 | ```
48 |
49 | [Verify and/or Edit the `fts` configuration file](../administration/usingConsole.md)
50 | ```
51 | /opt/fts/FTSConfig.yaml
52 | ```
53 |
54 | Here is a fragment of that configuration file.
55 | ```yaml
56 | Addresses:
57 | FTS_COT_PORT: 8087
58 | FTS_SSLCOT_PORT: 8089
59 | FTS_DP_ADDRESS: 127.0.0.1
60 | FTS_USER_ADDRESS: 127.0.0.1
61 | FTS_API_PORT: 19023
62 | FTS_FED_PORT: 9000
63 | FTS_API_ADDRESS: 127.0.0.1
64 | ```
65 | Adjust `FTS_DP_ADDRESS`, `FTS_USER_ADDRESS` & `FTS_API_ADDRESS`
66 | to reflect your IP (or ZeroTier IP) address.
67 |
68 |
69 |
--------------------------------------------------------------------------------
/docs/Troubleshooting/fts-hub-server.md:
--------------------------------------------------------------------------------
1 |
2 | # Integration Server
3 |
4 |
5 | 
6 |
7 | The integration server is [NodeRed]()
8 |
9 | 1. Instructions here:
10 | 2. Use command: `bash <(curl -sL https://raw.githubusercontent.com/node-red/linux-installers/master/deb/update-nodejs-and-nodered)`
11 | * Select `Y` to continue and `Y` to install Pi specific nodes
12 | * For additional settings, you can run the command: `node-red admin init`
13 | 3. Enable Node Red service:
14 | * Use command: sudo systemctl enable nodered.service
15 | 4. Run Node Red service:
16 | * Use command: sudo node-red-start
17 | 5. Login to Node Red at `:1880`
18 | 6. Check to see if you have tabs for Webmap and FTH Video Checker Flows in Node Red
19 | 1. If not, go to:
20 | 2. Click the copy button on the right side of the line to copy the raw contents of WebMap.json to your clipboard
21 | 3. Go back to your Node Red and click the Hamburger menu icon (right upper corner) and select Import
22 | 4. Paste the raw contents here and click import
23 | 5. If you get an error about missing “world map, world map in & config”
24 | 1. Click Hamburger menu and select Manage palette
25 | 2. Select install and search for “node-red-contrib-web-worldmap” and click install
26 | 3. Click back in search field and search for “node-red-contrib-config” and click install
27 | 7. In Node Red WebMap flow tab:
28 | 8. Select the FTH Global Config node and update the FTH_FTS_URL and FTH_FTS_VIDEO_URL fields with your IP (or ZeroTier) address
29 | * Select the Post CoT to FTS node and update the “bearer authentication” Token field with ‘’
30 | 9. Click DEPLOY in upper right corner of Node Red to save settings
31 | 10. You should now get green “connected” indicators under one or all these nodes: FTS Server, TAK Map, tak-map & event
32 | 11. Confirm that the flow is working by logging back into the FTS Web UI: `:5000` and click on the WebMap tab.
33 | Now you should see the world map displayed
34 |
35 |
--------------------------------------------------------------------------------
/docs/Troubleshooting/fts-ui-server.md:
--------------------------------------------------------------------------------
1 |
2 | # Free TAK Server User Interface
3 |
4 | The `WebUI` is typically under the control of `systemd` as `fts-ui.service`.
5 |
6 | 
7 |
8 |
9 | The `FTS-UI` communicates with
10 | the [FTS](fts-core-server.md) and
11 | the [FTH](fts-hub-server.md).
12 |
13 | ## Inbound Connection (in port 5000)
14 |
15 | (port 5000)
16 |
17 | ## API Service Connection (websocket port 19023)
18 |
19 |
20 | ## Integration Connection (websocket port 8000)
21 |
22 |
23 | ## Zero Touch Installer (`ZTI`)
24 |
25 | `ZeroTouch` makes assumptions configuring the system.
26 | However, there are many corner cases which `ZeroTouch` may miss.
27 | For example, `ZTI` acquires the IP address by, effectively using:
28 | ```bash
29 | curl http://ifconfig.me/ip
30 | ```
31 | In many environments this produces the desired result.
32 | In cases, not on the public internet, this result will be incorrect.
33 | The following is more likely to be what you want.
34 | ```bash
35 | ip addr
36 | ```
37 |
38 | Validate the properties set in the `fts-ui` configuration file.
39 |
40 | [Verify and/or Edit the `fts-ui` configuration file](../administration/usingConsole.md)
41 | Use of a python virtual environment (here the ZTI location) is recommended.
42 | ```
43 | /opt/fts.venv/lib/python3.11/site-packages/FreeTAKServer-UI/config.py
44 | ```
45 | Here is a sample fragment of that file.
46 | ```python
47 | class Config(object):
48 |
49 | # this IP will be used to connect with the FTS API
50 | IP = '127.0.0.1'
51 |
52 | # the public IP your server is exposing
53 | APPIP = '0.0.0.0'
54 |
55 | # The IP the Web UI service will use to access the Webmap service
56 | WEBMAPIP = '127.0.0.1'
57 |
58 | # The TCP port the Web UI service will use to access the Webmap service
59 | WEBMAPPORT = 1880
60 |
61 | ```
62 | `ZTI` sets the `IP` and `WEBMAPIP` to your externally known IP address.
63 | If you are not on a public network this will need to be adjusted.
64 |
65 | `WEBMAPPORT` is 1880 for a `NodeRedFlow` install
66 | and `8000` for a compiled `webmap`.
67 |
68 |
--------------------------------------------------------------------------------
/docs/Troubleshooting/fts-ui.service:
--------------------------------------------------------------------------------
1 | [Unit]
2 | Description=FreeTAKServer UI service
3 | After=network.target
4 | StartLimitIntervalSec=0
5 |
6 | [Service]
7 | Type=simple
8 | Restart=always
9 | RestartSec=1
10 | ExecStart=/usr/bin/python3 -m /opt/fts.venv/lib/python3.11/site-packages/FreeTAKServer-UI/run.py
11 |
12 | [Install]
13 | WantedBy=multi-user.target
--------------------------------------------------------------------------------
/docs/Troubleshooting/fts.service:
--------------------------------------------------------------------------------
1 | [Unit]
2 | Description=FreeTAK Server service
3 | After=network.target
4 | StartLimitIntervalSec=0
5 |
6 | [Service]
7 | Type=simple
8 | Restart=always
9 | RestartSec=1
10 | ExecStart=/usr/bin/python3 -m FreeTAKServer.controllers.services.FTS
11 |
12 | [Install]
13 | WantedBy=multi-user.target
--------------------------------------------------------------------------------
/docs/Troubleshooting/mediamtx.service:
--------------------------------------------------------------------------------
1 | [Unit]
2 | After=network.target
3 |
4 | [Service]
5 | StandardOutput=append:/var/log/mediamtx/mediamtx-stdout.log
6 | StandardError=append:/var/log/mediamtx/mediamtx-stderr.log
7 | ExecStart=/opt/mediamtx/rtsp-simple-server /opt/mediamtx/rtsp-simple-server.yml
8 |
9 | [Install]
10 | WantedBy=multi-user.target
11 |
--------------------------------------------------------------------------------
/docs/Troubleshooting/video-server.md:
--------------------------------------------------------------------------------
1 |
2 | # Video Server (third party application)
3 |
4 | 
5 |
6 | The video server is a third party application.
7 |
8 | The video server is [Media MTX](https://github.com/bluenviron/mediamtx) (previously known as `rtsp-simple-server`.
9 |
10 | ## Known Issues
11 |
12 | It may be that your problem may be related to a known issue.
13 | Please, check the known issues.
14 |
15 | * [Open Issues](https://github.com/FreeTAKTeam/FreeTAKHub_VideoChecker/issues)
16 | * [Bugs](https://github.com/FreeTAKTeam/FreeTAKHub_VideoChecker/labels/bug)
17 |
18 |
19 | ## Acquire the Appropriate Version
20 |
21 | Different versions exist depending on the type of RaspPi you are using.
22 | Instructions below are for RaspPi 4, having an ARM64 v8 processor.
23 |
24 | This example uses a specific version verified for use with `FTS`,
25 | vis. .
26 |
27 | ```bash
28 | wget https://github.com/bluenviron/mediamtx/releases/download/v0.18.5/rtsp-simple-server_v0.18.5_linux_arm64v8.tar.gz
29 | ```
30 |
31 | Extract the application into a suitable directory, e.g. `/opt`.
32 | ```bash
33 | sudo mkdir -p /opt/mediamtx
34 | sudo tar -zxvf rtsp-simple-server_v0.18.5_linux_arm64v8.tar.gz -C /opt/mediamtx/
35 | ```
36 |
37 | Edit the configuration file `/opt/mediamtx/rtsp-simple-server.yml`.
38 | The following shows the fragments of interest, before editing.
39 | ```yaml
40 | # Enable the HTTP API.
41 | api: no
42 | # Address of the API listener.
43 | apiAddress: 127.0.0.1:9997
44 |
45 | # Encrypt handshake and TCP streams with TLS (RTSPS).
46 | # Available values are "no", "strict", "optional".
47 | encryption: "no"
48 | # Address of the TCP/RTSP listener. This is needed only when encryption is "no" or "optional".
49 | rtspAddress: :8554
50 | # Address of the TCP/TLS/RTSPS listener. This is needed only when encryption is "strict" or "optional".
51 | rtspsAddress: :8322
52 | ```
53 | * Enable the HTTP API
54 | * Set the listener's address to the RaspPi's IP address (or ZeroTier)
55 |
56 | Here is an example with the relevant properties after updates (in context).
57 | ```yaml
58 | # Enable the HTTP API.
59 | api: yes
60 | # Address of the API listener.
61 | apiAddress: 10.2.118.237:9997
62 |
63 | # Encrypt handshake and TCP streams with TLS (RTSPS).
64 | # Available values are "no", "strict", "optional".
65 | encryption: "no"
66 | # Address of the TCP/RTSP listener. This is needed only when encryption is "no" or "optional".
67 | rtspAddress: 10.2.118.237:8554
68 | # Address of the TCP/TLS/RTSPS listener. This is needed only when encryption is "strict" or "optional".
69 | rtspsAddress: :8322
70 | ```
71 |
72 | ## Smoke Test (is it running?)
73 |
74 | * https://github.com/FreeTAKTeam/FreeTAKHub-Installation/blob/main/roles/videoserver/templates/rtsp-simple-server.service.j2
75 |
76 | ```text
77 | {!Troubleshooting/mediamtx.service!}
78 | ```
79 |
80 | Put the `mediamtx.service` file in `/etc/systemd/system/mediamtx.service`.
81 | ```bash
82 | sudo systemctl daemon-reload
83 | sudo systemctl enable mediamtx.service
84 | sudo systemctl start mediamtx.service
85 | ```
86 |
87 | ## Integrate Media Server with Integration Server
88 |
89 | This presumes the prior installation of [`NodeRed`](fts-hub-server.md).
90 |
91 | The integration server is configured with the `video-checker` via a `JSON` file.
92 | `NodeRed` provides .
93 |
94 |
95 |
96 | *
97 | *
98 |
99 | ## Connect a Client (ICU and/or drone) to Video Server
100 |
101 | * Receive the CoT notification in TAK client (`WinTAK` and `ATAK`)
102 | * Use notification to start video (`WinTAK` and `ATAK`)
103 |
104 |
--------------------------------------------------------------------------------
/docs/Troubleshooting/voip-server.md:
--------------------------------------------------------------------------------
1 |
2 | # Chat Server
3 |
4 | 
5 |
6 |
7 |
--------------------------------------------------------------------------------
/docs/Troubleshooting/webmap-server.md:
--------------------------------------------------------------------------------
1 |
2 | # WebMap Installation
3 |
4 | 
5 |
6 | Some versions of the `Zero Touch Installer` do not install the compiled `webmap`.
7 |
8 | In those cases you will need to install the [flow version](../administration/brokered/WebMap/Installation.md).
9 |
10 | The WebMap is similar in function to `WebTAK`.
11 |
12 |
13 | Web Team Awareness Kit (WebTAK)
14 | : [A web-based interface which allows users to type in the website for a specific TAK server
15 | (configured to support WebTAK) was recently developed.
16 | The primary use of WebTAK is to provide quick access to data collected
17 | in the TAK server to enable situational awareness to be shared and avoid having to install TAK clients
18 | (i.e. `ATAK`, `WinTAK`, `iTAK`) on hardware.](https://www.dhs.gov/sites/default/files/publications/tactical_awareness_kit_508.pdf)
19 |
20 | * [Press Release](https://www.draper.com/news-releases/us-inaugurations-military-units-used-draper-developed-webtak-communications)
21 | * [Video](https://vimeo.com/433760943)
22 |
23 |
24 |
25 |
--------------------------------------------------------------------------------
/docs/Usage/.pages:
--------------------------------------------------------------------------------
1 | nav:
2 | - Connect Clients:
3 | - ATAK: Connecting_ATAK.md
4 | - WinTAK: Connecting_WinTAK.md
5 | - Connect Plugin:
6 | - Execution Checker: ExCheck.md
7 | - Video Management: VideoManagement.md
8 | - TAK Tools: tools
9 |
--------------------------------------------------------------------------------
/docs/Usage/Connecting_ATAK.md:
--------------------------------------------------------------------------------
1 |
2 | # Connecting `ATAK` to Pub Server
3 | The FTS team supports a public instance of FTS with the last version installed so that you can test it.
4 |
5 | ## Configure `ATAK` for FreeTakServer on the Pub server
6 | In order to use `ATAK` with a FTS server you need to:
7 | 1. Download required files
8 | 2. Configure using import manager
9 |
10 | ### 1. Download required files
11 | The easiest way is to open this article in your Android phone, so that all the files will be already available there.
12 |
13 | #### Download and install `ATAK` 4.10 (updated Nov 2023)
14 | * Play store
15 | * Secondary (use CivTAK Community OwnCloud Repo)
16 |
17 | #### Download configurations
18 | * [Configuration `fts-official-pub.zip`](../assets/fts-official-pub.zip)
19 | This configuration includes `fts-offical-pub.pref`:
20 | ```xml
21 |
22 |
23 |
24 | 1
25 | FTS Official (Public)
26 | true
27 | 137.184.101.250:8087:tcp
28 |
29 |
30 | true
31 |
32 |
33 | ```
34 |
35 | #### Download maps (optional)
36 | There are places where you may acquire `ATAK` maps.
37 | Representative place are:
38 |
39 | * [ATAK-Maps](https://github.com/joshuafuller/ATAK-Maps)
40 | * [reddit `ATAK` MapSources](https://www.reddit.com/r/ATAK/wiki/index/#wiki_loading_mapsources_.2F_base_maps_to_tak)
41 | * [CivTAK Files](https://www.civtak.org/files/)
42 | * [Roll Your Own with MOBAC](https://mobac.sourceforge.io/)
43 |
44 |
45 | ### 2. Configure using import manager
46 |
47 | Navigation:
48 |
49 | * Start `ATAK` on android
50 | * Tap the menu selector, i.e. ≡, (upper left).
51 |
52 | → Tap `Import` manager
53 |
54 | 
55 |
56 | → Tap `Local SD`
57 |
58 | 
59 |
60 | → Go to the place where you have downloaded the files (probably `/sdcard/Download/`)
61 |
62 | 
63 |
64 | * Select `fts-official-pub.zip`
65 | * Click `OK`
66 |
67 | * A message will appear to inform you that you are connected to Pub Server
68 | * Under servers the Pub Server is green (if connected)
69 |
--------------------------------------------------------------------------------
/docs/Usage/Connecting_WinTAK.md:
--------------------------------------------------------------------------------
1 |
2 | # Connecting `WinTAK` to Pub Server
3 | The FTS team supports a public instance of FTS with the last version installed so that you can test it.
4 |
5 |
6 | ## Issues
7 |
8 | `WinTAK` has a known issue with the TAK Chat Plugin.
9 | You Must disable the plugin,
10 | or you will have frequent disconnects from FTS.
11 |
12 | ### Disable TAK Chat
13 | Navigate to the plugin management menu.
14 |
15 | 
16 |
17 | Then select unload on `TAK Chat`
18 |
19 | ## Connect to FTS
20 |
21 | Navigation:
22 | `Settings`
23 |
24 | 
25 |
26 | → `Network Preferences`
27 |
28 | 
29 |
30 | → `Mange Server Connections`
31 |
32 | 
33 |
34 | → `FTS Public 2.1`
35 | From here you can add your FTS server:
36 | Description; IP or host name, and; port.
37 |
38 | 
39 |
40 | → `Ok` If the connection is made you will see it reflected in the `TAK Network Status`.
41 |
42 | 
43 |
44 | ## Connect to FTS via Configuration File
45 |
46 | 
47 |
48 | This will bring up a file selection dialog.
49 |
50 | * [Configuration `fts-official-pub.zip`](../assets/fts-official-pub.zip)
51 |
52 | !!! note
53 | This reads the file, but it does not seem to update the server connections.
54 |
--------------------------------------------------------------------------------
/docs/Usage/ExCheck.md:
--------------------------------------------------------------------------------
1 |
2 | # ExCheck
3 | `ExCheck` is a plugin for `ATAK` and `WinTAK`.
4 | It allows users to collaborate on the execution and monitoring of tasks based on templates.
5 | To use `ExCheck`, you need to have a server that supports it.
6 | FTS supports the plugin since version 1.3.
7 | Version 1.5 supports also `ExCheck` in the WebUI.
8 |
9 | ## `WinTAK`
10 | in `WinTAK` (since version 4.1) you can find the plugin as `ExCheck` under the plugin tab.
11 | On the top of the window you will see two buttons.
12 | A list of active checklists shows up below them.
13 |
14 | with the buttons You can:
15 |
16 | - create a new Template
17 | - create a new template based on an existing one
18 | - Join active checklist
19 | - Start a new checklist
20 |
21 | ### create a new Template
22 |
23 | You need to define: a name, a description, and at least a task, to be able to save the template.
24 | Standard columns can be modified or deleted,
25 |
26 | - No: sequence of the task
27 | - Description: name of the task
28 | - Req. : this step is required to complete the checklist (???)
29 | - CallSign: TBD
30 | - Net: TBD
31 | - From: TBD
32 | - To: TBD
33 | - Codeword: a code word for this task
34 | - Due relative DTG: the timing of the competition of the task required field
35 |
36 | after that you have created a task you can right-click the hamburger menu (the 3 lines) to the left to:
37 |
38 | - Delete the task
39 | - add some background color
40 | - Toggle linebreak: allows to create a block of tasks
41 |
42 | ### create a new template based on an existing one
43 | Works like the previous,
44 | only you will start the template by modifying an existing one.
45 |
46 | ### Start a new checklist
47 | When you start a new checklist,
48 | the current status is saved locally and on the server.
49 |
50 | ### Join active checklist
51 | Allow you to participate with others in completing the checklist.
52 |
53 | ### Working with checklists
54 | As soon a checklist is started, you can click on an action and set it to be completed.
55 | You can also set back to pending a completed item.
56 | It's also possible to add Notes (those are only visible opening the task item).
57 | If another team member changes the status of a task,
58 | you will get an update.
59 |
60 | To delete a checklist, you need to open it and pres the delete button
61 |
62 | ## `ATAK`
63 | the plugin for `ATAK` is yet not available to the community (Dec 2020).
64 | Functionalities are similar to the `WinTAK` version.
65 | Tests indicate that FTS has the same level of functional support.
66 |
--------------------------------------------------------------------------------
/docs/Usage/VideoManagement.md:
--------------------------------------------------------------------------------
1 |
2 | # Video Management
3 | Since version 1.9 FTS supports a complete video management function.
4 | you can:
5 | * Upload to FTS a video end point using the client (`ATAK` only)
6 | * Download an existing video endpoint from FTS
7 |
8 | Additionally,
9 | FTS will automatically send to all the connected clients
10 | video streams information coming from FreeTAK UAS or TAK ICU
11 | using the [API](../API/REST_API_PublicDoc.md#managevideostream)
12 |
--------------------------------------------------------------------------------
/docs/Usage/images/atak_dialog_import_type.png:
--------------------------------------------------------------------------------
https://raw.githubusercontent.com/FreeTAKTeam/FreeTAKServer-User-Docs/0db9cacf4a575734097484a7a4761b872751edf0/docs/Usage/images/atak_dialog_import_type.png
--------------------------------------------------------------------------------
/docs/Usage/images/atak_dialog_select_import.png:
--------------------------------------------------------------------------------
https://raw.githubusercontent.com/FreeTAKTeam/FreeTAKServer-User-Docs/0db9cacf4a575734097484a7a4761b872751edf0/docs/Usage/images/atak_dialog_select_import.png
--------------------------------------------------------------------------------
/docs/Usage/images/atak_menu_main_import.png:
--------------------------------------------------------------------------------
https://raw.githubusercontent.com/FreeTAKTeam/FreeTAKServer-User-Docs/0db9cacf4a575734097484a7a4761b872751edf0/docs/Usage/images/atak_menu_main_import.png
--------------------------------------------------------------------------------
/docs/Usage/images/wintak_dialog_main_settings.png:
--------------------------------------------------------------------------------
https://raw.githubusercontent.com/FreeTAKTeam/FreeTAKServer-User-Docs/0db9cacf4a575734097484a7a4761b872751edf0/docs/Usage/images/wintak_dialog_main_settings.png
--------------------------------------------------------------------------------
/docs/Usage/images/wintak_dialog_network_prefs.png:
--------------------------------------------------------------------------------
https://raw.githubusercontent.com/FreeTAKTeam/FreeTAKServer-User-Docs/0db9cacf4a575734097484a7a4761b872751edf0/docs/Usage/images/wintak_dialog_network_prefs.png
--------------------------------------------------------------------------------
/docs/Usage/images/wintak_dialog_server_connect.png:
--------------------------------------------------------------------------------
https://raw.githubusercontent.com/FreeTAKTeam/FreeTAKServer-User-Docs/0db9cacf4a575734097484a7a4761b872751edf0/docs/Usage/images/wintak_dialog_server_connect.png
--------------------------------------------------------------------------------
/docs/Usage/images/wintak_dialog_server_connected.png:
--------------------------------------------------------------------------------
https://raw.githubusercontent.com/FreeTAKTeam/FreeTAKServer-User-Docs/0db9cacf4a575734097484a7a4761b872751edf0/docs/Usage/images/wintak_dialog_server_connected.png
--------------------------------------------------------------------------------
/docs/Usage/images/wintak_menu_main.png:
--------------------------------------------------------------------------------
https://raw.githubusercontent.com/FreeTAKTeam/FreeTAKServer-User-Docs/0db9cacf4a575734097484a7a4761b872751edf0/docs/Usage/images/wintak_menu_main.png
--------------------------------------------------------------------------------
/docs/Usage/images/wintak_menu_main_import.png:
--------------------------------------------------------------------------------
https://raw.githubusercontent.com/FreeTAKTeam/FreeTAKServer-User-Docs/0db9cacf4a575734097484a7a4761b872751edf0/docs/Usage/images/wintak_menu_main_import.png
--------------------------------------------------------------------------------
/docs/Usage/images/wintak_menu_main_select_settings.png:
--------------------------------------------------------------------------------
https://raw.githubusercontent.com/FreeTAKTeam/FreeTAKServer-User-Docs/0db9cacf4a575734097484a7a4761b872751edf0/docs/Usage/images/wintak_menu_main_select_settings.png
--------------------------------------------------------------------------------
/docs/Usage/tools/.pages:
--------------------------------------------------------------------------------
1 | title: Useful Tools
2 |
3 | nav:
4 | - FreeTAK Mumble VoIP (Mumla): FreeTAKMumla.md
5 | - FreeTAK Unmanned Arial (UAS): FreeTAKUAS.md
6 | - Video Server Tools:
7 | - Video Sources: rtsp.md
8 | - ATAK ICU: takICU.md
9 | - FreeTAK UAS Tool: UASTool.md
10 | - Manuals: Manuals
11 |
--------------------------------------------------------------------------------
/docs/Usage/tools/FreeTAKMumla.md:
--------------------------------------------------------------------------------
1 |
2 | # FreeTAKMumla Plugin
3 | An `ATAK` plugin that creates a button overlay for PPT.
4 | Requires a [Mumla](https://wiki.mumble.info/wiki/Mumla) android app to work.
5 |
6 | ## Requirements
7 | the FreeTAKMumla Plugin for `ATAK` requires that:
8 | 1. you have the [murmur server](../../administration/brokered/Voice/VoiceServer.md) installed and running
9 | 2. you have [Mumla](https://play.google.com/store/apps/details?id=se.lublin.mumla&gl=US) installed and running
10 | 3. you have a compatible version of `ATAK` installed.
11 |
12 | ## Installation
13 | * Download and install Mumla
14 | * Connect to your [murmur](../../administration/brokered/Voice/VoiceServer.md) server
15 | * set the microphone to work with Push-to-Talk
16 | * Download the [Mumla plugin](https://github.com/FreeTAKTeam/FreeTAKMumla_Plugin/releases) on your local `Windows` machine
17 | * start `WinTAK` and use the `ATAK` Manager to create a new device configuration
18 |
19 | 
20 |
21 | * connect your Android device to the PC
22 | * as soon the phone is recognized export the configuration to the device
23 |
24 | 
25 |
26 | * `ATAK` will ask if you want to load the plugin, at this point you will see a Microphone
27 |
28 | 
29 |
30 | # usage
31 | * tap the microphone and start to talk
32 | * tap again to silence yourself
33 |
--------------------------------------------------------------------------------
/docs/Usage/tools/FreeTAKUAS.md:
--------------------------------------------------------------------------------
1 |
2 | 
3 |
4 | # Introduction
5 | FreeTAK UAS (FTUAS) is an Android application that can:
6 |
7 | * Control any DJI drone supported by the current DJI SDK
8 | * Stream the position of the drone to all the connected TAK clients
9 | * Stream the video Feed to all the connected TAK clients
10 | * Create a "target" on the map and stream with all the connected TAK clients
11 |
12 | # Requirements
13 |
14 | * [FreeTAKUAS app](https://github.com/FreeTAKTeam/FreeTAKUAS/releases/tag/1.4.14)
15 | * DJI compatible drone
16 | * FTS v 1.9 (or better): the application will NOT support the legacy TAK server.
17 | * the FTS REST API service must be activated
18 | * You have a valid REST Token (created in the FTS UI under System User)
19 | * FTH Video Service (or compatible RTMP server) if you want to stream live videos
20 |
21 | # Installation
22 |
23 | * Assuming that you have installed and configured your [FTS](../../Installation/platform/Linux/installation_vm)
24 | * and the [video service](https://github.com/FreeTAKTeam/FreeTAKHub/blob/main/README.md),
25 | * download the [APK installation file](https://github.com/niccellular/FreeTAKUAS/releases) on your phone / tablet and follow the instructions.
26 | * if the installation is successful you should have a new Icon
27 |
28 | 
29 |
30 |
31 | # Usage
32 |
33 | ## Connection
34 | 
35 |
36 | * start your drone
37 | * start your controller
38 | * connect the phone with FTUAS to the controller
39 |
40 | * a popup will ask which application you want to open
41 | * select FTUAS and configure the following:
42 | * FTS IP and Port
43 | * Video Server IP and port
44 | * the Drone name
45 | * A series of messages will appear, indicating that the SDK is registered (requires an internet connection) and that the drone is ready
46 | * Now click on UAS [READY]
47 |
48 | ## Interface
49 | 
50 | the FTUAS interface is typical of DJI the following is special:
51 |
52 | * As soon you switch to it the drone will start streaming the camera
53 | * As soon you switch to it the drone will share his position with the FTS server, that will forward to all the connected clients
54 | * the "Red Dot" in the middle can be tapped to create a geoObject of type "Unknown" call target and send to all the connected clients
55 | * the vertical aim of the "Red Dot" can be changed by moving the gimbal
56 | * in some model, it's also possible to aim the gimbal independently of the position of the drone by dragging the position on screen
57 | * In the current version, the aim is not perfect so expect some delta
58 |
59 | ## `ATAK` Interface
60 | ### Map
61 | 
62 | In `ATAK` the drone shows:
63 |
64 | * a white zone (field of view)
65 | * a Sensor Point of Interest (SPI)
66 | * the position and name of the drone
67 |
68 | ### Menu
69 | 
70 | to visualize the video tap the drone's icon and then the video icon
71 |
72 | ### Video Player
73 | 
74 | In alternative open the `ATAK` video player and search for the name of your drone
75 |
76 | NOTICE: in the current version, every time a new video endpoint will be created, this must be manually deleted.
77 |
78 |
79 |
--------------------------------------------------------------------------------
/docs/Usage/tools/Manuals/ATAK_Data_Sync_User_Guide_Version_1.3_ATAK_4.8.pdf:
--------------------------------------------------------------------------------
https://raw.githubusercontent.com/FreeTAKTeam/FreeTAKServer-User-Docs/0db9cacf4a575734097484a7a4761b872751edf0/docs/Usage/tools/Manuals/ATAK_Data_Sync_User_Guide_Version_1.3_ATAK_4.8.pdf
--------------------------------------------------------------------------------
/docs/Usage/tools/Manuals/ATAK_ExCheck_User_Guide_1.1_ATAK_4.8.pdf:
--------------------------------------------------------------------------------
https://raw.githubusercontent.com/FreeTAKTeam/FreeTAKServer-User-Docs/0db9cacf4a575734097484a7a4761b872751edf0/docs/Usage/tools/Manuals/ATAK_ExCheck_User_Guide_1.1_ATAK_4.8.pdf
--------------------------------------------------------------------------------
/docs/Usage/tools/Manuals/Mumble Server Installation Guide.pdf:
--------------------------------------------------------------------------------
https://raw.githubusercontent.com/FreeTAKTeam/FreeTAKServer-User-Docs/0db9cacf4a575734097484a7a4761b872751edf0/docs/Usage/tools/Manuals/Mumble Server Installation Guide.pdf
--------------------------------------------------------------------------------
/docs/Usage/tools/Manuals/TAK Voice User Guide.pdf:
--------------------------------------------------------------------------------
https://raw.githubusercontent.com/FreeTAKTeam/FreeTAKServer-User-Docs/0db9cacf4a575734097484a7a4761b872751edf0/docs/Usage/tools/Manuals/TAK Voice User Guide.pdf
--------------------------------------------------------------------------------
/docs/Usage/tools/Manuals/UserGuides.md:
--------------------------------------------------------------------------------
1 |
2 | # User guides
3 |
4 | ## ExCheck
5 | - [WinTAK_ExCheck User Guide 3.0 `WinTAK` 4.8.pdf](https://github.com/FreeTAKTeam/FreeTAKServer-User-Docs/files/11017759/WinTAK_ExCheck.User.Guide.3.0.WinTAK.4.8.pdf)
6 |
7 | [//]: # (- [ATAK _ExCheck User Guide 4.7](https://github.com/FreeTAKTeam/FreeTAKServer-User-Docs/files/11017759/ATAK_ExCheck_User_Guide_1.1_ATAK_4.8.pdf))
8 |
9 | ## Mission / Data Sync
10 | - [WinTAK_Data Sync User Guide 1.1 `WinTAK` 4.8.pdf](https://github.com/FreeTAKTeam/FreeTAKServer-User-Docs/files/11017760/WinTAK_Data.Sync.User.Guide.1.1.WinTAK.4.8.pdf)
11 |
12 | [//]: # (- [ATAK_Data Sync User Guide 1.2 ATAK 4.7](https://github.com/FreeTAKTeam/FreeTAKServer-User-Docs/files/11017760/ATAK_Data.Sync_User_Guide_Version_1.3_ATAK_4.8.pdf))
13 |
--------------------------------------------------------------------------------
/docs/Usage/tools/UASTool.md:
--------------------------------------------------------------------------------
1 |
2 | # UAS tool
3 |
4 | The UAS Tool is a plug-in that provides integration of Unmanned Aircraft Systems (UAS)
5 | for enhanced Situational Awareness (SA) and telemetry data, Full Motion Video (FMV), and command and control (C2).
6 | The following instructions have been updated for tool compatible with `ATAK` 4.8.1.
7 |
8 | ## Connect UAS tool to FTS infrastructure
9 | * Make sure all devices are connected to the FTS server on the Digital Ocean (DO) droplet.
10 | * Open UAS tool settings, go to "Video Broadcast preferences", click on "video broadcast destination and change it to RTSP-Push"
11 | * Scroll down to the "RTSP-push configuration " section, click the "video destination ip address" and enter only the ip address of the DO droplet, do not enter port or paths here. hit ok.
12 | * Next click on the "video destination port", enter only the port of the video server here 8554. hit ok.
13 | * Click on "video broadcast Identifier" and enter something like
14 | `live/CorvoUAS` (no quotation marks) unless it is already filled in. hit OK
15 | * Scroll down and under the "other" section click on "video observer URL". If this is not already filled in, enter `rtsp://[yourIPhere]:[port]/live/example` (should look something like this again no quotation marks
16 | `rtsp://132.233.124.12:8554/live/corvo`
17 | * Then on the receiving device repeat steps 5a-9a and enter the same information that you did on the UAS EUD. All devices wishing to view the stream should now have identical settings (including same ip, port, video broadcast identifier etc.).
18 | * Start streaming the broadcast from the UAS EUD. On the receiving EUD back out to the list of UAS's and click the play button. Should start streaming the video.
19 |
20 | * in the client (e.g. `WinTAK`, you can use the plugin to see the position of the Drone
21 | 
22 |
23 | * also without a plugin, if you have the [videoCheck] configured, you will receive a new video feed
24 |
25 | 
26 |
--------------------------------------------------------------------------------
/docs/Usage/tools/images/atak_video_listing.png:
--------------------------------------------------------------------------------
https://raw.githubusercontent.com/FreeTAKTeam/FreeTAKServer-User-Docs/0db9cacf4a575734097484a7a4761b872751edf0/docs/Usage/tools/images/atak_video_listing.png
--------------------------------------------------------------------------------
/docs/Usage/tools/images/atak_video_locate.png:
--------------------------------------------------------------------------------
https://raw.githubusercontent.com/FreeTAKTeam/FreeTAKServer-User-Docs/0db9cacf4a575734097484a7a4761b872751edf0/docs/Usage/tools/images/atak_video_locate.png
--------------------------------------------------------------------------------
/docs/Usage/tools/images/atak_video_notification.png:
--------------------------------------------------------------------------------
https://raw.githubusercontent.com/FreeTAKTeam/FreeTAKServer-User-Docs/0db9cacf4a575734097484a7a4761b872751edf0/docs/Usage/tools/images/atak_video_notification.png
--------------------------------------------------------------------------------
/docs/Usage/tools/images/atak_video_stream_play.png:
--------------------------------------------------------------------------------
https://raw.githubusercontent.com/FreeTAKTeam/FreeTAKServer-User-Docs/0db9cacf4a575734097484a7a4761b872751edf0/docs/Usage/tools/images/atak_video_stream_play.png
--------------------------------------------------------------------------------
/docs/Usage/tools/images/wintak-atak-mgr-device-profiles-menu.png:
--------------------------------------------------------------------------------
https://raw.githubusercontent.com/FreeTAKTeam/FreeTAKServer-User-Docs/0db9cacf4a575734097484a7a4761b872751edf0/docs/Usage/tools/images/wintak-atak-mgr-device-profiles-menu.png
--------------------------------------------------------------------------------
/docs/Usage/tools/images/wintak-export-profile-to-atak.png:
--------------------------------------------------------------------------------
https://raw.githubusercontent.com/FreeTAKTeam/FreeTAKServer-User-Docs/0db9cacf4a575734097484a7a4761b872751edf0/docs/Usage/tools/images/wintak-export-profile-to-atak.png
--------------------------------------------------------------------------------
/docs/Usage/tools/rtsp.md:
--------------------------------------------------------------------------------
1 |
2 | # [RTSP](https://en.wikipedia.org/wiki/Real-Time_Streaming_Protocol)
3 |
4 | The Real-Time Streaming Protocol (RTSP) is an application-level network protocol designed for multiplexing and packetizing multimedia transport streams (such as interactive media, video and audio) over a suitable transport protocol. It is the primary protocol used by `TAK` video servers.
5 |
6 | The following client applications may be used as an alternative to `TAK ICU`.
7 |
8 |
9 | ## Configuration
10 |
11 | Any RTSP feed will need an appropriate URL.
12 | ```text
13 | rstp://:8554/
14 | ```
15 |
16 | ip
17 | : the IP address of the `FTS Server`.
18 |
19 | feed
20 | : any (ascii) text, e.g. `foo`, `test`.
21 |
22 | ## [TAK ICU : ATAK Plugin](takICU.md)
23 |
24 | This `RTSP` video generator has [its own page](takICU.md).
25 |
26 | ## [FFMPEG](https://ffmpeg.org/ffmpeg.html)
27 |
28 | On Windows and Linux you can generate RTSP video feeds with the venerable [ffmpeg](https://ffmpeg.org/ffmpeg.html).
29 |
30 | ```shell
31 | ffmpeg -re -stream_loop -1 -i https://download.samplelib.com/mp4/sample-5s.mp4 -c copy -f rtsp rtsp://10.68.1.101:8554/mystream
32 | ```
33 |
34 | This loops on the https://download.samplelib.com/mp4/sample-5s.mp4 mpeg4 file sending it as the `rtsp://10.68.1.101:8554/mystream` stream.
35 |
36 |
37 | ## [Larix Broadcaster](https://softvelum.com/larix/)
38 |
39 | Larix Broadcaster is an app for mobile devices, e.g. Android and iPad.
40 |
41 | ### Configuration
42 |
43 | In `Settings` establish a `Connections`.
44 | Use `Manage Connections` then use the `+` button. `Add` a `Connection`.
45 | The Connection has the following properties:
46 | * Name: ``
47 | * URL: `rstp://:8554/`
48 | * Mode: `Video only`
49 |
50 | The `` should be set to the IP address of the `FTS Server`.
51 | The `` can be set to any (ascii) text, e.g. `foo` or `test`.
52 |
53 | ### Usage
54 |
55 | Return to the main screen and press the play button.
56 |
57 | ## Integration with FTS
58 |
59 |
60 | The FTS integration, [FreeTAKHub_VideoChecker](https://github.com/FreeTAKTeam/FreeTAKHub_VideoChecker) has existed since FTS 1.9.5.
61 | It allows for seamless streaming of videos by connecting to the video server.
62 |
63 | Normally, when a device is streaming video, connected TAK end user device will be not notified,
64 | it is necessary to manually create a new feed in the RTSP application.
65 |
66 | The video stream is sent to all the connected TAK Devices
67 |
68 | 
69 |
70 | Now you can retrieve it in your video list
71 |
72 | 
73 |
74 | In the video you can open the feed and visualize it.
75 | 
76 |
77 | Touching the globe, will jump to the location of the stream,
78 | to see its context
79 |
80 | 
81 |
82 |
83 |
--------------------------------------------------------------------------------
/docs/Usage/tools/takICU.md:
--------------------------------------------------------------------------------
1 |
2 | # TAK ICU
3 |
4 | TAK ICU is an Android Team Awareness Kit (`ATAK`) support plugin that allows a user to stream video and position to a compatible RTSP server.
5 | An operator running TAK ICU sends video and telemetry to the RTSP server,
6 | and the observer(s) can view the video and telemetry on any compatible end-user device (EUD) that is connected to the server.
7 | Telemetry transmitted includes the senders position location information (PLI),
8 | field-of-view (FOV), focal point distance, and compass heading.
9 |
10 | The product is a bundled support app, and is maintained by the [TAK Product Center](https://tak.gov/products/atak-civ).
11 |
12 | This page describes the TAK ICU tool only.
13 |
14 | ## Client Installation (ANDROID ONLY)
15 |
16 | * Install `ATAK` from the [TAK Product Center](https://tak.gov/products/atak-civ)
17 | * Install/Enable the TAK ICU support plugin from Settings > Plugins
18 | * The install/enable creates a separate app icon to access TAK ICU, which may need to be added to your home screen
19 |
20 | ## Client configuration
21 |
22 | * Start TAK ICU
23 | * Tap the preferences (hamburger menu, top-right)
24 | * Tap Settings (gear icon)
25 | * Under Application Settings, select Broadcast Preferences
26 | * In BROADCAST PREFERENCES, select Destination Type > Wowza Server
27 | * In BROADCAST PREFERENCES, select Broadcast Alias and set it to your TAK ID (e.g. Corvo). It needs to be a single word, if broadcast alias contains a space it will fail.
28 | * Scroll down to WOWZA SERVER PREFERENCES
29 | * In WOWZA SERVER PREFERENCES > Wowza Server IP, specify your RTSP server IP address (e.g. 147.182.190.54)
30 | * In WOWZA SERVER PREFERENCES > Wowza Server Port, Set the server port to 8554
31 | * Tap the gear icon to close Settings
32 |
33 | ## Usage
34 |
35 | * Ensure that you have a GPS fix
36 | 
37 | * Again, ensure that you have a GPS fix! Best-case, without a GPS fix, your video will not be associated to a map location and telemetry will fail. Worst-case, the video broadcast will not even start.
38 | * Check the Broadcast checkbox
39 | * Press the Broadcast/Record button to begin streaming
40 |
41 | ## Integration with FTS
42 |
43 | The FTS integration, [FreeTAKHub_VideoChecker](https://github.com/FreeTAKTeam/FreeTAKHub_VideoChecker) exists since FTS 1.9.5.
44 | It allows for seamless streaming of videos by simply connecting to the video server.
45 |
46 | Normally, when a device is streaming video, connected TAK EUD will be not notified,
47 | it's necessary to manually create a new feed in the software.
48 |
49 | 
50 |
51 | The video stream is sent to all the connected TAK Devices
52 |
53 | 
54 |
55 |
56 | Now you can retrieve it in your video list
57 |
58 | 
59 |
60 | In the video you can open the feed and visualize it.
61 | 
62 |
63 | Touching the globe, you will jump to the location of the stream,
64 | to see its context
65 |
66 | 
67 |
68 |
69 |
70 |
--------------------------------------------------------------------------------
/docs/administration/.pages:
--------------------------------------------------------------------------------
1 | nav:
2 | - Configuration: Operation
3 | - Command Line Interface (CLI): CLI.md
4 | - Secure Socket Layer (SSL): SSL.md
5 | - Using the Console: usingConsole.md
6 | - Web Administration: Web_Admin.md
7 | - Brokered Services: brokered
--------------------------------------------------------------------------------
/docs/administration/CLI.md:
--------------------------------------------------------------------------------
1 |
2 | # CLI
3 |
4 | ## Availability
5 |
6 | The CLI has been sunset since version 1.5 of FTS, because of the new way to access the server.
7 |
8 | It may be reintroduced in the future.
9 |
10 | ## Access
11 |
12 | To access the CLI open a new terminal and run the command:
13 |
14 | ```console
15 | sudo python3 -m FreeTAKServer.views.CLI
16 | ```
17 |
18 | ## Commands
19 |
20 | | Command | Purpose |
21 | |----------------------------|----------------------------------------------------------------|
22 | | help | List all commands |
23 | | start_all | Begin all services type |
24 | | start_CoT_service | Begin CoT service type |
25 | | start_data_package_service | Begin data package service type |
26 | | stop_all | Terminate all services type |
27 | | stop_CoT_service | Terminate CoT service type |
28 | | stop_data_package_service | Terminate data package service type |
29 | | change_connection_info | Change the address and port of the server you're connecting to |
30 | | show_users | Show connected user information type |
31 | | kill | Kill the full server type |
32 | | show_DP | Show all DataPackages on the server |
33 | | remove_DP | Remove a DataPackages on the server |
34 | | add_api_user | add a user and a token for API consumption |
35 | | show_api_users | show a list of users and their tokens |
36 | | remove_api_user | remove a user and a token for API consumption |
37 |
38 |
--------------------------------------------------------------------------------
/docs/administration/FTS_Certifications_structure.png:
--------------------------------------------------------------------------------
https://raw.githubusercontent.com/FreeTAKTeam/FreeTAKServer-User-Docs/0db9cacf4a575734097484a7a4761b872751edf0/docs/administration/FTS_Certifications_structure.png
--------------------------------------------------------------------------------
/docs/administration/FTS_UI_Documention.pdf:
--------------------------------------------------------------------------------
https://raw.githubusercontent.com/FreeTAKTeam/FreeTAKServer-User-Docs/0db9cacf4a575734097484a7a4761b872751edf0/docs/administration/FTS_UI_Documention.pdf
--------------------------------------------------------------------------------
/docs/administration/Operation/.pages:
--------------------------------------------------------------------------------
1 | title: FTS Configuration
2 |
3 | nav:
4 | - Configuration: fts-config.md
5 | - Service Management: fts-service-mgmt.md
6 |
--------------------------------------------------------------------------------
/docs/administration/Operation/fts-config.md:
--------------------------------------------------------------------------------
1 |
2 | ## Configuration
3 |
4 | `ZeroTouch` will have configured the system and started the services for you.
5 | However, there are many corner cases which `ZeroTouch` may miss.
6 |
7 | ### [Verify and/or Edit the `fts-ui` configuration file](../usingConsole.md)
8 | ```text
9 | /opt/fts.venv/lib/python3.11/site-packages/FreeTAKServer-UI/config.py
10 | or
11 | /usr/local/lib/python3.11/dist-packages/FreeTAKServer-UI/config.py
12 | ```
13 | `WEBMAPPORT` is 1880 for a `NodeRedFlow` install and `8000` for a compiled `webmap`.
14 |
15 | For specific instructions on validating the configuration,
16 | see [these notes](../../Troubleshooting/fts-ui-server.md).
17 |
18 | ### [Verify and/or Edit the `fts` configuration file](../usingConsole.md)
19 | ```text
20 | /opt/fts/FTSConfig.yaml
21 | ```
22 |
23 | For specific instructions on validating the configuration,
24 | see [these notes](../../Troubleshooting/fts-core-server.md).
--------------------------------------------------------------------------------
/docs/administration/Operation/fts-service-mgmt.md:
--------------------------------------------------------------------------------
1 |
2 | ## Mange the FTS services
3 |
4 | If the `ZTI` had run it will have attempted to start the `fts` services.
5 | As you make changes to their configurations you will need to restart them.
6 | ```bash
7 | sudo systemctl stop fts-ui
8 | sudo systemctl stop fts
9 |
10 | sudo systemctl start fts
11 | sudo systemctl start fts-ui
12 | ```
13 |
14 | Your `FTS` should now be running.
15 |
16 | See [troubleshooting](../../Troubleshooting/troubleshooting_faq.md) for more information.
17 |
18 | There are other services which `ZTI` will start.
19 | They are also managed by `systemd`.
20 |
21 | ```bash
22 | # the core FTS services
23 | sudo systemctl status fts.service
24 | sudo systemctl status fts-ui.service
25 |
26 | # a flow programming environment
27 | sudo systemctl status nodered.service
28 | # manages the webmap service
29 | # manages the video-service checker
30 |
31 | # a video server
32 | sudo systemctl status rtsp-simple-server.service
33 | # sudo systemctl status mediamtx.service
34 |
35 | # a voice chat server
36 | sudo systemctl status mumble-server.service
37 | ```
38 |
--------------------------------------------------------------------------------
/docs/administration/brokered/.pages:
--------------------------------------------------------------------------------
1 | collapse_single_page: true
2 |
3 | nav:
4 | - Integration: Integration
5 | - Video: Video
6 | - Video Checker: VideoChecker
7 | - Voice: Voice
8 | - Web Map: WebMap
9 |
10 |
--------------------------------------------------------------------------------
/docs/administration/brokered/Integration/NodeRedInstallation.md:
--------------------------------------------------------------------------------
1 |
2 | # FreeTAKHub Node-RED
3 | This document describes how to install and secure Node-RED.
4 |
5 | - Install Using Script (simple)
6 | - Install using APT (advanced Users)
7 | - Secure Node-RED
8 |
9 | # Install Using Script (simple)
10 |
11 | The following script will do Installing and Upgrading Node-RED
12 | to install `Node.js`, `npm`, and `Node-RED` onto an Ubuntu Raspberry Pi.
13 | The script can also be used to upgrade an existing install when a new release is available.
14 |
15 | Running the following command will download and run the script.
16 | If you want to review the contents of the script first, you can view it on `Github`.
17 | ```bash
18 | bash <(curl -sL https://raw.githubusercontent.com/node-red/linux-installers/master/deb/update-nodejs-and-nodered)
19 | ```
20 |
21 | Enable service so that starts automagically:
22 | ```bash
23 | sudo systemctl enable nodered.service
24 | ```
25 | Run the Node-RED service:
26 | ```bash
27 | node-red-start
28 | ```
29 | Navigate to your Node-RED:
30 |
31 |
32 |
33 | # Install Using APT (advanced users)
34 | To install Node-RED with APT you will need to:
35 |
36 | - Satisfy the requirements
37 | - Create a Non-root user
38 | - Install Node JS
39 |
40 | ## Prerequisites
41 | This guide assumes that you are using Ubuntu 22.04 on cloud installation (we use digital Ocean).
42 |
43 |
44 | ## Create a Non-root user
45 | First create a special user and dedicated group:
46 |
47 | ```bash
48 | sudo useradd -m nodered -G nodered
49 | ```
50 |
51 | ## Install Node JS
52 | you can use the apt package manager. Refresh your local package index first by typing:
53 |
54 | ```bash
55 | sudo apt update
56 | ```
57 |
58 | Then install `Node.js`:
59 |
60 | ```bash
61 | sudo apt install nodejs
62 | ```
63 |
64 | Check that the installation was successful by querying node for its version number:
65 | ```shell
66 | node -v
67 | ```
68 | Output something like this
69 | ```text
70 | v10.19.0
71 | ```
72 |
73 | If the package in the repositories suits your needs,
74 | this is all you need to do to get set up with `Node.js`.
75 | In most cases, you’ll also want to also install npm, the Node.js package manager.
76 | You can do this by installing the npm package with apt:
77 | ```bash
78 | sudo apt install npm
79 | ```
80 | This will allow you to install modules and packages to use with `Node.js`.
81 |
82 | ## Install Node-RED
83 | Use npm to install `node-red` and a helper utility called `node-red-admin`.
84 |
85 | ```bash
86 | sudo npm install -g --unsafe-perm node-red node-red-admin
87 | ```
88 |
89 | npm normally installs its packages into your current directory.
90 | Here, we use the `-g` flag to install packages 'globally' so they’re placed in standard system locations such as `/usr/local/bin`.
91 | The `--unsafe-perm` flag helps us avoid some errors that can pop up when npm tries to compile native modules
92 | (modules written in a compiled language such as C or C++ vs. JavaScript).
93 |
94 | After a bit of downloading and file shuffling,
95 | you’ll be returned to the normal command line prompt.
96 | Let’s test our installation.
97 |
98 | First, we’ll need to open up a port on our firewall.
99 | Node-RED defaults to using port 1880, so let’s allow that.
100 | ```bash
101 | sudo ufw allow 1880
102 | ```
103 | And now launch Node-RED itself.
104 | No sudo is necessary, as port 1880 is high enough to not require root privileges.
105 |
106 | ```bash
107 | node-red
108 | ```
109 | ## Create the Service
110 | In order to start Node-RED automatically on startup,
111 | we will need to install a `/etc/systemd/system/node-red.service` file:
112 | ```ini
113 | {!administration/brokered/Integration/node-red.service!}
114 | ```
115 |
116 | Now that our service file is installed , we need to enable it. This will enable it to execute on startup.
117 | ```bash
118 | sudo systemctl enable node-red
119 | ```
120 |
121 | Let’s manually start the service now to test that it’s still working.
122 | ```bash
123 | sudo systemctl start node-red
124 | ```
125 | To shut it back down you can use:
126 |
127 | ```bash
128 | sudo systemctl stop node-red
129 | ```
130 | ## Test Your Installation
131 | Point a browser back at the server’s port 1880 and verify that Node-RED is back up.
132 | e.g. if your server is installed under the IP 143.198.39.135
133 |
134 |
135 |
136 | You will see the welcome screen of Node-RED with the tutorial.
137 | Now, to install the flows, click on the hamburger menu and then import:
138 |
139 | 
140 |
141 | Download one of the FreeTAKHub integrations (json files).
142 | Import into your Node-RED.
143 |
144 | Resolve any conflicts by importing additional nodes into your palette.
145 |
146 | You can find "Manage palette" from top right corner, "setting" > "Manage palette"
147 |
148 | 
149 |
150 | By clicking "Manage palette" a "User setting" page will pop up.
151 |
152 | go to "Palette" > "install" tab and type "node-red-contrib-config" in the search bar
153 |
154 | 
155 |
156 | Success!!!!
157 |
158 | 
159 |
160 | # Secure Node-RED
161 |
162 | By default, Node-RED is installed with no authentication to the user interface (UI), also called the "Editor".
163 | This means that anyone with your IP address can make changes to any of your flows,
164 | or even add malicious flows to your Node-RED instance.
165 | Once your Node-RED instance is up-and-running,
166 | you should **immediately** secure the editor with a password, at a minimum.
167 |
168 | The following will get you started on securing the Node-RED editor with a password.
169 | For more details on how to secure Node-RED, see the Node-RED docs here:
170 | https://nodered.org/docs/user-guide/runtime/securing-node-red
171 |
172 | Switch to the Node-RED folder:
173 | ```bash
174 | cd ~/.node-red
175 | ```
176 |
177 | Edit the settings.js file:
178 |
179 | ```bash
180 | sudo nano settings.js
181 | ```
182 |
183 | Uncomment the adminAuth section to password protect Node-RED editor and admin API.
184 | See for details.
185 | ```yaml
186 | adminAuth: {
187 | type: "credentials",
188 | users: [{
189 | username: "admin",
190 | password: ".....",
191 | permissions: "*"
192 | }]
193 | }
194 | ```
195 | save the file and Exit.
196 |
197 | ```text
198 | CTRL+o
199 | ENTER
200 | CRTL+X
201 | ```
202 |
203 | You can now log in to your Node-RED editor `[YOUR-IP-ADDRESS]:1880`.
204 | The default username is `admin`, and the default password is `password`.
205 | This isn't enough.
206 | You'll want to create a unique password, which will require creating a password hash.
207 |
208 | This is detailed in the Node-RED docs here:
209 |
210 |
--------------------------------------------------------------------------------
/docs/administration/brokered/Integration/node-red.service:
--------------------------------------------------------------------------------
1 | Description=Node-RED
2 | After=syslog.target network.target
3 |
4 | [Service]
5 | ExecStart=/usr/local/bin/node-red-pi --max-old-space-size=128 -v
6 | Restart=on-failure
7 | KillSignal=SIGINT
8 |
9 | # log output to syslog as 'node-red'
10 | SyslogIdentifier=node-red
11 | StandardOutput=syslog
12 |
13 | # non-root user to run as
14 | WorkingDirectory=/home/nodered/
15 | User=nodered
16 | Group=nodered
17 |
18 | [Install]
19 | WantedBy=multi-user.target
--------------------------------------------------------------------------------
/docs/administration/brokered/Video/Installation.md:
--------------------------------------------------------------------------------
1 |
2 | # Video Server
3 | MediaMTX is a RTSP / RTPM capable software to stream in real time from / to TAK devices.
4 | It is used with the [FreeTAK UAS](../../../Usage/tools/FreeTAKUAS.md) and [TAK ICU](../../../Usage/tools/takICU.md)
5 |
6 | ## Installation
7 | Get the linux_amd64 installation package link from the [release page](https://github.com/aler9/mediamtx/releases)
8 | 
9 |
10 | Download the MediaMTX release:
11 | ```bash
12 | wget https://github.com/aler9/mediamtx/releases/download/v0.22.2/mediamtx_v0.22.2_linux_amd64.tar.gz
13 | ```
14 |
15 | Un-tar the package:
16 | ```bash
17 | tar -zxvf mediamtx_v0.22.2_linux_amd64.tar.gz
18 | ```
19 |
20 |
21 | Edit the YAML file
22 | 
23 |
24 | - Enable API by setting yes
25 | - Support protocols only TCP
26 | - Set the API address 0.0.0.0
27 |
28 | 
29 |
30 | ### Configure to start as a service
31 | To start the video server as a system daemon, we will create a systemd unit file.
32 | The systemd framework is the service manager used by Ubuntu, Debian and many other Linux distributions.
33 | By creating a unit file to manage the daemon,
34 | systemd will ensure the service is started with the OS and stays healthy.
35 |
36 | Move the executable:
37 |
38 | ```bash
39 | sudo mv mediamtx /usr/local/bin/
40 | ```
41 | Move the configuration file:
42 | ```bash
43 | sudo mv mediamtx.yml /usr/local/etc/
44 | ```
45 |
46 | Create the Unit File.
47 | Copy this complete text to `/etc/systemd/system/mediamtx.service`:
48 | ```ini
49 | {!administration/brokered/Video/mediamtx.service!}
50 | ```
51 |
52 | Start the service:
53 | ```bash
54 | sudo systemctl start mediamtx.service
55 | ```
56 |
57 | Enable the service:
58 | ```bash
59 | sudo systemctl enable mediamtx.service
60 | ```
61 |
62 | ## Test your video Installation
63 | in a browser resolve and use this address
64 |
65 | `:9997/v1/config/get>`
66 |
67 | if you see your configuration the server is up and running
68 |
69 |
--------------------------------------------------------------------------------
/docs/administration/brokered/Video/howtoStartOnPi.md:
--------------------------------------------------------------------------------
1 |
2 | # How to autostart the video server on the Pi
3 |
4 | Hardware: Raspberry Pi 4b- 8g
5 | OS: Ubuntu Server 22.04 lts
6 | Program: mediamtx
7 |
8 | When trying to accomplish Auto start on system startup/reboot,
9 |
10 | Solution:
11 | For the `mediamtx.service` file, you will need to add and edit the following:
12 | ```ini
13 | {!administration/brokered/Video/mediamtx.service!}
14 | ```
15 |
16 | To build the auto start file, the Solution:
17 | The root user is needed
18 | ```sudo -i```
19 |
20 | Build your file:
21 | ```bash
22 | crontab -e
23 | ```
24 | (if this is new, select 1 when prompted)
25 |
26 | at the end of the file add the 3 @ lines
27 | ```
28 | @reboot sudo systemctl enable mediamtx.service &
29 | @reboot sudo systemctl stop mediamtx.service &
30 | @reboot nohup sudo mediamtx.service &
31 | ```
32 |
--------------------------------------------------------------------------------
/docs/administration/brokered/Video/mediamtx.service:
--------------------------------------------------------------------------------
1 | [Unit]
2 | Description=mediamtx
3 | After=network-online.target
4 | Wants=network-online.target
5 |
6 | [Service]
7 | ExecStart=/usr/local/bin/mediamtx /usr/local/etc/mediamtx.yml
8 |
9 | [Install]
10 | WantedBy=multi-user.target
--------------------------------------------------------------------------------
/docs/administration/brokered/VideoChecker/VideoCheck.md:
--------------------------------------------------------------------------------
1 |
2 | # Video Checker
3 |
4 | The VideoChecker allows a video stream to be published to all the connected clients.
5 | It's used with TAK ICU, but any type of client can be also used.
6 |
7 | ## Requirements
8 | - FTS 1.8+
9 | - Video Service
10 | - NodeRed
11 |
12 | ## Installation
13 |
14 | - Download the `video checker` `NodeRed` flow from [GitHub](https://github.com/FreeTAKTeam/FreeTAKHub_VideoChecker/releases)
15 | - open your node red installation at `:1880`
16 | - Import into NodeRed the VideoChecker flow (you may already have it installed by the [ZeroTouch](../../../Installation/mechanism/Ansible/ZeroTouchInstall.md) )
17 | 
18 |
19 | - open the config node
20 |
21 | 
22 |
23 | - Set up the EXTERNAL IP of the video server
24 |
25 | 
26 |
27 | - in the same node set the IP of FTS (probably the same as the video Server)
28 | - open the "Post Video to FTS" node
29 |
30 | - 
31 |
32 | - insert a valid API token
33 |
34 | 
35 |
--------------------------------------------------------------------------------
/docs/administration/brokered/Voice/VoiceServer.md:
--------------------------------------------------------------------------------
1 |
2 | # FreeTAKHub Voice installation
3 |
4 | the FTH Voice server is based on Mumble
5 | to install it manually:
6 | * open a console terminal
7 | * Do some cleaning
8 | ```bash
9 | sudo apt-get update
10 | sudo apt-get upgrade
11 | ```
12 | * If asked to confirm installing any packages; then, type `Y` and press Enter.
13 |
14 | * Now Install Mumble Server.
15 | ```bash
16 | sudo apt-get install mumble-server
17 | ```
18 |
19 | as soon it is started you may want to configure it
20 | ```bash
21 | sudo dpkg-reconfigure mumble-server
22 | ```
23 |
24 | You can use your arrow keys to select your answer, then press Enter to continue.
25 |
26 | 
27 |
28 | you will accept the default value of Yes because we want Mumble-Server to run when the server boots.
29 |
30 | 
31 |
32 | Even if this will be a dedicated Mumble-Server,
33 | now select `Yes` since this will ensure the lowest possible latency.
34 |
35 | ### Mumble SuperUser Password
36 | SuperUser is the highest-level administrative account for the server.
37 | You will need to log in to Mumble with this user when you want to manage the server.
38 |
39 | 
40 |
41 | Type a password, press `Tab` to select `Ok`, and press Enter.
42 |
43 | ## Configuring Certificates
44 |
45 | To create a self-signed cert that is fulfils all requirements for the TAK Voice Plugin, you can run the following command:
46 | ```
47 | openssl req -x509 -sha256 -nodes -days 1080 -newkey rsa:2048 -keyout (servername).key -out (servername).cer -subj '/CN=(IP Address)' -addext extendedKeyUsage=1.3.6.1.5.5.7.3.1
48 | ```
49 | This OpenSSL command is used to create a self-signed X.509 certificate along with a new private key. Here's a breakdown of each part of the command:
50 |
51 | * openssl req: Invokes the OpenSSL utility to generate a new X.509 certificate signing request (CSR). However, in this context, combined with -x509, it's used to create a self-signed certificate instead of just a CSR.
52 | * x509: This option specifies that a self-signed certificate is to be generated instead of a certificate request.
53 | * sha256: Specifies the hashing algorithm for signing the certificate. SHA-256 is a secure hashing algorithm, making the certificate more secure.
54 | * nodes: Stands for "no DES". This option specifies that the private key should not be encrypted with a passphrase, allowing applications to use the key without manual intervention.
55 | * days 1080: Sets the validity of the certificate to 1080 days from the issue date.
56 | * newkey rsa:2048: Generates a new RSA private key of 2048 bits. This is a good default for secure communications.
57 | * keyout ftsmurmur.key: Specifies the filename to save the newly created private key to, named ftsmurmur.key.
58 | * out ftsmurmur.cer: Specifies the filename to save the newly created certificate to, named ftsmurmur.cer.
59 | * subj '/CN=(IP Address)': Sets the subject of the certificate. In this case, it sets the Common Name (CN) to an IP address e.g. 117.154.131.250. Commonly, the CN is a domain name for SSL certificates, but an IP address can be used for specific purposes.
60 | * addext extendedKeyUsage=1.3.6.1.5.5.7.3.1: Adds an extension to the certificate for extended key usage. The specified Object Identifier (OID) 1.3.6.1.5.5.7.3.1 corresponds to TLS Web Server Authentication, indicating that the certificate is intended for use as a TLS/SSL server certificate.
61 |
62 | for example if your IP is 117.154.131.250 and registerName is 'ftsmurmur'
63 | ```
64 | openssl req -x509 -sha256 -nodes -days 1080 -newkey rsa:2048 -keyout ftsmurmur.key -out ftsmurmur.cer -subj '/CN=117.154.131.250' -addext extendedKeyUsage=1.3.6.1.5.5.7.3.1
65 | ```
66 |
67 | ## OPTIONAL: Use the voice Tak plugin
68 | In order to ensure the security of your Mumble Server connection TLS is utilised.
69 | The [TAK Voice Plugin](https://play.google.com/store/apps/details?id=com.atakmap.android.gbr.vx.plugin&hl=en_US&gl=US) will only connect to Mumble Servers whose server certificate is trusted and contains the full certificate chain as the whole chain is validated.
70 | if you want to use the plugin you must create a certificate for local CA.
71 | On the server, where the certs were created type:
72 | ```
73 | openssl x509 -in ftsmurmur.cer -outform der -out ftsmurmur.der
74 | ```
75 | ### Transfer the Certificate to Your Android Device
76 | Connect your device to your computer via USB, email the certificate to an account accessible from your device, or use a cloud storage service to transfer the ftsmurmur.der file to your Android device.
77 |
78 | ### Install the Certificate on your device
79 | tested for For Android Nougat (7.0) and above
80 |
81 | * Go to Settings > Security & location > Encryption & credentials (the exact path might vary).
82 | * Tap Install a certificate > CA certificate.
83 | * Navigate to the location where you saved the certificate file on your device.
84 | * Select the certificate file to be installed (e.g. ftsmurmur.der). You might need to change the file type to "All files" or similar to see the DER file.
85 |
86 |
87 | ## Init configuration
88 | you will need to edit some configuration files.
89 |
90 | Using `WinSCP` navigate to
91 | ```text
92 | /etc/mumble-server.ini
93 | ```
94 |
95 | In general, you want to set the following values:
96 | ```text
97 | ; Port to bind TCP and UDP sockets to you can leave the standard.
98 | port=64738
99 | ; Password to join server.
100 | serverpassword=
101 | ;Welcome message sent to clients when they connect.
102 | welcometext= " Welcome to this server running FTH Voice. the Parrot is not dead! "
103 | bandwidth=
104 | ; the maximum users allowed on the server
105 | users=
106 | registerName=ftsmurmur
107 | ; If you have generated a proper SSL certificate using the instructions above, you can provide the filenames here.
108 | ; Otherwise, Murmur will create its own certificate automatically.
109 | sslCert=/opt/fts/ftsmurmur.cer
110 | sslKey=/opt/fts/ftsmurmur.key
111 | ```
112 | examine the complete file for more settings.
113 |
--------------------------------------------------------------------------------
/docs/administration/brokered/WebMap/Installation.md:
--------------------------------------------------------------------------------
1 |
2 | ## About webmap
3 | The webmap provides insights of user presence and CoT's shared with everyone.
4 | Also in his NodeRed version can create certain types of CoT.
5 |
6 | There are 2 versions of the webmap:
7 |
8 | 1. webMap NodeRed Flow version
9 | 2. webMap Compiled version
10 |
11 |
12 | # webMap NodeRed Flow version
13 | the webmap Flow works with all systems that supports Nodered.
14 | Advanced users should use this version.
15 |
16 | ## Installation
17 | get the webmap.json the last release:
18 |
19 |
20 |
21 | import the flow into node red
22 |
23 | 
24 |
25 |
26 | in the FTS UI edit the file `config.py`
27 | changing the lines:
28 | ```text
29 | # webmap IP
30 | WEBMAPIP = "[YOURIP]"
31 |
32 | # webmap port
33 | WEBMAPPORT = *1880*
34 | ```
35 |
36 | manage palette
37 |
38 | 
39 |
40 | install/update the required nodes
41 |
42 | 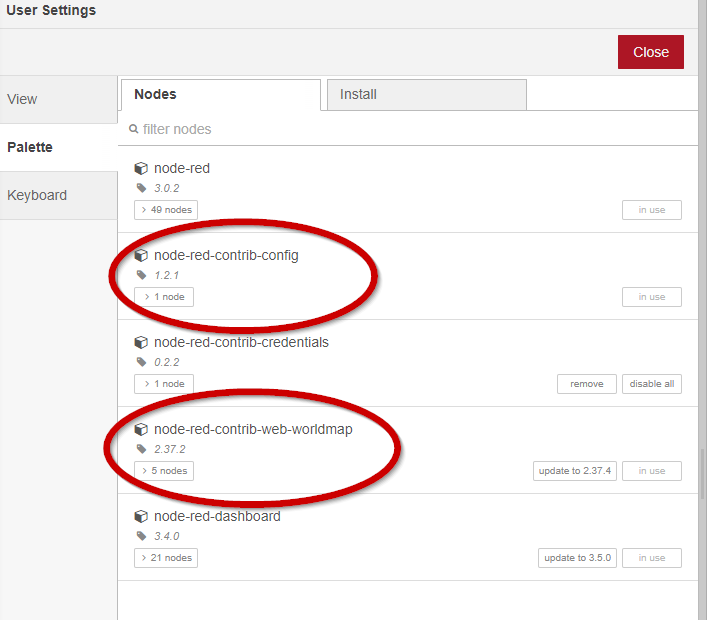
43 |
44 |
45 | # Compiled version
46 | The compiled version of the webmap work only with AMD64 CPU.
47 | Can be installed with the `ZeroTouch` installer
48 | or manually following the instructions below.
49 |
50 | ## NOTICE
51 | the webmap is not a background app;
52 | so, it needs to remain open to receive information and will not persist it;
53 | so, to test ensure that you have connected users and do not switch to other tabs.
54 |
55 |
56 | ## Installation
57 |
58 | get the link of the last release:
59 |
60 |
61 |
62 | login to your server and go to the opt folder
63 |
64 | ```bash
65 | cd /opt
66 | ```
67 |
68 | the console type
69 |
70 | ```bash
71 | wget https://github.com/FreeTAKTeam/FreeTAKHub/releases/download/v0.2.5/FTH-webmap-linux-0.2.5.zip
72 | ```
73 | to download the zip file
74 |
75 | 
76 |
77 | install Unzip
78 | ```bash
79 | sudo apt install unzip
80 | ```
81 |
82 | unzip the package
83 | ```bash
84 | unzip FTH-webmap-linux-0.2.5.zip
85 | ```
86 |
87 | make the file an executable
88 | ```bash
89 | sudo chmod +x FTH-webmap-linux-0.2.5
90 | ```
91 | edit the config file webMAP_config.json
92 | set FTH_FTS_URL to the IP and port of your FTS
93 |
94 | ```text
95 | "FTH_FTS_URL": "[YOUR_FTS_IP]"
96 | "FTH_FTS_TCP_Port": [YOUR_FTS_PORT]
97 | ```
98 |
99 | in the console type:
100 | ```bash
101 | ./[package_name]/[PATHTOCONFIGURATIONFILE]/webMAP_config.json
102 | ```
103 |
104 | e.g. if your configuration file is under opt
105 | ```bash
106 | ./FTH-webmap-linux-0.2.5 /opt/webMAP_config.json
107 | ```
108 |
109 | * navigate to your IP:8000/tak-map
110 | * e.g. http://10.0.2.15:8000/tak-map
111 |
112 | 
113 |
114 | now connect a TAK client to see if that displays
115 | 
116 |
117 | ## configure to start as a service
118 | Systemd is the service manager used by Ubuntu, Debian and many other Linux distributions,
119 | and allows to launch `mediamtx` on boot.
120 |
121 | move the executable
122 | ```bash
123 | sudo mv FTH-webmap-linux-0.2.5 /usr/local/bin/
124 | ```
125 |
126 | and configuration in the system:
127 |
128 | ```bash
129 | sudo mv webMAP_config.json /usr/local/etc/
130 | ```
131 |
132 | Create the service.
133 | Copy this complete text and paste into `/etc/systemd/system/webmap.service`:
134 | ```ini
135 | {!administration/brokered/WebMap/webmap.service!}
136 | ```
137 |
138 | Enable the service:
139 | ```bash
140 | sudo systemctl enable webMap.service
141 | ```
142 |
143 | start the service
144 | ```bash
145 | sudo systemctl start webMap.service
146 | ```
147 |
--------------------------------------------------------------------------------
/docs/administration/brokered/WebMap/webmap.service:
--------------------------------------------------------------------------------
1 | [Unit]
2 | After=network.target
3 | [Service]
4 | ExecStart=/usr/local/bin/FTH-webmap-linux-0.2.5 /usr/local/etc/webMAP_config.json
5 | [Install]
6 | WantedBy=multi-user.target
--------------------------------------------------------------------------------
/docs/administration/usingConsole.md:
--------------------------------------------------------------------------------
1 |
2 | # Unix Console
3 | ## how to edit the Config Files
4 | The suggested way to edit Configuration files is by using [WinSCP](../Installation/Tools.md).
5 | However, if you need to edit files in the console you need to use `vim`.
6 |
7 | * Open a console
8 | * go to ```cd /opt/fts.venv/lib/python3.11/site-packages/FreeTAKServer-UI/app```
9 | * type ```ls``` to see the list of files
10 | * type ```vim __init__.py```
11 | * begin insert mode by typing 'i'.
12 | * insert your edits
13 | * leave insert mode by pressing the `Esc` key.
14 | * write and quit by entering either `:wq!` or `:x!` (both do the same thing)
15 | * starting command mode is via `:`
16 | * hit ENTER (to save and exit)
17 |
--------------------------------------------------------------------------------
/docs/assets/FTSLOGOv2.png:
--------------------------------------------------------------------------------
https://raw.githubusercontent.com/FreeTAKTeam/FreeTAKServer-User-Docs/0db9cacf4a575734097484a7a4761b872751edf0/docs/assets/FTSLOGOv2.png
--------------------------------------------------------------------------------
/docs/assets/FTS_Circle.png:
--------------------------------------------------------------------------------
https://raw.githubusercontent.com/FreeTAKTeam/FreeTAKServer-User-Docs/0db9cacf4a575734097484a7a4761b872751edf0/docs/assets/FTS_Circle.png
--------------------------------------------------------------------------------
/docs/assets/FreeTAKserverIcon.ico:
--------------------------------------------------------------------------------
https://raw.githubusercontent.com/FreeTAKTeam/FreeTAKServer-User-Docs/0db9cacf4a575734097484a7a4761b872751edf0/docs/assets/FreeTAKserverIcon.ico
--------------------------------------------------------------------------------
/docs/assets/favicon_original.png:
--------------------------------------------------------------------------------
https://raw.githubusercontent.com/FreeTAKTeam/FreeTAKServer-User-Docs/0db9cacf4a575734097484a7a4761b872751edf0/docs/assets/favicon_original.png
--------------------------------------------------------------------------------
/docs/assets/fts-official-pub.zip:
--------------------------------------------------------------------------------
https://raw.githubusercontent.com/FreeTAKTeam/FreeTAKServer-User-Docs/0db9cacf4a575734097484a7a4761b872751edf0/docs/assets/fts-official-pub.zip
--------------------------------------------------------------------------------
/docs/diagrams/include/themes/dark.puml:
--------------------------------------------------------------------------------
1 | !define BG_MAIN_COLOR #1A618C
2 | !define BG_SECONDARY_COLOR #616768
3 | !define BG_PACKAGE_COLOR #7a209f
4 | !define BORDER_COLOR #EEEEEE
5 | !define FONT_COLOR #EEEEEE
6 |
7 |
8 | ' include the general skinparams for both, light and dark
9 | ' to overwrite with the given settings
10 | !include general.puml
11 |
--------------------------------------------------------------------------------
/docs/diagrams/include/themes/general.puml:
--------------------------------------------------------------------------------
1 | !define BORDER_THICKNESS 3
2 |
3 | skinparam Padding 4
4 | skinparam RoundCorner 4
5 | skinparam Shadowing false
6 |
7 | skinparam Default {
8 | 'FontName "Open Sans Semibold"
9 | FontColor FONT_COLOR
10 | FontSize 12
11 | }
12 |
13 | skinparam Arrow {
14 | Color FONT_COLOR
15 | FontColor FONT_COLOR
16 | FontStyle Bold
17 | }
18 |
19 | skinparam package {
20 | FontColor FONT_COLOR
21 | BackgroundColor BG_MAIN_COLOR
22 | BorderColor BORDER_COLOR
23 | }
24 | skinparam node {
25 | FontColor FONT_COLOR
26 | BackgroundColor BG_PACKAGE_COLOR
27 | BorderColor BORDER_COLOR
28 | }
29 | skinparam component {
30 | BackgroundColor BG_MAIN_COLOR
31 | BorderColor BORDER_COLOR
32 | FontColor FONT_COLOR
33 | Style uml2
34 | }
35 |
36 | skinparam database {
37 | BackgroundColor BG_MAIN_COLOR
38 | BorderColor BORDER_COLOR
39 | FontColor FONT_COLOR
40 | }
41 |
42 | skinparam cloud {
43 | BackgroundColor BG_MAIN_COLOR
44 | BorderColor BORDER_COLOR
45 | FontColor FONT_COLOR
46 | }
47 |
48 | skinparam collections {
49 | BackgroundColor BG_MAIN_COLOR
50 | BorderColor BORDER_COLOR
51 | FontColor FONT_COLOR
52 | }
53 | skinparam Control {
54 | BackgroundColor BG_MAIN_COLOR
55 | BorderColor BORDER_COLOR
56 | FontColor FONT_COLOR
57 | }
58 | skinparam Boundary {
59 | BackgroundColor BG_MAIN_COLOR
60 | BorderColor BORDER_COLOR
61 | FontColor FONT_COLOR
62 | }
63 | skinparam Entity {
64 | BackgroundColor BG_MAIN_COLOR
65 | BorderColor BORDER_COLOR
66 | FontColor FONT_COLOR
67 | }
68 | skinparam interface {
69 | BackgroundColor BG_MAIN_COLOR
70 | BorderColor BORDER_COLOR
71 | FontColor FONT_COLOR
72 | }
73 | skinparam SequenceParticipantBorderThickness 3
74 | skinparam sequence {
75 | ParticipantBackgroundColor BG_MAIN_COLOR
76 | ParticipantBorderColor BORDER_COLOR
77 | ParticipantFontStyle normal
78 | ParticipantFontColor FONT_COLOR
79 | LifeLineBorderColor BORDER_COLOR
80 | LifeLineBackgroundColor BG_MAIN_COLOR
81 | ArrowColor FONT_COLOR
82 | ArrowBorderColor BORDER_COLOR
83 | ArrowFontColor FONT_COLOR
84 | ArrowThickness 3
85 | ActorBackgroundColor BG_MAIN_COLOR
86 | ActorBorderColor BORDER_COLOR
87 | ActorFontColor FONT_COLOR
88 | }
89 |
90 | ' C4 Styling
91 | ' ##################################
92 |
93 | skinparam rectangle<> {
94 | StereotypeFontColor FONT_COLOR
95 | FontColor FONT_COLOR
96 | BackgroundColor BG_MAIN_COLOR
97 | BorderColor BORDER_COLOR
98 | BorderThickness BORDER_THICKNESS
99 | }
100 |
101 | skinparam rectangle<> {
102 | StereotypeFontColor FONT_COLOR
103 | FontColor FONT_COLOR
104 | BackgroundColor BG_SECONDARY_COLOR
105 | BorderColor BORDER_COLOR
106 | BorderThickness BORDER_THICKNESS
107 | }
108 |
109 | skinparam rectangle<> {
110 | StereotypeFontColor FONT_COLOR
111 | FontColor FONT_COLOR
112 | BackgroundColor BG_MAIN_COLOR
113 | BorderColor BORDER_COLOR
114 | BorderThickness BORDER_THICKNESS
115 | }
116 |
117 | skinparam rectangle<> {
118 | StereotypeFontColor FONT_COLOR
119 | FontColor FONT_COLOR
120 | BackgroundColor BG_SECONDARY_COLOR
121 | BorderColor BORDER_COLOR
122 | BorderThickness BORDER_THICKNESS
123 | }
124 |
125 | skinparam database<> {
126 | StereotypeFontColor FONT_COLOR
127 | FontColor FONT_COLOR
128 | BackgroundColor BG_MAIN_COLOR
129 | BorderColor BORDER_COLOR
130 | BorderThickness BORDER_THICKNESS
131 | }
132 |
133 | skinparam database<> {
134 | StereotypeFontColor FONT_COLOR
135 | FontColor FONT_COLOR
136 | BackgroundColor BG_SECONDARY_COLOR
137 | BorderColor BORDER_COLOR
138 | BorderThickness BORDER_THICKNESS
139 | }
140 |
141 | skinparam rectangle<> {
142 | Shadowing false
143 | StereotypeFontSize 0
144 | BackgroundColor BG_PACKAGE_COLOR
145 | StereotypeFontColor FONT_COLOR
146 | FontColor FONT_COLOR
147 | BorderColor BORDER_COLOR
148 | BorderStyle dashed
149 | BorderThickness BORDER_THICKNESS
150 | }
151 | skinparam rectangle<> {
152 | Shadowing false
153 | StereotypeFontSize 14
154 | BackgroundColor BG_MAIN_COLOR
155 | StereotypeFontColor FONT_COLOR
156 | FontColor FONT_COLOR
157 | BorderColor BORDER_COLOR
158 | BorderThickness BORDER_THICKNESS
159 | }
--------------------------------------------------------------------------------
/docs/diagrams/include/themes/light.puml:
--------------------------------------------------------------------------------
1 | !define BG_MAIN_COLOR #66BCF0
2 | !define BG_SECONDARY_COLOR #B4BCBE
3 | !define BG_PACKAGE_COLOR #eeb291
4 | !define BORDER_COLOR #444444
5 | !define FONT_COLOR #444444
6 |
7 |
8 | ' include the general skinparams for both, light and dark
9 | ' to overwrite with the given settings
10 | !include general.puml
11 |
--------------------------------------------------------------------------------
/docs/diagrams/src/content_goals.puml:
--------------------------------------------------------------------------------
1 | @startuml
2 | !include
3 |
4 | !include ../include/themes/light.puml
5 |
6 | !unquoted procedure Person()
7 | Person(personAlias, "Enduser", "Enduser uses My System")
8 | !endfunction
9 |
10 | !unquoted procedure BOUNDARY()
11 | System_Boundary(ms, "My System Boundary") {
12 | Container(mysystem, "My System", "Node, Angular", "Does really cool things")
13 | }
14 | !endfunction
15 |
16 | !unquoted procedure EXTSYSTEMS()
17 | System_Ext(sys_ext1, "Ext System 1", "Does things")
18 | System_Ext(sys_ext2, "Ext System 2", "Does things")
19 | System_Ext(sys_ext3, "Ext System 3", "Does things")
20 | System_Ext(sys_ext4, "Ext System 4", "Does things")
21 | !endfunction
22 |
23 | ' Echo the persons
24 | Person()
25 | ' The PB system context
26 | BOUNDARY()
27 | ' echo the external systems
28 | EXTSYSTEMS()
29 |
30 | ' Relationships
31 | Rel(personAlias, mysystem, "via App or Web", "REST over HTTPS")
32 | Rel(mysystem, sys_ext1, "Communicates", "REST")
33 | Rel(mysystem, sys_ext2, "Communicates","GraphQL")
34 | Rel(mysystem, sys_ext3, "Syncs Data", "REST")
35 | Rel(mysystem, sys_ext4, "Communicates", "SOAP")
36 |
37 | @enduml
--------------------------------------------------------------------------------
/docs/diagrams/src/net-deploy-rpi.puml:
--------------------------------------------------------------------------------
1 | @startuml
2 | !include
3 |
4 | LAYOUT_TOP_DOWN()
5 | LAYOUT_WITH_LEGEND()
6 |
7 | Node(isp, "Internet Service Provider") {
8 | Container(ispr, "Internet Service Provider Router")
9 | }
10 |
11 | Node(lan, "LAN") {
12 | Node(router, "Router") {
13 | Container(pfs, "pfsense")
14 | }
15 | Node(rpi1, "Raspberry Pi") {
16 | Container(rpios, "Ubuntu", "OS")
17 | Container(ftsui, "FreeTakServerUI")
18 | Container(fts, "FreeTakServer")
19 | Boundary(c1, "Flow Hub"){
20 | Container(nodered, "NodeRed")
21 | Container(video_check, "Video Server Checker", $descr="processor")
22 | Container(salute, "SALUTE Form", $descr="processor")
23 | Container(webmap, "WebMap", $descr="processor")
24 | }
25 | Container(video_server, "Video Server", "MediaMTX")
26 | Container(voice_server, "Voice Server", "Mumble")
27 | }
28 | Node(android, "Phone") {
29 | Container(atakos, "Android", "OS")
30 | Container(atak, "ATAK")
31 | }
32 | Node(laptop, "Windows Laptop") {
33 | Container(winos, "Windows 10", "OS")
34 | Container(wintak, "WinTAK")
35 | }
36 | Node(browser, "Admin Browser") {
37 | Container(admin, "admin")
38 | }
39 | }
40 |
41 | Rel(ispr, pfs, "assign IP addr WAN", "e.g. 192.168.1.1")
42 | Rel(pfs, atakos, "assign IP addr ATAK", "e.g. 10.2.1.100")
43 | Rel(pfs, winos, "assign IP addr", "e.g. 10.2.1.100")
44 | Rel(pfs, rpios, "statically assign IP addr", "e.g. 10.3.1.100")
45 |
46 | Rel(admin, ftsui, "connect to UI", "port: 5000")
47 | Rel(admin, nodered, "connect to UI", "port: 1880")
48 |
49 | Rel(atak, fts, "connect to CoT server", "port: 8087")
50 | Rel(wintak, fts, "connect to CoT server", "port: 8987")
51 |
52 | Rel(ftsui, fts, "connect to API service", "port: 19023")
53 | Rel(ftsui, nodered, "connect to hub", "port: 8000")
54 |
55 | Rel(video_check, video_server, "connect to video server", "port: 9997")
56 | Rel(video_check, fts, "connect to API service", "port: 19023")
57 |
58 | Rel(webmap, fts, "connect to CoT service", "port: 8087")
59 |
60 |
61 | @enduml
--------------------------------------------------------------------------------
/docs/diagrams/src/sequence.puml:
--------------------------------------------------------------------------------
1 | @startuml
2 | !include ../include/themes/light.puml
3 | actor Foo1
4 | boundary Foo2
5 | control Foo3
6 | entity Foo4
7 | database Foo5
8 | collections Foo6
9 | Foo1 -> Foo2 : To boundary
10 | Foo1 -> Foo3 : To control
11 | Foo1 -> Foo4 : To entity
12 | Foo1 -> Foo5 : To database
13 | Foo1 -> Foo6 : To collections
14 |
15 | @enduml
--------------------------------------------------------------------------------
/docs/index.md:
--------------------------------------------------------------------------------
1 | # FreeTAKServer
2 |
3 |
4 |
5 |
6 | FreeTAKServer (FTS) is a Python3 implementation of a TAK Server.
7 |
8 | ## Quick Start
9 |
10 | The easiest way to install FTS is to use our Ansible based ZeroTouch Installer.
11 |
12 | There are two recommended platforms.
13 | you may be able to simply use one of the following:
14 |
15 | ### Cloud: DigitalOcean
16 |
17 | [Create a droplet with Ubuntu 22.04 as the OS.](./Installation/platform/Cloud/DigitalOcean.md)
18 | ```bash
19 | wget -qO - bit.ly/freetakhub2 | sudo bash
20 | ```
21 | ??? tip "Alternate, full path."
22 | ```bash
23 | wget -qO - https://raw.githubusercontent.com/FreeTAKTeam/FreeTAKHub-Installation/main/scripts/easy_install.sh | sudo bash
24 | ```
25 |
26 | ### Single Board Computer: Raspberry Pi 4
27 |
28 | [Create an `sdcard` with Ubuntu 22.04 server x64 as the OS](./Installation/platform/RaspberryPi/Installation.md).
29 |
30 | This case is not quite 'zero-touch' as you will need to first identify the IP address of your Raspberry Pi
31 | and set an environment variable.
32 | ```bash
33 | export MY_IPA=
34 | ```
35 | ??? example "Here is an example capturing the wired LAN address:"
36 | ```bash
37 | export MY_IPA=$(ip -4 addr show eth0 | grep -oP '(?<=inet\s)\d+(\.\d+){3}')
38 | ```
39 |
40 | ```bash
41 | wget -qO - bit.ly/freetakhub2 | sudo bash -s -- --ip-addr ${MY_IPA}
42 | ```
43 | ??? tip "Alternate, full path."
44 | ```bash
45 | wget -qO - https://raw.githubusercontent.com/FreeTAKTeam/FreeTAKHub-Installation/main/scripts/easy_install.sh | sudo bash -s -- --ip-addr ${MY_IPA}
46 | ```
47 |
48 | ### Other
49 |
50 | We can not predict all the ways in which these base cases may vary.
51 | In that case you will need to read the [ZeroTouch Installer](Installation/mechanism/Ansible/ZeroTouchInstall.md).
52 |
53 | ## Overview
54 |
55 | A TAK Server, like FTS, services end user devices running client applications such as...
56 | [`ATAK-CIV`](https://play.google.com/store/apps/details?id=com.atakmap.app.civ),
57 | [`WinTAK`](https://www.civtak.org/2020/09/23/wintak-is-publicly-available/),
58 | and [`iTAK`](https://apps.apple.com/us/app/itak/id1561656396).
59 | FTS is a cross-platform project that,
60 | as of release 2.1,
61 | provides Situational Awareness and other capabilities such as:
62 |
63 | - Web administration
64 | - Federation Service (Connecting two or more FTS instances)
65 | - Data Package upload and retrieval
66 | - Image transfer and storage
67 | - CoT recording in a database
68 | - Data Sync / Mission Planning
69 | - Execution of common task lists (using the `ExCheck` plugin for `WinTAK`; `ATAK` plugin only available to users with tak.gov access)
70 | - SSL Encryption
71 | - Command Line Interface for start and stop services
72 | - REST API for the creation of information such as emergency, Enemy units, and so on
73 | - Android Edition
74 | - WebMap
75 | - Pushing of information (video streams, certifications, etc.) to clients
76 | - Component based architecture
77 |
78 | The following features are in the pipeline for the 2.x family:
79 |
80 | - Cloud Management
81 | - ... Much more!
82 |
83 | Check out our [roadmap](https://github.com/FreeTAKTeam/FreeTakServer/milestones?direction=asc&sort=due_date&state=open) to see everything we have planned.
84 |
85 | ## Community
86 | This project is currently in the *Early Production Stage*.
87 |
88 | If you have any issues, don't hesitate to [bring them up](https://github.com/Tapawingo/FreeTakServer/issues).
89 | Ensure that you have read the documentation and our [FAQ](About/FAQ.md).
90 | FreeTAKServer is in constant development.
91 | Subscribe to the [pip RSS](https://pypi.org/rss/project/freetakserver/releases.xml) to stay updated on all recent changes.
92 |
93 | ### FreeTAKTeam
94 | We are FreeTAKTeam, a group of individuals passionate about democratizing Situational Awareness through the power of technology.
95 | Read our [manifesto](About/Manifesto.md).
96 |
97 | ### Get help!
98 | We have create a customized AI that can answer to most of your questions! check the Pirate Parrot here: https://bit.ly/FTSPirateParrot
99 |
100 | ### FreeTAKTeam YouTube channel
101 | We have created the [FreeTAKTeam YouTube channel is @freetakteam](https://www.youtube.com/@freetakteam) with tutorials, use cases, and more.
102 |
103 | ### Tell us what you think!
104 | To discuss with our active developers, you may use:
105 |
106 | - The [FTS Discord](https://discord.gg/m8cBzQM2te) Server
107 |
108 | ### Others
109 |
110 | - Are you a fellow Redditor? Join us on the [TAK subreddit](https://www.reddit.com/r/ATAK/)!
111 |
112 | ### Donate Back
113 | The FreeTAKTeam is working daily developing an open solution.
114 | We plan to do more than just replicating the functionalities of the legacy TAK server.
115 | Check out our road map [roadmap](https://github.com/FreeTAKTeam/FreeTakServer/milestones?direction=asc&sort=due_date&state=open) to see what is currently in the works.
116 | It includes a lot of cool ideas.
117 |
118 | We are doing it for free because
119 | we believe that donating personal time to a cause is an endeavor that is worthy per se.
120 | However, part-time, we are also funding resources dedicated to:
121 |
122 | - Maintaining public and testing servers
123 | - Investing in different technologies for R&D
124 |
125 | If you feel that FTS is valuable to you,
126 | and you are able to donate in these challenging times,
127 | please consider sending a contribution: [DONATE](https://www.paypal.com/cgi-bin/webscr?cmd=_donations&business=brothercorvo%40gmail.com&item_name=FreeTAKServer+R%26D¤cy_code=CAD&source=url)
128 | 
129 |
130 | You can also support the project by buying one of our [T-Shirts](http://tee.pub/lic/elARpZYCmaw)
131 |
132 | !!! note
133 | We are not big fans of `Paypal`,
134 | but it is the easiest and most accessible way we have found for enabling some form of funding.
135 | We hope to implement a more ethical system in the future.
136 |
137 | ### Public Instance
138 |
139 | [](https://www.digitalocean.com/?refcode=f107fe7b7131&utm_campaign=Referral_Invite&utm_medium=Referral_Program&utm_source=badge)
140 |
141 | We support a public instance of FTS hosted by DigitalOcean.
142 |
143 | - download the configuration [here](assets/fts-official-pub.zip)
144 | - use the Import Manager in `ATAK` to import the configuration.
145 | - for a full tutorial see the [article](About/PubServer.md)
146 |
147 | !!! warning
148 | The documentation for FTS is a work-in-progress.
149 | If you find any of the documentation confusing please discuss it on the [FTS Discord server](https://discord.gg/m8cBzQM2te) .
150 | Please [report any errors as an issue](https://github.com/FreeTAKTeam/FreeTAKServer-User-Docs/issue).
151 |
152 |
--------------------------------------------------------------------------------
/docs/stylesheets/extra.css:
--------------------------------------------------------------------------------
1 |
2 | /* https://www.svgviewer.dev/ */
3 | :root {
4 | --md-status--ood: url('images/warning.svg');
5 | --md-status--todo: url('images/todo.svg');
6 | --md-status--warn: url('images/warning.svg');
7 |
8 | --md-status--current: url('images/current.svg');
9 | }
10 |
11 | .md-status--ood::after {
12 | mask-image: var(--md-status--ood);
13 | -webkit-mask-image: var(--md-status--ood);
14 | }
15 |
16 | .md-status--todo::after {
17 | mask-image: var(--md-status--todo);
18 | -webkit-mask-image: var(--md-status--todo);
19 | }
20 |
21 | .md-status--warning::after {
22 | mask-image: var(--md-status--warn);
23 | -webkit-mask-image: var(--md-status--warn);
24 | }
25 |
26 | .md-status--current::after {
27 | mask-image: var(--md-status--current);
28 | -webkit-mask-image: var(--md-status--current);
29 | }
30 |
31 | body:has(> .md-status--current) {
32 | background-color: green;
33 | }
34 |
35 | body:has(> .md-status--warning) {
36 | background: red;
37 | }
38 |
39 | body:has(> .md-status--ood) {
40 | color: blue;
41 | }
--------------------------------------------------------------------------------
/docs/stylesheets/images/current.svg:
--------------------------------------------------------------------------------
1 |
2 |
3 |
--------------------------------------------------------------------------------
/docs/stylesheets/images/todo.svg:
--------------------------------------------------------------------------------
1 |
2 |
3 |
--------------------------------------------------------------------------------
/docs/stylesheets/images/trashcan.svg:
--------------------------------------------------------------------------------
1 |
2 |
3 |
--------------------------------------------------------------------------------
/docs/stylesheets/images/warning.svg:
--------------------------------------------------------------------------------
1 |
2 |
3 |
4 |
--------------------------------------------------------------------------------
/docs/versions.json:
--------------------------------------------------------------------------------
1 | [
2 | {"version": "1.9", "title": "1.9", "aliases": ["obsolete"], "properties": "anything"},
3 | {"version": "2.1", "title": "2.1", "aliases": ["previous"], "properties": "anything"},
4 | {"version": "2.2", "title": "2.2", "aliases": ["latest"], "properties": "anything"}
5 | ]
--------------------------------------------------------------------------------
/mkdocs.yml:
--------------------------------------------------------------------------------
1 | site_name: FreeTAKServer Documentation
2 | repo_url: https://github.com/FreeTAKTeam/FreeTAKServer-User-Docs
3 | edit_uri: edit/main/docs/
4 | site_author: FreeTAKTeam
5 | copyright: Copyright (c)2022 FreeTAKTeam
6 | theme:
7 | # https://squidfunk.github.io/mkdocs-material/
8 | # https://github.com/squidfunk/mkdocs-material/README.md
9 | name: 'material'
10 | custom_dir: 'overrides/'
11 | favicon: 'assets/FTS_Circle.png'
12 | logo: 'assets/FTS_Circle.png'
13 | features:
14 | # https://squidfunk.github.io/mkdocs-material/setup/setting-up-navigation
15 | - navigation.instant
16 | - navigation.tabs
17 | - navigation.tabs.sticky
18 | - navigation.indexes
19 | - navigation.sections
20 | # - navigation.expand
21 | - navigation.path
22 | - toc.follow
23 | - toc.integrate
24 | icon:
25 | admonition:
26 | note: octicons/tag-16
27 | abstract: octicons/checklist-16
28 | info: octicons/info-16
29 | tip: octicons/squirrel-16
30 | success: octicons/check-16
31 | question: octicons/question-16
32 | warning: octicons/alert-16
33 | failure: octicons/x-circle-16
34 | danger: octicons/zap-16
35 | bug: octicons/bug-16
36 | example: octicons/beaker-16
37 | quote: octicons/quote-16
38 |
39 | markdown_extensions:
40 | - markdown_include.include:
41 | base_path: docs
42 | - attr_list
43 | - pymdownx.superfences:
44 | # make exceptions to highlighting of code:
45 | custom_fences:
46 | - name: mermaid
47 | class: mermaid
48 | format: !!python/name:mermaid2.fence_mermaid_custom
49 | - admonition
50 | - pymdownx.details
51 |
52 | plugins:
53 | - search
54 | - awesome-pages
55 | - mike:
56 | version_selector: true
57 | - section-index
58 | - build_plantuml:
59 | render: 'server'
60 | bin_path: "/usr/local/bin/plantuml"
61 | server: 'https://www.plantuml.com/plantuml'
62 | disable_ssl_certificate_validation: true
63 | output_format: 'svg'
64 | allow_multiple_roots: false
65 | diagram_root: 'docs/diagrams'
66 | output_folder: 'gen'
67 | input_folder: 'src'
68 | input_extensions: 'puml'
69 | theme_enabled: true
70 | - mermaid2:
71 | arguments:
72 | theme: 'dark'
73 | themeVariables:
74 | primaryColor: '#BB2528'
75 | primaryTextColor: '#fff'
76 | primaryBorderColor: '#7C0000'
77 | lineColor: '#F8B229'
78 | secondaryColor: '#006100'
79 | tertiaryColor: '#fff'
80 | - pdf-export:
81 | verbose: true
82 | media_type: print
83 | enabled_if_env: ENABLE_PDF_EXPORT
84 |
85 | # extra_css:
86 | # - stylesheets/extra.css
87 |
88 | extra:
89 | version:
90 | provider: mike
91 | default: latest
92 | # status:
93 | # new: Recently Added
94 | # deprecated: Slated to be Removed
95 | # ood: Out of Date
96 | # warning: Warning! Badly Out of Date
97 | # wip: Work in Progress
98 | # current: The Page is Up-to-Date
99 |
100 |
--------------------------------------------------------------------------------
/overrides/main.html:
--------------------------------------------------------------------------------
1 | {% extends "base.html" %}
2 |
3 | {% block htmltitle %}
4 | FTS Documentation
5 | {% endblock %}
6 |
--------------------------------------------------------------------------------
/resources/FTSLOGOSquare.png:
--------------------------------------------------------------------------------
https://raw.githubusercontent.com/FreeTAKTeam/FreeTAKServer-User-Docs/0db9cacf4a575734097484a7a4761b872751edf0/resources/FTSLOGOSquare.png
--------------------------------------------------------------------------------
/resources/FTSLOGOUI.png:
--------------------------------------------------------------------------------
https://raw.githubusercontent.com/FreeTAKTeam/FreeTAKServer-User-Docs/0db9cacf4a575734097484a7a4761b872751edf0/resources/FTSLOGOUI.png
--------------------------------------------------------------------------------
/resources/FTSLOGOv2.png:
--------------------------------------------------------------------------------
https://raw.githubusercontent.com/FreeTAKTeam/FreeTAKServer-User-Docs/0db9cacf4a575734097484a7a4761b872751edf0/resources/FTSLOGOv2.png
--------------------------------------------------------------------------------
/resources/FTSShield.png:
--------------------------------------------------------------------------------
https://raw.githubusercontent.com/FreeTAKTeam/FreeTAKServer-User-Docs/0db9cacf4a575734097484a7a4761b872751edf0/resources/FTSShield.png
--------------------------------------------------------------------------------
/resources/main.md:
--------------------------------------------------------------------------------
1 | this folder contains various resources to be used in docs (images, reference files, etc.)
2 |
--------------------------------------------------------------------------------
 61 |
--------------------------------------------------------------------------------
/docs/About/Manifesto.md:
--------------------------------------------------------------------------------
1 |
2 | # Manifesto for FreeTAKTeam
3 |
4 | We are FreeTAKTeam, a group of individuals passionate about democratizing Situational Awareness through the power of technology.
5 | We believe that access to situational awareness software should be available to everyone, regardless of their technical expertise or financial resources.
6 | Our mission is to create open-source software that is user-friendly, intuitive, and based on the latest and most advanced technologies.
7 | We strive to make our software accessible to anyone who needs it, whether it be first responders, humanitarian aid workers, or military personnel.
8 | We believe that by democratizing Situational Awareness, we can make the world a safer and more connected place.
9 | Our software is designed to be interoperable, allowing different organizations and agencies to share critical information in real-time, across multiple platforms and devices.
10 |
11 | We are committed to constantly improving our software and keeping it up-to-date with the latest advances in technology.
12 | We believe in the power of community and welcome feedback, contributions, and collaboration from anyone who shares our vision.
13 |
14 | Join us in our mission to democratize Situational Awareness and create a safer and more connected world.
15 | Together, we can make a difference.
16 |
--------------------------------------------------------------------------------
/docs/About/PubServer.md:
--------------------------------------------------------------------------------
1 |
2 | ## Connecting to FTS Public Server
3 |
4 | [](https://www.digitalocean.com/?refcode=f107fe7b7131&utm_campaign=Referral_Invite&utm_medium=Referral_Program&utm_source=badge)
5 |
6 | We support a public instance of FTS hosted by DigitalOcean.
7 |
8 | The Public server (PUB) is an instance of FTS made available for you to test and play with.
9 | We are not going to spy on you, but keep in mind that information will be shared with all the connected users.
10 | For production consider to install your own instance.
11 |
12 | ### FTS Public Instance Server Rules
13 |
14 | * Please be respectful of others.
15 | * This is a free service, but that cost money, do NOT upload huge data packages
16 | * We will use PUB to test new features, that means it can not be accessible during certain periods
17 | * Failure to respect those rules will be punished by our Killer Pirate Parrot (FreeTAKServer Developers), YOU HAVE BEEN WARNED.
18 |
19 | ### Configure `ATAK` for FreeTakServer (FTS) on the public server
20 |
21 | Download required files
22 |
23 | The easiest way is to open this article in your Android phone, so that all the files will be already available there.
24 |
25 | * Download and Install `ATAK` from the [TAK Product Center](https://www.tak.gov/) or [Mirror](https://7n7.us/civtak)
26 | * Download the Server Configuration File - [FTS Server Configuration File](../assets/fts-official-pub.zip)
27 | * Download the Basic Mapsources - [Basic Mapsources](https://drive.google.com/file/d/1u6xADO_kYolguf9-rXGZHtRgu-Cx_il4/view?usp=sharing)
28 | * Optional: Download Additional Maps - [Additional TAK Mapsources](https://drive.google.com/file/d/1Ltdp2U7ItEu6b380u9BYswVHLSD9F-vn/view?usp=sharing)
29 |
30 | ### Configure using Import Manager
31 |
32 | * Start `ATAK` on Android
33 | * Tap the "..." (Three-dot-Menu) on the Upper Right of the `ATAK` Screen.
34 | * Tap Import Manager
35 | * Tap "Local SD"
36 | * Go to the place where you have downloaded the files
37 | * Select "Google_Mapsources.zip" and "fts-official-pub.zip"
38 | * Optionally select "MOBAC-Maps-master.zip"
39 | * Click OK
40 | * A message will appear to inform you that you are connected to the FTS Official (Public) Server
41 |
42 |
43 | ### Configure using Settings
44 |
45 | * Tap ...
46 | * Tap the "..." (Three-dot-Menu) on the Upper Right of the `ATAK` Screen.
47 | * Go to Settings
48 | * Select "TAK Servers"
49 | * Tap the "..." and Click "Add"
50 | * Click Advanced Options
51 | * Select TCP as Streaming Protocol
52 | * Use this address: 137.184.101.250
53 | * Server port : 8087
54 | * Leave the rest unchecked. Username or Password are not required.
55 |
--------------------------------------------------------------------------------
/docs/About/architecture/.pages:
--------------------------------------------------------------------------------
1 | nav:
2 | - Cursor On Target:
3 | - CoT Domain: cot_domain.md
4 | - CoT Class Hierarchy: cot_hierarchy.md
5 | - CoT Table: cot_table.md
6 | - Common Warfighting Symbology 2525: mil_std_2525.md
--------------------------------------------------------------------------------
/docs/About/architecture/FlockOfParrots.md:
--------------------------------------------------------------------------------
1 | # Flock of Parrots Concept
2 | ``` mermaid
3 | graph TD;
4 | MasterParrot --> FTS1;
5 | MasterParrot --> FTS2;
6 | TAK_client_9 --> FTS2;
7 | TAK_client_2 --> FTS1;
8 | TAK_client_3 --> FTS1;
9 | TAK_client_1 --> FTS1;
10 | TAK_client_4 --> FTS2;
11 | TAK_client_6 --> FTS2;
12 | TAK_client_5 --> FTS2;
13 | FTS1 --> TAK_client_3;
14 | FTS1 --> TAK_client_2;
15 | FTS1 --> TAK_client_1;
16 | FTS2 --> TAK_client_4;
17 | FTS2 --> TAK_client_6;
18 | FTS2 --> TAK_client_5;
19 | FTS2 --> TAK_client_9;
20 | ```
21 |
22 |
23 |
--------------------------------------------------------------------------------
/docs/About/why_fts.md:
--------------------------------------------------------------------------------
1 |
2 | I want to emphasize a key principle:
3 | "Before you ask, ask yourself what you can give."
4 | Now, you might wonder, why should you give?
5 | As the authors of FTS, here are our top 10 reasons for creating this software for you:
6 |
7 | ## WHY FTS IS BETTER
8 |
9 | 1. Since 2020, FreeTAKServer (FTS) has been a labor of love,
10 | supported by dozens of volunteers dedicating their free time, including Sundays.
11 | 2. FTS boasts a modern, scalable architecture, completely revamped for the 2.X series.
12 | 3. It's nurtured by a dedicated community that stands up to giants.
13 | 4. Extensive documentation supports users at every step.
14 | 5. FTS is incredibly versatile, capable of running on a wide range of platforms (and no, this don't mean that ANYBOBY can run FTS on everything!) .
15 | 6. It intelligently "understands" COT messages, paving the way for innovative developments.
16 | 7. Our public roadmap invites community involvement and contribution towards a shared vision.
17 | 8. FTS embodies true open-source principles, welcoming everyone to contribute and benefit. we are not hiding behind secrecy and limited access
18 | 9. Installation is straightforward compared to the convoluted process for TAK Server.
19 | 10. We believe in the power of community and open-source development. FTS is not just "our software"; it's a collaborative effort that benefits all users.
20 |
21 | ## WHY WE DO NOT LIKE TAK Server
22 |
23 | 1. TAK Server OG is based on ancient (20+ years) J2EE architecture with a lot of spaghetti code.
24 | 2. It's notoriously difficult to install—historically requiring specialized personnel funded by the USG.
25 | 3. The user interface is far from user-friendly.
26 | 4. It's maintained by a mega-corporation charging exorbitant fees for minimal service.
27 | 5. The documentation is either sparse or non-existent.
28 | 6. It demands significant machine resources to operate.
29 | 7. It acts merely as a "broker" without any understanding of the messages it handles.
30 | 8. There's no public roadmap.
31 | 9. Though recently open-sourced, TAK Server lacks a true open-source spirit, focusing mainly on military applications without community engagement.
32 | 10. Pressure from our project contributed to making TAK server publicly available, highlighting its previous exclusivity.
33 |
34 | Join us in supporting and contributing to FTS, and let's continue to make it even better together. You can start by giving FTS a star in GitHub:
35 | On https://github.com/FreeTAKTeam/FreeTakServer, in the top-right corner of the page, click Star.
--------------------------------------------------------------------------------
/docs/HowToHelp/.pages:
--------------------------------------------------------------------------------
1 | title: How to Help
2 |
3 | nav:
4 | - Getting Started: GettingStartedAsHelper.md
5 | - Developer:
6 | - Set Up:
7 | - VS Code and PIP: DevSetupPipVScode.md
8 | - PyCharm and Mamba: DevSetupMambaPyCharm.md
9 | - Write Documentation: WriteDocumentation.md
--------------------------------------------------------------------------------
/docs/HowToHelp/DevSetupMambaPyCharm.md:
--------------------------------------------------------------------------------
1 |
2 | # Setup a development environment for FTS
3 | ## introduction
4 | this tutorial assumes that you are working under windows (tested under 11)
5 |
6 | # Tools Installation
7 |
8 | ## Get the IDE: PyCharm
9 | As an integrated Development Environment (IDE) some people use PyCharm.
10 |
11 | [Download PyCharm from here](https://www.jetbrains.com/pycharm/)
12 |
13 | ## Clone the Project Repositories
14 |
15 | Clone from the [FreeTAKTeam/repositories](https://github.com/orgs/FreeTAKTeam/repositories) group
16 | `FreeTakServer` and `DigitalPy` repositories locally.
17 | This can be done from within `PyCharm`.
18 |
19 | It can also be done from the command line.
20 |
21 | ```shell
22 | git clone https://github.com/FreeTAKTeam/FreeTakServer.git fts
23 | git clone https://github.com/FreeTAKTeam/DigitalPy dipy
24 | ```
25 |
26 | Some other optional repositories:
27 | ```shell
28 | git clone https://github.com/FreeTAKTeam/FreeTAKServer-User-Docs fts-docs
29 | git clone https://github.com/FreeTAKTeam/UI.git fts-ui
30 | ```
31 |
32 | # Create a virtual Environment
33 |
34 | Here we [use a `conda` variant, `micromamba`](https://mamba.readthedocs.io/en/latest/user_guide/micromamba.html).
35 |
36 | Detailed installation instructions can be found [here](https://mamba.readthedocs.io/en/latest/installation/micromamba-installation.html).
37 |
38 | With `micromamba` installed we can set up a virtual environment:
39 |
40 | ```shell
41 | mamba env create -y -f fts_user/docs/HowToHelp/fts-dev-env.yml
42 | ```
43 |
44 | This environment definition is not seminal.
45 | The dependencies used here are copied from the following sources:
46 |
47 | FreeTakServer
48 |
49 | * [FreeTakServer/pyproject.toml](https://github.com/FreeTAKTeam/FreeTakServer/pyproject.toml)
50 | * [FreeTakServer/setup.py](https://github.com/FreeTAKTeam/FreeTakServer/setup.py)
51 | * [FreeTAKServer/.../mission/test-requirements.txt](https://github.com/FreeTAKTeam/FreeTakServer/FreeTAKServer/components/extended/mission/test-requirements.txt)
52 | * [FreeTAKServer/.../mission/requirements.txt](https://github.com/FreeTAKTeam/FreeTakServer/FreeTAKServer/components/extended/mission/requirements.txt)
53 | * [FreeTakServer/requirements.txt](https://github.com/FreeTAKTeam/FreeTakServer/requirements.txt)
54 |
55 | DigitalPy
56 |
57 | * [DigitalPy/pyproject.toml](https://github.com/FreeTAKTeam/DigitalPy/pyproject.toml)
58 |
59 | ```yaml
60 | {!HowToHelp/fts-dev-env.yml!}
61 | ```
62 |
63 | Activate the virtual environment
64 | ```
65 | mamba activate fts-dev
66 | ```
67 | # Install FTS Locally
68 |
69 | Install dependencies and DigitalPy as package
70 | ```
71 | pushd dipy
72 | pip install -e .
73 | popd
74 | ```
75 |
76 | # Configure PyCharm
77 |
78 | ### FTS YAML File
79 | In the folder containing the FreeTakServer working repository create a file.
80 |
81 | Populate that file, `FTSConfig.yaml`, with the following:
82 | ```yaml
83 | {!HowToHelp/FTSConfig.yaml!}
84 | ```
85 |
86 | 1. Adjust paths to point to point to dir structure
87 | 2. Create a certs folder at the same level
88 | 3. Adjust FTS_CERTS_PATH to point to the newly created dir
89 | 4. Create new directory for the FreeTakServerLogs
90 | 5. Adjust FTS_LOGFILE_PATH to point to the newly created dir
91 |
92 | # you're Ready to Help!
93 |
94 |
95 |
--------------------------------------------------------------------------------
/docs/HowToHelp/DevSetupPipVScode.md:
--------------------------------------------------------------------------------
1 |
2 | # Setup a development environment for FTS
3 | ## introduction
4 | this tutorial assumes that you are working under windows (tested under 11)
5 |
6 | # Tools Installation
7 | ## Install Python
8 | Download python-3.11.1-amd64.exe from the [source](https://www.python.org/downloads/release/python-3111/)
9 |
10 | ## Get the IDE: VisualStudio Code
11 | As an integrated Development Environment (IDE) we use VisualStudio Code.
12 | Visual Studio Code is integrated with GitHub, in fact you can start editing any file directly in the browser for committing lightweight code changes.
13 |
14 | For a more serious collaboration you should install the desktop version:
15 | https://code.visualstudio.com/Download
16 | with the following plugins:
17 |
18 | 
19 |
20 | we use the **Setting Sync** plugin to keep the team setting aligned,
21 | ask us for the coordinates of the settings.
22 |
23 | ## Install visual-cpp-build-tools
24 | Get [Microsoft C++ Build Tools](https://visualstudio.microsoft.com/visual-cpp-build-tools/)
25 | 
26 |
27 | ensure that you have "Desktop development with C++" installed
28 | 
29 |
30 |
31 | ## Install a source code manager: TortoiseGit
32 | install a source code manager like [TortoiseGit](https://tortoisegit.org/)
33 |
34 | Clone from the `https://github.com/orgs/FreeTAKTeam/repositories` group
35 | `FreeTakServer` and `DigitalPy` repositories locally.
36 | 
37 | ```shell
38 | git clone https://github.com/FreeTAKTeam/FreeTakServer.git fts
39 | git clone https://github.com/FreeTAKTeam/DigitalPy dipy
40 | ```
41 |
42 | Some other optional repositories:
43 | ```shell
44 | git clone https://github.com/FreeTAKTeam/FreeTAKServer-User-Docs fts-docs
45 | git clone https://github.com/FreeTAKTeam/UI.git fts-ui
46 | ```
47 |
48 | # Configuration
49 | ## create a virtual Environment
50 | * open a command prompt and navigate to the FreeTakServer repo
51 | * Type:
52 | ```powershell
53 | py -m venv venv
54 | ```
55 |
56 | Having set up a virtual environment
57 | you now take a look inside the directory of your venv.
58 | You will see something like this (on Windows):
59 | ```
60 | .
61 | ├── Include
62 | ├── Lib
63 | │ └── site-packages
64 | ├── pyvenv.cfg
65 | └── Scripts
66 | ├── activate
67 | ├── activate.bat
68 | ├── Activate.ps1
69 | ├── deactivate.bat
70 | ├── pip3.10.exe
71 | ├── pip3.exe
72 | ├── pip.exe
73 | ├── python.exe
74 | └── pythonw.exe
75 | ```
76 | Activate the virtual environment
77 | ```
78 | # In cmd.exe
79 | venv\Scripts\activate.bat
80 | # In PowerShell
81 | venv\Scripts\Activate.ps1
82 | ```
83 | # Install FTS locally
84 | show installed packages
85 | ```
86 | pip list
87 | ```
88 | output
89 |
90 | 
91 |
92 | * now install dependencies and FreeTAKServer as package
93 | ```
94 | pip install -e .
95 | ```
96 |
97 | change directory to DigitalPy dir
98 | ```
99 | cd .../DigitalPy
100 | ```
101 | install dependencies and DigitalPy as package
102 | ```
103 | pip install -e .
104 | ```
105 |
106 | # Configure VS Code
107 | open VS Code Explorer to the location of the FreeTAKServer project
108 |
109 | 
110 |
111 | * change the VSCODE Python Interpreter (ctrl + shift + p).
112 | * Look for "Python: Select Interpreter".
113 | * Select the one in your `venv/scripts/python.exe`
114 | * Go to "Run and Debug"
115 | * Select "Create launch.json" file
116 | * copy this configuration over the created file and configure `[YOURPATH]` with your actual path
117 | ```json
118 | {
119 | "version": "0.2.0",
120 | "configurations": [
121 | {
122 | "name": "FTS",
123 | "type": "python",
124 | "request": "launch",
125 | "program": "C:\\[YOURPATH]\\src\\FreeTakServer\\FreeTAKServer\\controllers\\services\\FTS.py",
126 | "console": "integratedTerminal",
127 | "justMyCode": false,
128 | "env": {
129 | "FTS_CONFIG_PATH": "C:\\[YOURPATH]\\src\\FreeTakServer\\FreeTAKServer\\FTSConfig.yaml",
130 | "FTS_FIRST_START": "false",
131 | "PYTHONTRACEMALLOC": "25"
132 | }
133 | }
134 | ]
135 | }
136 | ```
137 |
138 | 
139 |
140 |
141 | ### FTS YAML File
142 | In the folder containing the FreeTakServer repo create a file:
143 | `FTSConfig.yaml`
144 |
145 |
146 |
147 | Copy the example FTSConfig.yaml into the file just created
148 | ```yaml
149 | {!HowToHelp/FTSConfig.yaml!}
150 | ```
151 |
152 | 1. Adjust paths to point to point to dir structure
153 | 2. Create a certs folder at the same level
154 | 3. Adjust FTS_CERTS_PATH to point to the newly created dir
155 | 4. Create new directory for the FreeTakServerLogs
156 | 5. Adjust FTS_LOGFILE_PATH to point to the newly created dir
157 |
158 | # you're Done!
159 | Hit `[F5]` to run debug
160 |
161 |
--------------------------------------------------------------------------------
/docs/HowToHelp/FTSConfig.yaml:
--------------------------------------------------------------------------------
1 | System:
2 | #FTS_DATABASE_TYPE: SQLite
3 | FTS_CONNECTION_MESSAGE: Welcome to FreeTAKServer FreeTAKServer-2.X alpha.
4 | The Parrot is not dead. It’s just resting
5 | #FTS_OPTIMIZE_API: True
6 | #FTS_MAINLOOP_DELAY: 1
7 | Addresses:
8 | #FTS_COT_PORT: 8087
9 | #FTS_SSLCOT_PORT: 8089
10 | FTS_DP_ADDRESS: 192.168.100.105
11 | FTS_USER_ADDRESS: 192.168.100.105
12 | #FTS_API_PORT: 19023
13 | #FTS_FED_PORT: 9000
14 | #FTS_API_ADDRESS: 0.0.0.0
15 | FTS_FIRST_START: false
16 | Filesystem:
17 | FTS_DB_PATH: [PATH]\\FreeTakServer\\FreeTAKServer.db
18 | #FTS_COT_TO_DB: True
19 | FTS_MAINPATH: [PATH]\\FreeTakServer\\FreeTAKServer
20 | FTS_CERTS_PATH: [PATH]\\FreeTakServer\\FreeTAKServerCerts
21 | FTS_EXCHECK_PATH: [PATH]\\FreeTakServer\\ExCheck
22 | FTS_EXCHECK_TEMPLATE_PATH: [PATH]\\FreeTakServer\\ExCheck\\template
23 | FTS_EXCHECK_CHECKLIST_PATH: [PATH]\\FreeTakServer\\ExCheck\\checklist
24 | FTS_DATAPACKAGE_PATH: [PATH]\\FreeTakServer\\FreeTAKServerDataPackageFolder
25 | FTS_LOGFILE_PATH: [PATH]\\FreeTakServer\\FreeTakServerLogs
26 | FTS_CORE_COMPONENTS_PATH: \\home\\ariel\\Workspace\\FTAK\\FreeTakServer\\FreeTAKServer\\components\\core
27 | FTS_EXTERNAL_COMPONENTS_PATH: [PATH]\\FreeTakServer\\components\\extended
28 | FTS_CLIENT_PACKAGES: [PATH]\\FreeTakServer\\FreeTAKServerCerts\\clientPackages
29 | Certs:
30 | FTS_SERVER_KEYDIR: [PATH]\\FreeTakServer\\FreeTAKServerCerts\\server.key
31 | FTS_SERVER_PEMDIR: [PATH]\\FreeTakServer\\FreeTAKServerCerts\\server.pem
32 | FTS_TESTCLIENT_PEMDIR: [PATH]\\FreeTakServer\\FreeTAKServerCerts\\Client.pem
33 | FTS_TESTCLIENT_KEYDIR: [PATH]\\FreeTakServer\\FreeTAKServerCerts\\Client.key
34 | FTS_UNENCRYPTED_KEYDIR: [PATH]\\FreeTakServer\\FreeTAKServerCerts\\server.key.unencrypted
35 | FTS_SERVER_P12DIR: [PATH]\\FreeTakServer\\FreeTAKServerCerts\\server.p12
36 | FTS_CADIR: [PATH]\\FreeTakServer\\FreeTAKServerCerts\\ca.pem
37 | FTS_CAKEYDIR: [PATH]\\FreeTakServer\\FreeTAKServerCerts\\ca.key
38 | FTS_FEDERATION_CERTDIR: [PATH]\\FreeTakServer\\FreeTAKServerCerts\\server.pem
39 | FTS_FEDERATION_KEYDIR: [PATH]\\FreeTakServer\\FreeTAKServerCerts\\server.key
40 | FTS_CRLDIR: [PATH]\\FreeTakServer\\FreeTAKServerCerts\\FTS_CRL.json
41 | FTS_FEDERATION_KEYPASS: demopassfed
42 | FTS_CLIENT_CERT_PASSWORD: demopasscert
43 | FTS_WEBSOCKET_KEY: YourWebsocketKey
--------------------------------------------------------------------------------
/docs/HowToHelp/GettingStartedAsHelper.md:
--------------------------------------------------------------------------------
1 |
2 | # How to help
3 | Depending on your skill-set and passion you can participate in the project in different ways.
4 | Jump to the proper Section to get the instructions,
5 | this page is structured so that the basic instructions applies to more advanced roles.
6 |
7 | * Hobby User
8 | * Professional User / SME
9 | * Unix Admin / DevOps
10 | * Developer
11 | * Modeler / Digital Engineer
12 |
13 | ## Hobby User
14 | As a Hobby user you want to install and use the FTS-TAK platform.
15 | ### getting started as a Hobby User
16 | * Connect to our Public server to familiarize your self
17 | * Read the user manual in GitHub, if you find inconsistencies submit a change request
18 | * Install FTS on your environment
19 | * give us a Star in GitHub
20 | * Donate to the project
21 |
22 | ## Professional User / SME
23 | ### getting started as Professional User / SME
24 | * Create a GitHub user
25 | * Submit issues to GitHub
26 |
27 | ## Unix Admin / DevOps
28 | You are familiar with installing and configuring complex applications using the console,
29 | you understand network configuration
30 |
31 | ### getting started as an Admin / DevOps
32 | * Help Other users on our Discord and Discourse with installation and configuration issues
33 | * Submit tutorials on how to deploy FTS in different environments (different clouds, different OS and so on)
34 |
35 | ## Developer
36 | As a developer you have code experience in one or many of the languages we use (Python, JavaScript).
37 |
38 | ### getting started as a Developer
39 | A good way to start helping is to pick a task.
40 |
41 | * Select a candidate task
42 | * from the current issues that we have [open](https://github.com/FreeTAKTeam/FreeTakServer/issues?q=is%3Aissue+is%3Aopen+is%3Aissue+is%3Aopen+label%3Abug_normal%2Cbug_minor%2Cbug_Fatal)
43 | * look in the planned [features](https://github.com/FreeTAKTeam/FreeTakServer/issues?q=is%3Aissue+is%3Aopen+label%3Aenhancement)
44 | * Fork the [appropriate repository](https://github.com/orgs/FreeTAKTeam/repositories)
45 | * Try to perform the task
46 | * to set up your machine for "VisualStudio Code" and "Pip" use [this tutorial](DevSetupPipVScode.md)
47 | * to set up your machine for "PyCharm" and "Mamba" use [this tutorial](DevSetupMambaPyCharm.md)
48 | * Make a GutHub pull request (PR)
49 | * work with an FTS committer to get the PR accepted
50 |
51 | While selecting or working on a task you can get guidance at the
52 |
53 | - The [FTS Discord](https://discord.gg/m8cBzQM2te) Server
54 |
55 | ### writing documentation
56 |
57 | [Improve the documentation](WriteDocumentation.md)
58 |
59 |
60 | ## Modeler / Digital Engineer
61 | You are an architect or a very experienced developer with
62 | deep understanding of Object-Oriented thinking, patterns and Models.
63 |
64 | #### get the digital environment
65 | we use Sparx ™ Enterprise Architect as modeling tool.
66 |
--------------------------------------------------------------------------------
/docs/HowToHelp/WriteDocumentation.md:
--------------------------------------------------------------------------------
1 |
2 | # Write Documentation
3 |
4 | This project houses the FreeTakServer (FTS) documentation.
5 | It is written in Markdown and mkdirs.
6 |
7 | ## Procedure
8 |
9 | ### Fork the Main Repository
10 |
11 | You will need a `github` account.
12 |
13 | Fork
61 |
--------------------------------------------------------------------------------
/docs/About/Manifesto.md:
--------------------------------------------------------------------------------
1 |
2 | # Manifesto for FreeTAKTeam
3 |
4 | We are FreeTAKTeam, a group of individuals passionate about democratizing Situational Awareness through the power of technology.
5 | We believe that access to situational awareness software should be available to everyone, regardless of their technical expertise or financial resources.
6 | Our mission is to create open-source software that is user-friendly, intuitive, and based on the latest and most advanced technologies.
7 | We strive to make our software accessible to anyone who needs it, whether it be first responders, humanitarian aid workers, or military personnel.
8 | We believe that by democratizing Situational Awareness, we can make the world a safer and more connected place.
9 | Our software is designed to be interoperable, allowing different organizations and agencies to share critical information in real-time, across multiple platforms and devices.
10 |
11 | We are committed to constantly improving our software and keeping it up-to-date with the latest advances in technology.
12 | We believe in the power of community and welcome feedback, contributions, and collaboration from anyone who shares our vision.
13 |
14 | Join us in our mission to democratize Situational Awareness and create a safer and more connected world.
15 | Together, we can make a difference.
16 |
--------------------------------------------------------------------------------
/docs/About/PubServer.md:
--------------------------------------------------------------------------------
1 |
2 | ## Connecting to FTS Public Server
3 |
4 | [](https://www.digitalocean.com/?refcode=f107fe7b7131&utm_campaign=Referral_Invite&utm_medium=Referral_Program&utm_source=badge)
5 |
6 | We support a public instance of FTS hosted by DigitalOcean.
7 |
8 | The Public server (PUB) is an instance of FTS made available for you to test and play with.
9 | We are not going to spy on you, but keep in mind that information will be shared with all the connected users.
10 | For production consider to install your own instance.
11 |
12 | ### FTS Public Instance Server Rules
13 |
14 | * Please be respectful of others.
15 | * This is a free service, but that cost money, do NOT upload huge data packages
16 | * We will use PUB to test new features, that means it can not be accessible during certain periods
17 | * Failure to respect those rules will be punished by our Killer Pirate Parrot (FreeTAKServer Developers), YOU HAVE BEEN WARNED.
18 |
19 | ### Configure `ATAK` for FreeTakServer (FTS) on the public server
20 |
21 | Download required files
22 |
23 | The easiest way is to open this article in your Android phone, so that all the files will be already available there.
24 |
25 | * Download and Install `ATAK` from the [TAK Product Center](https://www.tak.gov/) or [Mirror](https://7n7.us/civtak)
26 | * Download the Server Configuration File - [FTS Server Configuration File](../assets/fts-official-pub.zip)
27 | * Download the Basic Mapsources - [Basic Mapsources](https://drive.google.com/file/d/1u6xADO_kYolguf9-rXGZHtRgu-Cx_il4/view?usp=sharing)
28 | * Optional: Download Additional Maps - [Additional TAK Mapsources](https://drive.google.com/file/d/1Ltdp2U7ItEu6b380u9BYswVHLSD9F-vn/view?usp=sharing)
29 |
30 | ### Configure using Import Manager
31 |
32 | * Start `ATAK` on Android
33 | * Tap the "..." (Three-dot-Menu) on the Upper Right of the `ATAK` Screen.
34 | * Tap Import Manager
35 | * Tap "Local SD"
36 | * Go to the place where you have downloaded the files
37 | * Select "Google_Mapsources.zip" and "fts-official-pub.zip"
38 | * Optionally select "MOBAC-Maps-master.zip"
39 | * Click OK
40 | * A message will appear to inform you that you are connected to the FTS Official (Public) Server
41 |
42 |
43 | ### Configure using Settings
44 |
45 | * Tap ...
46 | * Tap the "..." (Three-dot-Menu) on the Upper Right of the `ATAK` Screen.
47 | * Go to Settings
48 | * Select "TAK Servers"
49 | * Tap the "..." and Click "Add"
50 | * Click Advanced Options
51 | * Select TCP as Streaming Protocol
52 | * Use this address: 137.184.101.250
53 | * Server port : 8087
54 | * Leave the rest unchecked. Username or Password are not required.
55 |
--------------------------------------------------------------------------------
/docs/About/architecture/.pages:
--------------------------------------------------------------------------------
1 | nav:
2 | - Cursor On Target:
3 | - CoT Domain: cot_domain.md
4 | - CoT Class Hierarchy: cot_hierarchy.md
5 | - CoT Table: cot_table.md
6 | - Common Warfighting Symbology 2525: mil_std_2525.md
--------------------------------------------------------------------------------
/docs/About/architecture/FlockOfParrots.md:
--------------------------------------------------------------------------------
1 | # Flock of Parrots Concept
2 | ``` mermaid
3 | graph TD;
4 | MasterParrot --> FTS1;
5 | MasterParrot --> FTS2;
6 | TAK_client_9 --> FTS2;
7 | TAK_client_2 --> FTS1;
8 | TAK_client_3 --> FTS1;
9 | TAK_client_1 --> FTS1;
10 | TAK_client_4 --> FTS2;
11 | TAK_client_6 --> FTS2;
12 | TAK_client_5 --> FTS2;
13 | FTS1 --> TAK_client_3;
14 | FTS1 --> TAK_client_2;
15 | FTS1 --> TAK_client_1;
16 | FTS2 --> TAK_client_4;
17 | FTS2 --> TAK_client_6;
18 | FTS2 --> TAK_client_5;
19 | FTS2 --> TAK_client_9;
20 | ```
21 |
22 |
23 |
--------------------------------------------------------------------------------
/docs/About/why_fts.md:
--------------------------------------------------------------------------------
1 |
2 | I want to emphasize a key principle:
3 | "Before you ask, ask yourself what you can give."
4 | Now, you might wonder, why should you give?
5 | As the authors of FTS, here are our top 10 reasons for creating this software for you:
6 |
7 | ## WHY FTS IS BETTER
8 |
9 | 1. Since 2020, FreeTAKServer (FTS) has been a labor of love,
10 | supported by dozens of volunteers dedicating their free time, including Sundays.
11 | 2. FTS boasts a modern, scalable architecture, completely revamped for the 2.X series.
12 | 3. It's nurtured by a dedicated community that stands up to giants.
13 | 4. Extensive documentation supports users at every step.
14 | 5. FTS is incredibly versatile, capable of running on a wide range of platforms (and no, this don't mean that ANYBOBY can run FTS on everything!) .
15 | 6. It intelligently "understands" COT messages, paving the way for innovative developments.
16 | 7. Our public roadmap invites community involvement and contribution towards a shared vision.
17 | 8. FTS embodies true open-source principles, welcoming everyone to contribute and benefit. we are not hiding behind secrecy and limited access
18 | 9. Installation is straightforward compared to the convoluted process for TAK Server.
19 | 10. We believe in the power of community and open-source development. FTS is not just "our software"; it's a collaborative effort that benefits all users.
20 |
21 | ## WHY WE DO NOT LIKE TAK Server
22 |
23 | 1. TAK Server OG is based on ancient (20+ years) J2EE architecture with a lot of spaghetti code.
24 | 2. It's notoriously difficult to install—historically requiring specialized personnel funded by the USG.
25 | 3. The user interface is far from user-friendly.
26 | 4. It's maintained by a mega-corporation charging exorbitant fees for minimal service.
27 | 5. The documentation is either sparse or non-existent.
28 | 6. It demands significant machine resources to operate.
29 | 7. It acts merely as a "broker" without any understanding of the messages it handles.
30 | 8. There's no public roadmap.
31 | 9. Though recently open-sourced, TAK Server lacks a true open-source spirit, focusing mainly on military applications without community engagement.
32 | 10. Pressure from our project contributed to making TAK server publicly available, highlighting its previous exclusivity.
33 |
34 | Join us in supporting and contributing to FTS, and let's continue to make it even better together. You can start by giving FTS a star in GitHub:
35 | On https://github.com/FreeTAKTeam/FreeTakServer, in the top-right corner of the page, click Star.
--------------------------------------------------------------------------------
/docs/HowToHelp/.pages:
--------------------------------------------------------------------------------
1 | title: How to Help
2 |
3 | nav:
4 | - Getting Started: GettingStartedAsHelper.md
5 | - Developer:
6 | - Set Up:
7 | - VS Code and PIP: DevSetupPipVScode.md
8 | - PyCharm and Mamba: DevSetupMambaPyCharm.md
9 | - Write Documentation: WriteDocumentation.md
--------------------------------------------------------------------------------
/docs/HowToHelp/DevSetupMambaPyCharm.md:
--------------------------------------------------------------------------------
1 |
2 | # Setup a development environment for FTS
3 | ## introduction
4 | this tutorial assumes that you are working under windows (tested under 11)
5 |
6 | # Tools Installation
7 |
8 | ## Get the IDE: PyCharm
9 | As an integrated Development Environment (IDE) some people use PyCharm.
10 |
11 | [Download PyCharm from here](https://www.jetbrains.com/pycharm/)
12 |
13 | ## Clone the Project Repositories
14 |
15 | Clone from the [FreeTAKTeam/repositories](https://github.com/orgs/FreeTAKTeam/repositories) group
16 | `FreeTakServer` and `DigitalPy` repositories locally.
17 | This can be done from within `PyCharm`.
18 |
19 | It can also be done from the command line.
20 |
21 | ```shell
22 | git clone https://github.com/FreeTAKTeam/FreeTakServer.git fts
23 | git clone https://github.com/FreeTAKTeam/DigitalPy dipy
24 | ```
25 |
26 | Some other optional repositories:
27 | ```shell
28 | git clone https://github.com/FreeTAKTeam/FreeTAKServer-User-Docs fts-docs
29 | git clone https://github.com/FreeTAKTeam/UI.git fts-ui
30 | ```
31 |
32 | # Create a virtual Environment
33 |
34 | Here we [use a `conda` variant, `micromamba`](https://mamba.readthedocs.io/en/latest/user_guide/micromamba.html).
35 |
36 | Detailed installation instructions can be found [here](https://mamba.readthedocs.io/en/latest/installation/micromamba-installation.html).
37 |
38 | With `micromamba` installed we can set up a virtual environment:
39 |
40 | ```shell
41 | mamba env create -y -f fts_user/docs/HowToHelp/fts-dev-env.yml
42 | ```
43 |
44 | This environment definition is not seminal.
45 | The dependencies used here are copied from the following sources:
46 |
47 | FreeTakServer
48 |
49 | * [FreeTakServer/pyproject.toml](https://github.com/FreeTAKTeam/FreeTakServer/pyproject.toml)
50 | * [FreeTakServer/setup.py](https://github.com/FreeTAKTeam/FreeTakServer/setup.py)
51 | * [FreeTAKServer/.../mission/test-requirements.txt](https://github.com/FreeTAKTeam/FreeTakServer/FreeTAKServer/components/extended/mission/test-requirements.txt)
52 | * [FreeTAKServer/.../mission/requirements.txt](https://github.com/FreeTAKTeam/FreeTakServer/FreeTAKServer/components/extended/mission/requirements.txt)
53 | * [FreeTakServer/requirements.txt](https://github.com/FreeTAKTeam/FreeTakServer/requirements.txt)
54 |
55 | DigitalPy
56 |
57 | * [DigitalPy/pyproject.toml](https://github.com/FreeTAKTeam/DigitalPy/pyproject.toml)
58 |
59 | ```yaml
60 | {!HowToHelp/fts-dev-env.yml!}
61 | ```
62 |
63 | Activate the virtual environment
64 | ```
65 | mamba activate fts-dev
66 | ```
67 | # Install FTS Locally
68 |
69 | Install dependencies and DigitalPy as package
70 | ```
71 | pushd dipy
72 | pip install -e .
73 | popd
74 | ```
75 |
76 | # Configure PyCharm
77 |
78 | ### FTS YAML File
79 | In the folder containing the FreeTakServer working repository create a file.
80 |
81 | Populate that file, `FTSConfig.yaml`, with the following:
82 | ```yaml
83 | {!HowToHelp/FTSConfig.yaml!}
84 | ```
85 |
86 | 1. Adjust paths to point to point to dir structure
87 | 2. Create a certs folder at the same level
88 | 3. Adjust FTS_CERTS_PATH to point to the newly created dir
89 | 4. Create new directory for the FreeTakServerLogs
90 | 5. Adjust FTS_LOGFILE_PATH to point to the newly created dir
91 |
92 | # you're Ready to Help!
93 |
94 |
95 |
--------------------------------------------------------------------------------
/docs/HowToHelp/DevSetupPipVScode.md:
--------------------------------------------------------------------------------
1 |
2 | # Setup a development environment for FTS
3 | ## introduction
4 | this tutorial assumes that you are working under windows (tested under 11)
5 |
6 | # Tools Installation
7 | ## Install Python
8 | Download python-3.11.1-amd64.exe from the [source](https://www.python.org/downloads/release/python-3111/)
9 |
10 | ## Get the IDE: VisualStudio Code
11 | As an integrated Development Environment (IDE) we use VisualStudio Code.
12 | Visual Studio Code is integrated with GitHub, in fact you can start editing any file directly in the browser for committing lightweight code changes.
13 |
14 | For a more serious collaboration you should install the desktop version:
15 | https://code.visualstudio.com/Download
16 | with the following plugins:
17 |
18 | 
19 |
20 | we use the **Setting Sync** plugin to keep the team setting aligned,
21 | ask us for the coordinates of the settings.
22 |
23 | ## Install visual-cpp-build-tools
24 | Get [Microsoft C++ Build Tools](https://visualstudio.microsoft.com/visual-cpp-build-tools/)
25 | 
26 |
27 | ensure that you have "Desktop development with C++" installed
28 | 
29 |
30 |
31 | ## Install a source code manager: TortoiseGit
32 | install a source code manager like [TortoiseGit](https://tortoisegit.org/)
33 |
34 | Clone from the `https://github.com/orgs/FreeTAKTeam/repositories` group
35 | `FreeTakServer` and `DigitalPy` repositories locally.
36 | 
37 | ```shell
38 | git clone https://github.com/FreeTAKTeam/FreeTakServer.git fts
39 | git clone https://github.com/FreeTAKTeam/DigitalPy dipy
40 | ```
41 |
42 | Some other optional repositories:
43 | ```shell
44 | git clone https://github.com/FreeTAKTeam/FreeTAKServer-User-Docs fts-docs
45 | git clone https://github.com/FreeTAKTeam/UI.git fts-ui
46 | ```
47 |
48 | # Configuration
49 | ## create a virtual Environment
50 | * open a command prompt and navigate to the FreeTakServer repo
51 | * Type:
52 | ```powershell
53 | py -m venv venv
54 | ```
55 |
56 | Having set up a virtual environment
57 | you now take a look inside the directory of your venv.
58 | You will see something like this (on Windows):
59 | ```
60 | .
61 | ├── Include
62 | ├── Lib
63 | │ └── site-packages
64 | ├── pyvenv.cfg
65 | └── Scripts
66 | ├── activate
67 | ├── activate.bat
68 | ├── Activate.ps1
69 | ├── deactivate.bat
70 | ├── pip3.10.exe
71 | ├── pip3.exe
72 | ├── pip.exe
73 | ├── python.exe
74 | └── pythonw.exe
75 | ```
76 | Activate the virtual environment
77 | ```
78 | # In cmd.exe
79 | venv\Scripts\activate.bat
80 | # In PowerShell
81 | venv\Scripts\Activate.ps1
82 | ```
83 | # Install FTS locally
84 | show installed packages
85 | ```
86 | pip list
87 | ```
88 | output
89 |
90 | 
91 |
92 | * now install dependencies and FreeTAKServer as package
93 | ```
94 | pip install -e .
95 | ```
96 |
97 | change directory to DigitalPy dir
98 | ```
99 | cd .../DigitalPy
100 | ```
101 | install dependencies and DigitalPy as package
102 | ```
103 | pip install -e .
104 | ```
105 |
106 | # Configure VS Code
107 | open VS Code Explorer to the location of the FreeTAKServer project
108 |
109 | 
110 |
111 | * change the VSCODE Python Interpreter (ctrl + shift + p).
112 | * Look for "Python: Select Interpreter".
113 | * Select the one in your `venv/scripts/python.exe`
114 | * Go to "Run and Debug"
115 | * Select "Create launch.json" file
116 | * copy this configuration over the created file and configure `[YOURPATH]` with your actual path
117 | ```json
118 | {
119 | "version": "0.2.0",
120 | "configurations": [
121 | {
122 | "name": "FTS",
123 | "type": "python",
124 | "request": "launch",
125 | "program": "C:\\[YOURPATH]\\src\\FreeTakServer\\FreeTAKServer\\controllers\\services\\FTS.py",
126 | "console": "integratedTerminal",
127 | "justMyCode": false,
128 | "env": {
129 | "FTS_CONFIG_PATH": "C:\\[YOURPATH]\\src\\FreeTakServer\\FreeTAKServer\\FTSConfig.yaml",
130 | "FTS_FIRST_START": "false",
131 | "PYTHONTRACEMALLOC": "25"
132 | }
133 | }
134 | ]
135 | }
136 | ```
137 |
138 | 
139 |
140 |
141 | ### FTS YAML File
142 | In the folder containing the FreeTakServer repo create a file:
143 | `FTSConfig.yaml`
144 |
145 |
146 |
147 | Copy the example FTSConfig.yaml into the file just created
148 | ```yaml
149 | {!HowToHelp/FTSConfig.yaml!}
150 | ```
151 |
152 | 1. Adjust paths to point to point to dir structure
153 | 2. Create a certs folder at the same level
154 | 3. Adjust FTS_CERTS_PATH to point to the newly created dir
155 | 4. Create new directory for the FreeTakServerLogs
156 | 5. Adjust FTS_LOGFILE_PATH to point to the newly created dir
157 |
158 | # you're Done!
159 | Hit `[F5]` to run debug
160 |
161 |
--------------------------------------------------------------------------------
/docs/HowToHelp/FTSConfig.yaml:
--------------------------------------------------------------------------------
1 | System:
2 | #FTS_DATABASE_TYPE: SQLite
3 | FTS_CONNECTION_MESSAGE: Welcome to FreeTAKServer FreeTAKServer-2.X alpha.
4 | The Parrot is not dead. It’s just resting
5 | #FTS_OPTIMIZE_API: True
6 | #FTS_MAINLOOP_DELAY: 1
7 | Addresses:
8 | #FTS_COT_PORT: 8087
9 | #FTS_SSLCOT_PORT: 8089
10 | FTS_DP_ADDRESS: 192.168.100.105
11 | FTS_USER_ADDRESS: 192.168.100.105
12 | #FTS_API_PORT: 19023
13 | #FTS_FED_PORT: 9000
14 | #FTS_API_ADDRESS: 0.0.0.0
15 | FTS_FIRST_START: false
16 | Filesystem:
17 | FTS_DB_PATH: [PATH]\\FreeTakServer\\FreeTAKServer.db
18 | #FTS_COT_TO_DB: True
19 | FTS_MAINPATH: [PATH]\\FreeTakServer\\FreeTAKServer
20 | FTS_CERTS_PATH: [PATH]\\FreeTakServer\\FreeTAKServerCerts
21 | FTS_EXCHECK_PATH: [PATH]\\FreeTakServer\\ExCheck
22 | FTS_EXCHECK_TEMPLATE_PATH: [PATH]\\FreeTakServer\\ExCheck\\template
23 | FTS_EXCHECK_CHECKLIST_PATH: [PATH]\\FreeTakServer\\ExCheck\\checklist
24 | FTS_DATAPACKAGE_PATH: [PATH]\\FreeTakServer\\FreeTAKServerDataPackageFolder
25 | FTS_LOGFILE_PATH: [PATH]\\FreeTakServer\\FreeTakServerLogs
26 | FTS_CORE_COMPONENTS_PATH: \\home\\ariel\\Workspace\\FTAK\\FreeTakServer\\FreeTAKServer\\components\\core
27 | FTS_EXTERNAL_COMPONENTS_PATH: [PATH]\\FreeTakServer\\components\\extended
28 | FTS_CLIENT_PACKAGES: [PATH]\\FreeTakServer\\FreeTAKServerCerts\\clientPackages
29 | Certs:
30 | FTS_SERVER_KEYDIR: [PATH]\\FreeTakServer\\FreeTAKServerCerts\\server.key
31 | FTS_SERVER_PEMDIR: [PATH]\\FreeTakServer\\FreeTAKServerCerts\\server.pem
32 | FTS_TESTCLIENT_PEMDIR: [PATH]\\FreeTakServer\\FreeTAKServerCerts\\Client.pem
33 | FTS_TESTCLIENT_KEYDIR: [PATH]\\FreeTakServer\\FreeTAKServerCerts\\Client.key
34 | FTS_UNENCRYPTED_KEYDIR: [PATH]\\FreeTakServer\\FreeTAKServerCerts\\server.key.unencrypted
35 | FTS_SERVER_P12DIR: [PATH]\\FreeTakServer\\FreeTAKServerCerts\\server.p12
36 | FTS_CADIR: [PATH]\\FreeTakServer\\FreeTAKServerCerts\\ca.pem
37 | FTS_CAKEYDIR: [PATH]\\FreeTakServer\\FreeTAKServerCerts\\ca.key
38 | FTS_FEDERATION_CERTDIR: [PATH]\\FreeTakServer\\FreeTAKServerCerts\\server.pem
39 | FTS_FEDERATION_KEYDIR: [PATH]\\FreeTakServer\\FreeTAKServerCerts\\server.key
40 | FTS_CRLDIR: [PATH]\\FreeTakServer\\FreeTAKServerCerts\\FTS_CRL.json
41 | FTS_FEDERATION_KEYPASS: demopassfed
42 | FTS_CLIENT_CERT_PASSWORD: demopasscert
43 | FTS_WEBSOCKET_KEY: YourWebsocketKey
--------------------------------------------------------------------------------
/docs/HowToHelp/GettingStartedAsHelper.md:
--------------------------------------------------------------------------------
1 |
2 | # How to help
3 | Depending on your skill-set and passion you can participate in the project in different ways.
4 | Jump to the proper Section to get the instructions,
5 | this page is structured so that the basic instructions applies to more advanced roles.
6 |
7 | * Hobby User
8 | * Professional User / SME
9 | * Unix Admin / DevOps
10 | * Developer
11 | * Modeler / Digital Engineer
12 |
13 | ## Hobby User
14 | As a Hobby user you want to install and use the FTS-TAK platform.
15 | ### getting started as a Hobby User
16 | * Connect to our Public server to familiarize your self
17 | * Read the user manual in GitHub, if you find inconsistencies submit a change request
18 | * Install FTS on your environment
19 | * give us a Star in GitHub
20 | * Donate to the project
21 |
22 | ## Professional User / SME
23 | ### getting started as Professional User / SME
24 | * Create a GitHub user
25 | * Submit issues to GitHub
26 |
27 | ## Unix Admin / DevOps
28 | You are familiar with installing and configuring complex applications using the console,
29 | you understand network configuration
30 |
31 | ### getting started as an Admin / DevOps
32 | * Help Other users on our Discord and Discourse with installation and configuration issues
33 | * Submit tutorials on how to deploy FTS in different environments (different clouds, different OS and so on)
34 |
35 | ## Developer
36 | As a developer you have code experience in one or many of the languages we use (Python, JavaScript).
37 |
38 | ### getting started as a Developer
39 | A good way to start helping is to pick a task.
40 |
41 | * Select a candidate task
42 | * from the current issues that we have [open](https://github.com/FreeTAKTeam/FreeTakServer/issues?q=is%3Aissue+is%3Aopen+is%3Aissue+is%3Aopen+label%3Abug_normal%2Cbug_minor%2Cbug_Fatal)
43 | * look in the planned [features](https://github.com/FreeTAKTeam/FreeTakServer/issues?q=is%3Aissue+is%3Aopen+label%3Aenhancement)
44 | * Fork the [appropriate repository](https://github.com/orgs/FreeTAKTeam/repositories)
45 | * Try to perform the task
46 | * to set up your machine for "VisualStudio Code" and "Pip" use [this tutorial](DevSetupPipVScode.md)
47 | * to set up your machine for "PyCharm" and "Mamba" use [this tutorial](DevSetupMambaPyCharm.md)
48 | * Make a GutHub pull request (PR)
49 | * work with an FTS committer to get the PR accepted
50 |
51 | While selecting or working on a task you can get guidance at the
52 |
53 | - The [FTS Discord](https://discord.gg/m8cBzQM2te) Server
54 |
55 | ### writing documentation
56 |
57 | [Improve the documentation](WriteDocumentation.md)
58 |
59 |
60 | ## Modeler / Digital Engineer
61 | You are an architect or a very experienced developer with
62 | deep understanding of Object-Oriented thinking, patterns and Models.
63 |
64 | #### get the digital environment
65 | we use Sparx ™ Enterprise Architect as modeling tool.
66 |
--------------------------------------------------------------------------------
/docs/HowToHelp/WriteDocumentation.md:
--------------------------------------------------------------------------------
1 |
2 | # Write Documentation
3 |
4 | This project houses the FreeTakServer (FTS) documentation.
5 | It is written in Markdown and mkdirs.
6 |
7 | ## Procedure
8 |
9 | ### Fork the Main Repository
10 |
11 | You will need a `github` account.
12 |
13 | Fork  5 |
6 | FreeTAKServer (FTS) is a Python3 implementation of a TAK Server.
7 |
8 | ## Quick Start
9 |
10 | The easiest way to install FTS is to use our Ansible based ZeroTouch Installer.
11 |
12 | There are two recommended platforms.
13 | you may be able to simply use one of the following:
14 |
15 | ### Cloud: DigitalOcean
16 |
17 | [Create a droplet with Ubuntu 22.04 as the OS.](./Installation/platform/Cloud/DigitalOcean.md)
18 | ```bash
19 | wget -qO - bit.ly/freetakhub2 | sudo bash
20 | ```
21 | ??? tip "Alternate, full path."
22 | ```bash
23 | wget -qO - https://raw.githubusercontent.com/FreeTAKTeam/FreeTAKHub-Installation/main/scripts/easy_install.sh | sudo bash
24 | ```
25 |
26 | ### Single Board Computer: Raspberry Pi 4
27 |
28 | [Create an `sdcard` with Ubuntu 22.04 server x64 as the OS](./Installation/platform/RaspberryPi/Installation.md).
29 |
30 | This case is not quite 'zero-touch' as you will need to first identify the IP address of your Raspberry Pi
31 | and set an environment variable.
32 | ```bash
33 | export MY_IPA=
5 |
6 | FreeTAKServer (FTS) is a Python3 implementation of a TAK Server.
7 |
8 | ## Quick Start
9 |
10 | The easiest way to install FTS is to use our Ansible based ZeroTouch Installer.
11 |
12 | There are two recommended platforms.
13 | you may be able to simply use one of the following:
14 |
15 | ### Cloud: DigitalOcean
16 |
17 | [Create a droplet with Ubuntu 22.04 as the OS.](./Installation/platform/Cloud/DigitalOcean.md)
18 | ```bash
19 | wget -qO - bit.ly/freetakhub2 | sudo bash
20 | ```
21 | ??? tip "Alternate, full path."
22 | ```bash
23 | wget -qO - https://raw.githubusercontent.com/FreeTAKTeam/FreeTAKHub-Installation/main/scripts/easy_install.sh | sudo bash
24 | ```
25 |
26 | ### Single Board Computer: Raspberry Pi 4
27 |
28 | [Create an `sdcard` with Ubuntu 22.04 server x64 as the OS](./Installation/platform/RaspberryPi/Installation.md).
29 |
30 | This case is not quite 'zero-touch' as you will need to first identify the IP address of your Raspberry Pi
31 | and set an environment variable.
32 | ```bash
33 | export MY_IPA=