├── BuildTrainTestCNN.py
├── CSVToNumpyConverter.py
├── Constants.py
├── DataLoader.py
├── LICENSE
├── README.md
├── WebCam.py
├── cascade_files
└── haarcascade_frontalface_default.xml
└── model_weights
/BuildTrainTestCNN.py:
--------------------------------------------------------------------------------
1 | from keras.layers import Input
2 | from keras.models import Model
3 | from keras.layers import Dense, Dropout, Flatten
4 | from keras.layers import Conv2D, MaxPooling2D
5 | from keras.optimizers import SGD
6 |
7 | from DataLoader import DataLoader
8 | from Constants import *
9 |
10 | '''
11 | CNN described in https://github.com/SamVenkatesh/FakeBlock/blob/master/README.md
12 | Training for 200 epochs took ~ 3 hours on my 2017 Macbook Pro.
13 | If you have a computer with a beefy GPU I recommend you try 500+, Keras and TensorFlow have crazy GPU optimizations.
14 | '''
15 |
16 |
17 | class NNModel:
18 | def __init__(self):
19 | self.dataLoader = DataLoader()
20 | self.model = None
21 |
22 | def build_model(self, learning_rate=0.03, learning_decay=1e-5, learning_momentum=0.4):
23 | # Inspired by AlexNet:
24 | # https://papers.nips.cc/paper/4824-imagenet-classification-with-deep-convolutional-neural-networks.pdf
25 | inputs = Input(shape=(FACE_SIZE, FACE_SIZE, 1))
26 | x = Conv2D(filters=64, kernel_size=5, activation='relu', input_shape=(FACE_SIZE, FACE_SIZE, 1))(inputs)
27 | x = MaxPooling2D(pool_size=3, strides=2)(x)
28 | x = Conv2D(filters=64, kernel_size=5, activation='relu')(x)
29 | x = MaxPooling2D(pool_size=3, strides=2)(x)
30 | x = Conv2D(filters=128, kernel_size=4, activation='relu')(x)
31 | # Trying to avoid overfitting.
32 | # Possibly unnecessary if dataset is sufficiently diversified
33 | x = Dropout(0.3)(x)
34 | x = Flatten()(x)
35 | outputs = Dense(units=len(EMOTIONS), activation='softmax')(x)
36 |
37 | self.model = Model(inputs, outputs)
38 | sgd = SGD(lr=learning_rate, decay=learning_decay, momentum=learning_momentum)
39 | self.model.compile(loss='mse', optimizer=sgd)
40 |
41 | def train_model(self, training_epochs=200, training_batch_size=50):
42 | x_train, x_test, y_train, y_test = self.dataLoader.load_from_save()
43 | print('->Training Model')
44 | # TODO: If deploying to AWS, dump to log
45 | self.model.fit(x=x_train, y=y_train, epochs=training_epochs, batch_size=training_batch_size, verbose=1, shuffle=True)
46 |
47 | def eval_model(self, eval_batch_size=50):
48 | x_train, x_test, y_train, y_test = self.dataLoader.load_from_save()
49 | print('->Evaluating Model')
50 | # TODO: If deploying to AWS, dump to log
51 | eval = self.model.evaluate(x_test, y_test, batch_size=eval_batch_size, verbose=1)
52 | return eval
53 |
54 | def make_prediction(self, image):
55 | if image is None:
56 | return None
57 | image = image.reshape([-1, FACE_SIZE, FACE_SIZE, 1])
58 | return self.model.predict(image)
59 |
--------------------------------------------------------------------------------
/CSVToNumpyConverter.py:
--------------------------------------------------------------------------------
1 | import Constants
2 | import cv2
3 | import pandas as pd
4 | import numpy as np
5 | from PIL import Image
6 | from os.path import join
7 |
8 | cascade_classifier = cv2.CascadeClassifier('cascade_files/haarcascade_frontalface_default.xml')
9 |
10 | '''
11 | Wrapping CSV strings into numpy arrays so we can dump them to disk.
12 | Handling data with numpy is much easier and several times faster
13 | than using standard library data structures.
14 | '''
15 |
16 |
17 | def data_to_image(data):
18 | new_image = np.fromstring(str(data),
19 | dtype=np.uint8,
20 | sep=' ')\
21 | .reshape((Constants.FACE_SIZE, Constants.FACE_SIZE))
22 |
23 | new_image = Image.fromarray(new_image).convert('RGB')
24 | # Need to flip
25 | new_image = np.array(new_image)[:, :, ::-1].copy()
26 | new_image = format_image(new_image)
27 | return new_image
28 |
29 |
30 | '''
31 | Basic one hot encoding vector.
32 | Specific emotion index is set to 1, everything else is 0.
33 | '''
34 |
35 |
36 | def encode_one_hot_emotion(x):
37 | d = np.zeros(len(Constants.EMOTIONS))
38 | d[x] = 1.0
39 | return d
40 |
41 | '''
42 | We need to isolate all faces in the image and retrieve
43 | the one with the largest "area".
44 | Crop/transform it to network specs and return it.
45 | '''
46 |
47 |
48 | def format_image(image_to_format):
49 | image_to_format = cv2.cvtColor(image_to_format, cv2.COLOR_BGR2GRAY)
50 |
51 | image_border = np.zeros((150, 150), np.uint8)
52 | image_border[:, :] = 200
53 | image_border[
54 | int((150 / 2) - (Constants.FACE_SIZE / 2)): int((150 / 2) + (Constants.FACE_SIZE / 2)),
55 | int((150 / 2) - (Constants.FACE_SIZE / 2)): int((150 / 2) + (Constants.FACE_SIZE / 2))
56 | ] = image_to_format
57 |
58 | image_to_format = image_border
59 | detected_faces = cascade_classifier.detectMultiScale(
60 | image_to_format,
61 | scaleFactor=1.3,
62 | minNeighbors=5,
63 | minSize=(48, 48),
64 | flags=cv2.CASCADE_SCALE_IMAGE
65 | )
66 |
67 | # If no faces are found, return Null
68 | if not detected_faces:
69 | return None
70 |
71 | max_face = detected_faces[0]
72 | for face in detected_faces:
73 | if face[2] * face[3] > max_face[2] * max_face[3]:
74 | max_face = face
75 |
76 | # Chop image to face
77 | face = max_face
78 | image_to_format = image_to_format[face[1]:(face[1] + face[2]), face[0]:(face[0] + face[3])]
79 |
80 | # Resize image to fit network specs
81 | try:
82 | image_to_format = cv2.resize(image_to_format, (Constants.FACE_SIZE, Constants.FACE_SIZE),
83 | interpolation=cv2.INTER_CUBIC) / 255.
84 | except Exception:
85 | # This happened once and now I'm scared to remove it.
86 | print("Image resize exception. Check input resolution inconsistency.")
87 | return None
88 | return image_to_format
89 |
90 |
91 | data = pd.read_csv(join(Constants.DATA_DIR, Constants.DATASET_CSV_FILENAME))
92 | # This data wrangling took me longer than I care to admit.
93 | # Pandas + Numpy ftw
94 | labels = []
95 | images = []
96 | total = data.shape[0]
97 | for index, row in data.iterrows():
98 | emotion = encode_one_hot_emotion(row['emotion'])
99 | image = data_to_image(row['pixels'])
100 |
101 | if image is not None:
102 | labels.append(emotion)
103 | images.append(image)
104 |
105 | print("Conversion Progress: {}/{}".format(index+1, total))
106 |
107 | print("Total: " + str(len(images)))
108 | np.save(join(Constants.DATA_DIR, Constants.DATA_IMAGE_FILE), images)
109 | np.save(join(Constants.DATA_DIR, Constants.DATA_LABEL_FILE), labels)
110 |
111 |
--------------------------------------------------------------------------------
/Constants.py:
--------------------------------------------------------------------------------
1 | # Constants without private static final look...wrong.
2 |
3 | CASCADE_DIR = 'cascade_files'
4 | DATA_DIR = './data/'
5 |
6 | CASCADE_FILE = 'haarcascade_frontalface_default.xml'
7 | DATA_IMAGE_FILE = 'converted_images.npy'
8 | DATA_LABEL_FILE = 'converted_labels.npy'
9 | DATASET_CSV_FILENAME = 'fer2013.csv'
10 |
11 | FACE_SIZE = 48
12 | EMOTIONS = ['angry', 'disgusted', 'fearful',
13 | 'happy', 'sad', 'surprised', 'neutral']
--------------------------------------------------------------------------------
/DataLoader.py:
--------------------------------------------------------------------------------
1 | from os.path import join
2 | import numpy as np
3 | from Constants import *
4 | from sklearn.model_selection import train_test_split
5 |
6 | class DataLoader:
7 | def load_from_save(self):
8 | images = np.load(join(DATA_DIR, DATA_IMAGE_FILE))
9 | images = images.reshape([-1, FACE_SIZE, FACE_SIZE, 1])
10 | labels = np.load(join(DATA_DIR, DATA_LABEL_FILE)).reshape([-1, len(EMOTIONS)])
11 | return train_test_split(images, labels, test_size=0.20, random_state=42)
12 |
--------------------------------------------------------------------------------
/LICENSE:
--------------------------------------------------------------------------------
1 | MIT License
2 |
3 | Copyright (c) 2018 Shyam Gaurav Venkatesh
4 |
5 | Permission is hereby granted, free of charge, to any person obtaining a copy
6 | of this software and associated documentation files (the "Software"), to deal
7 | in the Software without restriction, including without limitation the rights
8 | to use, copy, modify, merge, publish, distribute, sublicense, and/or sell
9 | copies of the Software, and to permit persons to whom the Software is
10 | furnished to do so, subject to the following conditions:
11 |
12 | The above copyright notice and this permission notice shall be included in all
13 | copies or substantial portions of the Software.
14 |
15 | THE SOFTWARE IS PROVIDED "AS IS", WITHOUT WARRANTY OF ANY KIND, EXPRESS OR
16 | IMPLIED, INCLUDING BUT NOT LIMITED TO THE WARRANTIES OF MERCHANTABILITY,
17 | FITNESS FOR A PARTICULAR PURPOSE AND NONINFRINGEMENT. IN NO EVENT SHALL THE
18 | AUTHORS OR COPYRIGHT HOLDERS BE LIABLE FOR ANY CLAIM, DAMAGES OR OTHER
19 | LIABILITY, WHETHER IN AN ACTION OF CONTRACT, TORT OR OTHERWISE, ARISING FROM,
20 | OUT OF OR IN CONNECTION WITH THE SOFTWARE OR THE USE OR OTHER DEALINGS IN THE
21 | SOFTWARE.
22 |
--------------------------------------------------------------------------------
/README.md:
--------------------------------------------------------------------------------
1 | # FakeBlock
2 |
3 | ## What
4 | A Deep Learning application built using Python to recognize emotion from facial expressions.
5 |
6 | #### TLDR/Usage
7 | First, [install Keras](https://keras.io/#installation) along with [TensorFlow](https://www.tensorflow.org/install/install_mac), you could simply run `pip install keras` and `pip install tensorflow` respectively if you have PyPI. You'll also need [OpenCV](https://pypi.org/project/opencv-python/) or `pip install opencv-python`.
8 |
9 | To run the application, simply execute `python3 WebCam.py` or your respective command to run python3. To train the network with different parameters, you would have to make minor modifications to `BuildTrainTestCNN.py`.
10 |
11 | I am working on adding functionality to make this process easier. For the time being, you could tweak the default values for training/testing parameters in the aforementioned file.
12 | The values I've used are by no means perfect. I encourage you to find better configurations.
13 |
14 | ## Why
15 | I recently completed the CSCI 567 - Machine Learning Course at USC and I enjoyed working on projects throughout that class.
16 | So, I decided to work on a side project over the summer just to see what I could build with what I had learned.
17 |
18 | I came across an [old contest on Kaggle](https://www.kaggle.com/c/challenges-in-representation-learning-facial-expression-recognition-challenge/data) and I was intrigued so I started working on it.
19 |
20 | ## How
21 | I decided to use a [Convolutional Neural Network](http://cs231n.github.io/convolutional-networks/) (CNN) for this project. Neural Networks were always a favorite of mine (I'm not entirely sure why I'm partial to Neural Nets, but they've always seemed very intuitive to me).
22 | Additionally, in order to retrieve the user's face, I used [OpenCV](https://opencv.org/) to open a continuous feed from the WebCam and it's [Haar Cascade Classifier](https://docs.opencv.org/3.3.1/d7/d8b/tutorial_py_face_detection.html) to detect faces from the resulting frames.
23 | Once I have this face, my CNN can do it's thing.
24 |
25 | #### Side Note:
26 | For those of you who aren't really familiar with Neural Networks or are not interested in diving deep on them, [this video](https://www.youtube.com/watch?v=aircAruvnKk) by 3Blue1Brown is an excellent introduction to the topic and I highly recommend it to everyone, regardless of prior knowledge.
27 |
28 | #### Back on topic:
29 | Additionally, for my course, I had to design and implement a Neural Network from scratch to classify the [MNIST dataset](http://yann.lecun.com/exdb/mnist/) so it seemed fitting that I could use a CNN for other image processing problems as well.
30 |
31 | Luckily for me, the aforementioned Kaggle contest contained a fairly comprehensive dataset of people making faces and a corresponding label of the emotion being displayed in the image.
32 | Specifically, it contains 28,709 images labelled with one of seven emotions - Neutral, Happy, Sad, Angry, Surprised, Fearful and Disgusted.
33 | Despite my limited experience with Machine Learning, I have learned that the 80-20 rule applies here as well. 80% of the job is getting/filtering/sorting/labelling data. The actual "learning" part is not overly complicated.
34 |
35 |
36 |
37 |  38 |
38 |
39 |
40 | Credit-[Randall Munroe's xkcd](https://xkcd.com/1425)
41 |
42 | Designing my network itself was not as difficult as I had anticipated. I referred to [AlexNet](https://papers.nips.cc/paper/4824-imagenet-classification-with-deep-convolutional-neural-networks.pdf) and tried to follow their example of applying Convolution and Max-Pooling layers at various stages.
43 |
44 | Ultimately, I ended up with the following network.
45 |
46 |
47 |  48 |
48 |
49 |
50 | For the implementation, I chose [Keras](https://keras.io/) with a [TensorFlow backend](https://www.tensorflow.org/guide/keras). Keras acts like a wrapper over TensorFlow and at the time, it seemed easier to get started with.
51 | In hindsight, performing the same in TensorFlow would not have been any different, save for changes in syntax. TensorFlow's [tutorials](https://www.tensorflow.org/tutorials/) and [documentation](https://www.tensorflow.org/api_docs/) are excellent.
52 |
53 | ## Training
54 | I trained the CNN for 200 epochs with a random 80-20 train-test split of the dataset with the training data being shuffled at the start of each iteration. This achieved a Mean Square Error (MSE) of 0.068.
55 |
56 | I'm currently debating training this on one of [Amazon's Deep Learning AMIs](https://aws.amazon.com/machine-learning/amis/) on AWS for 1000 epochs to see what kind of error rate we could achieve (and also spare my poor laptop from overheating). If you're curious about how that would work, I recommend [this video](https://www.youtube.com/watch?v=pK-LYoRwp-k) by CodeEmporium.
57 |
58 | ## Testing
59 | Ideally, I'd like to get an aspiring actor from the Film School to participate in the sample but as a CS Major, I'm not even allowed in the building.
60 | Behold
61 |
62 |
63 |  64 |
64 |
65 |
66 |
67 | I did my best with this one.
68 |  69 |
69 |
70 |
71 |
72 |  73 |
73 |
74 |
75 | So majestic.
76 |
77 | The CNN manages to identify the easy emotions (Happy, Sad and Neutral) most of the time. There are slight variations in results when testing on others but I will need a larger sample size to draw any statistically significant conclusions.
78 | That being said, I have noticed that it frequently mistakes my _angry_ face for _neutral_ and _disgusted_ is a hit or a miss a lot of the time.
79 |
80 | Despite the okay-sounding theoretical results, practical testing is not so straightforward. Especially in problems like this one with a variety of variables such as lighting, shadows, facial differences, distance from camera, camera quality, background noise and so on.
81 |
82 |
83 | 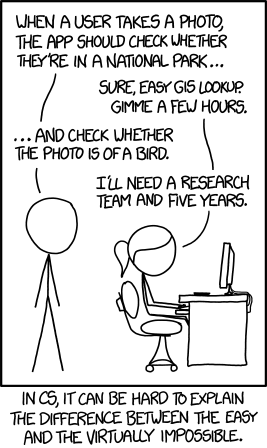 84 |
84 |
85 |
86 | Credit-[Randall Munroe's xkcd](https://xkcd.com/1838/)
87 |
88 |
89 | ## Future Work
90 | I still believe there is a fair bit of work that could improve this CNN's performance. For starters, Microsoft released a [FER+ dataset](https://github.com/Microsoft/FERPlus) which is the same collection of images, only now the labels could contain more than one emotion.
91 | I feel this is a more accurate representation of human emotions and that it will produce better accuracy in practice.
92 |
93 | Even beyond that, I'm curious how Apple's FaceID sensor could be potentially used for this purpose. Their face tracking hardware can capture much more information than cropping a face out of a webcam. For the time being however, I have yet to dive deep on the [ARKit API](https://developer.apple.com/documentation/arkit/creating_face_based_ar_experiences) to see what might be possible.
--------------------------------------------------------------------------------
/WebCam.py:
--------------------------------------------------------------------------------
1 | import cv2
2 | import Constants
3 | from BuildTrainTestCNN import NNModel
4 |
5 | face_cascade = cv2.CascadeClassifier('cascade_files/haarcascade_frontalface_default.xml')
6 |
7 | '''
8 | We need to isolate all faces in the image and retrieve
9 | the one with the largest "area".
10 | Crop/transform it to network specs and return it.
11 | '''
12 |
13 |
14 | def format_image(image_to_format):
15 | if len(image_to_format.shape) > 2 and image_to_format.shape[2] == 3:
16 | image_to_format = cv2.cvtColor(image_to_format, cv2.COLOR_BGR2GRAY)
17 | else:
18 | image_to_format = cv2.imdecode(image_to_format, cv2.CV_LOAD_IMAGE_GRAYSCALE)
19 |
20 | detected_faces = face_cascade.detectMultiScale(
21 | image_to_format,
22 | scaleFactor=1.3,
23 | minNeighbors=5,
24 | minSize = (48, 48),
25 | flags = cv2.CASCADE_SCALE_IMAGE
26 | )
27 |
28 | # If we don't find a face, return None
29 | if not len(detected_faces) > 0:
30 | return None
31 | max_face = detected_faces[0]
32 | for face in detected_faces:
33 | if face[2] * face[3] > max_face[2] * max_face[3]:
34 | max_face = face
35 |
36 | # Chop image to face
37 | face = max_face
38 | image_to_format = image_to_format[face[1]:(face[1] + face[2]), face[0]:(face[0] + face[3])]
39 |
40 | # Resize image to fit network specs
41 | try:
42 | image_to_format = cv2.resize(image_to_format, (Constants.FACE_SIZE, Constants.FACE_SIZE),
43 | interpolation=cv2.INTER_CUBIC) / 255.
44 | except Exception:
45 | print("Image resize exception. Check input resolution inconsistency.")
46 | return None
47 | return image_to_format
48 |
49 |
50 | video_capture = cv2.VideoCapture(0)
51 | nnModel = NNModel()
52 | nnModel.build_model()
53 | nnModel.model.load_weights('model_weights')
54 |
55 |
56 | '''
57 | Pulled this infinite loop of pulling the WebCam feed straight from OpenCVs docs.
58 | Its a little choppy on my computer, your mileage may vary.
59 | '''
60 |
61 |
62 | while True:
63 | # Capture frame-by-frame
64 | ret, frame = video_capture.read()
65 |
66 | result = nnModel.make_prediction(format_image(frame))
67 | print(result)
68 |
69 | gray = cv2.cvtColor(frame, cv2.COLOR_BGR2GRAY)
70 |
71 | faces = face_cascade.detectMultiScale(
72 | gray,
73 | scaleFactor=1.3,
74 | minNeighbors=5,
75 | minSize=(48, 48),
76 | flags=cv2.CASCADE_SCALE_IMAGE
77 | )
78 |
79 | for i, (x, y, w, h) in enumerate(faces):
80 | cv2.rectangle(frame, (x, y), (x+w, y+h), (0, 255, 0), 2)
81 |
82 | if result is not None:
83 | for index, emotion in enumerate(Constants.EMOTIONS):
84 | cv2.putText(frame, emotion, (15, index * 20 + 20),
85 | cv2.FONT_HERSHEY_SIMPLEX, 0.5, (0, 255, 0), 1)
86 | cv2.rectangle(frame, (130, index * 20 + 10), (130 +
87 | int(result[0][index] * 100), (index + 1) * 20 + 4),
88 | (255, 0, 0), -1)
89 |
90 | cv2.imshow('Video', frame)
91 |
92 | if cv2.waitKey(1) & 0xFF == ord('q'):
93 | break
94 |
95 | # Release the capture
96 | video_capture.release()
97 | cv2.destroyAllWindows()
98 |
--------------------------------------------------------------------------------
/model_weights:
--------------------------------------------------------------------------------
https://raw.githubusercontent.com/SamVenkatesh/FakeBlock/edddbdd3e846570d65fdd1d95b62c4b48c6fb3c7/model_weights
--------------------------------------------------------------------------------