├── .gitignore
├── README.md
├── SUMMARY.md
├── book.json
├── curriculum_map.md
├── mad_libs_screen_shot[1].png
├── readings.md
├── sign_up_screen_phto[1].png
├── styles
└── website.css
└── units
├── 1_unit
├── 01_lesson
│ ├── C9_python3.png
│ ├── Cloud9 Empty file photo.png
│ ├── Cloud9Python3.PNG
│ ├── cloud9_student_about.png
│ ├── cloud9_student_login.png
│ ├── cloud9_student_new_workspace.png
│ ├── cloud9_student_robot.png
│ ├── cloud9_student_username.png
│ ├── cloud9_student_workspace.png
│ ├── correctly shared photo.png
│ ├── create_new_workspace_photo.png
│ ├── create_workspace_photo.png
│ ├── hello_world.py
│ ├── ide_label.png
│ ├── lesson.md
│ ├── new_file_photo.png
│ ├── new_terminal_photo.png
│ ├── new_workspace_photo.png
│ ├── python_online_editor_sign_up.md
│ ├── python_online_editor_sign_up_teachers.md
│ ├── running_python3_photo.png
│ ├── share_workspace.png
│ ├── shared_with_me_photo.png
│ ├── sign_up_screen_phto.png
│ └── window_to_share_photo.png
├── 02_lesson
│ ├── lab.md
│ └── lesson.md
├── 03_lesson
│ ├── HelloWorld-Code.png
│ ├── Untitled.png
│ ├── do_now.md
│ ├── lab.md
│ ├── lab1.03 - code.png
│ ├── lab1.03 - image.png
│ ├── lesson.md
│ ├── new_file_photo.png
│ ├── new_terminal_photo.png
│ ├── running_file_python3.png
│ └── snap_blocks_variables.png
├── 04_lesson
│ ├── GenieProgram - Code.png
│ ├── do_now.md
│ ├── lab.md
│ ├── lesson.md
│ ├── magic_genie_output.png
│ ├── magic_genie_output_confused.png
│ └── snap_input.png
├── 05_lesson
│ ├── code.py
│ └── lesson.md
├── 06_lesson
│ ├── lesson.md
│ ├── lesson1.06 - code.png
│ ├── mad_libs_screen_shot.png
│ └── project.md
├── Cloud9_Student.pdf
├── Cloud9_Teacher.docx
├── Trinket_Student.docx
├── Trinket_Student.pdf
├── Trinket_Teacher.docx
├── Trinket_Teacher.pdf
├── cloud_9_cheat_sheet.md
└── unit_1.md
├── 2_unit
├── 01_lesson
│ ├── Screen Shot 2015-11-24 at 12.19.32 PM.png
│ ├── basic_city.png
│ ├── do_now.md
│ ├── lesson.md
│ └── starynight.png
├── 02_lesson
│ ├── do_now.md
│ ├── lab.md
│ └── lesson.md
├── 03_lesson
│ ├── Lesson 2.03 Truth Table.png
│ ├── do_now.md
│ ├── lab.md
│ ├── lesson.md
│ ├── snap_boolean_expressions.png
│ └── snap_boolean_expressions_equals.png
├── 04_lesson
│ ├── Lesson 2.04 Conditionals - Vending Machine 1.png
│ ├── Lesson 2.04 Conditionals - Vending Machine.png
│ ├── do_now.md
│ ├── lab.md
│ ├── lesson.md
│ └── triangle_program.png
├── 05_lesson
│ ├── do_now.md
│ ├── lab.md
│ └── lesson.md
├── 06_lesson
│ ├── do_now.md
│ ├── do_now2.md
│ ├── lab.md
│ ├── lesson.md
│ └── lesson2.md
├── 07_lesson
│ ├── do_now.md
│ ├── lab.md
│ └── lesson.md
├── 08_lesson
│ ├── lesson.md
│ └── project.md
└── unit2_md.md
├── 3_unit
├── 01_lesson
│ ├── do_now.md
│ ├── lab.md
│ └── lesson.md
├── 02_lesson
│ ├── do_now.md
│ ├── lab.md
│ └── lesson.md
├── 03_lesson
│ ├── do_now.md
│ ├── lab.md
│ └── lesson.md
├── 04_lesson
│ ├── do_now.md
│ ├── lab.md
│ └── lesson.md
├── 05_lesson
│ ├── lesson.md
│ └── project.md
└── unit_3.md
├── 4 Steps to Solve Any CS Problem.pdf
├── 4_unit
├── 01_lesson
│ ├── NestedLoops - NumOfCats - Code.png
│ ├── do_now.md
│ ├── lab.md
│ └── lesson.md
├── 02_lesson
│ ├── do_now.md
│ ├── lab.md
│ └── lesson.md
├── 03_lesson
│ ├── do_now.md
│ ├── lab.md
│ └── lesson.md
├── 04_lesson
│ ├── do_now.md
│ ├── lab.md
│ └── lesson.md
├── 05_lesson
│ ├── lab.md
│ ├── lesson.md
│ └── longer_coding_sample.py
├── 06_lesson
│ ├── lesson.md
│ └── project.md
├── unit4.md
└── unit_4.md
├── 5_unit
├── 01_lesson
│ ├── do_now.md
│ ├── lab.md
│ └── lesson.md
├── 02_lesson
│ ├── do_now.md
│ ├── lab.md
│ └── lesson.md
├── 03_lesson
│ ├── do_now.md
│ ├── lab.md
│ └── lesson.md
├── 04_lesson
│ ├── do_now.md
│ ├── lab.md
│ └── lesson.md
├── 05_lesson
│ ├── do_now.md
│ ├── lesson.md
│ └── project.md
└── unit5.md
├── 6_unit
├── 01_lesson
│ ├── do_now.md
│ ├── lab.md
│ └── lesson.md
├── 02_lesson
│ ├── do_now.md
│ ├── lab.md
│ └── lesson.md
├── 03_lesson
│ ├── do_now.md
│ ├── lab.md
│ └── lesson.md
├── 04_lesson
│ ├── do_now.md
│ ├── lab.md
│ └── lesson.md
├── 05_lesson
│ ├── do_now.md
│ ├── lesson.md
│ └── project.md
└── unit6.md
├── 7_unit
├── 01_lesson
│ ├── do_now.md
│ ├── example.md
│ ├── lab.md
│ └── lesson.md
├── 02_lesson
│ ├── do_now.md
│ ├── lab.md
│ └── lesson.md
├── 03_lesson
│ ├── do_now.md
│ ├── lab.md
│ └── lesson.md
├── 04_lesson
│ ├── do_now.md
│ ├── example.py
│ ├── lab.md
│ └── lesson.md
├── 05_lesson
│ ├── lesson.md
│ ├── project.md
│ └── starter_code.py
└── unit7.md
└── 8_unit
├── 01_lesson
├── do_now.md
└── lesson.md
├── 02_lesson
├── do_now.md
└── lesson.md
├── 03_lesson
├── do_now.md
└── lesson.md
├── 04_lesson
├── do_now.md
└── lesson.md
├── final_project_development_plan.docx
├── final_project_plan_organizer.docx
├── project.md
└── unit8.md
/.gitignore:
--------------------------------------------------------------------------------
1 | *.tmp
2 |
3 | # Word temporary
4 | #~$*.doc*
5 |
6 | # Excel temporary
7 | ~$*.xls*
8 |
9 | # Excel Backup File
10 | *.xlk
11 |
12 | # PowerPoint temporary
13 | ~$*.ppt*
14 |
15 | # OS generated files #
16 | ######################
17 | .DS_Store
18 | .DS_Store?
19 | ._*
20 | .Spotlight-V100
21 | .Trashes
22 | ehthumbs.db
23 | Thumbs.db
24 |
--------------------------------------------------------------------------------
/README.md:
--------------------------------------------------------------------------------
1 | # 2nd-semester-introduction-to-computer-science - Depricated
2 | A 2nd semester follow-up to the TEALS Intro CS course
3 |
4 | This repository will be depricated after the 2016-17 school year. The 2nd Semeseter Introduction to Computer Science curriculum is moving to a new GitHub repository and GitBook location starting the 2017-18 school year.
5 |
6 | - GitHub: https://github.com/TEALSK12/2nd-semester-introduction-to-computer-science
7 | - GitBook: https://tealsk12.gitbooks.io/2nd-semester-introduction-to-computer-science/content/
8 |
9 | # License
10 | This curriculum is licensed under the Creative Commons Attribution Non-Commercial Share-alike License (http://creativecommons.org/licenses/by-nc-sa/4.0/), which means you may share and adapt this material for non-commercial uses as long as you attribute its original source, and retain these same licensing terms.
11 |
12 | # About this curriculum
13 | Welcome to the TEALS Intro to Computer Science Part 2 Curriculum.
14 | This curriculum is intended for use by TEALS classrooms teaching Introduction to Computer Science in a yearlong format. We expect that students have completed the content from the [1st semester course](https://www.gitbook.com/book/teals-introcs/introduction-to-computer-science-principles/details) prior to this curriculum.
15 |
16 | Please help us complete it by contributing feedback and suggestions via the [GitHub repository](https://github.com/TEALS-IntroCS/2nd-semester-introduction-to-computer-science-principles) that contains the source files for this gitbook: https://github.com/TEALS-IntroCS/2nd-semester-introduction-to-computer-science-principles
17 |
18 | # Curriculum Orientation
19 | Check out this 1-hour Orientation to the Curriculum video: https://www.youtube.com/watch?v=UHgA_7x6-Qo
20 |
21 | # Python Versions (2 vs 3)
22 | Python is an evolving language. Python 3 is major upgrade to the language, released in 2010. There is a lot of existing software written under Python 2 and there is resistance to upgrading to Python 3 due to code breakage and cost. Just as a car part from a 10 year old model car will probably not fit a new model of the same car, Python 2 code probably would not run in a Python 3 environment. In Python 3 there are new features, significant upgrades "underneath" which makes the code run better and/or faster as well as no longer supporting (deprecating) some Python 2 capabilities. When looking at Python code, be careful to note whether it is Python2 or Pynton3.
23 |
24 | **This class will use Python 3.**
25 |
26 | For those knowledgable with Python 2, the following is a list of differences from Python 3 relevant to the 2nd semester intro course.
27 |
28 | | | Python 2 | Python 3 |
29 | | ------ | ---------- | --- |
30 | | Printing to console | print 3.14 | print (3.14) |
31 | | User input | raw_input()/input() | input () |
32 | | Integer arithmetic | 3/2 evaluates to 1 | 3/2 evaluates to 1.5 |
33 | | Not equal to | <> | != |
34 |
35 | # Issues
36 |
37 | Please open an issue in GitHub if you encounter factual, spelling, or grammatical errors, sequencing problems (topics needed before they are taught), or incomplete/missing materials.
38 |
39 |
40 | # Suggestions
41 | If you'd like to suggest changes or additions to the curriculum, please submit a Github Pull Request containing your changes. As a best practice, each pull request should contain a singular atomic change.
42 |
43 |
44 |
--------------------------------------------------------------------------------
/book.json:
--------------------------------------------------------------------------------
1 | {
2 | "gitbook": ">=3.0.0-pre.0"
3 | }
--------------------------------------------------------------------------------
/mad_libs_screen_shot[1].png:
--------------------------------------------------------------------------------
https://raw.githubusercontent.com/TEALS-IntroCS/2nd-semester-introduction-to-computer-science-principles/723385e9b07e68fc6d89d5d45a6fe566e488e510/mad_libs_screen_shot[1].png
--------------------------------------------------------------------------------
/sign_up_screen_phto[1].png:
--------------------------------------------------------------------------------
https://raw.githubusercontent.com/TEALS-IntroCS/2nd-semester-introduction-to-computer-science-principles/723385e9b07e68fc6d89d5d45a6fe566e488e510/sign_up_screen_phto[1].png
--------------------------------------------------------------------------------
/styles/website.css:
--------------------------------------------------------------------------------
1 | /* CSS for website */
2 | .summary .chapter a b{
3 | display: none;
4 | }
5 | .summary > .chapter > a{
6 | font-weight: bold !important;
7 | }
--------------------------------------------------------------------------------
/units/1_unit/01_lesson/C9_python3.png:
--------------------------------------------------------------------------------
https://raw.githubusercontent.com/TEALS-IntroCS/2nd-semester-introduction-to-computer-science-principles/723385e9b07e68fc6d89d5d45a6fe566e488e510/units/1_unit/01_lesson/C9_python3.png
--------------------------------------------------------------------------------
/units/1_unit/01_lesson/Cloud9 Empty file photo.png:
--------------------------------------------------------------------------------
https://raw.githubusercontent.com/TEALS-IntroCS/2nd-semester-introduction-to-computer-science-principles/723385e9b07e68fc6d89d5d45a6fe566e488e510/units/1_unit/01_lesson/Cloud9 Empty file photo.png
--------------------------------------------------------------------------------
/units/1_unit/01_lesson/Cloud9Python3.PNG:
--------------------------------------------------------------------------------
https://raw.githubusercontent.com/TEALS-IntroCS/2nd-semester-introduction-to-computer-science-principles/723385e9b07e68fc6d89d5d45a6fe566e488e510/units/1_unit/01_lesson/Cloud9Python3.PNG
--------------------------------------------------------------------------------
/units/1_unit/01_lesson/cloud9_student_about.png:
--------------------------------------------------------------------------------
https://raw.githubusercontent.com/TEALS-IntroCS/2nd-semester-introduction-to-computer-science-principles/723385e9b07e68fc6d89d5d45a6fe566e488e510/units/1_unit/01_lesson/cloud9_student_about.png
--------------------------------------------------------------------------------
/units/1_unit/01_lesson/cloud9_student_login.png:
--------------------------------------------------------------------------------
https://raw.githubusercontent.com/TEALS-IntroCS/2nd-semester-introduction-to-computer-science-principles/723385e9b07e68fc6d89d5d45a6fe566e488e510/units/1_unit/01_lesson/cloud9_student_login.png
--------------------------------------------------------------------------------
/units/1_unit/01_lesson/cloud9_student_new_workspace.png:
--------------------------------------------------------------------------------
https://raw.githubusercontent.com/TEALS-IntroCS/2nd-semester-introduction-to-computer-science-principles/723385e9b07e68fc6d89d5d45a6fe566e488e510/units/1_unit/01_lesson/cloud9_student_new_workspace.png
--------------------------------------------------------------------------------
/units/1_unit/01_lesson/cloud9_student_robot.png:
--------------------------------------------------------------------------------
https://raw.githubusercontent.com/TEALS-IntroCS/2nd-semester-introduction-to-computer-science-principles/723385e9b07e68fc6d89d5d45a6fe566e488e510/units/1_unit/01_lesson/cloud9_student_robot.png
--------------------------------------------------------------------------------
/units/1_unit/01_lesson/cloud9_student_username.png:
--------------------------------------------------------------------------------
https://raw.githubusercontent.com/TEALS-IntroCS/2nd-semester-introduction-to-computer-science-principles/723385e9b07e68fc6d89d5d45a6fe566e488e510/units/1_unit/01_lesson/cloud9_student_username.png
--------------------------------------------------------------------------------
/units/1_unit/01_lesson/cloud9_student_workspace.png:
--------------------------------------------------------------------------------
https://raw.githubusercontent.com/TEALS-IntroCS/2nd-semester-introduction-to-computer-science-principles/723385e9b07e68fc6d89d5d45a6fe566e488e510/units/1_unit/01_lesson/cloud9_student_workspace.png
--------------------------------------------------------------------------------
/units/1_unit/01_lesson/correctly shared photo.png:
--------------------------------------------------------------------------------
https://raw.githubusercontent.com/TEALS-IntroCS/2nd-semester-introduction-to-computer-science-principles/723385e9b07e68fc6d89d5d45a6fe566e488e510/units/1_unit/01_lesson/correctly shared photo.png
--------------------------------------------------------------------------------
/units/1_unit/01_lesson/create_new_workspace_photo.png:
--------------------------------------------------------------------------------
https://raw.githubusercontent.com/TEALS-IntroCS/2nd-semester-introduction-to-computer-science-principles/723385e9b07e68fc6d89d5d45a6fe566e488e510/units/1_unit/01_lesson/create_new_workspace_photo.png
--------------------------------------------------------------------------------
/units/1_unit/01_lesson/create_workspace_photo.png:
--------------------------------------------------------------------------------
https://raw.githubusercontent.com/TEALS-IntroCS/2nd-semester-introduction-to-computer-science-principles/723385e9b07e68fc6d89d5d45a6fe566e488e510/units/1_unit/01_lesson/create_workspace_photo.png
--------------------------------------------------------------------------------
/units/1_unit/01_lesson/hello_world.py:
--------------------------------------------------------------------------------
1 | # last_name, first_name
2 | # 11/30/2015
3 | # IntroCS A
4 |
5 | print("hello world")
6 |
7 | def my_function(name):
8 | print("hello world, " + name)
9 |
10 | my_function("Susan")
--------------------------------------------------------------------------------
/units/1_unit/01_lesson/ide_label.png:
--------------------------------------------------------------------------------
https://raw.githubusercontent.com/TEALS-IntroCS/2nd-semester-introduction-to-computer-science-principles/723385e9b07e68fc6d89d5d45a6fe566e488e510/units/1_unit/01_lesson/ide_label.png
--------------------------------------------------------------------------------
/units/1_unit/01_lesson/new_file_photo.png:
--------------------------------------------------------------------------------
https://raw.githubusercontent.com/TEALS-IntroCS/2nd-semester-introduction-to-computer-science-principles/723385e9b07e68fc6d89d5d45a6fe566e488e510/units/1_unit/01_lesson/new_file_photo.png
--------------------------------------------------------------------------------
/units/1_unit/01_lesson/new_terminal_photo.png:
--------------------------------------------------------------------------------
https://raw.githubusercontent.com/TEALS-IntroCS/2nd-semester-introduction-to-computer-science-principles/723385e9b07e68fc6d89d5d45a6fe566e488e510/units/1_unit/01_lesson/new_terminal_photo.png
--------------------------------------------------------------------------------
/units/1_unit/01_lesson/new_workspace_photo.png:
--------------------------------------------------------------------------------
https://raw.githubusercontent.com/TEALS-IntroCS/2nd-semester-introduction-to-computer-science-principles/723385e9b07e68fc6d89d5d45a6fe566e488e510/units/1_unit/01_lesson/new_workspace_photo.png
--------------------------------------------------------------------------------
/units/1_unit/01_lesson/python_online_editor_sign_up.md:
--------------------------------------------------------------------------------
1 | # Python Online Editor Sign Up
2 | We will be using the online IDE [cloud9](https://c9.io) to write python code this semester. Below are instructions for how to sign up, name a file, create a new file, and turn in a file. Refer back to this sheet if you are having difficulties.
3 |
4 | ## Sign Up Instructions
5 |
6 | 1. Open up your email and find an email from Cloud 9 to sign up
7 | 2. Click the sign up button.
8 | 3. Enter your Name in the box provided
9 | 
10 |
11 | 4. Create a username FirstnameLastName (All in lowercase)
12 | 
13 |
14 | 5. Select that you are a Student Developer
15 | 6. Select that you will use Cloud9 for Course work
16 | 
17 |
18 | 7. Confirm account details on the next page (Just click next)
19 | 8. Confirm that you are not a robot
20 | 
21 |
22 | 9. Student should have access to shared team workspace:
23 | 
24 |
25 | ## Creating a New Workspace
26 | 1. Click the plus sign to Create a new workspace
27 | 2. In “Workspace name” field enter “mypythonworkspace”
28 | 3. Give it a description of “This is my example workspace”
29 | 4. Make your workspace private
30 | 5. Select “Python” Template button
31 | 6. Click "Create workspace" at the bottom of the page
32 | 
33 |
34 | 7. This will take a few seconds to set you up, but it will look like this:
35 | 
36 |
37 | 8. From the top panel select window, pick share (third choice from the top)
38 | 
39 |
40 | 9. Enter your teachers' username or email in the "Invite People" section - this shares your workspace with your teachers and allows them to add comments.
41 | 
42 |
43 | ## Creating a New File
44 | 1. Click the plus button near the top of the page to create a new file
45 | 
46 | 2. Press Ctrl-s to save the file. Enter the filename(following your classes conventions) and press the save button
47 |
48 | ## Parts of the IDE
49 | 
50 | 1. *File tree*
51 | 2. *Bash/terminal*
52 | 3. *Editor*
53 |
54 | You can ignore the other parts for now!
55 |
56 | ## Running Python3 via Run Button Set Up
57 | Cloud9 Python defaults to Python 2.7.6. It can be changed to use Python 3.4.3 by doing the following:
58 |
59 | 1. Right mouse click on the Run button at the top of the Cloud9 Python window
60 | 2. Select Manage... from the pull down that appears
61 | 3. On the Project Settings window that appears, scroll down to Language Support
62 | 4. On the scroll list that appears to the right of the heading Python Version:, select the Python 3 entry
63 | 5. Exit the Preferences Tab on the line right below top line starting with Cloud9 and containing the Run button.
64 |
65 | ## Running Python
66 | 1. In the bottom half of the screen there should be a tab called "bash"
67 | 1. If there is not a tab called "bash", click the plus button and choose "new terminal"
68 | 
69 | 2. To run the interactive shell: type `python3` into the prompt
70 | 
71 | 3. To run a file: type `python3 [filename]`, but instead of `[filename]` use the name of the file you are trying to run
72 |
73 |
--------------------------------------------------------------------------------
/units/1_unit/01_lesson/python_online_editor_sign_up_teachers.md:
--------------------------------------------------------------------------------
1 | # Python Online Editor Sign Up
2 | We will be using the online IDE [cloud9](https://c9.io) to write Python code this semester. Below are instructions for how to sign up for an account, as well as how to collect and review student work.
3 |
4 | ## Sign Up Instructions
5 | 1. Follow instructions to create teacher Cloud9 account and sign up for school plan: [Sign Up Guide Teachers].
6 |
7 | ## Student Work Turn-in Procedure
8 | There are two different ways for students to submit their work:
9 | 1. Have students share their workspace with teachers/TAs. This only needs to happen once, and it then gives teachers read/write access to the students' files moving forward.
10 |
11 | * Once students have shared their workspaces with you, their work can be found in the "Shared With Me" section
12 |
13 | 2. Have students download their file and upload it to the school's Learning Management System (or however students normally hand in electronic files at the particular school)
14 |
15 | ## Revision History
16 | If you are concerned about students working on assignments outside of allocated time, this link shows how to check the revision history on a file saved in cloud9: [https://docs.c9.io/docs/file-revision-history](https://docs.c9.io/docs/file-revision-history)
17 |
18 | [Sign Up Guide Teachers]:https://teals-introcs.gitbooks.io/2nd-semester-introduction-to-computer-science-pri/content/units/1_unit/Cloud9_Teacher.docx
19 |
--------------------------------------------------------------------------------
/units/1_unit/01_lesson/running_python3_photo.png:
--------------------------------------------------------------------------------
https://raw.githubusercontent.com/TEALS-IntroCS/2nd-semester-introduction-to-computer-science-principles/723385e9b07e68fc6d89d5d45a6fe566e488e510/units/1_unit/01_lesson/running_python3_photo.png
--------------------------------------------------------------------------------
/units/1_unit/01_lesson/share_workspace.png:
--------------------------------------------------------------------------------
https://raw.githubusercontent.com/TEALS-IntroCS/2nd-semester-introduction-to-computer-science-principles/723385e9b07e68fc6d89d5d45a6fe566e488e510/units/1_unit/01_lesson/share_workspace.png
--------------------------------------------------------------------------------
/units/1_unit/01_lesson/shared_with_me_photo.png:
--------------------------------------------------------------------------------
https://raw.githubusercontent.com/TEALS-IntroCS/2nd-semester-introduction-to-computer-science-principles/723385e9b07e68fc6d89d5d45a6fe566e488e510/units/1_unit/01_lesson/shared_with_me_photo.png
--------------------------------------------------------------------------------
/units/1_unit/01_lesson/sign_up_screen_phto.png:
--------------------------------------------------------------------------------
https://raw.githubusercontent.com/TEALS-IntroCS/2nd-semester-introduction-to-computer-science-principles/723385e9b07e68fc6d89d5d45a6fe566e488e510/units/1_unit/01_lesson/sign_up_screen_phto.png
--------------------------------------------------------------------------------
/units/1_unit/01_lesson/window_to_share_photo.png:
--------------------------------------------------------------------------------
https://raw.githubusercontent.com/TEALS-IntroCS/2nd-semester-introduction-to-computer-science-principles/723385e9b07e68fc6d89d5d45a6fe566e488e510/units/1_unit/01_lesson/window_to_share_photo.png
--------------------------------------------------------------------------------
/units/1_unit/02_lesson/lab.md:
--------------------------------------------------------------------------------
1 | # Lab 1.02 - Using the Interpreter
2 |
3 | ## Part 1
4 | Using the interpreter, type in the expressions below. Copy and paste the output into the output column. If the result is unexpected, note that in the third column.
5 |
6 |
7 | ###Section 1
8 |
9 | | |**Input** | **Output** |**Did it do something unexpected?**|
10 | |-| ----| ------- | ----------- |
11 | |a| `5 + 2 * 2` |
| |
12 | |b| `2/3 `|
| |
13 | |c| `2.0 * 1.5`|
| |
14 | |d| `(2 + 3) * 10`|
| |
15 | |e| `5.0 // 2` |
| |
16 | |f| `5.0 % 2` |
| | |
17 |
18 |
19 | ###Section 2
20 |
21 | ||**Input** | **Output** |**Did it do something unexpected?**|
22 | |-| ----| ------- | ----------- |
23 | |a| `a` |
| |
24 | |b|`'a'`|
| | |
25 |
26 | ###Section 3
27 |
28 | ||**Input** | **Output** |**Did it do something unexpected?**|
29 | |-| ----| ------- | ----------- |
30 | |a| `'a + b'`|
| |
31 | |b| `'a' + 'b'`|
|| |
32 |
33 |
34 | ###Section 4
35 |
36 |
37 |
38 | ||**Input** | **Output** |**Did it do something unexpected?**|
39 | |-| ----| ------- | ----------- |
40 | |a| `'a' * 'b'` |
| |
41 | |b| `'a' * 2` |
| | |
42 |
43 | ## Part 2
44 | **Before going to the IDE: **
45 |
46 | 1. For each item, predict the data type of the result and enter into the "String/Integer/Float" column.
47 | 2. Next, predict the value of the result for each item and enter into it into the "Prediction of Result" column.
48 |
49 | | **Expression** | **String/Integer/Float**| **Prediction of Result** | **Interpreter Result**|
50 | | :------------------: | :-----------------------: | :--------------------: | :-----------------:|
51 | |`10 * 2` | integer | 20 | 20 |
52 | | `.5 * 2` | | | |
53 | | `10/2` | | | |
54 | | `10%2` | | | |
55 | | `2 ** 3` | | | |
56 | | `(2+5)*3` | | | |
57 | | `2 + 5 * 3` | | | |
58 | | `'ab' + '12' + '3'`| | | |
59 | | `x` | | | |
60 | | `"ab" + "cd"` | | | |
61 | | `'abc' * 2` | | | |
62 | | `'1'*2 + '2' * 3` | | | |
63 | | `1 * 2 + '3' * 2` | | | |
64 | | `'A' ** 2` | | | |
65 | | `'bc' % 2` | | | |
66 | | `'bc' / 2` | | | | |
67 |
68 | **Now go to the IDE:**
69 | 1. Use the interpreter to evaluate the expressions, write down results in the "Interpreter Result" column.
--------------------------------------------------------------------------------
/units/1_unit/03_lesson/HelloWorld-Code.png:
--------------------------------------------------------------------------------
https://raw.githubusercontent.com/TEALS-IntroCS/2nd-semester-introduction-to-computer-science-principles/723385e9b07e68fc6d89d5d45a6fe566e488e510/units/1_unit/03_lesson/HelloWorld-Code.png
--------------------------------------------------------------------------------
/units/1_unit/03_lesson/Untitled.png:
--------------------------------------------------------------------------------
https://raw.githubusercontent.com/TEALS-IntroCS/2nd-semester-introduction-to-computer-science-principles/723385e9b07e68fc6d89d5d45a6fe566e488e510/units/1_unit/03_lesson/Untitled.png
--------------------------------------------------------------------------------
/units/1_unit/03_lesson/do_now.md:
--------------------------------------------------------------------------------
1 | ## Do Now 1.03
2 | Open and save a new file called `my_file.py` in the IDE. Run a program by typing `python3 my_file.py` into the terminal. See the instructions below for how to open, save, and run a file in Cloud9.
3 |
4 | Practice typing the following expressions in the editor and running the code.
5 |
6 | `2 * 3 * 5`
7 |
8 | `"abc"`
9 |
10 | `"abc" + "bde"`
11 |
12 |
13 | Now try typing the statement below into the file. Save and run the code.
14 | ```python
15 | print(2*3*5)
16 | ```
17 | Write down the result. Explain what `print` does. Try printing out 3 different values.
18 |
19 | ## SNAP Flashback – Print Command
20 |
21 | 
22 |
23 |
24 | ## How to open, save, and run a file
25 | 1. Open
26 | 
27 | 2. Save
28 | * Save how you would on a Word, or by going to File->Save
29 | 3. Run
30 | 
31 | * If there is not a terminal open:
32 | 
33 |
34 |
--------------------------------------------------------------------------------
/units/1_unit/03_lesson/lab.md:
--------------------------------------------------------------------------------
1 | # Lab 1.03 - Printing & Variables
2 | ## Part 1 - Printing Practice
3 |
4 | Practice typing out some statements in the editor part of the IDE, then hit "Run" at the top of the screen:
5 |
6 | | Expression | Expected Output | Did anything unexpected happen? |
7 | |------------|-----------------|--------|
8 | |`print("1")`| | |
9 | |`print(1)`| | |
10 | |`print(1 + 2)`| | |
11 | |`print("1" + "2")`| | |
12 | |`print("this" + " " + "is" + " " + "a" + " " + "sentence" + ".")`| | | |
13 |
14 |
15 | ## SNAP Flashback - Print Comparison
16 | 
17 | 
18 |
19 | ## Part 2 - Variables Practice
20 |
21 | 1. Type and run the following code.
22 | ```python
23 | animal = "dogs"
24 | print(animal + " are really cool.")
25 | ```
26 | What happens? How would you make the program print out "cats are really cool" instead?
27 |
28 |
29 |
30 | 2. Type and run the following code.
31 | ```python
32 | print(dogs + " are cool.")
33 | ```
34 | What output does this produce? Why does this happen?
35 |
36 |
37 |
38 | 3. Rewrite the following SNAP! program in Python:
39 | 
40 |
41 | ## Part 3 - Four Fours
42 |
43 | The four fours challenge!
44 | Using four 4's and any operations, try to write equations that have the numbers from 0 to 4 as the answer.
45 | You should use Python's arithmetic operations:
46 | * + addition
47 | * - subtraction or negation
48 | * * multiplication
49 | * / division
50 | * ( ) parentheses for grouping
51 | * ** power
52 |
53 |
54 | You may also use 44 or 4.4, which count as two fours,
55 | or .4, which counts as one four.
56 |
57 | For example, one solution for zero is:
58 | ```python
59 | print("Zero is", 44-44)
60 | ```
61 |
62 | Can you find a different solution?
63 |
64 | Here are what the results, but not the source code, will look like. (Note: answers may have trailing zeros if floating point arithmetic is used which is fine, i.e. 1 may be displayed as 1.0)
65 |
66 | ```
67 | Zero is 0
68 | One is 1
69 | Two is 2
70 | Three is 3
71 | Four is 4
72 | ```
73 |
74 | ##Bonus!
75 | Print the output below, but only using **one** line of code. Feel free to use online resources.
76 | ```
77 | Wow!
78 | This is on a new line!
79 |
80 | ```
81 | ##Bonus 2!
82 | Can you find four fours for 5 to 10?
83 |
--------------------------------------------------------------------------------
/units/1_unit/03_lesson/lab1.03 - code.png:
--------------------------------------------------------------------------------
https://raw.githubusercontent.com/TEALS-IntroCS/2nd-semester-introduction-to-computer-science-principles/723385e9b07e68fc6d89d5d45a6fe566e488e510/units/1_unit/03_lesson/lab1.03 - code.png
--------------------------------------------------------------------------------
/units/1_unit/03_lesson/lab1.03 - image.png:
--------------------------------------------------------------------------------
https://raw.githubusercontent.com/TEALS-IntroCS/2nd-semester-introduction-to-computer-science-principles/723385e9b07e68fc6d89d5d45a6fe566e488e510/units/1_unit/03_lesson/lab1.03 - image.png
--------------------------------------------------------------------------------
/units/1_unit/03_lesson/new_file_photo.png:
--------------------------------------------------------------------------------
https://raw.githubusercontent.com/TEALS-IntroCS/2nd-semester-introduction-to-computer-science-principles/723385e9b07e68fc6d89d5d45a6fe566e488e510/units/1_unit/03_lesson/new_file_photo.png
--------------------------------------------------------------------------------
/units/1_unit/03_lesson/new_terminal_photo.png:
--------------------------------------------------------------------------------
https://raw.githubusercontent.com/TEALS-IntroCS/2nd-semester-introduction-to-computer-science-principles/723385e9b07e68fc6d89d5d45a6fe566e488e510/units/1_unit/03_lesson/new_terminal_photo.png
--------------------------------------------------------------------------------
/units/1_unit/03_lesson/running_file_python3.png:
--------------------------------------------------------------------------------
https://raw.githubusercontent.com/TEALS-IntroCS/2nd-semester-introduction-to-computer-science-principles/723385e9b07e68fc6d89d5d45a6fe566e488e510/units/1_unit/03_lesson/running_file_python3.png
--------------------------------------------------------------------------------
/units/1_unit/03_lesson/snap_blocks_variables.png:
--------------------------------------------------------------------------------
https://raw.githubusercontent.com/TEALS-IntroCS/2nd-semester-introduction-to-computer-science-principles/723385e9b07e68fc6d89d5d45a6fe566e488e510/units/1_unit/03_lesson/snap_blocks_variables.png
--------------------------------------------------------------------------------
/units/1_unit/04_lesson/GenieProgram - Code.png:
--------------------------------------------------------------------------------
https://raw.githubusercontent.com/TEALS-IntroCS/2nd-semester-introduction-to-computer-science-principles/723385e9b07e68fc6d89d5d45a6fe566e488e510/units/1_unit/04_lesson/GenieProgram - Code.png
--------------------------------------------------------------------------------
/units/1_unit/04_lesson/do_now.md:
--------------------------------------------------------------------------------
1 | # Do Now 1.04
2 | Type in the following code into a file and save:
3 |
4 | ```python
5 | a = input("What is your name? ")
6 | # a = "cats and dogs"
7 | # meow
8 | print("Hello there, " + a)
9 | ```
10 |
11 | 1. Read through the code and write down what you expect the printed results to be?
12 |
13 | 2. Run the code and write down the actual printed result?
14 |
15 | 3. Briefly describe what the `#` does?
16 |
17 | 4. Briefly describe what `input` does?
18 |
19 |
20 | ## Snap to Python
21 | Convert the following to Python code:
22 | 
23 |
24 |
25 |
26 | ## Swapping
27 | Copy the following code into your editor.
28 |
29 | ```python
30 | a = "this sentence should go second"
31 | b = "this sentence should go first."
32 | # your code starts here
33 |
34 | # your code ends here
35 | print(a)
36 | print(b)
37 | ```
38 |
39 | Run the program. What is the output?
40 |
41 |
42 | Write code to swap the values of variables `a` and `b`.
43 |
--------------------------------------------------------------------------------
/units/1_unit/04_lesson/lab.md:
--------------------------------------------------------------------------------
1 | # Lab 1.04 - Magic Genie
2 |
3 | **Goal**: Use Python to interact with variables and user input.
4 |
5 | Create a genie program. Save the file as `magic_genie.py`.
6 |
7 | 1. Have the program introduce itself. Then have the program ask for three separate wishes. Finally, print all the wishes together. 
8 |
9 | 2. There are some repeated strings in this genie program. Move those into variables.
10 |
11 | 3. Now it's time to make your genie confused. Edit your code to have him print your first wish as your last wish, and your second wish as your first wish, and your third wish as your second wish. 
12 |
13 | ## SNAP Flashback – Magic Genie
14 |
15 | 
16 |
17 | ### Hint!
18 | Remember to add spaces you can combine `" "` to the end of your string using the `+` operator. So `print("hello" + " " + "student")` would print `hello student`
--------------------------------------------------------------------------------
/units/1_unit/04_lesson/magic_genie_output.png:
--------------------------------------------------------------------------------
https://raw.githubusercontent.com/TEALS-IntroCS/2nd-semester-introduction-to-computer-science-principles/723385e9b07e68fc6d89d5d45a6fe566e488e510/units/1_unit/04_lesson/magic_genie_output.png
--------------------------------------------------------------------------------
/units/1_unit/04_lesson/magic_genie_output_confused.png:
--------------------------------------------------------------------------------
https://raw.githubusercontent.com/TEALS-IntroCS/2nd-semester-introduction-to-computer-science-principles/723385e9b07e68fc6d89d5d45a6fe566e488e510/units/1_unit/04_lesson/magic_genie_output_confused.png
--------------------------------------------------------------------------------
/units/1_unit/04_lesson/snap_input.png:
--------------------------------------------------------------------------------
https://raw.githubusercontent.com/TEALS-IntroCS/2nd-semester-introduction-to-computer-science-principles/723385e9b07e68fc6d89d5d45a6fe566e488e510/units/1_unit/04_lesson/snap_input.png
--------------------------------------------------------------------------------
/units/1_unit/05_lesson/code.py:
--------------------------------------------------------------------------------
1 | favorite_number_str = input("What is your favorite number: ")
2 | birth_month_str = input("What month where you born in: ")
3 |
4 | lucky_number = int(favorite_number_str) + int(birth_month_str)
5 | print("Your lucky number is " + lucky_number)
--------------------------------------------------------------------------------
/units/1_unit/05_lesson/lesson.md:
--------------------------------------------------------------------------------
1 | # Lesson Plan 1.05: Quiz & Debugging
2 |
3 | ##Learning Objectives
4 | Students will be able to...
5 | * Demonstrate their understanding of key concepts covered up to this point
6 | * Define and identify: **debugging, syntax errors**
7 | * Analyze and respond to error messages
8 |
9 | ##Materials/Preparation
10 | * Quiz (access protected resources by clicking on "Additional Curriculum Materials" on the [TEALS Dashboard])
11 | * Associated Reading - section 1.3 of Book
12 | * Take the quiz and create a scoring rubric
13 | * Look through [http://tinyurl.com/TEALS-Python-Errors] web tutorial and example [code] to prepare students for analyzing and responding to errors
14 |
15 | ## Pacing Guide
16 | | **Duration** | **Description** |
17 | | ---------- | ------------------ |
18 | | 5 Minutes | Welcome and Review |
19 | | 25 Minutes | Quiz |
20 | | 25 Minutes | Debugging Activity |
21 |
22 | ## Instructor's Notes
23 | 1. **Welcome and Review**
24 | * Ask students for any final questions before passing out the quiz.
25 | 2. **Quiz**
26 | 3. **Debugging Activity**
27 | * Explain to students that you will now be exploring how to read analyze and respond to errors in code.
28 | * Present students with a longer piece of code that will produce an error (e.g. [code]). Ask them to read through it and predict what will be printed out.
29 | * Remind students that when reading through code we go line by line, as if we are the interpreter.
30 | * Run the code, display the stack trace, and have students analyze the error message reported.
31 | * Explain that, much like in Snap, **debugging** is the process of tracking and fixing errors in your code.
32 | * Indentation Errors:
33 | * Errors the students are most likely to have seen
34 | * "IndentationError: unindent does not match any outer indentation level"
35 | * Ask student why these errors are caused and how they find/fix this type of error? Suggest using the tab key to indent and the shift-tab to remove an indent as ways to avoid the error.
36 | * Present an additional tool by running: `python3 -m tabnanny input.py` where input.py is the python source file having the unident error. The output will help you find the error.
37 | * Direct students to work through and complete this web tutorial on [debugging]
38 |
39 | ###Accomodation/Differentiation
40 | Make sure to provide extended time on the quiz for any students that have that requirement in an IEP or 504 plan.
41 |
42 | [TEALS Dashboard]:http://www.tealsk12.org/dashboard
43 | [http://tinyurl.com/TEALS-Python-Errors]: http://interactivepython.org/runestone/static/thinkcspy/Debugging/KnowyourerrorMessages.html
44 | [code]:code.py
45 |
--------------------------------------------------------------------------------
/units/1_unit/06_lesson/lesson1.06 - code.png:
--------------------------------------------------------------------------------
https://raw.githubusercontent.com/TEALS-IntroCS/2nd-semester-introduction-to-computer-science-principles/723385e9b07e68fc6d89d5d45a6fe566e488e510/units/1_unit/06_lesson/lesson1.06 - code.png
--------------------------------------------------------------------------------
/units/1_unit/06_lesson/mad_libs_screen_shot.png:
--------------------------------------------------------------------------------
https://raw.githubusercontent.com/TEALS-IntroCS/2nd-semester-introduction-to-computer-science-principles/723385e9b07e68fc6d89d5d45a6fe566e488e510/units/1_unit/06_lesson/mad_libs_screen_shot.png
--------------------------------------------------------------------------------
/units/1_unit/06_lesson/project.md:
--------------------------------------------------------------------------------
1 | # Project 1: Mad Libs
2 |
3 | Using Python, students will use variables, input, and printing to create a Mad Lib. You will also practice *designing* a project by planning out your Mad Lib before implementing it. Part of the project is to use your creativity to design your own unique story.
4 |
5 | ## Overview
6 | Mad Libs are a fun way to tell a story. The story is pre-written except for a few missing words. The story is hidden from the user. The user is asked a series of questions in order to fill in the missing words before seeing the story. Then the story is read off with the user's words mixed in!
7 |
8 | ## Details
9 | ### Behavior
10 | * The program will print out the title of the Mad Libs story, as well as a short explanation of game play
11 | ```
12 | A Day in NYC: a Mad Lib.
13 | Welcome! You are about to play a fantastic word game.
14 | I will ask you for nouns, verbs, adjectives, proper nouns and adverbs.
15 | Using those words I will create an unexpected story for you!
16 | ```
17 | * The program should then prompt the user to enter in nouns, verbs, adjectives, proper nouns, and adverbs
18 | 
19 | * After all the words have been entered. The program will print out the story. You will need to create a story of your own choosing. Keep it clean and fun. Here is an example of a day in New York City.
20 | ```
21 | A Day in NYC:
22 | It was a beautiful day in New York City. Our hero Ariana Grande was on a walk from the Standard to Duane Reade.Ariana Grande was walking rather quickly because he/she had lived in New York for a few months.All of a suden a slimey donut appeared out of nowhere!!!Ariana Grande decided to prance foolishly instead of dealing with the situation.Thrown off from Duane Reade Ariana Grande decides to go to Times Squareinstead.What a beautiful day in New York.
23 | ```
24 |
25 | ### Implementation Details
26 | Plan out your story on pencil and paper first, before you start implementing the program.
27 | * Create your story
28 | * Select the missing words
29 | * Determine each words part of speech
30 | * Create introduction
31 | * Create questions
32 | * Divide story into print statements
33 |
34 | As mentioned above the program must request words from the user. The following **must** be included in the program:
35 | * 10 different words inputted
36 | * Variable names should correspond to the part of speech requested and part of the story they belong to (e.g. `noun1`, `verb2`, etc)
37 | * You may only use 3 print statements to tell your story
38 |
39 | ## Grading
40 | ### Scheme/Rubric
41 | | **Functional Correctness(Behavior)** | |
42 | | --------------------------------------------------------------- |-----|
43 | | Program greets user and explains rules | 3 |
44 | | Program accurately requests 10 words (1 for word, 1 for correct request)| 20|
45 | | Program prints full Mad Lib | 10 |
46 | | Program exhibits creativity | 3 |
47 | | **Sub total** | 35 |
48 | | **Technical Correctness ** | |
49 | | Program utilizes variable names to convey meaning | 5 |
50 | | Correct order of inputted words | 10 |
51 | | Only 3 print statements | 10 |
52 | | **Sub total** | 25 |
53 | | **Total** | 60 |
54 |
55 |
56 |
--------------------------------------------------------------------------------
/units/1_unit/Cloud9_Student.pdf:
--------------------------------------------------------------------------------
https://raw.githubusercontent.com/TEALS-IntroCS/2nd-semester-introduction-to-computer-science-principles/723385e9b07e68fc6d89d5d45a6fe566e488e510/units/1_unit/Cloud9_Student.pdf
--------------------------------------------------------------------------------
/units/1_unit/Cloud9_Teacher.docx:
--------------------------------------------------------------------------------
https://raw.githubusercontent.com/TEALS-IntroCS/2nd-semester-introduction-to-computer-science-principles/723385e9b07e68fc6d89d5d45a6fe566e488e510/units/1_unit/Cloud9_Teacher.docx
--------------------------------------------------------------------------------
/units/1_unit/Trinket_Student.docx:
--------------------------------------------------------------------------------
https://raw.githubusercontent.com/TEALS-IntroCS/2nd-semester-introduction-to-computer-science-principles/723385e9b07e68fc6d89d5d45a6fe566e488e510/units/1_unit/Trinket_Student.docx
--------------------------------------------------------------------------------
/units/1_unit/Trinket_Student.pdf:
--------------------------------------------------------------------------------
https://raw.githubusercontent.com/TEALS-IntroCS/2nd-semester-introduction-to-computer-science-principles/723385e9b07e68fc6d89d5d45a6fe566e488e510/units/1_unit/Trinket_Student.pdf
--------------------------------------------------------------------------------
/units/1_unit/Trinket_Teacher.docx:
--------------------------------------------------------------------------------
https://raw.githubusercontent.com/TEALS-IntroCS/2nd-semester-introduction-to-computer-science-principles/723385e9b07e68fc6d89d5d45a6fe566e488e510/units/1_unit/Trinket_Teacher.docx
--------------------------------------------------------------------------------
/units/1_unit/Trinket_Teacher.pdf:
--------------------------------------------------------------------------------
https://raw.githubusercontent.com/TEALS-IntroCS/2nd-semester-introduction-to-computer-science-principles/723385e9b07e68fc6d89d5d45a6fe566e488e510/units/1_unit/Trinket_Teacher.pdf
--------------------------------------------------------------------------------
/units/1_unit/cloud_9_cheat_sheet.md:
--------------------------------------------------------------------------------
1 | # Terminal and Cloud 9 Cheat Sheet
2 |
3 | ## Terminal Shortcuts
4 | * Use ctrl-k to clear the terminal screen (cmd-k on Mac)
5 | * Use ctrl-c to stop a program running in the terminal
6 | * Use ctrl-d (or type exit()) to close out of the interactive python shell
7 |
8 | ## Cloud 9 Shortcuts
9 | * Use ctrl-s to save a file
10 | * Use ctrl-n to open a new file
11 | * Both the file and terminal tabs should be cleaned up by regularly deleting the tabs by selecting the x on the right side of the tab name.
12 |
--------------------------------------------------------------------------------
/units/1_unit/unit_1.md:
--------------------------------------------------------------------------------
1 | # Unit 1
2 |
3 |
--------------------------------------------------------------------------------
/units/2_unit/01_lesson/Screen Shot 2015-11-24 at 12.19.32 PM.png:
--------------------------------------------------------------------------------
https://raw.githubusercontent.com/TEALS-IntroCS/2nd-semester-introduction-to-computer-science-principles/723385e9b07e68fc6d89d5d45a6fe566e488e510/units/2_unit/01_lesson/Screen Shot 2015-11-24 at 12.19.32 PM.png
--------------------------------------------------------------------------------
/units/2_unit/01_lesson/basic_city.png:
--------------------------------------------------------------------------------
https://raw.githubusercontent.com/TEALS-IntroCS/2nd-semester-introduction-to-computer-science-principles/723385e9b07e68fc6d89d5d45a6fe566e488e510/units/2_unit/01_lesson/basic_city.png
--------------------------------------------------------------------------------
/units/2_unit/01_lesson/do_now.md:
--------------------------------------------------------------------------------
1 | # Do Now 2.01
2 |
3 | How could you represent 10 numbers using your fingers?
4 |
5 |
6 |
7 | How could you represent the number 1023 using your fingers?
8 |
9 |
10 |
11 |
--------------------------------------------------------------------------------
/units/2_unit/01_lesson/lesson.md:
--------------------------------------------------------------------------------
1 | #Lesson 2.01: Binary Day
2 |
3 | ##Learning Objectives
4 | Students will be able to...
5 | * Define and identify: **binary**
6 | * Describe different representations of data
7 | * Represent decimal numbers in binary
8 |
9 | ##Materials/Preparation
10 | * [Do Now]
11 | * Associated Reading - section 2.1 of Book
12 | * Index cards for binary activity (at least 1 per student)
13 | * Scissors
14 | * 8.5" x 11" printer paper, each page has a large number (2^n) written on it (1, 2, 4, 8, 16, 32, ...)
15 | * Read through the do now and lesson so that you are familiar with the requirements and can assist students as needed
16 |
17 | ##Additional Resources
18 | * [CS Unplugged Binary Numbers]
19 |
20 | ## Pacing Guide
21 | | **Duration** | **Description** |
22 | | ---------- | ----------- |
23 | | 5 Minutes | Do Now |
24 | | 45 Minutes | Lesson/Activity |
25 | | 5 Minutes | Debrief |
26 |
27 | ## Instructor's Notes
28 | 1. **Do Now**
29 | * Project [Do Now] questions on the screen
30 | * Have students discuss how they used their fingers to count to 10, compared to how they counted to 1023.
31 | 2. **Lesson/Activity**
32 | * Explain **binary** compared to decimal: it is a different base of counting, specifically base-2.
33 | * Have students write | 1 | 2 | 4 | 8 | 16 | 32 | ... on the bottom of an index card spaced out about half an inch apart. Cut along the lines so that the numbers are each on a flap.
34 | * Announce any number and have students fold up the index card sections such that the numbers showing add up to the desired number.
35 | * Write on the board what the decimal number announced now looks like in binary (e.g. 9 = 1001).
36 | * Repeat with additional numbers until all students demonstrate understanding.
37 | * Choose students to walk up to the front of the classroom. Have them hold the place they represent and have a number (2^n) on a sheet of paper (so student's have a 1 or 2 or 4 or ... written on their paper). Call out numbers and then have the students work together to decide if their number should be held up (representing a "1") or not.
38 | * What else can be represented by binary? Answer (ANYTHING!)
39 | * Picture example:
40 | * Show students this photo: 
41 | * Explain how this is a digital representation of the artwork, but it's not immediately clear to see how this is represented with 0's and 1's.
42 |
43 | * Now you can have students look at a black & white example for more clarity: 
44 | * Zooming in to pixel level: 
45 | * Explain to students that we can imagine saying 1 is black and 0 is white.
46 | * All data gets converted into binary values! Even music, video, and complex images!
47 | * Discuss how everything the computer reads gets turned into binary in the end, including the code that they will write in this class.
48 | * How could letters (a,b,c,...) be turned into binary?
49 | * How can letters be turned into numbers? a = 1, b = 2, c = 3.
50 |
51 | ###Accommodation/Differentiation
52 |
53 |
54 | [Do Now]:do_now.md
55 | [CS Unplugged Binary Numbers]:http://csunplugged.org/binary-numbers/
56 |
--------------------------------------------------------------------------------
/units/2_unit/01_lesson/starynight.png:
--------------------------------------------------------------------------------
https://raw.githubusercontent.com/TEALS-IntroCS/2nd-semester-introduction-to-computer-science-principles/723385e9b07e68fc6d89d5d45a6fe566e488e510/units/2_unit/01_lesson/starynight.png
--------------------------------------------------------------------------------
/units/2_unit/02_lesson/do_now.md:
--------------------------------------------------------------------------------
1 | #Do Now 2.02
2 |
3 | Open up the terminal. Type the following code.
4 | ```python
5 | x_stage1 = 123
6 | y_stage1 = 456
7 |
8 | x_stage2 = str(x_stage1)
9 | y_stage2 = str(y_stage1)
10 |
11 | print(x_stage2 + y_stage2)
12 |
13 | ```
14 |
15 | What type are the variables `x_stage1` and `x_stage2`?
16 |
17 |
18 |
19 |
20 | What type are the variables `x_stage2` and `y_stage2`?
21 |
22 |
23 |
24 |
25 | How would you convert a string, `'100'` to an integer?
26 |
27 |
28 |
--------------------------------------------------------------------------------
/units/2_unit/02_lesson/lab.md:
--------------------------------------------------------------------------------
1 | # Lab 2.02 - Casting
2 |
3 | 1) Without using the computer, predict what the following inputs will result in. Once you have filled in the "prediction" column, check your answers in interactive mode and write the actual result.
4 |
5 |
6 | | **Input** | **Prediction** | **Result** |
7 | | --- | --- | --- |
8 | | `float('1')`| | |
9 | | `str(1 + '2')`| | |
10 | | `str('2')`| | |
11 | |`int('abc')`| | |
12 | | `int(float('1.6'))`| | |
13 | | `float(int(1.6))`| | |
14 | | `str(float(1))`| | |
15 |
16 |
17 | 2) Create a program which will take in an input and print out that input divided by 2.
18 |
19 |
20 | 3) Alter one line of that program to return only whole numbers.
21 |
22 | ###Bonus!
23 | Make your program have two modes: an integer mode and a float mode. Add another input to ask which mode the user wants to use. If the user is in integer mode print out integers, otherwise print out float. Feel free to research Python docs (This is a concept covered in Snap)
24 |
--------------------------------------------------------------------------------
/units/2_unit/02_lesson/lesson.md:
--------------------------------------------------------------------------------
1 | #Lesson 2.02: Data Types & Casting
2 |
3 | ##Learning Objectives
4 | Students will be able to...
5 | * Define and identify: **type, string, casting, floating point number (float), integer**
6 | * Describe different representations of data in Python
7 | * Convert from one data type to another data type
8 |
9 | ##Materials/Preparation
10 | * [Do Now]
11 | * [Lab - Casting]
12 | * Read through the do now, lesson, and lab so that you are familiar with the requirements and can assist students
13 |
14 | ## Pacing Guide
15 | | **Duration** | **Description** |
16 | | ---------- | ----------- |
17 | | 5 Minutes | Do Now |
18 | | 10 Minutes | Lesson |
19 | | 35 Minutes | Lab |
20 | | 5 Minutes | Debrief |
21 |
22 | ## Instructor's Notes
23 | 1. **Do Now**
24 | * Project the Do Now on the board, circulate around the class to check that students are working and understand the instructions.
25 | 2. **Lesson**
26 | * Ask students to define **type**. Talk about types as a way to represent data (give examples of strings, ints, and floats).
27 | * Ask students what they thought typing the command str(123) does.
28 | * Define this process of changing data types as **casting**.
29 | * Ask students what they did to cast string into an integer.
30 | * Define the int function if the students were unable to guess it from the do now.
31 | * Take a few minutes to have students write down how they would produce the following output:
32 | ```
33 | >
34 | Give me a number you want to multiply by 2: 4
35 | 8
36 | => None
37 | ```
38 | * Call on students to write their answers on the board.
39 | * Discuss what would happen if the user types in 1.5 instead of 4.
40 | * If input is a float, can cast with float(num)
41 | * `type`: ask students what they think `type('a')` would output.
42 | * Why might you want to use `type`?
43 | 3. **Lab**
44 | * Practice predicting what casting will do to inputs.
45 | * Create a halving program as well as program that halves to whole numbers.
46 | 4. **Debrief**
47 | * Check student progress and completion of the lab, wrap up by taking any final questions.
48 |
49 |
50 | ###Accommodation/Differentiation
51 | If students are moving quickly, it is possible to introduce the concepts of booleans here. Discuss how students would represent binary (0's and 1's). In practice these translate to True and False. Convert numbers to boolean, and booleans to numbers.
52 |
53 |
54 | [Do Now]:do_now.md
55 | [Lab - Casting]:lab.md
--------------------------------------------------------------------------------
/units/2_unit/03_lesson/Lesson 2.03 Truth Table.png:
--------------------------------------------------------------------------------
https://raw.githubusercontent.com/TEALS-IntroCS/2nd-semester-introduction-to-computer-science-principles/723385e9b07e68fc6d89d5d45a6fe566e488e510/units/2_unit/03_lesson/Lesson 2.03 Truth Table.png
--------------------------------------------------------------------------------
/units/2_unit/03_lesson/do_now.md:
--------------------------------------------------------------------------------
1 | #Do Now 2.03
2 |
3 | ##Part 1
4 | Open up the terminal. Type each line of the following code into the interactive editor:
5 | ```
6 | >>> 5 < 3
7 | >>> 5 > 3
8 | >>> type(5 < 3)
9 | >>> type(5 > 3)
10 | >>> my_favorite_animal = "cats"
11 | >>> user_favorite_animal = input("What is your favorite animal? ")
12 | >>> my_favorite_animal == user_favorite_animal
13 | ```
14 | What does `5 < 3` evaluate to?
15 |
16 |
17 |
18 | What is the type of `5 < 3`? What does that stand for (should be familiar from Snap!)?
19 |
20 |
21 |
22 |
23 | What is the difference between `==` and `=` ?
24 |
25 |
26 |
27 |
28 | What data type do you think `my_favorite_animal == user_favorite_animal` is?
29 |
30 |
31 |
32 |
33 | ## Part 2
34 | Open up the terminal. Type the following code into the interactive editor.
35 | ```
36 | >>> months_with_driving_permit = 6
37 | >>> age = 16
38 | >>> can_get_license = months_with_driving_permit >= 6 and age >= 16
39 | >>> print(can_get_license)
40 |
41 | ```
42 |
43 | What does `and` do here? What type do you think `can_get_license` is?
44 |
45 |
46 |
47 |
48 | Update the code to fit the new driving law: If you are over the age of 18 you don't need to have a permit. The other law still applies for people ages 16-18.
49 |
50 |
51 |
52 |
53 |
--------------------------------------------------------------------------------
/units/2_unit/03_lesson/lab.md:
--------------------------------------------------------------------------------
1 | # Lab 2.03 - Can I or Can't I?
2 |
3 | 1) Without using the computer, predict if each of the following will produce a `True` or `False` output. Check your answers in interactive mode.
4 |
5 |
6 | ```
7 | >>> a = 100
8 | >>> b = "science"
9 | >>> a > 75 and b == "science"
10 | ```
11 |
12 | | **Predicted Output** | **Actual Output** |
13 | | --- | --- |
14 | |
|
|
15 |
16 | ```
17 | >>> a = 100
18 | >>> b = "science"
19 | >>> a > 75 and b != "science"
20 | ```
21 | | **Predicted Output** | **Actual Output** |
22 | | --- | --- |
23 | |
|
|
24 |
25 | ```
26 | >>> a = 100
27 | >>> b = "science"
28 | >>> a > 75 or b != "science"
29 | ```
30 | | **Predicted Output** | **Actual Output** |
31 | | --- | --- |
32 | |
|
|
33 |
34 | ```
35 | >>> a = 100
36 | >>> b = "science"
37 | >>> c = True
38 | >>> not c and a > 75 and b == "science"
39 | ```
40 | | **Predicted Output** | **Actual Output** |
41 | | --- | --- |
42 | |
|
|
43 |
44 |
45 | 2) Create a "Can I be President?" program, which determines if the user meets the minimum requirements for becoming the President of the United States. Use user input. The rules for being president of the U.S. are:
46 | 1. Older than 35
47 | 2. Resident of US for 14 Years
48 | 3. Natural born citizen
49 |
50 | Print `True` if the person could be president and `False` if they can't be president.
51 |
52 | 3) Alter one line of that program to be a "I can't be President?" game. Print `True` if the user cannot be President and `False` if they can be President.
53 |
54 | 4) Create a "Can I ride the roller coaster?" program. A roller coaster has the rule that a rider has to be over the height of 50 inches. Because of a legal loophole, if you are over the age of 18 you can ride regardless of your height. If you are allowed to ride, the coaster costs 4 quarters (although the operator accepts tips so more money is appreciated).
55 |
56 | Also, the theme park sells frequent rider passes: with a frequent rider pass the roller coaster costs only 2 quarters. Ask the user how tall they are in inches, their age, how many quarters they have, and if they have a frequent rider pass. Print `True` if the person can ride and `False` if they can't.
57 |
58 |
59 | ###Bonus!
60 | Are the following expressions equivalent? Research DeMorgan's Laws and write why you think they are the same or why they are not the same.
61 |
62 | `not(x or y) == not x and not y`
63 |
64 | `not(x and y) == not x or not y`
65 |
--------------------------------------------------------------------------------
/units/2_unit/03_lesson/lesson.md:
--------------------------------------------------------------------------------
1 | # Lesson 2.03: Booleans & Expressions
2 |
3 | ##Learning Objectives
4 | Students will be able to...
5 | * Define and identify: **boolean, expression, composition, True, False**
6 | * Evaluate a boolean expression
7 | * Compose boolean expressions using `and`, `or`, `not`, `<`, `>`, and `==`
8 |
9 | ##Materials/Preparation
10 | * [Do Now]
11 | * [Lab - Can I or Can't I?]
12 | * Associated Reading - section 2.2 of Book
13 | * Read through the do now, lesson, and lab so that you are familiar with the requirements and can assist students.
14 |
15 | ## Pacing Guide
16 | | **Duration** | **Description** |
17 | | ---------- | ----------- |
18 | | 5 Minutes | Do Now |
19 | | 10 Minutes | Lesson |
20 | | 35 Minutes | Lab |
21 | | 5 Minutes | Debrief |
22 |
23 | ## Instructor's Notes
24 | 1. **Do Now**
25 | * Project the Do Now on the board, circulate around the class to check that students are working and understand the instructions.
26 | 2. **Lesson**
27 | * After 5 minutes, ask students to recall what a boolean is and how they used booleans in Snap!
28 | * Ask students what values they saw in part 1 of the Do Now (answer should be `True` or `False`)
29 | * **Boolean expression**: is an expression that evaluates to either true or false.
30 | * Ask Students about the difference between `=` and `==`.
31 | * = is for assignment of value
32 | * == builds a boolean expression and is a way to compare two values
33 | * Remind students of boolean expressions in Snap!
34 | 
35 | 
36 | * Ask the students to recall what `and`, `or` and `not` did.
37 | * Give students additional time to finish completing part 2 of the Do Now, if needed.
38 | * Have a student write up the expression they used to update the `can_get_license` code.
39 | * Poll students - how many boolean expressions are used? Answers here may vary depending on the students' code.
40 | 2. Define **composition**: Using an expression as part of a larger expression, or a statement as part of a larger statement. You can use parentheses to compose expressions as well.
41 | 5. Parentheses: In Snap! to compose many expressions they were nested together by simply putting blocks one after another. However, in Python if you want certain things to be evaluated together, use parentheses.
42 | 3. **Lab**
43 | * Evaluate expressions with `and`, `or`, and `not`
44 | * Given written out rules, students will convert them into Boolean expressions.
45 | * Create a large expression using variables that describes you.
46 | 4. **Debrief**
47 | * Check student progress and completion of the lab, wrap up by taking any final questions.
48 |
49 | ###Accommodation/Differentiation
50 | If students are moving quickly, use this opportunity to go over truth tables (or ask them to research De Morgan's Law)
51 | * Convert the following SNAP Truth Table program into Python.
52 | 
53 |
54 | [Do Now]:do_now.md
55 | [Lab - Can I or Can't I?]:lab.md
--------------------------------------------------------------------------------
/units/2_unit/03_lesson/snap_boolean_expressions.png:
--------------------------------------------------------------------------------
https://raw.githubusercontent.com/TEALS-IntroCS/2nd-semester-introduction-to-computer-science-principles/723385e9b07e68fc6d89d5d45a6fe566e488e510/units/2_unit/03_lesson/snap_boolean_expressions.png
--------------------------------------------------------------------------------
/units/2_unit/03_lesson/snap_boolean_expressions_equals.png:
--------------------------------------------------------------------------------
https://raw.githubusercontent.com/TEALS-IntroCS/2nd-semester-introduction-to-computer-science-principles/723385e9b07e68fc6d89d5d45a6fe566e488e510/units/2_unit/03_lesson/snap_boolean_expressions_equals.png
--------------------------------------------------------------------------------
/units/2_unit/04_lesson/Lesson 2.04 Conditionals - Vending Machine 1.png:
--------------------------------------------------------------------------------
https://raw.githubusercontent.com/TEALS-IntroCS/2nd-semester-introduction-to-computer-science-principles/723385e9b07e68fc6d89d5d45a6fe566e488e510/units/2_unit/04_lesson/Lesson 2.04 Conditionals - Vending Machine 1.png
--------------------------------------------------------------------------------
/units/2_unit/04_lesson/Lesson 2.04 Conditionals - Vending Machine.png:
--------------------------------------------------------------------------------
https://raw.githubusercontent.com/TEALS-IntroCS/2nd-semester-introduction-to-computer-science-principles/723385e9b07e68fc6d89d5d45a6fe566e488e510/units/2_unit/04_lesson/Lesson 2.04 Conditionals - Vending Machine.png
--------------------------------------------------------------------------------
/units/2_unit/04_lesson/do_now.md:
--------------------------------------------------------------------------------
1 | # Do Now 2.04
2 |
3 | Create a schedule program. Given the hour of the day print out where you should be. If you're not doing anything else you should be "sleeping".
4 | ```
5 | >>> What hour? 12pm
6 | >>> You should be at lunch!
7 | ```
8 | How did you accomplish this? Did you feel like something was missing in your program?
9 |
10 |
11 |
12 |
13 | What if you wanted to add in a weekly functionality? For instance, maybe on Tuesday at 4pm you are at soccer practice, but on Thursday at 4pm you are at math club! How would you implement this in your program?
14 |
15 |
16 |
17 |
18 |
19 |
--------------------------------------------------------------------------------
/units/2_unit/04_lesson/lab.md:
--------------------------------------------------------------------------------
1 | # Lab 2.04 - Game Show
2 |
3 | 1) Follow the flow of execution in the following programs and predict what will happen for each one:
4 |
5 | ```python
6 | a = 100
7 | b = 7
8 | if a > 85 and b > 7:
9 | print("Stellar Grade")
10 | elif a <= 85 and b <= 7:
11 | print("okay grade")
12 | else:
13 | print("pretty good grade")
14 | ```
15 |
16 |
17 |
18 | ```python
19 | a = input("What... is your quest")
20 | b = "to seek the holy grail"
21 | if a != b:
22 | print("Go On. Off you go")
23 | else:
24 | b = input("What...is the air-speed velocity of an unladen swallow?")
25 | if b == "What do you mean? An African or European swallow?":
26 | print("I don't know that...AHHH [Bridgekeeper was thrown over bridge]")
27 | else:
28 | print("[you were thrown over bridge]")
29 | ```
30 |
31 |
32 |
33 | ```python
34 | user_input = input("What is your favorite color"):
35 | if user_input == 'blue':
36 | print("Blueskadoo")
37 | elif user_input == "red":
38 | print("Roses are red!")
39 | elif user_input == "yellow":
40 | print("Mellow Yellow")
41 | elif user_input == "green":
42 | print("Green Machine")
43 | elif user_input == "orange":
44 | print("Orange you glad I didn't say banana.")
45 | elif user_input == "black":
46 | print("I see a red door and I want it painted black")
47 | elif user_input == "purple":
48 | print("And we'll never be royalllssss")
49 | elif user_input == "pink":
50 | print("Pinky- and the Brain")
51 | else:
52 | print("I don't recognize that color. Is it even...??")
53 | ```
54 |
55 |
56 |
57 |
58 | 2) Translate this Snap! program into a Python program.
59 | 
60 |
61 | 3) Create a game show program!
62 |
63 | * Declare 10 prizes (prize1, prize2, prize 3 at the top of your file)
64 | * User picks a number
65 | * The prize corresponding with that door is printed for the user.
66 |
67 |
68 | ###Bonus!
69 |
70 | Research lists in Python. Re-implement problem 3 using lists.
71 |
--------------------------------------------------------------------------------
/units/2_unit/04_lesson/lesson.md:
--------------------------------------------------------------------------------
1 | # Lesson 2.04: Conditionals
2 |
3 | ##Learning Objectives
4 | Students will be able to...
5 | * Define and identify: **if, else, elif, conditionals, flow of control**
6 | * Create chaining if statements
7 | * Understand how conditional statements alter the flow of control of a program
8 |
9 | ##Materials/Preparation
10 | * [Do Now]
11 | * [Lab - Game Show]
12 | * Solution (access protected resources by clicking on "Additional Curriculum Materials" on the [TEALS Dashboard])
13 | * Associated Reading - section 2.3 of Book
14 | * Read through the do now, lesson, and lab so that you are familiar with the requirements and can assist students
15 |
16 | ## Pacing Guide
17 | | **Duration** | **Description** |
18 | | ---------- | ----------- |
19 | | 5 Minutes | Do Now |
20 | | 10 Minutes | Lesson |
21 | | 35 Minutes | Lab |
22 | | 5 Minutes | Debrief |
23 |
24 | ## Instructor's Notes
25 | 1. **Do Now**
26 | * Project the Do Now on the board, circulate around the class to check that students are working and understand the instructions.
27 | * Students should quickly realize that they do not have all the tools necessary to complete the task.
28 |
29 | 2. **Lesson**
30 | * Ask students what they felt like they needed that they had in Snap!
31 | * Explain that in order to write useful programs, we almost always need the ability to check conditions and change the behavior of the program accordingly.
32 | * **Conditional** statements give us this ability to affect the **flow of control**.
33 | * The simplest form is the `if` statement. The boolean expression after `if` is called the condition. If it is true, then the indented statement gets executed. If not, nothing happens.
34 |
35 | ```python
36 | if x > 0:
37 | print("x is positive")
38 | ```
39 | * Write out the syntax of the `if` statement on the board. Point out the Boolean expression(condition), the colon, and the indentation.
40 | * Ask students if they recall what else went along with the if statement when they used it in Snap!
41 | * `else` is used when there are two possibilities and the condition determines which one gets executed.
42 | * Demonstrate the syntax of `else`
43 | * Describe the `elif` statement
44 | * Sometimes there are more than two possibilities and we need more than two branches. One way to express a computation like that is a chained conditional:
45 | * Demonstrate the syntax of `elif`
46 |
47 | 3. **Lab**
48 | * Students convert the triangle program written in Snap! into Python.
49 | * Students must also write a program that simulates a list index using `if` statements.
50 | 4. **Debrief**
51 | * Check student progress and completion of the lab, wrap up by taking any final questions.
52 |
53 | ###Accommodation/Differentiation
54 | Use the following as an extension activity for students that are moving quickly:
55 | * Convert and finish the following SNAP Vending Machine program in Python.
56 | 
57 |
58 |
59 | If students are moving quickly, this lesson can move onto lists.
60 |
61 | [Do Now]:do_now.md
62 | [Lab - Game Show]:lab.md
63 | [TEALS Dashboard]:http://www.tealsk12.org/dashboard
64 |
--------------------------------------------------------------------------------
/units/2_unit/04_lesson/triangle_program.png:
--------------------------------------------------------------------------------
https://raw.githubusercontent.com/TEALS-IntroCS/2nd-semester-introduction-to-computer-science-principles/723385e9b07e68fc6d89d5d45a6fe566e488e510/units/2_unit/04_lesson/triangle_program.png
--------------------------------------------------------------------------------
/units/2_unit/05_lesson/do_now.md:
--------------------------------------------------------------------------------
1 | #Do Now 2.05
2 |
3 | Open up the terminal. Type the following code.
4 | ```
5 | a_list = ['a', 'b', 'c', 'd', 'e']
6 | print(len(a_list))
7 |
8 | ```
9 | What type do you think a_list is? (Hint: look at the name of the variable)
10 |
11 |
12 |
13 |
14 | What does `len` do?
15 |
16 |
17 |
18 |
19 |
20 | Brainstorm how you would print the first element from `a_list`?
21 |
22 |
23 |
24 |
25 | Type the following into the terminal. What happens?
26 | ```
27 | a_list = ['a', 'b', 'c', 'd', 'e']
28 | print(a_list[0])
29 | print(a_list[1])
30 | print(a_list[2])
31 | print(a_list[3])
32 | print(a_list[4])
33 | print(a_list[5])
34 | print(a_list[6])
35 | ```
36 |
37 |
--------------------------------------------------------------------------------
/units/2_unit/05_lesson/lab.md:
--------------------------------------------------------------------------------
1 | # Lab 2.05 - College Chooser
2 |
3 | 1. For each example below, predict what will be printed. Next, run the program and confirm what was output.
4 |
5 | ```python
6 | a = ['a', 'b', 'c', 'd', 'e']
7 | print(a[0])
8 | print(a[3])
9 | ```
10 |
11 |
12 | ```python
13 | a = ['a', 'b', 'c', 'd', 'e']
14 | print(a[len(a) - 3])
15 | ```
16 |
17 |
18 | ```python
19 | a = ['a', 'b', 'c', 'd', 'e']
20 | print(a[len(a) - 6])
21 | ```
22 |
23 |
24 |
25 | ```python
26 | a = ['a', 'b', 'c', 'd', 'e']
27 | a[3] = 'haha'
28 | print(a)
29 | ```
30 |
31 |
32 | 2) Remember the game show program from last lab? Create this game again using lists and indexes. Updated rules below:
33 |
34 | * Declare 10 prizes (prize0, prize1, prize2 at the top of your file), but store them all in a list.
35 | * User picks a number.
36 | * Print prize associated with the door user picked.
37 |
38 | 3) Create a quiz to help you choose which college you should go to (or another topic of your choice. See Example Below)! The program should ask the user a question and list five possible answers. If the student chooses the first answer, add 1 point to `School[0]`. If they choose the second answer add 1 point to `School[1]`, and so on. At the end print out the schools and the scores for each school.
39 | * Create a list of 5 options of colleges.
40 | * Create a different list of five 0s, representing the user's votes so far.
41 | * Create 4 questions. Each question should have five different answers. Each answer corresponds to the specific school option.
42 | * At the end print off the 5 different schools and the score the user got for each of those schools.
43 |
44 | ###Bonus!
45 | Research nested lists and work through the following:
46 |
47 | ```python
48 | a = ['a', 'b', 'c', ['d', 'e']]
49 | print(len(a))
50 | ```
51 |
52 |
53 | ```python
54 | a = ['a', 'b', 'c', ['d', 'e']]
55 | b = a[3]
56 | print(b)
57 | ```
58 |
59 |
60 | How would you access 'd' from the list `a`?
61 |
--------------------------------------------------------------------------------
/units/2_unit/05_lesson/lesson.md:
--------------------------------------------------------------------------------
1 | # Lesson 2.05: Lists
2 |
3 | ##Learning Objectives
4 | Students will be able to...
5 | * Define and identify: **list, item, index, integer**
6 | * Be able to access items from a list using the index
7 | * Create lists of different types
8 | * Use the length function
9 |
10 | ##Materials/Preparation
11 | * [Do Now]
12 | * [Lab - College Chooser]
13 | * Solution (access protected resources by clicking on "Additional Curriculum Materials" on the [TEALS Dashboard])
14 | * Associated Reading - section 2.4 of Book
15 | * Read through the do now, lesson, and lab so that you are familiar with the requirements and can assist students
16 |
17 | ## Pacing Guide
18 | | **Duration** | **Description** |
19 | | ---------- | ----------- |
20 | | 5 Minutes | Do Now |
21 | | 10 Minutes | Lesson |
22 | | 35 Minutes | Lab |
23 | | 5 Minutes | Debrief |
24 |
25 | ## Instructor's Notes
26 |
27 | 1. **Do Now**
28 | * Students follow instructions to create lists and use the `len` function.
29 | 2. **Lesson**
30 | * Ask students to recall what a list is, and how lists were used in Snap!
31 | * A **list** is a sequence of values. In a list, they can be any type. The values in a list are called elements or **items**.
32 | * In Python, to create a list you must enclose items in square brackets.
33 | * Emphasize that you can have lists of any type (int, float, string, etc). You can even have lists within lists (more on that later...)
34 | * Remind students of lists in Snap!
35 |
36 | 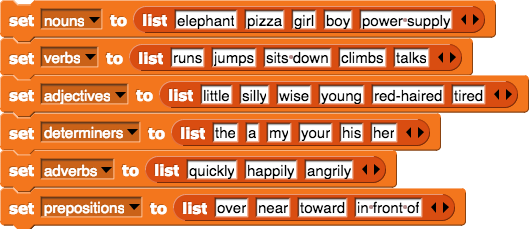
37 | * Ask students what `len` does when they used it in the Do Now.
38 | * Ask students how they tried to print the first item from a list. Was this what they were expecting?
39 | * **index**: a map from the position in the list to the element stored there.
40 | * 0-index: lists are 0 indexed. So the first element in the list is at the 0-index
41 | * Out-of-bounds: what happened when you tried to index into a list that was too long?
42 | * Snap Equivalent: 
43 | * Ask students how they would access the last item in a list of unknown length. (Use the length function!)
44 | * Ask students to write on the board how they got the last element of a list. Ask another student to write how they would get the second to last element of the list and so on.
45 | * After accessing any list element you can change it. Take a moment to demonstrate this syntax before starting the lab.
46 | 3. **Lab**
47 | * Practice accessing and updating items in a list
48 | * Implement program from last lab using lists
49 | * Create a quiz program
50 | 4. **Debrief**
51 | * Check student progress and completion of the lab, wrap up by taking any final questions.
52 |
53 | ###Accommodation/Differentiation
54 | If students are moving quickly, you can introduce the topic of nested lists. Start off with a simple nested list like `['a', 'b', 'c', [1, 2, 3]]`. Ask the students to guess the length. Ask the students to guess how they would access the item '1' from that list!
55 |
56 | [Do Now]:do_now.md
57 | [Lab - College Chooser]:lab.md
58 | [TEALS Dashboard]:http:/www.tealsk12.org/dashboard
59 |
--------------------------------------------------------------------------------
/units/2_unit/06_lesson/do_now.md:
--------------------------------------------------------------------------------
1 | # Do Now 2.06
2 |
3 | ## Part 1
4 | Open up the terminal. Type the following code using interactive mode:
5 | ```
6 | >>> a = [123, 'First Item', 456, 'Second Item']
7 | >>> b = a[0:2]
8 | >>> print(a)
9 | >>> print(b)
10 |
11 | ```
12 |
13 | What happens to a? What is b? What type is b?
14 |
15 |
16 |
17 | ```
18 | >>> a = [123, 'First Item', 456]
19 | >>> a.remove('First Item')
20 | >>> print(a)
21 | ```
22 |
23 | What does `remove` do? What would the length of this list be after `remove`?
24 |
25 |
26 |
27 |
28 | ```
29 | >>> a = [123, 'First Item', 456]
30 | >>> a.pop()
31 | >>> print(a)
32 | ```
33 |
34 | What does `pop` do? What is the difference between `remove` and `pop`?
35 |
36 |
37 |
38 | ```
39 | >>> a = [123, 'First Item', 456, 'Second Item']
40 | >>> b = a + ['Third Item']
41 | >>> print(a)
42 | >>> print(b)
43 |
44 | ```
45 |
46 | What happens to a? What is b? What type is b?
47 |
48 |
49 |
50 |
51 | ```
52 | >>> a = []
53 | >>> print(len(a))
54 | >>> a.append('First Item')
55 | >>> print(a)
56 |
57 | ```
58 | What was the length of `[]`?
59 |
60 |
61 |
62 |
63 | What does `append` do? What would the length be after `append`?
64 |
65 |
66 |
67 |
--------------------------------------------------------------------------------
/units/2_unit/06_lesson/do_now2.md:
--------------------------------------------------------------------------------
1 | # Do Now 2.06b
2 |
3 | Rank the topics you find the most confusing:
4 |
5 | 1. Length of lists
6 |
7 | 2. Appending elements from a list
8 |
9 | 3. Indexing into Lists
10 |
11 | 4. Popping elements off a list
12 |
13 | 5. Slicing lists
14 |
15 | 6. Adding elements to a list
16 |
17 | 7. Creating lists
18 |
19 | 8. Removing elements from a list
20 |
21 | Open up the terminal. How would you check if an item was in a three element list?
22 | ```python
23 | a = ['cats', 'dogs', 'pigs']
24 |
25 | ```
26 |
27 |
28 |
29 |
30 | What if the list was much longer? Try typing in the following code:
31 | ```python
32 | a = ['cats', 'dogs', 'pigs']
33 | print('dogs' in a)
34 | print('cows' in a)
35 | ```
36 |
37 |
38 |
--------------------------------------------------------------------------------
/units/2_unit/06_lesson/lab.md:
--------------------------------------------------------------------------------
1 | # Lab 2.06 - Tic-Tac-Toe
2 |
3 | 1) For each example below, predict what will be printed. Then run the program and confirm.
4 |
5 | ```python
6 | a = ['a', 'b', 'c', 'd', 'e']
7 | print(a[0:3])
8 | print(a[1:4])
9 | ```
10 |
11 |
12 | ```python
13 | a = ['a', 'b', 'c', 'd', 'e']
14 | print(a[1:len(a) - 3])
15 | ```
16 |
17 |
18 |
19 | ```python
20 | a = ['a', 'b', 'c', 'd', 'e']
21 | b = a.remove('b')
22 | print(a)
23 | print(b)
24 | ```
25 |
26 |
27 | ```python
28 | a = ['a', 'b', 'c', 'd', 'e']
29 | a[0] = 'haha'
30 | b = a.pop()
31 | print(a)
32 | print(b)
33 | ```
34 |
35 |
36 | ```python
37 | a = ['a', 'b', 'c', 'd', 'e']
38 | b = a + ['abc']
39 | print(a)
40 | print(b)
41 | ```
42 |
43 |
44 | ```python
45 | a = ['a', 'b', 'c', 'd', 'e']
46 | b = a.append('f')
47 | print(a)
48 | print(b)
49 | ```
50 |
51 |
52 | 2) Remember the tic-tac-toe board we created in class? We are going to start implementing Tic-Tac-Toe using a single list.
53 |
54 | * The user picks a location on the board according to the number:
55 | 
56 | * Depending on the position that the user inputs, update the position of the board to an "X" to reflect that.
57 | * Print the updated board out, but don't wory about making it look pretty.
58 | * Only need to implement one turn of the game
59 |
--------------------------------------------------------------------------------
/units/2_unit/06_lesson/lesson.md:
--------------------------------------------------------------------------------
1 | # Lesson 2.06: Lists 2
2 |
3 | ##Learning Objectives
4 | Students will be able to...
5 |
6 | * Define and identify: **slice, append, pop, remove**
7 | * Slice a list
8 | * Add and remove elements from a list
9 |
10 | ##Materials/Preparation
11 | * [Do Now]
12 | * [Lab - Tic-Tac-Toe]
13 | * Associated Reading - section 2.5 of Book
14 | * Read through the do now, lesson, and lab so that you are familiar with the requirements and can assist students
15 |
16 | ## Pacing Guide
17 | | **Duration** | **Description** |
18 | | ---------- | ----------- |
19 | | 10 Minutes | Do Now |
20 | | 10 Minutes | Lesson |
21 | | 30 Minutes | Lab |
22 | | 5 Minutes | Debrief |
23 |
24 | ## Instructor's Notes
25 | 1. **Do Now**
26 | * Students may need more time than usual to fully go through this lesson's Do Now.
27 | 2. **Lesson**
28 | * Ask students what doing `a[0:2]` in the Do Now did.
29 | * Define **slicing**: a list operation that gives back a list starting from the index to the left of the colon and going up to the index to the right of the colon.
30 | * Note that slicing doesn't exist in Snap!
31 | * Ask students what the list would return if you did `a[1:2]`.
32 | * Explore the differences between `remove` and `pop`, asking for student input.
33 | * Ask students what the plus sign and `append` do to a list.
34 | * Ask students to write down or brainstorm how they would represent a Tic-Tac-Toe board using lists.
35 | * Create a Tic-Tac-Toe board with students in class.
36 | 3. **Lab**
37 | * Students practice slicing, adding, and removing elements from some given lists.
38 | * Students create a single move Tic-Tac-Toe game
39 | 4. **Debrief**
40 | * Check student progress and completion of the lab, wrap up by taking any final questions.
41 |
42 | ###Accommodation/Differentiation
43 | If students are moving quickly, start the next topic of using a while loop as a game loop. Explore the concept of keeping score for the game.
44 |
45 | If students are moving slowly then spend an extra day reviewing lists and completing lab activities.
46 |
47 | There is also an opportunity for a quiz after the game loop lesson and before the project.
48 |
49 |
50 | [Do Now]:do_now.md
51 | [Lab - Tic-Tac-Toe]:lab.md
--------------------------------------------------------------------------------
/units/2_unit/06_lesson/lesson2.md:
--------------------------------------------------------------------------------
1 | # Lesson 2.06b: Lists Recap
2 |
3 | ##Learning Objectives
4 | Students will be able to...
5 | * Define and identify: **index, slice, append, pop, remove**
6 | * Apply list conditionals to determine if an element is in a list
7 |
8 | ##Materials/Preparation
9 | * [Do Now]
10 | * Associated Reading - section 2.6 of Book
11 | * Read through the do now, lesson, and lab so that you are familiar with the requirements and can assist students
12 |
13 | ## Pacing Guide
14 | | **Duration** | **Description** |
15 | | ---------- | ----------- |
16 | | 5 Minutes | Do Now |
17 | | 10 Minutes | Lesson |
18 | | 35 Minutes | Review |
19 | | 5 Minutes | Debrief |
20 |
21 | ## Instructor's Notes
22 | 1. **Do Now**
23 | * Students experiment and learn that if they want to find out if a particular element is in a list, there is a useful tool that can save time.
24 | 2. **Lesson**
25 | * Go over list `is in` conditionals. Ask what the return value is (Boolean expression).
26 | * Have students practice using the `is in` in an if statement. User this time to look over the student responses to the first part of the Do Now - identify the topics they are having problems with.
27 | 3. **Review**
28 | * Spend time reviewing the topics students are confused about.
29 | * Have students practice using lists and Boolean expressions.
30 |
31 | ###Accommodation/Differentiation
32 | This lesson may not be necessary, however this is a good opportunity to check for student understanding of lists and associated functions.
33 |
34 | There could also be a unit quiz after the game loop lesson or during the Zork project, and this lesson could be used to review for that quiz.
35 |
36 | [Do Now]:do_now2.md
37 |
--------------------------------------------------------------------------------
/units/2_unit/07_lesson/do_now.md:
--------------------------------------------------------------------------------
1 | # Do Now 2.07
2 |
3 | How would you print out something 10 times? What about 100? What about 1,000? Can you remember something from Snap! that might allow that?
4 |
5 |
6 |
7 |
8 | Open up the terminal. Type the following code using interactive mode.
9 |
10 | ```python
11 | while True:
12 | print('a')
13 | ```
14 | What happens when you run this code?
15 |
16 |
17 | Try using other Boolean expressions instead of `True` (e.g. `4 > 5` and `9 != 2`), and explore what happens.
--------------------------------------------------------------------------------
/units/2_unit/07_lesson/lab.md:
--------------------------------------------------------------------------------
1 | # Lab 2.07 - Tic-Tac-Toe Revisited
2 |
3 | 1) For each example below, predict what will be printed. Next, run the program and confirm.
4 |
5 | ```python
6 | a = 0
7 | while a< 100:
8 | print(a)
9 | ```
10 | | **Predicted Output** | **Actual Output** |
11 | | --- | --- |
12 | |
|
|
13 |
14 | ```python
15 | a = 0
16 | while a < 100:
17 | a = a + 1
18 | print(a)
19 | ```
20 | | **Predicted Output** | **Actual Output** |
21 | | --- | --- |
22 | |
|
|
23 |
24 | ```python
25 | a = input("Would you like to quit: ")
26 | while a != "y":
27 | a = input("Would you like to quit: ")
28 | ```
29 | | **Predicted Output** | **Actual Output** |
30 | | --- | --- |
31 | |
|
|
32 |
33 | 2) Remember the Tic-Tac-Toe game we started to create last week? We are going to keep implementing the game using a while loop.
34 |
35 | * Allow users to keep playing (max 9 times).
36 | * Use variables to decide whose turn it is, and greet them as Xs or Os.
37 | * User picks a location on the board according to the number:
38 | 
39 | * Depending on the position user gave, update the corresponding position of the board to reflect that.
40 | * Print the updated board out.
41 | * You will not need to determine the winner at this point, we will revisit this again and complete the game in Unit 4!
42 |
43 | ###Bonus!
44 | Create a variable-sized board. So instead of a classic 3 x 3 board, create a way for the user specify the size of the board they want to play with.
--------------------------------------------------------------------------------
/units/2_unit/07_lesson/lesson.md:
--------------------------------------------------------------------------------
1 | # Lesson 2.07: Game Loop
2 |
3 | ##Learning Objectives
4 | Students will be able to...
5 | * Define and identify: **while loop**
6 | * Use a while loop to simulate game play
7 |
8 | ##Materials/Preparation
9 | * [Do Now]
10 | * [Lab - Tic-Tac-Toe Revisited]
11 | * Associated Reading - section 2.7 of Book
12 | * Read through the do now, lesson, and lab so that you are familiar with the requirements and can assist students
13 |
14 | ## Pacing Guide
15 | | **Duration** | **Description** |
16 | | ---------- | ----------- |
17 | | 5 Minutes | Do Now |
18 | | 10 Minutes | Lesson |
19 | | 35 Minutes | Lab |
20 | | 5 Minutes | Debrief |
21 |
22 | ## Instructor's Notes
23 | 1. **Do Now**
24 | * Students experiment with creating `while` loops.
25 | 2. **Lesson**
26 | * Ask students what the `while` loops that they created did.
27 | * Go over the syntax of `while` loops. Use this as an opportunity to remind students of **boolean expressions**.
28 | * Ask: how might while loops be useful?
29 | * Ask students to consider how they could write a loop using user input, using the following scenario:
30 | * What if you wanted the loop to stop when the user inputs "quit"?
31 | * Have the students think about and write a solution, then call students up to the board to write out how they solved it.
32 | 3. **Lab**
33 | * Students work to create a Tic-Tac-Toe game that allows turns (up to 9), building on their previous work.
34 | 4. **Debrief**
35 | * Check for completion and understanding of the lab.
36 | ###Accommodation/Differentiation
37 |
38 | If there is extra time, have students start reading through the project specs and thinking about how they will apply what they have learned this unit to complete the project.
39 |
40 | [Do Now]:do_now.md
41 | [Lab - Tic-Tac-Toe Revisited]:lab.md
--------------------------------------------------------------------------------
/units/2_unit/08_lesson/lesson.md:
--------------------------------------------------------------------------------
1 | # Lesson 2.08: Project 2
2 |
3 | ##Learning Objectives
4 | Students will be able to...
5 | * Use knowledge of lists, booleans, conditionals, and while loops to create a text-based adventure game.
6 |
7 | ##Materials/Preparation
8 | * [Project Spec - Text Monster]
9 | * Solution (access protected resources by clicking on "Additional Curriculum Materials" on the [TEALS Dashboard])
10 | * [Text Monster Game - Example Code]
11 | * Update the Project Spec as needed to meet your grading requirements
12 | * Try creating your own variation on the Text Monster code so you are familiar with the potential challenges and bugs your students will hit.
13 | * Review [4 Steps to Solve Any CS Problem]
14 |
15 | ## Pacing Guide
16 |
17 | #### Day 1
18 | | **Duration** | **Description** |
19 | | ---------- | ----------- |
20 | | 10 Minutes | Project Overview/Demo|
21 | | 40 Minutes | Design |
22 | | 5 Minutes | Debrief |
23 | #### Days 2 - 9
24 | | **Duration** | **Description** |
25 | | ---------- | ----------- |
26 | | 10 Minutes | Review |
27 | | 40 Minutes | Project Work|
28 | | 5 Minutes | Debrief |
29 |
30 | ## Instructor's Notes
31 | 1. **4 Steps to Solve Any CS Problem**
32 | * Review [4 Steps to Solve Any CS Problem]
33 | 2. **Project Overview/Demo**
34 | * Distribute the project spec to all students and walk them through the goals and requirements of the project.
35 | * Show a demo of a completed project.
36 | * Go over specific design considerations from the project spec:
37 | * Draw out a game board using lists and a variable saving the current floor. Have students call out moves and practice going through a game. (Note using lists of lists ended up being too much info to cover here. If you think the students are ready it would make more sense design wise)
38 | * Introduce the concept of global variables and how they will be useful here.
39 | * Identify the importance of the "User Pocket" and how to use a list along with `append` and `remove` for this information.
40 | 3. **Design**
41 | * Have students stay at their desks and write down what lists they'll need.
42 | * They should break up the project into parts: parsing user input, keeping track of players position, returning what is at the player's position .
43 | 4. **Debrief/Review**
44 | * During discussion and warp up at the end of class, get a feeling for where students are in the project.
45 | * During the review the next morning cover the topics/areas that students are struggling on and present tips, suggestions, and goals for that day.
46 |
47 | ###Accommodation/Differentiation
48 | Make sure to do status checks with all students throughout the project. Identify students that are struggling on the project after the first few days and provide additional scaffolding & support as needed.
49 |
50 | For any students that are advancing rapidly through the project, give them extension ideas such as adding a new feature or floor to the game.
51 | Advanced students can also be paired as tutors/helpers with struggling students.
52 |
53 |
54 | [Project Spec - Text Monster]: project.md
55 | [Text Monster Game - Example Code]: project_file.py
56 | [TEALS Dashboard]:http:/www.tealsk12.org/dashboard
57 | [4 Steps to Solve Any CS Problem]:https://github.com/TEALS-IntroCS/2nd-semester-introduction-to-computer-science-principles/raw/master/units/4%20Steps%20to%20Solve%20Any%20CS%20Problem.pdf
58 |
--------------------------------------------------------------------------------
/units/2_unit/unit2_md.md:
--------------------------------------------------------------------------------
1 | # Unit 2
2 |
3 | | Lesson |
4 | | ---------- |
5 | | [Binary Day] |
6 | | [Data Types and Casting] |
7 | | [Booleans and Expressions] |
8 | | [Conditionals] |
9 | | [Lists] |
10 | | [Lists(2)] |
11 | | [Lists Recap] |
12 | | [Game Loop] |
13 | | [Project] |
14 |
15 | [Binary Day]:https://teals-introcs.gitbooks.io/2nd-semester-introduction-to-computer-science-pri/content/lesson_201_binary_day.html
16 | [Data Types and Casting]:https://teals-introcs.gitbooks.io/2nd-semester-introduction-to-computer-science-pri/content/lesson_202_casting.html
17 | [Booleans and Expressions]:https://teals-introcs.gitbooks.io/2nd-semester-introduction-to-computer-science-pri/content/lesson_203_booleans_&_expressions.html
18 | [Conditionals]:https://teals-introcs.gitbooks.io/2nd-semester-introduction-to-computer-science-pri/content/lesson_204_conditionals.html
19 | [Lists]:https://teals-introcs.gitbooks.io/2nd-semester-introduction-to-computer-science-pri/content/lesson_205_lists.html
20 | [Lists(2)]: https://teals-introcs.gitbooks.io/2nd-semester-introduction-to-computer-science-pri/content/lesson_206_lists_2.html
21 | [Lists Recap]: https://teals-introcs.gitbooks.io/2nd-semester-introduction-to-computer-science-pri/content/lesson_206b_lists_recap.html
22 | [Game Loop]: https://teals-introcs.gitbooks.io/2nd-semester-introduction-to-computer-science-pri/content/lesson_207_game_loop.html
23 | [Project]:https://teals-introcs.gitbooks.io/2nd-semester-introduction-to-computer-science-pri/content/lesson208_textgame.html
24 |
--------------------------------------------------------------------------------
/units/3_unit/01_lesson/do_now.md:
--------------------------------------------------------------------------------
1 | # Do Now 3.01
2 |
3 | Type the following code into the editor and run the program.
4 |
5 | ```python
6 | import random
7 | random.randint(0, 3)
8 | random.randint(0, 3)
9 | print(random.randint(0, 3))
10 | print(random.randint(0, 3))
11 | print(random.randint(0, 3))
12 | ```
13 |
14 | What does randint do?
15 |
16 |
17 |
18 | What do the values `0` and `3` do? Try changing those numbers, rerun the program, and write down what changed.
19 |
20 |
21 |
22 | What is the difference between `random.randint(0,3)` and `print(random.randint(0,3))`?
23 |
24 |
25 |
26 |
27 |
28 |
29 |
--------------------------------------------------------------------------------
/units/3_unit/01_lesson/lab.md:
--------------------------------------------------------------------------------
1 | # Lab 3.01 - Magic 8-Ball
2 |
3 | 1) Practice importing random, use `randint` with different arguments. Simulate a dice roll, printing out to the user what number they rolled.
4 |
5 | 2) Look at the [documentation](https://docs.python.org/2/library/random.html) of the random library. Experiment with another function (not `randint`) that returns a value.
6 |
7 | 3) Create a program that simulates a [magic 8-ball](https://en.wikipedia.org/wiki/Magic_8-Ball). Store all of the 8-ball's possible responses (shown below) in a list. Have the program prompt the user to ask the magic 8-ball a question, and then return and print a random response.
8 |
9 | Magic 8-ball response examples:
10 |
11 | * outlook is good
12 | * ask again later
13 | * yes
14 | * no
15 | * most likely no
16 | * most likely yes
17 | * maybe
18 | * outlook is not good
19 |
20 | ###Bonus!
21 | Research the math library and create a program that finds the length of the hypotenuse of a right triangle given two sides.
22 |
--------------------------------------------------------------------------------
/units/3_unit/02_lesson/do_now.md:
--------------------------------------------------------------------------------
1 | #Do Now 3.02
2 |
3 | Open up the terminal. Type the following code.
4 |
5 | ```python
6 | def my_function():
7 | print("THIS IS MY FUNCTION!")
8 | ```
9 |
10 | What does `my_function` do?
11 |
12 |
13 |
14 |
15 | How would you call the function? Practice calling `my_function` and checking that it does what you expect it to.
16 |
17 |
18 |
19 |
20 | How would you add arguments to `my_function`?
21 |
22 |
23 |
24 |
--------------------------------------------------------------------------------
/units/3_unit/02_lesson/lab.md:
--------------------------------------------------------------------------------
1 | # Lab 3.02 - Birthday Song & Random Cards
2 |
3 | 1) Create a function, `birthday_song`, that prints out the happy birthday song to whatever name is input as an argument. The contract should be:
4 |
5 | ```python
6 | # Name: birthday_song
7 | # Purpose: birthday_song prints out a personalized birthday song
8 | # Input: name, string
9 | # Returns: none
10 | def birthday_song(name):
11 | #your code goes here
12 | ```
13 |
14 | 2) Create a function that randomly picks 5 cards from a deck. The cards can repeat. Instead of creating a string for each card it might be useful to have two lists and pick randomly from both the lists. Write out the contract for this function:
15 |
16 | ```python
17 | number = ['A', '1', '2', '3', '4', '5', '6', '7', '8', '9', '10', 'J', 'Q', 'K']
18 | suit = ['Spades', 'Clubs', 'Diamonds', 'Hearts']
19 | ```
20 |
21 | ###Bonus!
22 | Practice passing in lists as an argument to a function. What is different about passing in a list as an argument? Read in the associated reading about list aliasing and write down what is happening in this case.
23 |
--------------------------------------------------------------------------------
/units/3_unit/02_lesson/lesson.md:
--------------------------------------------------------------------------------
1 | #Lesson 3.02: User-Defined Functions
2 |
3 | ##Learning Objectives
4 | Students will be able to...
5 | * Define and identify: **abstraction, def**
6 | * Create functions
7 |
8 | ##Materials/Preparation
9 | * [Do Now]
10 | * [Lab - Birthday Song & Random Cards]
11 | * Associated Reading - section 3.2 of Book
12 | * Read through the do now, lesson, and lab so that you are familiar with the requirements and can assist students.
13 |
14 | ## Pacing Guide
15 | | **Duration** | **Description** |
16 | | ---------- | ----------- |
17 | | 5 Minutes | Do Now |
18 | | 10 Minutes | Lesson |
19 | | 35 Minutes | Lab |
20 | | 5 Minutes | Debrief |
21 |
22 | ## Instructor's Notes
23 | 1. **Do Now**
24 | * Students should take 5 minutes to follow the instructions on the Do Now in order to create/manipulate a user-defined function.
25 | 2. **Lesson**
26 | * Ask students to brainstorm why, in general, a function might be useful in programming.
27 | * **Abstraction**: managing the complexity of a program by removing details and pushing them down to a lower level
28 | * Less repeated code.
29 | * Breaking the problem up into smaller pieces and solving each piece
30 | * Demonstrate to students how you create a function using *def*, calling out the syntax and where arguments would go.
31 | * Ask students how they would call your example function.
32 | * Have students practice making a function that takes two arguments, adds them together, and returns the sum.
33 | * Introduce the concept of a function contract using `#`, which adds a comment (non-executed line of code)
34 | * The function contract should
35 | * specify the name
36 | * explain the purpose
37 | * list what arguments it takes in and the types of those arguments
38 | * specify the return type
39 | 3. **Lab**
40 | * Practice making a function that will take in a name as an argument and output the 'happy birthday song' to that name.
41 | * Create a function that randomly selects 5 cards from a deck of cards (repeating allowed).
42 | 4. **Debrief**
43 | * Check student progress and completion of the lab, wrap up by taking any final questions.
44 |
45 | ###Accommodation/Differentiation
46 |
47 | If students are moving quickly, they could go back and use functions to improve an old project.
48 |
49 |
50 | [Do Now]:do_now.md
51 | [Lab - Birthday Song & Random Cards]:lab.md
52 |
--------------------------------------------------------------------------------
/units/3_unit/03_lesson/do_now.md:
--------------------------------------------------------------------------------
1 | #Do Now 3.03
2 |
3 | Open up the terminal. Paste the following code into the editor:
4 |
5 | ```python
6 | import random
7 | # inputs: x (int), y (int)
8 | # outputs: int
9 | # 50% returns sum of x and y, 50% returns product of x and y
10 | def mystery_function(x, y):
11 | random_number = random.randint(0,1)
12 | if random_number > 0:
13 | z = x + y
14 | else:
15 | z = x * y
16 | return z
17 | mystery_function(1, 2)
18 | ```
19 |
20 | What happens when your run this code? How do you know what the result was?
21 |
22 |
23 |
24 |
25 | Keeping the function the same, rewrite the code to print out the value that the function returns.
26 |
27 |
28 |
29 |
--------------------------------------------------------------------------------
/units/3_unit/03_lesson/lesson.md:
--------------------------------------------------------------------------------
1 | # Lesson 3.03: Return vs Print
2 |
3 | ##Learning Objectives
4 | Students will be able to...
5 | * Define and identify: **return, none, void**
6 | * Explain and demonstrate the difference between printing and returning
7 |
8 | ##Materials/Preparation
9 | * [Do Now]
10 | * [Lab - War (Card Game)]
11 | * Read through the do now, lesson, and lab so that you are familiar with the requirements and can assist students.
12 | * Note that this lesson may take two days.
13 |
14 | ## Pacing Guide
15 | | **Duration** | **Description** |
16 | | ---------- | ----------- |
17 | | 5 Minutes | Do Now |
18 | | 10 Minutes | Lesson |
19 | | 35 Minutes | Lab |
20 | | 5 Minutes | Debrief |
21 | | **Day 2** | |
22 | | 10 Minutes | Recap & Review |
23 | | 40 Minutes | Finish Lab |
24 | | 5 Minutes | Debrief |
25 |
26 | ## Instructor's Notes
27 | 1. **Do Now**
28 | * Students experiment with a function that returns a value, but they must add a print command to output that value.
29 | 2. **Lesson**
30 | * Ask students about what they think the difference between returning and printing is.
31 | * Get a volunteer to describe how they rewrote the code in the Do Now to get a value output.
32 | * Ask a student to write the code on the board.
33 | * Discuss the concept of the function contract again, explaining that the functions we will work with have both inputs and outputs.
34 | * Returning is a concept in Snap!, just with a different name: reporting.
35 | * 
36 | * If students appear to be struggling with the return vs. print concept, try this activity:
37 | * Students work together to build a structure using cards. One student volunteer represents the `give_card` function. This students holds the deck of cards and stands by the board.
38 | * On the board display the `give_card` function in code code that only **prints** the value of a randomly chosen card. Students 'call' the student and request cards, which then the student follows the instructions and draws ('prints') the card on the board.
39 | * Next display a new `give_card` function that **returns** a card instead. Have students 'call' the function, however this time have the `give_card` student pass out the card when a student calls him/her.
40 | * Debrief the activity and talk about what was learned.
41 | 3. **Lab**
42 | * Given a shuffled deck list, students will create a program that plays the game 'War' with the user.
43 |
44 | 4. **Debrief**
45 | * Check student progress and completion of the lab, wrap up by taking any final questions.
46 |
47 |
48 | ###Accommodation/Differentiation
49 | As an extension activity, ask students to research the shuffle function and the functions associated with it.
50 |
51 |
52 | [Do Now]:do_now.md
53 | [Lab - War (Card Game)]:lab.md
--------------------------------------------------------------------------------
/units/3_unit/04_lesson/do_now.md:
--------------------------------------------------------------------------------
1 | # Do Now 3.04
2 |
3 | Rank the following from easiest to hardest:
4 |
5 | 1. Importing built-in functions
6 | 2. Using `randint`
7 | 3. Abstraction/creating functions
8 | 4. Passing int/str/float/bool arguments into functions
9 | 5. Calling a function
10 | 6. List syntax
11 | 7. Return vs print
12 |
13 | We will have a quiz next class covering all of the above topics. Is there any topic you would like to focus on and cover more of?
14 |
15 | Type the following into the terminal and run the program:
16 |
17 | ```python
18 | my_list = ['a', 'b', 'c', 'd']
19 | # input: a list of strings
20 | # output: None
21 | def my_function(list_argument):
22 | list_argument[0] = 'z'
23 | print(my_list)
24 | my_function(my_list)
25 | print(my_list)
26 | ```
27 | What happened? Try writing a similar program but passing in integers instead of a list. What happens?
28 |
29 |
30 |
--------------------------------------------------------------------------------
/units/3_unit/04_lesson/lab.md:
--------------------------------------------------------------------------------
1 | # Lab 3.04 - Aliasing & Scope
2 |
3 | ##Aliasing
4 | * Will updating b affect a? Explain why or why not?
5 |
6 | ```python
7 | a = [1, 2, 4]
8 | b = a
9 | ```
10 |
11 |
12 | * Predict what `my_list` list will print out when this code is run. If you are not sure check the code by copying and running it.
13 |
14 | ```python
15 | # input: a list of ints
16 | # output: an int
17 | def update_list(a_list):
18 | a_list[3] = "yo"
19 | b = a_list[4]
20 | b = 100
21 |
22 | my_list = [1, 2, 3, 4, 5]
23 | update_list(my_list)
24 | ```
25 |
26 |
27 | ##Scope
28 | * Draw a stack diagram for the following:
29 |
30 | ```python
31 | var_1 = "kittens"
32 | var_2 = "cookies"
33 |
34 | # input: a string
35 | # output: a string
36 | def my_function(my_favorite_things):
37 | song_lyrics = "rain drops on roses,"
38 | combined_song = song_lyrics + my_favorite_things
39 | return combined_song
40 |
41 | # input: a string
42 | # output: a string
43 | def my_function_2(item, item2):
44 | full_lyrics = item + "on " + item2
45 | full_song = my_function(full_lyrics)
46 | return full_song
47 |
48 | my_song = my_function_2(var_1, var_2)
49 | ```
50 |
51 |
52 |
53 |
54 | * Write down what (if anything) is wrong with the following code. If there was an issue write out how to fix it. If you are unsure copy and run the code and fix it.
55 |
56 | 1\.
57 |
58 | ```python
59 | var_1 = 'cat'
60 | var_2 = 'dog'
61 |
62 | def print_out_my_favorite(favorite_pet):
63 | if favorite_pet == var_1:
64 | print("My favorite pet is the cat.")
65 | if favorite_pet == var_2:
66 | print("My favorite pet is the dog.")
67 | var_2 = "cat"
68 |
69 | print_out_my_favorite(var_1)
70 | print(var_2)
71 | ```
72 |
73 | 2\.
74 |
75 | ```python
76 | var_1 = 'cat'
77 | var_2 = 'dog'
78 |
79 | def print_out_my_favorite(favorite_pet):
80 | var_1 = 'dog'
81 | var_2 = 'cat'
82 | if favorite_pet == var_1:
83 | print("My favorite pet is the cat.")
84 | if favorite_pet == var_2:
85 | print("My favorite pet is the dog.")
86 |
87 | print_out_my_favorite(var_1)
88 | print(var_1 + " " + var_2)
89 | ```
90 |
91 | 3\.
92 |
93 | ```python
94 | var_1 = 'cat'
95 | var_2 = 'dog'
96 |
97 | def print_out_my_favorite(favorite_pet):
98 | if favorite_pet == var_1:
99 | print("My favorite pet is the cat.")
100 | if favorite_pet == var_2:
101 | print("My favorite pet is the dog.")
102 |
103 | print_out_my_favorite(var_1)
104 | print(var_2)
105 | ```
106 |
107 | * Write a program that has a global variable, `my_num`. Create three functions that update `my_num`:
108 | 1. `add2`: this function adds 2 to `my_num`
109 | 2. `multiply_num`: this function takes in a parameter, `multiplier`, and multiplies `my_num` by that parameter
110 | 3. `add2_and_multiply`: this function takes in a parameter, `multiplier`, and calls `add2`, then calls `multiply_num`.
111 |
--------------------------------------------------------------------------------
/units/3_unit/05_lesson/lesson.md:
--------------------------------------------------------------------------------
1 | # Lesson 3.05: Project 3
2 |
3 | ##Learning Objectives
4 | Students will be able to...
5 | * Use project planning skills to complete a longer-term project
6 | * Create functions to organize a project
7 | * Apply skills learned in units 1-3 to create a functioning program
8 |
9 | ##Materials/Preparation
10 | * [Project Spec - Oregon Trail]
11 | * Solution (access protected resources by clicking on "Additional Curriculum Materials" on the [TEALS Dashboard](https://www.tealsk12.org/dashboard/))
12 | * Update the Project Spec as needed to meet your grading requirements
13 | * Try creating your own variation on the Oregon Trail code so you are familiar with the potential challenges and bugs your students will hit.
14 | * Review [4 Steps to Solve Any CS Problem]
15 |
16 | ## Pacing Guide
17 | ####Day 1
18 | | **Duration** | **Description** |
19 | | ---------- | ----------- |
20 | | 10 Minutes | Project Overview |
21 | | 40 Minutes | Planning |
22 | | 5 Minutes | Debrief |
23 |
24 | ####Days 2-9
25 |
26 | |**Duration** |**Description** |
27 | |--|--|
28 | | 5 Minutes | Review Day Plan |
29 | | 45 Minutes | Project Work|
30 | | 5 Minutes | Debrief |
31 |
32 | ## Instructor's Notes
33 | 1. **4 Steps to Solve Any CS Problem**
34 | * Remind students of the [4 Steps to Solve Any CS Problem]
35 | 2. **Project Overview**
36 | * Demo the Oregon Trail finished project.
37 | * Give out the project spec and go over game rules.
38 | 3. **Planning**
39 | * Have students draw out the game play.
40 | * Students should plan to create functions for each user interaction by figuring out where the repeated code will be.
41 | * Students should list out which variables they will need.
42 | * Have students plan out their next 7 days. Suggested timeline/checkpoints below:
43 | 1. Set up user inputs with dummy functions, make sure game loop works
44 | 2. Create variables necessary to run the game, start implementing basic functions
45 | 3. Focus on the random functions
46 | 4. Figure out how to move the days
47 | 5. Finish day updating
48 | 6. Connect functions together
49 | 7. Wrap up and game over check is correct
50 |
51 | ###Accommodation/Differentiation
52 | Advanced students can add in random events like cholera or snake bites. Students can also have a list of travelers instead of just 1, where each traveler is affected differently by each action.
53 |
54 | The planning phase of this project will be essential, especially for students who you think may struggle with this project. Provide more guidance and scaffolding to those students that need it.
55 |
56 | [Project Spec - Oregon Trail]:project.md
57 | [Oregon Trail - Example Code]:oregon_trail.py
58 | [TEALS Dashboard]:http:/www.tealsk12.org/dashboard
59 | [4 Steps to Solve Any CS Problem]:https://github.com/TEALS-IntroCS/2nd-semester-introduction-to-computer-science-principles/raw/master/units/4%20Steps%20to%20Solve%20Any%20CS%20Problem.pdf
60 |
--------------------------------------------------------------------------------
/units/3_unit/05_lesson/project.md:
--------------------------------------------------------------------------------
1 | # Project 3: Oregon Trail
2 |
3 | Using variables, functions, and conditionals in Python, students will create an Oregon Trail game.
4 |
5 | ## Overview
6 | We will be recreating Oregon Trail! The goal is to travel from NYC to Oregon (2000 miles) by Dec 31st. However, the trail is arduous. Each day costs you food and health. You can hunt and rest, but you have to get there before winter!
7 |
8 | ## Details
9 | ### Behavior
10 | * Player starts in NYC on 03/01 with 2,000 miles to go, 500lbs of food, and 5 health.
11 | * The player must get to Oregon by 12/31
12 | * At the beginning of the game, user is asked their name.
13 | * Each turn, the player is asked what action they choose, where the player can type in the following: `travel`, `rest`, `hunt`, `status`, `help`, `quit`
14 | * The player's health randomly decreases 2 times during the month.
15 | * The player eats 5lbs of food a day.
16 | * `travel`: moves you randomly between 30-60 miles and takes 3-7 days (random).
17 | * `rest`: increases health 1 level (up to 5 maximum) and takes 2-5 days (random).
18 | * `hunt`: adds 100 lbs of food and takes 2-5 days (random).
19 | * `status`: lists food, health, distance traveled, and day.
20 | * `help`: lists all the commands.
21 | * `quit`: will end the game.
22 |
23 | ### Implementation details
24 | * Create functions for all options a player can take
25 | * Use globals to keep track of player health, food pounds, miles to go, current day, current month
26 | * Create a function add_day which updates the day
27 | * Use global list to keep track of which months have 31 days and use this in the add_day function (i.e.: MONTHS_WITH_31_DAYS = [1, 3, 5, 7, 8, 10, 12])
28 | * Create a function select_action which uses a while loop to call add_day function
29 |
30 | ## Grading
31 | ### Scheme/Rubric
32 | | **Functional Correctness(Behavior)** | |
33 | | --------------------------------------------------------------- |-----|
34 | | `travel`, `rest`, `hunt` | 15 |
35 | | `status`, `help`, and `quit` | 5 |
36 | | Game ends if food runs out, days run out, or health runs out | 10 |
37 | | Days roll over correctly | 10 |
38 | | Food decreases every day | 5 |
39 | | Health decreases randomly | 5 |
40 | | **Sub total** | 50 |
41 | | **Technical Correctness ** | |
42 | | Correctly use functions and contracts | 20 |
43 | | Correctly use imported random function | 5 |
44 | | Correctly use global variables | 5 |
45 | | Correctly use and update variables | 5 |
46 | | Correctly add_days and select_action functions | 15 |
47 | | **Sub total** | 50 |
48 | | **Total** | 100 |
49 |
50 |
51 | ## Extra Credit
52 | 1. Make the rate of food consumption be a function of activity. So if a player hunts for a turn they take up more food, but if they rest they take up less food.
53 | 2. Create a random event that occurs randomly once a month, like a river crossing or a dysentery, that will take up a range of 1-10 food, 1-10 days and 0-1 health.
54 |
--------------------------------------------------------------------------------
/units/3_unit/unit_3.md:
--------------------------------------------------------------------------------
1 | # Unit 3
2 |
3 |
--------------------------------------------------------------------------------
/units/4 Steps to Solve Any CS Problem.pdf:
--------------------------------------------------------------------------------
https://raw.githubusercontent.com/TEALS-IntroCS/2nd-semester-introduction-to-computer-science-principles/723385e9b07e68fc6d89d5d45a6fe566e488e510/units/4 Steps to Solve Any CS Problem.pdf
--------------------------------------------------------------------------------
/units/4_unit/01_lesson/NestedLoops - NumOfCats - Code.png:
--------------------------------------------------------------------------------
https://raw.githubusercontent.com/TEALS-IntroCS/2nd-semester-introduction-to-computer-science-principles/723385e9b07e68fc6d89d5d45a6fe566e488e510/units/4_unit/01_lesson/NestedLoops - NumOfCats - Code.png
--------------------------------------------------------------------------------
/units/4_unit/01_lesson/do_now.md:
--------------------------------------------------------------------------------
1 | # Do Now 4.01
2 |
3 | 1. Copy and run the following code:
4 | ```python
5 | single_fruit = ['apple', 'banana', 'watermelon', 'grape']
6 | multi_fruit = []
7 | multi_fruit.append(single_fruit[0] + 's')
8 | multi_fruit.append(single_fruit[1] + 's')
9 | multi_fruit.append(single_fruit[2] + 's')
10 | multi_fruit.append(single_fruit[3] + 's')
11 | print(multi_fruit)
12 | ```
13 | Briefly write down what happened. What would happen if you added 100 items to the list `single_fruit`? Write down how you would update `multi_fruit`.
14 |
15 |
16 |
17 |
18 | 2. Copy and run the following code:
19 | ```python
20 | list_of_numbers = [3, 5, 10, 23]
21 | for num in list_of_numbers:
22 | print("num is " + str(num))
23 | ```
24 | Briefly write down what happened. How would this change if you added 100 items to `list_of_numbers`?
25 |
26 |
27 |
28 |
29 | 3. Rewrite the code from part 1 using knowledge from part 2.
--------------------------------------------------------------------------------
/units/4_unit/01_lesson/lab.md:
--------------------------------------------------------------------------------
1 | # Lab 4.01 - de_vowel
2 |
3 | ## Remove the Vowels
4 | Create a function, `de_vowel`, which will take a string as input and return a copy of that string with all the vowels removed. Otherwise, the string should be the same.
5 |
6 | 1. Create the function contract for `de_vowel`.
7 | 2. Write `de_vowel` using a for loop
8 | 3. Provide a few examples that confirm de_vowel works as expected:
9 | * What if the string is all vowels?
10 | * What if there are no vowels?
11 | * What if there is a mix of vowels and non-vowels and spaces?
12 |
13 | ###Example
14 |
15 | Example of the file:
16 |
17 | ```python
18 | # contract goes here
19 | def de_vowel(a_string):
20 | # your code goes here
21 | no_vowels = de_vowel("This sentence has no vowels")
22 | print(no_vowels)
23 | # examples go here
24 | ```
25 |
26 | Example running of the code:
27 |
28 | ```python
29 | >>> python3 de_vowel_lab.py
30 | Ths sntnc hs n vwls
31 | ```
32 |
33 | ### Bonus!
34 | Use a counter (variable you define outside of a loop to keep track of a value inside a loop) to create a function `count_vowels`.
35 |
36 | `count_vowels` takes in a string and returns an int representing the number of vowels in the string.
37 |
38 | ## SNAP Challenge – 10 Cats Drinking Milk from a Saucer
39 | • Create the following program in Python.
40 | 
--------------------------------------------------------------------------------
/units/4_unit/01_lesson/lesson.md:
--------------------------------------------------------------------------------
1 | #Lesson 4.01: Looping Basics
2 |
3 | ##Learning Objectives
4 | Students will be able to...
5 |
6 | * Define and identify: **for loop**, **item**, **iteration**, **scope**
7 | * Recall looping in Snap! and reapply the concept in Python
8 | * Loop through (traverse) the items in a list
9 | * Be aware of the scope of variables during iteration
10 |
11 | ##Materials/Preparation
12 | * [Do Now]
13 | * [Lab - de_vowel]
14 | * Associated Reading - section 4.1 of Book
15 | * Read through the do now, lesson, and lab so that you are familiar with the requirements and can assist students
16 |
17 | ## Pacing Guide
18 | | **Duration** | **Description** |
19 | | ---------- | ----------- |
20 | | 10 Minutes | Do Now |
21 | | 10 Minutes | Lesson |
22 | | 30 Minutes | Lab |
23 | | 5 Minutes | Debrief |
24 |
25 | ## Instructor's Notes
26 |
27 | 1. **Do Now**
28 | * Display the Do Now on the board.
29 | * Students will experience how to use a for loop to efficiently complete a repeated action.
30 | 2. **Lesson**
31 | * Go over Part 1 of the Do Now. Ask the students what would happen if the list got much larger?
32 | * If they say they would write down a lot of code, ask how readable that might be, or how long would it take to write, or the greater potential for bugs due to typos.
33 | * Go over part 2 of the Do Now. Ask the students what happened. Ask if they remember something similar from Snap!
34 | * Introduce the **for loop** as a way to deal with issues associated with part 1 of the Do Now.
35 | * Syntax: `for num in list_of_numbers:`
36 | * Emphasize that the body of the for loop is the indented part
37 | * **Iteration**: body of the loop is repeated with different values of the list. Note how the body of the loop is repeated but `num` changes. Consider drawing this out on the board.
38 | * Remind students of the concept of **scope**, showing how `num` changes values with each iteration of the loop.
39 | * Go over Part 3 (many students likely didn't have time to finish). Ask students to write the first line of the loop on the board. Have students brainstorm what the body should be. Come to a group consensus and run the code.
40 | 3. **Lab**
41 | * De-vowel lab: Students will create a function that will take in a sentence and return that sentence without vowels.
42 | 4. **Debrief**
43 | * Talk about any issues or challenges the students had with this lab. If there is time, call students up to the board to shown and demonstrate their code/solutions.
44 |
45 |
46 | ###Accommodation/Differentiation
47 |
48 | If there is time, go over the bonus question. Explain how a counter is a frequently used tool to keep track of the count of things from outside the loop . Discuss the concept of the counter's scope (counter gets updated in the loop, but doesn't reset automatically at each iteration). Counters can be used with any loop, and are often used with while loops!
49 |
50 |
51 |
52 | [Do Now]: do_now.md
53 | [Lab - de_vowel]: lab.md
--------------------------------------------------------------------------------
/units/4_unit/02_lesson/do_now.md:
--------------------------------------------------------------------------------
1 | # Do Now 4.02
2 |
3 | # Part 1
4 | Copy and run the following code into the interpreter.
5 | ```python
6 | for i in range(0, 10):
7 | print(i)
8 | ```
9 | Write down what the range function does.
10 |
11 |
12 | # Part 2
13 | Use the `range` and `len` functions to make a for loop that loops through `a`.
14 |
15 | ```python
16 | a = ['apples', 'oranges', 'pears', 'grapes']
17 | ```
18 | len_a = len(a)
19 | range(0, len(a))
20 |
21 | Write down what `range(0, len(a))` does.
22 |
23 | What is the return value of the range function?
24 |
25 |
26 |
27 | # Part 3
28 | Use the `range` and `len` functions to make a for loop. (Remember that for loops iterate over lists)
29 |
--------------------------------------------------------------------------------
/units/4_unit/02_lesson/lab.md:
--------------------------------------------------------------------------------
1 | # Lab 4.02 - Getting Loopy
2 |
3 | ## Part 1
4 | Write a function `fruit_pluralizer`. It will take in a list of fruit and return nothing. The function should update the values of the list so that the values are plural. If the fruit name ends in a 'y' remove the 'y' and add 'ies', otherwise add an 's'.
5 |
6 | 1. Create the function contract for `fruit_pluralizer`.
7 | 2. Provide a few examples that confirm `fruit_pluralizer` works as expected:
8 | * Include examples with 'berry'
9 | * What if the list is empty?
10 | * What if the fruit ends in 's'?
11 |
12 | ### Example
13 |
14 | ```python
15 | # contract goes here
16 | def fruit_pluralizer(list_of_strings):
17 | # your code goes here
18 | fruit_list = ['apple', 'berry', 'melon']
19 | print("Single Fruit: " + str(fruit_list))
20 | fruit_pluralizer(fruit_list)
21 | print("No longer single Fruit: " + str(fruit_list))
22 | # examples go here
23 | ```
24 |
25 | Running the code:
26 |
27 | ```python
28 | >>> python3 fruit_pluralizer_lab.py
29 | Single Fruit: ['apple', 'berry', 'melon']
30 | No longer single Fruit: ['apples', 'berries', 'melons']
31 |
32 | ```
33 |
34 | ### Hint
35 | Remember that you can index into the string and get the length of a string. Use that to get the last letter of each word.
36 |
37 | ## Part 2
38 | Create a function `my_reverse`, which will return a reversed string.
39 |
40 | 1. Create the function contract for `my_reverse`.
41 | 2. Provide a few examples to confirm that `my_reverse` works:
42 | * An empty string
43 | * A string of even length
44 | * A string of odd length greater than 1
45 | * A string of length 1
46 |
47 | ### Example
48 |
49 | ```python
50 | # contract goes here
51 | def my_reverse(string_to_reverse):
52 | # your code goes here
53 | reversed = my_reverse("apples")
54 | print(reversed)
55 | # examples go here
56 | ```
57 |
58 | Running the code:
59 |
60 | ```python
61 | >>> python3 my_reverse_lab.py
62 | selppa
63 | ```
64 | ### Hint
65 | To get the last element:`(len(my_list) -1) - 0`
66 |
67 | To get the second to last element: `(len(my_list)-1 ) - 1`
68 |
69 | To get the third to last element: `(len(my_list)-1) - 2`
70 |
71 |
72 | ### Bonus!
73 | Create a function `reverse_strings_in_list`. This function will input a list of strings you want to reverse. The function will reverse the strings in the list by calling the `my_reverse` function in a loop.
--------------------------------------------------------------------------------
/units/4_unit/02_lesson/lesson.md:
--------------------------------------------------------------------------------
1 | #Lesson 4.02: For Loops Using Range
2 |
3 | ##Learning Objectives
4 | Students will be able to...
5 | * Define and identify: **range**
6 | * Use the `range` and `len` function to to update lists via for loops
7 |
8 | ##Materials/Preparation
9 | * [Do Now]
10 | * [Lab - Getting Loopy]
11 | * Associated Reading - section 4.2 of Book
12 | * Read through the Do Now, lesson, and lab so that you are familiar with the requirements and can assist students
13 |
14 | ## Pacing Guide
15 | | **Duration** | **Description** |
16 | | ---------- | ----------- |
17 | | 5 Minutes | Do Now |
18 | | 10 Minutes | Lesson |
19 | | 35 Minutes | Lab |
20 | | 5 Minutes | Debrief |
21 |
22 | ## Instructor's Notes
23 |
24 | 1. **Do Now**
25 | * Display the Do Now on the board.
26 | * Students experiment with and are introduced to the `range` function.
27 | 2. **Lesson**
28 | * Go over Part 1 of the Do Now. Ask students what the **range** function did. Remind them that there are reference docs online. Show the docs for the range function (note that it actually takes in a third value that is optional). Work together with the students to write a for loop just using the range function.
29 | * Go over part 2 of the Do Now. Ask the students what happened. Ask the students why these values might be helpful.
30 | * They are a list of the indices!
31 | * Go Over Part 3 (many students likely didn't finish). Ask students to write the first line of the loop on the board. Work together as a class to come to a solution that is demonstrated for all to see.
32 | 3. **Lab**
33 | * Students re-write the fruit pluralizer program from yesterday's do now, but without creating a new list.
34 | * Students write a function that reverses the letters in a string.
35 | 4. **Debrief**
36 | * Talk about any issues the students had with the lab today. Discuss how lists are mutable, so you don't have to return a new value. Instead, the list is just updated as the loop runs.
37 |
38 | ###Accommodation/Differentiation
39 |
40 | If students are having a hard time with the fruit pluralizer, consider altering the fruit program to not allow fruit that ends in y.
41 |
42 | Some students may have issues with grabbing the last item of a string, consider providing tips or scaffolding for students that are struggling with this.
43 |
44 | Go over the bonus question if any students got to it. Discuss having a function inside of the loop and how that operated.
45 |
46 |
47 |
48 | [Do Now]: do_now.md
49 | [Lab - Getting Loopy]: lab.md
--------------------------------------------------------------------------------
/units/4_unit/03_lesson/do_now.md:
--------------------------------------------------------------------------------
1 | # Do Now 4.03
2 |
3 | ```python
4 | def print_6_stars():
5 | my_string = ''
6 | for i in range(0, 6):
7 | my_string += ' *'
8 | print (my_string)
9 | ```
10 |
11 | 1. Write down what the output of the function `print_6_stars` is.
12 |
13 |
14 |
15 | 2. Write a function `print_star_squares` that calls `print_6_stars` in a loop to produce the following output.
16 |
17 | ```
18 | >>>python3 print_stars.py
19 | * * * * * *
20 | * * * * * *
21 | * * * * * *
22 | * * * * * *
23 | * * * * * *
24 | * * * * * *
25 | ```
26 |
27 | 3. Rewrite the function `print_star_squares` without using `print_6_stars`. Note that there are two ways to get the above output, so just try doing both!
28 |
--------------------------------------------------------------------------------
/units/4_unit/03_lesson/lab.md:
--------------------------------------------------------------------------------
1 | # Lab 4.03 - Nested For Loops
2 |
3 | In this lab we will be drawing images using nested for loops.
4 |
5 | For each of the following problems, you will write a function that will draw the desired output. You may use an extra function if you find it helpful.
6 |
7 |
8 | 1. Write a function, `draw_7`, to draw the 7x7 square (shown below)
9 |
10 | ```
11 | * * * * * * *
12 | * * * * * * *
13 | * * * * * * *
14 | * * * * * * *
15 | * * * * * * *
16 | * * * * * * *
17 | * * * * * * *
18 | ```
19 |
20 | 2. Write a function `stars_and_stripes`, that will draw a 3 sets of rows. 1st a row of 7 stars followed by a row of 7 dashes (shown below)
21 |
22 | ```
23 | * * * * * * *
24 | - - - - - - -
25 | * * * * * * *
26 | - - - - - - -
27 | * * * * * * *
28 | - - - - - - -
29 | ```
30 | 3. Write a function, `increasing_triangle` that will print out following:
31 |
32 | ```
33 | 1
34 | 1 2
35 | 1 2 3
36 | 1 2 3 4
37 | 1 2 3 4 5
38 | 1 2 3 4 5 6
39 | 1 2 3 4 5 6 7
40 | ```
41 |
42 | 4. Write a function, `vertical_stars_and_stripes` that will print out the following:
43 |
44 | ```
45 | - * - * - * -
46 | - * - * - * -
47 | - * - * - * -
48 | - * - * - * -
49 | - * - * - * -
50 | - * - * - * -
51 | - * - * - * -
52 | ```
53 |
54 | ###Bonus!
55 |
56 | 1. Write a function that will print a border around a 7x7 square (shown below)
57 |
58 | ```
59 | * * * * * * * *
60 | * - - - - - - *
61 | * - - - - - - *
62 | * - - - - - - *
63 | * - - - - - - *
64 | * - - - - - - *
65 | * - - - - - - *
66 | * - - - - - - *
67 | * * * * * * * *
68 | ```
69 |
70 | 2. Write a function that will print the following `balanced_triangle`.
71 |
72 | ```
73 | 1
74 | 1 2
75 | 1 2 3
76 | 1 2 3 4
77 | 1 2 3 4 5
78 | 1 2 3 4 5 6
79 | 1 2 3 4 5 6 7
80 | 1 2 3 4 5 6
81 | 1 2 3 4 5
82 | 1 2 3 4
83 | 1 2 3
84 | 1 2
85 | 1
86 | ```
87 | 3. Write a function that will print the following triangle.
88 |
89 | ```
90 | *
91 | ***
92 | *****
93 | ```
94 |
--------------------------------------------------------------------------------
/units/4_unit/03_lesson/lesson.md:
--------------------------------------------------------------------------------
1 | #Lesson 4.03: Nested For Loops
2 |
3 | ##Learning Objectives
4 | Students will be able to...
5 | * Define and identify: **nested for loops**, **stack trace**
6 | * Use nested for loops via a function and a for loop
7 | * Use nested for loops via two loops nested
8 | * Use a stack trace to understand and demonstrate the flow of nested for loops
9 |
10 | ##Materials/Preparation
11 | * [Do Now]
12 | * [Lab - Nested For Loops]
13 | * Read through the Do Now, lesson, and lab so that you are familiar with the requirements and can assist students
14 |
15 | ## Pacing Guide
16 | ###Day 1
17 | | **Duration** | **Description** |
18 | | ---------- | ----------- |
19 | | 5 Minutes | Do Now |
20 | | 10 Minutes | Lesson |
21 | | 35 Minutes | Lab |
22 | | 5 Minutes | Debrief |
23 | ###Day 2
24 | | ** Duration **| **Description** |
25 | |---|---|
26 | | 5 Minutes | Do Now |
27 | | 10 Minutes | Review |
28 | | 35 Minutes | Lab |
29 | | 5 Minutes | Debrief |
30 |
31 | ## Instructor's Notes
32 |
33 | 1. **Do Now**
34 | * Display the Do Now on the board.
35 | * Students use nested for loops to create a square star pattern.
36 | 2. **Lesson**
37 | * Go over part 1 of the Do Now.
38 | * Discuss the output of the program - were the students able to guess the output without typing it?
39 | * Go over how to read for loops if students are struggling (drawing the [loop diagram]). Make sure students are understanding loops and string concatenation.
40 | * If students continue to struggle, take 5 minutes to go over the loop syntax and practice.
41 | * Go over part 2 of the Do Now.
42 | * Ask students to write the `print_star_squares` function on the board.
43 | * Define **nested for loop**: a loop within another loop. For each iteration of the outer loop the inner loop is iterated through completely.
44 | * Draw a diagram (**stack trace**) of the for loop (e.g. something like [loop diagram])
45 | * Ask students to draw the nested part of the state diagram (should be inside the outer loop but look the same as the outer loop)
46 | * Go over part 3 of the Do Now.
47 | * If students were unable to finish this, give them 5 minutes to practice in groups before calling them back to go over this part.
48 | * Ask students to write on the board how they did this. Ask them how treating the loop as it's own function made it easier or harder.
49 | * Ideally this should make it easier as a way of abstracting knowledge of looping.
50 | 3. **Lab**
51 | * The lab asks students to write functions that produce different outputs using nested for loops.
52 | 4. **Debrief**
53 | * Inform students that there will be a Unit 4 Quiz after Lesson 4.04.
54 | * Go over common questions the students had.
55 | * On the second day, if time allows, go over the bonus and discuss how students solved the problem.
56 |
57 | ###Accommodation/Differentiation
58 | If students need extra time for lab there is another day in the schedule for that.
59 |
60 | This topic is often confusing for students new to the concept, so build in time for frequent individual checks for understanding.
61 |
62 | The bonus problems for the lab are a bit harder and should allow students who are moving fast to work on something a bit trickier.
63 |
64 | [Do Now]: do_now.md
65 | [Lab - Nested For Loops]: lab.md
66 | [loop diagram]: http://etutorials.org/shared/images/tutorials/tutorial_169/F05um02.jpg
--------------------------------------------------------------------------------
/units/4_unit/04_lesson/do_now.md:
--------------------------------------------------------------------------------
1 | # Do Now 4.04
2 |
3 | ## Part 1
4 | 1. Type and run the following code:
5 |
6 | ```python
7 | # my_building is a representation of the apartments on each floor of my 3 story building
8 | my_building = [
9 | ['apt1a', 'apt1b', 'apt1c'],
10 | ['apt2a', 'apt2b', 'apt2c'],
11 | ['apt3a', 'apt3b', 'apt3c']
12 | ]
13 | print("first floor" + str(my_building[0]))
14 | print("first floor, 3rd apartment" + str(my_building[0][2]))
15 | ```
16 |
17 | Write down what was printed. How you would access the 2nd apartment of the 3rd floor (`apt3b`)?
18 |
19 |
20 |
21 |
22 | 2. Write a for loop that iterates over `my_building` and prints out each value (apartment number). Describe what happened.
23 |
24 |
25 |
26 |
27 | ##Part 2
28 |
29 | 1. Copy the following code into editor:
30 |
31 | ```python
32 | my_floor = ['apt1a', 'apt1b', 'apt1c']
33 | ```
34 |
35 | Write a function `apartments_on_floor`. When given a list of apartments, `my_floor`, `apartments_on_floor` prints out each apartment.
36 |
37 |
38 |
39 |
40 |
41 | 2. Copy the following code into the editor:
42 |
43 | ```python
44 | my_building = [
45 | ['apt1a', 'apt1b', 'apt1c'],
46 | ['apt2a', 'apt2b', 'apt2c'],
47 | ['apt3a', 'apt3b', 'apt3c']
48 | ]
49 | ```
50 | Write a function `apartments_in_building`. `apartments_in_building` prints out every apartment in the building. Use your function `apartments_on_floor`.
51 |
52 |
53 |
--------------------------------------------------------------------------------
/units/4_unit/04_lesson/lab.md:
--------------------------------------------------------------------------------
1 | # Lab 4.04 - Shopping List
2 |
3 | ## Part 1
4 | The goal of this lab is to practice using and accessing items from lists of lists.
5 |
6 | You have a few errands to run and have created a few shopping list to help you remember what to buy. You stored your notes in a nested list, `shopping_cart`.
7 | This program will allow the user to ask for a specific item by it's index or update what items are in the cart. The user can request you `print all` the items in a specific shopping list.
8 |
9 | ###Schedule
10 |
11 | ```python
12 | shopping_cart = [
13 | ['tooth paste', 'q-tips', 'milk'],
14 | ['milk', 'candy', 'apples'],
15 | ['planner', 'pencils', 'q-tips']
16 | ]
17 | ```
18 |
19 | ### User Inputs
20 | * `update`
21 | * The program will ask which shopping list the user wants to update, which position it should update, and the new value to update.
22 | * `print`
23 | * The program will ask which shopping list the user wants to print from and afterwards will request which position it should print.
24 | * `print all`
25 | * The program will ask which shopping list the user wants to print and will print all of the items associated with that shopping list.
26 |
27 | ###Functions
28 | * `update_list`
29 | * Takes in an integer representing the index of the shopping list, an integer representing the index of the item to update, and a string representing the new item to add to that shopping list.
30 | * `print_item`
31 | * Takes an int representing the index of the shopping list followed by an int representing the index of the item to print.
32 | * `print_list`
33 | * Takes an int representing the index of the shopping list to print.
34 |
35 | * Feel free to add more functions as you see fit
36 |
37 | ### Example
38 |
39 | ```
40 | >>>What would you like to do? print all
41 | Which shopping list would you like to print? 1
42 | tooth paste, q-tips, gum
43 | ```
44 |
45 | ## Part 2
46 |
47 | In this part of the lab you will go through your shopping list program and perform a few different calculations.
48 |
49 | 1. Create a function, `all_in_one`, that will put all the shopping lists into a single list using a for loop.
50 | 2. Create a function, `count_q_tips`, which will go through all items of the list and keep a count of how many times `'q_tips'` occurs.
51 | 3. In order to make the shopping lists more calcium rich, write a function, `drink_more_milk`, that adds `'milk'` to each of the lists (unless it's already there).
52 | 4. You can't have milk without cookies. Write a function `if_you_give_a_moose_a_cookie`, that will go through every element of schedule and update `'milk'` to be `'milk and cookies'`.
53 |
54 | ###Bonus!
55 | Write a function to reverse the order of the lists and items in `shopping_cart`.
56 |
57 | The list should look like the following when printed:
58 |
59 | ```python
60 | schedule = [
61 | ['q-tips', 'pencils', 'planner'],
62 | ['apples', 'candy', 'milk'],
63 | ['milk', 'q-tips', 'toothe paste']
64 | ]
65 | ```
66 |
67 | ###Tip
68 | Last item can be gotten by `my_list[-1]`
69 |
70 | Second to last element: `my_list[-2]`
71 |
72 | Third to last element: `my_list[-3]`
73 |
--------------------------------------------------------------------------------
/units/4_unit/05_lesson/lab.md:
--------------------------------------------------------------------------------
1 | # Lab 4.05 - Debugging Practice
2 |
3 | 1. Read through the following code:
4 |
5 | ```python
6 | def my_looping_function(list):
7 | for i in range(1, len(list)+1):
8 | print(list[i])
9 |
10 | basic_list = [1, 2, 3, 4, 5, 6]
11 | my_looping_function(basic_list)
12 |
13 | ```
14 | Write down any bugs that you see in this program.
15 |
16 |
17 |
18 |
19 | 2. Read through the following code:
20 |
21 | ```python
22 | def my_nested_looping_function(a_list):
23 | for i in range(0, len(a_list)):
24 | value = a_list[a]
25 | for j in range(0, i):
26 | value += j
27 | print(value)
28 |
29 | basic_list = [1, 2, 3, 4]
30 | my_nested_looping_function(basic_list)
31 | ```
32 | Write down any bugs that you see in this program.
33 |
34 |
35 |
36 |
37 | 3. Go to the computer, type and fix the two above programs.
--------------------------------------------------------------------------------
/units/4_unit/05_lesson/lesson.md:
--------------------------------------------------------------------------------
1 | #Lesson 4.05: Debugging and Quiz
2 |
3 | ##Learning Objectives
4 | Students will be able to...
5 | * Read and understand longer programs involving loops
6 | * Demonstrate their knowledge of looping, lists, and nested loops/lists
7 | * Debug programs involving for loops and lists
8 |
9 | ##Materials/Preparation
10 | * Quiz (access protected resources by clicking on "Additional Curriculum Materials" on the [TEALS Dashboard])
11 | * [Lab - Debugging Practice]
12 | * [Coding Example]
13 | * Read through the quiz, lesson, and lab so that you are familiar with the requirements and can assist students
14 | * Go through the quiz and create an answer key & scoring rubric
15 |
16 | ## Pacing Guide
17 | | **Duration** | **Description** |
18 | | ---------- | ----------- |
19 | | 25 Minutes | Quiz |
20 | | 10 Minutes | Lesson |
21 | | 20 Minutes | Lab |
22 | | 5 Minutes | Debrief |
23 |
24 |
25 | ## Instructor's Notes
26 |
27 | 1. **Quiz**
28 | * Have students start working on the Quiz.
29 | 2. **Lesson**
30 | * Talk about how to read code in a loop (you can use something of your choice or the provided [Coding Example])
31 | * Go over debugging practices for loops.
32 | * Use print statements throughout the code to show where error is.
33 | * Alter input to make sure body of loop is working correctly.
34 | * Make sure lists don't go out of bounds/past the end of the list.
35 | 3. **Lab**
36 | * This lab will have students start by reading code and looking for errors while **not** at the computer.
37 | * After reading through the code they can practice the debugging practices mentioned on the computer to correct the programs.
38 | 4. **Debrief**
39 | * Discuss as a class what was most helpful in debugging, highlight those practices throughout the upcoming project.
40 |
41 | ###Accommodation/Differentiation
42 | Make sure to provide extended time on the quiz for any students that have that requirement in an IEP or 504 plan.
43 |
44 | [TEALS Dashboard]:http:/www.tealsk12.org/dashboard
45 | [Lab - Debugging Practice]: lab.md
46 | [Coding Example]: https://teals-introcs.gitbooks.io/2nd-semester-introduction-to-computer-science-pri/content/units/4_unit/05_lesson/longer_coding_sample.py
47 |
--------------------------------------------------------------------------------
/units/4_unit/05_lesson/longer_coding_sample.py:
--------------------------------------------------------------------------------
1 | def boxes_to_buy(num_needed, sizes):
2 | result = {}
3 | remaining = num_needed
4 |
5 | for size in sizes:
6 | result[size] = remaining // size
7 | remaining = remaining % size
8 |
9 | if remaining > 0:
10 | result[min(sizes)] += 1 # add one of the smallest pack-size if there are any left :)
11 |
12 | boxes_to_buy(96, [20, 5, 3])
13 |
--------------------------------------------------------------------------------
/units/4_unit/06_lesson/project.md:
--------------------------------------------------------------------------------
1 | # Project 4: Tic-Tac-Toe
2 |
3 | Using Python, students will create a Tic-Tac-Toe game. This project has two parts:
4 | 1. Designing the game so that two users can play Tic-Tac-Toe against one another.
5 | 2. Creating a Tic-Tac-Toe checker which will check the board to see if Xs or Os have won the game.
6 |
7 | ## Overview
8 | [Tic-Tac-Toe](http://www.merriam-webster.com/dictionary/tic-tac-toe) is a game in which one player draws X's and another player draws O's inside a set of nine squares and each player tries to be the first to fill a row, column, or diagonal of squares with either X's or O's. We will be writing an interactive Tic-Tac-Toe program. At the end of each turn the computer will check to see if X's have won the game or if the O's have won the game.
9 |
10 | ### Behavior
11 | * The program will prompt the user to enter their name and their opponents name.
12 | * Whoever enters their name first will be playing as X's, and the other player will be O's.
13 | * The players will take turns inputting the row and column they would like to place their mark.
14 | * If that spot is already taken the program will ask for the spot again.
15 | * At the end of each player's turn the program will check if that player has won.
16 | * At the end of each player's turn the program will print the updated game board.
17 | * If there are no more spots open and nobody has won the game, the program will print `Tie game!`.
18 |
19 | ### Implementation Details
20 | * Use variables to store the user names for personalized prompts.
21 | * Create a game board represented as a list of lists, size 3 by 3.
22 | ***Note: This is a change from our earlier implementations of Tic-Tac-Toe. Why do you think this might be better?***
23 | * Check for a winner horizontally, vertically, and on both diagonals.
24 | * Cannot allow a user to overwrite a spot on the board.
25 |
26 | ## Grading
27 | ### Scheme/Rubric
28 | | **Functional Correctness (Behavior)** | |
29 | | --------------------------------------------------------------- |-----|
30 | | Program prompts user for name | 2 |
31 | | Program marks board where user requested| 5|
32 | | Program prints a readable board after user's turn| 5|
33 | | Program won't overwrite value on board | 5 |
34 | | Program reports who won or if there was a tie | 15 |
35 | | Program ends after win, loss, or tie | 3 |
36 | | **Sub total** | 35 |
37 | | **Technical Correctness ** | |
38 | | Correct use of game loop | 5 |
39 | | Correctly indexes into lists of lists to store board | 5 |
40 | | Correctly check board for mark | 5 |
41 | | Check for winners on all three horizontals and verticals | 20 |
42 | | Checks for winners on both diagonals | 10 |
43 | | **Sub total** | 45 |
44 | | **Total** | 80 |
45 |
46 |
47 |
--------------------------------------------------------------------------------
/units/4_unit/unit4.md:
--------------------------------------------------------------------------------
1 | # Unit 4
2 |
3 |
--------------------------------------------------------------------------------
/units/4_unit/unit_4.md:
--------------------------------------------------------------------------------
1 | # Unit 4
2 |
3 |
--------------------------------------------------------------------------------
/units/5_unit/01_lesson/do_now.md:
--------------------------------------------------------------------------------
1 | # Do Now 5.01
2 |
3 | ##Introduction to EarSketch
4 | EarSketch, created by Georgia Tech, is an online tool that allows you to learn Python and music technology side by side. By applying concepts already covered in this curriculum such as functions, loops, and conditionals, you will be able to use the EarSketch IDE to create unique and entertaining beats and songs!
5 |
6 |
7 | 1. Skim the following lessons in the EarSketch documentation in [Unit 1], located in the right panel of the [EarSketch Editor].
8 |
9 | * 1.1.2 [Tools of the Trade: DAWs and APIs](https://earsketch.gatech.edu/earsketch2/?curriculum=1-1-1)
10 | * 1.1.3 [The EarSketch Workspace](https://earsketch.gatech.edu/earsketch2/?curriculum=1-1-2)
11 | * 1.1.6 [The DAW in Details](https://earsketch.gatech.edu/earsketch2/?curriculum=1-1-5)
12 | * 1.1.9 [Creating a New Script](https://earsketch.gatech.edu/earsketch2/?curriculum=1-1-8)
13 | * 1.1.10 [Compising in EarSketch - fitMedia()](https://earsketch.gatech.edu/earsketch2/?curriculum=1-1-9)
14 |
15 | 2. Copy the following code from the reading above into the [EarSketch Editor]:
16 |
17 | ```python
18 | # python code
19 | #
20 | # script_name: Intro_Script
21 | #
22 | # author: The EarSketch Team
23 | #
24 | # description: This code adds one audio clip to the DAW
25 | #
26 | #
27 | #
28 |
29 | #Setup Section
30 | from earsketch import *
31 | init()
32 | setTempo(120)
33 |
34 | #Music Section
35 | fitMedia(TECHNO_SYNTHPLUCK_001, 1, 1, 9)
36 |
37 | #Finish Section
38 | finish()
39 | ```
40 |
41 | What inputs does `fitMedia` take? Press the run button and describe what happened.
42 |
43 | [EarSketch Editor]: http://earsketch.gatech.edu/earsketch2/
44 |
--------------------------------------------------------------------------------
/units/5_unit/01_lesson/lab.md:
--------------------------------------------------------------------------------
1 | # Lab 5.01 - Intro to EarSketch
2 |
3 | Create a basic [EarSketch] project using the following requirements:
4 |
5 | * Open the Earsketch DAW and log in.
6 |
7 | * Click “Options – Save Script to Cloud” and set a name for your song.
8 |
9 | * In comments at the top of your code, include your name, the name of the song (e.g. “Lab 5.01”), and a brief, clear description of the project.
10 |
11 | * Set the tempo of the project to 140 BPM.
12 |
13 | * Make 4 different variables that will hold the following constants:
14 | * DUBSTEP_BASS_WOBBLE_007
15 | * DUBSTEP_PAD_003
16 | * DUBSTEP_DRUMLOOP_MAIN_005
17 | * DUBSTEP_LEAD_004
18 |
19 |
20 | * Make at least 4 tracks using the fitMedia() function. Each track should contain a different audio loop from the other tracks.
21 |
22 | * Each of the tracks should start or stop on different measures (e.g. track 1 starts on measure 1, track 2 starts on measure 4, and so on).
23 |
24 | * Define and use at least 4 variables using 4 different constants from the EarSketch Audio Loop Browser.
25 |
26 | * The project should have a total length of 12 measures.
27 |
28 | * Make sure to include descriptive comments throughout your script.
29 |
30 | * Copy and save the script to your online IDE for turn in.
31 |
32 |
33 |
34 | #### Copyright Note
35 | The above is taken from the EarSketch teaching resources.
36 |
37 | [EarSketch]: http://earsketch.gatech.edu/earsketch2/
--------------------------------------------------------------------------------
/units/5_unit/02_lesson/do_now.md:
--------------------------------------------------------------------------------
1 | # Do Now 5.02
2 |
3 | 1. Begin reading the following lessons in the EarSketch documentation in Unit 1 and Unit 2.
4 |
5 | * 1.2.1 [Rhythm](https://earsketch.gatech.edu/earsketch2/?curriculum=1-2-0)
6 | * 1.4.1 [Using Effect in EarSketch - setEffect()](https://earsketch.gatech.edu/earsketch2/?curriculum=1-4-0)
7 | * 1.7.1 [Copyright](https://earsketch.gatech.edu/earsketch2/?curriculum=1-7-1)
8 | * 2.12.3 [Using makeBeat()](https://earsketch.gatech.edu/earsketch2/?curriculum=2-4-2)
9 |
10 | 2. Answer the following questions, based on the reading:
11 | * What are three examples of effects used in music production and available in EarSketch?
12 |
13 | * Write down how you would use the `setEffect()` function to change the volume level of track 4 to a value of `-15.0`.
14 |
15 | * For most songs, how many beats make up one measure?
16 | * What is the purpose of the `0`, `+`, and `-` symbols when used in an EarSketch beat string?
17 |
--------------------------------------------------------------------------------
/units/5_unit/02_lesson/lab.md:
--------------------------------------------------------------------------------
1 | # Lab 5.02: EarSketch Music
2 |
3 |
4 | 1. Beat strings are made up of combinations of three different characters. Explain the rhythmic meaning of each of the characters:
5 | * "0”
6 | * “+”
7 | * “-”
8 | 2. Create a new EarSketch project using the following requirements. Include your name and a project description at the top of the file.
9 | * This project should have 4 tracks and be 12 measures in length. Each track should use a different/unique audio sample.
10 | * Create 4 variables that hold audio loop constants.
11 | * Create 1 variable that holds a beat string.
12 | * On one track, use the makeBeat() function with your beat string. Your beat string rhythm should repeat for all 12 measures of the project.
13 | * Use the `setEffect()` function for at least one track.
14 | * Make sure to use comments that outline and describe your code.
15 |
16 |
17 |
18 | #### Copyright Note
19 | The above is taken from the earsketch teaching resources.
20 |
--------------------------------------------------------------------------------
/units/5_unit/02_lesson/lesson.md:
--------------------------------------------------------------------------------
1 | #Lesson 5.02: EarSketch Music
2 |
3 | ##Learning Objectives
4 | Students will be able to...
5 |
6 | * Define and identify: **rhythm**, **beat**, **tempo**, **measures**, `setEffect()`, `makeBeat()`
7 | * Play beats using the functions
8 | * Loop through items in a list
9 | * Be aware of the scope of variables during iteration
10 |
11 | ##Materials/Preparation
12 | * [Do Now]
13 | * [Lab - EarSketch Music]
14 | * [EarSketch Editor]
15 | * Associated Reading in EarSketch
16 | * Read through the do now, lesson, and lab so that you are familiar with the requirements and can assist students
17 |
18 | ## Pacing Guide
19 | | **Duration** | **Description** |
20 | | ---------- | ----------- |
21 | | 5 Minutes | Do Now |
22 | | 10 Minutes | Lesson |
23 | | 35 Minutes | Lab |
24 | | 5 Minutes | Debrief |
25 |
26 | ## Instructor's Notes
27 |
28 | 1. **Do Now**
29 | * Students should be given time to read unit 2 of the EarSketch documentation.
30 | * Students should answer the questions included in the do now and be prepared to discuss them as a class.
31 | 2. **Lesson**
32 | * Call on students to discuss the answers to the questions from the Do Now.
33 | * Recap the following key concepts from the reading:
34 | * **Rhythm**: describing how the music moves through time.
35 | * A **beat** is the basic unit of time in music. If you have ever clapped along to a song, you were probably clapping on each beat. So how long does a beat last? The length depends on the overall speed of the song, called the tempo.
36 | * **Tempo** is measured in beats per minute (bpm). If we are clapping at 60 bpm, then each beat lasts one second. At 120 bpm, each beat takes half a second. The higher the bpm, the faster the song, the shorter the duration of each beat.
37 | * Beats are grouped into **measures**. In EarSketch, measures always have four beats.
38 | * `setEffect()`: add an effect to a track. Takes parameters: track number, effect name, effect parameter, effect value
39 | * `makeBeat()`: instead of composing at the measure-level, we can work at the note-level. Takes parameters: clip name, track number, measure number, beat string
40 | 3. **Lab**
41 | * Follow the EarSketch instructions in the lab to use the `makeBeat()` function
42 | * Create a simple song with 2 uses of `fitMedia()`, 2 uses of `makeBeat()` and 1 use of an effect.
43 |
44 | 4. **Debrief**
45 | * Talk about the new functions learned today, and go over any questions about data types and using strings.
46 |
47 | ###Accommodation/Differentiation
48 | Students can use looping and if statements to their song as an extension activity to make their songs more complex.
49 |
50 | Students will likely bring a wide range of background knowledge around music and the related terminology. Offer additional support to those students that are less familiar with the terms being introduced in this lesson.
51 |
52 | [Do Now]: do_now.md
53 | [Lab - EarSketch Music]: lab.md
54 | [EarSketch Editor]: http://earsketch.gatech.edu/earsketch2/
--------------------------------------------------------------------------------
/units/5_unit/03_lesson/do_now.md:
--------------------------------------------------------------------------------
1 | # Do Now 5.03
2 |
3 | 1. Begin reading the following lessons in of the EarSketch documentation in [Unit 2 and Unit 3](http://earsketch.gatech.edu/category/unit-2).
4 |
5 | * 2.9.1 [for loop](https://earsketch.gatech.edu/earsketch2/?curriculum=2-1-2)
6 | * 3.17.3 [Conditional Statements](https://earsketch.gatech.edu/earsketch2/?curriculum=3-1-2)
7 | * 3.19.1 [Procedure - modulo](https://earsketch.gatech.edu/earsketch2/?curriculum=3-3-0)
8 |
9 | 2. Answer the following questions, based on the reading:
10 | * Describe how using a `for` loop can be useful in using EarSketch to create a new beat.
11 | * How can an `if` statement be used with the **modulo** operator in order to have a beat repeat *every other* measure?
12 |
--------------------------------------------------------------------------------
/units/5_unit/03_lesson/lab.md:
--------------------------------------------------------------------------------
1 | # Lab 5.03: Earsketch Control Flow
2 |
3 | 1. Write a for loop that repeats the given rhythm every other measure from measures 1 to 8 (e.g. 1, 3, 5, etc.) on track 1.
4 | * Audio loop constant: HIPHOP_STOMP_BEAT_001
5 | * Rhythm: “0---0-0-00000+++”
6 |
7 | 2. Create an EarSketch script using the following requirements. Include your name and a description in comments at the top of the file.
8 |
9 | * Create a project with 4 tracks that is at least 16 measures in length.
10 |
11 | * 2 tracks should be music tracks, containing fitmedia() function calls.
12 |
13 | * The remaining two tracks should contain makeBeat() function calls.
14 |
15 | * One track should use a for loop to repeat a rhythm (beat string) for every measure in the song.
16 |
17 | * The other track should use a for loop to repeat a rhythm for every other measure in the song (e.g. 1, 3, 5, 7, 9, 11…).
18 |
19 |
20 |
21 | #### Copyright Note
22 | The above is taken from the earsketch teaching resources.
23 |
24 |
--------------------------------------------------------------------------------
/units/5_unit/03_lesson/lesson.md:
--------------------------------------------------------------------------------
1 | #Lesson 5.03: Earsketch Control Flow
2 |
3 | ##Learning Objectives
4 | Students will be able to...
5 |
6 | * Define and identify: **modulo**
7 | * Review looping and control structures
8 | * Use looping concepts in music making via EarSketch
9 | * Use control structures to create music
10 |
11 |
12 | ##Materials/Preparation
13 | * [Do Now]
14 | * [Lab - EarSketch Control Flow]
15 | * [EarSketch Editor]
16 | * Associated Reading in EarSketch
17 | * Read through the do now, lesson, and lab so that you are familiar with the requirements and can assist students
18 |
19 | ## Pacing Guide
20 | | **Duration** | **Description** |
21 | | ---------- | ----------- |
22 | | 5 Minutes | Do Now |
23 | | 10 Minutes | Lesson |
24 | | 35 Minutes | Lab |
25 | | 5 Minutes | Debrief |
26 |
27 | ## Instructor's Notes
28 |
29 | 1. **Do Now**
30 | * Students should be given time to read unit 3 of the EarSketch documentation.
31 | * Students should answer the questions included in the do now and be prepared to discuss them as a class.
32 | 2. **Lesson**
33 | * Call on students to discuss the answers to the questions from the Do Now.
34 | * Review looping in Python. Look at the examples given in the EarSketch documentation and play them for the class.
35 | * Review if statements and control flow. As with looping go over examples (starting at section "Conditional Statements in Loops"). Focus on the **modulo** operator, reminding students that it is an operator that returns the remainder after division.
36 | 3. **Lab**
37 | * Students practice using looping to make a song a single track. Make sure that students use if statements and the modulo operator.
38 | * Ask the students to practice using looping, effects, and control flow structures while using 2-3 different tracks.
39 | 4. **Debrief**
40 | * Talk about any of the common issues that students had with loops and control flow.
41 |
42 | ###Accommodation/Differentiation
43 | Students that are moving quickly can read additional documentation on the EarSketch website in order to move ahead and expand their skills and understanding.
44 |
45 | [Do Now]: do_now.md
46 | [Lab - EarSketch Control Flow]: lab.md
47 | [EarSketch Editor]: http://earsketch.gatech.edu/earsketch2/
--------------------------------------------------------------------------------
/units/5_unit/04_lesson/do_now.md:
--------------------------------------------------------------------------------
1 | # Do Now 5.04
2 |
3 | 1. Begin reading the following lessons of the EarSketch documentation in [Unit 2](http://earsketch.gatech.edu/category/unit-2).
4 |
5 | * 2.10.1 [Sections and Form](https://earsketch.gatech.edu/earsketch2/?curriculum=2-2-0)
6 | * 2.10.2 [A-B-A form](https://earsketch.gatech.edu/earsketch2/?curriculum=2-2-1)
7 | * 2.10.3 [Custom Functions](https://earsketch.gatech.edu/earsketch2/?curriculum=2-2-2)
8 |
9 | 2. Answer the following questions, based on the reading:
10 | * Why might it be useful to group sections of music into functions?
11 | * Write the code for defining a `verse()` function that takes in 5 parameters: `drums`, `guitar`, `bass`, `startMeasure`, and `endMeasure`.
12 |
--------------------------------------------------------------------------------
/units/5_unit/04_lesson/lab.md:
--------------------------------------------------------------------------------
1 | # Lab 5.04 - User-Defined Functions
2 |
3 | Create a new EarSketch project that meets the requirements below. Include your name and project description at the top of the file.
4 | * Create two functions. Both functions should use `fitMedia()` and `makeBeat()` at least once.
5 | * `sectionA()` function
6 | * Use parameters for the audio clip variable(s), starting measures, and ending measures.
7 | * This function should have at least 3 tracks.
8 | * `sectionB()` function
9 | * Use parameters for starting and ending measures.
10 | * This function should have at least 2 tracks.
11 | * Call both functions in an alternating pattern at least three times (ABABAB)
12 | * Use comments to outline and describe your code.
13 |
14 |
15 | #### Copyright Note
16 | The above is taken from the earsketch teaching resources.
17 |
--------------------------------------------------------------------------------
/units/5_unit/04_lesson/lesson.md:
--------------------------------------------------------------------------------
1 | #Lesson 5.04: EarSketch User-Defined Functions
2 |
3 | ##Learning Objectives
4 | Students will be able to...
5 |
6 | * Define and identify: **abstraction**, **section**, **A-B-A form**
7 | * Create and apply user-defined functions to create songs with complicated form
8 |
9 |
10 | ##Materials/Preparation
11 | * [Do Now]
12 | * [Lab - User-Defined Functions]
13 | * [EarSketch Editor]
14 | * Associated Reading in EarSketch
15 | * Read through the do now, lesson, and lab so that you are familiar with the requirements and can assist students
16 |
17 | ## Pacing Guide
18 | | **Duration** | **Description** |
19 | | ---------- | ----------- |
20 | | 5 Minutes | Do Now |
21 | | 10 Minutes | Lesson |
22 | | 35 Minutes | Lab |
23 | | 5 Minutes | Debrief |
24 |
25 | ## Instructor's Notes
26 |
27 | 1. **Do Now**
28 | * Students should be given time to read unit 4 of the EarSketch documentation.
29 | * Students should answer the questions included in the do now and be prepared to discuss them as a class.
30 | 2. **Lesson**
31 | * Call on students to discuss the answers to the questions from the Do Now.
32 | * Recap the following key concepts from the reading:
33 | * **Section**: generally refers to several measures of music (often 2, 4, 8, or 16 measures) that sound like a single musical unit.
34 | * **A-B-A Form**: a song divided into three sections:
35 | * Section A: measures 1-4.
36 | * Section B: measures 5-7. Features contrasting sounds to Section A.
37 | * Section A (repeated): measures 7-10.
38 | * Ask students about returning the measure number. Go over the concept of passing around the measure number and make sure students understand how it would be helpful. (Since it allows you to change how long/short sections are without updating every function)
39 | 3. **Lab**
40 | * Demo a song with **A-B-A Form**: [https://www.youtube.com/watch?v=PSZxmZmBfnU](https://www.youtube.com/watch?v=PSZxmZmBfnU)
41 | * Students create their own song with the form ABABAB.
42 | 4. **Debrief**
43 | * Talk about any of the phrases or issues the students had.
44 | * If time allows, give students the opportunity to demo their songs for the class.
45 |
46 | ###Accommodation/Differentiation
47 | Students that are moving quickly could explore and create alternative song forms (ex. AABA).
48 |
49 | [Do Now]: do_now.md
50 | [Lab - User-Defined Functions]: lab.md
51 | [EarSketch Editor]: http://earsketch.gatech.edu/earsketch2/
--------------------------------------------------------------------------------
/units/5_unit/05_lesson/do_now.md:
--------------------------------------------------------------------------------
1 | # Do Now 5.05
2 |
3 | 1. Begin reading the following lessons in the EarSketch documentation in Unit 3.
4 |
5 | * 3.21.4 [Sharing an EarSketch Script](https://earsketch.gatech.edu/earsketch2/?curriculum=3-5-3)
6 |
7 | 2. Write down 2-3 songs that have a structure that you could emulate in EarSketch.
8 | 3. For one of those songs write down the different musical parts of the song, in order. This most likely will include verses, the chorus, and the bridge.
9 |
10 | ## Example
11 | Using Pharrell Williams’ “Happy”:
12 |
13 | * Section A
14 | * Section B
15 | * Section A
16 | * Section B
17 | * Bridge
18 | * Section B
19 | * Section B
20 | * Bridge
21 | * Section B
22 | * Section B
23 |
24 | Note: No intro or outro in this song.
25 |
26 |
27 | #### Copyright Note
28 | The above is taken from the earsketch teaching resources.
29 |
--------------------------------------------------------------------------------
/units/5_unit/05_lesson/lesson.md:
--------------------------------------------------------------------------------
1 | #Lesson 5.05: EarSketch Project
2 |
3 | ##Learning Objectives
4 | Students will be able to...
5 | * Create a complete song in EarSketch with multiple parts
6 | * Utilize EarSketch's features and functions
7 |
8 |
9 | ##Materials/Preparation
10 | * [Do Now]
11 | * Solution (access protected resources by clicking on "Additional Curriculum Materials" on the [TEALS Dashboard])
12 | * [EarSketch Editor]
13 | * Read through the do now and project spec so that you are familiar with the requirements and can assist students
14 | * Practice creating your own EarSketch song(s) to demonstrate to students and to better understand the challenges they may face in the project
15 | * Review [4 Steps to Solve Any CS Problem]
16 |
17 | ## Pacing Guide
18 | ###Day 1
19 | | **Duration** | **Description** |
20 | | ---------- | ----------- |
21 | | 5 Minutes | Do Now |
22 | | 10 Minutes | Project Overview |
23 | | 15 Minutes | Project Planning |
24 | | 25 Minutes | Begin Project |
25 | ###Days 2-5
26 | | **Duration** | **Description** |
27 | |---|---|
28 | | 5 Minutes | Do Now |
29 | | 10 Minutes | Topic Review |
30 | | 35 Minutes | Project Work |
31 | | 5 Minutes | Debrief |
32 |
33 | ## Instructor's Notes
34 |
35 | 1. **Do Now**
36 | * Display the Do Now on the board
37 | * For Days 2-5, the Do Now is time for students to write down issues they had with the project from the day before and what they plan on doing to fix those issues.
38 | * Students should take time to create a timeline for when certain tasks will be completed.
39 | 2. **Project Overview**
40 | * Review the terminology, topics, and skills that students have learned from this unit. Talk about any questions or things the students are struggling with.
41 | * Discuss the parts of the song mentioned in the Do Now (chorus, bridge, and verses) and how they fit into building a song.
42 | * Distribute the project spec and talk students through the requirements and scoring rubric.
43 | * Demo a final song for the students to see a finished product.
44 |
45 | 3. **Project Planning**
46 | * Instruct students to create a project plan for what specifically they will accomplish during each day of the project.
47 | * Take time to check that each student has created a project plan before they begin working on their song.
48 |
49 | ###Accommodation/Differentiation
50 | Certain students that have a limited music background may need additional assistance during the planning phase of the project. Students may need additional examples demonstrating the difference between a verse, chorus, and bridge.
51 |
52 | [Do Now]: do_now.md
53 | [Lab]: lab.md
54 | [TEALS Dashboard]: http:/www.tealsk12.org/dashboard
55 | [EarSketch Editor]: http://earsketch.gatech.edu/earsketch2/
56 | [4 Steps to Solve Any CS Problem]:https://github.com/TEALS-IntroCS/2nd-semester-introduction-to-computer-science-principles/raw/master/units/4%20Steps%20to%20Solve%20Any%20CS%20Problem.pdf
57 |
--------------------------------------------------------------------------------
/units/5_unit/05_lesson/project.md:
--------------------------------------------------------------------------------
1 | # Project 5: EarSketch Song
2 |
3 |
4 | ## Overview
5 | Using Python and EarSketch you will create a complete song consisting of 2 verses, a chorus, and a bridge. We have worked in class to practice creating sections of songs. We'll use that knowledge to create a song using the samples we are given.
6 |
7 | ### Behavior
8 | * The song will have pattern (verse, chorus, verse2, chorus, bridge, chorus)
9 | * Create 4 different variables that will hold your choice of audio constants.
10 | * The verses should contain some of the same forms, but be independent.
11 | * The project should have at least 4 tracks, and each track should use a different/unique sound file (different constant).
12 | * Each verse should consist of at least 8 measures.
13 | * The chorus should consist of at least 8 measures.
14 | * The bridge should consist of 2-8 measures.
15 | * The song should have a flow and underlying themes that recur via the use of variables.
16 |
17 | ### Implementation Details
18 | * Use of `for` loop for creating tracks
19 | * Use of control flow operators
20 | * Proper use of `fitMedia`, `makeBeat`, `setEffect`
21 | * Use of user-defined functions for tracking forms and verses and choruses
22 | * Use of return statements for tracking the measure
23 |
24 |
25 |
26 | ## Grading
27 | ### Scheme/Rubric
28 | | **Functional Correctness(Behavior)** | |
29 | | --------------------------------------------------------------- |-----|
30 | | Song Runs and Plays | 5 |
31 | | Recognizable Chorus vs Verse | 10|
32 | | Correct Length | 5 |
33 | | Contains some reoccurring themes| 5 |
34 | | **Sub total** | 25 |
35 | | **Technical Correctness ** | |
36 | | Correct use of loop | 5 |
37 | | Correctly uses control flow | 5 |
38 | | Correctly use of `fitMedia`, `makeBeat`, `setEffect` | 10 |
39 | | Use of user defined functions for choruses, forms, verses | 10 |
40 | | Keeps track of measure using return statements | 15 |
41 | | **Sub total** | 45 |
42 | | **Total** | 70 |
43 |
44 |
45 |
46 |
47 | #### Copyright Note
48 | The above is adapted from the earsketch teaching resources.
--------------------------------------------------------------------------------
/units/5_unit/unit5.md:
--------------------------------------------------------------------------------
1 | # Unit 5
2 |
3 |
--------------------------------------------------------------------------------
/units/6_unit/01_lesson/do_now.md:
--------------------------------------------------------------------------------
1 | # Do Now 6.01
2 |
3 | 1. Type and run the following code:
4 |
5 | ```python
6 | my_dictionary = {
7 | 'cat': 'a domestic feline',
8 | 'dog': 'a domestic canine',
9 | 'chair': 'furniture piece for sitting',
10 | 'car': 'automobile'
11 | }
12 | print(my_dictionary)
13 | print(my_dictionary['dog'])
14 | print(my_dictionary.get('dog'))
15 | print('cat' in my_dictionary)
16 | print('monkey' in my_dictionary)
17 | ```
18 | Write down what was printed out. What type is `my_dictionary`?
19 |
20 |
21 | 2. Add a line of code that will print the definition of `'chair'`, then run the code again.
22 |
23 | 3. Write down what happens if you use `my_dictionary['kittens']`? What do you think that error means?
--------------------------------------------------------------------------------
/units/6_unit/01_lesson/lab.md:
--------------------------------------------------------------------------------
1 | # Lab 6.01 - Dictionaries & Memes
2 |
3 | Write a dictionary that gives context to "internet memes". Write a program, `dictionary_lab.py`, that prompts a user for what meme or abbreviation they want to look up. If the word is in the dictionary (use the `in` keyword with an `if` statement to test), then you will print out the definition. If the word is not in the dictionary, the program will print out that the word is not defined.
4 |
5 | ### Example Output
6 |
7 | ```
8 | >>> python3 dictionary_lab.py
9 | What word would you like to look up? nbd
10 | nbd: a phrase meaning no big deal
11 | What word would you like to look up? kittens
12 | Sorry, kittens is not defined
13 | What would would you like to look up?
14 | ```
15 |
16 | ## Bonus!
17 | Create a way to update values and add key/value pairs to the dictionary. Search for dictionaries in the Python documentation.
--------------------------------------------------------------------------------
/units/6_unit/01_lesson/lesson.md:
--------------------------------------------------------------------------------
1 | #Lesson 6.01: Introduction to Dictionaries
2 |
3 | ##Learning Objectives
4 | Students will be able to...
5 |
6 | * Define and identify: **dictionary**, **key**, **value**
7 | * Create dictionaries of key-value pairs
8 | * Access and update items from dictionaries
9 |
10 | ##Materials/Preparation
11 | * [Do Now]
12 | * [Lab - Dictionaries & Memes]
13 | * Associated Reading - section 6.1 of Book
14 | * Read through the do now, lesson, and lab so that you are familiar with the requirements and can assist students
15 |
16 | ## Pacing Guide
17 | | **Duration** | **Description** |
18 | | ---------- | ----------- |
19 | | 5 Minutes | Do Now |
20 | | 10 Minutes | Lesson |
21 | | 35 Minutes | Lab |
22 | | 5 Minutes | Debrief |
23 |
24 | ## Instructor's Notes
25 |
26 | 1. **Do Now**
27 | * Display the Do Now on the board.
28 | * Students will copy and edit code involving creating a dictionary and accessing items from that dictionary.
29 | 2. **Lesson**
30 | * Ask the students what type they think `my_dictionary` is.
31 | * Did anyone run the `type()` function to find out?
32 | * `my_dictionary` is a **dictionary** or a collection of **key-value** pairs. You use the key to look up the value in the dictionary.
33 | * Ask: what are the keys in the example from the Do Now? What are the associated values?
34 | * Keys and values can be of any type. The syntax is: `{key : value, key : value, ...}`
35 | * Ask the students what `my_dictionary['dog']` did, and if this syntax reminds them of anything (lists!).
36 | * To get the value associated with a key in a dictionary you use square brackets.
37 | * You can also use `my_dictionary.get()`, which will return `None` if the key isn't there.
38 | * *Note*: You can pass in a second argument to `get` which takes the place of the `None` default.
39 | * Ask how students would get the value for `chair` or `car`.
40 | * Discuss what happened when students ran `my_dictionary['kittens']`?
41 | * Explain that this error is common and means that there is no value in the dictionary. To avoid this error, use the `in` keyword with an `if` statement. If a certain key is `in` a specified dictionary, it will return `true`. Otherwise it will return `false`.
42 | * Example:
43 | ```python
44 | my_dictionary = {'a': 1, 'b': 2, 'c': 3}
45 |
46 | if 'a' in my_dictionary:
47 | print("It's there!")
48 | else:
49 | print("It's missing!")
50 |
51 | ```
52 | 3. **Lab**
53 | * Students will create a dictionary translating common internet phrases into their meanings.
54 | 4. **Debrief**
55 | * Review what was covered in today's lesson and check for understanding of the three concepts covered: **dictionaries, keys,** and **values**.
56 |
57 | ###Accommodation/Differentiation
58 |
59 | If any students are struggling with today's lesson, be prepared to offer additional examples of the usefulness of having key-value pairs.
60 |
61 | Students that are moving quickly through the lab should work on the bonus and research how to add new key/value pairs to a dictionary.
62 |
63 | [Do Now]: do_now.md
64 | [Lab - Dictionaries & Memes]: lab.md
65 |
--------------------------------------------------------------------------------
/units/6_unit/02_lesson/do_now.md:
--------------------------------------------------------------------------------
1 | # Do Now 6.02
2 |
3 | 1. Type and run the following code in the interpreter:
4 |
5 | ```python
6 | my_dictionary = {
7 | 'kittens': 'cute animals'
8 | }
9 | my_dictionary['kittens'] = 'p. cute'
10 | print(my_dictionary)
11 | ```
12 | Write down what the 2nd line does.
13 |
14 | 2. Type and run the following code in the interpreter:
15 |
16 | ```python
17 | my_dictionary = {}
18 | my_dictionary['puppies'] = 'baby dogs'
19 | print(my_dictionary)
20 | ```
21 | Write down what the second line does.
22 |
23 | 3. Type and run the following code in the interpreter:
24 |
25 | ```python
26 | my_dictionary = {
27 | 'kittens': 'cute animals',
28 | 'puppies': 'baby dogs'
29 | }
30 | my_dictionary.pop('kittens')
31 | print(my_dictionary)
32 | my_dictionary.pop('bunnies')
33 | my_dictionary.pop('bunnies', None)
34 | ```
35 | Write down what the second line does. What is different between `my_dictionary.pop('bunnies')` and `my_dictionary.pop('bunnies', None)`?
--------------------------------------------------------------------------------
/units/6_unit/02_lesson/lab.md:
--------------------------------------------------------------------------------
1 | # Lab 6.02 - Word Counter
2 |
3 | In this lab we will implement a word frequency algorithm. It will tell you how many of each word you had in an essay.
4 |
5 | At the top of the document save a variable with a long paragraph (example below). In order to turn this paragraph into a list of lower case words we will use the `split(" ")`, `replace()`, and `lower()` functions. There is code at the bottom of this page that will do this for you. Feel free to read more about `split()` in the Python documentation, but it's not critical to this lab.
6 |
7 | For each word in the document, count the number of times it occurs. Consider the following phrase: 'Cats are cool. Baby cats are called kittens. Cats make great pets.' The word 'cats' appears 3 times. The word 'are' appears 2 times.
8 |
9 | The program will first create a dictionary with the words as keys and the number of times they occur as values. Then it will prompt the user which word they are curious about. If the word was in the paragraph it will print the number of times it occurred.
10 |
11 | ### Example
12 |
13 | ```
14 | >>> python3 word_frequency_lab.py
15 | What word would you like to know the frequency of? cats
16 | 'cats' occurs 3 times
17 | ```
18 |
19 | ```
20 | >>> python3 word_frequency_lab.py
21 | What word would you like to know the frequency of? dogs
22 | 'dogs' does not occur
23 | ```
24 |
25 | ### `split`, `replace`, and `lower`
26 |
27 | This is the code to lower case the letters in the paragraph, remove the periods, and split them into individual words.
28 |
29 |
30 | ```python
31 | example_paragraph = "It was a beautiful day in New York City. Our hero Ariana Grande was on a walk
32 | from the Standard to Duane Reade. Ariana Grande was walking rather quickly because she had lived
33 | in New York for a few months. All of a sudden a slimy donut appeared out of nowhere. Ariana Grande
34 | decided to prance foolishly instead of dealing with the situation. Thrown off from Duane Reade
35 | Ariana Grande decides to go to Times Square instead. What a beautiful day in New York."
36 |
37 | #make all letters lowercase
38 | example_paragraph_lower = example_paragraph.lower()
39 |
40 | #remove all periods
41 | example_paragraph_lower_no_punctuation = example_paragraph_lower.replace(".", "")
42 |
43 | #convert paragraph into a list of individual strings
44 | example_word_list = example_paragraph_lower_no_punctuation.split(" ")
45 |
46 | ```
47 |
--------------------------------------------------------------------------------
/units/6_unit/02_lesson/lesson.md:
--------------------------------------------------------------------------------
1 | #Lesson 6.02: Dictionaries Methods
2 |
3 | ##Learning Objectives
4 | Students will be able to...
5 |
6 | * Define and identify: **pop**, **default value**
7 | * Update values in a dictionary
8 | * Add values to a dictionary
9 | * Remove values from a dictionary
10 |
11 | ##Materials/Preparation
12 | * [Do Now]
13 | * [Lab - Word Counter]
14 | * Solution (access protected resources by clicking on "Additional Curriculum Materials" on the [TEALS Dashboard])
15 | * Associated Reading - section 6.2 of Book
16 | * Read through the do now, lesson, and lab so that you are familiar with the requirements and can assist students
17 |
18 | ## Pacing Guide
19 | | **Duration** | **Description** |
20 | | ---------- | ----------- |
21 | | 5 Minutes | Do Now |
22 | | 10 Minutes | Lesson |
23 | | 35 Minutes | Lab |
24 | | 5 Minutes | Debrief |
25 |
26 | ## Instructor's Notes
27 |
28 | 1. **Do Now**
29 | * Display the Do Now on the board.
30 | * Students type code that edits dictionaries by modifying, adding, or removing key:value pairs.
31 | 2. **Lesson**
32 | * Discuss part 1 of the Do Now.
33 | * Describe that you can update a value in a dictionary in a similar way to how you would update a value in a list.
34 | * Discuss part 2 of the Do Now.
35 | * Note that you can add values to a dictionary by using the same syntax.
36 | * Review: How might you check if a value was in a dictionary before adding it?
37 | * Discuss part 3 of the Do Now
38 | * Review what **pop** does, as well as what the second argument does.
39 | * The second argument in `pop` is described as the **default value**. This is the value that will be returned if the first argument is not in the dictionary.
40 | 3. **Lab**
41 | * Students will create a word count algorithm that will count the number of words in a list of words.
42 | 4. **Debrief**
43 | * Talk about any confusion the students had. Discuss additional ideas of how dictionaries might be useful.
44 |
45 | ###Accommodation/Differentiation
46 | Some students may need to be explicitly reminded of the `in` keyword to check if a certain key is in their dictionary.
47 |
48 |
49 |
50 | [Do Now]: do_now.md
51 | [Lab - Word Counter]: lab.md
52 | [TEALS Dashboard]:http:/www.tealsk12.org/dashboard
53 |
--------------------------------------------------------------------------------
/units/6_unit/03_lesson/do_now.md:
--------------------------------------------------------------------------------
1 | # Do Now 6.03
2 |
3 | 1. Type and run the following code in the interpreter:
4 |
5 | ```python
6 | list_dictionaries = {
7 | 'cat': [1, 3, 4],
8 | 'is': [1, 2, 3, 4]
9 | }
10 | print(list_dictionaries['cat'])
11 | ```
12 | Write down what type `list_dictionaries` is, what type the keys are, and what type the values are.
13 |
14 | 2. Write code so that the value of 'is' becomes `[1, 2, 3, 4, 5]`
15 |
--------------------------------------------------------------------------------
/units/6_unit/03_lesson/lab.md:
--------------------------------------------------------------------------------
1 | # Lab 6.03 - Dictionaries Storing Lists
2 |
3 | In this lab we will create a dictionary to-do list. Each key in the dictionary will be a day of the week. Each associated value will a be a list of items.
4 |
5 | The program `daily_to_do_list_lab.py` will prompt the user what they want to do: 'add' or 'get'. If the user types in 'get', the program will ask which day and return the to-do list for that day. If the user writes 'add', the program will ask which day and what item should be added.
6 |
7 | At the start of the program the dictionary should be totally empty. Items should only occur once in the to-do list for any given day.
8 |
9 | ### Example
10 |
11 | ```
12 | >>>python3 daily_to_do_list_lab.py
13 | What would you like to do?
14 | add
15 | What day?
16 | Friday
17 | What would you like to add to Friday's to-do list?
18 | practice clarinet
19 | What would you like to do?
20 | get
21 | What day?
22 | Friday
23 | You have to practice clarinet.
24 | What would you like to do?
25 | ```
26 |
27 | ## Bonus!
28 | It's a bit tedious for the user to have to type in three different lines to add an item to a to-do list. Use `split` to allow the user to input `add Friday watch tv and relax`.
29 |
30 | Create a variation of the program that doesn't allow any duplicates across any of the days. Make sure when you add a to-do item that it doesn't exist in the to-do lists of any of the days before adding.
--------------------------------------------------------------------------------
/units/6_unit/03_lesson/lesson.md:
--------------------------------------------------------------------------------
1 | #Lesson 6.03: Dictionaries of Lists
2 |
3 | ##Learning Objectives
4 | Students will be able to...
5 |
6 | * Create dictionaries with keys and values of different types
7 | * Update, append, or remove list values in a dictionary
8 |
9 | ##Materials/Preparation
10 | * [Do Now]
11 | * [Lab - Dictionaries Storing Lists]
12 | * Associated Reading - section 6.3 of Book
13 | * Read through the do now, lesson, and lab so that you are familiar with the requirements and can assist students
14 |
15 | ## Pacing Guide
16 | | **Duration** | **Description** |
17 | | ---------- | ----------- |
18 | | 5 Minutes | Do Now |
19 | | 10 Minutes | Lesson |
20 | | 35 Minutes | Lab |
21 | | 5 Minutes | Debrief |
22 |
23 | ## Instructor's Notes
24 |
25 | 1. **Do Now**
26 | * Display the Do Now on the board.
27 | * Students will explore how to use dictionaries containing lists, as well as how to add values to those lists.
28 | 2. **Lesson**
29 | * Discuss part 1 of the Do Now.
30 | * Go over the type of `list_dictionaries`.
31 | * It is still a dictionary type which goes from string (key) to list (value). Dictionaries can also go from numbers to lists, or numbers to strings, or any other combination.
32 | * Discuss part 2 of the Do Now.
33 | * Review how you update a value within a dictionary, as well as how to append and remove items from lists.
34 | * Have students continue practicing adding and removing values from `list_dictionaries`.
35 | 3. **Lab**
36 | * Students will create a dictionary representing a weekly to-do list. The user can add items to the to-do list or have the program print what items must be done on a certain day.
37 | 4. **Debrief**
38 | * Discuss any confusion or problem areas the students faced.
39 | * Talk about how `in` works for dictionaries, specifically for the bonus.
40 |
41 | ###Accommodation/Differentiation
42 | Students that are moving quickly should work on the bonus activity in the lab. They can also be paired with students that are struggling (with close monitoring, as needed), as this lab requires pulling together a variety of concepts and skills: looping, conditionals, lists, and dictionaries.
43 |
44 | [Do Now]: do_now.md
45 | [Lab - Dictionaries Storing Lists]: lab.md
46 |
--------------------------------------------------------------------------------
/units/6_unit/04_lesson/do_now.md:
--------------------------------------------------------------------------------
1 | # Do Now 6.04
2 |
3 | 1. Type and run the following code in the interpreter
4 |
5 | ```python
6 | my_dictionary = {
7 | 'a': 1,
8 | 'b': 2,
9 | 'c': 3,
10 | 'd': 4,
11 | 'e': 5
12 | }
13 | print(my_dictionary.keys())
14 | ```
15 | Write down what `keys()` does. What type does `keys()` return?
16 |
17 | 2. Write down how you might use a `for` loop to go through and print the values of `my_dictionary`. Try your solution using the interpreter.
--------------------------------------------------------------------------------
/units/6_unit/04_lesson/lab.md:
--------------------------------------------------------------------------------
1 | # Lab 6.04 - Dictionaries Looping
2 |
3 | In this lab we will use our code from the word count lab (Lab 6.02) to create a program that will return the top 5 most used words in a document.
4 |
5 | The program, `most_frequent_lab.py`, will print out the top 5 most frequently occurring words in a paragraph. It should print out the word and the number of times used.
6 |
7 | 1. Take your old lab code and turn it into a function that takes in a list of words and returns a dictionary of word frequencies.
8 | 2. Write a different function, `find_max_value`, that will loop through the dictionary and keep track of the top value in that dictionary and return the key of the max value.
9 | 3. Print out the key/value of the highest value.
10 | 4. Remove that key from the dictionary.
11 | 5. Repeat steps 2-4 four more times: Call `find_max_value`, print out the key/value pair, and remove the key.
12 |
13 | If there is a tie, choose just one of the tied items to print.
14 |
15 | ### Example
16 |
17 | ```
18 | >>> python3 most_frequent_lab.py
19 | cats, 3
20 | are, 2
21 | kittens, 1
22 | cool, 1
23 | pet, 1
24 | ```
25 |
26 | ## Bonus!
27 | This process of finding the max element, printing it, and removing it from the dictionary is a way to sort items. Write a function that will return a sorted list of all the words from most frequent to least frequent.
28 |
29 | Change the code to find the least frequent words.
--------------------------------------------------------------------------------
/units/6_unit/04_lesson/lesson.md:
--------------------------------------------------------------------------------
1 | #Lesson 6.04: Dictionaries Looping
2 |
3 | ##Learning Objectives
4 | Students will be able to...
5 |
6 | * Use loops to traverse through key/value pairs in a dictionary
7 |
8 | ##Materials/Preparation
9 | * [Do Now]
10 | * [Lab - Dictionaries Looping]
11 | * Associated Reading - section 6.4 of Book
12 | * Read through the do now, lesson, and lab so that you are familiar with the requirements and can assist students
13 |
14 | ## Pacing Guide
15 | | **Duration** | **Description** |
16 | | ---------- | ----------- |
17 | | 5 Minutes | Do Now |
18 | | 10 Minutes | Lesson |
19 | | 35 Minutes | Lab |
20 | | 5 Minutes | Debrief |
21 |
22 | ## Instructor's Notes
23 |
24 | 1. **Do Now**
25 | * Display the Do Now on the board.
26 | * Students apply the `.keys()` method and investigate the type produced.
27 | 2. **Lesson**
28 | * Discuss part 1 of the Do Now.
29 | * Ask students what type was returned.
30 | * Discuss part 2 of the Do Now.
31 | * Ask for a small number of students to write their solution on the board.
32 | * Discuss that it is possible to do just `for key in my_dictionary:`, but behind the scenes this is similar to calling the `.keys()` function.
33 | * Discuss that the order of the list is not exactly what was expected.
34 | * Unlike lists, dictionaries have no guaranteed order.
35 | 3. **Lab**
36 | * Students will rewrite their word count lab (Lab 6.02) to return the top 5 most frequently occurring words.
37 | 4. **Debrief**
38 | * Take a moment to discuss any common areas of confusion or challenge that came up during the lab.
39 | * Talk about how `in` works for dictionaries for the bonus.
40 |
41 | ###Accommodation/Differentiation
42 | Students that are moving quickly can explore sorting additionally in the bonus activity.
43 |
44 | Some students may need a second class period to complete this lab.
45 |
46 | [Do Now]: do_now.md
47 | [Lab - Dictionaries Looping]: lab.md
48 |
--------------------------------------------------------------------------------
/units/6_unit/05_lesson/do_now.md:
--------------------------------------------------------------------------------
1 | #Do Now 6.05
2 |
3 | 1. Write down your ranking of these concepts from easiest to hardest:
4 | 1. Creating dictionaries
5 | 2. Adding items to dictionaries
6 | 3. Updating items in dictionaries
7 | 4. Looping through items in a dictionary
8 | 5. Having lists as values in a dictionary
9 | 6. Checking if an item is in a dictionary as a key
10 |
--------------------------------------------------------------------------------
/units/6_unit/05_lesson/lesson.md:
--------------------------------------------------------------------------------
1 | #Lesson 6.05: Dictionaries Project
2 |
3 | ##Learning Objectives
4 | Students will be able to...
5 |
6 | * Use dictionaries to create the game [Guess Who]
7 |
8 | ##Materials/Preparation
9 | * [Do Now]
10 | * [Project Spec - Guess Who]
11 | * Solution (access protected resources by clicking on "Additional Curriculum Materials" on the [TEALS Dashboard])
12 | * Read through the do now and project spec so that you are familiar with the requirements and can assist students.
13 | * Try creating your own variation on the Guess Who game so you are familiar with the potential challenges and bugs your students will hit.
14 | * Review [4 Steps to Solve Any CS Problem]
15 |
16 | ## Pacing Guide
17 | ###Day 1
18 | | **Duration** | **Description** |
19 | | ---------- | ----------- |
20 | | 5 Minutes | Do Now |
21 | | 10 Minutes | Review |
22 | | 10 Minutes | Project Overview |
23 | | 30 Minutes | Project Planning |
24 |
25 | ###Days 2-7
26 | |**Duration**|**Description**|
27 | |--|--|
28 | | 5 Minutes | Planning/Questions |
29 | | 10 Minutes | Review (if necessary) |
30 | | 35 Minutes | Project Work |
31 | | 5 Minutes | Wrap up |
32 | ## Instructor's Notes
33 | 1. **Day 1**
34 | * **Do Now**
35 | * Display the Do Now on the board.
36 | * Students should take a few moments to rank which topics they found most difficult during this unit.
37 | 2. **Review**
38 | * Take time to review the concepts students found most challenging during this unit.
39 | 3. **Project Overview**
40 | * Go over the project spec details with the students.
41 | * Demo a completed project.
42 | 4. **Planning**
43 | * Have the students design the variables, functions, dictionaries, lists, and structure they need, using pseudo code to help them visualize.
44 | * Have the students write out a plan /outline for how they will spend time over next few days.
45 | * Any students that finish their plan and have it checked should begin project work.
46 | 2. **Days 2-7**
47 | * ** Planning/Questions **
48 | * Have the students write down what they want to accomplish that day and any questions they have from the previous class.
49 | 2. **Review (if necessary)**
50 | * Go over any concepts or challenges that students are having.
51 | 3. **Project Work**
52 | * Students work independently to complete their projects and meet their daily goals.
53 | 4. **Wrap Up**
54 | * Discuss common issues that students were having each day, provide suggestions for how to overcome those challenges.
55 |
56 | ###Accommodation/Differentiation
57 | Some students may need a refresher on using a `while` loop to control whether the game is over or not.
58 |
59 | Some students may also need additional assistance or scaffolding for how to randomly choose a character from the dictionary.
60 |
61 |
62 | [Do Now]: do_now.md
63 | [Project Spec - Guess Who]: project.md
64 | [TEALS Dashboard]:http:/www.tealsk12.org/dashboard
65 |
66 | [Guess Who]:https://en.wikipedia.org/wiki/Guess_Who%3F
67 | [4 Steps to Solve Any CS Problem]:https://github.com/TEALS-IntroCS/2nd-semester-introduction-to-computer-science-principles/raw/master/units/4%20Steps%20to%20Solve%20Any%20CS%20Problem.pdf
68 |
--------------------------------------------------------------------------------
/units/6_unit/05_lesson/project.md:
--------------------------------------------------------------------------------
1 | # Project 6: Guess Who
2 |
3 | In Guess Who, you’ll be building a text version of the classic board game. Dictionaries will be the key to this project. [Play a Sample Game.](http://www.miniplay.gr/?view=game&gid=76)
4 |
5 | ## Overview
6 | The game should store information on at least 5 different characters. Each character should have a name, gender, age, height, and hair color.
7 |
8 | When the game begins, a character should be randomly selected by the computer. The player can ask for 2 pieces of information about the random character, and then has to make a guess as to who was picked.
9 |
10 | ### Behavior/Commands
11 | * list: list out all the character's names
12 | * gender/age/height/hair: asks for a piece of information
13 | * guess : guess a character
14 | * help: displays all commands
15 | * quit: exits the game
16 |
17 | ### Implementation Details
18 | * To store and access the information you’ll need to use dictionaries, which will allow for quick and direct access.
19 |
20 | ### Example Output
21 | ```
22 | What would you like to do? list
23 | mike:
24 | ['Male', '15', "6'1", 'Blonde']
25 | liv:
26 | ['Female', '25', "5'11", 'Blonde']
27 | lisa:
28 | ['Female', '15', "5'10", 'Red']
29 | linda:
30 | ['Female', '25', "5'7", 'Brown']
31 | bill:
32 | ['Male', '20', "5'5", 'Brown']
33 | What would you like to do? age
34 | 20
35 | What would you like to do? hair
36 | Brown
37 | What would you like to do? guess liv
38 | You lost...
39 | ```
40 |
41 | ```
42 | What would you like to do? gender
43 | Female
44 | What would you like to do? height
45 | 5'7
46 | What would you like to do? guess linda
47 | You won!
48 | ```
49 |
50 | ## Grading
51 | ### Scheme/Rubric
52 | | **Functional Correctness(Behavior)** | |
53 | | --------------------------------------------------------------- |-----|
54 | | List command | 5 |
55 | | gender/age/height/hair | 10|
56 | | guess command | 5 |
57 | | help command | 3 |
58 | | quit command | 2 |
59 | | **Sub total** | 25 |
60 | | **Technical Correctness ** | |
61 | | Correct use of dictionaries | 15 |
62 | | Correct use of variables and game loop |10|
63 | | Correct use of printing/formatting | 10|
64 | | **Sub total** | 35 |
65 | | **Total** | 60 |
66 |
67 |
68 |
--------------------------------------------------------------------------------
/units/6_unit/unit6.md:
--------------------------------------------------------------------------------
1 | # Unit 6
2 |
3 |
--------------------------------------------------------------------------------
/units/7_unit/01_lesson/do_now.md:
--------------------------------------------------------------------------------
1 | # Do Now 7.01
2 |
3 | 1. Read through the following code:
4 |
5 | ```python
6 | my_pet_1 = 'pet'
7 | my_pet_1_type = 'cat'
8 | my_pet_1_noise = 'meow'
9 | my_pet_1_full_name = 'Snuffles McGruff'
10 |
11 | my_pet_2 = 'pet'
12 | my_pet_2_type = 'cat'
13 | my_pet_2_noise = 'meow'
14 | my_pet_2_full_name = 'Snowpounce Flury'
15 |
16 | my_pet_3 = 'pet'
17 | my_pet_3_type = 'cat'
18 | my_pet_3_noise = 'meow'
19 | my_pet_3_full_name = 'Snickers Snorkel'
20 |
21 | my_pets = [my_pet_1, my_pet_2, my_pet_3]
22 | for pet in my_pets:
23 | ## print full name of each pet
24 |
25 | ```
26 |
27 | In the above code, write a quick description of how you would print out each of the pet's names.
28 |
29 | Write down some other data structures you could use to make this easier.
30 |
31 |
32 |
--------------------------------------------------------------------------------
/units/7_unit/01_lesson/example.md:
--------------------------------------------------------------------------------
1 | # Example
2 | 1. Read the following code:
3 |
4 | ```python
5 |
6 | class Pet(object):
7 | """Represents a pet"""
8 |
9 | my_pet_1 = Pet()
10 | my_pet_1.type = 'cat'
11 | my_pet_1.noise = 'meow'
12 | my_pet_1.full_name = 'Snuffles McGruff'
13 |
14 | my_pet_2 = Pet()
15 | my_pet_2.type = 'cat'
16 | my_pet_2.noise = 'meow'
17 | my_pet_2.full_name = 'Snowpounce Flury'
18 |
19 | my_pet_3 = Pet()
20 | my_pet_3.type = 'cat'
21 | my_pet_3.noise = 'meow'
22 | my_pet_3.full_name = 'Snickers Snorkel'
23 |
24 | my_pets = [my_pet_1, my_pet_2, my_pet_3]
25 | for pet in my_pets:
26 | print(pet.full_name)
27 | ```
28 |
--------------------------------------------------------------------------------
/units/7_unit/01_lesson/lab.md:
--------------------------------------------------------------------------------
1 | # Lab 7.01: Create a Color Class
2 |
3 | In this lab we will create a class that will represent colors and build a function to combine two colors.
4 |
5 | ### Background
6 | RGB is a way of storing color data. R stands for red, G stands for green, and B stands for blue. Each color is given a value from 0 to 255.
7 |
8 | You can use this tool to see what different colors are:[http://www.rapidtables.com/web/color/RGB_Color.htm](http://www.rapidtables.com/web/color/RGB_Color.htm)
9 |
10 | 
11 |
12 | ## Lab
13 |
14 | 1. Create a class, `Color`.
15 | 2. Instantiate at least 3 colors.
16 | 3. Add attributes of r, g, and b to those instances.
17 | 4. Create a function, `add_color`, which takes in two colors and returns a color that is the average of the two reds, greens, and blues.
--------------------------------------------------------------------------------
/units/7_unit/01_lesson/lesson.md:
--------------------------------------------------------------------------------
1 | # Lesson 7.01: User-Defined Types (Classes)
2 |
3 | ##Learning Objectives
4 | Students will be able to...
5 | * Define and identify: **class**, **instance**, **object**, **attributes**
6 | * Create a class and instantiate
7 | * Add attributes to an instance
8 | * Manipulate instances and attributes through a function
9 |
10 | ##Materials/Preparation
11 | * [Do Now]
12 | * [Example]
13 | * [Lab - Create a Color Class]
14 | * Associated Reading - section 7.1 of Book
15 | * Read through the do now, lesson, and lab so that you are familiar with the requirements and can assist students
16 |
17 | ## Pacing Guide
18 | | **Duration** | **Description** |
19 | | ---------- | ----------- |
20 | | 5 Minutes | Do Now |
21 | | 10 Minutes | Lesson |
22 | | 35 Minutes | Lab |
23 | | 5 Minutes | Discussion |
24 |
25 | ## Instructor's Notes
26 |
27 | 1. **Do Now**
28 | * Display the Do Now on the board.
29 | 2. **Lesson**
30 | * Discuss the Do Now:
31 | * Ask the students what data type they thought would be helpful. They probably noticed that this was going to be difficult to do concisely without some other data type.
32 | * Acknowledge that we need something that says "I am type Pet, which has three different qualities or attributes".
33 | * **Class**: a user-defined type.
34 | * On board write syntax for creating a class: `class Pet(object):`
35 | * **Object** : the basis of object-oriented programming (OOP). Objects correspond to a real world thing that has certain attributes associated with it.
36 | * Instantiated: you can create **instances** of a class by using `Pet()` (`my_pet_1` is an instance of the `Pet` class). If you check the type of an instance it will be `Pet`.
37 | * Instances are mutable, they can be changed or updated.
38 | * Show [Example] on board to demonstrate the `Pet` class.
39 | * Ask students what the difference is between this and the do now.
40 | * Have the students identify where the class is created.
41 | * Next have the students identify where the class is instantiated.
42 | * Ask students what they think `pet.full_name` will do.
43 | * This is a good time to explain the concept of an attribute.
44 | * **Attribute**: values assigned to an instance.
45 | * Note that you can also create functions that take in classes and use their attributes.
46 | 3. **Lab**
47 | * Students will create RGB colors using a `Color` class.
48 | * They will then create a function to merge two colors.
49 | * They can check their colors on the linked RGB website in the lab.
50 | 4. **Debrief**
51 |
52 | ###Accommodation/Differentiation
53 | Given the big leap taken today with much new terminology and challenging concepts, it's quite possible students will need additional class time to digest the information and finish the lab.
54 |
55 | For students that are quickly picking up the concepts, have them create their own unique class or have them help explain to struggling students with their own examples what a class, object, instance, or attribute is.
56 |
57 |
58 | [Do Now]:do_now.md
59 | [Lab - Create a Color Class]:lab.md
60 | [Example]:example.md
61 |
--------------------------------------------------------------------------------
/units/7_unit/02_lesson/do_now.md:
--------------------------------------------------------------------------------
1 | # Do Now 7.02
2 |
3 | 1. Type and run the following code:
4 |
5 | ```python
6 | class Pet(object):
7 | def __init__(self, name):
8 | self.name = name
9 |
10 | my_pet = Pet("Peter")
11 | print(my_pet.name)
12 | ```
13 |
14 | What is the purpose of the `__init__` method?
15 |
16 |
17 | What if you wanted to initialize all pet objects with a name and a color? How would you modify the code to create a pet object with a name of "Peter" and a color of "brown"?
--------------------------------------------------------------------------------
/units/7_unit/02_lesson/lab.md:
--------------------------------------------------------------------------------
1 | # Lab 7.02 - Pet Class
2 |
3 | In this lab we will create a Pet class that will keep track of the type of animal, color, food, noise and name of a given animal.
4 |
5 | 1. Create a class called Pet that has the following attributes:
6 | * Animal (i.e. dog, cat, fish)
7 | * Color (i.e. spotted, black, tabby, white)
8 | * Food (i.e. kibbles, tuna, fish flakes)
9 | * Noise (i.e. meow, woof, bark)
10 | * Name (i.e. Sparky, Scooby Doo)
11 | 2. Make sure to use the `__init__` method to create these attributes.
12 | 3. Create a list of pets.
13 | 4. Create a function that takes in a list of pets and prints out the name and the food attributes.
14 | 5. Test your function with your list of pets.
--------------------------------------------------------------------------------
/units/7_unit/02_lesson/lesson.md:
--------------------------------------------------------------------------------
1 | # Lesson 7.02: User-Defined Types, Part 2
2 |
3 | ##Learning Objectives
4 | Students will be able to...
5 | * Define and identify: **self**, **`__init__`**
6 | * Create a class with an init method
7 | * Understand and use the `self` argument
8 | * Instantiate a class with arguments
9 |
10 | ##Materials/Preparation
11 | * [Do Now]
12 | * [Lab - Pet Class]
13 | * Associated Reading - section 7.2 of Book
14 | * Read through the do now, lesson, and lab so that you are familiar with the requirements and can assist students
15 |
16 | ## Pacing Guide
17 | | **Duration** | **Description** |
18 | | ---------- | ----------- |
19 | | 5 Minutes | Do Now |
20 | | 10 Minutes | Lesson |
21 | | 35 Minutes | Lab |
22 | | 5 Minutes | Debrief |
23 |
24 | ## Instructor's Notes
25 |
26 | 1. **Do Now**
27 | * Display the Do Now on the board.
28 | * Students use the `__init__` method and explore how to initialize new objects with one or more arguments.
29 | 2. **Lesson**
30 | * Discuss the Do Now.
31 | * Ask students what the name of the class is.
32 | * Ask students where the Pet object is instantiated.
33 | * **`__init__`**:
34 | * Ask students what they think the `__init__` does.
35 | * `__init__` is a special function that is called when the class is first initialized.
36 | * If there is a print statement added to the `__init__` method, when would it get printed?
37 | * **`self`**:
38 | * Ask students what they think `self` is. What does `self.name` do and how does that relate to what `my_pet.name` does?
39 | * `self` is a way of referring to the instance within a function. Previously we had added attributes *after* the class was instantiated, but `self` allows for us to assign those at once in a single method.
40 | 3. **Lab**
41 | * Students will make a Pet class. Each pet will have an animal type, color, food, noise, and name.
42 | * Next students write a function that will take a list of pets and print out their name and the food they like to eat.
43 | 4. **Debrief**
44 | * Check for student understanding and completion of the lab.
45 | * Review the two key concepts introduced today (`self` and `__init__`)
46 |
47 | ###Accommodation/Differentiation
48 |
49 | As with the previous lesson, be prepared for some students to struggle with the new vocabulary and concepts being introduced. Reinforce the use of vocabulary such as **instantiate**, **object**, and **attribute** so that students are consistently exposed to how to use these terms.
50 |
51 | [Do Now]:do_now.md
52 | [Lab - Pet Class]:lab.md
53 |
--------------------------------------------------------------------------------
/units/7_unit/03_lesson/do_now.md:
--------------------------------------------------------------------------------
1 | # Do Now 7.03
2 |
3 | 1. Type and run the following code.
4 | ```python
5 | class Time(object):
6 | def __init__(self, hour, minute, second):
7 | self.hour = hour
8 | self.minute = minute
9 | self.second = second
10 |
11 | time1 = Time(5, 32, 0)
12 | time2 = Time(23, 11, 11)
13 |
14 | print(time1)
15 | print(time2)
16 | ```
17 |
18 | 2. Based on what is output, how can you tell the difference between `time1` and `time2`?
19 |
20 | 3. What happens if you try to add `time1` add `time2`?
--------------------------------------------------------------------------------
/units/7_unit/03_lesson/lab.md:
--------------------------------------------------------------------------------
1 | # Lab 7.03 - Kangaroo Class
2 |
3 | 1. Finish writing the `__add__` method for the time class from the Do Now.
4 |
5 | 2. Write a definition for a class named Kangaroo with the following methods:
6 | 1. An `__init__` method that initializes an attribute named `pouch_contents` to an empty list.
7 | 2. A method named `put_in_pouch` that takes an object of any type and adds it to `pouch_contents`.
8 | 3. A `__str__` method that returns a string representation of the Kangaroo object and the contents of the pouch.
9 |
10 | This exercise is a cautionary tale about one of the most common, and difficult to find, errors in Python:
11 | TypeError: Can't convert 'list' object to str implicitly
12 |
13 | Use the `str()` function to convert the list object to a string.
14 |
15 | Test your code by creating two Kangaroo objects, assigning them to variables named `kanga` and `roo`, and then adding `roo` to the contents of `kanga`’s pouch
16 |
17 | ## Extra Credit:
18 | Return to your Pet class from Lab 7.02. Research the `isinstance` function to write a method, `is_friend` that will take in another pet and return `True` if the two pets are friends, and `false` if they are not.
19 |
20 | ###Rules
21 | * If they are both dogs they are friends.
22 | * If the instance is a dog and the other pet is a cat, they are friends.
23 | * If the instance is a cat and the other is a dog they are not friends.
24 | * If they are both cats they are not friends.
25 |
--------------------------------------------------------------------------------
/units/7_unit/03_lesson/lesson.md:
--------------------------------------------------------------------------------
1 | # Lesson 7.03: Methods
2 |
3 | ##Learning Objectives
4 | Students will be able to...
5 | * Define and identify: **method**, **`__str__`**, **`__add__`**, **operator overloading**
6 | * Create a class with an `__init__` method
7 | * Understand and use the `self` argument
8 | * Instantiate a class with an argument
9 |
10 | ##Materials/Preparation
11 | * [Do Now]
12 | * [Lab - Kangaroo Class]
13 | * Associated Reading - section 7.3 of Book
14 | * Read through the do now, lesson, and lab so that you are familiar with the requirements and can assist students
15 |
16 | ## Pacing Guide
17 | | **Duration** | **Description** |
18 | | ---------- | ----------- |
19 | | 5 Minutes | Do Now |
20 | | 10 Minutes | Lesson |
21 | | 35 Minutes | Lab |
22 | | 5 Minutes | Debrief |
23 |
24 | ## Instructor's Notes
25 |
26 | 1. **Do Now**
27 | * Display the Do Now on the board.
28 | * Students will find that when they try to print the two different Time objects, it produces output that's not particularly useful or readable.
29 | * Students will also discover that adding objects doesn't work...yet!
30 | 2. **Lesson**
31 | * Discuss the Do Now.
32 | * **method**: a function inside of a class.
33 | * The first argument is always `self`.
34 | * Ask students what method we have already seen and used previously. (`init`)
35 | * Ask students how they would distinguish between the two time variables.
36 | * **`__str__`**: Need a method called `__str__`. This will get called when you print an object, and it returns a string that is easy to read and understand.
37 | * Have the students practice writing `__str__` for the `Time` class for 5 minutes.
38 | * Have a student write up their string method on the board.
39 | * **`__add__`**: add is a method that gets called when the plus sign is used between two `Time` objects. In this case it takes as parameters `self` and another `Time` object and returns a `Time` object that is the sum of both.
40 | * Overwriting add is called **operator overloading** because you are re-writing the code used to make the + work.
41 | * Work together with students to come up with the add time algorithm.
42 | 3. **Lab**
43 | * Have students finish up the time adding method.
44 | * Have students work on kanga roo lab.
45 | 4. **Debrief**
46 | * Go over students' questions and demonstrate some students' successfully completed labs.
47 | * Review what a method is, as well as what specific methods were used in today's lab.
48 |
49 | ###Accommodation/Differentiation
50 |
51 | Students that are moving quickly should work on the bonus assignment in the lab or assist a partner that is struggling.
52 |
53 | [Do Now]:do_now.md
54 | [Lab - Kangaroo Class]:lab.md
55 |
--------------------------------------------------------------------------------
/units/7_unit/04_lesson/do_now.md:
--------------------------------------------------------------------------------
1 | # Do Now 7.04
2 |
3 | Type and run the following code:
4 |
5 | ```python
6 | class Pet(object):
7 | def __init__(self, name):
8 | self.name = name
9 |
10 | def make_noise(self):
11 | print("Noise!")
12 | return
13 |
14 | class Dog(Pet):
15 | """
16 | A specific type of Pet!
17 | """
18 |
19 | dog1 = Dog()
20 | dog1.make_noise()
21 | ```
22 |
23 | 1. What is the output when you run this code?
24 | 2. Rewrite the code to resolve the error and make this work properly
25 | 3. What happens when you call method `make_noise`?
26 |
--------------------------------------------------------------------------------
/units/7_unit/04_lesson/example.py:
--------------------------------------------------------------------------------
1 | import random
2 |
3 | class Pokemon(object):
4 | def __init__(self, name, health_points, attack_power_upper_range, attack_power_lower_range):
5 | self.name = name
6 | self.health_points = health_points
7 | self.attack_power_lower_range = attack_power_lower_range
8 | self.attack_power_upper_range = attack_power_upper_range
9 |
10 | def attack(self):
11 | return random.randint(self.attack_power_lower_range, self.attack_power_upper_range)
12 |
13 | def defend(self, enemy, attack_power):
14 | self.health_points -= attack_power
15 |
16 | def growl(self):
17 | print("Growl")
18 |
19 |
--------------------------------------------------------------------------------
/units/7_unit/04_lesson/lab.md:
--------------------------------------------------------------------------------
1 | # Lab 7.04 - Pokemon Child Classes
2 | Given the following [example], practice using inheritance to create specific child classes for different types of Pokemon. Create the three child classes below:
3 |
4 | 1. Water Type
5 | * When attacking a fire type, the attack is more effective
6 | * When attacking a grass type the effect is less effective
7 | * When `growl` is called print out "Splish Splosh"
8 | 2. Fire Type
9 | * When attacking a water type, the attack is less effective
10 | * When attacking a grass type the effect is more effective
11 | * When `growl` is called print out "Fire Fire"
12 | 3. Grass Type
13 | * When attacking a water type, the attack is more effective
14 | * When attacking a fire type the effect is less effective
15 | * When `growl` is called print out "Cheep Cheep"
16 |
17 | **Note**: In order to check what type an object is you can use `isinstance` which takes in an object, a class and returns a boolean if the object is the type of the inputted class.
18 |
19 | ###Example
20 | ```python
21 | my_pet = Pet()
22 | isinstance(my_pet, Pet) # returns true
23 | isinstance(my_pet, Dog) # returns false
24 | ```
25 |
26 |
27 |
28 | [example]: https://teals-introcs.gitbooks.io/2nd-semester-introduction-to-computer-science-pri/content/units/7_unit/04_lesson/example.py
29 |
--------------------------------------------------------------------------------
/units/7_unit/04_lesson/lesson.md:
--------------------------------------------------------------------------------
1 | # Lesson 7.04: Inheritance
2 |
3 | ##Learning Objectives
4 | Students will be able to...
5 |
6 | * Define and identify: **inheritance**, **parent class**, **child class**
7 | * Create a class that inherits from anther class
8 | * Overwrite methods of parent class in a child class
9 |
10 | ##Materials/Preparation
11 | * [Do Now]
12 | * [Lab - Pokemon Child Classes]
13 | * Associated Reading - section 7.4 of Book
14 | * Read through the do now, lesson, and lab so that you are familiar with the requirements and can assist students
15 |
16 | ## Pacing Guide
17 | | **Duration** | **Description** |
18 | | ---------- | ----------- |
19 | | 5 Minutes | Do Now |
20 | | 10 Minutes | Lesson |
21 | | 30 Minutes | Lab |
22 | | 5 Minutes | Debrief |
23 |
24 | ## Instructor's Notes
25 |
26 | 1. **Do Now**
27 | * Display the Do Now on the board.
28 | * Students will explore an example of a new `Dog` class inheriting the methods of the `Pet` class
29 | 2. **Lesson**
30 | * Discuss the Do Now.
31 | * **Inheritance**: when you create a new class that is a subclass of the original (ex. the `Dog` class "inherits" the properties/methods of the `Pet` class.)
32 | * Ask students: what is the difference between the `Dog` declaration and the `Pet` declaration?
33 | * Discuss the error and what was missing in the original code.
34 | * When a class inherits from another class, the class it inherits FROM is called the **parent class** and the class that inherits is called the **child class**.
35 | * Ask: in the example from the do now, which is the child and which is the parent?
36 | * Child classes gain access to all the methods of the parent class
37 | * What does `dog1.make_nosie()` print out?
38 | * Child classes can also overwrite their parent classes. Have the students practice overwriting `make_noise` in the `Dog` class so that the dog will print out `bark bark`
39 | 3. **Lab**
40 | * Given a generic Pokemon class, create three child classes that represent different types of Pokemon.
41 | * Consider demonstrating the creation of one of the child classes before having students start the lab independently.
42 | 4. **Debrief**
43 | * Go over students' questions. Ask what questions the students have and review instance, class, methods, init, str, etc
44 |
45 | ###Accomodation/Differentiation
46 | In the Pokemon lab, students may need clarification regarding how to use `isinstance` and how to manipulate the `defend` method to meet the requirements of each child class. Consider demonstrating the creation of one child class for all students before having students work on the lab.
47 | [Do Now]:do_now.md
48 | [Lab - Pokemon Child Classes]:lab.md
49 |
--------------------------------------------------------------------------------
/units/7_unit/05_lesson/lesson.md:
--------------------------------------------------------------------------------
1 | # Lesson 7.05: Pokemon Project
2 |
3 | ##Learning Objectives
4 | Students will be able to...
5 |
6 | * Engage in **class design** before beginning coding
7 | * Apply what was learned with respect to **classes**, **methods**, and** inheritance** to create an implementation of Pokemon
8 |
9 | ##Materials/Preparation
10 | * [Project Spec - Pokemon]
11 | * Solution (access protected resources by clicking on "Additional Curriculum Materials" on the [TEALS Dashboard])
12 | * Read through the project spec so that you are familiar with the requirements and can assist students
13 | * Try creating your own project so that you can
14 | * Review [4 Steps to Solve Any CS Problem]
15 |
16 | ## Pacing Guide
17 | ###Day 1
18 | | **Duration** | **Description** |
19 | | ---------- | ----------- |
20 | | 5 Minutes | Project Handout |
21 | | 5 Minutes | Mini-Lesson |
22 | | 15 Minutes | Project Overview
23 | | 30 Minutes | Project Planning |
24 | ###Days 2-7
25 | | **Duration**|**Description** |
26 | |--|--|
27 | | 5 Minutes | Planning/Questions |
28 | | 10 Minutes | Review |
29 | | 35 Minutes | Project Work |
30 | | 5 Minutes | Wrap up |
31 | ## Instructor's Notes
32 |
33 | 1. **Day 1**
34 | 1. **Project Handout**
35 | * Hand out the project spec and have students read through it.
36 | * Demo a completed project to show user experience.
37 | 2. **Mini-Lesson**
38 | * Discuss **Class Design**
39 | * If you find yourself creating many classes with similar methods, use inheritance!
40 | * Figure out the actual structure without writing code and use that to create your classes
41 | 3. **Project Overview**
42 | * Go over the Pokemon project spec
43 | * Review the major aspects and requirements of the game
44 | 4. **Project Planning**
45 | * Have students write down the classes and methods they need to create
46 | * Students should then outline what they will do each day in order to complete the project on time
47 | 2. **Days 2-7**
48 | 1. ** Planning/Questions **
49 | * Have students review and update what they want to accomplish that day and any questions they have from the previous day.
50 | 2. **Review**
51 | * if necessary, review any concepts or struggles the class was having
52 | 3. **Project Work**
53 | * students work on their projects indecently
54 | 4. **Wrap Up**
55 | * have the students write down what they struggled on or had a hard time doing.
56 |
57 |
58 | [Project Spec - Pokemon]:project.md
59 | [TEALS Dashboard]:http:/www.tealsk12.org/dashboard
60 | [4 Steps to Solve Any CS Problem]:https://github.com/TEALS-IntroCS/2nd-semester-introduction-to-computer-science-principles/raw/master/units/4%20Steps%20to%20Solve%20Any%20CS%20Problem.pdf
61 |
--------------------------------------------------------------------------------
/units/7_unit/05_lesson/starter_code.py:
--------------------------------------------------------------------------------
1 | import random
2 |
3 | class User(object):
4 | def __init__(self, name):
5 | self.name = name
6 | self.pokemon = []
7 | self.attacking_pokemon = None
8 |
9 | def set_pokemon(self, set_of_pokemon):
10 | self.pokemon = set_of_pokemon
11 |
12 | def list_pokemon(self):
13 | pass
14 |
15 | def switch(self, pokemon_number):
16 | pass
17 |
18 | def heal(self):
19 | pass
20 |
21 | def is_end_game(self):
22 | pass
23 |
24 | def print_attacks(self):
25 | pass
26 |
27 | def attack(self, attack_name, enemy):
28 | pass
29 |
30 | class Computer(User):
31 | def play_turn(self, enemy):
32 | pass
33 |
34 | def set_pokemon(self, list_pokemon):
35 | pass
36 |
37 | def attack(self, enemy):
38 | pass
39 |
40 | def switch(self):
41 | pass
42 |
43 | class Pokemon(object):
44 | def __init__(self, hp, max_ap, name):
45 | self.hp = hp
46 | self.max_ap = max_ap
47 | self.name = name
48 | self.knocked_out = False
49 | self.attacks = self.set_attacks()
50 | self.pokemon_type = self.set_type()
51 |
52 | def set_type(self):
53 | return None
54 |
55 | def set_attacks(self):
56 | self.attacks = {}
57 |
58 | def get_attacks(self):
59 | return list(self.attacks.keys())
60 |
61 | def print_attacks(self):
62 | for attack in self.attacks:
63 | print(attack)
64 |
65 | def add_attacks(self, attack_dictionary):
66 | self.attacks = attack_dictionary
67 |
68 | def get_attack_power(self, attack, enemy):
69 | pass
70 |
71 | def attack(self, attack_name, enemy):
72 | pass
73 |
74 | def take_damage(self, damage_amount):
75 | pass
76 |
77 | def heal(self):
78 | pass
79 |
80 | class GrassType(Pokemon):
81 | def set_type(self):
82 | return 'grass'
83 |
84 | def set_attacks(self):
85 | pass
86 |
87 | def get_attack_power(self, attack, enemy):
88 | pass
89 |
90 | class WaterType(Pokemon):
91 | def set_attacks(self):
92 | pass
93 |
94 | def set_type(self):
95 | return 'water'
96 |
97 | def get_attack_power(self, attack, enemy):
98 | pass
99 |
100 | class FireType(Pokemon):
101 | def set_type(self):
102 | return 'fire'
103 |
104 | def set_attacks(self):
105 | pass
106 |
107 | def get_attack_power(self, attack, enemy):
108 | pass
109 |
110 | def game_loop():
111 | pokemon_list = [
112 | GrassType(60, 40, 'Bulbasoar'),
113 | GrassType(40, 60, 'Bellsprout'),
114 | GrassType(50, 50, 'Oddish'),
115 | FireType(25, 70, 'Charmainder'),
116 | FireType(30, 50, 'Ninetails'),
117 | FireType(40, 60, 'Ponyta'),
118 | WaterType(80, 20, 'Squirtle'),
119 | WaterType(70, 40, 'Psyduck'),
120 | WaterType(50, 50, 'Polywag')]
121 |
122 | game_over = False
123 |
124 | while not game_over:
125 | print_stats(player)
126 | print_stats(computer)
127 |
128 | game_loop()
129 |
--------------------------------------------------------------------------------
/units/7_unit/unit7.md:
--------------------------------------------------------------------------------
1 | # Unit 7
2 |
3 |
--------------------------------------------------------------------------------
/units/8_unit/01_lesson/do_now.md:
--------------------------------------------------------------------------------
1 | # Do Now
2 |
3 | Skim through the following summarized design basics.
4 |
5 | 1. Pitch - describe the basic functionality of the app in one paragraph of less
6 | 2. Define - List the features/scenarios the app will support
7 | 3. Sketch - Draw a very basic wireframe sketch of the main "screens" of the app
8 | 4. Expand - Build a comprehensive spec document, leaving out steps or requirements will make it difficult to plan effectively and will likely force major changes or cuts later.
9 | 5. Plan - Based on the feature list and spec, create a full development plan making sure to keep an eye on the total amount of time required and to include buffer for things going wrong. Be sure to prioritize tasks so that cuts can be made if necessary.
10 | 6. Start Coding - once you have your plan written begin to implement the project according to your plan.
--------------------------------------------------------------------------------
/units/8_unit/02_lesson/do_now.md:
--------------------------------------------------------------------------------
1 | # Do Now
2 |
3 | Take out your pitches from last class. Review the ideas and pick **one** to pursue for your final project.
4 |
--------------------------------------------------------------------------------
/units/8_unit/03_lesson/do_now.md:
--------------------------------------------------------------------------------
1 | # Do Now
2 |
3 | Ask students to take out their feature lists and flow charts from [Lesson 8.2](../02_lesson/lesson.md). You will be using these to develop a more detailed specification and plan for your project today. Read through them and make sure you have included all the main points.
--------------------------------------------------------------------------------
/units/8_unit/03_lesson/lesson.md:
--------------------------------------------------------------------------------
1 | # Lesson 8.3 - Building a Plan
2 |
3 | ## Learning Objectives
4 | Students will be able to...
5 | * Identify the main components of a functional project specification and explain the purpose of each section
6 | * Develop a project idea into a full, detailed specification
7 |
8 |
9 | ## Materials/Preparation
10 |
11 |
12 | ## Pacing Guide
13 | | Duration | Description |
14 | | --------- | --------------------------------------------- |
15 | | 5 minutes | Do Now |
16 | | 10 minutes | Review feature lists and flow chart |
17 | | 20 minutes | Spec writing |
18 | | 15 minutes | Building implementation plan|
19 | | 5 minutes | Debrief and wrap-up|
20 |
21 | ## Instructor's Notes
22 | 1. ** Do Now **
23 | * Project the Do Now on the board, circulate around the class to check that students are working and understand the instructions.
24 | 2. ** Review feature lists and flow chart **
25 | * If time allows, ask one or two students to share their feature list and/or flow chart and discuss with the class.
26 | * Ensure that students have an understanding of the proper level of detail at this point.
27 | 2. ** Spec writing **
28 | * Using the details from their pitch, their feature lists, their flow charts, and the feedback they've received, students should fill out the rest of the [Final Project Plan Organizer].
29 | * It is **VITAL** at this stage that students be as detailed and thorough as they can. Any missing information will complicate the process later when they realize what was left out. Encourage students to take their time and make sure they hit everything.
30 | * While this process is happening, instructors should circulate through the class and check-in with student. Verify that they have a complete, well-thought out idea that is feasible to complete in the available time.
31 | * If you have concerns about a student's ability to complete the proposed project, help them scope down by removing or simplifying features.
32 | 3. Implementation plan
33 | * Students should use the details built in their plan organizer to list the tasks necessary on their [Final Project Development Plan].
34 | * Emphasize to students that tasks should be at a very low level of granularity (hence the time requirement being specified in minutes). If a single task has a time estimate of more than a few hours, the student should try to break the task into smaller pieces.
35 | * Ensure that students do not skip "trivial" or "simple" tasks (such as building a script they have written before) or non-coding tasks (such as developing graphics) in their pla.
36 | 4. Debrief
37 | * As class ends, remind students that their spec and implementation plan will be their guides throughout the process. They should update them each day and keep them with them at all times.
38 | * Ideally, anytime there is a question about the requirements or scope of the project, the spec should have the answer. If not, it's a new idea and the spec needs to be updated acordingly.
39 |
40 | ## Accommodation/Differentiation
41 |
42 | [Final Project Plan Organizer]:https://teals-introcs.gitbooks.io/2nd-semester-introduction-to-computer-science-pri/content/units/8_unit/final_project_plan_organizer.docx
43 | [Final Project Development Plan]:https://teals-introcs.gitbooks.io/2nd-semester-introduction-to-computer-science-pri/content/units/8_unit/final_project_development_plan.docx
44 |
--------------------------------------------------------------------------------
/units/8_unit/04_lesson/do_now.md:
--------------------------------------------------------------------------------
1 | # Do Now
2 |
3 | Take out your planning documents, update them to reflect changes or difficulties, and write down what you need to accomplish today. If you have any questions from yesterday write those down as well.
--------------------------------------------------------------------------------
/units/8_unit/final_project_development_plan.docx:
--------------------------------------------------------------------------------
https://raw.githubusercontent.com/TEALS-IntroCS/2nd-semester-introduction-to-computer-science-principles/723385e9b07e68fc6d89d5d45a6fe566e488e510/units/8_unit/final_project_development_plan.docx
--------------------------------------------------------------------------------
/units/8_unit/final_project_plan_organizer.docx:
--------------------------------------------------------------------------------
https://raw.githubusercontent.com/TEALS-IntroCS/2nd-semester-introduction-to-computer-science-principles/723385e9b07e68fc6d89d5d45a6fe566e488e510/units/8_unit/final_project_plan_organizer.docx
--------------------------------------------------------------------------------
/units/8_unit/unit8.md:
--------------------------------------------------------------------------------
https://raw.githubusercontent.com/TEALS-IntroCS/2nd-semester-introduction-to-computer-science-principles/723385e9b07e68fc6d89d5d45a6fe566e488e510/units/8_unit/unit8.md
--------------------------------------------------------------------------------