 456 |
457 | ---
458 |
459 | ###
456 |
457 | ---
458 |
459 | ###  473 |
474 | ---
475 |
476 | ###
473 |
474 | ---
475 |
476 | ###  623 |
624 | ---
625 |
626 | ###
623 |
624 | ---
625 |
626 | ###  738 |
739 | - The main idea behind the flex layout is to give a container the ability to alter its items' width/height (and order) to best fill the available space (mostly to accommodate to all kind of display devices and screen sizes).
740 | - A flex container expands items to fill available free space, or shrinks them to prevent overflow.
741 | - **Note**: a comprehensive guide to flexboxes can be found at https://css-tricks.com/snippets/css/a-guide-to-flexbox/
742 |
743 | ---
744 |
745 | ###
738 |
739 | - The main idea behind the flex layout is to give a container the ability to alter its items' width/height (and order) to best fill the available space (mostly to accommodate to all kind of display devices and screen sizes).
740 | - A flex container expands items to fill available free space, or shrinks them to prevent overflow.
741 | - **Note**: a comprehensive guide to flexboxes can be found at https://css-tricks.com/snippets/css/a-guide-to-flexbox/
742 |
743 | ---
744 |
745 | ###  790 |
791 | ### Example
792 |
793 | ```
794 | .container {
795 | justify-content: center;
796 | }
797 | ```
798 |
799 | ------
800 |
801 | ###
790 |
791 | ### Example
792 |
793 | ```
794 | .container {
795 | justify-content: center;
796 | }
797 | ```
798 |
799 | ------
800 |
801 | ###  810 |
811 | #### Example
812 |
813 | ```
814 | .container {
815 | align-items: center;
816 | }
817 | ```
818 |
819 | ---
820 |
821 | ## Classes and IDs
822 |
823 | ###
810 |
811 | #### Example
812 |
813 | ```
814 | .container {
815 | align-items: center;
816 | }
817 | ```
818 |
819 | ---
820 |
821 | ## Classes and IDs
822 |
823 | ###  842 |
843 | ---
844 |
845 | ###
842 |
843 | ---
844 |
845 | ###  866 |
867 | ##
866 |
867 | ##  910 |
911 | ---
912 |
913 | ### Creating Clickable Blocks
914 |
915 | Currently, the links only work when we click the text. However, what if we want our navigation bar to be made up of stylable and clickable boxes? CSS comes to our rescue once again!
916 |
917 | **In your CSS file:**
918 |
919 | ```
920 | li a {
921 | display: block;
922 | width: 60px;
923 | background-color: #dddddd;
924 | }
925 | ```
926 |
927 | This code styles the \ elements inside of the list.
928 |
929 | - **display: block;**
930 | - Displays the links as block elements which makes the whole link area clickable (not just the text) and allows us to specify any other properties that we want (width, height, padding, margin, etc.).
931 | - **width: 60px;**
932 | - Sets the width of the block to 60 pixels. Without this, the block would take up the entire width of the webpage (by default).
933 | - **background-color: #dddddd;**
934 | - Sets the background color of the block to a dark gray (so we can see the blocks).
935 |
936 | You should now have something that looks like the following, where all gray areas are clickable:
937 |
938 |
910 |
911 | ---
912 |
913 | ### Creating Clickable Blocks
914 |
915 | Currently, the links only work when we click the text. However, what if we want our navigation bar to be made up of stylable and clickable boxes? CSS comes to our rescue once again!
916 |
917 | **In your CSS file:**
918 |
919 | ```
920 | li a {
921 | display: block;
922 | width: 60px;
923 | background-color: #dddddd;
924 | }
925 | ```
926 |
927 | This code styles the \ elements inside of the list.
928 |
929 | - **display: block;**
930 | - Displays the links as block elements which makes the whole link area clickable (not just the text) and allows us to specify any other properties that we want (width, height, padding, margin, etc.).
931 | - **width: 60px;**
932 | - Sets the width of the block to 60 pixels. Without this, the block would take up the entire width of the webpage (by default).
933 | - **background-color: #dddddd;**
934 | - Sets the background color of the block to a dark gray (so we can see the blocks).
935 |
936 | You should now have something that looks like the following, where all gray areas are clickable:
937 |
938 |  939 |
940 | ---
941 |
942 | ### Changing Color on Hover
943 |
944 | Let's change the background color of a link block as the user hovers over it. We can also achieve this with CSS.
945 |
946 | First, we should remove the default styling that hyperlinks receive, and add some padding so the text positioning looks nicer.
947 |
948 | **In your CSS file:**
949 |
950 | ```
951 | li a {
952 | /* stuff from before here */
953 | color: black;
954 | padding: 8px 16px;
955 | text-decoration: none;
956 | }
957 | ```
958 |
959 | - **color: black;**
960 | - Sets text color to black, as opposed to blue.
961 | - **padding: 8px 16px;**
962 | - Adds padding to the text.
963 | - **text-decoration: none**
964 | - Removes all text-decoration (i.e. removes the underline).
965 |
966 | Now, let's edit the styling of a link being hovered over:
967 |
968 | **In your CSS file:**
969 |
970 | ```
971 | li a:hover {
972 | background-color: #555;
973 | color: white;
974 | }
975 | ```
976 |
977 | a:hover is special syntax that specifically styles links that have the cursor on them.
978 |
979 | - **background-color: #555;**
980 | - Sets the background color to a dark gray (when user is hovering over link)
981 | - **color: white;**
982 | - Changes text color to white (when user is hovering over link)
983 |
984 | You should now have something that looks like the following (if your cursor was on "Home"):
985 |
986 |
939 |
940 | ---
941 |
942 | ### Changing Color on Hover
943 |
944 | Let's change the background color of a link block as the user hovers over it. We can also achieve this with CSS.
945 |
946 | First, we should remove the default styling that hyperlinks receive, and add some padding so the text positioning looks nicer.
947 |
948 | **In your CSS file:**
949 |
950 | ```
951 | li a {
952 | /* stuff from before here */
953 | color: black;
954 | padding: 8px 16px;
955 | text-decoration: none;
956 | }
957 | ```
958 |
959 | - **color: black;**
960 | - Sets text color to black, as opposed to blue.
961 | - **padding: 8px 16px;**
962 | - Adds padding to the text.
963 | - **text-decoration: none**
964 | - Removes all text-decoration (i.e. removes the underline).
965 |
966 | Now, let's edit the styling of a link being hovered over:
967 |
968 | **In your CSS file:**
969 |
970 | ```
971 | li a:hover {
972 | background-color: #555;
973 | color: white;
974 | }
975 | ```
976 |
977 | a:hover is special syntax that specifically styles links that have the cursor on them.
978 |
979 | - **background-color: #555;**
980 | - Sets the background color to a dark gray (when user is hovering over link)
981 | - **color: white;**
982 | - Changes text color to white (when user is hovering over link)
983 |
984 | You should now have something that looks like the following (if your cursor was on "Home"):
985 |
986 |  987 |
988 | ---
989 |
990 | ### Making the Bar Horizontal
991 |
992 | Making your bar horizontal can be done using a single line in CSS, and involves the float property.
993 |
994 | **In your CSS file:**
995 |
996 | ```
997 | li {
998 | float: left;
999 | }
1000 | ```
1001 |
1002 | However, let's restyle some things as well:
1003 |
1004 | **In your CSS file:**
1005 |
1006 | ```
1007 | ul {
1008 | list-style-type: none;
1009 | margin: 0;
1010 | padding: 0;
1011 | overflow: hidden;
1012 | background-color: #333;
1013 | }
1014 |
1015 | li {
1016 | float: left;
1017 | }
1018 |
1019 | li a {
1020 | display: block;
1021 | color: white;
1022 | text-align: center;
1023 | padding: 14px 16px;
1024 | text-decoration: none;
1025 | }
1026 |
1027 | li a:hover {
1028 | background-color: #111;
1029 | }
1030 | ```
1031 |
1032 | - **overflow: hidden;**
1033 | - Added to the \
987 |
988 | ---
989 |
990 | ### Making the Bar Horizontal
991 |
992 | Making your bar horizontal can be done using a single line in CSS, and involves the float property.
993 |
994 | **In your CSS file:**
995 |
996 | ```
997 | li {
998 | float: left;
999 | }
1000 | ```
1001 |
1002 | However, let's restyle some things as well:
1003 |
1004 | **In your CSS file:**
1005 |
1006 | ```
1007 | ul {
1008 | list-style-type: none;
1009 | margin: 0;
1010 | padding: 0;
1011 | overflow: hidden;
1012 | background-color: #333;
1013 | }
1014 |
1015 | li {
1016 | float: left;
1017 | }
1018 |
1019 | li a {
1020 | display: block;
1021 | color: white;
1022 | text-align: center;
1023 | padding: 14px 16px;
1024 | text-decoration: none;
1025 | }
1026 |
1027 | li a:hover {
1028 | background-color: #111;
1029 | }
1030 | ```
1031 |
1032 | - **overflow: hidden;**
1033 | - Added to the \- element to prevent \
- elements from going outside of the list
1034 | - **background-color: #333**
1035 | - Note that this property is added to the \
- element. This creates a full-width, charcoal background color.
1036 | - **text-align: center**
1037 | - Added to the \ elements in \
- blocks to center link text within the block.
1038 |
1039 | You should now have something that looks like the following:
1040 |
1041 |
1042 | 1043 | --- 1044 | 1045 | ### Fixed Navigation Bars 1046 | 1047 | What if we want to fix our navigation bar at the top or bottom of the page, even when the user is scrolling? You guessed it: a little more CSS. 1048 | 1049 | **In your CSS file:** 1050 | 1051 | ``` 1052 | ul { 1053 | /* stuff from before */ 1054 | position: fixed; 1055 | top: 0; 1056 | width: 100%; 1057 | } 1058 | ``` 1059 | 1060 | - **position: fixed;** 1061 | - Makes the list fixed from the users point of view/ 1062 | - **top: 0** 1063 | - top is a property for absolutely positioned (fixed) elements; in this case it positions our bar at the top of the page. 1064 | - **width: 100%** 1065 | - Allows the bar to take up all available width. 1066 | 1067 | This will fix the bar at the top of the screen, even when we scroll! To fix it at the bottom: 1068 | 1069 | ``` 1070 | ul { 1071 | position: fixed; 1072 | bottom: 0; 1073 | width: 100%; 1074 | } 1075 | ``` 1076 | 1077 | --- 1078 | 1079 | Congratulations! You should now have a pretty kick-ass navigation bar. Continue exploring other CSS properties to make it even cooler. :) 1080 | 1081 | -------------------------------------------------------------------------------- /Learn-Session-2-README.md: -------------------------------------------------------------------------------- 1 | # Learn-Session-2-README 2 | 3 | ## Table of Contents 4 | - **Learn Session 2** 5 | - What is Bootstrap? 6 | - Why Use Bootstrap? 7 | - Getting Bootstrap 8 | - Bootstrap CDN 9 | - Bootstrap Grid System 10 | - Grid Classes 11 | - Useful Class Names 12 | - container 13 | - row 14 | - col-\*-\* 15 | - Grid System Rules 16 | - Bootstrap Examples (for you to try) 17 | - Three Equal Columns 18 | - Mobile and Desktop 19 | - Introduction to Javascript 20 | - Using the Console 21 | - Variables 22 | - Functions 23 | - jQuery 24 | - What is jQuery? 25 | - Using jQuery 26 | - **Hack Session 2** 27 | - Getting Started 28 | - Creating a Bootstrap Navbar 29 | - Getting Started 30 | - Right-Aligned Links 31 | - Fixing the Navbar 32 | - Implementing a Meme Generator 33 | - Getting Started 34 | - Setting Everything Up 35 | - Entering a Caption 36 | - Useful JavaScript Syntax 37 | - jQuery 38 | 39 | ## What is Bootstrap? 40 | 41 | Bootstrap is a free front-end **framework** (collection of pre-written code) used for faster and easier web development. 42 | 43 | It includes HTML and CSS-based design templates for typography, forms, buttons, tables, navigation, modals, image carousels and many others, including optional JavaScript plugins. 44 | 45 | ## Why Use Bootstrap? 46 | 47 | Advantages of Bootstrap: 48 | 49 | - **Easy to use:** Anybody with basic knowledge of HTML and CSS can start using Bootstrap 50 | - **Responsive features:** Bootstrap's responsive CSS adjusts to phones, tablets, and desktops 51 | - **Mobile-first approach:** In Bootstrap 4, mobile-first styles are part of the core framework 52 | - **Browser compatibility:** Bootstrap is compatible with all modern browsers (Chrome, Firefox, Internet Explorer, Safari, and Opera) 53 | 54 | ## Getting Bootstrap 55 | 56 | There are two ways to start using Bootstrap on your own web site: 57 | 58 | - Download Bootstrap from getbootstrap.com 59 | - Include Bootstrap from a CDN 60 | 61 | For the purposes of Hackschool we will be using the second option. 62 | 63 | --- 64 | 65 | ### Bootstrap CDN 66 | 67 | A **CDN** is a Content Delivery Network. We can include Bootstrap in our HTML file from a CDN. 68 | 69 | **In your HTML file**, in your ` ` tags include the following code: 70 | 71 | ``` 72 | 73 | 74 | 75 | ``` 76 | 77 | - The first link tag is similar to how we linked our **style.css** file to our HTML file. This time, however, the element fetches a CSS file from MaxCDN. 78 | - The second ` 425 | ``` 426 | 427 | - The first link tag is similar to how we linked our **style.css** file to our HTML file. This time, however, the element fetches a CSS file from MaxCDN. 428 | - The second ` 575 | 576 | ``` 577 | 578 | ------ 579 | 580 | ### Setting Everything Up 581 | 582 | First let's add the HTML elements we'll need for our meme generator. 583 | 584 | **In your HTML file,** add: 585 | 586 | ``` 587 |
588 |590 | 591 | 592 | ``` 593 | 594 | **In your CSS file,** add: 595 | 596 | ``` 597 | #meme-image { 598 | background-image: url('http://i0.kym-cdn.com/entries/icons/original/000/022/138/reece.JPG'); 599 | background-size: cover; 600 | width: 500px; 601 | height: 500px; 602 | margin-top: 40px; 603 | margin-left: 40px; 604 | } 605 | 606 | #caption { 607 | padding-top: 40px; 608 | width: 100%; 609 | text-align: center; 610 | font: bold 50px Impact, Serif; 611 | color: white; 612 | text-shadow: 613 | -3px -3px 0 #000, 614 | 3px -3px 0 #000, 615 | -3px 3px 0 #000, 616 | 3px 3px 0 #000; 617 | } 618 | 619 | #caption-input { 620 | margin: 20px; 621 | margin-left: 40px; 622 | } 623 | 624 | #submit-button { 625 | margin-left: 40px; 626 | } 627 | ``` 628 | 629 | - We use the `text-shadow` property to make it appear that our text has a border. 630 | 631 | ------ 632 | 633 | ### Entering a Caption 634 | 635 | **In your script.js file**, add: 636 | 637 | ``` 638 | function attachEventHandlers() { 639 | $("#submit-button").on('click', updatePhoto); 640 | } 641 | 642 | function updatePhoto(event) { 643 | // TODO 644 | } 645 | 646 | $('document').ready(function() { 647 | attachEventHandlers(); 648 | }); 649 | ``` 650 | 651 | - In our "main()" function we call the function attachEventHandlers() 652 | - We add an event handler to our submit button that calls the function `updatePhoto()` after the button is clicked. 653 | 654 | Let's write the `updatePhoto()` function! 655 | 656 | **In your script.js file**, add: 657 | 658 | ``` 659 | function updatePhoto(event) { 660 | var caption = $("#caption-input").val(); 661 | $("#caption").html(caption); 662 | } 663 | ``` 664 | 665 | - `#caption-input` grabs our `` element, and the function `val()` gets its value (a user-entered string). 666 | - We use the `.html()` function to alter the raw HTML content inside our `Enter text
589 |` tags. 667 | 668 | Easy at that! 669 | 670 | **Save all of your files**, and try it out: 671 | 672 |
673 | 674 | -------------------------------------------------------------------------------- /Learn-Session-4-README.md: -------------------------------------------------------------------------------- 1 | # Hackschool Learn Session 4: Relational Databases 2 | 3 | ## Table of Contents: 4 | 1. [Logistics](https://github.com/acm-hackschool-f17/Resources/blob/master/Learn-Session-4-README.md#logistics) 5 | 2. [Introduction to Docker](https://github.com/acm-hackschool-f17/Resources/blob/master/Learn-Session-4-README.md#what-is-docker) 6 | - What is Docker? 7 | - Installation 8 | 3. [Setting up MySQL](https://github.com/acm-hackschool-f17/Resources/blob/master/Learn-Session-4-README.md#setting-up-mysql) 9 | 4. Sequelize 10 | - [What is Sequelize?](https://github.com/acm-hackschool-f17/Resources/blob/master/Learn-Session-4-README.md#what-is-sequelize) 11 | - [How to integrate with Node.js](https://github.com/acm-hackschool-f17/Resources/blob/master/Learn-Session-4-README.md#how-to-include-it-in-your-project) 12 | - [How to use Sequelize](https://github.com/acm-hackschool-f17/Resources/blob/master/Learn-Session-4-README.md#how-to-use-sequelize) 13 | 14 | ### Logistics 15 | **Location**: Covel 227 16 | 17 | **Time:** 6:15 - 8:15 18 | 19 | **Teachers:** 20 | 21 | - Shannon Phu 22 | 23 | **Slides:** 24 | 25 | - [Session 4 - Relational Databases](https://docs.google.com/presentation/d/1vjVnIyq-kgLSYtG5BeMeocWSXk8OgCMgRpbjlzveod8/edit) 26 | 27 | **E-Library Demo: How to Apply Sequelize** 28 | - [Code](https://github.com/acm-hackschool-f17/session-4-learn) 29 | 30 | **Attendance Code:** #SaveSoundcloud 31 | 32 | **Course Overview Table of Contents**: 33 | 34 | - [Course Schedule](https://github.com/acm-hackschool-f17/Resources/blob/master/README.md#basic-curriculum) 35 | 36 | ## What is Docker? 37 | 38 | Docker is a tool that allows developers, sys-admins etc. to easily deploy their applications in a sandbox (called **containers**) to run on the host operating system, i.e. Linux. 39 | 40 | The key benefit of Docker is that it allows users to **package an application with all of its dependencies into a standardized unit** for software development. 41 | 42 | Unlike virtual machines, containers do not have the high overhead and hence enable more efficient usage of the underlying system and resources. 43 | 44 | ### What are containers? 45 | 46 | The industry standard today is to use **Virtual Machines** (VMs) to run software applications. A VM simulates an operating system; it's kind of like a computer running as software inside another computer. 47 | 48 | VMs are great at providing full process isolation for applications: there are very few ways a problem in the host operating system can affect the software running in the guest operating system, and vice-versa. But this isolation comes at great cost — the computational overhead spent virtualizing hardware for a guest OS to use is substantial. 49 | 50 | Containers take a different approach: by leveraging the low-level mechanics of the host operating system, containers provide most of the isolation of virtual machines at a fraction of the computing power. 51 | 52 | ### Installing Docker 53 | 54 | **On Mac:** 55 | 56 | Click [here](https://www.docker.com/community-edition#/mac) and follow the instructions to download Docker. 57 | 58 | **On Windows:** 59 | 60 | Click [here](https://store.docker.com/editions/community/docker-ce-desktop-windows) and follow the instructions to download Docker. 61 | 62 | #### Once Docker is installed: 63 | 64 | Run Docker, then use your Terminal/Command Prompt to see if everything's set up. 65 | 66 | **On both Linux/Mac and Windows:** 67 | 68 | ``` 69 | $ docker version 70 | ``` 71 | 72 | This should output: 73 | 74 | ``` 75 | Client: 76 | Version: 17.09.0-ce 77 | API version: 1.32 78 | Go version: go1.8.3 79 | Git commit: afdb6d4 80 | Built: Tue Sep 26 22:40:09 2017 81 | OS/Arch: darwin/amd64 82 | 83 | Server: 84 | Version: 17.09.0-ce 85 | API version: 1.32 (minimum version 1.12) 86 | Go version: go1.8.3 87 | Git commit: afdb6d4 88 | Built: Tue Sep 26 22:45:38 2017 89 | OS/Arch: linux/amd64 90 | Experimental: true 91 | ``` 92 | 93 | All set! 94 | 95 | ## Setting up MySQL 96 | We'll be using Docker to run MySQL. 97 | ### Steps: 98 | 1. Open up Terminal/Command Prompt 99 | 2. Run the following command which installs and starts running your database: 100 | ``` 101 | docker run --name bruinplay-mysql -p 3306:3306 -e MYSQL_ROOT_PASSWORD=my-secret-pw -d mysql:8.0 102 | ``` 103 | You will see a long hash output, for example `bc6635833ed86be942067e0641df0bd3125447613e38c0b5cece9991f671c3ff`. The content of this text doesn't matter. 104 | 3. Type `docker ps`. Your Docker container should be running MySQL and you should see something like: 105 |  106 | 107 | * To stop the database from running, type `docker stop bruinplay-mysql` 108 | * To restart a currently existing container (ie you have't removed it), type `docker start bruinplay-mysql` 109 | * To remove the container and uninstall MySQL in that container type `docker rm bruinplay-mysql` 110 | 111 | ## What is [Sequelize](http://docs.sequelizejs.com/)? 112 | - It is a library that can work with any relational database and abstracts and handles all the raw SQL queries that you'd traditionally made. It makes your life easier working with databases! 113 | 114 | ## How to include it in your project 115 | In your node.js project directory, do the following steps: 116 | 1. Make sure you are running MySQL in Docker either by starting it for the first time with 117 | ``` 118 | docker run --name bruinplay-mysql -p 3306:3306 -e MYSQL_ROOT_PASSWORD=my-secret-pw -d mysql:8.0 119 | ``` 120 | or restarting a stopped instance with 121 | ``` 122 | docker start bruinplay-mysql 123 | ``` 124 | 2. Run `npm install mysql2 --save` 125 | 3. Run `npm install sequelize --save` 126 | 4. In your `server.js` or app entry point include sequelize 127 | ``` 128 | const Sequelize = require('sequelize'); 129 | ``` 130 | 5. In `server.js` configure your node app to work with the currently running database connection 131 | ``` 132 | const sequelize = new Sequelize('mysql', 'root', "my-secret-pw", { 133 | host: 'localhost', 134 | dialect: 'mysql' 135 | }); 136 | ``` 137 | 6. In `server.js` make the actual connection from your app to the database 138 | ``` 139 | sequelize 140 | .authenticate() 141 | .then(function() { 142 | console.log('Connection has been established successfully.'); 143 | }) 144 | .catch(function(err) { 145 | console.error('Unable to connect to the database:', err); 146 | }); 147 | ``` 148 | 7. Start using Sequelize in `server.js` to create, read, update, or delete data in your MySQL database! 149 | * Docs: http://docs.sequelizejs.com/ 150 | 151 | ## How to use Sequelize 152 | * You can put the following code in server.js. 153 | ### Create a database table: 154 | We start off by first creating a database table: 155 | ``` 156 | var Orders = sequelize.define('orders', { 157 | order_id: {type: Sequelize.INTEGER}, 158 | customer_id: {type: Sequelize.INTEGER}, 159 | order_date: {type: Sequelize.DATE}, 160 | amount: {type: Sequelize.DOUBLE}, 161 | }); 162 | ``` 163 | Here we are making a table named `orders` internally, that we'll refer to as `Orders` in our node app. It has 4 columns, `order_id` which contains integers, `customer_id` which contains integers, `order_date` which contains a Date type, and `amount` containing doubles. 164 | 165 | Then we can start using the empty table we just made! 166 | 167 | ### There are 4 basic operations databases can have: CRUD 168 | - C: Create 169 | - R: Read 170 | - U: Update 171 | - D: Destroy 172 | 173 | ### Create 174 | ``` 175 | Orders.create({ 176 | order_id: 558, 177 | customer_id: 101, 178 | order_date: new Date(), 179 | amount: 12.00 180 | }).then(function(newOrder) { 181 | console.log("Inserted new order with id 558" + newOrder); 182 | }); 183 | ``` 184 | ### Read 185 | ``` 186 | Orders.findAll({ 187 | where: { 188 | customer_id: 101 189 | } 190 | }).then(function(orders) { 191 | console.log("Found all orders where customer_id is 101: " + orders); 192 | }); 193 | ``` 194 | ### Update 195 | ``` 196 | Orders.findAll({ 197 | where: { 198 | order_id: 555 199 | }, 200 | limit: 1 201 | }).then(function(singleOrder) { 202 | return singleOrder.update({ 203 | amount: 100 204 | }); 205 | }).then(function(order) { 206 | console.log("Order #555's price is now $100: " + orders); 207 | }); 208 | ``` 209 | ### Destroy 210 | ``` 211 | Order.findAll({ 212 | where: { 213 | customer_id: 101 214 | } 215 | }).then(function(orders) { 216 | orders.destroy(); 217 | }); 218 | ``` 219 | -------------------------------------------------------------------------------- /README.md: -------------------------------------------------------------------------------- 1 | # Hackschool Resources - Fall 2017 2 | 3 | ## Welcome to Hackschool 4 | 5 | It's easy to feel lost in the world of tech or not know where to start. We 6 | created Hackschool to give you a place to start in this wonderful universe of 7 | possibilities. We wanted to fill the gaps between what is taught in class and 8 | what is needed to build change you'd like to see in the world. Over the next 8 9 | weeks, we'll alternate between Learn and Hack sessions, where we'll introduce a 10 | new topic with mentors on-hand to help, and then spend the following week 11 | building out a mini-project to apply it. By the end, you'll have glimpsed a 12 | little bit of everything behind the websites you visit every day. 13 | 14 | In this repository, you'll find a guidemap to all the topics we introduce this 15 | quarter, and links to helpful resources. 16 | 17 | We hope you have a blast this quarter, and encourage you to reach out to any of 18 | us if you have any questions or comments. Private concerns can be addressed to 19 | the current Hackschool Director, Shannon Phu, at 20 | [skphu@ucla.edu](mailto:skphu@ucla.edu). 21 | 22 | 23 | - [Course Curriculum](#basic-curriculum) 24 | - [Essential Links](#essential-links) 25 | - [What You'll Need for the Entire Course](#what-youll-need-for-the-entire-course) 26 | - [Helpful Docs & Tools](#helpful-docs--tools) 27 | - [Learning Beyond Hackschool](#learning-beyond-hackschool) 28 | 29 | 30 | 31 | ## Basic Curriculum 32 | 33 | Each week, we will alternate between "Learn" and "Hack" sessions. During Learn sessions, students will be taught new material and follow along with our instructors in writing some basic code. During Hack sessions, students will apply the knowledge gained from the previous teach session to build a project that we will guide you in making. 34 | 35 | * Week 1: Learn HTML & CSS 36 | * [Slides](http://tinyurl.com/hackschool17-session1-slides) 37 | * [Code](https://github.com/acm-hackschool-f17/session-1-learn) 38 | * [Step by Step Introductory Review](http://tinyurl.com/hackschool17-html-css-steps) 39 | * [HTML/CSS Comprehensive Review](http://tinyurl.com/hackschool17-html-css-review) 40 | * Week 2: Build a personal website 41 | * [Spec](http://tinyurl.com/hackschool17-spec-1) 42 | * Week 3: Learn Bootstrap and JavaScript 43 | * [Slides](http://tinyurl.com/hackschool17-session2-slides) 44 | * [Code](http://tinyurl.com/hackschool17-session2-code) 45 | * [Bootstrap/JavaScript Review](https://github.com/acm-hackschool-f17/Resources/blob/master/Learn-Session-2-README.md) 46 | * Week 4: Build an interactive photo gallery 47 | * [Slides](https://docs.google.com/presentation/d/1r2t1w3aaB68EXRH-HV-6MBjW8jVqrWWpF0BGq3U28Z4/edit?usp=sharing) 48 | * [Spec](http://tinyurl.com/hackschool17-spec-2) 49 | * Week 5: Intro to backend web development: Node.js 50 | * [Slides](https://docs.google.com/presentation/d/1gZQVm8quus5uuoqkaZKu8ktjhSpQC_Evp2l9YnzwYRw/edit?usp=sharing) 51 | * [Node.js and Handlebars.js Setup and Tutorial](https://github.com/acm-hackschool-f17/Resources/blob/master/nodejs-handlebars-README.md) 52 | * [Final Project Spec](https://github.com/acm-hackschool-f17/BruinPlay) 53 | * Week 6: Build your first web app 54 | * [Slides](https://docs.google.com/presentation/d/1IZ9FLMOWFWtitWH4UVtq9dIwcmMLmrWzaWHvDDFGzeE/edit) 55 | * [E-library Code (Server only)](https://github.com/acm-hackschool-f17/session-3-hack) 56 | * [Final Project Spec](https://github.com/acm-hackschool-f17/BruinPlay) 57 | * Week 7: Advanced backend topic: databases 58 | * [Slides](https://docs.google.com/presentation/d/1vjVnIyq-kgLSYtG5BeMeocWSXk8OgCMgRpbjlzveod8/edit) 59 | * [Docker and MySQL Setup + Tutorial](https://github.com/acm-hackschool-f17/Resources/blob/master/Learn-Session-4-README.md) 60 | * [E-library Code (with Database)](https://github.com/acm-hackschool-f17/session-4-learn) 61 | * [Final Project Spec](https://github.com/acm-hackschool-f17/BruinPlay) 62 | * Week 9: Finish your first web app 63 | * [Slides](https://docs.google.com/presentation/d/1pehGfdsiQjao58tpPrmfd4sV5Fxm-uAhfQ-SxjWwP3g/edit#slide=id.p) 64 | * [Final Project Spec](https://github.com/acm-hackschool-f17/BruinPlay) 65 | * [***Project Submission Link***](https://tinyurl.com/hackschool17-submit) 66 | 67 | ## Essential Links 68 | 69 | * [Hackschool Fall 2017 on GitHub](https://github.com/acm-hackschool-f17) 70 | 71 | * [Final Project Spec](https://github.com/acm-hackschool-f17/BruinPlay) 72 | 73 | * [ACM website](http://www.uclaacm.com/) 74 | 75 | * [ACM membership portal](https://members.uclaacm.com/login) 76 | 77 | * [ACM Hack website](http://hackucla.com/) 78 | 79 | 80 | ## What You'll Need for the Entire Course 81 | 82 | * A positive attitude. We'll encounter plenty of frustration along the way, 83 | but that makes the later joy all the better. 84 | 85 | * A text editor. We recommend [Sublime Text 3](https://www.sublimetext.com/) as 86 | a default choice, but [VS Code](https://code.visualstudio.com/) and 87 | [Atom](https://atom.io/) are also excellent choices. If you already use 88 | another editor, that's perfectly fine. Don't worry about using the "best" 89 | one; any modern editor is more than enough for what we'll tackle this 90 | quarter. 91 | 92 | * Google Chrome: it has the best developer tools and the most market share of 93 | any web browser 94 | 95 | Bonus items (if you have time; these are not needed for frontend web development): 96 | 97 | * Create a GitHub account 98 | 99 | * If you're on a Mac, you may later run into issues where software is missing. 100 | To prevent this, install Xcode from the App Store. Then run `xcode-select --install` in Terminal. This will install command-line tools that we'll need 101 | later on. Here's a [tutorial with screenshots](http://osxdaily.com/2014/02/12/install-command-line-tools-mac-os-x/) 102 | 103 | * Download and install the LTS version of [Node.js](https://nodejs.org/en/). 104 | We don't recommend using the latest version because of how quickly new Node 105 | versions are introducing, often leading to unexpected breakages when the 106 | newest version is incompatible with other code you're using. 107 | 108 | * (Advanced) If you're on a Mac, you'll eventually want 109 | [Homebrew](https://brew.sh/) to manage installing command-line tools and 110 | [n](https://github.com/tj/n) to manage different versions of Node.js. 111 | 112 | ### Helpful Docs & Tools 113 | 114 | * [http://jsbin.com/](http://jsbin.com/) for quick in-browser prototypes 115 | 116 | * [Mancy](https://github.com/princejwesley/Mancy) if you want an interactive 117 | JavaScript prompt (called a REPL: Read, Evaluate, Print, Loop) 118 | 119 | * [http://codepen.io/](http://codepen.io/) to share ideas with other people 120 | 121 | * You'll find the [Mozilla Developer Network (MDN) documentation](https://developer.mozilla.org/en-US/docs/Web) very helpful 122 | for looking up the particulars of a built-in function or CSS property. 123 | 124 | * [Modern JavaScript Cheatsheet](https://github.com/mbeaudru/modern-js-cheatsheet/blob/master/readme.md) 125 | 126 | 127 | ### Learning Beyond Hackschool 128 | 129 | For HTML and CSS: 130 | 131 | * [Interneting is Hard](https://internetingishard.com/) is a beautiful and complete tutorial 132 | 133 | For JavaScript: 134 | 135 | * [Codecademy](https://www.codecademy.com/learn/introduction-to-javascript) if you've never programmed before 136 | 137 | * [A Reintroduction to JavaScript](https://developer.mozilla.org/en-US/docs/Web/JavaScript/A_re-introduction_to_JavaScript) if you've touched JS a bit before 138 | 139 | * [JavaScript 30](https://javascript30.com/) for a free 30-day series of daily 140 | mini-projects 141 | 142 | * [You Don't Know JS](https://github.com/getify/You-Dont-Know-JS) to learn the language more deeply 143 | 144 | * [freeCodeCamp](https://www.freecodecamp.org/map) for a massive, highly comprehensive curriculum covering everything you would need to know to start a new career as a software engineer 145 | 146 | ### Points of Contact for Technical Questions 147 | [Mentor Contact Info Spreadsheet](https://docs.google.com/spreadsheets/d/1rWsnS8zYMXVQKqnVOAUyYM2391IOBNL-RTgOnIQJ6Pw/edit?usp=sharing) 148 | -------------------------------------------------------------------------------- /html-css-step-by-step.md: -------------------------------------------------------------------------------- 1 | # HTML/CSS Review 2 | 3 | ## What is HTML? 4 | 5 | HTML stands for **Hyper Text Markup Language** and is used to design and structure websites. 6 | 7 | HTML elements are the most basic building blocks for all web pages, and they are represented by **tags**. HTML tags label pieces of content such as "heading", "paragraph", "table", and so on. Browsers do not display the HTML tags, but use them to render the content of the page 8 | 9 | ## Getting Started 10 | 11 | 1. Create a folder on your Desktop named "MyWebsite" (or anything else you want) 12 | 2. In a text editor (**Sublime Text** recommended), create a new **empty** text file. Name it **index.html**, and save it inside the folder you created in Step 1. 13 | 3. We're ready to start coding! 14 | 15 | ## HTML Tags 16 | 17 | As mentioned above, all HTML elements are represented by tags. Tags have the following form: 18 | 19 | ``` 20 |
content goes here... 21 | ``` 22 | 23 | HTML tags normally come **in pairs** like \and \
. 24 | 25 | The first tag in a pair is the **start/opening tag,** and the second tag is the **end/closing tag**. 26 | 27 | The end tag is written like the start tag, but with a **forward slash** inserted before the tag name. 28 | 29 | ## Creating a Basic HTML Page 30 | 31 | All HTML documents begin with the following line: 32 | 33 | ``` 34 | 35 | ``` 36 | 37 | It declares your file as HTML. Add this line to your **index.html** file. 38 | 39 | --- 40 | 41 | Next, we are going to define the sections in our file where we will put meta information about the document and the actual visible page content. 42 | 43 | Underneath the `` line, add: 44 | 45 | ``` 46 | 47 | 48 | 49 | 50 | 51 | 52 | 53 | 54 | ``` 55 | 56 | Let's break each tag down: 57 | 58 | - The `` element is the root element of an HTML page. The html tags will surround **all** of the other HTML content that you write. 59 | - The `` element contains meta information about the document. In simplest terms, meta information is **information about information**. In this context, meta information can include a website's description, name, and date it was last modified. 60 | - The `` element contains the visible page content. It will surround all of the HTML elements you want the user to actually see. 61 | 62 | --- 63 | 64 | Let's give our website a name! 65 | 66 | Inside the ` ` tags, add: 67 | 68 | ``` 69 |[Your Name Here]'s Website 70 | ``` 71 | 72 | - The `` element specifies a title for the document and is the text you'll see inside your page's tab on a web browser. 73 | 74 | --- 75 | 76 | Finally, inside your `<body> </body>` tags, add: 77 | 78 | ``` 79 | <h1>My First Heading</h1> 80 | <p>My first paragraph.</p> 81 | ``` 82 | 83 | - The `<h1>` element defines a large heading. 84 | - The `<p>` element defines a paragraph. 85 | 86 | ## Viewing your Website 87 | 88 | Altogether, your **index.html** file should look like this: 89 | 90 | ``` 91 | <!DOCTYPE html> 92 | <html> 93 | <head> 94 | <title>[Your name here]'s Website 95 | 96 | 97 |My First Heading
98 |My first paragraph.
99 | 100 | 101 | ``` 102 | 103 | **Save** your index.html file. 104 | 105 | **To view your website:** 106 | 107 | - If you're in Sublime Text, you can right click on your document and select "Open in Browser" from the drop-down menu. 108 | - Otherwise, open the folder containing your index.html file in Finder or Windows Explorer and drag the file into your favorite browser. 109 | 110 | Voila! You now have a basic web page! From here, there's no limit to what you can build! 111 | 112 | **Note: It is very important that you always save your file(s) before reloading or trying to view your page! Most text editors do not autosave, so it will look as if any changes you made to your file did not appear!** 113 | 114 |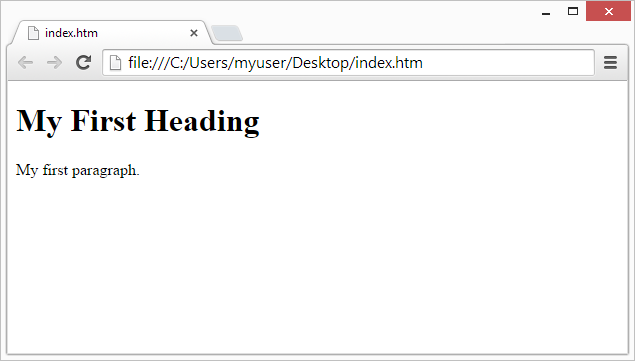 115 |
116 | ## What is CSS?
117 |
118 | CSS stands for **Cascading Style Sheets**.
119 |
120 | CSS describes how HTML elements are to be displayed on screen, paper, or in other media. CSS **saves a lot of work**. It can control the layout of multiple web pages all at once.
121 |
122 | ## Getting Started
123 |
124 | 1. In a text editor, create a new **empty** text file and name it **style.css**
125 | 2. Save it **inside the same folder** that contains your index.html file.
126 | 3. We're ready to start coding!
127 |
128 | ## CSS Syntax
129 |
130 | CSS uses a **property: value** syntax that looks like the following:
131 |
132 | ```
133 | element {
134 | property: value;
135 | }
136 | ```
137 |
138 | Let's break everything down:
139 |
140 | - The **element** is the specific HTML element you want to style. If we wanted to style `
115 |
116 | ## What is CSS?
117 |
118 | CSS stands for **Cascading Style Sheets**.
119 |
120 | CSS describes how HTML elements are to be displayed on screen, paper, or in other media. CSS **saves a lot of work**. It can control the layout of multiple web pages all at once.
121 |
122 | ## Getting Started
123 |
124 | 1. In a text editor, create a new **empty** text file and name it **style.css**
125 | 2. Save it **inside the same folder** that contains your index.html file.
126 | 3. We're ready to start coding!
127 |
128 | ## CSS Syntax
129 |
130 | CSS uses a **property: value** syntax that looks like the following:
131 |
132 | ```
133 | element {
134 | property: value;
135 | }
136 | ```
137 |
138 | Let's break everything down:
139 |
140 | - The **element** is the specific HTML element you want to style. If we wanted to style `` tags, we would replace "element" with "p". If we wanted to style `
` tags, we would replace "element" with "h1". 141 | - The **property** is the specific property of the element we want to style. There are hundreds of different properties and it is near impossible to memorize them all, but typical properties include **color**, **text-align**, **font-size**, and **font-family**. 142 | - The **value** is the value we wish to assign to the aforementioned property. Let's say our property is **color**. Some sample values would be **red**, **blue**, **black**, and **brown**. 143 | 144 | ## Styling our Page 145 | 146 | Add the following to **style.css**: 147 | 148 | ``` 149 | h1 { 150 | color: blue; 151 | text-align: center; 152 | } 153 | 154 | p { 155 | color: red; 156 | } 157 | ``` 158 | 159 | - We want `
` elements to be blue and centered. 160 | - We want `
` elements to be red. 161 | 162 | ## Linking your CSS to your HTML File 163 | 164 | We need to link our two files together so that our HTML can use this external sheet. 165 | 166 | In your **index.html** file, inside the `
` tags, add: 167 | 168 | ``` 169 | 170 | ``` 171 | 172 | **Save both index.html and style.css**, and reopen/refresh your page in a browser of your choice. 173 | 174 |175 | 176 | **And there you go!** You now have the skills necessary to build even the most complex and beautifully designed pages. Happy coding! -------------------------------------------------------------------------------- /images/docker-ps.png: -------------------------------------------------------------------------------- https://raw.githubusercontent.com/acm-hackschool-f17/Resources/405344b6c00a7174d9db5d4b92827adb251ea66e/images/docker-ps.png -------------------------------------------------------------------------------- /nodejs-handlebars-README.md: -------------------------------------------------------------------------------- 1 | # Learn Session 3: Backend Web Development with Node.js 2 | 3 | ## Table of Contents: 4 | - **Learn Session**: 5 | - Front-end vs. Back-end 6 | - Front-end 7 | - Back-end 8 | - What is a Server? 9 | - [What is Node.js and NPM?](https://github.com/acm-hackschool-f17/Resources/blob/master/nodejs-handlebars-README.md#what-is-nodejs-and-npm) 10 | - [Installing Node.js](https://github.com/acm-hackschool-f17/Resources/blob/master/nodejs-handlebars-README.md#installing-nodejs) 11 | - [Creating a new node.js application](https://github.com/acm-hackschool-f17/Resources/blob/master/nodejs-handlebars-README.md#creating-a-new-nodejs-application) 12 | - [Example Web Application: E-Library](https://github.com/acm-hackschool-f17/session-3-learn) 13 | - [Final Project Spec](https://github.com/acm-hackschool-f17/BruinPlay) 14 | - **Hack Session**: 15 | - Handlebars.js 16 | - Getting Started 17 | - Creating a Handlebars File 18 | - Configuring our Server to use Handlebars 19 | - Using Handlebars Expressions 20 | - Each Blocks 21 | - If Blocks 22 | 23 | ## Front-end vs. Back-end 24 | 25 | ### Front-end 26 | 27 | When we discuss the “**front-end**” of the web, what we’re really talking about is the part of the web that you can see and interact with. 28 | 29 | The term "**front-end web development**" includes those that work in creating image assets (artwork) in programs like Photoshop and Fireworks, and it also includes those who code in HTML, CSS, and Javascript, which is exactly what we have learned up to this point. 30 | 31 | **Essentially, everything that you see when using the web is a combination of HTML, CSS, and JavaScript all being controlled by your computer’s browser.** This is what we refer to when we say "front-end". 32 | 33 | - But what if we want to store the information that users put in the frontend elements? 34 | - What if we want our website to have a user database? 35 | - What if we're a gigantic video-sharing website that wants to track what its users watch so it can recommend them more videos they might enjoy? 36 | 37 | Enter the backend… 38 | 39 | ### Back-end 40 | 41 | The back-end usually consists of three parts: a **server**, an **application**, and a **database**. 42 | 43 | If you book a flight or buy concert tickets, you usually open a website and interact with the front-end. Once you’ve entered that information, the application stores it in a **database** that was created on a **server**. 44 | 45 | For now, just think about a database as a giant Excel spreadsheet on your computer, but that computer (server) is stored somewhere in Arizona. 46 | 47 | All of that information you just entered stays on the server so that when you log back into the application (say, to print your tickets), all of the information is still there on your account. 48 | 49 | We call a person that builds all of this technology to work together a **back-end developer**. 50 | 51 | Today, we'll be learning about servers. 52 | 53 | ## What is a Server? 54 | 55 | A **server** is a computer program designed to process requests and deliver data to other (**client**) computer programs over a local network or the internet. 56 | 57 | This model is called the **client/server** programming model, in which a *server* program awaits and fulfills requests from *client* programs. 58 | 59 | Servers are often categorized in terms of their purpose. 60 | 61 | A Web *server*, for example, is a computer program that serves requested HTML pages or files. 62 | 63 | A Web *client* is the requesting program associated with the user. The Web browser in your computer is a client that requests HTML files from Web servers. 64 | 65 | ## What is Node.js and NPM? 66 | 67 | * Node.js is a server-side platform for JavaScript that can pass data from server to client-side code (i.e. HTML, Handlebars, Jade, etc.). It can also render webpages dynamically to build full stack web applications. 68 | * NPM is the Node Package Manager. It essentially makes it easy to install and use external **libraries** in your application. You can install external packages with `npm install
--save` to install and add it to your `package.json`. 69 | * A **library** is a collection of resources used by computer programs, often to develop software. These resources typically include pre-written code, functions, classes, and type specifications. 70 | 71 | ## Installing Node.js 72 | 73 | ### On Windows 74 | 75 | 1. Go to https://nodejs.org/en/ 76 | 2. Click on green "8.8.1 Current" button to download installer 77 | 3. Install the downloaded `.msi` file; no need to change any options 78 | 79 | ### On macOS and Linux-based systems 80 | 81 | 1. Go to https://github.com/creationix/nvm 82 | 2. Copy the instructions for curl, and run it in the command line 83 | ``` 84 | $ curl -o- https://raw.githubusercontent.com/creationix/nvm/v0.33.6/install.sh | bash 85 | => Downloading nvm from git to '/home/your-username/.nvm' 86 | => Cloning into '/home/your-username/.nvm'... 87 | ... 88 | 89 | => Compressing and cleaning up git repository 90 | 91 | => Appending nvm source string to /home/your-username/.bashrc 92 | => Appending bash_completion source string to /home/your-username/.bashrc 93 | => Close and reopen your terminal to start using nvm or run the following to use it now: 94 | ``` 95 | Then run the following 3 lines together: 96 | ``` 97 | $ export NVM_DIR="$HOME/.nvm" 98 | [ -s "$NVM_DIR/nvm.sh" ] && \. "$NVM_DIR/nvm.sh" # This loads nvm 99 | [ -s "$NVM_DIR/bash_completion" ] && \. "$NVM_DIR/bash_completion" # This loads nvm bash_completion 100 | ``` 101 | *Note:* if that command fails with `curl: command not found`, try the following with Wget instead: 102 | ``` 103 | $ wget -qO- https://raw.githubusercontent.com/creationix/nvm/v0.33.6/install.sh | bash 104 | ``` 105 | 3. **Important:** Close the terminal and relaunch it 106 | 4. `nvm install 8` 107 | ``` 108 | $ nvm install 8 109 | Downloading and installing node v8.8.1... 110 | Downloading https://nodejs.org/dist/v8.8.1/node-v8.8.1-linux-x64.tar.xz... 111 | ######################################################################## 100.0% 112 | Computing checksum with sha256sum 113 | Checksums matched! 114 | Now using node v8.8.1 (npm v5.4.2) 115 | ``` 116 | *Note:* If that command fails with `nvm: command not found`, try `echo -e '\nsource ~/.bashrc' >> ~/.bash_profile`, and then close and relaunch the terminal and `nvm install 8` again. 117 | 118 | ## Creating a new node.js application 119 | 120 | 1. On your command line navigate to a new folder will make now where you want to save your project files. 121 | * To do this with commands: 122 | 1. Open Command Prompt/Terminal 123 | 2. Run the following commands: 124 | ``` 125 | cd Desktop 126 | mkdir node-tutorial 127 | cd node-tutorial 128 | ``` 129 | 2. On Command Prompt/Terminal, run `npm init` 130 | * Go through the steps in this including setting a project name, description, version, etc. Feel free to leave things blank because not everything is neccesary. 131 | ``` 132 | $ npm init 133 | This utility will walk you through creating a package.json file. 134 | ... 135 | name: (temp) some-title 136 | version: (1.0.0) 137 | description: some-description 138 | entry point: (index.js) server.js 139 | test command: 140 | git repository: 141 | keywords: 142 | author: my-name 143 | license: (ISC) 144 | 145 | ... 146 | 147 | { 148 | "name": "some-title", 149 | "version": "1.0.0", 150 | "description": "some-description", 151 | "main": "server.js", 152 | "scripts": { 153 | "test": "echo \"Error: no test specified\" && exit 1" 154 | }, 155 | "author": "my-name", 156 | "license": "ISC" 157 | } 158 | 159 | Is this ok? (yes) 160 | ``` 161 | * A file called `package.json` will be created. `package.json` is a file most importantly listing the external libraries your project has installed. Libraries are installed into a folder in your project directory NPM makes called `node_modules`. 162 | 3. On Command Prompt/Terminal, run `npm install express --save` 163 | * This adds a new dependency to your `package.json` called express (a library to simplify creating an HTTP server). 164 | * This code block will be added near the bottom of `package.json` 165 | ``` 166 | "dependencies": { 167 | "express": "^4.16.2" 168 | } 169 | ``` 170 | 4. On Command Prompt/Terminal, run `touch server.js` 171 | 5. Add the following code to the newly created `server.js`. 172 | ``` 173 | // Imports the library "express" 174 | const express = require('express'); 175 | 176 | // Creates an instance of the HTTP server 177 | const app = express(); 178 | 179 | // Creates an endpoint at your web application's root. 180 | // An endpoint is a way to connect the client and server by 181 | // means of a pathway URL. 182 | // Root in this case means there is no extended URL path 183 | // and to access the base directory of the server. 184 | // An example is https://github.com/ is the root endpoint 185 | // whereas https://github.com/acm-hackschool-f17/ has an 186 | // endpoint of /acm-hackschool-f17 187 | app.get('/', (req, res) => { 188 | res.send("Hello world"); 189 | }); 190 | 191 | app.get('/burrito', (req, res) => { 192 | res.send("Hello I am a burrito"); 193 | }); 194 | 195 | // Starts your server 196 | app.listen(3000, () => { 197 | console.log("Listening on port 3000"); 198 | }); 199 | ``` 200 | 6. On Command Prompt/Terminal, run `node server.js` 201 | * this runs the code in server.js which starts a server 202 | * this should run and stall your command prompt, which is correct behavior 203 | ``` 204 | $ node server.js 205 | Listening on port 3000 206 | ``` 207 | 7. Go to http://localhost:3000/ to see your server rendering "Hello world" on the page! 208 | 8. Go to http://localhost:3000/burrito to see your server rendering "Hello I am a burrito"! 209 | 9. On Command Prompt/Terminal, run `npm install hbs --save` 210 | * This installs [Handlebars.js](http://handlebarsjs.com/), a templating engine that lets you write HTML more like a programming language (ie passing in variables and writing loops) 211 | 10. Add this line below `var app = express();`: 212 | ``` 213 | app.set('view engine', 'hbs'); 214 | ``` 215 | 11. On Command Prompt/Terminal, run 216 | ``` 217 | mkdir views 218 | touch views/home.hbs 219 | ``` 220 | * The `.hbs` extension stands for a handlebars file. 221 | 12. Place the following code into the file `home.hbs` which should be in the folder `views`. 222 | ``` 223 | 224 | 225 | 226 | {{title}} 227 | 228 | 229 | {{content}} 230 | 231 | 232 | ``` 233 | * Things in curly brackets like `{{ something }}` represent a variable in Handlebars. 234 | 13. Replace your root endpoint code with: 235 | ``` 236 | app.get('/', function (request, response) { 237 | response.render('home', { 238 | title: "Title from Server", 239 | content: "This is a sentence sent from the server." 240 | }); 241 | }); 242 | ``` 243 | 14. Stop your server by doing `Ctrl+C`. Now restart your server with `node server.js`. 244 | 15. Go to http://localhost:3000/ to see the title of the tab be "Title from Server" and the text shown be "This is a sentence sent from the server." You've just successfully sent data from a server to your website! 245 | 246 | --- 247 | 248 | # Hack Session 3 249 | 250 | ## Handlebars.js 251 | 252 | Handlebars is a logic-less templating engine that **dynamically** generates your HTML page. 253 | 254 | When a Web page is requested (by a computer user clicking a hyperlink or entering a URL), the server where the page is stored returns the HTML document to the user's computer and the browser displays it. 255 | 256 | On a **static** Web page, this is all that happens. The user may interact with the document through clicking available links, or a small JavaScript program may be activated, but the document has **no capacity to return information that is not pre-formatted**. 257 | 258 | On a **dynamic** Web page, the user can make requests (often through a form) for data contained in a database on the server that will be assembled on the fly according to what is requested. 259 | 260 | Nowadays, the majority of the Web consists of dynamic applications in which the data keep changing frequently (e.g. stock prices that fluctuate often). As a result, there is a continuous need to update the data rendered on the browser (showed to the user). 261 | 262 | This is where JavaScript templating engines come to the rescue and become so useful: 263 | 264 | - They simplify the process of manually updating the **view** (what the user sees) 265 | - They improve the structure of the application by allowing developers to separate the back-end logic from the front-end. 266 | 267 | ### Getting Started 268 | 269 | 1. **Make sure you have installed node.js and NPM.** 270 | 271 | --- 272 | 273 | 2. **Create a new folder and call it handlebars_tutorial.** 274 | 275 | Inside your Terminal (do not type $ or >): 276 | 277 | Linux/Mac: 278 | 279 | ``` 280 | $ mkdir handlebars_tutorial 281 | $ cd handlebars_tutorial 282 | ``` 283 | 284 | Windows: 285 | 286 | ``` 287 | > mkdir handlebars_tutorial 288 | > cd handlebars_tutorial 289 | ``` 290 | 291 | --- 292 | 293 | 3. **Inside handlebars_tutorial, create another folder named views.** 294 | 295 | Inside your Terminal: 296 | 297 | Both Linux/Mac and Windows: 298 | 299 | ``` 300 | $ mkdir views 301 | ``` 302 | 303 | --- 304 | 305 | 4. **Use NPM to import Express and Handlebars.** 306 | 307 | Inside your Terminal: 308 | 309 | Both Linux/Mac and Windows: 310 | 311 | ``` 312 | $ npm init 313 | ``` 314 | 315 | - package name: (handlebars_tutorial) **[Press enter.]** 316 | - version: (1.0.0) **[Press enter.]** 317 | - description: **[Press enter.]** 318 | - entry point: (index.js) server.js **[Make sure to enter server.js here!]** 319 | - test command: **[Press enter.]** 320 | - git repository: **[Press enter.]** 321 | - keywords: **[Press enter.]** 322 | - author: **[Press enter.]** 323 | - license: (ISC) **[Press enter.]** 324 | 325 | You should see the following: 326 | 327 | ``` 328 | { 329 | "name": "handlebars_tutorial", 330 | "version": "1.0.0", 331 | "description": "", 332 | "main": "server.js", 333 | "scripts": { 334 | "test": "echo \"Error: no test specified\" && exit 1" 335 | }, 336 | "author": "", 337 | "license": "ISC" 338 | } 339 | ``` 340 | 341 | - Is this ok? (yes) **[Press enter.]** 342 | 343 | To install Express, in your Terminal run: 344 | 345 | ``` 346 | $ npm install express --save 347 | ``` 348 | 349 | To install Handlebars, in your Terminal run: 350 | 351 | ``` 352 | $ npm install hbs --save 353 | ``` 354 | 355 | --- 356 | 357 | 5. **Inside handlebars_tutorial (not views), create a text file named server.js**. 358 | 359 | Inside your Terminal: 360 | 361 | Linux/Mac: 362 | 363 | ``` 364 | $ touch server.js 365 | ``` 366 | 367 | Windows (note the second > is a part of the command): 368 | 369 | ``` 370 | > type nul > server.js 371 | ``` 372 | 373 | --- 374 | 375 | 6. **Open server.js using a text editor (Sublime Text recommended) and insert the following code:** 376 | 377 | ``` 378 | var express = require('express'); 379 | 380 | var app = express(); 381 | 382 | // TODO - Include Handlebars 383 | 384 | app.get('/', (request, response) => { 385 | // TODO - Render the home page. 386 | }); 387 | 388 | app.listen(3000, function () { 389 | console.log('App listening on port 3000!') 390 | }); 391 | ``` 392 | 393 | **Note**: You can open a file with a specified program from the Terminal as follows: 394 | 395 | Linux/Mac: 396 | 397 | ``` 398 | $ open -a "Sublime Text" server.js 399 | ``` 400 | 401 | Windows: 402 | 403 | ``` 404 | > "Sublime Text" server.js 405 | ``` 406 | 407 | --- 408 | 409 | ### Creating a Handlebars File 410 | 411 | Handlebars files have the file extension **.hbs**. The contents of a .hbs file, however, will look almost exactly the same as the contents of an HTML file! 412 | 413 | 1. **Navigate to the views folder we made:** 414 | 415 | Inside your Terminal: 416 | 417 | Both Linux/Mac and Windows: 418 | 419 | ``` 420 | $ cd views 421 | ``` 422 | 423 | --- 424 | 425 | 2. **Inside views, create a text file named home.hbs** 426 | 427 | Inside your Terminal: 428 | 429 | Linux/Mac: 430 | 431 | ``` 432 | $ touch home.hbs 433 | ``` 434 | 435 | Windows (note the second > is a part of the command): 436 | 437 | ``` 438 | > type nul > home.hbs 439 | ``` 440 | 441 | --- 442 | 443 | 3. **Open home.hbs using a text editor and insert the following code:** 444 | 445 | ``` 446 | 447 | 448 | 449 | 450 | 451 | 452 | 453 | 454 | 455 | ``` 456 | 457 | As stated earlier, notice how the contents of the .hbs are essentially HTML! 458 | 459 | --- 460 | 461 | ### Configuring our Server to use Handlebars 462 | 463 | As mentioned in the introduction, Handlebars.js is a **template engine**. A template engine enables you to use static **template files** in your application. At runtime, the template engine replaces variables in a template file with actual values, and transforms the template into an HTML file sent to the client (user). This approach makes it easier to design an HTML page. 464 | 465 | Some popular template engines that work with Express are [Pug](https://pugjs.org/api/getting-started.html), [Mustache](https://www.npmjs.com/package/mustache), and [EJS](https://www.npmjs.com/package/ejs). The Express application generator uses [Jade](https://www.npmjs.com/package/jade) as its default, but it also supports several others. Handlebars is actually based on the Mustache template language, but improves it in several important ways. 466 | 467 | We would like our Express server to use Handlebars as its template engine. We can achieve this using the `set()` function. 468 | 469 | **Inside server.js:** 470 | 471 | - Replace the "TODO - Include Handlebars" comment with: 472 | 473 | ``` 474 | app.set('view engine', 'hbs'); 475 | ``` 476 | 477 | **Explanation (extra reading):** 478 | 479 | We can use Express to store and retrieve variables using the `set()` and `get()` functions. 480 | 481 | For example, maybe we'd like to store a pet's name: 482 | 483 | ``` 484 | app.set('myPetName', 'fluffy'); 485 | ``` 486 | 487 | We could access it later using: 488 | 489 | ``` 490 | var name = app.get('myPetName'); 491 | ``` 492 | 493 | Notice that the value of the first parameter in `set()` is meaningless*; it can be whatever name you want. The second parameter is the value you wish to "assign" to that name. 494 | 495 | \* *see next paragraph* 496 | 497 | In this case, however, `set()` can also be used to change Express' default behaviors. These default behaviors are more specifically called [application setting properties](https://expressjs.com/en/4x/api.html#app.set). 498 | 499 | As mentioned earlier, the default template engine for Express is `Jade`. The name **'view engine'** is a special name reserved by Express that we can use to specify whichever template engine we're actually using. 500 | 501 | Another property we could set is **'views'**, the directory where the template files are located. The default value associated with the 'views' property is, surprise surprise, `views`. This means that Express is going to look for a folder named "views" when it is looking for template files (in our case, .hbs files). This is why we had to create a folder that's named "views". If we wanted the name of our `views` folder to be different, say, `my awesome views`, we could use: 502 | 503 | ``` 504 | app.set('views', 'my awesome views'); 505 | ``` 506 | 507 | --- 508 | 509 | ### Using Handlebars Expressions 510 | 511 | We can finally use Handlebars! How does it work? 512 | 513 | Essentially, our Express instance will be passing variables as **JavaScript objects** to our Handlebars file, which will fill in the appropriate HTML code where specified. 514 | 515 | #### JavaScript Objects (extra reading): 516 | 517 | In JavaScript, objects are king. If you understand objects, you understand JavaScript. 518 | 519 | Objects can be thought of as variables containing more variables. If you have taken CS 31, think of them as structs/classes. 520 | 521 | So far, we have used JavaScript variables to contain single values: 522 | 523 | ``` 524 | var person = "John Doe"; 525 | ``` 526 | 527 | Objects are variables too. But objects can contain many values. 528 | 529 | For example: 530 | 531 | ``` 532 | var person = { 533 | firstName: "John", 534 | lastName: "Doe", 535 | age: 50, 536 | favoriteFood: "Pizza" 537 | isMale: true, 538 | fullName: function() { 539 | return this.firstName + " " + this.lastName; 540 | } 541 | }; 542 | ``` 543 | 544 | JavaScript objects are essentially a number of **key-value** pairs inside curly braces {}. 545 | 546 | **Values** can be: 547 | 548 | - Numbers 549 | - Strings 550 | - Bools 551 | - Arrays 552 | - undefined 553 | - Functions 554 | - Even other objects! 555 | 556 | --- 557 | 558 | Let's use Handlebars to specify a title and some content for our Web page. 559 | 560 | **In home.hbs:** 561 | 562 | - Replace the "TODO - Add a Website Title using Handlebars" comment with: 563 | 564 | ``` 565 |{{title}} 566 | ``` 567 | 568 | - Replace the "TODO - Add some content using Handlebars" comment with: 569 | 570 | ``` 571 |{{content}}
572 | ``` 573 | 574 | We have just indicated places in our HTML code which we would like Handlebars to dynamically complete. 575 | 576 | The full line of code, e.g. 577 | 578 | ``` 579 |{{content}}
580 | ``` 581 | 582 | is called a **template**. 583 | 584 | The "placeholders" inside, however, are called **expressions**. 585 | 586 | Expressions are wrapped in double or triple curly braces `{{ }}`. As aforementioned, expressions can tell Handlebars to include the value of variables. As we will later see, we can use expressions to implement if statements, for loops, and even execute helper functions. 587 | 588 | Now we want Express to pass values to our expressions, so Handlebars knows what to replace them with. 589 | 590 | **In server.js:** 591 | 592 | - Replace the "TODO - Render the home page" comment with: 593 | 594 | ``` 595 | response.render('home', { 596 | title: "[Your Name Here]'s Website", 597 | content: "Hello World!" 598 | }); 599 | ``` 600 | 601 | **Explanation (extra reading):** 602 | 603 | The `render()` function compiles a template file, inserts the appropriate variable values there, and creates the resulting HTML output. 604 | 605 | The first parameter is the name of the template file. The file we created was named `home.hbs`, so we put 'home' as the value of this parameter. 606 | 607 | How does Express know the correct extension of the `home` file (.hbs)? Remember when we set the 'view engine' property earlier with `set()`? This is why! 608 | 609 | The second parameter contains a JavaScript object defining the local variables we wish to pass to the view (file) we specified. In our case, since we wrote {{title}} and {{content}} in our templates, we use 'title' and 'content' as keys in our object. 610 | 611 | **Run your server:** 612 | 613 | 1. Inside your Terminal: 614 | 615 | Both Linux/Mac and Windows: 616 | 617 | ``` 618 | $ node server.js 619 | ``` 620 | 621 | 2. In a browser (**Google Chrome recommended**), visit the URL `localhost:3000` 622 | 623 |624 | 625 | Congratulations, you've successfully used Handlebars! 626 | 627 | --- 628 | 629 | ### Each Blocks 630 | 631 | We can iterate over a list using the built-in `each` helper. Inside the `each` block, you can use `this` to reference the element being iterated over. 632 | 633 | **If you are familiar with C++:** 634 | 635 | Consider the following array: 636 | 637 | ``` 638 | int nums[5] = {9, 0, 0, 2, 4}; 639 | ``` 640 | 641 | To **iterate** over the array means to access each element individually and in order, and do whatever we want with it. We could achieve this in C++ like this: 642 | 643 | ``` 644 | for (int i = 0; i < 5; i++) { 645 | cout << (nums[i] * 5) << " "; 646 | } 647 | 648 | // This prints: 45 0 0 10 20 649 | ``` 650 | 651 | **In home.hbs**: 652 | 653 | Underneath the `
{{content}}
` line, and still inside the ` ` tags, add the following code: 654 | 655 | ``` 656 |-
657 | {{#each people}}
658 |
- {{this}} 659 | {{/each}} 660 |
`, `
`, ` `, etc.).
670 |
671 | **In server.js**:
672 |
673 | Replace the call to `response.render()` with the following code:
674 |
675 | ```
676 | response.render('home', {
677 | title: "ACM Hack's Website",
678 | content: "Hello World!",
679 | people: [
680 | "Joe Bruin",
681 | "Josie Bruin",
682 | "Zaddy Block"
683 | ]
684 | });
685 | ```
686 |
687 | - Reminder: Use of square brackets [] declares a list (array) in JavaScript.
688 | - We've added a new key named 'people' in accordance with our changes to `home.hbs`.
689 |
690 | **Run your server:**
691 |
692 | 1. Inside your Terminal:
693 |
694 | If your server is still running, abort it using `ctrl+c`, not to be confused with `cmd(⌘)+c` on Mac!
695 |
696 | 2. Restart your server:
697 |
698 | Both Linux/Mac and Windows:
699 |
700 | ```
701 | $ node server.js
702 | ```
703 |
704 | - 739 | {{#if this.middleName}} 740 | {{this.firstName}} "{{this.middleName}}" {{this.lastName}} 741 | {{else}} 742 | {{this.firstName}} {{this.lastName}} (no middle name) 743 | {{/if}} 744 | 745 | {{/each}} 746 | ``` 747 | 748 | Let's break down the syntax: 749 | 750 | - `#if` is used to mark the beginning of the `if` block. 751 | - `this.middleName` can be thought of as the condition of the `if` block. If the object that `this` represents has a `middleName` property, the `if` block evaluates true. Otherwise, it evaluates false. 752 | - `else` indicates what to do should the `if` condition fail. **Note that an else block is not required!** 753 | - `/if` is used to mark the end of the `if block`. 754 | 755 | **Run your server:** 756 | 757 | 1. Inside your Terminal: 758 | 759 | If your server is still running, abort it using `ctrl+c`, not to be confused with `cmd(⌘)+c` on Mac! 760 | 761 | 2. Restart your server: 762 | 763 | Both Linux/Mac and Windows: 764 | 765 | ``` 766 | $ node server.js 767 | ``` 768 | 769 |
705 | 706 | --- 707 | 708 | ### If Blocks 709 | 710 | You can use the `if` helper to conditionally render a template. If its argument returns `false`, `undefined`, `null`, `""`, `0`, or `[]`, Handlebars will not render the template. 711 | 712 | Handlebars is a **logic-less** engine, meaning that our if conditions won't be like the one's you would be used to, like (a == b) or (a > b). Instead, we're going to check if an object contains a certain key. `if` blocks are most useful when added to `each` blocks. 713 | 714 | **In server.js:** 715 | 716 | Replace the call to `response.render()` with the following code: 717 | 718 | ``` 719 | response.render('home', { 720 | title: "ACM Hack's Website", 721 | content: "Hello World!", 722 | people: [ 723 | { firstName: "Joe", lastName: "Bruin"}, 724 | { firstName: "Josie", lastName: "Bruin"}, 725 | { firstName: "Zaddy", middleName: "Gene", lastName: "Block"} 726 | ] 727 | }); 728 | ``` 729 | 730 | We have transformed our `people` list from a list of strings to a list of JavaScript objects. Notice that one has an additional `middleName` property. 731 | 732 | **In home.hbs:** 733 | 734 | Replace the entire `each` block with the following code: 735 | 736 | ``` 737 | {{#each people}} 738 |
770 | 771 | Congratulations! You now have a very thorough understanding of Handlebars. You'll be a master of dynamic templating in no time! 772 | --------------------------------------------------------------------------------
- blocks to center link text within the block.
1038 |
1039 | You should now have something that looks like the following:
1040 |
1041 |