├── Audacity-Tone-2Hz-0.04-500ms-Fadeout.opus
└── README.md
/Audacity-Tone-2Hz-0.04-500ms-Fadeout.opus:
--------------------------------------------------------------------------------
https://raw.githubusercontent.com/adrgumula/HomeAssitantBluetoothSpeaker/HEAD/Audacity-Tone-2Hz-0.04-500ms-Fadeout.opus
--------------------------------------------------------------------------------
/README.md:
--------------------------------------------------------------------------------
1 | ## The goal of this tutorial is to pair arbitrary bluetooth speaker with the Home Assistant (HASSO) to be able to hear notifications & Text-To-Speach (TTS)
2 |
3 | ### What was used during the installation:
4 | Proxmox server
5 | - BT dongle (Broadcom - BCM20702A0); A list of supported BT dongles -> https://www.home-assistant.io/integrations/bluetooth#known-working-high-performance-adapters
6 | You may also be able to use your integrated Bluetooth module if you are using
7 | something like an Intel NUC. The NUC6i5SYK is confirmed to be working.
8 | - Home Assistant (Supervisioned version) (for this tutorial Home Assistant 2023.6.3 -> Supervisor 2023.06.4 -> Operating System 10.3 were used)
9 | - Any Bluetooth speaker without auto-inactivity or/and auto-shutdown function. I've used **Xiaomi Mi Compact Bluetooth Speaker 2 (XMYX02YM)**
10 | - 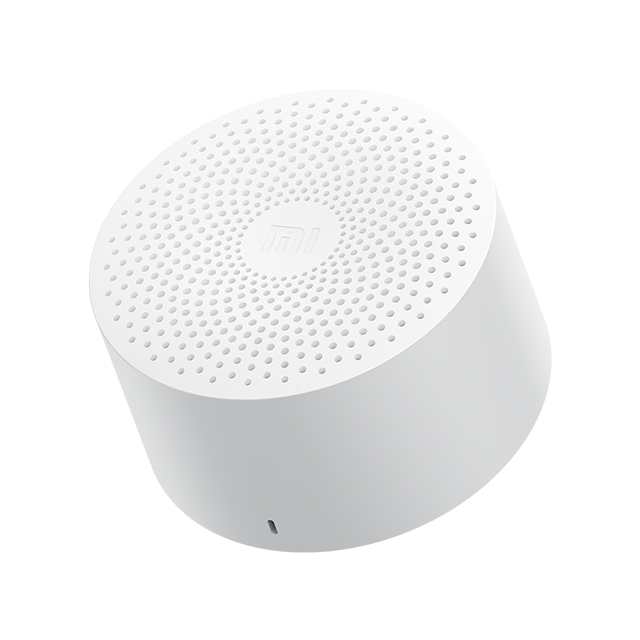
11 |
12 |
13 | ### I. Connection:
14 | 1. Identify your BT speaker's **BT MAC Address** & **BT Name**
15 | 2. Make sure that Proxmox’s HomeAssistant VM has an Audio device added (for example: ```device=intel-hda, driver=none```)
16 | 3. Pass the USB device to the VM:
17 | - Go to the Home Assistant VM, Hardware, Add USB Device, By Device ID.
18 | - Select the USB-Bluetooth dongle from the list.
19 | 3. Install **SSH** add-on into the HA and configure it
20 | 4. Logging into the HA using terminal: login@IP_Address
21 | 5. Switch off your BT speaker
22 | 6. Type: ```bluetoothctl```
23 | 7. Type: ```list``` to list all of your connected BT dongles. You should get the MAC addresses of all your BT dongles
24 | 8. Type: ```select MAC_ADRESS_DONGLE``` to select your main one dongle (for example: select 55:44:33:22:11:00)
25 | 10. Type: ```default-agent``` to make selected BT-dongle a default connector with your BT devices
26 | 11. Let's start connection & paring with your BT-speaker.
27 | 12. Type: ```scan on```
28 | 13. Turn on your BT speaker & set it to paring mode
29 | 14. Check the console to see if your BT speaker has been detected (look for its name or MAC address). NOTE: Be patient during this process. If the speaker does not appear, try putting it back into pairing mode and checking again.
30 | 15. Type: ```pair MAC_ADRESS``` (for example: pair 00:11:22:33:44:55)
31 | 16. Type: ```trust MAC_ADRESS``` (for example: trust 00:11:22:33:44:55)
32 | 17. Type: ```connect MAC_ADRESS``` (for example: connect 00:11:22:33:44:55)
33 | (in the case of any problems type ```help``` for more info)
34 | 18. Be sure to check the confirmations or errors from these commands.
35 | Simply repeating these steps if they show an error might help.
36 | 19. Optional: Check the configuration of the device in Pulseaudio:
37 |
38 | Note that at least with HAOS, this command only works inside the audio container,
39 | so you've to run `docker exec -it hassio_audio bash` to get a shell in it.
40 | - To check the connected devices use: ```pactl list | grep ".a2dp_sink"```.
41 | - Look for something similar to Name: ```bluez_sink.4C_72_74_XX_XX_XX.a2dp_sink```
42 |
43 | NOTE: the number represents the MAC address of your BT speaker
44 | 20. 
45 | 21. Set the newly connected BT device as the default sound output by using following command: ```pactl set-default-sink NAME_OF_YOUR_BT_SPEAKER_FIND_IN_THE_PREV_STEP```
46 | This is not needed if you only have one audio device in your VM, so you can skip this and the next step, (it should not be muted)
47 | 22. Check whether the output-audio is not muted, nor volume set to zero, by ```Mute:``` (should be ```no```) and ```Volume:```, should be ```front-left: 65536 / 100% / 0.00 dB, front-right: 65536 / 100% / 0.00 dB``` by using following commend: ```pactl list sinks | grep "Mute:"``` and ```pactl list sinks | grep "Volume:"```
48 | 23. Type ```ha audio reload``` and wait for ```Command completed successfully``` message on the terminal
49 | 24. At this point your BT should be connected to your HA
50 | 25. Type: ```exit```
51 |
52 | ### II. Installing required add-ons & integrations
53 | 1. Goto HA and install **Settings -> Addons -> Install VLC**, start it and enable start on boot.
54 | 2. Goto **VLC -> Configuration** and select your BT Audio device from the list.
55 | 3. Goto **Settings -> Devices & Services (Integrations)** and **Add New Integration**
56 | 4. Search for **VLC** select it and enable **Local VLC Media player via Telnet**
57 | It will add with 1 service called "core-vlc".
58 | You can test it by playing some audio from your "My Media" or a TTS.
59 | 5. Go to the Media dashboard, "**My media** -> **Manage** -> **Add media**"
60 | Select an audio file which VLC can play from your Computer to upload it to Media.
61 | 6. Below the file area, on the bottom of the browser window is a media player
62 | bar with a blue selection button that reads "Web browser". Open it and select
63 | **VLC-TELNET**. Click the media file. It should start playing.
64 |
65 | ### III. Testing (Audio files)
66 | 1. Go to **Developers Tools** and **Services** and enter followings :
67 | 2. **Service** or **Actions** : ```Media player: Play media```
68 | 3. **Target**: Search for ```VLC``` and select your one
69 | 4. **Content type**: ```music```
70 | 5. **Content ID**: ```/local/your.mp3``` (files your.mp3 should be located at the ```/local/www/``` folder of your HA installation)
71 | Note: With HAOS, you don't have /local. But you can play files in the media library.
72 | On the SSH shell, you can also create a `.hidden` directory and move special-purpose
73 | sound files that should not show up in the web browser in "My media":
74 | ```sh
75 | cd /mnt/data/supervisor/media
76 | mkdir .hidden
77 | mv 5-seconds-of-silence.mp3 .hidden/
78 | ```
79 | In HAOS, you can play back this example path using this Content ID:
80 | ```m
81 | media-source://media_source/local/.hidden/5-seconds-of-silence.mp3
82 | ```
83 |
84 | 6. Press **Call-Service** or **Perform the action**
85 |  86 | 7. To check the call_service Content-ID of other files, you can use:
87 | **Developers Tools** and **Events** -> **Listen to events**
88 | In **Listening to**, enter **call_service** and click **Start listening**
89 | When you play a not-hidden file from **My media**, you should see a yaml with this line:
90 | ```m
91 | media_content_id: media-source://media_source/local/5-seconds-of-silence.mp3
92 | ```
93 | On the SSH shell, run `journalctl -f` to get a live log of the HA warnings.
94 | In case the file is found, you get no warnings in the journal, but if there
95 | was an error, you'll see e.g. the errors opening the file if your Content ID is wrong.
96 |
97 | ### III. Testing (TTS - Text to speach)
98 | 1. Go to **Developers Tools** and go to **Actions** or **Services** and enter followings :
99 | 2. **Service** or **Actions**: type ```TTS``` and select one of your favourite (or default) one Text-To-Speach (for the porpouse of this tutoral I used gogole with google translate
100 |
86 | 7. To check the call_service Content-ID of other files, you can use:
87 | **Developers Tools** and **Events** -> **Listen to events**
88 | In **Listening to**, enter **call_service** and click **Start listening**
89 | When you play a not-hidden file from **My media**, you should see a yaml with this line:
90 | ```m
91 | media_content_id: media-source://media_source/local/5-seconds-of-silence.mp3
92 | ```
93 | On the SSH shell, run `journalctl -f` to get a live log of the HA warnings.
94 | In case the file is found, you get no warnings in the journal, but if there
95 | was an error, you'll see e.g. the errors opening the file if your Content ID is wrong.
96 |
97 | ### III. Testing (TTS - Text to speach)
98 | 1. Go to **Developers Tools** and go to **Actions** or **Services** and enter followings :
99 | 2. **Service** or **Actions**: type ```TTS``` and select one of your favourite (or default) one Text-To-Speach (for the porpouse of this tutoral I used gogole with google translate
100 |  101 |
102 | 4. **Target** or **entity_id**: Search for ```VLC``` and select your one
103 | 5. **Message**: type anything you want to be converted to speach
104 | 6. Press **Call-Service** or **Perform the action**
105 |
101 |
102 | 4. **Target** or **entity_id**: Search for ```VLC``` and select your one
103 | 5. **Message**: type anything you want to be converted to speach
104 | 6. Press **Call-Service** or **Perform the action**
105 |  106 |
107 | ### IV. Appendix 1 - Solution for BT inactivity – auto shutdown (Keep device busy)
108 |
109 | At least with current Home Assistant, it no longer working to play blank-silent
110 | "flat-line" audio at an interval to keep a BT speaker awake. The audio file must
111 | have some audio signal or else some part of the audio pipeline detects that and
112 | the BT speaker still disconnects.
113 |
114 | Infrasound is a wavelength that is too low for us to hear, where 20 Hz is said
115 | to be the limit, so anything at or below that frequency is sufficient to give
116 | the speaker membrane of the BT speaker some signal to move, but it is so slow
117 | that our ears (and others things at home) have no chance of picking it up.
118 |
119 | In addition, you can set this infrasound a very low level to barely cause any
120 | if at all movement of the speaker membrane.
121 |
122 | With Audacity, you can generate very precisely what you want: Any infrasound
123 | should be fine, but possibly, e.g. a too short signal could possibly cause
124 | the BT speaker not register the audio. A very short file that should be very
125 | hard to pick up even if you measure your speaker's amplifier would be 500ms#
126 | of 2Hz Infrasound with an amplitude of only 0.04. With 2Hz, only a single
127 | sine wave fits into the 0.5s time span so you could barely even speak of
128 | a frequency, as there is really nothing at all to hear. Combine this with
129 | a fade-out to reduce any possible click at the moment the audio stops.
130 |
131 | To generate the tone in Audacity, using **Generate** -> **Tone...**.
132 |
133 | 1. **Upload** the audio file to **Media** -> **My media** library
134 | - [Download this file](Audacity-Tone-2Hz-0.04-500ms-Fadeout.opus)
135 | or generate a similar Infrasound audio file using Audacity to your computer.
136 | - On the Home Assistant website,
137 | click "**Media** -> **My media** -> **Manage** -> **Add media**"
138 | Select the audio file from your Computer. This uploads it to Media.
139 | 2. Move the file to a hidden directory. Using an SSH login, run these commands:
140 | ```sh
141 | cd /mnt/data/supervisor/media
142 | mkdir .hidden
143 | mv your-nearly-silent-audio.mp3 .hidden/
144 | ```
145 | 3. Create a new Automation like this:
146 |
106 |
107 | ### IV. Appendix 1 - Solution for BT inactivity – auto shutdown (Keep device busy)
108 |
109 | At least with current Home Assistant, it no longer working to play blank-silent
110 | "flat-line" audio at an interval to keep a BT speaker awake. The audio file must
111 | have some audio signal or else some part of the audio pipeline detects that and
112 | the BT speaker still disconnects.
113 |
114 | Infrasound is a wavelength that is too low for us to hear, where 20 Hz is said
115 | to be the limit, so anything at or below that frequency is sufficient to give
116 | the speaker membrane of the BT speaker some signal to move, but it is so slow
117 | that our ears (and others things at home) have no chance of picking it up.
118 |
119 | In addition, you can set this infrasound a very low level to barely cause any
120 | if at all movement of the speaker membrane.
121 |
122 | With Audacity, you can generate very precisely what you want: Any infrasound
123 | should be fine, but possibly, e.g. a too short signal could possibly cause
124 | the BT speaker not register the audio. A very short file that should be very
125 | hard to pick up even if you measure your speaker's amplifier would be 500ms#
126 | of 2Hz Infrasound with an amplitude of only 0.04. With 2Hz, only a single
127 | sine wave fits into the 0.5s time span so you could barely even speak of
128 | a frequency, as there is really nothing at all to hear. Combine this with
129 | a fade-out to reduce any possible click at the moment the audio stops.
130 |
131 | To generate the tone in Audacity, using **Generate** -> **Tone...**.
132 |
133 | 1. **Upload** the audio file to **Media** -> **My media** library
134 | - [Download this file](Audacity-Tone-2Hz-0.04-500ms-Fadeout.opus)
135 | or generate a similar Infrasound audio file using Audacity to your computer.
136 | - On the Home Assistant website,
137 | click "**Media** -> **My media** -> **Manage** -> **Add media**"
138 | Select the audio file from your Computer. This uploads it to Media.
139 | 2. Move the file to a hidden directory. Using an SSH login, run these commands:
140 | ```sh
141 | cd /mnt/data/supervisor/media
142 | mkdir .hidden
143 | mv your-nearly-silent-audio.mp3 .hidden/
144 | ```
145 | 3. Create a new Automation like this:
146 |  147 | For the file uploaded to media/.hidden use this a Content ID like this:
148 | ```m
149 | media-source://media_source/local/.hidden/
150 | ```
151 | 5. Give it a name by selecting top-right corner menu, then select ```Rename``` (for example: "Keep Xiaomi BT Speaker Awake")
152 | 6. Save it and done. Now HA will play every 5 minute a silent sound preventing BT speaker auto-shutdown
153 |
154 | ### III. Appendix 2 - Solution for BT inactivity – auto shutdown (Disable HAOS Bluetooth interactivity drop)
155 |
156 | 1. TODO
157 |
--------------------------------------------------------------------------------
147 | For the file uploaded to media/.hidden use this a Content ID like this:
148 | ```m
149 | media-source://media_source/local/.hidden/
150 | ```
151 | 5. Give it a name by selecting top-right corner menu, then select ```Rename``` (for example: "Keep Xiaomi BT Speaker Awake")
152 | 6. Save it and done. Now HA will play every 5 minute a silent sound preventing BT speaker auto-shutdown
153 |
154 | ### III. Appendix 2 - Solution for BT inactivity – auto shutdown (Disable HAOS Bluetooth interactivity drop)
155 |
156 | 1. TODO
157 |
--------------------------------------------------------------------------------