├── .gitignore
├── README.md
└── en
├── INDEX.md
├── MENU.md
├── _images
├── install_company.png
├── install_database.png
├── install_language.png
├── install_login.png
└── update.png
├── app-manual
├── README.md
├── _images
│ └── .gitkeep
├── accounting
│ ├── _images
│ │ ├── DECOAAdd-New-Account.gif
│ │ ├── DEMJAdd-New1.gif
│ │ ├── DEMJOpening-Balance.gif
│ │ ├── DEReportsBS.gif
│ │ ├── DEReportsGL.gif
│ │ ├── DEReportsJE.gif
│ │ ├── DEReportsTB .gif
│ │ ├── credit-debit-notes-create-credit-note-from-invoice.png
│ │ ├── credit-debit-notes-create-debit-note-from-bill.png
│ │ ├── credit-debit-notes-credit-customer-account-switch.png
│ │ ├── credit-debit-notes-credit-notes-section.png
│ │ ├── credit-debit-notes-customer.png
│ │ ├── credit-debit-notes-debit-notes-section.png
│ │ ├── credit-debit-notes-make-refund-modal.png
│ │ ├── credit-debit-notes-receive-refund-modal.png
│ │ ├── credit-debit-notes-settings-credit-note-card.png
│ │ ├── credit-debit-notes-settings-credit-note-form.png
│ │ ├── credit-debit-notes-settings-credit-note-template.png
│ │ ├── credit-debit-notes-settings-debit-note-card.png
│ │ ├── credit-debit-notes-settings-debit-note-form.png
│ │ ├── credit-debit-notes-use-credits-modal.png
│ │ ├── double-entry-balance-sheet.gif
│ │ ├── double-entry-chart-of-accounts-show.gif
│ │ ├── double-entry-creating-new-account.gif
│ │ ├── double-entry-dashboard.gif
│ │ ├── double-entry-general-ledger.gif
│ │ ├── double-entry-journal-entry.gif
│ │ ├── double-entry-opening-starting-balance.gif
│ │ ├── double-entry-trial-balance.gif
│ │ ├── live-currency-setting-up.jpg
│ │ └── settings-sync-currencies.gif
│ ├── credit-debit-notes.md
│ ├── double-entry.md
│ └── live-currency.md
├── ecommerce
│ ├── _images
│ │ ├── opencart-settings-1.png
│ │ ├── opencart-settings-2.png
│ │ ├── opencart-settings-3.png
│ │ ├── woocommerce-settings-1.png
│ │ ├── woocommerce-settings-2.png
│ │ ├── woocommerce-settings-3.png
│ │ └── woocommerce-settings-4.png
│ ├── opencart.md
│ └── woocommerce.md
├── hr
│ ├── _images
│ │ ├── admin-page-expense-claim.gif
│ │ └── employee-page-expense-claim.gif
│ └── expenses.md
├── import-export
│ ├── _images
│ │ ├── expensify-integration-credentials.png
│ │ ├── expensify-setting-page.png
│ │ ├── freshbooks-start.png
│ │ ├── freshbooks-sync-menu.png
│ │ ├── ofx-create-bank.png
│ │ ├── ofx-demo.png
│ │ ├── ofx-import.png
│ │ ├── quickbooks-akaunting-connect.png
│ │ ├── quickbooks-start.png
│ │ ├── quickbooks-sync-menu.png
│ │ ├── xero-start.png
│ │ ├── xero-sync-menu.png
│ │ ├── zohobooks-start.png
│ │ └── zohobooks-sync-menu.png
│ ├── expensify.md
│ ├── freshbooks.md
│ ├── ofx.md
│ ├── quickbooks.md
│ ├── xero.md
│ └── zohobooks.md
├── inventory
│ ├── _images
│ │ ├── inventory-groups.gif
│ │ ├── inventory-items.jpg
│ │ ├── inventory-options.gif
│ │ └── inventory-warehouses.gif
│ └── inventory.md
├── operation
│ ├── _images
│ │ ├── custom-fields-1.png
│ │ ├── twofactor_auth.png
│ │ ├── twofactor_enable.png
│ │ └── twofactor_scan.png
│ ├── custom-fields.md
│ └── twofactor.md
├── payment-method
│ ├── _images
│ │ ├── payflexi-default-method.png
│ │ ├── payflexi-developers-keys.png
│ │ ├── payflexi-installation-page.png
│ │ ├── payflexi-installation.png
│ │ ├── payflexi-invoice-confirm.png
│ │ ├── payflexi-invoice-draft.png
│ │ ├── payflexi-payment-plans.png
│ │ ├── payflexi-settings.png
│ │ ├── payflexi-webhook-settings.png
│ │ ├── square-form.png
│ │ └── square-settings.png
│ ├── payflexi.md
│ └── square.md
└── point-of-sale
│ ├── _images
│ ├── pos-category-selected.png
│ ├── pos-main-pos-screen.png
│ ├── pos-order-details-footer.png
│ ├── pos-orders-tabs.png
│ ├── pos-orders.png
│ ├── pos-placeholder-image.png
│ ├── pos-receipt-screen.png
│ ├── pos-receiving-payment.png
│ ├── pos-select-customer.png
│ ├── pos-selected-customer.png
│ ├── pos-settings-pos-card.png
│ └── pos-settings-pos-form.png
│ └── pos.md
├── client-portal.md
├── developer-manual
├── _images
│ ├── docs_app.png
│ ├── docs_details.png
│ ├── permissions.png
│ └── simple_settings.png
├── adding-docs.md
├── hooking-models.md
├── menu.md
├── modules.md
├── overriding-output.md
├── permissions.md
├── restful-api.md
├── reverse-proxy.md
└── settings.md
├── download.md
├── employee-portal.md
├── faq
├── _images
│ ├── debug_bar.png
│ └── debug_enable.png
├── accrual-vs-cash.md
├── error-details.md
├── not-able-to-install-apps.md
└── shipping-cost.md
├── installation.md
├── migrating-to-akaunting.md
├── requirements.md
├── update.md
└── user-manual
├── _images
├── add-pin.gif
├── items-new-item.gif
├── items.gif
├── pa-add-new-organization.gif
├── pa-personalize-akaunting-interface.png
├── pp-users.gif
├── reports-add-new.gif
├── reports-view-report.gif
├── reports.gif
├── ui-add-new.gif
├── ui-favorites.gif
└── ui-settings.gif
├── app-store
├── _images
│ ├── app-buy.gif
│ ├── apps-api-key.gif
│ ├── apps-install-uninstall.gif
│ └── apps-overview.gif
├── apps.md
├── overview.md
└── uninstall-disable.md
├── banking
├── _images
│ ├── accounts-add-new.gif
│ ├── accounts.gif
│ ├── transfers-add-new.gif
│ └── transfers.gif
├── accounts.md
├── assign
│ ├── assign.md
│ └── new-expense.md
├── other.md
├── reconciliation.md
├── transactions
│ ├── _images
│ │ └── transactions.gif
│ ├── net-income.md
│ └── transactions.md
└── transfers.md
├── dashboard
├── _images
│ ├── adding-new-dashboard.gif
│ ├── adding-new-widget.gif
│ └── dashboard.png
├── add-widgets.md
├── create-and-manage-dashboard.md
├── default-dashboard
│ ├── _images
│ │ ├── cash-flow.png
│ │ ├── payables.png
│ │ ├── profit-loss.png
│ │ └── receivables.png
│ ├── account-balance.md
│ ├── cash-flow.md
│ ├── expenses-by-category.md
│ ├── payables.md
│ ├── profit-and-loss.md
│ └── receivables.md
└── overview.md
├── items.md
├── personalize-akaunting.md
├── profile-and-users.md
├── purchases
├── _images
│ ├── vendors-add-new.gif
│ └── vendors.gif
├── bills
│ ├── _images
│ │ ├── bill.gif
│ │ ├── bills-add-new.gif
│ │ └── bills-show.gif
│ ├── bills.md
│ └── recurring-templates.md
└── vendors.md
├── reports.md
├── sales
├── _images
│ ├── customers-new-customer.gif
│ └── customers.gif
├── customers.md
└── invoices
│ ├── _images
│ ├── add-payment.gif
│ ├── invoices-new-invoice-new.gif
│ ├── invoices-show-page.gif
│ ├── invoices.gif
│ └── send-mail-modal.gif
│ ├── invoices.md
│ └── recurring-templates.md
├── settings
├── _images
│ ├── Categories.png
│ ├── categories.png
│ ├── company-settings.gif
│ ├── company.gif
│ ├── default-settings.png
│ ├── email-templates.gif
│ ├── invoice-settings.gif
│ ├── localization-settings.gif
│ ├── offline-payments.png
│ ├── paypal-standard.png
│ ├── scheduling-settings.png
│ └── tax.png
├── calendar.md
├── categories.md
├── company.md
├── currencies.md
├── default.md
├── email-templates.md
├── invoice.md
├── live-currency.md
├── localization.md
├── offline-payments.md
├── paypal-standard.md
├── scheduling.md
└── taxes.md
├── the-user-interface-framework.md
└── welcome.md
/.gitignore:
--------------------------------------------------------------------------------
1 | /.idea
2 | /.history
3 | /.vscode
4 | /.vagrant
5 | /node_modules
6 | /storage/*.key
7 | /vendor
--------------------------------------------------------------------------------
/README.md:
--------------------------------------------------------------------------------
1 | Akaunting Documentation
2 | ======================
3 |
4 | This repository contains the source of the Akaunting documentation, currently accessible at [akaunting.com/docs](https://akaunting.com/docs).
5 |
6 | The documentation is structured in folders, exactly as you see them on the main website.
7 |
8 | You can read all of the documentation within as its just in plain text files, marked up with [Markdown.](https://daringfireball.net/projects/markdown/)
9 |
10 | If you would like a local copy of the documentation, you can either download it or you can clone the repository by running the following command:
11 |
12 | `git clone git://github.com/akaunting/docs docs`
13 |
14 |
15 | Contributing
16 | ---------------------
17 |
18 | Contributing to the documentation is very simple. Feel free to fork the repository, add your changes and give back by issuing a pull request. You can even edit the docs directly on GitHub, without having to ever download the files. Make sure to follow the conventions before issuing a pull request.
19 |
20 | You are also very welcome to make any suggestions or report any kind of problem with the documentation by opening a new [Issue](https://github.com/akaunting/docs/issues/new).
21 |
22 | Conventions
23 | ----------------------
24 |
25 | This is a list of few conventions we follow when writing documentation that help keep the repository well organized and consistent. Feel free to use any already available as reference.
26 |
27 | - Every change/pull request must be reviewed first. Once reviewed, approved and pulled, it will get merged into the master branch and automatically picked up by the website.
28 |
29 | - File and folder names must always be written in dash and lower case. For example, if you wanted to convert “How to Install” in dash-lower-case, you would name it “how-to-install”.
30 |
31 | - There are some reserved names that can’t be used for anything but the scope they are intended for:
32 |
33 | - **README.md:** This is a reserved name of GitHub, used to describe the content of a particular repository directory, like this you are reading right now.
34 |
35 | - **MENU.md:** The menu file contains the navigation structure of the documentation. The menu is represented as sidebar in the [Akaunting Documentation](https://akaunting.com/docs) page. Menu links must not contain the file extension which means not "how-to-install.md" but "how-to-install".
36 |
37 | - **INDEX.md:** This file defines the content of the home page of [documentation.](https://akaunting.com/docs)
38 |
39 | - **_images:** When the document requires images, they can be placed into the respected _images folder.
40 |
41 | - Every document must contain an H1 (=) text at the beginning/top of the file.
42 |
43 | - Headers sub lines (= and -) must always align to the header text. Because this can easily get confusing, be sure to use a mono-spaced fonts. Here a couple of examples of well aligned headers:
44 |
45 | ~~~
46 | Header H1
47 | =========
48 |
49 | Header H2
50 | ---------
51 | ~~~
52 |
53 | The headers allow for a much flexible output. For example we define the title of a Markdown file based on its H1 header title variable, rather than the file name itself.
54 |
55 | If you have any question feel free to open an [Issue.](https://github.com/akaunting/docs/issues/new)
56 |
57 | Thank You
58 |
--------------------------------------------------------------------------------
/en/INDEX.md:
--------------------------------------------------------------------------------
1 | Introduction
2 | ============
3 |
4 | Welcome to the documentation of Akaunting, the [free accounting software](https://akaunting.com).
5 |
6 | This guide serves as a resource to users and developers needing direction in the Akaunting interface or code. Everyone is welcome to help make this information better and improve as needed.
7 |
8 | ### Users
9 |
10 | You may start with the [dashboard](https://akaunting.com/docs/user-manual/dashboard) page and the [toolbar](https://akaunting.com/docs/user-manual/toolbar) description. Then see how [companies](https://akaunting.com/docs/user-manual/companies) work and check [users](https://akaunting.com/docs/user-manual/auth/users) page for permissions. Confused about the difference between invoices and revenues? [Check](https://akaunting.com/docs/faq/invoices-vs-revenues) it out. Here you can [learn](https://akaunting.com/docs/faq/bills-vs-payments) what is a payment and a bill.
11 |
12 | ### Developers
13 |
14 | Akaunting is built using [Laravel](https://laravel.com) framework, make sure you've got how it works first. The [modules](https://developer.akaunting.com/documentation/modules) article is the essential of developing apps. Then you can check how to show your app in navigation [menu](https://developer.akaunting.com/documentation/menu/). Akaunting ships with fine-grained [permissions](https://developer.akaunting.com/documentation/permissions/) and it's crucial to implement them into your app. [RESTful API](https://developer.akaunting.com/documentation/restful-api/) is one of the most important parts of Akaunting.
15 |
--------------------------------------------------------------------------------
/en/MENU.md:
--------------------------------------------------------------------------------
1 | * [Requirements](requirements)
2 | * [Download](download)
3 | * [Installation](installation)
4 | * [Update](update)
5 | * [Client Portal](client-portal)
6 | * [Employee Portal](employee-portal)
7 | * [Migrating to Akaunting](migrating-to-akaunting)
8 | * User Manual
9 | * [Welcome](user-manual/welcome)
10 | * [The User Interface Framework](user-manual/the-user-interface-framework)
11 | * [Profile and Users](user-manual/profile-and-users)
12 | * [Personalize Akaunting](user-manual/personalize-akaunting)
13 | * Dashboard
14 | * [Create and Manage Dashboard](user-manual/dashboard/create-and-manage-dashboard)
15 | * [Add Widgets](user-manual/dashboard/add-widgets)
16 | * Default Dashboard
17 | * [Receivables](user-manual/dashboard/default-dashboard/receivables)
18 | * [Payables](user-manual/dashboard/default-dashboard/payables)
19 | * [Cash Flow](user-manual/dashboard/default-dashboard/cash-flow)
20 | * [Profit and Loss](user-manual/dashboard/default-dashboard/profit-and-loss)
21 | * [Expenses by Category](user-manual/dashboard/default-dashboard/expenses-by-category)
22 | * [Account Balance](user-manual/dashboard/default-dashboard/account-balance)
23 | * [Items](user-manual/items)
24 | * Sales
25 | * Invoices
26 | * [Invoices](user-manual/sales/invoices/invoices)
27 | * [Recurring Templates](user-manual/sales/invoices/recurring-templates)
28 | * [Customers](user-manual/sales/customers)
29 | * Purchases
30 | * Bills
31 | * [Bills](user-manual/purchases/bills/bills)
32 | * [Recurring Templates](user-manual/purchases/bills/recurring-templates)
33 | * [Vendors](user-manual/purchases/vendors)
34 | * Banking
35 | * Transactions
36 | * [Assign](user-manual/banking/assign/assign)
37 | * [New Expense](user-manual/banking/assign/new-expense)
38 | * [Net Income](user-manual/banking/transactions/net-income)
39 | * [Transactions](user-manual/banking/transactions/transactions)
40 | * [Accounts](user-manual/banking/accounts)
41 | * [Other](user-manual/banking/other)
42 | * [Reconciliation](user-manual/banking/reconciliation)
43 | * [Transfers](user-manual/banking/transfers)
44 | * [Reports](user-manual/reports)
45 | * App Store
46 | * [Overview](user-manual/app-store/overview)
47 | * [Apps](user-manual/app-store/apps)
48 | * [Uninstall/Disable](user-manual/app-store/uninstall-disable)
49 | * Settings
50 | * [Company](user-manual/settings/company)
51 | * [Localization](user-manual/settings/localization)
52 | * [Invoice](user-manual/settings/invoice)
53 | * [Default](user-manual/settings/default)
54 | * [Email Templates](user-manual/settings/email-templates)
55 | * [Scheduling](user-manual/settings/scheduling)
56 | * [Categories](user-manual/settings/categories)
57 | * [Currencies](user-manual/settings/currencies)
58 | * [Taxes](user-manual/settings/taxes)
59 | * [Calendar](user-manual/settings/calendar)
60 | * [Live Currency](user-manual/settings/live-currency)
61 | * [Offline Payments](user-manual/settings/offline-payments)
62 | * [PayPal Standard](user-manual/settings/paypal-standard)
63 | * FAQ
64 | * [Accrual vs Cash](faq/accrual-vs-cash)
65 | * [Shipping Cost](faq/shipping-cost)
66 | * [Not able to install apps](faq/not-able-to-install-apps)
67 | * [Error details](faq/error-details)
68 | * App Manual
69 | * Accounting
70 | * [Credit/Debit Notes](app-manual/accounting/credit-debit-notes)
71 | * [Double-Entry](app-manual/accounting/double-entry)
72 | * [Live Currency](app-manual/accounting/live-currency)
73 | * Analytics
74 | * CRM
75 | * eCommerce
76 | * [OpenCart](app-manual/ecommerce/opencart)
77 | * [WooCommerce](app-manual/ecommerce/woocommerce)
78 | * Help Desk
79 | * HR
80 | * [Expenses](app-manual/hr/expenses)
81 | * Import Export
82 | * [Expensify](app-manual/import-export/expensify)
83 | * [OFX](app-manual/import-export/ofx)
84 | * [QuickBooks](app-manual/import-export/quickbooks)
85 | * [Zoho Books](app-manual/import-export/zohobooks)
86 | * [Xero](app-manual/import-export/xero)
87 | * [Freshbooks](app-manual/import-export/freshbooks)
88 | * Inventory
89 | * [Inventory](app-manual/inventory/inventory)
90 | * Notification
91 | * Operation
92 | * [Custom Fields](app-manual/operation/custom-fields)
93 | * Payment Method
94 | * [Square](app-manual/payment-method/square)
95 | * [PayFlexi](app-manual/payment-method/payflexi)
96 | * Payroll
97 | * Point of Sale
98 | * [Point of Sale](app-manual/point-of-sale/pos)
99 | * Time Tracking
100 |
--------------------------------------------------------------------------------
/en/_images/install_company.png:
--------------------------------------------------------------------------------
https://raw.githubusercontent.com/akaunting/docs/205f53a3ef9d69a59057321d33e1a859fd293a69/en/_images/install_company.png
--------------------------------------------------------------------------------
/en/_images/install_database.png:
--------------------------------------------------------------------------------
https://raw.githubusercontent.com/akaunting/docs/205f53a3ef9d69a59057321d33e1a859fd293a69/en/_images/install_database.png
--------------------------------------------------------------------------------
/en/_images/install_language.png:
--------------------------------------------------------------------------------
https://raw.githubusercontent.com/akaunting/docs/205f53a3ef9d69a59057321d33e1a859fd293a69/en/_images/install_language.png
--------------------------------------------------------------------------------
/en/_images/install_login.png:
--------------------------------------------------------------------------------
https://raw.githubusercontent.com/akaunting/docs/205f53a3ef9d69a59057321d33e1a859fd293a69/en/_images/install_login.png
--------------------------------------------------------------------------------
/en/_images/update.png:
--------------------------------------------------------------------------------
https://raw.githubusercontent.com/akaunting/docs/205f53a3ef9d69a59057321d33e1a859fd293a69/en/_images/update.png
--------------------------------------------------------------------------------
/en/app-manual/README.md:
--------------------------------------------------------------------------------
1 | App Manual
2 | ==========
3 |
4 | Here you can add documentation for your app so that users could learn how to use it.
5 |
6 | Contributing
7 | ------------
8 |
9 | Adding documentation to your app is very simple. Feel free to fork the repository, add your changes and give back by issuing a pull request. Make sure to follow the conventions before issuing a pull request.
10 |
11 | Conventions
12 | -----------
13 |
14 | In addition to the conventions available the main [README](https://github.com/akaunting/docs) file, this is a list of few conventions required only for app documentation.
15 |
16 | - The file must be located under the proper folder, using the category in the [App Store](https://akaunting.com/apps) like **{category}/{slug}.md**. For example, *ecommerce/woocommerce.md*
17 |
18 | - The link added to the **MENU.md** must be like **app-manual/{category}/{slug}**. For example, *app-manual/ecommerce/woocommerce*
19 |
20 | - The link added to the **MENU.md** must be in alphabetic order.
21 |
22 | Thank You
--------------------------------------------------------------------------------
/en/app-manual/_images/.gitkeep:
--------------------------------------------------------------------------------
https://raw.githubusercontent.com/akaunting/docs/205f53a3ef9d69a59057321d33e1a859fd293a69/en/app-manual/_images/.gitkeep
--------------------------------------------------------------------------------
/en/app-manual/accounting/_images/DECOAAdd-New-Account.gif:
--------------------------------------------------------------------------------
https://raw.githubusercontent.com/akaunting/docs/205f53a3ef9d69a59057321d33e1a859fd293a69/en/app-manual/accounting/_images/DECOAAdd-New-Account.gif
--------------------------------------------------------------------------------
/en/app-manual/accounting/_images/DEMJAdd-New1.gif:
--------------------------------------------------------------------------------
https://raw.githubusercontent.com/akaunting/docs/205f53a3ef9d69a59057321d33e1a859fd293a69/en/app-manual/accounting/_images/DEMJAdd-New1.gif
--------------------------------------------------------------------------------
/en/app-manual/accounting/_images/DEMJOpening-Balance.gif:
--------------------------------------------------------------------------------
https://raw.githubusercontent.com/akaunting/docs/205f53a3ef9d69a59057321d33e1a859fd293a69/en/app-manual/accounting/_images/DEMJOpening-Balance.gif
--------------------------------------------------------------------------------
/en/app-manual/accounting/_images/DEReportsBS.gif:
--------------------------------------------------------------------------------
https://raw.githubusercontent.com/akaunting/docs/205f53a3ef9d69a59057321d33e1a859fd293a69/en/app-manual/accounting/_images/DEReportsBS.gif
--------------------------------------------------------------------------------
/en/app-manual/accounting/_images/DEReportsGL.gif:
--------------------------------------------------------------------------------
https://raw.githubusercontent.com/akaunting/docs/205f53a3ef9d69a59057321d33e1a859fd293a69/en/app-manual/accounting/_images/DEReportsGL.gif
--------------------------------------------------------------------------------
/en/app-manual/accounting/_images/DEReportsJE.gif:
--------------------------------------------------------------------------------
https://raw.githubusercontent.com/akaunting/docs/205f53a3ef9d69a59057321d33e1a859fd293a69/en/app-manual/accounting/_images/DEReportsJE.gif
--------------------------------------------------------------------------------
/en/app-manual/accounting/_images/DEReportsTB .gif:
--------------------------------------------------------------------------------
https://raw.githubusercontent.com/akaunting/docs/205f53a3ef9d69a59057321d33e1a859fd293a69/en/app-manual/accounting/_images/DEReportsTB .gif
--------------------------------------------------------------------------------
/en/app-manual/accounting/_images/credit-debit-notes-create-credit-note-from-invoice.png:
--------------------------------------------------------------------------------
https://raw.githubusercontent.com/akaunting/docs/205f53a3ef9d69a59057321d33e1a859fd293a69/en/app-manual/accounting/_images/credit-debit-notes-create-credit-note-from-invoice.png
--------------------------------------------------------------------------------
/en/app-manual/accounting/_images/credit-debit-notes-create-debit-note-from-bill.png:
--------------------------------------------------------------------------------
https://raw.githubusercontent.com/akaunting/docs/205f53a3ef9d69a59057321d33e1a859fd293a69/en/app-manual/accounting/_images/credit-debit-notes-create-debit-note-from-bill.png
--------------------------------------------------------------------------------
/en/app-manual/accounting/_images/credit-debit-notes-credit-customer-account-switch.png:
--------------------------------------------------------------------------------
https://raw.githubusercontent.com/akaunting/docs/205f53a3ef9d69a59057321d33e1a859fd293a69/en/app-manual/accounting/_images/credit-debit-notes-credit-customer-account-switch.png
--------------------------------------------------------------------------------
/en/app-manual/accounting/_images/credit-debit-notes-credit-notes-section.png:
--------------------------------------------------------------------------------
https://raw.githubusercontent.com/akaunting/docs/205f53a3ef9d69a59057321d33e1a859fd293a69/en/app-manual/accounting/_images/credit-debit-notes-credit-notes-section.png
--------------------------------------------------------------------------------
/en/app-manual/accounting/_images/credit-debit-notes-customer.png:
--------------------------------------------------------------------------------
https://raw.githubusercontent.com/akaunting/docs/205f53a3ef9d69a59057321d33e1a859fd293a69/en/app-manual/accounting/_images/credit-debit-notes-customer.png
--------------------------------------------------------------------------------
/en/app-manual/accounting/_images/credit-debit-notes-debit-notes-section.png:
--------------------------------------------------------------------------------
https://raw.githubusercontent.com/akaunting/docs/205f53a3ef9d69a59057321d33e1a859fd293a69/en/app-manual/accounting/_images/credit-debit-notes-debit-notes-section.png
--------------------------------------------------------------------------------
/en/app-manual/accounting/_images/credit-debit-notes-make-refund-modal.png:
--------------------------------------------------------------------------------
https://raw.githubusercontent.com/akaunting/docs/205f53a3ef9d69a59057321d33e1a859fd293a69/en/app-manual/accounting/_images/credit-debit-notes-make-refund-modal.png
--------------------------------------------------------------------------------
/en/app-manual/accounting/_images/credit-debit-notes-receive-refund-modal.png:
--------------------------------------------------------------------------------
https://raw.githubusercontent.com/akaunting/docs/205f53a3ef9d69a59057321d33e1a859fd293a69/en/app-manual/accounting/_images/credit-debit-notes-receive-refund-modal.png
--------------------------------------------------------------------------------
/en/app-manual/accounting/_images/credit-debit-notes-settings-credit-note-card.png:
--------------------------------------------------------------------------------
https://raw.githubusercontent.com/akaunting/docs/205f53a3ef9d69a59057321d33e1a859fd293a69/en/app-manual/accounting/_images/credit-debit-notes-settings-credit-note-card.png
--------------------------------------------------------------------------------
/en/app-manual/accounting/_images/credit-debit-notes-settings-credit-note-form.png:
--------------------------------------------------------------------------------
https://raw.githubusercontent.com/akaunting/docs/205f53a3ef9d69a59057321d33e1a859fd293a69/en/app-manual/accounting/_images/credit-debit-notes-settings-credit-note-form.png
--------------------------------------------------------------------------------
/en/app-manual/accounting/_images/credit-debit-notes-settings-credit-note-template.png:
--------------------------------------------------------------------------------
https://raw.githubusercontent.com/akaunting/docs/205f53a3ef9d69a59057321d33e1a859fd293a69/en/app-manual/accounting/_images/credit-debit-notes-settings-credit-note-template.png
--------------------------------------------------------------------------------
/en/app-manual/accounting/_images/credit-debit-notes-settings-debit-note-card.png:
--------------------------------------------------------------------------------
https://raw.githubusercontent.com/akaunting/docs/205f53a3ef9d69a59057321d33e1a859fd293a69/en/app-manual/accounting/_images/credit-debit-notes-settings-debit-note-card.png
--------------------------------------------------------------------------------
/en/app-manual/accounting/_images/credit-debit-notes-settings-debit-note-form.png:
--------------------------------------------------------------------------------
https://raw.githubusercontent.com/akaunting/docs/205f53a3ef9d69a59057321d33e1a859fd293a69/en/app-manual/accounting/_images/credit-debit-notes-settings-debit-note-form.png
--------------------------------------------------------------------------------
/en/app-manual/accounting/_images/credit-debit-notes-use-credits-modal.png:
--------------------------------------------------------------------------------
https://raw.githubusercontent.com/akaunting/docs/205f53a3ef9d69a59057321d33e1a859fd293a69/en/app-manual/accounting/_images/credit-debit-notes-use-credits-modal.png
--------------------------------------------------------------------------------
/en/app-manual/accounting/_images/double-entry-balance-sheet.gif:
--------------------------------------------------------------------------------
https://raw.githubusercontent.com/akaunting/docs/205f53a3ef9d69a59057321d33e1a859fd293a69/en/app-manual/accounting/_images/double-entry-balance-sheet.gif
--------------------------------------------------------------------------------
/en/app-manual/accounting/_images/double-entry-chart-of-accounts-show.gif:
--------------------------------------------------------------------------------
https://raw.githubusercontent.com/akaunting/docs/205f53a3ef9d69a59057321d33e1a859fd293a69/en/app-manual/accounting/_images/double-entry-chart-of-accounts-show.gif
--------------------------------------------------------------------------------
/en/app-manual/accounting/_images/double-entry-creating-new-account.gif:
--------------------------------------------------------------------------------
https://raw.githubusercontent.com/akaunting/docs/205f53a3ef9d69a59057321d33e1a859fd293a69/en/app-manual/accounting/_images/double-entry-creating-new-account.gif
--------------------------------------------------------------------------------
/en/app-manual/accounting/_images/double-entry-dashboard.gif:
--------------------------------------------------------------------------------
https://raw.githubusercontent.com/akaunting/docs/205f53a3ef9d69a59057321d33e1a859fd293a69/en/app-manual/accounting/_images/double-entry-dashboard.gif
--------------------------------------------------------------------------------
/en/app-manual/accounting/_images/double-entry-general-ledger.gif:
--------------------------------------------------------------------------------
https://raw.githubusercontent.com/akaunting/docs/205f53a3ef9d69a59057321d33e1a859fd293a69/en/app-manual/accounting/_images/double-entry-general-ledger.gif
--------------------------------------------------------------------------------
/en/app-manual/accounting/_images/double-entry-journal-entry.gif:
--------------------------------------------------------------------------------
https://raw.githubusercontent.com/akaunting/docs/205f53a3ef9d69a59057321d33e1a859fd293a69/en/app-manual/accounting/_images/double-entry-journal-entry.gif
--------------------------------------------------------------------------------
/en/app-manual/accounting/_images/double-entry-opening-starting-balance.gif:
--------------------------------------------------------------------------------
https://raw.githubusercontent.com/akaunting/docs/205f53a3ef9d69a59057321d33e1a859fd293a69/en/app-manual/accounting/_images/double-entry-opening-starting-balance.gif
--------------------------------------------------------------------------------
/en/app-manual/accounting/_images/double-entry-trial-balance.gif:
--------------------------------------------------------------------------------
https://raw.githubusercontent.com/akaunting/docs/205f53a3ef9d69a59057321d33e1a859fd293a69/en/app-manual/accounting/_images/double-entry-trial-balance.gif
--------------------------------------------------------------------------------
/en/app-manual/accounting/_images/live-currency-setting-up.jpg:
--------------------------------------------------------------------------------
https://raw.githubusercontent.com/akaunting/docs/205f53a3ef9d69a59057321d33e1a859fd293a69/en/app-manual/accounting/_images/live-currency-setting-up.jpg
--------------------------------------------------------------------------------
/en/app-manual/accounting/_images/settings-sync-currencies.gif:
--------------------------------------------------------------------------------
https://raw.githubusercontent.com/akaunting/docs/205f53a3ef9d69a59057321d33e1a859fd293a69/en/app-manual/accounting/_images/settings-sync-currencies.gif
--------------------------------------------------------------------------------
/en/app-manual/accounting/credit-debit-notes.md:
--------------------------------------------------------------------------------
1 | Credit/Debit Notes
2 | ============
3 |
4 | [Credit/Debit Notes](https://akaunting.com/apps/credit-debit-notes) app allows to:
5 |
6 | - Issue credit notes
7 | - Credit a customer account
8 | - Use credits in an invoice
9 | - Make a refund
10 | - Issue debit notes
11 | - Receive a refund
12 |
13 | ## Working with credit notes
14 |
15 | A credit note is a commercial document issued by a vendor to a customer when there has been an error in an invoice, such as an incorrect amount, or when a customer wishes to change the order or return some goods.
16 |
17 | ### Issuing a credit note
18 |
19 | After installing the app, a new Credit Notes menu item will be added under the Sales section. Here you can issue new credit notes.
20 |
21 | 
22 |
23 | Also, you can quickly create a credit note right from an invoice.
24 |
25 | 
26 |
27 | In this case, all credit note's fields will be prefilled with the data from the invoice.
28 |
29 | Set the Credit Customer Account switch to the appropriate position depending on whether you want to credit a customer's account or make a refund.
30 |
31 | 
32 |
33 | ### Using credits
34 |
35 | If you set it to the Yes, then the credit note's amount will be added to a customer account as credits after a credit note is marked as sent. You can use them to fully or partially paid an invoice.
36 |
37 | 
38 |
39 | ### Making a refund
40 |
41 | In case you set the Credit Customer Account switch to the No, you will be able to refund some amount to a customer. You can use any of the available accounts and payment methods to do this.
42 |
43 | 
44 |
45 | ### Customer details
46 |
47 | The list of credit notes and their total count are also available in the Customer details.
48 |
49 | 
50 |
51 | ### Settings
52 |
53 | You can customize credit note's settings using the standard Akaunting's settings section. Here you can set a number prefix, a number digit, next number, a title, a subheading, notes, a footer text, and a template.
54 |
55 | 
56 |
57 | 
58 |
59 | 
60 |
61 | ## Working with debit notes
62 |
63 | A debit note is a commercial document issued by a customer to a vendor to indicate or request a return of funds due to incorrect or damaged goods received or purchase cancellation.
64 |
65 | ### Issuing a debit note
66 |
67 | After installing the app, a new Debit Notes menu item will be added under the Purchases section. Here you can issue new debit notes.
68 |
69 | 
70 |
71 | Also, you can quickly create a debit note right from a bill.
72 |
73 | 
74 |
75 | In this case, all debit note's fields will be prefilled with the data from the bill.
76 |
77 | ### Receiving a refund
78 |
79 | It is possible to receive a refund from a vendor after a debit note is marked as sent. You can use any of the available accounts and payment methods to do this.
80 |
81 | 
82 |
83 | ### Settings
84 |
85 | You can customize debit note's settings using the standard Akaunting's settings section. Here you can set a number prefix, a number digit, and next number.
86 |
87 | 
88 |
89 | 
90 |
--------------------------------------------------------------------------------
/en/app-manual/accounting/double-entry.md:
--------------------------------------------------------------------------------
1 | Double-Entry
2 | ============
3 |
4 | Akaunting ships with a single-entry accounting feature set as it's easier to understand for most users. However, some businesses use double-entry accounting to keep their books.
5 |
6 | Double-Entry accounting is a practice that helps minimize errors and increases the chance that your books balance. If you're an accountant, thanks to the multi-company feature of Akaunting, you can manage the financials of unlimited companies using this app.
7 |
8 | Double-Entry app contains the following features:
9 |
10 | - Chart of Accounts
11 | - Manual Journal
12 | - General Ledger
13 | - Balance Sheet
14 | - Trial Balance
15 | - Opening/Starting Balance
16 |
17 | ## Dashboard
18 |
19 | The dashboard is the landing page of the Akaunting, you can reach the Double-entry Dashboard below the Dashboard in the left side menu. The Double-Entry Dashboard gives you insight into the business activities of your company based on the COA. You can adjust the Double-Entry dashboard according to your needs. The dashboard shows you active fiscal year data of your company's financial activities by default; if you need, you can change the date range.
20 |
21 | Following data display on the dashboard by default.
22 | Widgets: Total Income by COA, Total Expense by COA, Total Profil by COA
23 | Line Chart: Cash Flow
24 | Pie Chart: Income by COA, Expense by COA
25 | List: Account Balance, Latest Income By COA, Latest Expenses By COA
26 |
27 | ## Chart of Accounts
28 |
29 | Double-Entry presents you a Chart of Accounts list that shows account types and its' details. You can see account types, what items they contain, types, and ability situations on this page and edit them. Chart of Account list page displays account code, account name, account, balance, and status. You can easily adjust the Chart of Account according to your needs.
30 |
31 | You can add a new account, import your account list, or export yours in Akaunting from the button on the top right. To add a new account, just click the "Add New" button on the top right. If necessary, you can delete the default COA list and create or import your own COA list. Note that deleting and disabling are not possible if an account has associated with a transaction. You can view each account balance on this page. Additionally, each account's activities are listed by clicking related account. You can manage your transactions default account type on the Settings page.
32 |
33 | In Double-Entry, all classes are collected under these 5 account types.
34 |
35 | - Assets
36 | - Liabilities
37 | - Expenses
38 | - Income
39 | - Equity
40 |
41 | ### Creating a New Account
42 |
43 | You can add a new account easily on the Chart of Accounts page. To do this, click on Add New button on the top right and fill in the required fields. After entering the account name, account type, code, and description (optional), you can save it by selecting whether it is enabled or disabled. If necessary, you can add a sub-account by entering the parent account.
44 |
45 | 
46 |
47 | ### Import and Export
48 |
49 | You can export your COA list with one click at the right top of the COA page. To import your COA, you can find the import template on the import page, and then you can fill this excel table according to your request. You need to fill in the all required fields to complete the import. An account code can be added only for one account, if there is a duplicate account code on the import table, import is not completed. You can not add a new account type by importing a new COA list, you must use the previously added one. You can find the list of account Types below.
50 | If you want to import the Revenues/Payments with a chart of accounts, you have to fill a column named chart_of_account that contains the code/name/id of an account.
51 |
52 | Assets
53 |
54 | - Bank & Cash
55 | - Current Asset
56 | - Depreciation
57 | - Fixed Asset
58 | - Inventory
59 | - Non-current Asset
60 | - Prepayment
61 |
62 | Liabilities
63 |
64 | - Current Liability
65 | - Liability
66 | - Non-current Liability
67 | - Tax
68 |
69 | Expenses
70 |
71 | - Direct Costs
72 | - Expense
73 |
74 | Income
75 |
76 | - Other Income
77 | - Revenue
78 | - Sales
79 |
80 | Equity
81 |
82 | - Equity
83 |
84 | ## Manual Journals
85 |
86 | A manual journal is used to record any monetary movement of a business. Manual Journal is used to divided debit or credit into more than one account. Your transactions such as Sales, Purchase, Banking, etc are listed on the Double Entry reports. However, if you still need to create an additional entry, you can create a Manual Journal. If you create a manual journal for a transaction be aware that it may be duplicated data in reports.
87 |
88 | There are some important steps when creating a manual journal:
89 |
90 | - The date of the entry should be entered
91 | - A description should be entered
92 | - Every manual journal entry should be balanced. It means that the debits and credits have to total to the same amount. Otherwise, it cannot be saved until the credits and debits are matched.
93 |
94 | 
95 |
96 | ## Reports
97 |
98 | All reports of Double-Entry are available under the Reports pages, accessible from the left menu of Akaunting.
99 |
100 | ### General Ledger
101 |
102 | A general ledger shows all movements of the chart of accounts that gives you insight into your company's financial health. All transactions details are listed on the General Ledger Report that includes your company's financial data used to create the firm's financial statements. It can be printed, exported, shared easily with one click on the General Ledger page. You can filter the General Ledger report by date, basis (cash accrual), contact, and COA.
103 |
104 | 
105 |
106 | ### Balance Sheet
107 |
108 | Balance Sheet shows the currents assets, receivables, debts, and capital of a business. Balance Sheet report can be found under the Reports from the menu. It can be printed, exported, shared easily with one click on the Balance Sheet page. You can filter the General Ledger report by date, basis (cash accrual).
109 |
110 | 
111 |
112 | ### Trial Balance
113 |
114 | Trial Balance is a bookkeeping worksheet that shows whether debits and credits are equal or not. It can be printed, exported, shared easily with one click on the Trial Balance. You can filter the Trial Balance report by date, basis (cash accrual), and COA.
115 |
116 | 
117 |
118 | ### Journals Entries
119 |
120 | Journals Entries report shows all transactions that show a company's debit and credit balances. It can be printed, exported, shared easily with one click on the Journals Report page. You can filter the General Ledger report by date, basis (cash accrual), contact, and COA.
121 |
122 | 
123 |
124 | ## Settings
125 |
126 | ### Default Chart of Accounts
127 |
128 | You can manage your transactions default account type on the Settings page. Default Chart of Accounts makes it easier to keep your Double Entry ledgers.
129 |
130 | - Invoice: Accounts Receivable records as Sales, if there is no account type on the related item.
131 | - Bill: Accounts Payable records as General Expense, if there is no account type on the related item.
132 | - Revenue records as Sales.
133 | - Payment record as General Expense.
134 | - If an invoice includes a discount, the discount amount records Sales Discount.
135 | - If a bill includes a discount, the discount amount records Purchase Discount.
136 |
137 | ### Default Types
138 |
139 | You can change default Bank & Cash and Tax types on the Settings page.
140 |
141 | ## FAQ
142 |
143 | ### How to enter the Opening/Starting Balance?
144 |
145 | An opening balance is the amount of funds in an account at the beginning of a new fiscal period.
146 |
147 | To set the opening balance, create a new entry from **Double-Entry > Journal Entry** page. Select the account for which you're setting the opening balance as first and the **Owner Contribution/Equity** (or an appropriate Equity) account as the second. Then:
148 |
149 | 1. If the opening balance account (first) is an **asset** (i.e. accounts receivable, bank, credit card), enter the amount as a **debit**.
150 | 2. If the opening balance account (first) is a **liability** (i.e. accounts payable), enter the amount as a **credit**.
151 |
152 | 
153 |
154 | ### How to customize the types or classes of the chart of accounts?
155 |
156 | You can easily customize your Chart of Account list by adding new accounts or deleting accounts. If you have already using a Chart of Account, you can import it.
157 |
158 | ### What are the differences between Bookkeeping (Single-Entry) and Double-Entry?
159 |
160 | The main difference is the number of the entires. Single entry has one cash-based entry for a transaction, in contrast, double-entry has 2 ledgers for a transaction as debit and credit.
161 |
162 | ### Why should I use the Double-Entry app?
163 |
164 | Single entry is a quite simple accounting method for small businesses, that helps you to keep track of your company's income and expense statements. However, Double-Entry allows you to get detailed insight into your company's financial health. Double-entry accounting helps you to minimize errors and increases the chance that your books balance. You need to Double-Entry to generate Balance Sheet, General Ledger, Trial Balance reports. Additionally, Double Entry tracks your company's asset, equity, and liability balance.
165 |
166 | ## Terminology
167 |
168 | ### Assets
169 |
170 | Assets are valuable things that belong to your business. Assets can contain things like office equipment, properties, or Accounts Receivable that your customer owes to your business for the service or product you provide and etc.
171 |
172 | ### Liabilities
173 |
174 | Liabilities show your business's debts to other parties. It contains things like employee benefits payable, bank payments, tax payments and etc.
175 |
176 | ### Expenses
177 |
178 | Expenses for goods and services used by your business are found in this section. You can find general expenses, legal expenses, rent expenses and etc. in this section, which is very useful for tracking operation costs, or you can tailor it to your needs as in other categories.
179 |
180 | ### Income
181 |
182 | The revenue that your business earns is shown here. It includes items such as revenues from sales and investments etc.
183 |
184 | ### Equity
185 |
186 | Equity shows the net worth of your business by representing the difference between your assets and liabilities. It contains things like owner contribution or owners draw etc.
187 |
--------------------------------------------------------------------------------
/en/app-manual/accounting/live-currency.md:
--------------------------------------------------------------------------------
1 | Live Currency
2 | =============
3 |
4 | This app allows you to retrieve live currency exchange rates from various services such as Fixer, Open Exchange Rates, Google and a lot more and save them into Akaunting, automatically. Don't waste your time updating currencies manually, [Live Currency](https://akaunting.com/apps/livecurrency) will sync the rates for you.
5 |
6 | You can set the service you want to use with Live Currency on Settings > Live Currency page.
7 |
8 | 
9 |
10 | Once you've set that up, it will automatically sync currencies based on the service that you're using, once a day. However, when you need to sync currencies instantly, you can always do it by using Sync button on Settings > Currencies page.
11 |
12 | 
13 |
--------------------------------------------------------------------------------
/en/app-manual/ecommerce/_images/opencart-settings-1.png:
--------------------------------------------------------------------------------
https://raw.githubusercontent.com/akaunting/docs/205f53a3ef9d69a59057321d33e1a859fd293a69/en/app-manual/ecommerce/_images/opencart-settings-1.png
--------------------------------------------------------------------------------
/en/app-manual/ecommerce/_images/opencart-settings-2.png:
--------------------------------------------------------------------------------
https://raw.githubusercontent.com/akaunting/docs/205f53a3ef9d69a59057321d33e1a859fd293a69/en/app-manual/ecommerce/_images/opencart-settings-2.png
--------------------------------------------------------------------------------
/en/app-manual/ecommerce/_images/opencart-settings-3.png:
--------------------------------------------------------------------------------
https://raw.githubusercontent.com/akaunting/docs/205f53a3ef9d69a59057321d33e1a859fd293a69/en/app-manual/ecommerce/_images/opencart-settings-3.png
--------------------------------------------------------------------------------
/en/app-manual/ecommerce/_images/woocommerce-settings-1.png:
--------------------------------------------------------------------------------
https://raw.githubusercontent.com/akaunting/docs/205f53a3ef9d69a59057321d33e1a859fd293a69/en/app-manual/ecommerce/_images/woocommerce-settings-1.png
--------------------------------------------------------------------------------
/en/app-manual/ecommerce/_images/woocommerce-settings-2.png:
--------------------------------------------------------------------------------
https://raw.githubusercontent.com/akaunting/docs/205f53a3ef9d69a59057321d33e1a859fd293a69/en/app-manual/ecommerce/_images/woocommerce-settings-2.png
--------------------------------------------------------------------------------
/en/app-manual/ecommerce/_images/woocommerce-settings-3.png:
--------------------------------------------------------------------------------
https://raw.githubusercontent.com/akaunting/docs/205f53a3ef9d69a59057321d33e1a859fd293a69/en/app-manual/ecommerce/_images/woocommerce-settings-3.png
--------------------------------------------------------------------------------
/en/app-manual/ecommerce/_images/woocommerce-settings-4.png:
--------------------------------------------------------------------------------
https://raw.githubusercontent.com/akaunting/docs/205f53a3ef9d69a59057321d33e1a859fd293a69/en/app-manual/ecommerce/_images/woocommerce-settings-4.png
--------------------------------------------------------------------------------
/en/app-manual/ecommerce/opencart.md:
--------------------------------------------------------------------------------
1 | OpenCart
2 | ========
3 |
4 | This app will sync your current and future OpenCart data (categories, products (items), customers, tax rates, orders) with Akaunting.
5 |
6 | Keep in mind that both OpenCart [extension](https://www.opencart.com/index.php?route=marketplace/extension/info&extension_id=32533) and Akaunting [app](https://akaunting.com/apps/opencart) are required in order to have the 2 system talk to each other.
7 |
8 | ### 1) OpenCart Extension Installation
9 |
10 | First of all, after downloding the extension, install it by uploading from *Extensions > Installer* page of your OpenCart. You can also unzip and upload via FTP.
11 |
12 | 
13 |
14 | ### 2) OpenCart Extension Settings
15 |
16 | After installation, go to *Extensions > Extensions* page and filter Modules. In the Akaunting edit page you'll find the API Key to be copy-pasted.
17 |
18 | 
19 |
20 | ### 3) Akaunting App Settings
21 |
22 | Akaunting app will get and send data automatically between Akaunting and OpenCart. In order to get the current data after first installation, you can click on the *Sync Current Data* button. It's not required for future data.
23 |
24 | **OpenCart URL**: The full path of your OpenCart installation without "admin" part. For example: https://my-opencart-domain.com
25 |
26 | **API Key**: Generated in the previous step
27 |
28 | **Order Status IDs**: The status ids that OpenCart order should have in order to get transferred to Akaunting.
29 |
30 | **Invoices Category**: The category that invoices will be assigned to.
31 |
32 | **Payments Account**: The bank account that payments will be attached to.
33 |
34 | **2-way Create/Update**: Select whether to sync the *create* and *update* actions between Akaunting and OpenCart for categories, products (items), tax rates, and orders. In other words, when a product is created/updated in OpenCart, it will also be created/updated in Akaunting, automatically. Same for vice-versa.
35 |
36 | **2-way Delete**: Select whether to sync the *delete* action between Akaunting and OpenCart for categories, products (items), tax rates, and orders. In other words, when a product is deleted in OpenCart, it will also be deleted in Akaunting, automatically. Same for vice-versa.
37 |
38 | 
39 |
--------------------------------------------------------------------------------
/en/app-manual/ecommerce/woocommerce.md:
--------------------------------------------------------------------------------
1 | WooCommerce
2 | ===========
3 |
4 | This app will sync your current and future WooCommerce data (categories, products (items), customers, tax rates, orders) with Akaunting.
5 |
6 | Keep in mind that both WordPress [plugin](https://wordpress.org/plugins/akaunting-for-woocommerce) and Akaunting [app](https://akaunting.com/apps/woocommerce) are required in order to have the 2 system talk to each other.
7 |
8 | ### 1) WordPress Plugin Settings
9 |
10 | **Akaunting URL**: The full path of your Akaunting installation. If you're using our cloud service, then it's https://app.akaunting.com
11 |
12 | 
13 |
14 | ### 2) WooCommerce REST API Keys
15 |
16 | After entering the Akaunting URL, you should get the WooCommerce API keys. Make sure you set the **Permissions** as Read/Write. [Here](https://woocommerce.github.io/woocommerce-rest-api-docs/?php#rest-api-keys) you can find more information.
17 |
18 | 
19 |
20 | 
21 |
22 | ### 3) Akaunting App Settings
23 |
24 | Akaunting app will get and send data automatically between Akaunting and WooCommerce. In order to get the current data after first installation, you can click on the *Sync Current Data* button. It's not required for future data.
25 |
26 | **WordPress URL**: The full path of your WordPress installation without "wp-admin" or "wp-login" parts. For example: https://my-wordpress-domain.com
27 |
28 | **WooCommerce Consumer Key**: Generated in the previous step
29 |
30 | **WooCommerce Consumer Secret**: Generated in the previous step
31 |
32 | **Order Status IDs**: The status ids that WooCommerce order should have in order to get transferred to Akaunting.
33 |
34 | **Invoices Category**: The category that invoices will be assigned to.
35 |
36 | **Payments Account**: The bank account that payments will be attached to.
37 |
38 | **2-way Create/Update**: Select whether to sync the *create* and *update* actions between Akaunting and WooCommerce for categories, products (items), tax rates, and orders. In other words, when a product is created/updated in WooCommerce, it will also be created/updated in Akaunting, automatically. Same for vice-versa.
39 |
40 | **2-way Delete**: Select whether to sync the *delete* action between Akaunting and WooCommerce for categories, products (items), tax rates, and orders. In other words, when a product is deleted in WooCommerce, it will also be deleted in Akaunting, automatically. Same for vice-versa.
41 |
42 | 
43 |
44 | ### Common Issues
45 |
46 | Here there are some solutions based on the common issues faced by other users.
47 |
48 | #### 401 Unauthorized
49 |
50 | Your API keys or signature is wrong. It may also be caused by your server settings. Check out [this tutorial](https://github.com/woocommerce/woocommerce/wiki/Getting-started-with-the-REST-API#401-unauthorized) for a solution.
51 |
--------------------------------------------------------------------------------
/en/app-manual/hr/_images/admin-page-expense-claim.gif:
--------------------------------------------------------------------------------
https://raw.githubusercontent.com/akaunting/docs/205f53a3ef9d69a59057321d33e1a859fd293a69/en/app-manual/hr/_images/admin-page-expense-claim.gif
--------------------------------------------------------------------------------
/en/app-manual/hr/_images/employee-page-expense-claim.gif:
--------------------------------------------------------------------------------
https://raw.githubusercontent.com/akaunting/docs/205f53a3ef9d69a59057321d33e1a859fd293a69/en/app-manual/hr/_images/employee-page-expense-claim.gif
--------------------------------------------------------------------------------
/en/app-manual/hr/expenses.md:
--------------------------------------------------------------------------------
1 | Expenses
2 | ============
3 |
4 |
5 | Expenses app allows you to track completed employee’s expenses both paid by the company or employee.
6 |
7 | Reimbursement is compensation paid by companies to employees for payments made by your employees on behalf of your company. While recording an expense claim, you can pay back reimbursable expenses to your employees such as transportation, travel, food, etc.
8 |
9 | The Expense is located under the HR menu, Employee App is also automatically installed when you install Expenses App. To create an expense for an employee first, you should add a new employee.
10 |
11 | The widgets located on the expense page show you all expenses status such as approved, paid, and pending on pie charts. Moreover, the Expense App is fully integrated with Akaunting reports, and you can track employee expenses on the expense reports. You can track the distribution of expenses by adding new expense categories such as transportation, travel, food, etc.
12 |
13 | Add New button is located on the top right on the expense page. In order to a new expense claim, you must fill the required fields listed below.
14 |
15 | ## Features
16 |
17 | - Vendor
18 | - Expense Claim Date
19 | - Expense Claim Number
20 | - Due Date
21 | - Paid By Employee (to reimburse)
22 | - Employee
23 | - Item
24 | - Category
25 |
26 | Moreover, you can add an approver and attach a receipt of the expense.
27 |
28 | 
29 |
30 | The admin can create an employee portal, thus employees can view their expense claims and create a new claim for reimbursements. To create an employee portal, the admin should select the ‘Can Login’ while adding a new employee or you can edit created employee. Thanks to the employee portal employees can create their own expense for reimbursement then, the expense shows on the admin portal, the admin can approve or refuse to pay it back to the employee. Employees can create a new item and vendor while adding a new expense claim.
31 |
32 | 
33 |
34 | On the settings page, you can adjust expense billing details.
35 |
--------------------------------------------------------------------------------
/en/app-manual/import-export/_images/expensify-integration-credentials.png:
--------------------------------------------------------------------------------
https://raw.githubusercontent.com/akaunting/docs/205f53a3ef9d69a59057321d33e1a859fd293a69/en/app-manual/import-export/_images/expensify-integration-credentials.png
--------------------------------------------------------------------------------
/en/app-manual/import-export/_images/expensify-setting-page.png:
--------------------------------------------------------------------------------
https://raw.githubusercontent.com/akaunting/docs/205f53a3ef9d69a59057321d33e1a859fd293a69/en/app-manual/import-export/_images/expensify-setting-page.png
--------------------------------------------------------------------------------
/en/app-manual/import-export/_images/freshbooks-start.png:
--------------------------------------------------------------------------------
https://raw.githubusercontent.com/akaunting/docs/205f53a3ef9d69a59057321d33e1a859fd293a69/en/app-manual/import-export/_images/freshbooks-start.png
--------------------------------------------------------------------------------
/en/app-manual/import-export/_images/freshbooks-sync-menu.png:
--------------------------------------------------------------------------------
https://raw.githubusercontent.com/akaunting/docs/205f53a3ef9d69a59057321d33e1a859fd293a69/en/app-manual/import-export/_images/freshbooks-sync-menu.png
--------------------------------------------------------------------------------
/en/app-manual/import-export/_images/ofx-create-bank.png:
--------------------------------------------------------------------------------
https://raw.githubusercontent.com/akaunting/docs/205f53a3ef9d69a59057321d33e1a859fd293a69/en/app-manual/import-export/_images/ofx-create-bank.png
--------------------------------------------------------------------------------
/en/app-manual/import-export/_images/ofx-demo.png:
--------------------------------------------------------------------------------
https://raw.githubusercontent.com/akaunting/docs/205f53a3ef9d69a59057321d33e1a859fd293a69/en/app-manual/import-export/_images/ofx-demo.png
--------------------------------------------------------------------------------
/en/app-manual/import-export/_images/ofx-import.png:
--------------------------------------------------------------------------------
https://raw.githubusercontent.com/akaunting/docs/205f53a3ef9d69a59057321d33e1a859fd293a69/en/app-manual/import-export/_images/ofx-import.png
--------------------------------------------------------------------------------
/en/app-manual/import-export/_images/quickbooks-akaunting-connect.png:
--------------------------------------------------------------------------------
https://raw.githubusercontent.com/akaunting/docs/205f53a3ef9d69a59057321d33e1a859fd293a69/en/app-manual/import-export/_images/quickbooks-akaunting-connect.png
--------------------------------------------------------------------------------
/en/app-manual/import-export/_images/quickbooks-start.png:
--------------------------------------------------------------------------------
https://raw.githubusercontent.com/akaunting/docs/205f53a3ef9d69a59057321d33e1a859fd293a69/en/app-manual/import-export/_images/quickbooks-start.png
--------------------------------------------------------------------------------
/en/app-manual/import-export/_images/quickbooks-sync-menu.png:
--------------------------------------------------------------------------------
https://raw.githubusercontent.com/akaunting/docs/205f53a3ef9d69a59057321d33e1a859fd293a69/en/app-manual/import-export/_images/quickbooks-sync-menu.png
--------------------------------------------------------------------------------
/en/app-manual/import-export/_images/xero-start.png:
--------------------------------------------------------------------------------
https://raw.githubusercontent.com/akaunting/docs/205f53a3ef9d69a59057321d33e1a859fd293a69/en/app-manual/import-export/_images/xero-start.png
--------------------------------------------------------------------------------
/en/app-manual/import-export/_images/xero-sync-menu.png:
--------------------------------------------------------------------------------
https://raw.githubusercontent.com/akaunting/docs/205f53a3ef9d69a59057321d33e1a859fd293a69/en/app-manual/import-export/_images/xero-sync-menu.png
--------------------------------------------------------------------------------
/en/app-manual/import-export/_images/zohobooks-start.png:
--------------------------------------------------------------------------------
https://raw.githubusercontent.com/akaunting/docs/205f53a3ef9d69a59057321d33e1a859fd293a69/en/app-manual/import-export/_images/zohobooks-start.png
--------------------------------------------------------------------------------
/en/app-manual/import-export/_images/zohobooks-sync-menu.png:
--------------------------------------------------------------------------------
https://raw.githubusercontent.com/akaunting/docs/205f53a3ef9d69a59057321d33e1a859fd293a69/en/app-manual/import-export/_images/zohobooks-sync-menu.png
--------------------------------------------------------------------------------
/en/app-manual/import-export/expensify.md:
--------------------------------------------------------------------------------
1 | Expensify
2 | ==========
3 |
4 | **What's Expensify?**
5 |
6 | Expensify is a software company that develops an expense management system for personal and business use.
7 |
8 | **How do I integrate Expensify into Akaunting?**
9 |
10 | **Step1:** You can access the API credentials by going to this [Link](https://www.expensify.com/tools/integrations/). A pair of credentials: `partnerUserID` and `partnerUserSecret` will be generated and shown on the page.
11 |
12 | 
13 |
14 | **Step2:** Go back to Akaunting and Save API credentials from Expensify app's settings then you can sync your current expenses.
15 |
16 | 
17 |
--------------------------------------------------------------------------------
/en/app-manual/import-export/freshbooks.md:
--------------------------------------------------------------------------------
1 | Freshbooks
2 | ==========
3 |
4 | **What's Freshbooks?**
5 |
6 | Freshbooks is a cloud-based small business accounting software. You can send invoices, track time, manage receipts and expenses.
7 |
8 | **How to use?**
9 |
10 | **Step1:** Find [Here](https://akaunting.com/apps/freshbooks) "**Freshbooks**" on Akaunting App Store and click _Install_.
11 |
12 | **Step2:** Click Settings then "Freshbooks" in the right menu.
13 |
14 | 
15 |
16 | **Step3:** Connect to your Freshbooks account.
17 |
18 | **Step4:** After connect to your Freshbooks account you can select from menu items which data you like to copy from your Freshbooks into Akaunting app.
19 |
20 | 
21 |
--------------------------------------------------------------------------------
/en/app-manual/import-export/ofx.md:
--------------------------------------------------------------------------------
1 | OFX Import
2 | ==========
3 |
4 | **What's OFX File?**
5 |
6 | An OFX (Open Financial Exchange) file is a text file containing financial data.
7 |
8 | **How to use?**
9 |
10 | **Step1:** Buy [Here](https://akaunting.com/apps/ofx) "OFX Import" on Akaunting app store.
11 |
12 | **Step2:** Click Settings -> "OFX Import" in the left menu.
13 |
14 | 
15 |
16 | **Step3:** The file OFX to be transferred is selected and the press transfer button.
17 |
18 | **Step4:** If the bank name and bank id are present in ofx file:
19 | - The currency is checked. The currency is automatically added if it is not attached as a currency.
20 | - If this information is not available, the user is asked to fill in the missing information.
21 |
22 | 
23 |
24 | **Step5:** Transfer successful message is given and transfer is provided.
25 |
26 | **Testing:** Your revenue and payment will be transferred when the transfer is successful.
27 |
28 | 
29 |
--------------------------------------------------------------------------------
/en/app-manual/import-export/quickbooks.md:
--------------------------------------------------------------------------------
1 | QuickBooks
2 | ==========
3 |
4 | **What's QuickBooks?**
5 |
6 | QuickBooks is an accounting software package developed and marketed by Intuit. QuickBooks products are geared mainly
7 | toward small and medium-sized businesses and offer on-premises accounting applications as well as cloud-based
8 | versions that accept business payments, manage and pay bills, and payroll functions.
9 |
10 | **How to use?**
11 |
12 | **Step1:** Find [Here](https://akaunting.com/apps/quickbooks) "**QuickBooks**" on Akaunting App Store and click _Install_.
13 |
14 | **Step2:** Click Settings then "QuickBooks" in the right menu.
15 |
16 | 
17 |
18 | **Step3:** Connect to your Qucikbooks account.
19 |
20 | 
21 |
22 | **Step4:** After connect to your QuickBooks account you can select from menu items which data you like to copy from your QuickBooks into Akaunting app.
23 |
24 | 
25 |
--------------------------------------------------------------------------------
/en/app-manual/import-export/xero.md:
--------------------------------------------------------------------------------
1 | Xero
2 | ==========
3 |
4 | **What's Xero?**
5 |
6 | Xero online accounting software for your business connects you to your bank, accountant, bookkeeper, and other business apps.
7 |
8 | **How to use?**
9 |
10 | **Step1:** Find [Here](https://akaunting.com/apps/xero) "**Xero**" on Akaunting App Store and click _Install_.
11 |
12 | **Step2:** Click Settings then click on "Xero" in the right menu.
13 |
14 | 
15 |
16 | **Step3:** Connect to your Xero account.
17 |
18 | **Step4:** After connect to your Xero account you can select from menu items which data you like to copy from your Xero into Akaunting app.
19 |
20 | 
21 |
--------------------------------------------------------------------------------
/en/app-manual/import-export/zohobooks.md:
--------------------------------------------------------------------------------
1 | ZohoBooks
2 | ==========
3 |
4 | **What's ZohoBooks?**
5 |
6 | Zoho Books is online accounting software that manages your finances, automates business workflows, and helps you work collectively across departments.
7 |
8 | **How to use?**
9 |
10 | **Step1:** Find [Here](https://akaunting.com/apps/zohobooks) "**ZohoBooks**" on Akaunting App Store and click _Install_.
11 |
12 | **Step2:** Click Settings then "ZohoBooks" in the right menu.
13 |
14 | 
15 |
16 | **Step3:** Connect to your ZohoBooks account.
17 |
18 | **Step4:** After connect to your ZohoBooks account you can select from menu items which data you like to copy from your ZohoBooks into Akaunting app.
19 |
20 | 
21 |
--------------------------------------------------------------------------------
/en/app-manual/inventory/_images/inventory-groups.gif:
--------------------------------------------------------------------------------
https://raw.githubusercontent.com/akaunting/docs/205f53a3ef9d69a59057321d33e1a859fd293a69/en/app-manual/inventory/_images/inventory-groups.gif
--------------------------------------------------------------------------------
/en/app-manual/inventory/_images/inventory-items.jpg:
--------------------------------------------------------------------------------
https://raw.githubusercontent.com/akaunting/docs/205f53a3ef9d69a59057321d33e1a859fd293a69/en/app-manual/inventory/_images/inventory-items.jpg
--------------------------------------------------------------------------------
/en/app-manual/inventory/_images/inventory-options.gif:
--------------------------------------------------------------------------------
https://raw.githubusercontent.com/akaunting/docs/205f53a3ef9d69a59057321d33e1a859fd293a69/en/app-manual/inventory/_images/inventory-options.gif
--------------------------------------------------------------------------------
/en/app-manual/inventory/_images/inventory-warehouses.gif:
--------------------------------------------------------------------------------
https://raw.githubusercontent.com/akaunting/docs/205f53a3ef9d69a59057321d33e1a859fd293a69/en/app-manual/inventory/_images/inventory-warehouses.gif
--------------------------------------------------------------------------------
/en/app-manual/inventory/inventory.md:
--------------------------------------------------------------------------------
1 | Inventory
2 | ============
3 |
4 | Almost all product-based businesses need reliable and simple inventory management software. Introducing an easy way for companies and small businesses to keep track of their inventory.
5 |
6 | Inventory app allows you to do advanced inventory management to track your company's stock easily. You can take control of your inventory with features such as items, item groups, transfer orders, and adjustments. It also has many other dynamic features and tools to help with inventory control and management.
7 |
8 | Inventory app is one of the most needed applications for managing all products, from raw materials to finished products and running warehouse processes. With this app, you can easily monitor the stock status, run your supply chains smoothly, and thus significantly reduce the risks such as excess stock or shortage.
9 |
10 | Additionally, get a complete overview of your warehouses through the reports and history.
11 |
12 | ### Dashboard
13 |
14 | The dashboard gives insight into your stocks, sales, and purchases of inventory-tracked items.
15 |
16 | Dashboard
17 | 
18 |
19 |
20 | ### Items
21 |
22 | Items are products and services, which are listed within business transactions.
23 |
24 | In this section, you can add a single item that is non-inventory or inventory tracked. You can add an item’s picture, it will help to remind what the product is. Also, adding a category makes it easier to analyze your reports. While creating a transaction, related fields fill default. As you wish, you can edit related fields such as price or tax, you can edit them manually.
25 |
26 | If you have myriad items, don’t panic. You can import your ready-to-use lists or export your items lists, instantly.
27 |
28 | The following fields are displayed:
29 |
30 | Picture: Item's picture.
31 |
32 | Name: The name of product/service.
33 |
34 | Category: Category of item, if applicable.
35 |
36 | Sale Price: This price will be populated in invoices.
37 |
38 | Purchase Price: This price will be populated in bills.
39 |
40 | Enabled: Disabled items won't be listed when creating invoices/bills.
41 |
42 | Actions: You can use this button to edit, duplicate, and delete the item.
43 |
44 | Unit: A standard measure of a quantity.
45 |
46 | If you click the **Track Inventory** checkbox while creating an item, the stock management feature will be activated for the item, then you can fill in the stock/warehouses detail. Returnable Item select box right under the Track Inventory option.
47 |
48 | **Opening Stock** identifies the number of stock when the item is created. If you change the opening stock, the total current stock will be calculated according to the recorded transactions.
49 |
50 | **Reorder Level** provides you to track which items are near to out of stock. You will notify if the item stock drops below the specified amount.
51 |
52 | Add New Item
53 | 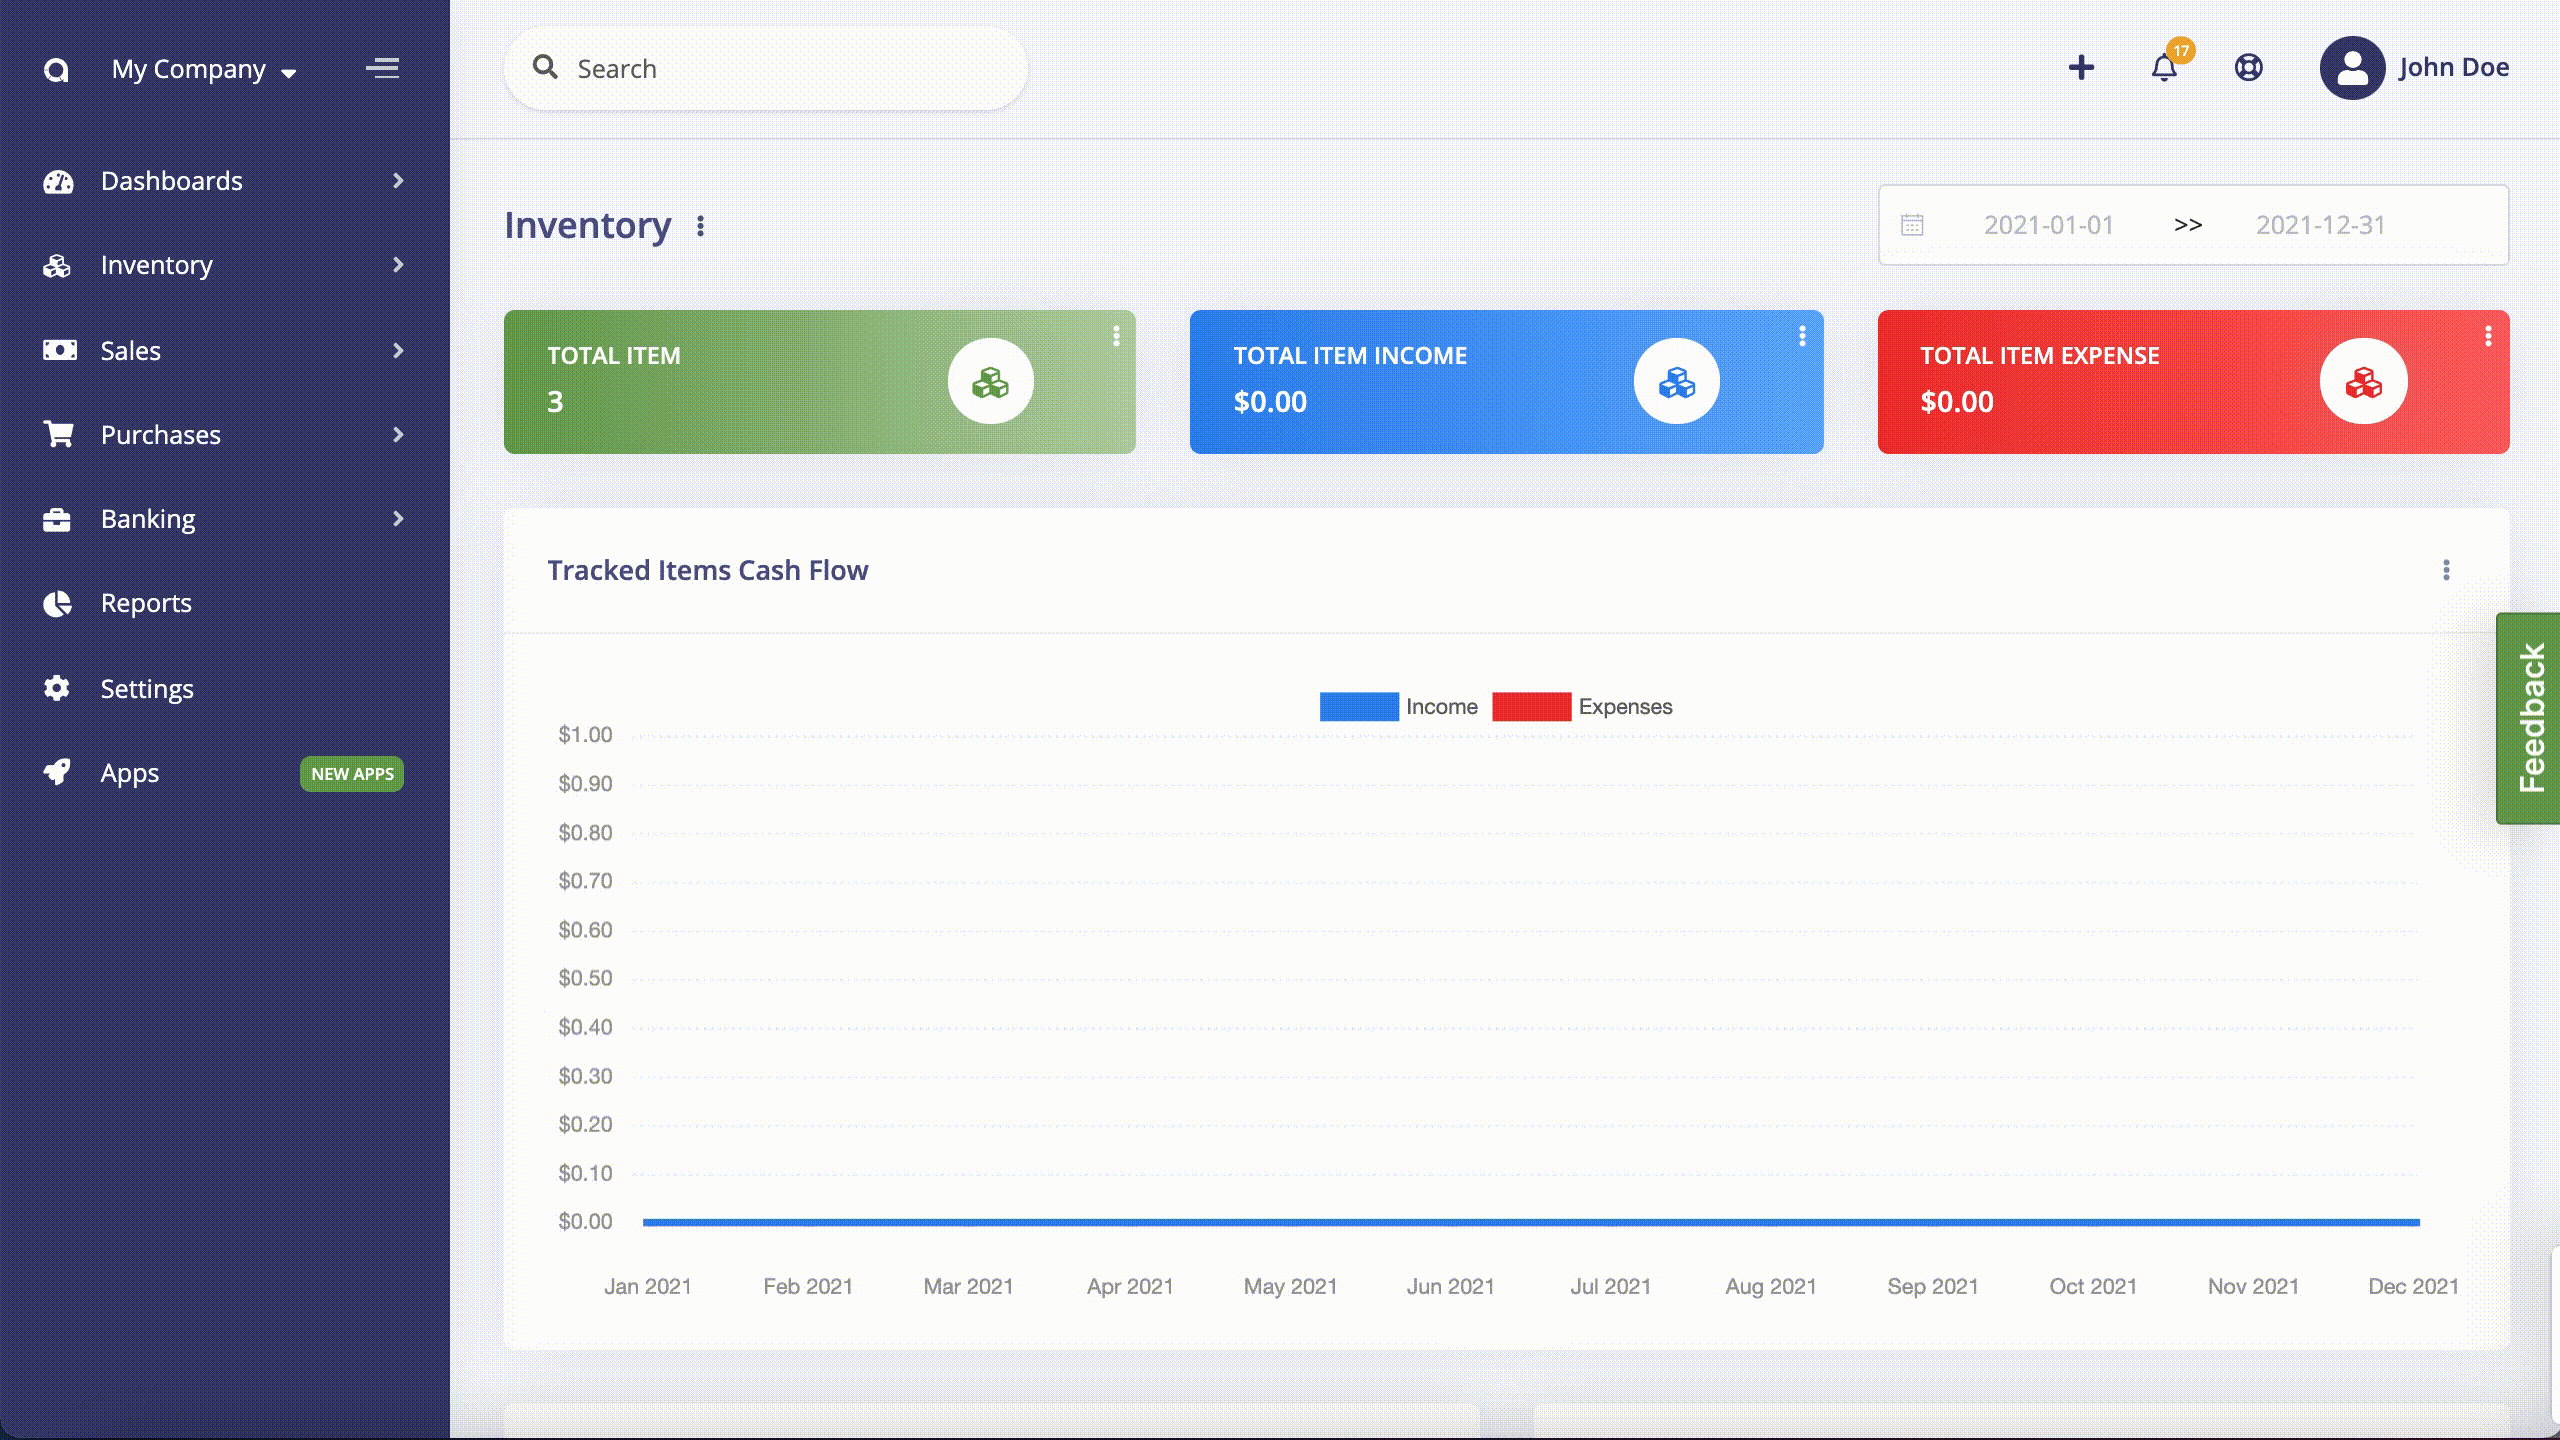
54 |
55 | Thanks to Item Show page, you can get the complete overview of your company's item which includes item information, stocks, income, expense summaries.
56 |
57 | Item Show Page
58 | 
59 |
60 | ### Groups
61 |
62 | In the Groups section, you can manage your items that can be considered under the same group. You can select variants, add new items and manage their details from groups.
63 |
64 | For example, if you have a fashion business, you may have groups like T-shirts, Jeans, Jackets, and so on. You can group them under this section and add variants such as like size, color and etc. To be able to add a variant, you need to add a variant first under the variants section. Also with the reorder field, you’ll be notified when your stock is under the specified amount. To add an item group, firstly you need to add variants.
65 |
66 | Add New Group
67 | 
68 |
69 | ### Variants
70 |
71 | In the Variants section, you can add and manage variants that describe your items better. You can create a group of items that have the same variants such as color, size, etc.
72 |
73 | Add New Variant
74 | 
75 |
76 | ### Transfer Orders
77 |
78 | Transfer Order allows you to keep track of item movement from one warehouse to another.
79 |
80 | To create a Transfer Order your company need to have at least two warehouses.
81 |
82 | When you create a Transfer Order, its status will be draft then you should have to update the status by following steps Ready to Transfer > In Transfer > In Transfer. When you mark the status as Transferred, the stock will be updated in both 2 warehouses.
83 |
84 | New Transfer Order
85 | 
86 |
87 | ### Adjustments
88 |
89 | Inventory adjustment provides you to record missing items. Because of some reasons such as damaged items and stolen items etc., your company's real stocks and recorded stocks may not be equal.
90 |
91 | New Adjustment
92 | 
93 |
94 | ### Warehouses
95 |
96 | The inventory app provides you warehouse management feature, as well. In this section, you can add and manage multi warehouses through detailed reports and dashboards. You can also track stock control of all your items by warehouses. Warehouse Overview and History give you insight into warehouse operations.
97 |
98 | Add New Warehouse
99 | 
100 |
101 | Warehouse Show Page
102 | 
103 |
104 | ### Histories
105 |
106 | In the Histories section, you can see your item history, which warehouse they are coming from, and their quantity. All transactions are displayed on this page, which tracks the inventory such as Bills, Invoices, Created Items, Adjustment, and Transfer Order.
107 |
108 | ### Settings
109 |
110 | You can adjust the default warehouse and unit. If the Negative Stock option is disabled, you can not create a transaction if there is not enough stock.
111 |
112 | If Reorder Level Notification is enabled, you will notify by email and notification when the stock drops under the specified amount.
113 |
114 | You can customize transfer orders and adjustment numbers.
115 |
116 | ###
117 |
--------------------------------------------------------------------------------
/en/app-manual/operation/_images/custom-fields-1.png:
--------------------------------------------------------------------------------
https://raw.githubusercontent.com/akaunting/docs/205f53a3ef9d69a59057321d33e1a859fd293a69/en/app-manual/operation/_images/custom-fields-1.png
--------------------------------------------------------------------------------
/en/app-manual/operation/_images/twofactor_auth.png:
--------------------------------------------------------------------------------
https://raw.githubusercontent.com/akaunting/docs/205f53a3ef9d69a59057321d33e1a859fd293a69/en/app-manual/operation/_images/twofactor_auth.png
--------------------------------------------------------------------------------
/en/app-manual/operation/_images/twofactor_enable.png:
--------------------------------------------------------------------------------
https://raw.githubusercontent.com/akaunting/docs/205f53a3ef9d69a59057321d33e1a859fd293a69/en/app-manual/operation/_images/twofactor_enable.png
--------------------------------------------------------------------------------
/en/app-manual/operation/_images/twofactor_scan.png:
--------------------------------------------------------------------------------
https://raw.githubusercontent.com/akaunting/docs/205f53a3ef9d69a59057321d33e1a859fd293a69/en/app-manual/operation/_images/twofactor_scan.png
--------------------------------------------------------------------------------
/en/app-manual/operation/custom-fields.md:
--------------------------------------------------------------------------------
1 | Custom Fields
2 | =============
3 |
4 | The custom fields app allows you to add unlimited fields anywhere.
5 |
6 | 
7 |
8 | **Name**: Field name.
9 |
10 | **Code**: A unique word to be used by the system to map the field with other pages.
11 |
12 | **Type**: The type of the field. There are 8 different field types at the moment:
13 |
14 | - Text
15 | - Text Area
16 | - Select Box
17 | - Checkbox
18 | - Radio Button
19 | - Date
20 | - Time
21 | - Date & Time
22 |
23 | **Validation**: You can enter any validation rule available here [here](https://laravel.com/docs/validation#available-validation-rules). For example, *integer* if you want to be able to enter only numbers.
24 |
25 | **Value**: The default value or values list based on the selected type.
26 |
27 | **Location**: In which page you want to show the field.
28 |
29 | **Sort & Position**: Before/After which field you want to show the custom field.
30 |
31 | **FontAwesome Icon**: The icon to be shown in the form. [Here](https://adminlte.io/themes/AdminLTE/pages/UI/icons.html) you can find the list. *Don't* add the **fa-** prefix.
32 |
33 | **CSS Class**: You can add any class available within the [AdminLTE](https://adminlte.io/themes/AdminLTE/index2.html) theme but generally the [Boostrap grid](https://getbootstrap.com/docs/3.3/examples/grid/) is used..
34 |
35 | [Here](https://akaunting.com/apps/custom-fields) you can get the app and start using it instantly.
36 |
--------------------------------------------------------------------------------
/en/app-manual/operation/twofactor.md:
--------------------------------------------------------------------------------
1 | Two Factor Auth
2 | ===============
3 |
4 | Two factor authentication (2FA) strengthens access security by requiring two methods (also referred to as factors) to verify your identity. Two factor authentication protects against phishing, social engineering and password brute force attacks and secures your logins from attackers exploiting weak or stolen credentials.
5 |
6 | This addon presents the following screen once activated and configured to protect your user account.
7 |
8 | 
9 |
10 |
11 | ## Installation
12 |
13 | Install the app within one click from your **Akaunting > Apps > XXX** page then go to **Profile > Two Factor Authentication** page.
14 |
15 | 
16 |
17 | Click the `Generate Secret Key to Enable 2FA` button to enable it for your user account.
18 |
19 | 
20 |
21 | Scan then enter the code and Enable. In future you will now be required to enter the code every time you login to the account.
22 |
--------------------------------------------------------------------------------
/en/app-manual/payment-method/_images/payflexi-default-method.png:
--------------------------------------------------------------------------------
https://raw.githubusercontent.com/akaunting/docs/205f53a3ef9d69a59057321d33e1a859fd293a69/en/app-manual/payment-method/_images/payflexi-default-method.png
--------------------------------------------------------------------------------
/en/app-manual/payment-method/_images/payflexi-developers-keys.png:
--------------------------------------------------------------------------------
https://raw.githubusercontent.com/akaunting/docs/205f53a3ef9d69a59057321d33e1a859fd293a69/en/app-manual/payment-method/_images/payflexi-developers-keys.png
--------------------------------------------------------------------------------
/en/app-manual/payment-method/_images/payflexi-installation-page.png:
--------------------------------------------------------------------------------
https://raw.githubusercontent.com/akaunting/docs/205f53a3ef9d69a59057321d33e1a859fd293a69/en/app-manual/payment-method/_images/payflexi-installation-page.png
--------------------------------------------------------------------------------
/en/app-manual/payment-method/_images/payflexi-installation.png:
--------------------------------------------------------------------------------
https://raw.githubusercontent.com/akaunting/docs/205f53a3ef9d69a59057321d33e1a859fd293a69/en/app-manual/payment-method/_images/payflexi-installation.png
--------------------------------------------------------------------------------
/en/app-manual/payment-method/_images/payflexi-invoice-confirm.png:
--------------------------------------------------------------------------------
https://raw.githubusercontent.com/akaunting/docs/205f53a3ef9d69a59057321d33e1a859fd293a69/en/app-manual/payment-method/_images/payflexi-invoice-confirm.png
--------------------------------------------------------------------------------
/en/app-manual/payment-method/_images/payflexi-invoice-draft.png:
--------------------------------------------------------------------------------
https://raw.githubusercontent.com/akaunting/docs/205f53a3ef9d69a59057321d33e1a859fd293a69/en/app-manual/payment-method/_images/payflexi-invoice-draft.png
--------------------------------------------------------------------------------
/en/app-manual/payment-method/_images/payflexi-payment-plans.png:
--------------------------------------------------------------------------------
https://raw.githubusercontent.com/akaunting/docs/205f53a3ef9d69a59057321d33e1a859fd293a69/en/app-manual/payment-method/_images/payflexi-payment-plans.png
--------------------------------------------------------------------------------
/en/app-manual/payment-method/_images/payflexi-settings.png:
--------------------------------------------------------------------------------
https://raw.githubusercontent.com/akaunting/docs/205f53a3ef9d69a59057321d33e1a859fd293a69/en/app-manual/payment-method/_images/payflexi-settings.png
--------------------------------------------------------------------------------
/en/app-manual/payment-method/_images/payflexi-webhook-settings.png:
--------------------------------------------------------------------------------
https://raw.githubusercontent.com/akaunting/docs/205f53a3ef9d69a59057321d33e1a859fd293a69/en/app-manual/payment-method/_images/payflexi-webhook-settings.png
--------------------------------------------------------------------------------
/en/app-manual/payment-method/_images/square-form.png:
--------------------------------------------------------------------------------
https://raw.githubusercontent.com/akaunting/docs/205f53a3ef9d69a59057321d33e1a859fd293a69/en/app-manual/payment-method/_images/square-form.png
--------------------------------------------------------------------------------
/en/app-manual/payment-method/_images/square-settings.png:
--------------------------------------------------------------------------------
https://raw.githubusercontent.com/akaunting/docs/205f53a3ef9d69a59057321d33e1a859fd293a69/en/app-manual/payment-method/_images/square-settings.png
--------------------------------------------------------------------------------
/en/app-manual/payment-method/payflexi.md:
--------------------------------------------------------------------------------
1 | PayFlexi
2 | ========
3 |
4 | > [PayFlexi](https://payflexi.co) is a payment method that allows businesses to accept instalment (partial) or full payments for invoices from their customers.
5 |
6 | PayFlexi supports automatic recurring payments such that the customer will be charged automatically for the next due amount based on their payment plans.
7 |
8 | Our new bring-your-own-payment-processor allows businesses to use their existing payment gateway to receive payment. PayFlexi currently support the following payment gateways:
9 |
10 | __[Stripe](https://stripe.com)__
11 | __[Paystack](https://paystack.com)__
12 | __[Flutterwave](https://flutterwave.com)__
13 |
14 | ## Installation
15 |
16 | To integrate PayFlexi with Akaunting, sign up for a free cloud account on [Akaunting](https://akaunting.com/dashboard)
17 |
18 | After setting up the account, click on Apps menu and search for PayFlexi. To learn more on how to set up your Akaunting dashboard, click [here](https://akaunting.com/docs/user-manual/dashboard)
19 |
20 | 
21 |
22 | Click on the “PayFlexi” card to view and then click on the “Install” button
23 |
24 | 
25 |
26 | ## Settings
27 |
28 | After installing, click on the **Settings** menu and click on **PayFlexi** card
29 |
30 | 
31 |
32 | * __Test Secret API Key__ – Enter PayFlexi Test Secret Key here. Get the API key from your PayFlexi Merchant Account under Developer > API
33 | * __Test Public API Key__ – Enter PayFlexi Test Public Key here. Get the API key from your PayFlexi Merchant Account under Developer > API
34 | * __Live Secret API Key__ – Enter PayFlexi Live Secret Key here. Get the API key from your PayFlexi Merchant Account under Developer > API
35 | * __Live Public API Key__ – Enter PayFlexi Live Public Key here. Get the API key from your PayFlexi Merchant Account under Developer > API
36 | * __Webhook URL__ – This is automatically generated for each Akaunting account. Copy it and add it to the webhook url field on your PayFlexi merchant dashbaord.
37 |
38 | Next, add the API keys from your PayFlexi merchant dashboard. If you don’t have a merchant account, you can register for a merchant account by clicking [here](https://merchant.payflexi.co/)
39 |
40 | Then navigate to **Developers > API Keys** menu on the PayFlexi dashboard. Copy the keys from this page to the **Akaunting > PayFlexi > Settings** page
41 |
42 | 
43 |
44 | ### Setup Webhook URL
45 |
46 | Set the Webhook URL in the [API Keys & Webhooks](https://merchant.payflexi.co/developers?tab=api-keys-integrations) settings page in your PayFlexi Merchant Account
47 |
48 | Copy the Webhook URL from the **Akaunting > PayFlexi > Settings** page.
49 |
50 | 
51 |
52 | Click on __Save__ once done.
53 |
54 | ## General Configuration
55 |
56 | Under the **Akaunting > Settings** page, click on the **Default** card and select **PayFlexi** as the default payment method.
57 |
58 | 
59 |
60 | After creating an invoice, click on **Send Email** to send it to the customer for payment
61 |
62 | 
63 |
64 | The customer will receive an email with a link to make payment.
65 |
66 | 
67 |
68 | On clicking **Confirm**, it redirects the customer to PayFlexi to set up their payment plans.
69 |
70 | 
71 |
72 | ### Useful Resources
73 |
74 | * Learn how to connect your Stripe account with PayFlexi - [Click Here](https://support.payflexi.co/collections/how-to-connect-your-stripe-account/)
75 |
76 | * Learn how to test your integration by following this instruction [here](https://support.payflexi.co/collections/how-to-test-payments-on-payflexi/)
77 |
78 |
79 |
80 |
81 |
82 |
83 |
84 |
85 |
86 |
87 |
88 |
--------------------------------------------------------------------------------
/en/app-manual/payment-method/square.md:
--------------------------------------------------------------------------------
1 | Square
2 | ======
3 |
4 | > Secure payment processing for your invoices
5 |
6 | ## Installation
7 |
8 | Install the app within one click from your **Akaunting > Apps > Square** page then go to **Settings > Square** page.
9 |
10 | 
11 |
12 | ## Settings
13 |
14 | From this page, you can update the required settings for your app.
15 |
16 | 
17 |
18 | ### General
19 |
20 | In General Box, you can enable and disable the sandbox (the sandbox is for testing the payment system).
21 |
22 | > In a live site, the sandbox option should be disabled.
23 |
24 | **Access Token** - You can get the Access token from [Square](https://squareup.com/us/en) Payment site, there are two types of access tokens: the first one is for production mode, and another one is for testing(sandbox) mode.
25 |
26 | If Sandbox is enabled, the app will use test access token else production access token.
27 |
28 | ### Payment
29 |
30 | In this section, you can update payment mode visibility.
31 |
32 | **Display Name:** this name will be displayed to the customer when they select a payment method to pay an invoice.
33 |
34 | **Order:** You can choose the order of your payment method name in the customer payment method select dropdown.
35 |
36 | **Enabled:** You can enable/disable payment options from here.
37 |
38 | ### Sync
39 |
40 | In this section, you can manage the sync functionality of the Square App. From here, you can import/sync your payment received from Square Reader, POS, etc. and convert to Akaunting invoices. You can sync the current ones manually, new ones will be synced automatically.
41 |
--------------------------------------------------------------------------------
/en/app-manual/point-of-sale/_images/pos-category-selected.png:
--------------------------------------------------------------------------------
https://raw.githubusercontent.com/akaunting/docs/205f53a3ef9d69a59057321d33e1a859fd293a69/en/app-manual/point-of-sale/_images/pos-category-selected.png
--------------------------------------------------------------------------------
/en/app-manual/point-of-sale/_images/pos-main-pos-screen.png:
--------------------------------------------------------------------------------
https://raw.githubusercontent.com/akaunting/docs/205f53a3ef9d69a59057321d33e1a859fd293a69/en/app-manual/point-of-sale/_images/pos-main-pos-screen.png
--------------------------------------------------------------------------------
/en/app-manual/point-of-sale/_images/pos-order-details-footer.png:
--------------------------------------------------------------------------------
https://raw.githubusercontent.com/akaunting/docs/205f53a3ef9d69a59057321d33e1a859fd293a69/en/app-manual/point-of-sale/_images/pos-order-details-footer.png
--------------------------------------------------------------------------------
/en/app-manual/point-of-sale/_images/pos-orders-tabs.png:
--------------------------------------------------------------------------------
https://raw.githubusercontent.com/akaunting/docs/205f53a3ef9d69a59057321d33e1a859fd293a69/en/app-manual/point-of-sale/_images/pos-orders-tabs.png
--------------------------------------------------------------------------------
/en/app-manual/point-of-sale/_images/pos-orders.png:
--------------------------------------------------------------------------------
https://raw.githubusercontent.com/akaunting/docs/205f53a3ef9d69a59057321d33e1a859fd293a69/en/app-manual/point-of-sale/_images/pos-orders.png
--------------------------------------------------------------------------------
/en/app-manual/point-of-sale/_images/pos-placeholder-image.png:
--------------------------------------------------------------------------------
https://raw.githubusercontent.com/akaunting/docs/205f53a3ef9d69a59057321d33e1a859fd293a69/en/app-manual/point-of-sale/_images/pos-placeholder-image.png
--------------------------------------------------------------------------------
/en/app-manual/point-of-sale/_images/pos-receipt-screen.png:
--------------------------------------------------------------------------------
https://raw.githubusercontent.com/akaunting/docs/205f53a3ef9d69a59057321d33e1a859fd293a69/en/app-manual/point-of-sale/_images/pos-receipt-screen.png
--------------------------------------------------------------------------------
/en/app-manual/point-of-sale/_images/pos-receiving-payment.png:
--------------------------------------------------------------------------------
https://raw.githubusercontent.com/akaunting/docs/205f53a3ef9d69a59057321d33e1a859fd293a69/en/app-manual/point-of-sale/_images/pos-receiving-payment.png
--------------------------------------------------------------------------------
/en/app-manual/point-of-sale/_images/pos-select-customer.png:
--------------------------------------------------------------------------------
https://raw.githubusercontent.com/akaunting/docs/205f53a3ef9d69a59057321d33e1a859fd293a69/en/app-manual/point-of-sale/_images/pos-select-customer.png
--------------------------------------------------------------------------------
/en/app-manual/point-of-sale/_images/pos-selected-customer.png:
--------------------------------------------------------------------------------
https://raw.githubusercontent.com/akaunting/docs/205f53a3ef9d69a59057321d33e1a859fd293a69/en/app-manual/point-of-sale/_images/pos-selected-customer.png
--------------------------------------------------------------------------------
/en/app-manual/point-of-sale/_images/pos-settings-pos-card.png:
--------------------------------------------------------------------------------
https://raw.githubusercontent.com/akaunting/docs/205f53a3ef9d69a59057321d33e1a859fd293a69/en/app-manual/point-of-sale/_images/pos-settings-pos-card.png
--------------------------------------------------------------------------------
/en/app-manual/point-of-sale/_images/pos-settings-pos-form.png:
--------------------------------------------------------------------------------
https://raw.githubusercontent.com/akaunting/docs/205f53a3ef9d69a59057321d33e1a859fd293a69/en/app-manual/point-of-sale/_images/pos-settings-pos-form.png
--------------------------------------------------------------------------------
/en/app-manual/point-of-sale/pos.md:
--------------------------------------------------------------------------------
1 | Point of Sale
2 | =============
3 |
4 | [Point of Sale](https://akaunting.com/apps/pos) app allows to:
5 |
6 | - Select a customer for an order
7 | - Serve multiple customers at the same time
8 | - Receive payment using multiple payment methods in one order
9 | - Apply discount
10 | - Print a receipt or send an electronic receipt by email
11 | - Track processed orders
12 |
13 | ## Starting using the Point of Sale app
14 |
15 | It is advised to start by checking the PoS settings. Make sure that all settings fit your needs. If you are not sure with any setting - leave it as is, with the default value.
16 |
17 | 
18 |
19 | ### Available settings
20 |
21 | **Prefix** added to each order's number before digits making the number look like ORD-00001.
22 |
23 | **Number of digits** in an order's number. 5 digits will make an order number look like ORD-00199, and 6 digits will generate numbers like ORD-000345. Add as many digits as you need, but 5 should be enough in most cases.
24 |
25 | **Next order number** is used to set the number of the next order. It will be incremented automatically, but you can adjust it in case of deleted order or any other case.
26 |
27 | **Account and payment method** for payments made by cash are used for income transactions for cash payments.
28 |
29 | **Account and payment method** for payments made by card are used for income transactions for card payments.
30 |
31 | **Guest customer** is a customer that is used in a payment transaction if you don't select a customer for an order.
32 |
33 | **Sale category** is used in an income transaction created for payment.
34 |
35 | **Change category** is used in an expense transaction created for a change.
36 |
37 | **Printer paper size** allows you to adjust a receipt's size to your printer's paper width.
38 |
39 | **Paper cutter usage** switch if enabled, will make a receipt having a page break below all the content. Most receipt printers use the page break as a command to cut the paper.
40 |
41 | **Company logo printing** switch if enabled, will make a receipt having a company's logo at the top.
42 |
43 | **Barcode scanner usage** switch controls the search field behavior. When it is set to "Yes", then the search field will automatically get focus, allowing you to scan goods sequentially, one by one.
44 |
45 | 
46 |
47 | ## Working in PoS interface
48 |
49 | The main PoS screen consists of 5 sections:
50 |
51 | - Order's "basket"
52 | - Numeric keypad
53 | - Orders tabs
54 | - Categories
55 | - Items
56 |
57 | Also, there are screens for receiving payment and for printing a receipt.
58 |
59 | 
60 |
61 | ### Basket
62 |
63 | It is a list of all items added to the current order. It shows their quantity, price, discount, and sum. Also, it calculates the order's total sum.
64 |
65 | The last added item is highlighted by grey color. You can select another item by clicking on it. Quantity, price, and discount of the selected item can be adjusted using the numeric keypad.
66 |
67 | ### Numeric keypad
68 |
69 | Numpad serves 3 goals at once - it allows you to select a customer for an order, switch to receiving a payment from a customer, and quickly adjust a quantity, price, and discount for items added in the order.
70 |
71 | #### Selecting a customer
72 |
73 | Press the `Customer` button to select or clear the customer for an order. You will see a list of registered customers. Already selected customer is highlighted by green color.
74 |
75 | 
76 |
77 | Clicking on any row will select that customer and return to the main PoS screen. The `Clear Customer` button deselects the current customer making order have no customer selected.
78 |
79 | The name of the current customer is displayed in the Numpad:
80 |
81 | 
82 |
83 | #### Adjusting the order items
84 |
85 | The right part of the Numpad contains numeric buttons from `0` to `9`, `.` button for decimal point, `delete` button, and radio buttons for mode selection. There are 3 modes: `quantity`, `discount`, `price`. The result of pressing other buttons depends on the current mode. The current mode can be identified by green color on one of the "mode" radio buttons.
86 |
87 | You may use a physical numpad on your computer keyboard as well as buttons of the onscreen Numpad.
88 |
89 | `Quantity` mode allows you to change the quantity of the selected item. The first press of a numeric button immediately changes the quantity. Let's say the selected item has the quantity of "1", then pressing the `5` button will change it to "5". Subsequent presses of numeric buttons will add numbers to the quantity. So, in the above case, pressing the `1` button will change the quantity to "51". Pressing the `.` and `2` buttons will change the quantity to "51.2". The `delete` button clears the last number. When the quantity is equal to zero, pressing the `delete` button will remove the selected item from an order.
90 |
91 | In the `Discount` mode you add or reduce/remove a discount (in percents) for the selected item. The discount can't be more than 100%, so if you exceed this amount, then the discount will be automatically set to 100%.
92 |
93 | Using the `Price` mode you control the price of the selected item. There are no restrictions on how big or small a price can be, so pressing the `delete` button when the price is zero won't remove the selected item from an order.
94 |
95 | ### Orders tabs
96 |
97 | The `Orders tabs` section contains a tab for each unprocessed order and buttons for creating a new order and closing a current order.
98 |
99 | 
100 |
101 | Each tab shows the time when an order was created. The current order's tab is highlighted by light grey color. You may switch between orders by clicking on their tabs. A number on the left side of each tab shows a serial number of an order, and counting begins when a PoS session starts.
102 |
103 | ### Categories
104 |
105 | The `Categories` section shows all categories your goods belong to and allow you to filter goods by clicking on a category.
106 |
107 | 
108 |
109 | Clicking on the "home" button here will reset the filtering, and you'll see all your goods again.
110 |
111 | ### Items
112 |
113 | Your goods are shown in the `Items` section as rectangles that contain the price, name, and image of an item. If you don't provide an image, then a placeholder image will be used.
114 |
115 | 
116 |
117 | Clicking on a rectangle adds an item in an order. If there is already such an item in an order, then its quantity will be incremented by 1. Thus, you can successively click on an item as many times as you want to add it.
118 |
119 | Items section also provides a search field that searches for your input in items' name, description, SKU, and barcode. When items are filtered by a category, a search will include only items that belong to that category. You may press the `Enter` key when you found a single item, and it will be added to an order. This works similar to clicking on an item and speeds up a process. If you use a barcode scanner, it will do that for you automatically, so you'll be able to scan products one by one without even using a keyboard. The `X` button clears an entered text.
120 |
121 | ### Receiving a payment
122 |
123 | Clicking the `Payment` button in the Numpad will open a screen for receiving payment for an order.
124 |
125 | 
126 |
127 | This screen automatically calculates the total due, remaining amount, and change. Using the `Cash` and `Card` buttons you can add as many payments as a customer wants. The newly added payment will have an amount equal to the remaining amount. By clicking on a payment you select it and make it available for adjusting using a Numpad. The current payment is highlighted in white color. Payment can be deleted by pressing the `X` symbol on its right side.
128 |
129 | At any time you may press the `Back` button and return to the main PoS screen. This is helpful in cases when a customer wants to add something to the order at the last moment or when a customer asks you to postpone the order for a while. After you return to the main PoS screen, you may adjust the current order or serve the next customer in line.
130 |
131 | When you add enough payments, you'll see the `Validate` button changing its color to green. You confirm the payment by clicking on it and proceed to the `Receipt` screen.
132 |
133 | ### Printing a receipt
134 |
135 | `Receipt` screen shows a preview of a receipt and also allows you to print it and send it by email. If you selected a customer for an order and that customer has an email, then the `email` field will be automatically filled. Of course, you may provide any other valid email address here.
136 |
137 | 
138 |
139 | After printing or/and sending a receipt, click the `New Order` button and return to the main PoS screen with a fresh new order awaiting you.
140 |
141 | ## Back office
142 |
143 | Front and back office are terms used to refer to various business processes within a company where revenue-driving and customer-facing activities are called "front office", and all the backend processes such as accounting and analysis are called "back office".
144 |
145 | All processed orders are available from the `Orders` menu item under the `PoS` dropdown menu.
146 |
147 | 
148 |
149 | There you can cancel and delete any order, and also see its details. In the footer of an order details page you may find all its transactions.
150 |
151 | 
152 |
--------------------------------------------------------------------------------
/en/client-portal.md:
--------------------------------------------------------------------------------
1 | Client Portal
2 | ======
3 |
4 | The Akaunting Client Portal allows your customers to track and manage transactions that come from you. The customer can only see transactions/events related to them.
5 | Your customer can take the following actions on their client portal.
6 | - View Dashboard
7 | - View Invoices
8 | - View Bills
9 | - Accept estimate
10 | - Get notified of the due date of the transactions or upcoming events.
11 | - View projects
12 | - View and manage deals (should be checked)
13 | - Edit company profile
14 |
15 |
16 | How can I add Invite my Customer to the Akaunting Client Portal?
17 | - Go to the Customer Page or directly click the Customer button on the quick add section
18 | - Click on New Customer Button
19 | - Check the Click Portal section (Checking this box requires the email field are required)
20 | - Save and create a new customer
21 |
22 | You can also invite already created customers by editing the customer form.
23 |
24 | After you save and create or edit the customer, an invitation email will be sent to the customer. Your customers can create their client portal via the link in the invitation email.
--------------------------------------------------------------------------------
/en/developer-manual/_images/docs_app.png:
--------------------------------------------------------------------------------
https://raw.githubusercontent.com/akaunting/docs/205f53a3ef9d69a59057321d33e1a859fd293a69/en/developer-manual/_images/docs_app.png
--------------------------------------------------------------------------------
/en/developer-manual/_images/docs_details.png:
--------------------------------------------------------------------------------
https://raw.githubusercontent.com/akaunting/docs/205f53a3ef9d69a59057321d33e1a859fd293a69/en/developer-manual/_images/docs_details.png
--------------------------------------------------------------------------------
/en/developer-manual/_images/permissions.png:
--------------------------------------------------------------------------------
https://raw.githubusercontent.com/akaunting/docs/205f53a3ef9d69a59057321d33e1a859fd293a69/en/developer-manual/_images/permissions.png
--------------------------------------------------------------------------------
/en/developer-manual/_images/simple_settings.png:
--------------------------------------------------------------------------------
https://raw.githubusercontent.com/akaunting/docs/205f53a3ef9d69a59057321d33e1a859fd293a69/en/developer-manual/_images/simple_settings.png
--------------------------------------------------------------------------------
/en/developer-manual/adding-docs.md:
--------------------------------------------------------------------------------
1 | Adding Documentation
2 | ====================
3 |
4 | Akaunting documentation is not only for its core features but also for apps. The documentation of apps will be shown both on this site and embed into Akaunting itself.
5 |
6 | 
7 |
8 | 
9 |
10 | ### Menu
11 |
12 | As mentioned in the [README](https://github.com/akaunting/docs) file, the menu file contains the navigation structure of the documentation. You should add your app under its respective category.
13 |
14 | ### File
15 |
16 | After adding to menu, you should create a file under the respective folder. If there is no such a folder, feel free to create it. Screenshots can be placed into the *_images* folder.
17 |
18 | Check out this [commit](https://github.com/akaunting/docs/commit/01af4d5f4788a812bf8865e8008bf9fd8579b4ab) as a live example.
19 |
--------------------------------------------------------------------------------
/en/developer-manual/hooking-models.md:
--------------------------------------------------------------------------------
1 | Hooking Models
2 | ==============
3 |
4 | Let's say you're developing a module/app that adds functionality to Akaunting. However, in order to keep Akaunting up-to-date, you don't want to, and shouldn't, change/hack the core files.
5 |
6 | Eloquent fires [several events](https://laravel.com/docs/eloquent#events), allowing you to hook into lots of points in a model's lifecycle. You can listen these events using [Observers](https://laravel.com/docs/eloquent#observers) feature of Eloquent. Let's make an example for modules.
7 |
8 | First of all, create and install a [module](https://akaunting.com/docs/developer-manual/modules).
9 |
10 | Then add the folowing code into the `boot` method of your `Service Provider`.
11 |
12 | ```php
13 | use App\Models\Common\Item;
14 |
15 | ...
16 |
17 | public function boot()
18 | {
19 | Item::observe('Modules\MyBlog\Observers\Common\Item');
20 | }
21 |
22 | ...
23 | ```
24 |
25 | Then create the observer file:
26 |
27 | ```php
28 | id)->first();
48 |
49 | $post->opening_stock = $item->quantity;
50 |
51 | $post->update();
52 | }
53 | }
54 |
55 | ```
56 |
57 | That's all you need to do to hook a model.
58 |
--------------------------------------------------------------------------------
/en/developer-manual/menu.md:
--------------------------------------------------------------------------------
1 | Menu
2 | ====
3 |
4 | The left sidebar of Akaunting contains the company switcher and menu. We use our own [akaunting/menu](https://github.com/akaunting/menu) package as builder.
5 |
6 | You may want to extend the menu by adding your own pages. You should listen to the `AdminCreated` event for admin and/or `PortalCreated` for client sides.
7 |
8 | Here it is a listener example:
9 |
10 | ```php
11 | menu->whereTitle(trans_choice('general.sales', 2));
29 | $item->route('my-blog.posts.index', trans('my-blog::general.posts'), [], 4, ['icon' => '']);
30 |
31 | // Add new menu item
32 | $event->menu->add([
33 | 'route' => ['my-blog.posts.index', [] ],
34 | 'title' => trans('my-blog::general.posts'),
35 | 'icon' => 'fas fa-pen',
36 | 'order' => 5,
37 | ]);
38 | }
39 | }
40 | ```
41 |
42 | [Menu](https://github.com/akaunting/menu/wiki) documentation can help to understand the system, especially about how to find a menu item, add child ones, and create dropdown menus.
43 |
--------------------------------------------------------------------------------
/en/developer-manual/modules.md:
--------------------------------------------------------------------------------
1 | Modules
2 | =======
3 |
4 | Akaunting ships with core accounting tools needed to manage money. It also has a module structure so that you could extend it. We use our own [akaunting/module](https://github.com/akaunting/module) package as builder.
5 |
6 | A module is like a Laravel package, it has some routes, views, controllers, and models. While technically we call it `Module`, we name it `App` in the UI for the end-user as that's what they are familiar with.
7 |
8 | ### Folder Structure
9 |
10 | As you can see from the example below, the structure of a module is very similar to a basic Laravel app.
11 |
12 | ```
13 | app/
14 | bootstrap/
15 | config/
16 | database/
17 | modules/
18 | ├── MyBlog/
19 | ├── Console/
20 | ├── Database/
21 | ├── Migrations/
22 | ├── Seeds/
23 | ├── Http/
24 | ├── Controllers/
25 | ├── Requests/
26 | ├── Jobs/
27 | ├── Listeners/
28 | ├── Models/
29 | ├── Providers/
30 | ├── Main.php
31 | ├── Resources/
32 | ├── assets/
33 | ├── lang/
34 | ├── views/
35 | ├── Routes/
36 | ├── admin.php
37 | ├── portal.php
38 | ├── composer.json
39 | ├── module.json
40 | ├── package.json
41 | ├── webpack.mix.js
42 | public/
43 | ...
44 | vendor/
45 | .env
46 | ```
47 |
48 | ### Creating a module
49 |
50 | There are loads of Artisan commands built-in the module package. For example, let's see how to create a new module:
51 |
52 | ```bash
53 | php artisan module:make my-blog
54 | ```
55 |
56 | This will create all files and folders shown in the above example. Now let's install the module using the following command:
57 |
58 | ```bash
59 | php artisan module:install my-blog 1
60 | ```
61 |
62 | `my-blog` is the **alias** of the module and `1` is the **company id** that you want to install the module. [Here](https://akaunting.com/docs/user-manual/companies) you can find more about companies in Akaunting.
63 |
64 | Alias is the unique name of the module as is used everywhere in Akaunting.
65 |
66 | ### module.json file
67 |
68 | The `module.json` file contains the main information about your module such as name, version, providers, etc..
69 |
70 | ```json
71 | {
72 | "alias": "my-blog",
73 | "icon": "fas fa-pen",
74 | "version": "1.0.0",
75 | "active": 1,
76 | "providers": [
77 | "Modules\\MyBlog\\Providers\\Main"
78 | ],
79 | "aliases": {},
80 | "files": [],
81 | "requires": [],
82 | "reports": [],
83 | "widgets": [],
84 | "settings": []
85 | }
86 | ```
87 |
88 | You can check the **Offline Payments** module built into the Akaunting core as a live example.
89 |
90 | ### Showing to the user
91 |
92 | If your module has pages that need to be shown in the left sidebar, you can check [this](https://akaunting.com/docs/developer-manual/menu) article to learn more.
93 |
94 | ### More
95 |
96 | [Module](https://github.com/akaunting/module/wiki) documentation can help to understand how the system works.
97 |
--------------------------------------------------------------------------------
/en/developer-manual/overriding-output.md:
--------------------------------------------------------------------------------
1 | Overriding Output
2 | =================
3 |
4 | Let's say you're developing a module/app that adds/removes functionality to/from Akaunting core and you want to override the output. However, in order to keep Akaunting up-to-date, you don't want to, and shouldn't, change/hack the core files. As an example, let's see how to remove the `Phone` field from the customer creation form without changing the core files.
5 |
6 | First of all, create and install a [module](https://akaunting.com/docs/developer-manual/modules).
7 |
8 | Then add the folowing code into the `boot` method of your `ServiceProvider`. [Here](https://laravel.com/docs/views#view-composers) you can learn more about view composers.
9 |
10 | ```php
11 | View::composer(
12 | ['incomes.customers.create'], 'Modules\MyBlog\Http\ViewComposers\Customers'
13 | );
14 | ```
15 |
16 | Then create the view composer file:
17 |
18 | ```php
19 | getFactory()->startSection('content', view('my-blog::customers.create'));
37 |
38 | // Override the whole file
39 | $view->setPath(view('my-blog::customers.create')->getPath());
40 |
41 | // Push to a stack
42 | $view->getFactory()->startPush('scripts', view('my-blog::script'));
43 | }
44 | }
45 | ```
46 |
47 | Finally, create a [Blade](https://laravel.com/docs/blade) template file `modules/MyBlog/Resources/views/customers/create.blade.php` with your custom output. The original one is located in `resources/views/incomes/customers/create.blade.php` file.
48 |
49 | If you also want to modify the data stored in the database, then you can create an Observer to [hook models](https://akaunting.com/docs/developer-manual/hooking-models).
50 |
--------------------------------------------------------------------------------
/en/developer-manual/permissions.md:
--------------------------------------------------------------------------------
1 | Permissions
2 | ===========
3 |
4 | Akaunting provides a powerful ACL system thanks to the wonderful [Laratrust](https://github.com/santigarcor/laratrust) package for Laravel. It ships with very useful functions to be used on both PHP and Blade templates.
5 |
6 | Akaunting adds even more power to Laratrust with an easy to use interface to manage all Users, Roles and Permissions.
7 |
8 | 
9 |
10 | Furthermore, all these permissions and roles are also applicable to RESTful API access so you can create an API user account that can just read but not write data to your Akaunting.
11 |
12 | ### Checking for permissions
13 |
14 | It's so simple to check for roles and permissions:
15 |
16 | ```php
17 | $user->hasRole('admin');
18 | $user->hasRole('customer');
19 | $user->can('update-auth-users');
20 | $user->can('create-settings-categories');
21 | ```
22 |
23 | ```
24 | @permission('update-auth-users')
25 | This is visible to users with the given permissions.
26 | @endpermission
27 | ```
28 |
29 | Laratrust's [documentation](http://laratrust.readthedocs.io/en/5.0/usage/concepts.html#checking-for-roles-permissions) has more details about how to check for roles and permissions.
30 |
31 | ### More
32 |
33 | [Here](http://laratrust.readthedocs.io/en/5.0) you can find the Laratrust documentation to learn more about.
34 |
--------------------------------------------------------------------------------
/en/developer-manual/restful-api.md:
--------------------------------------------------------------------------------
1 | RESTful API
2 | ===========
3 |
4 | Akaunting provides a RESTful API to create, read, update and delete (CRUD) all entities of Akaunting.
5 |
6 | The API of Akaunting is built on top of [Dingo API](https://github.com/dingo/api) package for Laravel. It provides amazing tools such as Content Negotiation, API Versioning, Rate Limiting, Response Transformers, Internal Requests and a lot more.
7 |
8 | ### Authentication
9 |
10 | The HTTP Basic authentication is used by the Akaunting API. Any user that has `read-api` permission may access the API using their email and password. By default, Akaunting gives `read-api` permission to `admin` role.
11 |
12 | Permissions for CRUD actions are based on default [ACL](https://akaunting.com/docs/developer-manual/permissions).
13 |
14 | ### Routes
15 |
16 | The API endpoints/routes of Akaunting are located in the following file:
17 |
18 | ```
19 | routes/api.php
20 | ```
21 |
22 | You may also add API endpoints to your module:
23 |
24 | ```php
25 | $api = app('Dingo\Api\Routing\Router');
26 | $api->get('products', 'Catalog/Products@index');
27 | ```
28 |
29 | Check out the documentation of [Dingo API](https://github.com/dingo/api/wiki/Creating-API-Endpoints) for further details on API endpoints.
30 |
31 | ### Transformers
32 |
33 | Transformers allow you to easily and consistently transform objects into an array. You can find the transformers of Akaunting in the following directory:
34 |
35 | ```
36 | app/Transformers
37 | ```
38 |
39 | ### API Blueprint
40 |
41 | # 📁 Collection: Companies
42 |
43 |
44 | ## End-point: Companies
45 | ### Description:
46 | Method: GET
47 | >```
48 | >{{akaunting_url}}/companies
49 | >```
50 | ### 🔑 Authentication basic
51 |
52 | |Param|value|Type|
53 | |---|---|---|
54 |
55 |
56 |
57 | ⁃ ⁃ ⁃ ⁃ ⁃ ⁃ ⁃ ⁃ ⁃ ⁃ ⁃ ⁃ ⁃ ⁃ ⁃ ⁃ ⁃ ⁃ ⁃ ⁃ ⁃ ⁃ ⁃ ⁃ ⁃ ⁃ ⁃ ⁃ ⁃ ⁃ ⁃ ⁃ ⁃ ⁃ ⁃ ⁃ ⁃ ⁃ ⁃ ⁃ ⁃ ⁃ ⁃ ⁃ ⁃ ⁃ ⁃
58 |
59 |
60 | ## End-point: Get owner of company
61 | ### Description:
62 | Method: GET
63 | >```
64 | >{{akaunting_url}}/companies/{{akaunting_company_id}}/owner
65 | >```
66 | ### 🔑 Authentication basic
67 |
68 | |Param|value|Type|
69 | |---|---|---|
70 |
71 |
72 |
73 | ⁃ ⁃ ⁃ ⁃ ⁃ ⁃ ⁃ ⁃ ⁃ ⁃ ⁃ ⁃ ⁃ ⁃ ⁃ ⁃ ⁃ ⁃ ⁃ ⁃ ⁃ ⁃ ⁃ ⁃ ⁃ ⁃ ⁃ ⁃ ⁃ ⁃ ⁃ ⁃ ⁃ ⁃ ⁃ ⁃ ⁃ ⁃ ⁃ ⁃ ⁃ ⁃ ⁃ ⁃ ⁃ ⁃ ⁃
74 |
75 |
76 | ## End-point: Enable company
77 | ### Description:
78 | Method: GET
79 | >```
80 | >{{akaunting_url}}/companies/{{akaunting_company_id}}/enable
81 | >```
82 | ### 🔑 Authentication basic
83 |
84 | |Param|value|Type|
85 | |---|---|---|
86 |
87 |
88 |
89 | ⁃ ⁃ ⁃ ⁃ ⁃ ⁃ ⁃ ⁃ ⁃ ⁃ ⁃ ⁃ ⁃ ⁃ ⁃ ⁃ ⁃ ⁃ ⁃ ⁃ ⁃ ⁃ ⁃ ⁃ ⁃ ⁃ ⁃ ⁃ ⁃ ⁃ ⁃ ⁃ ⁃ ⁃ ⁃ ⁃ ⁃ ⁃ ⁃ ⁃ ⁃ ⁃ ⁃ ⁃ ⁃ ⁃ ⁃
90 |
91 |
92 | ## End-point: Disable company
93 | ### Description:
94 | Method: GET
95 | >```
96 | >{{akaunting_url}}/companies/{{akaunting_company_id}}/disable
97 | >```
98 | ### 🔑 Authentication basic
99 |
100 | |Param|value|Type|
101 | |---|---|---|
102 |
103 |
104 |
105 | ⁃ ⁃ ⁃ ⁃ ⁃ ⁃ ⁃ ⁃ ⁃ ⁃ ⁃ ⁃ ⁃ ⁃ ⁃ ⁃ ⁃ ⁃ ⁃ ⁃ ⁃ ⁃ ⁃ ⁃ ⁃ ⁃ ⁃ ⁃ ⁃ ⁃ ⁃ ⁃ ⁃ ⁃ ⁃ ⁃ ⁃ ⁃ ⁃ ⁃ ⁃ ⁃ ⁃ ⁃ ⁃ ⁃ ⁃
106 |
107 | # 📁 Collection: Items
108 |
109 |
110 | ## End-point: Items
111 | ### Description:
112 | Method: GET
113 | >```
114 | >{{akaunting_url}}/items?company_id={{akaunting_company_id}}&page={{akaunting_page}}&limit={{akaunting_limit}}
115 | >```
116 | ### Query Params
117 |
118 | |Param|value|
119 | |---|---|
120 | |company_id|{{akaunting_company_id}}|
121 | |page|{{akaunting_page}}|
122 | |limit|{{akaunting_limit}}|
123 |
124 |
125 | ### 🔑 Authentication basic
126 |
127 | |Param|value|Type|
128 | |---|---|---|
129 |
130 |
131 |
132 | ⁃ ⁃ ⁃ ⁃ ⁃ ⁃ ⁃ ⁃ ⁃ ⁃ ⁃ ⁃ ⁃ ⁃ ⁃ ⁃ ⁃ ⁃ ⁃ ⁃ ⁃ ⁃ ⁃ ⁃ ⁃ ⁃ ⁃ ⁃ ⁃ ⁃ ⁃ ⁃ ⁃ ⁃ ⁃ ⁃ ⁃ ⁃ ⁃ ⁃ ⁃ ⁃ ⁃ ⁃ ⁃ ⁃ ⁃
133 |
134 |
135 | ## End-point: Enable item
136 | ### Description:
137 | Method: GET
138 | >```
139 | >{{akaunting_url}}/items/{{akaunting_item_id}}/enable?company_id={{akaunting_company_id}}
140 | >```
141 | ### Query Params
142 |
143 | |Param|value|
144 | |---|---|
145 | |company_id|{{akaunting_company_id}}|
146 |
147 |
148 | ### 🔑 Authentication basic
149 |
150 | |Param|value|Type|
151 | |---|---|---|
152 |
153 |
154 |
155 | ⁃ ⁃ ⁃ ⁃ ⁃ ⁃ ⁃ ⁃ ⁃ ⁃ ⁃ ⁃ ⁃ ⁃ ⁃ ⁃ ⁃ ⁃ ⁃ ⁃ ⁃ ⁃ ⁃ ⁃ ⁃ ⁃ ⁃ ⁃ ⁃ ⁃ ⁃ ⁃ ⁃ ⁃ ⁃ ⁃ ⁃ ⁃ ⁃ ⁃ ⁃ ⁃ ⁃ ⁃ ⁃ ⁃ ⁃
156 |
157 |
158 | ## End-point: Disable item
159 | ### Description:
160 | Method: GET
161 | >```
162 | >{{akaunting_url}}/items/{{akaunting_item_id}}/disable?company_id={{akaunting_company_id}}
163 | >```
164 | ### Query Params
165 |
166 | |Param|value|
167 | |---|---|
168 | |company_id|{{akaunting_company_id}}|
169 |
170 |
171 | ### 🔑 Authentication basic
172 |
173 | |Param|value|Type|
174 | |---|---|---|
175 |
176 |
177 |
178 | ⁃ ⁃ ⁃ ⁃ ⁃ ⁃ ⁃ ⁃ ⁃ ⁃ ⁃ ⁃ ⁃ ⁃ ⁃ ⁃ ⁃ ⁃ ⁃ ⁃ ⁃ ⁃ ⁃ ⁃ ⁃ ⁃ ⁃ ⁃ ⁃ ⁃ ⁃ ⁃ ⁃ ⁃ ⁃ ⁃ ⁃ ⁃ ⁃ ⁃ ⁃ ⁃ ⁃ ⁃ ⁃ ⁃ ⁃
179 |
180 |
181 | ## End-point: Delete item
182 | ### Description:
183 | Method: DELETE
184 | >```
185 | >{{akaunting_url}}/items/{{akaunting_item_id}}/disable?company_id={{akaunting_company_id}}
186 | >```
187 | ### Query Params
188 |
189 | |Param|value|
190 | |---|---|
191 | |company_id|{{akaunting_company_id}}|
192 |
193 |
194 | ### 🔑 Authentication basic
195 |
196 | |Param|value|Type|
197 | |---|---|---|
198 |
199 |
200 |
201 | ⁃ ⁃ ⁃ ⁃ ⁃ ⁃ ⁃ ⁃ ⁃ ⁃ ⁃ ⁃ ⁃ ⁃ ⁃ ⁃ ⁃ ⁃ ⁃ ⁃ ⁃ ⁃ ⁃ ⁃ ⁃ ⁃ ⁃ ⁃ ⁃ ⁃ ⁃ ⁃ ⁃ ⁃ ⁃ ⁃ ⁃ ⁃ ⁃ ⁃ ⁃ ⁃ ⁃ ⁃ ⁃ ⁃ ⁃
202 |
203 |
204 | ## End-point: Get item
205 | ### Description:
206 | Method: GET
207 | >```
208 | >{{akaunting_url}}/items/{{akaunting_item_id}}?company_id={{akaunting_company_id}}
209 | >```
210 | ### Query Params
211 |
212 | |Param|value|
213 | |---|---|
214 | |company_id|{{akaunting_company_id}}|
215 |
216 |
217 | ### 🔑 Authentication basic
218 |
219 | |Param|value|Type|
220 | |---|---|---|
221 |
222 |
223 |
224 | ⁃ ⁃ ⁃ ⁃ ⁃ ⁃ ⁃ ⁃ ⁃ ⁃ ⁃ ⁃ ⁃ ⁃ ⁃ ⁃ ⁃ ⁃ ⁃ ⁃ ⁃ ⁃ ⁃ ⁃ ⁃ ⁃ ⁃ ⁃ ⁃ ⁃ ⁃ ⁃ ⁃ ⁃ ⁃ ⁃ ⁃ ⁃ ⁃ ⁃ ⁃ ⁃ ⁃ ⁃ ⁃ ⁃ ⁃
225 |
226 |
227 | ## End-point: Create item
228 | ### Description:
229 | Method: POST
230 | >```
231 | >{{akaunting_url}}/items?company_id={{akaunting_company_id}}&name=Demo&description=Demo description&sale_price=23.3&purchase_price=21.1&category_id={{akaunting_category_id}}&tax_ids=[]
232 | >```
233 | ### Query Params
234 |
235 | |Param|value|
236 | |---|---|
237 | |company_id|{{akaunting_company_id}}|
238 | |name|Demo|
239 | |description|Demo description|
240 | |sale_price|23.3|
241 | |purchase_price|21.1|
242 | |category_id|{{akaunting_category_id}}|
243 | |tax_ids|[]|
244 |
245 |
246 | ### 🔑 Authentication basic
247 |
248 | |Param|value|Type|
249 | |---|---|---|
250 |
251 |
252 |
253 | ⁃ ⁃ ⁃ ⁃ ⁃ ⁃ ⁃ ⁃ ⁃ ⁃ ⁃ ⁃ ⁃ ⁃ ⁃ ⁃ ⁃ ⁃ ⁃ ⁃ ⁃ ⁃ ⁃ ⁃ ⁃ ⁃ ⁃ ⁃ ⁃ ⁃ ⁃ ⁃ ⁃ ⁃ ⁃ ⁃ ⁃ ⁃ ⁃ ⁃ ⁃ ⁃ ⁃ ⁃ ⁃ ⁃ ⁃
254 |
255 |
256 | ## End-point: Update item
257 | ### Description:
258 | Method: PUT
259 | >```
260 | >{{akaunting_url}}/items/{{akaunting_item_id}}?company_id={{akaunting_company_id}}&name=Demo&description=Demo description&sale_price=233&purchase_price=211&category_id={{akaunting_category_id}}&tax_ids=[]
261 | >```
262 | ### Query Params
263 |
264 | |Param|value|
265 | |---|---|
266 | |company_id|{{akaunting_company_id}}|
267 | |name|Demo|
268 | |description|Demo description|
269 | |sale_price|233|
270 | |purchase_price|211|
271 | |category_id|{{akaunting_category_id}}|
272 | |tax_ids|[]|
273 |
274 |
275 | ### 🔑 Authentication basic
276 |
277 | |Param|value|Type|
278 | |---|---|---|
279 |
280 |
281 |
282 | ⁃ ⁃ ⁃ ⁃ ⁃ ⁃ ⁃ ⁃ ⁃ ⁃ ⁃ ⁃ ⁃ ⁃ ⁃ ⁃ ⁃ ⁃ ⁃ ⁃ ⁃ ⁃ ⁃ ⁃ ⁃ ⁃ ⁃ ⁃ ⁃ ⁃ ⁃ ⁃ ⁃ ⁃ ⁃ ⁃ ⁃ ⁃ ⁃ ⁃ ⁃ ⁃ ⁃ ⁃ ⁃ ⁃ ⁃
283 |
284 | # 📁 Collection: Accounts
285 |
286 |
287 | ## End-point: Accounts
288 | ### Description:
289 | Method: GET
290 | >```
291 | >{{akaunting_url}}/accounts?company_id={{akaunting_company_id}}&page={{akaunting_page}}&limit={{akaunting_limit}}
292 | >```
293 | ### Query Params
294 |
295 | |Param|value|
296 | |---|---|
297 | |company_id|{{akaunting_company_id}}|
298 | |page|{{akaunting_page}}|
299 | |limit|{{akaunting_limit}}|
300 |
301 |
302 | ### 🔑 Authentication basic
303 |
304 | |Param|value|Type|
305 | |---|---|---|
306 |
307 |
308 |
309 | ⁃ ⁃ ⁃ ⁃ ⁃ ⁃ ⁃ ⁃ ⁃ ⁃ ⁃ ⁃ ⁃ ⁃ ⁃ ⁃ ⁃ ⁃ ⁃ ⁃ ⁃ ⁃ ⁃ ⁃ ⁃ ⁃ ⁃ ⁃ ⁃ ⁃ ⁃ ⁃ ⁃ ⁃ ⁃ ⁃ ⁃ ⁃ ⁃ ⁃ ⁃ ⁃ ⁃ ⁃ ⁃ ⁃ ⁃
310 |
311 |
312 | ## End-point: Enable account
313 | ### Description:
314 | Method: GET
315 | >```
316 | >{{akaunting_url}}/accounts/{{akaunting_acount_id}}/enable?company_id={{akaunting_company_id}}
317 | >```
318 | ### Query Params
319 |
320 | |Param|value|
321 | |---|---|
322 | |company_id|{{akaunting_company_id}}|
323 |
324 |
325 | ### 🔑 Authentication basic
326 |
327 | |Param|value|Type|
328 | |---|---|---|
329 |
330 |
331 |
332 | ⁃ ⁃ ⁃ ⁃ ⁃ ⁃ ⁃ ⁃ ⁃ ⁃ ⁃ ⁃ ⁃ ⁃ ⁃ ⁃ ⁃ ⁃ ⁃ ⁃ ⁃ ⁃ ⁃ ⁃ ⁃ ⁃ ⁃ ⁃ ⁃ ⁃ ⁃ ⁃ ⁃ ⁃ ⁃ ⁃ ⁃ ⁃ ⁃ ⁃ ⁃ ⁃ ⁃ ⁃ ⁃ ⁃ ⁃
333 |
334 |
335 | ## End-point: Disable account
336 | ### Description:
337 | Method: GET
338 | >```
339 | >{{akaunting_url}}/accounts/{{akaunting_acount_id}}/disable?company_id={{akaunting_company_id}}
340 | >```
341 | ### Query Params
342 |
343 | |Param|value|
344 | |---|---|
345 | |company_id|{{akaunting_company_id}}|
346 |
347 |
348 | ### 🔑 Authentication basic
349 |
350 | |Param|value|Type|
351 | |---|---|---|
352 |
353 |
354 |
355 | ⁃ ⁃ ⁃ ⁃ ⁃ ⁃ ⁃ ⁃ ⁃ ⁃ ⁃ ⁃ ⁃ ⁃ ⁃ ⁃ ⁃ ⁃ ⁃ ⁃ ⁃ ⁃ ⁃ ⁃ ⁃ ⁃ ⁃ ⁃ ⁃ ⁃ ⁃ ⁃ ⁃ ⁃ ⁃ ⁃ ⁃ ⁃ ⁃ ⁃ ⁃ ⁃ ⁃ ⁃ ⁃ ⁃ ⁃
356 |
357 |
358 | ## End-point: Delete account
359 | ### Description:
360 | Method: DELETE
361 | >```
362 | >{{akaunting_url}}/accounts/{{akaunting_acount_id}}/disable?company_id={{akaunting_company_id}}
363 | >```
364 | ### Query Params
365 |
366 | |Param|value|
367 | |---|---|
368 | |company_id|{{akaunting_company_id}}|
369 |
370 |
371 | ### 🔑 Authentication basic
372 |
373 | |Param|value|Type|
374 | |---|---|---|
375 |
376 |
377 |
378 | ⁃ ⁃ ⁃ ⁃ ⁃ ⁃ ⁃ ⁃ ⁃ ⁃ ⁃ ⁃ ⁃ ⁃ ⁃ ⁃ ⁃ ⁃ ⁃ ⁃ ⁃ ⁃ ⁃ ⁃ ⁃ ⁃ ⁃ ⁃ ⁃ ⁃ ⁃ ⁃ ⁃ ⁃ ⁃ ⁃ ⁃ ⁃ ⁃ ⁃ ⁃ ⁃ ⁃ ⁃ ⁃ ⁃ ⁃
379 |
380 |
381 | ## End-point: Get account
382 | ### Description:
383 | Method: GET
384 | >```
385 | >{{akaunting_url}}/accounts/{{akaunting_acount_id}}?company_id={{akaunting_company_id}}
386 | >```
387 | ### Query Params
388 |
389 | |Param|value|
390 | |---|---|
391 | |company_id|{{akaunting_company_id}}|
392 |
393 |
394 | ### 🔑 Authentication basic
395 |
396 | |Param|value|Type|
397 | |---|---|---|
398 |
399 |
400 |
401 | ⁃ ⁃ ⁃ ⁃ ⁃ ⁃ ⁃ ⁃ ⁃ ⁃ ⁃ ⁃ ⁃ ⁃ ⁃ ⁃ ⁃ ⁃ ⁃ ⁃ ⁃ ⁃ ⁃ ⁃ ⁃ ⁃ ⁃ ⁃ ⁃ ⁃ ⁃ ⁃ ⁃ ⁃ ⁃ ⁃ ⁃ ⁃ ⁃ ⁃ ⁃ ⁃ ⁃ ⁃ ⁃ ⁃ ⁃
402 |
403 |
404 | ## End-point: Create account
405 | ### Description:
406 | Method: POST
407 | >```
408 | >{{akaunting_url}}/accounts?company_id={{akaunting_company_id}}&name=Cach&number=1¤cy_code=USD&opening_balance=0&bank_name=My Bank&bank_phone=&bank_address=Bank Address&enabled=1
409 | >```
410 | ### Query Params
411 |
412 | |Param|value|
413 | |---|---|
414 | |company_id|{{akaunting_company_id}}|
415 | |name|Cach|
416 | |number|1|
417 | |currency_code|USD|
418 | |opening_balance|0|
419 | |bank_name|My Bank|
420 | |bank_phone||
421 | |bank_address|Bank Address|
422 | |enabled|1|
423 |
424 |
425 | ### 🔑 Authentication basic
426 |
427 | |Param|value|Type|
428 | |---|---|---|
429 |
430 |
431 |
432 | ⁃ ⁃ ⁃ ⁃ ⁃ ⁃ ⁃ ⁃ ⁃ ⁃ ⁃ ⁃ ⁃ ⁃ ⁃ ⁃ ⁃ ⁃ ⁃ ⁃ ⁃ ⁃ ⁃ ⁃ ⁃ ⁃ ⁃ ⁃ ⁃ ⁃ ⁃ ⁃ ⁃ ⁃ ⁃ ⁃ ⁃ ⁃ ⁃ ⁃ ⁃ ⁃ ⁃ ⁃ ⁃ ⁃ ⁃
433 |
434 |
435 | ## End-point: Update account
436 | ### Description:
437 | Method: PUT
438 | >```
439 | >{{akaunting_url}}/accounts/{{akaunting_acount_id}}?company_id={{akaunting_company_id}}&name=Cach&number=1¤cy_code=USD&opening_balance=0&bank_name=My Bank&bank_phone=&bank_address=Bank Address&enabled=1
440 | >```
441 | ### Query Params
442 |
443 | |Param|value|
444 | |---|---|
445 | |company_id|{{akaunting_company_id}}|
446 | |name|Cach|
447 | |number|1|
448 | |currency_code|USD|
449 | |opening_balance|0|
450 | |bank_name|My Bank|
451 | |bank_phone||
452 | |bank_address|Bank Address|
453 | |enabled|1|
454 |
455 |
456 | ### 🔑 Authentication basic
457 |
458 | |Param|value|Type|
459 | |---|---|---|
460 |
461 |
462 |
463 | ⁃ ⁃ ⁃ ⁃ ⁃ ⁃ ⁃ ⁃ ⁃ ⁃ ⁃ ⁃ ⁃ ⁃ ⁃ ⁃ ⁃ ⁃ ⁃ ⁃ ⁃ ⁃ ⁃ ⁃ ⁃ ⁃ ⁃ ⁃ ⁃ ⁃ ⁃ ⁃ ⁃ ⁃ ⁃ ⁃ ⁃ ⁃ ⁃ ⁃ ⁃ ⁃ ⁃ ⁃ ⁃ ⁃ ⁃
464 |
465 | # 📁 Collection: Categories
466 |
467 |
468 | ## End-point: Categories
469 | ### Description:
470 | Method: GET
471 | >```
472 | >{{akaunting_url}}/categories?company_id={{akaunting_company_id}}&page={{akaunting_page}}&limit={{akaunting_limit}}
473 | >```
474 | ### Query Params
475 |
476 | |Param|value|
477 | |---|---|
478 | |company_id|{{akaunting_company_id}}|
479 | |page|{{akaunting_page}}|
480 | |limit|{{akaunting_limit}}|
481 |
482 |
483 | ### 🔑 Authentication basic
484 |
485 | |Param|value|Type|
486 | |---|---|---|
487 |
488 |
489 |
490 | ⁃ ⁃ ⁃ ⁃ ⁃ ⁃ ⁃ ⁃ ⁃ ⁃ ⁃ ⁃ ⁃ ⁃ ⁃ ⁃ ⁃ ⁃ ⁃ ⁃ ⁃ ⁃ ⁃ ⁃ ⁃ ⁃ ⁃ ⁃ ⁃ ⁃ ⁃ ⁃ ⁃ ⁃ ⁃ ⁃ ⁃ ⁃ ⁃ ⁃ ⁃ ⁃ ⁃ ⁃ ⁃ ⁃ ⁃
491 |
492 |
493 | ## End-point: Enable category
494 | ### Description:
495 | Method: GET
496 | >```
497 | >{{akaunting_url}}/categories/{{akaunting_category_id}}/enable?company_id={{akaunting_company_id}}
498 | >```
499 | ### Query Params
500 |
501 | |Param|value|
502 | |---|---|
503 | |company_id|{{akaunting_company_id}}|
504 |
505 |
506 | ### 🔑 Authentication basic
507 |
508 | |Param|value|Type|
509 | |---|---|---|
510 |
511 |
512 |
513 | ⁃ ⁃ ⁃ ⁃ ⁃ ⁃ ⁃ ⁃ ⁃ ⁃ ⁃ ⁃ ⁃ ⁃ ⁃ ⁃ ⁃ ⁃ ⁃ ⁃ ⁃ ⁃ ⁃ ⁃ ⁃ ⁃ ⁃ ⁃ ⁃ ⁃ ⁃ ⁃ ⁃ ⁃ ⁃ ⁃ ⁃ ⁃ ⁃ ⁃ ⁃ ⁃ ⁃ ⁃ ⁃ ⁃ ⁃
514 |
515 |
516 | ## End-point: Disable category
517 | ### Description:
518 | Method: GET
519 | >```
520 | >{{akaunting_url}}/categories/{{akaunting_category_id}}/enable?company_id={{akaunting_company_id}}
521 | >```
522 | ### Query Params
523 |
524 | |Param|value|
525 | |---|---|
526 | |company_id|{{akaunting_company_id}}|
527 |
528 |
529 | ### 🔑 Authentication basic
530 |
531 | |Param|value|Type|
532 | |---|---|---|
533 |
534 |
535 |
536 | ⁃ ⁃ ⁃ ⁃ ⁃ ⁃ ⁃ ⁃ ⁃ ⁃ ⁃ ⁃ ⁃ ⁃ ⁃ ⁃ ⁃ ⁃ ⁃ ⁃ ⁃ ⁃ ⁃ ⁃ ⁃ ⁃ ⁃ ⁃ ⁃ ⁃ ⁃ ⁃ ⁃ ⁃ ⁃ ⁃ ⁃ ⁃ ⁃ ⁃ ⁃ ⁃ ⁃ ⁃ ⁃ ⁃ ⁃
537 |
538 | # 📁 Collection: Currencies
539 |
540 |
541 | ## End-point: Currencies
542 | ### Description:
543 | Method: GET
544 | >```
545 | >{{akaunting_url}}/currencies?company_id={{akaunting_company_id}}&page={{akaunting_page}}&limit={{akaunting_limit}}
546 | >```
547 | ### Query Params
548 |
549 | |Param|value|
550 | |---|---|
551 | |company_id|{{akaunting_company_id}}|
552 | |page|{{akaunting_page}}|
553 | |limit|{{akaunting_limit}}|
554 |
555 |
556 | ### 🔑 Authentication basic
557 |
558 | |Param|value|Type|
559 | |---|---|---|
560 |
561 |
562 |
563 | ⁃ ⁃ ⁃ ⁃ ⁃ ⁃ ⁃ ⁃ ⁃ ⁃ ⁃ ⁃ ⁃ ⁃ ⁃ ⁃ ⁃ ⁃ ⁃ ⁃ ⁃ ⁃ ⁃ ⁃ ⁃ ⁃ ⁃ ⁃ ⁃ ⁃ ⁃ ⁃ ⁃ ⁃ ⁃ ⁃ ⁃ ⁃ ⁃ ⁃ ⁃ ⁃ ⁃ ⁃ ⁃ ⁃ ⁃
564 |
565 |
566 | ## End-point: Enable currency
567 | ### Description:
568 | Method: GET
569 | >```
570 | >{{akaunting_url}}/currency/{{akaunting_currency_id}}/enable?company_id={{akaunting_company_id}}
571 | >```
572 | ### Query Params
573 |
574 | |Param|value|
575 | |---|---|
576 | |company_id|{{akaunting_company_id}}|
577 |
578 |
579 | ### 🔑 Authentication basic
580 |
581 | |Param|value|Type|
582 | |---|---|---|
583 |
584 |
585 |
586 | ⁃ ⁃ ⁃ ⁃ ⁃ ⁃ ⁃ ⁃ ⁃ ⁃ ⁃ ⁃ ⁃ ⁃ ⁃ ⁃ ⁃ ⁃ ⁃ ⁃ ⁃ ⁃ ⁃ ⁃ ⁃ ⁃ ⁃ ⁃ ⁃ ⁃ ⁃ ⁃ ⁃ ⁃ ⁃ ⁃ ⁃ ⁃ ⁃ ⁃ ⁃ ⁃ ⁃ ⁃ ⁃ ⁃ ⁃
587 |
588 |
589 | ## End-point: Disable currency
590 | ### Description:
591 | Method: GET
592 | >```
593 | >{{akaunting_url}}/currency/{{akaunting_currency_id}}/disable?company_id={{akaunting_company_id}}
594 | >```
595 | ### Query Params
596 |
597 | |Param|value|
598 | |---|---|
599 | |company_id|{{akaunting_company_id}}|
600 |
601 |
602 | ### 🔑 Authentication basic
603 |
604 | |Param|value|Type|
605 | |---|---|---|
606 |
607 |
608 |
609 | ⁃ ⁃ ⁃ ⁃ ⁃ ⁃ ⁃ ⁃ ⁃ ⁃ ⁃ ⁃ ⁃ ⁃ ⁃ ⁃ ⁃ ⁃ ⁃ ⁃ ⁃ ⁃ ⁃ ⁃ ⁃ ⁃ ⁃ ⁃ ⁃ ⁃ ⁃ ⁃ ⁃ ⁃ ⁃ ⁃ ⁃ ⁃ ⁃ ⁃ ⁃ ⁃ ⁃ ⁃ ⁃ ⁃ ⁃
610 |
611 | # 📁 Collection: Taxes
612 |
613 |
614 | ## End-point: Taxes
615 | ### Description:
616 | Method: GET
617 | >```
618 | >{{akaunting_url}}/taxes?company_id={{akaunting_company_id}}&page={{akaunting_page}}&limit={{akaunting_limit}}
619 | >```
620 | ### Query Params
621 |
622 | |Param|value|
623 | |---|---|
624 | |company_id|{{akaunting_company_id}}|
625 | |page|{{akaunting_page}}|
626 | |limit|{{akaunting_limit}}|
627 |
628 |
629 | ### 🔑 Authentication basic
630 |
631 | |Param|value|Type|
632 | |---|---|---|
633 |
634 |
635 |
636 | ⁃ ⁃ ⁃ ⁃ ⁃ ⁃ ⁃ ⁃ ⁃ ⁃ ⁃ ⁃ ⁃ ⁃ ⁃ ⁃ ⁃ ⁃ ⁃ ⁃ ⁃ ⁃ ⁃ ⁃ ⁃ ⁃ ⁃ ⁃ ⁃ ⁃ ⁃ ⁃ ⁃ ⁃ ⁃ ⁃ ⁃ ⁃ ⁃ ⁃ ⁃ ⁃ ⁃ ⁃ ⁃ ⁃ ⁃
637 |
638 |
639 | ## End-point: Enable tax
640 | ### Description:
641 | Method: GET
642 | >```
643 | >{{akaunting_url}}/taxes/{{akaunting_tax_id}}/enable?company_id={{akaunting_company_id}}
644 | >```
645 | ### Query Params
646 |
647 | |Param|value|
648 | |---|---|
649 | |company_id|{{akaunting_company_id}}|
650 |
651 |
652 | ### 🔑 Authentication basic
653 |
654 | |Param|value|Type|
655 | |---|---|---|
656 |
657 |
658 |
659 | ⁃ ⁃ ⁃ ⁃ ⁃ ⁃ ⁃ ⁃ ⁃ ⁃ ⁃ ⁃ ⁃ ⁃ ⁃ ⁃ ⁃ ⁃ ⁃ ⁃ ⁃ ⁃ ⁃ ⁃ ⁃ ⁃ ⁃ ⁃ ⁃ ⁃ ⁃ ⁃ ⁃ ⁃ ⁃ ⁃ ⁃ ⁃ ⁃ ⁃ ⁃ ⁃ ⁃ ⁃ ⁃ ⁃ ⁃
660 |
661 |
662 | ## End-point: Disable tax
663 | ### Description:
664 | Method: GET
665 | >```
666 | >{{akaunting_url}}/taxes/{{akaunting_tax_id}}/disable?company_id={{akaunting_company_id}}
667 | >```
668 | ### Query Params
669 |
670 | |Param|value|
671 | |---|---|
672 | |company_id|{{akaunting_company_id}}|
673 |
674 |
675 | ### 🔑 Authentication basic
676 |
677 | |Param|value|Type|
678 | |---|---|---|
679 |
680 |
681 |
682 | ⁃ ⁃ ⁃ ⁃ ⁃ ⁃ ⁃ ⁃ ⁃ ⁃ ⁃ ⁃ ⁃ ⁃ ⁃ ⁃ ⁃ ⁃ ⁃ ⁃ ⁃ ⁃ ⁃ ⁃ ⁃ ⁃ ⁃ ⁃ ⁃ ⁃ ⁃ ⁃ ⁃ ⁃ ⁃ ⁃ ⁃ ⁃ ⁃ ⁃ ⁃ ⁃ ⁃ ⁃ ⁃ ⁃ ⁃
683 |
684 | # 📁 Collection: Payments
685 |
686 |
687 | ## End-point: Payments
688 | ### Description:
689 | Method: GET
690 | >```
691 | >{{akaunting_url}}/transactions?company_id={{akaunting_company_id}}&search=type:expense&page={{akaunting_page}}&limit={{akaunting_limit}}
692 | >```
693 | ### Query Params
694 |
695 | |Param|value|
696 | |---|---|
697 | |company_id|{{akaunting_company_id}}|
698 | |search|type:expense|
699 | |page|{{akaunting_page}}|
700 | |limit|{{akaunting_limit}}|
701 |
702 |
703 | ### 🔑 Authentication basic
704 |
705 | |Param|value|Type|
706 | |---|---|---|
707 |
708 |
709 |
710 | ⁃ ⁃ ⁃ ⁃ ⁃ ⁃ ⁃ ⁃ ⁃ ⁃ ⁃ ⁃ ⁃ ⁃ ⁃ ⁃ ⁃ ⁃ ⁃ ⁃ ⁃ ⁃ ⁃ ⁃ ⁃ ⁃ ⁃ ⁃ ⁃ ⁃ ⁃ ⁃ ⁃ ⁃ ⁃ ⁃ ⁃ ⁃ ⁃ ⁃ ⁃ ⁃ ⁃ ⁃ ⁃ ⁃ ⁃
711 |
712 |
713 | ## End-point: Paymen details
714 | ### Description:
715 | Method: GET
716 | >```
717 | >{{akaunting_url}}/transactions/{{akaunting_transaction_id}}?company_id={{akaunting_company_id}}&search=type:expense
718 | >```
719 | ### Query Params
720 |
721 | |Param|value|
722 | |---|---|
723 | |company_id|{{akaunting_company_id}}|
724 | |search|type:expense|
725 |
726 |
727 | ### 🔑 Authentication basic
728 |
729 | |Param|value|Type|
730 | |---|---|---|
731 |
732 |
733 |
734 | ⁃ ⁃ ⁃ ⁃ ⁃ ⁃ ⁃ ⁃ ⁃ ⁃ ⁃ ⁃ ⁃ ⁃ ⁃ ⁃ ⁃ ⁃ ⁃ ⁃ ⁃ ⁃ ⁃ ⁃ ⁃ ⁃ ⁃ ⁃ ⁃ ⁃ ⁃ ⁃ ⁃ ⁃ ⁃ ⁃ ⁃ ⁃ ⁃ ⁃ ⁃ ⁃ ⁃ ⁃ ⁃ ⁃ ⁃
735 |
736 | # 📁 Collection: Revenues
737 |
738 |
739 | ## End-point: Revenues
740 | ### Description:
741 | Method: GET
742 | >```
743 | >{{akaunting_url}}/transactions?company_id={{akaunting_company_id}}&search=type:income&page={{akaunting_page}}&limit={{akaunting_limit}}
744 | >```
745 | ### Query Params
746 |
747 | |Param|value|
748 | |---|---|
749 | |company_id|{{akaunting_company_id}}|
750 | |search|type:income|
751 | |page|{{akaunting_page}}|
752 | |limit|{{akaunting_limit}}|
753 |
754 |
755 | ### 🔑 Authentication basic
756 |
757 | |Param|value|Type|
758 | |---|---|---|
759 |
760 |
761 |
762 | ⁃ ⁃ ⁃ ⁃ ⁃ ⁃ ⁃ ⁃ ⁃ ⁃ ⁃ ⁃ ⁃ ⁃ ⁃ ⁃ ⁃ ⁃ ⁃ ⁃ ⁃ ⁃ ⁃ ⁃ ⁃ ⁃ ⁃ ⁃ ⁃ ⁃ ⁃ ⁃ ⁃ ⁃ ⁃ ⁃ ⁃ ⁃ ⁃ ⁃ ⁃ ⁃ ⁃ ⁃ ⁃ ⁃ ⁃
763 |
764 |
765 | ## End-point: Revenue details
766 | ### Description:
767 | Method: GET
768 | >```
769 | >{{akaunting_url}}/transactions/{{akaunting_transaction_id}}?company_id={{akaunting_company_id}}&search=type:income
770 | >```
771 | ### Query Params
772 |
773 | |Param|value|
774 | |---|---|
775 | |company_id|{{akaunting_company_id}}|
776 | |search|type:income|
777 |
778 |
779 | ### 🔑 Authentication basic
780 |
781 | |Param|value|Type|
782 | |---|---|---|
783 |
784 |
785 |
786 | ⁃ ⁃ ⁃ ⁃ ⁃ ⁃ ⁃ ⁃ ⁃ ⁃ ⁃ ⁃ ⁃ ⁃ ⁃ ⁃ ⁃ ⁃ ⁃ ⁃ ⁃ ⁃ ⁃ ⁃ ⁃ ⁃ ⁃ ⁃ ⁃ ⁃ ⁃ ⁃ ⁃ ⁃ ⁃ ⁃ ⁃ ⁃ ⁃ ⁃ ⁃ ⁃ ⁃ ⁃ ⁃ ⁃ ⁃
787 |
788 | # 📁 Collection: Invoices
789 |
790 |
791 | ## End-point: Invoices
792 | ### Description:
793 | Method: GET
794 | >```
795 | >{{akaunting_url}}/documents?company_id={{akaunting_company_id}}&search=type:invoice&page={{akaunting_page}}&limit={{akaunting_limit}}
796 | >```
797 | ### Query Params
798 |
799 | |Param|value|
800 | |---|---|
801 | |company_id|{{akaunting_company_id}}|
802 | |search|type:invoice|
803 | |page|{{akaunting_page}}|
804 | |limit|{{akaunting_limit}}|
805 |
806 |
807 | ### 🔑 Authentication basic
808 |
809 | |Param|value|Type|
810 | |---|---|---|
811 |
812 |
813 |
814 | ⁃ ⁃ ⁃ ⁃ ⁃ ⁃ ⁃ ⁃ ⁃ ⁃ ⁃ ⁃ ⁃ ⁃ ⁃ ⁃ ⁃ ⁃ ⁃ ⁃ ⁃ ⁃ ⁃ ⁃ ⁃ ⁃ ⁃ ⁃ ⁃ ⁃ ⁃ ⁃ ⁃ ⁃ ⁃ ⁃ ⁃ ⁃ ⁃ ⁃ ⁃ ⁃ ⁃ ⁃ ⁃ ⁃ ⁃
815 |
816 |
817 | ## End-point: Invoice create
818 | ### Description:
819 | Method: POST
820 | >```
821 | >{{akaunting_url}}/documents?company_id={{akaunting_company_id}}&search=type:invoice
822 | >```
823 | ### Body formdata
824 |
825 | |Param|value|Type|
826 | |---|---|---|
827 | |type|invoice|text|
828 | |document|invoice|text|
829 | |currency_code|EUR|text|
830 | |company_id|1|text|
831 | |amount|0|text|
832 | |sort_order|ASC|text|
833 | |status|'draft' or 'sent'|text|
834 | |footer||text|
835 | |issued_at|2021-05-10 00:00:00|text|
836 | |due_at|2021-05-10 00:00:00|text|
837 | |recurring_frequency|no|text|
838 | |contact_id|1|text|
839 | |category_id|2|text|
840 | |currency_rate|1|text|
841 | |prefix|sales|text|
842 | |group|sales|text|
843 | |document_number|000010-10|text|
844 | |contact_name||text|
845 | |setting[title]|Invoice|text|
846 | |setting[subheading]||text|
847 | |setting[company_logo][id]||text|
848 | |items[0][item_id]|1|text|
849 | |items[0][name]|item name|text|
850 | |items[0][description]||text|
851 | |items[0][quantity]||text|
852 | |items[0][price]||text|
853 | |items[0][tax_ids][0]||text|
854 | |items[0][discount]||text|
855 | |items[0][total]||text|
856 | |items[0][grand_total]||text|
857 | |item_backup[0][name]||text|
858 | |item_backup[0][quantity]||text|
859 | |item_backup[0][description]||text|
860 | |pre_discount||text|
861 | |discount||text|
862 | |type||text|
863 | |status||text|
864 | |footer||text|
865 | |||text|
866 | |contact_id|1|text|
867 | |contact_email||text|
868 | |contact_tax_number||text|
869 | |contact_phone||text|
870 | |contact_address||text|
871 | | ||text|
872 | |recurring_frequency||text|
873 | |recurring_interval||text|
874 | |recurring_custom_frequency||text|
875 | |recurring_count||text|
876 | |category_id||text|
877 | |currency_rate||text|
878 |
879 |
880 | ### Query Params
881 |
882 | |Param|value|
883 | |---|---|
884 | |company_id|{{akaunting_company_id}}|
885 | |currency_code|EUR|
886 | |contact_id|1|
887 | |search|type:invoice|
888 |
889 |
890 | ### 🔑 Authentication basic
891 |
892 | |Param|value|Type|
893 | |---|---|---|
894 |
895 |
896 |
897 | ⁃ ⁃ ⁃ ⁃ ⁃ ⁃ ⁃ ⁃ ⁃ ⁃ ⁃ ⁃ ⁃ ⁃ ⁃ ⁃ ⁃ ⁃ ⁃ ⁃ ⁃ ⁃ ⁃ ⁃ ⁃ ⁃ ⁃ ⁃ ⁃ ⁃ ⁃ ⁃ ⁃ ⁃ ⁃ ⁃ ⁃ ⁃ ⁃ ⁃ ⁃ ⁃ ⁃ ⁃ ⁃ ⁃ ⁃
898 |
899 |
900 | ## End-point: Invoice details
901 | ### Description:
902 | Method: GET
903 | >```
904 | >{{akaunting_url}}/documents/{{akaunting_documents_id}}?company_id={{akaunting_company_id}}&search=type:invoice
905 | >```
906 | ### Query Params
907 |
908 | |Param|value|
909 | |---|---|
910 | |company_id|{{akaunting_company_id}}|
911 | |search|type:invoice|
912 |
913 |
914 | ### 🔑 Authentication basic
915 |
916 | |Param|value|Type|
917 | |---|---|---|
918 |
919 |
920 |
921 | ⁃ ⁃ ⁃ ⁃ ⁃ ⁃ ⁃ ⁃ ⁃ ⁃ ⁃ ⁃ ⁃ ⁃ ⁃ ⁃ ⁃ ⁃ ⁃ ⁃ ⁃ ⁃ ⁃ ⁃ ⁃ ⁃ ⁃ ⁃ ⁃ ⁃ ⁃ ⁃ ⁃ ⁃ ⁃ ⁃ ⁃ ⁃ ⁃ ⁃ ⁃ ⁃ ⁃ ⁃ ⁃ ⁃ ⁃
922 |
923 | # 📁 Collection: Bills
924 |
925 |
926 | ## End-point: Invoices
927 | ### Description:
928 | Method: GET
929 | >```
930 | >{{akaunting_url}}/documents?company_id={{akaunting_company_id}}&search=type:bill&page={{akaunting_page}}&limit={{akaunting_limit}}
931 | >```
932 | ### Query Params
933 |
934 | |Param|value|
935 | |---|---|
936 | |company_id|{{akaunting_company_id}}|
937 | |search|type:bill|
938 | |page|{{akaunting_page}}|
939 | |limit|{{akaunting_limit}}|
940 |
941 |
942 | ### 🔑 Authentication basic
943 |
944 | |Param|value|Type|
945 | |---|---|---|
946 |
947 |
948 |
949 | ⁃ ⁃ ⁃ ⁃ ⁃ ⁃ ⁃ ⁃ ⁃ ⁃ ⁃ ⁃ ⁃ ⁃ ⁃ ⁃ ⁃ ⁃ ⁃ ⁃ ⁃ ⁃ ⁃ ⁃ ⁃ ⁃ ⁃ ⁃ ⁃ ⁃ ⁃ ⁃ ⁃ ⁃ ⁃ ⁃ ⁃ ⁃ ⁃ ⁃ ⁃ ⁃ ⁃ ⁃ ⁃ ⁃ ⁃
950 |
951 |
952 | ## End-point: Invoice details
953 | ### Description:
954 | Method: GET
955 | >```
956 | >{{akaunting_url}}/documents/{{akaunting_documents_id}}?company_id={{akaunting_company_id}}&search=type:bill
957 | >```
958 | ### Query Params
959 |
960 | |Param|value|
961 | |---|---|
962 | |company_id|{{akaunting_company_id}}|
963 | |search|type:bill|
964 |
965 |
966 | ### 🔑 Authentication basic
967 |
968 | |Param|value|Type|
969 | |---|---|---|
970 |
971 |
972 |
973 | ⁃ ⁃ ⁃ ⁃ ⁃ ⁃ ⁃ ⁃ ⁃ ⁃ ⁃ ⁃ ⁃ ⁃ ⁃ ⁃ ⁃ ⁃ ⁃ ⁃ ⁃ ⁃ ⁃ ⁃ ⁃ ⁃ ⁃ ⁃ ⁃ ⁃ ⁃ ⁃ ⁃ ⁃ ⁃ ⁃ ⁃ ⁃ ⁃ ⁃ ⁃ ⁃ ⁃ ⁃ ⁃ ⁃ ⁃
974 |
975 | # 📁 Collection: Customers
976 |
977 |
978 | ## End-point: Customers
979 | ### Description:
980 | Method: GET
981 | >```
982 | >{{akaunting_url}}/contacts?company_id={{akaunting_company_id}}&search=type:customer&page={{akaunting_page}}&limit={{akaunting_limit}}
983 | >```
984 | ### Query Params
985 |
986 | |Param|value|
987 | |---|---|
988 | |company_id|{{akaunting_company_id}}|
989 | |search|type:customer|
990 | |page|{{akaunting_page}}|
991 | |limit|{{akaunting_limit}}|
992 |
993 |
994 | ### 🔑 Authentication basic
995 |
996 | |Param|value|Type|
997 | |---|---|---|
998 |
999 |
1000 |
1001 | ⁃ ⁃ ⁃ ⁃ ⁃ ⁃ ⁃ ⁃ ⁃ ⁃ ⁃ ⁃ ⁃ ⁃ ⁃ ⁃ ⁃ ⁃ ⁃ ⁃ ⁃ ⁃ ⁃ ⁃ ⁃ ⁃ ⁃ ⁃ ⁃ ⁃ ⁃ ⁃ ⁃ ⁃ ⁃ ⁃ ⁃ ⁃ ⁃ ⁃ ⁃ ⁃ ⁃ ⁃ ⁃ ⁃ ⁃
1002 |
1003 |
1004 | ## End-point: Customer details
1005 | ### Description:
1006 | Method: GET
1007 | >```
1008 | >{{akaunting_url}}/contacts/{{akaunting_contact_id}}?company_id={{akaunting_company_id}}&search=type:customer
1009 | >```
1010 | ### Query Params
1011 |
1012 | |Param|value|
1013 | |---|---|
1014 | |company_id|{{akaunting_company_id}}|
1015 | |search|type:customer|
1016 |
1017 |
1018 | ### 🔑 Authentication basic
1019 |
1020 | |Param|value|Type|
1021 | |---|---|---|
1022 |
1023 |
1024 |
1025 | ⁃ ⁃ ⁃ ⁃ ⁃ ⁃ ⁃ ⁃ ⁃ ⁃ ⁃ ⁃ ⁃ ⁃ ⁃ ⁃ ⁃ ⁃ ⁃ ⁃ ⁃ ⁃ ⁃ ⁃ ⁃ ⁃ ⁃ ⁃ ⁃ ⁃ ⁃ ⁃ ⁃ ⁃ ⁃ ⁃ ⁃ ⁃ ⁃ ⁃ ⁃ ⁃ ⁃ ⁃ ⁃ ⁃ ⁃
1026 |
1027 |
1028 | ## End-point: Ping - check is login ok
1029 | ### Description:
1030 | Method: GET
1031 | >```
1032 | >{{akaunting_url}}/ping
1033 | >```
1034 | ### 🔑 Authentication basic
1035 |
1036 | |Param|value|Type|
1037 | |---|---|---|
1038 |
1039 |
1040 |
1041 | ⁃ ⁃ ⁃ ⁃ ⁃ ⁃ ⁃ ⁃ ⁃ ⁃ ⁃ ⁃ ⁃ ⁃ ⁃ ⁃ ⁃ ⁃ ⁃ ⁃ ⁃ ⁃ ⁃ ⁃ ⁃ ⁃ ⁃ ⁃ ⁃ ⁃ ⁃ ⁃ ⁃ ⁃ ⁃ ⁃ ⁃ ⁃ ⁃ ⁃ ⁃ ⁃ ⁃ ⁃ ⁃ ⁃ ⁃
1042 |
1043 |
1044 | ## End-point: Dashboards
1045 | ### Description:
1046 | Method: GET
1047 | >```
1048 | >{{akaunting_url}}/dashboards?company_id={{akaunting_company_id}}
1049 | >```
1050 | ### Query Params
1051 |
1052 | |Param|value|
1053 | |---|---|
1054 | |company_id|{{akaunting_company_id}}|
1055 |
1056 |
1057 | ### 🔑 Authentication basic
1058 |
1059 | |Param|value|Type|
1060 | |---|---|---|
1061 |
1062 |
1063 |
1064 | ⁃ ⁃ ⁃ ⁃ ⁃ ⁃ ⁃ ⁃ ⁃ ⁃ ⁃ ⁃ ⁃ ⁃ ⁃ ⁃ ⁃ ⁃ ⁃ ⁃ ⁃ ⁃ ⁃ ⁃ ⁃ ⁃ ⁃ ⁃ ⁃ ⁃ ⁃ ⁃ ⁃ ⁃ ⁃ ⁃ ⁃ ⁃ ⁃ ⁃ ⁃ ⁃ ⁃ ⁃ ⁃ ⁃ ⁃
1065 |
1066 | _________________________________________________
1067 |
--------------------------------------------------------------------------------
/en/developer-manual/reverse-proxy.md:
--------------------------------------------------------------------------------
1 | Reverse Proxy
2 | =============
3 |
4 | Some Akaunting installations, especially those within containers, may have problems with proxies and/or HTTPS protocol.
5 |
6 | Akaunting ships with [TrustedProxy](https://github.com/fideloper/TrustedProxy) package so you could easily configure your proxies.
7 |
8 | ### Installation
9 |
10 | All you have to do is to publish the configuration file from the command line:
11 |
12 | ```
13 | php artisan vendor:publish --provider="Fideloper\Proxy\TrustedProxyServiceProvider"
14 | ```
15 |
16 | ### Configuration
17 |
18 | Now you can enter your proxy details in the `config/trustedproxy.php` file like the following:
19 |
20 | ```
21 | 'proxies' => '*',
22 | ```
23 |
24 | [Here](https://github.com/akaunting/akaunting/issues/213) you can find an example with Apache as a reverse proxy and [here](https://github.com/fideloper/TrustedProxy#configure-trusted-proxies) there are more details about configuration.
--------------------------------------------------------------------------------
/en/developer-manual/settings.md:
--------------------------------------------------------------------------------
1 | Settings
2 | ========
3 |
4 | Akaunting ships with a centralized settings page where modules can add their own in a few steps.
5 |
6 | ### Simple Settings
7 |
8 | We've tried the best to ease the life of developers. Mostly, developers just want to add just some inputs on the settings page. In such a case, you can add them to the `module.json` file and Akaunting will display your module under the Settings page, nothing else is required.
9 |
10 | All you have to do is to fill the `settings` array like the following:
11 |
12 | ```json
13 | "settings": [
14 | {
15 | "type": "textGroup",
16 | "name": "title",
17 | "title": "my-blog::general.title",
18 | "icon": "font",
19 | "attributes": {
20 | "required": "required"
21 | },
22 | "rules": "required|string"
23 | },
24 | {
25 | "type": "textGroup",
26 | "name": "header",
27 | "title": "my-blog::general.header",
28 | "icon": "user",
29 | "attributes": {},
30 | "rules": "nullable|string"
31 | },
32 | {
33 | "type": "textareaGroup",
34 | "name": "meta_description",
35 | "title": "my-blog::general.meta_description",
36 | "icon": "key",
37 | "attributes": {},
38 | "rules": "nullable|string"
39 | }
40 | ]
41 | ```
42 |
43 | ### Custom Settings
44 |
45 | If your settings page needs a little bit more actions then you can listen to the `SettingShowing` event and create your own route, controller, and view files.
46 |
47 | Here it is a listener example:
48 |
49 | ```php
50 | modules->settings['my-blog'] = [
67 | 'name' => trans('my-blog::general.name'),
68 | 'description' => trans('my-blog::general.description'),
69 | 'url' => route('my-blog.settings.edit'),
70 | 'icon' => 'fas fa-edit',
71 | ];
72 | }
73 | }
74 | ```
75 |
76 | You can check the built-in Akaunting modules as live examples. **Offline Payments** module ships with a custom settings page and **PayPal Standard** module uses the module.json file.
77 |
--------------------------------------------------------------------------------
/en/download.md:
--------------------------------------------------------------------------------
1 | Download
2 | ========
3 |
4 | Download the software and install on your own host/server for free, no restrictions.
5 |
6 | ### Stable
7 |
8 | You can download the ZIP file containing the stable version from our [Download](https://akaunting.com/download) page.
9 |
10 | ### Development
11 |
12 | If you are a developer and would like to contribute, Akaunting is waiting for you on [GitHub](https://github.com/akaunting)
--------------------------------------------------------------------------------
/en/employee-portal.md:
--------------------------------------------------------------------------------
1 | Employee Portal
2 | ======
3 |
4 | The Akaunting Employee Portal provides your employee to track their activities and payslips. An employee can only view their event on the platform.
5 |
6 | Your employee can take the following actions on the Employee portal.
7 | - View Payslips
8 | - Expense Claims
9 | - Track and manage projects
10 | - Edit profile
11 |
12 | How can I Invite an Employee to the Akaunting Employee Portal?
13 | - Go to the Employee Page
14 | - Click on New Employee Button
15 | - Check the Click Portal section (Checking this box requires the email field are required)
16 | - Save and create a new Employee
17 |
18 | You can also invite an already created employee by editing the employee form.
--------------------------------------------------------------------------------
/en/faq/_images/debug_bar.png:
--------------------------------------------------------------------------------
https://raw.githubusercontent.com/akaunting/docs/205f53a3ef9d69a59057321d33e1a859fd293a69/en/faq/_images/debug_bar.png
--------------------------------------------------------------------------------
/en/faq/_images/debug_enable.png:
--------------------------------------------------------------------------------
https://raw.githubusercontent.com/akaunting/docs/205f53a3ef9d69a59057321d33e1a859fd293a69/en/faq/_images/debug_enable.png
--------------------------------------------------------------------------------
/en/faq/accrual-vs-cash.md:
--------------------------------------------------------------------------------
1 | Accrual vs Cash
2 | ===============
3 |
4 | Akaunting performs accounting on an accrual basis. Let's see what does it mean and why it's been choosen:
5 |
6 | ### Accrual accounting
7 |
8 | Incomes are reported in the fiscal period they're earned, **regardless of when they're received**, and expenses are deducted in the fiscal period they're incurred, **whether they are paid or not**.
9 |
10 | ### Cash accounting
11 |
12 | Incomes are recorded when cash is **actually received** and expenses are recorded when they are **actually paid** (no matter when they were actually invoiced).
13 |
14 | In short, accrual basis accounting gives the most accurate picture of the financial status of your business. You can use the **Cash** option in reports for cash basis accounting and it will give you a complete picture of the money moving in and out of your business.
15 |
--------------------------------------------------------------------------------
/en/faq/error-details.md:
--------------------------------------------------------------------------------
1 | Error details
2 | =============
3 |
4 | As all the software outside, Akaunting is not perfect so you may encounter errors. In such a case, you may want to see the details of the error. To get that, you should enable the debug variable.
5 |
6 | By default, the debug is disabled as it designed to be used only in development environment. It can slow the application down (because it has to gather data). To enable it, set `true` the `APP_DEBUG` variable in the `.env` file, located in the root directory of your Akaunting installation.
7 |
8 | 
--------------------------------------------------------------------------------
/en/faq/not-able-to-install-apps.md:
--------------------------------------------------------------------------------
1 | Not able to install apps
2 | ========================
3 |
4 | This problem is caused by the PHP CLI and "php" command set lower than 8.0.2 version and/or disabled PHP functions in your server. It generally happens in shared hosting with cPanel, Plesk, etc. panels where they offer Multi-PHP versions and set the lowest one for CLI and/or "php" command, mostly 5.x version.
5 |
6 | Please, ask your hosting provider to make sure that **PHP CLI** and **php** command has at least 8.0.2 version and the following PHP functions are not disabled:
7 |
8 | - proc_open
9 | - proc_close
10 |
11 | You can get Akaunting installed within one-click on [DigitalOcean](https://bit.ly/akaunting-do-start) or [Linode](https://bit.ly/akaunting-linode-start) servers and see the app installation working fine.
12 |
13 | ### How to set PHP path manually?
14 |
15 | If you know the exact path of PHP executable in your server, then you can set it within the `.env` file (located in the root directory of your Akaunting installation) like the following:
16 |
17 | ```bash
18 | APP_PHP_PATH="/usr/bin/php8.0"
19 | ```
20 |
21 | ### How to change PHP version?
22 |
23 | If you have SSH access to your Ubuntu server, you can change the PHP version by running the following commands:
24 |
25 | ```bash
26 | sudo update-alternatives --set php /usr/bin/php8.0
27 | sudo update-alternatives --set phar /usr/bin/phar8.0
28 | sudo update-alternatives --set phar.phar /usr/bin/phar.phar8.0
29 | sudo update-alternatives --set phpize /usr/bin/phpize8.0
30 | sudo update-alternatives --set php-config /usr/bin/php-config8.0
31 | ```
32 |
33 | Keep in mind that the `/usr/bin/php8.0` path may differ on your server. [Here](https://tecadmin.net/switch-between-multiple-php-version-on-ubuntu) you can learn more.
34 |
35 | If you don't have SSH access then your hosting provider must apply the change.
36 |
--------------------------------------------------------------------------------
/en/faq/shipping-cost.md:
--------------------------------------------------------------------------------
1 | How to add Shipping Cost to invoice/bill?
2 | =========================================
3 |
4 | You can create an item named as **Shipping Cost** and add it as the last line item while creating an invoice/bill.
5 |
--------------------------------------------------------------------------------
/en/installation.md:
--------------------------------------------------------------------------------
1 | Installation
2 | ============
3 |
4 | This guide will show you how to install Akaunting in your local or remote server just in a couple of minutes.
5 |
6 | Steps
7 | -----
8 |
9 | 1. [Download](https://akaunting.com/download) the Akaunting package.
10 | 2. Unzip the downloaded package.
11 | 3. Upload all the files to your server.
12 |
13 | **Launch the Installer**
14 |
15 | Open the link: `http://your-domain/akaunting-directory` in your browser. It will start the installation wizard.
16 |
17 | ### Step 1. Language
18 |
19 | 
20 |
21 | The first step is choosing which language you want to use. This is a good way for all who want to use a different language as default.
22 |
23 | ### Step 2. Database
24 |
25 | 
26 |
27 | You need to fill in the fields by adding the database connection details (Hostname, Username, Password and Database Name).
28 |
29 | ### Step 3. Admin
30 |
31 | 
32 |
33 | This step allows you to add the Company Name & E-mail and also to create a new Admin account for administration access to your Akaunting.
34 |
35 | Login
36 | -----
37 |
38 | Now that installation is complete, you can log into the admin panel.
39 |
40 | 
41 |
42 |
43 | Support
44 | -------
45 |
46 | If there are any issues regarding installation, please visit the [Installation & Update](https://akaunting.com/forum) category of the Akaunting community forum.
47 |
--------------------------------------------------------------------------------
/en/migrating-to-akaunting.md:
--------------------------------------------------------------------------------
1 | Overview
2 | ======
3 |
4 | If you track your business bookkeeping using pen and paper or excel sheets, we recommend entering your business' accounting transactions into Akaunting by starting with the fiscal year. If you track your accounting in an excel sheet, you can import your data easily by following the steps on this page > Import and Export.
5 |
6 | If you previously used a different accounting tool, you can migrate your data usingı the migration modules. Migration apps can be found in the [App Store](https://akaunting.com/apps/categories/import-export). You can find steps to migrate them in the description of the related module.
7 |
8 |
9 | Import/Export
10 | ======
11 |
12 | Akaunting makes it easy to Import or Export your data. The import and export options are available on the page's top right, such as Invoices, Transactions, Customers, Vendors, and more.
13 | You can find related import XLS or XLSX templates for all pages.
14 | For a successful import, you should fill all required fields. Once an import/export is complete, you'll get a notification.
--------------------------------------------------------------------------------
/en/requirements.md:
--------------------------------------------------------------------------------
1 | Requirements
2 | ===========
3 |
4 | When selecting a hosting company, you should check if the following requirements are provided:
5 |
6 | Environment
7 | -----------
8 |
9 | * PHP 8.0 or higher
10 | * Database (eg: [MySQL, PostgreSQL, SQLite, SQL Server](https://laravel.com/docs/database))
11 | * Web Server (eg: Apache, Nginx, IIS)
12 | * URL Rewrite (eg: mod_rewrite for Apache)
13 |
14 | PHP Extensions
15 | --------------
16 | - BCMath
17 | - Ctype
18 | - cURL
19 | - DOM
20 | - FileInfo
21 | - Intl
22 | - GD
23 | - JSON
24 | - Mbstring
25 | - OpenSSL
26 | - PDO
27 | - Tokenizer
28 | - XML
29 | - Zip
30 |
31 | These requirements are provided by almost all hosting companies.
32 |
33 | During the installation process, Akaunting will check if you have them all and not let you continue if any is missing. In such a case, you should contact your hosting provider to make them available.
34 |
--------------------------------------------------------------------------------
/en/update.md:
--------------------------------------------------------------------------------
1 | Update
2 | ======
3 |
4 | Akaunting is periodically updated with new versions. Each new version released brings the advantage of bug fixes and new features.
5 |
6 | Thanks to the One-Click Update feature of Akaunting, it takes just a couple of minutes to get the latest version. All you have to do is to click the Update notification button at the right top. After that you will be redirected to the "Updates" page.
7 |
8 | 
9 |
10 | There are two sections, **Akaunting** and **Apps**.
11 |
12 | If you are using the latest version of Akaunting then you will see a message on top saying "Congratulations! You have the latest version of Akaunting".
13 |
14 | The **Changelog** button will display the changelog of all missing versions on a pop-up window so you will be informed about all new features, changes, fixes and removes for each version.
15 |
16 | ### Manual Update
17 |
18 | If you have SSH access to your server you can update Akaunting manually by running the following command from console:
19 |
20 | ```
21 | php /your/akaunting/directory/artisan update:all
22 | ```
23 |
24 | If you want to update a specific app:
25 |
26 | ```
27 | php /your/akaunting/directory/artisan update blog 1
28 | ```
29 |
30 | * blog: Alias of the app/module, use "core" for Akaunting itself
31 | * 1: Company id
32 |
33 | If you don't have SSH access, you may ask your hosting company to run that command.
34 |
--------------------------------------------------------------------------------
/en/user-manual/_images/add-pin.gif:
--------------------------------------------------------------------------------
https://raw.githubusercontent.com/akaunting/docs/205f53a3ef9d69a59057321d33e1a859fd293a69/en/user-manual/_images/add-pin.gif
--------------------------------------------------------------------------------
/en/user-manual/_images/items-new-item.gif:
--------------------------------------------------------------------------------
https://raw.githubusercontent.com/akaunting/docs/205f53a3ef9d69a59057321d33e1a859fd293a69/en/user-manual/_images/items-new-item.gif
--------------------------------------------------------------------------------
/en/user-manual/_images/items.gif:
--------------------------------------------------------------------------------
https://raw.githubusercontent.com/akaunting/docs/205f53a3ef9d69a59057321d33e1a859fd293a69/en/user-manual/_images/items.gif
--------------------------------------------------------------------------------
/en/user-manual/_images/pa-add-new-organization.gif:
--------------------------------------------------------------------------------
https://raw.githubusercontent.com/akaunting/docs/205f53a3ef9d69a59057321d33e1a859fd293a69/en/user-manual/_images/pa-add-new-organization.gif
--------------------------------------------------------------------------------
/en/user-manual/_images/pa-personalize-akaunting-interface.png:
--------------------------------------------------------------------------------
https://raw.githubusercontent.com/akaunting/docs/205f53a3ef9d69a59057321d33e1a859fd293a69/en/user-manual/_images/pa-personalize-akaunting-interface.png
--------------------------------------------------------------------------------
/en/user-manual/_images/pp-users.gif:
--------------------------------------------------------------------------------
https://raw.githubusercontent.com/akaunting/docs/205f53a3ef9d69a59057321d33e1a859fd293a69/en/user-manual/_images/pp-users.gif
--------------------------------------------------------------------------------
/en/user-manual/_images/reports-add-new.gif:
--------------------------------------------------------------------------------
https://raw.githubusercontent.com/akaunting/docs/205f53a3ef9d69a59057321d33e1a859fd293a69/en/user-manual/_images/reports-add-new.gif
--------------------------------------------------------------------------------
/en/user-manual/_images/reports-view-report.gif:
--------------------------------------------------------------------------------
https://raw.githubusercontent.com/akaunting/docs/205f53a3ef9d69a59057321d33e1a859fd293a69/en/user-manual/_images/reports-view-report.gif
--------------------------------------------------------------------------------
/en/user-manual/_images/reports.gif:
--------------------------------------------------------------------------------
https://raw.githubusercontent.com/akaunting/docs/205f53a3ef9d69a59057321d33e1a859fd293a69/en/user-manual/_images/reports.gif
--------------------------------------------------------------------------------
/en/user-manual/_images/ui-add-new.gif:
--------------------------------------------------------------------------------
https://raw.githubusercontent.com/akaunting/docs/205f53a3ef9d69a59057321d33e1a859fd293a69/en/user-manual/_images/ui-add-new.gif
--------------------------------------------------------------------------------
/en/user-manual/_images/ui-favorites.gif:
--------------------------------------------------------------------------------
https://raw.githubusercontent.com/akaunting/docs/205f53a3ef9d69a59057321d33e1a859fd293a69/en/user-manual/_images/ui-favorites.gif
--------------------------------------------------------------------------------
/en/user-manual/_images/ui-settings.gif:
--------------------------------------------------------------------------------
https://raw.githubusercontent.com/akaunting/docs/205f53a3ef9d69a59057321d33e1a859fd293a69/en/user-manual/_images/ui-settings.gif
--------------------------------------------------------------------------------
/en/user-manual/app-store/_images/app-buy.gif:
--------------------------------------------------------------------------------
https://raw.githubusercontent.com/akaunting/docs/205f53a3ef9d69a59057321d33e1a859fd293a69/en/user-manual/app-store/_images/app-buy.gif
--------------------------------------------------------------------------------
/en/user-manual/app-store/_images/apps-api-key.gif:
--------------------------------------------------------------------------------
https://raw.githubusercontent.com/akaunting/docs/205f53a3ef9d69a59057321d33e1a859fd293a69/en/user-manual/app-store/_images/apps-api-key.gif
--------------------------------------------------------------------------------
/en/user-manual/app-store/_images/apps-install-uninstall.gif:
--------------------------------------------------------------------------------
https://raw.githubusercontent.com/akaunting/docs/205f53a3ef9d69a59057321d33e1a859fd293a69/en/user-manual/app-store/_images/apps-install-uninstall.gif
--------------------------------------------------------------------------------
/en/user-manual/app-store/_images/apps-overview.gif:
--------------------------------------------------------------------------------
https://raw.githubusercontent.com/akaunting/docs/205f53a3ef9d69a59057321d33e1a859fd293a69/en/user-manual/app-store/_images/apps-overview.gif
--------------------------------------------------------------------------------
/en/user-manual/app-store/apps.md:
--------------------------------------------------------------------------------
1 | Apps
2 | =========
3 |
4 | Apps can be free or paid. Paid apps have monthly and yearly subscription options. If you'd like to use the app on self-hosted installation, you have to subscribe to the app on a yearly plan.
5 |
6 | 
7 |
8 | To Install an App;
9 |
10 | - Select your preferred subscription period - Yearly or Monthly.
11 | - Add your app to Cart or Click on the Buy Now button. Adding Apps to cart, gives you Checkout option on the top right.
12 | - Enter your billing details. You can decide to save your card details for ease of future purchases.
13 | - Click the Buy Now button
14 | - After the payment process is finished, you’ll be able to install the app with one click.
15 |
16 | 
17 |
18 | You can cancel subscriptions from the subscriptions page. After cancellation, you can continue to use the app until the end of the subscription period, when support and update will discontinue.
19 |
--------------------------------------------------------------------------------
/en/user-manual/app-store/overview.md:
--------------------------------------------------------------------------------
1 | Overview
2 | =========
3 |
4 | Akaunting is a free, open-source, and online accounting software for small businesses and freelancers. It is built with modern technologies such as Laravel, VueJS, RESTful API, etc. Akaunting ships with core accounting tools needed to manage your business finances conveniently. Instead of creating bloated software by adding all of them to the core, we've made a modular structure so that it can get extended easily.
5 |
6 | For example, an app can connect your online store built with WooCommerce so that products, customers, and orders can automatically be transferred to the Akaunting. Another one may connect with a CRM. And another one may be a payment gateway such as PayPal, Stripe, etc., to be used on the client-side of the Akaunting software to pay invoices online.
7 |
8 | To access the App Store from your Akaunting software installation and install the apps you've purchased, you need to get your API Key and enter it when asked.
9 |
10 | 
--------------------------------------------------------------------------------
/en/user-manual/app-store/uninstall-disable.md:
--------------------------------------------------------------------------------
1 | Uninstall/Disable
2 | =========
3 |
4 | You can uninstall or disable the app from the App details page. Paid apps are connected to your account at the [akaunting.com](https://akaunting.com) site, so you can always install them again.
5 |
6 | 
--------------------------------------------------------------------------------
/en/user-manual/banking/_images/accounts-add-new.gif:
--------------------------------------------------------------------------------
https://raw.githubusercontent.com/akaunting/docs/205f53a3ef9d69a59057321d33e1a859fd293a69/en/user-manual/banking/_images/accounts-add-new.gif
--------------------------------------------------------------------------------
/en/user-manual/banking/_images/accounts.gif:
--------------------------------------------------------------------------------
https://raw.githubusercontent.com/akaunting/docs/205f53a3ef9d69a59057321d33e1a859fd293a69/en/user-manual/banking/_images/accounts.gif
--------------------------------------------------------------------------------
/en/user-manual/banking/_images/transfers-add-new.gif:
--------------------------------------------------------------------------------
https://raw.githubusercontent.com/akaunting/docs/205f53a3ef9d69a59057321d33e1a859fd293a69/en/user-manual/banking/_images/transfers-add-new.gif
--------------------------------------------------------------------------------
/en/user-manual/banking/_images/transfers.gif:
--------------------------------------------------------------------------------
https://raw.githubusercontent.com/akaunting/docs/205f53a3ef9d69a59057321d33e1a859fd293a69/en/user-manual/banking/_images/transfers.gif
--------------------------------------------------------------------------------
/en/user-manual/banking/accounts.md:
--------------------------------------------------------------------------------
1 | Accounts
2 | =========
3 |
4 | You can see a list of your accounts under Banking>Accounts. On the Accounts page, you can create, edit or delete accounts.
5 | Each transaction changes the amount of cash in your account(s).
6 |
7 | At the top right corner of the Accounts page, you'll find the New Account and Connect Your Bank buttons. The New Account button allows you to add new accounts for everyday transactions on Akaunting. At the same time, [Connect Your Bank](https://akaunting.com/apps/bank-feeds) lets you automatically import your bank transactions into Akaunting through the Bank Feeds feature on the [Premium Plan](http://akaunting.com/plans).
8 |
9 | 
10 |
11 | To create a new account, click on the New Account button at the top of the Accounts page and enter the required details on the New Account page. You can add a Bank Account or a Credit Card account.
12 |
13 | The following fields are displayed when creating a new account:
14 |
15 | - **Type**: Choose between Bank or Credit Card account name: Account's name
16 | - **Number**: Account's number
17 | - **Currency**: The default currency of the account
18 | - **Opening Balance**: The amount you'll be depositing in the account.
19 | - **Default account**: Make the account your default for your bookkeeping transactions
20 | Bank - You may have multiple bank accounts in more than one Bank. Recording information about your Bank will make it easier to match the transactions within your Bank.
21 | - **Bank Name**: Enter the Bank's name
22 | - **Bank Phone**: Enter the Bank's Phone number
23 | - **Bank address**: Enter the Bank's address
24 |
25 | 
26 |
27 | You can see all the transactions associated with an account by clicking on an account from the Accounts page.
28 |
--------------------------------------------------------------------------------
/en/user-manual/banking/assign/assign.md:
--------------------------------------------------------------------------------
1 | Assign
2 | =========
3 |
4 | Select a category and the customer to make your reports detailed
5 | - **Category**: Choose between Sales or Deposit
6 | - **Customer**: Select a customer
--------------------------------------------------------------------------------
/en/user-manual/banking/assign/new-expense.md:
--------------------------------------------------------------------------------
1 | New Expense
2 | =========
3 |
4 | Expense is one of the two purchase types in Akaunting and allows you to record payments.
5 | All expenses of your business are listed on the Transactions page.
6 |
7 | You can add an Expense by clicking the New Expense button at the top of the Transactions page and filling out the required fields.
8 |
9 | On the New Expense page, the following fields are displayed:
10 |
11 | - **Date**: Enter a date for the transaction
12 | - **Payment method**: Choose the payment method
13 | - **Account**: Select the account
14 | - **Chart of Accounts**: Select from your Chart of Account
15 | - **Amount**: Enter the income amount
16 | - **Description**: Give details of the transaction
17 |
--------------------------------------------------------------------------------
/en/user-manual/banking/other.md:
--------------------------------------------------------------------------------
1 | Other
2 | =========
3 |
4 | Select the transfer method to make your reports more detailed.
5 | - **Payment method**: Choose the money transfer method
6 | - **Reference**: Enter a reference number or name
7 |
8 | Attachment: You can attach relevant documents of the transfer
9 | You can complete the following actions to create a new transfer
10 | - Go to the Transfer Page
11 | - Click on New Transfer Button
12 | - Fill out the required fields in the form
13 | - Save and initiate a new Transfer
14 |
15 | You can click on a Transfer to see details. On the page of a selected transfer, you can Edit, Duplicate, Print, Download PDF, Choose Template or Delete.
16 |
--------------------------------------------------------------------------------
/en/user-manual/banking/reconciliation.md:
--------------------------------------------------------------------------------
1 | Reconciliation
2 | =========
3 |
4 | Bank reconciliation is a process to ensure that your company's income and expense records match your bank records.
5 |
6 | The reconciliations page is located under the Banking > Reconciliations menu. You can see all reconciliations on this page, search for any, create a new one, edit the current ones or delete them.
7 |
8 | Reconciled income/expenses get protected so they can't be deleted. You can reconcile your transaction for a selected period or edit your closing balance if needed to reconcile your accounts.
9 | To complete reconciliation, your Closing Balance and Cleared Amount must be the same.
10 | When you select from a list of transactions, you can see the difference at the left bottom of the reconciliation page.
11 |
12 | When creating a new reconciliation, the following fields are displayed:
13 | - **Start Date**: The date reconciliation is performed.
14 | - **End date**: Reconciliation end date
15 | - **Closing Balance**: The reconciled balance.
16 | - **Account**: The account from which the reconciliation is carried out.
17 | On the Reconciliations page, you can click the checkbox on a transaction to see the following quick options just at the top - Reconcile, Unreconcile, and Delete.
18 |
19 | You can also hover on a transaction to Edit or Delete.
20 |
--------------------------------------------------------------------------------
/en/user-manual/banking/transactions/_images/transactions.gif:
--------------------------------------------------------------------------------
https://raw.githubusercontent.com/akaunting/docs/205f53a3ef9d69a59057321d33e1a859fd293a69/en/user-manual/banking/transactions/_images/transactions.gif
--------------------------------------------------------------------------------
/en/user-manual/banking/transactions/net-income.md:
--------------------------------------------------------------------------------
1 | Net Income
2 | =========
3 |
4 | Income is one of the two sales types in Akaunting and allows you to record revenue from a transaction without an invoice. All your business income is listed on the Transactions page.
5 |
6 | You can add an income by clicking the New Income button at the top of the Transactions page and filling out the required fields.
7 |
8 | On the New Income page, the following fields are displayed:
9 | - **Date**: Enter a date for the transaction
10 | - **Payment method**: Choose the payment method
11 | - **Account**: Select the account
12 | - **Chart of Accounts**: Select from your Chart of Account
13 | - **Amount**: Enter the income amount
14 | - **Description**: Give details of the transaction
--------------------------------------------------------------------------------
/en/user-manual/banking/transactions/transactions.md:
--------------------------------------------------------------------------------
1 | Transactions
2 | =========
3 |
4 | Transactions keep records of the income and expenses of your business. This page shows up all the transactions made for each account.
5 | You can easily see the transaction date, type, account, contact, and amount.
6 | All transactions are added under income and expense types.
7 |
8 | You can connect transactions with invoices or bills. So documents you have recorded match your income and expense records.
9 |
10 | At the top right of the Transactions page, you can add New Income or New Expense by clicking on the buttons. To import a list of transactions, you should download the sample template.
11 |
12 | 
--------------------------------------------------------------------------------
/en/user-manual/banking/transfers.md:
--------------------------------------------------------------------------------
1 | Transfers
2 | =========
3 |
4 | Sometimes you may want to transfer money from one account to another. For example, moving your cash to the Bank. In such a case, Akaunting creates a revenue and payment record for the respected accounts.
5 |
6 | The transfers page is located under the Banking > Transfers menu. You can see all transfers on this page, search for any, create a new one, edit the current ones or delete them.
7 |
8 | 
9 |
10 | Money transferred between accounts with different currencies will be converted automatically by Akaunting, based on the currency rates you have set up from the Settings > Currencies page. [Premium Plan](http://akaunting.com/plans) offers you the Live Currency feature, allowing you to adjust the exchange rates.
11 |
12 | On the Transfer page, you can click on the New Transfer button to initiate a transfer or click on More options to Import or Export transfers.
13 |
14 | On the New Transfer page, the following fields are displayed:
15 | - **From**: The account money gets out.
16 | - **To Account**: The account money gets in.
17 | - **Date**: Transfer date.
18 | - **Amount**: The amount of the transfer.
19 | - **Description**: Add a note for the transfer
20 |
21 | 
22 |
--------------------------------------------------------------------------------
/en/user-manual/dashboard/_images/adding-new-dashboard.gif:
--------------------------------------------------------------------------------
https://raw.githubusercontent.com/akaunting/docs/205f53a3ef9d69a59057321d33e1a859fd293a69/en/user-manual/dashboard/_images/adding-new-dashboard.gif
--------------------------------------------------------------------------------
/en/user-manual/dashboard/_images/adding-new-widget.gif:
--------------------------------------------------------------------------------
https://raw.githubusercontent.com/akaunting/docs/205f53a3ef9d69a59057321d33e1a859fd293a69/en/user-manual/dashboard/_images/adding-new-widget.gif
--------------------------------------------------------------------------------
/en/user-manual/dashboard/_images/dashboard.png:
--------------------------------------------------------------------------------
https://raw.githubusercontent.com/akaunting/docs/205f53a3ef9d69a59057321d33e1a859fd293a69/en/user-manual/dashboard/_images/dashboard.png
--------------------------------------------------------------------------------
/en/user-manual/dashboard/add-widgets.md:
--------------------------------------------------------------------------------
1 | Add Widgets
2 | =========
3 |
4 | Sections in dashboards are called widgets. They are designed to give you a quick picture of the information that can be digestible at a glance. For further details, you can always use Reports.
5 |
6 | To add a widget, click on the three dots at the top of the dashboard page and select the "Add Widget" option. A window opens with fields for name, type, Width, and Sort.
7 |
8 | You can choose the widget size by selecting the Width, while Sort lets you decide where you want it positioned on the Dashboard.
9 |
10 | Now you know how to personalize your dashboards, let's deep dive into the default widgets on your Dashboard.
11 |
12 | 
--------------------------------------------------------------------------------
/en/user-manual/dashboard/create-and-manage-dashboard.md:
--------------------------------------------------------------------------------
1 | Create and Manage Dashboards
2 | =========
3 |
4 | Akaunting allows users to create multiple dashboards for a company or certain users in your company. You can create dashboards by clicking on the three dots at the top of the dashboard page more options button and selecting the "Create Dashboard" option.
5 |
6 | Name your Dashboard and select the users you want to give access to the new Dashboard.
7 | You can see the list of your dashboards and check whom in your organization has access to which dashboards on the "Manage Dashboards" option.
8 |
9 | 
--------------------------------------------------------------------------------
/en/user-manual/dashboard/default-dashboard/_images/cash-flow.png:
--------------------------------------------------------------------------------
https://raw.githubusercontent.com/akaunting/docs/205f53a3ef9d69a59057321d33e1a859fd293a69/en/user-manual/dashboard/default-dashboard/_images/cash-flow.png
--------------------------------------------------------------------------------
/en/user-manual/dashboard/default-dashboard/_images/payables.png:
--------------------------------------------------------------------------------
https://raw.githubusercontent.com/akaunting/docs/205f53a3ef9d69a59057321d33e1a859fd293a69/en/user-manual/dashboard/default-dashboard/_images/payables.png
--------------------------------------------------------------------------------
/en/user-manual/dashboard/default-dashboard/_images/profit-loss.png:
--------------------------------------------------------------------------------
https://raw.githubusercontent.com/akaunting/docs/205f53a3ef9d69a59057321d33e1a859fd293a69/en/user-manual/dashboard/default-dashboard/_images/profit-loss.png
--------------------------------------------------------------------------------
/en/user-manual/dashboard/default-dashboard/_images/receivables.png:
--------------------------------------------------------------------------------
https://raw.githubusercontent.com/akaunting/docs/205f53a3ef9d69a59057321d33e1a859fd293a69/en/user-manual/dashboard/default-dashboard/_images/receivables.png
--------------------------------------------------------------------------------
/en/user-manual/dashboard/default-dashboard/account-balance.md:
--------------------------------------------------------------------------------
1 | Account Balance
2 | =========
3 |
4 | The Account Balance section displays the list of all your bank accounts recorded in Akaunting. The records on Akaunting and your bank account can be easily matched by connecting your bank account via [Bank Feeds](https://akaunting.com/apps/bank-feeds).
--------------------------------------------------------------------------------
/en/user-manual/dashboard/default-dashboard/cash-flow.md:
--------------------------------------------------------------------------------
1 | Cash Flow
2 | =========
3 |
4 | The Cash Flow section helps you analyze the cash coming in and out of your company within a set timeframe. This section displays the performance chart, income, expense, and profitability.
5 |
6 | You can always get more information by clicking on View Report.
7 |
8 | 
--------------------------------------------------------------------------------
/en/user-manual/dashboard/default-dashboard/expenses-by-category.md:
--------------------------------------------------------------------------------
1 | Expenses by Category
2 | =========
3 |
4 | The Expense by Category section is a donut chart that displays all the top expenses recorded in Akaunting. Being on top of your expense information is crucial for managing business cash flow. This chart is designed to help you see your returns on money spent.
--------------------------------------------------------------------------------
/en/user-manual/dashboard/default-dashboard/payables.md:
--------------------------------------------------------------------------------
1 | Payables
2 | =========
3 |
4 | The payables section displays the amount you're yet to receive from your customers. The section is divided into two parts:
5 |
6 | - **Open**: The total amount of bills you have recorded for the selected timeframe on the payment schedule and not paid yet.
7 | - **Overdue**: The number of bills with an exceeded due date for the payment. You can see more details about the overdue invoices by clicking on more details.
8 |
9 | You can deep dive into the information by clicking on View Report.
10 |
11 | 
--------------------------------------------------------------------------------
/en/user-manual/dashboard/default-dashboard/profit-and-loss.md:
--------------------------------------------------------------------------------
1 | Profit and Loss
2 | =========
3 |
4 | The Profit and Loss section displays your company's total income and expenses using a bar chart every month. You can quickly get a picture of your best-performing months.
5 |
6 | 
--------------------------------------------------------------------------------
/en/user-manual/dashboard/default-dashboard/receivables.md:
--------------------------------------------------------------------------------
1 | Receivables
2 | =========
3 |
4 | The Receivables section displays the amount you're yet to receive from your customers. The section is divided into two parts:
5 |
6 | - **Open**: The total amount of invoices you have created for the selected timeframe and expect to receive within the due date.
7 | - **Overdue**: The number of invoices you're yet to receive after the due date has passed. You can see more details about the outstanding invoices by clicking on more details.
8 |
9 | You can deep dive into the information by clicking on View Report.
10 |
11 | 
--------------------------------------------------------------------------------
/en/user-manual/dashboard/overview.md:
--------------------------------------------------------------------------------
1 | Overview
2 | =========
3 |
4 | The Dashboard is your default home page in Akaunting. Here you can get a clearer insight into the position and performance of your company's financials.
5 |
6 | Before looking into the various sections in the Dashboard, here are tips on how you can customize your company's Dashboard.
7 |
8 | You can select the timeframe for any information you need. The date picker on the top right of the dashboard page allows you to see your company's performance in a timeframe. As you select the period, your Dashboard brings together the insight accordingly.
9 |
10 | 
--------------------------------------------------------------------------------
/en/user-manual/items.md:
--------------------------------------------------------------------------------
1 | Items
2 | =========
3 |
4 | Items are the goods or services that your business offers customers. Click on the Items menu to add new items from the top of the page.
5 |
6 | 
7 |
8 | When creating a new item, you get to select the type - Product or Service- and the category to make your reports detailed. The description field is helpful when creating an invoice or bill.
9 | Under the billing section, you can enter any item's sales and purchase prices.
10 | The following fields are displayed for items
11 |
12 | - Name: The name of product/service.
13 | - Type: Service or Product.
14 | - Category: Selecting a category helps when analyzing the performance of items.
15 | - Sale Price: This price will be used on invoices.
16 | - Purchase Price: This price will be used on bills.
17 |
18 | 
19 |
20 | If you want a comprehensive monitor of the Status and performance of your products, you can try the [Inventory](https://akaunting.com/apps/inventory) app.
21 |
22 | Let's try sending invoices to customers.
--------------------------------------------------------------------------------
/en/user-manual/personalize-akaunting.md:
--------------------------------------------------------------------------------
1 | Create New Company
2 | =========
3 |
4 | On the top left, you'll see the name of your company. You can set up new companies by clicking on the name. You get a dropdown with two menu options:
5 |
6 | - **Your company name**: Clicking on this takes you to your accounting dashboard.
7 | - **Manage Companies**: Clicking on this takes you to where you can set up a new company or edit an existing company.
8 |
9 | 
10 |
11 | Personalize the Interface
12 | =========
13 |
14 | You can personalize the Akaunting user interface to your company's needs. The White Label app allows you to change the primary color applied to the interface, the favicon in your browser, the background, and the logo of the login page.
15 |
16 | [Get the White label app](https://akaunting.com/apps/white-label) for further personalization.
17 |
18 | Now you've personalized your Akaunting, let's learn about the Akaunting dashboard.
19 |
20 | 
--------------------------------------------------------------------------------
/en/user-manual/profile-and-users.md:
--------------------------------------------------------------------------------
1 | Overview
2 | =========
3 |
4 | The email provided while signing up to Akaunting will be the primary email address.
5 |
6 | You can drop a profile picture on the profile page. Akaunting allows you to keep books of multiple companies on the same profile. So you can switch between your companies with one click.
7 |
8 | Profile
9 | =========
10 |
11 | You can view your profile by clicking the avatar icon on the top left of the Sidebar. You can change your personal information such as name, email, profile picture, and portal preferences such as companies, roles, landing page, and language.
12 |
13 | Users
14 | =========
15 |
16 | The Akaunting profile creator is, by default, the admin. You can add only two users to the free plan. To add more users, check the [Akaunting Premium](https://akaunting.com/plans).
17 |
18 | While creating a user, you'll need to choose the user's role and company. The user will only have access to assigned companies and role permissions.
19 |
20 | How can I create a new User?
21 | You should follow these steps to add a new user.
22 | - Click the profile icon on the top left of the Sidebar.
23 | - Go to Team
24 | - On the Team page, Click "Invite User" on the top right of the page
25 | - Enter the required fields and Save
26 | - An invitation link will be sent to your new team member.
27 |
28 | When you send an invitation link to a user, They can be able to access your company portal with the given permission. If the permission settings do not meet your needs, you can try Role Management.
29 |
30 | If your Akaunting is not self-hosted, you must upgrade to the [Premium Cloud Plan](https://akaunting.com/plans).
31 |
32 | 
--------------------------------------------------------------------------------
/en/user-manual/purchases/_images/vendors-add-new.gif:
--------------------------------------------------------------------------------
https://raw.githubusercontent.com/akaunting/docs/205f53a3ef9d69a59057321d33e1a859fd293a69/en/user-manual/purchases/_images/vendors-add-new.gif
--------------------------------------------------------------------------------
/en/user-manual/purchases/_images/vendors.gif:
--------------------------------------------------------------------------------
https://raw.githubusercontent.com/akaunting/docs/205f53a3ef9d69a59057321d33e1a859fd293a69/en/user-manual/purchases/_images/vendors.gif
--------------------------------------------------------------------------------
/en/user-manual/purchases/bills/_images/bill.gif:
--------------------------------------------------------------------------------
https://raw.githubusercontent.com/akaunting/docs/205f53a3ef9d69a59057321d33e1a859fd293a69/en/user-manual/purchases/bills/_images/bill.gif
--------------------------------------------------------------------------------
/en/user-manual/purchases/bills/_images/bills-add-new.gif:
--------------------------------------------------------------------------------
https://raw.githubusercontent.com/akaunting/docs/205f53a3ef9d69a59057321d33e1a859fd293a69/en/user-manual/purchases/bills/_images/bills-add-new.gif
--------------------------------------------------------------------------------
/en/user-manual/purchases/bills/_images/bills-show.gif:
--------------------------------------------------------------------------------
https://raw.githubusercontent.com/akaunting/docs/205f53a3ef9d69a59057321d33e1a859fd293a69/en/user-manual/purchases/bills/_images/bills-show.gif
--------------------------------------------------------------------------------
/en/user-manual/purchases/bills/bills.md:
--------------------------------------------------------------------------------
1 | Bills
2 | =========
3 |
4 | All your company’s expenses are logged in Bills under the Purchases section.
5 | Bills are the first purchase types in the Akaunting. When you make a purchase, the vendor sends a bill with details of the product or service..
6 |
7 | Bills are generally recorded as unpaid. When it is paid, you should record it as a payment.
8 |
9 | 
10 |
11 | On the Bills page, you will see the overview of your all bills categorized into Overdue, Open and Draft. Here, all bills are listed and you can sort them by date, status, or amount.
12 |
13 | At the top right of the Bills page, you’ll find the New Bill, Receipts and Credit/Debit Notes buttons.
14 | When creating a new bill, the following fields are displayed:
15 |
16 | - **Vendor**: To whom you pay the bill.
17 | - **Bill Date**: Date when the bill is issued.
18 | - **Due Date**: Date when the bill is due to be paid.
19 | - **Bill Number**: This is assigned by default, but you can edit it..
20 | - **Order Number**: A number assigned to that bill.
21 | - **Items**: The list of all items assigned to the bill. You can add multiple items from the Items page.
22 | - **Description**: This gives more information about the item.
23 | - **Quantity**: The number of product or service you are purchasing.
24 | - **Price**: The purchase price of the item. It will be updated automatically but you have the opportunity to edit it.
25 | - **Tax**: Add applicable Tax Rates. You can select multiple taxes. See the Settings > Tax Rates documentation for more details.
26 | - **Total**: This isIt willautomatically calculated automatically the total price of the item according to the item quantity, discount and tax. It is not an editable field. In order to change the total amount, you should change the item price, or quantity or applied discount.
27 | - **Notes**: You can add a custom note to the bill.
28 | - **Category**: Category of the invoice to be used in reports.
29 | - **Attachment**: You can attach a file related to that invoice
30 |
31 | 
32 |
33 | On the Bills page, you can view the status of your bills group into paid, partial, or received. The status of bills change automatically depending on your actions.
34 |
35 | By checking a Bill, you get the options to Mark Received, Cancel, Delete or Export. You can also hover on a bill to reveal a summary of the bill. The hover also gives you more options - Show, Edit, Duplicate and More.
36 |
37 | 
38 |
39 | You can complete the following actions to create a new bill.
40 |
41 | - Go to the Bills Page or directly click the Bills button on the quick add section.
42 | - Click on New Bill Button
43 | - Fill out the form (Here you can add a new vendor and item instantly)
44 | - Save the Bill
45 |
--------------------------------------------------------------------------------
/en/user-manual/purchases/bills/recurring-templates.md:
--------------------------------------------------------------------------------
1 | Recurring Bills
2 | =========
3 |
4 | You will see the recurring templates in the second tab on the Bills page. Here, all typical bill templates are listed.
5 |
6 | Create a recurring Bill by clicking on New Recurring Bill. On the New Recurring Bill Page, enter the required details on the available fields and select the frequency.
7 |
8 | The recurring bill will be created automatically based on your selected frequency of Daily, Weekly, Monthly, or Yearly. You can choose a custom option and enter your preferred frequency.
9 |
10 | The recurring bill will be generated as a draft, and you should update the payment details manually. When the bill is generated, it will be listed under the Bills tab. It won't affect a previously generated bill if you edit your recurring bills template.
--------------------------------------------------------------------------------
/en/user-manual/purchases/vendors.md:
--------------------------------------------------------------------------------
1 | Vendors
2 | =========
3 |
4 | A Vendor or Seller supplies items (product and service) to your business, which requires you to create a bill.
5 |
6 | You can see a complete list of your vendors by clicking on the Vendors option listed under Purchases.
7 |
8 | On the vendor's page, you see a summary of bills grouped into Overdue, Open, and Draft.
9 |
10 | At the top right of the page, you can find the New Vendor, [Payroll](https://akaunting.com/apps/payroll?utm_source=suggestion&utm_medium=app&utm_campaign=payroll), and More options.
11 | You can add vendors by selecting the New Vendor button or clicking on the More option to import a list of vendors using XLS or XLSX sheet format.
12 |
13 | 
14 |
15 | When creating a new vendor, the following fields are displayed:
16 |
17 | - **Name**: Vendor's name.
18 | - **Email**: Vendor's email address.
19 | - **Phone**: Vendor's phone number.
20 | - **Website**: Vendor's website.
21 | - **Reference**: Specify or reference number or name
22 | - **Picture**: Vendor's image to be used in bills as the logo.
23 | - **Tax Number**: Vendor's tax number.
24 | - **Currency**: Default currency to be used for the vendor.
25 | - **Address finder**: Here, you get a droplist of all customer addresses previously added.
26 | - **Address**: Vendor's address.
27 |
28 | 
29 |
30 | Also, when creating a new vendor, there's a [Custom Fields](https://akaunting.com/apps/custom-fields?utm_source=suggestion&utm_medium=app&utm_campaign=custom_fields) button at the top page, which helps you add custom fields to vendor data.
31 |
32 | After creating a new vendor, you can see a list of your vendors on the Vendors home page.
33 | By checking the Checkbox next to a listed Vendor on the Vendors page, you get the options to enable, disable, delete or export a vendor.
34 |
35 | A mouse hover on a listed vendor reveals the options to show, edit, duplicate or delete a vendor.
36 |
37 | Viewing the Vendors profile, you can see all the bills and transactions associated with a vendor.
38 |
39 | You can complete the following actions to create a new vendor.
40 |
41 | - Go to the Vendor Page or directly click the Vendor button on the quick add section
42 | - Click on New Vendor Button
43 | - Fill out the form
44 | - Save and create a new Vendor
45 |
46 | To import a list of vendors, you should download the sample template.
47 |
--------------------------------------------------------------------------------
/en/user-manual/reports.md:
--------------------------------------------------------------------------------
1 | Reports
2 | =========
3 |
4 | Reports are available from the sidebar and gives a detailed view of your business’ financial health.
5 | On this page, you can view all report summaries and be able to edit and delete them. Also, graphics on reports make it easier to understand and analyze your business's financial situation.
6 |
7 | 
8 |
9 | You can pin the most used report(s) to the top of the page for quick access.
10 |
11 | 
12 |
13 | If you have transactions in foreign currency, don’t worry. Reports are automatically adjusted according to the selected currency rate. But don’t forget to update currency rates from the Settings page.
14 |
15 | Additionally, if you use different currencies, the Live Currency feature (Available on Premium Plan) helps you update exchange rates automatically. If you wish, you can change the currency on the Company Settings page. All reports are displayed in the fiscal year you set up while creating your account and can be changed in Company Settings.
16 |
17 | On the Reports home page, you can see reports listed by categories, its description, and the vertical ellipsis (three dots) that allows you to edit/duplicate/delete the report. You can also use the search filters to get your preferred data.
18 |
19 | The financial reports make it easy to understand your business performance. You can Print or Export any report. However, If you need to share reports with your organization or shareholder, [Schedule Reports](https://akaunting.com/apps/schedule-reports?utm_source=suggestion&utm_medium=app&utm_campaign=schedule_reports) would be helpful for you.
20 |
21 |
22 | You can also add a report to favorites, which makes it quickly accessible from the sidepanel.
23 |
24 | When creating a new report, the following details are displayed:
25 |
26 | - **Name**: The name of the report.
27 | - **Type**: There are 5 default types and it can be extended by apps.
28 | - **Description**: Description to be used in the report list.
29 |
30 | 
31 |
32 | The following fields depend on the selected report type:
33 |
34 | - **Group By**: You can group reports by category, customer, etc. Each report type has its own groups.
35 | - **Period**: You can set the report on a monthly, quarterly, and yearly basis.
36 | - **Basis**: Here you can learn more about cash and accrual accounting.
37 | - **Chart**: Chart type to be used.
38 |
39 | The following action helps you to create a new report
40 |
41 | - Go to the Report
42 | - Click on New Report Button
43 | - Fill out the form
44 | - Save and create the new report
45 |
46 | To automatically schedule reports on a weekly, monthly and custom frequency, use the [Schedule Reports](https://akaunting.com/apps/schedule-reports?utm_source=suggestion&utm_medium=app&utm_campaign=schedule_reports) feature.
47 |
48 | 
49 |
50 | **What is the Expense Summary Report?**
51 |
52 | The Expense summary report gives you a detailed overview of your company’s transactions in a given period of time; classified under purchases that are payments and bills.
53 | Thes transactions are categorized to help you analyze your expense group.
54 |
55 | **What is the Income Summary Report?**
56 |
57 | The Income summary report gives you a detailed overview of your company’s transactions in a given period of time; classified under sales and captured primarily via invoices.
58 |
59 | **What is the Income vs. Expense Report?**
60 |
61 | Income vs. Expense report is the summary of your sales and purchases. It is calculated by the difference between all transactions under sales and purchases. This report helps you to understand your company’s cash flow in a given period of time.
62 |
63 | **What is the Profit & Loss Report?**
64 |
65 | The profit and loss report shows a summary of sales and purchases quarterly. It also helps you understand the financial position of your company during the specified period of time.
66 |
67 | **What is the Tax Summary Report?**
68 |
69 | Tax Summary Report gives you a summary of all taxes that you have paid on your expenses or bills and received on invoices or revenues during a specified period.
70 |
71 | In order to analyze the financial status of your business better; General Ledger, Balance Sheet, Chart of Account, and Trial Balance reports are recommended. [Premium Plan](http://akaunting.com/plans) allows you to access these valuable reports.
72 |
73 | Additionally, you may need more reports depending on your business activities. You can check out the [App Store](https://akaunting.com/apps/categories/report). Some of these reports are below.
74 | - [Aged receivables/payables](https://akaunting.com/apps/aged-receivables-payables)
75 | - [Vendor Statement](https://akaunting.com/apps/vendor-statement)
76 | - [Customer Statement](https://akaunting.com/apps/customer-statement)
77 | - [Time to Get Paid](https://akaunting.com/apps/time-to-get-paid)
78 |
--------------------------------------------------------------------------------
/en/user-manual/sales/_images/customers-new-customer.gif:
--------------------------------------------------------------------------------
https://raw.githubusercontent.com/akaunting/docs/205f53a3ef9d69a59057321d33e1a859fd293a69/en/user-manual/sales/_images/customers-new-customer.gif
--------------------------------------------------------------------------------
/en/user-manual/sales/_images/customers.gif:
--------------------------------------------------------------------------------
https://raw.githubusercontent.com/akaunting/docs/205f53a3ef9d69a59057321d33e1a859fd293a69/en/user-manual/sales/_images/customers.gif
--------------------------------------------------------------------------------
/en/user-manual/sales/customers.md:
--------------------------------------------------------------------------------
1 | Customers
2 | =========
3 |
4 | Customers are the source of a business's income, making them an essential part of your business operations.
5 | You can view the list of all customers under the Sales section. You can add, edit, enable, disable, delete, export, or duplicate a customer.
6 |
7 | At the top of the Customers page, you'll find the New Customer and CRM buttons. The New Customer option allows you to create new customers, while the [CRM option](https://akaunting.com/apps/crm?utm_source=suggestion&utm_medium=app&utm_campaign=crm) lets you create deals. You can add customers by selecting the New Customer button or clicking on the More option to import a list of customers using the XLS or XLSX sheet format.
8 |
9 | 
10 |
11 | The following fields are displayed when creating a New Customer:
12 |
13 | - **Name**: Customer's full name.
14 | - **Email**: Customer's email address
15 | - **Invite to Client Portal**: When checked, customers access the Client Portal to see/pay the invoices assigned to them.
16 | - **Phone**: Customer's phone number.
17 | - **Website**: Customer's website.
18 | - **Reference**: Any possible reference.
19 | - **Tax Number**: Customer'sVendor's tax number.
20 | - **Currency**: Default currency to be used for the customer.
21 | - **Address finder**: Here, you get a droplist of all customer addresses previously added
22 | - **Address**: Customer's address.
23 |
24 | 
25 |
26 | Also, when creating a new customer, there's a [Custom Fields button](https://akaunting.com/apps/custom-fields?utm_source=suggestion&utm_medium=app&utm_campaign=custom_fields) at the top page, which helps you add custom fields to customer data.
27 |
28 | After creating a new customer, you can see a list of your customers on the Customers home page.
29 | By checking a customer on the Customers page, you get the options to enable, disable, delete or export a customer.
30 |
31 | A mouse hover on a listed customer reveals the options to show, edit, duplicate or delete.
32 | To import a list of customers, you should download the sample template.
--------------------------------------------------------------------------------
/en/user-manual/sales/invoices/_images/add-payment.gif:
--------------------------------------------------------------------------------
https://raw.githubusercontent.com/akaunting/docs/205f53a3ef9d69a59057321d33e1a859fd293a69/en/user-manual/sales/invoices/_images/add-payment.gif
--------------------------------------------------------------------------------
/en/user-manual/sales/invoices/_images/invoices-new-invoice-new.gif:
--------------------------------------------------------------------------------
https://raw.githubusercontent.com/akaunting/docs/205f53a3ef9d69a59057321d33e1a859fd293a69/en/user-manual/sales/invoices/_images/invoices-new-invoice-new.gif
--------------------------------------------------------------------------------
/en/user-manual/sales/invoices/_images/invoices-show-page.gif:
--------------------------------------------------------------------------------
https://raw.githubusercontent.com/akaunting/docs/205f53a3ef9d69a59057321d33e1a859fd293a69/en/user-manual/sales/invoices/_images/invoices-show-page.gif
--------------------------------------------------------------------------------
/en/user-manual/sales/invoices/_images/invoices.gif:
--------------------------------------------------------------------------------
https://raw.githubusercontent.com/akaunting/docs/205f53a3ef9d69a59057321d33e1a859fd293a69/en/user-manual/sales/invoices/_images/invoices.gif
--------------------------------------------------------------------------------
/en/user-manual/sales/invoices/_images/send-mail-modal.gif:
--------------------------------------------------------------------------------
https://raw.githubusercontent.com/akaunting/docs/205f53a3ef9d69a59057321d33e1a859fd293a69/en/user-manual/sales/invoices/_images/send-mail-modal.gif
--------------------------------------------------------------------------------
/en/user-manual/sales/invoices/invoices.md:
--------------------------------------------------------------------------------
1 | Invoices
2 | =========
3 |
4 | An invoice is a commercial document that contains a list of items (products or services) with their cost for payment at a later time. You are running a business to provide solutions and record sales; hence, creating an invoice is one of the most used actions in Akaunting. Invoices are located under Sales.
5 |
6 | At the top of the Invoices page, you will see the overview of all your invoices. Here, all invoices are listed and can be sorted by date, Status, or amount.
7 |
8 | 
9 |
10 | To create an invoice, click on the New Invoice button at the top of the Invoices page and fill out the fields. Although some fields are not required, they make it easier to track your reports.
11 |
12 | When creating an invoice, you need to enter the recipient of the invoice through the "Add a customer" option and fill in other mandatory fields like the invoice date, due date, and number.
13 | You add items by selecting from your list of items and also add discounts/taxes for each item on an invoice.
14 | Below the items section, you can also enter an overall discount for items listed on an Invoice.
15 |
16 | After creating an invoice, you can send it at that time or save it and send it later from the invoices page.
17 |
18 | While sending an invoice, enter a custom message in the pop-up email box.
19 | After sending an Invoice, you view an invoice page that displays details such as the date, the recipient, and the payment status.
20 |
21 | 
22 |
23 | The Status of an invoice changes automatically when the recipient confirms payment or views the invoice. You can also update the status of an invoice manually by clicking the "add payment" button.
24 | If, for some reason, an invoice recipient confirms payment, however, you are yet to receive payment, you can click on "delete payment" on the selected invoice page to undo the transaction.
25 |
26 | 
27 |
28 | You can customize your invoices through Invoice Settings, and Email Settings(Insert anchor link) allows you to customize your email templates.
29 |
30 | The following fields are displayed on the New Invoice page:
31 |
32 | - **Customer**: The receiver of the invoice.
33 | - **Invoice Date**: Date when the invoice is issued.
34 | - **Due Date**: Date when the invoice is scheduled for payment.
35 | - **Number**: The number assigned to the invoice.
36 | - **Order Number**: A number assigned to that invoice.
37 | - **Items**: The list of items that you can n to that invoice. You can add multiple items from your list of items.
38 | - **Quantity**: Enter the number of products or services on offer.
39 | - **Price**: The sales price of the item. This will automatically be updated from the listed price of the item. You can also change the price if you want.
40 | - **Tax**: Choose from a list of applicable Tax Rates as set by you. You can select multiple taxes. See the Settings > Tax Rates documentation for more details.
41 | - **Total**: This is calculated automatically according to the item quantity, discount, and tax. It is not an editable field. To change the total amount, you should change the item price, quantity, or discount.
42 | - **Notes**: You can add a custom note to the invoice.
43 | - **Category**: Category of the invoice to be used in reports.
44 | - **Attachment**: You can attach a file related to the invoice.
45 |
46 | 
47 |
48 | On the Invoice page, you can see the status of the invoices.
49 | The Status of an invoice can be:
50 |
51 | **Sent** - when you send the invoice;
52 |
53 | **Paid** - when the receiver confirms payment, or you add payment manually;
54 |
55 | **Viewed** - when the recipient views the mailed invoice;
56 |
57 | **Draft** - When you create and save an invoice without sending; and
58 |
59 | **Partial** - when the total amount is not recorded.
60 |
61 | 
62 |
63 | You can complete the following actions to create a new invoice
64 | - Go to the Invoice Page or directly click the Invoice button on the quick add section
65 | - Click on New Invoice Button
66 | - Fill out the form (Here, you can add a new customer and item instantly)
67 | - Save or Send the Invoice
68 |
--------------------------------------------------------------------------------
/en/user-manual/sales/invoices/recurring-templates.md:
--------------------------------------------------------------------------------
1 | Recurring Invoice
2 | =========
3 |
4 | You will see the recurring templates in the second tab on the Invoice page. Here all recurring invoices templates are listed.
5 |
6 | Create a recurring invoice by clicking on New Recurring Invoice. On the New Recurring Invoice Page, enter the required details on the available fields and select the frequency.
7 |
8 | The recurring invoice will be created automatically based on your selected option of Daily, Weekly, Monthly, or Yearly. You can choose a custom option and enter your preferred frequency.
9 |
10 | The recurring invoice will be generated as a draft, and you should add your payment details manually. When the invoice is generated, it will be listed under the invoice tab. Editing your recurring invoice template won't affect the previously generated invoice based on the old template.
11 |
--------------------------------------------------------------------------------
/en/user-manual/settings/_images/Categories.png:
--------------------------------------------------------------------------------
https://raw.githubusercontent.com/akaunting/docs/205f53a3ef9d69a59057321d33e1a859fd293a69/en/user-manual/settings/_images/Categories.png
--------------------------------------------------------------------------------
/en/user-manual/settings/_images/categories.png:
--------------------------------------------------------------------------------
https://raw.githubusercontent.com/akaunting/docs/205f53a3ef9d69a59057321d33e1a859fd293a69/en/user-manual/settings/_images/categories.png
--------------------------------------------------------------------------------
/en/user-manual/settings/_images/company-settings.gif:
--------------------------------------------------------------------------------
https://raw.githubusercontent.com/akaunting/docs/205f53a3ef9d69a59057321d33e1a859fd293a69/en/user-manual/settings/_images/company-settings.gif
--------------------------------------------------------------------------------
/en/user-manual/settings/_images/company.gif:
--------------------------------------------------------------------------------
https://raw.githubusercontent.com/akaunting/docs/205f53a3ef9d69a59057321d33e1a859fd293a69/en/user-manual/settings/_images/company.gif
--------------------------------------------------------------------------------
/en/user-manual/settings/_images/default-settings.png:
--------------------------------------------------------------------------------
https://raw.githubusercontent.com/akaunting/docs/205f53a3ef9d69a59057321d33e1a859fd293a69/en/user-manual/settings/_images/default-settings.png
--------------------------------------------------------------------------------
/en/user-manual/settings/_images/email-templates.gif:
--------------------------------------------------------------------------------
https://raw.githubusercontent.com/akaunting/docs/205f53a3ef9d69a59057321d33e1a859fd293a69/en/user-manual/settings/_images/email-templates.gif
--------------------------------------------------------------------------------
/en/user-manual/settings/_images/invoice-settings.gif:
--------------------------------------------------------------------------------
https://raw.githubusercontent.com/akaunting/docs/205f53a3ef9d69a59057321d33e1a859fd293a69/en/user-manual/settings/_images/invoice-settings.gif
--------------------------------------------------------------------------------
/en/user-manual/settings/_images/localization-settings.gif:
--------------------------------------------------------------------------------
https://raw.githubusercontent.com/akaunting/docs/205f53a3ef9d69a59057321d33e1a859fd293a69/en/user-manual/settings/_images/localization-settings.gif
--------------------------------------------------------------------------------
/en/user-manual/settings/_images/offline-payments.png:
--------------------------------------------------------------------------------
https://raw.githubusercontent.com/akaunting/docs/205f53a3ef9d69a59057321d33e1a859fd293a69/en/user-manual/settings/_images/offline-payments.png
--------------------------------------------------------------------------------
/en/user-manual/settings/_images/paypal-standard.png:
--------------------------------------------------------------------------------
https://raw.githubusercontent.com/akaunting/docs/205f53a3ef9d69a59057321d33e1a859fd293a69/en/user-manual/settings/_images/paypal-standard.png
--------------------------------------------------------------------------------
/en/user-manual/settings/_images/scheduling-settings.png:
--------------------------------------------------------------------------------
https://raw.githubusercontent.com/akaunting/docs/205f53a3ef9d69a59057321d33e1a859fd293a69/en/user-manual/settings/_images/scheduling-settings.png
--------------------------------------------------------------------------------
/en/user-manual/settings/_images/tax.png:
--------------------------------------------------------------------------------
https://raw.githubusercontent.com/akaunting/docs/205f53a3ef9d69a59057321d33e1a859fd293a69/en/user-manual/settings/_images/tax.png
--------------------------------------------------------------------------------
/en/user-manual/settings/calendar.md:
--------------------------------------------------------------------------------
1 | Calendar
2 | =========
3 |
4 | In this section, you can select your Business's default first day of the week. You can also enable public holidays to ensure that your bookkeeping records are only on workdays.
5 |
--------------------------------------------------------------------------------
/en/user-manual/settings/categories.md:
--------------------------------------------------------------------------------
1 | Categories
2 | =========
3 |
4 | You can divide transactions into groups through categories. Categorization makes it easy to track your transactions on reports.
5 |
6 | You can create categories for invoices, expenses, and items. On this page, you can see all categories, search for any, create a new one, edit the current ones and delete them.
7 |
8 | 
--------------------------------------------------------------------------------
/en/user-manual/settings/company.md:
--------------------------------------------------------------------------------
1 | Company
2 | =========
3 |
4 | The Company settings page is located under Settings > Company menu. On this page, you can update the details of each company.
5 |
6 | 
7 |
8 | **Company**
9 |
10 | - **Name**: Company's name.
11 | - **Email**: Company's email.
12 | - **Tax Number**: The tax number to be used on invoices.
13 | - **Phone**: Company's phone number.
14 | - **Address**: The company address to be used on invoices.
15 | - **Logo**: The company's logo to be used in the client portal, invoices, etc.
16 |
17 | 
--------------------------------------------------------------------------------
/en/user-manual/settings/currencies.md:
--------------------------------------------------------------------------------
1 | Currencies
2 | =========
3 |
4 | Akauting makes it easy for your Business to deal with multiple currencies. You can create, edit, or delete currencies according to your Business's needs.
5 |
6 | You can name the currency and select the code and symbol for the currency. The thousand separators and symbol position are basic settings for your documents.
7 |
--------------------------------------------------------------------------------
/en/user-manual/settings/default.md:
--------------------------------------------------------------------------------
1 | Default
2 | =========
3 |
4 | Set the default for Account, Currency, Payment method, Income category, and more. If you have multiple companies, please note that each company has its defaults Settings page, and you would have to switch between companies for this. (You can switch between your companies by clicking the company name on the top left side).
5 | While creating an account, you set up your companies based currency. If you change your company's currency, your report's default currency will also change. Hence, you should adjust currency rates.
6 |
7 | Below are the defaults you can adjust:
8 |
9 | **General**
10 |
11 | - **Account**: Default account to be used when marking invoices/bills as paid.
12 | - **Currency**: Default currency to be used in charts etc.
13 | - **Tax**: Default tax to be used when creating an item, customer, etc.
14 | - **Payment Method**: Default payment method to be used when marking invoices/bills as paid.
15 |
16 | **Categories**
17 |
18 | - **Income Category**: Select the default category to expedite income creation.
19 | - **Expense Category**: Select the default category to expedite expense creation.
20 |
21 | **Other**
22 |
23 | - **Language**: Default language to be used on the User Interface.
24 | - **Records Per Page**: Number of records to be shown on the list page.
25 |
26 | 
--------------------------------------------------------------------------------
/en/user-manual/settings/email-templates.md:
--------------------------------------------------------------------------------
1 | Email Templates
2 | =========
3 |
4 | By default, there are four categories with email templates:
5 | - Bills
6 | - Invoices
7 | - Payments
8 | - Others
9 |
10 |
11 | Each category has an email template(s) that specifies the receiver, and the copies can be customized according to your preference. Receivers are classified into the Admin, the Customer, and the Vendor.
12 |
13 |
14 | You can edit the Subject line and Body of the email templates by selecting the record type on the left and choosing the email for whom the template is created.
15 |
16 | You can use the suggested tags summarized at the bottom of the page in the "Available tags" section to enhance your invoice personalization.
17 |
18 | Note that to send emails to your customers, you must add their email addresses on the customer's page.
19 |
20 | 
--------------------------------------------------------------------------------
/en/user-manual/settings/invoice.md:
--------------------------------------------------------------------------------
1 | Invoice
2 | =========
3 |
4 | You can create a new invoice template or select from a list of invoice templates. Invoice Setting allows you to set the defaults for formatting your invoice numbers and payment terms.
5 |
6 | You can also customize one of the three default templates.
7 |
8 | The fields below are not required, but they may be crucial if you need to personalize your invoices.
9 |
10 | General Terms & IDs for Invoices
11 | - **Number Prefix**: The word to be placed before the invoice number.
12 | - **Number Digit**: The number of digits of the invoice number.
13 | - **Next Number**: The upcoming invoice's number.
14 | - **Payment Terms**: Default payment terms. You can override this each time you create an invoice.
15 |
16 | Defaults for Invoices
17 | - **Title**: Invoice title.
18 | - **Subheading**: Subheading that will be displayed below the title of each invoice.
19 | - **Footer**: The specified footer display for the bottom of each invoice. You can override this per invoice.
20 |
21 | Column Personalization
22 | - **Item Name**: The title content used for items can be personalized.
23 | - **Price Name**: The title content used for the price can be personalized.
24 | - **Quantity Name**: The title content used for quantity can be personalized.
25 | - **Logo**: The company logo to be used in invoices.
26 |
27 | 
--------------------------------------------------------------------------------
/en/user-manual/settings/live-currency.md:
--------------------------------------------------------------------------------
1 | Live Currency
2 | =========
3 |
4 | Akaunting allows you to populate the current exchange rates from various service providers like Fixer, the European Central Bank, and others. You can select the service provider and fetch the currency exchange rates automatically. The rates are always up to date.
--------------------------------------------------------------------------------
/en/user-manual/settings/localization.md:
--------------------------------------------------------------------------------
1 | Localization
2 | =========
3 |
4 | The localization settings page is located under the Settings menu. You can change your company's fiscal year and more on this page.
5 |
6 | - **Financial Year Start**: The day and month of the financial year start.
7 | - **Time Zone**: The time zone of the company.
8 | - **Date Format**: The default date format for your app.
9 | - **Data Separator**: The separator of date format.
10 | - **Percent Position**: Select the position of the percentage sign.
11 |
12 | 
--------------------------------------------------------------------------------
/en/user-manual/settings/offline-payments.md:
--------------------------------------------------------------------------------
1 | Offline Payments
2 | =========
3 |
4 | This payment method is defined by a user associated with either Cash or Bank Transfer as default. Admins generally use offline payments to categorize the method they receive payments. They can also be used to show offline payment details to customers.
5 | For example, you can create a Bank Transfer payment method and enter your bank account details so that your customer may transfer the invoice amount.
6 |
7 | You can create a new offline payment method on this page, edit the current ones or delete them.
8 |
9 | On the left section, you can create new payment methods as follows:
10 | - **Name**: Payment method name.
11 | - **Code**: Payment method code.
12 | - **Order**: The sorting order of the payment method.
13 | - **Show to the customer**: You can enable this if you want this payment method to be available as an option to your customers.
14 |
15 | 
--------------------------------------------------------------------------------
/en/user-manual/settings/paypal-standard.md:
--------------------------------------------------------------------------------
1 | PayPal Standard
2 | =========
3 |
4 | Paypal Standard allows you to accept debit and credit card payments from Paypal.
5 | To accept payment, you need a Paypal business account. With Paypal standard, you can sync with Akaunting in the settings.
6 | (Getting a Paypal business account is easy, as you only need to convert an existing Personal account to Business)
7 |
8 | Customers are redirected from your site to PayPal to complete payment for their orders.
9 | To enable the standard payment option of PayPal, you need to enter the following details:
10 |
11 | - **Name**: The name to be shown.
12 | - **Email**: Your PayPal account's email, where the customer will make the payment.
13 | - **Mode**: Select whether to launch your checkout process or test it in Sandbox mode. If you wish to test the checkout, select the sandbox mode. If you are ready to accept payments, go for the Live mode.
14 | - **Transaction**: Select between Sale or Authorization.
15 | - **Account**: Select the currency account to which payments/transactions will be recorded.
16 | - **Order**: Enter the display order for each transaction.
17 | - **Show to Customer**: If enabled, your customer will see this payment method in the Client Portal so they can use it to pay invoices.
18 | - **Debug**: Enable/Disable activity log for access to callback data.
19 |
20 | 
--------------------------------------------------------------------------------
/en/user-manual/settings/scheduling.md:
--------------------------------------------------------------------------------
1 | Scheduling
2 | =========
3 |
4 | You can enable or disable reminders for your overdue/upcoming invoices or bills here.
5 |
6 | These reminders work with your email templates and automatically send emails based on your schedule.
7 | Once you set a reminder, you do not need to update it when creating a new record.
8 |
9 | The following fields are found on the scheduling page:
10 |
11 | - **Send Invoice Reminder**: You can enable/disable the send invoice reminder email to your customers.
12 | - **Send After Due Days**: Type in the days after the due date to send the invoice reminder.
13 |
14 | - **Send Bill Reminder**: You can enable/disable bill reminder email for yourself.
15 | - **Send After Due Days**: Type in the due date to send the bill reminder.
16 |
17 | 
--------------------------------------------------------------------------------
/en/user-manual/settings/taxes.md:
--------------------------------------------------------------------------------
1 | Taxes
2 | =========
3 |
4 | Tax is used to apply fees to invoices and bills for different tax classes. When creating an invoice or a bill, Akaunting calculates taxes based on the type of tax.
5 |
6 | You can name, select a tax, and enter the rate or the amount according to the type. For example, VAT or Sales Tax is a regular tax of a percentage that is calculated over the sales price and added to the bill.
7 |
8 | Akaunting calculates compounding, fixed amount, inclusive, and withholding tax, as well as the normal tax.
9 |
10 | 
--------------------------------------------------------------------------------
/en/user-manual/the-user-interface-framework.md:
--------------------------------------------------------------------------------
1 | Overview
2 | =========
3 |
4 | The UI Framework reveals the main navigation and the content areas. There are three main areas on Akaunting 3.0:
5 |
6 | - Sidebar
7 | - Navigation Menu
8 | - Content Area
9 |
10 | Sidebar
11 | =========
12 |
13 | The Sidebar is a section for navigating through your Akaunting workspace. The section helps you personalize your profile and company and can be collapsed or expanded with a click of the collapse menu icon.
14 |
15 | Expanding the menu pans out options that allow you to navigate the workspace and handle your daily to-dos with a couple of clicks.
16 |
17 | On the side, you have icons for easy access to:
18 |
19 | Profile
20 | =========
21 |
22 | Here, you can personalize your profile - update the company's name, users, subscriptions, plans, teams, and roles; send tickets and access rewards. You can log out through the profile menu.
23 |
24 | Notifications
25 | =========
26 |
27 | The bell-shaped icon displays in-app notifications. Akaunting notifies you of recurring records you may need to take action on. Announcements on Akaunting or alerts for the applications you are subscribed to will also appear here.
28 |
29 | Search
30 | =========
31 |
32 | You can search globally for all records created on your Akaunting account. This includes items, invoices, transactions, and more. Click on the magnifier and search for any record in Akaunting from customers to expenses.
33 |
34 | Quick Add
35 | =========
36 |
37 | The plus (+) icon allows you to easily create invoices, clients, and transactions without navigating to their main pages.
38 |
39 | 
40 |
41 | Settings
42 | =========
43 |
44 | The Sidebar section also contains the settings menu where you can personalize Akaunting and all your subscribed apps. Settings allow you to customize how your Akaunting behaves - make changes to your company, choose a default currency, define your financial year, and configure installed apps. Take a step further for more personalization in settings.
45 |
46 | 
47 |
48 | Help
49 | =========
50 |
51 | Get access to the [support page](https://akaunting.com/support) where you can submit tickets, access the Akaunting community, or speak to dedicated support personnel.
52 |
53 | Favorites
54 | =========
55 |
56 | This part of the Sidebar is an easter bunny. When you favorite a page, it appears on the Sidebar for quick access from any page. You can add a page to favorites by clicking on the star icon at the top, beside the title. All favorite pages appear on the Sidebar.
57 |
58 | 
--------------------------------------------------------------------------------
/en/user-manual/welcome.md:
--------------------------------------------------------------------------------
1 | Overview
2 | =========
3 |
4 | Akaunting a free accounting platform for your business. You can handle all your accounting-related operations, such as invoicing, purchases and taxes. You can customize the software according to your bookkeeping needs using the [App Store](https://akaunting.com/apps).
5 |
6 | Setting Up Your Company
7 | =========
8 |
9 | You can easily set up your company and start invoicing your clients. Akaunting provides different workspaces for your companies, allowing you to keep the books for multiple companies using one profile.
10 |
11 | To set up your company, enter the name, tax ID, base currency, and start of the financial year. Select your preferred language, as Akaunting is available in over 50 languages. You can add your company's logo and address to personalize invoices. These details will be visible on the invoices and estimates you send.
12 |
13 | We know that every business is unique in itself. You can add more information about your company, like the industry, team size, and what you'd like to do in Akaunting. This will help us provide tailored information as you use Akaunting.
14 |
15 | Now you are ready to personalize your company settings in Akaunting.
--------------------------------------------------------------------------------