
Trigger the creation of a DB by github actions
\n", 22 | "_id": "Datastax-Examples-astra-cli-github-action", 23 | "readme_markdown": "# astra-cli-github-action\nTrigger the creation of a DB by github actions\n" 24 | } -------------------------------------------------------------------------------- /astrajson/krishnannarayanaswamy-video-summarizer-langchain.json: -------------------------------------------------------------------------------- 1 | { 2 | "key": "krishnannarayanaswamy-video-summarizer-langchain", 3 | "tags": [ 4 | "vector", 5 | "astradb", 6 | "langchain", 7 | "openai", 8 | "python" 9 | ], 10 | "urls": { 11 | "github": "https://github.com/krishnannarayanaswamy/video-summarizer-langchain", 12 | "heroimage": "https://raw.githubusercontent.com/datastaxdevs/gallery_content_loader/main/datastax-logo_square.png" 13 | }, 14 | "last_modified": "Fri, 06 Oct 2023 01:33:20 GMT", 15 | "forks_count": 0, 16 | "stargazers_count": 0, 17 | "name": "Video Summarizer", 18 | "description": "Demonstrates how to perform multi modal vector retrieval with Astra and langchain with flickr-8k dataset.", 19 | "duration": "2 hours", 20 | "skilllevel": "Intermediate", 21 | "priority": 1, 22 | "readme": "This demo uses langchain. OpenAI and Streamlit. Uses langchain's Youtube loader to extract text from the video and summarize chain to summarize the video.
\nRun the demo locally
\npip install -r requirements.txt
\nstreamlit run summarizer.py
\n", 23 | "readme_markdown": "This demo uses langchain. OpenAI and Streamlit. Uses langchain's Youtube loader to extract text from the video and summarize chain to summarize the video.\n\nRun the demo locally\n\npip install -r requirements.txt\n\nstreamlit run summarizer.py", 24 | "_id": "krishnannarayanaswamy-video-summarizer-langchain" 25 | } -------------------------------------------------------------------------------- /astrajson/krishnannarayanaswamy-streamlit-langchain-vectorstore.json: -------------------------------------------------------------------------------- 1 | { 2 | "key": "krishnannarayanaswamy-streamlit-langchain-vectorstore", 3 | "tags": [ 4 | "vector", 5 | "astradb", 6 | "langchain", 7 | "openai", 8 | "python" 9 | ], 10 | "urls": { 11 | "github": "https://github.com/krishnannarayanaswamy/video-summarizer-langchain", 12 | "heroImage": "https://raw.githubusercontent.com/krishnannarayanaswamy/streamlit-langchain-vectorstore-demo/main/img/chatbot.png" 13 | }, 14 | "last_modified": "Fri, 06 Oct 2023 01:33:20 GMT", 15 | "forks_count": 0, 16 | "stargazers_count": 0, 17 | "name": "Streamlit Langchain Vectorstore", 18 | "description": "A chatbot built on streamlit and langchain. It is a playground to compare using other vector stores like REDIS, Mongo.", 19 | "duration": "2 hours", 20 | "skilllevel": "Intermediate", 21 | "priority": 1, 22 | "readme": "This demo uses langchain. OpenAI and Streamlit. Uses langchain's Youtube loader to extract text from the video and summarize chain to summarize the video.
\nRun the demo locally
\npip install -r requirements.txt
\nstreamlit run summarizer.py
\n", 23 | "readme_markdown": "This demo uses langchain. OpenAI and Streamlit. Uses langchain's Youtube loader to extract text from the video and summarize chain to summarize the video.\n\nRun the demo locally\n\npip install -r requirements.txt\n\nstreamlit run summarizer.py", 24 | "_id": "krishnannarayanaswamy-streamlit-langchain-vectorstore" 25 | } -------------------------------------------------------------------------------- /retrieveCreds.py: -------------------------------------------------------------------------------- 1 | import json 2 | import base64 3 | 4 | def decode_and_parse_credentials(encoded_credentials): 5 | try: 6 | # Decode the base64 string to bytes 7 | credentials_bytes = base64.b64decode(encoded_credentials) 8 | 9 | # Convert bytes to a JSON string 10 | credentials_str = credentials_bytes.decode('utf-8') 11 | 12 | # Parse the JSON string into a dictionary 13 | credentials = json.loads(credentials_str) 14 | 15 | return json.dumps(credentials) 16 | except Exception as e: 17 | print(f"An error occurred: {str(e)}") 18 | 19 | # Example usage: 20 | encoded_credentials = "ewogICJ0b2tlbiI6ICJ5YTI5LmEwQWZCX2J5REVELVFYcjl3eFVwU08tb1hzQ1h6b1U4cGVEVV9DN01faHc1UXhTU19nakIxWWFGNTdaSHByaDJWM0FSZEJkRUx1cC1ab3pYRE1lRDRrSGhYcHNnX0ZNZTNvS1Mtano4ODJud2RpTVNOaXIwUmJSbURDUUN6Q1JLV3FvSGlPMUk1VWVMa0haekM0WC1UNHNIdmRIdTBhUnZva1pIVGwyZ2FDZ1lLQVlZU0FSRVNGUUhHWDJNaWlnVVE1U0kwUTIyeVZKdFFhYjhvZkEwMTczIiwKICAicmVmcmVzaF90b2tlbiI6ICIxLy8wNnhLUkMzUUZaMmp2Q2dZSUFSQUFHQVlTTndGLUw5SXJXdVpGQ1pWR0JUUXkyRlI2UFk3UU9sRnlkeTRpMVZjZzNmVHpfQVQ0TDdXWlJBSTlZYW1MVF9hak83elBISW05NDhRIiwKICAidG9rZW5fdXJpIjogImh0dHBzOi8vb2F1dGgyLmdvb2dsZWFwaXMuY29tL3Rva2VuIiwKICAiY2xpZW50X2lkIjogIjUxNzM5MTE0NzQ2MC0xZDducGdmNjBwajYwb3J1c2ZyNXBmdThuZmZrYWlycS5hcHBzLmdvb2dsZXVzZXJjb250ZW50LmNvbSIsCiAgImNsaWVudF9zZWNyZXQiOiAiR09DU1BYLWQtcV9XVkI0RU90Zzl4ak5MRGwwaTcyVXhKbDQiLAogICJzY29wZXMiOiBbCiAgICAiaHR0cHM6Ly93d3cuZ29vZ2xlYXBpcy5jb20vYXV0aC95b3V0dWJlLnJlYWRvbmx5IgogIF0sCiAgInVuaXZlcnNlX2RvbWFpbiI6ICJnb29nbGVhcGlzLmNvbSIsCiAgImV4cGlyeSI6ICIyMDI0LTAxLTMxVDE5OjQ4OjMyLjExODMwN1oiCn0K" 21 | decoded_credentials = decode_and_parse_credentials(encoded_credentials) 22 | 23 | if decoded_credentials: 24 | print("Decoded Credentials:") 25 | print(decoded_credentials) 26 | else: 27 | print("Failed to decode and parse credentials.") -------------------------------------------------------------------------------- /requirements.txt: -------------------------------------------------------------------------------- 1 | aiohttp==3.9.1 2 | aiosignal==1.3.1 3 | annotated-types==0.6.0 4 | anyio==4.2.0 5 | astrapy==0.6.2 6 | attrs==23.2.0 7 | beautifulsoup4==4.12.2 8 | cachetools==5.3.2 9 | cassandra-driver==3.29.0 10 | cassio==0.1.3 11 | certifi==2023.11.17 12 | cffi==1.16.0 13 | charset-normalizer==3.3.2 14 | click==8.1.7 15 | cmarkgfm==2022.10.27 16 | cqlsh==6.1.2 17 | cryptography==38.0.4 18 | dataclasses-json==0.6.3 19 | defusedxml==0.7.1 20 | Deprecated==1.2.14 21 | distro==1.9.0 22 | emoji==2.9.0 23 | frozenlist==1.4.1 24 | geomet==0.2.1.post1 25 | gh-md-to-html==1.21.2 26 | google-api-core==2.15.0 27 | google-api-python-client==2.113.0 28 | google-auth==2.26.1 29 | google-auth-httplib2==0.2.0 30 | google-auth-oauthlib==1.2.0 31 | googleapis-common-protos==1.62.0 32 | h11==0.14.0 33 | h2==4.1.0 34 | hpack==4.0.0 35 | httpcore==1.0.2 36 | httpie==3.2.2 37 | httpie-astra==0.1.3 38 | httplib2==0.22.0 39 | httpx==0.25.2 40 | hyperframe==6.0.1 41 | idna==3.6 42 | jq==1.6.0 43 | jsonpatch==1.33 44 | jsonpointer==2.4 45 | langchain==0.1.0 46 | langchain-community==0.0.11 47 | langchain-core==0.1.9 48 | langchain-openai==0.0.2 49 | langsmith==0.0.79 50 | markdown-it-py==3.0.0 51 | marshmallow==3.20.2 52 | mdurl==0.1.2 53 | minify_html==0.15.0 54 | multidict==6.0.4 55 | mypy-extensions==1.0.0 56 | numpy==1.26.3 57 | oauthlib==3.2.2 58 | openai==1.7.1 59 | packaging==23.2 60 | paka.cmark==2.3.0 61 | pillow==10.2.0 62 | protobuf==4.25.1 63 | pyasn1==0.5.1 64 | pyasn1-modules==0.3.0 65 | pycmarkgfm==1.2.1 66 | pycparser==2.21 67 | pydantic==2.5.3 68 | pydantic_core==2.14.6 69 | PyGithub==2.1.1 70 | Pygments==2.17.2 71 | PyJWT==2.8.0 72 | PyNaCl==1.5.0 73 | pyOpenSSL==22.1.0 74 | pyparsing==3.1.1 75 | PySocks==1.7.1 76 | python-dateutil==2.8.2 77 | python-dotenv==1.0.0 78 | pytube==15.0.0 79 | PyYAML==6.0.1 80 | regex==2023.12.25 81 | requests==2.31.0 82 | requests-oauthlib==1.3.1 83 | requests-toolbelt==1.0.0 84 | rich==13.7.0 85 | rsa==4.9 86 | shellescape==3.8.1 87 | six==1.16.0 88 | sniffio==1.3.0 89 | soupsieve==2.5 90 | SQLAlchemy==2.0.25 91 | tenacity==8.2.3 92 | tiktoken==0.5.2 93 | tqdm==4.66.1 94 | typing-inspect==0.9.0 95 | typing_extensions==4.9.0 96 | uritemplate==4.1.1 97 | urllib3==2.1.0 98 | webcolors==1.13 99 | wrapt==1.16.0 100 | yarl==1.9.4 101 | -------------------------------------------------------------------------------- /astrajson/smatiolids-astra-agent-memory.json: -------------------------------------------------------------------------------- 1 | { 2 | "key": "smatiolids-astra-agent-memory", 3 | "tags": [ 4 | "vector", 5 | "astradb", 6 | "python" 7 | ], 8 | "urls": { 9 | "github": "https://github.com/smatiolids/astra-agent-memory", 10 | "heroimage": "https://raw.githubusercontent.com/smatiolids/astra-agent-memory/main/astra_agent.png" 11 | }, 12 | "last_modified": "Mon, 11 Dec 2023 12:19:40 GMT", 13 | "forks_count": 1, 14 | "stargazers_count": 4, 15 | "name": "Astra Agent Memory with PDF context", 16 | "description": "This demo combines the processing of PDF files, embedding generation, multiple retrieval metrics and a user interface with streamlit.", 17 | "duration": "2 hours", 18 | "skilllevel": "Intermediate", 19 | "priority": 1, 20 | "readme": "
The purpose of this demo is to combine the processing of PDF files, embedding generation, multiple retrieval metrics and a user interface with streamlit that also consider agent memory.
\npip install -r requirements.txt
\nCreate an account and a Vector DB at (astra.datastax.com).
\nDefine the AstraDB credentials and Open AI API Key in the .env file.
\nCopy .env.sample to .env
\nstreamlit run app.py
\nI uploaded and converted PDF using the notebook "Explicando Retrieval Augmented Generation.ipynb".
\n", 21 | "readme_markdown": "# Astra Agent Memory with PDF context\n\n\n\nThe purpose of this demo is to combine the processing of PDF files, embedding generation, multiple retrieval metrics and a user interface with streamlit that also consider agent memory.\n\n## Installing dependencies\n\npip install -r requirements.txt\n\n## DataStax Astra\n\nCreate an account and a Vector DB at (astra.datastax.com).\n\n## Environment Variables\n\nDefine the AstraDB credentials and Open AI API Key in the .env file.\n\nCopy .env.sample to .env\n\n## Running\n\nstreamlit run app.py\n\n## Loading PDF\n\nI uploaded and converted PDF using the notebook \"Explicando Retrieval Augmented Generation.ipynb\". \n", 22 | "_id": "smatiolids-astra-agent-memory" 23 | } -------------------------------------------------------------------------------- /astrajson/mukundha-genai-multi-lingual-retail-demo.json: -------------------------------------------------------------------------------- 1 | { 2 | "key": "mukundha-genai-multi-lingual-retail-demo", 3 | "tags": [ 4 | "vector", 5 | "python", 6 | "cassandra" 7 | ], 8 | "urls": { 9 | "github": "https://github.com/mukundha/genai-multi-lingual-retail-demo/tree/main", 10 | "heroimage": "https://raw.githubusercontent.com/mukundha/genai-multi-lingual-retail-demo/main/embedding-projector/ss.png" 11 | }, 12 | "last_modified": "Mon, 03 Jul 2023 08:14:06 GMT", 13 | "forks_count": 1, 14 | "stargazers_count": 0, 15 | "name": "Generative AI demo for Multi-lingual Retail application", 16 | "description": "Visualize embeddings for a multi-lingual retail application", 17 | "duration": "20 minutes", 18 | "skilllevel": "Intermediate", 19 | "priority": 1, 20 | "readme": "Source the following env variables
\nopenai_api_key=\ncass_user=\ncass_pw=\nscb_path=\nkeyspace=\ntable=\npip install openai pandas numpy flask flask_cors tensorflow tensorflow_hub cassandra-driver googletrans
python3 similaritySearch_openAI.py\nnpm install\nnpm start\nUpdate src/App.js to point to the local backend
cd embedding-projector\ntensorboard --logdir logs\nVisit http://localhost:6006/?darkMode=true#projector

The purpose of this demo is to combine the processing of PDF files, embedding generation, multiple retrieval metrics and a user interface with streamlit that also consider agent memory.
\npip install -r requirements.txt
\nCreate an account and a Vector DB at (astra.datastax.com).
\nDefine the AstraDB credentials and Open AI API Key in the .env file.
\nCopy .env.sample to .env
\nstreamlit run app.py
\nI uploaded and converted PDF using the notebook "Explicando Retrieval Augmented Generation.ipynb".
\n", 25 | "readme_markdown": "# Astra Agent Memory with PDF context\n\n\n\nThe purpose of this demo is to combine the processing of PDF files, embedding generation, multiple retrieval metrics and a user interface with streamlit that also consider agent memory.\n\n## Installing dependencies\n\npip install -r requirements.txt\n\n## DataStax Astra\n\nCreate an account and a Vector DB at (astra.datastax.com).\n\n## Environment Variables\n\nDefine the AstraDB credentials and Open AI API Key in the .env file.\n\nCopy .env.sample to .env\n\n## Running\n\nstreamlit run app.py\n\n## Loading PDF\n\nI uploaded and converted PDF using the notebook \"Explicando Retrieval Augmented Generation.ipynb\". \n", 26 | "_id": "mborges-pivotal-ds-vector-demo" 27 | } -------------------------------------------------------------------------------- /astrajson/DatastaxDevs-bootcamp-fullstack-apps-with-cassandra.json: -------------------------------------------------------------------------------- 1 | { 2 | "key": "DatastaxDevs-bootcamp-fullstack-apps-with-cassandra", 3 | "tags": [ 4 | "spring", 5 | "fastapi", 6 | "express", 7 | "java", 8 | "javascript", 9 | "python", 10 | "api", 11 | "astradb", 12 | "cassandra", 13 | "workshop", 14 | "nosql" 15 | ], 16 | "urls": { 17 | "github": "https://github.com/datastaxdevs/bootcamp-fullstack-apps-with-cassandra", 18 | "youtube": [ 19 | "https://www.youtube.com/watch?v=4djnV5wZSeg", 20 | "https://www.youtube.com/watch?v=8KmSN3KEspE", 21 | "https://www.youtube.com/watch?v=sGBFNDvk0pA", 22 | "https://www.youtube.com/watch?v=h7BEsnMk1_E" 23 | ] 24 | }, 25 | "last_modified": "Fri, 03 Feb 2023 03:39:54 GMT", 26 | "forks_count": 58, 27 | "stargazers_count": 70, 28 | "name": "Build Microservice and API", 29 | "description": "Learn how to build a backend for Cassandra, from data model to drivers to API exposition", 30 | "duration": "2 hours", 31 | "skilllevel": "Intermediate", 32 | "language": [ 33 | "java", 34 | "python", 35 | "javascript" 36 | ], 37 | "badge": "https://media.badgr.com/uploads/badges/ca43050e-5e6e-4edc-8218-3c12e66de4af.png", 38 | "likes": "164", 39 | "views": "3821", 40 | "usecases": [], 41 | "readme": "
\n
 \n\n\n* [Week I: Intro to Cassandra](https://github.com/datastaxdevs/bootcamp-fullstack-apps-with-cassandra/tree/main/week1-intro-to-cassandra)\n* [Week II: Building Efficient Data Model with Apache Cassandra](https://github.com/datastaxdevs/bootcamp-fullstack-apps-with-cassandra/tree/main/week2-data-modelling)\n* [Week III: Back End App Dev with Cassandra](week3-app-development)\n* [Week IV: APIs and Microservices with Cassandra](week4-api-microservices)\n\n\n"
44 | }
--------------------------------------------------------------------------------
/astrajson/krishnannarayanaswamy-bank-ragstax-demo.json:
--------------------------------------------------------------------------------
1 | {
2 | "key": "krishnannarayanaswamy-bank-ragstax-demo",
3 | "tags": [
4 | "vector",
5 | "astradb",
6 | "data api",
7 | "ragstax"
8 | ],
9 | "urls": {
10 | "github": "https://github.com/krishnannarayanaswamy/bank-ragstax-demo",
11 | "heroimage": "https://raw.githubusercontent.com/datastaxdevs/gallery_content_loader/main/datastax-logo_square.png"
12 | },
13 | "last_modified": "Fri, 03 Nov 2023 02:24:45 GMT",
14 | "forks_count": 0,
15 | "stargazers_count": 0,
16 | "name": "Bank Ragstax Demo",
17 | "description": "A demo that demonstrates Astra RAGStax platform, Streamlit interface for a chatbot and DataStax Astra as Vector Store.",
18 | "duration": "2 hours",
19 | "skilllevel": "Intermediate",
20 | "priority": 1,
21 | "readme": "
\n\n\n* [Week I: Intro to Cassandra](https://github.com/datastaxdevs/bootcamp-fullstack-apps-with-cassandra/tree/main/week1-intro-to-cassandra)\n* [Week II: Building Efficient Data Model with Apache Cassandra](https://github.com/datastaxdevs/bootcamp-fullstack-apps-with-cassandra/tree/main/week2-data-modelling)\n* [Week III: Back End App Dev with Cassandra](week3-app-development)\n* [Week IV: APIs and Microservices with Cassandra](week4-api-microservices)\n\n\n"
44 | }
--------------------------------------------------------------------------------
/astrajson/krishnannarayanaswamy-bank-ragstax-demo.json:
--------------------------------------------------------------------------------
1 | {
2 | "key": "krishnannarayanaswamy-bank-ragstax-demo",
3 | "tags": [
4 | "vector",
5 | "astradb",
6 | "data api",
7 | "ragstax"
8 | ],
9 | "urls": {
10 | "github": "https://github.com/krishnannarayanaswamy/bank-ragstax-demo",
11 | "heroimage": "https://raw.githubusercontent.com/datastaxdevs/gallery_content_loader/main/datastax-logo_square.png"
12 | },
13 | "last_modified": "Fri, 03 Nov 2023 02:24:45 GMT",
14 | "forks_count": 0,
15 | "stargazers_count": 0,
16 | "name": "Bank Ragstax Demo",
17 | "description": "A demo that demonstrates Astra RAGStax platform, Streamlit interface for a chatbot and DataStax Astra as Vector Store.",
18 | "duration": "2 hours",
19 | "skilllevel": "Intermediate",
20 | "priority": 1,
21 | "readme": "A demo that demonstrates Astra RAGStax platform, Streamlit interface for a chatbot and DataStax Astra as Vector Store.
\nCreate Astra account, enable RAGStax, create vector database, download the secure bundle and create a token
\nCreate a folder named config
\nStore the Astra token in json format
\nStore the secure connect bundle
Create a Streaming tenant and Astra and enable RAGStax on it.
\nInstall langstream in your computer for CLI
\nexport KAFKA_BOOTSTRAP_SERVERS=""
\nexport KAFKA_USERNAME=""
\nexport KAFKA_PASSWORD=""
\nexport OPEN_AI_ACCESS_KEY=""
\nexport ASTRA_CLIENT_ID=""
\nexport ASTRA_SECRET=""
\nexport ASTRA_TOKEN=""
\nexport ASTRA_DATABASE=
\nexport S3_BUCKET_NAME=
\nexport S3_ENDPOINT=
\nexport S3_ACCESS_KEY=
\nexport S3_SECRET=
\nexport S3_REGION=
ragstack apps deploy ragstax-astra-demo -app app -i instances/astra.yaml -s secrets/secrets.yaml
\nReview logs using
\nragstack apps logs ragstax-astra-demo
\nReview and Change the code in frontend/chatbot.py based on your config files, keyspace and table names.
\nexport ASTRA_DB_APPLICATION_TOKEN=""
\nexport ASTRA_DB_ID=""
\nexport ASTRA_DB_KEYSPACE=""
streamlit run frontend/chatbot.py
\n", 22 | "readme_markdown": "A demo that demonstrates Astra RAGStax platform, Streamlit interface for a chatbot and DataStax Astra as Vector Store.\n\nCreate Astra account, enable RAGStax, create vector database, download the secure bundle and create a token\nCreate a folder named config\nStore the Astra token in json format\nStore the secure connect bundle\n\nCreate a Streaming tenant and Astra and enable RAGStax on it. \n\nInstall langstream in your computer for CLI\n\nexport KAFKA_BOOTSTRAP_SERVERS=\"\"\nexport KAFKA_USERNAME=\"\"\nexport KAFKA_PASSWORD=\"\"\nexport OPEN_AI_ACCESS_KEY=\"\"\nexport ASTRA_CLIENT_ID=\"\"\nexport ASTRA_SECRET=\"\"\nexport ASTRA_TOKEN=\"\"\nexport ASTRA_DATABASE=\nexport S3_BUCKET_NAME=\nexport S3_ENDPOINT=\nexport S3_ACCESS_KEY=\nexport S3_SECRET=\nexport S3_REGION=\n\nragstack apps deploy ragstax-astra-demo -app app -i instances/astra.yaml -s secrets/secrets.yaml\n\nReview logs using\n\nragstack apps logs ragstax-astra-demo\n\nReview and Change the code in frontend/chatbot.py based on your config files, keyspace and table names.\n\nexport ASTRA_DB_APPLICATION_TOKEN=\"\"\nexport ASTRA_DB_ID=\"\"\nexport ASTRA_DB_KEYSPACE=\"\"\n\nstreamlit run frontend/chatbot.py", 23 | "_id": "krishnannarayanaswamy-bank-ragstax-demo" 24 | } -------------------------------------------------------------------------------- /astrajson/Datastax-Examples-astra-ide-plugin.json: -------------------------------------------------------------------------------- 1 | { 2 | "key": "Datastax-Examples-astra-ide-plugin", 3 | "tags": [ 4 | "jetbrains", 5 | "java", 6 | "tools", 7 | "tutorials", 8 | "dev", 9 | "astradb" 10 | ], 11 | "urls": { 12 | "github": "https://github.com/DataStax-Examples/astra-ide-plugin", 13 | "heroimage": "https://raw.githubusercontent.com/DataStax-Examples/astra-ide-plugin/master/hero.jpeg" 14 | }, 15 | "last_modified": "Fri, 28 Jan 2022 14:06:20 GMT", 16 | "forks_count": 0, 17 | "stargazers_count": 1, 18 | "name": "JetBrains Astra DB Plugin", 19 | "description": "A plugin that allows you to connect Jetbrains with your data on Astra DB or any Apache Cassandra cluster running with Stargate.", 20 | "duration": "15 minutes", 21 | "skilllevel": "Beginner", 22 | "priority": 2, 23 | "readme": "\n15 minutes, Beginner, Get Started
\nA Jetbrains plugin that allows you to connect and explore your data on Astra DB or any Apache Cassandra cluster running with Stargate.
\n\n
View the plugin's information page at JetBrains: https://plugins.jetbrains.com/plugin/17013-datastax-astra-db-explorer/
\nView the plugin's source code on GitHub: https://github.com/datastax/astra-ide-plugin
\nmvn package\nmvn spring-boot:run\nAccess the app at http://localhost:8080
Datastax Astra recently added support for term based search for text columns!
Now, one can index text columns using SAI with Lucene based Analyzers
for example,
\nCREATE TABLE test.table1 (id text PRIMARY KEY, val text);\n\nCREATE CUSTOM INDEX ON test.table1(val) USING 'org.apache.cassandra.index.sai.StorageAttachedIndex' WITH OPTIONS = { 'index_analyzer': 'standard'};\nThe above index allows to query based on term(s) in the text column val
for example,
\nSELECT * FROM test.table1 WHERE val : 'hello';\nThere are several built-in Analyzers available
\nGoal of this project is to help with understanding how Analyzers work, so one can understand how the text columns are indexed and queried.
\nAt a high level, Analyzer has a Tokenizer (to split the text into tokens) and a list of Filters (to apply any required transformation on the tokens)
\n
When run, this project allows users to choose a Token and a list of Filters and see the effect of Analyzer on the given text,
\nfor example,
\n
Have fun!
\n", 21 | "readme_markdown": "### Term-based search with Astra\n\n#### Quickstart\n\n```\nmvn package\nmvn spring-boot:run\n```\n\nAccess the app at `http://localhost:8080`\n\n#### What is it? \nDatastax Astra recently added support for `term` based search for `text` columns!\n\nNow, one can index `text` columns using [SAI](https://docs.datastax.com/en/cql/astra/docs/developing/indexing/sai/sai-concepts.html) with Lucene based [Analyzers](https://lucene.apache.org/core/8_0_0/core/org/apache/lucene/analysis/Analyzer.html) \n\nfor example,\n```\nCREATE TABLE test.table1 (id text PRIMARY KEY, val text);\n\nCREATE CUSTOM INDEX ON test.table1(val) USING 'org.apache.cassandra.index.sai.StorageAttachedIndex' WITH OPTIONS = { 'index_analyzer': 'standard'};\n```\n\nThe above index allows to query based on `term(s)` in the text column `val`\n\nfor example, \n```\nSELECT * FROM test.table1 WHERE val : 'hello';\n```\nThere are several [built-in Analyzers](https://github.com/apache/lucene/tree/main/lucene/analysis/common/src/java/org/apache/lucene/analysis) available\n\nGoal of this project is to help with understanding how Analyzers work, so one can understand how the text columns are indexed and queried.\n\nAt a high level, Analyzer has a Tokenizer (to split the text into tokens) and a list of Filters (to apply any required transformation on the tokens)\n\n\n\nWhen run, this project allows users to choose a Token and a list of Filters and see the effect of Analyzer on the given text,\n\nfor example,\n\n\n\nHave fun!", 22 | "_id": "mukundha-term-search-playground" 23 | } -------------------------------------------------------------------------------- /astrajson/Datastax-Examples-doom-patrol.json: -------------------------------------------------------------------------------- 1 | { 2 | "key": "Datastax-Examples-doom-patrol", 3 | "tags": [ 4 | "labs", 5 | "python", 6 | "javascript", 7 | "dev" 8 | ], 9 | "urls": { 10 | "github": "https://github.com/DataStax-Examples/doom-patrol" 11 | }, 12 | "last_modified": "Thu, 03 Dec 2020 01:38:16 GMT", 13 | "forks_count": 0, 14 | "stargazers_count": 0, 15 | "name": "Doom Patrol, an Astra + Kepler.gl App", 16 | "description": "Geospatial data store based on Astra and Stargate leveraging both the keyspace and document APIs.", 17 | "duration": "50 minutes", 18 | "skilllevel": "Advanced", 19 | "priority": 2, 20 | "readme": "
Geospatial data store based on Astra and Stargate leveraging both the keyspace and document APIs.
\nAwesome C*aaS and API interfaces for powering the data layer behind our application.
\nCreate an Astra Database
\nTake note of the Database ID, Region, Username and Password
\nExport these values for the backend to use later
\nexport ASTRA_DATABASE_ID=00000000-0000-0000-0000-000000000000\nexport ASTRA_REGION=us-east1\n\nexport ASTRA_DATABASE_USERNAME=MyAwesomeUsername\nexport ASTRA_DATABASE_PASSWORD=MrNobody\nexport ASTRA_KEYSPACE=dooooom\nCreate a new table in the CQLSH Console
\nCREATE TABLE dooooom.geohash (\n hash text PRIMARY KEY,\n id text\n);\nLightweight Flask application with helper libraries around GeoJSON, GeoHashing, and the Astra REST APIs.
\ncd backend\nvirtualenv venv\nsource venv/bin/activate\n\npip3 install -r requirements.txt\ncd backend\nsource venv/bin/activate\n\npython3 main.py\ncd backend\nsource venv/bin/activate\npython -m unittest discover -s test -v -p '**test_*.py'\n
React Single Page Application (SPA) leveraging the Kepler.gl for visualizing GeoJSON data served by the backend.
\ncd frontend\nnpm install\ncd frontend\nnpm run start\n180 minutes, Advanced, Start Building
\nTrain a ML Model and turn it into an Rest API using Astra DB, Keras, and FastAPI by following along with CodingEntrepreneurs' video, part one is located here, part two is located here.
\n\n
sag_ai_api in your database.Database Administrator for the Organization that your Astra DB is in.bundle.zipFollow along in this video tutorial: https://youtu.be/56qQNcHJxyQ.
\n", 26 | "_id": "Datastax-Examples-ai-as-an-api", 27 | "readme_markdown": "\n# AI as an API\n*180 minutes, Advanced, [Start Building](https://github.com/DataStax-Examples/ai-as-an-api/blob/master/README.md)*\n\nTrain a ML Model and turn it into an Rest API using Astra DB, Keras, and FastAPI by following along with CodingEntrepreneurs' video, part one is located [here](https://youtu.be/56qQNcHJxyQ), part two is located [here](https://www.youtube.com/watch?v=nTdMjFcK3SM).\n\n\n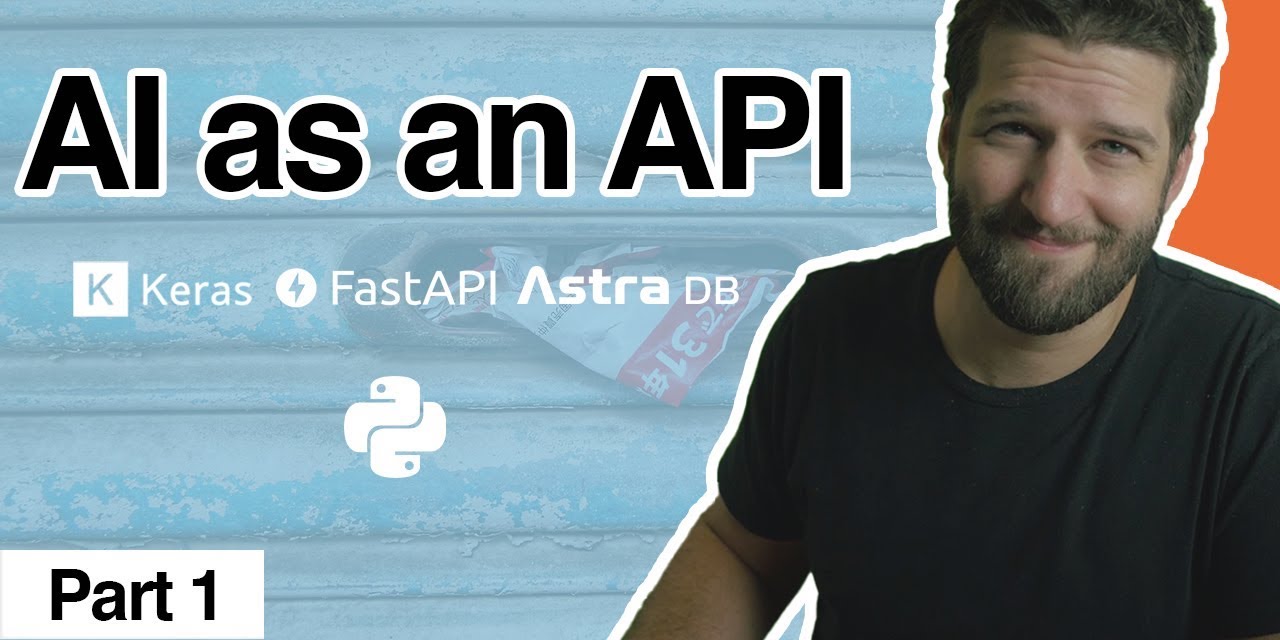\n\n## Quick Start\n\n* [Signup for DataStax Astra](https://dtsx.io/3aKPUOt), or login to your already existing account. \n* [Create an Astra DB Database](https://github.com/DataStax-Examples/sample-app-template/blob/master/GETTING_STARTED.md#create-an-astra-db) if you don't already have one.\n\n* [Create an Astra DB Keyspace](https://github.com/DataStax-Examples/sample-app-template/blob/master/GETTING_STARTED.md#create-an-astra-db-keyspace) called `sag_ai_api` in your database.\n* [Generate an Application Token](https://github.com/DataStax-Examples/sample-app-template/blob/master/GETTING_STARTED.md#create-an-application-token) with the role of `Database Administrator` for the Organization that your Astra DB is in.\n* Get your [secure connect bundle](https://github.com/DataStax-Examples/sample-app-template/blob/master/GETTING_STARTED.md#get-an-astra-db-secure-connect-bundle) from the connect page of your database and save it to your project folder. Rename it to `bundle.zip`\n \n## How this works\nFollow along in this video tutorial: [https://youtu.be/56qQNcHJxyQ](https://youtu.be/56qQNcHJxyQ).\n" 28 | } -------------------------------------------------------------------------------- /createTagSections.py: -------------------------------------------------------------------------------- 1 | from github import Github 2 | import cassio 3 | from langchain_community.vectorstores import Cassandra 4 | from langchain.schema import Document 5 | import cmarkgfm 6 | from cmarkgfm.cmark import Options as cmarkgfmOptions 7 | import requests 8 | from openai import OpenAI 9 | from astrapy.db import AstraDB, AstraDBCollection 10 | from astrapy.ops import AstraDBOps 11 | 12 | import json 13 | import os.path 14 | import os 15 | import re 16 | from dotenv import load_dotenv 17 | load_dotenv() 18 | 19 | # using an access token 20 | f = open("github.token", "r") 21 | line = f.readlines()[0].replace("\n", "") 22 | g = Github(line) 23 | 24 | p = re.compile('[a-zA-Z]+') 25 | token = os.getenv("ASTRA_DB_APPLICATION_TOKEN") 26 | api_endpoint = os.getenv("ASTRA_DB_API_ENDPOINT") 27 | 28 | # Initialize our vector db 29 | astra_db = AstraDB(token=token, api_endpoint=api_endpoint) 30 | astra_db.delete_collection(collection_name="tag_gallery") 31 | astra_db.create_collection(collection_name="tag_gallery", dimension=1536) 32 | 33 | demo_collection = AstraDBCollection(collection_name="tag_gallery", astra_db=astra_db) 34 | 35 | 36 | def main(): 37 | insert = { 38 | "_id": "languages", 39 | "tags":[ 40 | "javascript", 41 | "csharp", 42 | "java", 43 | "nodejs", 44 | "python", 45 | "c#", 46 | "scala", 47 | ]} 48 | demo_collection.delete_one(id="languages") 49 | response = demo_collection.insert_one(insert) 50 | print(response) 51 | insert = { 52 | "_id":"apis", "tags":[ 53 | "doc api", 54 | "graphql api", 55 | "rest api", 56 | "gprc api", 57 | "devops apis", 58 | "data api", 59 | "api" 60 | ]} 61 | 62 | response = demo_collection.insert_one(insert) 63 | print(response) 64 | insert = { 65 | "_id":"secret", "tags": ["workshop", "apps", "starters", "dev", "tools", "examples"] 66 | } 67 | demo_collection.delete_one(id="secret") 68 | 69 | response = demo_collection.insert_one(insert) 70 | print(response) 71 | insert = { 72 | "_id":"frameworks", 73 | "tags":[ 74 | "selenium", 75 | "react", 76 | "pandas", 77 | "spring", 78 | "stargate-mongoose", 79 | "mongoose", 80 | "django", 81 | "nextjs", 82 | "nestjs", 83 | "nuxtjs", 84 | "helm", 85 | "angular", 86 | "redux", 87 | "webflux", 88 | "elixir", 89 | "serverless-framework", 90 | "video", 91 | "pulsar", 92 | "express" 93 | ] 94 | } 95 | response = demo_collection.insert_one(insert) 96 | print(response) 97 | insert={"_id":"technology", "tags":[ 98 | "kubernetes", 99 | "k8ssandra", 100 | "cql", 101 | "nosql", 102 | "vector", 103 | "astradb", 104 | "cassandra", 105 | "fastapi", 106 | "datastax", 107 | "stargate", 108 | "keyspaces", 109 | "astrastreaming", 110 | "ios", 111 | "android" 112 | ]} 113 | demo_collection.delete_one(id="technology") 114 | 115 | response = demo_collection.insert_one(insert) 116 | print(response) 117 | insert = {"_id":"integrations", "tags": 118 | [ 119 | "eddiehub", 120 | "jamstack", 121 | "netlify", 122 | "gitpod", 123 | "template", 124 | "google cloud", 125 | "docker", 126 | "selenium", 127 | "pyspark", 128 | "nodejs driver" 129 | ]} 130 | demo_collection.delete_one(id="integrations") 131 | 132 | response = demo_collection.insert_one(insert) 133 | print(response) 134 | insert = {"_id":"usecases", "tags":[ 135 | "machine learning", 136 | "tutorials", 137 | "data engineering", 138 | "data science", 139 | "event streaming", 140 | "game", 141 | "performance testing", 142 | "ds-bulk", 143 | "timeseries db", 144 | "devops", 145 | "continuous integration", 146 | "continuous deployment", 147 | "real time" 148 | ] } 149 | response = demo_collection.insert_one(insert) 150 | print(response) 151 | if __name__ == '__main__': 152 | main() 153 | -------------------------------------------------------------------------------- /astrajson/difli-astra_vsearch_QA_for_documents.json: -------------------------------------------------------------------------------- 1 | { 2 | "key": "difli-astra_vsearch_QA_for_documents", 3 | "tags": [ 4 | "vector", 5 | "astradb", 6 | "cassio", 7 | "openai", 8 | "python" 9 | ], 10 | "urls": { 11 | "github": "https://github.com/difli/astra_vsearch_QA_for_documents", 12 | "heroimage": "https://raw.githubusercontent.com/datastaxdevs/gallery_content_loader/main/datastax-logo_square.png" 13 | }, 14 | "last_modified": "Sun, 23 Jul 2023 13:17:36 GMT", 15 | "forks_count": 0, 16 | "stargazers_count": 0, 17 | "name": "AstraDB Vector Search QA for Documents", 18 | "description": "This demo guides you through setting up Astra DB with Vector Search, Cassio and Open AI to implement an generative Q&A for your own Documentation.", 19 | "duration": "2 hours", 20 | "skilllevel": "Intermediate", 21 | "priority": 1, 22 | "readme": "This demo guides you through setting up Astra DB with Vector Search, Cassio and Open AI to implement an generative Q&A for your own Documentation
\nJupyter notebook for generative Q&A for douments is powered by Astra Vector Search and OpenAI [(https://github.com/openai/) and Casssio [Opensource LLM integration with Cassandra and Astra DB (https://cassio.org/)].
\nThis project is licensed under the Apache License, Version 2.0.
\nAstra vector search enables developers to search a database by context or meaning rather than keywords or literal values. This is done by using \u201cembeddings\u201d. Embeddings are a type of representation used in machine learning where high-dimensional or complex data is mapped onto vectors in a lower-dimensional space. These vectors capture the semantic properties of the input data, meaning that similar data points have similar embeddings.
\nCassIO is the ultimate solution for seamlessly integrating Apache Cassandra\u00ae with generative artificial intelligence and other machine learning workloads. This powerful Python library simplifies the complicated process of accessing the advanced features of the Cassandra database, including vector search capabilities. With CassIO, developers can fully concentrate on designing and perfecting their AI systems without any concerns regarding the complexities of integration with Cassandra.
\nOpenAI provides various tools and resources to implement your own Document QA Search system. This includes pre-trained language models like GPT-3.5, which can understand and generate human-like text. Additionally, OpenAI offers guidelines and APIs to leverage their models for document search and question-answering tasks, enabling developers to build powerful and intelligent Document QA Search applications.
\n", 23 | "readme_markdown": "# astra_vsearch_QA_for_documents\n\nThis demo guides you through setting up Astra DB with Vector Search, Cassio and Open AI to implement an generative Q&A for your own Documentation\n\nJupyter notebook for generative Q&A for douments is powered by Astra Vector Search and OpenAI [(https://github.com/openai/) and Casssio [Opensource LLM integration with Cassandra and Astra DB (https://cassio.org/)].\n\n\n# License\n\nThis project is licensed under the Apache License, Version 2.0. \n\n# Astra Vector Search\nAstra vector search enables developers to search a database by context or meaning rather than keywords or literal values. This is done by using \u201cembeddings\u201d. Embeddings are a type of representation used in machine learning where high-dimensional or complex data is mapped onto vectors in a lower-dimensional space. These vectors capture the semantic properties of the input data, meaning that similar data points have similar embeddings.\n\n# CassIO\nCassIO is the ultimate solution for seamlessly integrating Apache Cassandra\u00ae with generative artificial intelligence and other machine learning workloads. This powerful Python library simplifies the complicated process of accessing the advanced features of the Cassandra database, including vector search capabilities. With CassIO, developers can fully concentrate on designing and perfecting their AI systems without any concerns regarding the complexities of integration with Cassandra.\n\n# OpenAI\nOpenAI provides various tools and resources to implement your own Document QA Search system. This includes pre-trained language models like GPT-3.5, which can understand and generate human-like text. Additionally, OpenAI offers guidelines and APIs to leverage their models for document search and question-answering tasks, enabling developers to build powerful and intelligent Document QA Search applications.\n", 24 | "_id": "difli-astra_vsearch_QA_for_documents" 25 | } -------------------------------------------------------------------------------- /astrajson/mukundha-multi-modal-vector-retrieval-astra.json: -------------------------------------------------------------------------------- 1 | { 2 | "key": "mukundha-multi-modal-vector-retrieval-astra", 3 | "tags": [ 4 | "vector", 5 | "astradb", 6 | "cassio", 7 | "openai", 8 | "python" 9 | ], 10 | "urls": { 11 | "github": "https://github.com/mukundha/multi-modal-vector-retrieval-astra", 12 | "heroimage": "https://raw.githubusercontent.com/datastaxdevs/gallery_content_loader/main/datastax-logo_square.png" 13 | }, 14 | "last_modified": "Fri, 06 Oct 2023 00:55:27 GMT", 15 | "forks_count": 1, 16 | "stargazers_count": 0, 17 | "name": "Multi-Modal Vector Retrieval", 18 | "description": "Demonstrates how to perform multi modal vector retrieval with Astra and langchain with flickr-8k dataset.", 19 | "duration": "2 hours", 20 | "skilllevel": "Intermediate", 21 | "priority": 1, 22 | "readme": "Demonstrates how to perform multi modal vector retrieval with Astra and langchain with flickr-8k dataset
\nDownload flickr-8k dataset from
\nhttps://www.kaggle.com/datasets/adityajn105/flickr8k
Extract here, folder structure would look like
\n./flickr\n./flickr/captions.txt\n./flickr/Images\npip install -r requirements.txt\nInit Astra
\nexport ASTRA_DB_APPLICATION_TOKEN=\nexport ASTRA_DB_DATABASE_ID=\nexport ASTRA_DB_KEYSPACE=\npython3 multimodal_demo.py\nWith langchain
\npython3 multimodal_langchain.py\n\nCLIP Embeddings are generated based on this paper
\nKey idea is representing text and image in the same vector space
langchain doesn't have good support for multi-modal embeddings yet, so if you want to use it with langchain, here is a sample on how to do that clip_embedding.py. It uses a json encoded string to support text and images
As MultiModal generative models become more accessible, usecases to retrieve multimodal content for RAG usecases will follow.
\nThere are some fun projects out there to caption images, text guided image generation etc.
\nOne of the usecase, I'm trying to solve in Edtech / learning space -
\nStudents can take a picture of their work (partially completed), either they are trying to sktech a plant cell or electronic circuitry for a Adder and ask a Generative model to help complete.
\nStudent provides the Initial state (A),
\nRAG can supplement the final state (B),
\nGenerative model shows the path from A -> B
Cool? What will you build with MultiModal retrieval?
\n", 23 | "readme_markdown": "## Multi-Modal Vector Retrieval with Astra\n\nDemonstrates how to perform multi modal vector retrieval with Astra and langchain with flickr-8k dataset\n\n### Get started\n\nDownload flickr-8k dataset from \n`https://www.kaggle.com/datasets/adityajn105/flickr8k`\n\nExtract here, folder structure would look like\n```\n./flickr\n./flickr/captions.txt\n./flickr/Images\n```\n\n```\npip install -r requirements.txt\n```\n\nInit Astra\n```\nexport ASTRA_DB_APPLICATION_TOKEN=\nexport ASTRA_DB_DATABASE_ID=\nexport ASTRA_DB_KEYSPACE=\n```\n\n```\npython3 multimodal_demo.py\n```\n\nWith langchain \n```\npython3 multimodal_langchain.py\n\n```\n\n### How it works\n\nCLIP Embeddings are generated based on this [paper](https://ai.meta.com/research/publications/scaling-autoregressive-multi-modal-models-pretraining-and-instruction-tuning/)\nKey idea is representing text and image in the same vector space\n\n`langchain` doesn't have good support for multi-modal embeddings yet, so if you want to use it with langchain, here is a sample on how to do that `clip_embedding.py`. It uses a json encoded string to support text and images\n\n### Usecases\n\nAs MultiModal generative models become more accessible, usecases to retrieve multimodal content for RAG usecases will follow. \n\nThere are some fun projects out there to caption images, text guided image generation etc.\n\nOne of the usecase, I'm trying to solve in Edtech / learning space - \n\nStudents can take a picture of their work (partially completed), either they are trying to sktech a plant cell or electronic circuitry for a Adder and ask a Generative model to help complete.\n\nStudent provides the Initial state (A), \nRAG can supplement the final state (B), \nGenerative model shows the path from A -> B\n\nCool? What will you build with MultiModal retrieval?", 24 | "_id": "mukundha-multi-modal-vector-retrieval-astra" 25 | } -------------------------------------------------------------------------------- /astrajson/Datastax-Examples-todo-native-mobile.json: -------------------------------------------------------------------------------- 1 | { 2 | "key": "Datastax-Examples-todo-native-mobile", 3 | "tags": [ 4 | "javascript", 5 | "workshop", 6 | "astradb", 7 | "ds-bulk", 8 | "react", 9 | "react-native", 10 | "ios", 11 | "android", 12 | "dev", 13 | "tutorials" 14 | ], 15 | "urls": { 16 | "github": "https://github.com/DataStax-Examples/todo-native-mobile", 17 | "gitpod": "https://gitpod.io/#https://github.com/DataStax-Examples/todo-native-mobile", 18 | "heroimage": "https://raw.githubusercontent.com/DataStax-Examples/todo-native-mobile/master/hero.png" 19 | }, 20 | "last_modified": "Thu, 23 Mar 2023 19:01:16 GMT", 21 | "forks_count": 3, 22 | "stargazers_count": 1, 23 | "name": "React Native Todo List, an Astra DB + Netlify Workshop", 24 | "description": "A workshop where you build a React Native Todo application using DataStax Astra DB.", 25 | "duration": "40 minutes", 26 | "skilllevel": "Intermediate", 27 | "priority": 2, 28 | "readme": "\n40 minutes, Beginner/Intermediate
\n
In this workshop, you will learn how to convert the Todo web application from a previous DataStaxDevs workshop into a React Native mobile and web application. We will actually be using the same database setup as before, so if you've already created it during the prior workshop, you can skip the Database setup section of this workshop.
\nBefore going all React Native, if you would like to learn more about React and create your first React app take a look at our previous Todo app workshop. HERE.
\nThis is an example React Native Todo application using a DataStax AstraDB free tier database.
\n\n
Create a DataStax Astra account if you don't already have one.
\n\nTo build and play with this app, follow the workshop instructions that are located here: https://github.com/DataStax-Examples/todo-native-mobile/blob/master/WORKSHOP.md
\n", 29 | "_id": "Datastax-Examples-todo-native-mobile", 30 | "readme_markdown": "\n\n# React Native Todo List, an Astra DB + Netlify Workshop\n*40 minutes, Beginner/Intermediate*\n\n[](https://gitpod.io/from-referrer/)\n\nIn this workshop, you will learn how to convert the Todo web application from a previous [DataStaxDevs workshop](https://github.com/datastaxdevs/appdev-week1-todolist) into a React Native mobile and web application. We will actually be using the same database setup as before, so if you've already created it during the prior workshop, you can skip the Database setup section of this workshop.\n\nBefore going all React Native, if you would like to learn more about React and create your first React app take a look at our previous Todo app workshop. [HERE](https://github.com/datastaxdevs/appdev-week1-todolist).\n\nThis is an example React Native Todo application using a [DataStax AstraDB](https://dtsx.io/3nvKRsO) free tier database.\n\n\n\n\n## Objectives\n* Implement a **React Native** Todo app using Expo\n* Learn about **React Native** components and how they are used to dynamically update the DOM with new information\n* Learn how to convert a React web app to a **React Native** mobile and web app\n* Learn how **state** and **props** changes are used\n* Leverage Netlify and DataStax AstraDB\n\n## Get Started\n\nCreate a [DataStax Astra account](https://dtsx.io/3nvKRsO) if you don't already have one.\n\n\nTo build and play with this app, follow the workshop instructions that are located here: [https://github.com/DataStax-Examples/todo-native-mobile/blob/master/WORKSHOP.md](https://github.com/DataStax-Examples/todo-native-mobile/blob/master/WORKSHOP.md)\n\n\n" 31 | } -------------------------------------------------------------------------------- /astrajson/Datastax-Examples-rpg-astra.json: -------------------------------------------------------------------------------- 1 | { 2 | "key": "Datastax-Examples-rpg-astra", 3 | "tags": [ 4 | "javascript", 5 | "react", 6 | "netlify", 7 | "astradb", 8 | "tutorials", 9 | "dev" 10 | ], 11 | "urls": { 12 | "github": "https://github.com/DataStax-Examples/rpg-astra", 13 | "heroimage": "https://raw.githubusercontent.com/DataStax-Examples/rpg-astra/master/hero.jpg", 14 | "gitpod": "https://gitpod.io/#https://github.com/DataStax-Examples/rpg-astra" 15 | }, 16 | "last_modified": "Mon, 20 Nov 2023 13:08:02 GMT", 17 | "forks_count": 3, 18 | "stargazers_count": 8, 19 | "name": "Build an Astra DB RPG", 20 | "description": "This example is a simple RPG application that allows you to add skills and allocate skill points to them.", 21 | "duration": "30 minutes", 22 | "skilllevel": "Advanced", 23 | "priority": 3, 24 | "readme": "\n30 minutes, Advanced, Start Building
\nThis example is a simple RPG application that allows you to add skills and allocate skill points to them, gaining you experience and levels as a result.
\n\n
sag_rpg in your database.Database Administrator for the Organization that your Astra DB is in.env.example file to a file named .env and fill the required values in from your Application Token and Astra DB connection settings.npm run dev in the Gitpod console.Launch and explore an example of a RPG app in Gitpod, built with React and Netlify.
\n", 25 | "_id": "Datastax-Examples-rpg-astra", 26 | "readme_markdown": "\n\n# Build an Astra DB RPG\n\n_30 minutes, Advanced, [Start Building](https://github.com/DataStax-Examples/rpg-astra/blob/master/README.md#quick-start)_\n\nThis example is a simple RPG application that allows you to add skills and allocate skill points to them, gaining you experience and levels as a result.\n\n\n\n\n\n## Quick Start\n\n\n- [Signup for DataStax Astra](https://astra.dev/3ANTraE), or login to your already existing account.\n- [Create an Astra DB Database](https://github.com/DataStax-Examples/sample-app-template/blob/master/GETTING_STARTED.md#create-an-astra-db) if you don't already have one.\n\n- [Create an Astra DB Keyspace](https://github.com/DataStax-Examples/sample-app-template/blob/master/GETTING_STARTED.md#create-an-astra-db-keyspace) called `sag_rpg` in your database.\n- [Generate an Application Token](https://github.com/DataStax-Examples/sample-app-template/blob/master/GETTING_STARTED.md#create-an-application-token) with the role of `Database Administrator` for the Organization that your Astra DB is in.\n- Click the 'Open in Gitpod' link: [](https://gitpod.io/#https://github.com/DataStax-Examples/rpg-astra)\n- Once the app is finished launching in the Gitpod IDE, copy the `env.example` file to a file named `.env` and fill the required values in from your Application Token and [Astra DB connection settings](https://github.com/DataStax-Examples/sample-app-template/blob/master/GETTING_STARTED.md#get-your-astra-db-connection-settings).\n- Start the example by running `npm run dev` in the Gitpod console.\n\n## Objectives\n\nLaunch and explore an example of a RPG app in [Gitpod](https://www.gitpod.io/), built with [React](https://reactjs.org/) and [Netlify](https://www.netlify.com).\n" 27 | } -------------------------------------------------------------------------------- /astrajson/DatastaxDevs-workshop-ai-as-api.json: -------------------------------------------------------------------------------- 1 | { 2 | "key": "DatastaxDevs-workshop-ai-as-api", 3 | "tags": [ 4 | "nlp", 5 | "workshop", 6 | "astradb", 7 | "fastapi", 8 | "pandas", 9 | "python", 10 | "vector" 11 | ], 12 | "urls": { 13 | "github": "https://github.com/datastaxdevs/workshop-ai-as-api", 14 | "heroimage": "https://raw.githubusercontent.com/DataStax-Examples/ai-as-an-api/master/hero.jpeg", 15 | "youtube": [ 16 | "https://www.youtube.com/watch?v=sKa1uPjIBC0" 17 | ] 18 | }, 19 | "last_modified": "Tue, 23 Jan 2024 16:39:17 GMT", 20 | "forks_count": 55, 21 | "stargazers_count": 135, 22 | "name": "AI as an API", 23 | "description": "Learn to build your own NLP text classifier and expose it as an API:", 24 | "skilllevel": "Intermediate", 25 | "language": [], 26 | "likes": "36", 27 | "views": "3264", 28 | "usecases": [], 29 | "readme": "The full course, including hands-on instructions, is on DataStax Academy. There,
\nyou will learn how to work in the Interactive Lab.
For best results: (1) Check the course start page.
\n(2) Enroll in the course. (3) Start learning and practicing!
 \n
\npandas, pydantic, dotenv, sklearn, uvicorn, and more.\n\n- AI-based text analysis with Tensorflow/Keras;\n- Astra DB, a Database-as-a-Service built on Apache Cassandra\u00ae;\n- FastAPI, the high-performance Python framework for creating APIs;\n- Many useful Python libraries and packages including `pandas`, `pydantic`, `dotenv`, `sklearn`, `uvicorn`, and more.\n\n### During this hands-on workshop, you will:\n\n- prepare the labeled dataset for model training;\n- train the model to classify any input text;\n- export the trained model and test it interactively;\n- create your free NoSQL database for data storage;\n- set up and start an API exposing the classifier as a reusable class;\n- learn how to speed up the API with DB-based caching;\n- inspect how a streaming response is handled in the API.\n\n#### Prerequisites:\n\n- Familiarity with Python;\n- A Github account is required for the hands-on.\n"
32 | }
--------------------------------------------------------------------------------
/astrajson/Datastax-Examples-glitch-astra-starter.json:
--------------------------------------------------------------------------------
1 | {
2 | "key": "Datastax-Examples-glitch-astra-starter",
3 | "tags": [
4 | "javascript",
5 | "rest api",
6 | "astradb",
7 | "tutorials",
8 | "dev",
9 | "ds-bulk",
10 | "cassandra",
11 | "nodejs",
12 | "glitch"
13 | ],
14 | "urls": {
15 | "github": "https://github.com/DataStax-Examples/glitch-astra-starter",
16 | "heroimage": "https://raw.githubusercontent.com/DataStax-Examples/glitch-astra-starter/master/hero.png"
17 | },
18 | "last_modified": "Wed, 19 Oct 2022 15:31:59 GMT",
19 | "forks_count": 0,
20 | "stargazers_count": 2,
21 | "name": "Glitch and Astra DB Starter",
22 | "description": "Jumpstart your next React/Express prototype with this starter!",
23 | "duration": "10 minutes",
24 | "skilllevel": "Beginner",
25 | "priority": 1,
26 | "readme": "\n10 minutes, Beginner, Start Building
\nJumpstart your next NodeJS prototype with this starter!
\n\n
sag_glitch_starter in your database.Database Administrator for the Organization that your Astra DB is in.
.env section provided by Glitch.
Run this sample in Glitch or on your local machine and then use it to jump start your next App.
\nGlitch is a a place to prototype fast, full-stack web apps in your browser for free.
\n", 27 | "_id": "Datastax-Examples-glitch-astra-starter", 28 | "readme_markdown": "\n# Glitch and Astra DB Starter\n*10 minutes, Beginner, [Start Building](https://github.com/DataStax-Examples/glitch-astra-starter#quick-start)*\n\nJumpstart your next NodeJS prototype with this starter!\n\n\n\n\n## Quick Start\n\n* [Signup for DataStax Astra](https://dtsx.io/2YmhZJ6), or login to your already existing account. \n* [Create an Astra DB Database](https://github.com/DataStax-Examples/sample-app-template/blob/master/GETTING_STARTED.md#create-an-astra-db) if you don't already have one.\n\n* [Create an Astra DB Keyspace](https://github.com/DataStax-Examples/sample-app-template/blob/master/GETTING_STARTED.md#create-an-astra-db-keyspace) called `sag_glitch_starter` in your database.\n* [Generate an Application Token](https://github.com/DataStax-Examples/sample-app-template/blob/master/GETTING_STARTED.md#create-an-application-token) with the role of `Database Administrator` for the Organization that your Astra DB is in.\n* Login to or create a [Glitch](https://glitch.com) account.\n* Start a new project using the sample app github repository (https://github.com/DataStax-Examples/glitch-astra-starter).\n\n* Add your Astra DB connection information into the `.env` section provided by Glitch. \n\n\n## Objectives\n* Provide a fullstack development example using Astra DB as the storage backend\n \n## How this works\nRun this sample in Glitch or on your local machine and then use it to jump start your next App.\n\n[Glitch](https://glitch.com/) is a a place to prototype fast, full-stack web apps in your browser for free.\n" 29 | } -------------------------------------------------------------------------------- /astrajson/Datastax-Examples-nf-data-explorer.json: -------------------------------------------------------------------------------- 1 | { 2 | "key": "Datastax-Examples-nf-data-explorer", 3 | "tags": [ 4 | "javascript", 5 | "tools", 6 | "cassandra", 7 | "dev", 8 | "ds-bulk", 9 | "astradb", 10 | "netflix data explorer", 11 | "tutorials", 12 | "netflix-data-explorer" 13 | ], 14 | "urls": { 15 | "github": "https://github.com/DataStax-Examples/nf-data-explorer", 16 | "gitpod": "https://gitpod.io/#https://github.com/DataStax-Examples/nf-data-explorer", 17 | "heroimage": "https://raw.githubusercontent.com/DataStax-Examples/nf-data-explorer/master/hero.png" 18 | }, 19 | "last_modified": "Fri, 18 Nov 2022 10:44:27 GMT", 20 | "forks_count": 0, 21 | "stargazers_count": 1, 22 | "name": "Netflix Data Explorer", 23 | "description": "Launch Netlfix's Open Source Data Explorer in Gitpod and connect to your Astra DB instance!", 24 | "duration": "10 minutes", 25 | "skilllevel": "Beginner", 26 | "priority": 1, 27 | "readme": "\n10 minutes, Beginner, Start Building
\n
Launch Netlfix's Open Source Data Explorer in Gitpod and connect to your Astra DB instance!
\n\n
sag_nf_data_explorer in your database.Database Administrator for the Organization that your Astra DB is in.yarn start in the Gitpod console.Run the Netflix Data Explorer in Gitpod by selecting "Open in IDE" or by launching from this link.
\n", 28 | "_id": "Datastax-Examples-nf-data-explorer", 29 | "readme_markdown": "\n# Netflix Data Explorer\n*10 minutes, Beginner, [Start Building](https://github.com/DataStax-Examples/nf-data-explorer#prerequisites)*\n\n[](https://gitpod.io/#https://github.com/DataStax-Examples/nf-data-explorer)\n\nLaunch Netlfix's Open Source Data Explorer in Gitpod and connect to your Astra DB instance!\n\n\n\n\n## Quick Start\n\n* [Signup for DataStax Astra](https://dtsx.io/3tuBCKj), or login to your already existing account.\n* [Create an Astra DB Database](https://github.com/DataStax-Examples/sample-app-template/blob/master/GETTING_STARTED.md#create-an-astra-db) if you don't already have one.\n\n* [Create an Astra DB Keyspace](https://github.com/DataStax-Examples/sample-app-template/blob/master/GETTING_STARTED.md#create-an-astra-db-keyspace) called `sag_nf_data_explorer` in your database.\n* [Generate an Application Token](https://github.com/DataStax-Examples/sample-app-template/blob/master/GETTING_STARTED.md#create-an-application-token) with the role of `Database Administrator` for the Organization that your Astra DB is in.\n* Click the 'Open in Gitpod' link: [](https://gitpod.io/#https://github.com/DataStax-Examples/nf-data-explorer)\n* Get your [secure connect bundle](https://github.com/DataStax-Examples/sample-app-template/blob/master/GETTING_STARTED.md#get-an-astra-db-secure-connect-bundle) from the connect page of your database.\n* Start the example by running `yarn start` in the Gitpod console.\n\n## Objectives\n* Connect the Netflix Data Explorer that is running in Gitpod to your Astra DB instance.\n\n## How this works\nRun the Netflix Data Explorer in Gitpod by selecting \"Open in IDE\" or by launching from this [link](https://gitpod.io/#https://github.com/DataStax-Examples/nf-data-explorer).\n" 30 | } -------------------------------------------------------------------------------- /astrajson/DatastaxDevs-workshop-k8ssandra.json: -------------------------------------------------------------------------------- 1 | { 2 | "key": "DatastaxDevs-workshop-k8ssandra", 3 | "tags": [ 4 | "docker", 5 | "helm", 6 | "kubernetes", 7 | "k8ssandra", 8 | "stargate", 9 | "workshop", 10 | "cloud native", 11 | "cassandra", 12 | "apache-cassandra" 13 | ], 14 | "urls": { 15 | "github": "https://github.com/datastaxdevs/workshop-k8ssandra", 16 | "youtube": [ 17 | "https://www.youtube.com/watch?v=mDHT-yBOUUs" 18 | ] 19 | }, 20 | "last_modified": "Fri, 29 Dec 2023 16:33:11 GMT", 21 | "forks_count": 16, 22 | "stargazers_count": 19, 23 | "name": "Deploy Cassandra into Kubernetes with K8ssandra", 24 | "description": " learn how to deploy and manage a data tier based on Apache Cassandra\u2122 cluster in Kubernetes using K8ssandra. ", 25 | "duration": "3 hours", 26 | "skilllevel": "Intermediate", 27 | "language": [ 28 | "yaml" 29 | ], 30 | "badge": "https://media.badgr.com/uploads/badges/f1523f2b-9fc2-4368-aed7-0e78a5216427.png", 31 | "likes": "32", 32 | "views": "1166", 33 | "usecases": [ 34 | "cloud native" 35 | ], 36 | "readme": "In this repository, you'll find everything for the Cassandra Kubernetes Workshop delivered by DataStax Developers!
\nHow to do the workshop and learn the new skills? Very easy, just three steps!
\nDone! That's it, you are amazing!
\nInstructions has been moved to the wiki to ease the progression.
\n\n\n  \n\n
\n\n
\n\n \n\n
You are here because you are curious about simplifying your Gen AI journey. DataStax has the answer.
\nDataStax is a real-time data company for building production Gen AI applications. Our vector search capability is
\nthe key to harnessing the potential of generative AI and Retrieval-Augmented Generation (RAG) for
\nyour Gen AI applications. Think of it as a mix of Astra DB, our fully managed data service with vector
\nsearch capabilities, seamlessly integrated into the LangChain and Cassio app developer framework.
\nThis unique cocktail is loved by developers because it provides the means to rapidly master Gen AI and
\nRAG, enabling the creation of powerful, contextually rich systems.
You don\u2019t need to be a Deep Learning Machine Learning Expert / Data Scientist to understand how to
\nuse LLM\u2019s like OpenAI and Vector Database like AstraDB to make intelligent Experts, Assistants, and
\nPlatforms
This Dev Jam will help your enterprise architects, developers and practitioners to quickly become
\nfamiliar with RAGStack, LLMs and Vector Database. These sessions with a DataStax technical coach,
\nself-paced and hands-on learning assignments. Bring in a Gen AI use case, your data and
\nbuild a Gen AI agent using DataStax Astra platform.
This Dev Jam has number different projects to pick from. Excited! , you can pick all!
\nragbot - this module takes in data using a json file , break the data into chunks, embed , store and build a RAG enabled chatbot and deploy into production. It has got a Cool UI!
\nragstack - built using DataStax RAGStack , a Gen AI full stack to take your agents in production in minutes. This module has variety of datasources (crawl a webpage, take PDFs from object store) and has a full fledged chatbot build using RAGStack
\nastrachatbot - this module let's you crawl a webpage, break the data into chunks, embed , store and build a RAG enabled chatbot and deploy into production. It has got a Cool UI!
\nFrameworks/Stack used to Build a Production Gen AI Agent
\nHappy Learning!
\n", 23 | "readme_markdown": "# DATA = AI\n\n# Welcome to DataStax - Gen AI Dev Jam\n\n\nYou are here because you are curious about simplifying your Gen AI journey. DataStax has the answer. \nDataStax is a real-time data company for building production Gen AI applications. Our vector search capability is\nthe key to harnessing the potential of generative AI and Retrieval-Augmented Generation (RAG) for\nyour Gen AI applications. Think of it as a mix of Astra DB, our fully managed data service with vector\nsearch capabilities, seamlessly integrated into the LangChain and Cassio app developer framework.\nThis unique cocktail is loved by developers because it provides the means to rapidly master Gen AI and\nRAG, enabling the creation of powerful, contextually rich systems.\n\nYou don\u2019t need to be a Deep Learning Machine Learning Expert / Data Scientist to understand how to\nuse LLM\u2019s like OpenAI and Vector Database like AstraDB to make intelligent Experts, Assistants, and\nPlatforms\n\nThis Dev Jam will help your enterprise architects, developers and practitioners to quickly become\nfamiliar with RAGStack, LLMs and Vector Database. These sessions with a DataStax technical coach,\nself-paced and hands-on learning assignments. Bring in a Gen AI use case, your data and\nbuild a Gen AI agent using DataStax Astra platform.\n\nThis Dev Jam has number different projects to pick from. Excited! , you can pick all!\n\n[ragbot](ragbot/README.md) - this module takes in data using a json file , break the data into chunks, embed , store and build a RAG enabled chatbot and deploy into production. It has got a Cool UI!\n\n[ragstack](ragstack/README.md) - built using DataStax RAGStack , a Gen AI full stack to take your agents in production in minutes. This module has variety of datasources (crawl a webpage, take PDFs from object store) and has a full fledged chatbot build using RAGStack\n\n[astrachatbot](astrachatbot/README.md) - this module let's you crawl a webpage, break the data into chunks, embed , store and build a RAG enabled chatbot and deploy into production. It has got a Cool UI!\n\nFrameworks/Stack used to Build a Production Gen AI Agent\n- RAGStack\n- Astra\n- LangChain\n- Vercel\n- Streamlit \n\nHappy Learning!", 24 | "_id": "krishnannarayanaswamy-hiring-assistant-rag-astra" 25 | } -------------------------------------------------------------------------------- /astrajson/krishnannarayanaswamy-ragstack-astra-dev-jam.json: -------------------------------------------------------------------------------- 1 | { 2 | "key": "krishnannarayanaswamy-ragstack-astra-dev-jam", 3 | "tags": [ 4 | "vector", 5 | "ragbot", 6 | "ragstack", 7 | "astrachatbot", 8 | "astradb", 9 | "langchain", 10 | "vercel", 11 | "streamlit" 12 | ], 13 | "urls": { 14 | "github": "https://github.com/krishnannarayanaswamy/ragstack-astra-dev-jam", 15 | "heroimage": "https://raw.githubusercontent.com/krishnannarayanaswamy/ragstack-astra-dev-jam/main/ragbot/images/dbdataexplorer.png" 16 | }, 17 | "last_modified": "Thu, 30 Nov 2023 03:13:21 GMT", 18 | "forks_count": 0, 19 | "stargazers_count": 0, 20 | "name": "Gen AI Dev Jam", 21 | "description": "This Dev Jam will help your enterprise architects, developers and practitioners to quickly become familiar with RAGStack, LLMs and Vector Database.", 22 | "duration": "2 hours", 23 | "skilllevel": "Intermediate", 24 | "priority": 1, 25 | "readme": "You are here because you are curious about simplifying your Gen AI journey. DataStax has the answer.
\nDataStax is a real-time data company for building production Gen AI applications. Our vector search capability is
\nthe key to harnessing the potential of generative AI and Retrieval-Augmented Generation (RAG) for
\nyour Gen AI applications. Think of it as a mix of Astra DB, our fully managed data service with vector
\nsearch capabilities, seamlessly integrated into the LangChain and Cassio app developer framework.
\nThis unique cocktail is loved by developers because it provides the means to rapidly master Gen AI and
\nRAG, enabling the creation of powerful, contextually rich systems.
You don\u2019t need to be a Deep Learning Machine Learning Expert / Data Scientist to understand how to
\nuse LLM\u2019s like OpenAI and Vector Database like AstraDB to make intelligent Experts, Assistants, and
\nPlatforms
This Dev Jam will help your enterprise architects, developers and practitioners to quickly become
\nfamiliar with RAGStack, LLMs and Vector Database. These sessions with a DataStax technical coach,
\nself-paced and hands-on learning assignments. Bring in a Gen AI use case, your data and
\nbuild a Gen AI agent using DataStax Astra platform.
This Dev Jam has number different projects to pick from. Excited! , you can pick all!
\nragbot - this module takes in data using a json file , break the data into chunks, embed , store and build a RAG enabled chatbot and deploy into production. It has got a Cool UI!
\nragstack - built using DataStax RAGStack , a Gen AI full stack to take your agents in production in minutes. This module has variety of datasources (crawl a webpage, take PDFs from object store) and has a full fledged chatbot build using RAGStack
\nastrachatbot - this module let's you crawl a webpage, break the data into chunks, embed , store and build a RAG enabled chatbot and deploy into production. It has got a Cool UI!
\nFrameworks/Stack used to Build a Production Gen AI Agent
\nHappy Learning!
\n", 26 | "readme_markdown": "# DATA = AI\n\n# Welcome to DataStax - Gen AI Dev Jam\n\n\nYou are here because you are curious about simplifying your Gen AI journey. DataStax has the answer. \nDataStax is a real-time data company for building production Gen AI applications. Our vector search capability is\nthe key to harnessing the potential of generative AI and Retrieval-Augmented Generation (RAG) for\nyour Gen AI applications. Think of it as a mix of Astra DB, our fully managed data service with vector\nsearch capabilities, seamlessly integrated into the LangChain and Cassio app developer framework.\nThis unique cocktail is loved by developers because it provides the means to rapidly master Gen AI and\nRAG, enabling the creation of powerful, contextually rich systems.\n\nYou don\u2019t need to be a Deep Learning Machine Learning Expert / Data Scientist to understand how to\nuse LLM\u2019s like OpenAI and Vector Database like AstraDB to make intelligent Experts, Assistants, and\nPlatforms\n\nThis Dev Jam will help your enterprise architects, developers and practitioners to quickly become\nfamiliar with RAGStack, LLMs and Vector Database. These sessions with a DataStax technical coach,\nself-paced and hands-on learning assignments. Bring in a Gen AI use case, your data and\nbuild a Gen AI agent using DataStax Astra platform.\n\nThis Dev Jam has number different projects to pick from. Excited! , you can pick all!\n\n[ragbot](ragbot/README.md) - this module takes in data using a json file , break the data into chunks, embed , store and build a RAG enabled chatbot and deploy into production. It has got a Cool UI!\n\n[ragstack](ragstack/README.md) - built using DataStax RAGStack , a Gen AI full stack to take your agents in production in minutes. This module has variety of datasources (crawl a webpage, take PDFs from object store) and has a full fledged chatbot build using RAGStack\n\n[astrachatbot](astrachatbot/README.md) - this module let's you crawl a webpage, break the data into chunks, embed , store and build a RAG enabled chatbot and deploy into production. It has got a Cool UI!\n\nFrameworks/Stack used to Build a Production Gen AI Agent\n- RAGStack\n- Astra\n- LangChain\n- Vercel\n- Streamlit \n\nHappy Learning!", 27 | "_id": "krishnannarayanaswamy-ragstack-astra-dev-jam" 28 | } -------------------------------------------------------------------------------- /astrajson/Datastax-Examples-astra-nodejs-starter.json: -------------------------------------------------------------------------------- 1 | { 2 | "key": "Datastax-Examples-astra-nodejs-starter", 3 | "tags": [ 4 | "javascript", 5 | "nodejs", 6 | "astradb", 7 | "ds-bulk", 8 | "dev", 9 | "tutorials", 10 | "cassandra" 11 | ], 12 | "urls": { 13 | "github": "https://github.com/DataStax-Examples/astra-nodejs-starter", 14 | "heroimage": "https://raw.githubusercontent.com/DataStax-Examples/sample-app-template/master/screenshots/astra-sample-app-default.png", 15 | "gitpod": "https://gitpod.io/#https://github.com/DataStax-Examples/astra-nodejs-starter" 16 | }, 17 | "last_modified": "Wed, 03 Jan 2024 06:04:56 GMT", 18 | "forks_count": 2, 19 | "stargazers_count": 2, 20 | "name": "Astra + NodeJS Starter", 21 | "description": "Bootstrap your next NodeJS app with an Astra integration.", 22 | "duration": "10 minutes", 23 | "skilllevel": "Beginner", 24 | "priority": 1, 25 | "readme": "\n10 minutes, Beginner, Start Building
\nBootstrap your next NodeJS app with an Astra integration.
\n\n
sag_nodejs_starter in your database.Database Administrator for the Organization that your Astra DB is in.env.example file to a file named .env and fill the required values in from your Application Token and Astra DB connection settings.secure-connect-bundle.zipnpm start in the Gitpod console.Bootstrap a NodeJS app with Astra already integrated.
\nOpening and running the app will populate the database you specify in your .env file with the required data, allowing you to explore the NodeJS starter app.
50 minutes, Advanced, Start Building
\nCreate a fullstack NuxtJS + NestJS app while following along with the tutorial video from Eddie Jaoude.
\n\n
sag_nuxtjs_fullstack in your database.Database Administrator for the Organization that your Astra DB is in.env.example file in the api folder to a file named .env in the api folder and fill the required values in from your Application Token and Astra DB connection settings.npm start in the Gitpod console while in the api folder.Create a fullstack NuxtJS + NestJS app while following along with the tutorial video from Eddie Jaoude.
\nOpening and running the app will populate the database you specify in your .env file with the required data, allowing you to explore the NuxtJS + NestJS tutorial app.
10 minutes, Beginner, Start Building, View Demo
\nLet's code a Netflix Clone with GraphQL Pagination!
\n\n
sag_netflix in your database.Database Administrator for the Organization that your Astra DB is in.env.example file to a file named .env and fill the required values in from your Application Token and Astra DB connection settings.npm run dev in the Gitpod console.Opening and running the app will populate the database you specify in your .env file with the required data, allowing you to explore the astra-netflix app. You can view a demo of the running app here.
Follow along with Ania's walkthrough video.
\nAdditionally, there is a workshop repository for this sample app located here.
\n", 28 | "_id": "Datastax-Examples-astra-netflix", 29 | "readme_markdown": "\n# Netflix Clone using Astra DB and GraphQL\n*10 minutes, Beginner, [Start Building](https://github.com/DataStax-Examples/astra-netflix#quick-start), [View Demo](https://sag-astra-netflix.netlify.app)*\n\nLet's code a Netflix Clone with GraphQL Pagination! \n\n\n\n\n## Quick Start\n\n* [Signup for DataStax Astra](https://dtsx.io/3sYwYUL), or login to your already existing account. \n* [Create an Astra DB Database](https://github.com/DataStax-Examples/sample-app-template/blob/master/GETTING_STARTED.md#create-an-astra-db) if you don't already have one.\n\n* [Create an Astra DB Keyspace](https://github.com/DataStax-Examples/sample-app-template/blob/master/GETTING_STARTED.md#create-an-astra-db-keyspace) called `sag_netflix` in your database.\n* [Generate an Application Token](https://github.com/DataStax-Examples/sample-app-template/blob/master/GETTING_STARTED.md#create-an-application-token) with the role of `Database Administrator` for the Organization that your Astra DB is in.\n* Click the 'Open in Gitpod' link: [](https://gitpod.io/#https://github.com/DataStax-Examples/astra-netflix)\n* Once the app is finished launching in the Gitpod IDE, copy the `env.example` file to a file named `.env` and fill the required values in from your Application Token and [Astra DB connection settings](https://github.com/DataStax-Examples/sample-app-template/blob/master/GETTING_STARTED.md#get-your-astra-db-connection-settings).\n* Start the example by running `npm run dev` in the Gitpod console.\n\n## Objectives\n* Build a Netflix clone using GraphQL\n \n## How this works\nOpening and running the app will populate the database you specify in your `.env` file with the required data, allowing you to explore the astra-netflix app. You can view a demo of the running app [here](https://sag-astra-netflix.netlify.app).\n\nFollow along with Ania's [walkthrough video](https://www.youtube.com/watch?v=g8COh40v2jU). \n\nAdditionally, there is a workshop repository for this sample app [located here](https://github.com/datastaxdevs/appdev-week3-graphql).\n" 30 | } -------------------------------------------------------------------------------- /astrajson/Datastax-Examples-astra-nextjs-tutorial.json: -------------------------------------------------------------------------------- 1 | { 2 | "key": "Datastax-Examples-astra-nextjs-tutorial", 3 | "tags": [ 4 | "javascript", 5 | "nextjs", 6 | "eddiehub", 7 | "ds-bulk", 8 | "astradb", 9 | "dev", 10 | "tutorials" 11 | ], 12 | "urls": { 13 | "github": "https://github.com/DataStax-Examples/astra-nextjs-tutorial", 14 | "heroimage": "https://raw.githubusercontent.com/DataStax-Examples/astra-nextjs-tutorial/master/hero.jpeg", 15 | "gitpod": "https://gitpod.io/#https://github.com/DataStax-Examples/astra-nextjs-tutorial" 16 | }, 17 | "last_modified": "Tue, 19 Dec 2023 06:49:42 GMT", 18 | "forks_count": 1, 19 | "stargazers_count": 4, 20 | "name": "NextJS Fullstack Tutorial", 21 | "description": "Create a fullstack NextJS app with the tutorial video and blogpost from Eddie Jaoude.", 22 | "duration": "30 minutes", 23 | "skilllevel": "Advanced", 24 | "priority": 2, 25 | "readme": "\n30 minutes, Advanced, Start Building
\nCreate a fullstack NextJS app while following along with the tutorial video and blogpost from Eddie Jaoude.
\n\n
sag_nextjs_fullstack in your database.Database Administrator for the Organization that your Astra DB is in.env.example file to a file named .env and fill the required values in from your Application Token and Astra DB connection settings.npm run dev in the Gitpod console.Create a fullstack NextJS app while following along with the tutorial video and blogpost from Eddie Jaoude.
\nOpening and running the app will populate the database you specify in your .env file with the required data, allowing you to explore the NextJS tutorial app.
60 minutes, Advanced, Start Building
\nLoom is a thread based chat server, where users can send messages to one or more threads via hashtags (ex. "I'm heading to the park at noon #family #friends #frisbee_club" ). Users can subscribe to new threads they see by clicking them and start new threads but just adding a new hashtag to a message.
\n\n
sag_loom in your database.Database Administrator for the Organization that your Astra DB is in..env.example file to a file named .env and fill the required values in from your Application Token and Astra DB connection settings.source .env\nmix phx.server\nThe app demonstrates working with DataStax Astra DB, Elixir, and Phoenix Liveviews together. The project attempts to make the best use of this stack. Messages histories are saved and loaded in Astra DB, while new messages are shared via Phoenix channels between all active users in a "thread". The goal is a fast, scalable, and durable chat/messaging application.
\n", 27 | "_id": "Datastax-Examples-astra-loom", 28 | "readme_markdown": "\n# Astra DB Loom\n\n_60 minutes, Advanced, [Start Building](https://github.com/DataStax-Examples/astra-loom#prerequisites)_\n\nLoom is a thread based chat server, where users can send messages to one or more threads via hashtags (ex. \"I'm heading to the park at noon #family #friends #frisbee_club\" ). Users can subscribe to new threads they see by clicking them and start new threads but just adding a new hashtag to a message.\n\n\n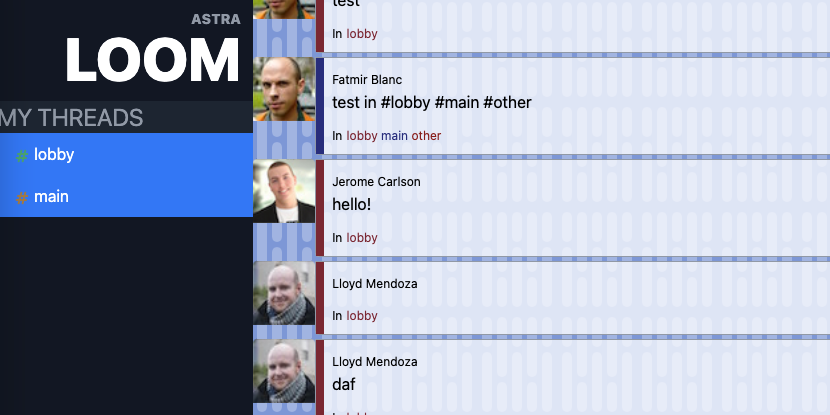\n\n## Quick Start\n\n0. [Signup for DataStax Astra](https://dtsx.io/38DEkDw), or login to your already existing account.\n\n1. [Create an Astra DB Database](https://github.com/DataStax-Examples/sample-app-template/blob/master/GETTING_STARTED.md#create-an-astra-db) or use an existing one.\n2. [Create an Astra DB Keyspace](https://github.com/DataStax-Examples/sample-app-template/blob/master/GETTING_STARTED.md#create-an-astra-db-keyspace) called `sag_loom` in your database.\n3. [Generate an Application Token](https://github.com/DataStax-Examples/sample-app-template/blob/master/GETTING_STARTED.md#create-an-application-token) with the role of `Database Administrator` for the Organization that your Astra DB is in.\n4. Click the 'Open in Gitpod' link: [](https://gitpod.io/#https://github.com/DataStax-Examples/todo-astra-jamstack-netlify)\n5. Once the app is finished launching in the Gitpod IDE, copy the `.env.example` file to a file named `.env` and fill the required values in from your Application Token and [Astra DB connection settings](https://github.com/DataStax-Examples/sample-app-template/blob/master/GETTING_STARTED.md#get-your-astra-db-connection-settings).\n6. Start the example by running the following command in the Gitpod console:\n```bash\nsource .env\nmix phx.server\n```\n\n## How this works\nThe app demonstrates working with DataStax Astra DB, Elixir, and Phoenix Liveviews together. The project attempts to make the best use of this stack. Messages histories are saved and loaded in Astra DB, while new messages are shared via Phoenix channels between all active users in a \"thread\". The goal is a fast, scalable, and durable chat/messaging application.\n" 29 | } -------------------------------------------------------------------------------- /astrajson/Datastax-Examples-telco-billing-app.json: -------------------------------------------------------------------------------- 1 | { 2 | "key": "Datastax-Examples-telco-billing-app", 3 | "tags": [ 4 | "javascript", 5 | "react", 6 | "netlify", 7 | "ds-bulk", 8 | "astradb", 9 | "gitpod", 10 | "dev", 11 | "tutorials" 12 | ], 13 | "urls": { 14 | "github": "https://github.com/DataStax-Examples/telco-billing-app", 15 | "heroimage": "https://raw.githubusercontent.com/DataStax-Examples/telco-billing-app/master/hero.png", 16 | "gitpod": "https://gitpod.io/#https://github.com/DataStax-Examples/telco-billing-app", 17 | "demo": "https://sag-telco-billing-app.netlify.app/" 18 | }, 19 | "last_modified": "Sun, 05 Mar 2023 22:44:06 GMT", 20 | "forks_count": 4, 21 | "stargazers_count": 2, 22 | "name": "Telco Billing App", 23 | "description": "An example of a telcom app dashboard, built with React and Netlify.", 24 | "duration": "30 minutes", 25 | "skilllevel": "Advanced", 26 | "priority": 3, 27 | "readme": "\n30 minutes, Advanced, Start Building, View Demo
\nAn example of a telcom app dashboard, built with React and Netlify.
\n\n
sag_telco_billing in your database.Database Administrator for the Organization that your Astra DB is in.env.example file to a file named .env and fill the required values in from your Application Token and Astra DB connection settings.npm run dev in the Gitpod console.Launch and explore an example of a telco app dashboard in Gitpod, built with React and Netlify.
\nOpening and running the app will populate the database you specify in your .env file with the required data, allowing you to explore the telco app. You can view a demo of the running app here.
60m, advanced, Start Building
\nFastSite is a no-code tool to generate content-driven websites. It leverages the power of modern JAMStack and cloud-native technologies.
\n\n
Demo Video: https://youtu.be/3Pw0-7XqjC8
\nsag_sites in your database.Database Administrator for the Organization that your Astra DB is in..env.example file to a file named .env and fill the required values in from your Application Token and Astra DB connection settings.npm run dev in the Gitpod console.| Layer | \nTechnology | \nProvider | \n
|---|---|---|
| Front-end | \nSPA/ SPA-SSR/ Static website | \nNetlify/ Vercel | \n
| Back-end | \nServerless Functions | \nNetlify/ Vercel | \n
| Database | \nCloud-native NoSQL DB | \nDataStax Astra | \n
30 minutes, Beginner, Start Building
\nCreate a React.js, Gatsby application that reads data from DataStax Astra DB using GraphQL.
\n\n
sag_gatsby_starter in your database.Database Administrator for the Organization that your Astra DB is in.env.example file to a file named .env and fill the required values in from your Application Token and Astra DB connection settings.npm run develop in the Gitpod console.Once the Astra DB credentials are provided, Gatsby can connect to your Astra DB's GraphQL endpoint. The webservice will be available on port 8080 once the application has been deployed.
\nGatsby is a React-based, GraphQL powered, static site generator, with much of the functionality of a modern front-end framework. It brings together the best components of React, webpack, react-router, GraphQL, and other front-end tools. This is used to generate the application.
\n", 32 | "_id": "Datastax-Examples-astra-gatsbyjs-starter", 33 | "readme_markdown": "\n# Astra DB and Gatsby.js Starter\n*30 minutes, Beginner, [Start Building](https://github.com/DataStax-Examples/astra-gatsbyjs-starter#quick-start)*\n\nCreate a React.js, Gatsby application that reads data from [DataStax Astra DB](https://dtsx.io/3BEQp7R) using GraphQL.\n\n\n\n\n## Quick Start\n\n* [Signup for DataStax Astra](https://dtsx.io/3BEQp7R), or login to your already existing account. \n* [Create an Astra DB Database](https://github.com/DataStax-Examples/sample-app-template/blob/master/GETTING_STARTED.md#create-an-astra-db) if you don't already have one.\n\n* [Create an Astra DB Keyspace](https://github.com/DataStax-Examples/sample-app-template/blob/master/GETTING_STARTED.md#create-an-astra-db-keyspace) called `sag_gatsby_starter` in your database.\n* [Generate an Application Token](https://github.com/DataStax-Examples/sample-app-template/blob/master/GETTING_STARTED.md#create-an-application-token) with the role of `Database Administrator` for the Organization that your Astra DB is in.\n* Click the 'Open in Gitpod' link: [](https://gitpod.io/#https://github.com/DataStax-Examples/astra-gatsbyjs-starter)\n* Once the app is finished launching in the Gitpod IDE, copy the `env.example` file to a file named `.env` and fill the required values in from your Application Token and [Astra DB connection settings](https://github.com/DataStax-Examples/sample-app-template/blob/master/GETTING_STARTED.md#get-your-astra-db-connection-settings).\n* Start the example by running `npm run develop` in the Gitpod console.\n\n## Objectives\n* Provide a development example using GraphQL with Astra DB as the storage backend.\n\n## How this works\nOnce the Astra DB credentials are provided, Gatsby can connect to your Astra DB's GraphQL endpoint. The webservice will be available on port 8080 once the application has been deployed.\n\n[Gatsby](https://www.gatsbyjs.org/) is a React-based, GraphQL powered, static site generator, with much of the functionality of a modern front-end framework. It brings together the best components of React, webpack, react-router, GraphQL, and other front-end tools. This is used to generate the application.\n" 34 | } -------------------------------------------------------------------------------- /astrajson/Datastax-Examples-betterreads-webapp.json: -------------------------------------------------------------------------------- 1 | { 2 | "key": "Datastax-Examples-betterreads-webapp", 3 | "tags": [ 4 | "java", 5 | "spring", 6 | "dev", 7 | "astradb", 8 | "tutorials" 9 | ], 10 | "urls": { 11 | "github": "https://github.com/DataStax-Examples/betterreads-webapp", 12 | "gitpod": "https://gitpod.io/#https://github.com/DataStax-Examples/betterreads-webapp", 13 | "heroimage": "https://raw.githubusercontent.com/DataStax-Examples/betterreads-webapp/master/hero.jpeg" 14 | }, 15 | "last_modified": "Tue, 31 Jan 2023 06:23:33 GMT", 16 | "forks_count": 3, 17 | "stargazers_count": 1, 18 | "name": "BetterReads Spring App", 19 | "description": "Companion code for the Java Brains \"code with me\" series that reads data from DataStax Astra DB.", 20 | "duration": "3 hours", 21 | "skilllevel": "Advanced", 22 | "priority": 2, 23 | "readme": "\n180 minutes, Advanced, Start Building
\nCompanion code for the Java Brains "code with me" series that reads data from DataStax Astra DB. The video series is located here
\n\n
sag_betterreads in your database.Database Administrator for the Organization that your Astra DB is in.env.example file to a file named .env and fill the required values in from your Application Token and Astra DB connection settings.source .env in the Gitpod console.secure-connect.zipsecure-connect.zip to src/main/resources in the Gitpod file explorer../mvnw spring-boot:run in the Gitpod console.Once the Astra DB credentials are provided, BetterReads can connect to Astra DB.
\n", 24 | "_id": "Datastax-Examples-betterreads-webapp", 25 | "readme_markdown": "\n# BetterReads Spring App\n*180 minutes, Advanced, [Start Building](https://github.com/DataStax-Examples/betterreads-webapp#quick-start)*\n\nCompanion code for the Java Brains \"code with me\" series that reads data from [DataStax Astra DB](https://dtsx.io/3FkFP94). The video series is located [here](https://www.youtube.com/playlist?list=PLqq-6Pq4lTTZgMZbKkvJyr7u2repYYXE-)\n\n\n\n\n## Quick Start\n\n* [Signup for DataStax Astra](https://dtsx.io/3FkFP94), or login to your already existing account. \n* [Create an Astra DB Database](https://github.com/DataStax-Examples/sample-app-template/blob/master/GETTING_STARTED.md#create-an-astra-db) if you don't already have one.\n\n* [Create an Astra DB Keyspace](https://github.com/DataStax-Examples/sample-app-template/blob/master/GETTING_STARTED.md#create-an-astra-db-keyspace) called `sag_betterreads` in your database.\n* [Generate an Application Token](https://github.com/DataStax-Examples/sample-app-template/blob/master/GETTING_STARTED.md#create-an-application-token) with the role of `Database Administrator` for the Organization that your Astra DB is in.\n* Click the 'Open in Gitpod' link: [](https://gitpod.io/#https://github.com/DataStax-Examples/betterreads-webapp)\n* Once the app is finished launching in the Gitpod IDE, copy the `env.example` file to a file named `.env` and fill the required values in from your Application Token and [Astra DB connection settings](https://github.com/DataStax-Examples/sample-app-template/blob/master/GETTING_STARTED.md#get-your-astra-db-connection-settings).\n* Activate your environment settings by running `source .env` in the Gitpod console.\n* Get your [secure connect bundle](https://github.com/DataStax-Examples/sample-app-template/blob/master/GETTING_STARTED.md#get-an-astra-db-secure-connect-bundle) from the connect page of your database and upload it to your Gitpod instance. Rename it to `secure-connect.zip`\n* Move your `secure-connect.zip` to `src/main/resources` in the Gitpod file explorer.\n* Start the example by running `./mvnw spring-boot:run` in the Gitpod console.\n\n## Objectives\n* Follow along with the Java Brains \"code with me\" series. The video playlist is located [here](https://www.youtube.com/playlist?list=PLqq-6Pq4lTTZgMZbKkvJyr7u2repYYXE-).\n\n## How this works\nOnce the Astra DB credentials are provided, BetterReads can connect to Astra DB.\n" 26 | } -------------------------------------------------------------------------------- /astrajson/Datastax-Examples-todo-astra-jamstack-netlify.json: -------------------------------------------------------------------------------- 1 | { 2 | "key": "Datastax-Examples-todo-astra-jamstack-netlify", 3 | "tags": [ 4 | "javascript", 5 | "deprecated", 6 | "deprecated", 7 | "doc api", 8 | "cassandra", 9 | "ds-bulk", 10 | "astradb", 11 | "tutorials", 12 | "dev", 13 | "deprecated", 14 | "deprecated" 15 | ], 16 | "urls": { 17 | "github": "https://github.com/DataStax-Examples/todo-astra-jamstack-netlify", 18 | "gitpod": "https://dtsx.io/3gtADSq", 19 | "netlify": "https://dtsx.io/2EtfGty", 20 | "heroimage": "https://raw.githubusercontent.com/DataStax-Examples/todo-astra-jamstack-netlify/master/hero.png" 21 | }, 22 | "last_modified": "Wed, 13 Dec 2023 10:34:15 GMT", 23 | "forks_count": 22, 24 | "stargazers_count": 30, 25 | "name": "ToDo App using JAMStack, Netlify, and Astra DB", 26 | "description": "This is an example React To-Do application using a DataStax Astra DB free tier database.", 27 | "duration": "10 minutes", 28 | "skilllevel": "Beginner", 29 | "priority": 2, 30 | "readme": "\n10 minutes, Beginner, Start Building
\nThis is an example React To-Do application using a DataStax Astra free tier database.
\n\n
sag_todo_jamstack in your database.Database Administrator for the Organization that your Astra DB is in..env.example file to a file named .env and fill the required values in from your Application Token and Astra DB connection settings.npm run dev in the Gitpod console.Once the Astra DB credentials are provided, the necessary tables are created in the database. The webservice will be available on port 8888 once the application has been deployed (Note: ignore the message about a service being available on port 3000, what you are looking for is at an URL starting with https://8888-...).
JAMstack is a big leap forward in how we can write web applications that are easy to write, deploy, scale, and also maintain. Using this approach means that newly created content is rendered from a content API, while a static render of it is being built into the site for future.
\n", 31 | "_id": "Datastax-Examples-todo-astra-jamstack-netlify", 32 | "readme_markdown": "\n# JAMStack + Netlify + Astra DB + Cassandra\n*10 minutes, Beginner, [Start Building](https://github.com/DataStax-Examples/todo-astra-jamstack-netlify#quick-start)*\n\nThis is an example React To-Do application using a [DataStax Astra](https://dtsx.io/2Yhvqtv) free tier database.\n\n\n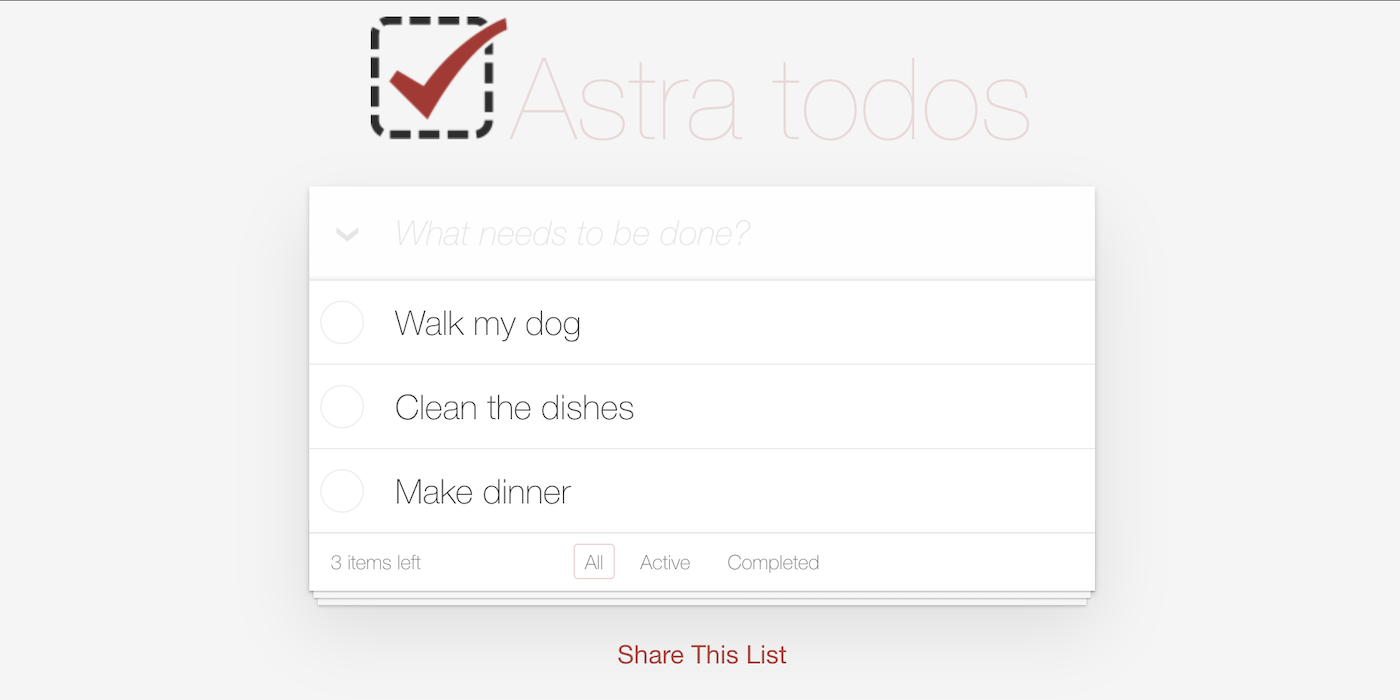\n\n## Quick Start\n\n0) [Signup for DataStax Astra](https://dtsx.io/2Yhvqtv), or login to your already existing account. \n\n1) [Create an Astra DB Database](https://github.com/DataStax-Examples/sample-app-template/blob/master/GETTING_STARTED.md#create-an-astra-db) or use an existing one.\n2) [Create an Astra DB Keyspace](https://github.com/DataStax-Examples/sample-app-template/blob/master/GETTING_STARTED.md#create-an-astra-db-keyspace) called `sag_todo_jamstack` in your database.\n3) [Generate an Application Token](https://github.com/DataStax-Examples/sample-app-template/blob/master/GETTING_STARTED.md#create-an-application-token) with the role of `Database Administrator` for the Organization that your Astra DB is in.\n4) Click the 'Open in Gitpod' link: [](https://gitpod.io/#https://github.com/DataStax-Examples/todo-astra-jamstack-netlify)\n5) Once the app is finished launching in the Gitpod IDE, copy the `.env.example` file to a file named `.env` and fill the required values in from your Application Token and [Astra DB connection settings](https://github.com/DataStax-Examples/sample-app-template/blob/master/GETTING_STARTED.md#get-your-astra-db-connection-settings).\n6) Start the example by running `npm run dev` in the Gitpod console.\n\n## Objectives\n* Provide a fullstack development example using Astra DB as the storage backend\n\n## How this works\nOnce the Astra DB credentials are provided, the necessary tables are created in the database. The webservice will be available on port 8888 once the application has been deployed (_Note_: ignore the message about a service being available on port 3000, what you are looking for is at an URL starting with `https://8888-...`).\n\n[JAMstack](https://jamstack.org/) is a big leap forward in how we can write web applications that are easy to write, deploy, scale, and also maintain. Using this approach means that newly created content is rendered from a content API, while a static render of it is being built into the site for future.\n" 33 | } -------------------------------------------------------------------------------- /astrajson/Datastax-Examples-astra-next.js-starter.json: -------------------------------------------------------------------------------- 1 | { 2 | "key": "Datastax-Examples-astra-next.js-starter", 3 | "tags": [ 4 | "javascript", 5 | "rest api", 6 | "tutorials", 7 | "dev", 8 | "gitpod", 9 | "ds-bulk", 10 | "astradb", 11 | "nextjs", 12 | "rest-api" 13 | ], 14 | "urls": { 15 | "github": "https://github.com/DataStax-Examples/astra-next.js-starter", 16 | "gitpod": "https://dtsx.io/2YtXWVU", 17 | "vercel": "https://dtsx.io/3aUg00p", 18 | "heroimage": "https://raw.githubusercontent.com/DataStax-Examples/astra-next.js-starter/master/hero.png" 19 | }, 20 | "last_modified": "Wed, 03 Jan 2024 06:10:07 GMT", 21 | "forks_count": 8, 22 | "stargazers_count": 18, 23 | "name": "Next.js and Astra DB Starter", 24 | "description": "A sample Next.js + DataStax Astra DB starter app that integrates Astra DB with Next.js.", 25 | "duration": "10 minutes", 26 | "skilllevel": "Beginner", 27 | "priority": 1, 28 | "readme": "\n10 minutes, Beginner, Start Building
\nA sample Next.js + DataStax Astra DB starter app that integrates Astra DB into a Next.js API.
\n\n
sag_nextjs_starter in your database.Database Administrator for the Organization that your Astra DB is in.env.example file to a file named .env and fill the required values in from your Application Token and Astra DB connection settings.npm run dev in the Gitpod console.Once the Astra DB credentials are provided, the Next.js endpoint will fetch your Astra DB keyspaces. The webservice will be available on port 3000 once the application has been deployed. Once the application is running, you can begin to make changes to your app by editing pages/index.js.
Next.js is an open-source JavaScript framework that lets you build server-side rendering and static web applications using React. It is not nescessary to configuration of webpack or similar to start using Next.js, as it comes with its configuration. This make it very simple to start a project, as we only need to execute simple commands and the project is ready.
\nVercel is a cloud platform for static sites and Serverless Functions, it enables developers to host Jamstack websites and web services that deploy instantly. You also have the option to deloy this app in Vercel.
\n", 29 | "_id": "Datastax-Examples-astra-next.js-starter", 30 | "readme_markdown": "\n# Next.js and Astra DB Starter\n*10 minutes, Beginner, [Start Building](https://github.com/DataStax-Examples/astra-next.js-starter#quick-start)*\n\nA sample Next.js + [DataStax Astra DB](https://dtsx.io/3BzlUQU) starter app that integrates Astra DB into a Next.js API.\n\n\n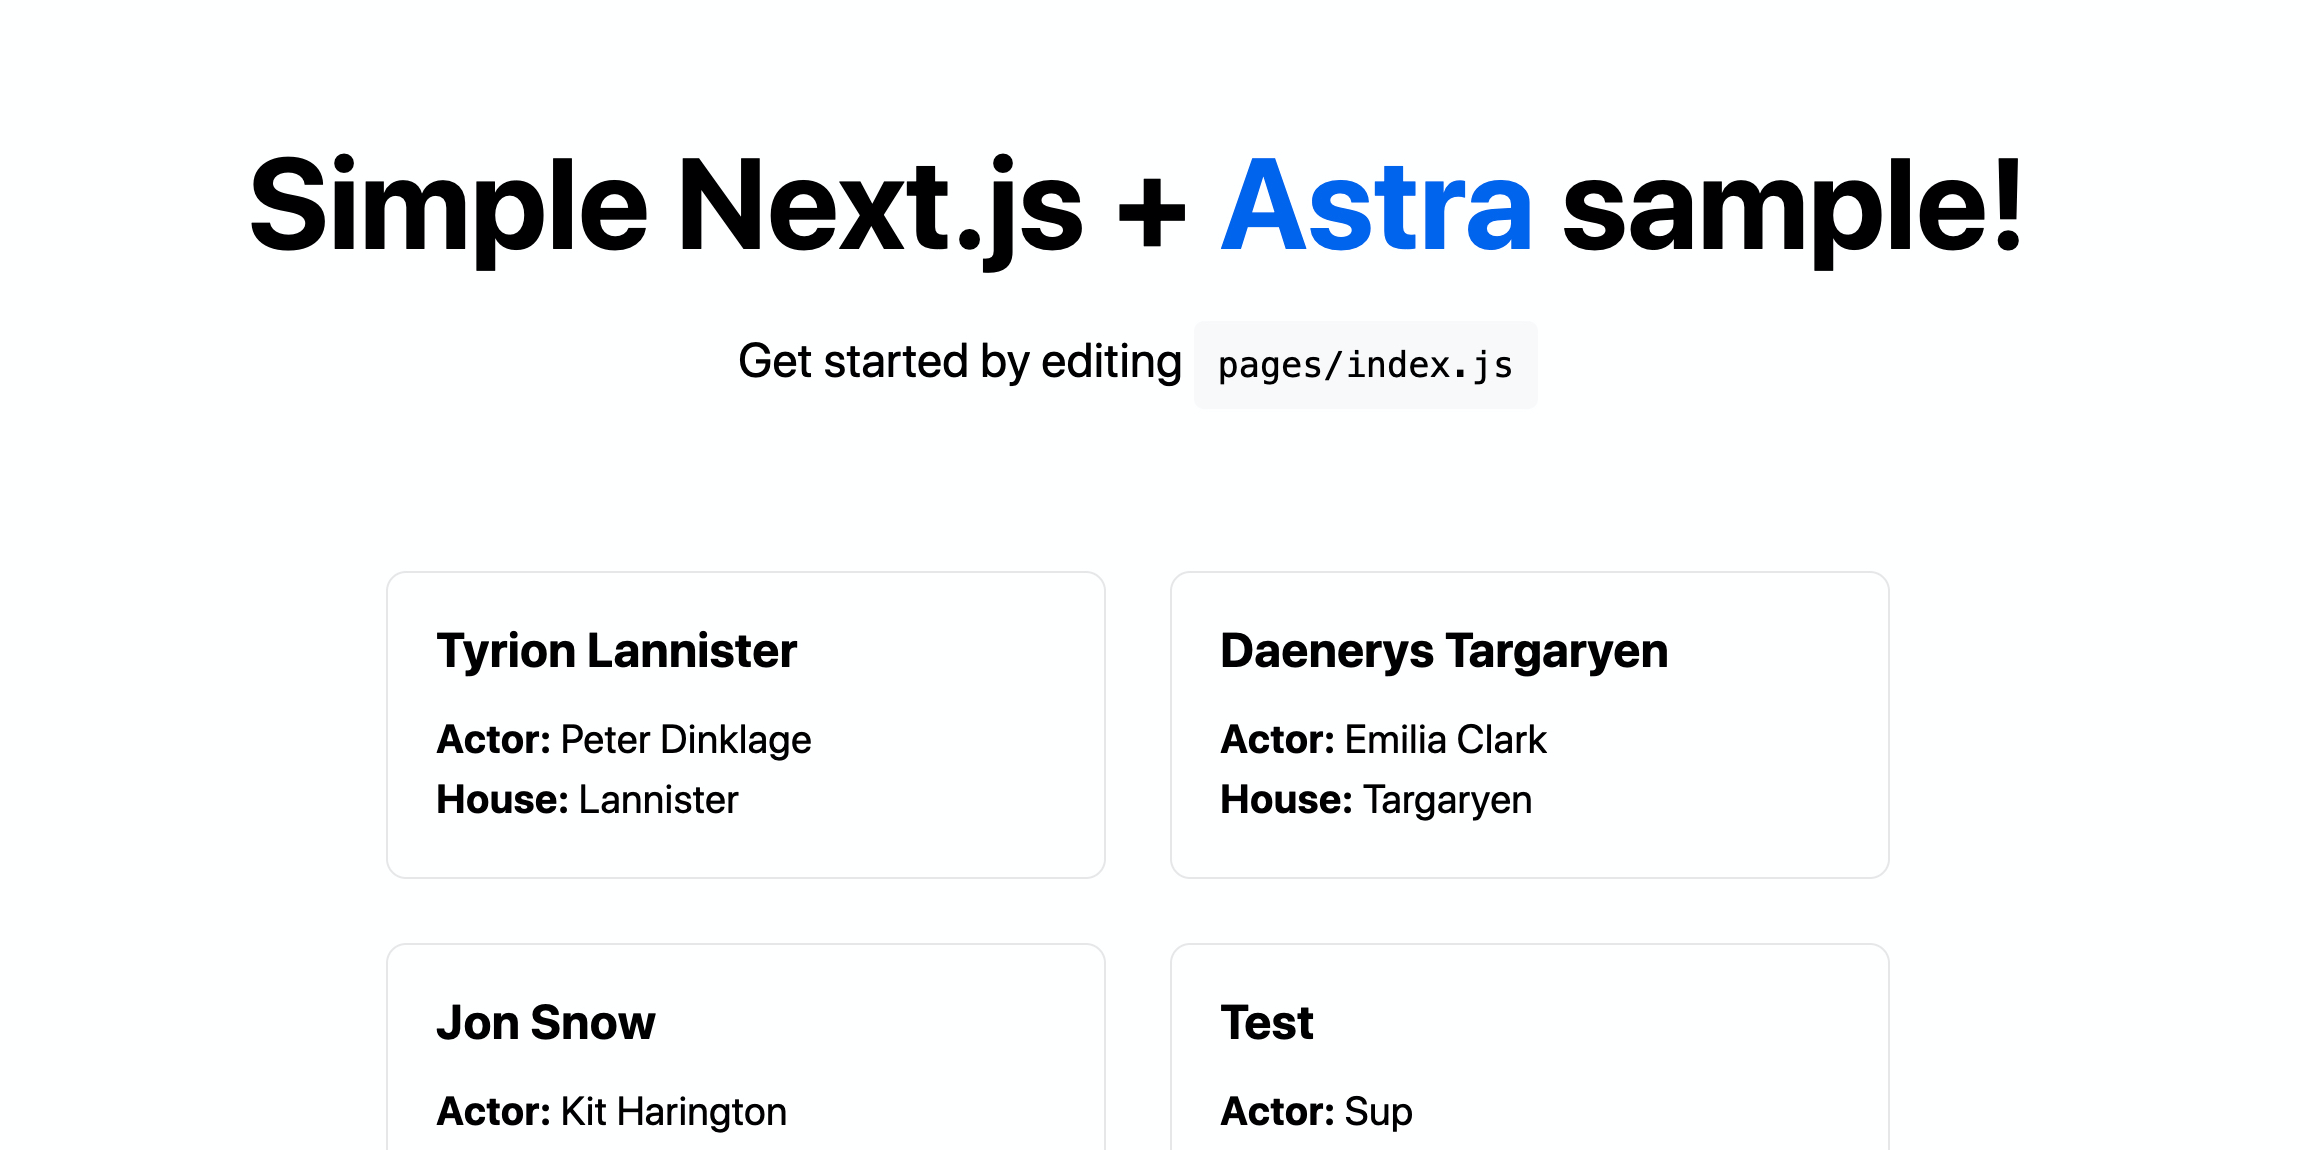\n\n## Quick Start\n\n* [Signup for DataStax Astra](https://dtsx.io/3BzlUQU), or login to your already existing account. \n* [Create an Astra DB Database](https://github.com/DataStax-Examples/sample-app-template/blob/master/GETTING_STARTED.md#create-an-astra-db) if you don't already have one.\n\n* [Create an Astra DB Keyspace](https://github.com/DataStax-Examples/sample-app-template/blob/master/GETTING_STARTED.md#create-an-astra-db-keyspace) called `sag_nextjs_starter` in your database.\n* [Generate an Application Token](https://github.com/DataStax-Examples/sample-app-template/blob/master/GETTING_STARTED.md#create-an-application-token) with the role of `Database Administrator` for the Organization that your Astra DB is in.\n* Click the 'Open in Gitpod' link: [](https://gitpod.io/#https://github.com/DataStax-Examples/astra-next.js-starter)\n* Once the app is finished launching in the Gitpod IDE, copy the `env.example` file to a file named `.env` and fill the required values in from your Application Token and [Astra DB connection settings](https://github.com/DataStax-Examples/sample-app-template/blob/master/GETTING_STARTED.md#get-your-astra-db-connection-settings).\n* Start the example by running `npm run dev` in the Gitpod console.\n\n## Objectives\n* Provide a Next.js starter using Astra DB as the storage backend\n\n## How this works\nOnce the Astra DB credentials are provided, the Next.js endpoint will fetch your Astra DB keyspaces. The webservice will be available on port 3000 once the application has been deployed. Once the application is running, you can begin to make changes to your app by editing `pages/index.js`.\n\n[Next.js](https://nextjs.org/) is an open-source JavaScript framework that lets you build server-side rendering and static web applications using React. It is not nescessary to configuration of webpack or similar to start using Next.js, as it comes with its configuration. This make it very simple to start a project, as we only need to execute simple commands and the project is ready.\n\n[Vercel](https://vercel.com/) is a cloud platform for static sites and Serverless Functions, it enables developers to host Jamstack websites and web services that deploy instantly. You also have the option to deloy this app in Vercel.\n" 31 | } -------------------------------------------------------------------------------- /astrajson/Datastax-Examples-weatherapp.json: -------------------------------------------------------------------------------- 1 | { 2 | "key": "Datastax-Examples-weatherapp", 3 | "tags": [ 4 | "javascript", 5 | "deprecated", 6 | "deprecated", 7 | "doc api", 8 | "timeseries db", 9 | "dev", 10 | "nextjs", 11 | "typescript", 12 | "astradb", 13 | "ds-bulk", 14 | "tutorials", 15 | "deprecated" 16 | ], 17 | "urls": { 18 | "github": "https://github.com/DataStax-Examples/weatherapp", 19 | "heroimage": "https://raw.githubusercontent.com/DataStax-Examples/weatherapp/master/hero.png" 20 | }, 21 | "last_modified": "Wed, 14 Jun 2023 23:15:05 GMT", 22 | "forks_count": 0, 23 | "stargazers_count": 1, 24 | "name": "Using Stargate Documents API to build a TimeSeries DB API", 25 | "description": "A sample app that shows how the Stargate Documents API can be used to build a TimeSeries DB Abstraction layer.", 26 | "duration": "15 minutes", 27 | "skilllevel": "Beginner", 28 | "priority": 3, 29 | "readme": "Stargate Document API as TimeSeries DB for Weather Monitoring
\nStargate is a data gateway deployed between the client applications and a database. The Stargate Document API modifies and queries data stored as unstructured JSON documents in collections. This gives the application developers native json support without having to give up any of the reliability and scalability goodness of Cassandra. This Stargate Docs API lets most Cassandra distros (Cassandra 3.11, Cassandra 4.0, and DataStax Enterprise 6.8), work with JSON through a REST API. The deep dive details on how to the Stargate Docs API stores the json as C* column family within Cassandra are at https://stargate.io/2020/10/19/the-stargate-cassandra-documents-api.html.
\nIn this blog, you would see how to use the Stargate Docs API and build a simple TimeSeries DB for Weather monitoring on top of the DataStax Astra DB. The demo is restricted to the data model, data extraction, storage and retrieval queries for the Weather monitoring app.
\nThe retrieval queries for various reports are available as Postman collection at https://www.postman.com/datastax/workspace/stargate-cassandra/collection/24325908-23927518-65bd-4797-911b-e872931bb735?ctx=documentation
\nThis is a Next.js project bootstrapped with create-next-app.
add the configuration params to .env.local
run the development server:
\nnpm run dev\n# or\nyarn dev\nOpen http://localhost:3000 with your browser to see the result.
\nYou can start editing the page by modifying pages/index.tsx. The page auto-updates as you edit the file.
The pages/api directory is mapped to /api/*. Files in this directory are treated as API routes instead of React pages.
To learn more about Next.js, take a look at the following resources:
\nYou can check out the Next.js GitHub repository - your feedback and contributions are welcome!
\nThe easiest way to deploy your Next.js app is to use the Vercel Platform from the creators of Next.js.
\nCheck out our Next.js deployment documentation for more details.
\n", 30 | "_id": "Datastax-Examples-weatherapp", 31 | "readme_markdown": "# weatherapp\nStargate Document API as TimeSeries DB for Weather Monitoring\n\nStargate is a data gateway deployed between the client applications and a database. The Stargate Document API modifies and queries data stored as unstructured JSON documents in collections. This gives the application developers native json support without having to give up any of the reliability and scalability goodness of Cassandra. This Stargate Docs API lets most Cassandra distros (Cassandra 3.11, Cassandra 4.0, and DataStax Enterprise 6.8), work with JSON through a REST API. The deep dive details on how to the Stargate Docs API stores the json as C* column family within Cassandra are at https://stargate.io/2020/10/19/the-stargate-cassandra-documents-api.html.\n\nIn this blog, you would see how to use the Stargate Docs API and build a simple TimeSeries DB for Weather monitoring on top of the DataStax Astra DB. The demo is restricted to the data model, data extraction, storage and retrieval queries for the Weather monitoring app.\n\nThe retrieval queries for various reports are available as Postman collection at https://www.postman.com/datastax/workspace/stargate-cassandra/collection/24325908-23927518-65bd-4797-911b-e872931bb735?ctx=documentation \n\n### App Dev Framework ### \nThis is a [Next.js](https://nextjs.org/) project bootstrapped with [`create-next-app`](https://github.com/vercel/next.js/tree/canary/packages/create-next-app).\n\n## Running on local \n\n1. add the configuration params to `.env.local` \n\n2. run the development server:\n\n```bash\nnpm run dev\n# or\nyarn dev\n```\n\nOpen [http://localhost:3000](http://localhost:3000) with your browser to see the result.\n\nYou can start editing the page by modifying `pages/index.tsx`. The page auto-updates as you edit the file.\n\nThe `pages/api` directory is mapped to `/api/*`. Files in this directory are treated as [API routes](https://nextjs.org/docs/api-routes/introduction) instead of React pages.\n\n## Learn More\n\nTo learn more about Next.js, take a look at the following resources:\n\n- [Next.js Documentation](https://nextjs.org/docs) - learn about Next.js features and API.\n- [Learn Next.js](https://nextjs.org/learn) - an interactive Next.js tutorial.\n\nYou can check out [the Next.js GitHub repository](https://github.com/vercel/next.js/) - your feedback and contributions are welcome!\n\n## Deploy on Vercel\n\nThe easiest way to deploy your Next.js app is to use the [Vercel Platform](https://vercel.com/new?utm_medium=default-template&filter=next.js&utm_source=create-next-app&utm_campaign=create-next-app-readme) from the creators of Next.js.\n\nCheck out our [Next.js deployment documentation](https://nextjs.org/docs/deployment) for more details.\n" 32 | } -------------------------------------------------------------------------------- /astrajson/Datastax-Examples-springboot3-astrastreaming-db.json: -------------------------------------------------------------------------------- 1 | { 2 | "key": "Datastax-Examples-springboot3-astrastreaming-db", 3 | "tags": [ 4 | "java", 5 | "spring", 6 | "streaming" 7 | ], 8 | "urls": { 9 | "github": "https://github.com/DataStax-Examples/springboot3-astrastreaming-db", 10 | "gitpod": "https://gitpod.io/#https://github.com/DataStax-Examples/springboot3-astrastreaming-db", 11 | "heroimage": "https://stackjava.com/wp-content/uploads/2018/05/spring-boot-data-logo.png" 12 | }, 13 | "last_modified": "Wed, 01 Feb 2023 08:12:13 GMT", 14 | "forks_count": 0, 15 | "stargazers_count": 0, 16 | "name": "Spring Boot 3 with Astra Streaming and Astra DB", 17 | "description": "A new sample including the bleeding edge spring-pulsar-spring-boot-starter library for connecting with Astra Streaming.", 18 | "duration": "10 minutes", 19 | "skilllevel": "Beginner", 20 | "priority": 1, 21 | "readme": "This project can be used as a starting point to create your own Vaadin application with Spring Boot.
\nIt contains all the necessary configuration and some placeholder files to get you started.
The project is a standard Maven project. To run it from the command line,
\ntype mvnw (Windows), or ./mvnw (Mac & Linux), then open
\nhttp://localhost:8080 in your browser.
You can also import the project to your IDE of choice as you would with any
\nMaven project. Read more on how to import Vaadin projects to different
\nIDEs (Eclipse, IntelliJ IDEA, NetBeans, and VS Code).
To create a production build, call mvnw clean package -Pproduction (Windows),
\nor ./mvnw clean package -Pproduction (Mac & Linux).
\nThis will build a JAR file with all the dependencies and front-end resources,
\nready to be deployed. The file can be found in the target folder after the build completes.
Once the JAR file is built, you can run it using
\njava -jar target/datastock-1.0-SNAPSHOT.jar
MainLayout.java in src/main/java contains the navigation setup (i.e., theviews package in src/main/java contains the server-side Java views of your application.views folder in frontend/ contains the client-side JavaScript views of your application.themes folder in frontend/ contains the custom CSS styles.50 minutes, Advanced, Start Building
\nA simple Tik-Tok clone running on Astra DB that leverages the Document API.
\n\n
sag_tiktok in your database.Database Administrator for the Organization that your Astra DB is in.env.example file to a file named .env and fill the required values in from your Application Token and Astra DB connection settings.npm run dev in the Gitpod console.This Chat Agent is build specifically as a reusable and configurable sample app to share with enterprises or prospects.
\nlocalization.csvrails.csvpip3 install -r requirements.txt\nOpenAI, AstraDB and optionally LangSmith secrets in streamlit-langchain/.streamlit/secrets.toml. There is an example provided at secrets.toml.example.Now it's time to customize the app for your specific situation or customers.
\nDefine credentials by adding a new username and password in the [passwords] section in streamlit-langchain/.streamlit/secrets.toml.
Define the UI language of the app by adding a localization code in the [languages] section in streamlit-langchain/.streamlit/secrets.toml. Currently en_US and nl_NL are supported. However it is easy to add additional languages in localization.csv.
Create a guided experience by providing sample prompts in rails.csv. The convention here is that <username> from Step 1 is used to define the experience.
Start up the app and pre-load relevant PDF and Text files so that the app has content that can be used as context for the questions/prompts in the next step. All this data will be loaded into a user specific table defined by <username>.
Create a customized welcome page in the root folder. The convention here is to create a markdown file called <username>.md. Ideally, list which files have been pre-loaded.
You're ready to run the app as follows:
\nstreamlit run app.py\nIn addition to the pre-loaded content, a user can add additional content that will be used as context for prompts.
\nIt's easy to upload this app to the community edition of Streamlit. As the app uses a login page it is safe to have it publicly available.
\nThe goal of this app is to be easily shared within enterprises. Just be aware that YOUR OPENAI subscription is being used for creating embeddings and LLM calls. This WILL incur cost.
\n", 23 | "readme_markdown": "# Configurable Enterprise Chat Agent\nThis Chat Agent is build specifically as a reusable and configurable sample app to share with enterprises or prospects. \n\n1. It uses [LangChain](https://www.langchain.com/) as the framework to easily set up LLM Q&A chains\n2. It uses [Streamlit](https://streamlit.io/) as the framework to easily create Web Applications\n3. It uses [Astra DB](https://astra.datastax.com/) as the Vector Store to enable Rerieval Augmented Generation in order to provide meaningfull contextual interactions\n4. It uses [Astra DB](https://astra.datastax.com/) as Short Term Memory to keep track of what was said and generated\n5. It uses a StreamingCallbackHandler to stream output to the screen which prevents having to wait for the final answer\n6. It allows for new Content to be uploaded, Vectorized and Stored into the Astra DB Vector Database so it can be used as Context\n7. It offers a configurable localization through `localization.csv`\n8. It offers a guided experience on-rails through `rails.csv`\n\n## Preparation\n1. First install the Python dependencies using:\n```\npip3 install -r requirements.txt\n```\n2. Then update the `OpenAI`, `AstraDB` and optionally `LangSmith` secrets in `streamlit-langchain/.streamlit/secrets.toml`. There is an example provided at `secrets.toml.example`.\n\n## Customization\nNow it's time to customize the app for your specific situation or customers.\n### Step 1\nDefine credentials by adding a new username and password in the `[passwords]` section in `streamlit-langchain/.streamlit/secrets.toml`.\n### Step 2\nDefine the UI language of the app by adding a localization code in the `[languages]` section in `streamlit-langchain/.streamlit/secrets.toml`. Currently `en_US` and `nl_NL` are supported. However it is easy to add additional languages in `localization.csv`.\n### Step 3\nCreate a guided experience by providing sample prompts in `rails.csv`. The convention here is that `15 minutes, Intermediate, Start Building
\nLearn how to build a blog application with Django and connect it to Astra DB by following along with Tomi's video, located here.
\n\n
sag_tech_blog in your database.Database Administrator for the Organization that your Astra DB is in.env.example file to a file named .env and fill the required values in from your Application Token and Astra DB connection settings. (The Django setting SECRET_KEY is unrelated to Astra and can be any alphanumeric string.)bundle.zip. (To upload the file, drag-and-drop it to the Explorer section of your Gitpod window.)python manage.py syncdb\npython manage.py runserver\nhttps://8000-sapphire-sailfish-wfxezcum.ws-eu18.gitpod.io/; if you are running locally,http://127.0.0.1:8000/ in your browser instead.Follow along in this video tutorial: https://youtu.be/JH24exA7-CA.
\n", 25 | "_id": "Datastax-Examples-django-cassandra-blog", 26 | "readme_markdown": "\n# Build a Blog With Django and Astra DB\n*15 minutes, Intermediate, [Start Building](https://github.com/DataStax-Examples/django-cassandra-blog/blob/master/README.md#quick-start)*\n\nLearn how to build a blog application with Django and connect it to Astra DB by following along with Tomi's video, located [here](https://youtu.be/JH24exA7-CA).\n\n\n\n\n## Quick Start\n\n* [Signup for DataStax Astra](https://dtsx.io/3z81JIa), or login to your already existing account. \n* [Create an Astra DB Database](https://github.com/DataStax-Examples/sample-app-template/blob/master/GETTING_STARTED.md#create-an-astra-db) if you don't already have one.\n\n* [Create an Astra DB Keyspace](https://github.com/DataStax-Examples/sample-app-template/blob/master/GETTING_STARTED.md#create-an-astra-db-keyspace) called `sag_tech_blog` in your database.\n* [Generate an Application Token](https://github.com/DataStax-Examples/sample-app-template/blob/master/GETTING_STARTED.md#create-an-application-token) with the role of `Database Administrator` for the Organization that your Astra DB is in.\n* Click the 'Open in Gitpod' link: [](https://gitpod.io/#https://github.com/DataStax-Examples/django-cassandra-blog)\n* Once the app is finished launching in the Gitpod IDE, copy the `env.example` file to a file named `.env` and fill the required values in from your Application Token and [Astra DB connection settings](https://github.com/DataStax-Examples/sample-app-template/blob/master/GETTING_STARTED.md#get-your-astra-db-connection-settings). (The Django setting `SECRET_KEY` is unrelated to Astra and can be any alphanumeric string.)\n* Get your [secure connect bundle](https://github.com/DataStax-Examples/sample-app-template/blob/master/GETTING_STARTED.md#get-an-astra-db-secure-connect-bundle) from the connect page of your database and upload it to your Gitpod instance. Rename it to `bundle.zip`. (To upload the file, drag-and-drop it to the Explorer section of your Gitpod window.)\n* Create the project tables in Astra DB by running this command in the console:\n```bash\npython manage.py syncdb\n```\n* Run the Django project by running this command in the console:\n```bash\npython manage.py runserver\n```\n* The app should open in a new browser tab by itself (if it doesn't, check your popup blocker). If you are on Gitpod,\nits URL will be something like `https://8000-sapphire-sailfish-wfxezcum.ws-eu18.gitpod.io/`; if you are running locally,\nopen `http://127.0.0.1:8000/` in your browser instead.\n\n## Objectives\n* Work through a video tutorial to build a blog with Django and Astra DB\n \n## How this works\nFollow along in this video tutorial: [https://youtu.be/JH24exA7-CA](https://youtu.be/JH24exA7-CA).\n" 27 | } -------------------------------------------------------------------------------- /astrajson/qzg-streamlit-langchain.json: -------------------------------------------------------------------------------- 1 | { 2 | "key": "qzg-streamlit-langchain", 3 | "tags": [ 4 | "vector", 5 | "langchain", 6 | "streamlit", 7 | "astradb", 8 | "localization", 9 | "rails" 10 | ], 11 | "urls": { 12 | "github": "https://github.com/qzg/streamlit-langchain", 13 | "heroimage": "https://raw.githubusercontent.com/qzg/streamlit-langchain/main/assets/QA-app-RAG.png" 14 | }, 15 | "last_modified": "Thu, 25 Jan 2024 22:59:27 GMT", 16 | "forks_count": 64, 17 | "stargazers_count": 4, 18 | "name": "Configurable Enterprise Chat Agent", 19 | "description": "This Chat Agent is build specifically as a reusable and configurable sample app to share with enterprises or prospects.", 20 | "duration": "20 minutes", 21 | "skilllevel": "Intermediate", 22 | "priority": 1, 23 | "readme": "This Chat Agent is build specifically as a reusable and configurable sample app to share with enterprises or prospects.
\nlocalization.csvrails.csvpip3 install -r requirements.txt\nOpenAI, AstraDB and optionally LangSmith secrets in streamlit-langchain/.streamlit/secrets.toml. There is an example provided at secrets.toml.example.Now it's time to customize the app for your specific situation or customers.
\nDefine credentials by adding a new username and password in the [passwords] section in streamlit-langchain/.streamlit/secrets.toml.
Define the UI language of the app by adding a localization code in the [languages] section in streamlit-langchain/.streamlit/secrets.toml. Currently en_US and nl_NL are supported. However it is easy to add additional languages in localization.csv.
Create a guided experience by providing sample prompts in rails.csv. The convention here is that <username> from Step 1 is used to define the experience.
Start up the app and pre-load relevant PDF and Text files so that the app has content that can be used as context for the questions/prompts in the next step. All this data will be loaded into a user specific table defined by <username>.
Create a customized welcome page in the root folder. The convention here is to create a markdown file called <username>.md. Ideally, list which files have been pre-loaded.
You're ready to run the app as follows:
\nstreamlit run app.py\nIn addition to the pre-loaded content, a user can add additional content that will be used as context for prompts.
\nIt's easy to upload this app to the community edition of Streamlit. As the app uses a login page it is safe to have it publicly available.
\nThe goal of this app is to be easily shared within enterprises. Just be aware that YOUR OPENAI subscription is being used for creating embeddings and LLM calls. This WILL incur cost.
\n", 24 | "readme_markdown": "# Configurable Enterprise Chat Agent\nThis Chat Agent is build specifically as a reusable and configurable sample app to share with enterprises or prospects. \n\n1. It uses [LangChain](https://www.langchain.com/) as the framework to easily set up LLM Q&A chains\n2. It uses [Streamlit](https://streamlit.io/) as the framework to easily create Web Applications\n3. It uses [Astra DB](https://astra.datastax.com/) as the Vector Store to enable Rerieval Augmented Generation in order to provide meaningfull contextual interactions\n4. It uses [Astra DB](https://astra.datastax.com/) as Short Term Memory to keep track of what was said and generated\n5. It uses a StreamingCallbackHandler to stream output to the screen which prevents having to wait for the final answer\n6. It allows for new Content to be uploaded, Vectorized and Stored into the Astra DB Vector Database so it can be used as Context\n7. It offers a configurable localization through `localization.csv`\n8. It offers a guided experience on-rails through `rails.csv`\n\n## Preparation\n1. First install the Python dependencies using:\n```\npip3 install -r requirements.txt\n```\n2. Then update the `OpenAI`, `AstraDB` and optionally `LangSmith` secrets in `streamlit-langchain/.streamlit/secrets.toml`. There is an example provided at `secrets.toml.example`.\n\n## Customization\nNow it's time to customize the app for your specific situation or customers.\n### Step 1\nDefine credentials by adding a new username and password in the `[passwords]` section in `streamlit-langchain/.streamlit/secrets.toml`.\n### Step 2\nDefine the UI language of the app by adding a localization code in the `[languages]` section in `streamlit-langchain/.streamlit/secrets.toml`. Currently `en_US` and `nl_NL` are supported. However it is easy to add additional languages in `localization.csv`.\n### Step 3\nCreate a guided experience by providing sample prompts in `rails.csv`. The convention here is that `This example shows how to use AWS Lambda with the Node.js DataStax Cassandra Driver to set up a basic REST API for a Cassandra database via HTTP Endpoints. The Serverless Framework is used to facilitate the setup and deployment of the functions.
\nContributor(s): Chris Splinter
\nThe Serverless Framework handles the packaging and deployment of the functions to the AWS resources. Once the functions are deployed, the DataStax Cassandra Driver establishes the connection to the database and returns the results via the AWS Lambda HTTP Endpoints which can be accessed to interact with the database.
\nBefore running with this example, head over to the SETUP-README for instructions on how to
\nOnce the above is completed, you will have all of the needed pieces in place to run this example.
\ngit clone https://github.com/DataStax-Examples/aws-lambda-nodejs.git\naws-lambda-nodejs directorycd aws-lambda-nodejs\nnpm install cassandra-driver\nserverless.yml with your S3 bucket, Contact Points ( public IP of AWS EC2 instance ), and Local Data Center ( likely datacenter1 )From the project directory, deploy your function. This should output the endpoints that you can use to access the database.
\nsls deploy\nsls remove\ncurl -X POST https://<function-id>.execute-api.us-east-2.amazonaws.com/dev/catalog/create\nexpected output:
\nSuccessfully created shopping.catalog schema\ncurl -X POST -d '{"item_id": 0, "name": "name_0", "description": "desc_0", "price": 10.1}' https://<function-id>.execute-api.us-east-2.amazonaws.com/dev/catalog/add\nexpected output:
\n{"query":"INSERT INTO shopping.catalog (item_id, name, description, price) VALUES (?, ?, ?, ?)","item_id":0,"name":"name_0","description":"desc_0","price":10.1}\ncurl -X GET https://<function-id>.execute-api.us-east-2.amazonaws.com/dev/catalog/get/0\nexpected output:
\n{"query":"SELECT name, description, price FROM shopping.catalog WHERE item_id = ?","item_id":"0","name":"name_0","description":"desc_0","price":"10.1"}\nThis example shows how to use Azure Functions with the Node.js DataStax Cassandra Driver to set up a basic REST API for a Cassandra database via HTTP Endpoints. The Serverless Framework is used to facilitate the setup and deployment of the functions.
\nContributor(s): Chris Splinter
\nThe Serverless Framework handles the packaging and deployment of the functions to the Azure resources. Once the functions are deployed, the DataStax Cassandra Driver establishes the connection to the database and returns the results to the Azure HTTP Endpoints which can be accessed to interact with the database.
\nBefore running with this example, head over to the SETUP-README for instructions on how to
\nOnce the above is completed, you will have all of the needed pieces in place to run this example.
\ngit clone https://github.com/DataStax-Examples/azure-functions-nodejs.git\ncd azure-functions-nodejs\nnpm install cassandra-driver\nnpm install serverless-azure-functions\nserverless.yml with your Contact Points ( public IP of Azure instance ), and Local Data Center ( likely datacenter1 )From the project directory, deploy your function. This should output the endpoints that you can use to access the database.
\nsls deploy\nsls remove\nNote the -d '{}' is required here
curl -X POST -d '{}' <function-app-name>.azurewebsites.net/api/catalog/create\nexpected output:
\nSuccessfully created shopping.catalog schema\ncurl -X POST -d '{"item_id": 0, "name": "name_0", "description": "desc_0", "price": 10.1}' <function-app-name>.azurewebsites.net/api/catalog/add\nexpected output:
\n{"query":"INSERT INTO shopping.catalog (item_id, name, description, price) VALUES (?, ?, ?, ?)","item_id":0,"name":"name_0","description":"desc_0","price":10.1}\ncurl -X GET <function-app-name>.azurewebsites.net/api/catalog/get/0\nexpected output:
\n{"query":"SELECT name, description, price FROM shopping.catalog WHERE item_id = ?","item_id":"0","name":"name_0","description":"desc_0","price":"10.1"}\n
 \n
\n \n
\n