├── ready_project
├── blazor_default_8
│ ├── screen_shot.png
│ └── blazor_default_8.zip
├── asp_dot_net_core_default_2
│ ├── screen_shot.png
│ └── asp_dot_net_core_default_2.zip
├── asp_dot_net_core_default_7
│ ├── screen_shot.png
│ └── asp_dot_net_core_default_7.zip
└── readme.md
├── doc
├── download_file.md
├── how_to_create_modular_systems_by_code_behind_framework.md
├── code_behind_story.md
├── error_detection.md
├── code_behind_framework_vs_code_behind_pattern.md
├── mvc_architecture_in_code_behind.md
├── examples_of_development.md
├── namespace_and_dll_for_code_behind_view_class.md
├── how_to_create_startup_system_by_code_behind_framework.md
├── it_is_not_necessary_to_follow_the_mvc_pattern.md
├── constructor_method.md
├── how_to_create_scheduled_task_by_code_behind_framework.md
├── code_behind_framework_data.md
├── html_data_classes.md
├── web_part_in_code_behind.md
├── transfer_template_block_data_in_view_data.md
├── how_to_use_code_behind.md
├── used_with_razor_pages_and_asp_dot_net_core_mvc.md
├── segment.md
├── error_handling.md
├── asp_dot_net_core_vs_code_behind.md
├── load_aspx_page_finally_result_in_another_aspx_page.md
├── standard_syntax_reference_for_code_behind_framework.md
├── simple_and_structured_mvc_in_code_behind.md
├── route_configuration.md
├── using_web_forms.md
├── layout.md
├── how_to_create_dynamic_middleware_by_code_behind_framework.md
├── modularity_in_the_default_mode.md
├── controller_class_constructor_and_model_class_constructor.md
├── razor_syntax_reference_for_code_behind_framework.md
├── dynamic_model.md
├── modularity_in_the_configuration_of_the_controller_in_the_route.md
├── how_is_the_list_of_views_finally_made.md
├── performance_test_in_only_view_section_version_1.5.2.md
├── send_data.md
├── use_cache.md
├── template.md
└── manage_roles_in_code_behind.md
├── class
├── API.cs
├── RequestQuery.cs
├── StaticObject.cs
├── Library.cs
├── Model.cs
├── Extensions.cs
├── Options.cs
├── RoleAccess.cs
└── Controller.cs
├── LICENSE
└── README.md
/ready_project/blazor_default_8/screen_shot.png:
--------------------------------------------------------------------------------
https://raw.githubusercontent.com/elanatframework/Code_behind/HEAD/ready_project/blazor_default_8/screen_shot.png
--------------------------------------------------------------------------------
/ready_project/blazor_default_8/blazor_default_8.zip:
--------------------------------------------------------------------------------
https://raw.githubusercontent.com/elanatframework/Code_behind/HEAD/ready_project/blazor_default_8/blazor_default_8.zip
--------------------------------------------------------------------------------
/ready_project/asp_dot_net_core_default_2/screen_shot.png:
--------------------------------------------------------------------------------
https://raw.githubusercontent.com/elanatframework/Code_behind/HEAD/ready_project/asp_dot_net_core_default_2/screen_shot.png
--------------------------------------------------------------------------------
/ready_project/asp_dot_net_core_default_7/screen_shot.png:
--------------------------------------------------------------------------------
https://raw.githubusercontent.com/elanatframework/Code_behind/HEAD/ready_project/asp_dot_net_core_default_7/screen_shot.png
--------------------------------------------------------------------------------
/ready_project/asp_dot_net_core_default_2/asp_dot_net_core_default_2.zip:
--------------------------------------------------------------------------------
https://raw.githubusercontent.com/elanatframework/Code_behind/HEAD/ready_project/asp_dot_net_core_default_2/asp_dot_net_core_default_2.zip
--------------------------------------------------------------------------------
/ready_project/asp_dot_net_core_default_7/asp_dot_net_core_default_7.zip:
--------------------------------------------------------------------------------
https://raw.githubusercontent.com/elanatframework/Code_behind/HEAD/ready_project/asp_dot_net_core_default_7/asp_dot_net_core_default_7.zip
--------------------------------------------------------------------------------
/doc/download_file.md:
--------------------------------------------------------------------------------
1 | ### Download file
2 |
3 | You can use the Download method to download files after users request them on the view pages; the Download method has an input argument of the file path and can be accessed from all three sections: view, controller, and model.
4 |
5 | Example:
6 | ```csharp
7 | Download("C:\\image.png");
8 | ```
9 |
--------------------------------------------------------------------------------
/doc/how_to_create_modular_systems_by_code_behind_framework.md:
--------------------------------------------------------------------------------
1 | ## How to create modular systems by CodeBehind framework?
2 |
3 | The project created by using CodeBehind is automatically a modular project, that is, it has the ability to add web parts. In addition, each web part can be used in other projects.
4 |
5 | You can add a page to insert a module (web part) on the admin page of your project; this page should include an input for uploading, and after copying, run the CodeBehind compilation methods again; according to the following codes:
6 |
7 | ```csharp
8 | CodeBehindCompiler.ReCompile();
9 | ```
10 |
--------------------------------------------------------------------------------
/doc/code_behind_story.md:
--------------------------------------------------------------------------------
1 | ## CodeBehind story
2 |
3 | First, CodeBehind was supposed to be a back-end framework for the C++ programming language; our project in C++ was going well, we built the listener structure and we were even able to implement fast-cgi in the coding phase for the Windows operating system. Windows operating system test with nginx web server was very stable and fast; but for some reason, we stopped working and implemented CodeBehind on .NET Core version 7.
4 |
5 | Programming in CodeBehind is simple. The simplicity of the CodeBehind project is the result of two years of study and research on back-end frameworks and how they support web parts.
6 |
--------------------------------------------------------------------------------
/doc/error_detection.md:
--------------------------------------------------------------------------------
1 | ### Error detection
2 |
3 | After running the project, CodeBehind will create a directory called `code_behind` next to the `wwwroot` directory. In this directory, the view class, which is made of aspx files, is kept. If there is any compile error in the aspx files, it will be displayed in the `views_compile_error.log` file. The `views_compile_error.log` file shows errors related to the `views_class.cs.tmp` file in the `code_behind` directory.
4 |
5 | If there is an error related to the structure of the aspx files or their page attributes, a file named `views_class_aggregation_error.log` will be displayed in the `code_behind` folder and it will display the errors.
6 |
--------------------------------------------------------------------------------
/doc/code_behind_framework_vs_code_behind_pattern.md:
--------------------------------------------------------------------------------
1 | ## CodeBehind framework vs Code-Behind pattern
2 |
3 | Code-behind is a programming pattern that separates the presentation logic from the HTML code that allowing for a cleaner separation of concerns. It involves creating a separate class file for the code, which can help with maintainability and readability. Code-Behind contribute to maintaining code quality and readability.
4 |
5 | The Elanat team introduces the framework created by itself as CodeBehind and calls the coding structure for the complete separation of the server part codes from the design part Code-Behind (uses the dash character to separate Code and Behind). If the name CodeBehind is confusing for you, you can call it Elanat CodeBehind or Elanat CodeBehind framework!
6 |
7 | Common people usually know Code-Behind with Microsoft web-form. Please note that the CodeBehind framework is one of the most powerful and modern back-end frameworks and its structure has nothing to do with Microsoft's former web-form.
8 |
--------------------------------------------------------------------------------
/doc/mvc_architecture_in_code_behind.md:
--------------------------------------------------------------------------------
1 | ## MVC architecture in CodeBehind
2 |
3 | # Simple definition of MVC
4 |
5 | MVC is a design pattern that consists of three parts: model, view, and controller. View is the display part. Dynamic data models are placed in the view. Controllers are responsible for determining the view and model for requests.
6 |
7 | Using the MVC Design Pattern In most MVC frameworks, controllers must be configured in the root routes. In this structure, the request reaches the route and the route recognizes the controller based on the text patterns and then calls the controller. The configuration of the controller is in the path of a poor process and the wrong structure, which is placed at the beginning of the request and response cycle and causes problems for that structure.
8 |
9 | In the CodeBehind framework, the controller is specified in the attributes section of the view page.
10 |
11 | MVC diagram in CodeBehind Framework
12 |
13 | 
14 |
--------------------------------------------------------------------------------
/class/API.cs:
--------------------------------------------------------------------------------
1 | using System.Reflection;
2 |
3 | namespace CodeBehind.API
4 | {
5 | public class Path
6 | {
7 | public string RunTimePath { get; private set; }
8 | public string AspRunTimePath { get; private set; }
9 | public string BaseDirectory { get; private set; }
10 |
11 | public Path()
12 | {
13 | BaseDirectory = AppContext.BaseDirectory;
14 | BaseDirectory = BaseDirectory.Replace("\\", "/");
15 |
16 | RunTimePath = System.IO.Path.GetDirectoryName(typeof(object).GetTypeInfo().Assembly.Location);
17 | RunTimePath = RunTimePath.Replace("\\", "/");
18 |
19 | var assembly = typeof(Microsoft.AspNetCore.Http.HttpContext).Assembly;
20 | var codeBase = assembly.CodeBase;
21 | var uri = new UriBuilder(codeBase);
22 | string path = Uri.UnescapeDataString(uri.Path);
23 | var AspNetCorePath = System.IO.Path.GetDirectoryName(path);
24 |
25 | AspRunTimePath = AspNetCorePath.Replace("\\", "/");
26 | }
27 | }
28 | }
29 |
--------------------------------------------------------------------------------
/LICENSE:
--------------------------------------------------------------------------------
1 | MIT License
2 |
3 | Copyright (c) 2025 Elanat
4 |
5 | Permission is hereby granted, free of charge, to any person obtaining a copy
6 | of this software and associated documentation files (the "Software"), to deal
7 | in the Software without restriction, including without limitation the rights
8 | to use, copy, modify, merge, publish, distribute, sublicense, and/or sell
9 | copies of the Software, and to permit persons to whom the Software is
10 | furnished to do so, subject to the following conditions:
11 |
12 | The above copyright notice and this permission notice shall be included in all
13 | copies or substantial portions of the Software.
14 |
15 | THE SOFTWARE IS PROVIDED "AS IS", WITHOUT WARRANTY OF ANY KIND, EXPRESS OR
16 | IMPLIED, INCLUDING BUT NOT LIMITED TO THE WARRANTIES OF MERCHANTABILITY,
17 | FITNESS FOR A PARTICULAR PURPOSE AND NONINFRINGEMENT. IN NO EVENT SHALL THE
18 | AUTHORS OR COPYRIGHT HOLDERS BE LIABLE FOR ANY CLAIM, DAMAGES OR OTHER
19 | LIABILITY, WHETHER IN AN ACTION OF CONTRACT, TORT OR OTHERWISE, ARISING FROM,
20 | OUT OF OR IN CONNECTION WITH THE SOFTWARE OR THE USE OR OTHER DEALINGS IN THE
21 | SOFTWARE.
22 |
--------------------------------------------------------------------------------
/doc/examples_of_development.md:
--------------------------------------------------------------------------------
1 | ## Examples of development
2 |
3 | **In aspx pages, you will access HttpContext with context**
4 |
5 | View file (razor syntax)
6 | ```cshtml
7 | @page
8 | @{
9 | string HasValue = (!string.IsNullOrEmpty(context.Request.Query["value"]))? "Yes" : "No";
10 | }
11 |
12 |
13 |
Exist value in querystring? @HasValue
14 |
15 | value is: @(context.Request.Query["value"].ToString())
16 |
26 |
27 | value is: <%=context.Request.Query["value"].ToString()%>
28 |
29 | ```
30 |
31 | **To receive the information sent through the form, you can follow the instructions below**
32 | ```csharp
33 | public DefaultModel model = new DefaultModel();
34 | public void PageLoad(HttpContext context)
35 | {
36 | if (!string.IsNullOrEmpty(context.Request.Form["btn_Add"]))
37 | btn_Add_Click();
38 |
39 | View(model);
40 | }
41 |
42 | private void btn_Add_Click()
43 | {
44 | model.PageTitle = "btn_Add Button Clicked";
45 | }
46 | ```
47 |
--------------------------------------------------------------------------------
/doc/namespace_and_dll_for_code_behind_view_class.md:
--------------------------------------------------------------------------------
1 | ## Namespace and dll for CodeBehind view class
2 |
3 | You can add namespaces to the view class aggregating aspx files. Add the namespaces to the namespace_import_list file at this path: `code_behind/namespace_import_list.ini`.
4 |
5 | The default content of the namespace_import_list.ini file
6 | ```ini
7 | [CodeBehind namespace import list]
8 | namespace=System.IO
9 | namespace=System.Collections
10 | namespace=System.Collections.Generic
11 | namespace=System.Linq
12 | namespace=System.Threading
13 | namespace=System.Threading.Tasks
14 | ```
15 |
16 | You can also add necessary dlls to the view class that aggregates aspx files. This file is located in: `code_behind/dll_import_list.ini path`.
17 |
18 | The default content of the dll_import_list.ini file
19 | ```ini
20 | [CodeBehind dll import list]
21 | dll_path={run_time_path}/System.IO.dll
22 | dll_path={run_time_path}/System.Collections.dll
23 | dll_path={run_time_path}/System.Linq.dll
24 | dll_path={run_time_path}/System.Threading.dll
25 | ```
26 | You can use the variables `{run_time_path}`, `{asp_run_time_path}` and `{base_directory_path}` to determine the path.
27 |
28 | Note: The dll_import_list.ini file is only for the dlls that the view class aggregating aspx files need, and these dlls have nothing to do with the wwwroot/dll path.
29 |
--------------------------------------------------------------------------------
/doc/how_to_create_startup_system_by_code_behind_framework.md:
--------------------------------------------------------------------------------
1 | ## How to create startup system by CodeBehind framework?
2 |
3 | First, create an xml file (or json or ini or etc) similar to the following file:
4 | ```xml
5 |
6 |
7 |
8 |
9 |
10 |
11 |
12 | ```
13 |
14 | Startup is a structure that allows you to initialize some things before the program is activated; you can run the Startup method before the Run method in the builder located in the Program.cs class.
15 | ```diff
16 | + Startup.Run();
17 |
18 | app.Run(async context =>
19 | {
20 | CodeBehindExecute execute = new CodeBehindExecute();
21 | await context.Response.WriteAsync(execute.Run(context));
22 | await context.Response.CompleteAsync();
23 | });
24 | ```
25 |
26 | Note: In CodeBehind framework version 1.5.1 (and later versions) you can call Run method in CodeBehindExecute without needing HttpContext.
27 |
28 | ```csharp
29 | CodeBehindExecute execute = new CodeBehindExecute();
30 | execute.Run(StartupNodePath);
31 | ```
32 |
33 | In the code above, StartupNodePath can be a path like below:
34 |
35 | `/action/system_access/start_up/send_start_project_email_to_provider/Default.aspx`
36 |
--------------------------------------------------------------------------------
/doc/it_is_not_necessary_to_follow_the_mvc_pattern.md:
--------------------------------------------------------------------------------
1 | ### It is not necessary to follow the MVC pattern
2 |
3 | In addition to the MVC pattern, you can expand your systems in the form of only View or Controller and View or Model and View.
4 |
5 | MVC and V and VC and MV patterns are supported in CodeBehind.
6 |
7 | It is not necessary to have a controller and a model, you can code in an aspx page.
8 |
9 | **Only View example**
10 |
11 | View (razor syntax)
12 | ```cshtml
13 | @page
14 | @{
15 | Random rand = new Random();
16 | }
17 |
18 |
56 | ```
57 |
58 | Model
59 | ```csharp
60 | using CodeBehind;
61 |
62 | namespace YourProjectName
63 | {
64 | public partial class DefaultModel : CodeBehindModel
65 | {
66 | public string Value1 { get; set; }
67 | public string Value2 { get; set; }
68 |
69 | public DefaultModel()
70 | {
71 | Value1 = "text1";
72 | Value2 = "text2";
73 | }
74 | }
75 | }
76 | ```
77 |
--------------------------------------------------------------------------------
/doc/constructor_method.md:
--------------------------------------------------------------------------------
1 | ## Constructor method
2 |
3 | One of the initiatives of the Elanat team in the CodeBehind framework is to add support for the CodeBehind constructor method for models and controllers. You can open parentheses in front of the model and controller class names and add the desired input arguments that you created in the CodeBehind constructor method.
4 |
5 | Example for standard syntax
6 | ```html
7 | <%@ Page Controller="YourProjectName.DefaultController(1)" Model="YourProjectName.DefaultModel(context)" %>
8 | ```
9 |
10 | Example for Razor syntax
11 |
12 | ```csharp
13 | @page
14 | @controller YourProjectName.DefaultController(1)
15 | @model YourProjectName.DefaultModel(context)
16 | ```
17 |
18 | Controller class
19 | ```csharp
20 | using CodeBehind;
21 |
22 | namespace YourProjectName
23 | {
24 | public partial class DefaultController : CodeBehindController
25 | {
26 | public DefaultModel model = new DefaultModel();
27 | public void PageLoad(HttpContext context)
28 | {
29 | View(model);
30 | }
31 |
32 | public void CodeBehindConstructor(int Index)
33 | {
34 | Write(Index.ToString());
35 | }
36 | }
37 | }
38 | ```
39 |
40 | Model class
41 | ```csharp
42 | using CodeBehind;
43 |
44 | namespace YourProjectName
45 | {
46 | public partial class DefaultModel : CodeBehindModel
47 | {
48 | public void CodeBehindConstructor(HttpContext context)
49 | {
50 | Write(context.Request.Query["name"].ToString());
51 | }
52 | }
53 | }
54 | ```
55 |
56 | As shown in the above example, from now on you can access the HttpContext in the model without a controller, just add the context value as an input argument in front of the model class name. Then you can add the CodeBehindConstructor method in the model class.
57 |
--------------------------------------------------------------------------------
/ready_project/readme.md:
--------------------------------------------------------------------------------
1 | ## Ready project
2 |
3 | In this section, ready-made projects (and templates) are located using the CodeBehind framework.
4 |
5 | ### ASP.NET Core Default 7
6 |
7 | The following project is the default for ASP.NET Core version 7, which has been slightly modified under the CodeBehind framework. This project has additional HTML attributes that are not used in the CodeBehind framework; we did not remove these attributes.
8 |
9 | 
10 |
11 | Download:
12 |
13 | [ASP.NET Core default 7](https://github.com/elanatframework/Code_behind/raw/elanat_framework/ready_project/asp_dot_net_core_default_7/asp_dot_net_core_default_7.zip)
14 |
15 |
16 | ### ASP.NET Core Default 2
17 |
18 | The following project is the default for ASP.NET Core version 2.1, which has been slightly modified under the CodeBehind framework. This project has additional HTML attributes that are not used in the CodeBehind framework; we did not remove these attributes.
19 |
20 | 
21 |
22 | Download:
23 |
24 | [ASP.NET Core default 2](https://github.com/elanatframework/Code_behind/raw/elanat_framework/ready_project/asp_dot_net_core_default_2/asp_dot_net_core_default_2.zip)
25 |
26 | ### Blazor Default 8
27 |
28 | The following project is the default version 8 of Blazor .NET Core technology, which has been rewritten under the CodeBehind framework and WebForms Core technology.
29 |
30 | 
31 |
32 | Download:
33 |
34 | [Blazor default 8](https://github.com/elanatframework/Code_behind/raw/elanat_framework/ready_project/blazor_default_8/blazor_default_8.zip)
35 |
--------------------------------------------------------------------------------
/doc/how_to_create_scheduled_task_by_code_behind_framework.md:
--------------------------------------------------------------------------------
1 | ## How to create scheduled task system by CodeBehind framework?
2 |
3 | First, create an xml file (or json or ini or etc) similar to the following file:
4 |
5 | ```xml
6 |
7 |
8 |
9 |
10 |
11 |
12 |
13 |
14 |
15 | ```
16 |
17 | Scheduled task is one of the most important parts of a high-level project; you can run the Scheduled task method in the Run method in the builder located in the Program.cs class.
18 |
19 | ```diff
20 | app.Run(async context =>
21 | {
22 | + ScheduledTask.Run(context);
23 |
24 | CodeBehindExecute execute = new CodeBehindExecute();
25 | await context.Response.WriteAsync(execute.Run(context));
26 | await context.Response.CompleteAsync();
27 | });
28 | ```
29 |
30 | You can perform the scheduled task either by request or by calling a timer (of course, if you don't allow the system to sleep!).
31 |
32 | **Note:** You can implement both of them in a combination.
33 |
--------------------------------------------------------------------------------
/class/RequestQuery.cs:
--------------------------------------------------------------------------------
1 | using CodeBehind.HtmlData;
2 | using Microsoft.AspNetCore.Http;
3 |
4 | namespace CodeBehind
5 | {
6 | internal class RequestQuery
7 | {
8 | internal void AddQueryString(HttpContext context, string QueryString)
9 | {
10 | if (string.IsNullOrEmpty(QueryString))
11 | return;
12 |
13 | NameCollection QueryValues = new NameCollection();
14 | QueryString TmpQueryString = new QueryString();
15 | string[] QueryElements = QueryString.Split('&');
16 | foreach (string element in QueryElements)
17 | {
18 | string[] NameValue = element.Split('=');
19 |
20 | if (NameValue.Length > 1)
21 | TmpQueryString = TmpQueryString.Add(NameValue[0], NameValue[1]);
22 | else
23 | TmpQueryString = TmpQueryString.Add(NameValue[0], "");
24 |
25 | QueryValues.Add(NameValue[0]);
26 | }
27 |
28 | string RequestQueryString = context.Request.QueryString.Value;
29 |
30 | if (!string.IsNullOrEmpty(RequestQueryString))
31 | {
32 | RequestQueryString = RequestQueryString.GetTextAfterValue("?");
33 | string[] TmpQueryElements = RequestQueryString.Split('&');
34 | foreach (string element in TmpQueryElements)
35 | {
36 | string[] NameValue = element.Split('=');
37 |
38 | if (!QueryValues.Exist(NameValue[0]))
39 | if (NameValue.Length > 1)
40 | TmpQueryString = TmpQueryString.Add(NameValue[0], NameValue[1]);
41 | else
42 | TmpQueryString = TmpQueryString.Add(NameValue[0], "");
43 | }
44 | }
45 |
46 | context.Request.QueryString = TmpQueryString;
47 | }
48 | }
49 | }
50 |
--------------------------------------------------------------------------------
/doc/code_behind_framework_data.md:
--------------------------------------------------------------------------------
1 | ## CodeBehind framework data
2 |
3 | CodeBehind framework creates a directory named code_behind in the project directory after the first execution.
4 |
5 | There are the following files in the code_behind directory:
6 | - cache.xml
7 | - dll_import_list.ini
8 | - global_template.astx
9 | - namespace_import_list.ini
10 | - options.ini
11 | - role.xml
12 | - views_class.cs.tmp
13 | - views_class_last_success_compiled.cs.tmp
14 | - views_class_aggregation_error.log (maybe)
15 | - views_compile_error.log (maybe)
16 |
17 | Apart from the list above, a file called `CodeBehindLastSuccessCompiled.dll.tmp` is added next to the `CodeBehind.dll` library and the main project dll.
18 |
19 | ### cache.xml
20 |
21 | In this file, the cache is determined on the View pages and Controller classes.
22 |
23 | ### dll_import_list.ini
24 |
25 | This file set dlls path in the view class aggregating aspx files.
26 |
27 | ### global_template.astx
28 |
29 | This file is a global template that is applied to all aspx files.
30 |
31 | ### namespace_import_list.ini
32 |
33 | This file adds namespaces to the view class aggregating aspx files.
34 |
35 | ### options.ini
36 |
37 | This file will contain many options for customization.
38 |
39 | ### role.xml
40 |
41 | In this file, user roles and their access are determined.
42 |
43 | ### views_class.cs.tmp
44 |
45 | This file is the final class of views that is made from aspx files.
46 |
47 | ### views_class_last_success_compiled.cs.tmp
48 |
49 | This file is a copy of the final view class that was compiled without problems.
50 |
51 | ### views_compile_error.log (maybe)
52 |
53 | If the compiler gives an error while compiling the final view class, this file displays the errors; If the compilation is successful, this file will not be displayed.
54 |
55 | ### views_class_aggregation_error.log (maybe)
56 |
57 | If there is a problem while collecting data from the views, this file will display the problems; Otherwise, this file will not be displayed.
58 |
59 | ### CodeBehindLastSuccessCompiled.dll.tmp
60 |
61 | This file is a dll that stores the last successful compilation of the view class.
62 |
--------------------------------------------------------------------------------
/doc/html_data_classes.md:
--------------------------------------------------------------------------------
1 | ## HtmlData classes
2 |
3 | You can use classes located in the HtmlData namespace.
4 |
5 | The Elanat team currently supports three commonly used and recurring data types and will add more data types to the HtmlData namespace in the future.
6 |
7 | Attribute and AttributeCollection
8 | This data type adds one or more attributes to the html tag.
9 |
10 | OptionTag and OptionTagCollection
11 | This type of data is used for drop-down and fixed lists, and you can call and add this type of data inside the select tag.
12 |
13 | **Example**
14 |
15 | View (aspx page) (Razor syntax)
16 | ```cshtml
17 |
20 | ```
21 |
22 | View (aspx page) (standard syntax)
23 | ```aspx
24 |
27 | ```
28 |
29 | Controller
30 | ```csharp
31 | using CodeBehind;
32 | using CodeBehind.HtmlData;
33 |
34 | namespace YourProjectName
35 | {
36 | public partial class DefaultController : CodeBehindController
37 | {
38 | public DefaultModel model = new DefaultModel();
39 |
40 | public void PageLoad(HttpContext context)
41 | {
42 | OptionTagCollection options = new OptionTagCollection();
43 | options.Add("code_behind", "CodeBehind", true);
44 | options.Add("asp_dot_net_core", "ASP.NET Core");
45 | options.Add("django", "Django");
46 | options.Add("laravel", "Laravel");
47 | options.Add("spring_boot", "Spring Boot");
48 | options.Add("ruby_on_rails", "Ruby on Rails");
49 |
50 | model.FrameworkOptionTags = options.GetString();
51 |
52 | View(model);
53 | }
54 | }
55 | }
56 | ```
57 |
58 | Result after response
59 | ```html
60 |
68 | ```
69 |
70 | CheckBoxItem and CheckBoxItemCollection
71 | Sometimes it happens that you need a single list where the user can select more than one data; this data type adds lists of checkbox tags.
72 |
--------------------------------------------------------------------------------
/doc/web_part_in_code_behind.md:
--------------------------------------------------------------------------------
1 | ### Web part in CodeBehind
2 |
3 | In CodeBehind, the physical executable pages (aspx) are placed in the root path, and this makes the program structured.
4 |
5 | CodeBehind supports web parts; web parts are like other parts of the project and include aspx files.
6 |
7 | 
8 |
9 | To add the web part in CodeBehind, just put the project files in the root.
10 |
11 | In CodeBehind, you can run web parts that make changes to aspx files. You can edit all aspx files during project execution and responding to users.
12 |
13 | In CodeBehind, the structure of web parts is the same as the structure of the main project; your main project includes aspx pages, dll files, and other client-side files (css, js, images, etc.); web parts in CodeBehind also include aspx pages, dll files and other client side files.
14 |
15 | 
16 |
17 | The project created by using CodeBehind is automatically a modular project, that is, it has the ability to add web parts. In addition, each web part can be used in other projects.
18 |
19 | The system built with CodeBehind is also a web part itself. Each web part can also be a separate system! The web part that adds the configuration of the Program.cs class is considered the main system.
20 |
21 | One of the great features that CodeBehind gives you is the support for DLL libraries. You can add all the .NET Core DLL libraries that you have created into the bin directory located in wwwroot so that the CodeBehind will call all of them.
22 |
23 | 
24 |
25 | How to add web part?
26 | First, copy your compiled project files to the desired path in wwwroot; then copy the main dll file to wwwroot/bin path. You can do the copy while the process is running in the method and then call the code below to compile without restarting the program.
27 |
28 | ```csharp
29 | // Recompile
30 | CodeBehindCompiler.ReCompile();
31 | ```
32 |
33 | > Note: Please note that the CodeBehind framework version of the new web part must be equal or lower than the CodeBehind version of the main project.
34 |
--------------------------------------------------------------------------------
/doc/transfer_template_block_data_in_view_data.md:
--------------------------------------------------------------------------------
1 | ## Transfer template block data in ViewData
2 |
3 | The ability to send template blocks through ViewData is a feature of the CodeBehind framework. You can now enclose template variables within `{@#TempName}` brackets so that double-quote (`"{@#TempName}"`) characters do not cause problems in code blocks.
4 |
5 | Template variables placed between open and closed brackets make the double-quote and `\n` characters of the block suitable for placement in a string. This will help you add template blocks in ViewData and call them in other pages (like layout).
6 |
7 | Example:
8 |
9 | ```html
10 | @page
11 | @layout "/layout.aspx"
12 | @{
13 | @ViewData.Add("title", "Company name");
14 | @ViewData.Add("script", "{@#TempName}");
15 | }
16 | ...
17 | @#TempName{
18 |
38 | }
39 | ```
40 |
41 | After placing the template blocks in the template variables, the values of the `@#TempName` block in the above codes are added to the ViewData as below.
42 |
43 | ```csharp
44 | @ViewData.Add("script", "\n \n");
45 | ```
46 |
--------------------------------------------------------------------------------
/doc/how_to_use_code_behind.md:
--------------------------------------------------------------------------------
1 | ## How to use CodeBehind?
2 |
3 | ### Add CodeBehind framework in Visual Studio 2022
4 |
5 | **Step 1:**
6 |
7 | Open Visual Studio 2022, and Click on the File menu and then select the New and then click on Project in the opened box.
8 |
9 | **Step 2:**
10 |
11 | In the box that opens with the name Create a new project, select the ASP.NET Core Empty option and click Next.
12 |
13 | **Step 3:**
14 |
15 | Then choose a name for the project and click on the next option again.
16 |
17 | **Step 4:**
18 |
19 | In this section, in the drop-down list with the name of the framework, select the option **.NET 7.0 (Standard team support)** and then click on the Create button.
20 |
21 | **Step 5:**
22 |
23 | On the Project menu, select Manage NuGet Package. Then, in the opened box, select the Browse tab. Then enter CodeBehind in the search field.
24 |
25 | **Step 6:**
26 |
27 | Select CodeBehind among the options and select Install on the right side of the option to install the latest version of the CodeBehind framework.
28 |
29 | ### CodeBehind configuration
30 |
31 | To configure CodeBehind, it is necessary to set the Program.cs class file according to the following codes.
32 |
33 | Program File: Program.cs
34 | ```diff
35 | var builder = WebApplication.CreateBuilder(args);
36 |
37 | var app = builder.Build();
38 |
39 | +SetCodeBehind.CodeBehindCompiler.Initialization();
40 |
41 | +app.UseCodeBehind();
42 |
43 | app.Run();
44 | ```
45 |
46 | ### Use CodeBehind
47 |
48 | #### Programming
49 |
50 | **Step 1:**
51 |
52 | In the Solution Explore section, right-click on the project name and then select Add and then New Folder in the opened menu and name the folder **wwwroot**.
53 |
54 | **Step 2:**
55 | In the Solution Explore section, right-click on the name of the wwwroot directory and then select Add and then New Item in the opened menu, and in the opened box, regardless of the list, put the file name as Default.aspx and select the Add button.
56 |
57 | **Step 3:**
58 | Open the Default.aspx file and delete the values inside it and put the following codes in it.
59 |
60 | ```cshtml
61 | @page
62 | @{
63 | string HelloWorld = "Hello CodeBehind framework!";
64 | }
65 |
66 |
67 |
Text value is: @HelloWorld
68 |
69 | ```
70 |
71 | Press F5 to test the project.
72 |
73 | #### Run default pages
74 |
75 | if you run (Press F5) CodeBehind for the first time without the wwwroot directory, a ready default page will be created including a layout, header and footer.
76 |
77 | 
78 |
--------------------------------------------------------------------------------
/doc/used_with_razor_pages_and_asp_dot_net_core_mvc.md:
--------------------------------------------------------------------------------
1 | # Used with Razor Pages and ASP.NET Core MVC
2 |
3 | In this tutorial, we want to teach how to configure the CodeBehind framework along with Razor pages and ASP.NET Core MVC.
4 |
5 | The following codes show how to configure the CodeBehind framework in the Program.cs class:
6 | ```csharp
7 | var builder = WebApplication.CreateBuilder(args);
8 |
9 | var app = builder.Build();
10 |
11 | SetCodeBehind.CodeBehindCompiler.Initialization();
12 |
13 | app.UseCodeBehind();
14 |
15 | app.Run();
16 | ```
17 |
18 | According to the above codes, the `UseCodeBehind` middleware answers the requests and the process of the request and response of the program is terminated.
19 |
20 | Using the `UseCodeBehindNextNotFound` middleware will respond if the path matches and otherwise continue the process. Using this middleware allows you to configure CideBehind simultaneously with Razor pages and ASP.NET Core MVC.
21 |
22 | ## Razor Pages and CodeBehind config in Program.cs
23 |
24 | The codes below are configuration for Razor pages and CodeBehind framework. Using this configuration allows you to use Razor pages and CodeBehind in ASP.NET Core at the same time.
25 |
26 | ```csharp
27 | var builder = WebApplication.CreateBuilder(args);
28 |
29 | builder.Services.AddRazorPages();
30 |
31 | var app = builder.Build();
32 |
33 | app.MapRazorPages();
34 |
35 | SetCodeBehind.CodeBehindCompiler.Initialization();
36 |
37 | app.UseCodeBehindNextNotFound();
38 |
39 | app.Run();
40 | ```
41 |
42 | ## MVC and CodeBehind config in Program.cs
43 |
44 | The code below is the configuration for MVC and the CodeBehind framework. Applying this configuration allows you to use the default MVC and CodeBehind in ASP.NET Core at the same time.
45 |
46 | ```csharp
47 | var builder = WebApplication.CreateBuilder(args);
48 |
49 | builder.Services.AddControllersWithViews();
50 |
51 | var app = builder.Build();
52 |
53 | app.UseRouting();
54 |
55 | app.MapControllerRoute(
56 | name: "default",
57 | pattern: "MVC/{controller=Home}/{action=Index}");
58 |
59 | SetCodeBehind.CodeBehindCompiler.Initialization();
60 |
61 | app.UseCodeBehindNextNotFound();
62 |
63 | app.Run();
64 | ```
65 |
66 | ## Razor Pages and MVC and CodeBehind config in Program.cs
67 |
68 | The codes below are a super config! MVC and Razor Pages and CodeBehind work side by side without interference.
69 | ```csharp
70 | var builder = WebApplication.CreateBuilder(args);
71 |
72 | builder.Services.AddRazorPages();
73 |
74 | var app = builder.Build();
75 |
76 | app.UseRouting();
77 |
78 | app.MapControllerRoute(
79 | name: "default",
80 | pattern: "MVC/{controller=Home}/{action=Index}");
81 |
82 | app.MapRazorPages();
83 |
84 | SetCodeBehind.CodeBehindCompiler.Initialization();
85 |
86 | app.UseCodeBehindNextNotFound();
87 |
88 | app.Run();
89 | ```
90 |
--------------------------------------------------------------------------------
/doc/segment.md:
--------------------------------------------------------------------------------
1 | ## Segment
2 |
3 | Segment is a attribute that applies to aspx pages. Segment is a feature whose activation makes all paths after the aspx path refer to the current aspx path. Segment is one of the revolutionary ideas of the Elanat team. Enabling segment in aspx pages gives you full control over the paths.
4 |
5 | Example of segment activation in Razor syntax
6 | ```diff
7 | @page
8 | +@segment
9 |
10 |
11 | ...
12 | ```
13 |
14 | Example of segment activation in standard syntax
15 | ```html
16 | <%@ Page Segment="true" %>
17 |
18 |
19 | ...
20 | ```
21 |
22 | If you enable segment in the `/page/about.aspx` path, any path added after the current path will be considered a segment and the executable file in the `/page/about.aspx` path will still be executed.
23 |
24 | Example
25 |
26 | `/page/about.aspx/segment1/segment2/.../segmentN`
27 |
28 | If you enable the segment in an executable file called Default.aspx, you will still have access to the default path.
29 |
30 | Example
31 |
32 | `/page/about/Default.aspx/segment1/segment2/.../segmentN`
33 |
34 | or
35 |
36 | `/page/about/segment1/segment2/.../segmentN`
37 |
38 | You will have access to segment in all three segments, view, controller and model.
39 |
40 | Example segment in view (Razor syntax)
41 | ```cshtml
42 | segment 1 is: @Segment.GetValue(0)
43 | ```
44 |
45 | Example segment in view (standard syntax)
46 | ```aspx
47 | segment 1 is: <%=Segment.GetValue(0)%>
48 | ```
49 |
50 | Example segment in controller
51 | ```diff
52 | using CodeBehind;
53 |
54 | namespace YourProjectName
55 | {
56 | public partial class DefaultController : CodeBehindController
57 | {
58 | public void PageLoad(HttpContext context)
59 | {
60 | + Write(Segment.GetValue(0));
61 | }
62 | }
63 | }
64 | ```
65 |
66 | Example segment in model
67 | ```diff
68 | using CodeBehind;
69 |
70 | namespace YourProjectName
71 | {
72 | public partial class DefaultModel : CodeBehindModel
73 | {
74 | public void CodeBehindConstructor()
75 | {
76 | + Write(Segment.GetValue(0));
77 | }
78 | }
79 | }
80 | ```
81 |
82 | Activating the segment makes it no longer necessary to have a query string.
83 |
84 | Please note that if you activate the segment in a path, none of the view files (aspx) in the subdirectories of that path will be executed.
85 |
86 | Example
87 |
88 | `/page/about/Default.aspx`
89 |
90 | If you enable the segment in the path above, the path below will no longer be accessible.
91 |
92 | `/page/about/license/Default.aspx`
93 |
94 | You can use Exist method and check the existence of segment values.
95 |
96 | Example
97 | ```html
98 | @if (!Segment.Exist(0))
99 | {
100 | Value not exist
101 | }
102 | ```
103 |
--------------------------------------------------------------------------------
/doc/error_handling.md:
--------------------------------------------------------------------------------
1 | ## Error handling
2 |
3 | The default CodeBehind template includes an error page. In the options file, there is an option that determines the path of the error file; The path of the error page is set by default in this option. In the error page, we activated the page section attribute by default. If you look carefully at the path to the error page in the options file, you will see the value value surrounded by two brackets. This is a type and the numeric value of the error replaces this type.
4 |
5 | Options file
6 | ```ini
7 | ...
8 | error_page_path=/error.aspx/{value}
9 | ...
10 | ```
11 |
12 | Example
13 |
14 | `/error.aspx/500`
15 |
16 | According to the path above, the value 500 is substituted for the {value} variant.
17 |
18 | You can call up the error page according to the type of error. The following example is an implemented example of error handling in the CodeBehind framework.
19 |
20 | Program.cs class
21 | ```csharp
22 | var builder = WebApplication.CreateBuilder(args);
23 |
24 | var app = builder.Build();
25 |
26 | SetCodeBehind.CodeBehindCompiler.Initialization();
27 |
28 | app.Run(async context =>
29 | {
30 | CodeBehind.CodeBehindExecute execute = new CodeBehind.CodeBehindExecute();
31 |
32 | string PageResult = execute.Run(context);
33 |
34 | if (execute.FoundPage)
35 | await context.Response.WriteAsync(PageResult);
36 | else
37 | await context.Response.WriteAsync(execute.RunErrorPage(404));
38 | });
39 |
40 | app.Run();
41 | ```
42 |
43 |
44 | The example above shows a not found error. `FoundPage` attribute and `RunErrorPage` method have been added in the `CodeBehindExecute` class. According to the above codes, the `Run(context)` method puts the executable file string in the PageResult variable. If a page is not found, the FoundPage attribute is set to false. The `RunErrorPage(404, context)` method also calls the error page.
45 |
46 | Note: If you do not need to use context in the error page, you can call the RunErrorPage method without context.
47 |
48 | `RunErrorPage(404)`
49 |
50 | Please note that to use the RunErrorPage method, you must create the error view file and set its path in the options file. Of course, if you create a new project under ASP.NET Core 7.0 Empty for the first time and there is no wwwroot directory in your project, if you run the project once, the default CodeBehind framework template along with the view error file will be added.
51 |
52 | The Program.cs class below shows an example of error handling by configuring the controller in the route.
53 |
54 | Program.cs class
55 | ```csharp
56 | var builder = WebApplication.CreateBuilder(args);
57 |
58 | var app = builder.Build();
59 |
60 | SetCodeBehind.CodeBehindCompiler.Initialization();
61 |
62 | app.Run(async context =>
63 | {
64 | CodeBehind.CodeBehindExecute execute = new CodeBehind.CodeBehindExecute();
65 |
66 | string PageResult = execute.RunRoute(context, 0);
67 |
68 | if (execute.FoundController)
69 | await context.Response.WriteAsync(PageResult);
70 | else
71 | await context.Response.WriteAsync(execute.RunErrorPage(404));
72 | });
73 |
74 | app.Run();
75 | ```
76 |
--------------------------------------------------------------------------------
/doc/asp_dot_net_core_vs_code_behind.md:
--------------------------------------------------------------------------------
1 | ## ASP.NET Core VS CodeBehind; why should we use CodeBehind?
2 |
3 | 
4 |
5 | Many developers avoid ASP.NET Core and choose interpretive frameworks like Django and Laravel. And this is due to the complexities and weak default structure of ASP.NET Core and the need for complex configurations and controller classes with a chaotic and incomprehensible structure for novice programmers, as well as the difficulty of building a modular system.
6 |
7 | 
8 |
9 | CodeBehind stores the final values of its pages outside of the Response in the HttpContext; you can edit the output of the final values in the aspx pages before the answer. This gives you more control than ASP.NET Core.
10 |
11 | CodeBehind produces understandable code, while the Controller part of ASP.NET Core is a messy and complex situation.
12 |
13 | You will never experience the power that the CodeBehind framework gives you in ASP.NET Core.
14 |
15 | .NET developers accept CodeBehind as part of the larger .NET ecosystem. Whatever benefits CodeBehind has belongs to the .NET community.
16 |
17 | CodeBehind is similar to interpreted frameworks such as Django and Laravel, and programmers of interpreted programming language projects can easily program with CodeBehind.
18 |
19 | Developers of interpretative frameworks can consider CodeBehind as an alternative.
20 |
21 | ### CodeBehind advantages
22 |
23 | In every scenario, CodeBehind performs better than the default structure in ASP.NET Core.
24 |
25 | 
26 |
27 | CodeBehind is a flexible framework. CodeBehind inherits all the advantages of ASP.NET Core and gives it more simplicity, power and flexibility.
28 |
29 | CodeBehind, like the default ASP.NET Core, supports multiple platforms, and in the test conducted by the Elanat team, it also has high stability on Linux.
30 |
31 | CodeBehind occupies less memory resources (ram) than ASP.NET Core.
32 |
33 | aspx pages are compiled in CodeBehind and their calling is done at a very high speed, so that the path of the aspx file is not even referred to during the calling.
34 |
35 | 
36 |
37 | Really, no matter what we tried, we couldn't find any advantages to using ASP.NET Core compared to CodeBehind; perhaps if we were to compare ASP.NET Core with frameworks such as Django and Laravel, we could introduce high execution speed and leading programming language C# as a measure of ASP.NET Core's superiority; but using CodeBehind will give us the same advantages.
38 |
39 | ### Elanat was created using CodeBehind
40 |
41 | CodeBehind is a stable and reliable framework; [Elanat](https://elanat.net) is the most powerful .NET system implemented using the CodeBehind framework.
42 |
43 | [https://github.com/elanatframework/Elanat](https://github.com/elanatframework/Elanat)
44 |
45 | 
46 |
--------------------------------------------------------------------------------
/class/StaticObject.cs:
--------------------------------------------------------------------------------
1 | namespace CodeBehind
2 | {
3 | internal static class StaticObject
4 | {
5 | private static bool StaticObjectHasInitialization { get; set; } = false;
6 | internal static bool PreventAccessDefaultAspx { get; private set; } = false;
7 | internal static string ViewPath { get; private set; }
8 | internal static string DefaultRole { get; private set; }
9 | internal static string ViewPlace { get; private set; }
10 | internal static bool UseDefaultController { get; private set; } = false;
11 | internal static string DefaultController { get; private set; }
12 | internal static bool UseSegmentInDefaultController { get; private set; } = false;
13 | internal static bool SetBreakForDefaultController { get; private set; } = false;
14 | internal static char OsDirectorySplitter = OperatingSystem.IsWindows() ? '\\' : '/';
15 | internal static string ErrorPagePathBeforeValue { get; private set; }
16 | internal static string ErrorPagePathAfterValue { get; private set; }
17 | internal static int MaxWebSocketConnectionsPerClient { get; private set; }
18 | internal static int WebSocketBufferSize { get; private set; }
19 | internal static int SseInterval { get; private set; }
20 | internal static int MaxSSEConnectionsPerClient { get; private set; }
21 | internal static bool UseCommentModeForWebFormsCombinate { get; private set; } = false;
22 |
23 | internal static void SetValue()
24 | {
25 | if (StaticObjectHasInitialization)
26 | return;
27 |
28 | CodeBehindOptions options = new CodeBehindOptions();
29 |
30 | if (options.UseDefaultController)
31 | {
32 | DefaultController = options.DefaultController;
33 |
34 | if (options.PutTwoUnderlinesEqualToDashForController)
35 | DefaultController = DefaultController.Replace("__", "-");
36 | if (DefaultController.StartsWith(options.IgnorePrefixController))
37 | DefaultController = DefaultController.Remove(0, options.IgnorePrefixController.Length);
38 | if (DefaultController.EndsWith(options.IgnoreSuffixController))
39 | DefaultController = DefaultController.GetTextBeforeLastValue(options.IgnoreSuffixController);
40 |
41 | DefaultController = (options.AccessControllerByLowerCase || options.JustAccessControllerByLowerCase) ? DefaultController.ToLower() : DefaultController;
42 | }
43 |
44 | PreventAccessDefaultAspx = options.PreventAccessDefaultAspx;
45 | ViewPath = options.ViewPath;
46 | DefaultRole = options.DefaultRole;
47 | ViewPlace = options.WebFormsViewPlace;
48 | UseDefaultController = options.UseDefaultController;
49 | UseSegmentInDefaultController = options.UseSegmentInDefaultController;
50 | SetBreakForDefaultController = options.SetBreakForDefaultController;
51 |
52 | ErrorPagePathBeforeValue = options.ErrorPagePath.GetTextBeforeValue("{value}");
53 | ErrorPagePathAfterValue = options.ErrorPagePath.GetTextAfterValue("{value}");
54 |
55 | MaxWebSocketConnectionsPerClient = options.MaxWebSocketConnectionsPerClient;
56 | WebSocketBufferSize = options.WebSocketBufferSize;
57 |
58 | SseInterval = options.SseInterval;
59 | MaxSSEConnectionsPerClient = options.MaxSSEConnectionsPerClient;
60 | UseCommentModeForWebFormsCombinate = options.UseCommentModeForWebFormsCombinate;
61 |
62 | StaticObjectHasInitialization = true;
63 | }
64 | }
65 | }
66 |
--------------------------------------------------------------------------------
/doc/load_aspx_page_finally_result_in_another_aspx_page.md:
--------------------------------------------------------------------------------
1 | ### Load aspx page finally result in another aspx page
2 |
3 | Before we explain this tutorial, it is necessary to know that the method we are explaining will recreate and execute an instance of the final View class. This is not recommended under normal circumstances.
4 |
5 | Instead, you can use the `LoadPage` method on View pages.
6 |
7 | Example:
8 | ```html
9 | ...
10 |
11 | @LoadPage(/menu/left.aspx, context);
12 |
13 | ...
14 | ```
15 |
16 | The following example shows the power of CodeBehind:
17 |
18 | aspx page (razor syntax)
19 | ```cshtml
20 | @page
21 | @controller YourProjectName.DefaultController
22 | @model YourProjectName.DefaultModel
23 |
24 |
25 |
26 |
27 | @model.PageTitle
28 |
29 |
30 | @model.LeftMenuValue
31 |
53 | <%=model.RightMenuValue%>
54 |
55 |
56 | ```
57 |
58 | Controller class
59 | ```csharp
60 | using CodeBehind;
61 |
62 | namespace YourProjectName
63 | {
64 | public partial class DefaultController : CodeBehindController
65 | {
66 | public void PageLoad(HttpContext context)
67 | {
68 | public DefaultModel model = new DefaultModel();
69 |
70 | model.PageTitle = "My Title";
71 |
72 | CodeBehindExecute execute = new CodeBehindExecute();
73 |
74 | // Add Left Menu Page
75 | model.LeftMenuValue = execute.Run(context, "/menu/left.aspx");
76 |
77 | // Add Right Menu Page
78 | model.RightMenuValue = execute.Run(context, "/menu/right.aspx");
79 |
80 | // Add Main Content Page
81 | model.MainContentValue = execute.Run(context, "/pages/main.aspx");
82 |
83 | View(model);
84 | }
85 | }
86 | }
87 | ```
88 |
89 | Each of the pages left.aspx, right.aspx and main.aspx can also call several other aspx files; these calls can definitely be dynamic and an add-on can be executed that the kernel programmers don't even know about.
90 |
91 | You can also call a page without specifying an HttpContext. You should note that query string and HttpContext data are not supported in this method.
92 |
93 | ```csharp
94 | CodeBehindExecute execute = new CodeBehindExecute();
95 | model.MainContentValue = execute.Run("/pages/main.aspx");
96 | ```
97 |
98 | You can even call pages with query strings.
99 |
100 | ```csharp
101 | model.MainContentValue = execute.Run(context, "/pages/main.aspx?template=1");
102 | ```
103 |
104 | You can also call a path that is determined at runtime and may change over time.
105 |
106 | ```csharp
107 | string MainPage = Pages.GetDefaultPage();
108 | model.MainContentValue = execute.Run(context, MainPage);
109 | ```
110 |
111 | Note: If you have enabled the Rewrite Aspx File To Directory option and the Access Aspx File After Rewrite option is disabled, either you must enter the path argument in the Run method without an extension or use the RunFullPath method instead of the Run method.
112 |
113 | Enjoy CodeBehind, but be careful not to loop the program! (Don't call pages that call the current page)
114 |
--------------------------------------------------------------------------------
/doc/standard_syntax_reference_for_code_behind_framework.md:
--------------------------------------------------------------------------------
1 | ## Standrd syntax reference for CodeBehind framework
2 |
3 | In CodeBehind framework the standrd syntax will also be created in the aspx files and the standrd syntax will be automatically determined from the Razor syntax. In addition, it is not possible to combine standard syntax and Razor syntax.
4 |
5 | The standard syntax in CodeBehind is very similar to the aspx page syntaxes of Microsoft's former Web-Forms in ASP.NET Standard and classic asp pages, but in some cases there may be slight differences.
6 |
7 | **An HTML page combined with standard syntax**
8 | ```aspx
9 | <%@ Page Controller="YourProjectName.DefaultController" Model="YourProjectName.DefaultModel" %>
10 |
11 |
12 |
13 |
14 | <%=model.PageTitle%>
15 |
16 |
17 | <%=model.BodyValue%>
18 |
19 |
20 | ```
21 |
22 | ### Standard syntax
23 |
24 | #### Implicit standard expressions
25 |
26 | Implicit standard expressions start with `<%=` and end with `%>` followed by C# code:
27 | ```aspx
28 |
<%=DateTime.Now%>
29 |
<%=DateTime.IsLeapYear(2024)%>
30 | ```
31 |
32 | #### Code block
33 |
34 | Code block start with `<%` and end with `%>` followed by C# code:
35 |
36 | **Standard syntax example for code block**
37 | ```aspx
38 | <%
39 | string Note = "Elanat CMS was created to be a reliable system in .NET and an honor for .NET programmers and can be compared to other systems under PHP and JAVA.";
40 | %>
41 |
42 |
<%=Note%>
43 | ```
44 |
45 | ### Page attributes in standard syntax
46 |
47 | The CodeBehind framework supports several attributes for view pages. Each of the adjectives are placed between `<%@` and `%>` at the top of the page.
48 |
49 | **Model attribute**
50 |
51 | To determine the model attribute, the model string must be written and then the equals character must be added, and the name of the model class must be placed between the double quotation marks (").
52 |
53 | Example
54 | ```aspx
55 | <%@ page model="YourProjectName.DefaultModel" %>
56 |
57 | ...
58 | ```
59 |
60 | **Controller attribute**
61 |
62 | To determine the controller attribute, the controller string must be written then the equals character must be added, and the name of the controller class must be placed between the double quotation marks (").
63 |
64 | Example
65 | ```aspx
66 | <%@ page controller="YourProjectName.DefaultController" %>
67 |
68 | ...
69 | ```
70 |
71 | **Layout attribute**
72 |
73 | To determine the layout attribute, the layout string must be written and then the equals character must be added, and the path of the layout must be placed between the double quotation marks (").
74 |
75 | Example
76 | ```aspx
77 | <%@ page layout="/main-layout.aspx" %>
78 |
79 | ...
80 | ```
81 |
82 | **Template attribute**
83 |
84 | To determine the template attribute, the template string must be written and then the equals character must be added, and the path of the template must be placed between the double quotation marks (").
85 |
86 | Example
87 | ```aspx
88 | <%@ page template="/templates/template1.aspx" %>
89 |
90 | ...
91 | ```
92 |
93 | **Break attribute**
94 |
95 | To determine the break attribute, the break string must be written and then the equals character must be added, and the true string must be placed between the double quotation marks (").
96 |
97 | Example
98 | ```aspx
99 | <%@ page break="true" %>
100 |
101 | ...
102 | ```
103 |
104 | **Islayout attribute**
105 |
106 | To determine the Islayout attribute, the Islayout string must be written and then the equals character must be added, and the true string must be placed between the double quotation marks (").
107 |
108 | Example
109 | ```aspx
110 | <%@ page islayout="true" %>
111 |
112 | ...
113 | ```
114 |
--------------------------------------------------------------------------------
/doc/simple_and_structured_mvc_in_code_behind.md:
--------------------------------------------------------------------------------
1 | ### Simple and structured MVC in CodeBehind
2 |
3 | ***Note:*** All tutorials are updated based on the latest version of CodeBehind. Avoid installing previous versions and install the latest version. Version 1.0.0 does not support Default.aspx files for directories!
4 |
5 | View File: Default.aspx (razor syntax)
6 | ```aspx
7 | @page
8 | @controller YourProjectName.DefaultController
9 | @model YourProjectName.DefaultModel
10 |
11 |
12 |
13 |
14 | @model.PageTitle
15 |
16 |
17 | @model.BodyValue
18 |
19 |
20 | ```
21 |
22 | View File: Default.aspx (standard syntax)
23 | ```aspx
24 | <%@ Page Controller="YourProjectName.DefaultController" Model="YourProjectName.DefaultModel" %>
25 |
26 |
27 |
28 |
29 | <%=model.PageTitle%>
30 |
31 |
32 | <%=model.BodyValue%>
33 |
34 |
35 | ```
36 |
37 | Model File: Default.aspx.Model.cs
38 | ```csharp
39 | using CodeBehind;
40 |
41 | namespace YourProjectName
42 | {
43 | public partial class DefaultModel : CodeBehindModel
44 | {
45 | public string PageTitle { get; set; }
46 | public string BodyValue { get; set; }
47 | }
48 | }
49 | ```
50 |
51 | Controler File: Default.aspx.Controller.cs
52 | ```csharp
53 | using CodeBehind;
54 |
55 | namespace YourProjectName
56 | {
57 | public partial class DefaultController : CodeBehindController
58 | {
59 | public DefaultModel model = new DefaultModel();
60 | public void PageLoad(HttpContext context)
61 | {
62 | model.PageTitle = "My Title";
63 | model.BodyValue = "HTML Body";
64 | View(model);
65 | }
66 | }
67 | }
68 | ```
69 |
70 | CodeBehind Configure in ASP.NET Core
71 | Program File: Program.cs
72 | ```diff
73 | var builder = WebApplication.CreateBuilder(args);
74 |
75 | var app = builder.Build();
76 |
77 | SetCodeBehind.CodeBehindCompiler.Initialization();
78 |
79 | app.UseCodeBehind();
80 |
81 | app.Run();
82 | ```
83 |
84 | If you enter the value true in SetCodeBehind.CodeBehindCompiler.Initialization(), as long as the CodeBehindLastSuccessCompiled.dll.tmp file exists next to the main dll files of the program, recompilation will not be done. Doing this makes the response speed of the requests high after the first request since the program goes to sleep.
85 |
86 | ```csharp
87 | SetCodeBehind.CodeBehindCompiler.Initialization(true);
88 | ```
89 |
90 | Note : If you configure the Program.cs class like this, any changes in the aspx files, or adding new web parts or removing web parts, requires deleting the CodeBehindLastSuccessCompiled.dll.tmp file.
91 |
92 | You can use the Write method in the model and controller classes; the Write method adds a string value to the ResponseText attribute; you can also change the values of the ResponseText attribute by accessing them directly.
93 |
94 | In the controller class, there is an attribute named IgnoreViewAndModel attribute, and if you activate the IgnoreViewAndModel attribute, it will ignore the values of model and view and you will only see a blank page; this feature allows you to display the values you need to the user and avoid multiple redirects and transfers.
95 |
96 |
97 | Note: If you have set the name of a model in the aspx file, You must make sure to call View(ModelName) in the controller class at the end of the method or set the value of IgnoreViewAndModel to true.
98 |
99 | you can determine the path of a view in the controller through the View method; this will make the current view not run and the new view will be called; of course, the new view can still include the new controller and model.
100 |
101 | `View("/page1.aspx");`
102 |
103 | Changing the view in the controller allows you to create headless systems.
104 |
--------------------------------------------------------------------------------
/class/Library.cs:
--------------------------------------------------------------------------------
1 | namespace CodeBehind
2 | {
3 | public class ValueCollectionLock
4 | {
5 | private string[] ValueList;
6 | private bool Lock = false;
7 |
8 | public ValueCollectionLock()
9 | {
10 |
11 | }
12 |
13 | public ValueCollectionLock(string AspxPagePath, string RequestPath, bool RewriteAspxFileToDirectory, bool IgnoreDefaultAfterRewrite)
14 | {
15 | string Segments = RequestPath;
16 |
17 | Segments = Segments.GetTextBeforeValue("?");
18 |
19 | if (StaticObject.PreventAccessDefaultAspx && Segments.EndsWith("/Default.aspx"))
20 | Segments = Segments.GetTextBeforeLastValue("/Default.aspx");
21 |
22 | if (string.IsNullOrEmpty(Segments))
23 | return;
24 |
25 | if (Segments.StartsWith(AspxPagePath))
26 | Segments = Segments.Remove(0, AspxPagePath.Length);
27 | else if (Segments.StartsWith(AspxPagePath.GetTextBeforeValue(".aspx") + "/") && RewriteAspxFileToDirectory && !IgnoreDefaultAfterRewrite)
28 | Segments = Segments.Remove(0, AspxPagePath.GetTextBeforeValue(".aspx").Length);
29 | else if (Segments.StartsWith(AspxPagePath.GetTextBeforeValue("/Default.aspx")))
30 | Segments = Segments.Remove(0, AspxPagePath.GetTextBeforeValue("/Default.aspx").Length);
31 | else if (Segments.StartsWith(AspxPagePath.GetTextBeforeValue(".aspx")))
32 | {
33 | if (RewriteAspxFileToDirectory)
34 | if (!(IgnoreDefaultAfterRewrite && AspxPagePath.EndsWith("/Default.aspx")))
35 | Segments = Segments.Remove(0, AspxPagePath.GetTextBeforeValue(".aspx").Length);
36 | }
37 | else
38 | return;
39 |
40 |
41 | if (Segments.Length == 0)
42 | return;
43 |
44 | if (Segments[0] != '/')
45 | return;
46 |
47 | if (Segments == "/Default" && RewriteAspxFileToDirectory && !IgnoreDefaultAfterRewrite)
48 | return;
49 |
50 | Segments = Segments.Remove(0, 1);
51 |
52 | ValueList = Segments.Split("/");
53 |
54 | Lock = true;
55 | }
56 |
57 | public bool Exist(string Name)
58 | {
59 | if (!Lock)
60 | return false;
61 |
62 | if (ValueList == null)
63 | return false;
64 |
65 | for (int i = 0; i < ValueList.Length; i++)
66 | {
67 | if (ValueList[i] == Name)
68 | return true;
69 | }
70 |
71 | return false;
72 | }
73 |
74 | ///
75 | /// This Method Only Accepts Data For One Time And Ignores The Next Times.
76 | ///
77 | public void AddList(string[] ValueList)
78 | {
79 | if (Lock)
80 | return;
81 |
82 | this.ValueList = ValueList;
83 |
84 | Lock = true;
85 | }
86 |
87 | public string GetValue(int id)
88 | {
89 | if (!Lock)
90 | return "";
91 |
92 | if (ValueList == null)
93 | return "";
94 |
95 | if (id >= ValueList.Length)
96 | return "";
97 |
98 | return ValueList[id];
99 | }
100 |
101 | public string GetDecodeValue(int id)
102 | {
103 | return System.Web.HttpUtility.UrlDecode(GetValue(id));
104 | }
105 |
106 | public int Count()
107 | {
108 | if (!Lock)
109 | return 0;
110 |
111 | if (ValueList == null)
112 | return 0;
113 |
114 | return ValueList.Length;
115 | }
116 |
117 | public string[] GetList()
118 | {
119 | return ValueList;
120 | }
121 | }
122 | }
123 |
--------------------------------------------------------------------------------
/doc/route_configuration.md:
--------------------------------------------------------------------------------
1 | ## Route configuration
2 |
3 | CodeBehind is created based on a unique MVC architecture where there is no need to configure the Controller in the Route. In this architecture, the Controller is determined like a Model in the View pages, then the requests process first reach the View and the View creates an instance of the Controller class.
4 |
5 | Because some developers may still be interested in configuring the Controller in the Route, it is still possible to configure the Controller in the Route within the CodeBehind framework.
6 |
7 | Compared to ASP.NET Core, the CodeBehind framework provides a dynamic and modular configuration Controller in route.
8 |
9 | Example:
10 |
11 | Route configuration in the CodeBehind framework
12 | ```csharp
13 | var builder = WebApplication.CreateBuilder(args);
14 |
15 | var app = builder.Build();
16 |
17 | SetCodeBehind.CodeBehindCompiler.Initialization();
18 |
19 | app.Run(async context =>
20 | {
21 | CodeBehind.CodeBehindExecute execute = new CodeBehind.CodeBehindExecute();
22 | await context.Response.WriteAsync(execute.RunRoute(context, 0));
23 | });
24 |
25 | app.Run();
26 | ```
27 |
28 | The code above shows the Route configuration in the CodeBehind framework in the `Program.cs` class. The `RunRoute` method takes two arguments. The first argument is the context and the second is the section that specifies the Controller.
29 |
30 | Note: Section means the strings between slash characters.
31 | Example: `example.com/section0/section1/section2`
32 |
33 | If we set the section value to 0, if there is a Controller with the same name as the value of the first section, the `RunRoute` method will execute the Controller.
34 |
35 | Example:
36 |
37 | CodeBehind Controller
38 | ```csharp
39 | using CodeBehind;
40 |
41 | namespace YourProjectName
42 | {
43 | public partial class home : CodeBehindController
44 | {
45 | public void PageLoad(HttpContext context)
46 | {
47 | Write("Route work fine");
48 | }
49 | }
50 | }
51 | ```
52 |
53 | > Note: When the Controller is executed, the sections are created after the Controller path.
54 |
55 | According to the Controller class above, if the path `example.com/home` is requested, the Controller class above is executed and the `Route work fine` string is returned.
56 |
57 | If the name of the Controller class matches the section in the url, Regardless of the namespace, the Controller class is executed.
58 |
59 | The Controller class name is case sensitive. Therefore, the path `example.com/Home` cannot execute the Controller with the class name home.
60 |
61 | This process is modular, so if you have an external dll that contains the Controller class of the CodeBehind framework, you can copy it to `wwwroot/bin` to call the Controller class.
62 |
63 | Unlike the weak default structure of MVC in ASP.NET Core, the process of executing the Controller is dynamic and there is no need to create methods with `IActionResult` output; as a result, instead of a hard connection and full dependency, you will have a loose connection and little dependency.
64 |
65 | Example:
66 |
67 | Dynamic Controller in CodeBehind
68 | ```csharp
69 | using CodeBehind;
70 |
71 | namespace YourProjectName
72 | {
73 | public partial class home : CodeBehindController
74 | {
75 | public void PageLoad(HttpContext context)
76 | {
77 | if (Section.Count() == 0)
78 | {
79 | Write("This is main page");
80 | return;
81 | }
82 |
83 | switch (Section.GetValue(0))
84 | {
85 | case "first": View("/page1.aspx"); break;
86 | case "second": View("/page2.aspx"); break;
87 | case "third": View("/page3.aspx"); break;
88 | case "fourth": View("/page4.aspx"); break;
89 | }
90 | }
91 | }
92 | }
93 | ```
94 |
95 | The code above shows a Controller that returns the string `This is main page` if there is no section. If there is section named first, second, third, and fourth is requested after the main path, the pages `page1.aspx`, `page2.aspx`, `page3.aspx` and `page4.aspx` will be returned respectively.
96 |
97 | Example:
98 |
99 | Requesting `example.com/main/first` returns the page `page1.aspx`.
100 |
--------------------------------------------------------------------------------
/doc/using_web_forms.md:
--------------------------------------------------------------------------------
1 | ## Using Web-Forms
2 |
3 | WebForms are a new technology in the CodeBehind framework. Web-Forms allow developers to easily manage HTML tags on the server side. To create this new technology, a library called [WebFormsJS](https://github.com/elanatframework/Web_forms) has been created.
4 |
5 | WebFormsJS is a JavaScript library that provides the infrastructure for interacting with web controls in the CodeBehind framework. WebFormsJS has a two-way communication with the CodeBehind framework. The communication between the two is done automatically based on a new protocol.
6 |
7 | Using WebFormsJS allows the developers to focus on the server response and therefore there is no need to develop the front side and the developers set the controls on the server-side. WebFormsJS can also be used outside of the CodeBehind framework.
8 |
9 | The bandwidth consumption when using WebFormsJS is very low. WebFormsJS is like a gasoline car that absorbs carbon pollution as much as it pollutes the air.
10 |
11 | Advantages of using WebFormsJS:
12 |
13 | - WebFormsJS provides features like postback, progress bar and script extraction.
14 | - WebForms is an advanced system that can be run with simple HTML pages without View or server script pages.
15 | - WebFormsJS automatically sends form data through Ajax. WebFormsJS serializes form data as a string or a FormData object, depending on whether the form is multipart or not.
16 | - Using WebFormsJS reduces the complexity of web development.
17 |
18 | ### How to use Web-Forms in CodeBehind framework
19 |
20 | We create a new View in which there is an input of select type; we want to add new option values in select, so we put two textbox input for the name and value of the new option in the View, and we also create a checkbox input for whether the new option is selected or not in this View.
21 |
22 | View (Form.aspx)
23 | ```html
24 | @page
25 | @controller FormController
26 |
27 |
28 |
29 |
30 | Send Form Data
31 |
32 |
33 |
34 |
57 |
58 |
59 | ```
60 |
61 | We first activate the `IgnoreViewAndModel` attribute; by doing this, we prevent the View page from returning. Then we create an instance of the `WebForms` class and add a new value in the drop-down list according to the values sent through the Form method. Finally, we must place the created instance of the `WebForms` class inside the `Control` method.
62 |
63 | Controller (FormController)
64 | ```csharp
65 | using CodeBehind;
66 |
67 | public partial class FormController : CodeBehindController
68 | {
69 | public void PageLoad(HttpContext context)
70 | {
71 | if (!string.IsNullOrEmpty(context.Request.Form["btn_Button"]))
72 | btn_Button_Click(context);
73 | }
74 |
75 | private void btn_Button_Click(HttpContext context)
76 | {
77 | IgnoreViewAndModel = true;
78 |
79 | Random rand = new Random();
80 | string RandomColor = "#" + rand.Next(16).ToString("X") + rand.Next(16).ToString("X") + rand.Next(16).ToString("X") + rand.Next(16).ToString("X") + rand.Next(16).ToString("X") + rand.Next(16).ToString("X");
81 |
82 | WebForms Form = new WebForms();
83 |
84 | string SelectValue = context.Request.Form["txt_SelectValue"];
85 | string SelectName = context.Request.Form["txt_SelectName"];
86 | bool SelectIsChecked = context.Request.Form["cbx_SelectIsSelected"] == "on";
87 |
88 | Form.AddOptionTag(InputPlace.Id("ddlst_Select"), SelectName, SelectValue, SelectIsChecked);
89 | Form.SetBackgroundColor(InputPlace.Tag("body"), RandomColor);
90 |
91 | Control(Form);
92 | }
93 | }
94 | ```
95 |
96 | Each time the button is clicked, new values are added to the drop-down list and the background changes to a random color.
97 |
98 | This is a simple example of CodeBehind framework interaction with WebFormsJS.
99 |
--------------------------------------------------------------------------------
/doc/layout.md:
--------------------------------------------------------------------------------
1 | ## Layout
2 | A layout is a top-level template for views in an application, which defines a common layout for pages, providing a consistent user experience as users navigate between pages. Layouts are particularly useful for web applications with shared UI elements, such as headers, navigation menus, and footers. By using layouts, you can reduce duplicate code in views and maintain a consistent look and feel across multiple pages in your application.
3 |
4 | Layout page (layout.aspx) (Razor syntax)
5 | ```cshtml
6 | @page
7 | @islayout
8 |
9 |
10 |
11 | @ViewData.GetValue("title")
12 |
13 |
14 | @PageReturnValue
15 |
16 |
17 | ```
18 |
19 | In the example above, an aspx file (layout.aspx) has been added to the project in the wwwroot path.
20 | Here we have specified that this page is a layout by adding the `@islayout` variable to the page attributes section. `PageReturnValue` variable will add final values from aspx files in which this layout is introduced. Between the title tags, there is a NameValueCollection attribute (`ViewData`) that all aspx files have access to.
21 |
22 | View (hello-world.aspx) (Razor syntax)
23 | ```cshtml
24 | @page
25 | @layout "/layout.aspx"
26 | @{
27 | string HelloWorld = "Hello CodeBehind framework!";
28 | ViewData.Add("title", "Hello World!");
29 | }
30 |
31 |
Text value is: @HelloWorld
32 |
33 | ```
34 |
35 | The above example shows an aspx file (hello-world.aspx) in which a layout is introduced.
36 | On this page, `@layout` and the text inside the double quotes indicate that the page has a layout in the path wwwroot/layout.aspx. According to the above codes, a NameValue is added to the ViewData attribute with the name title and the value Hello World!.
37 |
38 | Result in hello-world.aspx path
39 | ```cshtml
40 |
41 |
42 |
43 | Hello World!
44 |
45 |
46 |
47 |
Text value is: Hello CodeBehind framework!
48 |
49 |
50 |
51 | ```
52 |
53 | As you can see, the above result is obtained by calling the hello-world.aspx path.
54 |
55 | Note: The name value in ViewData is case sensitive.
56 |
57 | You can add other pages in the view section.
58 |
59 | Layout page (layout.aspx) (Razor syntax)
60 | ```cshtml
61 | @page
62 | @islayout
63 |
64 |
65 |
66 | @ViewData.GetValue("title")
67 |
68 |
69 | @LoadPage("/header.aspx")
70 | @PageReturnValue
71 |
72 |
73 | ```
74 |
75 | According to the above code, only one LoadPage function has been added to the previous example.
76 |
77 | The `LoadPage("/header.aspx")` function also adds a page at the path `wwwroot/header.aspx` to the same section.
78 |
79 | Please note that if you want to access the HttpContet in the header.aspx file, you must write a method similar to the following:
80 | `@LoadPage("/header.aspx", context)`
81 |
82 | Header page (header.aspx) (Razor syntax)
83 | ```cshtml
84 | @page
85 | @break
86 | @{
87 | string WebsiteName = "My Company";
88 | }
89 |
90 | Website name: @WebsiteName
91 |
92 |
93 | ```
94 |
95 | The header file is clear in the example above. The presence of the `@break` attribute means that the page will no longer be directly accessible. This file cannot be accessed in the browser.
96 |
97 | Result in hello-world.aspx path
98 | ```html
99 |
100 |
101 |
102 | Hello World!
103 |
104 |
105 |
106 | Website name: My Company
107 |
108 |
109 |
110 |
Text value is: Hello CodeBehind framework!
111 |
112 |
113 |
114 | ```
115 |
116 | As you can see, the output of the header.aspx file is added to the output of the hello-world.aspx file.
117 |
118 | **you can use standard syntax for layout**
119 |
120 | Layout page (layout.aspx) (standard syntax)
121 | ```html
122 | <%@ Page IsLayout="true" %>
123 |
124 |
125 |
126 | <%=ViewData.GetValue("title")%>
127 |
128 |
129 | <%=LoadPage("/header.aspx")%>
130 | <%=PageReturnValue%>
131 |
132 |
133 | ```
134 |
135 | View (standard syntax)
136 | ```html
137 | <%@ Page Layout="/layout.aspx" %>
138 | <%
139 | string HelloWorld = "Hello CodeBehind framework!";
140 | ViewData.Add("title", "Hello World!");
141 | %>
142 |
143 |
Text value is: <%=HelloWorld%>
144 |
145 | ```
146 |
147 | Header page (header.aspx) (standard syntax)
148 | ```html
149 | <%@ Page Break="true" %>
150 | <% string WebsiteName = "My Company"; %>
151 |
152 | Website name: <%=WebsiteName%>
153 |
154 |
155 | ```
156 |
--------------------------------------------------------------------------------
/doc/how_to_create_dynamic_middleware_by_code_behind_framework.md:
--------------------------------------------------------------------------------
1 | ## How to create dynamic middleware system by CodeBehind framework?
2 |
3 | ### Dynamic middleware after request and before response
4 |
5 | First, create an xml file (or json or ini or etc) similar to the following file:
6 | ```xml
7 |
8 |
9 |
10 |
11 |
12 |
13 | btn_Login=
14 |
15 |
16 |
17 |
18 | btn_Login=
19 |
20 |
21 |
22 |
23 | btn_Login=
24 |
25 |
26 |
27 |
28 | btn_Login=
29 |
30 |
31 |
32 |
33 | btn_Search=
34 |
35 |
36 |
37 |
38 | btn_Search=
39 |
40 |
41 |
42 |
43 |
44 |
45 | ```
46 |
47 | You can control the url paths before execution. The above example shows that you can execute aspx pages before executing the route and deny access to the routes or change or add to the output hypertext. The first reference in the xml file above shows that there is a restriction to enter the login page; every time the user clicks on the login button, the aspx page is executed and the number of login attempts is reduced by one from the session; if this value becomes 0, it will not allow entry.
48 |
49 | you can run the BeforeLoadPathReference method in the Run method in the builder (before execute page) located in the Program.cs class.
50 |
51 | ```diff
52 | app.Run(async context =>
53 | {
54 | + BeforeLoadPathReference.Run(context);
55 |
56 | CodeBehindExecute execute = new CodeBehindExecute();
57 | await context.Response.WriteAsync(execute.Run(context));
58 | await context.Response.CompleteAsync();
59 | });
60 | ```
61 |
62 | ### Dynamic middleware after response
63 |
64 | First, create an xml file (or json or ini or etc) similar to the following file:
65 | ```xml
66 |
67 |
68 |
69 |
70 |
71 |
72 | /upload/attachment/
73 |
74 |
75 |
76 |
77 |
78 |
79 | ```
80 |
81 | You also have the possibility to control the url paths after execution. The example above shows that you can run aspx pages after running the route. In the xml file above, you can see that after the requests, an aspx page is executed in the upload/attachment path, and if the path is an existing file in the path and database, the download value of the attachment file in the database is added by one number.
82 |
83 | you can run the AfterLoadPathReference method in the Run method in the builder (before execute page) located in the Program.cs class.
84 |
85 | ```diff
86 | app.Run(async context =>
87 | {
88 | CodeBehindExecute execute = new CodeBehindExecute();
89 | await context.Response.WriteAsync(execute.Run(context));
90 |
91 | + AfterLoadPathReference.Run(context);
92 |
93 | await context.Response.CompleteAsync();
94 | });
95 | ```
96 |
--------------------------------------------------------------------------------
/doc/modularity_in_the_default_mode.md:
--------------------------------------------------------------------------------
1 | ## Modularity in the default mode
2 |
3 | In this tutorial, we want to teach how to add a module to the project compiled under the CodeBehind framework.
4 |
5 | We first explain the concept of a module, then teach how to create a module in a project built using the CodeBehind framework.
6 |
7 | Note: Any project built with the CodeBehind framework is a modular system in itself.
8 |
9 | What is the concept of the module according to the [Elanat team](https://elanat.net)?
10 | >Any interpreted programming language used on the server side is itself modular. That is, it is enough to copy executable files (py, php, rb, etc.) and other files (css, js, image, etc.) to the current project; A set of executable files and other related files are a module. In compiled programming languages or compiled frameworks such as C++, Java and .NET, creating a modular system is complex. Back-end framework developers should provide solutions for creating a modular system for web-based system developers.
11 |
12 | **How does the modular structure of the CodeBehind framework work?**
13 |
14 | You can understand this theoretically by referring to the link below.
15 |
16 | [Web part in CodeBehind](https://github.com/elanatframework/Code_behind/blob/elanat_framework/doc/web_part_in_code_behind.md)
17 |
18 | But let us show this matter in a practical way with an example.
19 |
20 | ### Steps to create the main project
21 |
22 | **Step 1:** First, in Visual Studio, we create a new empty project under ASP.NET Core version 7.0.
23 |
24 | **Step 2:** We install the latest version of CodeBehind framework through NuGet packages.
25 |
26 | **Step 3:** Configure the Program.cs class as follows.
27 | ```csharp
28 | var builder = WebApplication.CreateBuilder(args);
29 |
30 | var app = builder.Build();
31 |
32 | SetCodeBehind.CodeBehindCompiler.Initialization();
33 |
34 | app.UseCodeBehind();
35 |
36 | app.Run();
37 | ```
38 |
39 | **Step 4:** Run the project to add the default pages.
40 |
41 | When you run a project configured under CodeBehind for the first time, default execution pages will be built into it. The image below is a screenshot of the main page.
42 |
43 | 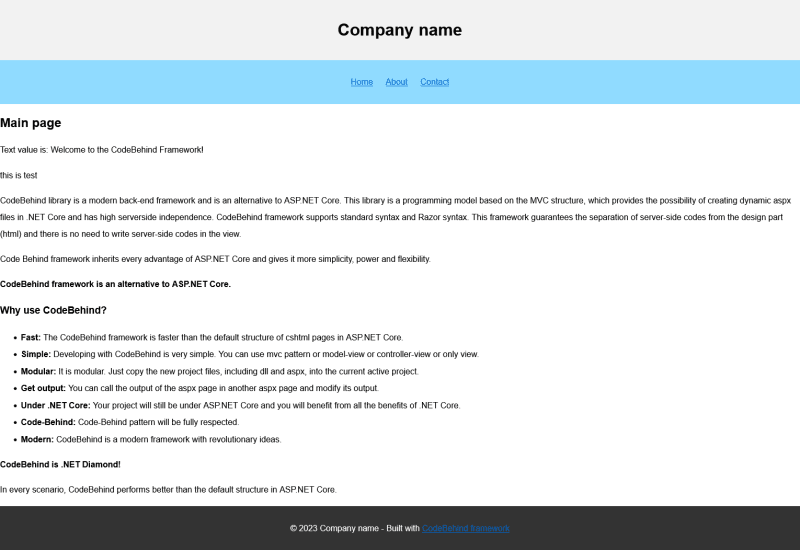
44 |
45 | **Step 5:** Open the `layout.aspx` file in the `wwwroot` path for editing and set the about page link as below.
46 | ```html
47 |
48 | ```
49 |
50 | ### Steps to create a module project
51 |
52 | **Step 1:** First, in Visual Studio, we create a new empty project under ASP.NET Core version 7.0.
53 |
54 | **Step 2:** We install the latest version of CodeBehind framework through NuGet packages.
55 |
56 | **Step 3:** Configure the Program.cs class as follows.
57 |
58 | ```csharp
59 | var builder = WebApplication.CreateBuilder(args);
60 |
61 | var app = builder.Build();
62 |
63 | app.Run();
64 | ```
65 |
66 | **Step 4:** Create a D`efault.aspx` file in `wwwroot/about` path and add the following values to it.
67 |
68 | ```html
69 | @page
70 | @layout "/layout.aspx"
71 | @controller ModuleProject.AboutController
72 |
An "About Us" page is a section on a website that provides information about a company, organization, or individual. It is an opportunity to tell the brand’s story, share its vision, history, values, and achievements, and introduce team members. The primary purpose of an About Us page is to inform the reader about the company and its operations, and it is also used to build trust and credibility with customers. This page is where site users go to learn more about the site they’re on, and it is helpful to define the audience for whom the page is being written, such as first-time visitors and regular users.
73 | ```
74 |
75 | **Step 5:** We add a new controller class with the following values in the project.
76 |
77 | ```csharp
78 | using CodeBehind;
79 |
80 | namespace ModuleProject
81 | {
82 | public partial class AboutController : CodeBehindController
83 | {
84 | public void PageLoad(HttpContext context)
85 | {
86 | ViewData.Add("title", "About page");
87 | }
88 | }
89 | }
90 | ```
91 |
92 | **Step 6:** We publish the project.
93 |
94 | ### Steps to add the module project to the main project
95 |
96 | **Step 1:** Copy the `Default.aspx` file from the module project to `wwwroot/about` in the main project.
97 |
98 | **Step 2:** We copy the DLL file of the module project to `wwwroot/bin` path in the main project.
99 |
100 | 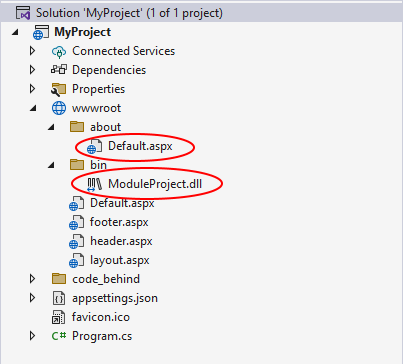
101 |
102 | **This is just an example! Please note that you can add the module project files in the web server and the result will be the same. For more practice, you can put the main project on the web server and then add the `Default.aspx` and DLL files related to the module project in the web server and see the result.**
103 |
104 | **Step 3:** We run the main project and click on the about link.
105 |
106 | The image below is a screenshot of the About page.
107 |
108 | 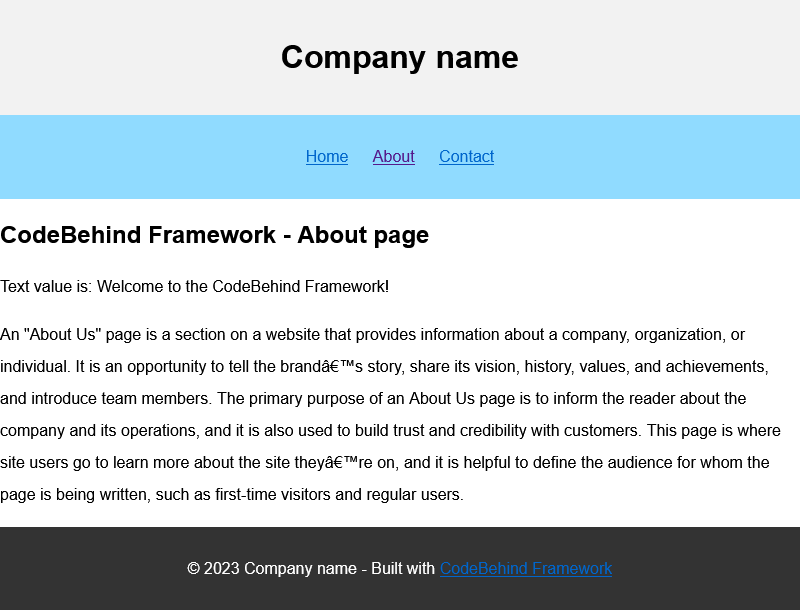
109 |
110 | > Note: Please note that the CodeBehind framework version of the new module project must be equal or lower than the CodeBehind version of the main project.
111 |
112 | As you can see, we introduced the modular structure of the powerful CodeBehind framework in practice.
113 |
--------------------------------------------------------------------------------
/doc/controller_class_constructor_and_model_class_constructor.md:
--------------------------------------------------------------------------------
1 | ## Controller class constructor and Model class constructor
2 |
3 | The constructor of the Controller class and the Model class has nothing to do with the CodeBehind constructor.
4 |
5 | Before we explain the details about the constructor of the Controller class and the Model class, we must say that the constructor of the Controller class and the Model class has nothing to do with the CodeBehind constructor.
6 |
7 | Please read the following article about the CodeBehind constructor:
8 | [CodeBehind Constructor](https://github.com/elanatframework/Code_behind/blob/elanat_framework/doc/constructor_method.md)
9 |
10 | As you know, in the modern MVC architecture in the CodeBehind framework, there is no need to configure the Controller in the Route, and the requests reach the View first. Now, in the CodeBehind framework, a possibility has been added to be able to set values of Controller classes and Model classes in the constructor methods of the View.
11 |
12 | Example
13 |
14 | View (Default.aspx)
15 | ```html
16 | @page
17 | @controller MyController()
18 | @controllerconstructor(context.Request.Form)
19 |
20 |
21 |
22 |
23 | Controller class constructor
24 |
25 |
26 |
32 |
33 |
34 | ```
35 |
36 | The HTML code above is a CodeBehind Framework View page that has a button that submits a textbox. The `@controllerconstructor` variable passes the `context.Request.Form` value to the constructor of the Controller class.
37 |
38 | Controller
39 | ```csharp
40 | using CodeBehind;
41 |
42 | public partial class MyController : CodeBehindController
43 | {
44 | private readonly IFormCollection _Form;
45 |
46 | public MyController(IFormCollection Form = null)
47 | {
48 | _Form = Form;
49 | }
50 |
51 | public void CodeBehindConstructor()
52 | {
53 | if (!string.IsNullOrEmpty(_Form["btn_Button"]))
54 | btn_Button_Click();
55 | }
56 |
57 | private void btn_Button_Click()
58 | {
59 | string TextBoxValue = _Form["txt_TextBox"];
60 |
61 | Write(TextBoxValue);
62 |
63 | IgnoreViewAndModel = true;
64 | }
65 | }
66 | ```
67 |
68 | The `MyController` class has a constructor that accepts an `IFrmCollection` object that is used to access form data. When the Controller is called, the `_Form` field, which is private and read-only, is initialized in the constructor method of `MyController`.
69 |
70 | The `_Form` field is initialized with the `context.Request.Form` input argument from the View page. This is a dependency injection.
71 |
72 | The `CodeBehindConstructor` method is called when the page loads and checks if the button has been clicked. If the button is clicked, it calls the `btn_Button_Click` method, which reads the value of the text box and writes it to the page. The `IgnoreViewAndModel` property is set to true, which clears the contents of the View page and displays only the textbox string in the output.
73 |
74 | > Note: Considering that in the CodeBehind framework it is possible to configure the Controller in the Route and also to call a controller, the controller class must have a constructor without arguments. For this reason, we set the IFormCollection parameter in the constructor method equal to null; of course, we can also create a constructor class without arguments value (`public MyController()`).
75 |
76 | ### Define constructor method class by Attribute in View
77 |
78 | You can call constructor method of Controller class and Model class on View pages.
79 |
80 | **Razor syntax**
81 |
82 | To call the constructor method of the Controller class in View, the string `@controllerconstructor` must be written and then the input arguments should be placed between parentheses.
83 |
84 | Example:
85 | `@controllerconstructor(26, "my text", 'c')`
86 |
87 | To call the constructor method of the Controller class in View, the string `@modelconstructor` must be written and then the input arguments should be placed between parentheses.
88 |
89 | Example:
90 | `@modelconstructor(26, "my text", 'c')`
91 |
92 | **Standard syntax**
93 |
94 | To call the constructor method of the Controller class in View, the `controllerconstructor` string must be written then the equals character must be added, and the input arguments should be placed between parentheses and must be placed between the double quotation marks (`"`). If the input arguments contain quotation marks (`"`), you must use the code `"` instead of the quotation marks.
95 |
96 | Example:
97 | `<%@ page ... controllerconstructor="(26, "my text", 'c')" ... %>`
98 |
99 | To call the constructor method of the Model class in View, the `modelconstructor` string must be written then the equals character must be added, and the input arguments should be placed between parentheses and must be placed between the double quotation marks (`"`). If the input arguments contain quotation marks (`"`), you must use the code `"` instead of the quotation marks.
100 |
101 | Example:
102 | `<%@ page ... modelconstructor="(26, "my text", 'c')" ... %>`
103 |
104 | > Note: The constructor method of the Model is only available when you follow the Model-View pattern; otherwise is will not be available.
105 |
--------------------------------------------------------------------------------
/doc/razor_syntax_reference_for_code_behind_framework.md:
--------------------------------------------------------------------------------
1 | ## Razor syntax reference for CodeBehind framework
2 |
3 | In CodeBehind framework the Razor syntax will also be created in the aspx files and the Razor syntax will be automatically determined from the standard syntax. In addition, it is not possible to combine Razor syntax and standard syntax.
4 |
5 | Razor syntax in CodeBehind is very similar to Razor syntax in cshtml pages in .NET Core, but in some cases there may be slight differences. Also note that if there is an error in aspx pages that are created with Razor syntax, it is different from Razor syntax errors in .NET Core cshtml pages. The Elanat team doesn't know the Microsoft approach, and the support for Razor pages in CodeBehind was created from the ground up by the Elanat team.
6 |
7 | **An HTML page combined with Razor syntax**
8 | ```cshtml
9 | @page
10 | @controller YourProjectName.DefaultController
11 | @model YourProjectName.DefaultModel
12 |
13 |
14 |
15 |
16 | @model.PageTitle
17 |
18 |
19 | @model.BodyValue
20 |
21 |
22 | ```
23 |
24 | ### Razor syntax
25 |
26 | **Escape Razor syntax**
27 |
28 | To escape the @ symbol in Razor markup, use a second @ symbol:
29 | ```cshtml
30 |
@@user
31 | ```
32 |
33 | The above code will be displayed as follows after compilation:
34 | ```cshtml
35 |
@user
36 | ```
37 |
38 | **Email**
39 |
40 | If the characters before and after the @ symbol are letters or numbers, it is not considered as syntax. So the email remains intact:
41 | ```cshtml
42 |
Example of an email: yourname@example.com
43 | ```
44 |
45 | ### Implicit Razor expressions
46 |
47 | Implicit Razor expressions start with @ followed by C# code:
48 | ```cshtml
49 |
@DateTime.Now
50 |
@DateTime.IsLeapYear(2024)
51 | ```
52 |
53 | ### Razor syntax determination
54 |
55 | To determine the razor syntax in aspx pages, there must be @page at the beginning of the page.
56 |
57 | Example
58 |
59 | ```diff
60 | +@page
61 |
62 | ...
63 | ```
64 |
65 | ### Page attributes in Razor syntax
66 |
67 | The CodeBehind framework supports several attributes for view pages. Each of the adjectives are placed at the top of the page. Page attributes and their values must be specified on one line only.
68 |
69 | **Model attribute**
70 |
71 | To specify the model attribute, the string @model must be written and then added after the space character of the model class.
72 |
73 | Example
74 | ```diff
75 | @page
76 | +@model YourProjectName.DefaultModel
77 |
78 | ...
79 | ```
80 |
81 | **Controller attribute**
82 |
83 | To specify the controller attribute, the string @controller must be written and then added after the space character of the controller class.
84 |
85 | Example
86 | ```diff
87 | @page
88 | +@controller YourProjectName.DefaultController
89 |
90 | ...
91 | ```
92 |
93 | **Layout attribute**
94 |
95 | To specify the layout attribute, the string @layout must be written, and then after the space character, the path of the layout file should be placed between two double quotes.
96 |
97 | Example
98 | ```diff
99 | @page
100 | +@layout "/main-layout.aspx"
101 |
102 | ...
103 | ```
104 |
105 | **Template attribute**
106 |
107 | To specify the template attribute, the string @template must be written, and then after the space character, the path of the template file should be placed between two double quotes.
108 |
109 | Example
110 | ```diff
111 | @page
112 | +@template "/templates/template1.aspx"
113 |
114 | ...
115 | ```
116 |
117 | **Break attribute**
118 |
119 | To specify the break attribute, only the string @break should be written.
120 |
121 | Example
122 | ```diff
123 | @page
124 | +@break
125 |
126 | ...
127 | ```
128 |
129 | **Islayout attribute**
130 |
131 | To specify the islayout attribute, only the string @islayout should be written.
132 |
133 | Example
134 | ```diff
135 | @page
136 | +@islayout
137 |
138 | ...
139 | ```
140 |
141 | ### Code block
142 |
143 | Code block start with `@{` and end with `}` followed by C# code:
144 |
145 | **Razor syntax example for code block**
146 | ```cshtml
147 | @{
148 | string Note = "Elanat CMS was created to be a reliable system in .NET and an honor for .NET programmers and can be compared to other systems under PHP and JAVA.";
149 | }
150 |
151 |
164 | }
165 | ```
166 |
167 | ### Special cases
168 |
169 | **Escape apostrophe**
170 |
171 | Note: If you use quote ('), double quote ("), and backtick (`) characters, you must either re-use these characters before reaching the closing bracket (}), or write the closing bracket on a lower line, or the closing bracket should end on the next line.
172 |
173 | ```cshtml
174 | @if (IsTrue)
175 | {
176 |
You don't do it.
}bold text
177 | ```
178 |
179 | In the code above, there is a character quote (') and closing bracket (}) is closed in the same line. After that, the html character is written; the above code may give an unexpected error, so it should be written as below.
180 |
181 | ```cshtml
182 | @if (IsTrue)
183 | {
184 |
You don't do it.
185 | }
186 | bold text
187 | ```
188 |
189 | Note: You cannot code in conditional blocks and loops in default cshtml pages in ASP.NET Core, but in the CodeBehind framework you will be allowed to code; therefore, for JavaScript codes, it is necessary to use @ and : characters before each character at the beginning of the lines.
190 |
--------------------------------------------------------------------------------
/doc/dynamic_model.md:
--------------------------------------------------------------------------------
1 | ## Dynamic Model
2 |
3 | In this tutorial, we want to teach you how to create a dynamic Model in the CodeBehind framework.
4 |
5 | This is the MVC example that we usually use to describe the CodeBehind framework:
6 |
7 | View File: Default.aspx (razor syntax)
8 | ```html
9 | @page
10 | @controller YourProjectName.DefaultController
11 | @model {YourProjectName.DefaultModel}
12 |
13 |
14 |
15 |
16 | @model.PageTitle
17 |
18 |
19 | @model.BodyValue
20 |
21 |
22 | ```
23 |
24 | Model Class: Default.aspx.Model.cs
25 | ```csharp
26 | namespace YourProjectName
27 | {
28 | public class DefaultModel
29 | {
30 | public string PageTitle { get; set; }
31 | public string BodyValue { get; set; }
32 | }
33 | }
34 | ```
35 |
36 | Controler Class: Default.aspx.Controller.cs
37 | ```csharp
38 | using CodeBehind;
39 |
40 | namespace YourProjectName
41 | {
42 | public partial class DefaultController : CodeBehindController
43 | {
44 | public DefaultModel model = new DefaultModel();
45 | public void PageLoad(HttpContext context)
46 | {
47 | model.PageTitle = "My Title";
48 | model.BodyValue = "HTML Body";
49 | View(model);
50 | }
51 | }
52 | }
53 | ```
54 |
55 | In this example, we can set an instance of the Model class in the controller as we want, so that its values are placed in the View.
56 |
57 | Consider a situation where we want to place Models whose class names we do not know in the View. In the usual case, we cannot call a Model class other than the Model we specified in the View page in the controller page.
58 |
59 | But don't worry!, you can call a dynamic Model class in the CodeBehind framework.
60 |
61 | We will modify the same MVC example that we introduced earlier so that you can better understand how to create a dynamic Model.
62 |
63 | View File: Default.aspx (razor syntax)
64 | ```diff
65 | @page
66 | @controller YourProjectName.DefaultController
67 | -@model {YourProjectName.DefaultModel}
68 |
69 |
70 |
71 |
72 | - @model.PageTitle
73 | + @controller.model.PageTitle
74 |
75 |
76 | - @model.BodyValue
77 | + @controller.model.BodyValue
78 |
79 |
80 | ```
81 |
82 | According to the View codes above, the Model attribute is omitted in the second line. Also, the controller prefix has been added to the models in the View page.
83 |
84 | New Model Class: MyClass.cs
85 | ```csharp
86 | namespace YourProjectName
87 | {
88 | public class MyClass
89 | {
90 | public string PageTitle { get; set; }
91 | public bool BodyValue { get; set; }
92 | }
93 | }
94 | ```
95 |
96 | The above code shows the same Model class with the name `DefaultModel`, whose name has been changed to `MyClass`, and the value of the `BodyValue` attribute has been changed to boolean.
97 |
98 | Controler Class: Default.aspx.Controller.cs
99 | ```csharp
100 | using CodeBehind;
101 |
102 | namespace YourProjectName
103 | {
104 | public partial class DefaultController : CodeBehindController
105 | {
106 | public MyClass model = new MyClass();
107 | public void PageLoad(HttpContext context)
108 | {
109 | model.PageTitle = "My Title";
110 | model.BodyValue = true;
111 | }
112 | }
113 | }
114 | ```
115 |
116 | According to the Controller class above, an instance of the `MyClass` class named model is created inside the `DefaultController` class and its values are set in the `PageLoad` method.
117 |
118 | In this example, the type of `BodyValue` attribute in Model has changed from string to boolean; this is not the only advantage of creating a dynamic Model.
119 |
120 | ### Advantages of using a dynamic Model in the CodeBehind framework:
121 |
122 | - **Flexibility:** With a dynamic Model, you can easily change the type or structure of your Model without impacting the rest of your application. This allows for more flexibility and adaptability in your development process. Dynamic Models can easily incorporate new data and changes in variables, making them adaptable to changing circumstances.
123 |
124 | - **Reusability:** By using dynamic Models, you can reuse the same controller logic for different Model classes. This can save time and effort in coding and testing, as you do not need to duplicate code for each Model class.
125 |
126 | - **Scalability:** Dynamic Models allow you to scale your application more easily, as you can quickly add new Model classes or modify existing ones without having to make extensive changes to your codebase.
127 |
128 | - **Simplified maintenance:** Having dynamic Models can make your codebase easier to maintain, as changes to one Model class do not necessarily impact other parts of your application. This can result in cleaner and more manageable code.
129 |
130 | - **Improved predictive power:** Dynamic Models can be used to predict future outcomes based on current conditions and how they are likely to evolve over time.
131 |
132 | - **Better representation of complex systems:** Dynamic Models allow for a more accurate representation of how variables interact and change over time in complex systems.
133 |
134 | ### Disadvantages of using a dynamic Model in the CodeBehind framework:
135 |
136 | - **Code errors:** Dynamic Models can make it easier to introduce coding errors, as there is less compile-time checking to catch mistakes.
137 |
138 | - **Limited tooling support:** Some development tools may not fully support dynamic Models, leading to potential limitations in IDE features such as code completion and refactoring.
139 |
140 | ### Conclusion
141 |
142 | Overall, using dynamic Models in the CodeBehind framework can lead to a more efficient and flexible development process, allowing you to easily adapt to changes in requirements or business needs. Using the dynamic Model is very useful in some situations, However, too much dynamism for the Model may break the structural coherence of MVC. Our recommendation is be careful in using dynamic Model and to use dynamic Model in a limited way only in situations where you have to.
143 |
--------------------------------------------------------------------------------
/doc/modularity_in_the_configuration_of_the_controller_in_the_route.md:
--------------------------------------------------------------------------------
1 | ## Modularity in the configuration of the controller in the route
2 |
3 | In this tutorial, we are going to invoke a Controller class from another DLL in a main project. The calling method is completely modular and the DLL is not added to the main project.
4 |
5 | In this tutorial, we will first create a main project and compile it and run it on the web server. Then we create a module project and put its DLL in `wwwroot/bin` path in the main project.
6 |
7 | ### Steps to create the main project
8 |
9 | **Step 1:** First, in Visual Studio, we create a new empty project under ASP.NET Core version 7.0.
10 |
11 | **Step 2**: We install the latest version of CodeBehind framework through NuGet packages.
12 |
13 | **Step 3:** Configure the Program.cs class as follows.
14 | ```csharp
15 | var builder = WebApplication.CreateBuilder(args);
16 |
17 | var app = builder.Build();
18 |
19 | SetCodeBehind.CodeBehindCompiler.Initialization();
20 |
21 | app.Run(async context =>
22 | {
23 | CodeBehind.CodeBehindExecute execute = new CodeBehind.CodeBehindExecute();
24 | await context.Response.WriteAsync(execute.RunRoute(context, 0));
25 | });
26 |
27 | app.Run();
28 | ```
29 |
30 | The code above is the Route configuration to implement the controller class
31 |
32 | **Step 4:** Create new CodeBehind Controller class and put `main` in the name of the Controller class.
33 |
34 | CodeBehind Controller
35 | ```csharp
36 | using CodeBehind;
37 |
38 | namespace YourProjectName
39 | {
40 | public partial class main : CodeBehindController
41 | {
42 | public void PageLoad(HttpContext context)
43 | {
44 | MainModel model = new MainModel();
45 | model.Value = "My text in main project";
46 | View("/main.aspx", model);
47 | }
48 | }
49 | }
50 | ```
51 |
52 | According to the Controller class above, if the path `example.com/main` is requested, the Controller class above is executed and the `main.aspx` page is initialized with a Model value named `MainModel` and then called.
53 |
54 | Note : Because we want the Controller class codes to be displayed in the Program.cs class after the Route configuration, we teach how to create a View and Model below.
55 |
56 | **Step 5:** Create new Model class as follows.
57 |
58 | Model class
59 | ```csharp
60 | namespace YourProjectName
61 | {
62 | public class MainModel
63 | {
64 | public string Value { get; set; }
65 | }
66 | }
67 | ```
68 |
69 | **Step 6:** Create new View file as follows.
70 |
71 | View (main.aspx)
72 | ```html
73 | @page
74 | @model {YourProjectName.MyModel}
75 |
76 |
77 |
78 |
79 | Main project
80 |
81 |
82 | @model.Value
83 |
84 |
85 | ```
86 |
87 | **Step 7:** Run the project and then request the path `example.com/main` to see the result.
88 |
89 | Result for `example.com/main` request
90 | ```html
91 |
92 |
93 |
94 |
95 | Main project
96 |
97 |
98 | My value text in main project
99 |
100 |
101 | ```
102 |
103 | Note: Please compile the project and put it on the web server to have a better understanding of the modularity of the CodeBehind framework.
104 |
105 | ### Steps to create a module project
106 |
107 | **Step 1:** First, in Visual Studio, we create a new empty project under ASP.NET Core version 7.0.
108 |
109 | **Step 2:** We install the latest version of CodeBehind framework through NuGet packages.
110 |
111 | **Step 3:** Configure the Program.cs class as follows.
112 |
113 | ```csharp
114 | var builder = WebApplication.CreateBuilder(args);
115 |
116 | var app = builder.Build();
117 |
118 | app.Run();
119 | ```
120 |
121 | **Step 4:** Create new CodeBehind Controller class and put `module` in the name of the Controller class.
122 |
123 | CodeBehind Controller
124 | ```csharp
125 | using CodeBehind;
126 |
127 | namespace YourProjectName
128 | {
129 | public partial class module : CodeBehindController
130 | {
131 | public void PageLoad(HttpContext context)
132 | {
133 | ModuleModel model = new ModuleModel();
134 | model.Value = "My text in module project";
135 | View("/module.aspx", model);
136 | }
137 | }
138 | }
139 | ```
140 |
141 | According to the Controller class above, if the path `example.com/module ` is requested, the Controller class above is executed and the `module.aspx` page is initialized with a Model value named `ModuleModel` and then called.
142 |
143 | **Step 5:** Create new Model class as follows.
144 |
145 | Model class
146 | ```csharp
147 | namespace YourProjectName
148 | {
149 | public class ModuleModel
150 | {
151 | public string Value { get; set; }
152 | }
153 | }
154 | ```
155 |
156 | **Step 6:** Create new View file as follows.
157 |
158 | View (module.aspx)
159 | ```html
160 | @page
161 | @model {YourProjectName.ModuleModel}
162 |
163 |
164 |
165 |
166 | Module project
167 |
168 |
169 | @model.Value
170 |
171 |
172 | ```
173 |
174 | **Step 7:** Publish the module project.
175 |
176 | ### Steps to add the module project to the main project
177 |
178 | **Step 1:** Copy the `module.aspx` file from the module project to `wwwroot` directory in the main project.
179 |
180 | **Step 2:** We copy the DLL file of the module project to `wwwroot/bin` path in the main project.
181 |
182 | 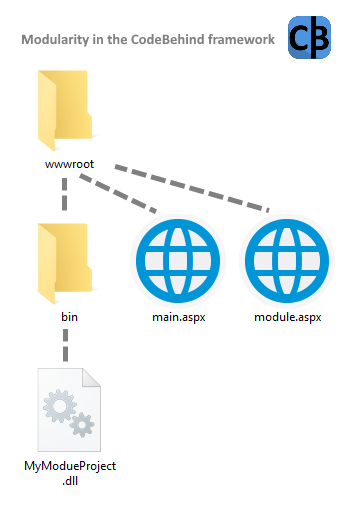
183 |
184 | **Step 3:** We run the main project and then we request the `example.com/module` path.
185 |
186 | Result for `example.com/module` request
187 | ```html
188 |
189 |
190 |
191 |
192 | Module project
193 |
194 |
195 | My text in module project
196 |
197 |
198 | ```
199 |
200 | > Note: Please note that the CodeBehind framework version of the new module project must be equal or lower than the CodeBehind version of the main project.
201 |
202 | As you can see, we introduced the modular structure of the powerful [CodeBehind framework](https://elanat.net/page_content/code_behind) in practice.
203 |
--------------------------------------------------------------------------------
/doc/how_is_the_list_of_views_finally_made.md:
--------------------------------------------------------------------------------
1 | This article tells how to create the final class of views in the CodeBehind framework.
2 |
3 | When you create a project under the CodeBehind framework, all classes (including Controller and Model) are compiled in a dll file; but aspx pages are rendered and compiled into one class when the project is first run. The final View class is built from rendering and separating server-side code from static values (like HTML).
4 |
5 | In this example, an MVC page named Default.aspx, and a single page named Random.aspx are created. The Default.aspx page is located in the root and the Random.aspx page is located in the test directory located in the root.
6 |
7 | **Note: This class is a simplified example of the view class; the View class in the CodeBehind framework has a more complex structure.**
8 |
9 | # Pages
10 |
11 | **Default.aspx**
12 |
13 | View 1 - Default.aspx in wwwroot (razor syntax)
14 | ```cshtml
15 | @page
16 | @controller YourProjectName.DefaultController
17 | @model YourProjectName.DefaultModel
18 |
19 |
20 |
21 |
22 | @model.PageTitle
23 |
24 |
25 | @model.BodyValue
26 |
27 |
28 | ```
29 |
30 | View 1 - Default.aspx in wwwroot (standard syntax)
31 | ```aspx
32 | <%@ Page Controller="YourProjectName.DefaultController" Model="YourProjectName.DefaultModel" %>
33 |
34 |
35 |
36 |
37 | <%=model.PageTitle%>
38 |
39 |
40 | <%=model.BodyValue%>
41 |
42 |
43 | ```
44 |
45 | Model for View 1
46 | ```csharp
47 | using CodeBehind;
48 |
49 | namespace YourProjectName
50 | {
51 | public partial class DefaultModel : CodeBehindModel
52 | {
53 | public string PageTitle { get; set; }
54 | public string BodyValue { get; set; }
55 | }
56 | }
57 | ```
58 |
59 | Controller for View 1
60 | ```csharp
61 | using CodeBehind;
62 |
63 | namespace YourProjectName
64 | {
65 | public partial class DefaultController : CodeBehindController
66 | {
67 | public DefaultModel model = new DefaultModel();
68 | public void PageLoad(HttpContext context)
69 | {
70 | model.PageTitle = "My Title";
71 | model.BodyValue = "HTML Body";
72 | View(model);
73 | }
74 | }
75 | }
76 | ```
77 |
78 | **Random.aspx**
79 |
80 | View 2 - Random.aspx in wwwroot/test (razor syntax)
81 | ```cshtml
82 | @page
83 | @{
84 | Random rand = new Random();
85 | }
86 |
87 |
";
152 | return ReturnValue;
153 | }
154 |
155 | }
156 | }
157 |
158 | namespace YourProjectName
159 | {
160 | public partial class CodeBehindEmptyClass
161 | {
162 | }
163 | }
164 | ```
165 |
166 | In the views class, there is a switch case that calls methods based on the path of the aspx file; the internal values of these methods correspond to the same aspx file that existed in that path.
167 | I think you must have noticed why CodeBehind doesn't even refer to the aspx file!
168 |
169 | Please note that Controller and Model have already been compiled in the dll file of the project and are only called in the methods of the views class.
170 |
171 | How to call the Default.aspx file is known in the `_Default_aspx_YourProjectName_DefaultController_PageLoad1` method.
172 |
173 | Also how to call the Random.aspx file is known in the `_test_Random_aspx__PageLoad2` method.
174 |
175 | According to the code below, in the last line, a namespace with the name of the project has been added. This namespace has an empty class inside it. The reason for adding this namespace is that if the developer does not use the same namespace as the project name, there will be no problem in calling the namespace with the same name as the project name.
176 |
177 | ```csharp
178 | namespace YourProjectName
179 | {
180 | public partial class CodeBehindEmptyClass
181 | {
182 | }
183 | }
184 | ```
185 |
--------------------------------------------------------------------------------
/doc/performance_test_in_only_view_section_version_1.5.2.md:
--------------------------------------------------------------------------------
1 | In this performance test, we examine the performance of the default ASP.NET Core structure compared to CodeBehind. This review was done on .NET Core version 7.0 and CodeBehind version 1.5.2. This review is only focused on view section in MVC; In version 1.5.2 of CodeBehind, we need to specify the Controller class in the view section.
2 |
3 | ## Classes and codes of the examined frameworks
4 |
5 | ### ASP.NET Core
6 |
7 | cshtml
8 | ```cshtml
9 | @page
10 | @{
11 | Random rand = new Random();
12 | }
13 |
14 |
");
121 |
122 | IgnoreViewAndModel = true;
123 | }
124 | }
125 | }
126 | ```
127 |
128 | We added a Controller class and in the `PageLoad` method we check the presence of data named `btn_Button` in the form data.
129 |
130 | Checking the existence of data with the name `btn_Button`
131 | ```csharp
132 | if (context.Request.Form["btn_Button"].has())
133 | btn_Button_Click(context);
134 | ```
135 |
136 | According to the above codes, if there is a data named `btn_Button`, the `btn_Button_Click` method is called with the context argument.
137 |
138 | Clicking on the `Click to send data` button causes the data of the form named `btn_Button` to be sent to the server.
139 |
140 | The HTML tag below shows the btn_Button button
141 | ```html
142 |
143 | ```
144 |
145 | The text, hidden, select, and radio inputs have text values and their data is retrieved as follows.
146 |
147 | ```csharp
148 | string InputValue = context.Request.Form["InputName"];
149 | ```
150 |
151 | The `InputName` value is an example and the name of the input tag should be replased.
152 |
153 | Example:
154 | ```csharp
155 | string TextBoxValue = context.Request.Form["txt_TextBox"];
156 | ```
157 |
158 | The checkbox input sends a text data with the value on if its tick value is active.
159 |
160 | The code below shows how to read checkbox data.
161 | ```csharp
162 | bool CheckBoxValue = context.Request.Form["cbx_CheckBox"] == "on";
163 | ```
164 |
165 | To receive the file, we used the IFormFile data type.
166 |
167 | How to get the file is specified in the codes below.
168 |
169 | ```csharp
170 | IFormFile FileUploadValue = context.Request.Form.Files["upd_File"];
171 |
172 | if ((FileUploadValue != null) && (FileUploadValue.Length > 0))
173 | {
174 | CodeBehind.API.Path path = new CodeBehind.API.Path();
175 |
176 | using (Stream stream = new FileStream(path.BaseDirectory + "/" + FileUploadValue.FileName, FileMode.Create, FileAccess.ReadWrite))
177 | {
178 | FileUploadValue.CopyTo(stream);
179 | }
180 |
181 | Write("
File was uploaded" + "
");
182 | }
183 | ```
184 |
185 | As it is clear in the codes above, first we create a data value of `IFormFile` type and value it with the input file data.
186 |
187 | Then we check whether the input file is initialized on the user side or not. If the initialization is done on the user side, the file will be uploaded.
188 |
189 | To check that we have received the data correctly, we add the received data on the page using the `Write` method.
190 |
191 | We active the `IgnoreViewAndModel` attribute; enabling the `IgnoreViewAndModel` attribute causes the View to be completely ignored and only the Controller values are added to the page.
192 |
193 | The values of the text below are displayed after clicking on the Click to send data button.
194 |
195 | ```
196 | File was uploaded
197 |
198 | TextBoxValue=my text box value
199 |
200 | HiddenValue=This is hide value
201 |
202 | SelectValue=3
203 |
204 | CheckBoxValue=true
205 |
206 | RadioButtonValue=2
207 | ```
208 |
--------------------------------------------------------------------------------
/doc/use_cache.md:
--------------------------------------------------------------------------------
1 | ## Use cache
2 |
3 | ### What is the definition of cache?
4 | In software development, a cache is a hardware or software component that stores data so that future requests for that data can be served faster. Caching is used to reduce load times and improve performance by storing frequently accessed or recently used data in a more easily accessible location. This can help reduce the need to repeatedly access slower storage mediums, like databases, and can improve overall system efficiency. Cache prevents heavy reprocessing, so a system that uses a cache only performs complex requests once and saves the processing performed for subsequent requests.
5 |
6 | ### Enable cache service in ASP.NET Core
7 |
8 | To enable the cache in CodeBehind, you need to enable the cache service in ASP.NET Core in the `Program.cs` class.
9 |
10 | Enable memory cache in ASP.NET Core
11 | ```diff
12 | var builder = WebApplication.CreateBuilder(args);
13 |
14 | +builder.Services.AddMemoryCache();
15 |
16 | var app = builder.Build();
17 |
18 | SetCodeBehind.CodeBehindCompiler.Initialization();
19 |
20 | app.UseCodeBehind();
21 |
22 | app.Run();
23 | ```
24 |
25 | > Note: The cache memory service is related to ASP.NET Core and the cache mechanism in the CodeBehind framework is based on the cache memory service.
26 |
27 | ### cache.xml file
28 |
29 | If you are using CodeBehind version 2.8 and later, if you start a new project or restart an existing project, a `cache.xml` file will be created for you in the `code_behind` directory.
30 |
31 | The contents of the default cache.xml file are as follows:
32 | ```xml
33 |
34 |
35 |
36 | main
37 | /file_and_directory/EditFile.aspx
38 | /page/book
39 | value=true
40 |
41 |
42 |
43 | ```
44 |
45 | The cache.xml file is the cache configuration of CodeBehind pages and controllers. In this file, you can cache the pages and controllers you want for as long as you want. This file is read only once in the first run of the program; therefore, the changes in this file during the execution of the program have no effect and the program needs to be restarted.
46 |
47 | For better understanding, let's change this file a little and make it more concise.
48 | ```xml
49 |
50 |
51 |
52 | SeriesController
53 |
54 |
55 | /main.aspx
56 | ?value=true
57 |
58 |
59 | ```
60 |
61 | According to the code above, the caches are added inside the `cache_list` tag. To add a new cache, we add a tag named `cache` and put the `duration` of the cache (in seconds) in the `duration` attribute. In the above code, there is a tag named `controller` inside the first cache tag, and the text inside it is the name of `SeriesController`; the cache tag caches the first Controller named `SeriesController` for `60` seconds. The second cache tag works for `3` seconds and there are two tags inside it. A `view` name tag whose text inside is the value of `/main.aspx`. A tag with the name `query` is also inside the cache tag, which has the `match_type` attribute, the value of which is `full_match`, and the text inside it is `?value=true`; the second cache tag only works if the View is requested with the `/main.aspx` path and the query string only has the value `?value=true`.
62 |
63 | Internal tags in each tag cache are actually filters; that is, the cache is activated only when the request is equal to all these filters.
64 |
65 | Please note that the cache on the controller is done only when you have configured the controller in the route; otherwise, in the default MVC architecture of the CodeBehind framework, the View section is preferred over the Controller, and the cache will be effective on the View path.
66 |
67 | Configuration of the controller in the route is done by calling the `UseCodeBehindRoute` middleware.
68 | `app.UseCodeBehindRoute();`
69 |
70 | Configuring the default MVC architecture of the CodeBehind framework is also done by calling the `UseCodeBehind` middleware.
71 | `app.UseCodeBehind();`
72 |
73 | ### Path, Query, Form
74 |
75 | You can define 3 tags inside the cache tag:
76 |
77 | - path tag
78 | - query tag
79 | - form tag
80 |
81 | Each of the above tags must have an attribute named `match_type` that has one of the following values:
82 |
83 | - **start**: Matches when the requested path starts with the specified string
84 | - **end**: Matches when the requested path ends with the specified string
85 | - **exist**: Matches when the specified path exists, regardless of its position in the requested path
86 | - **regex**: The regex match type is used to match the requested path using a regular expression pattern
87 | - **full_match**: The regex match type is used to match the requested path using a regular expression pattern
88 |
89 | Example:
90 |
91 | Requested route: `example.com/page/book`
92 |
93 | - **start**: `/page` Matches because the requested path starts with "/page"
94 | - **end**: `/book` Matches because the requested path ends with "/book"
95 | - **exist**: /page Matches because "/page" exists in the requested path
96 | - **regex**: `/page/[a-z]+` Matches because the requested path matches the regular expression pattern "/page/[a-z]+"
97 | - **full_match**: `/page/book` Matches because the requested path exactly matches "/page/book"
98 |
99 | The path tag is for the requested path.
100 |
101 | Example:
102 |
103 | `example.com/admin`
104 |
105 | The query tag is for querystring.
106 |
107 | Example:
108 |
109 | `example.com/?value=active`
110 |
111 | The form tag is also for form data.
112 |
113 | Example:
114 |
115 | Form data is sent when the `post` method is used in the `form` tag in HTML.
116 |
117 | ```html
118 |
125 | ```
126 |
127 | The above form submit sends values similar to the below in the form data:
128 | `fname=Cristiano&lname=Ronaldo`
129 |
130 | ### Simultaneous use of path, query and form tags
131 |
132 | The simultaneous use of each of these tags along with one or two other tags means that the request must meet all the conditions at the same time.
133 |
134 | Example:
135 | ```xml
136 |
137 |
138 |
139 | /series_page/main.aspx
140 | value=true
141 |
142 |
143 |
144 | ```
145 |
146 | In the above example, the cache is applied only if the View is requested with the path `/series_page/main.aspx`; and the query `value=true` exists in the query string; and also the data value of the form `hdn_HiddenValue=0` should also exist in the user's request.
147 |
148 | ### Example of cache in CodeBehind Framework
149 |
150 | First, we replace the following contents in the `cache.xml` file (located in the `code_behind` directory). According to the previous explanation, we cache a file named `random.aspx` in `the wwwroot` directory for `10` seconds; caching is done only in the condition that the query string matches the value `?value=true`.
151 |
152 | cache.xml file
153 | ```xml
154 |
155 |
156 |
157 | /random.aspx
158 | ?value=true
159 |
160 |
161 | ```
162 |
163 | We add the `random.aspx` file in the `wwwroot` directory and place the following codes in it.
164 |
165 | View (random.aspx)
166 | ```html
167 | @page
168 | @{ int RandomValue = new Random().Next(1000000); }
169 | @RandomValue
170 | ```
171 |
172 | After running the project, if you request the following path, the random response will remain constant for 10 seconds.
173 | `example.com/random.aspx?value=true`
174 |
175 | Consequently, if you request the following paths, the cache will not be activated:
176 |
177 | - `example.com/random.aspx`
178 | - `example.com/random.aspx?value=true2`
179 | - `example.com/random.aspx?value=true&query2=value2`
180 |
--------------------------------------------------------------------------------
/class/Extensions.cs:
--------------------------------------------------------------------------------
1 | using Microsoft.AspNetCore.Http;
2 | using System.Text.RegularExpressions;
3 |
4 | namespace CodeBehind
5 | {
6 | public static class ExtensionMethodsClass
7 | {
8 | public static string GetTextAfterValue(this string Text, string Value)
9 | {
10 | if (Text.Length < Value.Length)
11 | return Text;
12 |
13 | if (!Text.Contains(Value))
14 | return Text;
15 |
16 | return Text.Substring(Text.IndexOf(Value) + Value.Length);
17 | }
18 |
19 | // Overload
20 | public static string GetTextAfterValue(this string Text, char Value)
21 | {
22 | return Text.GetTextAfterValue(Value);
23 | }
24 |
25 | public static string GetTextAfterLastValue(this string Text, string Value)
26 | {
27 | if (Text.Length < Value.Length)
28 | return Text;
29 |
30 | if (!Text.Contains(Value))
31 | return Text;
32 |
33 | return Text.Substring(Text.LastIndexOf(Value) + Value.Length);
34 | }
35 |
36 | // Overload
37 | public static string GetTextAfterLastValue(this string Text, char Value)
38 | {
39 | return Text.GetTextAfterLastValue(Value);
40 | }
41 |
42 | public static string GetTextBeforeValue(this string Text, string Value)
43 | {
44 | if (Text.Length < Value.Length)
45 | return Text;
46 |
47 | if (!Text.Contains(Value))
48 | return Text;
49 |
50 | return Text.Substring(0, Text.IndexOf(Value));
51 | }
52 |
53 | // Overload
54 | public static string GetTextBeforeValue(this string Text, char Value)
55 | {
56 | return Text.GetTextBeforeValue(Value);
57 | }
58 |
59 | public static string GetTextBeforeLastValue(this string Text, string Value)
60 | {
61 | if (Text.Length < Value.Length)
62 | return Text;
63 |
64 | if (!Text.Contains(Value))
65 | return Text;
66 |
67 | return Text.Substring(0, Text.LastIndexOf(Value));
68 | }
69 |
70 | // Overload
71 | public static string GetTextBeforeLastValue(this string Text, char Value)
72 | {
73 | return Text.GetTextBeforeLastValue(Value);
74 | }
75 |
76 | public static int ToNumber(this string Text)
77 | {
78 | if (string.IsNullOrEmpty(Text))
79 | return 0;
80 |
81 | int i;
82 |
83 | int.TryParse(Text, out i);
84 |
85 | return i;
86 | }
87 |
88 | public static int ToNumber(this object Text)
89 | {
90 | return ToNumber(Text.ToString());
91 | }
92 |
93 | public static bool Has(this string Text)
94 | {
95 | if (!string.IsNullOrEmpty(Text))
96 | return true;
97 |
98 | return false;
99 | }
100 |
101 | public static bool Has(this object Text)
102 | {
103 | return Has(Text.ToString());
104 | }
105 |
106 | public static bool HasEmbedded(this IFormCollection Form, string Key)
107 | {
108 | foreach (string name in Form.Keys)
109 | if (name.StartsWith(Key))
110 | return true;
111 |
112 | return false;
113 | }
114 |
115 | // Overload
116 | public static bool HasEmbedded(this IFormCollection Form, string Key, out string Value)
117 | {
118 | foreach (string name in Form.Keys)
119 | if (name.StartsWith(Key))
120 | {
121 | Value = name.GetTextAfterValue(Key);
122 | return true;
123 | }
124 |
125 | Value = "";
126 | return false;
127 | }
128 |
129 | // Overload
130 | public static bool HasEmbedded(this IQueryCollection Query, string Key)
131 | {
132 | foreach (string name in Query.Keys)
133 | if (name.StartsWith(Key))
134 | return true;
135 |
136 | return false;
137 | }
138 |
139 | // Overload
140 | public static bool HasEmbedded(this IQueryCollection Query, string Key, out string Value)
141 | {
142 | foreach (string name in Query.Keys)
143 | if (name.StartsWith(Key))
144 | {
145 | Value = name.GetTextAfterValue(Key);
146 | return true;
147 | }
148 |
149 | Value = "";
150 | return false;
151 | }
152 |
153 | public static string GetEmbedded(this IFormCollection Form, string Key)
154 | {
155 | foreach (string name in Form.Keys)
156 | if (name.StartsWith(Key))
157 | return name.GetTextAfterValue(Key);
158 |
159 | return "";
160 | }
161 |
162 | // Overload
163 | public static string GetEmbedded(this IQueryCollection Query, string Key)
164 | {
165 | foreach (string name in Query.Keys)
166 | if (name.StartsWith(Key))
167 | return name.GetTextAfterValue(Key);
168 |
169 | return "";
170 | }
171 |
172 | public static bool IsNumber(this string Text)
173 | {
174 | for (int i = 0; i < Text.Length; i++)
175 | if (!char.IsNumber(Text[i]))
176 | return false;
177 |
178 | return true;
179 | }
180 |
181 | public static bool IsNumber(this object Text)
182 | {
183 | return IsNumber(Text.ToString());
184 | }
185 |
186 | public static string ToMethodNameClean(this string Text)
187 | {
188 | Regex regex = new Regex("[^a-zA-Z0-9_]");
189 | return regex.Replace(Text, "_");
190 | }
191 |
192 | public static bool ClassPathIsFine(this string Text)
193 | {
194 | Regex regex = new Regex("[^a-zA-Z0-9_.]");
195 | return !regex.IsMatch(Text);
196 | }
197 |
198 | public static int GetNumberOfCharacter(this string Text, char Character)
199 | {
200 | if (Text.Length < 1)
201 | return 0;
202 |
203 | int count = 0;
204 |
205 | for (int i = 0; i < Text.Length; i++)
206 | if (Text[i] == Character)
207 | count++;
208 |
209 | return count;
210 | }
211 |
212 | /// start, end, exist, full_match, regex
213 | public static bool HasMatching(this string Text, string MatchingType, string Matching)
214 | {
215 | switch (MatchingType)
216 | {
217 | case "start": return Text.StartsWith(Matching);
218 | case "end": return Text.EndsWith(Matching);
219 | case "exist": return Text.Contains(Matching);
220 | case "full_match": return (Text == Matching);
221 | case "regex":
222 | {
223 | Regex re = new Regex(Matching, RegexOptions.IgnoreCase);
224 | return re.IsMatch(Text);
225 | }
226 | }
227 |
228 | return false;
229 | }
230 |
231 | /// start, end, exist, full_match, regex
232 | public static bool HasMatching(this object Text, string MatchingType, string Matching)
233 | {
234 | return HasMatching(Text.ToString(), MatchingType, Matching);
235 | }
236 |
237 | public static List AddList(this List CurrentList, List NewList)
238 | {
239 | foreach (string s in NewList)
240 | CurrentList.Add(s);
241 |
242 | return CurrentList;
243 | }
244 |
245 | public static bool IsNullOrTrue(this bool? Value)
246 | {
247 | if (Value == null)
248 | return true;
249 |
250 | if (Value == true)
251 | return true;
252 |
253 | return false;
254 | }
255 |
256 | public static bool IsNullOrFalse(this bool? Value)
257 | {
258 | if (Value == null)
259 | return true;
260 |
261 | if (Value == false)
262 | return true;
263 |
264 | return false;
265 | }
266 | }
267 |
268 | public static class MatchingType
269 | {
270 | public const string StartWith = "start";
271 | public const string EndWith = "end";
272 | public const string Exist = "exist";
273 | public const string FullMatch = "full_match";
274 | public const string Regex = "regex";
275 | }
276 | }
277 |
--------------------------------------------------------------------------------
/doc/template.md:
--------------------------------------------------------------------------------
1 | ## Template
2 |
3 | 100% Code-Behind support guarantee!
4 |
5 | The Elanat team has introduced a wonderful Template structure. Templates form parts of an aspx page.
6 |
7 | Please consider the following example:
8 |
9 | This example is for standard syntax; we will also give an example for Razor syntax.
10 |
11 | aspx file (standard syntax)
12 | ```diff
13 | <%@ Page Controller="YourProjectName.DefaultController" Model="YourProjectName.DefaultModel" %>
14 |
15 |
16 |
17 | + <#GlobalTags#>
18 | <%=model.PageTitle%>
19 |
20 |
21 | <%=model.BodyValue%>
22 |
23 |
24 |
25 | +<#GlobalTags
26 | +
27 | +
28 | +
29 | +
30 | +
31 | +
32 | +
33 | +
34 | +#>
35 | ```
36 |
37 | In this example, a Template section is called in the Template variable and the output is converted as follows.
38 |
39 | ```html
40 | <%@ Page Controller="YourProjectName.DefaultController" Model="YourProjectName.DefaultModel" %>
41 |
42 |
43 |
44 |
45 |
46 |
47 |
48 |
49 |
50 |
51 |
52 | <%=model.PageTitle%>
53 |
54 |
55 | <%=model.BodyValue%>
56 |
57 |
58 | ```
59 |
60 | But this structure seems to be very simple and basic! Why did we talk about a wonderful structure?
61 |
62 | In a **revolutionary initiative**, the Elanat team provides a return templating structure that guarantees 100% separation of server-side code from the design part (like html).
63 |
64 | Usually, for repetitive parts such as loops and conditions, you should either add the codes of the design part in the server side codes or add the server side codes in the design part.
65 |
66 | An example of server side coding in the design section
67 |
68 | ```html
69 |
88 | ```
89 |
90 | Example of integration of the design part in the server side codes
91 | ```csharp
92 | model.ListValue = "
";
93 |
94 | foreach(string s in List)
95 | model.ListValue += "
" + s + "
";
96 |
97 | model.ListValue += "
";
98 | ```
99 |
100 | Please note that things like the presence of a variable between the codes of the design section are still considered Code-Behind, unless the codes of the server section are added.
101 |
102 | Example for Razor syntax
103 | ```html
104 |
@model.PageName
105 | ```
106 |
107 | Example for standard syntax
108 | ```html
109 |
<%=model.PageName%>
110 | ```
111 |
112 | In the two examples above, the @model.PageName and <%=model.PageName%> values are easily recognized in the html tags; So the Code-Behind is still in place and designers or client-side developers can easily recognize these values.
113 |
114 | One of the most famous frameworks that guaranteed the separation of server-side codes from the design department was Microsoft's web-form; but this guarantee was a heavy price, such as additional codes and lack of full control of the designers over the design department.
115 |
116 | Example (Razor syntax)
117 | View section before pasting the template
118 | ```html
119 |
184 | ```
185 |
186 | Enjoy beautiful structer in returned template in CodeBehind framework.
187 |
188 | You can introduce the template externally.
189 | Elanat team has considered astx file extension for external files of templates.
190 |
191 | **Elanat Framework company provides astx extension**
192 |
193 | Example for set external template
194 |
195 | Razor syntax example
196 | ```html
197 | @page
198 | @template "/page/template/page_template.astx"
199 | ```
200 |
201 | Standard syntax example
202 | ```html
203 | <%@ Page Template="/page/template/page_template.astx" %>
204 | ```
205 |
206 | There is no need to add the astx file extension and the following path is also correct.
207 |
208 | `"/page/template/page_template"`
209 |
210 | You can add more templates; it is enough to separate the paths of the templates with the semicolon character (;).
211 |
212 | Razor syntax example:
213 |
214 | ```html
215 | @page
216 | @template "/page/template/template1.astx;/page/template/template2.astx;/page/template/template3.astx"
217 | ```
218 |
219 | Standard syntax example:
220 |
221 | ```html
222 | <%@ Page Template="/page/template/template1.astx;/page/template/template2.astx;/page/template/template3.astx" %>
223 | ```
224 |
225 | In the template placement example, if you add the template externally, you will have the following html in the design section.
226 |
227 | View section before pasting the template
228 | ```diff
229 |
235 | ```
236 |
237 | Without a return template, at best you will have the following html in the design section.
238 |
239 | View section without use return template
240 | ```diff
241 |
250 | ```
251 |
252 | **Do you understand the beauty of working with a return template?**
253 |
254 | You can also use template for standard syntax. The previous example is unclear in the standard syntax in the following codes.
255 |
256 | ```html
257 |
263 |
264 | <#Tags
265 | <% foreach (PageItem page in model.PageItemList)
266 | {
267 | <#Tags#>
268 | }
269 | %>
270 | #>
271 |
272 | <#PageName <%=page.Title%>#>
273 | <#Href <%=((page.Path == "main")? "/" : page.Path)%>#>
274 | ```
275 |
276 | If the return value is placed between the standard syntax tags, the syntax will be automatically closed before the return value and the syntax will be opened after it.
277 |
278 | pasting template auto step finally for standard syntax
279 | ```html
280 |