Home
7 |8 | Lorem ipsum dolor sit amet consectetur adipisicing elit. Ea dignissimos 9 | aut consequuntur aspernatur corrupti ratione, odit similique tenetur 10 | accusantium, est nostrum esse minus iure voluptatum nihil cumque 11 | blanditiis non? Odit. 12 |
13 |14 | Lorem ipsum dolor sit amet consectetur adipisicing elit. Ea dignissimos 15 | aut consequuntur aspernatur corrupti ratione, odit similique tenetur 16 | accusantium, est nostrum esse minus iure voluptatum nihil cumque 17 | blanditiis non? Odit. 18 |
19 |20 | Lorem ipsum dolor sit amet consectetur adipisicing elit. Ea dignissimos 21 | aut consequuntur aspernatur corrupti ratione, odit similique tenetur 22 | accusantium, est nostrum esse minus iure voluptatum nihil cumque 23 | blanditiis non? Odit. 24 |
25 |26 | Lorem ipsum dolor sit amet consectetur adipisicing elit. Ea dignissimos 27 | aut consequuntur aspernatur corrupti ratione, odit similique tenetur 28 | accusantium, est nostrum esse minus iure voluptatum nihil cumque 29 | blanditiis non? Odit. 30 |
31 |32 | Lorem ipsum dolor sit amet consectetur adipisicing elit. Ea dignissimos 33 | aut consequuntur aspernatur corrupti ratione, odit similique tenetur 34 | accusantium, est nostrum esse minus iure voluptatum nihil cumque 35 | blanditiis non? Odit. 36 |
37 |About
7 |8 | Lorem ipsum dolor sit amet consectetur adipisicing elit. Ea dignissimos 9 | aut consequuntur aspernatur corrupti ratione, odit similique tenetur 10 | accusantium, est nostrum esse minus iure voluptatum nihil cumque 11 | blanditiis non? Odit. 12 |
13 |14 | Lorem ipsum dolor sit amet consectetur adipisicing elit. Ea dignissimos 15 | aut consequuntur aspernatur corrupti ratione, odit similique tenetur 16 | accusantium, est nostrum esse minus iure voluptatum nihil cumque 17 | blanditiis non? Odit. 18 |
19 |20 | Lorem ipsum dolor sit amet consectetur adipisicing elit. Ea dignissimos 21 | aut consequuntur aspernatur corrupti ratione, odit similique tenetur 22 | accusantium, est nostrum esse minus iure voluptatum nihil cumque 23 | blanditiis non? Odit. 24 |
25 |26 | Lorem ipsum dolor sit amet consectetur adipisicing elit. Ea dignissimos 27 | aut consequuntur aspernatur corrupti ratione, odit similique tenetur 28 | accusantium, est nostrum esse minus iure voluptatum nihil cumque 29 | blanditiis non? Odit. 30 |
31 |32 | Lorem ipsum dolor sit amet consectetur adipisicing elit. Ea dignissimos 33 | aut consequuntur aspernatur corrupti ratione, odit similique tenetur 34 | accusantium, est nostrum esse minus iure voluptatum nihil cumque 35 | blanditiis non? Odit. 36 |
37 |Contact
7 |8 | Lorem ipsum dolor sit amet consectetur adipisicing elit. Ea dignissimos 9 | aut consequuntur aspernatur corrupti ratione, odit similique tenetur 10 | accusantium, est nostrum esse minus iure voluptatum nihil cumque 11 | blanditiis non? Odit. 12 |
13 |14 | Lorem ipsum dolor sit amet consectetur adipisicing elit. Ea dignissimos 15 | aut consequuntur aspernatur corrupti ratione, odit similique tenetur 16 | accusantium, est nostrum esse minus iure voluptatum nihil cumque 17 | blanditiis non? Odit. 18 |
19 |20 | Lorem ipsum dolor sit amet consectetur adipisicing elit. Ea dignissimos 21 | aut consequuntur aspernatur corrupti ratione, odit similique tenetur 22 | accusantium, est nostrum esse minus iure voluptatum nihil cumque 23 | blanditiis non? Odit. 24 |
25 |26 | Lorem ipsum dolor sit amet consectetur adipisicing elit. Ea dignissimos 27 | aut consequuntur aspernatur corrupti ratione, odit similique tenetur 28 | accusantium, est nostrum esse minus iure voluptatum nihil cumque 29 | blanditiis non? Odit. 30 |
31 |32 | Lorem ipsum dolor sit amet consectetur adipisicing elit. Ea dignissimos 33 | aut consequuntur aspernatur corrupti ratione, odit similique tenetur 34 | accusantium, est nostrum esse minus iure voluptatum nihil cumque 35 | blanditiis non? Odit. 36 |
37 |Building A Blog With Gatsby & GraphQL
2 | 3 | --- 4 | 5 |Building a custom blog doesn’t have to be hard, and you don’t have to do all of the hard work from scratch!
6 |Gatsby, a static site generator for React, is an amazing tool that comes pre-configured with GraphQL and it allows you to easily get up and running.
7 |Foundational Knowledge
8 |Since Gatsby is a static site generator for React, you should have some React knowledge prior to taking this tutorial.
9 |You should also be familiar with how to use the command line / terminal as we’ll be installing some packages with npm.
10 |Setup
11 |We need to install the Gatsby CLI (command-line-interface) to build new Gatsby projects.
12 |To install the Gatsby CLI tool, run the following npm command:
npm install -g gatsby-cli
14 | Building A Blog: The Short Way
16 |Gatsby has a series of starter files called Gatsby Starters which allow you to quickly spin up different types of Gatsby sites.
17 |Gatsby provides a starter blog which you can use to quickly get up-and-running.
18 |If you aren’t familiar with Gatsby or GraphQL, I recommend following the in-depth tutorial to learn the in-and-outs.
19 |To build a blog with the blog starter, simply run:
20 |gatsby new <<my-blog-name>> https://github.com/gatsbyjs/gatsby-starter-blog
21 | Then add your markdown blog files and customize to your heart’s content.
23 |Building A Blog: The Long (But In-Depth) Way
24 |Let’s walk through the steps of building a Gatsby blog from scratch using the default starter.
25 |First, create your starter project by running
26 |gatsby new <<my-blog-name>> && cd <<my-blog-name>>
27 | gatsby develop
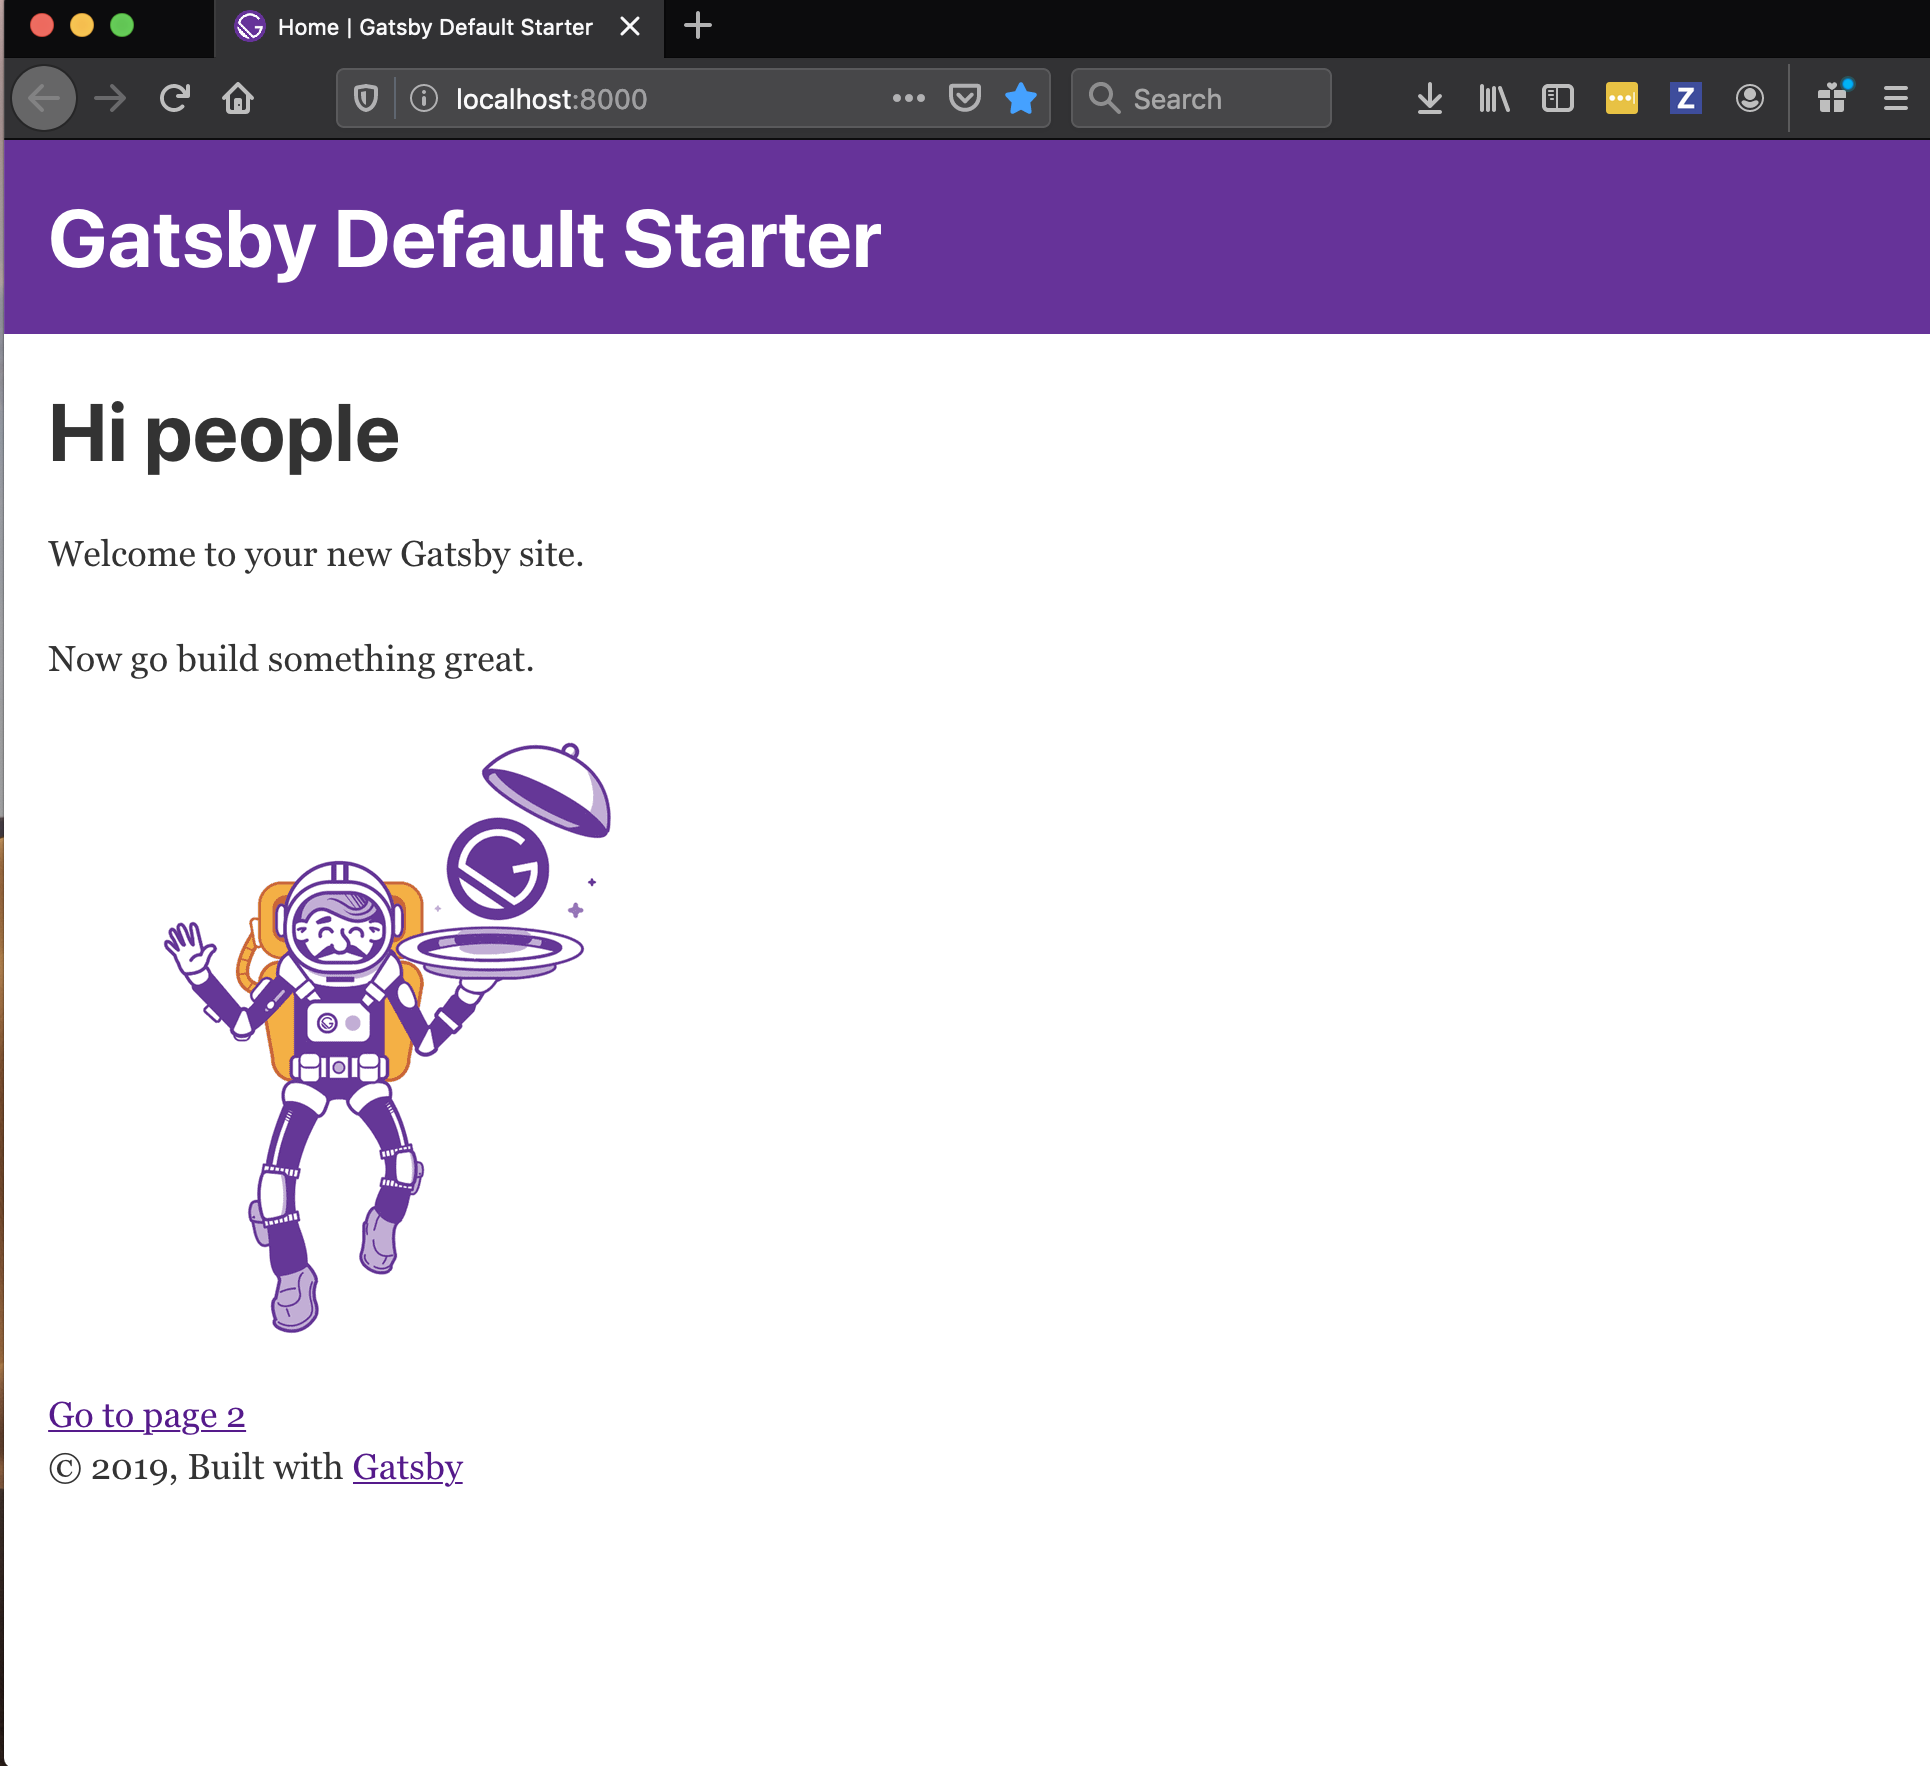
28 | When you open localhost:8000 in your browser, you will see the Gatsby default application.
31 | Let’s go ahead and remove all of the boilerplate. We will leave the current file structure inside of the src/ directory but remove all of the files inside.
rm -rf src/**/*.*
33 | Gatsby Architecture
35 |Since Gatsby is a static site generator for React, you can write simple React components, like you would do with create react app.
36 |Here is the current architecture of our application:
37 |-
38 |
components/: Contains all of your React components (i.e. navigation).
39 | pages/: Contains all pages with unique routes: any JavaScript file located in this directory will be accessible through its own URLmy-website/<<page-name>>
40 | images/: Contains all image assets for our project.
41 |
Structure
43 |Let’s go ahead and add some of the files that we’ll need to build our blog.
44 |Our blog will have four pages:
45 |-
46 |
- Home 47 |
- About 48 |
- Blog 49 |
- Contact 50 |
Let’s create a JavaScript file for each of these pages inside of the pages directory:
-
53 |
index.js
54 | about.js
55 | blog.js
56 | contact.js
57 |
Since we also removed all of the images from our project, we need to remove the reference to gatsby-icon to fix our development server.
Inside gatsby-config.js, remove the icon from the options object.
// delete me
 61 | icon: `src/images/gatsby-icon.png`
62 | To check whether everything is working as expected, let’s have index.js in the pages/ directory return some simple JSX.
// pages/index.js
 65 | import React from  "react"
 66 | const Home  =  ()  => (
 67 |   <div>
 68 |      <h1>Home</h1>
 69 |   </div>
 70 | );
 71 |
 72 | export  default Home
73 | When we restart our development server and head to our browser, we should see this:
75 |Let’s add similar JSX into the other three page components:
76 |// pages/about.js
77 | import React from "react"
78 |
79 | const About = () => (
80 | <div>
81 | <h1>About</h1>
82 | </div>
83 | );
84 |
85 | export default About
86 | // pages/blog.js
88 | import React from "react"
89 |
90 | const Blog = () => (
91 | <div>
92 | <h1>Blog</h1>
93 | </div>
94 | );
95 |
96 | export default Blog
97 | // pages/contact.js
99 | import React from "react"
100 |
101 | const Contact = () => (
102 | <div>
103 | <h1>Contact</h1>
104 | </div>
105 | );
106 |
107 | export default Contact
108 | If we head back to the browser and add a /about to the end of our localhost URL, we should see the about page. Likewise this will work for /blog and /contact.
So all of our pages are rendering, but wouldn’t it be nice if we had a navigation component we could use to switch between page views? Let’s build one!
111 |Navigation
112 |First let’s create two new files in the components/ directory: Nav.js and nav.css .
Inside Nav.js add the following code:
// Nav.js
115 | import React from  "react"
116 |
117 | const  Nav  =  ()  => (
118 |   <nav>
119 |     <ul>
120 |       <li>
121 |         <a  href="/">Home</a>
122 |       </li>
123 |       <li>
124 |         <a  href="/about">About</a>
125 |       </li>
126 |       <li>
127 |         <a  href="/blog">Blog</a>
128 |       </li>
129 |       <li>
130 |         <a  href="/contact">Contact</a>
131 |       </li>
132 |     </ul>
133 |   </nav>
134 | )
135 | export  default Nav
136 | Since we want the navigation bar on every single page, we could import it to each individual page and render it, however there’s an easier way.
138 |We can use a <Layout> component to ensure our navigation is rendered on each page, without having to manually import and render it for each one.
This is what our <Layout> component will look like:
// ADD 03 HERE
141 |The navigation bar will sit at the top of the page, and all of the page content will be rendered in a <main> element beneath.
Inside components/ create Layout.js.
First, let’s import React, Prop Types, and our Nav component:
144 |// Layout.js
145 | import React from "react"
146 | import PropTypes from "prop-types"
147 |
148 | import Nav from "./Nav"
149 | Next, we’ll create a stateless functional React component, passing children as a prop.
// Layout.js
152 | const Layout = ({ children }) => (
153 |   <>
154 |     <Nav />
155 |     <main>{children}</main>
156 |   </>
157 | );
158 |
159 | export default Layout;
160 | We also want to ensure we’re passing JSX to the <Layout> component, so we’ll use PropTypes to enforce that.
// Layout.js
163 | import React from  "react"
164 | import PropTypes from  "prop-types"
165 |
166 | import Nav from  "./Nav"
167 |
168 | const Layout = ({ children }) => (
169 |   <>
170 |     <Nav />
171 |     <main>{children}</main>
172 |   </>
173 | );
174 |
175 | Layout.propTypes = {
176 |   children: PropTypes.node.isRequired
177 | }
178 |
179 | export default Layout;
180 | Let’s see if our <Layout> component works.
Back in index.js, let’s import our <Layout> component and render it around our page content.
// index.js
184 | import React from "react"
185 | import Layout from "../components/Layout"
186 |
187 | const Home = () => (
188 |   <Layout>
189 |     <h1>Home</h1>
190 |   </Layout>
191 | );
192 |
193 | export default Home;
194 | If we head over to our browser we should see the navigation appearing above our page title:
196 |// ADD 04 HERE
197 |Let’s add the <Layout> component to the other three pages.
// pages/about.js
199 | import React from "react"
200 | import Layout from "../components/Layout"
201 |
202 | const About  =  ()  => (
203 |   <Layout>
204 |      <h1>About</h1>
205 |   </Layout>
206 | );
207 |
208 | export  default About
209 | // pages/blog.js
211 | import React from "react"
212 | import Layout from "../components/Layout"
213 |
214 | const Blog = () => (
215 | <Layout>
216 | <h1>Blog</h1>
217 | </Layout>
218 | );
219 |
220 | export default Blog
221 | // pages/contact.js
223 | import React from "react"
224 | import Layout from "../components/Layout"
225 |
226 | const Contact = () => (
227 | <Layout>
228 | <h1>Contact</h1>
229 | </Layout>
230 | );
231 |
232 | export default Contact
233 | If we head back to the browser, we can now click each navigation item and see it’s respective page content.
235 |And while this works, you’ll notice a re-render on each page. This is because we’re using the <a> tag to link between pages, and this forces a re-render.
As a solution, Gatsby provides a <Link> component to handle page routing.
Let’s head back to Nav.js and fix the page routing.
First let’s import Link.
239 |// Nav.js
240 | import React from "react";
241 | import { Link } from "gatsby";
242 | Next, let’s replace all <a> tags with <Link> and change the href= attributes to to= attributes.
// Nav.js
245 | import React from "react";
246 | import { Link } from "gatsby";
247 |
248 | const  Nav  =  ()  => (
249 |   <nav>
250 |     <ul>
251 |       <li>
252 |         <Link to="/">Home</Link>
253 |       </li>
254 |       <li>
255 |         <Link to="/about">About</Link>
256 |       </li>
257 |       <li>
258 |         <Link to="/blog">Blog</Link>
259 |       </li>
260 |       <li>
261 |         <Link to="/contact">Contact<Link>
262 |       </li>
263 |     </ul>
264 |   </nav>
265 | )
266 | export  default Nav
267 | Switching back to the browser, the page routing should be instantaneous when we click a navigation item.
269 |Styling
270 |Now that our app works, let’s add a bit of styling to make it look nicer.
271 |Active Link Styling
272 |Gatsby makes it simple to add specific styles when a navigation link is active.
273 |There are two ways to add styles to an active link:
274 |-
275 |
activeStyle: Uses inline CSS-in-JS to style an element when active.
276 |
<Link activeStyle={{ backgroundColor: 'red' }}>My link</Link>
278 | -
280 |
activeClassName: Gives the link element a class name when active.
281 |
<Link activeClassName="active-link">My link</Link>
283 | I generally use activeClassName if I have multiple links, however we’ll use activeStyle here to demonstrate CSS-in-JS.
I’ve also added some className attributes to the JSX code which we’ll use to style the rest of our navigation.
// Nav.js
287 | import React from  "react"
288 | import  { Link }  from  "gatsby"
289 |
290 | import  "./nav.css"
291 |
292 | const  Nav  =  ()  => (
293 |   <nav className="nav">
294 |     <ul className="nav-list">
295 |       <li className="nav-list-item">
296 |         <Link
297 | 	  activeStyle={{ borderBottom:  "2px solid #a64ac9"  }}
298 | 	  to="/"
299 | 	>
300 |             Home
301 |         </Link>
302 |       </li>
303 |       <li className="nav-list-item">
304 |         <Link
305 |           activeStyle={{ borderBottom:  "2px solid #a64ac9"  }}
306 |           to="/about"
307 |         >
308 |             About
309 |        </Link>
310 |      </li>
311 |      <li className="nav-list-item">
312 |        <Link
313 |          activeStyle={{ borderBottom:  "2px solid #a64ac9"  }}
314 |          to="/blog"
315 |        >
316 |            Blog
317 |        </Link>
318 |     </li>
319 |     <li className="nav-list-item">
320 |       <Link
321 |         activeStyle={{ borderBottom:  "2px solid #a64ac9"  }}
322 |         to="/contact"
323 |       >
324 |         Contact
325 |       </Link>
326 |     </li>
327 |   </ul>
328 | </nav>
329 | )
330 |
331 | export  default Nav
332 | Now each link, when selected, will have an underline of 2px.
Navigation Styling
335 |Let’s create a nav.css file in the components/ directory and add the following code.
/* nav.css */
337 | .nav  {
338 |   padding:  24px;
339 | }
340 |
341 | .nav-list  {
342 |   list-style:  none;
343 |   display:  flex;
344 |   margin:  0;
345 |   padding:  0;
346 | }
347 |
348 | .nav-list-item  {
349 |   margin-right:  24px;
350 |   font-family:  -apple-system, BlinkMacSystemFont,  "Segoe UI", Roboto, Oxygen,
351 |        Ubuntu, Cantarell,  "Open Sans",  "Helvetica Neue",  sans-serif;
352 |   font-size:  1.5em;
353 | }
354 |
355 | .nav-list  a  {
356 |   color:  #a64ac9;
357 |   text-decoration:  none;
358 |   border-bottom:  2px  transparent;
359 |   transition:  border  0.1s  linear;
360 | }
361 |
362 | .nav-list  a:hover,
363 | .nav-list  a:focus  {
364 |   border-bottom:  2px  solid  #a64ac9;
365 | }
366 | Don’t forget to import nav.css in Nav.js:
// Nav.js
369 | ...
370 | import "./nav.css";
371 | ...
372 | Layout Styling
374 |Now let’s add some styling to Layout.js. Create layout.css in the components/ directory.
/* layout.css */
376 | html,
377 | body  {
378 |   padding:  0;
379 |   margin:  0;
380 |   overflow-x:  hidden;
381 | }
382 |
383 | .main  {
384 |   padding:  24px;
385 |   font-family:  -apple-system, BlinkMacSystemFont,  "Segoe UI", Roboto, Oxygen,
386 |         Ubuntu, Cantarell,  "Open Sans",  "Helvetica Neue",  sans-serif;
387 |   background-color:  #a64ac9;
388 |   height:  100vh;
389 |   color:  #ffffff;
390 | }
391 |
392 | .main  h1  {
393 |   font-size:  5em;
394 | }
395 |
396 | .main  p  {
397 |   font-size:  2em;
398 | }
399 | Import the CSS file into Layout.js and add a class name of layout to the outer <div> element and a class name of main to the <main> element.
// Layout.js
402 | ...
403 | import "./layout.css"
404 | ...
405 | <Layout className="layout">
406 |   <Nav />
407 |   <main className="main">{children}</main>
408 | </Layout>
409 | ...
410 | Filler Content
412 |Lastly I’m going to add some filler content to index.js, about.js, and contact.js. I added 5 paragraphs with lorem ipsum text to each of the three pages.
// index.js, about.js, contact.js
414 | ...
415 | <p>
416 |   Lorem ipsum dolor sit amet consectetur adipisicing elit. Ea dignissimos
417 |   aut consequuntur aspernatur corrupti ratione, odit similique tenetur
418 |   accusantium, est nostrum esse minus iure voluptatum nihil cumque
419 |   blanditiis non? Odit.
420 | </p>
421 | ...
422 | Your site should now look much better!
424 |// ADD 05
425 |Blogs
426 |Now it’s time to add some blogs!
427 |Adding Blog Posts
428 |Inside of the pages/ directory, create three folders: 2020-01-01-my-first-blog, 2020-02-14-valentines-day, 2020-04-01-april-fools.
Inside each of these folders, add an index.md file with the following structure:
---
431 | path: '/my-first-blog'
432 | date: '2020-01-01'
433 | title: 'My First Blog'
434 | author: 'Emma Wedekind'
435 | description: 'This is my very first blog of 2020!'
436 | ---
437 |
438 | Here is my main content
439 | It is very interesting.
440 |
441 | Lorem ipsum dolor sit amet consectetur adipisicing elit. Ea dignissimos
442 | aut consequuntur aspernatur corrupti ratione, odit similique tenetur
443 | accusantium, est nostrum esse minus iure voluptatum nihil cumque
444 | blanditiis non? Odit.
445 | Everything between the three hyphens is called frontmatter. Frontmatter is essentially metadata for your blog post.
447 |For each blog post, add some frontmatter, containing the following data:
448 |-
449 |
path: The URL path to your blog
450 | date: The date of publish
451 | title: The blog post title
452 | author: The blog post author
453 | description: The blog post description
454 |
Everything after the closing hyphens is the main body of the blog post. You can add whatever you’d like here.
456 |Add markdown content for each of our three blog posts.
457 |Rendering A List Of Blog Posts
458 |Now that we have markdown files, we want to render them on our blog.js page.
We first need to install two package dependencies:
460 |In your terminal, run the following command:
461 |yarn add gatsby-transformer-remark
462 | Then, in gatsby-config.js, add gatsby-transformer-remark to the list of plugins.
  // gatsby-config.js
465 |   plugins: [
466 |     ...
467 |     `gatsby-transformer-remark`,
468 |     ...
469 |   ]
470 | We also need to add another plugin for gatsby-source-filesystem to tell GraphQL where to find our blog posts: our pages/ directory.
// gatsby-config.js
473 | {
474 | plugins: [
475 | ...
476 | {
477 |   resolve:  `gatsby-source-filesystem`,
478 |   options:  {
479 |   name:  `pages`,
480 |   path:  `${__dirname}/src/pages`,
481 | },
482 | ...
483 | ]
484 | Restart your development server, then head over to http://localhost:8000/___graphql.
Gatsby comes pre-configured with GraphQL which means we have access to GraphiQL.
487 |To get a list of all blog posts, we’ll use the AllMarkdownRemark plugin. Select the following options in the Explorer panel:
AllMarkdownRemark > edges > node > frontmatter > date title
489 | Then press the play button.
491 |You should see your blog post data in the right-hand panel.
492 |// 06
493 |Copy this GraphQL query and head over to blog.js.
First, import graphql from gatsby.
// blog.js
496 | ...
497 | import { graphql } from "gatsby"
498 | ...
499 | Then, after the blog export, add the following code, pasting in the GraphQL query we just copied from GraphiQL where it says <<Your code here>>
export const AllBlogsQuery = graphql`
502 |   <<your code here>>
503 | `
504 | My query looks like this (I added description path, and author to the list of data to retrieve from the frontmatter).
// blog.js
507 | export const AllBlogsQuery = graphql`
508 |   query AllBlogPosts {
509 |     allMarkdownRemark {
510 |       edges {
511 |         node {
512 |           frontmatter {
513 |             date
514 |             title
515 |             description
516 |             author
517 |             path
518 |           }
519 |         }
520 |       }
521 |     }
522 |   }
523 | `
524 | The last thing we have to do is pass data from the query as a parameter to the blog page. Let’s console log it to see if it’s working.
// blog.js
527 | ...
528 | const Blog = ({ data }) => (
529 |   <Layout>
530 |     <h1>Blog</h1>
531 |     { console.log(data) }
532 |   </Layout>
533 | )
534 | // 07
536 |Dynamically Creating A List Of Blogs
537 |Now let’s iterate over our blog data and create nodes for each of them.
538 |Create two new files in the component folder called Post.js and post.css.
Post will take five arguments:
-
541 |
title
542 | author
543 | description
544 | date
545 | path
546 |
// Post.js
548 | import React from  "react"
549 | import  { Link }  from  "gatsby"
550 | import  "./post.css"
551 |
552 | const  Post  =  ({  title,  author,  date,  description,  path  })  => (
553 |   <div  className="post">
554 |     <h3  className="post-title">{title}</h3>
555 |     <p  className="post-description">{description}</p>
556 |     <p  className="post-written-by">
557 |       Written by {author} on {date}
558 |     </p>
559 |     <Link  to={path}>Read more</Link>
560 |   </div>
561 | )
562 |
563 | export  default Post
564 | Here is the styling for our blog posts:
566 |/* post.css */
567 | .post {
568 | margin-bottom: 80px;
569 | padding-bottom: 80px;
570 | border-bottom: 2px solid white;
571 | }
572 |
573 | .post .post-title {
574 | font-size: 3em;
575 | margin: 0;
576 | }
577 |
578 | .post .post-description {
579 | font-size: 1.5em;
580 | }
581 |
582 | .post .post-written-by {
583 | font-size: 1em;
584 | }
585 |
586 | .post a {
587 | background-color: white;
588 | color: #a64ac9;
589 | padding: 16px 24px;
590 | text-decoration: none;
591 | margin-top: 16px;
592 | display: inline-block;
593 | }
594 | Now we can import Post into blog.js and render a new post for each markdown file:
// blog.js
597 | ...
598 | import Post from  "../components/Post"
599 |
600 | ...
601 |
602 | const  Blog  =  ({  data  })  => (
603 |   <Layout>
604 |     <h1>Blog</h1>
605 |     {data.allMarkdownRemark.edges.map(post  =>  {
606 |       const  {  title,  author,  date,  description,  path  }  = post.node.frontmatter
607 |
608 |     return (
609 |       <Post
610 |         title={title}
611 |         author={author}
612 |         date={date}
613 |         description={description}
614 |         key={`${date}__${title}`}
615 |         path={path}
616 |      />
617 |     )
618 |   })}
619 | </Layout>
620 | )
621 | Your blog should now look like this:
623 | // 08
Dynamically Generating Individual Blog Pages
625 |Now that we’ve generated a list of blogs on our blog page, how can we create a page for each blog which appears when the user clicks ‘Read More’?
626 |We could manually create a page for each post, but this would be tedious.
627 |Luckily Gatsby, in combination with node.js, provides functionality for dynamically generating pages.
628 |Let’s first create the GraphQL query for retrieving data for an individual blog post.
629 |When we created the GraphQL schema for retrieving all blog posts, we used the allMarkdownRemark plugin.
This time, we only want the data for an individual blog post, so we’ll use the markdownRemark plugin.
In the Explorer panel on the left, select:
632 |`markdownRemark > frontmatter(purple) > eq: "_"
633 | Be sure to select the purple frontmatter for this part of the query; it’s an argument versus a field name.
This tells GraphQL that we will select a specific asset by their path, which will be passed as a parameter.
636 |For this individual post we want to get several pieces of frontmatter data, so we’ll select
637 |markdownRemark > html, frontmatter (blue) > author date path title
638 | Be sure to select the blue frontmatter for this part of the query; it’s a field name versus an argument.
Next, where we’re passing an argument to markdownRemark, we have to give GraphQL an eq value to look for. In our case, we’ll pass the path for the blog post whose content we want to display.
We first need to pass this argument to our query, before we can pass it to the markdownRemark plugin. You can also change the name of the query to be more semantic:
query BlogPost($path: String!) {
643 |    markdownRemark(frontmatter: { path: eq: $path }}) {
644 |     frontmatter {
645 |       author
646 |       date
647 |       title
648 |       path
649 |     }
650 |     html
651 |   }
652 | }
653 | String! tells GraphQL that the path argument we’re passing is of type String and is required.
Now let’s test if this query actually works.
656 |If we press play, we get an error:
657 |// 09
658 |This is due to the fact that our query expects an argument but we haven’t passed it one!
659 |Open the panel at the bottom called Query Variables and enter the following:
660 |{
661 | "path": "/april-fools"
662 | }
663 | When we press the play button now we get the data back for our April Fools blog.
665 |// 10
666 |Now that we have our query, what do we do with it?
667 |First, let’s build a template which will denote how each blog post should be structured.
668 |In the src/ directory, create a new folder called templates and add a file inside called blogTemplate.js.
We first need to include some imports:
670 |// templates/blogTemplate.js
671 | import React from "react"
672 | import { graphql, Link } from "gatsby"
673 |
674 | import Layout from "../components/Layout"
675 | Next, let’s create the function skeleton:
677 |// templates/blogTemplate.js
678 | ...
679 |
680 | export default function Template({ data }) {
681 | return ()
682 | }
683 | This template will take in our blog data and render it accordingly.
685 |Finally, let’s add our GraphQL query to the bottom of the file.
686 |// templates/blogTemplate.js
687 | ...
688 | export const postQuery = graphql`
689 | query BlogPost($path: String!) {
690 | markdownRemark(frontmatter: { path: { eq: $path }}) {
691 | frontmatter {
692 | author
693 | date
694 | title
695 | path
696 | }
697 | html
698 | }
699 | }
700 | `
701 | Now let’s construct our blog post structure. First, let’s grab the post and the title, author, and date from the data.
// templates/blogTemplate.js
704 | ...
705 | export default function Template({ data }) {
706 |   const post = data.markdownRemark;
707 |   const { title, author, date } = post.frontmatter;
708 | We’ll wrap our JSX in the <Layout> component, and inside we’ll have:
-
711 |
- A link back to the blogs page 712 |
- The blog post title 713 |
- The posted by with author name and date 714 |
- A
<div>containing thedangerouslySetInnerHTMLattribute, which takes thepost.htmlmarkup as the value.
715 |
// templates/blogTemplate.js
717 | ...
718 | export default function Template({ data }) {
719 |   const post = data.markdownRemark;
720 |   const { title, author, date } = post.frontmatter;
721 |
722 |   return (
723 |     <Layout>
724 |       <Link to="/">Back to blogs</Link>
725 |       <h1>{title}</h1>
726 |       <p>Posted by {author} on {date}</p>
727 |       <div dangerouslySetInnerHTML={{ __html: post.html }} />
728 |     </Layout>
729 |   )
730 | }
731 | ...
732 | Here is the completed blogTemplate.js file:
// templates/blogTemplate.js
735 | import React from "react"
736 | import { graphql, Link } from "gatsby"
737 |
738 | import Layout from "../components/Layout"
739 |
740 | export default function Template({ data }) {
741 |   const post = data.markdownRemark;
742 |   const { title, author, date } = post.frontmatter;
743 |
744 |   return (
745 |     <Layout>
746 |       <Link to="/">Back to blogs</Link>
747 |       <h1>{title}</h1>
748 |       <p>Posted by {author} on {date}</p>
749 |       <div dangerouslySetInnerHTML={{ __html: post.html }} />
750 |     </Layout>
751 |   )
752 | }
753 |
754 | export const postQuery = graphql`
755 | query BlogPost($path: String!) {
756 |    markdownRemark(frontmatter: { path: { eq: $path }}) {
757 |     frontmatter {
758 |       author
759 |       date
760 |       title
761 |       path
762 |     }
763 |     html
764 |   }
765 | }
766 | `
767 | Now that we have our template, let’s use it! We have to tell Gatsby to dynamically generate pages for each blog post, so let’s head over to gatsby-node.js.
Let’s first require the path module:
// gatsby-node.js
771 | const path = require('path')
772 | We’re going to use the exports.createPages API to dynamically generate our pages.
// gatsby-node.js
775 | ...
776 | exports.createPages = ({ boundActionCreators, graphql }) => {
777 |   const { createPages } = boundActionCreators
778 |
779 |   const postTemplate = path.resolve('src/templates/blogTemplate.js')
780 | }
781 | We now have to return a query to get all blog posts, so we can iterate over an generate our pages. We already have this query from a previous step, and all we need for each post is its path.
  ...
784 |   return graphql(`
785 |     {
786 |       allMarkdownRemark {
787 |         edges {
788 |           node {
789 |             frontmatter {
790 |               path
791 |             }
792 |           }
793 |         }
794 |       }
795 |     }
796 |   `)
797 | Once we receive a response back from the query, we want to reject the promise if an error occurred, and otherwise create a page for each post.
799 |This will create a post at the designated path received from the query results, and will use the postTemplate we declared above (our blogPost.js template) to render each post.
  ...
801 |   return graphql(`
802 |     {
803 |       allMarkdownRemark {
804 |         edges {
805 |           node {
806 |             frontmatter {
807 |               path
808 |             }
809 |           }
810 |         }
811 |       }
812 |     }
813 |   `).then(res => {
814 |     if (res.errors) { return Promise.reject(res.errors) }
815 |
816 |     res.data.allMarkdownRemark.edges.forEach(({ node }) => {
817 |     createPage({
818 |       path: node.frontmatter.path,
819 |       component: postTemplate
820 |     })
821 |   })
822 | Here is the completed gatsby-node.js file:
const path = require('path')
825 |
826 | exports.createPages = ({ boundActionCreators, graphql }) => {
827 |   const { createPages } = boundActionCreators
828 |
829 |   const postTemplate = path.resolve('src/templates/blogTemplate.js')
830 | }
831 |
832 |   return graphql(`
833 |     {
834 |       allMarkdownRemark {
835 |         edges {
836 |           node {
837 |             frontmatter {
838 |               path
839 |             }
840 |           }
841 |         }
842 |       }
843 |     }
844 |   `).then(res => {
845 |     if (res.errors) { return Promise.reject(res.errors) }
846 |
847 |     res.data.allMarkdownRemark.edges.forEach(({ node }) => {
848 |     createPage({
849 |       path: node.frontmatter.path,
850 |       component: postTemplate
851 |     })
852 |   })
853 | Now we’re ready to see if it worked!
855 |Re-start your development server, then head over to the browser and click one of the blog post “Read more” links:
856 |I’m going to add a bit more styling to make it look nicer.
857 |I’ll create a blogTemplate.css file in the templates/ directory:
/* blogTemplate.css */
859 | .blogTemplate  .blogTemplate-title  {
860 |   margin:  80px  0  24px;
861 | }
862 |
863 | .blogTemplate  .blogTemplate-posted-by  {
864 |   font-size:  1.2em;
865 | }
866 |
867 | .blogTemplate  a  {
868 |   color:  #fff;
869 | }
870 | Then I’ll import the CSS file into blogTemplate.js and add the appropriate class names. I’ll also wrap the JSX inside of <Layout> in a <div> so we can give it a class name of blogTemplate.
// templates/blogTemplate.js
873 | import React from "react"
874 | import { graphql, Link } from "gatsby"
875 |
876 | import Layout from "../components/Layout"
877 |
878 | import "./blogTemplate.css"
879 |
880 | export default function Template({ data }) {
881 |   const post = data.markdownRemark;
882 |   const { title, author, date } = post.frontmatter;
883 |
884 |   return (
885 |     <Layout>
886 |       <div className='blogTemplate'>
887 |         <Link to="/">Back to blogs</Link>
888 |         <h1 className="blogTemplate-title>{title}</h1>
889 |         <p className='blogTemplate-posted-by'>Posted by {author} on {date}</p>
890 |         <div dangerouslySetInnerHTML={{ __html: post.html }} />
891 |       </div>
892 |     </Layout>
893 |   )
894 | }
895 |
896 | export const postQuery = graphql`
897 | query BlogPost($path: String!) {
898 |    markdownRemark(frontmatter: { path: { eq: $path }}) {
899 |     frontmatter {
900 |       author
901 |       date
902 |       title
903 |       path
904 |     }
905 |     html
906 |   }
907 | }
908 | `
909 | Your blog post should look like this:
911 |// 11
912 |Deploying To Netlify
913 |Now that we have a working blog, let’s deploy it to Netlify!
914 |Setting Up A GitHub Repository
915 |First, we need to establish our blog as a Git repository.
916 |On GitHub, create a new repo:
917 |// 12
918 |With the terminal, in the project directory run the following commands:
919 |git init
920 | git add .
921 | git commit -m "Adding my blog files"
922 | git remote add origin <<repo-link>>
923 | git push -u origin master
924 | Deploying To Netlify
926 |Once your code is on GitHub, it’s time to deploy!
927 |Create an account on Netlify or sign in.
928 |Click “New site from Git” and authenticate with GitHub.
929 |Select your newly-created repository and click “Deploy.”
930 |// 13
931 |Every time you push to the master branch, your site will auto-deploy (you can change the deploy configuration but this is the default.)
932 |You can even add a custom domain to really make the blog your own.
933 |Conclusion
934 |And that’s it! I hope this was helpful to explain the process for building a blog with Gatsby.
935 |This process is tedious, so once you understand the architecture I would recommend using the Gatsby blog starter.
936 |Feel free to contact me on Twitter if you have any questions.
937 |Happy blogging!
938 | 939 | --------------------------------------------------------------------------------