├── .github
└── workflows
│ └── python-publish.yml
├── .gitignore
├── LICENSE
├── MANIFEST.in
├── README.md
├── SceneEditor
├── GUI
│ ├── MainView.py
│ ├── MenuBar.py
│ ├── ToolBar.py
│ ├── __init__.py
│ ├── dialogs
│ │ ├── ShaderInput.py
│ │ ├── ShaderLoaderDialog.py
│ │ ├── ShaderLoaderDialogManager.py
│ │ └── __init__.py
│ └── panels
│ │ ├── ObjectPropertiesDefinition.py
│ │ ├── PropertiesPanel.py
│ │ ├── StructurePanel.py
│ │ └── __init__.py
├── SceneEditor.py
├── __init__.py
├── core
│ ├── CameraController.py
│ ├── Core.py
│ ├── CoreKillRingHandler.py
│ ├── KillRing.py
│ ├── SelectionHandler.py
│ ├── TransformationHandler.py
│ └── __init__.py
├── custom_export
│ └── custom_bam
│ │ └── exporter.py
├── directGuiOverrides
│ ├── DirectOptionMenu.py
│ └── __init__.py
├── directtoolsOverrides
│ ├── DirectGrid.py
│ └── __init__.py
├── export
│ ├── ExportBam.py
│ ├── ExportProject.py
│ ├── ExportPy.py
│ └── __init__.py
├── icons
│ ├── ArrowDownSmall.png
│ ├── ArrowUpSmall.png
│ ├── Collapse.png
│ ├── Collapse.svg
│ ├── Collapsed.png
│ ├── CycleRedo.png
│ ├── CycleRedo.svg
│ ├── Delete.png
│ ├── Delete.svg
│ ├── DeleteSmall.png
│ ├── DeleteSmall.svg
│ ├── Export.png
│ ├── Export.svg
│ ├── GridOff.png
│ ├── GridOn.png
│ ├── GridOnOff.svg
│ ├── Help.png
│ ├── Help.svg
│ ├── Load.png
│ ├── Load.svg
│ ├── New.png
│ ├── New.svg
│ ├── Quit.png
│ ├── Quit.svg
│ ├── Redo.png
│ ├── Redo.svg
│ ├── Reload.png
│ ├── Reload.svg
│ ├── Save.png
│ ├── Save.svg
│ ├── Settings.png
│ ├── Settings.svg
│ ├── Undo.png
│ ├── Undo.svg
│ ├── VisibilityOffSmall.png
│ ├── VisibilityOnSmall.png
│ ├── VisibilitySmall.svg
│ ├── arrowSmall.svg
│ └── arrowUpSmall.svg
├── loader
│ ├── LoadProject.py
│ └── __init__.py
└── tools
│ ├── JSONTools.py
│ └── __init__.py
├── Screenshots
└── SceneEditor.png
├── build.sh
├── design
├── ShaderInput.json
└── ShaderLoaderDialog.json
├── editorLogHandler.py
├── main.py
├── requirements.txt
├── setup.py
└── todo.org
/.github/workflows/python-publish.yml:
--------------------------------------------------------------------------------
1 | # This workflow will upload a Python Package using Twine when a release is created
2 | # For more information see: https://help.github.com/en/actions/language-and-framework-guides/using-python-with-github-actions#publishing-to-package-registries
3 |
4 | # This workflow uses actions that are not certified by GitHub.
5 | # They are provided by a third-party and are governed by
6 | # separate terms of service, privacy policy, and support
7 | # documentation.
8 |
9 | name: Upload Python Package
10 |
11 | on:
12 | release:
13 | types: [published]
14 |
15 | permissions:
16 | contents: read
17 |
18 | jobs:
19 | deploy:
20 |
21 | runs-on: ubuntu-latest
22 |
23 | steps:
24 | - uses: actions/checkout@v3
25 | - name: Set up Python
26 | uses: actions/setup-python@v3
27 | with:
28 | python-version: '3.x'
29 | - name: Install dependencies
30 | run: |
31 | python -m pip install --upgrade pip
32 | pip install build
33 | - name: Build package
34 | run: python -m build
35 | - name: Publish package
36 | uses: pypa/gh-action-pypi-publish@27b31702a0e7fc50959f5ad993c78deac1bdfc29
37 | with:
38 | user: __token__
39 | password: ${{ secrets.PYPI_API_TOKEN }}
40 |
--------------------------------------------------------------------------------
/.gitignore:
--------------------------------------------------------------------------------
1 | __pycache__
2 | /build
3 | /dist
4 | /*.egg-info
5 | *.py[cod]
6 |
--------------------------------------------------------------------------------
/LICENSE:
--------------------------------------------------------------------------------
1 | BSD 2-Clause License
2 |
3 | Copyright (c) 2022, Fireclaw
4 | All rights reserved.
5 |
6 | Redistribution and use in source and binary forms, with or without
7 | modification, are permitted provided that the following conditions are met:
8 |
9 | 1. Redistributions of source code must retain the above copyright notice, this
10 | list of conditions and the following disclaimer.
11 |
12 | 2. Redistributions in binary form must reproduce the above copyright notice,
13 | this list of conditions and the following disclaimer in the documentation
14 | and/or other materials provided with the distribution.
15 |
16 | THIS SOFTWARE IS PROVIDED BY THE COPYRIGHT HOLDERS AND CONTRIBUTORS "AS IS"
17 | AND ANY EXPRESS OR IMPLIED WARRANTIES, INCLUDING, BUT NOT LIMITED TO, THE
18 | IMPLIED WARRANTIES OF MERCHANTABILITY AND FITNESS FOR A PARTICULAR PURPOSE ARE
19 | DISCLAIMED. IN NO EVENT SHALL THE COPYRIGHT HOLDER OR CONTRIBUTORS BE LIABLE
20 | FOR ANY DIRECT, INDIRECT, INCIDENTAL, SPECIAL, EXEMPLARY, OR CONSEQUENTIAL
21 | DAMAGES (INCLUDING, BUT NOT LIMITED TO, PROCUREMENT OF SUBSTITUTE GOODS OR
22 | SERVICES; LOSS OF USE, DATA, OR PROFITS; OR BUSINESS INTERRUPTION) HOWEVER
23 | CAUSED AND ON ANY THEORY OF LIABILITY, WHETHER IN CONTRACT, STRICT LIABILITY,
24 | OR TORT (INCLUDING NEGLIGENCE OR OTHERWISE) ARISING IN ANY WAY OUT OF THE USE
25 | OF THIS SOFTWARE, EVEN IF ADVISED OF THE POSSIBILITY OF SUCH DAMAGE.
26 |
--------------------------------------------------------------------------------
/MANIFEST.in:
--------------------------------------------------------------------------------
1 | include SceneEditor/icons/*.png
2 |
--------------------------------------------------------------------------------
/README.md:
--------------------------------------------------------------------------------
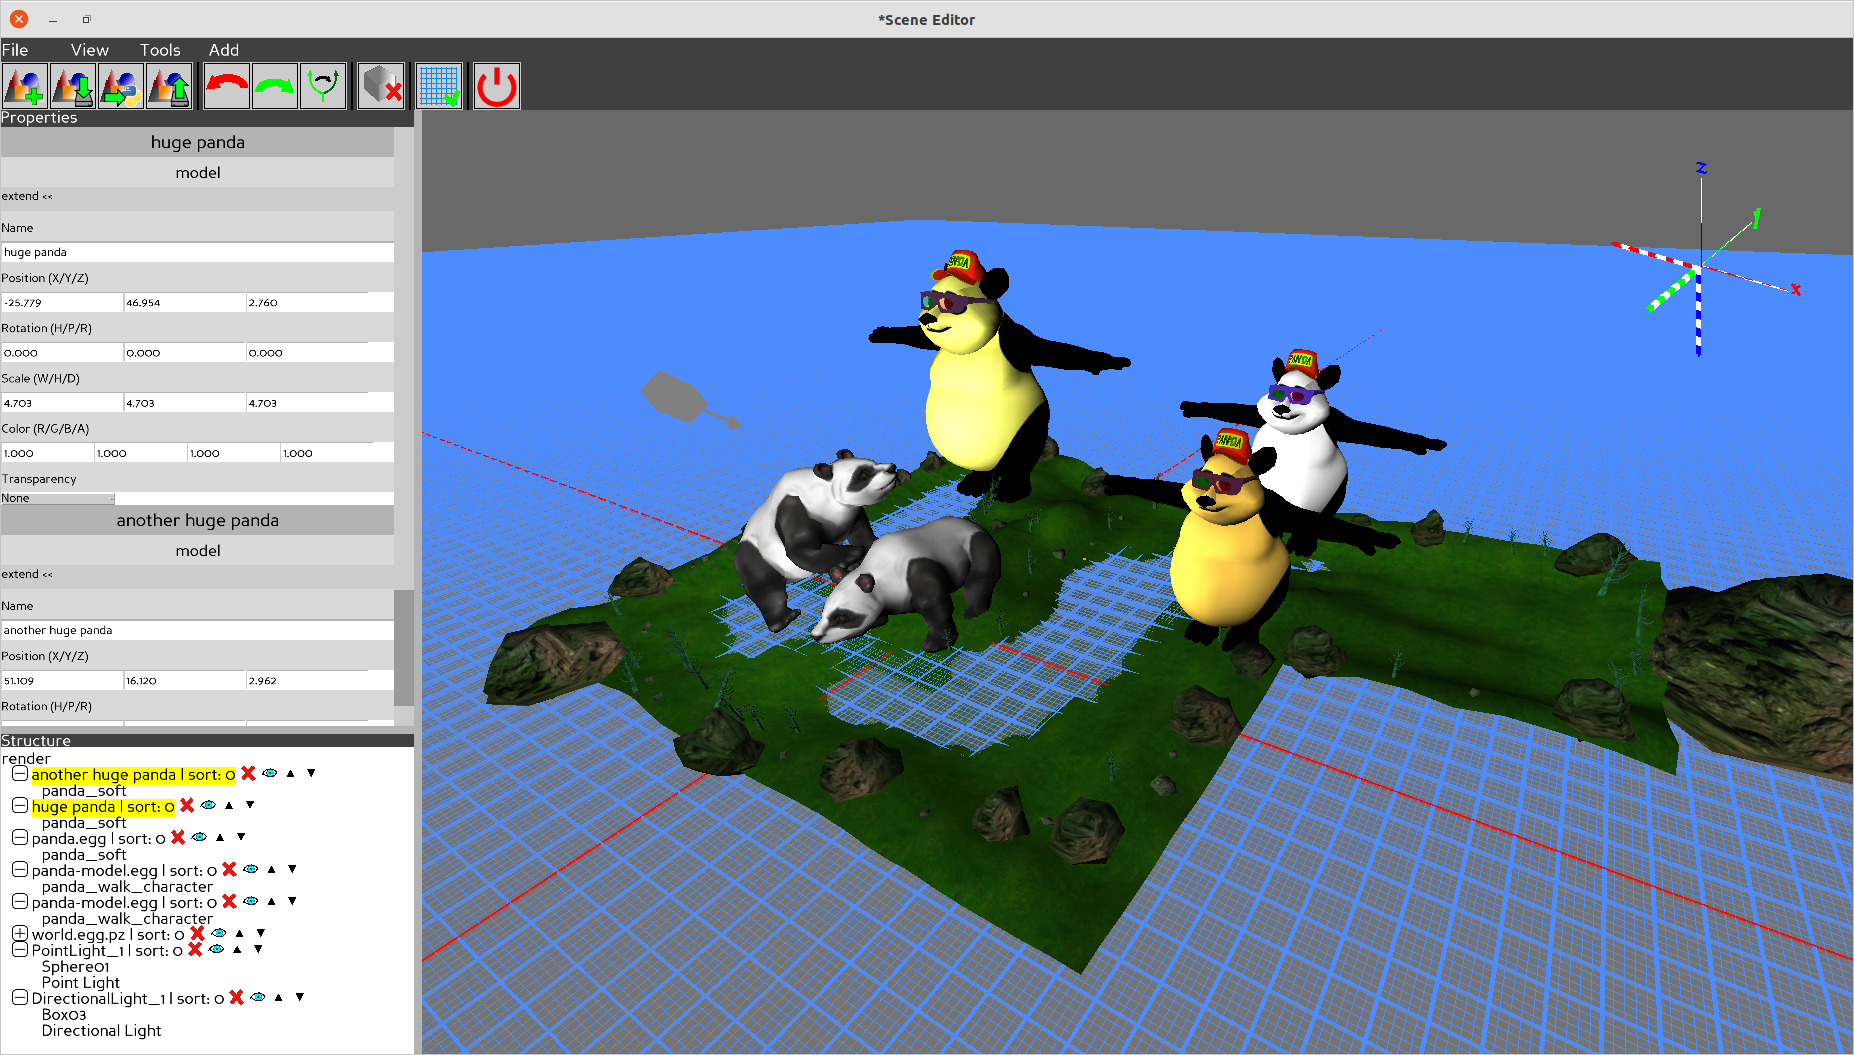
1 | # SceneEditor
2 | A simple Scene editor for the Panda3D game engine
3 |
4 | ## Requirements
5 | - Python 3.x
6 | - Panda3D 1.10.4.1+
7 | - DirectFolderBrowser
8 | - DirectGuiExtension
9 |
10 | To install them, using pip:
11 | pip install -r requirements.txt
12 |
13 | ## Manual
14 | NOTE: Currently the editor is heavily work in progress so things may change later
15 |
16 | ### Starting the editor
17 | To start the Scene Editor, simply run the main.py script
18 |
19 | python main.py
20 |
21 | ### Shortcuts
22 | #### Basic
23 | |shortcut|action|
24 | |---|---|
25 | |Ctrl-Q|Quit the editor|
26 | |Ctrl-N|New Scene|
27 | |Ctrl-O|Open Scene from JSON format|
28 | |Ctrl-S|Save Scene to JSON format|
29 | |Ctrl-E|Export Scene to Python format|
30 |
31 | #### Navigation
32 | Navigating the scene is similar to Blender in that you can move around with the mouse.
33 | |shortcut|action|
34 | |---|---|
35 | |Middle mouse button|Rotate around pivot|
36 | |Shift + Middle mouse button|Pan|
37 | |mouse wheel|Zoom|
38 | |Left mouse button|Select|
39 | |Shift + Left mouse button|Multiselect|
40 | |Ctrl-G|Toggle grid|
41 | |5|Toggle Perspective/Orthographic lense|
42 | |7|Show top|
43 | |Ctrl-7|Show bottom|
44 | |1|Show front|
45 | |Ctrl-1|Show back|
46 | |3|Show right|
47 | |Ctrl-3|Show left|
48 |
49 | #### Editing
50 | |shortcut|action|
51 | |---|---|
52 | |G|Move selected objects|
53 | |R|Rotate selected objects around objects center|
54 | |S|Scale selected objects|
55 | |X, Y and Z|During moving and rotating clips to the respective axis|
56 | |Del|Remove objects|
57 | |Ctrl-Z|Undo|
58 | |Ctrl-Y|Redo|
59 | |Ctrl-Shift-Y|Switch between redo branches|
60 | |C|Show collision solids|
61 | |H|Toggle model hidden status|
62 | |Ctrl-C|Copy|
63 | |Ctrl-X|Cut|
64 | |Ctrl-V|Paste (makes last selected object parent or render if none is selected)|
65 | |Page Up|Increase objects sort value|
66 | |Page Down|Decrease objects sort value|
67 |
68 | ### Save and export
69 | To save The Scene as a project file, hit Ctrl-S or the respective button in the toolbar.
70 | This will save a Json file that can later be loaded by the editor again.
71 |
72 | To export as a python script that can directly be used in projects, either hit Ctrl-E or click the button in the toolbar.
73 |
74 | ### Use exported scripts
75 | The python script will always contain a class called Scene which you can pass a NodePath to be used as root parent element for the scene. Simply instancing the class will load and show the scene by default. If this is not desired, hide the root NodePath as given on initialization. As you shouldn't edit the exported class due to edits being overwritten with a new export, you should create another python module which will handle the logic for the scene. This dedicated module could for example implement a show and hide method to easily change the visibility of the scene. All objects can be accessed from the instantiated scene by their name with special characters being replaced with an underscore.
76 |
77 | Here is a small example of how to load and instantiate a Scene. We expect the scene to be exported to a file called myScene.py and contain a model named panda:
78 | from myScene import Scene as MyScene
79 | myScene = MyScene()
80 | myScene.panda.set_pos(0,0,0)
81 |
22 |
62 |
63 |
65 | image/svg+xml
66 |
70 |
71 |
72 |
78 |
97 |
102 |
115 |
116 |
--------------------------------------------------------------------------------
/SceneEditor/icons/Collapsed.png:
--------------------------------------------------------------------------------
https://raw.githubusercontent.com/fireclawthefox/SceneEditor/f02ac2539f6cdb11af0fb2fb7e5204feca1b1eee/SceneEditor/icons/Collapsed.png
--------------------------------------------------------------------------------
/SceneEditor/icons/CycleRedo.png:
--------------------------------------------------------------------------------
https://raw.githubusercontent.com/fireclawthefox/SceneEditor/f02ac2539f6cdb11af0fb2fb7e5204feca1b1eee/SceneEditor/icons/CycleRedo.png
--------------------------------------------------------------------------------
/SceneEditor/icons/Delete.png:
--------------------------------------------------------------------------------
https://raw.githubusercontent.com/fireclawthefox/SceneEditor/f02ac2539f6cdb11af0fb2fb7e5204feca1b1eee/SceneEditor/icons/Delete.png
--------------------------------------------------------------------------------
/SceneEditor/icons/Delete.svg:
--------------------------------------------------------------------------------
1 |
2 |
3 |
4 |
23 |
25 |
28 |
37 |
47 |
52 |
63 |
92 |
93 |
95 | image/svg+xml
96 |
99 |
100 |
101 |
106 |
120 |
163 |
172 |
183 |
184 |
185 |
--------------------------------------------------------------------------------
/SceneEditor/icons/DeleteSmall.png:
--------------------------------------------------------------------------------
https://raw.githubusercontent.com/fireclawthefox/SceneEditor/f02ac2539f6cdb11af0fb2fb7e5204feca1b1eee/SceneEditor/icons/DeleteSmall.png
--------------------------------------------------------------------------------
/SceneEditor/icons/DeleteSmall.svg:
--------------------------------------------------------------------------------
1 |
2 |
3 |
4 |
22 |
45 |
46 |
48 | image/svg+xml
49 |
53 |
54 |
55 |
60 |
64 |
75 |
76 |
77 |
--------------------------------------------------------------------------------
/SceneEditor/icons/Export.png:
--------------------------------------------------------------------------------
https://raw.githubusercontent.com/fireclawthefox/SceneEditor/f02ac2539f6cdb11af0fb2fb7e5204feca1b1eee/SceneEditor/icons/Export.png
--------------------------------------------------------------------------------
/SceneEditor/icons/GridOff.png:
--------------------------------------------------------------------------------
https://raw.githubusercontent.com/fireclawthefox/SceneEditor/f02ac2539f6cdb11af0fb2fb7e5204feca1b1eee/SceneEditor/icons/GridOff.png
--------------------------------------------------------------------------------
/SceneEditor/icons/GridOn.png:
--------------------------------------------------------------------------------
https://raw.githubusercontent.com/fireclawthefox/SceneEditor/f02ac2539f6cdb11af0fb2fb7e5204feca1b1eee/SceneEditor/icons/GridOn.png
--------------------------------------------------------------------------------
/SceneEditor/icons/GridOnOff.svg:
--------------------------------------------------------------------------------
1 |
2 |
3 |
4 |
23 |
25 |
28 |
33 |
34 |
59 |
60 |
62 | image/svg+xml
63 |
67 |
68 |
69 |
74 |
84 |
125 |
129 |
170 |
171 |
176 |
182 |
187 |
190 |
201 |
202 |
203 |
--------------------------------------------------------------------------------
/SceneEditor/icons/Help.png:
--------------------------------------------------------------------------------
https://raw.githubusercontent.com/fireclawthefox/SceneEditor/f02ac2539f6cdb11af0fb2fb7e5204feca1b1eee/SceneEditor/icons/Help.png
--------------------------------------------------------------------------------
/SceneEditor/icons/Help.svg:
--------------------------------------------------------------------------------
1 |
2 |
3 |
4 |
22 |
50 |
51 |
53 | image/svg+xml
54 |
58 |
59 |
60 |
65 |
75 |
115 |
116 |
117 |
--------------------------------------------------------------------------------
/SceneEditor/icons/Load.png:
--------------------------------------------------------------------------------
https://raw.githubusercontent.com/fireclawthefox/SceneEditor/f02ac2539f6cdb11af0fb2fb7e5204feca1b1eee/SceneEditor/icons/Load.png
--------------------------------------------------------------------------------
/SceneEditor/icons/Load.svg:
--------------------------------------------------------------------------------
1 |
2 |
3 |
4 |
23 |
25 |
37 |
46 |
59 |
68 |
81 |
90 |
103 |
112 |
113 |
138 |
139 |
141 | image/svg+xml
142 |
146 |
147 |
148 |
153 |
156 |
183 |
220 |
221 |
--------------------------------------------------------------------------------
/SceneEditor/icons/New.png:
--------------------------------------------------------------------------------
https://raw.githubusercontent.com/fireclawthefox/SceneEditor/f02ac2539f6cdb11af0fb2fb7e5204feca1b1eee/SceneEditor/icons/New.png
--------------------------------------------------------------------------------
/SceneEditor/icons/New.svg:
--------------------------------------------------------------------------------
1 |
2 |
3 |
4 |
23 |
25 |
28 |
37 |
40 |
49 |
52 |
61 |
64 |
73 |
113 |
136 |
137 |
139 | image/svg+xml
140 |
144 |
145 |
146 |
151 |
153 |
180 |
193 |
194 |
--------------------------------------------------------------------------------
/SceneEditor/icons/Quit.png:
--------------------------------------------------------------------------------
https://raw.githubusercontent.com/fireclawthefox/SceneEditor/f02ac2539f6cdb11af0fb2fb7e5204feca1b1eee/SceneEditor/icons/Quit.png
--------------------------------------------------------------------------------
/SceneEditor/icons/Quit.svg:
--------------------------------------------------------------------------------
1 |
2 |
3 |
4 |
22 |
45 |
46 |
48 | image/svg+xml
49 |
53 |
54 |
55 |
60 |
79 |
80 |
--------------------------------------------------------------------------------
/SceneEditor/icons/Redo.png:
--------------------------------------------------------------------------------
https://raw.githubusercontent.com/fireclawthefox/SceneEditor/f02ac2539f6cdb11af0fb2fb7e5204feca1b1eee/SceneEditor/icons/Redo.png
--------------------------------------------------------------------------------
/SceneEditor/icons/Redo.svg:
--------------------------------------------------------------------------------
1 |
2 |
20 |
22 |
30 |
36 |
44 |
50 |
58 |
64 |
72 |
78 |
86 |
92 |
94 |
103 |
105 |
114 |
115 |
140 |
141 |
143 | image/svg+xml
144 |
148 |
149 |
150 |
155 |
159 |
182 |
190 |
191 |
--------------------------------------------------------------------------------
/SceneEditor/icons/Reload.png:
--------------------------------------------------------------------------------
https://raw.githubusercontent.com/fireclawthefox/SceneEditor/f02ac2539f6cdb11af0fb2fb7e5204feca1b1eee/SceneEditor/icons/Reload.png
--------------------------------------------------------------------------------
/SceneEditor/icons/Reload.svg:
--------------------------------------------------------------------------------
1 |
2 |
3 |
4 |
22 |
24 |
32 |
38 |
46 |
52 |
60 |
66 |
74 |
80 |
88 |
94 |
96 |
105 |
107 |
116 |
117 |
140 |
141 |
143 | image/svg+xml
144 |
148 |
149 |
150 |
155 |
159 |
163 |
185 |
189 |
211 |
212 |
213 |
214 |
--------------------------------------------------------------------------------
/SceneEditor/icons/Save.png:
--------------------------------------------------------------------------------
https://raw.githubusercontent.com/fireclawthefox/SceneEditor/f02ac2539f6cdb11af0fb2fb7e5204feca1b1eee/SceneEditor/icons/Save.png
--------------------------------------------------------------------------------
/SceneEditor/icons/Save.svg:
--------------------------------------------------------------------------------
1 |
2 |
3 |
4 |
23 |
25 |
37 |
46 |
59 |
68 |
81 |
90 |
103 |
112 |
113 |
136 |
137 |
139 | image/svg+xml
140 |
144 |
145 |
146 |
151 |
154 |
181 |
214 |
215 |
--------------------------------------------------------------------------------
/SceneEditor/icons/Settings.png:
--------------------------------------------------------------------------------
https://raw.githubusercontent.com/fireclawthefox/SceneEditor/f02ac2539f6cdb11af0fb2fb7e5204feca1b1eee/SceneEditor/icons/Settings.png
--------------------------------------------------------------------------------
/SceneEditor/icons/Settings.svg:
--------------------------------------------------------------------------------
1 |
2 |
3 |
4 |
22 |
45 |
46 |
48 | image/svg+xml
49 |
53 |
54 |
55 |
60 |
73 |
74 |
--------------------------------------------------------------------------------
/SceneEditor/icons/Undo.png:
--------------------------------------------------------------------------------
https://raw.githubusercontent.com/fireclawthefox/SceneEditor/f02ac2539f6cdb11af0fb2fb7e5204feca1b1eee/SceneEditor/icons/Undo.png
--------------------------------------------------------------------------------
/SceneEditor/icons/Undo.svg:
--------------------------------------------------------------------------------
1 |
2 |
20 |
22 |
30 |
36 |
44 |
50 |
58 |
64 |
72 |
78 |
86 |
92 |
94 |
103 |
105 |
114 |
115 |
140 |
141 |
143 | image/svg+xml
144 |
148 |
149 |
150 |
155 |
159 |
182 |
190 |
191 |
--------------------------------------------------------------------------------
/SceneEditor/icons/VisibilityOffSmall.png:
--------------------------------------------------------------------------------
https://raw.githubusercontent.com/fireclawthefox/SceneEditor/f02ac2539f6cdb11af0fb2fb7e5204feca1b1eee/SceneEditor/icons/VisibilityOffSmall.png
--------------------------------------------------------------------------------
/SceneEditor/icons/VisibilityOnSmall.png:
--------------------------------------------------------------------------------
https://raw.githubusercontent.com/fireclawthefox/SceneEditor/f02ac2539f6cdb11af0fb2fb7e5204feca1b1eee/SceneEditor/icons/VisibilityOnSmall.png
--------------------------------------------------------------------------------
/SceneEditor/icons/VisibilitySmall.svg:
--------------------------------------------------------------------------------
1 |
2 |
3 |
4 |
22 |
48 |
49 |
51 | image/svg+xml
52 |
56 |
57 |
58 |
64 |
72 |
85 |
86 |
91 |
104 |
105 |
--------------------------------------------------------------------------------
/SceneEditor/icons/arrowSmall.svg:
--------------------------------------------------------------------------------
1 |
2 |
3 |
4 |
22 |
49 |
50 |
52 | image/svg+xml
53 |
56 |
57 |
58 |
64 |
82 |
87 |
100 |
101 |
--------------------------------------------------------------------------------
/SceneEditor/icons/arrowUpSmall.svg:
--------------------------------------------------------------------------------
1 |
2 |
3 |
4 |
22 |
49 |
50 |
52 | image/svg+xml
53 |
57 |
58 |
59 |
65 |
83 |
88 |
101 |
102 |
--------------------------------------------------------------------------------
/SceneEditor/loader/LoadProject.py:
--------------------------------------------------------------------------------
1 | #!/usr/bin/python
2 | # -*- coding: utf-8 -*-
3 | __author__ = "Fireclaw the Fox"
4 | __license__ = """
5 | Simplified BSD (BSD 2-Clause) License.
6 | See License.txt or http://opensource.org/licenses/BSD-2-Clause for more info
7 | """
8 |
9 | import os
10 | import json
11 | import logging
12 | import tempfile
13 |
14 | from direct.showbase.DirectObject import DirectObject
15 | from direct.gui import DirectGuiGlobals as DGG
16 |
17 | from panda3d.core import TextNode
18 | from panda3d.core import LVecBase2f, LVecBase3f, LVecBase4f, LPoint2f, LPoint3f, LPoint4f, LVector3f
19 | from panda3d.core import LVecBase2i
20 | from panda3d.core import LVecBase2, LVecBase3, LVecBase4, LPoint2, LPoint3, LPoint4
21 | from panda3d.core import LVector2f
22 | from panda3d.core import LPlane, LPlanef
23 |
24 | from DirectFolderBrowser.DirectFolderBrowser import DirectFolderBrowser
25 |
26 | from SceneEditor.GUI.panels.ObjectPropertiesDefinition import DEFINITIONS, PropertyEditTypes
27 | from SceneEditor.GUI.panels.PropertiesPanel import PropertyHelper
28 |
29 |
30 | class ProjectLoader(DirectObject):
31 | def __init__(self, load_path, load_file, core, exceptionLoading=False, tooltip=None, newProjectCall=None, directLoading=False):
32 | self.newProjectCall = newProjectCall
33 | self.hasErrors = False
34 | self.core = core
35 | self.objects = []
36 | if directLoading:
37 | if not self.newProjectCall():
38 | return
39 | self.__executeLoad(os.path.join(load_path, load_file))
40 | elif exceptionLoading:
41 | self.excLoad()
42 | else:
43 | self.browser = DirectFolderBrowser(
44 | self.load,
45 | True,
46 | load_path,
47 | load_file,
48 | tooltip=tooltip)
49 | self.browser.show()
50 |
51 | def excLoad(self):
52 | tmpPath = os.path.join(tempfile.gettempdir(), "SEExceptionSave.scene")
53 | self.__executeLoad(tmpPath)
54 |
55 | def get(self):
56 | return self.objects
57 |
58 | def load(self, doLoad):
59 | if doLoad:
60 | path = self.browser.get()
61 | path = os.path.expanduser(path)
62 | path = os.path.expandvars(path)
63 |
64 | if not os.path.exists(path):
65 | base.messenger.send("showWarning", ["File \"{}\" does not exist.".format(path)])
66 | return
67 |
68 | if self.newProjectCall():
69 | self.__executeLoad(path)
70 | else:
71 | self.accept("clearDirtyFlag", self.__executeLoad, [path])
72 |
73 | self.browser.destroy()
74 | del self.browser
75 |
76 | def __executeLoad(self, path):
77 | fileContent = None
78 | with open(path, 'r') as infile:
79 | try:
80 | fileContent = json.load(infile)
81 | except Exception as e:
82 | logging.error("Couldn't load project file {}".format(infile))
83 | logging.exception(e)
84 | base.messenger.send("showWarning", ["Error while loading Project!\nPlease check output logs for more information."])
85 | return
86 | if fileContent is None:
87 | logging.error("Problems reading Project file: {}".format(infile))
88 | return
89 |
90 | if fileContent["ProjectVersion"] != "0":
91 | logging.warning("Unsupported Project Version")
92 | base.messenger.send("showWarning", ["Unsupported Project Version"])
93 | return
94 |
95 | for name, info in fileContent["Scene"].items():
96 | self.__createElement(name.split("|")[1], info)
97 |
98 | if self.hasErrors:
99 | base.messenger.send("showWarning", ["Errors occured while loading the project!\nProject may not be fully loaded\nSee output log for more information."])
100 | return
101 |
102 | base.messenger.send("setLastPath", [path])
103 | base.messenger.send("update_structure")
104 |
105 | def __createElement(self, name, info):
106 | object_type = info["object_type"]
107 |
108 | definitions = {}
109 |
110 | if object_type == "model":
111 | # create the element
112 | model = self.core.load_model(info["filepath"])
113 | if "transparency" in info:
114 | model.set_transparency(eval(info["transparency"]))
115 | definitions = DEFINITIONS[object_type]
116 | elif object_type == "empty":
117 | # create the element
118 | model = self.core.add_empty()
119 | definitions = DEFINITIONS[object_type]
120 | elif object_type == "collision":
121 | # create the element
122 | model = self.core.add_collision_solid(
123 | info["collision_solid_type"],
124 | eval(info["collision_solid_info"]))
125 | definitions = DEFINITIONS[info["collision_solid_type"]]
126 | elif object_type == "physics":
127 | model = self.core.add_physics_node()
128 | definitions = DEFINITIONS[object_type]
129 | elif object_type == "light":
130 | # create the element
131 | model = self.core.add_light(
132 | info["light_type"],
133 | {})
134 | definitions = DEFINITIONS[info["light_type"]]
135 | elif object_type == "camera":
136 | # create the element
137 | model = self.core.add_camera(
138 | info["camera_type"],
139 | {})
140 | definitions = DEFINITIONS[info["camera_type"]]
141 | self.set_nodepath_values(model, name, info, definitions)
142 |
143 | def set_nodepath_values(self, model, name, info, definitions):
144 | model.set_name(name)
145 |
146 | edit_list = []
147 | for definition in definitions:
148 | if definition.internalName not in info:
149 | continue
150 |
151 | edit_list.append(definition.internalName)
152 |
153 | if definition.editType != PropertyEditTypes.text:
154 | #TODO: We probably shouldn't use eval here
155 | value = eval(info[definition.internalName])
156 | PropertyHelper.setValue(definition, model, value)
157 | else:
158 | value = info[definition.internalName]
159 | PropertyHelper.setValue(definition, model, value)
160 |
161 | model.set_tag("edited_properties", ",".join(edit_list))
162 |
163 | parent_name = info["parent"]
164 | if parent_name != "scene_model_parent":
165 | parents = self.core.scene_objects[:]
166 | for obj in reversed(parents):
167 | if obj.get_name() == parent_name:
168 | model.reparent_to(obj)
169 | break
170 |
171 |
--------------------------------------------------------------------------------
/SceneEditor/loader/__init__.py:
--------------------------------------------------------------------------------
https://raw.githubusercontent.com/fireclawthefox/SceneEditor/f02ac2539f6cdb11af0fb2fb7e5204feca1b1eee/SceneEditor/loader/__init__.py
--------------------------------------------------------------------------------
/SceneEditor/tools/JSONTools.py:
--------------------------------------------------------------------------------
1 | #!/usr/bin/python
2 | # -*- coding: utf-8 -*-
3 | __author__ = "Fireclaw the Fox"
4 | __license__ = """
5 | Simplified BSD (BSD 2-Clause) License.
6 | See License.txt or http://opensource.org/licenses/BSD-2-Clause for more info
7 | """
8 |
9 | import logging
10 |
11 | from direct.gui import DirectGuiGlobals as DGG
12 | from panda3d.core import NodePath
13 |
14 | from SceneEditor.GUI.panels.ObjectPropertiesDefinition import DEFINITIONS
15 | from SceneEditor.GUI.panels.PropertiesPanel import PropertyHelper
16 |
17 | class JSONTools:
18 | def getProjectJSON(self, scene_objects, scene_root):
19 | self.scene_objects = scene_objects
20 | self.jsonElements = {}
21 | self.jsonElements["ProjectVersion"] = "0"
22 | self.jsonElements["Scene"] = {}
23 |
24 | self.writeScene(scene_root)
25 |
26 | return self.jsonElements
27 |
28 | def writeScene(self, root):
29 | index = 0
30 | for child in root.get_children():
31 | if child in self.scene_objects:
32 | if not child.is_stashed():
33 | index += 1
34 | self.jsonElements["Scene"][f"{index}|{child.get_name()}"] = self.__createJSONEntry(child)
35 | if child.getNumChildren() > 0:
36 | self.writeScene(child)
37 |
38 | def __createJSONEntry(self, scene_object):
39 | object_type = scene_object.get_tag("object_type")
40 |
41 | object_dict = {
42 | "object_type":object_type,
43 | "parent":scene_object.parent.get_name()
44 | }
45 |
46 | definition_object_type = object_type
47 | if object_type == "light":
48 | #
49 | # LIGHT
50 | #
51 | definition_object_type = scene_object.get_tag("light_type")
52 |
53 | # additional specific properties not given in the definition
54 | object_dict["light_type"] = scene_object.get_tag("light_type")
55 |
56 | elif object_type == "collision":
57 | #
58 | # COLLISION
59 | #
60 | definition_object_type = scene_object.get_tag("collision_solid_type")
61 |
62 | # additional specific properties not given in the definition
63 | object_dict["collision_solid_type"] = scene_object.get_tag("collision_solid_type")
64 | object_dict["collision_solid_info"] = scene_object.get_tag("collision_solid_info")
65 |
66 | elif object_type == "camera":
67 | #
68 | # CAMERA
69 | #
70 | definition_object_type = scene_object.get_tag("camera_type")
71 |
72 | # additional specific properties not given in the definition
73 | object_dict["camera_type"] = scene_object.get_tag("camera_type")
74 |
75 | # get edited property names
76 | edit_list = []
77 | if scene_object.has_tag("edited_properties"):
78 | edit_list = scene_object.get_tag("edited_properties").split(",")
79 |
80 | # add all edited properties
81 | for definition in DEFINITIONS[definition_object_type]:
82 | if definition.internalName in edit_list:
83 | if definition.internalName == "":
84 | continue
85 | object_dict[definition.internalName] = str(PropertyHelper.getValues(definition, scene_object))
86 |
87 | return object_dict
88 |
--------------------------------------------------------------------------------
/SceneEditor/tools/__init__.py:
--------------------------------------------------------------------------------
https://raw.githubusercontent.com/fireclawthefox/SceneEditor/f02ac2539f6cdb11af0fb2fb7e5204feca1b1eee/SceneEditor/tools/__init__.py
--------------------------------------------------------------------------------
/Screenshots/SceneEditor.png:
--------------------------------------------------------------------------------
https://raw.githubusercontent.com/fireclawthefox/SceneEditor/f02ac2539f6cdb11af0fb2fb7e5204feca1b1eee/Screenshots/SceneEditor.png
--------------------------------------------------------------------------------
/build.sh:
--------------------------------------------------------------------------------
1 | python3 setup.py build
2 | python3 setup.py install --user
3 |
--------------------------------------------------------------------------------
/design/ShaderInput.json:
--------------------------------------------------------------------------------
1 | {
2 | "ProjectVersion": "0.2a",
3 | "EditorConfig": {
4 | "usePixel2D": true,
5 | "canvasSize": "(0, 1920, -1080, 0)"
6 | },
7 | "ComponentList": {
8 | "frm_content": {
9 | "element": {
10 | "borderWidth": "(2, 2)",
11 | "frameSize": "(0.0, 426.0, -24.0, 0.0)",
12 | "frameColor": "(1, 1, 1, 1)",
13 | "pos": "LPoint3f(0, 0, 0)",
14 | "transparency": "0"
15 | },
16 | "type": "DirectFrame",
17 | "parent": "root",
18 | "command": null,
19 | "extraArgs": null,
20 | "extraOptions": {}
21 | },
22 | "txt_input_name": {
23 | "element": {
24 | "borderWidth": "(0.08333333333333333, 0.08333333333333333)",
25 | "pos": "LPoint3f(7.5, 0, -16.5)",
26 | "scale": "LVecBase3f(12, 12, 12)",
27 | "transparency": "0",
28 | "text": "['']",
29 | "width": "7.0",
30 | "initialText": "'Input name'",
31 | "overflow": "1",
32 | "text0_scale": "(1, 1)"
33 | },
34 | "type": "DirectEntry",
35 | "parent": "frm_content",
36 | "command": null,
37 | "extraArgs": null,
38 | "extraOptions": {
39 | "initialText": "Input name"
40 | }
41 | },
42 | "frm_texture": {
43 | "element": {
44 | "relief": "3",
45 | "borderWidth": "(1.0, 1.0)",
46 | "frameSize": "(0.0, 300.0, -24.0, 0.0)",
47 | "frameColor": "(1.0, 1.0, 1.0, 1.0)",
48 | "pos": "LPoint3f(99.5, 0, 0)",
49 | "transparency": "0"
50 | },
51 | "type": "DirectFrame",
52 | "parent": "frm_content",
53 | "command": null,
54 | "extraArgs": null,
55 | "extraOptions": {}
56 | },
57 | "txt_texture_path": {
58 | "element": {
59 | "borderWidth": "(0.08333333333333333, 0.08333333333333333)",
60 | "pos": "LPoint3f(5.5, 0, -16.5)",
61 | "scale": "LVecBase3f(12, 12, 12)",
62 | "transparency": "0",
63 | "width": "19.5",
64 | "overflow": "1"
65 | },
66 | "type": "DirectEntry",
67 | "parent": "frm_texture",
68 | "command": null,
69 | "extraArgs": null,
70 | "extraOptions": {}
71 | },
72 | "btn_browse": {
73 | "element": {
74 | "relief": "1",
75 | "borderWidth": "(2, 2)",
76 | "pad": "(5.0, 5.0)",
77 | "pos": "LPoint3f(268.5, 0, -16)",
78 | "transparency": "0",
79 | "text": "['browse']",
80 | "text0_scale": "(12.0, 12.0)",
81 | "text1_scale": "(12.0, 12.0)",
82 | "text2_scale": "(12.0, 12.0)",
83 | "text3_scale": "(12.0, 12.0)"
84 | },
85 | "type": "DirectButton",
86 | "parent": "frm_texture",
87 | "command": null,
88 | "extraArgs": null,
89 | "extraOptions": {
90 | "pressEffect": 1
91 | }
92 | },
93 | "btn_remove": {
94 | "element": {
95 | "relief": "1",
96 | "borderWidth": "(2, 2)",
97 | "pad": "(3.0, 1.0)",
98 | "pos": "LPoint3f(411, 0, -19.5)",
99 | "transparency": "0",
100 | "text": "['X']",
101 | "text0_scale": "(24, 24)",
102 | "text1_scale": "(24, 24)",
103 | "text2_scale": "(24, 24)",
104 | "text3_scale": "(24, 24)"
105 | },
106 | "type": "DirectButton",
107 | "parent": "frm_content",
108 | "command": null,
109 | "extraArgs": null,
110 | "extraOptions": {
111 | "pressEffect": 1
112 | }
113 | },
114 | "frm_nodepath": {
115 | "element": {
116 | "relief": "3",
117 | "borderWidth": "(1.0, 1.0)",
118 | "frameSize": "(0.0, 300.0, -24.0, 0.0)",
119 | "frameColor": "(1.0, 1.0, 1.0, 1.0)",
120 | "pos": "LPoint3f(99.5, 0, 0)",
121 | "transparency": "0"
122 | },
123 | "type": "DirectFrame",
124 | "parent": "frm_content",
125 | "command": null,
126 | "extraArgs": null,
127 | "extraOptions": {}
128 | },
129 | "cmb_nodepaths": {
130 | "element": {
131 | "relief": "1",
132 | "borderWidth": "(0.2, 0.2)",
133 | "pad": "(0.2, 0.2)",
134 | "pos": "LPoint3f(5, 0, -15.5)",
135 | "hpr": "LVecBase3f(0, 0, 0)",
136 | "scale": "LVecBase3f(12, 12, 12)",
137 | "transparency": "0",
138 | "popupMarker_pos": "None",
139 | "text_align": "0",
140 | "cancelframe_transparency": "0",
141 | "item0_transparency": "0",
142 | "popupMarker_transparency": "0",
143 | "popupMenu_transparency": "0"
144 | },
145 | "type": "DirectOptionMenu",
146 | "parent": "frm_nodepath",
147 | "command": null,
148 | "extraArgs": null,
149 | "extraOptions": {}
150 | },
151 | "frm_vector": {
152 | "element": {
153 | "relief": "3",
154 | "borderWidth": "(1.0, 1.0)",
155 | "frameSize": "(0.0, 300.0, -24.0, 0.0)",
156 | "frameColor": "(1.0, 1.0, 1.0, 1.0)",
157 | "pos": "LPoint3f(99.5, 0, 0)",
158 | "transparency": "0"
159 | },
160 | "type": "DirectFrame",
161 | "parent": "frm_content",
162 | "command": null,
163 | "extraArgs": null,
164 | "extraOptions": {}
165 | },
166 | "txt_vec_1": {
167 | "element": {
168 | "borderWidth": "(0.08333333333333333, 0.08333333333333333)",
169 | "pos": "LPoint3f(12.5, 0, -16.5)",
170 | "scale": "LVecBase3f(12, 12, 12)",
171 | "transparency": "0",
172 | "width": "5.0",
173 | "overflow": "1"
174 | },
175 | "type": "DirectEntry",
176 | "parent": "frm_vector",
177 | "command": null,
178 | "extraArgs": null,
179 | "extraOptions": {}
180 | },
181 | "txt_vec_2": {
182 | "element": {
183 | "borderWidth": "(0.08333333333333333, 0.08333333333333333)",
184 | "pos": "LPoint3f(82.5, 0, -16.5)",
185 | "scale": "LVecBase3f(12, 12, 12)",
186 | "transparency": "0",
187 | "width": "5.0",
188 | "overflow": "1"
189 | },
190 | "type": "DirectEntry",
191 | "parent": "frm_vector",
192 | "command": null,
193 | "extraArgs": null,
194 | "extraOptions": {}
195 | },
196 | "txt_vec_3": {
197 | "element": {
198 | "borderWidth": "(0.08333333333333333, 0.08333333333333333)",
199 | "pos": "LPoint3f(152.5, 0, -16.5)",
200 | "scale": "LVecBase3f(12, 12, 12)",
201 | "transparency": "0",
202 | "width": "5.0",
203 | "overflow": "1"
204 | },
205 | "type": "DirectEntry",
206 | "parent": "frm_vector",
207 | "command": null,
208 | "extraArgs": null,
209 | "extraOptions": {}
210 | },
211 | "txt_vec_4": {
212 | "element": {
213 | "borderWidth": "(0.08333333333333333, 0.08333333333333333)",
214 | "pos": "LPoint3f(222.5, 0, -16.5)",
215 | "scale": "LVecBase3f(12, 12, 12)",
216 | "transparency": "0",
217 | "width": "5.0",
218 | "overflow": "1"
219 | },
220 | "type": "DirectEntry",
221 | "parent": "frm_vector",
222 | "command": null,
223 | "extraArgs": null,
224 | "extraOptions": {}
225 | }
226 | }
227 | }
--------------------------------------------------------------------------------
/editorLogHandler.py:
--------------------------------------------------------------------------------
1 | import sys
2 | import os
3 | import logging
4 | from datetime import datetime
5 | from logging.handlers import TimedRotatingFileHandler
6 | from logging import StreamHandler
7 |
8 |
9 | from panda3d.core import (
10 | loadPrcFileData,
11 | loadPrcFile,
12 | Filename,
13 | ConfigVariableSearchPath,
14 | )
15 |
16 | def setupLog(editor_name):
17 | # check if we have a config file
18 | home = os.path.expanduser("~")
19 | basePath = os.path.join(home, f".{editor_name}")
20 | if not os.path.exists(basePath):
21 | os.makedirs(basePath)
22 | logPath = os.path.join(basePath, "logs")
23 | if not os.path.exists(logPath):
24 | os.makedirs(logPath)
25 |
26 | # Remove log files older than 30 days
27 | for f in os.listdir(logPath):
28 | fParts = f.split(".")
29 | fDate = datetime.now()
30 | try:
31 | fDate = datetime.strptime(fParts[-1], "%Y-%m-%d_%H")
32 | delta = datetime.now() - fDate
33 | if delta.days > 30:
34 | #print(f"remove {os.path.join(logPath, f)}")
35 | os.remove(os.path.join(logPath, f))
36 | except Exception:
37 | # this file does not have a date ending
38 | pass
39 |
40 | log_file = os.path.join(logPath, f"{editor_name}.log")
41 | handler = TimedRotatingFileHandler(log_file)
42 | consoleHandler = StreamHandler()
43 | logging.basicConfig(
44 | level=logging.DEBUG,
45 | handlers=[handler])#, consoleHandler])
46 | config_file = os.path.join(basePath, f".{editor_name}.prc")
47 | if os.path.exists(config_file):
48 | loadPrcFile(Filename.fromOsSpecific(config_file))
49 |
50 | # make sure to load our custom paths
51 | paths_cfg = ConfigVariableSearchPath("custom-model-path", "").getValue()
52 | for path in paths_cfg.getDirectories():
53 | line = "model-path {}".format(str(path))
54 | loadPrcFileData("", line)
55 | else:
56 | with open(config_file, "w") as prcFile:
57 | prcFile.write("skip-ask-for-quit #f\n")
58 | prcFile.write("create-executable-scripts #f\n")
59 | prcFile.write("show-toolbar #t\n")
60 |
--------------------------------------------------------------------------------
/main.py:
--------------------------------------------------------------------------------
1 | #!/usr/bin/env python
2 | # -*- coding: utf-8 -*-
3 |
4 | from direct.showbase.ShowBase import ShowBase
5 | from panda3d.core import loadPrcFileData, WindowProperties
6 | from editorLogHandler import setupLog
7 | from SceneEditor.SceneEditor import SceneEditor
8 |
9 | loadPrcFileData(
10 | "",
11 | """
12 | sync-video #t
13 | textures-power-2 none
14 | window-title Scene Editor
15 | maximized #t
16 | win-size 1280 720
17 | """)
18 |
19 | setupLog("SceneEditor")
20 |
21 | base = ShowBase()
22 |
23 | def set_dirty_name():
24 | wp = WindowProperties()
25 | wp.setTitle("*Scene Editor")
26 | base.win.requestProperties(wp)
27 |
28 | def set_clean_name():
29 | wp = WindowProperties()
30 | wp.setTitle("Scene Editor")
31 | base.win.requestProperties(wp)
32 |
33 | base.accept("request_dirty_name", set_dirty_name)
34 | base.accept("request_clean_name", set_clean_name)
35 |
36 | SceneEditor(base.pixel2d)
37 |
38 | base.run()
39 |
--------------------------------------------------------------------------------
/requirements.txt:
--------------------------------------------------------------------------------
1 | panda3d
2 | DirectFolderBrowser
3 | DirectGuiExtension
4 |
--------------------------------------------------------------------------------
/setup.py:
--------------------------------------------------------------------------------
1 | import setuptools
2 |
3 | with open("README.md", "r") as fh:
4 | long_description = fh.read()
5 |
6 | setuptools.setup(
7 | name="SceneEditor",
8 | version="22.05",
9 | author="Fireclaw",
10 | author_email="fireclawthefox@gmail.com",
11 | description="A scene editor for the Panda3D engine",
12 | long_description=long_description,
13 | long_description_content_type="text/markdown",
14 | url="https://github.com/fireclawthefox/SceneEditor",
15 | packages=setuptools.find_packages(),
16 | include_package_data=True,
17 | classifiers=[
18 | "Programming Language :: Python :: 3",
19 | "License :: OSI Approved :: BSD License",
20 | "Operating System :: OS Independent",
21 | "Development Status :: 2 - Pre-Alpha",
22 | "Intended Audience :: Developers",
23 | "Intended Audience :: End Users/Desktop",
24 | "Topic :: Artistic Software",
25 | "Topic :: Multimedia :: Graphics",
26 | "Topic :: Multimedia :: Graphics :: Editors",
27 | ],
28 | install_requires=[
29 | 'panda3d',
30 | 'DirectFolderBrowser',
31 | 'DirectGuiExtension'
32 | ],
33 | python_requires='>=3.6',
34 | )
35 |
--------------------------------------------------------------------------------
/todo.org:
--------------------------------------------------------------------------------
1 | * DONE Base features [100%]
2 | - [X] Adding models
3 | - [X] Moving models
4 | - [X] Rotating models
5 | - [X] Scaling models
6 | - [X] Deleting models
7 | - [X] Add Empties
8 | - [X] Show model origin
9 | - [X] Edit object properties
10 | - Name
11 | - Transformation
12 | - [X] Undo/Redo (take kill cycle from DGui Editor)
13 | * TODO Edit Collision solids [80%]
14 | - [X] Add any kind of panda3d solids
15 | - [ ] Edit solid properties
16 | - collision masks
17 | - Name
18 | - [X] Save solids
19 | - Can we get solid details from the col_np.node()?
20 | - [X] Load solids
21 | - [X] Export solids
22 | * DONE Camera editing [100%]
23 | - [X] Add camera
24 | - [X] Edit camera properties
25 | - Name
26 | - Lense properties
27 | * DONE Scene lighting [100%]
28 | - [X] Add lamps
29 | - [X] Edit lamp properties
30 | - name
31 | - color
32 | - type
33 | - Optional lense properties
34 | - Optional shadow caster props
35 | * TODO GUI [50%]
36 | - [X] Scene graph browser (copy from DGui editor)
37 | - [X] Menu bar
38 | - [X] Tool bar
39 | - [ ] Help Dialog
40 | - [ ] Configuration Dialog
41 | - [ ] Asset browser
42 | * DONE Physics [100%]
43 | - [X] Can we add force fields or the like with the internal engine?
44 | We may want to make nodes physically interactive, which would require simply reparent them to an ActorNode in the end.
45 | - [X] Implementation
46 | * DONE Exporting [100%]
47 | - [X] Export all objects and settings as python class
48 | - Make sure they can be directly used and don't do too much (similar to exported GUI python script)
49 | - [X] Export as project JSON
50 | * TODO Extended features [14%]
51 | - [ ] Nicer highlighting/outlining of selected models
52 | - [ ] Texture and Material editing
53 | - [X] adding shaders to objects
54 | - [ ] Make objects placeable on other objects (taking normals) and optionally rotate to fit normals of hit objects
55 | - [ ] Add Render attributes (e.g. bilboard, compass, etc...)
56 | - [X] Make sure the 3D space is not occupied by other panels e.g. it scales and is centered between other panels
57 | - [ ] Memory viewer (how does the direct session panel does it?)
58 | - [ ] Curve and Mopath editing
59 | - [ ] Particle adding/editing
60 | - [ ] Heightmap and ground texture painting
61 | - [ ] LOD node editing
62 | - [ ] Simple onscreen text adding
63 | - [ ] Transform objects with displayed widgets
64 |
--------------------------------------------------------------------------------
 85 |
86 | ## WIP
87 | Not all values will be saved and loaded yet
88 | Property editor is heavily work in progress
89 |
--------------------------------------------------------------------------------
/SceneEditor/GUI/MainView.py:
--------------------------------------------------------------------------------
1 | import logging
2 |
3 | from panda3d.core import NodePath
4 |
5 | from direct.showbase.DirectObject import DirectObject
6 |
7 | from direct.gui import DirectGuiGlobals as DGG
8 |
9 | from DirectGuiExtension import DirectGuiHelper as DGH
10 |
11 | from DirectGuiExtension.DirectTooltip import DirectTooltip
12 |
13 | from DirectGuiExtension.DirectBoxSizer import DirectBoxSizer
14 | from DirectGuiExtension.DirectAutoSizer import DirectAutoSizer
15 | from DirectGuiExtension.DirectSplitFrame import DirectSplitFrame
16 |
17 | from SceneEditor.GUI.MenuBar import MenuBar
18 | from SceneEditor.GUI.ToolBar import ToolBar
19 | from SceneEditor.GUI.panels.PropertiesPanel import PropertiesPanel
20 | from SceneEditor.GUI.panels.StructurePanel import StructurePanel
21 | from SceneEditor.GUI.dialogs.ShaderLoaderDialogManager import ShaderLoaderDialogManager
22 |
23 |
24 | class MainView(DirectObject):
25 | def __init__(self, tooltip, grid, core, parent):
26 | logging.debug("Setup GUI")
27 |
28 | self.parent = parent
29 | self.core = core
30 |
31 | splitterWidth = 8
32 | self.menuBarHeight = 24
33 | self.toolBarHeight = 48
34 |
35 | #
36 | # LAYOUT SETUP
37 | #
38 |
39 | # the box everything get's added to
40 | self.mainBox = DirectBoxSizer(
41 | frameColor=(0,0,0,0),
42 | state=DGG.DISABLED,
43 | orientation=DGG.VERTICAL,
44 | autoUpdateFrameSize=False)
45 |
46 | # our root element for the main box
47 | self.mainSizer = DirectAutoSizer(
48 | frameColor=(0,0,0,0),
49 | parent=parent,
50 | child=self.mainBox,
51 | childUpdateSizeFunc=self.mainBox.refresh
52 | )
53 |
54 | # our menu bar
55 | self.menuBarSizer = DirectAutoSizer(
56 | updateOnWindowResize=False,
57 | frameColor=(0,0,0,0),
58 | parent=self.mainBox,
59 | extendVertical=False)
60 |
61 | # our tool bar
62 | self.toolBarSizer = DirectAutoSizer(
63 | updateOnWindowResize=False,
64 | frameColor=(0,0,0,0),
65 | parent=self.mainBox,
66 | extendVertical=False)
67 |
68 | # the splitter separating the the panels from the main content area
69 | splitterPos = 0
70 | if type(self.parent) is NodePath:
71 | splitterPos = -base.get_size()[0] / 4
72 | else:
73 | splitterPos = -parent["frameSize"][1] / 4
74 |
75 | self.mainSplitter = DirectSplitFrame(
76 | frameSize=self.get_main_splitter_size(),
77 | splitterWidth=splitterWidth,
78 | splitterPos=splitterPos)
79 | self.mainSplitter["frameColor"] = (0,0,0,0)
80 | self.mainSplitter.firstFrame["frameColor"] = (0,0,0,0)
81 | self.mainSplitter.secondFrame["frameColor"] = (0,0,0,0)
82 |
83 | # The sizer which makes sure our splitter is filling up
84 | self.mainSplitSizer = DirectAutoSizer(
85 | updateOnWindowResize=False,
86 | frameColor=(0,0,0,0),
87 | parent=self.mainBox,
88 | child=self.mainSplitter,
89 | parentGetSizeFunction=self.get_main_splitter_size,
90 | childUpdateSizeFunc=self.mainSplitter.refresh,
91 | )
92 |
93 | # The splitter dividing the sidebar on the left
94 | self.sidebarSplitter = DirectSplitFrame(
95 | orientation=DGG.VERTICAL,
96 | frameSize=self.mainSplitter.firstFrame["frameSize"],
97 | splitterWidth=splitterWidth,
98 | splitterPos=DGH.getRealHeight(self.mainSplitter.firstFrame) / 2,
99 | pixel2d=True)
100 |
101 | # The sizer which makes sure our sidebar is filling up
102 | self.sidebarSplitSizer = DirectAutoSizer(
103 | updateOnWindowResize=False,
104 | frameColor=(0,0,0,0),
105 | parent=self.mainSplitter.firstFrame,
106 | child=self.sidebarSplitter,
107 | childUpdateSizeFunc=self.sidebarSplitter.refresh,
108 | )
109 |
110 | # CONNECT THE UI ELEMENTS
111 | self.mainBox.addItem(
112 | self.menuBarSizer,
113 | updateFunc=self.menuBarSizer.refresh,
114 | skipRefresh=True)
115 | self.mainBox.addItem(
116 | self.toolBarSizer,
117 | updateFunc=self.toolBarSizer.refresh,
118 | skipRefresh=True)
119 | self.mainBox.addItem(
120 | self.mainSplitSizer,
121 | updateFunc=self.mainSplitSizer.refresh,
122 | skipRefresh=True)
123 |
124 | #
125 | # CONTENT SETUP
126 | #
127 | self.menuBar = MenuBar()
128 | self.menuBarSizer.setChild(self.menuBar.menuBar)
129 | self.menuBarSizer["childUpdateSizeFunc"] = self.menuBar.menuBar.refresh
130 |
131 | self.tool_bar = ToolBar(tooltip, grid)
132 | self.toolBarSizer.setChild(self.tool_bar.toolBar)
133 | self.toolBarSizer["childUpdateSizeFunc"] = self.tool_bar.toolBar.refresh
134 |
135 | self.propertiesPanel = PropertiesPanel(self.sidebarSplitter.firstFrame, tooltip)
136 | self.sidebarSplitter["firstFrameUpdateSizeFunc"] = self.propertiesPanel.resizeFrame
137 |
138 | self.structurePanel = StructurePanel(self.sidebarSplitter.secondFrame)
139 | self.sidebarSplitter["secondFrameUpdateSizeFunc"] = self.structurePanel.resizeFrame
140 |
141 | self.mainSplitter["firstFrameUpdateSizeFunc"] = self.sidebarSplitSizer.refresh
142 | self.mainSplitter["secondFrameUpdateSizeFunc"] = self.update_3d_display_region
143 |
144 | self.accept("show_load_shader_dialog", self.show_load_shader_dialog)
145 |
146 | self.mainBox.refresh()
147 |
148 | def update_3d_display_region(self):
149 | dr = base.cam.node().get_display_region(0)
150 |
151 | # get the size of the frame the display region should be fit into
152 | size = [0,1,-1,0]
153 | if type(self.parent) is NodePath:
154 | #TODO: Get the size of the actual nodepath
155 | # currently we expect the nodepath to be pixel2d
156 | size = [0, base.get_size()[0], -base.get_size()[1], 0]
157 | else:
158 | size = self.parent["frameSize"]
159 |
160 | # store the display resolution
161 | dw = base.get_size()[0]
162 | dh = base.get_size()[1]
163 |
164 | # store the frame size
165 | fw = size[1]
166 | fh = -size[2]
167 |
168 | # calculate the shift from top and left
169 | top_height = (self.menuBarHeight + self.toolBarHeight) / dh
170 | left_frame_width = DGH.getRealWidth(self.mainSplitter.firstFrame) / dw
171 |
172 | # get the frames position according to pixel2d
173 | pos = self.parent.getPos(base.pixel2d)
174 |
175 | # calculate the left and right values for the display region
176 | left_x = (pos.x / dw) + left_frame_width
177 | right_x = (pos.x / dw) + (fw / dw)
178 |
179 | # calculate the bottom and top values for the display region
180 | bottom_y = -(pos.z / dh)
181 | top_y = -(pos.z / dh) + (fh / dh) - top_height
182 |
183 | # update the display region with the new values
184 | dr.dimensions = (
185 | left_x, right_x,
186 | bottom_y, top_y)
187 |
188 | # calculate width and height for the aspect ratio calculation
189 | w = 1
190 | h = 1
191 | if type(self.parent) is NodePath:
192 | w = (1-left_frame_width) * dw
193 | h = (1-top_height) * dh
194 | else:
195 | w = (right_x - left_x) * dw
196 | h = (top_y - bottom_y) * dh
197 |
198 | # update the aspect ratio
199 | base.camLens.setAspectRatio(w/h)
200 |
201 | base.messenger.send("3d_display_region_changed")
202 |
203 | def get_main_splitter_size(self):
204 | size = [0,1,1,0]
205 | if type(self.parent) is NodePath:
206 | width = base.get_size()[0]
207 | height = base.get_size()[1]
208 | else:
209 | width = DGH.getRealWidth(self.parent)
210 | height = DGH.getRealHeight(self.parent)
211 | return (
212 | -width/2,
213 | width/2,
214 | 0,
215 | height - self.menuBarHeight - self.toolBarHeight)
216 |
217 | def show_load_shader_dialog(self):
218 | base.messenger.send("unregisterKeyboardAndMouseEvents")
219 | ShaderLoaderDialogManager(self.close_load_shader_dialog, self.core.scene_objects)
220 |
221 | def close_load_shader_dialog(self, accept, shader_details):
222 | base.messenger.send("reregisterKeyboardAndMouseEvents")
223 | if accept:
224 | base.messenger.send("addShader", [shader_details])
225 |
--------------------------------------------------------------------------------
/SceneEditor/GUI/MenuBar.py:
--------------------------------------------------------------------------------
1 | from direct.showbase.DirectObject import DirectObject
2 | from direct.gui import DirectGuiGlobals as DGG
3 | from DirectGuiExtension.DirectMenuItem import (
4 | DirectMenuItem,
5 | DirectMenuItemEntry,
6 | DirectMenuItemSubMenu,
7 | DirectMenuSeparator)
8 | from DirectGuiExtension.DirectMenuBar import DirectMenuBar
9 |
10 | class MenuBar(DirectObject):
11 | def __init__(self):
12 | screenWidthPx = base.getSize()[0]
13 |
14 | #
15 | # Menubar
16 | #
17 | self.menuBar = DirectMenuBar(
18 | frameColor=(0.25, 0.25, 0.25, 1),
19 | frameSize=(0,screenWidthPx,-12, 12),
20 | autoUpdateFrameSize=False,
21 | pos=(0, 0, 0),
22 | itemMargin=(2,2,2,2),
23 | parent=base.pixel2d)
24 |
25 | self.export_entry = DirectMenuItemSubMenu("Export >", [
26 | DirectMenuItemEntry("Python", base.messenger.send, ["exportProject_python"]),
27 | DirectMenuItemEntry("Bam", base.messenger.send, ["exportProject_bam"]),
28 | ])
29 | self.fileEntries = [
30 | DirectMenuItemEntry("New", base.messenger.send, ["newProject"]),
31 | DirectMenuSeparator(),
32 | DirectMenuItemEntry("Open", base.messenger.send, ["loadProject"]),
33 | DirectMenuItemEntry("Save", base.messenger.send, ["saveProject"]),
34 | self.export_entry,
35 | DirectMenuSeparator(),
36 | DirectMenuItemEntry("Quit", base.messenger.send, ["quit_app"]),
37 | ]
38 | self.file = self.__create_menu_item("File", self.fileEntries)
39 |
40 | viewEntries = [
41 | DirectMenuItemEntry("Toggle Grid", base.messenger.send, ["toggleGrid"]),
42 | DirectMenuSeparator(),
43 | DirectMenuItemEntry("Zoom-in", base.messenger.send, ["zoom-in"]),
44 | DirectMenuItemEntry("Zoom-out", base.messenger.send, ["zoom-out"]),
45 | DirectMenuItemEntry("reset Zoom", base.messenger.send, ["zoom-reset"]),
46 |
47 | ]
48 | self.view = self.__create_menu_item("View", viewEntries)
49 |
50 | toolsEntries = [
51 | DirectMenuItemEntry("Undo", base.messenger.send, ["undo"]),
52 | DirectMenuItemEntry("Redo", base.messenger.send, ["redo"]),
53 | DirectMenuItemEntry("Cycle redos", base.messenger.send, ["cycleRedo"]),
54 | DirectMenuSeparator(),
55 | DirectMenuItemEntry("Delete Object", base.messenger.send, ["removeObject"]),
56 | DirectMenuItemEntry("Copy", base.messenger.send, ["copyElement"]),
57 | DirectMenuItemEntry("Cut", base.messenger.send, ["cutElement"]),
58 | DirectMenuItemEntry("Paste", base.messenger.send, ["pasteElement"]),
59 | #DirectMenuSeparator(),
60 | #DirectMenuItemEntry("Options", base.messenger.send, ["showSettings"]),
61 | #DirectMenuItemEntry("Help", base.messenger.send, ["showHelp"]),
62 | ]
63 | self.tools = self.__create_menu_item("Tools", toolsEntries)
64 |
65 | addEntries = [
66 | DirectMenuItemEntry("Model", base.messenger.send, ["loadModel"]),
67 | DirectMenuItemEntry("Panda", base.messenger.send, ["loadPanda"]),
68 | DirectMenuItemEntry("Empty", base.messenger.send, ["addEmpty"]),
69 | DirectMenuItemSubMenu("Collision >", [
70 | DirectMenuItemEntry("Sphere", base.messenger.send, ["addCollision", ["CollisionSphere", {}]]),
71 | DirectMenuItemEntry("Box", base.messenger.send, ["addCollision", ["CollisionBox", {}]]),
72 | DirectMenuItemEntry("Plane", base.messenger.send, ["addCollision", ["CollisionPlane", {}]]),
73 | DirectMenuItemEntry("Capsule", base.messenger.send, ["addCollision", ["CollisionCapsule", {}]]),
74 | DirectMenuItemEntry("Line", base.messenger.send, ["addCollision", ["CollisionLine", {}]]),
75 | DirectMenuItemEntry("Segment", base.messenger.send, ["addCollision", ["CollisionSegment", {}]]),
76 | DirectMenuItemEntry("Ray", base.messenger.send, ["addCollision", ["CollisionRay", {}]]),
77 | #DirectMenuItemEntry("Parabola", base.messenger.send, ["addCollision", ["CollisionParabola", {}]]),
78 | DirectMenuItemEntry("Inverse Sphere", base.messenger.send, ["addCollision", ["CollisionInvSphere", {}]]),
79 | #Polygon # Do we want to support this
80 | ]),
81 | DirectMenuItemEntry("Physics Node", base.messenger.send, ["addPhysicsNode"]),
82 | DirectMenuItemSubMenu("Light >", [
83 | DirectMenuItemEntry("Point Light", base.messenger.send, ["addLight", ["PointLight", {}]]),
84 | DirectMenuItemEntry("Spotlight", base.messenger.send, ["addLight", ["Spotlight", {}]]),
85 | DirectMenuItemEntry("Directional Light", base.messenger.send, ["addLight", ["DirectionalLight", {}]]),
86 | DirectMenuItemEntry("Ambient Light", base.messenger.send, ["addLight", ["AmbientLight", {}]]),
87 | ]),
88 | DirectMenuItemSubMenu("Camera >", [
89 | DirectMenuItemEntry("Perspective", base.messenger.send, ["addCamera", ["PerspectiveLens", {}]]),
90 | DirectMenuItemEntry("Orthographic", base.messenger.send, ["addCamera", ["OrthographicLens", {}]]),
91 | ]),
92 | DirectMenuItemEntry("Shader", base.messenger.send, ["show_load_shader_dialog"]),
93 | ]
94 | #TODO: THE COLORS DON'T WORK CORRECT YET
95 | self.add = self.__create_menu_item("Add", addEntries)
96 |
97 | self.menuBar["menuItems"] = [self.file, self.view, self.tools, self.add]
98 |
99 | def add_export_entry(self, text, tag):
100 | self.export_entry.items.append(
101 | DirectMenuItemEntry(text, base.messenger.send, ["custom_export", [tag]]))
102 | self.fileEntries[4] = self.export_entry
103 | self.file["items"] = self.fileEntries
104 |
105 | color = (
106 | (0.25, 0.25, 0.25, 1), # Normal
107 | (0.35, 0.35, 1, 1), # Click
108 | (0.25, 0.25, 1, 1), # Hover
109 | (0.1, 0.1, 0.1, 1)) # Disabled
110 |
111 | self.file["item_text_fg"]=(1,1,1,1)
112 | self.file["item_text_scale"]=0.8
113 | self.file["item_relief"]=DGG.FLAT
114 | self.file["item_pad"]=(0.2, 0.2)
115 | self.file["itemFrameColor"]=color
116 | self.file["popupMenu_itemMargin"]=(0,0,-.1,-.1)
117 | self.file["popupMenu_frameColor"]=color
118 |
119 | def __create_menu_item(self, text, entries):
120 | color = (
121 | (0.25, 0.25, 0.25, 1), # Normal
122 | (0.35, 0.35, 1, 1), # Click
123 | (0.25, 0.25, 1, 1), # Hover
124 | (0.1, 0.1, 0.1, 1)) # Disabled
125 |
126 | sepColor = (0.7, 0.7, 0.7, 1)
127 |
128 | return DirectMenuItem(
129 | text=text,
130 | text_fg=(1,1,1,1),
131 | text_scale=0.8,
132 | items=entries,
133 | frameSize=(0,65/21,-7/21,17/21),
134 | frameColor=color,
135 | scale=21,
136 | relief=DGG.FLAT,
137 | item_text_fg=(1,1,1,1),
138 | item_text_scale=0.8,
139 | item_relief=DGG.FLAT,
140 | item_pad=(0.2, 0.2),
141 | itemFrameColor=color,
142 | separatorFrameColor=sepColor,
143 | popupMenu_itemMargin=(0,0,-.1,-.1),
144 | popupMenu_frameColor=color,
145 | highlightColor=color[2])
146 |
--------------------------------------------------------------------------------
/SceneEditor/GUI/ToolBar.py:
--------------------------------------------------------------------------------
1 | from panda3d.core import TransparencyAttrib, ConfigVariableBool
2 |
3 | from direct.showbase.DirectObject import DirectObject
4 |
5 | from direct.gui import DirectGuiGlobals as DGG
6 | DGG.BELOW = "below"
7 |
8 | from direct.gui.DirectButton import DirectButton
9 | from direct.gui.DirectSlider import DirectSlider
10 | from direct.gui.DirectFrame import DirectFrame
11 | from direct.gui.DirectCheckBox import DirectCheckBox
12 | from DirectGuiExtension.DirectMenuItem import DirectMenuItem, DirectMenuItemEntry, DirectMenuItemSubMenu
13 | from DirectGuiExtension.DirectBoxSizer import DirectBoxSizer
14 |
15 | class ToolBar(DirectObject):
16 | def __init__(self, tooltip, grid):
17 | self.tt = tooltip
18 | self.grid = grid
19 | screenWidthPx = base.getSize()[0]
20 | left = screenWidthPx*0.25
21 | barWidth = screenWidthPx*0.75
22 |
23 | self.active_alpha_type = TransparencyAttrib.M_alpha
24 |
25 | color = (
26 | (0.25, 0.25, 0.25, 1), # Normal
27 | (0.35, 0.35, 1, 1), # Click
28 | (0.25, 0.25, 1, 1), # Hover
29 | (0.1, 0.1, 0.1, 1)) # Disabled
30 |
31 | #
32 | # Toolbar
33 | #
34 | self.toolBar = DirectBoxSizer(
35 | frameColor=(0.25, 0.25, 0.25, 1),
36 | frameSize=(0,barWidth,-24, 24),
37 | autoUpdateFrameSize=False,
38 | pos=(0, 0, 0),
39 | parent=base.pixel2d)
40 |
41 | buttonColor = (
42 | (0.8, 0.8, 0.8, 1), # Normal
43 | (0.9, 0.9, 1, 1), # Click
44 | (0.8, 0.8, 1, 1), # Hover
45 | (0.5, 0.5, 0.5, 1)) # Disabled
46 | btn = DirectButton(
47 | frameSize=(-24,24,-24,24),
48 | frameColor=buttonColor,
49 | relief=DGG.FLAT,
50 | command=base.messenger.send,
51 | extraArgs=["newProject"],
52 | image="icons/New.png",
53 | image_scale=24)
54 | btn.setTransparency(self.active_alpha_type)
55 | btn.bind(DGG.ENTER, self.tt.show, ["Create New Scene (Ctrl-N)"])
56 | btn.bind(DGG.EXIT, self.tt.hide)
57 | self.toolBar.addItem(btn)
58 |
59 | btn = DirectButton(
60 | frameSize=(-24,24,-24,24),
61 | frameColor=buttonColor,
62 | relief=DGG.FLAT,
63 | command=base.messenger.send,
64 | extraArgs=["saveProject"],
65 | image="icons/Save.png",
66 | image_scale=24)
67 | btn.setTransparency(self.active_alpha_type)
68 | btn.bind(DGG.ENTER, self.tt.show, ["Save Scene as Project (Ctrl-S)"])
69 | btn.bind(DGG.EXIT, self.tt.hide)
70 | self.toolBar.addItem(btn)
71 |
72 | btn = DirectButton(
73 | frameSize=(-24,24,-24,24),
74 | frameColor=buttonColor,
75 | text_scale=0.33,
76 | relief=DGG.FLAT,
77 | command=base.messenger.send,
78 | extraArgs=["exportProject_python"],
79 | image="icons/Export.png",
80 | image_scale=24)
81 | btn.setTransparency(self.active_alpha_type)
82 | btn.bind(DGG.ENTER, self.tt.show, ["Export Scene as Python Script (Ctrl-E)"])
83 | btn.bind(DGG.EXIT, self.tt.hide)
84 | self.toolBar.addItem(btn)
85 |
86 | btn = DirectButton(
87 | frameSize=(-24,24,-24,24),
88 | frameColor=buttonColor,
89 | relief=DGG.FLAT,
90 | text_scale=0.33,
91 | command=base.messenger.send,
92 | extraArgs=["loadProject"],
93 | image="icons/Load.png",
94 | image_scale=24)
95 | btn.setTransparency(self.active_alpha_type)
96 | btn.bind(DGG.ENTER, self.tt.show, ["Load Scene project (Ctrl-O)"])
97 | btn.bind(DGG.EXIT, self.tt.hide)
98 | self.toolBar.addItem(btn)
99 |
100 | self.add_separator()
101 |
102 | btn = DirectButton(
103 | frameSize=(-24,24,-24,24),
104 | frameColor=buttonColor,
105 | relief=DGG.FLAT,
106 | text_scale=0.33,
107 | command=base.messenger.send,
108 | extraArgs=["undo"],
109 | image="icons/Undo.png",
110 | image_scale=24)
111 | btn.setTransparency(self.active_alpha_type)
112 | btn.bind(DGG.ENTER, self.tt.show, ["Undo last action (Ctrl-Z)"])
113 | btn.bind(DGG.EXIT, self.tt.hide)
114 | self.toolBar.addItem(btn)
115 |
116 | btn = DirectButton(
117 | frameSize=(-24,24,-24,24),
118 | frameColor=buttonColor,
119 | relief=DGG.FLAT,
120 | text_scale=0.33,
121 | command=base.messenger.send,
122 | extraArgs=["redo"],
123 | image="icons/Redo.png",
124 | image_scale=24)
125 | btn.setTransparency(self.active_alpha_type)
126 | btn.bind(DGG.ENTER, self.tt.show, ["Redo last action (Ctrl-Y)"])
127 | btn.bind(DGG.EXIT, self.tt.hide)
128 | self.toolBar.addItem(btn)
129 |
130 | btn = DirectButton(
131 | frameSize=(-24,24,-24,24),
132 | frameColor=buttonColor,
133 | relief=DGG.FLAT,
134 | text_scale=0.33,
135 | command=base.messenger.send,
136 | extraArgs=["cycleRedo"],
137 | image="icons/CycleRedo.png",
138 | image_scale=24)
139 | btn.setTransparency(self.active_alpha_type)
140 | btn.bind(DGG.ENTER, self.tt.show, ["Cycle through redo branches (Ctrl-Shift-Y)"])
141 | btn.bind(DGG.EXIT, self.tt.hide)
142 | self.toolBar.addItem(btn)
143 |
144 | self.add_separator()
145 |
146 | btn = DirectButton(
147 | frameSize=(-24,24,-24,24),
148 | frameColor=buttonColor,
149 | relief=DGG.FLAT,
150 | text_scale=0.33,
151 | command=base.messenger.send,
152 | extraArgs=["removeElement"],
153 | image="icons/Delete.png",
154 | image_scale=24)
155 | btn.setTransparency(self.active_alpha_type)
156 | btn.bind(DGG.ENTER, self.tt.show, ["Delete selected element (Del)"])
157 | btn.bind(DGG.EXIT, self.tt.hide)
158 | self.toolBar.addItem(btn)
159 |
160 | self.add_separator()
161 |
162 | self.cb_grid = DirectCheckBox(
163 | frameSize=(-24,24,-24,24),
164 | frameColor=buttonColor,
165 | relief=DGG.FLAT,
166 | text_scale=12,
167 | image="icons/GridOff.png" if self.grid.isHidden() else "icons/GridOn.png",
168 | uncheckedImage="icons/GridOff.png",
169 | checkedImage="icons/GridOn.png",
170 | image_scale=24,
171 | isChecked=not self.grid.isHidden(),
172 | command=self.toggleGrid)
173 | self.cb_grid.setTransparency(self.active_alpha_type)
174 | self.cb_grid.bind(DGG.ENTER, self.tt.show, ["Toggle Grid (Ctrl-G)"])
175 | self.cb_grid.bind(DGG.EXIT, self.tt.hide)
176 | self.toolBar.addItem(self.cb_grid)
177 |
178 | self.add_separator()
179 |
180 | btn = DirectButton(
181 | frameSize=(-24,24,-24,24),
182 | frameColor=buttonColor,
183 | relief=DGG.FLAT,
184 | text_scale=0.33,
185 | command=base.messenger.send,
186 | extraArgs=["quit_app"],
187 | image="icons/Quit.png",
188 | image_scale=24)
189 | btn.setTransparency(TransparencyAttrib.M_alpha)
190 | btn.bind(DGG.ENTER, self.tt.show, ["Quit Scene Editor (Ctrl-Q)"])
191 | btn.bind(DGG.EXIT, self.tt.hide)
192 | self.toolBar.addItem(btn)
193 |
194 | '''
195 | self.add_separator()
196 |
197 | btn = DirectButton(
198 | frameSize=(-24,24,-24,24),
199 | frameColor=buttonColor,
200 | relief=DGG.FLAT,
201 | text_scale=0.33,
202 | command=base.messenger.send,
203 | extraArgs=["showHelp"],
204 | image="icons/Help.png",
205 | image_scale=24)
206 | btn.setTransparency(self.active_alpha_type)
207 | btn.bind(DGG.ENTER, self.tt.show, ["Show a help Dialog (F1)"])
208 | btn.bind(DGG.EXIT, self.tt.hide)
209 | self.toolBar.addItem(btn)
210 |
211 | btn = DirectButton(
212 | frameSize=(-24,24,-24,24),
213 | frameColor=buttonColor,
214 | relief=DGG.FLAT,
215 | text_scale=0.33,
216 | command=base.messenger.send,
217 | extraArgs=["showSettings"],
218 | image="icons/Settings.png",
219 | image_scale=24)
220 | btn.setTransparency(self.active_alpha_type)
221 | btn.bind(DGG.ENTER, self.tt.show, ["Show Designer Settings"])
222 | btn.bind(DGG.EXIT, self.tt.hide)
223 | self.toolBar.addItem(btn)
224 | '''
225 |
226 | if not ConfigVariableBool("show-toolbar", True).getValue():
227 | self.toolBar.hide()
228 |
229 | self.accept("toggleGrid", self.setGrid)
230 |
231 | def add_separator(self):
232 | placeholder = DirectFrame(
233 | text="|",
234 | frameSize=(-1,1,-24,24),
235 | pad=(4, 0),
236 | frameColor=(0,0,0,1))
237 | self.toolBar.addItem(placeholder)
238 |
239 |
240 | def toggleGrid(self, selection):
241 | base.messenger.send("toggleGrid")
242 |
243 | def setGrid(self):
244 | self.cb_grid['isChecked'] = not self.grid.is_hidden()
245 | if self.grid.is_hidden():
246 | self.cb_grid['image'] = self.cb_grid['checkedImage']
247 | else:
248 | self.cb_grid['image'] = self.cb_grid['uncheckedImage']
249 |
250 | self.cb_grid.setImage()
251 |
252 |
--------------------------------------------------------------------------------
/SceneEditor/GUI/__init__.py:
--------------------------------------------------------------------------------
https://raw.githubusercontent.com/fireclawthefox/SceneEditor/f02ac2539f6cdb11af0fb2fb7e5204feca1b1eee/SceneEditor/GUI/__init__.py
--------------------------------------------------------------------------------
/SceneEditor/GUI/dialogs/ShaderInput.py:
--------------------------------------------------------------------------------
1 | #!/usr/bin/python
2 | # -*- coding: utf-8 -*-
3 |
4 | # This file was created using the DirectGUI Designer
5 |
6 | from direct.gui import DirectGuiGlobals as DGG
7 |
8 | from direct.gui.DirectFrame import DirectFrame
9 | from direct.gui.DirectEntry import DirectEntry
10 | from direct.gui.DirectButton import DirectButton
11 | from direct.gui.DirectOptionMenu import DirectOptionMenu
12 | from panda3d.core import (
13 | LPoint3f,
14 | LVecBase3f,
15 | LVecBase4f,
16 | TextNode
17 | )
18 |
19 | class GUI:
20 | def __init__(self, rootParent=None):
21 |
22 | self.frm_content = DirectFrame(
23 | borderWidth = (2, 2),
24 | frameSize = (0.0, 426.0, -24.0, 0.0),
25 | frameColor = (1, 1, 1, 1),
26 | pos = LPoint3f(0, 0, 0),
27 | parent=rootParent,
28 | )
29 | self.frm_content.setTransparency(0)
30 |
31 | self.txt_input_name = DirectEntry(
32 | borderWidth = (0.08333333333333333, 0.08333333333333333),
33 | pos = LPoint3f(7.5, 0, -16.5),
34 | scale = LVecBase3f(12, 12, 12),
35 | text = [''],
36 | width = 7.0,
37 | overflow = 1,
38 | text0_scale = (1, 1),
39 | parent=self.frm_content,
40 | initialText='Input name',
41 | )
42 | self.txt_input_name.setTransparency(0)
43 |
44 | self.frm_texture = DirectFrame(
45 | relief = 3,
46 | borderWidth = (1.0, 1.0),
47 | frameSize = (0.0, 300.0, -24.0, 0.0),
48 | frameColor = (1.0, 1.0, 1.0, 1.0),
49 | pos = LPoint3f(99.5, 0, 0),
50 | parent=self.frm_content,
51 | )
52 | self.frm_texture.setTransparency(0)
53 |
54 | self.txt_texture_path = DirectEntry(
55 | borderWidth = (0.08333333333333333, 0.08333333333333333),
56 | pos = LPoint3f(5.5, 0, -16.5),
57 | scale = LVecBase3f(12, 12, 12),
58 | width = 19.5,
59 | overflow = 1,
60 | parent=self.frm_texture,
61 | )
62 | self.txt_texture_path.setTransparency(0)
63 |
64 | self.btn_browse = DirectButton(
65 | relief = 1,
66 | borderWidth = (2, 2),
67 | pad = (5.0, 5.0),
68 | pos = LPoint3f(268.5, 0, -16),
69 | text = ['browse'],
70 | text0_scale = (12.0, 12.0),
71 | text1_scale = (12.0, 12.0),
72 | text2_scale = (12.0, 12.0),
73 | text3_scale = (12.0, 12.0),
74 | parent=self.frm_texture,
75 | pressEffect=1,
76 | )
77 | self.btn_browse.setTransparency(0)
78 |
79 | self.btn_remove = DirectButton(
80 | relief = 1,
81 | borderWidth = (2, 2),
82 | pad = (3.0, 1.0),
83 | pos = LPoint3f(411, 0, -19.5),
84 | text = ['X'],
85 | text0_scale = (24, 24),
86 | text1_scale = (24, 24),
87 | text2_scale = (24, 24),
88 | text3_scale = (24, 24),
89 | parent=self.frm_content,
90 | pressEffect=1,
91 | )
92 | self.btn_remove.setTransparency(0)
93 |
94 | self.frm_nodepath = DirectFrame(
95 | relief = 3,
96 | borderWidth = (1.0, 1.0),
97 | frameSize = (0.0, 300.0, -24.0, 0.0),
98 | frameColor = (1.0, 1.0, 1.0, 1.0),
99 | pos = LPoint3f(99.5, 0, 0),
100 | parent=self.frm_content,
101 | )
102 | self.frm_nodepath.setTransparency(0)
103 |
104 | self.cmb_nodepaths = DirectOptionMenu(
105 | #relief = 1,
106 | borderWidth = (0.2, 0.2),
107 | pad = (0.2, 0.2),
108 | pos = LPoint3f(5, 0, -15.5),
109 | hpr = LVecBase3f(0, 0, 0),
110 | scale = LVecBase3f(12, 12, 12),
111 | #popupMarker_pos = None,
112 | #text_align = 0,
113 | parent=self.frm_nodepath,
114 | )
115 | self.cmb_nodepaths.setTransparency(0)
116 |
117 | self.frm_vector = DirectFrame(
118 | relief = 3,
119 | borderWidth = (1.0, 1.0),
120 | frameSize = (0.0, 300.0, -24.0, 0.0),
121 | frameColor = (1.0, 1.0, 1.0, 1.0),
122 | pos = LPoint3f(99.5, 0, 0),
123 | parent=self.frm_content,
124 | )
125 | self.frm_vector.setTransparency(0)
126 |
127 | self.txt_vec_1 = DirectEntry(
128 | borderWidth = (0.08333333333333333, 0.08333333333333333),
129 | pos = LPoint3f(12.5, 0, -16.5),
130 | scale = LVecBase3f(12, 12, 12),
131 | width = 5.0,
132 | overflow = 1,
133 | parent=self.frm_vector,
134 | )
135 | self.txt_vec_1.setTransparency(0)
136 |
137 | self.txt_vec_2 = DirectEntry(
138 | borderWidth = (0.08333333333333333, 0.08333333333333333),
139 | pos = LPoint3f(82.5, 0, -16.5),
140 | scale = LVecBase3f(12, 12, 12),
141 | width = 5.0,
142 | overflow = 1,
143 | parent=self.frm_vector,
144 | )
145 | self.txt_vec_2.setTransparency(0)
146 |
147 | self.txt_vec_3 = DirectEntry(
148 | borderWidth = (0.08333333333333333, 0.08333333333333333),
149 | pos = LPoint3f(152.5, 0, -16.5),
150 | scale = LVecBase3f(12, 12, 12),
151 | width = 5.0,
152 | overflow = 1,
153 | parent=self.frm_vector,
154 | )
155 | self.txt_vec_3.setTransparency(0)
156 |
157 | self.txt_vec_4 = DirectEntry(
158 | borderWidth = (0.08333333333333333, 0.08333333333333333),
159 | pos = LPoint3f(222.5, 0, -16.5),
160 | scale = LVecBase3f(12, 12, 12),
161 | width = 5.0,
162 | overflow = 1,
163 | parent=self.frm_vector,
164 | )
165 | self.txt_vec_4.setTransparency(0)
166 |
167 |
168 | def show(self):
169 | self.frm_content.show()
170 |
171 | def hide(self):
172 | self.frm_content.hide()
173 |
174 | def destroy(self):
175 | self.frm_content.destroy()
176 |
--------------------------------------------------------------------------------
/SceneEditor/GUI/dialogs/ShaderLoaderDialogManager.py:
--------------------------------------------------------------------------------
1 | import logging
2 |
3 | from SceneEditor.GUI.dialogs.ShaderLoaderDialog import GUI
4 | from SceneEditor.GUI.dialogs.ShaderInput import GUI as ShaderInput
5 | from direct.gui import DirectGuiGlobals as DGG
6 | from direct.gui.DirectFrame import DirectFrame
7 | from SceneEditor.directGuiOverrides.DirectOptionMenu import DirectOptionMenu
8 | from DirectGuiExtension.DirectAutoSizer import DirectAutoSizer
9 | from DirectFolderBrowser.DirectFolderBrowser import DirectFolderBrowser
10 | from DirectGuiExtension.DirectBoxSizer import DirectBoxSizer
11 |
12 | from panda3d.core import Shader, Vec2, Vec3, Vec4
13 |
14 | DGG.BELOW = "below"
15 |
16 | class ShaderDetails:
17 | shader_language = Shader.SL_GLSL
18 |
19 | vertex_path = ""
20 | tessellation_ctrl_path = ""
21 | tessellation_eval_path = ""
22 | geometry_path = ""
23 | fragment_path = ""
24 |
25 | input_dict = {}
26 |
27 | class ShaderLoaderDialogManager(GUI):
28 | def __init__(self, accept_func, scene_objects):
29 | self.bg_frame = DirectFrame(frameColor=(0,0,0,0.5))
30 | self.autoSizer = DirectAutoSizer(
31 | frameColor=(0,0,0,0),
32 | parent=base.pixel2d,
33 | child=self.bg_frame
34 | )
35 | GUI.__init__(self, base.pixel2d)
36 | self.frm_main.set_pos((base.win.get_size().x/2, 0, -base.win.get_size().y/2))
37 |
38 | self.accept_func = accept_func
39 | self.scene_objects = scene_objects
40 |
41 | self.btn_ok["command"] = self.close_dialog
42 | self.btn_ok["extraArgs"] = [True]
43 |
44 | self.btn_cancel["command"] = self.close_dialog
45 | self.btn_cancel["extraArgs"] = [False]
46 |
47 | self.lbl_tessellation_ctrl["text"] = "Tessellation\nControll"
48 | self.lbl_tessellation_ev["text"] = "Tessellation\nEvaluation"
49 |
50 | self.btn_browse_vertex["command"] = self.browse_vertex
51 | self.btn_browse_fragment["command"] = self.browse_fragment
52 | self.btn_browse_tessellation_ctrl["command"] = self.browse_tessellation_ctrl
53 | self.btn_browse_tessellation_eval["command"] = self.browse_tessellation_eval
54 | self.btn_browse_geometry["command"] = self.browse_geometry
55 |
56 | self.shader_input_list = []
57 | self.btn_add_shader_input["command"] = self.add_input
58 | self.input_box = DirectBoxSizer(
59 | parent=self.frm_shader_input.canvas,
60 | orientation=DGG.VERTICAL)
61 |
62 | # prepare the item list for the nodepath selection
63 | self.item_dict = {}
64 | max_length = 40
65 | for obj in self.scene_objects:
66 | entry = str(obj)
67 | if len(entry) > max_length:
68 | entry = f"...{entry[-max_length:]}"
69 | if entry in self.item_dict:
70 | index = 1
71 | new_entry = ""
72 | while True:
73 | new_entry = f"{index}-...{entry[-max_length:]}"
74 | if new_entry not in self.item_dict:
75 | entry = new_entry
76 | break
77 | index += 1
78 | self.item_dict[entry] = obj
79 |
80 | def add_input(self):
81 | input_type = self.cmb_shader_input_type.get().lower()
82 | shader_input = ShaderInput()
83 | shader_input.input_type = input_type
84 | if input_type == "texture":
85 | shader_input.frm_nodepath.hide()
86 | shader_input.frm_vector.hide()
87 | elif input_type == "nodepath":
88 | shader_input.frm_texture.hide()
89 | shader_input.frm_vector.hide()
90 |
91 | shader_input.cmb_nodepaths.destroy()
92 | shader_input.cmb_nodepaths = DirectOptionMenu(
93 | borderWidth = (0.2, 0.2),
94 | pad = (0.2, 0.2),
95 | pos = (5, 0, -15.5),
96 | hpr = (0, 0, 0),
97 | scale = (12, 12, 12),
98 | parent=shader_input.frm_nodepath,
99 | items=list(self.item_dict.keys()),
100 | popupMenuLocation=DGG.BELOW
101 | )
102 |
103 | #shader_input.cmb_nodepaths["items"] = list(self.item_dict.keys())
104 | #shader_input.cmb_nodepaths.setItems()
105 | #shader_input.cmb_nodepaths["item_text_align"] = 0
106 | #shader_input.cmb_nodepaths.resetFrameSize()
107 | elif input_type == "vector":
108 | shader_input.frm_texture.hide()
109 | shader_input.frm_nodepath.hide()
110 | self.input_box.addItem(shader_input.frm_content)
111 | shader_input.txt_input_name["focusInCommand"] = self.clearText
112 | shader_input.txt_input_name["focusInExtraArgs"] = [shader_input.txt_input_name]
113 |
114 | shader_input.btn_remove["command"] = self.remove_input
115 | shader_input.btn_remove["extraArgs"] = [shader_input]
116 |
117 | self.frm_shader_input["canvasSize"] = self.input_box["frameSize"]
118 |
119 | self.shader_input_list.append(shader_input)
120 |
121 | def remove_input(self, shader_input):
122 | self.shader_input_list.remove(shader_input)
123 | shader_input.destroy()
124 |
125 | def clearText(self, entry):
126 | entry.enterText('')
127 |
128 | def browse_vertex(self):
129 | self.show_browser(self.set_vertex_path, "vertex.glsl")
130 |
131 | def set_vertex_path(self, accept):
132 | if accept:
133 | self.txt_vertex_path.set(self.browser.get())
134 | self.browser.destroy()
135 |
136 | def browse_fragment(self):
137 | self.show_browser(self.set_fragment_path, "fragment.glsl")
138 |
139 | def set_fragment_path(self, accept):
140 | if accept:
141 | self.txt_fragment_path.set(self.browser.get())
142 | self.browser.destroy()
143 |
144 | def browse_tessellation_eval(self):
145 | self.show_browser(self.set_tessellation_eval_path, "tessellation_evaluation.glsl")
146 |
147 | def set_tessellation_eval_path(self, accept):
148 | if accept:
149 | self.txt_tessellation_ev_path.set(self.browser.get())
150 | self.browser.destroy()
151 |
152 | def browse_tessellation_ctrl(self):
153 | self.show_browser(self.set_tessellation_ctrl_path, "tessellation_control.glsl")
154 |
155 | def set_tessellation_ctrl_path(self, accept):
156 | if accept:
157 | self.txt_tessellation_ctrl_path.set(self.browser.get())
158 | self.browser.destroy()
159 |
160 | def browse_geometry(self):
161 | self.show_browser(self.set_geometry_path, "geometry.glsl")
162 |
163 | def set_geometry_path(self, accept):
164 | if accept:
165 | self.txt_geometry_path.set(self.browser.get())
166 | self.browser.destroy()
167 |
168 | def show_browser(self, cmd, filename):
169 | self.browser = DirectFolderBrowser(
170 | cmd,
171 | True,
172 | defaultFilename=filename)
173 |
174 | def close_dialog(self, accept):
175 | details = ShaderDetails()
176 | details.vertex_path = self.txt_vertex_path.get()
177 | details.tessellation_ctrl_path = self.txt_tessellation_ctrl_path.get()
178 | details.tessellation_eval_path = self.txt_tessellation_ev_path.get()
179 | details.geometry_path = self.txt_geometry_path.get()
180 | details.fragment_path = self.txt_fragment_path.get()
181 | for entry in self.shader_input_list:
182 | input_name = entry.txt_input_name.get()
183 | value = None
184 | print("CHECK INPUT VALUE")
185 | print(entry.input_type)
186 | if entry.input_type == "texture":
187 | value = entry.txt_texture_path.get()
188 | elif entry.input_type == "nodepath":
189 | value = self.item_dict[entry.cmb_nodepaths.get()]
190 | elif entry.input_type == "vector":
191 | print("VECTOR VALUE")
192 | val_1 = entry.txt_vec_1.get()
193 | val_2 = entry.txt_vec_2.get()
194 | val_3 = entry.txt_vec_3.get()
195 | val_4 = entry.txt_vec_4.get()
196 | if val_4:
197 | print("VEC 4")
198 | val_1 = float(val_1 if val_1 != "" else 0.0)
199 | val_2 = float(val_2 if val_2 != "" else 0.0)
200 | val_3 = float(val_3 if val_3 != "" else 0.0)
201 | val_4 = float(val_4 if val_4 != "" else 0.0)
202 | value = Vec4(val_1, val_2, val_3, val_4)
203 | elif val_3:
204 | print("VEC 3")
205 | val_1 = float(val_1 if val_1 != "" else 0.0)
206 | val_2 = float(val_2 if val_2 != "" else 0.0)
207 | val_3 = float(val_3 if val_3 != "" else 0.0)
208 | value = Vec3(val_1, val_2, val_3)
209 | elif val_2:
210 | print("VEC 2")
211 | val_1 = float(val_1 if val_1 != "" else 0.0)
212 | val_2 = float(val_2 if val_2 != "" else 0.0)
213 | value = Vec2(val_1, val_2)
214 | else:
215 | print("VEC Failed")
216 | logging.error(f"Can't create a 1 dimensional vector for {input_name}")
217 |
218 | print(value)
219 |
220 | if value != None:
221 | details.input_dict[input_name] = value
222 |
223 | self.accept_func(accept, details)
224 | self.destroy()
225 |
226 | self.autoSizer["updateOnWindowResize"] = False
227 | self.autoSizer.removeChild()
228 | self.autoSizer.destroy()
229 | self.bg_frame.destroy()
230 |
--------------------------------------------------------------------------------
/SceneEditor/GUI/dialogs/__init__.py:
--------------------------------------------------------------------------------
https://raw.githubusercontent.com/fireclawthefox/SceneEditor/f02ac2539f6cdb11af0fb2fb7e5204feca1b1eee/SceneEditor/GUI/dialogs/__init__.py
--------------------------------------------------------------------------------
/SceneEditor/GUI/panels/__init__.py:
--------------------------------------------------------------------------------
https://raw.githubusercontent.com/fireclawthefox/SceneEditor/f02ac2539f6cdb11af0fb2fb7e5204feca1b1eee/SceneEditor/GUI/panels/__init__.py
--------------------------------------------------------------------------------
/SceneEditor/__init__.py:
--------------------------------------------------------------------------------
https://raw.githubusercontent.com/fireclawthefox/SceneEditor/f02ac2539f6cdb11af0fb2fb7e5204feca1b1eee/SceneEditor/__init__.py
--------------------------------------------------------------------------------
/SceneEditor/core/CameraController.py:
--------------------------------------------------------------------------------
1 | import math
2 | from panda3d.core import Point2, Vec3, PerspectiveLens, OrthographicLens
3 |
4 | class CameraController:
5 | def __init__(self):
6 | #
7 | # Camera
8 | #
9 | # set ortographic lens
10 | #lens = OrthographicLens()
11 | #lens.setFilmSize(80, 60) # Or whatever is appropriate for your scene
12 | #base.cam.node().setLens(lens)
13 | self.fov = 90
14 | base.camLens.setFov(self.fov)
15 |
16 | self.is_orthographic = False
17 |
18 | self.ortho_zoom_size = 90
19 | self.min_ortho_zoom_size = 10
20 | self.max_ortho_zoom_size = 180
21 |
22 | self.pivotDefaultH = 30
23 | self.pivotDefaultP = 30
24 |
25 | # camera movement
26 | self.mousePos = None
27 | self.startCameraMovement = False
28 | self.movePivot = False
29 |
30 | # disable pandas default mouse-camera controls so we can handle the cam
31 | # movements by ourself
32 | base.disableMouse()
33 | # this variable will be used to determine the distance from the player to
34 | # the camera
35 | self.camDistance = 15.0
36 | # min and maximal distance between player and camera
37 | self.maxCamDistance = 1000.0
38 | self.minCamDistance = 1.5
39 | # the speed at which the mousewheel and +/- will zoom the camera in/out
40 | self.zoomSpeed = 1.0
41 | # minumum and maximum zoom speed
42 | self.min_zoom_speed = 0.45
43 | self.max_zoom_speed = 100
44 | # the speed at which the mouse moves the camera
45 | self.mouseSpeed = 50
46 |
47 | self.pivot = render.attachNewNode("Pivot Point")
48 | self.pivot.setPos(0, 0, 0)
49 | self.pivot.setHpr(self.pivotDefaultH, self.pivotDefaultP, 0)
50 | camera.reparentTo(self.pivot)
51 |
52 | self.enable_cam_controller()
53 |
54 | def enable_cam_controller(self):
55 | if base.taskMgr.hasTaskNamed("SceneEditor_task_camActualisation"):
56 | return
57 |
58 | # add the cameras update task so it will be updated every frame
59 | base.taskMgr.add(self.updateCam, "SceneEditor_task_camActualisation", priority=-4)
60 |
61 | def disable_cam_controller(self):
62 | base.taskMgr.remove("SceneEditor_task_camActualisation")
63 |
64 | def toggle_lense(self):
65 | if self.is_orthographic:
66 | lens = PerspectiveLens()
67 | # TODO: get the size according to the display region size
68 | lens.set_film_size(*base.win.get_size())
69 | lens.set_fov(self.fov)
70 | lens.set_near_far(0.001, 1000)
71 | else:
72 | lens = OrthographicLens()
73 | # TODO: get the aspect according to the display region size
74 | aspect = base.win.get_size()[0] / base.win.get_size()[1]
75 | lens.set_film_size(self.ortho_zoom_size*aspect, self.ortho_zoom_size)
76 | lens.set_near_far(0.001, 1000)
77 | base.cam.node().set_lens(lens)
78 | base.camLens = lens
79 | self.is_orthographic = not self.is_orthographic
80 |
81 | def setPivot(self, h, p):
82 | interval = self.pivot.hprInterval(0.5, Vec3(h, p, 0))
83 | interval.start()
84 |
85 | def resetPivotDefault(self):
86 | self.setPivot(self.pivotDefaultH, self.pivotDefaultP)
87 |
88 | def setPivotLeft(self):
89 | self.setPivot(270, 0)
90 |
91 | def setPivotRight(self):
92 | self.setPivot(90, 0)
93 |
94 | def setPivotFront(self):
95 | self.setPivot(0, 0)
96 |
97 | def setPivotBack(self):
98 | self.setPivot(180, 0)
99 |
100 | def setPivotTop(self):
101 | self.setPivot(0, 90)
102 |
103 | def setPivotBottom(self):
104 | self.setPivot(0, -90)
105 |
106 | def setMoveCamera(self, moveCamera):
107 | # store the mouse position if weh have a mouse
108 | if base.mouseWatcherNode.hasMouse():
109 | x = base.mouseWatcherNode.getMouseX()
110 | y = base.mouseWatcherNode.getMouseY()
111 | self.mousePos = Point2(x, y)
112 | # set the variable according to if we want to move the camera or not
113 | self.startCameraMovement = moveCamera
114 |
115 | def setMovePivot(self, movePivot):
116 | self.movePivot = movePivot
117 |
118 | def setAndMovePivot(self, move):
119 | self.setMovePivot(move)
120 | self.setMoveCamera(move)
121 |
122 | #
123 | # CAMERA SPECIFIC FUNCTIONS
124 | #
125 | def zoom(self, zoomIn):
126 | if not self.is_orthographic:
127 | # PERSPECTIVE
128 |
129 | # calculate new zoom speed dependent on distance
130 | dist_relative = self.camDistance/self.maxCamDistance
131 | if dist_relative > 1:
132 | dist_relative = 0.9
133 | self.zoomSpeed = self.camDistance * math.asin(dist_relative)
134 | if self.zoomSpeed < self.min_zoom_speed:
135 | self.zoomSpeed = self.min_zoom_speed
136 | if self.zoomSpeed > self.max_zoom_speed:
137 | self.zoomSpeed = self.max_zoom_speed
138 |
139 | # actual zooming
140 | if zoomIn:
141 | #
142 | # ZOOM IN
143 | #
144 | # check if we are far enough away to further zoom in
145 | if self.camDistance > self.minCamDistance:
146 | # zoom in by a given speed
147 | self.camDistance -= self.zoomSpeed
148 | if self.camDistance < self.minCamDistance:
149 | self.camDistance = self.minCamDistance
150 | else:
151 | #
152 | # ZOOM OUT
153 | #
154 | # check if we are close enough to further zoom out
155 | if self.camDistance < self.maxCamDistance:
156 | # zoom out by a given speed
157 | self.camDistance += self.zoomSpeed
158 | if self.camDistance > self.maxCamDistance:
159 | self.camDistance = self.maxCamDistance
160 | else:
161 | # ORTHOGRAPHIC
162 |
163 | aspect = base.win.get_size()[0] / base.win.get_size()[1]
164 |
165 | if zoomIn:
166 | #
167 | # ZOOM IN
168 | #
169 | self.ortho_zoom_size -= 1
170 | if self.ortho_zoom_size < self.min_ortho_zoom_size:
171 | self.ortho_zoom_size = self.min_ortho_zoom_size
172 | else:
173 | #
174 | # ZOOM OUT
175 | #
176 | self.ortho_zoom_size += 1
177 | if self.ortho_zoom_size > self.max_ortho_zoom_size:
178 | self.ortho_zoom_size = self.max_ortho_zoom_size
179 |
180 | lens = base.cam.node().get_lens()
181 | lens.setFilmSize(self.ortho_zoom_size*aspect, self.ortho_zoom_size)
182 |
183 | def reset_zoom(self):
184 | self.camDistance = 75.0
185 |
186 | def updateCam(self, task):
187 | # variables to store the mouses current x and y position
188 | x = 0.0
189 | y = 0.0
190 | if base.mouseWatcherNode.hasMouse():
191 | # get the mouse position
192 | x = base.mouseWatcherNode.getMouseX()
193 | y = base.mouseWatcherNode.getMouseY()
194 | if base.mouseWatcherNode.hasMouse() \
195 | and self.mousePos is not None \
196 | and self.startCameraMovement:
197 | # Move the camera if the left mouse key is pressed and the mouse moved
198 | mouseMoveX = (self.mousePos.getX() - x) * (self.mouseSpeed + globalClock.getDt())
199 | mouseMoveY = (self.mousePos.getY() - y) * (self.mouseSpeed + globalClock.getDt())
200 | self.mousePos = Point2(x, y)
201 |
202 | if not self.movePivot:
203 | # Rotate the pivot point
204 | preP = self.pivot.getP()
205 | self.pivot.setP(0)
206 | self.pivot.setH(self.pivot, mouseMoveX)
207 | self.pivot.setP(preP)
208 | self.pivot.setP(self.pivot, mouseMoveY)
209 | else:
210 | # Move the pivot point
211 | self.pivot.setX(self.pivot, -mouseMoveX)
212 | self.pivot.setZ(self.pivot, mouseMoveY)
213 |
214 | # set the cameras zoom
215 | camera.setY(self.camDistance)
216 |
217 | # always look at the pivot point
218 | camera.lookAt(self.pivot)
219 |
220 | # continue the task until it got manually stopped
221 | return task.cont
222 |
--------------------------------------------------------------------------------
/SceneEditor/core/CoreKillRingHandler.py:
--------------------------------------------------------------------------------
1 | import logging
2 | from SceneEditor.core.KillRing import KillRing
3 |
4 | class CoreKillRingHandler:
5 | def __init__(self):
6 | self.killRing = KillRing()
7 |
8 | #
9 | # KILL RING HANDLING
10 | #
11 | def addToKillRing(self, obj, action, objectType, oldValue, newValue):
12 | if action == "set" and oldValue == newValue:
13 | logging.debug(f"action={action}, type={objectType} was not added to killring, reason: old={oldValue} equals new={newValue}")
14 | return
15 | logging.debug(f"Add to killring action={action}, type={objectType}, old={oldValue}, new={newValue}")
16 | self.killRing.push(obj, action, objectType, oldValue, newValue)
17 |
18 | def undo(self):
19 | # undo this action
20 | workOn = self.killRing.pop()
21 |
22 | if workOn is None:
23 | return
24 |
25 | if workOn.action == "set":
26 | if workOn.objectType == "pos":
27 | logging.debug(f"undo Position to {workOn.oldValue}")
28 | workOn.editObject.set_pos(workOn.oldValue)
29 | elif workOn.objectType == "hpr":
30 | logging.debug(f"undo Rotation to {workOn.oldValue}")
31 | workOn.editObject.set_hpr(workOn.oldValue)
32 | elif workOn.objectType == "scale":
33 | logging.debug(f"undo Scale to {workOn.oldValue}")
34 | workOn.editObject.set_scale(workOn.oldValue)
35 | elif workOn.action == "add":
36 | logging.debug(f"undo remove added element {workOn.editObject}")
37 | self.remove([workOn.editObject], False)
38 |
39 | elif workOn.action == "kill" and workOn.objectType == "element":
40 | logging.debug(f"undo last kill {workOn.editObject}")
41 | workOn.editObject.unstash()
42 | if workOn.editObject.get_tag("object_type") == "light":
43 | self.scene_model_parent.set_light(workOn.editObject.find("+Light"))
44 | base.messenger.send("update_structure")
45 |
46 | elif workOn.action == "copy":
47 | logging.debug(f"undo last copy {workOn.objectType}")
48 | if workOn.objectType == "element":
49 | self.remove([workOn.editObject], False)
50 |
51 | elif workOn.action == "cut":
52 | logging.debug(f"undo last cut {workOn.objectType}")
53 | if workOn.objectType == "element":
54 | workOn.editObject.reparent_to(workOn.oldValue)
55 |
56 | if len(self.selected_objects):
57 | base.messenger.send("update_selection_highlight_marker")
58 |
59 | base.messenger.send("setDirtyFlag")
60 |
61 | def redo(self):
62 | # redo this
63 | workOn = self.killRing.pull()
64 |
65 | if workOn is None:
66 | logging.debug("nothing to redo")
67 | return
68 |
69 | if workOn.action == "set":
70 | if workOn.objectType == "pos":
71 | if type(workOn.newValue) is list:
72 | workOn.editObject.set_pos(*workOn.newValue)
73 | else:
74 | workOn.editObject.set_pos(workOn.newValue)
75 | elif workOn.objectType == "hpr":
76 | if type(workOn.newValue) is list:
77 | workOn.editObject.set_hpr(*workOn.newValue)
78 | else:
79 | workOn.editObject.set_hpr(workOn.newValue)
80 | elif workOn.objectType == "scale":
81 | if type(workOn.newValue) is list:
82 | workOn.editObject.set_scale(*workOn.newValue)
83 | else:
84 | workOn.editObject.set_scale(workOn.newValue)
85 |
86 | elif workOn.action == "add":
87 | workOn.editObject.unstash()
88 | base.messenger.send("update_structure")
89 | if workOn.editObject.get_tag("object_type") == "light":
90 | self.scene_model_parent.set_light(workOn.editObject.find("+Light"))
91 |
92 | elif workOn.action == "kill" and workOn.objectType == "element":
93 | self.remove([workOn.editObject], False)
94 | base.messenger.send("update_structure")
95 |
96 | elif workOn.action == "copy":
97 | if workOn.objectType == "element":
98 | workOn.editObject.unstash()
99 | base.messenger.send("update_structure")
100 | if workOn.editObject.get_tag("object_type") == "light":
101 | self.scene_model_parent.set_light(workOn.editObject.find("+Light"))
102 |
103 | elif workOn.action == "cut":
104 | logging.debug(f"undo last cut {workOn.objectType}")
105 | if workOn.objectType == "element":
106 | workOn.editObject.reparent_to(workOn.newValue)
107 |
108 | if len(self.selected_objects):
109 | base.messenger.send("update_selection_highlight_marker")
110 |
111 | base.messenger.send("setDirtyFlag")
112 |
113 | def cycleKillRing(self):
114 | """Cycles through the redo branches at the current depth of the kill ring"""
115 | self.undo()
116 | self.killRing.cycleChildren()
117 | self.redo()
118 |
--------------------------------------------------------------------------------
/SceneEditor/core/KillRing.py:
--------------------------------------------------------------------------------
1 |
2 | class KillRingEntry():
3 | def __init__(self, editObject=None, action="", objectType="", oldValue=None, newValue=None):
4 | self.activeChild = None
5 | self.children = []
6 | self.parent = None
7 |
8 | self.editObject = editObject
9 | self.action = action
10 | self.objectType = objectType
11 | self.oldValue = oldValue
12 | self.newValue = newValue
13 |
14 | def addChild(self, child):
15 | self.children.append(child)
16 | self.activeChild = child
17 |
18 | def setParent(self, parent):
19 | self.parent = parent
20 |
21 | def cycleChildren(self):
22 | if len(self.children) < 2: return
23 | self.children = self.children[-1:] + self.children[:-1]
24 | self.activeChild = self.children[-1]
25 |
26 | class KillRing():
27 | def __init__(self):
28 | self.currentRoot = KillRingEntry()
29 | self.currentRoot.setParent(self.currentRoot)
30 |
31 | def push(self, editObject, action, objectType, oldValue, newValue):
32 | newKill = KillRingEntry(editObject, action, objectType, oldValue, newValue)
33 | self.currentRoot.addChild(newKill)
34 | newKill.setParent(self.currentRoot)
35 | self.currentRoot = newKill
36 |
37 | def pop(self):
38 | # revert last push
39 | if self.currentRoot.parent is self.currentRoot: return None
40 | root = self.currentRoot
41 | self.currentRoot = self.currentRoot.parent
42 | return root
43 |
44 | def pull(self):
45 | # revert last pop
46 | if self.currentRoot.activeChild is None: return
47 | self.currentRoot = self.currentRoot.activeChild
48 | return self.currentRoot
49 |
50 | def cycleChildren(self):
51 | # change the active child to the next one in the active kill ring entry
52 | self.currentRoot.cycleChildren()
53 |
--------------------------------------------------------------------------------
/SceneEditor/core/SelectionHandler.py:
--------------------------------------------------------------------------------
1 | from panda3d.core import (
2 | MouseWatcher,
3 | CollisionTraverser,
4 | CollisionHandlerQueue,
5 | CollisionRay,
6 | CollisionNode,
7 | GeomNode,
8 | Point3,
9 | BitMask32)
10 |
11 | class SelectionHandler:
12 | def __init__(self):
13 | # new mouse watcher to handle display region changes correct
14 | self.selction_mouse_watcher = MouseWatcher()
15 | base.mouseWatcher.getParent().attachNewNode(self.selction_mouse_watcher)
16 |
17 | self.pick_traverser = CollisionTraverser()
18 |
19 | self.picker_ray = CollisionRay()
20 | self.pick_handler = CollisionHandlerQueue()
21 |
22 | self.picker_node = CollisionNode("mouseRay")
23 | self.picker_node.setFromCollideMask(BitMask32.all_on()) #GeomNode.getDefaultCollideMask())
24 | self.picker_node.addSolid(self.picker_ray)
25 |
26 | self.picker_np = base.cam.attachNewNode(self.picker_node)
27 |
28 | self.pick_traverser.addCollider(self.picker_np, self.pick_handler)
29 |
30 | self.selection_highlight_marker = loader.load_model('models/misc/sphere')
31 | self.selection_highlight_marker.node().setName('selection_highlight_marker')
32 | self.selection_highlight_marker.reparentTo(self.scene_root)
33 | self.selection_highlight_marker.setColor(1, 0.6, 0.2, 1)
34 | self.selection_highlight_marker.set_depth_test(False)
35 | self.selection_highlight_marker.set_depth_write(False)
36 | self.selection_highlight_marker.set_bin("fixed",0)
37 | self.selection_highlight_marker.setScale(0.3)
38 | self.selection_highlight_marker.hide()
39 |
40 | def has_objects_selected(self):
41 | return len(self.selected_objects) > 0
42 |
43 | def update_selection_mouse_watcher(self):
44 | dr = base.cam.node().get_display_region(0)
45 | self.selction_mouse_watcher.setDisplayRegion(dr)
46 |
47 | def handle_pick(self, multiselect):
48 | if self.selction_mouse_watcher.hasMouse():
49 | mpos = self.selction_mouse_watcher.getMouse()
50 | self.picker_ray.setFromLens(base.camNode, mpos.x, mpos.y)
51 | self.pick_traverser.traverse(self.scene_model_parent)
52 |
53 | if self.pick_handler.getNumEntries() > 0:
54 | self.pick_handler.sortEntries()
55 | picked_obj = self.pick_handler.getEntry(0).getIntoNodePath()
56 | picked_obj = picked_obj.findNetTag("scene_object_id")
57 | if not picked_obj.is_empty() and not picked_obj.is_hidden():
58 | base.messenger.send("pickObject", [picked_obj, multiselect])
59 |
60 | def update_selection_highlight_marker(self):
61 | self.selection_highlight_marker.setPos(self.get_selection_middle_point())
62 |
63 | def select(self, obj, multiselect=False):
64 | if obj in self.selected_objects and multiselect:
65 | # deselect an already selected model
66 | self.deselect(obj)
67 |
68 | self.selection_highlight_marker.setPos(self.get_selection_middle_point())
69 | return
70 | if not multiselect:
71 | self.deselect_all()
72 |
73 | self.selected_objects += [obj]
74 |
75 | self.selected_objects[-1].setColorScale(1, 0.8, 0.3, 1)
76 | for obj in self.selected_objects[:-1]:
77 | # lighter color for all except the last selected
78 | obj.setColorScale(1, 1, 0.4, 1)
79 |
80 |
81 | self.selection_highlight_marker.setPos(self.get_selection_middle_point())
82 | self.selection_highlight_marker.show()
83 |
84 | base.messenger.send("update_structure")
85 | base.messenger.send("update_properties")
86 |
87 | def deselect(self, obj):
88 | if obj not in self.selected_objects: return
89 | obj.clearColorScale()
90 | self.selected_objects.remove(obj)
91 | if len(self.selected_objects) == 0:
92 | self.selection_highlight_marker.hide()
93 |
94 | base.messenger.send("update_structure")
95 | base.messenger.send("update_properties")
96 | base.messenger.send("reregisterKeyboardAndMouseEvents")
97 |
98 | def deselect_all(self):
99 | for obj in self.selected_objects:
100 | obj.clearColorScale()
101 | self.selection_highlight_marker.hide()
102 |
103 | self.selected_objects = []
104 |
105 | base.messenger.send("update_structure")
106 | base.messenger.send("update_properties")
107 | base.messenger.send("reregisterKeyboardAndMouseEvents")
108 |
109 | def remove(self, objs=None, includeWithKillCycle=True):
110 | if objs is None:
111 | objs = self.selected_objects[:]
112 |
113 | for obj in objs:
114 | self.deselect(obj)
115 |
116 | if obj.get_tag("object_type") == "light":
117 | self.scene_model_parent.clear_light(obj.find("+Light"))
118 |
119 | obj.stash()
120 | if includeWithKillCycle:
121 | base.messenger.send("addToKillRing",
122 | [obj, "kill", "element", None, None])
123 |
124 | base.messenger.send("setDirtyFlag")
125 | base.messenger.send("update_structure")
126 |
127 | def remove_all(self):
128 | for obj in self.scene_objects[:]:
129 | self.deselect(obj)
130 | obj.stash()
131 |
132 | base.messenger.send("setDirtyFlag")
133 | base.messenger.send("update_structure")
134 |
135 | def toggle_visibility(self, objs=None):
136 | if objs is None:
137 | objs = self.selected_objects
138 |
139 | for obj in objs:
140 | if obj.is_hidden():
141 | obj.show()
142 | else:
143 | obj.hide()
144 | #self.deselect(obj)
145 |
146 | base.messenger.send("update_structure")
147 |
148 | def get_selection_middle_point(self):
149 | max_x = None
150 | max_y = None
151 | max_z = None
152 | min_x = None
153 | min_y = None
154 | min_z = None
155 | for obj in self.selected_objects:
156 | if max_x is None:
157 | max_x = obj.get_x()
158 | max_y = obj.get_y()
159 | max_z = obj.get_z()
160 | min_x = obj.get_x()
161 | min_y = obj.get_y()
162 | min_z = obj.get_z()
163 | else:
164 | max_x = max(max_x, obj.get_x())
165 | max_y = max(max_y, obj.get_y())
166 | max_z = max(max_z, obj.get_z())
167 | min_x = min(min_x, obj.get_x())
168 | min_y = min(min_y, obj.get_y())
169 | min_z = min(min_z, obj.get_z())
170 |
171 | return Point3((min_x + max_x)/2, (min_y + max_y)/2, (min_z + max_z)/2)
172 |
173 |
--------------------------------------------------------------------------------
/SceneEditor/core/__init__.py:
--------------------------------------------------------------------------------
https://raw.githubusercontent.com/fireclawthefox/SceneEditor/f02ac2539f6cdb11af0fb2fb7e5204feca1b1eee/SceneEditor/core/__init__.py
--------------------------------------------------------------------------------
/SceneEditor/custom_export/custom_bam/exporter.py:
--------------------------------------------------------------------------------
1 | #!/usr/bin/python
2 | # -*- coding: utf-8 -*-
3 | __author__ = "Fireclaw the Fox"
4 | __license__ = """
5 | Simplified BSD (BSD 2-Clause) License.
6 | See License.txt or http://opensource.org/licenses/BSD-2-Clause for more info
7 | """
8 |
9 | import os
10 | import logging
11 | from panda3d.core import ConfigVariableBool
12 | from direct.gui import DirectGuiGlobals as DGG
13 | from direct.gui.DirectFrame import DirectFrame
14 | from direct.gui.DirectDialog import YesNoDialog
15 | from panda3d.core import LVecBase2f, LVecBase3f, LVecBase4f, LPoint2f, LPoint3f, LPoint4f, LVector3f
16 | from panda3d.core import LVecBase2, LVecBase3, LVecBase4, LPoint2, LPoint3, LPoint4
17 | from panda3d.core import LPlane
18 | from panda3d.core import NodePath
19 | from panda3d.core import Camera, OrthographicLens, PerspectiveLens
20 |
21 | from DirectFolderBrowser.DirectFolderBrowser import DirectFolderBrowser
22 |
23 | def get_name():
24 | return "Custom Bam Exporter"
25 |
26 | def get_id():
27 | return "custom_bam_exporter"
28 |
29 | class Exporter:
30 | def __init__(self, save_path, save_file, scene_root, scene_objects, tooltip):
31 | # create a new NP which will be written out to the bam file
32 | self.export_scene_np = NodePath("export_root")
33 |
34 | # copy the existing scene to our new NP
35 | scene_root.copy_to(self.export_scene_np)
36 |
37 | # clean up the copied scene from parts it shouldn't export
38 | self.cleanup_np(self.export_scene_np)
39 |
40 | self.browser = DirectFolderBrowser(
41 | self.save,
42 | True,
43 | save_path,
44 | save_file,
45 | [".bam"],
46 | tooltip)
47 | self.browser.show()
48 |
49 | def cleanup_np(self, root_np):
50 | if root_np.get_tag("object_type") == "empty":
51 | # replace the visible axis with an empty NodePath
52 | name = root_np.get_name()
53 | pos = root_np.get_pos()
54 | hpr = root_np.get_hpr()
55 | parent = root_np.get_parent()
56 |
57 | empty = NodePath(name)
58 | empty.set_pos(pos)
59 | empty.set_hpr(hpr)
60 | empty.reparent_to(parent)
61 |
62 | for child in list(root_np.get_children())[1:]:
63 | child.reparent_to(empty)
64 |
65 | root_np.remove_node()
66 | root_np = empty
67 |
68 | elif root_np.get_tag("object_type") == "collision":
69 | root_np.hide()
70 |
71 | elif root_np.get_tag("object_type") == "light":
72 | # remove the light representation model
73 | root_np.get_children()[0].remove_node()
74 |
75 | elif root_np.get_tag("object_type") == "camera":
76 | # create a camera and remove the dummy camera in the scene
77 | lens = None
78 | if root_np.get_tag("camera_type") == "PerspectiveLens":
79 | lens = PerspectiveLens()
80 | else:
81 | lens = OrthographicLens()
82 | cam = Camera(root_np.get_name(), lens)
83 | cam_np = root_np.get_parent().attach_new_node(cam)
84 | root_np.remove_node()
85 | root_np = cam_np
86 |
87 | for child in root_np.get_children():
88 | self.cleanup_np(child)
89 |
90 | def save(self, doSave):
91 | if doSave:
92 | self.dlgOverwrite = None
93 | self.dlgOverwriteShadow = None
94 | path = self.browser.get()
95 | path = os.path.expanduser(path)
96 | path = os.path.expandvars(path)
97 | if os.path.exists(path):
98 | self.dlgOverwrite = YesNoDialog(
99 | text="File already Exist.\nOverwrite?",
100 | relief=DGG.RIDGE,
101 | frameColor=(1,1,1,1),
102 | frameSize=(-0.5,0.5,-0.3,0.2),
103 | sortOrder=1,
104 | button_relief=DGG.FLAT,
105 | button_frameColor=(0.8, 0.8, 0.8, 1),
106 | command=self.__executeSave,
107 | extraArgs=[path],
108 | scale=300,
109 | pos=(base.getSize()[0]/2, 0, -base.getSize()[1]/2),
110 | parent=base.pixel2d)
111 | self.dlgOverwriteShadow = DirectFrame(
112 | pos=(base.getSize()[0]/2 + 10, 0, -base.getSize()[1]/2 - 10),
113 | sortOrder=0,
114 | frameColor=(0,0,0,0.5),
115 | frameSize=self.dlgOverwrite.bounds,
116 | scale=300,
117 | parent=base.pixel2d)
118 | else:
119 | self.__executeSave(True, path)
120 | base.messenger.send("setLastPath", [path])
121 | self.browser.destroy()
122 | del self.browser
123 |
124 | def __executeSave(self, overwrite, path):
125 | if self.dlgOverwrite is not None: self.dlgOverwrite.destroy()
126 | if self.dlgOverwriteShadow is not None: self.dlgOverwriteShadow.destroy()
127 | if not overwrite: return
128 | self.export_scene_np.writeBamFile(path)
129 |
--------------------------------------------------------------------------------
/SceneEditor/directGuiOverrides/__init__.py:
--------------------------------------------------------------------------------
1 | #!/usr/bin/python
2 | # -*- coding: utf-8 -*-
3 | __author__ = "Fireclaw the Fox"
4 | __license__ = """
5 | Simplified BSD (BSD 2-Clause) License.
6 | See License.txt or http://opensource.org/licenses/BSD-2-Clause for more info
7 | """
8 |
9 |
10 |
--------------------------------------------------------------------------------
/SceneEditor/directtoolsOverrides/DirectGrid.py:
--------------------------------------------------------------------------------
1 |
2 | from panda3d.core import *
3 | from direct.showbase.DirectObject import DirectObject
4 | from direct.directtools.DirectUtil import *
5 | from direct.directtools.DirectGeometry import *
6 |
7 |
8 | class DirectGrid(NodePath, DirectObject):
9 | def __init__(self,gridSize=100.0,gridSpacing=5.0,planeColor=(0.5,0.5,0.5,0.5),parent = None):
10 | # Initialize superclass
11 | NodePath.__init__(self, 'DirectGrid')
12 | # Don't wireframe or light
13 | useDirectRenderStyle(self)
14 |
15 | # Load up grid parts to initialize grid object
16 | # Polygon used to mark grid plane
17 | self.gridBack = base.loader.loadModel('models/misc/gridBack')
18 | self.gridBack.reparentTo(self)
19 | self.gridBack.setColor(*planeColor)
20 |
21 | # Grid Lines
22 | self.lines = self.attachNewNode('gridLines')
23 | self.minorLines = LineNodePath(self.lines)
24 | self.minorLines.lineNode.setName('minorLines')
25 | self.minorLines.setColor(VBase4(0.3, 0.55, 1, 1))
26 | self.minorLines.setThickness(1)
27 |
28 | self.majorLines = LineNodePath(self.lines)
29 | self.majorLines.lineNode.setName('majorLines')
30 | self.majorLines.setColor(VBase4(0.3, 0.55, 1, 1))
31 | self.majorLines.setThickness(5)
32 |
33 | self.centerLines = LineNodePath(self.lines)
34 | self.centerLines.lineNode.setName('centerLines')
35 | self.centerLines.setColor(VBase4(1, 0, 0, 0))
36 | self.centerLines.setThickness(3)
37 |
38 | # Small marker to hilight snap-to-grid point
39 | self.snapMarker = base.loader.loadModel('models/misc/sphere')
40 | self.snapMarker.node().setName('gridSnapMarker')
41 | self.snapMarker.reparentTo(self)
42 | self.snapMarker.setColor(1, 0, 0, 1)
43 | self.snapMarker.setScale(0.3)
44 | self.snapPos = Point3(0)
45 |
46 | # Initialize Grid characteristics
47 | self.fXyzSnap = 1
48 | self.fHprSnap = 1
49 | self.gridSize = gridSize
50 | self.gridSpacing = gridSpacing
51 | self.snapAngle = 15.0
52 | self.enable(parent = parent)
53 |
54 | def enable(self, parent = None):
55 | if parent:
56 | self.reparentTo(parent)
57 | else:
58 | self.reparentTo(base.direct.group)
59 |
60 | self.updateGrid()
61 | self.fEnabled = 1
62 |
63 | def disable(self):
64 | self.detachNode()
65 | self.fEnabled = 0
66 |
67 | def toggleGrid(self, parent = None):
68 | if self.fEnabled:
69 | self.disable()
70 | else:
71 | self.enable(parent = parent)
72 |
73 | def isEnabled(self):
74 | return self.fEnabled
75 |
76 | def updateGrid(self):
77 | # Update grid lines based upon current grid spacing and grid size
78 | # First reset existing grid lines
79 | self.minorLines.reset()
80 | self.majorLines.reset()
81 | self.centerLines.reset()
82 |
83 | # Now redraw lines
84 | numLines = int(math.ceil(self.gridSize/self.gridSpacing))
85 | scaledSize = numLines * self.gridSpacing
86 |
87 | center = self.centerLines
88 | minor = self.minorLines
89 | major = self.majorLines
90 | for i in range(-numLines, numLines + 1):
91 | if i == 0:
92 | center.setColor(VBase4(0, 1, 0, 0))
93 | center.moveTo(i * self.gridSpacing, -scaledSize, 0)
94 | center.drawTo(i * self.gridSpacing, scaledSize, 0)
95 | center.setColor(VBase4(1, 0, 0, 0))
96 | center.moveTo(-scaledSize, i * self.gridSpacing, 0)
97 | center.drawTo(scaledSize, i * self.gridSpacing, 0)
98 | else:
99 | if (i % 5) == 0:
100 | major.moveTo(i * self.gridSpacing, -scaledSize, 0)
101 | major.drawTo(i * self.gridSpacing, scaledSize, 0)
102 | major.moveTo(-scaledSize, i * self.gridSpacing, 0)
103 | major.drawTo(scaledSize, i * self.gridSpacing, 0)
104 | else:
105 | minor.moveTo(i * self.gridSpacing, -scaledSize, 0)
106 | minor.drawTo(i * self.gridSpacing, scaledSize, 0)
107 | minor.moveTo(-scaledSize, i * self.gridSpacing, 0)
108 | minor.drawTo(scaledSize, i * self.gridSpacing, 0)
109 |
110 | center.create()
111 | minor.create()
112 | major.create()
113 | if self.gridBack:
114 | self.gridBack.setScale(scaledSize)
115 |
116 | def setXyzSnap(self, fSnap):
117 | self.fXyzSnap = fSnap
118 |
119 | def getXyzSnap(self):
120 | return self.fXyzSnap
121 |
122 | def setHprSnap(self, fSnap):
123 | self.fHprSnap = fSnap
124 |
125 | def getHprSnap(self):
126 | return self.fHprSnap
127 |
128 | def computeSnapPoint(self, point):
129 | # Start of with current point
130 | self.snapPos.assign(point)
131 | # Snap if necessary
132 | if self.fXyzSnap:
133 | self.snapPos.set(
134 | ROUND_TO(self.snapPos[0], self.gridSpacing),
135 | ROUND_TO(self.snapPos[1], self.gridSpacing),
136 | ROUND_TO(self.snapPos[2], self.gridSpacing))
137 |
138 | # Move snap marker to this point
139 | self.snapMarker.setPos(self.snapPos)
140 |
141 | # Return the hit point
142 | return self.snapPos
143 |
144 | def computeSnapAngle(self, angle):
145 | return ROUND_TO(angle, self.snapAngle)
146 |
147 | def setSnapAngle(self, angle):
148 | self.snapAngle = angle
149 |
150 | def getSnapAngle(self):
151 | return self.snapAngle
152 |
153 | def setGridSpacing(self, spacing):
154 | self.gridSpacing = spacing
155 | self.updateGrid()
156 |
157 | def getGridSpacing(self):
158 | return self.gridSpacing
159 |
160 | def setGridSize(self, size):
161 | # Set size of grid back and redraw lines
162 | self.gridSize = size
163 | self.updateGrid()
164 |
165 | def getGridSize(self):
166 | return self.gridSize
167 |
--------------------------------------------------------------------------------
/SceneEditor/directtoolsOverrides/__init__.py:
--------------------------------------------------------------------------------
https://raw.githubusercontent.com/fireclawthefox/SceneEditor/f02ac2539f6cdb11af0fb2fb7e5204feca1b1eee/SceneEditor/directtoolsOverrides/__init__.py
--------------------------------------------------------------------------------
/SceneEditor/export/ExportBam.py:
--------------------------------------------------------------------------------
1 | #!/usr/bin/python
2 | # -*- coding: utf-8 -*-
3 | __author__ = "Fireclaw the Fox"
4 | __license__ = """
5 | Simplified BSD (BSD 2-Clause) License.
6 | See License.txt or http://opensource.org/licenses/BSD-2-Clause for more info
7 | """
8 |
9 | import os
10 | import logging
11 | from panda3d.core import ConfigVariableBool
12 | from direct.gui import DirectGuiGlobals as DGG
13 | from direct.gui.DirectFrame import DirectFrame
14 | from direct.gui.DirectDialog import YesNoDialog
15 | from panda3d.core import LVecBase2f, LVecBase3f, LVecBase4f, LPoint2f, LPoint3f, LPoint4f, LVector3f
16 | from panda3d.core import LVecBase2, LVecBase3, LVecBase4, LPoint2, LPoint3, LPoint4
17 | from panda3d.core import LPlane
18 | from panda3d.core import NodePath
19 | from panda3d.core import Camera, OrthographicLens, PerspectiveLens
20 |
21 | from DirectFolderBrowser.DirectFolderBrowser import DirectFolderBrowser
22 |
23 | class ExporterBam:
24 | def __init__(self, save_path, save_file, scene_root, scene_objects, tooltip):
25 | # create a new NP which will be written out to the bam file
26 | self.export_scene_np = NodePath("export_root")
27 |
28 | # copy the existing scene to our new NP
29 | scene_root.copy_to(self.export_scene_np)
30 |
31 | # clean up the copied scene from parts it shouldn't export
32 | self.cleanup_np(self.export_scene_np)
33 |
34 | self.browser = DirectFolderBrowser(
35 | self.save,
36 | True,
37 | save_path,
38 | save_file,
39 | [".bam"],
40 | tooltip)
41 | self.browser.show()
42 |
43 | def cleanup_np(self, root_np):
44 | if root_np.get_tag("object_type") == "empty":
45 | # replace the visible axis with an empty NodePath
46 | name = root_np.get_name()
47 | pos = root_np.get_pos()
48 | hpr = root_np.get_hpr()
49 | parent = root_np.get_parent()
50 |
51 | empty = NodePath(name)
52 | empty.set_pos(pos)
53 | empty.set_hpr(hpr)
54 | empty.reparent_to(parent)
55 |
56 | for child in list(root_np.get_children())[1:]:
57 | child.reparent_to(empty)
58 |
59 | root_np.remove_node()
60 | root_np = empty
61 |
62 | elif root_np.get_tag("object_type") == "collision":
63 | root_np.hide()
64 |
65 | elif root_np.get_tag("object_type") == "light":
66 | # remove the light representation model
67 | root_np.get_children()[0].remove_node()
68 |
69 | elif root_np.get_tag("object_type") == "camera":
70 | # create a camera and remove the dummy camera in the scene
71 | lens = None
72 | if root_np.get_tag("camera_type") == "PerspectiveLens":
73 | lens = PerspectiveLens()
74 | else:
75 | lens = OrthographicLens()
76 | cam = Camera(root_np.get_name(), lens)
77 | cam_np = root_np.get_parent().attach_new_node(cam)
78 | root_np.remove_node()
79 | root_np = cam_np
80 |
81 | for child in root_np.get_children():
82 | self.cleanup_np(child)
83 |
84 | def save(self, doSave):
85 | if doSave:
86 | self.dlgOverwrite = None
87 | self.dlgOverwriteShadow = None
88 | path = self.browser.get()
89 | path = os.path.expanduser(path)
90 | path = os.path.expandvars(path)
91 | if os.path.exists(path):
92 | self.dlgOverwrite = YesNoDialog(
93 | text="File already Exist.\nOverwrite?",
94 | relief=DGG.RIDGE,
95 | frameColor=(1,1,1,1),
96 | frameSize=(-0.5,0.5,-0.3,0.2),
97 | sortOrder=1,
98 | button_relief=DGG.FLAT,
99 | button_frameColor=(0.8, 0.8, 0.8, 1),
100 | command=self.__executeSave,
101 | extraArgs=[path],
102 | scale=300,
103 | pos=(base.getSize()[0]/2, 0, -base.getSize()[1]/2),
104 | parent=base.pixel2d)
105 | self.dlgOverwriteShadow = DirectFrame(
106 | pos=(base.getSize()[0]/2 + 10, 0, -base.getSize()[1]/2 - 10),
107 | sortOrder=0,
108 | frameColor=(0,0,0,0.5),
109 | frameSize=self.dlgOverwrite.bounds,
110 | scale=300,
111 | parent=base.pixel2d)
112 | else:
113 | self.__executeSave(True, path)
114 | base.messenger.send("setLastPath", [path])
115 | self.browser.destroy()
116 | del self.browser
117 |
118 | def __executeSave(self, overwrite, path):
119 | if self.dlgOverwrite is not None: self.dlgOverwrite.destroy()
120 | if self.dlgOverwriteShadow is not None: self.dlgOverwriteShadow.destroy()
121 | if not overwrite: return
122 | self.export_scene_np.writeBamFile(path)
123 |
--------------------------------------------------------------------------------
/SceneEditor/export/ExportProject.py:
--------------------------------------------------------------------------------
1 | #!/usr/bin/python
2 | # -*- coding: utf-8 -*-
3 | __author__ = "Fireclaw the Fox"
4 | __license__ = """
5 | Simplified BSD (BSD 2-Clause) License.
6 | See License.txt or http://opensource.org/licenses/BSD-2-Clause for more info
7 | """
8 |
9 | import os
10 | import json
11 | import logging
12 | import tempfile
13 |
14 | from direct.gui import DirectGuiGlobals as DGG
15 | from direct.gui.DirectFrame import DirectFrame
16 | from direct.gui.DirectDialog import YesNoDialog
17 |
18 | from SceneEditor.tools.JSONTools import JSONTools
19 |
20 | from DirectFolderBrowser.DirectFolderBrowser import DirectFolderBrowser
21 |
22 | class ExporterProject:
23 | def __init__(self, save_path, save_file, scene_root, scene_objects, exceptionSave=False, autosave=False, tooltip=None):
24 | self.objects = scene_objects
25 | self.scene_root = scene_root
26 | self.isAutosave = False
27 |
28 | if exceptionSave:
29 | self.excSave()
30 | return
31 |
32 | if autosave:
33 | self.isAutosave = True
34 | self.autoSave(os.path.join(save_path, save_file))
35 | return
36 |
37 |
38 | self.browser = DirectFolderBrowser(
39 | self.save,
40 | True,
41 | save_path,
42 | save_file,
43 | tooltip=tooltip)
44 | self.browser.show()
45 |
46 | def excSave(self):
47 | self.dlgOverwrite = None
48 | self.dlgOverwriteShadow = None
49 |
50 | tmpPath = os.path.join(tempfile.gettempdir(), "SEExceptionSave.scene")
51 | self.__executeSave(True, tmpPath)
52 | logging.info("Wrote crash session file to {}".format(tmpPath))
53 |
54 | def autoSave(self, fileName=""):
55 | self.dlgOverwrite = None
56 | self.dlgOverwriteShadow = None
57 | if fileName == "":
58 | fileName = os.path.join(tempfile.gettempdir(), "SEAutosave.scene")
59 | self.__executeSave(True, fileName)
60 | logging.info("Wrote autosave file to {}".format(fileName))
61 |
62 | def save(self, doSave):
63 | if doSave:
64 | self.dlgOverwrite = None
65 | self.dlgOverwriteShadow = None
66 | path = self.browser.get()
67 | path = os.path.expanduser(path)
68 | path = os.path.expandvars(path)
69 | if os.path.exists(path):
70 | self.dlgOverwrite = YesNoDialog(
71 | text="File already Exist.\nOverwrite?",
72 | relief=DGG.RIDGE,
73 | frameColor=(1,1,1,1),
74 | frameSize=(-0.5,0.5,-0.3,0.2),
75 | sortOrder=1,
76 | button_relief=DGG.FLAT,
77 | button_frameColor=(0.8, 0.8, 0.8, 1),
78 | command=self.__executeSave,
79 | extraArgs=[path],
80 | scale=300,
81 | pos=(base.getSize()[0]/2, 0, -base.getSize()[1]/2),
82 | parent=base.pixel2d)
83 | self.dlgOverwriteShadow = DirectFrame(
84 | pos=(base.getSize()[0]/2 + 10, 0, -base.getSize()[1]/2 - 10),
85 | sortOrder=0,
86 | frameColor=(0,0,0,0.5),
87 | frameSize=self.dlgOverwrite.bounds,
88 | scale=300,
89 | parent=base.pixel2d)
90 | else:
91 | self.__executeSave(True, path)
92 | base.messenger.send("setLastPath", [path])
93 | self.browser.destroy()
94 | del self.browser
95 |
96 | def __executeSave(self, overwrite, path):
97 | if self.dlgOverwrite is not None: self.dlgOverwrite.destroy()
98 | if self.dlgOverwriteShadow is not None: self.dlgOverwriteShadow.destroy()
99 | if not overwrite: return
100 |
101 | jsonTools = JSONTools()
102 | jsonElements = jsonTools.getProjectJSON(self.objects, self.scene_root)
103 | with open(path, 'w') as outfile:
104 | json.dump(jsonElements, outfile, indent=2)
105 |
106 | if not self.isAutosave:
107 | base.messenger.send("clearDirtyFlag")
108 |
109 |
--------------------------------------------------------------------------------
/SceneEditor/export/__init__.py:
--------------------------------------------------------------------------------
https://raw.githubusercontent.com/fireclawthefox/SceneEditor/f02ac2539f6cdb11af0fb2fb7e5204feca1b1eee/SceneEditor/export/__init__.py
--------------------------------------------------------------------------------
/SceneEditor/icons/ArrowDownSmall.png:
--------------------------------------------------------------------------------
https://raw.githubusercontent.com/fireclawthefox/SceneEditor/f02ac2539f6cdb11af0fb2fb7e5204feca1b1eee/SceneEditor/icons/ArrowDownSmall.png
--------------------------------------------------------------------------------
/SceneEditor/icons/ArrowUpSmall.png:
--------------------------------------------------------------------------------
https://raw.githubusercontent.com/fireclawthefox/SceneEditor/f02ac2539f6cdb11af0fb2fb7e5204feca1b1eee/SceneEditor/icons/ArrowUpSmall.png
--------------------------------------------------------------------------------
/SceneEditor/icons/Collapse.png:
--------------------------------------------------------------------------------
https://raw.githubusercontent.com/fireclawthefox/SceneEditor/f02ac2539f6cdb11af0fb2fb7e5204feca1b1eee/SceneEditor/icons/Collapse.png
--------------------------------------------------------------------------------
/SceneEditor/icons/Collapse.svg:
--------------------------------------------------------------------------------
1 |
2 |
3 |
4 |
116 |
--------------------------------------------------------------------------------
/SceneEditor/icons/Collapsed.png:
--------------------------------------------------------------------------------
https://raw.githubusercontent.com/fireclawthefox/SceneEditor/f02ac2539f6cdb11af0fb2fb7e5204feca1b1eee/SceneEditor/icons/Collapsed.png
--------------------------------------------------------------------------------
/SceneEditor/icons/CycleRedo.png:
--------------------------------------------------------------------------------
https://raw.githubusercontent.com/fireclawthefox/SceneEditor/f02ac2539f6cdb11af0fb2fb7e5204feca1b1eee/SceneEditor/icons/CycleRedo.png
--------------------------------------------------------------------------------
/SceneEditor/icons/Delete.png:
--------------------------------------------------------------------------------
https://raw.githubusercontent.com/fireclawthefox/SceneEditor/f02ac2539f6cdb11af0fb2fb7e5204feca1b1eee/SceneEditor/icons/Delete.png
--------------------------------------------------------------------------------
/SceneEditor/icons/Delete.svg:
--------------------------------------------------------------------------------
1 |
2 |
3 |
4 |
185 |
--------------------------------------------------------------------------------
/SceneEditor/icons/DeleteSmall.png:
--------------------------------------------------------------------------------
https://raw.githubusercontent.com/fireclawthefox/SceneEditor/f02ac2539f6cdb11af0fb2fb7e5204feca1b1eee/SceneEditor/icons/DeleteSmall.png
--------------------------------------------------------------------------------
/SceneEditor/icons/DeleteSmall.svg:
--------------------------------------------------------------------------------
1 |
2 |
3 |
4 |
77 |
--------------------------------------------------------------------------------
/SceneEditor/icons/Export.png:
--------------------------------------------------------------------------------
https://raw.githubusercontent.com/fireclawthefox/SceneEditor/f02ac2539f6cdb11af0fb2fb7e5204feca1b1eee/SceneEditor/icons/Export.png
--------------------------------------------------------------------------------
/SceneEditor/icons/GridOff.png:
--------------------------------------------------------------------------------
https://raw.githubusercontent.com/fireclawthefox/SceneEditor/f02ac2539f6cdb11af0fb2fb7e5204feca1b1eee/SceneEditor/icons/GridOff.png
--------------------------------------------------------------------------------
/SceneEditor/icons/GridOn.png:
--------------------------------------------------------------------------------
https://raw.githubusercontent.com/fireclawthefox/SceneEditor/f02ac2539f6cdb11af0fb2fb7e5204feca1b1eee/SceneEditor/icons/GridOn.png
--------------------------------------------------------------------------------
/SceneEditor/icons/GridOnOff.svg:
--------------------------------------------------------------------------------
1 |
2 |
3 |
4 |
203 |
--------------------------------------------------------------------------------
/SceneEditor/icons/Help.png:
--------------------------------------------------------------------------------
https://raw.githubusercontent.com/fireclawthefox/SceneEditor/f02ac2539f6cdb11af0fb2fb7e5204feca1b1eee/SceneEditor/icons/Help.png
--------------------------------------------------------------------------------
/SceneEditor/icons/Help.svg:
--------------------------------------------------------------------------------
1 |
2 |
3 |
4 |
117 |
--------------------------------------------------------------------------------
/SceneEditor/icons/Load.png:
--------------------------------------------------------------------------------
https://raw.githubusercontent.com/fireclawthefox/SceneEditor/f02ac2539f6cdb11af0fb2fb7e5204feca1b1eee/SceneEditor/icons/Load.png
--------------------------------------------------------------------------------
/SceneEditor/icons/Load.svg:
--------------------------------------------------------------------------------
1 |
2 |
3 |
4 |
221 |
--------------------------------------------------------------------------------
/SceneEditor/icons/New.png:
--------------------------------------------------------------------------------
https://raw.githubusercontent.com/fireclawthefox/SceneEditor/f02ac2539f6cdb11af0fb2fb7e5204feca1b1eee/SceneEditor/icons/New.png
--------------------------------------------------------------------------------
/SceneEditor/icons/New.svg:
--------------------------------------------------------------------------------
1 |
2 |
3 |
4 |
194 |
--------------------------------------------------------------------------------
/SceneEditor/icons/Quit.png:
--------------------------------------------------------------------------------
https://raw.githubusercontent.com/fireclawthefox/SceneEditor/f02ac2539f6cdb11af0fb2fb7e5204feca1b1eee/SceneEditor/icons/Quit.png
--------------------------------------------------------------------------------
/SceneEditor/icons/Quit.svg:
--------------------------------------------------------------------------------
1 |
2 |
3 |
4 |
80 |
--------------------------------------------------------------------------------
/SceneEditor/icons/Redo.png:
--------------------------------------------------------------------------------
https://raw.githubusercontent.com/fireclawthefox/SceneEditor/f02ac2539f6cdb11af0fb2fb7e5204feca1b1eee/SceneEditor/icons/Redo.png
--------------------------------------------------------------------------------
/SceneEditor/icons/Redo.svg:
--------------------------------------------------------------------------------
1 |
2 |
191 |
--------------------------------------------------------------------------------
/SceneEditor/icons/Reload.png:
--------------------------------------------------------------------------------
https://raw.githubusercontent.com/fireclawthefox/SceneEditor/f02ac2539f6cdb11af0fb2fb7e5204feca1b1eee/SceneEditor/icons/Reload.png
--------------------------------------------------------------------------------
/SceneEditor/icons/Reload.svg:
--------------------------------------------------------------------------------
1 |
2 |
3 |
4 |
214 |
--------------------------------------------------------------------------------
/SceneEditor/icons/Save.png:
--------------------------------------------------------------------------------
https://raw.githubusercontent.com/fireclawthefox/SceneEditor/f02ac2539f6cdb11af0fb2fb7e5204feca1b1eee/SceneEditor/icons/Save.png
--------------------------------------------------------------------------------
/SceneEditor/icons/Save.svg:
--------------------------------------------------------------------------------
1 |
2 |
3 |
4 |
215 |
--------------------------------------------------------------------------------
/SceneEditor/icons/Settings.png:
--------------------------------------------------------------------------------
https://raw.githubusercontent.com/fireclawthefox/SceneEditor/f02ac2539f6cdb11af0fb2fb7e5204feca1b1eee/SceneEditor/icons/Settings.png
--------------------------------------------------------------------------------
/SceneEditor/icons/Settings.svg:
--------------------------------------------------------------------------------
1 |
2 |
3 |
4 |
74 |
--------------------------------------------------------------------------------
/SceneEditor/icons/Undo.png:
--------------------------------------------------------------------------------
https://raw.githubusercontent.com/fireclawthefox/SceneEditor/f02ac2539f6cdb11af0fb2fb7e5204feca1b1eee/SceneEditor/icons/Undo.png
--------------------------------------------------------------------------------
/SceneEditor/icons/Undo.svg:
--------------------------------------------------------------------------------
1 |
2 |
191 |
--------------------------------------------------------------------------------
/SceneEditor/icons/VisibilityOffSmall.png:
--------------------------------------------------------------------------------
https://raw.githubusercontent.com/fireclawthefox/SceneEditor/f02ac2539f6cdb11af0fb2fb7e5204feca1b1eee/SceneEditor/icons/VisibilityOffSmall.png
--------------------------------------------------------------------------------
/SceneEditor/icons/VisibilityOnSmall.png:
--------------------------------------------------------------------------------
https://raw.githubusercontent.com/fireclawthefox/SceneEditor/f02ac2539f6cdb11af0fb2fb7e5204feca1b1eee/SceneEditor/icons/VisibilityOnSmall.png
--------------------------------------------------------------------------------
/SceneEditor/icons/VisibilitySmall.svg:
--------------------------------------------------------------------------------
1 |
2 |
3 |
4 |
105 |
--------------------------------------------------------------------------------
/SceneEditor/icons/arrowSmall.svg:
--------------------------------------------------------------------------------
1 |
2 |
3 |
4 |
101 |
--------------------------------------------------------------------------------
/SceneEditor/icons/arrowUpSmall.svg:
--------------------------------------------------------------------------------
1 |
2 |
3 |
4 |
102 |
--------------------------------------------------------------------------------
/SceneEditor/loader/LoadProject.py:
--------------------------------------------------------------------------------
1 | #!/usr/bin/python
2 | # -*- coding: utf-8 -*-
3 | __author__ = "Fireclaw the Fox"
4 | __license__ = """
5 | Simplified BSD (BSD 2-Clause) License.
6 | See License.txt or http://opensource.org/licenses/BSD-2-Clause for more info
7 | """
8 |
9 | import os
10 | import json
11 | import logging
12 | import tempfile
13 |
14 | from direct.showbase.DirectObject import DirectObject
15 | from direct.gui import DirectGuiGlobals as DGG
16 |
17 | from panda3d.core import TextNode
18 | from panda3d.core import LVecBase2f, LVecBase3f, LVecBase4f, LPoint2f, LPoint3f, LPoint4f, LVector3f
19 | from panda3d.core import LVecBase2i
20 | from panda3d.core import LVecBase2, LVecBase3, LVecBase4, LPoint2, LPoint3, LPoint4
21 | from panda3d.core import LVector2f
22 | from panda3d.core import LPlane, LPlanef
23 |
24 | from DirectFolderBrowser.DirectFolderBrowser import DirectFolderBrowser
25 |
26 | from SceneEditor.GUI.panels.ObjectPropertiesDefinition import DEFINITIONS, PropertyEditTypes
27 | from SceneEditor.GUI.panels.PropertiesPanel import PropertyHelper
28 |
29 |
30 | class ProjectLoader(DirectObject):
31 | def __init__(self, load_path, load_file, core, exceptionLoading=False, tooltip=None, newProjectCall=None, directLoading=False):
32 | self.newProjectCall = newProjectCall
33 | self.hasErrors = False
34 | self.core = core
35 | self.objects = []
36 | if directLoading:
37 | if not self.newProjectCall():
38 | return
39 | self.__executeLoad(os.path.join(load_path, load_file))
40 | elif exceptionLoading:
41 | self.excLoad()
42 | else:
43 | self.browser = DirectFolderBrowser(
44 | self.load,
45 | True,
46 | load_path,
47 | load_file,
48 | tooltip=tooltip)
49 | self.browser.show()
50 |
51 | def excLoad(self):
52 | tmpPath = os.path.join(tempfile.gettempdir(), "SEExceptionSave.scene")
53 | self.__executeLoad(tmpPath)
54 |
55 | def get(self):
56 | return self.objects
57 |
58 | def load(self, doLoad):
59 | if doLoad:
60 | path = self.browser.get()
61 | path = os.path.expanduser(path)
62 | path = os.path.expandvars(path)
63 |
64 | if not os.path.exists(path):
65 | base.messenger.send("showWarning", ["File \"{}\" does not exist.".format(path)])
66 | return
67 |
68 | if self.newProjectCall():
69 | self.__executeLoad(path)
70 | else:
71 | self.accept("clearDirtyFlag", self.__executeLoad, [path])
72 |
73 | self.browser.destroy()
74 | del self.browser
75 |
76 | def __executeLoad(self, path):
77 | fileContent = None
78 | with open(path, 'r') as infile:
79 | try:
80 | fileContent = json.load(infile)
81 | except Exception as e:
82 | logging.error("Couldn't load project file {}".format(infile))
83 | logging.exception(e)
84 | base.messenger.send("showWarning", ["Error while loading Project!\nPlease check output logs for more information."])
85 | return
86 | if fileContent is None:
87 | logging.error("Problems reading Project file: {}".format(infile))
88 | return
89 |
90 | if fileContent["ProjectVersion"] != "0":
91 | logging.warning("Unsupported Project Version")
92 | base.messenger.send("showWarning", ["Unsupported Project Version"])
93 | return
94 |
95 | for name, info in fileContent["Scene"].items():
96 | self.__createElement(name.split("|")[1], info)
97 |
98 | if self.hasErrors:
99 | base.messenger.send("showWarning", ["Errors occured while loading the project!\nProject may not be fully loaded\nSee output log for more information."])
100 | return
101 |
102 | base.messenger.send("setLastPath", [path])
103 | base.messenger.send("update_structure")
104 |
105 | def __createElement(self, name, info):
106 | object_type = info["object_type"]
107 |
108 | definitions = {}
109 |
110 | if object_type == "model":
111 | # create the element
112 | model = self.core.load_model(info["filepath"])
113 | if "transparency" in info:
114 | model.set_transparency(eval(info["transparency"]))
115 | definitions = DEFINITIONS[object_type]
116 | elif object_type == "empty":
117 | # create the element
118 | model = self.core.add_empty()
119 | definitions = DEFINITIONS[object_type]
120 | elif object_type == "collision":
121 | # create the element
122 | model = self.core.add_collision_solid(
123 | info["collision_solid_type"],
124 | eval(info["collision_solid_info"]))
125 | definitions = DEFINITIONS[info["collision_solid_type"]]
126 | elif object_type == "physics":
127 | model = self.core.add_physics_node()
128 | definitions = DEFINITIONS[object_type]
129 | elif object_type == "light":
130 | # create the element
131 | model = self.core.add_light(
132 | info["light_type"],
133 | {})
134 | definitions = DEFINITIONS[info["light_type"]]
135 | elif object_type == "camera":
136 | # create the element
137 | model = self.core.add_camera(
138 | info["camera_type"],
139 | {})
140 | definitions = DEFINITIONS[info["camera_type"]]
141 | self.set_nodepath_values(model, name, info, definitions)
142 |
143 | def set_nodepath_values(self, model, name, info, definitions):
144 | model.set_name(name)
145 |
146 | edit_list = []
147 | for definition in definitions:
148 | if definition.internalName not in info:
149 | continue
150 |
151 | edit_list.append(definition.internalName)
152 |
153 | if definition.editType != PropertyEditTypes.text:
154 | #TODO: We probably shouldn't use eval here
155 | value = eval(info[definition.internalName])
156 | PropertyHelper.setValue(definition, model, value)
157 | else:
158 | value = info[definition.internalName]
159 | PropertyHelper.setValue(definition, model, value)
160 |
161 | model.set_tag("edited_properties", ",".join(edit_list))
162 |
163 | parent_name = info["parent"]
164 | if parent_name != "scene_model_parent":
165 | parents = self.core.scene_objects[:]
166 | for obj in reversed(parents):
167 | if obj.get_name() == parent_name:
168 | model.reparent_to(obj)
169 | break
170 |
171 |
--------------------------------------------------------------------------------
/SceneEditor/loader/__init__.py:
--------------------------------------------------------------------------------
https://raw.githubusercontent.com/fireclawthefox/SceneEditor/f02ac2539f6cdb11af0fb2fb7e5204feca1b1eee/SceneEditor/loader/__init__.py
--------------------------------------------------------------------------------
/SceneEditor/tools/JSONTools.py:
--------------------------------------------------------------------------------
1 | #!/usr/bin/python
2 | # -*- coding: utf-8 -*-
3 | __author__ = "Fireclaw the Fox"
4 | __license__ = """
5 | Simplified BSD (BSD 2-Clause) License.
6 | See License.txt or http://opensource.org/licenses/BSD-2-Clause for more info
7 | """
8 |
9 | import logging
10 |
11 | from direct.gui import DirectGuiGlobals as DGG
12 | from panda3d.core import NodePath
13 |
14 | from SceneEditor.GUI.panels.ObjectPropertiesDefinition import DEFINITIONS
15 | from SceneEditor.GUI.panels.PropertiesPanel import PropertyHelper
16 |
17 | class JSONTools:
18 | def getProjectJSON(self, scene_objects, scene_root):
19 | self.scene_objects = scene_objects
20 | self.jsonElements = {}
21 | self.jsonElements["ProjectVersion"] = "0"
22 | self.jsonElements["Scene"] = {}
23 |
24 | self.writeScene(scene_root)
25 |
26 | return self.jsonElements
27 |
28 | def writeScene(self, root):
29 | index = 0
30 | for child in root.get_children():
31 | if child in self.scene_objects:
32 | if not child.is_stashed():
33 | index += 1
34 | self.jsonElements["Scene"][f"{index}|{child.get_name()}"] = self.__createJSONEntry(child)
35 | if child.getNumChildren() > 0:
36 | self.writeScene(child)
37 |
38 | def __createJSONEntry(self, scene_object):
39 | object_type = scene_object.get_tag("object_type")
40 |
41 | object_dict = {
42 | "object_type":object_type,
43 | "parent":scene_object.parent.get_name()
44 | }
45 |
46 | definition_object_type = object_type
47 | if object_type == "light":
48 | #
49 | # LIGHT
50 | #
51 | definition_object_type = scene_object.get_tag("light_type")
52 |
53 | # additional specific properties not given in the definition
54 | object_dict["light_type"] = scene_object.get_tag("light_type")
55 |
56 | elif object_type == "collision":
57 | #
58 | # COLLISION
59 | #
60 | definition_object_type = scene_object.get_tag("collision_solid_type")
61 |
62 | # additional specific properties not given in the definition
63 | object_dict["collision_solid_type"] = scene_object.get_tag("collision_solid_type")
64 | object_dict["collision_solid_info"] = scene_object.get_tag("collision_solid_info")
65 |
66 | elif object_type == "camera":
67 | #
68 | # CAMERA
69 | #
70 | definition_object_type = scene_object.get_tag("camera_type")
71 |
72 | # additional specific properties not given in the definition
73 | object_dict["camera_type"] = scene_object.get_tag("camera_type")
74 |
75 | # get edited property names
76 | edit_list = []
77 | if scene_object.has_tag("edited_properties"):
78 | edit_list = scene_object.get_tag("edited_properties").split(",")
79 |
80 | # add all edited properties
81 | for definition in DEFINITIONS[definition_object_type]:
82 | if definition.internalName in edit_list:
83 | if definition.internalName == "":
84 | continue
85 | object_dict[definition.internalName] = str(PropertyHelper.getValues(definition, scene_object))
86 |
87 | return object_dict
88 |
--------------------------------------------------------------------------------
/SceneEditor/tools/__init__.py:
--------------------------------------------------------------------------------
https://raw.githubusercontent.com/fireclawthefox/SceneEditor/f02ac2539f6cdb11af0fb2fb7e5204feca1b1eee/SceneEditor/tools/__init__.py
--------------------------------------------------------------------------------
/Screenshots/SceneEditor.png:
--------------------------------------------------------------------------------
https://raw.githubusercontent.com/fireclawthefox/SceneEditor/f02ac2539f6cdb11af0fb2fb7e5204feca1b1eee/Screenshots/SceneEditor.png
--------------------------------------------------------------------------------
/build.sh:
--------------------------------------------------------------------------------
1 | python3 setup.py build
2 | python3 setup.py install --user
3 |
--------------------------------------------------------------------------------
/design/ShaderInput.json:
--------------------------------------------------------------------------------
1 | {
2 | "ProjectVersion": "0.2a",
3 | "EditorConfig": {
4 | "usePixel2D": true,
5 | "canvasSize": "(0, 1920, -1080, 0)"
6 | },
7 | "ComponentList": {
8 | "frm_content": {
9 | "element": {
10 | "borderWidth": "(2, 2)",
11 | "frameSize": "(0.0, 426.0, -24.0, 0.0)",
12 | "frameColor": "(1, 1, 1, 1)",
13 | "pos": "LPoint3f(0, 0, 0)",
14 | "transparency": "0"
15 | },
16 | "type": "DirectFrame",
17 | "parent": "root",
18 | "command": null,
19 | "extraArgs": null,
20 | "extraOptions": {}
21 | },
22 | "txt_input_name": {
23 | "element": {
24 | "borderWidth": "(0.08333333333333333, 0.08333333333333333)",
25 | "pos": "LPoint3f(7.5, 0, -16.5)",
26 | "scale": "LVecBase3f(12, 12, 12)",
27 | "transparency": "0",
28 | "text": "['']",
29 | "width": "7.0",
30 | "initialText": "'Input name'",
31 | "overflow": "1",
32 | "text0_scale": "(1, 1)"
33 | },
34 | "type": "DirectEntry",
35 | "parent": "frm_content",
36 | "command": null,
37 | "extraArgs": null,
38 | "extraOptions": {
39 | "initialText": "Input name"
40 | }
41 | },
42 | "frm_texture": {
43 | "element": {
44 | "relief": "3",
45 | "borderWidth": "(1.0, 1.0)",
46 | "frameSize": "(0.0, 300.0, -24.0, 0.0)",
47 | "frameColor": "(1.0, 1.0, 1.0, 1.0)",
48 | "pos": "LPoint3f(99.5, 0, 0)",
49 | "transparency": "0"
50 | },
51 | "type": "DirectFrame",
52 | "parent": "frm_content",
53 | "command": null,
54 | "extraArgs": null,
55 | "extraOptions": {}
56 | },
57 | "txt_texture_path": {
58 | "element": {
59 | "borderWidth": "(0.08333333333333333, 0.08333333333333333)",
60 | "pos": "LPoint3f(5.5, 0, -16.5)",
61 | "scale": "LVecBase3f(12, 12, 12)",
62 | "transparency": "0",
63 | "width": "19.5",
64 | "overflow": "1"
65 | },
66 | "type": "DirectEntry",
67 | "parent": "frm_texture",
68 | "command": null,
69 | "extraArgs": null,
70 | "extraOptions": {}
71 | },
72 | "btn_browse": {
73 | "element": {
74 | "relief": "1",
75 | "borderWidth": "(2, 2)",
76 | "pad": "(5.0, 5.0)",
77 | "pos": "LPoint3f(268.5, 0, -16)",
78 | "transparency": "0",
79 | "text": "['browse']",
80 | "text0_scale": "(12.0, 12.0)",
81 | "text1_scale": "(12.0, 12.0)",
82 | "text2_scale": "(12.0, 12.0)",
83 | "text3_scale": "(12.0, 12.0)"
84 | },
85 | "type": "DirectButton",
86 | "parent": "frm_texture",
87 | "command": null,
88 | "extraArgs": null,
89 | "extraOptions": {
90 | "pressEffect": 1
91 | }
92 | },
93 | "btn_remove": {
94 | "element": {
95 | "relief": "1",
96 | "borderWidth": "(2, 2)",
97 | "pad": "(3.0, 1.0)",
98 | "pos": "LPoint3f(411, 0, -19.5)",
99 | "transparency": "0",
100 | "text": "['X']",
101 | "text0_scale": "(24, 24)",
102 | "text1_scale": "(24, 24)",
103 | "text2_scale": "(24, 24)",
104 | "text3_scale": "(24, 24)"
105 | },
106 | "type": "DirectButton",
107 | "parent": "frm_content",
108 | "command": null,
109 | "extraArgs": null,
110 | "extraOptions": {
111 | "pressEffect": 1
112 | }
113 | },
114 | "frm_nodepath": {
115 | "element": {
116 | "relief": "3",
117 | "borderWidth": "(1.0, 1.0)",
118 | "frameSize": "(0.0, 300.0, -24.0, 0.0)",
119 | "frameColor": "(1.0, 1.0, 1.0, 1.0)",
120 | "pos": "LPoint3f(99.5, 0, 0)",
121 | "transparency": "0"
122 | },
123 | "type": "DirectFrame",
124 | "parent": "frm_content",
125 | "command": null,
126 | "extraArgs": null,
127 | "extraOptions": {}
128 | },
129 | "cmb_nodepaths": {
130 | "element": {
131 | "relief": "1",
132 | "borderWidth": "(0.2, 0.2)",
133 | "pad": "(0.2, 0.2)",
134 | "pos": "LPoint3f(5, 0, -15.5)",
135 | "hpr": "LVecBase3f(0, 0, 0)",
136 | "scale": "LVecBase3f(12, 12, 12)",
137 | "transparency": "0",
138 | "popupMarker_pos": "None",
139 | "text_align": "0",
140 | "cancelframe_transparency": "0",
141 | "item0_transparency": "0",
142 | "popupMarker_transparency": "0",
143 | "popupMenu_transparency": "0"
144 | },
145 | "type": "DirectOptionMenu",
146 | "parent": "frm_nodepath",
147 | "command": null,
148 | "extraArgs": null,
149 | "extraOptions": {}
150 | },
151 | "frm_vector": {
152 | "element": {
153 | "relief": "3",
154 | "borderWidth": "(1.0, 1.0)",
155 | "frameSize": "(0.0, 300.0, -24.0, 0.0)",
156 | "frameColor": "(1.0, 1.0, 1.0, 1.0)",
157 | "pos": "LPoint3f(99.5, 0, 0)",
158 | "transparency": "0"
159 | },
160 | "type": "DirectFrame",
161 | "parent": "frm_content",
162 | "command": null,
163 | "extraArgs": null,
164 | "extraOptions": {}
165 | },
166 | "txt_vec_1": {
167 | "element": {
168 | "borderWidth": "(0.08333333333333333, 0.08333333333333333)",
169 | "pos": "LPoint3f(12.5, 0, -16.5)",
170 | "scale": "LVecBase3f(12, 12, 12)",
171 | "transparency": "0",
172 | "width": "5.0",
173 | "overflow": "1"
174 | },
175 | "type": "DirectEntry",
176 | "parent": "frm_vector",
177 | "command": null,
178 | "extraArgs": null,
179 | "extraOptions": {}
180 | },
181 | "txt_vec_2": {
182 | "element": {
183 | "borderWidth": "(0.08333333333333333, 0.08333333333333333)",
184 | "pos": "LPoint3f(82.5, 0, -16.5)",
185 | "scale": "LVecBase3f(12, 12, 12)",
186 | "transparency": "0",
187 | "width": "5.0",
188 | "overflow": "1"
189 | },
190 | "type": "DirectEntry",
191 | "parent": "frm_vector",
192 | "command": null,
193 | "extraArgs": null,
194 | "extraOptions": {}
195 | },
196 | "txt_vec_3": {
197 | "element": {
198 | "borderWidth": "(0.08333333333333333, 0.08333333333333333)",
199 | "pos": "LPoint3f(152.5, 0, -16.5)",
200 | "scale": "LVecBase3f(12, 12, 12)",
201 | "transparency": "0",
202 | "width": "5.0",
203 | "overflow": "1"
204 | },
205 | "type": "DirectEntry",
206 | "parent": "frm_vector",
207 | "command": null,
208 | "extraArgs": null,
209 | "extraOptions": {}
210 | },
211 | "txt_vec_4": {
212 | "element": {
213 | "borderWidth": "(0.08333333333333333, 0.08333333333333333)",
214 | "pos": "LPoint3f(222.5, 0, -16.5)",
215 | "scale": "LVecBase3f(12, 12, 12)",
216 | "transparency": "0",
217 | "width": "5.0",
218 | "overflow": "1"
219 | },
220 | "type": "DirectEntry",
221 | "parent": "frm_vector",
222 | "command": null,
223 | "extraArgs": null,
224 | "extraOptions": {}
225 | }
226 | }
227 | }
--------------------------------------------------------------------------------
/editorLogHandler.py:
--------------------------------------------------------------------------------
1 | import sys
2 | import os
3 | import logging
4 | from datetime import datetime
5 | from logging.handlers import TimedRotatingFileHandler
6 | from logging import StreamHandler
7 |
8 |
9 | from panda3d.core import (
10 | loadPrcFileData,
11 | loadPrcFile,
12 | Filename,
13 | ConfigVariableSearchPath,
14 | )
15 |
16 | def setupLog(editor_name):
17 | # check if we have a config file
18 | home = os.path.expanduser("~")
19 | basePath = os.path.join(home, f".{editor_name}")
20 | if not os.path.exists(basePath):
21 | os.makedirs(basePath)
22 | logPath = os.path.join(basePath, "logs")
23 | if not os.path.exists(logPath):
24 | os.makedirs(logPath)
25 |
26 | # Remove log files older than 30 days
27 | for f in os.listdir(logPath):
28 | fParts = f.split(".")
29 | fDate = datetime.now()
30 | try:
31 | fDate = datetime.strptime(fParts[-1], "%Y-%m-%d_%H")
32 | delta = datetime.now() - fDate
33 | if delta.days > 30:
34 | #print(f"remove {os.path.join(logPath, f)}")
35 | os.remove(os.path.join(logPath, f))
36 | except Exception:
37 | # this file does not have a date ending
38 | pass
39 |
40 | log_file = os.path.join(logPath, f"{editor_name}.log")
41 | handler = TimedRotatingFileHandler(log_file)
42 | consoleHandler = StreamHandler()
43 | logging.basicConfig(
44 | level=logging.DEBUG,
45 | handlers=[handler])#, consoleHandler])
46 | config_file = os.path.join(basePath, f".{editor_name}.prc")
47 | if os.path.exists(config_file):
48 | loadPrcFile(Filename.fromOsSpecific(config_file))
49 |
50 | # make sure to load our custom paths
51 | paths_cfg = ConfigVariableSearchPath("custom-model-path", "").getValue()
52 | for path in paths_cfg.getDirectories():
53 | line = "model-path {}".format(str(path))
54 | loadPrcFileData("", line)
55 | else:
56 | with open(config_file, "w") as prcFile:
57 | prcFile.write("skip-ask-for-quit #f\n")
58 | prcFile.write("create-executable-scripts #f\n")
59 | prcFile.write("show-toolbar #t\n")
60 |
--------------------------------------------------------------------------------
/main.py:
--------------------------------------------------------------------------------
1 | #!/usr/bin/env python
2 | # -*- coding: utf-8 -*-
3 |
4 | from direct.showbase.ShowBase import ShowBase
5 | from panda3d.core import loadPrcFileData, WindowProperties
6 | from editorLogHandler import setupLog
7 | from SceneEditor.SceneEditor import SceneEditor
8 |
9 | loadPrcFileData(
10 | "",
11 | """
12 | sync-video #t
13 | textures-power-2 none
14 | window-title Scene Editor
15 | maximized #t
16 | win-size 1280 720
17 | """)
18 |
19 | setupLog("SceneEditor")
20 |
21 | base = ShowBase()
22 |
23 | def set_dirty_name():
24 | wp = WindowProperties()
25 | wp.setTitle("*Scene Editor")
26 | base.win.requestProperties(wp)
27 |
28 | def set_clean_name():
29 | wp = WindowProperties()
30 | wp.setTitle("Scene Editor")
31 | base.win.requestProperties(wp)
32 |
33 | base.accept("request_dirty_name", set_dirty_name)
34 | base.accept("request_clean_name", set_clean_name)
35 |
36 | SceneEditor(base.pixel2d)
37 |
38 | base.run()
39 |
--------------------------------------------------------------------------------
/requirements.txt:
--------------------------------------------------------------------------------
1 | panda3d
2 | DirectFolderBrowser
3 | DirectGuiExtension
4 |
--------------------------------------------------------------------------------
/setup.py:
--------------------------------------------------------------------------------
1 | import setuptools
2 |
3 | with open("README.md", "r") as fh:
4 | long_description = fh.read()
5 |
6 | setuptools.setup(
7 | name="SceneEditor",
8 | version="22.05",
9 | author="Fireclaw",
10 | author_email="fireclawthefox@gmail.com",
11 | description="A scene editor for the Panda3D engine",
12 | long_description=long_description,
13 | long_description_content_type="text/markdown",
14 | url="https://github.com/fireclawthefox/SceneEditor",
15 | packages=setuptools.find_packages(),
16 | include_package_data=True,
17 | classifiers=[
18 | "Programming Language :: Python :: 3",
19 | "License :: OSI Approved :: BSD License",
20 | "Operating System :: OS Independent",
21 | "Development Status :: 2 - Pre-Alpha",
22 | "Intended Audience :: Developers",
23 | "Intended Audience :: End Users/Desktop",
24 | "Topic :: Artistic Software",
25 | "Topic :: Multimedia :: Graphics",
26 | "Topic :: Multimedia :: Graphics :: Editors",
27 | ],
28 | install_requires=[
29 | 'panda3d',
30 | 'DirectFolderBrowser',
31 | 'DirectGuiExtension'
32 | ],
33 | python_requires='>=3.6',
34 | )
35 |
--------------------------------------------------------------------------------
/todo.org:
--------------------------------------------------------------------------------
1 | * DONE Base features [100%]
2 | - [X] Adding models
3 | - [X] Moving models
4 | - [X] Rotating models
5 | - [X] Scaling models
6 | - [X] Deleting models
7 | - [X] Add Empties
8 | - [X] Show model origin
9 | - [X] Edit object properties
10 | - Name
11 | - Transformation
12 | - [X] Undo/Redo (take kill cycle from DGui Editor)
13 | * TODO Edit Collision solids [80%]
14 | - [X] Add any kind of panda3d solids
15 | - [ ] Edit solid properties
16 | - collision masks
17 | - Name
18 | - [X] Save solids
19 | - Can we get solid details from the col_np.node()?
20 | - [X] Load solids
21 | - [X] Export solids
22 | * DONE Camera editing [100%]
23 | - [X] Add camera
24 | - [X] Edit camera properties
25 | - Name
26 | - Lense properties
27 | * DONE Scene lighting [100%]
28 | - [X] Add lamps
29 | - [X] Edit lamp properties
30 | - name
31 | - color
32 | - type
33 | - Optional lense properties
34 | - Optional shadow caster props
35 | * TODO GUI [50%]
36 | - [X] Scene graph browser (copy from DGui editor)
37 | - [X] Menu bar
38 | - [X] Tool bar
39 | - [ ] Help Dialog
40 | - [ ] Configuration Dialog
41 | - [ ] Asset browser
42 | * DONE Physics [100%]
43 | - [X] Can we add force fields or the like with the internal engine?
44 | We may want to make nodes physically interactive, which would require simply reparent them to an ActorNode in the end.
45 | - [X] Implementation
46 | * DONE Exporting [100%]
47 | - [X] Export all objects and settings as python class
48 | - Make sure they can be directly used and don't do too much (similar to exported GUI python script)
49 | - [X] Export as project JSON
50 | * TODO Extended features [14%]
51 | - [ ] Nicer highlighting/outlining of selected models
52 | - [ ] Texture and Material editing
53 | - [X] adding shaders to objects
54 | - [ ] Make objects placeable on other objects (taking normals) and optionally rotate to fit normals of hit objects
55 | - [ ] Add Render attributes (e.g. bilboard, compass, etc...)
56 | - [X] Make sure the 3D space is not occupied by other panels e.g. it scales and is centered between other panels
57 | - [ ] Memory viewer (how does the direct session panel does it?)
58 | - [ ] Curve and Mopath editing
59 | - [ ] Particle adding/editing
60 | - [ ] Heightmap and ground texture painting
61 | - [ ] LOD node editing
62 | - [ ] Simple onscreen text adding
63 | - [ ] Transform objects with displayed widgets
64 |
--------------------------------------------------------------------------------
85 |
86 | ## WIP
87 | Not all values will be saved and loaded yet
88 | Property editor is heavily work in progress
89 |
--------------------------------------------------------------------------------
/SceneEditor/GUI/MainView.py:
--------------------------------------------------------------------------------
1 | import logging
2 |
3 | from panda3d.core import NodePath
4 |
5 | from direct.showbase.DirectObject import DirectObject
6 |
7 | from direct.gui import DirectGuiGlobals as DGG
8 |
9 | from DirectGuiExtension import DirectGuiHelper as DGH
10 |
11 | from DirectGuiExtension.DirectTooltip import DirectTooltip
12 |
13 | from DirectGuiExtension.DirectBoxSizer import DirectBoxSizer
14 | from DirectGuiExtension.DirectAutoSizer import DirectAutoSizer
15 | from DirectGuiExtension.DirectSplitFrame import DirectSplitFrame
16 |
17 | from SceneEditor.GUI.MenuBar import MenuBar
18 | from SceneEditor.GUI.ToolBar import ToolBar
19 | from SceneEditor.GUI.panels.PropertiesPanel import PropertiesPanel
20 | from SceneEditor.GUI.panels.StructurePanel import StructurePanel
21 | from SceneEditor.GUI.dialogs.ShaderLoaderDialogManager import ShaderLoaderDialogManager
22 |
23 |
24 | class MainView(DirectObject):
25 | def __init__(self, tooltip, grid, core, parent):
26 | logging.debug("Setup GUI")
27 |
28 | self.parent = parent
29 | self.core = core
30 |
31 | splitterWidth = 8
32 | self.menuBarHeight = 24
33 | self.toolBarHeight = 48
34 |
35 | #
36 | # LAYOUT SETUP
37 | #
38 |
39 | # the box everything get's added to
40 | self.mainBox = DirectBoxSizer(
41 | frameColor=(0,0,0,0),
42 | state=DGG.DISABLED,
43 | orientation=DGG.VERTICAL,
44 | autoUpdateFrameSize=False)
45 |
46 | # our root element for the main box
47 | self.mainSizer = DirectAutoSizer(
48 | frameColor=(0,0,0,0),
49 | parent=parent,
50 | child=self.mainBox,
51 | childUpdateSizeFunc=self.mainBox.refresh
52 | )
53 |
54 | # our menu bar
55 | self.menuBarSizer = DirectAutoSizer(
56 | updateOnWindowResize=False,
57 | frameColor=(0,0,0,0),
58 | parent=self.mainBox,
59 | extendVertical=False)
60 |
61 | # our tool bar
62 | self.toolBarSizer = DirectAutoSizer(
63 | updateOnWindowResize=False,
64 | frameColor=(0,0,0,0),
65 | parent=self.mainBox,
66 | extendVertical=False)
67 |
68 | # the splitter separating the the panels from the main content area
69 | splitterPos = 0
70 | if type(self.parent) is NodePath:
71 | splitterPos = -base.get_size()[0] / 4
72 | else:
73 | splitterPos = -parent["frameSize"][1] / 4
74 |
75 | self.mainSplitter = DirectSplitFrame(
76 | frameSize=self.get_main_splitter_size(),
77 | splitterWidth=splitterWidth,
78 | splitterPos=splitterPos)
79 | self.mainSplitter["frameColor"] = (0,0,0,0)
80 | self.mainSplitter.firstFrame["frameColor"] = (0,0,0,0)
81 | self.mainSplitter.secondFrame["frameColor"] = (0,0,0,0)
82 |
83 | # The sizer which makes sure our splitter is filling up
84 | self.mainSplitSizer = DirectAutoSizer(
85 | updateOnWindowResize=False,
86 | frameColor=(0,0,0,0),
87 | parent=self.mainBox,
88 | child=self.mainSplitter,
89 | parentGetSizeFunction=self.get_main_splitter_size,
90 | childUpdateSizeFunc=self.mainSplitter.refresh,
91 | )
92 |
93 | # The splitter dividing the sidebar on the left
94 | self.sidebarSplitter = DirectSplitFrame(
95 | orientation=DGG.VERTICAL,
96 | frameSize=self.mainSplitter.firstFrame["frameSize"],
97 | splitterWidth=splitterWidth,
98 | splitterPos=DGH.getRealHeight(self.mainSplitter.firstFrame) / 2,
99 | pixel2d=True)
100 |
101 | # The sizer which makes sure our sidebar is filling up
102 | self.sidebarSplitSizer = DirectAutoSizer(
103 | updateOnWindowResize=False,
104 | frameColor=(0,0,0,0),
105 | parent=self.mainSplitter.firstFrame,
106 | child=self.sidebarSplitter,
107 | childUpdateSizeFunc=self.sidebarSplitter.refresh,
108 | )
109 |
110 | # CONNECT THE UI ELEMENTS
111 | self.mainBox.addItem(
112 | self.menuBarSizer,
113 | updateFunc=self.menuBarSizer.refresh,
114 | skipRefresh=True)
115 | self.mainBox.addItem(
116 | self.toolBarSizer,
117 | updateFunc=self.toolBarSizer.refresh,
118 | skipRefresh=True)
119 | self.mainBox.addItem(
120 | self.mainSplitSizer,
121 | updateFunc=self.mainSplitSizer.refresh,
122 | skipRefresh=True)
123 |
124 | #
125 | # CONTENT SETUP
126 | #
127 | self.menuBar = MenuBar()
128 | self.menuBarSizer.setChild(self.menuBar.menuBar)
129 | self.menuBarSizer["childUpdateSizeFunc"] = self.menuBar.menuBar.refresh
130 |
131 | self.tool_bar = ToolBar(tooltip, grid)
132 | self.toolBarSizer.setChild(self.tool_bar.toolBar)
133 | self.toolBarSizer["childUpdateSizeFunc"] = self.tool_bar.toolBar.refresh
134 |
135 | self.propertiesPanel = PropertiesPanel(self.sidebarSplitter.firstFrame, tooltip)
136 | self.sidebarSplitter["firstFrameUpdateSizeFunc"] = self.propertiesPanel.resizeFrame
137 |
138 | self.structurePanel = StructurePanel(self.sidebarSplitter.secondFrame)
139 | self.sidebarSplitter["secondFrameUpdateSizeFunc"] = self.structurePanel.resizeFrame
140 |
141 | self.mainSplitter["firstFrameUpdateSizeFunc"] = self.sidebarSplitSizer.refresh
142 | self.mainSplitter["secondFrameUpdateSizeFunc"] = self.update_3d_display_region
143 |
144 | self.accept("show_load_shader_dialog", self.show_load_shader_dialog)
145 |
146 | self.mainBox.refresh()
147 |
148 | def update_3d_display_region(self):
149 | dr = base.cam.node().get_display_region(0)
150 |
151 | # get the size of the frame the display region should be fit into
152 | size = [0,1,-1,0]
153 | if type(self.parent) is NodePath:
154 | #TODO: Get the size of the actual nodepath
155 | # currently we expect the nodepath to be pixel2d
156 | size = [0, base.get_size()[0], -base.get_size()[1], 0]
157 | else:
158 | size = self.parent["frameSize"]
159 |
160 | # store the display resolution
161 | dw = base.get_size()[0]
162 | dh = base.get_size()[1]
163 |
164 | # store the frame size
165 | fw = size[1]
166 | fh = -size[2]
167 |
168 | # calculate the shift from top and left
169 | top_height = (self.menuBarHeight + self.toolBarHeight) / dh
170 | left_frame_width = DGH.getRealWidth(self.mainSplitter.firstFrame) / dw
171 |
172 | # get the frames position according to pixel2d
173 | pos = self.parent.getPos(base.pixel2d)
174 |
175 | # calculate the left and right values for the display region
176 | left_x = (pos.x / dw) + left_frame_width
177 | right_x = (pos.x / dw) + (fw / dw)
178 |
179 | # calculate the bottom and top values for the display region
180 | bottom_y = -(pos.z / dh)
181 | top_y = -(pos.z / dh) + (fh / dh) - top_height
182 |
183 | # update the display region with the new values
184 | dr.dimensions = (
185 | left_x, right_x,
186 | bottom_y, top_y)
187 |
188 | # calculate width and height for the aspect ratio calculation
189 | w = 1
190 | h = 1
191 | if type(self.parent) is NodePath:
192 | w = (1-left_frame_width) * dw
193 | h = (1-top_height) * dh
194 | else:
195 | w = (right_x - left_x) * dw
196 | h = (top_y - bottom_y) * dh
197 |
198 | # update the aspect ratio
199 | base.camLens.setAspectRatio(w/h)
200 |
201 | base.messenger.send("3d_display_region_changed")
202 |
203 | def get_main_splitter_size(self):
204 | size = [0,1,1,0]
205 | if type(self.parent) is NodePath:
206 | width = base.get_size()[0]
207 | height = base.get_size()[1]
208 | else:
209 | width = DGH.getRealWidth(self.parent)
210 | height = DGH.getRealHeight(self.parent)
211 | return (
212 | -width/2,
213 | width/2,
214 | 0,
215 | height - self.menuBarHeight - self.toolBarHeight)
216 |
217 | def show_load_shader_dialog(self):
218 | base.messenger.send("unregisterKeyboardAndMouseEvents")
219 | ShaderLoaderDialogManager(self.close_load_shader_dialog, self.core.scene_objects)
220 |
221 | def close_load_shader_dialog(self, accept, shader_details):
222 | base.messenger.send("reregisterKeyboardAndMouseEvents")
223 | if accept:
224 | base.messenger.send("addShader", [shader_details])
225 |
--------------------------------------------------------------------------------
/SceneEditor/GUI/MenuBar.py:
--------------------------------------------------------------------------------
1 | from direct.showbase.DirectObject import DirectObject
2 | from direct.gui import DirectGuiGlobals as DGG
3 | from DirectGuiExtension.DirectMenuItem import (
4 | DirectMenuItem,
5 | DirectMenuItemEntry,
6 | DirectMenuItemSubMenu,
7 | DirectMenuSeparator)
8 | from DirectGuiExtension.DirectMenuBar import DirectMenuBar
9 |
10 | class MenuBar(DirectObject):
11 | def __init__(self):
12 | screenWidthPx = base.getSize()[0]
13 |
14 | #
15 | # Menubar
16 | #
17 | self.menuBar = DirectMenuBar(
18 | frameColor=(0.25, 0.25, 0.25, 1),
19 | frameSize=(0,screenWidthPx,-12, 12),
20 | autoUpdateFrameSize=False,
21 | pos=(0, 0, 0),
22 | itemMargin=(2,2,2,2),
23 | parent=base.pixel2d)
24 |
25 | self.export_entry = DirectMenuItemSubMenu("Export >", [
26 | DirectMenuItemEntry("Python", base.messenger.send, ["exportProject_python"]),
27 | DirectMenuItemEntry("Bam", base.messenger.send, ["exportProject_bam"]),
28 | ])
29 | self.fileEntries = [
30 | DirectMenuItemEntry("New", base.messenger.send, ["newProject"]),
31 | DirectMenuSeparator(),
32 | DirectMenuItemEntry("Open", base.messenger.send, ["loadProject"]),
33 | DirectMenuItemEntry("Save", base.messenger.send, ["saveProject"]),
34 | self.export_entry,
35 | DirectMenuSeparator(),
36 | DirectMenuItemEntry("Quit", base.messenger.send, ["quit_app"]),
37 | ]
38 | self.file = self.__create_menu_item("File", self.fileEntries)
39 |
40 | viewEntries = [
41 | DirectMenuItemEntry("Toggle Grid", base.messenger.send, ["toggleGrid"]),
42 | DirectMenuSeparator(),
43 | DirectMenuItemEntry("Zoom-in", base.messenger.send, ["zoom-in"]),
44 | DirectMenuItemEntry("Zoom-out", base.messenger.send, ["zoom-out"]),
45 | DirectMenuItemEntry("reset Zoom", base.messenger.send, ["zoom-reset"]),
46 |
47 | ]
48 | self.view = self.__create_menu_item("View", viewEntries)
49 |
50 | toolsEntries = [
51 | DirectMenuItemEntry("Undo", base.messenger.send, ["undo"]),
52 | DirectMenuItemEntry("Redo", base.messenger.send, ["redo"]),
53 | DirectMenuItemEntry("Cycle redos", base.messenger.send, ["cycleRedo"]),
54 | DirectMenuSeparator(),
55 | DirectMenuItemEntry("Delete Object", base.messenger.send, ["removeObject"]),
56 | DirectMenuItemEntry("Copy", base.messenger.send, ["copyElement"]),
57 | DirectMenuItemEntry("Cut", base.messenger.send, ["cutElement"]),
58 | DirectMenuItemEntry("Paste", base.messenger.send, ["pasteElement"]),
59 | #DirectMenuSeparator(),
60 | #DirectMenuItemEntry("Options", base.messenger.send, ["showSettings"]),
61 | #DirectMenuItemEntry("Help", base.messenger.send, ["showHelp"]),
62 | ]
63 | self.tools = self.__create_menu_item("Tools", toolsEntries)
64 |
65 | addEntries = [
66 | DirectMenuItemEntry("Model", base.messenger.send, ["loadModel"]),
67 | DirectMenuItemEntry("Panda", base.messenger.send, ["loadPanda"]),
68 | DirectMenuItemEntry("Empty", base.messenger.send, ["addEmpty"]),
69 | DirectMenuItemSubMenu("Collision >", [
70 | DirectMenuItemEntry("Sphere", base.messenger.send, ["addCollision", ["CollisionSphere", {}]]),
71 | DirectMenuItemEntry("Box", base.messenger.send, ["addCollision", ["CollisionBox", {}]]),
72 | DirectMenuItemEntry("Plane", base.messenger.send, ["addCollision", ["CollisionPlane", {}]]),
73 | DirectMenuItemEntry("Capsule", base.messenger.send, ["addCollision", ["CollisionCapsule", {}]]),
74 | DirectMenuItemEntry("Line", base.messenger.send, ["addCollision", ["CollisionLine", {}]]),
75 | DirectMenuItemEntry("Segment", base.messenger.send, ["addCollision", ["CollisionSegment", {}]]),
76 | DirectMenuItemEntry("Ray", base.messenger.send, ["addCollision", ["CollisionRay", {}]]),
77 | #DirectMenuItemEntry("Parabola", base.messenger.send, ["addCollision", ["CollisionParabola", {}]]),
78 | DirectMenuItemEntry("Inverse Sphere", base.messenger.send, ["addCollision", ["CollisionInvSphere", {}]]),
79 | #Polygon # Do we want to support this
80 | ]),
81 | DirectMenuItemEntry("Physics Node", base.messenger.send, ["addPhysicsNode"]),
82 | DirectMenuItemSubMenu("Light >", [
83 | DirectMenuItemEntry("Point Light", base.messenger.send, ["addLight", ["PointLight", {}]]),
84 | DirectMenuItemEntry("Spotlight", base.messenger.send, ["addLight", ["Spotlight", {}]]),
85 | DirectMenuItemEntry("Directional Light", base.messenger.send, ["addLight", ["DirectionalLight", {}]]),
86 | DirectMenuItemEntry("Ambient Light", base.messenger.send, ["addLight", ["AmbientLight", {}]]),
87 | ]),
88 | DirectMenuItemSubMenu("Camera >", [
89 | DirectMenuItemEntry("Perspective", base.messenger.send, ["addCamera", ["PerspectiveLens", {}]]),
90 | DirectMenuItemEntry("Orthographic", base.messenger.send, ["addCamera", ["OrthographicLens", {}]]),
91 | ]),
92 | DirectMenuItemEntry("Shader", base.messenger.send, ["show_load_shader_dialog"]),
93 | ]
94 | #TODO: THE COLORS DON'T WORK CORRECT YET
95 | self.add = self.__create_menu_item("Add", addEntries)
96 |
97 | self.menuBar["menuItems"] = [self.file, self.view, self.tools, self.add]
98 |
99 | def add_export_entry(self, text, tag):
100 | self.export_entry.items.append(
101 | DirectMenuItemEntry(text, base.messenger.send, ["custom_export", [tag]]))
102 | self.fileEntries[4] = self.export_entry
103 | self.file["items"] = self.fileEntries
104 |
105 | color = (
106 | (0.25, 0.25, 0.25, 1), # Normal
107 | (0.35, 0.35, 1, 1), # Click
108 | (0.25, 0.25, 1, 1), # Hover
109 | (0.1, 0.1, 0.1, 1)) # Disabled
110 |
111 | self.file["item_text_fg"]=(1,1,1,1)
112 | self.file["item_text_scale"]=0.8
113 | self.file["item_relief"]=DGG.FLAT
114 | self.file["item_pad"]=(0.2, 0.2)
115 | self.file["itemFrameColor"]=color
116 | self.file["popupMenu_itemMargin"]=(0,0,-.1,-.1)
117 | self.file["popupMenu_frameColor"]=color
118 |
119 | def __create_menu_item(self, text, entries):
120 | color = (
121 | (0.25, 0.25, 0.25, 1), # Normal
122 | (0.35, 0.35, 1, 1), # Click
123 | (0.25, 0.25, 1, 1), # Hover
124 | (0.1, 0.1, 0.1, 1)) # Disabled
125 |
126 | sepColor = (0.7, 0.7, 0.7, 1)
127 |
128 | return DirectMenuItem(
129 | text=text,
130 | text_fg=(1,1,1,1),
131 | text_scale=0.8,
132 | items=entries,
133 | frameSize=(0,65/21,-7/21,17/21),
134 | frameColor=color,
135 | scale=21,
136 | relief=DGG.FLAT,
137 | item_text_fg=(1,1,1,1),
138 | item_text_scale=0.8,
139 | item_relief=DGG.FLAT,
140 | item_pad=(0.2, 0.2),
141 | itemFrameColor=color,
142 | separatorFrameColor=sepColor,
143 | popupMenu_itemMargin=(0,0,-.1,-.1),
144 | popupMenu_frameColor=color,
145 | highlightColor=color[2])
146 |
--------------------------------------------------------------------------------
/SceneEditor/GUI/ToolBar.py:
--------------------------------------------------------------------------------
1 | from panda3d.core import TransparencyAttrib, ConfigVariableBool
2 |
3 | from direct.showbase.DirectObject import DirectObject
4 |
5 | from direct.gui import DirectGuiGlobals as DGG
6 | DGG.BELOW = "below"
7 |
8 | from direct.gui.DirectButton import DirectButton
9 | from direct.gui.DirectSlider import DirectSlider
10 | from direct.gui.DirectFrame import DirectFrame
11 | from direct.gui.DirectCheckBox import DirectCheckBox
12 | from DirectGuiExtension.DirectMenuItem import DirectMenuItem, DirectMenuItemEntry, DirectMenuItemSubMenu
13 | from DirectGuiExtension.DirectBoxSizer import DirectBoxSizer
14 |
15 | class ToolBar(DirectObject):
16 | def __init__(self, tooltip, grid):
17 | self.tt = tooltip
18 | self.grid = grid
19 | screenWidthPx = base.getSize()[0]
20 | left = screenWidthPx*0.25
21 | barWidth = screenWidthPx*0.75
22 |
23 | self.active_alpha_type = TransparencyAttrib.M_alpha
24 |
25 | color = (
26 | (0.25, 0.25, 0.25, 1), # Normal
27 | (0.35, 0.35, 1, 1), # Click
28 | (0.25, 0.25, 1, 1), # Hover
29 | (0.1, 0.1, 0.1, 1)) # Disabled
30 |
31 | #
32 | # Toolbar
33 | #
34 | self.toolBar = DirectBoxSizer(
35 | frameColor=(0.25, 0.25, 0.25, 1),
36 | frameSize=(0,barWidth,-24, 24),
37 | autoUpdateFrameSize=False,
38 | pos=(0, 0, 0),
39 | parent=base.pixel2d)
40 |
41 | buttonColor = (
42 | (0.8, 0.8, 0.8, 1), # Normal
43 | (0.9, 0.9, 1, 1), # Click
44 | (0.8, 0.8, 1, 1), # Hover
45 | (0.5, 0.5, 0.5, 1)) # Disabled
46 | btn = DirectButton(
47 | frameSize=(-24,24,-24,24),
48 | frameColor=buttonColor,
49 | relief=DGG.FLAT,
50 | command=base.messenger.send,
51 | extraArgs=["newProject"],
52 | image="icons/New.png",
53 | image_scale=24)
54 | btn.setTransparency(self.active_alpha_type)
55 | btn.bind(DGG.ENTER, self.tt.show, ["Create New Scene (Ctrl-N)"])
56 | btn.bind(DGG.EXIT, self.tt.hide)
57 | self.toolBar.addItem(btn)
58 |
59 | btn = DirectButton(
60 | frameSize=(-24,24,-24,24),
61 | frameColor=buttonColor,
62 | relief=DGG.FLAT,
63 | command=base.messenger.send,
64 | extraArgs=["saveProject"],
65 | image="icons/Save.png",
66 | image_scale=24)
67 | btn.setTransparency(self.active_alpha_type)
68 | btn.bind(DGG.ENTER, self.tt.show, ["Save Scene as Project (Ctrl-S)"])
69 | btn.bind(DGG.EXIT, self.tt.hide)
70 | self.toolBar.addItem(btn)
71 |
72 | btn = DirectButton(
73 | frameSize=(-24,24,-24,24),
74 | frameColor=buttonColor,
75 | text_scale=0.33,
76 | relief=DGG.FLAT,
77 | command=base.messenger.send,
78 | extraArgs=["exportProject_python"],
79 | image="icons/Export.png",
80 | image_scale=24)
81 | btn.setTransparency(self.active_alpha_type)
82 | btn.bind(DGG.ENTER, self.tt.show, ["Export Scene as Python Script (Ctrl-E)"])
83 | btn.bind(DGG.EXIT, self.tt.hide)
84 | self.toolBar.addItem(btn)
85 |
86 | btn = DirectButton(
87 | frameSize=(-24,24,-24,24),
88 | frameColor=buttonColor,
89 | relief=DGG.FLAT,
90 | text_scale=0.33,
91 | command=base.messenger.send,
92 | extraArgs=["loadProject"],
93 | image="icons/Load.png",
94 | image_scale=24)
95 | btn.setTransparency(self.active_alpha_type)
96 | btn.bind(DGG.ENTER, self.tt.show, ["Load Scene project (Ctrl-O)"])
97 | btn.bind(DGG.EXIT, self.tt.hide)
98 | self.toolBar.addItem(btn)
99 |
100 | self.add_separator()
101 |
102 | btn = DirectButton(
103 | frameSize=(-24,24,-24,24),
104 | frameColor=buttonColor,
105 | relief=DGG.FLAT,
106 | text_scale=0.33,
107 | command=base.messenger.send,
108 | extraArgs=["undo"],
109 | image="icons/Undo.png",
110 | image_scale=24)
111 | btn.setTransparency(self.active_alpha_type)
112 | btn.bind(DGG.ENTER, self.tt.show, ["Undo last action (Ctrl-Z)"])
113 | btn.bind(DGG.EXIT, self.tt.hide)
114 | self.toolBar.addItem(btn)
115 |
116 | btn = DirectButton(
117 | frameSize=(-24,24,-24,24),
118 | frameColor=buttonColor,
119 | relief=DGG.FLAT,
120 | text_scale=0.33,
121 | command=base.messenger.send,
122 | extraArgs=["redo"],
123 | image="icons/Redo.png",
124 | image_scale=24)
125 | btn.setTransparency(self.active_alpha_type)
126 | btn.bind(DGG.ENTER, self.tt.show, ["Redo last action (Ctrl-Y)"])
127 | btn.bind(DGG.EXIT, self.tt.hide)
128 | self.toolBar.addItem(btn)
129 |
130 | btn = DirectButton(
131 | frameSize=(-24,24,-24,24),
132 | frameColor=buttonColor,
133 | relief=DGG.FLAT,
134 | text_scale=0.33,
135 | command=base.messenger.send,
136 | extraArgs=["cycleRedo"],
137 | image="icons/CycleRedo.png",
138 | image_scale=24)
139 | btn.setTransparency(self.active_alpha_type)
140 | btn.bind(DGG.ENTER, self.tt.show, ["Cycle through redo branches (Ctrl-Shift-Y)"])
141 | btn.bind(DGG.EXIT, self.tt.hide)
142 | self.toolBar.addItem(btn)
143 |
144 | self.add_separator()
145 |
146 | btn = DirectButton(
147 | frameSize=(-24,24,-24,24),
148 | frameColor=buttonColor,
149 | relief=DGG.FLAT,
150 | text_scale=0.33,
151 | command=base.messenger.send,
152 | extraArgs=["removeElement"],
153 | image="icons/Delete.png",
154 | image_scale=24)
155 | btn.setTransparency(self.active_alpha_type)
156 | btn.bind(DGG.ENTER, self.tt.show, ["Delete selected element (Del)"])
157 | btn.bind(DGG.EXIT, self.tt.hide)
158 | self.toolBar.addItem(btn)
159 |
160 | self.add_separator()
161 |
162 | self.cb_grid = DirectCheckBox(
163 | frameSize=(-24,24,-24,24),
164 | frameColor=buttonColor,
165 | relief=DGG.FLAT,
166 | text_scale=12,
167 | image="icons/GridOff.png" if self.grid.isHidden() else "icons/GridOn.png",
168 | uncheckedImage="icons/GridOff.png",
169 | checkedImage="icons/GridOn.png",
170 | image_scale=24,
171 | isChecked=not self.grid.isHidden(),
172 | command=self.toggleGrid)
173 | self.cb_grid.setTransparency(self.active_alpha_type)
174 | self.cb_grid.bind(DGG.ENTER, self.tt.show, ["Toggle Grid (Ctrl-G)"])
175 | self.cb_grid.bind(DGG.EXIT, self.tt.hide)
176 | self.toolBar.addItem(self.cb_grid)
177 |
178 | self.add_separator()
179 |
180 | btn = DirectButton(
181 | frameSize=(-24,24,-24,24),
182 | frameColor=buttonColor,
183 | relief=DGG.FLAT,
184 | text_scale=0.33,
185 | command=base.messenger.send,
186 | extraArgs=["quit_app"],
187 | image="icons/Quit.png",
188 | image_scale=24)
189 | btn.setTransparency(TransparencyAttrib.M_alpha)
190 | btn.bind(DGG.ENTER, self.tt.show, ["Quit Scene Editor (Ctrl-Q)"])
191 | btn.bind(DGG.EXIT, self.tt.hide)
192 | self.toolBar.addItem(btn)
193 |
194 | '''
195 | self.add_separator()
196 |
197 | btn = DirectButton(
198 | frameSize=(-24,24,-24,24),
199 | frameColor=buttonColor,
200 | relief=DGG.FLAT,
201 | text_scale=0.33,
202 | command=base.messenger.send,
203 | extraArgs=["showHelp"],
204 | image="icons/Help.png",
205 | image_scale=24)
206 | btn.setTransparency(self.active_alpha_type)
207 | btn.bind(DGG.ENTER, self.tt.show, ["Show a help Dialog (F1)"])
208 | btn.bind(DGG.EXIT, self.tt.hide)
209 | self.toolBar.addItem(btn)
210 |
211 | btn = DirectButton(
212 | frameSize=(-24,24,-24,24),
213 | frameColor=buttonColor,
214 | relief=DGG.FLAT,
215 | text_scale=0.33,
216 | command=base.messenger.send,
217 | extraArgs=["showSettings"],
218 | image="icons/Settings.png",
219 | image_scale=24)
220 | btn.setTransparency(self.active_alpha_type)
221 | btn.bind(DGG.ENTER, self.tt.show, ["Show Designer Settings"])
222 | btn.bind(DGG.EXIT, self.tt.hide)
223 | self.toolBar.addItem(btn)
224 | '''
225 |
226 | if not ConfigVariableBool("show-toolbar", True).getValue():
227 | self.toolBar.hide()
228 |
229 | self.accept("toggleGrid", self.setGrid)
230 |
231 | def add_separator(self):
232 | placeholder = DirectFrame(
233 | text="|",
234 | frameSize=(-1,1,-24,24),
235 | pad=(4, 0),
236 | frameColor=(0,0,0,1))
237 | self.toolBar.addItem(placeholder)
238 |
239 |
240 | def toggleGrid(self, selection):
241 | base.messenger.send("toggleGrid")
242 |
243 | def setGrid(self):
244 | self.cb_grid['isChecked'] = not self.grid.is_hidden()
245 | if self.grid.is_hidden():
246 | self.cb_grid['image'] = self.cb_grid['checkedImage']
247 | else:
248 | self.cb_grid['image'] = self.cb_grid['uncheckedImage']
249 |
250 | self.cb_grid.setImage()
251 |
252 |
--------------------------------------------------------------------------------
/SceneEditor/GUI/__init__.py:
--------------------------------------------------------------------------------
https://raw.githubusercontent.com/fireclawthefox/SceneEditor/f02ac2539f6cdb11af0fb2fb7e5204feca1b1eee/SceneEditor/GUI/__init__.py
--------------------------------------------------------------------------------
/SceneEditor/GUI/dialogs/ShaderInput.py:
--------------------------------------------------------------------------------
1 | #!/usr/bin/python
2 | # -*- coding: utf-8 -*-
3 |
4 | # This file was created using the DirectGUI Designer
5 |
6 | from direct.gui import DirectGuiGlobals as DGG
7 |
8 | from direct.gui.DirectFrame import DirectFrame
9 | from direct.gui.DirectEntry import DirectEntry
10 | from direct.gui.DirectButton import DirectButton
11 | from direct.gui.DirectOptionMenu import DirectOptionMenu
12 | from panda3d.core import (
13 | LPoint3f,
14 | LVecBase3f,
15 | LVecBase4f,
16 | TextNode
17 | )
18 |
19 | class GUI:
20 | def __init__(self, rootParent=None):
21 |
22 | self.frm_content = DirectFrame(
23 | borderWidth = (2, 2),
24 | frameSize = (0.0, 426.0, -24.0, 0.0),
25 | frameColor = (1, 1, 1, 1),
26 | pos = LPoint3f(0, 0, 0),
27 | parent=rootParent,
28 | )
29 | self.frm_content.setTransparency(0)
30 |
31 | self.txt_input_name = DirectEntry(
32 | borderWidth = (0.08333333333333333, 0.08333333333333333),
33 | pos = LPoint3f(7.5, 0, -16.5),
34 | scale = LVecBase3f(12, 12, 12),
35 | text = [''],
36 | width = 7.0,
37 | overflow = 1,
38 | text0_scale = (1, 1),
39 | parent=self.frm_content,
40 | initialText='Input name',
41 | )
42 | self.txt_input_name.setTransparency(0)
43 |
44 | self.frm_texture = DirectFrame(
45 | relief = 3,
46 | borderWidth = (1.0, 1.0),
47 | frameSize = (0.0, 300.0, -24.0, 0.0),
48 | frameColor = (1.0, 1.0, 1.0, 1.0),
49 | pos = LPoint3f(99.5, 0, 0),
50 | parent=self.frm_content,
51 | )
52 | self.frm_texture.setTransparency(0)
53 |
54 | self.txt_texture_path = DirectEntry(
55 | borderWidth = (0.08333333333333333, 0.08333333333333333),
56 | pos = LPoint3f(5.5, 0, -16.5),
57 | scale = LVecBase3f(12, 12, 12),
58 | width = 19.5,
59 | overflow = 1,
60 | parent=self.frm_texture,
61 | )
62 | self.txt_texture_path.setTransparency(0)
63 |
64 | self.btn_browse = DirectButton(
65 | relief = 1,
66 | borderWidth = (2, 2),
67 | pad = (5.0, 5.0),
68 | pos = LPoint3f(268.5, 0, -16),
69 | text = ['browse'],
70 | text0_scale = (12.0, 12.0),
71 | text1_scale = (12.0, 12.0),
72 | text2_scale = (12.0, 12.0),
73 | text3_scale = (12.0, 12.0),
74 | parent=self.frm_texture,
75 | pressEffect=1,
76 | )
77 | self.btn_browse.setTransparency(0)
78 |
79 | self.btn_remove = DirectButton(
80 | relief = 1,
81 | borderWidth = (2, 2),
82 | pad = (3.0, 1.0),
83 | pos = LPoint3f(411, 0, -19.5),
84 | text = ['X'],
85 | text0_scale = (24, 24),
86 | text1_scale = (24, 24),
87 | text2_scale = (24, 24),
88 | text3_scale = (24, 24),
89 | parent=self.frm_content,
90 | pressEffect=1,
91 | )
92 | self.btn_remove.setTransparency(0)
93 |
94 | self.frm_nodepath = DirectFrame(
95 | relief = 3,
96 | borderWidth = (1.0, 1.0),
97 | frameSize = (0.0, 300.0, -24.0, 0.0),
98 | frameColor = (1.0, 1.0, 1.0, 1.0),
99 | pos = LPoint3f(99.5, 0, 0),
100 | parent=self.frm_content,
101 | )
102 | self.frm_nodepath.setTransparency(0)
103 |
104 | self.cmb_nodepaths = DirectOptionMenu(
105 | #relief = 1,
106 | borderWidth = (0.2, 0.2),
107 | pad = (0.2, 0.2),
108 | pos = LPoint3f(5, 0, -15.5),
109 | hpr = LVecBase3f(0, 0, 0),
110 | scale = LVecBase3f(12, 12, 12),
111 | #popupMarker_pos = None,
112 | #text_align = 0,
113 | parent=self.frm_nodepath,
114 | )
115 | self.cmb_nodepaths.setTransparency(0)
116 |
117 | self.frm_vector = DirectFrame(
118 | relief = 3,
119 | borderWidth = (1.0, 1.0),
120 | frameSize = (0.0, 300.0, -24.0, 0.0),
121 | frameColor = (1.0, 1.0, 1.0, 1.0),
122 | pos = LPoint3f(99.5, 0, 0),
123 | parent=self.frm_content,
124 | )
125 | self.frm_vector.setTransparency(0)
126 |
127 | self.txt_vec_1 = DirectEntry(
128 | borderWidth = (0.08333333333333333, 0.08333333333333333),
129 | pos = LPoint3f(12.5, 0, -16.5),
130 | scale = LVecBase3f(12, 12, 12),
131 | width = 5.0,
132 | overflow = 1,
133 | parent=self.frm_vector,
134 | )
135 | self.txt_vec_1.setTransparency(0)
136 |
137 | self.txt_vec_2 = DirectEntry(
138 | borderWidth = (0.08333333333333333, 0.08333333333333333),
139 | pos = LPoint3f(82.5, 0, -16.5),
140 | scale = LVecBase3f(12, 12, 12),
141 | width = 5.0,
142 | overflow = 1,
143 | parent=self.frm_vector,
144 | )
145 | self.txt_vec_2.setTransparency(0)
146 |
147 | self.txt_vec_3 = DirectEntry(
148 | borderWidth = (0.08333333333333333, 0.08333333333333333),
149 | pos = LPoint3f(152.5, 0, -16.5),
150 | scale = LVecBase3f(12, 12, 12),
151 | width = 5.0,
152 | overflow = 1,
153 | parent=self.frm_vector,
154 | )
155 | self.txt_vec_3.setTransparency(0)
156 |
157 | self.txt_vec_4 = DirectEntry(
158 | borderWidth = (0.08333333333333333, 0.08333333333333333),
159 | pos = LPoint3f(222.5, 0, -16.5),
160 | scale = LVecBase3f(12, 12, 12),
161 | width = 5.0,
162 | overflow = 1,
163 | parent=self.frm_vector,
164 | )
165 | self.txt_vec_4.setTransparency(0)
166 |
167 |
168 | def show(self):
169 | self.frm_content.show()
170 |
171 | def hide(self):
172 | self.frm_content.hide()
173 |
174 | def destroy(self):
175 | self.frm_content.destroy()
176 |
--------------------------------------------------------------------------------
/SceneEditor/GUI/dialogs/ShaderLoaderDialogManager.py:
--------------------------------------------------------------------------------
1 | import logging
2 |
3 | from SceneEditor.GUI.dialogs.ShaderLoaderDialog import GUI
4 | from SceneEditor.GUI.dialogs.ShaderInput import GUI as ShaderInput
5 | from direct.gui import DirectGuiGlobals as DGG
6 | from direct.gui.DirectFrame import DirectFrame
7 | from SceneEditor.directGuiOverrides.DirectOptionMenu import DirectOptionMenu
8 | from DirectGuiExtension.DirectAutoSizer import DirectAutoSizer
9 | from DirectFolderBrowser.DirectFolderBrowser import DirectFolderBrowser
10 | from DirectGuiExtension.DirectBoxSizer import DirectBoxSizer
11 |
12 | from panda3d.core import Shader, Vec2, Vec3, Vec4
13 |
14 | DGG.BELOW = "below"
15 |
16 | class ShaderDetails:
17 | shader_language = Shader.SL_GLSL
18 |
19 | vertex_path = ""
20 | tessellation_ctrl_path = ""
21 | tessellation_eval_path = ""
22 | geometry_path = ""
23 | fragment_path = ""
24 |
25 | input_dict = {}
26 |
27 | class ShaderLoaderDialogManager(GUI):
28 | def __init__(self, accept_func, scene_objects):
29 | self.bg_frame = DirectFrame(frameColor=(0,0,0,0.5))
30 | self.autoSizer = DirectAutoSizer(
31 | frameColor=(0,0,0,0),
32 | parent=base.pixel2d,
33 | child=self.bg_frame
34 | )
35 | GUI.__init__(self, base.pixel2d)
36 | self.frm_main.set_pos((base.win.get_size().x/2, 0, -base.win.get_size().y/2))
37 |
38 | self.accept_func = accept_func
39 | self.scene_objects = scene_objects
40 |
41 | self.btn_ok["command"] = self.close_dialog
42 | self.btn_ok["extraArgs"] = [True]
43 |
44 | self.btn_cancel["command"] = self.close_dialog
45 | self.btn_cancel["extraArgs"] = [False]
46 |
47 | self.lbl_tessellation_ctrl["text"] = "Tessellation\nControll"
48 | self.lbl_tessellation_ev["text"] = "Tessellation\nEvaluation"
49 |
50 | self.btn_browse_vertex["command"] = self.browse_vertex
51 | self.btn_browse_fragment["command"] = self.browse_fragment
52 | self.btn_browse_tessellation_ctrl["command"] = self.browse_tessellation_ctrl
53 | self.btn_browse_tessellation_eval["command"] = self.browse_tessellation_eval
54 | self.btn_browse_geometry["command"] = self.browse_geometry
55 |
56 | self.shader_input_list = []
57 | self.btn_add_shader_input["command"] = self.add_input
58 | self.input_box = DirectBoxSizer(
59 | parent=self.frm_shader_input.canvas,
60 | orientation=DGG.VERTICAL)
61 |
62 | # prepare the item list for the nodepath selection
63 | self.item_dict = {}
64 | max_length = 40
65 | for obj in self.scene_objects:
66 | entry = str(obj)
67 | if len(entry) > max_length:
68 | entry = f"...{entry[-max_length:]}"
69 | if entry in self.item_dict:
70 | index = 1
71 | new_entry = ""
72 | while True:
73 | new_entry = f"{index}-...{entry[-max_length:]}"
74 | if new_entry not in self.item_dict:
75 | entry = new_entry
76 | break
77 | index += 1
78 | self.item_dict[entry] = obj
79 |
80 | def add_input(self):
81 | input_type = self.cmb_shader_input_type.get().lower()
82 | shader_input = ShaderInput()
83 | shader_input.input_type = input_type
84 | if input_type == "texture":
85 | shader_input.frm_nodepath.hide()
86 | shader_input.frm_vector.hide()
87 | elif input_type == "nodepath":
88 | shader_input.frm_texture.hide()
89 | shader_input.frm_vector.hide()
90 |
91 | shader_input.cmb_nodepaths.destroy()
92 | shader_input.cmb_nodepaths = DirectOptionMenu(
93 | borderWidth = (0.2, 0.2),
94 | pad = (0.2, 0.2),
95 | pos = (5, 0, -15.5),
96 | hpr = (0, 0, 0),
97 | scale = (12, 12, 12),
98 | parent=shader_input.frm_nodepath,
99 | items=list(self.item_dict.keys()),
100 | popupMenuLocation=DGG.BELOW
101 | )
102 |
103 | #shader_input.cmb_nodepaths["items"] = list(self.item_dict.keys())
104 | #shader_input.cmb_nodepaths.setItems()
105 | #shader_input.cmb_nodepaths["item_text_align"] = 0
106 | #shader_input.cmb_nodepaths.resetFrameSize()
107 | elif input_type == "vector":
108 | shader_input.frm_texture.hide()
109 | shader_input.frm_nodepath.hide()
110 | self.input_box.addItem(shader_input.frm_content)
111 | shader_input.txt_input_name["focusInCommand"] = self.clearText
112 | shader_input.txt_input_name["focusInExtraArgs"] = [shader_input.txt_input_name]
113 |
114 | shader_input.btn_remove["command"] = self.remove_input
115 | shader_input.btn_remove["extraArgs"] = [shader_input]
116 |
117 | self.frm_shader_input["canvasSize"] = self.input_box["frameSize"]
118 |
119 | self.shader_input_list.append(shader_input)
120 |
121 | def remove_input(self, shader_input):
122 | self.shader_input_list.remove(shader_input)
123 | shader_input.destroy()
124 |
125 | def clearText(self, entry):
126 | entry.enterText('')
127 |
128 | def browse_vertex(self):
129 | self.show_browser(self.set_vertex_path, "vertex.glsl")
130 |
131 | def set_vertex_path(self, accept):
132 | if accept:
133 | self.txt_vertex_path.set(self.browser.get())
134 | self.browser.destroy()
135 |
136 | def browse_fragment(self):
137 | self.show_browser(self.set_fragment_path, "fragment.glsl")
138 |
139 | def set_fragment_path(self, accept):
140 | if accept:
141 | self.txt_fragment_path.set(self.browser.get())
142 | self.browser.destroy()
143 |
144 | def browse_tessellation_eval(self):
145 | self.show_browser(self.set_tessellation_eval_path, "tessellation_evaluation.glsl")
146 |
147 | def set_tessellation_eval_path(self, accept):
148 | if accept:
149 | self.txt_tessellation_ev_path.set(self.browser.get())
150 | self.browser.destroy()
151 |
152 | def browse_tessellation_ctrl(self):
153 | self.show_browser(self.set_tessellation_ctrl_path, "tessellation_control.glsl")
154 |
155 | def set_tessellation_ctrl_path(self, accept):
156 | if accept:
157 | self.txt_tessellation_ctrl_path.set(self.browser.get())
158 | self.browser.destroy()
159 |
160 | def browse_geometry(self):
161 | self.show_browser(self.set_geometry_path, "geometry.glsl")
162 |
163 | def set_geometry_path(self, accept):
164 | if accept:
165 | self.txt_geometry_path.set(self.browser.get())
166 | self.browser.destroy()
167 |
168 | def show_browser(self, cmd, filename):
169 | self.browser = DirectFolderBrowser(
170 | cmd,
171 | True,
172 | defaultFilename=filename)
173 |
174 | def close_dialog(self, accept):
175 | details = ShaderDetails()
176 | details.vertex_path = self.txt_vertex_path.get()
177 | details.tessellation_ctrl_path = self.txt_tessellation_ctrl_path.get()
178 | details.tessellation_eval_path = self.txt_tessellation_ev_path.get()
179 | details.geometry_path = self.txt_geometry_path.get()
180 | details.fragment_path = self.txt_fragment_path.get()
181 | for entry in self.shader_input_list:
182 | input_name = entry.txt_input_name.get()
183 | value = None
184 | print("CHECK INPUT VALUE")
185 | print(entry.input_type)
186 | if entry.input_type == "texture":
187 | value = entry.txt_texture_path.get()
188 | elif entry.input_type == "nodepath":
189 | value = self.item_dict[entry.cmb_nodepaths.get()]
190 | elif entry.input_type == "vector":
191 | print("VECTOR VALUE")
192 | val_1 = entry.txt_vec_1.get()
193 | val_2 = entry.txt_vec_2.get()
194 | val_3 = entry.txt_vec_3.get()
195 | val_4 = entry.txt_vec_4.get()
196 | if val_4:
197 | print("VEC 4")
198 | val_1 = float(val_1 if val_1 != "" else 0.0)
199 | val_2 = float(val_2 if val_2 != "" else 0.0)
200 | val_3 = float(val_3 if val_3 != "" else 0.0)
201 | val_4 = float(val_4 if val_4 != "" else 0.0)
202 | value = Vec4(val_1, val_2, val_3, val_4)
203 | elif val_3:
204 | print("VEC 3")
205 | val_1 = float(val_1 if val_1 != "" else 0.0)
206 | val_2 = float(val_2 if val_2 != "" else 0.0)
207 | val_3 = float(val_3 if val_3 != "" else 0.0)
208 | value = Vec3(val_1, val_2, val_3)
209 | elif val_2:
210 | print("VEC 2")
211 | val_1 = float(val_1 if val_1 != "" else 0.0)
212 | val_2 = float(val_2 if val_2 != "" else 0.0)
213 | value = Vec2(val_1, val_2)
214 | else:
215 | print("VEC Failed")
216 | logging.error(f"Can't create a 1 dimensional vector for {input_name}")
217 |
218 | print(value)
219 |
220 | if value != None:
221 | details.input_dict[input_name] = value
222 |
223 | self.accept_func(accept, details)
224 | self.destroy()
225 |
226 | self.autoSizer["updateOnWindowResize"] = False
227 | self.autoSizer.removeChild()
228 | self.autoSizer.destroy()
229 | self.bg_frame.destroy()
230 |
--------------------------------------------------------------------------------
/SceneEditor/GUI/dialogs/__init__.py:
--------------------------------------------------------------------------------
https://raw.githubusercontent.com/fireclawthefox/SceneEditor/f02ac2539f6cdb11af0fb2fb7e5204feca1b1eee/SceneEditor/GUI/dialogs/__init__.py
--------------------------------------------------------------------------------
/SceneEditor/GUI/panels/__init__.py:
--------------------------------------------------------------------------------
https://raw.githubusercontent.com/fireclawthefox/SceneEditor/f02ac2539f6cdb11af0fb2fb7e5204feca1b1eee/SceneEditor/GUI/panels/__init__.py
--------------------------------------------------------------------------------
/SceneEditor/__init__.py:
--------------------------------------------------------------------------------
https://raw.githubusercontent.com/fireclawthefox/SceneEditor/f02ac2539f6cdb11af0fb2fb7e5204feca1b1eee/SceneEditor/__init__.py
--------------------------------------------------------------------------------
/SceneEditor/core/CameraController.py:
--------------------------------------------------------------------------------
1 | import math
2 | from panda3d.core import Point2, Vec3, PerspectiveLens, OrthographicLens
3 |
4 | class CameraController:
5 | def __init__(self):
6 | #
7 | # Camera
8 | #
9 | # set ortographic lens
10 | #lens = OrthographicLens()
11 | #lens.setFilmSize(80, 60) # Or whatever is appropriate for your scene
12 | #base.cam.node().setLens(lens)
13 | self.fov = 90
14 | base.camLens.setFov(self.fov)
15 |
16 | self.is_orthographic = False
17 |
18 | self.ortho_zoom_size = 90
19 | self.min_ortho_zoom_size = 10
20 | self.max_ortho_zoom_size = 180
21 |
22 | self.pivotDefaultH = 30
23 | self.pivotDefaultP = 30
24 |
25 | # camera movement
26 | self.mousePos = None
27 | self.startCameraMovement = False
28 | self.movePivot = False
29 |
30 | # disable pandas default mouse-camera controls so we can handle the cam
31 | # movements by ourself
32 | base.disableMouse()
33 | # this variable will be used to determine the distance from the player to
34 | # the camera
35 | self.camDistance = 15.0
36 | # min and maximal distance between player and camera
37 | self.maxCamDistance = 1000.0
38 | self.minCamDistance = 1.5
39 | # the speed at which the mousewheel and +/- will zoom the camera in/out
40 | self.zoomSpeed = 1.0
41 | # minumum and maximum zoom speed
42 | self.min_zoom_speed = 0.45
43 | self.max_zoom_speed = 100
44 | # the speed at which the mouse moves the camera
45 | self.mouseSpeed = 50
46 |
47 | self.pivot = render.attachNewNode("Pivot Point")
48 | self.pivot.setPos(0, 0, 0)
49 | self.pivot.setHpr(self.pivotDefaultH, self.pivotDefaultP, 0)
50 | camera.reparentTo(self.pivot)
51 |
52 | self.enable_cam_controller()
53 |
54 | def enable_cam_controller(self):
55 | if base.taskMgr.hasTaskNamed("SceneEditor_task_camActualisation"):
56 | return
57 |
58 | # add the cameras update task so it will be updated every frame
59 | base.taskMgr.add(self.updateCam, "SceneEditor_task_camActualisation", priority=-4)
60 |
61 | def disable_cam_controller(self):
62 | base.taskMgr.remove("SceneEditor_task_camActualisation")
63 |
64 | def toggle_lense(self):
65 | if self.is_orthographic:
66 | lens = PerspectiveLens()
67 | # TODO: get the size according to the display region size
68 | lens.set_film_size(*base.win.get_size())
69 | lens.set_fov(self.fov)
70 | lens.set_near_far(0.001, 1000)
71 | else:
72 | lens = OrthographicLens()
73 | # TODO: get the aspect according to the display region size
74 | aspect = base.win.get_size()[0] / base.win.get_size()[1]
75 | lens.set_film_size(self.ortho_zoom_size*aspect, self.ortho_zoom_size)
76 | lens.set_near_far(0.001, 1000)
77 | base.cam.node().set_lens(lens)
78 | base.camLens = lens
79 | self.is_orthographic = not self.is_orthographic
80 |
81 | def setPivot(self, h, p):
82 | interval = self.pivot.hprInterval(0.5, Vec3(h, p, 0))
83 | interval.start()
84 |
85 | def resetPivotDefault(self):
86 | self.setPivot(self.pivotDefaultH, self.pivotDefaultP)
87 |
88 | def setPivotLeft(self):
89 | self.setPivot(270, 0)
90 |
91 | def setPivotRight(self):
92 | self.setPivot(90, 0)
93 |
94 | def setPivotFront(self):
95 | self.setPivot(0, 0)
96 |
97 | def setPivotBack(self):
98 | self.setPivot(180, 0)
99 |
100 | def setPivotTop(self):
101 | self.setPivot(0, 90)
102 |
103 | def setPivotBottom(self):
104 | self.setPivot(0, -90)
105 |
106 | def setMoveCamera(self, moveCamera):
107 | # store the mouse position if weh have a mouse
108 | if base.mouseWatcherNode.hasMouse():
109 | x = base.mouseWatcherNode.getMouseX()
110 | y = base.mouseWatcherNode.getMouseY()
111 | self.mousePos = Point2(x, y)
112 | # set the variable according to if we want to move the camera or not
113 | self.startCameraMovement = moveCamera
114 |
115 | def setMovePivot(self, movePivot):
116 | self.movePivot = movePivot
117 |
118 | def setAndMovePivot(self, move):
119 | self.setMovePivot(move)
120 | self.setMoveCamera(move)
121 |
122 | #
123 | # CAMERA SPECIFIC FUNCTIONS
124 | #
125 | def zoom(self, zoomIn):
126 | if not self.is_orthographic:
127 | # PERSPECTIVE
128 |
129 | # calculate new zoom speed dependent on distance
130 | dist_relative = self.camDistance/self.maxCamDistance
131 | if dist_relative > 1:
132 | dist_relative = 0.9
133 | self.zoomSpeed = self.camDistance * math.asin(dist_relative)
134 | if self.zoomSpeed < self.min_zoom_speed:
135 | self.zoomSpeed = self.min_zoom_speed
136 | if self.zoomSpeed > self.max_zoom_speed:
137 | self.zoomSpeed = self.max_zoom_speed
138 |
139 | # actual zooming
140 | if zoomIn:
141 | #
142 | # ZOOM IN
143 | #
144 | # check if we are far enough away to further zoom in
145 | if self.camDistance > self.minCamDistance:
146 | # zoom in by a given speed
147 | self.camDistance -= self.zoomSpeed
148 | if self.camDistance < self.minCamDistance:
149 | self.camDistance = self.minCamDistance
150 | else:
151 | #
152 | # ZOOM OUT
153 | #
154 | # check if we are close enough to further zoom out
155 | if self.camDistance < self.maxCamDistance:
156 | # zoom out by a given speed
157 | self.camDistance += self.zoomSpeed
158 | if self.camDistance > self.maxCamDistance:
159 | self.camDistance = self.maxCamDistance
160 | else:
161 | # ORTHOGRAPHIC
162 |
163 | aspect = base.win.get_size()[0] / base.win.get_size()[1]
164 |
165 | if zoomIn:
166 | #
167 | # ZOOM IN
168 | #
169 | self.ortho_zoom_size -= 1
170 | if self.ortho_zoom_size < self.min_ortho_zoom_size:
171 | self.ortho_zoom_size = self.min_ortho_zoom_size
172 | else:
173 | #
174 | # ZOOM OUT
175 | #
176 | self.ortho_zoom_size += 1
177 | if self.ortho_zoom_size > self.max_ortho_zoom_size:
178 | self.ortho_zoom_size = self.max_ortho_zoom_size
179 |
180 | lens = base.cam.node().get_lens()
181 | lens.setFilmSize(self.ortho_zoom_size*aspect, self.ortho_zoom_size)
182 |
183 | def reset_zoom(self):
184 | self.camDistance = 75.0
185 |
186 | def updateCam(self, task):
187 | # variables to store the mouses current x and y position
188 | x = 0.0
189 | y = 0.0
190 | if base.mouseWatcherNode.hasMouse():
191 | # get the mouse position
192 | x = base.mouseWatcherNode.getMouseX()
193 | y = base.mouseWatcherNode.getMouseY()
194 | if base.mouseWatcherNode.hasMouse() \
195 | and self.mousePos is not None \
196 | and self.startCameraMovement:
197 | # Move the camera if the left mouse key is pressed and the mouse moved
198 | mouseMoveX = (self.mousePos.getX() - x) * (self.mouseSpeed + globalClock.getDt())
199 | mouseMoveY = (self.mousePos.getY() - y) * (self.mouseSpeed + globalClock.getDt())
200 | self.mousePos = Point2(x, y)
201 |
202 | if not self.movePivot:
203 | # Rotate the pivot point
204 | preP = self.pivot.getP()
205 | self.pivot.setP(0)
206 | self.pivot.setH(self.pivot, mouseMoveX)
207 | self.pivot.setP(preP)
208 | self.pivot.setP(self.pivot, mouseMoveY)
209 | else:
210 | # Move the pivot point
211 | self.pivot.setX(self.pivot, -mouseMoveX)
212 | self.pivot.setZ(self.pivot, mouseMoveY)
213 |
214 | # set the cameras zoom
215 | camera.setY(self.camDistance)
216 |
217 | # always look at the pivot point
218 | camera.lookAt(self.pivot)
219 |
220 | # continue the task until it got manually stopped
221 | return task.cont
222 |
--------------------------------------------------------------------------------
/SceneEditor/core/CoreKillRingHandler.py:
--------------------------------------------------------------------------------
1 | import logging
2 | from SceneEditor.core.KillRing import KillRing
3 |
4 | class CoreKillRingHandler:
5 | def __init__(self):
6 | self.killRing = KillRing()
7 |
8 | #
9 | # KILL RING HANDLING
10 | #
11 | def addToKillRing(self, obj, action, objectType, oldValue, newValue):
12 | if action == "set" and oldValue == newValue:
13 | logging.debug(f"action={action}, type={objectType} was not added to killring, reason: old={oldValue} equals new={newValue}")
14 | return
15 | logging.debug(f"Add to killring action={action}, type={objectType}, old={oldValue}, new={newValue}")
16 | self.killRing.push(obj, action, objectType, oldValue, newValue)
17 |
18 | def undo(self):
19 | # undo this action
20 | workOn = self.killRing.pop()
21 |
22 | if workOn is None:
23 | return
24 |
25 | if workOn.action == "set":
26 | if workOn.objectType == "pos":
27 | logging.debug(f"undo Position to {workOn.oldValue}")
28 | workOn.editObject.set_pos(workOn.oldValue)
29 | elif workOn.objectType == "hpr":
30 | logging.debug(f"undo Rotation to {workOn.oldValue}")
31 | workOn.editObject.set_hpr(workOn.oldValue)
32 | elif workOn.objectType == "scale":
33 | logging.debug(f"undo Scale to {workOn.oldValue}")
34 | workOn.editObject.set_scale(workOn.oldValue)
35 | elif workOn.action == "add":
36 | logging.debug(f"undo remove added element {workOn.editObject}")
37 | self.remove([workOn.editObject], False)
38 |
39 | elif workOn.action == "kill" and workOn.objectType == "element":
40 | logging.debug(f"undo last kill {workOn.editObject}")
41 | workOn.editObject.unstash()
42 | if workOn.editObject.get_tag("object_type") == "light":
43 | self.scene_model_parent.set_light(workOn.editObject.find("+Light"))
44 | base.messenger.send("update_structure")
45 |
46 | elif workOn.action == "copy":
47 | logging.debug(f"undo last copy {workOn.objectType}")
48 | if workOn.objectType == "element":
49 | self.remove([workOn.editObject], False)
50 |
51 | elif workOn.action == "cut":
52 | logging.debug(f"undo last cut {workOn.objectType}")
53 | if workOn.objectType == "element":
54 | workOn.editObject.reparent_to(workOn.oldValue)
55 |
56 | if len(self.selected_objects):
57 | base.messenger.send("update_selection_highlight_marker")
58 |
59 | base.messenger.send("setDirtyFlag")
60 |
61 | def redo(self):
62 | # redo this
63 | workOn = self.killRing.pull()
64 |
65 | if workOn is None:
66 | logging.debug("nothing to redo")
67 | return
68 |
69 | if workOn.action == "set":
70 | if workOn.objectType == "pos":
71 | if type(workOn.newValue) is list:
72 | workOn.editObject.set_pos(*workOn.newValue)
73 | else:
74 | workOn.editObject.set_pos(workOn.newValue)
75 | elif workOn.objectType == "hpr":
76 | if type(workOn.newValue) is list:
77 | workOn.editObject.set_hpr(*workOn.newValue)
78 | else:
79 | workOn.editObject.set_hpr(workOn.newValue)
80 | elif workOn.objectType == "scale":
81 | if type(workOn.newValue) is list:
82 | workOn.editObject.set_scale(*workOn.newValue)
83 | else:
84 | workOn.editObject.set_scale(workOn.newValue)
85 |
86 | elif workOn.action == "add":
87 | workOn.editObject.unstash()
88 | base.messenger.send("update_structure")
89 | if workOn.editObject.get_tag("object_type") == "light":
90 | self.scene_model_parent.set_light(workOn.editObject.find("+Light"))
91 |
92 | elif workOn.action == "kill" and workOn.objectType == "element":
93 | self.remove([workOn.editObject], False)
94 | base.messenger.send("update_structure")
95 |
96 | elif workOn.action == "copy":
97 | if workOn.objectType == "element":
98 | workOn.editObject.unstash()
99 | base.messenger.send("update_structure")
100 | if workOn.editObject.get_tag("object_type") == "light":
101 | self.scene_model_parent.set_light(workOn.editObject.find("+Light"))
102 |
103 | elif workOn.action == "cut":
104 | logging.debug(f"undo last cut {workOn.objectType}")
105 | if workOn.objectType == "element":
106 | workOn.editObject.reparent_to(workOn.newValue)
107 |
108 | if len(self.selected_objects):
109 | base.messenger.send("update_selection_highlight_marker")
110 |
111 | base.messenger.send("setDirtyFlag")
112 |
113 | def cycleKillRing(self):
114 | """Cycles through the redo branches at the current depth of the kill ring"""
115 | self.undo()
116 | self.killRing.cycleChildren()
117 | self.redo()
118 |
--------------------------------------------------------------------------------
/SceneEditor/core/KillRing.py:
--------------------------------------------------------------------------------
1 |
2 | class KillRingEntry():
3 | def __init__(self, editObject=None, action="", objectType="", oldValue=None, newValue=None):
4 | self.activeChild = None
5 | self.children = []
6 | self.parent = None
7 |
8 | self.editObject = editObject
9 | self.action = action
10 | self.objectType = objectType
11 | self.oldValue = oldValue
12 | self.newValue = newValue
13 |
14 | def addChild(self, child):
15 | self.children.append(child)
16 | self.activeChild = child
17 |
18 | def setParent(self, parent):
19 | self.parent = parent
20 |
21 | def cycleChildren(self):
22 | if len(self.children) < 2: return
23 | self.children = self.children[-1:] + self.children[:-1]
24 | self.activeChild = self.children[-1]
25 |
26 | class KillRing():
27 | def __init__(self):
28 | self.currentRoot = KillRingEntry()
29 | self.currentRoot.setParent(self.currentRoot)
30 |
31 | def push(self, editObject, action, objectType, oldValue, newValue):
32 | newKill = KillRingEntry(editObject, action, objectType, oldValue, newValue)
33 | self.currentRoot.addChild(newKill)
34 | newKill.setParent(self.currentRoot)
35 | self.currentRoot = newKill
36 |
37 | def pop(self):
38 | # revert last push
39 | if self.currentRoot.parent is self.currentRoot: return None
40 | root = self.currentRoot
41 | self.currentRoot = self.currentRoot.parent
42 | return root
43 |
44 | def pull(self):
45 | # revert last pop
46 | if self.currentRoot.activeChild is None: return
47 | self.currentRoot = self.currentRoot.activeChild
48 | return self.currentRoot
49 |
50 | def cycleChildren(self):
51 | # change the active child to the next one in the active kill ring entry
52 | self.currentRoot.cycleChildren()
53 |
--------------------------------------------------------------------------------
/SceneEditor/core/SelectionHandler.py:
--------------------------------------------------------------------------------
1 | from panda3d.core import (
2 | MouseWatcher,
3 | CollisionTraverser,
4 | CollisionHandlerQueue,
5 | CollisionRay,
6 | CollisionNode,
7 | GeomNode,
8 | Point3,
9 | BitMask32)
10 |
11 | class SelectionHandler:
12 | def __init__(self):
13 | # new mouse watcher to handle display region changes correct
14 | self.selction_mouse_watcher = MouseWatcher()
15 | base.mouseWatcher.getParent().attachNewNode(self.selction_mouse_watcher)
16 |
17 | self.pick_traverser = CollisionTraverser()
18 |
19 | self.picker_ray = CollisionRay()
20 | self.pick_handler = CollisionHandlerQueue()
21 |
22 | self.picker_node = CollisionNode("mouseRay")
23 | self.picker_node.setFromCollideMask(BitMask32.all_on()) #GeomNode.getDefaultCollideMask())
24 | self.picker_node.addSolid(self.picker_ray)
25 |
26 | self.picker_np = base.cam.attachNewNode(self.picker_node)
27 |
28 | self.pick_traverser.addCollider(self.picker_np, self.pick_handler)
29 |
30 | self.selection_highlight_marker = loader.load_model('models/misc/sphere')
31 | self.selection_highlight_marker.node().setName('selection_highlight_marker')
32 | self.selection_highlight_marker.reparentTo(self.scene_root)
33 | self.selection_highlight_marker.setColor(1, 0.6, 0.2, 1)
34 | self.selection_highlight_marker.set_depth_test(False)
35 | self.selection_highlight_marker.set_depth_write(False)
36 | self.selection_highlight_marker.set_bin("fixed",0)
37 | self.selection_highlight_marker.setScale(0.3)
38 | self.selection_highlight_marker.hide()
39 |
40 | def has_objects_selected(self):
41 | return len(self.selected_objects) > 0
42 |
43 | def update_selection_mouse_watcher(self):
44 | dr = base.cam.node().get_display_region(0)
45 | self.selction_mouse_watcher.setDisplayRegion(dr)
46 |
47 | def handle_pick(self, multiselect):
48 | if self.selction_mouse_watcher.hasMouse():
49 | mpos = self.selction_mouse_watcher.getMouse()
50 | self.picker_ray.setFromLens(base.camNode, mpos.x, mpos.y)
51 | self.pick_traverser.traverse(self.scene_model_parent)
52 |
53 | if self.pick_handler.getNumEntries() > 0:
54 | self.pick_handler.sortEntries()
55 | picked_obj = self.pick_handler.getEntry(0).getIntoNodePath()
56 | picked_obj = picked_obj.findNetTag("scene_object_id")
57 | if not picked_obj.is_empty() and not picked_obj.is_hidden():
58 | base.messenger.send("pickObject", [picked_obj, multiselect])
59 |
60 | def update_selection_highlight_marker(self):
61 | self.selection_highlight_marker.setPos(self.get_selection_middle_point())
62 |
63 | def select(self, obj, multiselect=False):
64 | if obj in self.selected_objects and multiselect:
65 | # deselect an already selected model
66 | self.deselect(obj)
67 |
68 | self.selection_highlight_marker.setPos(self.get_selection_middle_point())
69 | return
70 | if not multiselect:
71 | self.deselect_all()
72 |
73 | self.selected_objects += [obj]
74 |
75 | self.selected_objects[-1].setColorScale(1, 0.8, 0.3, 1)
76 | for obj in self.selected_objects[:-1]:
77 | # lighter color for all except the last selected
78 | obj.setColorScale(1, 1, 0.4, 1)
79 |
80 |
81 | self.selection_highlight_marker.setPos(self.get_selection_middle_point())
82 | self.selection_highlight_marker.show()
83 |
84 | base.messenger.send("update_structure")
85 | base.messenger.send("update_properties")
86 |
87 | def deselect(self, obj):
88 | if obj not in self.selected_objects: return
89 | obj.clearColorScale()
90 | self.selected_objects.remove(obj)
91 | if len(self.selected_objects) == 0:
92 | self.selection_highlight_marker.hide()
93 |
94 | base.messenger.send("update_structure")
95 | base.messenger.send("update_properties")
96 | base.messenger.send("reregisterKeyboardAndMouseEvents")
97 |
98 | def deselect_all(self):
99 | for obj in self.selected_objects:
100 | obj.clearColorScale()
101 | self.selection_highlight_marker.hide()
102 |
103 | self.selected_objects = []
104 |
105 | base.messenger.send("update_structure")
106 | base.messenger.send("update_properties")
107 | base.messenger.send("reregisterKeyboardAndMouseEvents")
108 |
109 | def remove(self, objs=None, includeWithKillCycle=True):
110 | if objs is None:
111 | objs = self.selected_objects[:]
112 |
113 | for obj in objs:
114 | self.deselect(obj)
115 |
116 | if obj.get_tag("object_type") == "light":
117 | self.scene_model_parent.clear_light(obj.find("+Light"))
118 |
119 | obj.stash()
120 | if includeWithKillCycle:
121 | base.messenger.send("addToKillRing",
122 | [obj, "kill", "element", None, None])
123 |
124 | base.messenger.send("setDirtyFlag")
125 | base.messenger.send("update_structure")
126 |
127 | def remove_all(self):
128 | for obj in self.scene_objects[:]:
129 | self.deselect(obj)
130 | obj.stash()
131 |
132 | base.messenger.send("setDirtyFlag")
133 | base.messenger.send("update_structure")
134 |
135 | def toggle_visibility(self, objs=None):
136 | if objs is None:
137 | objs = self.selected_objects
138 |
139 | for obj in objs:
140 | if obj.is_hidden():
141 | obj.show()
142 | else:
143 | obj.hide()
144 | #self.deselect(obj)
145 |
146 | base.messenger.send("update_structure")
147 |
148 | def get_selection_middle_point(self):
149 | max_x = None
150 | max_y = None
151 | max_z = None
152 | min_x = None
153 | min_y = None
154 | min_z = None
155 | for obj in self.selected_objects:
156 | if max_x is None:
157 | max_x = obj.get_x()
158 | max_y = obj.get_y()
159 | max_z = obj.get_z()
160 | min_x = obj.get_x()
161 | min_y = obj.get_y()
162 | min_z = obj.get_z()
163 | else:
164 | max_x = max(max_x, obj.get_x())
165 | max_y = max(max_y, obj.get_y())
166 | max_z = max(max_z, obj.get_z())
167 | min_x = min(min_x, obj.get_x())
168 | min_y = min(min_y, obj.get_y())
169 | min_z = min(min_z, obj.get_z())
170 |
171 | return Point3((min_x + max_x)/2, (min_y + max_y)/2, (min_z + max_z)/2)
172 |
173 |
--------------------------------------------------------------------------------
/SceneEditor/core/__init__.py:
--------------------------------------------------------------------------------
https://raw.githubusercontent.com/fireclawthefox/SceneEditor/f02ac2539f6cdb11af0fb2fb7e5204feca1b1eee/SceneEditor/core/__init__.py
--------------------------------------------------------------------------------
/SceneEditor/custom_export/custom_bam/exporter.py:
--------------------------------------------------------------------------------
1 | #!/usr/bin/python
2 | # -*- coding: utf-8 -*-
3 | __author__ = "Fireclaw the Fox"
4 | __license__ = """
5 | Simplified BSD (BSD 2-Clause) License.
6 | See License.txt or http://opensource.org/licenses/BSD-2-Clause for more info
7 | """
8 |
9 | import os
10 | import logging
11 | from panda3d.core import ConfigVariableBool
12 | from direct.gui import DirectGuiGlobals as DGG
13 | from direct.gui.DirectFrame import DirectFrame
14 | from direct.gui.DirectDialog import YesNoDialog
15 | from panda3d.core import LVecBase2f, LVecBase3f, LVecBase4f, LPoint2f, LPoint3f, LPoint4f, LVector3f
16 | from panda3d.core import LVecBase2, LVecBase3, LVecBase4, LPoint2, LPoint3, LPoint4
17 | from panda3d.core import LPlane
18 | from panda3d.core import NodePath
19 | from panda3d.core import Camera, OrthographicLens, PerspectiveLens
20 |
21 | from DirectFolderBrowser.DirectFolderBrowser import DirectFolderBrowser
22 |
23 | def get_name():
24 | return "Custom Bam Exporter"
25 |
26 | def get_id():
27 | return "custom_bam_exporter"
28 |
29 | class Exporter:
30 | def __init__(self, save_path, save_file, scene_root, scene_objects, tooltip):
31 | # create a new NP which will be written out to the bam file
32 | self.export_scene_np = NodePath("export_root")
33 |
34 | # copy the existing scene to our new NP
35 | scene_root.copy_to(self.export_scene_np)
36 |
37 | # clean up the copied scene from parts it shouldn't export
38 | self.cleanup_np(self.export_scene_np)
39 |
40 | self.browser = DirectFolderBrowser(
41 | self.save,
42 | True,
43 | save_path,
44 | save_file,
45 | [".bam"],
46 | tooltip)
47 | self.browser.show()
48 |
49 | def cleanup_np(self, root_np):
50 | if root_np.get_tag("object_type") == "empty":
51 | # replace the visible axis with an empty NodePath
52 | name = root_np.get_name()
53 | pos = root_np.get_pos()
54 | hpr = root_np.get_hpr()
55 | parent = root_np.get_parent()
56 |
57 | empty = NodePath(name)
58 | empty.set_pos(pos)
59 | empty.set_hpr(hpr)
60 | empty.reparent_to(parent)
61 |
62 | for child in list(root_np.get_children())[1:]:
63 | child.reparent_to(empty)
64 |
65 | root_np.remove_node()
66 | root_np = empty
67 |
68 | elif root_np.get_tag("object_type") == "collision":
69 | root_np.hide()
70 |
71 | elif root_np.get_tag("object_type") == "light":
72 | # remove the light representation model
73 | root_np.get_children()[0].remove_node()
74 |
75 | elif root_np.get_tag("object_type") == "camera":
76 | # create a camera and remove the dummy camera in the scene
77 | lens = None
78 | if root_np.get_tag("camera_type") == "PerspectiveLens":
79 | lens = PerspectiveLens()
80 | else:
81 | lens = OrthographicLens()
82 | cam = Camera(root_np.get_name(), lens)
83 | cam_np = root_np.get_parent().attach_new_node(cam)
84 | root_np.remove_node()
85 | root_np = cam_np
86 |
87 | for child in root_np.get_children():
88 | self.cleanup_np(child)
89 |
90 | def save(self, doSave):
91 | if doSave:
92 | self.dlgOverwrite = None
93 | self.dlgOverwriteShadow = None
94 | path = self.browser.get()
95 | path = os.path.expanduser(path)
96 | path = os.path.expandvars(path)
97 | if os.path.exists(path):
98 | self.dlgOverwrite = YesNoDialog(
99 | text="File already Exist.\nOverwrite?",
100 | relief=DGG.RIDGE,
101 | frameColor=(1,1,1,1),
102 | frameSize=(-0.5,0.5,-0.3,0.2),
103 | sortOrder=1,
104 | button_relief=DGG.FLAT,
105 | button_frameColor=(0.8, 0.8, 0.8, 1),
106 | command=self.__executeSave,
107 | extraArgs=[path],
108 | scale=300,
109 | pos=(base.getSize()[0]/2, 0, -base.getSize()[1]/2),
110 | parent=base.pixel2d)
111 | self.dlgOverwriteShadow = DirectFrame(
112 | pos=(base.getSize()[0]/2 + 10, 0, -base.getSize()[1]/2 - 10),
113 | sortOrder=0,
114 | frameColor=(0,0,0,0.5),
115 | frameSize=self.dlgOverwrite.bounds,
116 | scale=300,
117 | parent=base.pixel2d)
118 | else:
119 | self.__executeSave(True, path)
120 | base.messenger.send("setLastPath", [path])
121 | self.browser.destroy()
122 | del self.browser
123 |
124 | def __executeSave(self, overwrite, path):
125 | if self.dlgOverwrite is not None: self.dlgOverwrite.destroy()
126 | if self.dlgOverwriteShadow is not None: self.dlgOverwriteShadow.destroy()
127 | if not overwrite: return
128 | self.export_scene_np.writeBamFile(path)
129 |
--------------------------------------------------------------------------------
/SceneEditor/directGuiOverrides/__init__.py:
--------------------------------------------------------------------------------
1 | #!/usr/bin/python
2 | # -*- coding: utf-8 -*-
3 | __author__ = "Fireclaw the Fox"
4 | __license__ = """
5 | Simplified BSD (BSD 2-Clause) License.
6 | See License.txt or http://opensource.org/licenses/BSD-2-Clause for more info
7 | """
8 |
9 |
10 |
--------------------------------------------------------------------------------
/SceneEditor/directtoolsOverrides/DirectGrid.py:
--------------------------------------------------------------------------------
1 |
2 | from panda3d.core import *
3 | from direct.showbase.DirectObject import DirectObject
4 | from direct.directtools.DirectUtil import *
5 | from direct.directtools.DirectGeometry import *
6 |
7 |
8 | class DirectGrid(NodePath, DirectObject):
9 | def __init__(self,gridSize=100.0,gridSpacing=5.0,planeColor=(0.5,0.5,0.5,0.5),parent = None):
10 | # Initialize superclass
11 | NodePath.__init__(self, 'DirectGrid')
12 | # Don't wireframe or light
13 | useDirectRenderStyle(self)
14 |
15 | # Load up grid parts to initialize grid object
16 | # Polygon used to mark grid plane
17 | self.gridBack = base.loader.loadModel('models/misc/gridBack')
18 | self.gridBack.reparentTo(self)
19 | self.gridBack.setColor(*planeColor)
20 |
21 | # Grid Lines
22 | self.lines = self.attachNewNode('gridLines')
23 | self.minorLines = LineNodePath(self.lines)
24 | self.minorLines.lineNode.setName('minorLines')
25 | self.minorLines.setColor(VBase4(0.3, 0.55, 1, 1))
26 | self.minorLines.setThickness(1)
27 |
28 | self.majorLines = LineNodePath(self.lines)
29 | self.majorLines.lineNode.setName('majorLines')
30 | self.majorLines.setColor(VBase4(0.3, 0.55, 1, 1))
31 | self.majorLines.setThickness(5)
32 |
33 | self.centerLines = LineNodePath(self.lines)
34 | self.centerLines.lineNode.setName('centerLines')
35 | self.centerLines.setColor(VBase4(1, 0, 0, 0))
36 | self.centerLines.setThickness(3)
37 |
38 | # Small marker to hilight snap-to-grid point
39 | self.snapMarker = base.loader.loadModel('models/misc/sphere')
40 | self.snapMarker.node().setName('gridSnapMarker')
41 | self.snapMarker.reparentTo(self)
42 | self.snapMarker.setColor(1, 0, 0, 1)
43 | self.snapMarker.setScale(0.3)
44 | self.snapPos = Point3(0)
45 |
46 | # Initialize Grid characteristics
47 | self.fXyzSnap = 1
48 | self.fHprSnap = 1
49 | self.gridSize = gridSize
50 | self.gridSpacing = gridSpacing
51 | self.snapAngle = 15.0
52 | self.enable(parent = parent)
53 |
54 | def enable(self, parent = None):
55 | if parent:
56 | self.reparentTo(parent)
57 | else:
58 | self.reparentTo(base.direct.group)
59 |
60 | self.updateGrid()
61 | self.fEnabled = 1
62 |
63 | def disable(self):
64 | self.detachNode()
65 | self.fEnabled = 0
66 |
67 | def toggleGrid(self, parent = None):
68 | if self.fEnabled:
69 | self.disable()
70 | else:
71 | self.enable(parent = parent)
72 |
73 | def isEnabled(self):
74 | return self.fEnabled
75 |
76 | def updateGrid(self):
77 | # Update grid lines based upon current grid spacing and grid size
78 | # First reset existing grid lines
79 | self.minorLines.reset()
80 | self.majorLines.reset()
81 | self.centerLines.reset()
82 |
83 | # Now redraw lines
84 | numLines = int(math.ceil(self.gridSize/self.gridSpacing))
85 | scaledSize = numLines * self.gridSpacing
86 |
87 | center = self.centerLines
88 | minor = self.minorLines
89 | major = self.majorLines
90 | for i in range(-numLines, numLines + 1):
91 | if i == 0:
92 | center.setColor(VBase4(0, 1, 0, 0))
93 | center.moveTo(i * self.gridSpacing, -scaledSize, 0)
94 | center.drawTo(i * self.gridSpacing, scaledSize, 0)
95 | center.setColor(VBase4(1, 0, 0, 0))
96 | center.moveTo(-scaledSize, i * self.gridSpacing, 0)
97 | center.drawTo(scaledSize, i * self.gridSpacing, 0)
98 | else:
99 | if (i % 5) == 0:
100 | major.moveTo(i * self.gridSpacing, -scaledSize, 0)
101 | major.drawTo(i * self.gridSpacing, scaledSize, 0)
102 | major.moveTo(-scaledSize, i * self.gridSpacing, 0)
103 | major.drawTo(scaledSize, i * self.gridSpacing, 0)
104 | else:
105 | minor.moveTo(i * self.gridSpacing, -scaledSize, 0)
106 | minor.drawTo(i * self.gridSpacing, scaledSize, 0)
107 | minor.moveTo(-scaledSize, i * self.gridSpacing, 0)
108 | minor.drawTo(scaledSize, i * self.gridSpacing, 0)
109 |
110 | center.create()
111 | minor.create()
112 | major.create()
113 | if self.gridBack:
114 | self.gridBack.setScale(scaledSize)
115 |
116 | def setXyzSnap(self, fSnap):
117 | self.fXyzSnap = fSnap
118 |
119 | def getXyzSnap(self):
120 | return self.fXyzSnap
121 |
122 | def setHprSnap(self, fSnap):
123 | self.fHprSnap = fSnap
124 |
125 | def getHprSnap(self):
126 | return self.fHprSnap
127 |
128 | def computeSnapPoint(self, point):
129 | # Start of with current point
130 | self.snapPos.assign(point)
131 | # Snap if necessary
132 | if self.fXyzSnap:
133 | self.snapPos.set(
134 | ROUND_TO(self.snapPos[0], self.gridSpacing),
135 | ROUND_TO(self.snapPos[1], self.gridSpacing),
136 | ROUND_TO(self.snapPos[2], self.gridSpacing))
137 |
138 | # Move snap marker to this point
139 | self.snapMarker.setPos(self.snapPos)
140 |
141 | # Return the hit point
142 | return self.snapPos
143 |
144 | def computeSnapAngle(self, angle):
145 | return ROUND_TO(angle, self.snapAngle)
146 |
147 | def setSnapAngle(self, angle):
148 | self.snapAngle = angle
149 |
150 | def getSnapAngle(self):
151 | return self.snapAngle
152 |
153 | def setGridSpacing(self, spacing):
154 | self.gridSpacing = spacing
155 | self.updateGrid()
156 |
157 | def getGridSpacing(self):
158 | return self.gridSpacing
159 |
160 | def setGridSize(self, size):
161 | # Set size of grid back and redraw lines
162 | self.gridSize = size
163 | self.updateGrid()
164 |
165 | def getGridSize(self):
166 | return self.gridSize
167 |
--------------------------------------------------------------------------------
/SceneEditor/directtoolsOverrides/__init__.py:
--------------------------------------------------------------------------------
https://raw.githubusercontent.com/fireclawthefox/SceneEditor/f02ac2539f6cdb11af0fb2fb7e5204feca1b1eee/SceneEditor/directtoolsOverrides/__init__.py
--------------------------------------------------------------------------------
/SceneEditor/export/ExportBam.py:
--------------------------------------------------------------------------------
1 | #!/usr/bin/python
2 | # -*- coding: utf-8 -*-
3 | __author__ = "Fireclaw the Fox"
4 | __license__ = """
5 | Simplified BSD (BSD 2-Clause) License.
6 | See License.txt or http://opensource.org/licenses/BSD-2-Clause for more info
7 | """
8 |
9 | import os
10 | import logging
11 | from panda3d.core import ConfigVariableBool
12 | from direct.gui import DirectGuiGlobals as DGG
13 | from direct.gui.DirectFrame import DirectFrame
14 | from direct.gui.DirectDialog import YesNoDialog
15 | from panda3d.core import LVecBase2f, LVecBase3f, LVecBase4f, LPoint2f, LPoint3f, LPoint4f, LVector3f
16 | from panda3d.core import LVecBase2, LVecBase3, LVecBase4, LPoint2, LPoint3, LPoint4
17 | from panda3d.core import LPlane
18 | from panda3d.core import NodePath
19 | from panda3d.core import Camera, OrthographicLens, PerspectiveLens
20 |
21 | from DirectFolderBrowser.DirectFolderBrowser import DirectFolderBrowser
22 |
23 | class ExporterBam:
24 | def __init__(self, save_path, save_file, scene_root, scene_objects, tooltip):
25 | # create a new NP which will be written out to the bam file
26 | self.export_scene_np = NodePath("export_root")
27 |
28 | # copy the existing scene to our new NP
29 | scene_root.copy_to(self.export_scene_np)
30 |
31 | # clean up the copied scene from parts it shouldn't export
32 | self.cleanup_np(self.export_scene_np)
33 |
34 | self.browser = DirectFolderBrowser(
35 | self.save,
36 | True,
37 | save_path,
38 | save_file,
39 | [".bam"],
40 | tooltip)
41 | self.browser.show()
42 |
43 | def cleanup_np(self, root_np):
44 | if root_np.get_tag("object_type") == "empty":
45 | # replace the visible axis with an empty NodePath
46 | name = root_np.get_name()
47 | pos = root_np.get_pos()
48 | hpr = root_np.get_hpr()
49 | parent = root_np.get_parent()
50 |
51 | empty = NodePath(name)
52 | empty.set_pos(pos)
53 | empty.set_hpr(hpr)
54 | empty.reparent_to(parent)
55 |
56 | for child in list(root_np.get_children())[1:]:
57 | child.reparent_to(empty)
58 |
59 | root_np.remove_node()
60 | root_np = empty
61 |
62 | elif root_np.get_tag("object_type") == "collision":
63 | root_np.hide()
64 |
65 | elif root_np.get_tag("object_type") == "light":
66 | # remove the light representation model
67 | root_np.get_children()[0].remove_node()
68 |
69 | elif root_np.get_tag("object_type") == "camera":
70 | # create a camera and remove the dummy camera in the scene
71 | lens = None
72 | if root_np.get_tag("camera_type") == "PerspectiveLens":
73 | lens = PerspectiveLens()
74 | else:
75 | lens = OrthographicLens()
76 | cam = Camera(root_np.get_name(), lens)
77 | cam_np = root_np.get_parent().attach_new_node(cam)
78 | root_np.remove_node()
79 | root_np = cam_np
80 |
81 | for child in root_np.get_children():
82 | self.cleanup_np(child)
83 |
84 | def save(self, doSave):
85 | if doSave:
86 | self.dlgOverwrite = None
87 | self.dlgOverwriteShadow = None
88 | path = self.browser.get()
89 | path = os.path.expanduser(path)
90 | path = os.path.expandvars(path)
91 | if os.path.exists(path):
92 | self.dlgOverwrite = YesNoDialog(
93 | text="File already Exist.\nOverwrite?",
94 | relief=DGG.RIDGE,
95 | frameColor=(1,1,1,1),
96 | frameSize=(-0.5,0.5,-0.3,0.2),
97 | sortOrder=1,
98 | button_relief=DGG.FLAT,
99 | button_frameColor=(0.8, 0.8, 0.8, 1),
100 | command=self.__executeSave,
101 | extraArgs=[path],
102 | scale=300,
103 | pos=(base.getSize()[0]/2, 0, -base.getSize()[1]/2),
104 | parent=base.pixel2d)
105 | self.dlgOverwriteShadow = DirectFrame(
106 | pos=(base.getSize()[0]/2 + 10, 0, -base.getSize()[1]/2 - 10),
107 | sortOrder=0,
108 | frameColor=(0,0,0,0.5),
109 | frameSize=self.dlgOverwrite.bounds,
110 | scale=300,
111 | parent=base.pixel2d)
112 | else:
113 | self.__executeSave(True, path)
114 | base.messenger.send("setLastPath", [path])
115 | self.browser.destroy()
116 | del self.browser
117 |
118 | def __executeSave(self, overwrite, path):
119 | if self.dlgOverwrite is not None: self.dlgOverwrite.destroy()
120 | if self.dlgOverwriteShadow is not None: self.dlgOverwriteShadow.destroy()
121 | if not overwrite: return
122 | self.export_scene_np.writeBamFile(path)
123 |
--------------------------------------------------------------------------------
/SceneEditor/export/ExportProject.py:
--------------------------------------------------------------------------------
1 | #!/usr/bin/python
2 | # -*- coding: utf-8 -*-
3 | __author__ = "Fireclaw the Fox"
4 | __license__ = """
5 | Simplified BSD (BSD 2-Clause) License.
6 | See License.txt or http://opensource.org/licenses/BSD-2-Clause for more info
7 | """
8 |
9 | import os
10 | import json
11 | import logging
12 | import tempfile
13 |
14 | from direct.gui import DirectGuiGlobals as DGG
15 | from direct.gui.DirectFrame import DirectFrame
16 | from direct.gui.DirectDialog import YesNoDialog
17 |
18 | from SceneEditor.tools.JSONTools import JSONTools
19 |
20 | from DirectFolderBrowser.DirectFolderBrowser import DirectFolderBrowser
21 |
22 | class ExporterProject:
23 | def __init__(self, save_path, save_file, scene_root, scene_objects, exceptionSave=False, autosave=False, tooltip=None):
24 | self.objects = scene_objects
25 | self.scene_root = scene_root
26 | self.isAutosave = False
27 |
28 | if exceptionSave:
29 | self.excSave()
30 | return
31 |
32 | if autosave:
33 | self.isAutosave = True
34 | self.autoSave(os.path.join(save_path, save_file))
35 | return
36 |
37 |
38 | self.browser = DirectFolderBrowser(
39 | self.save,
40 | True,
41 | save_path,
42 | save_file,
43 | tooltip=tooltip)
44 | self.browser.show()
45 |
46 | def excSave(self):
47 | self.dlgOverwrite = None
48 | self.dlgOverwriteShadow = None
49 |
50 | tmpPath = os.path.join(tempfile.gettempdir(), "SEExceptionSave.scene")
51 | self.__executeSave(True, tmpPath)
52 | logging.info("Wrote crash session file to {}".format(tmpPath))
53 |
54 | def autoSave(self, fileName=""):
55 | self.dlgOverwrite = None
56 | self.dlgOverwriteShadow = None
57 | if fileName == "":
58 | fileName = os.path.join(tempfile.gettempdir(), "SEAutosave.scene")
59 | self.__executeSave(True, fileName)
60 | logging.info("Wrote autosave file to {}".format(fileName))
61 |
62 | def save(self, doSave):
63 | if doSave:
64 | self.dlgOverwrite = None
65 | self.dlgOverwriteShadow = None
66 | path = self.browser.get()
67 | path = os.path.expanduser(path)
68 | path = os.path.expandvars(path)
69 | if os.path.exists(path):
70 | self.dlgOverwrite = YesNoDialog(
71 | text="File already Exist.\nOverwrite?",
72 | relief=DGG.RIDGE,
73 | frameColor=(1,1,1,1),
74 | frameSize=(-0.5,0.5,-0.3,0.2),
75 | sortOrder=1,
76 | button_relief=DGG.FLAT,
77 | button_frameColor=(0.8, 0.8, 0.8, 1),
78 | command=self.__executeSave,
79 | extraArgs=[path],
80 | scale=300,
81 | pos=(base.getSize()[0]/2, 0, -base.getSize()[1]/2),
82 | parent=base.pixel2d)
83 | self.dlgOverwriteShadow = DirectFrame(
84 | pos=(base.getSize()[0]/2 + 10, 0, -base.getSize()[1]/2 - 10),
85 | sortOrder=0,
86 | frameColor=(0,0,0,0.5),
87 | frameSize=self.dlgOverwrite.bounds,
88 | scale=300,
89 | parent=base.pixel2d)
90 | else:
91 | self.__executeSave(True, path)
92 | base.messenger.send("setLastPath", [path])
93 | self.browser.destroy()
94 | del self.browser
95 |
96 | def __executeSave(self, overwrite, path):
97 | if self.dlgOverwrite is not None: self.dlgOverwrite.destroy()
98 | if self.dlgOverwriteShadow is not None: self.dlgOverwriteShadow.destroy()
99 | if not overwrite: return
100 |
101 | jsonTools = JSONTools()
102 | jsonElements = jsonTools.getProjectJSON(self.objects, self.scene_root)
103 | with open(path, 'w') as outfile:
104 | json.dump(jsonElements, outfile, indent=2)
105 |
106 | if not self.isAutosave:
107 | base.messenger.send("clearDirtyFlag")
108 |
109 |
--------------------------------------------------------------------------------
/SceneEditor/export/__init__.py:
--------------------------------------------------------------------------------
https://raw.githubusercontent.com/fireclawthefox/SceneEditor/f02ac2539f6cdb11af0fb2fb7e5204feca1b1eee/SceneEditor/export/__init__.py
--------------------------------------------------------------------------------
/SceneEditor/icons/ArrowDownSmall.png:
--------------------------------------------------------------------------------
https://raw.githubusercontent.com/fireclawthefox/SceneEditor/f02ac2539f6cdb11af0fb2fb7e5204feca1b1eee/SceneEditor/icons/ArrowDownSmall.png
--------------------------------------------------------------------------------
/SceneEditor/icons/ArrowUpSmall.png:
--------------------------------------------------------------------------------
https://raw.githubusercontent.com/fireclawthefox/SceneEditor/f02ac2539f6cdb11af0fb2fb7e5204feca1b1eee/SceneEditor/icons/ArrowUpSmall.png
--------------------------------------------------------------------------------
/SceneEditor/icons/Collapse.png:
--------------------------------------------------------------------------------
https://raw.githubusercontent.com/fireclawthefox/SceneEditor/f02ac2539f6cdb11af0fb2fb7e5204feca1b1eee/SceneEditor/icons/Collapse.png
--------------------------------------------------------------------------------
/SceneEditor/icons/Collapse.svg:
--------------------------------------------------------------------------------
1 |
2 |
3 |
4 |
116 |
--------------------------------------------------------------------------------
/SceneEditor/icons/Collapsed.png:
--------------------------------------------------------------------------------
https://raw.githubusercontent.com/fireclawthefox/SceneEditor/f02ac2539f6cdb11af0fb2fb7e5204feca1b1eee/SceneEditor/icons/Collapsed.png
--------------------------------------------------------------------------------
/SceneEditor/icons/CycleRedo.png:
--------------------------------------------------------------------------------
https://raw.githubusercontent.com/fireclawthefox/SceneEditor/f02ac2539f6cdb11af0fb2fb7e5204feca1b1eee/SceneEditor/icons/CycleRedo.png
--------------------------------------------------------------------------------
/SceneEditor/icons/Delete.png:
--------------------------------------------------------------------------------
https://raw.githubusercontent.com/fireclawthefox/SceneEditor/f02ac2539f6cdb11af0fb2fb7e5204feca1b1eee/SceneEditor/icons/Delete.png
--------------------------------------------------------------------------------
/SceneEditor/icons/Delete.svg:
--------------------------------------------------------------------------------
1 |
2 |
3 |
4 |
185 |
--------------------------------------------------------------------------------
/SceneEditor/icons/DeleteSmall.png:
--------------------------------------------------------------------------------
https://raw.githubusercontent.com/fireclawthefox/SceneEditor/f02ac2539f6cdb11af0fb2fb7e5204feca1b1eee/SceneEditor/icons/DeleteSmall.png
--------------------------------------------------------------------------------
/SceneEditor/icons/DeleteSmall.svg:
--------------------------------------------------------------------------------
1 |
2 |
3 |
4 |
77 |
--------------------------------------------------------------------------------
/SceneEditor/icons/Export.png:
--------------------------------------------------------------------------------
https://raw.githubusercontent.com/fireclawthefox/SceneEditor/f02ac2539f6cdb11af0fb2fb7e5204feca1b1eee/SceneEditor/icons/Export.png
--------------------------------------------------------------------------------
/SceneEditor/icons/GridOff.png:
--------------------------------------------------------------------------------
https://raw.githubusercontent.com/fireclawthefox/SceneEditor/f02ac2539f6cdb11af0fb2fb7e5204feca1b1eee/SceneEditor/icons/GridOff.png
--------------------------------------------------------------------------------
/SceneEditor/icons/GridOn.png:
--------------------------------------------------------------------------------
https://raw.githubusercontent.com/fireclawthefox/SceneEditor/f02ac2539f6cdb11af0fb2fb7e5204feca1b1eee/SceneEditor/icons/GridOn.png
--------------------------------------------------------------------------------
/SceneEditor/icons/GridOnOff.svg:
--------------------------------------------------------------------------------
1 |
2 |
3 |
4 |
203 |
--------------------------------------------------------------------------------
/SceneEditor/icons/Help.png:
--------------------------------------------------------------------------------
https://raw.githubusercontent.com/fireclawthefox/SceneEditor/f02ac2539f6cdb11af0fb2fb7e5204feca1b1eee/SceneEditor/icons/Help.png
--------------------------------------------------------------------------------
/SceneEditor/icons/Help.svg:
--------------------------------------------------------------------------------
1 |
2 |
3 |
4 |
117 |
--------------------------------------------------------------------------------
/SceneEditor/icons/Load.png:
--------------------------------------------------------------------------------
https://raw.githubusercontent.com/fireclawthefox/SceneEditor/f02ac2539f6cdb11af0fb2fb7e5204feca1b1eee/SceneEditor/icons/Load.png
--------------------------------------------------------------------------------
/SceneEditor/icons/Load.svg:
--------------------------------------------------------------------------------
1 |
2 |
3 |
4 |
221 |
--------------------------------------------------------------------------------
/SceneEditor/icons/New.png:
--------------------------------------------------------------------------------
https://raw.githubusercontent.com/fireclawthefox/SceneEditor/f02ac2539f6cdb11af0fb2fb7e5204feca1b1eee/SceneEditor/icons/New.png
--------------------------------------------------------------------------------
/SceneEditor/icons/New.svg:
--------------------------------------------------------------------------------
1 |
2 |
3 |
4 |
194 |
--------------------------------------------------------------------------------
/SceneEditor/icons/Quit.png:
--------------------------------------------------------------------------------
https://raw.githubusercontent.com/fireclawthefox/SceneEditor/f02ac2539f6cdb11af0fb2fb7e5204feca1b1eee/SceneEditor/icons/Quit.png
--------------------------------------------------------------------------------
/SceneEditor/icons/Quit.svg:
--------------------------------------------------------------------------------
1 |
2 |
3 |
4 |
80 |
--------------------------------------------------------------------------------
/SceneEditor/icons/Redo.png:
--------------------------------------------------------------------------------
https://raw.githubusercontent.com/fireclawthefox/SceneEditor/f02ac2539f6cdb11af0fb2fb7e5204feca1b1eee/SceneEditor/icons/Redo.png
--------------------------------------------------------------------------------
/SceneEditor/icons/Redo.svg:
--------------------------------------------------------------------------------
1 |
2 |
191 |
--------------------------------------------------------------------------------
/SceneEditor/icons/Reload.png:
--------------------------------------------------------------------------------
https://raw.githubusercontent.com/fireclawthefox/SceneEditor/f02ac2539f6cdb11af0fb2fb7e5204feca1b1eee/SceneEditor/icons/Reload.png
--------------------------------------------------------------------------------
/SceneEditor/icons/Reload.svg:
--------------------------------------------------------------------------------
1 |
2 |
3 |
4 |
214 |
--------------------------------------------------------------------------------
/SceneEditor/icons/Save.png:
--------------------------------------------------------------------------------
https://raw.githubusercontent.com/fireclawthefox/SceneEditor/f02ac2539f6cdb11af0fb2fb7e5204feca1b1eee/SceneEditor/icons/Save.png
--------------------------------------------------------------------------------
/SceneEditor/icons/Save.svg:
--------------------------------------------------------------------------------
1 |
2 |
3 |
4 |
215 |
--------------------------------------------------------------------------------
/SceneEditor/icons/Settings.png:
--------------------------------------------------------------------------------
https://raw.githubusercontent.com/fireclawthefox/SceneEditor/f02ac2539f6cdb11af0fb2fb7e5204feca1b1eee/SceneEditor/icons/Settings.png
--------------------------------------------------------------------------------
/SceneEditor/icons/Settings.svg:
--------------------------------------------------------------------------------
1 |
2 |
3 |
4 |
74 |
--------------------------------------------------------------------------------
/SceneEditor/icons/Undo.png:
--------------------------------------------------------------------------------
https://raw.githubusercontent.com/fireclawthefox/SceneEditor/f02ac2539f6cdb11af0fb2fb7e5204feca1b1eee/SceneEditor/icons/Undo.png
--------------------------------------------------------------------------------
/SceneEditor/icons/Undo.svg:
--------------------------------------------------------------------------------
1 |
2 |
191 |
--------------------------------------------------------------------------------
/SceneEditor/icons/VisibilityOffSmall.png:
--------------------------------------------------------------------------------
https://raw.githubusercontent.com/fireclawthefox/SceneEditor/f02ac2539f6cdb11af0fb2fb7e5204feca1b1eee/SceneEditor/icons/VisibilityOffSmall.png
--------------------------------------------------------------------------------
/SceneEditor/icons/VisibilityOnSmall.png:
--------------------------------------------------------------------------------
https://raw.githubusercontent.com/fireclawthefox/SceneEditor/f02ac2539f6cdb11af0fb2fb7e5204feca1b1eee/SceneEditor/icons/VisibilityOnSmall.png
--------------------------------------------------------------------------------
/SceneEditor/icons/VisibilitySmall.svg:
--------------------------------------------------------------------------------
1 |
2 |
3 |
4 |
105 |
--------------------------------------------------------------------------------
/SceneEditor/icons/arrowSmall.svg:
--------------------------------------------------------------------------------
1 |
2 |
3 |
4 |
101 |
--------------------------------------------------------------------------------
/SceneEditor/icons/arrowUpSmall.svg:
--------------------------------------------------------------------------------
1 |
2 |
3 |
4 |
102 |
--------------------------------------------------------------------------------
/SceneEditor/loader/LoadProject.py:
--------------------------------------------------------------------------------
1 | #!/usr/bin/python
2 | # -*- coding: utf-8 -*-
3 | __author__ = "Fireclaw the Fox"
4 | __license__ = """
5 | Simplified BSD (BSD 2-Clause) License.
6 | See License.txt or http://opensource.org/licenses/BSD-2-Clause for more info
7 | """
8 |
9 | import os
10 | import json
11 | import logging
12 | import tempfile
13 |
14 | from direct.showbase.DirectObject import DirectObject
15 | from direct.gui import DirectGuiGlobals as DGG
16 |
17 | from panda3d.core import TextNode
18 | from panda3d.core import LVecBase2f, LVecBase3f, LVecBase4f, LPoint2f, LPoint3f, LPoint4f, LVector3f
19 | from panda3d.core import LVecBase2i
20 | from panda3d.core import LVecBase2, LVecBase3, LVecBase4, LPoint2, LPoint3, LPoint4
21 | from panda3d.core import LVector2f
22 | from panda3d.core import LPlane, LPlanef
23 |
24 | from DirectFolderBrowser.DirectFolderBrowser import DirectFolderBrowser
25 |
26 | from SceneEditor.GUI.panels.ObjectPropertiesDefinition import DEFINITIONS, PropertyEditTypes
27 | from SceneEditor.GUI.panels.PropertiesPanel import PropertyHelper
28 |
29 |
30 | class ProjectLoader(DirectObject):
31 | def __init__(self, load_path, load_file, core, exceptionLoading=False, tooltip=None, newProjectCall=None, directLoading=False):
32 | self.newProjectCall = newProjectCall
33 | self.hasErrors = False
34 | self.core = core
35 | self.objects = []
36 | if directLoading:
37 | if not self.newProjectCall():
38 | return
39 | self.__executeLoad(os.path.join(load_path, load_file))
40 | elif exceptionLoading:
41 | self.excLoad()
42 | else:
43 | self.browser = DirectFolderBrowser(
44 | self.load,
45 | True,
46 | load_path,
47 | load_file,
48 | tooltip=tooltip)
49 | self.browser.show()
50 |
51 | def excLoad(self):
52 | tmpPath = os.path.join(tempfile.gettempdir(), "SEExceptionSave.scene")
53 | self.__executeLoad(tmpPath)
54 |
55 | def get(self):
56 | return self.objects
57 |
58 | def load(self, doLoad):
59 | if doLoad:
60 | path = self.browser.get()
61 | path = os.path.expanduser(path)
62 | path = os.path.expandvars(path)
63 |
64 | if not os.path.exists(path):
65 | base.messenger.send("showWarning", ["File \"{}\" does not exist.".format(path)])
66 | return
67 |
68 | if self.newProjectCall():
69 | self.__executeLoad(path)
70 | else:
71 | self.accept("clearDirtyFlag", self.__executeLoad, [path])
72 |
73 | self.browser.destroy()
74 | del self.browser
75 |
76 | def __executeLoad(self, path):
77 | fileContent = None
78 | with open(path, 'r') as infile:
79 | try:
80 | fileContent = json.load(infile)
81 | except Exception as e:
82 | logging.error("Couldn't load project file {}".format(infile))
83 | logging.exception(e)
84 | base.messenger.send("showWarning", ["Error while loading Project!\nPlease check output logs for more information."])
85 | return
86 | if fileContent is None:
87 | logging.error("Problems reading Project file: {}".format(infile))
88 | return
89 |
90 | if fileContent["ProjectVersion"] != "0":
91 | logging.warning("Unsupported Project Version")
92 | base.messenger.send("showWarning", ["Unsupported Project Version"])
93 | return
94 |
95 | for name, info in fileContent["Scene"].items():
96 | self.__createElement(name.split("|")[1], info)
97 |
98 | if self.hasErrors:
99 | base.messenger.send("showWarning", ["Errors occured while loading the project!\nProject may not be fully loaded\nSee output log for more information."])
100 | return
101 |
102 | base.messenger.send("setLastPath", [path])
103 | base.messenger.send("update_structure")
104 |
105 | def __createElement(self, name, info):
106 | object_type = info["object_type"]
107 |
108 | definitions = {}
109 |
110 | if object_type == "model":
111 | # create the element
112 | model = self.core.load_model(info["filepath"])
113 | if "transparency" in info:
114 | model.set_transparency(eval(info["transparency"]))
115 | definitions = DEFINITIONS[object_type]
116 | elif object_type == "empty":
117 | # create the element
118 | model = self.core.add_empty()
119 | definitions = DEFINITIONS[object_type]
120 | elif object_type == "collision":
121 | # create the element
122 | model = self.core.add_collision_solid(
123 | info["collision_solid_type"],
124 | eval(info["collision_solid_info"]))
125 | definitions = DEFINITIONS[info["collision_solid_type"]]
126 | elif object_type == "physics":
127 | model = self.core.add_physics_node()
128 | definitions = DEFINITIONS[object_type]
129 | elif object_type == "light":
130 | # create the element
131 | model = self.core.add_light(
132 | info["light_type"],
133 | {})
134 | definitions = DEFINITIONS[info["light_type"]]
135 | elif object_type == "camera":
136 | # create the element
137 | model = self.core.add_camera(
138 | info["camera_type"],
139 | {})
140 | definitions = DEFINITIONS[info["camera_type"]]
141 | self.set_nodepath_values(model, name, info, definitions)
142 |
143 | def set_nodepath_values(self, model, name, info, definitions):
144 | model.set_name(name)
145 |
146 | edit_list = []
147 | for definition in definitions:
148 | if definition.internalName not in info:
149 | continue
150 |
151 | edit_list.append(definition.internalName)
152 |
153 | if definition.editType != PropertyEditTypes.text:
154 | #TODO: We probably shouldn't use eval here
155 | value = eval(info[definition.internalName])
156 | PropertyHelper.setValue(definition, model, value)
157 | else:
158 | value = info[definition.internalName]
159 | PropertyHelper.setValue(definition, model, value)
160 |
161 | model.set_tag("edited_properties", ",".join(edit_list))
162 |
163 | parent_name = info["parent"]
164 | if parent_name != "scene_model_parent":
165 | parents = self.core.scene_objects[:]
166 | for obj in reversed(parents):
167 | if obj.get_name() == parent_name:
168 | model.reparent_to(obj)
169 | break
170 |
171 |
--------------------------------------------------------------------------------
/SceneEditor/loader/__init__.py:
--------------------------------------------------------------------------------
https://raw.githubusercontent.com/fireclawthefox/SceneEditor/f02ac2539f6cdb11af0fb2fb7e5204feca1b1eee/SceneEditor/loader/__init__.py
--------------------------------------------------------------------------------
/SceneEditor/tools/JSONTools.py:
--------------------------------------------------------------------------------
1 | #!/usr/bin/python
2 | # -*- coding: utf-8 -*-
3 | __author__ = "Fireclaw the Fox"
4 | __license__ = """
5 | Simplified BSD (BSD 2-Clause) License.
6 | See License.txt or http://opensource.org/licenses/BSD-2-Clause for more info
7 | """
8 |
9 | import logging
10 |
11 | from direct.gui import DirectGuiGlobals as DGG
12 | from panda3d.core import NodePath
13 |
14 | from SceneEditor.GUI.panels.ObjectPropertiesDefinition import DEFINITIONS
15 | from SceneEditor.GUI.panels.PropertiesPanel import PropertyHelper
16 |
17 | class JSONTools:
18 | def getProjectJSON(self, scene_objects, scene_root):
19 | self.scene_objects = scene_objects
20 | self.jsonElements = {}
21 | self.jsonElements["ProjectVersion"] = "0"
22 | self.jsonElements["Scene"] = {}
23 |
24 | self.writeScene(scene_root)
25 |
26 | return self.jsonElements
27 |
28 | def writeScene(self, root):
29 | index = 0
30 | for child in root.get_children():
31 | if child in self.scene_objects:
32 | if not child.is_stashed():
33 | index += 1
34 | self.jsonElements["Scene"][f"{index}|{child.get_name()}"] = self.__createJSONEntry(child)
35 | if child.getNumChildren() > 0:
36 | self.writeScene(child)
37 |
38 | def __createJSONEntry(self, scene_object):
39 | object_type = scene_object.get_tag("object_type")
40 |
41 | object_dict = {
42 | "object_type":object_type,
43 | "parent":scene_object.parent.get_name()
44 | }
45 |
46 | definition_object_type = object_type
47 | if object_type == "light":
48 | #
49 | # LIGHT
50 | #
51 | definition_object_type = scene_object.get_tag("light_type")
52 |
53 | # additional specific properties not given in the definition
54 | object_dict["light_type"] = scene_object.get_tag("light_type")
55 |
56 | elif object_type == "collision":
57 | #
58 | # COLLISION
59 | #
60 | definition_object_type = scene_object.get_tag("collision_solid_type")
61 |
62 | # additional specific properties not given in the definition
63 | object_dict["collision_solid_type"] = scene_object.get_tag("collision_solid_type")
64 | object_dict["collision_solid_info"] = scene_object.get_tag("collision_solid_info")
65 |
66 | elif object_type == "camera":
67 | #
68 | # CAMERA
69 | #
70 | definition_object_type = scene_object.get_tag("camera_type")
71 |
72 | # additional specific properties not given in the definition
73 | object_dict["camera_type"] = scene_object.get_tag("camera_type")
74 |
75 | # get edited property names
76 | edit_list = []
77 | if scene_object.has_tag("edited_properties"):
78 | edit_list = scene_object.get_tag("edited_properties").split(",")
79 |
80 | # add all edited properties
81 | for definition in DEFINITIONS[definition_object_type]:
82 | if definition.internalName in edit_list:
83 | if definition.internalName == "":
84 | continue
85 | object_dict[definition.internalName] = str(PropertyHelper.getValues(definition, scene_object))
86 |
87 | return object_dict
88 |
--------------------------------------------------------------------------------
/SceneEditor/tools/__init__.py:
--------------------------------------------------------------------------------
https://raw.githubusercontent.com/fireclawthefox/SceneEditor/f02ac2539f6cdb11af0fb2fb7e5204feca1b1eee/SceneEditor/tools/__init__.py
--------------------------------------------------------------------------------
/Screenshots/SceneEditor.png:
--------------------------------------------------------------------------------
https://raw.githubusercontent.com/fireclawthefox/SceneEditor/f02ac2539f6cdb11af0fb2fb7e5204feca1b1eee/Screenshots/SceneEditor.png
--------------------------------------------------------------------------------
/build.sh:
--------------------------------------------------------------------------------
1 | python3 setup.py build
2 | python3 setup.py install --user
3 |
--------------------------------------------------------------------------------
/design/ShaderInput.json:
--------------------------------------------------------------------------------
1 | {
2 | "ProjectVersion": "0.2a",
3 | "EditorConfig": {
4 | "usePixel2D": true,
5 | "canvasSize": "(0, 1920, -1080, 0)"
6 | },
7 | "ComponentList": {
8 | "frm_content": {
9 | "element": {
10 | "borderWidth": "(2, 2)",
11 | "frameSize": "(0.0, 426.0, -24.0, 0.0)",
12 | "frameColor": "(1, 1, 1, 1)",
13 | "pos": "LPoint3f(0, 0, 0)",
14 | "transparency": "0"
15 | },
16 | "type": "DirectFrame",
17 | "parent": "root",
18 | "command": null,
19 | "extraArgs": null,
20 | "extraOptions": {}
21 | },
22 | "txt_input_name": {
23 | "element": {
24 | "borderWidth": "(0.08333333333333333, 0.08333333333333333)",
25 | "pos": "LPoint3f(7.5, 0, -16.5)",
26 | "scale": "LVecBase3f(12, 12, 12)",
27 | "transparency": "0",
28 | "text": "['']",
29 | "width": "7.0",
30 | "initialText": "'Input name'",
31 | "overflow": "1",
32 | "text0_scale": "(1, 1)"
33 | },
34 | "type": "DirectEntry",
35 | "parent": "frm_content",
36 | "command": null,
37 | "extraArgs": null,
38 | "extraOptions": {
39 | "initialText": "Input name"
40 | }
41 | },
42 | "frm_texture": {
43 | "element": {
44 | "relief": "3",
45 | "borderWidth": "(1.0, 1.0)",
46 | "frameSize": "(0.0, 300.0, -24.0, 0.0)",
47 | "frameColor": "(1.0, 1.0, 1.0, 1.0)",
48 | "pos": "LPoint3f(99.5, 0, 0)",
49 | "transparency": "0"
50 | },
51 | "type": "DirectFrame",
52 | "parent": "frm_content",
53 | "command": null,
54 | "extraArgs": null,
55 | "extraOptions": {}
56 | },
57 | "txt_texture_path": {
58 | "element": {
59 | "borderWidth": "(0.08333333333333333, 0.08333333333333333)",
60 | "pos": "LPoint3f(5.5, 0, -16.5)",
61 | "scale": "LVecBase3f(12, 12, 12)",
62 | "transparency": "0",
63 | "width": "19.5",
64 | "overflow": "1"
65 | },
66 | "type": "DirectEntry",
67 | "parent": "frm_texture",
68 | "command": null,
69 | "extraArgs": null,
70 | "extraOptions": {}
71 | },
72 | "btn_browse": {
73 | "element": {
74 | "relief": "1",
75 | "borderWidth": "(2, 2)",
76 | "pad": "(5.0, 5.0)",
77 | "pos": "LPoint3f(268.5, 0, -16)",
78 | "transparency": "0",
79 | "text": "['browse']",
80 | "text0_scale": "(12.0, 12.0)",
81 | "text1_scale": "(12.0, 12.0)",
82 | "text2_scale": "(12.0, 12.0)",
83 | "text3_scale": "(12.0, 12.0)"
84 | },
85 | "type": "DirectButton",
86 | "parent": "frm_texture",
87 | "command": null,
88 | "extraArgs": null,
89 | "extraOptions": {
90 | "pressEffect": 1
91 | }
92 | },
93 | "btn_remove": {
94 | "element": {
95 | "relief": "1",
96 | "borderWidth": "(2, 2)",
97 | "pad": "(3.0, 1.0)",
98 | "pos": "LPoint3f(411, 0, -19.5)",
99 | "transparency": "0",
100 | "text": "['X']",
101 | "text0_scale": "(24, 24)",
102 | "text1_scale": "(24, 24)",
103 | "text2_scale": "(24, 24)",
104 | "text3_scale": "(24, 24)"
105 | },
106 | "type": "DirectButton",
107 | "parent": "frm_content",
108 | "command": null,
109 | "extraArgs": null,
110 | "extraOptions": {
111 | "pressEffect": 1
112 | }
113 | },
114 | "frm_nodepath": {
115 | "element": {
116 | "relief": "3",
117 | "borderWidth": "(1.0, 1.0)",
118 | "frameSize": "(0.0, 300.0, -24.0, 0.0)",
119 | "frameColor": "(1.0, 1.0, 1.0, 1.0)",
120 | "pos": "LPoint3f(99.5, 0, 0)",
121 | "transparency": "0"
122 | },
123 | "type": "DirectFrame",
124 | "parent": "frm_content",
125 | "command": null,
126 | "extraArgs": null,
127 | "extraOptions": {}
128 | },
129 | "cmb_nodepaths": {
130 | "element": {
131 | "relief": "1",
132 | "borderWidth": "(0.2, 0.2)",
133 | "pad": "(0.2, 0.2)",
134 | "pos": "LPoint3f(5, 0, -15.5)",
135 | "hpr": "LVecBase3f(0, 0, 0)",
136 | "scale": "LVecBase3f(12, 12, 12)",
137 | "transparency": "0",
138 | "popupMarker_pos": "None",
139 | "text_align": "0",
140 | "cancelframe_transparency": "0",
141 | "item0_transparency": "0",
142 | "popupMarker_transparency": "0",
143 | "popupMenu_transparency": "0"
144 | },
145 | "type": "DirectOptionMenu",
146 | "parent": "frm_nodepath",
147 | "command": null,
148 | "extraArgs": null,
149 | "extraOptions": {}
150 | },
151 | "frm_vector": {
152 | "element": {
153 | "relief": "3",
154 | "borderWidth": "(1.0, 1.0)",
155 | "frameSize": "(0.0, 300.0, -24.0, 0.0)",
156 | "frameColor": "(1.0, 1.0, 1.0, 1.0)",
157 | "pos": "LPoint3f(99.5, 0, 0)",
158 | "transparency": "0"
159 | },
160 | "type": "DirectFrame",
161 | "parent": "frm_content",
162 | "command": null,
163 | "extraArgs": null,
164 | "extraOptions": {}
165 | },
166 | "txt_vec_1": {
167 | "element": {
168 | "borderWidth": "(0.08333333333333333, 0.08333333333333333)",
169 | "pos": "LPoint3f(12.5, 0, -16.5)",
170 | "scale": "LVecBase3f(12, 12, 12)",
171 | "transparency": "0",
172 | "width": "5.0",
173 | "overflow": "1"
174 | },
175 | "type": "DirectEntry",
176 | "parent": "frm_vector",
177 | "command": null,
178 | "extraArgs": null,
179 | "extraOptions": {}
180 | },
181 | "txt_vec_2": {
182 | "element": {
183 | "borderWidth": "(0.08333333333333333, 0.08333333333333333)",
184 | "pos": "LPoint3f(82.5, 0, -16.5)",
185 | "scale": "LVecBase3f(12, 12, 12)",
186 | "transparency": "0",
187 | "width": "5.0",
188 | "overflow": "1"
189 | },
190 | "type": "DirectEntry",
191 | "parent": "frm_vector",
192 | "command": null,
193 | "extraArgs": null,
194 | "extraOptions": {}
195 | },
196 | "txt_vec_3": {
197 | "element": {
198 | "borderWidth": "(0.08333333333333333, 0.08333333333333333)",
199 | "pos": "LPoint3f(152.5, 0, -16.5)",
200 | "scale": "LVecBase3f(12, 12, 12)",
201 | "transparency": "0",
202 | "width": "5.0",
203 | "overflow": "1"
204 | },
205 | "type": "DirectEntry",
206 | "parent": "frm_vector",
207 | "command": null,
208 | "extraArgs": null,
209 | "extraOptions": {}
210 | },
211 | "txt_vec_4": {
212 | "element": {
213 | "borderWidth": "(0.08333333333333333, 0.08333333333333333)",
214 | "pos": "LPoint3f(222.5, 0, -16.5)",
215 | "scale": "LVecBase3f(12, 12, 12)",
216 | "transparency": "0",
217 | "width": "5.0",
218 | "overflow": "1"
219 | },
220 | "type": "DirectEntry",
221 | "parent": "frm_vector",
222 | "command": null,
223 | "extraArgs": null,
224 | "extraOptions": {}
225 | }
226 | }
227 | }
--------------------------------------------------------------------------------
/editorLogHandler.py:
--------------------------------------------------------------------------------
1 | import sys
2 | import os
3 | import logging
4 | from datetime import datetime
5 | from logging.handlers import TimedRotatingFileHandler
6 | from logging import StreamHandler
7 |
8 |
9 | from panda3d.core import (
10 | loadPrcFileData,
11 | loadPrcFile,
12 | Filename,
13 | ConfigVariableSearchPath,
14 | )
15 |
16 | def setupLog(editor_name):
17 | # check if we have a config file
18 | home = os.path.expanduser("~")
19 | basePath = os.path.join(home, f".{editor_name}")
20 | if not os.path.exists(basePath):
21 | os.makedirs(basePath)
22 | logPath = os.path.join(basePath, "logs")
23 | if not os.path.exists(logPath):
24 | os.makedirs(logPath)
25 |
26 | # Remove log files older than 30 days
27 | for f in os.listdir(logPath):
28 | fParts = f.split(".")
29 | fDate = datetime.now()
30 | try:
31 | fDate = datetime.strptime(fParts[-1], "%Y-%m-%d_%H")
32 | delta = datetime.now() - fDate
33 | if delta.days > 30:
34 | #print(f"remove {os.path.join(logPath, f)}")
35 | os.remove(os.path.join(logPath, f))
36 | except Exception:
37 | # this file does not have a date ending
38 | pass
39 |
40 | log_file = os.path.join(logPath, f"{editor_name}.log")
41 | handler = TimedRotatingFileHandler(log_file)
42 | consoleHandler = StreamHandler()
43 | logging.basicConfig(
44 | level=logging.DEBUG,
45 | handlers=[handler])#, consoleHandler])
46 | config_file = os.path.join(basePath, f".{editor_name}.prc")
47 | if os.path.exists(config_file):
48 | loadPrcFile(Filename.fromOsSpecific(config_file))
49 |
50 | # make sure to load our custom paths
51 | paths_cfg = ConfigVariableSearchPath("custom-model-path", "").getValue()
52 | for path in paths_cfg.getDirectories():
53 | line = "model-path {}".format(str(path))
54 | loadPrcFileData("", line)
55 | else:
56 | with open(config_file, "w") as prcFile:
57 | prcFile.write("skip-ask-for-quit #f\n")
58 | prcFile.write("create-executable-scripts #f\n")
59 | prcFile.write("show-toolbar #t\n")
60 |
--------------------------------------------------------------------------------
/main.py:
--------------------------------------------------------------------------------
1 | #!/usr/bin/env python
2 | # -*- coding: utf-8 -*-
3 |
4 | from direct.showbase.ShowBase import ShowBase
5 | from panda3d.core import loadPrcFileData, WindowProperties
6 | from editorLogHandler import setupLog
7 | from SceneEditor.SceneEditor import SceneEditor
8 |
9 | loadPrcFileData(
10 | "",
11 | """
12 | sync-video #t
13 | textures-power-2 none
14 | window-title Scene Editor
15 | maximized #t
16 | win-size 1280 720
17 | """)
18 |
19 | setupLog("SceneEditor")
20 |
21 | base = ShowBase()
22 |
23 | def set_dirty_name():
24 | wp = WindowProperties()
25 | wp.setTitle("*Scene Editor")
26 | base.win.requestProperties(wp)
27 |
28 | def set_clean_name():
29 | wp = WindowProperties()
30 | wp.setTitle("Scene Editor")
31 | base.win.requestProperties(wp)
32 |
33 | base.accept("request_dirty_name", set_dirty_name)
34 | base.accept("request_clean_name", set_clean_name)
35 |
36 | SceneEditor(base.pixel2d)
37 |
38 | base.run()
39 |
--------------------------------------------------------------------------------
/requirements.txt:
--------------------------------------------------------------------------------
1 | panda3d
2 | DirectFolderBrowser
3 | DirectGuiExtension
4 |
--------------------------------------------------------------------------------
/setup.py:
--------------------------------------------------------------------------------
1 | import setuptools
2 |
3 | with open("README.md", "r") as fh:
4 | long_description = fh.read()
5 |
6 | setuptools.setup(
7 | name="SceneEditor",
8 | version="22.05",
9 | author="Fireclaw",
10 | author_email="fireclawthefox@gmail.com",
11 | description="A scene editor for the Panda3D engine",
12 | long_description=long_description,
13 | long_description_content_type="text/markdown",
14 | url="https://github.com/fireclawthefox/SceneEditor",
15 | packages=setuptools.find_packages(),
16 | include_package_data=True,
17 | classifiers=[
18 | "Programming Language :: Python :: 3",
19 | "License :: OSI Approved :: BSD License",
20 | "Operating System :: OS Independent",
21 | "Development Status :: 2 - Pre-Alpha",
22 | "Intended Audience :: Developers",
23 | "Intended Audience :: End Users/Desktop",
24 | "Topic :: Artistic Software",
25 | "Topic :: Multimedia :: Graphics",
26 | "Topic :: Multimedia :: Graphics :: Editors",
27 | ],
28 | install_requires=[
29 | 'panda3d',
30 | 'DirectFolderBrowser',
31 | 'DirectGuiExtension'
32 | ],
33 | python_requires='>=3.6',
34 | )
35 |
--------------------------------------------------------------------------------
/todo.org:
--------------------------------------------------------------------------------
1 | * DONE Base features [100%]
2 | - [X] Adding models
3 | - [X] Moving models
4 | - [X] Rotating models
5 | - [X] Scaling models
6 | - [X] Deleting models
7 | - [X] Add Empties
8 | - [X] Show model origin
9 | - [X] Edit object properties
10 | - Name
11 | - Transformation
12 | - [X] Undo/Redo (take kill cycle from DGui Editor)
13 | * TODO Edit Collision solids [80%]
14 | - [X] Add any kind of panda3d solids
15 | - [ ] Edit solid properties
16 | - collision masks
17 | - Name
18 | - [X] Save solids
19 | - Can we get solid details from the col_np.node()?
20 | - [X] Load solids
21 | - [X] Export solids
22 | * DONE Camera editing [100%]
23 | - [X] Add camera
24 | - [X] Edit camera properties
25 | - Name
26 | - Lense properties
27 | * DONE Scene lighting [100%]
28 | - [X] Add lamps
29 | - [X] Edit lamp properties
30 | - name
31 | - color
32 | - type
33 | - Optional lense properties
34 | - Optional shadow caster props
35 | * TODO GUI [50%]
36 | - [X] Scene graph browser (copy from DGui editor)
37 | - [X] Menu bar
38 | - [X] Tool bar
39 | - [ ] Help Dialog
40 | - [ ] Configuration Dialog
41 | - [ ] Asset browser
42 | * DONE Physics [100%]
43 | - [X] Can we add force fields or the like with the internal engine?
44 | We may want to make nodes physically interactive, which would require simply reparent them to an ActorNode in the end.
45 | - [X] Implementation
46 | * DONE Exporting [100%]
47 | - [X] Export all objects and settings as python class
48 | - Make sure they can be directly used and don't do too much (similar to exported GUI python script)
49 | - [X] Export as project JSON
50 | * TODO Extended features [14%]
51 | - [ ] Nicer highlighting/outlining of selected models
52 | - [ ] Texture and Material editing
53 | - [X] adding shaders to objects
54 | - [ ] Make objects placeable on other objects (taking normals) and optionally rotate to fit normals of hit objects
55 | - [ ] Add Render attributes (e.g. bilboard, compass, etc...)
56 | - [X] Make sure the 3D space is not occupied by other panels e.g. it scales and is centered between other panels
57 | - [ ] Memory viewer (how does the direct session panel does it?)
58 | - [ ] Curve and Mopath editing
59 | - [ ] Particle adding/editing
60 | - [ ] Heightmap and ground texture painting
61 | - [ ] LOD node editing
62 | - [ ] Simple onscreen text adding
63 | - [ ] Transform objects with displayed widgets
64 |
--------------------------------------------------------------------------------