├── .release-please-manifest.json
├── docs
├── images
│ ├── GEEAuth.png
│ ├── GEEInit.png
│ ├── GCS2Asset.png
│ ├── GEE_toolbox.png
│ ├── RunPyScript.png
│ ├── gcloud_shell.png
│ ├── AddComp2MapbyID.png
│ ├── AddFC2MapbyID.png
│ ├── AddFC2MapbyJSON.png
│ ├── AddIC2MapbyID.png
│ ├── AddIC2MapbyJSON.png
│ ├── AddImg2MapbyID.png
│ ├── CheckProjectID.png
│ ├── DownloadFCbyID.png
│ ├── DownloadICbyID.png
│ ├── DownloadImgbyID.png
│ ├── DownloadToolbox.png
│ ├── SaveAsset2JSON.png
│ ├── AddImg2MapbyJSON.png
│ ├── ApplyMap2ColbyID.png
│ ├── ApplyReducerbyID.png
│ ├── DownloadFCbyJSON.png
│ ├── DownloadICbyJSON.png
│ ├── DownloadImgbyJSON.png
│ ├── Upload2GCS2Asset.png
│ ├── ApplyFilter2ColbyID.png
│ ├── ApplyMap2ColbyJSON.png
│ ├── ApplyReducerbyJSON.png
│ ├── DownloadICbyID_Multi.png
│ ├── ExportImg2AssetbyObj.png
│ ├── ApplyFilter2ColbyJSON.png
│ ├── QuickStart_ImageCollection_Result.png
│ ├── QuickStart_ImageCollection_project.png
│ └── QuickStart_ImageCollection_toolbox.png
├── 08_upgrades.md
├── index.md
├── 01_quick_start.md
├── 04_authentication_tools.md
├── 02_introduction.md
├── 07_data_processing_tools.md
└── 03_installation.md
├── .gitignore
├── release-please-config.json
├── requirements.txt
├── mkdocs.yml
├── .github
├── ISSUE_TEMPLATE
│ ├── config.yaml
│ ├── feature_request.md
│ └── bug_report.md
└── workflows
│ └── release-please.yml
├── toolbox
├── GEE_Connector.DownloadImgCol2Gif.pyt.xml
├── GEE_Connector.DownloadLandsatTimelapse2Gif.pyt.xml
├── arcgee
│ ├── __init__.py
│ └── map.py
├── GEE_Connector.pyt.xml
├── GEE_Connector.SaveAsset2JSON.pyt.xml
├── GEE_Connector.GEEInit.pyt.xml
├── GEE_Connector.RunPythonScript.pyt.xml
├── GEE_Connector.AddFeatCol2MapbyObj.pyt.xml
├── GEE_Connector.GEEAuth.pyt.xml
├── GEE_Connector.ChangeProjectID.pyt.xml
├── GEE_Connector.DownloadFeatColbyObj.pyt.xml
├── GEE_Connector.ApplyMapFunctionbyID.pyt.xml
├── GEE_Connector.ApplyFilterbyObj.pyt.xml
├── GEE_Connector.ApplyMapFunctionbyObj.pyt.xml
├── GEE_Connector.ApplyFilterbyID.pyt.xml
├── GEE_Connector.DownloadImgbyObj.pyt.xml
├── GEE_Connector.DownloadImgbyID.pyt.xml
├── GEE_Connector.DownloadImgColbyObj.pyt.xml
├── GEE_Connector.AddFeatCol2MapbyID.pyt.xml
├── GEE_Connector.ApplyReducerbyObj.pyt.xml
├── GEE_Connector.ApplyReducerbyID.pyt.xml
├── GEE_Connector.DownloadFeatColbyID.pyt.xml
├── GEE_Connector.AddImg2MapbyObj.pyt.xml
├── GEE_Connector.AddImg2MapbyID.pyt.xml
├── GEE_Connector.AddImgCol2MapbyObj.pyt.xml
├── GEE_Connector.DownloadImgColbyIDMultiRegion.pyt.xml
├── GEE_Connector.GCSFile2Asset.pyt.xml
├── GEE_Connector.Upload2GCS.pyt.xml
├── GEE_Connector.ExportImg2AssetbyObj.pyt.xml
├── GEE_Connector.DownloadImgColbyID.pyt.xml
└── GEE_Connector.AddImgCol2MapbyID.pyt.xml
├── .pre-commit-config.yaml
├── .pylintrc
├── README.md
├── .git-hooks
└── pretty_xml.py
├── CONTRIBUTING.md
└── CHANGELOG.md
/.release-please-manifest.json:
--------------------------------------------------------------------------------
1 | {
2 | ".": "1.3.6"
3 | }
--------------------------------------------------------------------------------
/docs/images/GEEAuth.png:
--------------------------------------------------------------------------------
https://raw.githubusercontent.com/gee-community/arcgis-earthengine-toolbox/main/docs/images/GEEAuth.png
--------------------------------------------------------------------------------
/docs/images/GEEInit.png:
--------------------------------------------------------------------------------
https://raw.githubusercontent.com/gee-community/arcgis-earthengine-toolbox/main/docs/images/GEEInit.png
--------------------------------------------------------------------------------
/docs/images/GCS2Asset.png:
--------------------------------------------------------------------------------
https://raw.githubusercontent.com/gee-community/arcgis-earthengine-toolbox/main/docs/images/GCS2Asset.png
--------------------------------------------------------------------------------
/docs/images/GEE_toolbox.png:
--------------------------------------------------------------------------------
https://raw.githubusercontent.com/gee-community/arcgis-earthengine-toolbox/main/docs/images/GEE_toolbox.png
--------------------------------------------------------------------------------
/docs/images/RunPyScript.png:
--------------------------------------------------------------------------------
https://raw.githubusercontent.com/gee-community/arcgis-earthengine-toolbox/main/docs/images/RunPyScript.png
--------------------------------------------------------------------------------
/docs/images/gcloud_shell.png:
--------------------------------------------------------------------------------
https://raw.githubusercontent.com/gee-community/arcgis-earthengine-toolbox/main/docs/images/gcloud_shell.png
--------------------------------------------------------------------------------
/docs/images/AddComp2MapbyID.png:
--------------------------------------------------------------------------------
https://raw.githubusercontent.com/gee-community/arcgis-earthengine-toolbox/main/docs/images/AddComp2MapbyID.png
--------------------------------------------------------------------------------
/docs/images/AddFC2MapbyID.png:
--------------------------------------------------------------------------------
https://raw.githubusercontent.com/gee-community/arcgis-earthengine-toolbox/main/docs/images/AddFC2MapbyID.png
--------------------------------------------------------------------------------
/docs/images/AddFC2MapbyJSON.png:
--------------------------------------------------------------------------------
https://raw.githubusercontent.com/gee-community/arcgis-earthengine-toolbox/main/docs/images/AddFC2MapbyJSON.png
--------------------------------------------------------------------------------
/docs/images/AddIC2MapbyID.png:
--------------------------------------------------------------------------------
https://raw.githubusercontent.com/gee-community/arcgis-earthengine-toolbox/main/docs/images/AddIC2MapbyID.png
--------------------------------------------------------------------------------
/docs/images/AddIC2MapbyJSON.png:
--------------------------------------------------------------------------------
https://raw.githubusercontent.com/gee-community/arcgis-earthengine-toolbox/main/docs/images/AddIC2MapbyJSON.png
--------------------------------------------------------------------------------
/docs/images/AddImg2MapbyID.png:
--------------------------------------------------------------------------------
https://raw.githubusercontent.com/gee-community/arcgis-earthengine-toolbox/main/docs/images/AddImg2MapbyID.png
--------------------------------------------------------------------------------
/docs/images/CheckProjectID.png:
--------------------------------------------------------------------------------
https://raw.githubusercontent.com/gee-community/arcgis-earthengine-toolbox/main/docs/images/CheckProjectID.png
--------------------------------------------------------------------------------
/docs/images/DownloadFCbyID.png:
--------------------------------------------------------------------------------
https://raw.githubusercontent.com/gee-community/arcgis-earthengine-toolbox/main/docs/images/DownloadFCbyID.png
--------------------------------------------------------------------------------
/docs/images/DownloadICbyID.png:
--------------------------------------------------------------------------------
https://raw.githubusercontent.com/gee-community/arcgis-earthengine-toolbox/main/docs/images/DownloadICbyID.png
--------------------------------------------------------------------------------
/docs/images/DownloadImgbyID.png:
--------------------------------------------------------------------------------
https://raw.githubusercontent.com/gee-community/arcgis-earthengine-toolbox/main/docs/images/DownloadImgbyID.png
--------------------------------------------------------------------------------
/docs/images/DownloadToolbox.png:
--------------------------------------------------------------------------------
https://raw.githubusercontent.com/gee-community/arcgis-earthengine-toolbox/main/docs/images/DownloadToolbox.png
--------------------------------------------------------------------------------
/docs/images/SaveAsset2JSON.png:
--------------------------------------------------------------------------------
https://raw.githubusercontent.com/gee-community/arcgis-earthengine-toolbox/main/docs/images/SaveAsset2JSON.png
--------------------------------------------------------------------------------
/.gitignore:
--------------------------------------------------------------------------------
1 | __pycache__/
2 | *.py[cod]
3 | *$py.class
4 |
5 | .env
6 | .venv
7 | env/
8 | venv/
9 | ENV/
10 | env.bak/
11 | venv.bak/
--------------------------------------------------------------------------------
/docs/images/AddImg2MapbyJSON.png:
--------------------------------------------------------------------------------
https://raw.githubusercontent.com/gee-community/arcgis-earthengine-toolbox/main/docs/images/AddImg2MapbyJSON.png
--------------------------------------------------------------------------------
/docs/images/ApplyMap2ColbyID.png:
--------------------------------------------------------------------------------
https://raw.githubusercontent.com/gee-community/arcgis-earthengine-toolbox/main/docs/images/ApplyMap2ColbyID.png
--------------------------------------------------------------------------------
/docs/images/ApplyReducerbyID.png:
--------------------------------------------------------------------------------
https://raw.githubusercontent.com/gee-community/arcgis-earthengine-toolbox/main/docs/images/ApplyReducerbyID.png
--------------------------------------------------------------------------------
/docs/images/DownloadFCbyJSON.png:
--------------------------------------------------------------------------------
https://raw.githubusercontent.com/gee-community/arcgis-earthengine-toolbox/main/docs/images/DownloadFCbyJSON.png
--------------------------------------------------------------------------------
/docs/images/DownloadICbyJSON.png:
--------------------------------------------------------------------------------
https://raw.githubusercontent.com/gee-community/arcgis-earthengine-toolbox/main/docs/images/DownloadICbyJSON.png
--------------------------------------------------------------------------------
/docs/images/DownloadImgbyJSON.png:
--------------------------------------------------------------------------------
https://raw.githubusercontent.com/gee-community/arcgis-earthengine-toolbox/main/docs/images/DownloadImgbyJSON.png
--------------------------------------------------------------------------------
/docs/images/Upload2GCS2Asset.png:
--------------------------------------------------------------------------------
https://raw.githubusercontent.com/gee-community/arcgis-earthengine-toolbox/main/docs/images/Upload2GCS2Asset.png
--------------------------------------------------------------------------------
/release-please-config.json:
--------------------------------------------------------------------------------
1 | {
2 | "packages": {
3 | ".": {
4 | "release-type": "python"
5 | }
6 | }
7 | }
--------------------------------------------------------------------------------
/docs/images/ApplyFilter2ColbyID.png:
--------------------------------------------------------------------------------
https://raw.githubusercontent.com/gee-community/arcgis-earthengine-toolbox/main/docs/images/ApplyFilter2ColbyID.png
--------------------------------------------------------------------------------
/docs/images/ApplyMap2ColbyJSON.png:
--------------------------------------------------------------------------------
https://raw.githubusercontent.com/gee-community/arcgis-earthengine-toolbox/main/docs/images/ApplyMap2ColbyJSON.png
--------------------------------------------------------------------------------
/docs/images/ApplyReducerbyJSON.png:
--------------------------------------------------------------------------------
https://raw.githubusercontent.com/gee-community/arcgis-earthengine-toolbox/main/docs/images/ApplyReducerbyJSON.png
--------------------------------------------------------------------------------
/docs/images/DownloadICbyID_Multi.png:
--------------------------------------------------------------------------------
https://raw.githubusercontent.com/gee-community/arcgis-earthengine-toolbox/main/docs/images/DownloadICbyID_Multi.png
--------------------------------------------------------------------------------
/docs/images/ExportImg2AssetbyObj.png:
--------------------------------------------------------------------------------
https://raw.githubusercontent.com/gee-community/arcgis-earthengine-toolbox/main/docs/images/ExportImg2AssetbyObj.png
--------------------------------------------------------------------------------
/docs/images/ApplyFilter2ColbyJSON.png:
--------------------------------------------------------------------------------
https://raw.githubusercontent.com/gee-community/arcgis-earthengine-toolbox/main/docs/images/ApplyFilter2ColbyJSON.png
--------------------------------------------------------------------------------
/docs/images/QuickStart_ImageCollection_Result.png:
--------------------------------------------------------------------------------
https://raw.githubusercontent.com/gee-community/arcgis-earthengine-toolbox/main/docs/images/QuickStart_ImageCollection_Result.png
--------------------------------------------------------------------------------
/docs/images/QuickStart_ImageCollection_project.png:
--------------------------------------------------------------------------------
https://raw.githubusercontent.com/gee-community/arcgis-earthengine-toolbox/main/docs/images/QuickStart_ImageCollection_project.png
--------------------------------------------------------------------------------
/docs/images/QuickStart_ImageCollection_toolbox.png:
--------------------------------------------------------------------------------
https://raw.githubusercontent.com/gee-community/arcgis-earthengine-toolbox/main/docs/images/QuickStart_ImageCollection_toolbox.png
--------------------------------------------------------------------------------
/requirements.txt:
--------------------------------------------------------------------------------
1 | # ArcGIS Pro dependency (install via ArcGIS Pro)
2 | # arcpy
3 |
4 | earthengine-api
5 | matplotlib
6 | numpy
7 | requests
8 | ujson
9 | xarray
10 | rasterio
11 | google-auth
12 | google-cloud-storage
--------------------------------------------------------------------------------
/mkdocs.yml:
--------------------------------------------------------------------------------
1 | site_name: Earth Engine ArcGIS Connector Docs
2 | nav:
3 | - Overview: index.md
4 | - Installation: installation.md
5 | - User Instruction: instruction.md
6 | theme:
7 | name: material
8 | plugins:
9 | - search
--------------------------------------------------------------------------------
/.github/ISSUE_TEMPLATE/config.yaml:
--------------------------------------------------------------------------------
1 | contact_links:
2 | - name: Ask questions from the GEE community
3 | url: https://gis.stackexchange.com/questions/tagged/google-earth-engine
4 | about: To get answers from questions in the GEE commminuty, please ask and answer questions here.
--------------------------------------------------------------------------------
/toolbox/GEE_Connector.DownloadImgCol2Gif.pyt.xml:
--------------------------------------------------------------------------------
1 |
2 |
3 |
4 | 20240919
5 | 01582600
6 | 1.0
7 | TRUE
8 |
9 |
10 |
--------------------------------------------------------------------------------
/toolbox/GEE_Connector.DownloadLandsatTimelapse2Gif.pyt.xml:
--------------------------------------------------------------------------------
1 |
2 |
3 |
4 | 20250126
5 | 01300000
6 | 1.0
7 | TRUE
8 |
9 |
10 |
--------------------------------------------------------------------------------
/.github/workflows/release-please.yml:
--------------------------------------------------------------------------------
1 | name: release-please
2 | on:
3 | push:
4 | branches:
5 | - main # Use your default branch
6 |
7 | jobs:
8 | release-please:
9 | runs-on: ubuntu-latest
10 | steps:
11 | - uses: googleapis/release-please-action@v4
12 | with:
13 | token: ${{ secrets.GITHUB_TOKEN }}
14 |
15 |
16 |
--------------------------------------------------------------------------------
/.github/ISSUE_TEMPLATE/feature_request.md:
--------------------------------------------------------------------------------
1 | ---
2 | name: Feature Request
3 | about: Submit a feature request to help us improve
4 | labels: Feature Request
5 | ---
6 |
7 |
8 |
9 | ### Description
10 |
11 | Describe the feature (e.g., new functions/tutorials) you would like to propose.
12 | Tell us what can be achieved with this new feature and what's the expected outcome.
13 |
14 | ### Source code
15 |
16 | ```
17 | Paste your source code here if have sample code to share.
18 | ```
--------------------------------------------------------------------------------
/toolbox/arcgee/__init__.py:
--------------------------------------------------------------------------------
1 | # Copyright 2025 Google LLC
2 | #
3 | # Licensed under the Apache License, Version 2.0 (the "License");
4 | # you may not use this file except in compliance with the License.
5 | # You may obtain a copy of the License at
6 | #
7 | # https://www.apache.org/licenses/LICENSE-2.0
8 | #
9 | # Unless required by applicable law or agreed to in writing, software
10 | # distributed under the License is distributed on an "AS IS" BASIS,
11 | # WITHOUT WARRANTIES OR CONDITIONS OF ANY KIND, either express or implied.
12 | # See the License for the specific language governing permissions and
13 | # limitations under the License.
14 |
15 | import arcgee.map as map
16 | import arcgee.data as data
17 |
--------------------------------------------------------------------------------
/.pre-commit-config.yaml:
--------------------------------------------------------------------------------
1 | repos:
2 | - repo: local
3 | hooks:
4 | - id: pretty-xml
5 | name: Pretty print XML files
6 | entry: python .git-hooks/pretty_xml.py
7 | language: system
8 | files: \.xml$
9 |
10 | - repo: https://github.com/psf/black-pre-commit-mirror
11 | rev: 25.1.0
12 | hooks:
13 | - id: black
14 | language_version: python3.11
15 | files: \.py[t]$ # Includes .py and .pyt files
16 |
17 | - repo: https://github.com/codespell-project/codespell
18 | rev: v2.4.1
19 | hooks:
20 | - id: codespell
21 | language_version: python3.11
22 | exclude: '.*\.xml' # xml files are controlled through ArcPro metadata editor
23 |
24 |
25 |
--------------------------------------------------------------------------------
/.github/ISSUE_TEMPLATE/bug_report.md:
--------------------------------------------------------------------------------
1 | ---
2 | name: Bug Report
3 | about: Create a bug report to help us improve
4 | labels: bug
5 | ---
6 |
7 |
8 |
9 | ### Environment Information
10 |
11 | Please run the following code on your computer and share the output with us so that we can better debug your issue:
12 |
13 | * ArcGIS Pro Version
14 | * arcgis-earthengine-toolbox Version
15 | * Python Version
16 |
17 |
18 | ### Description
19 |
20 | Describe what you were trying to get done.
21 | Tell us what happened, what went wrong, and what you expected to happen.
22 |
23 | ### What I Did
24 |
25 | * Share the tool you are using.
26 | * Share the parameters input to the tool
27 | * Share error messages from tool if applicable
28 | * Share screenshots of output if applicable
29 |
--------------------------------------------------------------------------------
/.pylintrc:
--------------------------------------------------------------------------------
1 | [MASTER]
2 | ignore-patterns=test_.* # Ignore test files if needed
3 | extension-pkg-whitelist=arcpy
4 | load-plugins=pylint.extensions.docparams
5 |
6 | [MESSAGES CONTROL]
7 | # Disable warnings that conflict with ArcPy-required method names or patterns
8 | disable=
9 | invalid-name,
10 | useless-return,
11 | missing-class-docstring,
12 | missing-function-docstring,
13 | too-few-public-methods,
14 | unused-argument,
15 | fixme,
16 | too-many-lines,
17 | pointless-string-statement
18 |
19 | [FORMAT]
20 | # ArcPy methods like 'getParameterInfo' don’t follow snake_case
21 | max-line-length=100
22 |
23 | [DESIGN]
24 | max-args=10
25 | max-locals=20
26 | max-branches=15
27 | max-statements=50
28 |
29 | [REPORTS]
30 | output-format=colorized
31 | reports=no
32 |
33 | [TYPECHECK]
34 | generated-members=arcpy.*
35 |
--------------------------------------------------------------------------------
/toolbox/GEE_Connector.pyt.xml:
--------------------------------------------------------------------------------
1 |
2 |
3 |
4 | 20240718
5 | 15490700
6 | 1.0
7 | TRUE
8 | 20251211
9 | 210138
10 |
11 |
12 | c:\program files\arcgis\pro\Resources\Help\gp
13 |
14 |
15 |
16 |
17 | GEE_Connector
18 |
19 |
20 |
21 |
22 |
23 | ArcToolbox Toolbox
24 |
25 |
26 |
27 |
28 |
--------------------------------------------------------------------------------
/docs/08_upgrades.md:
--------------------------------------------------------------------------------
1 | # ArcGIS Earth Engine Toolbox (GEE Connector) User Guide: Upgrades
2 |
3 | ## Upgrade ArcGIS Pro
4 |
5 | In the future, if you upgrade your ArcGIS Pro to a newer version, for example, from `3.3` to `3.4`, you will need to set up the conda environment again. Because the existing `gee` conda environment is not compatible with the new ArcGIS Pro version. To do this, you need to:
6 |
7 | 1. Delete the existing conda environment `gee` using the following command:
8 |
9 | ```bash
10 | conda env remove --name gee
11 | ```
12 |
13 | 2. Repeat Step 1 and Step 2 of the Conda Environment Setup in the [Installation Guide](03_installation.md) to create the compatible conda environment.
14 |
15 | ## Upgrade ArcGIS Earth Engine Toolbox
16 |
17 | The newest version of the ArcGIS Earth Engine Toolbox will be released on the [ArcGIS Earth Engine Toolbox GitHub repository](https://github.com/gee-community/arcgis-earthengine-toolbox). Please check the repository for the latest version and update your toolbox accordingly.
18 |
19 | 1. For git users, you can pull the latest version from the repository:
20 |
21 | ```bash
22 | git pull
23 | ```
24 |
25 | 2. For non-git users, you can download the latest version from the repository and replace the existing version in your local toolbox folder.
26 |
--------------------------------------------------------------------------------
/README.md:
--------------------------------------------------------------------------------
1 | # arcgis-earthengine-toolbox
2 | An ArcGIS Pro toolbox for connection to Google Earth Engine
3 |
4 | **DISCLAIMER: This is an community project and is not an officially supported Google project. You are welcome to use it, but we do not guarantee stability.**
5 |
6 | A set of open source Python scripts that wrap functionality of the Python GEE API, that can be added to ArcGIS Pro desktop application as a Python toolbox. These scripts would present simple GUIs to users of ArcGIS Pro that would help them to:
7 | * Connect to GEE for data visualization and limited processing within the ArcGIS Pro application
8 | * Access data from the GEE data catalog, and GEE assets from their Google Cloud Platform projects for use in their ArcGIS projects
9 | * Upload data from ArcGIS Pro to Google Cloud Storage and GEE assets
10 | * Run Python scripts calling GEE from ArcGIS pro
11 | * Include GEE operations in model builder
12 |
13 | Dependencies to use toolbox include:
14 | * Be a user of of ArcGIS Pro 3.2 or later
15 | * Be a user of Google Earth Engine. Pricing for use of Google Earth Engine is described [here](https://cloud.google.com/earth-engine/pricing)
16 |
17 | ## Get started
18 | * If you're interested in learning how to use arcgis-earthengine-toolbox, please read our [documentation](docs/index.md).
19 | * If you're interested in contributing to the arcgis-earthengine-toolbox, please read our [contributing guide](CONTRIBUTING.md).
20 |
21 | ## Contributors
22 | This toolbox was developed in partnership with [Woolpert Digital Innovations](http://innovations.woolpert.com)
23 |
--------------------------------------------------------------------------------
/.git-hooks/pretty_xml.py:
--------------------------------------------------------------------------------
1 | #!/usr/bin/env python
2 | import os
3 | from pathlib import Path
4 | import subprocess
5 |
6 |
7 | def remove_whitespace_nodes(node):
8 | """Recursively remove unnecessary whitespace-only text nodes."""
9 | from xml.dom.minidom import Node
10 |
11 | remove_list = []
12 | for child in node.childNodes:
13 | if child.nodeType == Node.TEXT_NODE and child.data.strip() == "":
14 | remove_list.append(child)
15 | elif child.hasChildNodes():
16 | remove_whitespace_nodes(child)
17 | for node in remove_list:
18 | node.parentNode.removeChild(node)
19 |
20 |
21 | def format_xml(file_path):
22 | """Format XML file using xmllint or fallback to Python."""
23 | try:
24 | # First try with xmllint (if available)
25 | subprocess.run(
26 | ["xmllint", "--format", str(file_path), "-o", str(file_path)], check=True
27 | )
28 | print(f"[xmllint] Prettified {file_path}")
29 | except Exception:
30 | # Fallback: use minidom + fix whitespace issue
31 | import xml.dom.minidom
32 |
33 | with open(file_path, "r", encoding="utf-8") as f:
34 | content = f.read()
35 | try:
36 | dom = xml.dom.minidom.parseString(content)
37 | remove_whitespace_nodes(dom)
38 | pretty_xml = dom.toprettyxml(indent=" ")
39 | # Avoid extra blank lines
40 | pretty_xml = "\n".join(
41 | [line for line in pretty_xml.splitlines() if line.strip()]
42 | )
43 | with open(file_path, "w", encoding="utf-8") as f:
44 | f.write(pretty_xml)
45 | print(f"[python] Prettified {file_path}")
46 | except Exception as e:
47 | print(f"[error] Failed to parse {file_path}: {e}")
48 |
49 |
50 | def main():
51 | # Get list of staged files
52 | result = subprocess.run(
53 | ["git", "diff", "--cached", "--name-only", "--diff-filter=ACM"],
54 | capture_output=True,
55 | text=True,
56 | )
57 | files = result.stdout.strip().splitlines()
58 |
59 | xml_files = [f for f in files if f.lower().endswith(".xml") and os.path.isfile(f)]
60 | for file in xml_files:
61 | print(f"Prettifying {file}")
62 | format_xml(file)
63 | subprocess.run(["git", "add", file])
64 |
65 |
66 | if __name__ == "__main__":
67 | main()
68 |
--------------------------------------------------------------------------------
/toolbox/GEE_Connector.SaveAsset2JSON.pyt.xml:
--------------------------------------------------------------------------------
1 |
2 |
3 |
4 | 20241128
5 | 01064200
6 | 1.0
7 | TRUE
8 | 20241217
9 | 1333800
10 |
11 | 150000000
12 | 5000
13 |
14 | ItemDescription
15 |
16 |
17 | c:\program files\arcgis\pro\Resources\Help\gp
18 |
19 |
20 | <DIV STYLE="text-align:Left;"><DIV><P><SPAN>Input the asset tag of the Google Earth Engine dataset including Feature Collection, Image, and Image Collection. </SPAN></P></DIV></DIV>
21 |
22 |
23 | <DIV STYLE="text-align:Left;"><DIV><P><SPAN>Choose among Feature Collection, Image and Image Collection.</SPAN></P></DIV></DIV>
24 |
25 |
26 | <DIV STYLE="text-align:Left;"><DIV><P><SPAN>Save the JSON file to local drive. </SPAN></P></DIV></DIV>
27 |
28 |
29 | <DIV STYLE="text-align:Left;"><P><SPAN>This script exports a Google Earth Engine dataset from an asset tag to a serialized JSON file, allowing for quick access in the future without needing to recall the asset tag.</SPAN></P></DIV>
30 |
31 |
32 |
33 | Save Asset to Serialized JSON File
34 |
35 |
36 | management
37 |
38 |
39 |
40 |
41 |
42 | ArcToolbox Tool
43 |
44 |
45 |
46 |
47 |
48 |
49 | 20241217
50 |
51 |
--------------------------------------------------------------------------------
/docs/index.md:
--------------------------------------------------------------------------------
1 | # ArcGIS Earth Engine Connector
2 |
3 | An ArcGIS Pro Python toolbox for connection to Google Earth Engine (GEE) through the GEE Python API.
4 |
5 | ## Introduction
6 |
7 | ArcGIS Earth Engine Connector is a Python toolbox for ArcGIS that seamlessly connects the Google Earth Engine Python API with ArcGIS Pro. This integration empowers ArcGIS users to explore, download, analyze, and visualize an extensive repository of Google Earth Engine datasets directly within ArcGIS Pro, while also enabling the upload of local datasets to Google Earth Engine assets. ArcGIS Earth Engine Connector provides a powerful, no-code solution for big data analytics, combining the strengths of both platforms for an enhanced, efficient workflow.
8 |
9 | ## Getting started
10 |
11 | Please see the [Installation](03_installation.md) page to get started on set up of the environment and toolbox.
12 |
13 | ## Toolbox tools
14 |
15 | - [Authentication Tools](04_authentication_tools.md)
16 | - Authenticate Earth Engine
17 | - Check or Change Project ID
18 | - Initialize Earth Engine
19 | - [Data Exploration Tools](05_data_exploration_tools.md)
20 | - Add Feature Collection to Map by Asset ID
21 | - Add Feature Collection to Map by Serialized Object
22 | - Add Image Collection Composite to Map by Asset ID
23 | - Add Image Collection to Map by Asset ID
24 | - Add Image Collection to Map by Serialized Object
25 | - Add Image to Map by Asset ID
26 | - Add Image to Map by Serialized Object
27 | - [Data Management Tools](06_data_management_tools.md)
28 | - Convert Google Cloud Storage File(s) to Earth Engine Asset
29 | - Download Feature Collection by Asset ID
30 | - Download Feature Collection by Serialized Object
31 | - Download Image by Asset ID
32 | - Download Image by Serialized Object
33 | - Download Image Collection by Asset ID
34 | - Download Image Collection by Asset ID at Multiple Regions
35 | - Download Image Collection by Serialized Object
36 | - Export Image or Image Collection to Earth Engine Asset by Serialized Object
37 | - Save Earth Engine Asset to Serialized JSON File
38 | - Upload File(s) to Goolge Cloud Storage and Convert to Earth Engine Asset
39 | - [Data Processing Tools](07_data_processing_tools.md)
40 | - Apply Filters to Collection Dataset by Asset ID
41 | - Apply Filters to Collection Dataset by Serialized Object
42 | - Apply Map Functions to Collection Dataset by Asset ID
43 | - Apply Map Functions to Collection Dataset by Serialized Object
44 | - Apply Reducers to GEE Dataset by Asset ID
45 | - Apply Reducers to GEE Dataset by Serialized Object
46 | - Run User-Provided Python Script
47 |
48 | ## Upgrade ArcGIS Pro and ArcGIS Earth Engine Toolbox
49 |
50 | Please see the [Upgrades](08_upgrades.md) page for instructions on how to work with upgrades of ArcGIS Pro and ArcGIS Earth Engine Toolbox.
51 |
--------------------------------------------------------------------------------
/toolbox/GEE_Connector.GEEInit.pyt.xml:
--------------------------------------------------------------------------------
1 |
2 |
3 |
4 | 20241215
5 | 00174800
6 | 1.0
7 | TRUE
8 | 20250122
9 | 22561100
10 |
11 | 150000000
12 | 5000
13 |
14 | ItemDescription
15 |
16 |
17 | c:\program files\arcgis\pro\Resources\Help\gp
18 |
19 |
20 | <DIV STYLE="text-align:Left;"><DIV><DIV><P><SPAN>Automatically showing the default Project ID. Provide the Google Cloud Project ID in string format, for example, project-earth-374600</SPAN></P><P><SPAN /></P></DIV></DIV></DIV>
21 |
22 |
23 | <DIV STYLE="text-align:Left;"><DIV><DIV><P><SPAN>Workload tags are labels for monitoring specific computations within Earth Engine. The user can monitor and track tagged computations in the Metrics Explorer using the Earth Engine Cloud Project > Project > Used EECUs metric, and grouping or filtering by workload_tag. Visit this link for more information: </SPAN><A href="https://developers.google.com/earth-engine/guides/monitoring_usage" target="_blank" STYLE="text-decoration:underline;"><SPAN>https://developers.google.com/earth-engine/guides/monitoring_usage </SPAN></A></P><P><SPAN>Workload tag must be 1 - 63 characters, beginning and ending with an alphanumeric character ([a-z0-9A-Z]) with dashes (-), underscores (_), dots (.), and alpha numerics between, or an empty string to reset the default back to none.</SPAN></P></DIV></DIV></DIV>
24 |
25 |
26 | <DIV STYLE="text-align:Left;"><DIV><DIV><P><SPAN>The script initializes the use of Google Earth Engine with a project ID and workload tag. The user must assign a project ID to use Earth Engine. The user will need to run this script every time they restart the ArcGIS Pro.</SPAN></P></DIV></DIV></DIV>
27 |
28 |
29 |
30 | Initialize Earth Engine
31 |
32 |
33 | authentication
34 |
35 |
36 |
37 |
38 |
39 | ArcToolbox Tool
40 |
41 |
42 |
43 |
44 |
45 |
46 | 20250122
47 |
48 |
--------------------------------------------------------------------------------
/toolbox/GEE_Connector.RunPythonScript.pyt.xml:
--------------------------------------------------------------------------------
1 |
2 |
3 |
4 | 20241103
5 | 23111300
6 | 1.0
7 | TRUE
8 | 20250123
9 | 23334000
10 |
11 | 150000000
12 | 5000
13 |
14 | ItemDescription
15 |
16 |
17 | c:\program files\arcgis\pro\Resources\Help\gp
18 |
19 |
20 | <DIV STYLE="text-align:Left;"><DIV><P><SPAN>Select the python script to run</SPAN></P></DIV></DIV>
21 |
22 |
23 | <DIV STYLE="text-align:Left;"><DIV><DIV><P><SPAN>This script enables users to execute customized Python scripts within ArcGIS Pro. To ensure your script runs successfully, follow these tips:</SPAN></P><OL><LI><P><SPAN>Include the following line at the beginning of your script to import the Earth Engine API </SPAN></P><P><SPAN STYLE="font-weight:bold;">import ee</SPAN></P></LI><LI><P><SPAN>Unlike the ArcGIS Pro environment, the Earth Engine API must be initialized separately. Add the following line to your script, replacing QUOTA_PROJECT_ID with your project ID</SPAN></P><P><SPAN STYLE="font-weight:bold;">ee.Initialize(project</SPAN><SPAN STYLE="font-style:italic;font-weight:bold;">='QUOTA_PROJECT_ID</SPAN><SPAN STYLE="font-weight:bold;">')</SPAN></P></LI><LI><P><SPAN>Set workload tag if needed, add the following line to your script, replacing WORKLOAD_TAG with your workload tag such as "arcgis-ee-connector" </SPAN></P><P><SPAN STYLE="font-weight:bold;">ee.data.setWorkloadTag(</SPAN><SPAN STYLE="font-style:italic;font-weight:bold;">WORKLOAD_TAG</SPAN><SPAN STYLE="font-weight:bold;">)</SPAN></P></LI><LI><P><SPAN>To prevent the script window from closing immediately after execution, include this line at the end of your code:</SPAN></P><P><SPAN STYLE="font-weight:bold;">input("Press Enter to exit...")</SPAN></P><P><SPAN /></P></LI></OL></DIV></DIV></DIV>
24 |
25 |
26 |
27 | Run User-Provided Python Script
28 |
29 |
30 | processing
31 |
32 |
33 |
34 |
35 |
36 | ArcToolbox Tool
37 |
38 |
39 |
40 |
41 |
42 |
43 | 20250123
44 |
45 |
--------------------------------------------------------------------------------
/toolbox/GEE_Connector.AddFeatCol2MapbyObj.pyt.xml:
--------------------------------------------------------------------------------
1 |
2 |
3 |
4 | 20241122
5 | 13394500
6 | 1.0
7 | TRUE
8 | 20250515
9 | 0292800
10 |
11 | 150000000
12 | 5000
13 |
14 | ItemDescription
15 |
16 |
17 | c:\program files\arcgis\pro\Resources\Help\gp
18 |
19 |
20 | <DIV STYLE="text-align:Left;"><DIV><DIV><P><SPAN>The serialized Google Earth Engine object in JSON format. Browse and select the target JSON file to load. </SPAN></P></DIV></DIV></DIV>
21 |
22 |
23 | <DIV STYLE="text-align:Left;"><DIV><P><SPAN>You can specify the color the feature collection for visualization. For example, red, yellow, green, blue, etc. or CSS-style hex strings. </SPAN></P></DIV></DIV>
24 |
25 |
26 | <DIV STYLE="text-align:Left;"><DIV><DIV><P><SPAN>The user can save the serialized Google Earth Engine object (Image, Image Collection, Feature, Feature Collection, List, Geometry, etc. ) to JSON file. This is very helpful when the user filters the dataset and saves the modified dataset for future use. </SPAN><SPAN STYLE="font-weight:bold;">To avoid slow response, the feature collection size is limited to 100,000 elements. </SPAN></P><P><SPAN>This script adds the Google Earth Engine Feature Collection to ArcGIS Pro as a base map by its serialized JSON object. Please note that the dataset is added as a Tiled Map Service Layer, which is view only and cannot be edited. The user will need to download the dataset for analysis in ArcGIS Pro. To browse all datasets, please visit </SPAN><A href="https://developers.google.com/earth-engine/datasets/catalog" STYLE="text-decoration:underline;"><SPAN>https://developers.google.com/earth-engine/datasets/catalog</SPAN></A><SPAN>.</SPAN></P><P><SPAN /></P></DIV></DIV></DIV>
27 |
28 |
29 |
30 | Add Feature Collection to Map by Serialized Object
31 |
32 |
33 | exploration
34 |
35 |
36 |
37 |
38 |
39 | ArcToolbox Tool
40 |
41 |
42 |
43 |
44 |
45 |
46 | 20250515
47 |
48 |
--------------------------------------------------------------------------------
/docs/01_quick_start.md:
--------------------------------------------------------------------------------
1 |
2 |
3 | # ArcGIS Earth Engine Toolbox (GEE Connector) User Guide: Quick Start
4 |
5 | Guide to get you up and running with the ArcGIS Earth Engine Toolbox
6 |
7 | ## Installation
8 |
9 | Before using the toolbox, ensure you have the following:
10 |
11 | 1. ArcGIS Pro 3.2 or later installed on your computer with a license.
12 | 2. Google Earth Engine API enabled for your Google Cloud project.
13 | 3. Google Cloud SDK installed on your computer.
14 | 4. ArcGIS Earth Engine toolbox downloaded from this repo and added to your ArcGIS Pro project.
15 |
16 | Follow the instructions on the [installation page](03_installation.md) for a step-by-step guide.
17 |
18 | ## Authenticate Earth Engine from ArcGIS Pro
19 |
20 | Once you have completed the installation, you will need to:
21 | 1. [Authenticate Earth Engine](04_authentication_tools.md#authenticate-earth-engine) - note this is only needed once per computer.
22 | 2. [Initialize Earth Engine](04_authentication_tools.md#initialize-earth-engine)
23 | > [!IMPORTANT]
24 | > Initialize Earth Engine will need to be run each time ArcGIS Pro is started.
25 |
26 | ## Where to find Earth Engine Assets to use with this toolbox
27 | Earth Engine assets are geospatial data stored within the platform. You can access datasets in catalogs, or upload your own data and store data produced from your Earth Engine analyses as assets.
28 |
29 | * [Earth Engine Data Catalog](https://developers.google.com/earth-engine/datasets/) this is the primary source for public Earth Engine assets and is maintained by Google and contributing publishers.
30 | * [Awesome GEE Community Catalog](https://gee-community-catalog.org/) is a community sourced and maintained data catalog that lives alongside the Earth Engine Data Catalog.
31 | * Organizational or private assets - your orgainzation use Earth Engine, assests can be shared across users. Learn more about [assets](https://developers.google.com/earth-engine/guides/manage_assets)
32 |
33 | ## Visualize data from the Earth Engine Catalog
34 | The Data Exploration tools provide multiple ways Earth Engine assests into your project to to visualize. Visualization of Earth Engine assets can be helpful to add context to an analysis. Assets brought into ArcGIS Pro with these tools are **read only**.
35 |
36 | ### Add an ImageCollection() to your ArcGIS project
37 | 1. Starting at the catalog's [main page](https://developers.google.com/earth-engine/datasets) search or navigate to the asset of interest. For this example, we are using the [ERA5-Land Monthly Aggregated](https://developers.google.com/earth-engine/datasets/catalog/ECMWF_ERA5_LAND_MONTHLY_AGGR) asset.
38 |
39 | 2. Add the image collection asset id and other desired parameters to the [Add Image Collection to Map by Asset ID tool](https://github.com/gee-community/arcgis-earthengine-toolbox/blob/aSullivan-geo-doc-updates/docs/05%20Data%20Exploration%20Tools.md#add-image-collection-to-map-by-asset-id)
40 | - Parameters used:
41 | - asset ID: ECMWF/ERA5_LAND/MONTHLY_AGGR
42 | - Starting date: 2023-01-01
43 | - Ending date: 2023-02-01
44 | - Band: temperature_2m--11131.9--m
45 | - Minimum for visualization: 229
46 | - Maximum for visualization: 304
47 | - Color palette for visualization: #fcffa4,#f98e09,#bc3754,#57106e,#000004
48 |
49 | 
50 |
51 | 4. Click "run" at the bottom of the tool GUI, and the resulting layer will be displayed in the map of your project.
52 | 
53 |
--------------------------------------------------------------------------------
/toolbox/GEE_Connector.GEEAuth.pyt.xml:
--------------------------------------------------------------------------------
1 |
2 |
3 |
4 | 20240719
5 | 03084500
6 | 1.0
7 | TRUE
8 | 20250515
9 | 0381500
10 |
11 | 150000000
12 | 5000
13 |
14 | ItemDescription
15 |
16 |
17 | c:\program files\arcgis\pro\Resources\Help\gp
18 |
19 |
20 | <DIV STYLE="text-align:Left;"><DIV><DIV><P><SPAN>Provide the Google Cloud Project ID in string format, for example, project-earth-374600</SPAN></P></DIV></DIV></DIV>
21 |
22 |
23 | <DIV STYLE="text-align:Left;"><DIV><DIV><P><SPAN>Workload tags are labels for monitoring specific computations within Earth Engine. The user can monitor and track tagged computations in the Metrics Explorer using the Earth Engine Cloud Project > Project > Used EECUs metric, and grouping or filtering by workload_tag. Visit this link for more information: </SPAN><A href="https://developers.google.com/earth-engine/guides/monitoring_usage" target="_blank" STYLE="text-decoration:underline;"><SPAN>https://developers.google.com/earth-engine/guides/monitoring_usage</SPAN></A></P><P><SPAN>Workload tag must be 1 - 63 characters, beginning and ending with an alphanumeric character ([a-z0-9A-Z]) with dashes (-), underscores (_), dots (.), and alpha numerics between, or an empty string to reset the default back to none.</SPAN></P></DIV></DIV></DIV>
24 |
25 |
26 | <DIV STYLE="text-align:Left;"><DIV><DIV><P><SPAN>This script authenticates Google Earth Engine with a Google account. Project ID and workload tags are optional. To use Earth Engine, you'll need access to a Cloud project that:</SPAN></P><OL><LI><P><SPAN>has the Earth Engine API enabled,</SPAN></P></LI><LI><P><SPAN>is registered for commercial or noncommercial use, and</SPAN></P></LI><LI><P><SPAN>grants you (or the user) the correct roles and permissions.</SPAN></P></LI></OL><P><SPAN>For more information, please visit </SPAN><A href="https://developers.google.com/earth-engine/guides/access" STYLE="text-decoration:underline;"><SPAN>https://developers.google.com/earth-engine/guides/access</SPAN></A></P></DIV></DIV></DIV>
27 |
28 |
29 |
30 | Authenticate Earth Engine
31 |
32 |
33 | authentication
34 |
35 |
36 |
37 |
38 |
39 | ArcToolbox Tool
40 |
41 |
42 |
43 |
44 |
45 |
46 | 20250515
47 |
48 |
--------------------------------------------------------------------------------
/toolbox/GEE_Connector.ChangeProjectID.pyt.xml:
--------------------------------------------------------------------------------
1 |
2 |
3 |
4 | 20241204
5 | 00211500
6 | 1.0
7 | TRUE
8 | 20250522
9 | 12084000
10 |
11 | 150000000
12 | 5000
13 |
14 | ItemDescription
15 |
16 |
17 | c:\program files\arcgis\pro\Resources\Help\gp
18 |
19 |
20 | <DIV STYLE="text-align:Left;"><DIV><DIV><P><SPAN>Current project ID automatically displays. No need for user input. </SPAN></P></DIV></DIV></DIV>
21 |
22 |
23 | <DIV STYLE="text-align:Left;"><DIV><P><SPAN>Current workload tag automatically displays. No need for user input.</SPAN></P></DIV></DIV>
24 |
25 |
26 | <DIV STYLE="text-align:Left;"><DIV><DIV><P><SPAN>Input the new project ID here. </SPAN></P></DIV></DIV></DIV>
27 |
28 |
29 | <DIV STYLE="text-align:Left;"><DIV><DIV><P><SPAN>Input the new workload tag if any.</SPAN></P><DIV><DIV><P><SPAN>Workload tag must be 1 - 63 characters, beginning and ending with an alphanumeric character ([a-z0-9A-Z]) with dashes (-), underscores (_), dots (.), and alpha numerics between, or an empty string to reset the default back to none.</SPAN></P></DIV></DIV><P><SPAN /></P></DIV></DIV></DIV>
30 |
31 |
32 | <DIV STYLE="text-align:Left;"><DIV><DIV><P><SPAN>This script displays the current Google Cloud quota project ID and workload tag, and allows users to switch quota project ID and workload tag associated with Google Earth Engine.</SPAN></P><P><SPAN>Please note that if you have installed Google Cloud SDK shell, you cannot switch quota project ID using this script. Instead, open the Google Cloud SDK shell, copy and paste the following command `gcloud auth application-default set-quota-project QUOTA_PROJECT_ID`, replace the `QUOTA_PROJECT_ID` with your target project ID. </SPAN></P></DIV></DIV></DIV>
33 |
34 |
35 |
36 | Check or Change Project ID
37 |
38 |
39 | authentication
40 |
41 |
42 |
43 |
44 |
45 | ArcToolbox Tool
46 |
47 |
48 |
49 |
50 |
51 |
52 | 20250522
53 |
54 |
--------------------------------------------------------------------------------
/docs/04_authentication_tools.md:
--------------------------------------------------------------------------------
1 |
2 | # ArcGIS Earth Engine Toolbox (GEE Connector) User Guide: Authentication tools
3 |
4 | These tools help you get connected to your cloud project and Earth Engine.
5 |
6 | ## Authenticate Earth Engine
7 |
8 | > [!NOTE]
9 | > If you have already installed Google Cloud SDK, you will need to set up the application default login for Earth Engine authentication. To do this, go to [Installation](03_installation.md) and follow the instructions. This script is for users who do not have Google Cloud SDK.
10 |
11 | This script authenticates the use of Google Earth Engine with provided Google account.
12 | >[!TIP]
13 | >The user only needs to run this script once on the same computer.
14 |
15 | 
16 |
17 | The project ID and workload tag are optional inputs here. If the user inputs the project ID, the script will also initialize the Earth Engine. The user can define them in the "Initialize Earth Engine" script later. To use Earth Engine, you'll need access to a Cloud project that:
18 |
19 | 1. has the Earth Engine API enabled, refer to [this link](https://developers.google.com/earth-engine/guides/access) for more information.
20 | 2. is registered for commercial or noncommercial use. Earth Engine, Google's geospatial science platform in Google Cloud, is **available for paid commercial use and remains free for academic and research use.** Refer to [this link](https://console.cloud.google.com/earth-engine) to register for commercial use or noncommercial use.
21 | 3. grants you (or the user) the correct roles and permissions.
22 |
23 | Please note that if you have installed Google Cloud SDK shell and set up the application default credentials, this script will authenticate Earth Engine using the quota project ID in the `application_default_credentials.json` usually located at `C:\Users\user_name\AppData\Roaming\gcloud`. If you don't have Google Cloud SDK shell, the script will authenticate through the web browser.
24 |
25 | ### Parameters
26 |
27 | 1. Google Cloud project ID (Optional)
28 | 2. Workload tag (Optional)
29 |
30 | Here is the video guide for the Earth Engine authentication:
31 |
32 |
37 |
38 | ## Check or Change Project ID
39 |
40 | This script displays the current Google Cloud quota project ID and allows users to switch quota project ID and workload tag associated with Google Earth Engine if needed.
41 |
42 | 
43 |
44 | Please note that if you have installed Google Cloud SDK shell, you cannot switch quota project ID using this script. Instead, open the Google Cloud SDK shell, copy and paste the following command `gcloud auth application-default set-quota-project QUOTA_PROJECT_ID`, replace the `QUOTA_PROJECT_ID` with your target project ID.
45 |
46 | ### Parameters
47 |
48 | 1. Current project ID (automatically displays)
49 | 2. Current workload tag (automatically displays)
50 | 3. New project ID (Optional)
51 | 4. New workload tag (Optional)
52 |
53 | Here is the video guide for checking or changing project ID and workload tag:
54 |
55 |
60 |
61 | ## Initialize Earth Engine
62 |
63 | The script initialize the use of Google Earth Engine with a project ID and workload tag. The user must assign a project ID to use Earth Engine. **The user will need to run this script every time they start the ArcGIS Pro.**
64 |
65 | 
66 |
67 | ### Parameters
68 |
69 | 1. Google Cloud project ID
70 | 2. Workload tag (Optional)
71 |
72 | Here is the video guide for the Earth Engine initialization:
73 |
74 |
79 |
--------------------------------------------------------------------------------
/toolbox/GEE_Connector.DownloadFeatColbyObj.pyt.xml:
--------------------------------------------------------------------------------
1 |
2 |
3 |
4 | 20250122
5 | 13523800
6 | 1.0
7 | TRUE
8 | 20250122
9 | 22141200
10 |
11 | 150000000
12 | 5000
13 |
14 | ItemDescription
15 |
16 |
17 | c:\program files\arcgis\pro\Resources\Help\gp
18 |
19 |
20 | <DIV STYLE="text-align:Left;"><DIV><DIV><P><SPAN>The serialized Google Earth Engine object in JSON format. Browse and select the target JSON file to load. </SPAN></P></DIV></DIV></DIV>
21 |
22 |
23 | <DIV STYLE="text-align:Left;"><DIV><DIV><P><SPAN>An ArcGIS Pro feature class can store only one geometry type per file. If multiple geometry types are selected, separate feature class files will be created for each geometry type. The file names will include the specified output name below, with the geometry type appended at the end, such as "output_file_name_Point", "output_file_name_Polyline", etc.</SPAN></P><P><SPAN /></P></DIV></DIV></DIV>
24 |
25 |
26 | <DIV STYLE="text-align:Left;"><DIV><DIV><P><SPAN>Specify the output file name. Final output file name will have geometry type appended at the end. </SPAN></P></DIV></DIV></DIV>
27 |
28 |
29 | <DIV STYLE="text-align:Left;"><DIV><P><SPAN>Check this box if the user wants to load the output feature class to the current map after download. </SPAN></P></DIV></DIV>
30 |
31 |
32 | <DIV STYLE="text-align:Left;"><DIV><DIV><P><SPAN>This script downloads the Earth Engine feature collection dataset to ArcGIS Pro feature class by its serialized JSON object. The user can save the serialized Google Earth Engine object (Image, Image Collection, Feature, Feature Collection, List, Geometry, etc. ) to JSON file. This is very helpful when the user filters the dataset and saves the modified dataset for future use. </SPAN></P><P><SPAN>The geometry types of the feature collection can be converted to the ArcGIS Pro geometry types: point, multipoint, polyline, polygon. Since ArcGIS Pro feature class does not allow multiple geometry types in the same file, the different geometry types will be saved into separate feature class files. </SPAN></P><P><SPAN /></P></DIV></DIV></DIV>
33 |
34 |
35 |
36 | Download Feature Collection by Serialized Object
37 |
38 |
39 | management
40 |
41 |
42 |
43 |
44 |
45 | ArcToolbox Tool
46 |
47 |
48 |
49 |
50 |
51 |
52 | 20250122
53 |
54 |
--------------------------------------------------------------------------------
/CONTRIBUTING.md:
--------------------------------------------------------------------------------
1 | # How to contribute
2 |
3 | Thanks for looking into contributing to the `arcgis-earthengine-toolbox`. There's many ways to contribute to the toolbox:
4 |
5 | * Filing new issues and providing feedback on existing issues
6 | * Contributing examples
7 | * Improving our docs
8 | * Contributing code
9 |
10 | All types of contributions are welcome and are a key piece to making the `arcgis-earthengine-toolbox` work well as a community project.
11 |
12 | ## Before you begin
13 |
14 | ### Review our community guidelines
15 |
16 | This project follows
17 | [Google's Open Source Community Guidelines](https://opensource.google/conduct/).
18 |
19 | ## Submitting a GitHub issue
20 |
21 | You can submit a [GitHub issue](https://github.com/gee-community/arcgis-earthengine-toolbox/issues) for any questions, feature requests, or bug reports.
22 |
23 | When submitting a GitHub issue, please provide the following information:
24 |
25 | * A clear and concise description of the issue
26 | * The steps to reproduce the issue
27 | * The expected behavior
28 | * The actual behavior
29 | * The ArcGIS Pro version and the version of the toolbox you are using
30 |
31 | We have created template for feature requests and bug reports. Please use them when submitting a GitHub issue.
32 |
33 | ## Contributing examples
34 |
35 | Under development. Please check back later.
36 |
37 | ## Contributing code and documentation
38 |
39 | To contribute code and documentation, follow these steps:
40 |
41 | 1. Fork the latest `arcgis-earthengine-toolbox` into your GitHub account.
42 |
43 | 2. Clone the forked repository to your local machine and add the original repository as a remote. This will allow you to pull in the latest changes from the original repository.
44 |
45 | ```bash
46 | git clone https://github.com//arcgis-earthengine-toolbox.git
47 | cd arcgis-earthengine-toolbox
48 | git remote add upstream https://github.com/gee-community/arcgis-earthengine-toolbox.git
49 | ```
50 |
51 | 3. Follow the installation guide in the [docs](docs/03_installation.md) to install the necessary dependencies.
52 |
53 | 4. Before you do any new work or submit a pull request, please open an issue to discuss the changes you want to make.
54 |
55 | 5. Create a new, separate branch for each feature or bug fix. Make your changes to the code or documentation.
56 |
57 | ```bash
58 | git checkout main
59 | git fetch upstream
60 | git checkout -b upstream/main
61 | git push -u origin
62 | ```
63 |
64 | 6. Test your changes in ArcGIS Pro with versions 3.2 and 3.5. It is highly recommended to test the toolbox with both versions to ensure compatibility.
65 |
66 | 7. Push your changes to your forked repository.
67 |
68 | ```bash
69 | git add .
70 | git commit -m "Your commit message"
71 | git push
72 | ```
73 |
74 | 8. Submit a pull request to the main repository.
75 |
76 | 9. Wait for the pull request to be reviewed and merged.
77 |
78 | ### Code quality checks
79 |
80 | The `arcgis-earthengine-toolbox` uses the following code quality checks:
81 |
82 | * [pre-commit](https://pre-commit.com/) to run checks on the code before it is committed.
83 | * [black](https://black.readthedocs.io/en/stable/) to format the code.
84 | * [codespell](https://github.com/codespell-project/codespell) to check for spelling errors.
85 | * [mypy](https://mypy.readthedocs.io/en/stable/) to check for type errors.
86 | * [pylint](https://pylint.pycqa.org/en/stable/) to check for code style violations.
87 |
88 | The pre-commit yaml file currently contains `xml` file format, `black` and `codespell` checks. If you don't have pre-commit installed, run the following command:
89 |
90 | ```bash
91 | pip install pre-commit
92 | ```
93 |
94 | To install the pre-commit hooks, run the following command:
95 |
96 | ```bash
97 | pre-commit install
98 | ```
99 |
100 | To run the checks manually, run the following command:
101 |
102 | ```bash
103 | pre-commit run --all-files
104 | ```
105 |
106 | **Since the ArcGIS Pro Python Toolbox does not fully comply with the Python code style, we recommend to run `mypy` and `pylint` checks manually as there will be many warnings and errors. Please also note that this package has to be compatible with ArcGIS Pro 3.2 (Python 3.9). Therefore, Python 3.10 type hints (e.g. `str | None`) are not supported.**
107 |
108 | ## Contribution process
109 |
110 | ### Code reviews
111 |
112 | All submissions, including submissions by project members, require review. We
113 | use GitHub pull requests for this purpose. Consult
114 | [GitHub Help](https://help.github.com/articles/about-pull-requests/) for more
115 | information on using pull requests.
116 |
--------------------------------------------------------------------------------
/toolbox/GEE_Connector.ApplyMapFunctionbyID.pyt.xml:
--------------------------------------------------------------------------------
1 |
2 |
3 |
4 | 20250123
5 | 00313000
6 | 1.0
7 | TRUE
8 | 20250123
9 | 23090400
10 |
11 | 150000000
12 | 5000
13 |
14 | ItemDescription
15 |
16 |
17 | c:\program files\arcgis\pro\Resources\Help\gp
18 |
19 |
20 | <DIV STYLE="text-align:Left;"><DIV><DIV><P><SPAN>Select the type of the Earth Engine dataset between feature collection and image collection</SPAN></P></DIV></DIV></DIV>
21 |
22 |
23 | <DIV STYLE="text-align:Left;"><DIV><DIV><P><SPAN>Specify the asset ID of the dataset. </SPAN></P></DIV></DIV></DIV>
24 |
25 |
26 | <DIV STYLE="text-align:Left;"><DIV><DIV><P><SPAN>Select the python script that stores the map functions. The python script is used as a module or library. The available map functions will be extracted and listed below. </SPAN></P></DIV></DIV></DIV>
27 |
28 |
29 | <DIV STYLE="text-align:Left;"><DIV><DIV><P><SPAN>Select the map functions to apply to the dataset. You can select as many as needed. </SPAN></P></DIV></DIV></DIV>
30 |
31 |
32 | <DIV STYLE="text-align:Left;"><DIV><P><SPAN>Save the processed dataset as a serialized JSON object for future use. When you use this JSON file again, the dataset will already have the map functions applied.</SPAN></P></DIV></DIV>
33 |
34 |
35 | <DIV STYLE="text-align:Left;"><DIV><DIV><P><SPAN>This script applies user-define map functions to the feature collection or image collection dataset by asset ID and saves the processed dataset to a serialized JSON object for future use.</SPAN></P><P><SPAN>For a quick guide on mapping over image collection dataset, please visit </SPAN><A href="https://developers.google.com/earth-engine/guides/ic_mapping" STYLE="text-decoration:underline;"><SPAN>https://developers.google.com/earth-engine/guides/ic_mapping</SPAN></A></P><P><SPAN>For a quick guide on mapping over feature collection dataset, please visit </SPAN><A href="https://developers.google.com/earth-engine/guides/feature_collection_mapping" STYLE="text-decoration:underline;"><SPAN>https://developers.google.com/earth-engine/guides/feature_collection_mapping</SPAN></A></P></DIV></DIV></DIV>
36 |
37 |
38 |
39 | Apply Map Functions to Collection Dataset by Asset ID
40 |
41 |
42 | processing
43 |
44 |
45 |
46 |
47 |
48 | ArcToolbox Tool
49 |
50 |
51 |
52 |
53 |
54 |
55 | 20250123
56 |
57 |
--------------------------------------------------------------------------------
/toolbox/GEE_Connector.ApplyFilterbyObj.pyt.xml:
--------------------------------------------------------------------------------
1 |
2 |
3 |
4 | 20250122
5 | 23581400
6 | 1.0
7 | TRUE
8 | 20250123
9 | 23112700
10 |
11 | 150000000
12 | 5000
13 |
14 | ItemDescription
15 |
16 |
17 | c:\program files\arcgis\pro\Resources\Help\gp
18 |
19 |
20 | <DIV STYLE="text-align:Left;"><DIV><DIV><P><SPAN>The serialized Google Earth Engine object in JSON format. Browse and select the target JSON file to load. </SPAN></P></DIV></DIV><DIV><P><SPAN /></P></DIV></DIV>
21 |
22 |
23 | <DIV STYLE="text-align:Left;"><DIV><DIV><P><SPAN>Select filters and apply arguments. For example, to filter by date, choose filter </SPAN><SPAN STYLE="font-style:italic;">ee.Filter.date </SPAN><SPAN>and apply argument in this format </SPAN><SPAN STYLE="font-style:italic;">'2015-01-01', '2018-01-01'.</SPAN><SPAN> Another example, to filter by equal, choose filter </SPAN><SPAN STYLE="font-style:italic;">ee.Filter.eq </SPAN><SPAN>and apply argument in this format </SPAN><SPAN STYLE="font-style:italic;">'CLOUD_COVER', 0. </SPAN><SPAN>You can apply as many filters as needed.</SPAN></P></DIV></DIV></DIV>
24 |
25 |
26 | <DIV STYLE="text-align:Left;"><DIV><P><SPAN>Save the filtered dataset as a serialized JSON object for future use. When you use this JSON file again, the dataset will already have the filters applied.</SPAN></P></DIV></DIV>
27 |
28 |
29 | <DIV STYLE="text-align:Left;"><DIV><DIV><P><SPAN>This script applies filters to feature collection or image collection by serialized JSON object, and saves the filtered dataset to a new serialized JSON object for future use. It is useful when you want to apply filters to the existing JSON object. </SPAN></P><P><SPAN>To browser all available earth engine filters, please visit </SPAN><A href="https://developers.google.com/earth-engine/apidocs/ee-filter" STYLE="text-decoration:underline;"><SPAN>https://developers.google.com/earth-engine/apidocs/ee-filter</SPAN></A><SPAN>. </SPAN></P><P><SPAN>For a quick guide on filtering feature collection, please visit </SPAN><A href="https://developers.google.com/earth-engine/guides/feature_collection_filtering" STYLE="text-decoration:underline;"><SPAN>https://developers.google.com/earth-engine/guides/feature_collection_filtering</SPAN></A><SPAN>.</SPAN></P><P><SPAN>For a quick guide on filtering image collection, please visit </SPAN><A href="https://developers.google.com/earth-engine/guides/ic_filtering" STYLE="text-decoration:underline;"><SPAN>https://developers.google.com/earth-engine/guides/ic_filtering</SPAN></A></P></DIV></DIV></DIV>
30 |
31 |
32 |
33 | Apply Filters to Collection Dataset by Serialized Object
34 |
35 |
36 | processing
37 |
38 |
39 |
40 |
41 |
42 | ArcToolbox Tool
43 |
44 |
45 |
46 |
47 |
48 |
49 | 20250123
50 |
51 |
--------------------------------------------------------------------------------
/toolbox/GEE_Connector.ApplyMapFunctionbyObj.pyt.xml:
--------------------------------------------------------------------------------
1 |
2 |
3 |
4 | 20250123
5 | 00430400
6 | 1.0
7 | TRUE
8 | 20250123
9 | 23125000
10 |
11 | 150000000
12 | 5000
13 |
14 | ItemDescription
15 |
16 |
17 | c:\program files\arcgis\pro\Resources\Help\gp
18 |
19 |
20 | <DIV STYLE="text-align:Left;"><DIV><DIV><P><SPAN>Select the type of the Earth Engine dataset between feature collection and image collection</SPAN></P><P><SPAN /></P></DIV></DIV></DIV>
21 |
22 |
23 | <DIV STYLE="text-align:Left;"><DIV><DIV><P><SPAN>The serialized Google Earth Engine object in JSON format. Browse and select the target JSON file to load. </SPAN></P></DIV></DIV></DIV>
24 |
25 |
26 | <DIV STYLE="text-align:Left;"><DIV><DIV><P><SPAN>Select the python script that stores the map functions. The python script is used as a module or library. The available map functions will be extracted and listed below. </SPAN></P></DIV></DIV></DIV>
27 |
28 |
29 | <DIV STYLE="text-align:Left;"><DIV><DIV><P><SPAN>Select the map functions to apply to the dataset. You can select as many as needed. </SPAN></P></DIV></DIV></DIV>
30 |
31 |
32 | <DIV STYLE="text-align:Left;"><P><SPAN>Save the processed dataset as a serialized JSON object for future use. When you use this JSON file again, the dataset will already have the map functions applied.</SPAN></P></DIV>
33 |
34 |
35 | <DIV STYLE="text-align:Left;"><DIV><DIV><P><SPAN>This script applies user-define map functions to the feature collection or image collection dataset by the serialized JSON object and saves the processed dataset to a new serialized JSON object for future use. It is useful when you want to apply map functions to the existing JSON object. </SPAN></P><P><SPAN>For a quick guide on mapping over image collection dataset, please visit </SPAN><A href="https://developers.google.com/earth-engine/guides/ic_mapping" STYLE="text-decoration:underline;"><SPAN>https://developers.google.com/earth-engine/guides/ic_mapping</SPAN></A></P><P><SPAN>For a quick guide on mapping over feature collection dataset, please visit </SPAN><A href="https://developers.google.com/earth-engine/guides/feature_collection_mapping" STYLE="text-decoration:underline;"><SPAN>https://developers.google.com/earth-engine/guides/feature_collection_mapping</SPAN></A></P></DIV></DIV></DIV>
36 |
37 |
38 |
39 | Apply Map Functions to Collection Dataset by Serialized Object
40 |
41 |
42 | processing
43 |
44 |
45 |
46 |
47 |
48 | ArcToolbox Tool
49 |
50 |
51 |
52 |
53 |
54 |
55 | 20250123
56 |
57 |
--------------------------------------------------------------------------------
/toolbox/GEE_Connector.ApplyFilterbyID.pyt.xml:
--------------------------------------------------------------------------------
1 |
2 |
3 |
4 | 20241014
5 | 02365100
6 | 1.0
7 | TRUE
8 | 20250204
9 | 17052800
10 |
11 | 150000000
12 | 5000
13 |
14 | ItemDescription
15 |
16 |
17 | c:\program files\arcgis\pro\Resources\Help\gp
18 |
19 |
20 | <DIV STYLE="text-align:Left;"><DIV><DIV><P><SPAN>Select the type of the Earth Engine dataset between feature collection and image collection</SPAN></P></DIV></DIV></DIV>
21 |
22 |
23 | <DIV STYLE="text-align:Left;"><DIV><P><SPAN>Specify the asset ID of the dataset. </SPAN></P></DIV></DIV>
24 |
25 |
26 | <DIV STYLE="text-align:Left;"><DIV><DIV><P><SPAN>Select filters and apply arguments. For example, to filter by date, choose filter </SPAN><SPAN STYLE="font-style:italic;">ee.Filter.date </SPAN><SPAN>and apply argument in this format </SPAN><SPAN STYLE="font-style:italic;">'2015-01-01', '2018-01-01'.</SPAN><SPAN> Another example, to filter by equal, choose filter </SPAN><SPAN STYLE="font-style:italic;">ee.Filter.eq </SPAN><SPAN>and apply argument in this format </SPAN><SPAN STYLE="font-style:italic;">'CLOUD_COVER', 0. </SPAN><SPAN>You can apply as many filters as needed.</SPAN></P></DIV></DIV></DIV>
27 |
28 |
29 | <DIV STYLE="text-align:Left;"><DIV><DIV><P><SPAN>Save the filtered dataset as a serialized JSON object for future use. When you use this JSON file again, the dataset already has the filters applied.</SPAN></P></DIV></DIV></DIV>
30 |
31 |
32 | <DIV STYLE="text-align:Left;"><DIV><DIV><P><SPAN>This script applies filters to feature collection or image collection by asset ID, and saves the filtered dataset to serialized JSON object for future use. </SPAN></P><P><SPAN>To browser all available earth engine filters, please visit </SPAN><A href="https://developers.google.com/earth-engine/apidocs/ee-filter" STYLE="text-decoration:underline;"><SPAN>https://developers.google.com/earth-engine/apidocs/ee-filter</SPAN></A><SPAN>. </SPAN></P><P><SPAN>For a quick guide on filtering feature collection, please visit </SPAN><A href="https://developers.google.com/earth-engine/guides/feature_collection_filtering" STYLE="text-decoration:underline;"><SPAN>https://developers.google.com/earth-engine/guides/feature_collection_filtering</SPAN></A><SPAN>.</SPAN></P><P><SPAN>For a quick guide on filtering image collection, please visit </SPAN><A href="https://developers.google.com/earth-engine/guides/ic_filtering" STYLE="text-decoration:underline;"><SPAN>https://developers.google.com/earth-engine/guides/ic_filtering</SPAN></A></P></DIV></DIV></DIV>
33 |
34 |
35 |
36 | Apply Filters to Collection Dataset by Asset ID
37 |
38 |
39 | processing
40 |
41 |
42 |
43 |
44 |
45 | ArcToolbox Tool
46 |
47 |
48 |
49 |
50 |
51 |
52 | 20250204
53 |
54 |
--------------------------------------------------------------------------------
/toolbox/GEE_Connector.DownloadImgbyObj.pyt.xml:
--------------------------------------------------------------------------------
1 |
2 |
3 |
4 | 20241214
5 | 00375900
6 | 1.0
7 | TRUE
8 | 20250515
9 | 0344500
10 |
11 | 150000000
12 | 5000
13 |
14 | ItemDescription
15 |
16 |
17 | c:\program files\arcgis\pro\Resources\Help\gp
18 |
19 |
20 | <DIV STYLE="text-align:Left;"><DIV><DIV><P><SPAN>The serialized Google Earth Engine object in JSON format. Browse and select the target JSON file to load. </SPAN></P><P><SPAN /></P></DIV></DIV></DIV>
21 |
22 |
23 | <DIV STYLE="text-align:Left;"><DIV><DIV><P><SPAN>The image dataset could contain multiple bands. Select the target bands to download. The user can select as many as needed. </SPAN></P></DIV></DIV></DIV>
24 |
25 |
26 | <DIV STYLE="text-align:Left;"><DIV><DIV><P><SPAN>Specify the scale of the downloaded GeoTIFF in meters. The default scale uses the maximum scale among the selected bands. </SPAN></P></DIV></DIV></DIV>
27 |
28 |
29 | <DIV STYLE="text-align:Left;"><DIV><DIV><P><SPAN>Choose a polygon feature layer as the region of interest to download the GeoTIFF. The image will be clipped by the polygon extent. </SPAN></P></DIV></DIV></DIV>
30 |
31 |
32 | <DIV STYLE="text-align:Left;"><DIV><DIV><P><SPAN>Check this box if using the current map extent as the region of interest.</SPAN></P></DIV></DIV></DIV>
33 |
34 |
35 | <DIV STYLE="text-align:Left;"><DIV><DIV><P><SPAN>Specify the full path of the output GeoTIFF file.</SPAN></P></DIV></DIV></DIV>
36 |
37 |
38 | <DIV STYLE="text-align:Left;"><DIV><P><SPAN>Check this box if the user wants to load the output GeoTIFF file to the current map after download. </SPAN></P></DIV></DIV>
39 |
40 |
41 | <DIV STYLE="text-align:Left;"><DIV><DIV><P><SPAN>This script downloads the Earth Engine image dataset to GeoTIFF by its serialized JSON object. It converts Earth Engine image object to xarray dataset using 'xee' and writes to local GeoTIFF file using 'rasterio'. This supports download of larger file sizes and is not constrained by file size limitation that impact other standard GEE functions like ee.Image.getDownloadURL() and ee.data.getPixels(). Larger files will take longer to download. </SPAN></P></DIV></DIV></DIV>
42 |
43 |
44 |
45 | Download Image by Serialized Object
46 |
47 |
48 | management
49 |
50 |
51 |
52 |
53 |
54 | ArcToolbox Tool
55 |
56 |
57 |
58 |
59 |
60 |
61 | 20250515
62 |
63 |
--------------------------------------------------------------------------------
/toolbox/GEE_Connector.DownloadImgbyID.pyt.xml:
--------------------------------------------------------------------------------
1 |
2 |
3 |
4 | 20241212
5 | 23241000
6 | 1.0
7 | TRUE
8 | 20250515
9 | 0335700
10 |
11 | 150000000
12 | 5000
13 |
14 | ItemDescription
15 |
16 |
17 | c:\program files\arcgis\pro\Resources\Help\gp
18 |
19 |
20 | <DIV STYLE="text-align:Left;"><DIV><DIV><P><SPAN>The asset ID could be found at the dataset information page. For example, </SPAN><SPAN>“</SPAN><SPAN>ee.Image('AHN/AHN2_05M_INT')</SPAN><SPAN>” </SPAN><SPAN>loads the Google Earth Engine Image </SPAN><SPAN>by asset ID "AHN/AHN2_05M_INT". </SPAN></P></DIV></DIV><DIV><P><SPAN /></P></DIV></DIV>
21 |
22 |
23 | <DIV STYLE="text-align:Left;"><DIV><DIV><P><SPAN>The image dataset could contain multiple bands. Select the target bands to download. The user can select as many as needed. </SPAN></P></DIV></DIV></DIV>
24 |
25 |
26 | <DIV STYLE="text-align:Left;"><DIV><DIV><P><SPAN>Specify the scale of the downloaded GeoTIFF in meters. The default scale uses the maximum scale among the selected bands. </SPAN></P></DIV></DIV></DIV>
27 |
28 |
29 | <DIV STYLE="text-align:Left;"><DIV><DIV><P><SPAN>Choose a polygon feature layer as the region of interest to download the GeoTIFF. The image will be clipped by the polygon extent. </SPAN></P></DIV></DIV></DIV>
30 |
31 |
32 | <DIV STYLE="text-align:Left;"><DIV><DIV><P><SPAN>Check this box if using the current map extent as the region of interest.</SPAN></P></DIV></DIV></DIV>
33 |
34 |
35 | <DIV STYLE="text-align:Left;"><DIV><DIV><P><SPAN>Specify the full path of the output GeoTIFF file.</SPAN></P></DIV></DIV></DIV>
36 |
37 |
38 | <DIV STYLE="text-align:Left;"><DIV><DIV><P><SPAN>Check this box if the user wants to load the output GeoTIFF file to the current map after download. </SPAN></P></DIV></DIV></DIV>
39 |
40 |
41 | <DIV STYLE="text-align:Left;"><DIV><DIV><P><SPAN>This script downloads the Earth Engine image dataset to GeoTIFF by its asset tag. It converts Earth Engine image object to xarray dataset using 'xee' and writes to local GeoTIFF file using 'rasterio'. This supports download of larger file sizes and is not constrained by file size limitation that impact other standard GEE functions like ee.Image.getDownloadURL() and ee.data.getPixels(). Larger files will take longer to download. </SPAN></P></DIV></DIV></DIV>
42 |
43 |
44 |
45 | Download Image by Asset ID
46 |
47 |
48 | management
49 |
50 |
51 |
52 |
53 |
54 | ArcToolbox Tool
55 |
56 |
57 |
58 |
59 |
60 |
61 | 20250515
62 |
63 |
--------------------------------------------------------------------------------
/toolbox/GEE_Connector.DownloadImgColbyObj.pyt.xml:
--------------------------------------------------------------------------------
1 |
2 |
3 |
4 | 20241216
5 | 01323600
6 | 1.0
7 | TRUE
8 | 20250515
9 | 0315200
10 |
11 | 150000000
12 | 5000
13 |
14 | ItemDescription
15 |
16 |
17 | c:\program files\arcgis\pro\Resources\Help\gp
18 |
19 |
20 | <DIV STYLE="text-align:Left;"><DIV><DIV><P><SPAN>The serialized Google Earth Engine object in JSON format. Browse and select the target JSON file to load. </SPAN></P></DIV></DIV></DIV>
21 |
22 |
23 | <DIV STYLE="text-align:Left;"><DIV><DIV><P><SPAN>The first 100 filtered images will be listed here. The user can select multiple images to download. </SPAN></P></DIV></DIV></DIV>
24 |
25 |
26 | <DIV STYLE="text-align:Left;"><DIV><DIV><P><SPAN>The image dataset could contain multiple bands. Select the target bands to download. The user can select as many as needed. </SPAN></P></DIV></DIV></DIV>
27 |
28 |
29 | <DIV STYLE="text-align:Left;"><DIV><DIV><P><SPAN>Specify the scale of the downloaded GeoTIFF in meters. The default scale uses the maximum scale among the selected bands. </SPAN></P></DIV></DIV></DIV>
30 |
31 |
32 | <DIV STYLE="text-align:Left;"><DIV><DIV><P><SPAN>Choose a polygon feature layer as the region of interest to download the GeoTIFF. The image will be clipped by the polygon extent. </SPAN></P></DIV></DIV></DIV>
33 |
34 |
35 | <DIV STYLE="text-align:Left;"><DIV><DIV><P><SPAN>Check this box if using the current map extent as the region of interest.</SPAN></P></DIV></DIV></DIV>
36 |
37 |
38 | <DIV STYLE="text-align:Left;"><DIV><DIV><P><SPAN>Specify the full path of the output folder to store the GeoTIFF files. One image per GeoTIFF file. Each GeoTIFF file is automatically named with the image collection asset tag and the image id. </SPAN></P></DIV></DIV></DIV>
39 |
40 |
41 | <DIV STYLE="text-align:Left;"><DIV><DIV><P><SPAN>Check this box to load the output GeoTIFF file to the current map after download. </SPAN></P></DIV></DIV></DIV>
42 |
43 |
44 | <DIV STYLE="text-align:Left;"><DIV><DIV><P><SPAN>This script downloads the Earth Engine image collection dataset to GeoTIFF by its serialized JSON object. It converts Earth Engine image collection object to xarray dataset using 'xee' and writes to local GeoTIFF file using 'rasterio'. Theoretically, there is no file size limitation compared to other functions such as ee.Image.getDownloadURL() and ee.data.getPixels(). Larger files will take longer to download. </SPAN></P></DIV></DIV></DIV>
45 |
46 |
47 |
48 | Download Image Collection by Serialized Object
49 |
50 |
51 | management
52 |
53 |
54 |
55 |
56 |
57 | ArcToolbox Tool
58 |
59 |
60 |
61 |
62 |
63 |
64 | 20250515
65 |
66 |
--------------------------------------------------------------------------------
/toolbox/GEE_Connector.AddFeatCol2MapbyID.pyt.xml:
--------------------------------------------------------------------------------
1 |
2 |
3 |
4 | 20241122
5 | 13201200
6 | 1.0
7 | TRUE
8 | 20250625
9 | 10561300
10 |
11 | 150000000
12 | 5000
13 |
14 | ItemDescription
15 |
16 |
17 | c:\program files\arcgis\pro\Resources\Help\gp
18 |
19 |
20 | <DIV STYLE="text-align:Left;"><DIV><DIV><P><SPAN>The asset ID could be found at the dataset information page. For example, ee.FeatureCollection('BLM/AIM/v1/TerrADat/TerrestrialAIM') </SPAN><SPAN>loads the Google Earth Engine Image </SPAN><SPAN>Collection </SPAN><SPAN>by asset ID BLM/AIM/v1/TerrADat/TerrestrialAIM. </SPAN></P></DIV></DIV></DIV>
21 |
22 |
23 | <DIV STYLE="text-align:Left;"><DIV><DIV><P><SPAN>Filter the feature collection by values of its properties. The user needs to select a property, an operation and a value to filter the feature collection. For example, "ADM2_NAME == 'Denver'" has the property name as 'ADM2_NAME', operator '==', and filter value 'Denver'. The user can apply as many filters as needed. </SPAN></P></DIV></DIV></DIV>
24 |
25 |
26 | <DIV STYLE="text-align:Left;"><DIV><DIV><P><SPAN>Filter a feature collection by intersection with polygon geometry. Items in the feature collection with a footprint that fails to intersect the given geometry will be excluded. </SPAN></P><P><SPAN /></P><P><SPAN /></P></DIV></DIV></DIV>
27 |
28 |
29 | <DIV STYLE="text-align:Left;"><P><SPAN>Use the user-defined polygon as the geometry. If the polygon contains multiple parts, the full extent of the polygon will be utilized.</SPAN></P></DIV>
30 |
31 |
32 | <DIV STYLE="text-align:Left;"><DIV><DIV><P><SPAN>You can specify the color the feature collection for visualization. For example, red, yellow, green, blue, etc. or CSS-style hex strings. </SPAN></P></DIV></DIV></DIV>
33 |
34 |
35 | <DIV STYLE="text-align:Left;"><DIV><DIV><P><SPAN>Save the filtered image collection to a serialized JSON object for future use. </SPAN></P></DIV></DIV></DIV>
36 |
37 |
38 | <DIV STYLE="text-align:Left;"><DIV><DIV><P><SPAN>This script adds the</SPAN><SPAN> </SPAN><SPAN>Google Earth Engine Feature Collection</SPAN><SPAN> to ArcGIS Pro as a base map by its asset tag and customizes the visualization parameters. </SPAN><SPAN STYLE="font-weight:bold;">To avoid slow response, the feature collection size is limited to 100,000 elements. </SPAN></P><P><SPAN>Please note that the dataset is added as a Tiled Map Service Layer, which is view only and cannot be edited. The user will need to download the dataset for analysis in ArcGIS Pro. To browse all datasets, please visit </SPAN><A href="https://developers.google.com/earth-engine/datasets/catalog" STYLE="text-decoration:underline;"><SPAN>https://developers.google.com/earth-engine/datasets/catalog</SPAN></A><SPAN>.</SPAN></P></DIV></DIV></DIV>
39 |
40 |
41 |
42 | Add Feature Collection to Map by Asset ID
43 |
44 |
45 | exploration
46 |
47 |
48 |
49 |
50 |
51 | ArcToolbox Tool
52 |
53 |
54 |
55 |
56 |
57 |
58 | 20250625
59 |
60 |
--------------------------------------------------------------------------------
/toolbox/GEE_Connector.ApplyReducerbyObj.pyt.xml:
--------------------------------------------------------------------------------
1 |
2 |
3 |
4 | 20250204
5 | 17162300
6 | 1.0
7 | TRUE
8 | 20250204
9 | 17300100
10 |
11 | 150000000
12 | 5000
13 |
14 | ItemDescription
15 |
16 |
17 | c:\program files\arcgis\pro\Resources\Help\gp
18 |
19 |
20 | <DIV STYLE="text-align:Left;"><DIV><DIV><P><SPAN>Select the type of the Earth Engine dataset among feature collection, image and image collection. Different datasets have different reduction methods. </SPAN></P></DIV></DIV></DIV>
21 |
22 |
23 | <DIV STYLE="text-align:Left;"><DIV><DIV><P><SPAN>Choose a reduction method. </SPAN></P></DIV></DIV></DIV>
24 |
25 |
26 | <DIV STYLE="text-align:Left;"><DIV><DIV><P><SPAN>Specify any additional arguments in the reduction method. For example, ee.Image.reduceRegion may have geometry=geom, scale=30, crs='EPSG:3310' in addition to the core argument reducer=reducer</SPAN></P></DIV></DIV></DIV>
27 |
28 |
29 | <DIV STYLE="text-align:Left;"><DIV><DIV><P><SPAN>The serialized Google Earth Engine object in JSON format. Browse and select the target JSON file to load. </SPAN></P></DIV></DIV></DIV>
30 |
31 |
32 | <DIV STYLE="text-align:Left;"><DIV><DIV><P><SPAN>Select reducers to be applied. Multiple reducers will be combined. </SPAN></P></DIV></DIV></DIV>
33 |
34 |
35 | <DIV STYLE="text-align:Left;"><DIV><DIV><P><SPAN>Check this box if sharedInput is True for combined reducer. </SPAN></P></DIV></DIV></DIV>
36 |
37 |
38 | <DIV STYLE="text-align:Left;"><DIV><P><SPAN>Save the reduced dataset as a serialized JSON object for future use. When you use this JSON file again, the dataset already has the reducers applied.</SPAN></P></DIV></DIV>
39 |
40 |
41 | <DIV STYLE="text-align:Left;"><DIV><DIV><P><SPAN>This script applies reducers to feature collection, image or image collection by asset ID, and saves the reduced dataset to serialized JSON object for future use. It is useful when you want to apply reducers to the existing JSON object. </SPAN></P><P><SPAN>To browser all available earth engine filters, please visit </SPAN><A href="https://developers.google.com/earth-engine/apidocs/ee-reducer-allnonzero" STYLE="text-decoration:underline;"><SPAN>https://developers.google.com/earth-engine/apidocs/ee-reducer-allnonzero</SPAN></A><SPAN>.</SPAN></P><P><SPAN>For reducer overview, please visit </SPAN><A href="https://developers.google.com/earth-engine/guides/reducers_intro" STYLE="text-decoration:underline;"><SPAN>https://developers.google.com/earth-engine/guides/reducers_intro</SPAN></A><SPAN>.</SPAN></P></DIV></DIV></DIV>
42 |
43 |
44 |
45 | Apply Reducers to Earth Engine Dataset by Serialized Object
46 |
47 |
48 | processing
49 |
50 |
51 |
52 |
53 |
54 | ArcToolbox Tool
55 |
56 |
57 |
58 |
59 |
60 |
61 | 20250204
62 |
63 |
--------------------------------------------------------------------------------
/CHANGELOG.md:
--------------------------------------------------------------------------------
1 | # Changelog
2 |
3 | ## [1.3.6](https://github.com/gee-community/arcgis-earthengine-toolbox/compare/v1.3.5...v1.3.6) (2025-12-12)
4 |
5 |
6 | ### Bug Fixes
7 |
8 | * valid-pixel check incorrectly returns False when ROI has limited data coverage ([f02acf2](https://github.com/gee-community/arcgis-earthengine-toolbox/commit/f02acf2e27bdd80d9035430e67cdf62a07940af5))
9 | * valid-pixel check incorrectly returns False when ROI has limited data coverage ([80a6096](https://github.com/gee-community/arcgis-earthengine-toolbox/commit/80a609605875f9e28267210df04910b700d1a6a6))
10 |
11 | ## [1.3.5](https://github.com/gee-community/arcgis-earthengine-toolbox/compare/v1.3.4...v1.3.5) (2025-12-09)
12 |
13 |
14 | ### Bug Fixes
15 |
16 | * update installation guide with rasterio version compatible with ArcGIS Pro 3.6 ([9921400](https://github.com/gee-community/arcgis-earthengine-toolbox/commit/9921400ba5365d8eb088094b44e8db416f79d58e))
17 | * update installation guide with rasterio version compatible with ArcGIS Pro 3.6 ([#165](https://github.com/gee-community/arcgis-earthengine-toolbox/issues/165)) ([638fb2b](https://github.com/gee-community/arcgis-earthengine-toolbox/commit/638fb2b51d279b6b7ea9ce0c1fc46165d730f92f))
18 |
19 | ## [1.3.4](https://github.com/gee-community/arcgis-earthengine-toolbox/compare/v1.3.3...v1.3.4) (2025-12-04)
20 |
21 |
22 | ### Bug Fixes
23 |
24 | * enhance messaging to users during ROI processing ([#160](https://github.com/gee-community/arcgis-earthengine-toolbox/issues/160)) ([8d41657](https://github.com/gee-community/arcgis-earthengine-toolbox/commit/8d4165796bdd7d51b3df01e047e28942792ec08a))
25 | * enhance messaging to users during ROI processing ([#160](https://github.com/gee-community/arcgis-earthengine-toolbox/issues/160)) ([2fcdcda](https://github.com/gee-community/arcgis-earthengine-toolbox/commit/2fcdcda8a2cead85e1526c64cc8c35a743edd8a1))
26 |
27 | ## [1.3.3](https://github.com/gee-community/arcgis-earthengine-toolbox/compare/v1.3.2...v1.3.3) (2025-11-20)
28 |
29 |
30 | ### Bug Fixes
31 |
32 | * projection errors when downloading COPERNICUS/S5P/NRTI/L3_SO2 ([6c99609](https://github.com/gee-community/arcgis-earthengine-toolbox/commit/6c9960952964921e9164a90b6d41ec00d984813d))
33 | * projection errors when downloading COPERNICUS/S5P/NRTI/L3_SO2 ([#153](https://github.com/gee-community/arcgis-earthengine-toolbox/issues/153), [#156](https://github.com/gee-community/arcgis-earthengine-toolbox/issues/156)) ([58c351e](https://github.com/gee-community/arcgis-earthengine-toolbox/commit/58c351e9b4b79acf222cee763c3aca9f21185465))
34 |
35 | ## [1.3.2](https://github.com/gee-community/arcgis-earthengine-toolbox/compare/v1.3.1...v1.3.2) (2025-11-15)
36 |
37 |
38 | ### Bug Fixes
39 |
40 | * index error when adding dataset to nondefault map name ([#152](https://github.com/gee-community/arcgis-earthengine-toolbox/issues/152)) ([562b4d2](https://github.com/gee-community/arcgis-earthengine-toolbox/commit/562b4d28e21e921e28923a963ddd38b10f3f0530))
41 | * index error when adding dataset to nondefault map name ([#152](https://github.com/gee-community/arcgis-earthengine-toolbox/issues/152)) ([48f716b](https://github.com/gee-community/arcgis-earthengine-toolbox/commit/48f716b1d9b98e001f0c459cf474f06740018201))
42 |
43 | ## [1.3.1](https://github.com/gee-community/arcgis-earthengine-toolbox/compare/v1.3.0...v1.3.1) (2025-08-22)
44 |
45 |
46 | ### Bug Fixes
47 |
48 | * filtering by date did not work when only start date was provided ([e3fbe3d](https://github.com/gee-community/arcgis-earthengine-toolbox/commit/e3fbe3d03c3d171ba2d33c3cd0d6e5c2623d46bb))
49 | * filtering by date did not work when only start date was provided ([#148](https://github.com/gee-community/arcgis-earthengine-toolbox/issues/148)) ([59d4917](https://github.com/gee-community/arcgis-earthengine-toolbox/commit/59d491797c4676e50ed48c623d7a6bc1ad5483b5))
50 |
51 | ## [1.3.0](https://github.com/gee-community/arcgis-earthengine-toolbox/compare/v1.2.0...v1.3.0) (2025-08-19)
52 |
53 |
54 | ### Features
55 |
56 | * add script to export processed image or image collection to earth engine asset ([#86](https://github.com/gee-community/arcgis-earthengine-toolbox/issues/86)) ([ec4bc29](https://github.com/gee-community/arcgis-earthengine-toolbox/commit/ec4bc29875c5784eee409a33d570ad6f79533ad7))
57 |
58 | ## [1.2.0](https://github.com/gee-community/arcgis-earthengine-toolbox/compare/v1.1.2...v1.2.0) (2025-08-15)
59 |
60 |
61 | ### Features
62 |
63 | * add script to add composite image from image collection dataset to map ([#120](https://github.com/gee-community/arcgis-earthengine-toolbox/issues/120)) ([6f8520f](https://github.com/gee-community/arcgis-earthengine-toolbox/commit/6f8520fbca1a47fd05678c0988d4b11629f2b3f2))
64 |
65 | ## [1.1.2](https://github.com/gee-community/arcgis-earthengine-toolbox/compare/v1.1.1...v1.1.2) (2025-08-11)
66 |
67 |
68 | ### Documentation
69 |
70 | * add instruction for testing to contributing guidelines ([efb71fc](https://github.com/gee-community/arcgis-earthengine-toolbox/commit/efb71fc9f87865d03f2bebbe81592b6290e3e6d4))
71 |
72 | ## [1.1.1](https://github.com/gee-community/arcgis-earthengine-toolbox/compare/v1.1.0...v1.1.1) (2025-08-08)
73 |
74 |
75 | ### Documentation
76 |
77 | * update contributing guidelines with code and documentation instructions ([36f02c7](https://github.com/gee-community/arcgis-earthengine-toolbox/commit/36f02c79c52bf5814189730f0f44b4c1a944de0d))
78 |
79 | ## [1.1.0](https://github.com/gee-community/arcgis-earthengine-toolbox/compare/v1.0.0...v1.1.0) (2025-08-01)
80 |
81 |
82 | ### Features
83 |
84 | * add option to use polygon feature as ROI in "Add Image Collection to Map" script ([#83](https://github.com/gee-community/arcgis-earthengine-toolbox/issues/83)) ([3c22c96](https://github.com/gee-community/arcgis-earthengine-toolbox/commit/3c22c962243e24053d7d6e522ee18c03ab1b4a04))
85 |
--------------------------------------------------------------------------------
/toolbox/GEE_Connector.ApplyReducerbyID.pyt.xml:
--------------------------------------------------------------------------------
1 |
2 |
3 |
4 | 20250124
5 | 00363600
6 | 1.0
7 | TRUE
8 | 20250204
9 | 17051400
10 |
11 | 150000000
12 | 5000
13 |
14 | ItemDescription
15 |
16 |
17 | c:\program files\arcgis\pro\Resources\Help\gp
18 |
19 |
20 | <DIV STYLE="text-align:Left;"><DIV><P><SPAN>Select the type of the Earth Engine dataset among feature collection, image and image collection. Different datasets have different reduction methods. </SPAN></P></DIV></DIV>
21 |
22 |
23 | <DIV STYLE="text-align:Left;"><DIV><P><SPAN>Choose a reduction method. </SPAN></P></DIV></DIV>
24 |
25 |
26 | <DIV STYLE="text-align:Left;"><DIV><DIV><P><SPAN>Specify any additional arguments in the reduction method. For example, ee.Image.reduceRegion may have geometry=geom, scale=30, crs='EPSG:3310' in addition to the core argument reducer=reducer</SPAN></P></DIV></DIV></DIV>
27 |
28 |
29 | <DIV STYLE="text-align:Left;"><DIV><DIV><P><SPAN>Specify the asset ID of the dataset</SPAN></P></DIV></DIV></DIV>
30 |
31 |
32 | <DIV STYLE="text-align:Left;"><DIV><DIV><P><SPAN>Apply filters if needed</SPAN></P></DIV></DIV></DIV>
33 |
34 |
35 | <DIV STYLE="text-align:Left;"><DIV><DIV><P><SPAN>Select reducers to be applied. Multiple reducers will be combined. </SPAN></P></DIV></DIV></DIV>
36 |
37 |
38 | <DIV STYLE="text-align:Left;"><DIV><DIV><P><SPAN>Check this box if sharedInput is True for combined reducer. </SPAN></P></DIV></DIV></DIV>
39 |
40 |
41 | <DIV STYLE="text-align:Left;"><DIV><DIV><P><SPAN>Save the reduced dataset as a serialized JSON object for future use. When you use this JSON file again, the dataset already has the reducers applied.</SPAN></P></DIV></DIV></DIV>
42 |
43 |
44 | <DIV STYLE="text-align:Left;"><DIV><DIV><P><SPAN>This script applies reducers to feature collection, image or image collection by asset ID, and saves the reduced dataset to serialized JSON object for future use. </SPAN></P><P><SPAN>To browser all available earth engine filters, please visit </SPAN><A href="https://developers.google.com/earth-engine/apidocs/ee-reducer-allnonzero" STYLE="text-decoration:underline;"><SPAN>https://developers.google.com/earth-engine/apidocs/ee-reducer-allnonzero</SPAN></A><SPAN>.</SPAN></P><P><SPAN>For reducer overview, please visit </SPAN><A href="https://developers.google.com/earth-engine/guides/reducers_intro" STYLE="text-decoration:underline;"><SPAN>https://developers.google.com/earth-engine/guides/reducers_intro</SPAN></A><SPAN>.</SPAN></P></DIV></DIV></DIV>
45 |
46 |
47 |
48 | Apply Reducers to Earth Engine Dataset by Asset ID
49 |
50 |
51 | processing
52 |
53 |
54 |
55 |
56 |
57 | ArcToolbox Tool
58 |
59 |
60 |
61 |
62 |
63 |
64 | 20250204
65 |
66 |
--------------------------------------------------------------------------------
/toolbox/GEE_Connector.DownloadFeatColbyID.pyt.xml:
--------------------------------------------------------------------------------
1 |
2 |
3 |
4 | 20250121
5 | 23455800
6 | 1.0
7 | TRUE
8 | 20250625
9 | 10562500
10 |
11 | 150000000
12 | 5000
13 |
14 | ItemDescription
15 |
16 |
17 | c:\program files\arcgis\pro\Resources\Help\gp
18 |
19 |
20 | <DIV STYLE="text-align:Left;"><DIV><DIV><P><SPAN>The asset ID could be found at the dataset information page. For example, ee.FeatureCollection('BLM/AIM/v1/TerrADat/TerrestrialAIM') </SPAN><SPAN>loads the Google Earth Engine Image </SPAN><SPAN>Collection </SPAN><SPAN>by asset ID BLM/AIM/v1/TerrADat/TerrestrialAIM. </SPAN></P><P><SPAN /></P></DIV></DIV></DIV>
21 |
22 |
23 | <DIV STYLE="text-align:Left;"><DIV><DIV><P><SPAN>Filter the feature collection by values of its properties. The user needs to select a property, an operation and a value to filter the feature collection. For example, "ADM2_NAME == 'Denver'" has the property name as 'ADM2_NAME', operator '==', and filter value 'Denver'. The user can apply as many filters as needed. </SPAN></P></DIV></DIV></DIV>
24 |
25 |
26 | <DIV STYLE="text-align:Left;"><DIV><DIV><P><SPAN>Filter a feature collection by intersection with polygon geometry. Items in the feature collection with a footprint that fails to intersect the given geometry will be excluded. </SPAN></P></DIV></DIV></DIV>
27 |
28 |
29 | <DIV STYLE="text-align:Left;"><DIV><DIV><P><SPAN>Use the user-defined polygon as the geometry. If the polygon contains multiple parts, the full extent of the polygon will be utilized.</SPAN></P></DIV></DIV></DIV>
30 |
31 |
32 | <DIV STYLE="text-align:Left;"><DIV><DIV><P><SPAN>An ArcGIS Pro feature class can store only one geometry type per file. If multiple geometry types are selected, separate feature class files will be created for each geometry type. The file names will include the specified output name below, with the geometry type appended at the end, such as "output_file_name_Point", "output_file_name_Polyline", etc.</SPAN></P></DIV></DIV></DIV>
33 |
34 |
35 | <DIV STYLE="text-align:Left;"><DIV><DIV><P><SPAN>Specify the output file name. Final output file name will have geometry type appended at the end. </SPAN></P></DIV></DIV></DIV>
36 |
37 |
38 | <DIV STYLE="text-align:Left;"><DIV><DIV><P><SPAN>Check this box if the user wants to load the output feature class to the current map after download. </SPAN></P></DIV></DIV></DIV>
39 |
40 |
41 | <DIV STYLE="text-align:Left;"><DIV><DIV><P><SPAN>This script downloads the Earth Engine feature collection dataset to ArcGIS Pro feature class by its asset ID. The geometry types of the feature collection can be converted to the ArcGIS Pro geometry types: point, multipoint, polyline, polygon. Since ArcGIS Pro feature class does not allow multiple geometry types in the same file, the different geometry types will be saved into separate feature class files. </SPAN></P></DIV></DIV></DIV>
42 |
43 |
44 |
45 | Download Feature Collection by Asset ID
46 |
47 |
48 | management
49 |
50 |
51 |
52 |
53 |
54 | ArcToolbox Tool
55 |
56 |
57 |
58 |
59 |
60 |
61 | 20250625
62 |
63 |
--------------------------------------------------------------------------------
/docs/02_introduction.md:
--------------------------------------------------------------------------------
1 |
2 | # ArcGIS Earth Engine Toolbox (GEE Connector) User Guide: Introduction
3 |
4 | Welcome to the ArcGIS-EarthEngine Toolbox!
5 | This section will describe the basic concepts, and perquisites to use the ArcGIS-EarthEngine Connector toolbox within ArcGIS Pro.
6 |
7 | This user guide provides instructions for using the ArcGIS Earth Engine Toolbox, a Python toolbox that allows users to interact with Google Earth Engine (GEE) from ArcGIS Pro. The toolbox provides a set of tools for managing Earth Engine assets, downloading and uploading data, and processing data using Earth Engine's API. Please see the individual toolbox descriptions in the documents pages for specifics on each tool.
8 |
9 | ## Prerequisites
10 |
11 | Before using the ArcGIS Earth Engine Toolbox, ensure you have the following:
12 |
13 | 1. ArcGIS Pro 3.2 or later installed on your computer.
14 | 2. Google Earth Engine API enabled for your Google Cloud project. See [this page](https://console.cloud.google.com/earth-engine) for Google Cloud Project creation & registration with Earth Engine.
15 | 3. Google Cloud SDK installed on your computer.
16 |
17 | For more detailed information see the [installation page](03_installation.md) in the documentation.
18 |
19 | ## Key Concepts Overview
20 |
21 | ### Google Earth Engine
22 |
23 | [Google Earth Engine](https://cloud.google.com/earth-engine) (GEE) is a cloud-based platform that provides access to a wide range of satellite imagery and geospatial datasets. It allows users to perform complex geospatial analysis and visualization tasks using a wide range of Earth observation data.
24 |
25 | ### Google Cloud Project
26 |
27 | A Google Cloud project is a container for resources and services in Google Cloud. Each project has a unique ID and is associated with a billing account.
28 |
29 | To find your project ID, go to the [Google Cloud Console](https://console.cloud.google.com/), click on the project dropdown menu in the top left corner, and select "Project info". The project ID is displayed in the "Project ID" field.
30 |
31 | If you do not have a Google Cloud project, please see [this page](https://console.cloud.google.com/earth-engine) for a guided flow to create a project, or register an existing project with Earth Engine.
32 |
33 | ### Workload Tag
34 |
35 | Workload tags are labels for monitoring specific computations within Earth Engine. The user can monitor and track tagged computations in the Metrics Explorer using the Earth Engine Cloud Project > Project > Used EECUs metric, and grouping or filtering by workload_tag. Refer to [this link](https://developers.google.com/earth-engine/guides/monitoring_usage) for more information.
36 |
37 | **Workload tag must be 1 - 63 characters, beginning and ending with an alphanumeric character ([a-z0-9A-Z]) with dashes (-), underscores (_), dots (.), and alpha numerics between, or an empty string to reset the default back to none.**
38 |
39 |
40 | ### Google Cloud SDK
41 |
42 | The [Google Cloud SDK](https://cloud.google.com/sdk) (Software Development Kit) is a collection of tools and libraries designed to interact with Google Cloud services. It provides the core tools necessary for managing resources and services on Google Cloud.
43 |
44 | Key components include:
45 |
46 | - gcloud CLI: A command-line tool to manage Google Cloud resources (e.g., deploying applications, managing Kubernetes clusters, configuring services, etc.).
47 | - gsutil: A command-line tool for working with Google Cloud Storage (e.g., uploading, downloading, and managing storage buckets and objects).
48 | - bq: A command-line tool for interacting with BigQuery.
49 | - Libraries and APIs: Programming tools to help developers integrate with Google Cloud.
50 |
51 | ### Google Cloud SDK Shell
52 |
53 | The Google Cloud SDK Shell (specific to Windows) is a pre-configured command-line shell that comes with the Google Cloud SDK installation for Windows users. It provides:
54 |
55 | - A command-line environment with all the tools from the Google Cloud SDK ready to use.
56 | - A pre-configured path for Google Cloud SDK binaries, so users don’t have to configure environment variables manually.
57 | - Windows-specific convenience: It simplifies setup and usage, especially for users who are less comfortable with configuring standard shells like PowerShell or Command Prompt.
58 |
59 | ### ArcGIS Python Toolbox
60 |
61 | An [ArcGIS Python Toolbox](https://pro.arcgis.com/en/pro-app/latest/arcpy/geoprocessing_and_python/a-quick-tour-of-python-toolboxes.htm) (.pyt) is a specialized type of toolbox in the ArcGIS platform, created using Python. It allows users to develop and integrate geoprocessing tools and workflows directly into ArcGIS using Python scripting.
62 |
63 | An ArcGIS Python Toolbox (created as a .pyt file) does not inherently include a custom-designed graphical user interface (GUI). Instead, its GUI is dynamically generated by ArcGIS Pro or ArcMap's **Geoprocessing Pane** or **Toolbox Window**. When a Python toolbox is added to ArcGIS, its tools appear as menu items, and selecting a tool opens a standard ArcGIS geoprocessing dialog box where users can interact with the tool's parameters.
64 |
65 | The GUI for tools in a Python toolbox includes:
66 |
67 | 1. Tool Name and Description:
68 |
69 | The top of the dialog box displays the tool's name and an optional description that the user can define in the Python script.
70 |
71 | 2. Parameter Input Fields and Description:
72 |
73 | Input field types depend on the parameter data type, such as:
74 | - Dropdowns for choices.
75 | - File or layer pickers for datasets.
76 | - Textboxes for string or numeric inputs.
77 | - **Required parameters are marked with a red asterisk.**
78 | - **Input parameters without a red asterisk are optional.**
79 |
80 | Each parameter has a description that the user can define in the Python script.
81 |
82 | 3. Messages Section:
83 |
84 | A section displays any messages generated during execution, such as progress updates, warnings, or errors. **The user can click "View Details" at the bottom of the script to view the full message during or after execution.**
85 |
86 | 4. Environment Settings:
87 |
88 | Users can modify environment settings like processing extents, output coordinate systems, and cell sizes through an additional expandable menu. **Environment settings are unnecessary for the ArcGIS Earth Engine Toolbox.**
89 |
--------------------------------------------------------------------------------
/toolbox/GEE_Connector.AddImg2MapbyObj.pyt.xml:
--------------------------------------------------------------------------------
1 |
2 |
3 |
4 | 20241203
5 | 23464500
6 | 1.0
7 | TRUE
8 | 20250528
9 | 0114200
10 |
11 | 150000000
12 | 5000
13 |
14 | ItemDescription
15 |
16 |
17 | c:\program files\arcgis\pro\Resources\Help\gp
18 |
19 |
20 | <DIV STYLE="text-align:Left;"><DIV><DIV><P><SPAN>The serialized Google Earth Engine object in JSON format. Browse and select the target JSON file to load. </SPAN></P></DIV></DIV></DIV>
21 |
22 |
23 | <DIV STYLE="text-align:Left;"><DIV><DIV><P><SPAN>Choose up to 3 bands for visualization. You can choose </SPAN></P><OL><LI><P><SPAN>One single band for visualization with color ramps</SPAN></P></LI><LI><P><SPAN>Two bands for visualization with red and blue</SPAN></P></LI><LI><P><SPAN>Three bands for visualization with red, green and blue</SPAN></P></LI></OL><P><SPAN /></P></DIV></DIV></DIV>
24 |
25 |
26 | <DIV STYLE="text-align:Left;"><DIV><DIV><P><SPAN>Specify the pixel value(s) to map to 0 (black).</SPAN></P><P><SPAN>Values are scaled to the 8-bit display range (0–255). For example, if band 1 ranges from 5 to 3000, setting min to 5 maps it to 0 (black), and max to 3000 maps it to 255 (white).</SPAN></P><P><SPAN>Use a single number for one band, or a comma-separated list for three bands (e.g., 0 or 0, 0, 0).</SPAN></P><P><SPAN /></P></DIV></DIV></DIV>
27 |
28 |
29 | <DIV STYLE="text-align:Left;"><DIV><DIV><P><SPAN>Specify the pixel value(s) to map to 255 (white).</SPAN></P><P><SPAN>Values are scaled to the 8-bit display range (0–255). For example, if band 1 ranges from 5 to 3000, setting min to 5 maps it to 0 (black), and max to 3000 maps it to 255 (white).</SPAN></P><P><SPAN>Use a single number for one band, or a comma-separated list for three bands (e.g., 30 or 30, 30, 30).</SPAN></P><P><SPAN /></P></DIV></DIV></DIV>
30 |
31 |
32 | <DIV STYLE="text-align:Left;"><DIV><DIV><P><SPAN>Gamma correction adjusts perceived brightness. Use it to enhance contrast in specific tone ranges after mapping pixel values to 0–255. Gamma Values <1 lighten shadows; >1 darken highlights.</SPAN></P><P><SPAN>Use a single number for one band, or a comma-separated list for three bands (e.g., 1 or 0.9, 1, 1.2).</SPAN></P></DIV></DIV></DIV>
33 |
34 |
35 | <DIV STYLE="text-align:Left;"><DIV><DIV><P><SPAN>For single-band images only.</SPAN></P></DIV></DIV></DIV>
36 |
37 |
38 | <DIV STYLE="text-align:Left;"><DIV><DIV><P><SPAN>The user can save the serialized Google Earth Engine object (Image, Image Collection, Feature, Feature Collection, List, Geometry, etc. ) to JSON file. This is very helpful when the user filters the dataset and saves the modified dataset for future use. </SPAN></P><P><SPAN>This script adds the Google Earth Engine Image to ArcGIS Pro as a base map by its serialized JSON object. Please note that the dataset is added as a Tiled Map Service Layer, which is view-only and cannot be edited. The user will need to download the dataset for analysis in ArcGIS Pro. </SPAN></P><P><SPAN>To browse all datasets, please visit </SPAN><A href="https://developers.google.com/earth-engine/datasets/catalog" STYLE="text-decoration:underline;"><SPAN>https://developers.google.com/earth-engine/datasets/catalog</SPAN></A><SPAN>.</SPAN></P><P><SPAN>For image visualization guides, please visit </SPAN><A href="https://developers.google.com/earth-engine/guides/image_visualization" STYLE="text-decoration:underline;"><SPAN>https://developers.google.com/earth-engine/guides/image_visualization </SPAN></A></P></DIV></DIV></DIV>
39 |
40 |
41 |
42 | Add Image to Map by Serialized Object
43 |
44 |
45 | exploration
46 |
47 |
48 |
49 |
50 |
51 | ArcToolbox Tool
52 |
53 |
54 |
55 |
56 |
57 |
58 | 20250528
59 |
60 |
--------------------------------------------------------------------------------
/toolbox/GEE_Connector.AddImg2MapbyID.pyt.xml:
--------------------------------------------------------------------------------
1 |
2 |
3 |
4 | 20241223
5 | 01043500
6 | 1.0
7 | TRUE
8 | 20250528
9 | 0165500
10 |
11 | 150000000
12 | 5000
13 |
14 | ItemDescription
15 |
16 |
17 | c:\program files\arcgis\pro\Resources\Help\gp
18 |
19 |
20 | <DIV STYLE="text-align:Left;"><DIV><DIV><P><SPAN>The asset ID could be found at the dataset information page. For example, ee.Image('AHN/AHN2_05M_INT') </SPAN><SPAN>loads the Google Earth Engine Image </SPAN><SPAN>by asset ID AHN/AHN2_05M_INT. </SPAN></P></DIV></DIV></DIV>
21 |
22 |
23 | <DIV STYLE="text-align:Left;"><DIV><DIV><P><SPAN>Choose up to 3 bands for visualization. You can choose </SPAN></P><OL><LI><P><SPAN>One single band for visualization with color ramps</SPAN></P></LI><LI><P><SPAN>Two bands for visualization with red and blue</SPAN></P></LI><LI><P><SPAN>Three bands for visualization with red, green and blue</SPAN></P></LI></OL></DIV></DIV></DIV>
24 |
25 |
26 | <DIV STYLE="text-align:Left;"><DIV><DIV><P><SPAN>Specify the pixel value(s) to map to 0 (black).</SPAN></P><P><SPAN>Values are scaled to the 8-bit display range (0–255). For example, if band 1 ranges from 5 to 3000, setting min to 5 maps it to 0 (black), and max to 3000 maps it to 255 (white).</SPAN></P><P><SPAN>Use a single number for one band, or a comma-separated list for three bands (e.g., 0 or 0, 0, 0).</SPAN></P><P><SPAN /></P></DIV></DIV></DIV>
27 |
28 |
29 | <DIV STYLE="text-align:Left;"><DIV><DIV><P><SPAN>Specify the pixel value(s) to map to 255 (white).</SPAN></P><P><SPAN>Values are scaled to the 8-bit display range (0–255). For example, if band 1 ranges from 5 to 3000, setting min to 5 maps it to 0 (black), and max to 3000 maps it to 255 (white).</SPAN></P><P><SPAN>Use a single number for one band, or a comma-separated list for three bands (e.g., 30 or 30, 30, 30).</SPAN></P><P><SPAN /></P></DIV></DIV></DIV>
30 |
31 |
32 | <DIV STYLE="text-align:Left;"><DIV><DIV><P><SPAN>Gamma correction adjusts perceived brightness. Use it to enhance contrast in specific tone ranges after mapping pixel values to 0–255. Gamma Values <1 lighten shadows; >1 darken highlights.</SPAN></P><P><SPAN>Use a single number for one band, or a comma-separated list for three bands (e.g., 1 or 0.9, 1, 1.2).</SPAN></P></DIV></DIV></DIV>
33 |
34 |
35 | <DIV STYLE="text-align:Left;"><DIV><DIV><P><SPAN>For single-band images only.</SPAN></P></DIV></DIV></DIV>
36 |
37 |
38 | <DIV STYLE="text-align:Left;"><DIV><DIV><P><SPAN>Save the image to a serialized JSON object for future use.</SPAN></P></DIV></DIV></DIV>
39 |
40 |
41 | <DIV STYLE="text-align:Left;"><DIV><DIV><P><SPAN>This script adds the Google Earth Engine Image to ArcGIS Pro as a base map by its asset ID and customizes the visualization parameters. Please note that the dataset is added as a Tiled Map Service Layer, which is view- only and cannot be edited. The user will need to download the dataset for analysis in ArcGIS Pro. </SPAN></P><P><SPAN>To browse all datasets, please visit </SPAN><A href="https://developers.google.com/earth-engine/datasets/catalog" STYLE="text-decoration:underline;"><SPAN>https://developers.google.com/earth-engine/datasets/catalog</SPAN></A><SPAN>.</SPAN></P><P><SPAN>For image visualization guides, please visit </SPAN><A href="https://developers.google.com/earth-engine/guides/image_visualization" STYLE="text-decoration:underline;"><SPAN>https://developers.google.com/earth-engine/guides/image_visualization </SPAN></A></P></DIV></DIV></DIV>
42 |
43 |
44 |
45 | Add Image to Map by Asset ID
46 |
47 |
48 | exploration
49 |
50 |
51 |
52 |
53 |
54 | ArcToolbox Tool
55 |
56 |
57 |
58 |
59 |
60 |
61 | 20250528
62 |
63 |
--------------------------------------------------------------------------------
/toolbox/GEE_Connector.AddImgCol2MapbyObj.pyt.xml:
--------------------------------------------------------------------------------
1 |
2 |
3 |
4 | 20241122
5 | 12174800
6 | 1.0
7 | TRUE
8 | 20250528
9 | 0171900
10 |
11 | 150000000
12 | 5000
13 |
14 | ItemDescription
15 |
16 |
17 | c:\program files\arcgis\pro\Resources\Help\gp
18 |
19 |
20 | <DIV STYLE="text-align:Left;"><DIV><DIV><P><SPAN>The serialized Google Earth Engine object in JSON format. Browse and select the target JSON file to load. </SPAN></P></DIV></DIV></DIV>
21 |
22 |
23 | <DIV STYLE="text-align:Left;"><DIV><DIV><P><SPAN>The first 100 filtered images will be listed here. Select one image to add per run. </SPAN></P><P><SPAN /></P></DIV></DIV></DIV>
24 |
25 |
26 | <DIV STYLE="text-align:Left;"><DIV><DIV><P><SPAN>Choose up to 3 bands for visualization. You can choose </SPAN></P><OL><LI><P><SPAN>One single band for visualization with color ramps</SPAN></P></LI><LI><P><SPAN>Two bands for visualization with red and blue</SPAN></P></LI><LI><P><SPAN>Three bands for visualization with red, green and blue</SPAN></P></LI></OL></DIV></DIV></DIV>
27 |
28 |
29 | <DIV STYLE="text-align:Left;"><DIV><DIV><P><SPAN>Specify the pixel value(s) to map to 0 (black).</SPAN></P><P><SPAN>Values are scaled to the 8-bit display range (0–255). For example, if band 1 ranges from 5 to 3000, setting min to 5 maps it to 0 (black), and max to 3000 maps it to 255 (white).</SPAN></P><P><SPAN>Use a single number for one band, or a comma-separated list for three bands (e.g., 0 or 0, 0, 0).</SPAN></P></DIV></DIV></DIV>
30 |
31 |
32 | <DIV STYLE="text-align:Left;"><DIV><DIV><P><SPAN>Specify the pixel value(s) to map to 255 (white).</SPAN></P><P><SPAN>Values are scaled to the 8-bit display range (0–255). For example, if band 1 ranges from 5 to 3000, setting min to 5 maps it to 0 (black), and max to 3000 maps it to 255 (white).</SPAN></P><P><SPAN>Use a single number for one band, or a comma-separated list for three bands (e.g., 30 or 30, 30, 30).</SPAN></P></DIV></DIV></DIV>
33 |
34 |
35 | <DIV STYLE="text-align:Left;"><DIV><DIV><P><SPAN>Gamma correction adjusts perceived brightness. Use it to enhance contrast in specific tone ranges after mapping pixel values to 0–255. Gamma Values <1 lighten shadows; >1 darken highlights.</SPAN></P><P><SPAN>Use a single number for one band, or a comma-separated list for three bands (e.g., 1 or 0.9, 1, 1.2).</SPAN></P></DIV></DIV></DIV>
36 |
37 |
38 | <DIV STYLE="text-align:Left;"><DIV><DIV><P><SPAN>For single-band images only.</SPAN></P></DIV></DIV></DIV>
39 |
40 |
41 | <DIV STYLE="text-align:Left;"><DIV><DIV><P><SPAN>The user can save the serialized Google Earth Engine object (Image, Image Collection, Feature, Feature Collection, List, Geometry, etc. ) to JSON file. This is very helpful when the user filters the dataset and saves the modified dataset for future use. </SPAN></P><P><SPAN>This script adds the Google Earth Engine Image Collection to ArcGIS Pro as a base map by its serialized JSON object. Please note that the dataset is added as a Tiled Map Service Layer, which is view only and cannot be edited. The user will need to download the dataset for analysis in ArcGIS Pro. </SPAN></P><P><SPAN>To browse all datasets, please visit </SPAN><A href="https://developers.google.com/earth-engine/datasets/catalog" STYLE="text-decoration:underline;"><SPAN>https://developers.google.com/earth-engine/datasets/catalog</SPAN></A><SPAN>.</SPAN></P><P><SPAN>For image visualization guides, please visit </SPAN><A href="https://developers.google.com/earth-engine/guides/image_visualization" STYLE="text-decoration:underline;"><SPAN>https://developers.google.com/earth-engine/guides/image_visualization </SPAN></A></P></DIV></DIV></DIV>
42 |
43 |
44 |
45 | Add Image Collection to Map by Serialized Object
46 |
47 |
48 | exploration
49 |
50 |
51 |
52 |
53 |
54 | ArcToolbox Tool
55 |
56 |
57 |
58 |
59 |
60 |
61 | 20250528
62 |
63 |
--------------------------------------------------------------------------------
/toolbox/GEE_Connector.DownloadImgColbyIDMultiRegion.pyt.xml:
--------------------------------------------------------------------------------
1 |
2 |
3 |
4 | 20250204
5 | 23571700
6 | 1.0
7 | TRUE
8 | 20250205
9 | 0201200
10 |
11 | 150000000
12 | 5000
13 |
14 | ItemDescription
15 |
16 |
17 | c:\program files\arcgis\pro\Resources\Help\gp
18 |
19 |
20 | <DIV STYLE="text-align:Left;"><DIV><DIV><P><SPAN>The asset ID could be found at the dataset information page. For example, </SPAN><SPAN>“</SPAN><SPAN>ee.ImageCollection('AAFC/ACI')</SPAN><SPAN>” </SPAN><SPAN>loads the Google Earth Engine Image </SPAN><SPAN>Collection </SPAN><SPAN>by asset ID "AAFC/ACI". </SPAN></P></DIV></DIV></DIV>
21 |
22 |
23 | <DIV STYLE="text-align:Left;"><DIV><DIV><P><SPAN>The user can filter the image collection by starting and ending dates. The typical formats of date strings are listed below. </SPAN></P><OL><LI><P><SPAN> Year only, '2020'</SPAN></P></LI><LI><P><SPAN>Year and month, '2020-07'</SPAN></P></LI><LI><P><SPAN>Year, month and date, '2020-07-01'</SPAN></P></LI><LI><P><SPAN>Year, month, date, and time, '2020-07-05T06:34:46'</SPAN></P></LI></OL><P><SPAN>For more information, please visit </SPAN><A href="https://developers.google.com/earth-engine/apidocs/ee-imagecollection-filterdate" STYLE="text-decoration:underline;"><SPAN>https://developers.google.com/earth-engine/apidocs/ee-imagecollection-filterdate</SPAN></A></P></DIV></DIV></DIV>
24 |
25 |
26 | <DIV STYLE="text-align:Left;"><DIV><DIV><P><SPAN>Choose a polygon feature layer as the region of interest to download the GeoTIFF. The image will be clipped by the extent of each polygon object. </SPAN></P></DIV></DIV></DIV>
27 |
28 |
29 | <DIV STYLE="text-align:Left;"><DIV><DIV><P><SPAN>Choose between filtering by the centroid of polygon object or by the bounding box of polygon object.</SPAN></P></DIV></DIV></DIV>
30 |
31 |
32 | <DIV STYLE="text-align:Left;"><DIV><DIV><P><SPAN>Specify the maximum number of images to download per region. This is used to control the total download size. If not specified, the script will download all images. </SPAN></P></DIV></DIV></DIV>
33 |
34 |
35 | <DIV STYLE="text-align:Left;"><DIV><DIV><P><SPAN>The image dataset could contain multiple bands. Select the target bands to download. The user can select as many as needed. </SPAN></P></DIV></DIV></DIV>
36 |
37 |
38 | <DIV STYLE="text-align:Left;"><DIV><DIV><P><SPAN>Specify the scale of the downloaded GeoTIFF in meters. The default scale uses the maximum scale among the selected bands. </SPAN></P></DIV></DIV></DIV>
39 |
40 |
41 | <DIV STYLE="text-align:Left;"><DIV><DIV><P><SPAN>Specify the full path of the output folder to store the GeoTIFF files. One image per GeoTIFF file. Each GeoTIFF file is automatically named with the image name. </SPAN></P></DIV></DIV></DIV>
42 |
43 |
44 | <DIV STYLE="text-align:Left;"><DIV><P><SPAN>Check this box if the user wants to load the output GeoTIFF file to the current map after download. </SPAN></P></DIV></DIV>
45 |
46 |
47 | <DIV STYLE="text-align:Left;"><DIV><DIV><P><SPAN>This script downloads the Earth Engine image collection dataset to GeoTIFF by its asset ID at multiple regions. Each polygon object will be treated as one region and the images are clipped by the region bounding box. </SPAN></P></DIV></DIV></DIV>
48 |
49 |
50 |
51 | Download Image Collection by Asset ID at Multiple Regions
52 |
53 |
54 | management
55 |
56 |
57 |
58 |
59 |
60 | ArcToolbox Tool
61 |
62 |
63 |
64 |
65 |
66 |
67 | 20250205
68 |
69 |
--------------------------------------------------------------------------------
/toolbox/GEE_Connector.GCSFile2Asset.pyt.xml:
--------------------------------------------------------------------------------
1 |
2 |
3 |
4 | 20241108
5 | 00184200
6 | 1.0
7 | TRUE
8 | 20250515
9 | 0362400
10 |
11 | 150000000
12 | 5000
13 |
14 | ItemDescription
15 |
16 |
17 | c:\program files\arcgis\pro\Resources\Help\gp
18 |
19 |
20 | <DIV STYLE="text-align:Left;"><DIV><DIV><P><SPAN>Specify the Google Cloud project ID associated with Google Cloud Storage. </SPAN></P></DIV></DIV></DIV>
21 |
22 |
23 | <DIV STYLE="text-align:Left;"><DIV><DIV><P><SPAN>All buckets available in the specified project will be listed here. Select one bucket.</SPAN></P></DIV></DIV></DIV>
24 |
25 |
26 | <DIV STYLE="text-align:Left;"><DIV><DIV><P><SPAN>All folders in the selected bucket will be listed here. Select one folder. </SPAN></P></DIV></DIV></DIV>
27 |
28 |
29 | <DIV STYLE="text-align:Left;"><DIV><DIV><P><SPAN>Two options: </SPAN></P><OL><LI><P><SPAN>If you know the gsutil URI of the target file, just paste the URI here. </SPAN></P></LI><LI><P><SPAN>If not, all files in the selected folder in format (".tif", ".shp", ".csv", ".zip", ".tfrecord") will be listed here. Select one or multiple files to convert to Earth Engine asset.</SPAN></P></LI></OL><P><SPAN>Each .zip file can only contain one .shp file and its accessory files (.shx, .dbf, .prj, .cpg). When you choose .shp file, please make sure the accessory files are in the same folder. </SPAN></P><P><SPAN> </SPAN></P></DIV></DIV></DIV>
30 |
31 |
32 | <DIV STYLE="text-align:Left;"><DIV><DIV><P><SPAN>Choose asset type between image and table. </SPAN></P><OL><LI><P><SPAN>Choose image if you want to convert files to image or image collection</SPAN></P></LI><LI><P><SPAN>Choose table if you want to convert files to feature collection(s)</SPAN></P></LI></OL></DIV></DIV></DIV>
33 |
34 |
35 | <DIV STYLE="text-align:Left;"><P><SPAN>Specify an asset tag for the file(s). The available options are given below:</SPAN></P><OL><LI><P><SPAN>Select one file with asset type as image. The input value is the image asset tag. </SPAN></P></LI><LI><P><SPAN>Select multiple files with asset type as image. The input value is the image collection asset tag. The image ID in the collection will be automatically assigned with the file name.</SPAN></P></LI><LI><P><SPAN>Select one file with asset type as table. The input value is the feature collection asset tag. </SPAN></P></LI><LI><P><SPAN>Select multiple files with asset type as table. The input value is the folder that contains multiple feature collections. The feature collection ID will be automatically assigned with the file name. </SPAN></P></LI></OL></DIV>
36 |
37 |
38 | <DIV STYLE="text-align:Left;"><DIV><DIV><P><SPAN>This script converts file(s) in Google Cloud Storage to an Earth Engine asset. It is used to share dataset on the Earth Engine platform. The file(s) will be assigned with a user-specified asset tag. There are two options to locate the target files: </SPAN></P><OL><LI><P><SPAN>If the gsutil URI is known, specify the project ID and URI as the file output. If you are working with a large number of folders and files in your bucket, we recommend using the file URI directly.</SPAN></P></LI><LI><P><SPAN>If not, specify the project ID and select the bucket, folder and target file one by one.</SPAN></P></LI></OL><P><SPAN>You can convert the file(s) to the following types of Earth Engine assets:</SPAN></P><OL><LI><P><SPAN>Image when you select one file in '.tif' format</SPAN></P></LI><LI><P><SPAN>Image collection when you select multiple files in '.tif' format</SPAN></P></LI><LI><P><SPAN>Feature collection when you select one file in '.shp', '.csv', '.zip' or '.tfrecord' format. </SPAN></P></LI><LI><P><SPAN>Feature collections when you select multiple files in '.shp', '.csv', '.zip' or '.tfrecord' format. Each file will be converted to a feature collection, respectively. </SPAN></P><P><SPAN /></P></LI></OL></DIV></DIV></DIV>
39 |
40 |
41 |
42 | Convert Cloud Storage File to Earth Engine Asset
43 |
44 |
45 | management
46 |
47 |
48 |
49 |
50 |
51 | ArcToolbox Tool
52 |
53 |
54 |
55 |
56 |
57 |
58 | 20250515
59 |
60 |
--------------------------------------------------------------------------------
/toolbox/GEE_Connector.Upload2GCS.pyt.xml:
--------------------------------------------------------------------------------
1 |
2 |
3 |
4 | 20241007
5 | 00090900
6 | 1.0
7 | TRUE
8 | 20241220
9 | 0034100
10 |
11 | 150000000
12 | 5000
13 |
14 | ItemDescription
15 |
16 |
17 | c:\program files\arcgis\pro\Resources\Help\gp
18 |
19 |
20 | <DIV STYLE="text-align:Left;"><DIV><DIV><P><SPAN>Specify the Google Cloud project ID associated with Google Cloud Storage. </SPAN></P><P><SPAN /></P></DIV></DIV></DIV>
21 |
22 |
23 | <DIV STYLE="text-align:Left;"><DIV><DIV><P><SPAN>All buckets available in the specified project will be listed here. Select one bucket.</SPAN></P><P><SPAN /></P></DIV></DIV></DIV>
24 |
25 |
26 | <DIV STYLE="text-align:Left;"><DIV><DIV><P><SPAN>All folders in the selected bucket will be listed here. Select one folder. </SPAN></P></DIV></DIV></DIV>
27 |
28 |
29 | <DIV STYLE="text-align:Left;"><DIV><DIV><P><SPAN>Choose files from local storage in format (".tif", ".shp", ".csv", ".zip", ".tfrecord"). Select one or multiple files to convert to Earth Engine asset.</SPAN></P><P><SPAN>Each .zip file can only contain one .shp file and its accessory files (.shx, .dbf, .prj, .cpg). When you choose .shp file, please make sure the accessory files are in the same folder. The script will automatically upload the accessory files. </SPAN></P></DIV></DIV></DIV>
30 |
31 |
32 | <DIV STYLE="text-align:Left;"><DIV><DIV><P><SPAN>Check this box if you want to convert the selected files to Earth Engine asset. </SPAN></P></DIV></DIV></DIV>
33 |
34 |
35 | <DIV STYLE="text-align:Left;"><DIV><DIV><P><SPAN>Choose asset type between image and table. </SPAN></P><OL><LI><P><SPAN>Choose image if you want to convert files to image or image collection</SPAN></P></LI><LI><P><SPAN>Choose table if you want to convert files to feature collection(s)</SPAN></P></LI></OL></DIV></DIV></DIV>
36 |
37 |
38 | <DIV STYLE="text-align:Left;"><P><SPAN>Specify an asset tag for the file(s). The available options are given below:</SPAN></P><OL><LI><P><SPAN>Select one file with asset type as image. The input value is the image asset tag. </SPAN></P></LI><LI><P><SPAN>Select multiple files with asset type as image. The input value is the image collection asset tag. The image ID in the collection will be automatically assigned with the file name.</SPAN></P></LI><LI><P><SPAN>Select one file with asset type as table. The input value is the feature collection asset tag. </SPAN></P></LI><LI><P><SPAN>Select multiple files with asset type as table. The input value is the folder that contains multiple feature collections. The feature collection ID will be automatically assigned with the file name. </SPAN></P></LI></OL></DIV>
39 |
40 |
41 | <DIV STYLE="text-align:Left;"><DIV><DIV><P><SPAN>This script uploads file(s) from local storage to Google Cloud Storage and converts file(s) to Earth Engine asset. It is used to share dataset on Google Cloud and the Earth Engine platform. The file(s) will be assigned with a user-specified asset tag. There are two options to locate the target files: </SPAN></P><OL><LI><P><SPAN>If you know the gsutil URI of the target file, just specify the project ID and paste the URI to the file input. If you are dealing with a large bucket with lots of folders and files, it is recommended to use file URI directly. Otherwise, it will take time to locate the file. </SPAN></P></LI><LI><P><SPAN>If not, specify the project ID and select the bucket, folder and target file one by one.</SPAN></P></LI></OL><P><SPAN>You can convert the file(s) to the following types of Earth Engine assets:</SPAN></P><OL><LI><P><SPAN>Image when you select one file in '.tif' format</SPAN></P></LI><LI><P><SPAN>Image collection when you select multiple files in '.tif' format</SPAN></P></LI><LI><P><SPAN>Feature collection when you select one file in '.shp', '.csv', '.zip' or '.tfrecord' format. </SPAN></P></LI><LI><P><SPAN>Feature collections when you select multiple files in '.shp', '.csv', '.zip' or '.tfrecord' format. Each file will be converted to a feature collection, respectively. </SPAN></P></LI></OL></DIV></DIV></DIV>
42 |
43 |
44 |
45 | Upload File to Google Cloud Storage and Convert to Earth Engine Asset
46 |
47 |
48 | management
49 |
50 |
51 |
52 |
53 |
54 | ArcToolbox Tool
55 |
56 |
57 |
58 |
59 |
60 |
61 | 20241220
62 |
63 |
--------------------------------------------------------------------------------
/toolbox/GEE_Connector.ExportImg2AssetbyObj.pyt.xml:
--------------------------------------------------------------------------------
1 |
2 |
3 |
4 | 20250818
5 | 14345800
6 | 1.0
7 | TRUE
8 | 20250818
9 | 23121800
10 |
11 | 150000000
12 | 5000
13 |
14 | ItemDescription
15 |
16 |
17 | c:\program files\arcgis\pro\Resources\Help\gp
18 |
19 |
20 | <DIV STYLE="text-align:Left;"><DIV><DIV><P><SPAN>The serialized Google Earth Engine object in JSON format. Browse and select the target JSON file to load. </SPAN></P></DIV></DIV><DIV><P><SPAN /></P></DIV></DIV>
21 |
22 |
23 | <DIV STYLE="text-align:Left;"><DIV><P><SPAN>Select either Image or Image Collection. If Image Collection is chosen, the script will export each image in the collection individually.</SPAN></P></DIV></DIV>
24 |
25 |
26 | <DIV STYLE="text-align:Left;"><DIV><P><SPAN>Select the bands to export. If not selected, all bands will be exported. </SPAN></P></DIV></DIV>
27 |
28 |
29 | <DIV STYLE="text-align:Left;"><DIV><P><SPAN>Specify the asset ID for the exported dataset within your asset folder. The asset ID must begin with projects/YOUR_PROJECT_ID/assets/, followed by any additional path you wish to include.</SPAN></P></DIV></DIV>
30 |
31 |
32 | <DIV STYLE="text-align:Left;"><DIV><P><SPAN>This string is used as the task name for each export. For image collections, the image ID is appended to the description to ensure each export task name is unique.</SPAN></P></DIV></DIV>
33 |
34 |
35 | <DIV STYLE="text-align:Left;"><DIV><P><SPAN>The pyramiding policy to apply to each band in the image, keyed by band name. Values must be one of: mean, sample, min, max, or mode. Defaults to "mean". A special key, ".default" may be used to change the default for all bands.</SPAN></P></DIV></DIV>
36 |
37 |
38 | <DIV STYLE="text-align:Left;"><DIV><P><SPAN>The dimensions to use for the exported image. Takes either a single positive integer as the maximum dimension or "WIDTHxHEIGHT" where WIDTH and HEIGHT are each positive integers.</SPAN></P></DIV></DIV>
39 |
40 |
41 | <DIV STYLE="text-align:Left;"><DIV><P><SPAN>Choose between using the current map extent and specifying a polygon feature layer. </SPAN></P></DIV></DIV>
42 |
43 |
44 | <DIV STYLE="text-align:Left;"><DIV><P><SPAN>Specify the polygon layer if you choose polygon as region of interest. </SPAN></P></DIV></DIV>
45 |
46 |
47 | <DIV STYLE="text-align:Left;"><DIV><P><SPAN>Resolution in meters per pixel. Defaults to 1000.</SPAN></P></DIV></DIV>
48 |
49 |
50 | <DIV STYLE="text-align:Left;"><DIV><P><SPAN>Restrict the number of pixels in the export. By default, you will see an error if the export exceeds 1e8 pixels. Setting this value explicitly allows one to raise or lower this limit.</SPAN></P></DIV></DIV>
51 |
52 |
53 | <DIV STYLE="text-align:Left;"><DIV><P><SPAN>Size in pixels of the tiles in which this image will be computed. Defaults to 256.</SPAN></P></DIV></DIV>
54 |
55 |
56 | <DIV STYLE="text-align:Left;"><DIV><P><SPAN>The priority of the task within the project. Higher priority tasks are scheduled sooner. Must be an integer between 0 and 9999. Defaults to 100.</SPAN></P></DIV></DIV>
57 |
58 |
59 | <DIV STYLE="text-align:Left;"><DIV><DIV><P><SPAN>This script exports the serialized JSON object of an image or image collection to an Earth Engine asset. It is intended for cases where the user has applied filters, mapping, or reduction operations and wants to save the processed dataset to avoid repeated computation.</SPAN></P></DIV></DIV></DIV>
60 |
61 |
62 |
63 | Export Image or Image Collection to Earth Engine Asset by Serialized Object
64 |
65 |
66 | management
67 |
68 |
69 |
70 |
71 |
72 | ArcToolbox Tool
73 |
74 |
75 |
76 |
77 |
78 |
79 | 20250818
80 |
81 |
--------------------------------------------------------------------------------
/toolbox/GEE_Connector.DownloadImgColbyID.pyt.xml:
--------------------------------------------------------------------------------
1 |
2 |
3 |
4 | 20241211
5 | 23373800
6 | 1.0
7 | TRUE
8 | 20250314
9 | 2402200
10 |
11 | 150000000
12 | 5000
13 |
14 | ItemDescription
15 |
16 |
17 | c:\program files\arcgis\pro\Resources\Help\gp
18 |
19 |
20 | <DIV STYLE="text-align:Left;"><DIV><DIV><P><SPAN>The asset ID could be found at the dataset information page. For example, </SPAN><SPAN>“</SPAN><SPAN>ee.ImageCollection('AAFC/ACI')</SPAN><SPAN>” </SPAN><SPAN>loads the Google Earth Engine Image </SPAN><SPAN>Collection </SPAN><SPAN>by asset ID "AAFC/ACI". </SPAN></P></DIV></DIV></DIV>
21 |
22 |
23 | <DIV STYLE="text-align:Left;"><DIV><DIV><P><SPAN>The user can filter the image collection by starting and ending dates. The typical formats of date strings are listed below. </SPAN></P><OL><LI><P><SPAN> Year only, '2020'</SPAN></P></LI><LI><P><SPAN>Year and month, '2020-07'</SPAN></P></LI><LI><P><SPAN>Year, month and date, '2020-07-01'</SPAN></P></LI><LI><P><SPAN>Year, month, date, and time, '2020-07-05T06:34:46'</SPAN></P></LI></OL><P><SPAN>For more information, please visit </SPAN><A href="https://developers.google.com/earth-engine/apidocs/ee-imagecollection-filterdate" STYLE="text-decoration:underline;"><SPAN>https://developers.google.com/earth-engine/apidocs/ee-imagecollection-filterdate</SPAN></A></P></DIV></DIV></DIV>
24 |
25 |
26 | <DIV STYLE="text-align:Left;"><DIV><DIV><P><SPAN>Filter a collection by intersection with point geometry. Items in the collection with a footprint that fails to intersect the given geometry will be excluded.</SPAN></P></DIV></DIV></DIV>
27 |
28 |
29 | <DIV STYLE="text-align:Left;"><DIV><DIV><P><SPAN>Use the centroid of the current map view as the point geometry.</SPAN></P><P><SPAN /></P></DIV></DIV></DIV>
30 |
31 |
32 | <DIV STYLE="text-align:Left;"><DIV><DIV><P><SPAN>The first 100 filtered images will be listed here. The user can select multiple images to download. </SPAN></P><P><SPAN /></P></DIV></DIV></DIV>
33 |
34 |
35 | <DIV STYLE="text-align:Left;"><DIV><DIV><P><SPAN>The image dataset could contain multiple bands. Select the target bands to download. The user can select as many as needed. </SPAN></P></DIV></DIV></DIV>
36 |
37 |
38 | <DIV STYLE="text-align:Left;"><DIV><DIV><P><SPAN>Specify the scale of the downloaded GeoTIFF in meters. The default scale uses the maximum scale among the selected bands. </SPAN></P></DIV></DIV></DIV>
39 |
40 |
41 | <DIV STYLE="text-align:Left;"><DIV><DIV><P><SPAN>Choose a polygon feature layer as the region of interest to download the GeoTIFF. The image will be clipped by the polygon extent. </SPAN></P></DIV></DIV></DIV>
42 |
43 |
44 | <DIV STYLE="text-align:Left;"><DIV><DIV><P><SPAN>Check this box if using the current map extent as the region of interest.</SPAN></P></DIV></DIV></DIV>
45 |
46 |
47 | <DIV STYLE="text-align:Left;"><DIV><DIV><P><SPAN>Specify the full path of the output folder to store the GeoTIFF files. One image per GeoTIFF file. Each GeoTIFF file is automatically named with the image name. </SPAN></P></DIV></DIV></DIV>
48 |
49 |
50 | <DIV STYLE="text-align:Left;"><DIV><DIV><P><SPAN>Check this box if the user wants to load the output GeoTIFF file to the current map after download. </SPAN></P></DIV></DIV></DIV>
51 |
52 |
53 | <DIV STYLE="text-align:Left;"><DIV><DIV><P><SPAN>This script downloads the Earth Engine image collection dataset to GeoTIFF by its asset ID. It converts Earth Engine image collection object to xarray dataset using 'xee' and writes to local GeoTIFF file using 'rasterio'. Theoretically, there is no file size limitation compared to other functions such as ee.Image.getDownloadURL() and ee.data.getPixels(). Larger files will take longer to download. </SPAN></P><P><SPAN /></P></DIV></DIV></DIV>
54 |
55 |
56 |
57 | Download Image Collection by Asset ID
58 |
59 |
60 | management
61 |
62 |
63 |
64 |
65 |
66 | ArcToolbox Tool
67 |
68 |
69 |
70 |
71 |
72 |
73 | 20250314
74 |
75 |
--------------------------------------------------------------------------------
/docs/07_data_processing_tools.md:
--------------------------------------------------------------------------------
1 | # ArcGIS Earth Engine Toolbox User Guide: Data Processing Tools
2 |
3 | These tools allow applying filters and map functions to collection datasets, apply reducers and run Python scripts.
4 |
5 | ## Data Processing Tools
6 |
7 | ### Apply Filters to Collection Dataset by Asset ID
8 |
9 | This script applies filters to feature collection or image collection by asset ID, and saves the filtered dataset to serialized JSON object for future use.
10 |
11 | To browser all available earth engine filters, please visit [this link](https://developers.google.com/earth-engine/apidocs/ee-filter).
12 |
13 | For a quick guide on filtering feature collection, please visit [this link](https://developers.google.com/earth-engine/guides/feature_collection_filtering).
14 |
15 | For a quick guide on filtering image collection, please visit [this link](https://developers.google.com/earth-engine/guides/ic_filtering).
16 |
17 | 
18 |
19 | #### Parameters
20 |
21 | 1. Choose the type of dataset to filter
22 | 2. Asset ID
23 | 3. Specify the filters and the corresponding arguments
24 | 4. Specify the output JSON file name
25 |
26 | Here is the video guide for applying filters to collection dataset by asset ID:
27 |
28 |
33 |
34 | ### Apply Filters to Collection Dataset by Serialized Object
35 |
36 | This script applies filters to feature collection or image collection by serialized JSON object, and saves the filtered dataset to a new serialized JSON object for future use. It is useful when you want to apply filters to the existing JSON object.
37 |
38 | To browser all available earth engine filters, please visit [this link](https://developers.google.com/earth-engine/apidocs/ee-filter).
39 |
40 | For a quick guide on filtering feature collection, please visit [this link](https://developers.google.com/earth-engine/guides/feature_collection_filtering).
41 |
42 | For a quick guide on filtering image collection, please visit [this link](https://developers.google.com/earth-engine/guides/ic_filtering).
43 |
44 | 
45 |
46 | #### Parameters
47 |
48 | 1. Serialized JSON file
49 | 2. Specify the filters and the corresponding arguments
50 | 3. Specify the output JSON file name
51 |
52 | Here is the video guide for applying filters to collection dataset by serialized object:
53 |
54 |
59 |
60 | ### Apply Map Functions to Collection Dataset by Asset ID
61 |
62 | This script applies user-defined map functions to the feature collection or image collection dataset by asset ID and saves the processed dataset to a serialized JSON object for future use.
63 |
64 | For a quick guide on mapping over image collection dataset, please visit [this link](https://developers.google.com/earth-engine/guides/ic_mapping).
65 |
66 | For a quick guide on mapping over feature collection dataset, please visit [this link](https://developers.google.com/earth-engine/guides/feature_collection_mapping).
67 |
68 | 
69 |
70 | #### Parameters
71 |
72 | 1. Choose the type of dataset to process
73 | 2. Asset ID
74 | 3. Specify the python script that contains the map functions
75 | 4. Select the map functions to apply
76 | 5. Specify the output JSON file name
77 |
78 | >[!NOTE]
79 | > The python script that contains the map functions must be saved in the same folder as the GEE Connector Python Toolbox.
80 |
81 | Here is the video guide for applying map functions to collection dataset by asset ID:
82 |
83 |
88 |
89 | ### Apply Map Functions to Collection Dataset by Serialized Object
90 |
91 | This script applies user-define map functions to the feature collection or image collection dataset by the serialized JSON object and saves the processed dataset to a new serialized JSON object for future use. It is useful when you want to apply map functions to the existing JSON object.
92 |
93 | For a quick guide on mapping over image collection dataset, please visit [this link](https://developers.google.com/earth-engine/guides/ic_mapping).
94 |
95 | For a quick guide on mapping over feature collection dataset, please visit [this link](https://developers.google.com/earth-engine/guides/feature_collection_mapping).
96 |
97 | 
98 |
99 | #### Parameters
100 |
101 | 1. Choose the type of dataset to process
102 | 2. Serialized JSON file
103 | 3. Specify the python script that contains the map functions
104 | 4. Select the map functions to apply
105 | 5. Specify the output JSON file name
106 |
107 | >[!NOTE]
108 | > The python script that contains the map functions must be saved in the same folder as the GEE Connector Python Toolbox.
109 |
110 | Here is the video guide for applying map functions to collection dataset by serialized object:
111 |
112 |
117 |
118 | ### Apply Reducers to Earth Engine Dataset by Asset ID
119 |
120 | This script applies reducers to the feature collection, image or image collection dataset by asset ID and saves the processed dataset to a serialized JSON object for future use.
121 |
122 | To browser all available earth engine filters, please visit [this link](https://developers.google.com/earth-engine/apidocs/ee-reducer-allnonzero).
123 |
124 | For reducer overview, please visit [this link](https://developers.google.com/earth-engine/guides/reducers_intro).
125 |
126 | 
127 |
128 | #### Parameters
129 |
130 | 1. Choose the type of dataset to process
131 | 2. Choose the reduction method
132 | 3. Specify the arguments for the reduction method
133 | 4. Asset ID
134 | 5. Specify the filters and the corresponding arguments
135 | 6. Specify the reducers and the corresponding arguments
136 | 7. Specify the output JSON file name
137 |
138 | ### Apply Reducers to Earth Engine Dataset by Serialized Object
139 |
140 | This script applies reducers to the feature collection, image or image collection dataset by serialized JSON object and saves the processed dataset to a new serialized JSON object for future use. It is useful when you want to apply reducers to the existing JSON object.
141 |
142 | To browser all available earth engine filters, please visit [this link](https://developers.google.com/earth-engine/apidocs/ee-reducer-allnonzero).
143 |
144 | For reducer overview, please visit [this link](https://developers.google.com/earth-engine/guides/reducers_intro).
145 |
146 | 
147 |
148 | #### Parameters
149 |
150 | 1. Choose the type of dataset to process
151 | 2. Choose the reduction method
152 | 3. Specify the arguments for the reduction method
153 | 4. Serialized JSON file
154 | 5. Specify the reducers and the corresponding arguments
155 | 6. Specify the output JSON file name
156 |
157 | ### Run User-Provided Python Script
158 |
159 | This script enables users to execute customized Python scripts within ArcGIS Pro. To ensure your script runs successfully, follow these tips:
160 |
161 | 1. Include the following line at the beginning of your script to import the Earth Engine API
162 |
163 | ```
164 | import ee
165 | ```
166 |
167 | 2. Unlike the ArcGIS Pro environment, the Earth Engine API must be initialized separately. Add the following line to your script, replacing QUOTA_PROJECT_ID with your project ID
168 |
169 | ```
170 | ee.Initialize(project='QUOTA_PROJECT_ID')
171 | ```
172 |
173 | 3. Set workload tag if needed, add the following line to your script, replacing WORKLOAD_TAG with your workload tag such as "arcgis-ee-connector"
174 |
175 | ```
176 | ee.data.setWorkloadTag(WORKLOAD_TAG)
177 | ```
178 |
179 | 4. To prevent the script window from closing immediately after execution, include this line at the end of your code:
180 |
181 | ```
182 | input("Press Enter to exit...")
183 | ```
184 |
185 | 
186 |
187 | #### Parameters
188 |
189 | 1. Specify the python script
190 |
--------------------------------------------------------------------------------
/toolbox/arcgee/map.py:
--------------------------------------------------------------------------------
1 | # Copyright 2025 Google LLC
2 | #
3 | # Licensed under the Apache License, Version 2.0 (the "License");
4 | # you may not use this file except in compliance with the License.
5 | # You may obtain a copy of the License at
6 | #
7 | # https://www.apache.org/licenses/LICENSE-2.0
8 | #
9 | # Unless required by applicable law or agreed to in writing, software
10 | # distributed under the License is distributed on an "AS IS" BASIS,
11 | # WITHOUT WARRANTIES OR CONDITIONS OF ANY KIND, either express or implied.
12 | # See the License for the specific language governing permissions and
13 | # limitations under the License.
14 |
15 | import arcpy
16 | import ee
17 | import matplotlib.colors as mcolors
18 | import matplotlib.cm as cm
19 | from arcgee import data
20 |
21 |
22 | def list_color_ramps() -> list[str]:
23 | """Return a list all supported color ramps.
24 | Returns:
25 | list[str] : A list of supported color ramps.
26 | """
27 | return [
28 | "viridis",
29 | "magma",
30 | "plasma",
31 | "cividis",
32 | "Blues",
33 | "Greens",
34 | "Reds",
35 | "Purples",
36 | "Oranges",
37 | "Spectral",
38 | "turbo",
39 | ]
40 |
41 |
42 | def get_color_ramp(name: str, n: int = 10) -> list[str]:
43 | """Return a list of hex color codes from a matplotlib colormap name.
44 | Args:
45 | name : The name of the colormap.
46 | n : The number of colors to return.
47 | Returns:
48 | list[str] : A list of hex color codes.
49 | """
50 | try:
51 | cmap = cm.get_cmap(name, n)
52 | return [mcolors.to_hex(cmap(i)) for i in range(cmap.N)]
53 | except ValueError:
54 | raise ValueError(f"Colormap '{name}' is not recognized by Matplotlib.")
55 |
56 |
57 | def add_ee_layer_to_map(
58 | ee_object: "ee.Image | ee.FeatureCollection",
59 | vis_params: dict,
60 | asset_id: str,
61 | ) -> None:
62 | """Add an Earth Engine object to the current map view.
63 | Args:
64 | ee_object : Earth Engine object to add.
65 | vis_params : Visualization parameters for the Earth Engine object.
66 | asset_id : Asset ID of the Earth Engine object.
67 | """
68 | arcpy.AddMessage("Constructing map URL ...")
69 | map_id_dict = ee_object.getMapId(vis_params)
70 | map_url = map_id_dict["tile_fetcher"].url_format
71 |
72 | aprx = arcpy.mp.ArcGISProject("CURRENT")
73 | aprxMap = aprx.activeMap
74 | arcpy.AddMessage(f"Adding the layer to the current ArcMap: {aprxMap.name}")
75 | layer = aprxMap.addDataFromPath(map_url)
76 | # Add band information to layer name if specified.
77 | if vis_params.get("bands") is not None:
78 | layer.name = asset_id + "--" + "--".join(vis_params.get("bands"))
79 | else:
80 | layer.name = asset_id
81 |
82 | # Zoom to image centroid if provided by dataset.
83 | try:
84 | centroid_coords, bounds_coords = data.get_object_centroid(ee_object, 1)
85 | zoom_to_point(aprx, centroid_coords, bounds_coords)
86 | except:
87 | arcpy.AddWarning(
88 | "Automatic zoom to the Earth Engine object failed. Please zoom manually."
89 | )
90 | pass
91 |
92 |
93 | # Zoom project map view to point.
94 | def zoom_to_point(
95 | aprx: "arcpy.mp.ArcGISProject",
96 | point_coords: list[float],
97 | extent_coords: list[list[float]],
98 | ) -> None:
99 | """Zoom the map view to a point with buffer based on extent.
100 |
101 | Args:
102 | aprx : ArcGIS Pro project object.
103 | point_coords : [lon, lat] coordinates of center point.
104 | extent_coords : List of corner coordinates defining the bounds.
105 | """
106 | # Get the current project map view.
107 | view = aprx.activeView
108 | # Create an extent around the centroid.
109 | centroid_x, centroid_y = point_coords
110 | bottom_left = extent_coords[0]
111 | top_right = extent_coords[2]
112 | x_min = bottom_left[0]
113 | y_min = bottom_left[1]
114 | x_max = top_right[0]
115 | y_max = top_right[1]
116 | width = x_max - x_min
117 | height = y_max - y_min
118 | zoom_buffer = max(width, height) * 0.6
119 |
120 | extent = arcpy.Extent(
121 | centroid_x - zoom_buffer, # xmin
122 | centroid_y - zoom_buffer, # ymin
123 | centroid_x + zoom_buffer, # xmax
124 | centroid_y + zoom_buffer, # ymax
125 | )
126 | # Assuming the ee object centroid and extent are always in lat/lon.
127 | extent.spatialReference = arcpy.SpatialReference(4326)
128 |
129 | # Set the map view to the new extent.
130 | view.camera.setExtent(extent)
131 |
132 | return
133 |
134 |
135 | # Get map view extent.
136 | def get_map_view_extent(target_epsg: int = 4326) -> tuple[float, float, float, float]:
137 | """Get the current map view extent coordinates in WGS 84.
138 | Args:
139 | target_epsg : Target EPSG code for the extent coordinates.
140 | Returns:
141 | tuple : (xmin, ymin, xmax, ymax) coordinates in WGS 84.
142 | """
143 | aprx = arcpy.mp.ArcGISProject("CURRENT")
144 | # Get the active map view.
145 | view = aprx.activeView
146 | # Get the current camera object, which includes the map view extent.
147 | camera = view.camera
148 |
149 | # Extract the projection and the boundary coordinates (extent).
150 | spatial_ref = camera.getExtent().spatialReference
151 | arcpy.AddMessage(f"The current map CRS is EPSG:{spatial_ref.factoryCode}.")
152 | xmin = camera.getExtent().XMin
153 | ymin = camera.getExtent().YMin
154 | xmax = camera.getExtent().XMax
155 | ymax = camera.getExtent().YMax
156 | # ArcPro 3.2 uses EPSG 3857 (Web Mercator) as the default projection.
157 | # Refer to https://epsg.io/3857 for more details.
158 | # When the user zooms out of the global extent to the blank,
159 | # the map extent coordinates (values are out of range)
160 | # can not be converted to ESPG 4326 (latitude and longitude).
161 | # Need to clip the map extent coordinates to valid EPSG 3857 extent.
162 | if spatial_ref.PCSCode == 3857:
163 | xmin, ymin, xmax, ymax = clip_to_epsg3857_extent(xmin, ymin, xmax, ymax)
164 | arcpy.AddMessage("The map extent has been clipped to valid EPSG:3857 extent.")
165 | # Check if projection code is the target EPSG code.
166 | # projected
167 | poly_prj = spatial_ref.PCSCode
168 | if poly_prj == 0:
169 | # geographic
170 | poly_prj = spatial_ref.GCSCode
171 | # Always using latitude and longtiude for ee.Geometry, ee will automatically transform.
172 | if str(poly_prj) not in "EPSG:" + str(target_epsg):
173 | # Convert the extent corners to target EPSG.
174 | arcpy.AddMessage(f"Converting the extent corners to target EPSG:{target_epsg}.")
175 | xmin, ymin = project_to_new_sr(xmin, ymin, spatial_ref, target_epsg)
176 | xmax, ymax = project_to_new_sr(xmax, ymax, spatial_ref, target_epsg)
177 | arcpy.AddMessage([xmin, ymin, xmax, ymax])
178 | return xmin, ymin, xmax, ymax
179 |
180 |
181 | # Project a point to a different spatial reference.
182 | def project_to_new_sr(
183 | x: float,
184 | y: float,
185 | in_spatial_ref: "arcpy.SpatialReference",
186 | out_spatial_ref: "arcpy.SpatialReference",
187 | ) -> tuple[float, float]:
188 | """Project a point from input spatial reference to output spatial reference.
189 |
190 | Args:
191 | x : X coordinate in input spatial reference.
192 | y : Y coordinate in input spatial reference.
193 | in_spatial_ref : Input spatial reference object.
194 | out_spatial_ref : Output spatial reference object.
195 |
196 | Returns:
197 | tuple: coordinates in output spatial reference.
198 | """
199 | point = arcpy.Point(x, y)
200 | point_geom = arcpy.PointGeometry(point, in_spatial_ref)
201 | new_sr = arcpy.SpatialReference(out_spatial_ref)
202 | point_geom_wgs84 = point_geom.projectAs(new_sr)
203 | return point_geom_wgs84.centroid.X, point_geom_wgs84.centroid.Y
204 |
205 |
206 | def clip_to_epsg3857_extent(
207 | xmin: float, ymin: float, xmax: float, ymax: float
208 | ) -> tuple[float, float, float, float]:
209 | """Clip the extent coordinates to the valid EPSG 3857 extent.
210 |
211 | Args:
212 | xmin : X coordinate in input spatial reference.
213 | ymin : Y coordinate in input spatial reference.
214 | xmax : X coordinate in input spatial reference.
215 | ymax : Y coordinate in input spatial reference.
216 |
217 | Returns:
218 | The extent clipped to EPSG 3857's valid extent as (xmin, ymin, xmax, ymax).
219 | """
220 | # EPSG 3857 global valid extent in meters.
221 | MIN_VAL = -20037500
222 | MAX_VAL = 20037500
223 |
224 | xmin_clipped = max(xmin, MIN_VAL)
225 | ymin_clipped = max(ymin, MIN_VAL)
226 | xmax_clipped = min(xmax, MAX_VAL)
227 | ymax_clipped = min(ymax, MAX_VAL)
228 |
229 | return xmin_clipped, ymin_clipped, xmax_clipped, ymax_clipped
230 |
--------------------------------------------------------------------------------
/docs/03_installation.md:
--------------------------------------------------------------------------------
1 |
2 | # ArcGIS Earth Engine Toolbox (GEE Connector) User Guide: Installation
3 |
4 | There are three steps for installing arcgis-earthengine-toolbox:
5 |
6 | - Setting up a Python environment for use with Earth Engine
7 | - Installing the toolbox
8 | - Setting up Google Cloud SDK for uploading local data and working with it in the toolbox
9 |
10 | This page walks through these broad steps for installation and authentication with Earth Engine for use.
11 |
12 | ## Prerequisites
13 |
14 | Before starting the installation process, ensure you have the following:
15 |
16 | 1. ArcGIS Pro 3.2 or later installed on your computer.
17 | 2. Google Earth Engine API enabled for your Google Cloud project. See [this page](https://console.cloud.google.com/earth-engine) for Google Cloud Project creation & registration with Earth Engine.
18 |
19 | ## Conda Environment Setup For Earth Engine API
20 |
21 | Before starting the installation, ensure that you have the necessary account permissions to create a conda environment and install the required packages. **If your ArcGIS Pro was installed by an administrator, you will need administrator-level permissions to complete the installation.**
22 |
23 | For ArcGIS Pro version `3.x`, follow the steps below to set up the conda environment. If you have ArcGIS Pro version lower than `3.0`, it is suggested that you upgrade it to `3.x`. You can login to your ESRI account, and download the specific ArcGIS Pro version from the **Downloads** -> **All Products and Versions** -> **All Versions**.
24 |
25 | **A video guide for the Conda Environment Setup is available following the steps below.**
26 |
27 | ### Step 1 - Run ArcGIS Python Command Prompt
28 |
29 | To do this in your Windows computer, go to **Start Menu** -> **All Apps** -> **ArcGIS folder** -> **Python Command Prompt**, click to run. To run the Python Command Prompt as administrator, right-click on the Python Command Prompt, and select **Run as administrator**.
30 |
31 | ### Step 2 - Set up the Conda Environment
32 |
33 | Once you run the Python Command Prompt,
34 |
35 | 1. List all available conda environments using the following command. The default ArcGIS Pro package should be `arcgispro-py3`.
36 |
37 | conda env list
38 |
39 | 2. You cannot modify the default package `arcgispro-py3`. Instead, clone it to create a new conda environment `gee`. Please make sure to use a new name for the conda environment. Creating conda environment with the existing name `gee` will overwrite the existing conda environment.
40 |
41 | conda create --name gee --clone arcgispro-py3
42 |
43 | 3. (**Optional**) Initialize conda for the proper shell. It is required to run this command for the first time of using `conda activate`.
44 |
45 | conda init cmd.exe
46 |
47 | **After running the command, please make sure to restart the Python Command Prompt.** To do this, close the current Python Command Prompt window and open a new one.
48 |
49 | 4. Activate the new conda environment `gee`.
50 |
51 | conda activate gee
52 |
53 | 5. (**Optional**) Disable the SSL verification. It is suggested to run this command for the first time of using `conda install`.
54 |
55 | conda config --set ssl_verify false
56 |
57 | 6. Install `earthengine-api` and `xee` from `conda-forge` channel. Please note that these two packages are unavailable in `esri` channel. It is recommended to use `conda install` instead of `mamba install`, because `mamba install` may not work properly with `earthengine-api` and `xee`.
58 |
59 | conda install earthengine-api xee --channel conda-forge
60 |
61 | 7. Install the specific version of `rasterio` from [the `esri` conda channel](https://anaconda.org/Esri/repo). The current default installation version of `rasterio=1.3.10` may be incompatible with ArcGIS Pro pre-installed `gdal`. (**Note: `rasterio` is only required for the image and image collection download scripts; other scripts do not depend on it.**)
62 |
63 | For ArcGIS Pro 3.5 and older versions, use the following command:
64 |
65 | ```bash
66 | conda install rasterio=1.3.9 --channel esri
67 | ```
68 |
69 | For ArcGIS Pro 3.6 and newer versions, use the following command:
70 |
71 | ```bash
72 | conda install rasterio=1.4.3 --channel esri
73 | ```
74 |
75 | 8. Activate package `gee` within ArcGIS Pro
76 |
77 | proswap gee
78 |
79 | After running the above commands, close Python Command Prompt, and start ArcGIS Pro. The default conda environment becomes `gee`. To check if the packages have been successfully installed, click **Analysis** -> **Python** -> **Python Window**. Run the following commands.
80 |
81 | import ee
82 | import xee
83 | import rasterio
84 |
85 | The `earthengine-api` is then ready for authentication and initialization.
86 |
87 | **If you want to upgrade your ArcGIS Pro to a newer version after installing the toolbox, please see the [Upgrades](08_upgrades.md) page for instructions.**
88 |
89 | Here is the video guide for the Conda environment setup:
90 |
91 |
96 |
97 | ## Download ArcGIS Earth Engine Toolbox
98 |
99 | The ArcGIS Earth Engine Toolbox can be obtained through the following steps:
100 |
101 | 
102 |
103 | 1. Download the repository using either method:
104 | - Clone the repository using git: `git clone https://github.com/gee-community/arcgis-earthengine-toolbox.git`
105 | - Or download the latest release from [this link](https://github.com/gee-community/arcgis-earthengine-toolbox/releases/latest) and extract it to your desired location.
106 |
107 | You can download the repository folder to your ArcGIS Pro project folder such as `C:\Users\\Documents\ArcGIS\Projects\\ArcGIS Earth Engine Toolbox`. Meanwhile, you can also download the repository folder to any other location and connect it to ArcGIS Pro.
108 |
109 | 2. Add the toolbox to ArcGIS Pro:
110 | - Open ArcGIS Pro
111 | - In the Catalog pane, right-click on "Toolboxes"
112 | - Select "Add Toolbox"
113 | - Navigate to and select the toolbox in the downloaded repository folder
114 |
115 | 3. The toolbox will appear in the Toolbox dropdown menu.
116 |
117 | 
118 |
119 | **To get future updates of the toolbox, please check the [Upgrades](08_upgrades.md) page for instructions.**
120 |
121 | ## Google Cloud SDK
122 |
123 | Google Cloud SDK is required to fully utilize the ArcGIS Earth Engine Toolbox. Specifically, it is used to upload local data to Google Cloud Storage and convert the data to Earth Engine assets.
124 |
125 | ### Downloading Google Cloud SDK
126 |
127 | Please check this [link](https://cloud.google.com/sdk/docs/install) for instructions of downloading and installing the Google Cloud SDK.
128 |
129 | To install the Google Cloud SDK, admin permissions are often required, especially on systems where the SDK needs to modify system files or be installed for all users. It's also possible to install the SDK without admin rights if you install it in a user-specific directory.
130 |
131 | Admin rights are typically only required during installation. Most gcloud commands and operations can be performed without admin rights, provided the user has the correct permissions within Google Cloud.
132 |
133 | **When Google Cloud SDK is installed, the Google Earth Engine authentication will use Google Cloud Application Default Credentials.** Therefore, the user needs to setup the Google Cloud Application Default Credentials before using the Earth Engine. To achieve this, follow the steps below.
134 |
135 | ### Finding Your Google Cloud Project ID
136 |
137 | Before proceeding, you'll need your Google Cloud Project ID. To find it:
138 |
139 | 1. Go to the [Google Cloud Console](https://console.cloud.google.com)
140 | 2. Click on the project dropdown at the top of the page
141 | 3. Your Project ID is listed in the projects table
142 | - Note: The Project ID is different from the Project Name
143 | - It typically looks like: `my-project-123456` or `project-id-123456`
144 |
145 | ### Configuring Google Cloud SDK
146 |
147 | The Google Cloud SDK shell (commonly referred to as the gcloud command-line interface) operates in a terminal or command prompt environment and has a standard text-based interface. It doesn't have a graphical user interface but relies on commands and text outputs.
148 |
149 | **A video guide for the Google Cloud SDK application default login setup is available following the steps below.**
150 |
151 | 1. In Windows OS, search for "Google Cloud SDK Shell", click to open. To run the Google Cloud SDK Shell as administrator, right-click on the Google Cloud SDK Shell, and select **Run as administrator**.
152 |
153 | >[!NOTE]
154 | > **Step 2 is only for the first time setup**, skip Step 3 if you have already done this on your machine.
155 |
156 | 2. For the first time setup, authenticate to create the `application_default_credentials.json` file using:
157 |
158 | ```
159 | gcloud auth application-default login
160 | ```
161 |
162 | A browser window will pop up asking you to choose the target Google account.
163 |
164 | 3. For the existing setup, update the project ID in the `application_default_credentials.json` file using:
165 |
166 | ```
167 | gcloud auth application-default set-quota-project QUOTA_PROJECT_ID
168 | ```
169 |
170 | Replace `QUOTA_PROJECT_ID` with the Project ID you found in the Google Cloud Console.
171 |
172 | >[!TIP]
173 | >The `application_default_credentials.json` file is usually located in the `C:\Users\\AppData\Roaming\gcloud` directory. After this, when you run `ee.Initialize()`, it will automatically use the default project specified in the `application_default_credentials.json` file.
174 |
175 | Here is the video guide for the Google Cloud SDK application default login setup:
176 |
177 |
182 |
--------------------------------------------------------------------------------
/toolbox/GEE_Connector.AddImgCol2MapbyID.pyt.xml:
--------------------------------------------------------------------------------
1 |
2 |
3 |
4 | 20241224
5 | 00552400
6 | 1.0
7 | TRUE
8 | 20250801
9 | 14260400
10 |
11 | 150000000
12 | 5000
13 |
14 | ItemDescription
15 |
16 |
17 | c:\program files\arcgis\pro\Resources\Help\gp
18 |
19 |
20 | <DIV STYLE="text-align:Left;"><DIV><DIV><P><SPAN>The asset ID could be found at the dataset information page. For example, ee.ImageCollection('AAFC/ACI') </SPAN><SPAN>loads the Google Earth Engine Image </SPAN><SPAN>Collection </SPAN><SPAN>by asset ID AAFC/ACI. </SPAN></P><P><SPAN /></P></DIV></DIV></DIV>
21 |
22 |
23 | <DIV STYLE="text-align:Left;"><DIV><DIV><P><SPAN>The user can filter an image collection using properties such as CLOUD_COVER, WRS_PATH, or SUN_ELEVATION, though the available properties vary depending on the dataset.</SPAN></P></DIV></DIV></DIV>
24 |
25 |
26 | <DIV STYLE="text-align:Left;"><DIV><DIV><P><SPAN>The user can filter the image collection by starting and ending dates. The typical formats of date strings are listed below. </SPAN></P><OL><LI><P><SPAN>Year only, '2020'</SPAN></P></LI><LI><P><SPAN>Year and month, '2020-07'</SPAN></P></LI><LI><P><SPAN>Year, month and date, '2020-07-01'</SPAN></P></LI><LI><P><SPAN>Year, month, date, and time, '2020-07-05T06:34:46'</SPAN></P></LI></OL><P><SPAN>For more information, please visit </SPAN><A href="https://developers.google.com/earth-engine/apidocs/ee-imagecollection-filterdate" STYLE="text-decoration:underline;"><SPAN>https://developers.google.com/earth-engine/apidocs/ee-imagecollection-filterdate</SPAN></A></P></DIV></DIV></DIV>
27 |
28 |
29 | <DIV STYLE="text-align:Left;"><DIV><DIV><P><SPAN>Filter the collection to include only items that intersect the selected geometry. Any item whose footprint does not intersect the geometry will be excluded.</SPAN></P><OL><LI><P><SPAN>Map Centroid (Point) – Filters the collection using the center point of the current map view.</SPAN></P><P><SPAN /></P></LI><LI><P><SPAN>Polygon Extent (Area) – Filters the collection using a user-defined polygon. If multiple polygons are provided, the combined extent will be used.</SPAN></P><P><SPAN /></P></LI><LI><P><SPAN>Map Extent (Area) – Filters the collection using the full extent of the current map view.</SPAN></P></LI></OL><P><SPAN /></P></DIV></DIV></DIV>
30 |
31 |
32 | <DIV STYLE="text-align:Left;"><DIV><P><SPAN>Select the polygon feature as the filter geometry.</SPAN></P></DIV></DIV>
33 |
34 |
35 | <DIV STYLE="text-align:Left;"><DIV><DIV><P><SPAN>The first 100 images will be listed here. </SPAN><SPAN>To display the desired images, please narrow the date ranges and use</SPAN><SPAN> filter by</SPAN><SPAN> location. </SPAN><SPAN>Select one image to add per run. </SPAN></P></DIV></DIV></DIV>
36 |
37 |
38 | <DIV STYLE="text-align:Left;"><DIV><DIV><P><SPAN>Choose up to 3 bands for visualization. You can choose </SPAN></P><OL><LI><P><SPAN>One single band for visualization with color ramps</SPAN></P></LI><LI><P><SPAN>Two bands for visualization with red and blue</SPAN></P></LI><LI><P><SPAN>Three bands for visualization with red, green and blue</SPAN></P></LI></OL></DIV></DIV></DIV>
39 |
40 |
41 | <DIV STYLE="text-align:Left;"><DIV><DIV><P><SPAN>Specify the pixel value(s) to map to 0 (black).</SPAN></P><P><SPAN>Values are scaled to the 8-bit display range (0–255). For example, if band 1 ranges from 5 to 3000, setting min to 5 maps it to 0 (black), and max to 3000 maps it to 255 (white).</SPAN></P><P><SPAN>Use a single number for one band, or a comma-separated list for three bands (e.g., 0 or 0, 0, 0).</SPAN></P></DIV></DIV></DIV>
42 |
43 |
44 | <DIV STYLE="text-align:Left;"><DIV><DIV><P><SPAN>Specify the pixel value(s) to map to 255 (white).</SPAN></P><P><SPAN>Values are scaled to the 8-bit display range (0–255). For example, if band 1 ranges from 5 to 3000, setting min to 5 maps it to 0 (black), and max to 3000 maps it to 255 (white).</SPAN></P><P><SPAN>Use a single number for one band, or a comma-separated list for three bands (e.g., 30 or 30, 30, 30).</SPAN></P></DIV></DIV></DIV>
45 |
46 |
47 | <DIV STYLE="text-align:Left;"><DIV><DIV><P><SPAN>Gamma correction adjusts perceived brightness. Use it to enhance contrast in specific tone ranges after mapping pixel values to 0–255. Gamma Values <1 lighten shadows; >1 darken highlights.</SPAN></P><P><SPAN>Use a single number for one band, or a comma-separated list for three bands (e.g., 1 or 0.9, 1, 1.2).</SPAN></P></DIV></DIV></DIV>
48 |
49 |
50 | <DIV STYLE="text-align:Left;"><DIV><DIV><P><SPAN>For single-band images only.</SPAN></P></DIV></DIV></DIV>
51 |
52 |
53 | <DIV STYLE="text-align:Left;"><DIV><P><SPAN>Save the filtered image collection to a serialized JSON object for future use. </SPAN></P></DIV></DIV>
54 |
55 |
56 | <DIV STYLE="text-align:Left;"><DIV><DIV><P><SPAN>This script adds the Google Earth Engine Image Collection to ArcGIS Pro as a base map by its asset ID. Please note that the dataset is added as a Tiled Map Service Layer, which is view only and cannot be edited. The user will need to download the dataset for analysis in ArcGIS Pro. </SPAN></P><P><SPAN>To browse all datasets, please visit </SPAN><A href="https://developers.google.com/earth-engine/datasets/catalog" STYLE="text-decoration:underline;"><SPAN>https://developers.google.com/earth-engine/datasets/catalog</SPAN></A><SPAN>.</SPAN></P><P><SPAN>For image visualization guides, please visit </SPAN><A href="https://developers.google.com/earth-engine/guides/image_visualization" STYLE="text-decoration:underline;"><SPAN>https://developers.google.com/earth-engine/guides/image_visualization </SPAN></A></P></DIV></DIV></DIV>
57 |
58 |
59 |
60 | Add Image Collection to Map by Asset ID
61 |
62 |
63 | exploration
64 |
65 |
66 |
67 |
68 |
69 | ArcToolbox Tool
70 |
71 |
72 |
73 |
74 |
75 |
76 | 20250801
77 |
78 |
--------------------------------------------------------------------------------
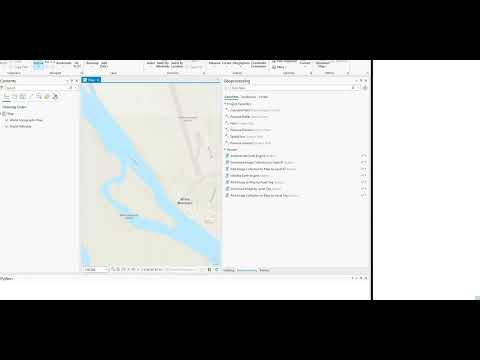 35 |
36 |
35 |
36 | 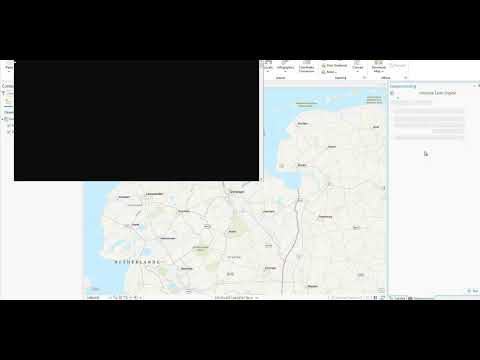 58 |
59 |
58 |
59 | 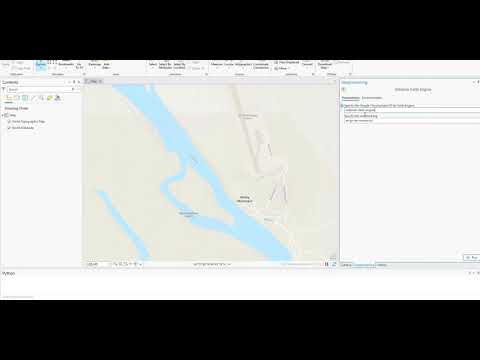 77 |
78 |
77 |
78 | 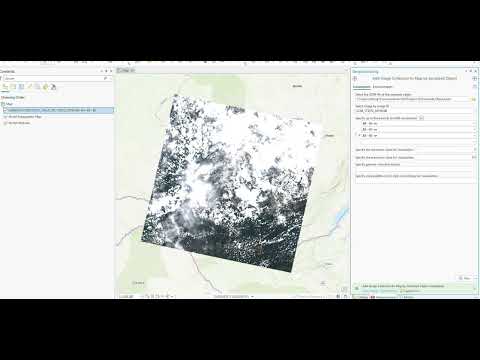 31 |
32 |
31 |
32 | 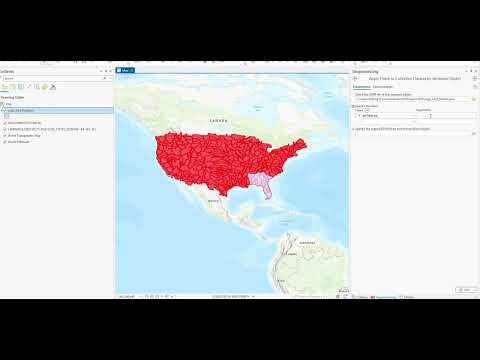 57 |
58 |
57 |
58 | 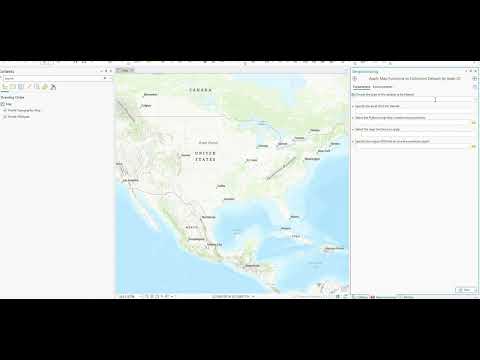 86 |
87 |
86 |
87 | 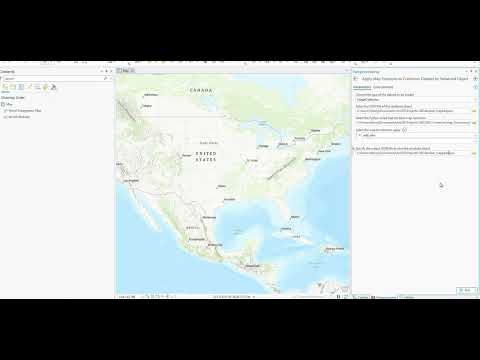 115 |
116 |
115 |
116 | 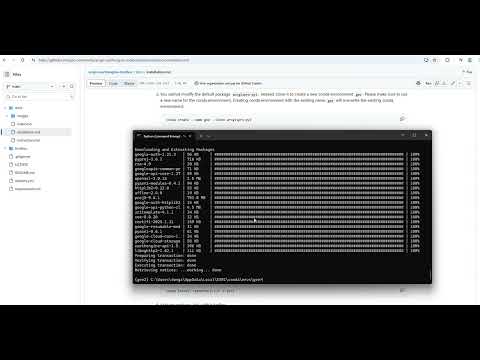 94 |
95 |
94 |
95 |  180 |
181 |
180 |
181 |