├── .ansible-lint
├── .github
├── FUNDING.yml
└── workflows
│ ├── ci.yml
│ └── stale.yml
├── .gitignore
├── .yamllint
├── LICENSE
├── README.md
├── ansible.cfg
├── config.yml
├── files
├── pi-video-youtube.jpg
└── pi-webcam-tripod.jpg
├── inventory-local.example
├── inventory-ssh.example
├── main.yml
└── tasks
├── boot-config.yml
├── piwebcam.yml
└── uvc-gadget.yml
/.ansible-lint:
--------------------------------------------------------------------------------
1 | ---
2 | skip_list:
3 | - 'fqcn-builtins'
4 |
--------------------------------------------------------------------------------
/.github/FUNDING.yml:
--------------------------------------------------------------------------------
1 | # These are supported funding model platforms
2 | ---
3 | github: geerlingguy
4 | patreon: geerlingguy
5 |
--------------------------------------------------------------------------------
/.github/workflows/ci.yml:
--------------------------------------------------------------------------------
1 | ---
2 | name: CI
3 | 'on':
4 | pull_request:
5 | push:
6 | branches:
7 | - master
8 | schedule:
9 | - cron: '0 3 * * 0'
10 |
11 | jobs:
12 |
13 | lint:
14 | name: Lint
15 | runs-on: ubuntu-latest
16 |
17 | steps:
18 | - name: Check out the codebase.
19 | uses: actions/checkout@v2
20 |
21 | - name: Set up Python 3.
22 | uses: actions/setup-python@v2
23 | with:
24 | python-version: '3.x'
25 |
26 | - name: Install test dependencies.
27 | run: pip3 install yamllint ansible ansible-lint
28 |
29 | - name: Lint the project.
30 | run: |
31 | yamllint .
32 | ansible-lint
33 |
--------------------------------------------------------------------------------
/.github/workflows/stale.yml:
--------------------------------------------------------------------------------
1 | ---
2 | name: Close inactive issues
3 | 'on':
4 | schedule:
5 | - cron: "55 12 * * 4" # semi-random time
6 |
7 | jobs:
8 | close-issues:
9 | runs-on: ubuntu-latest
10 | permissions:
11 | issues: write
12 | pull-requests: write
13 | steps:
14 | - uses: actions/stale@v8
15 | with:
16 | days-before-stale: 120
17 | days-before-close: 60
18 | exempt-issue-labels: bug,pinned,security,planned
19 | exempt-pr-labels: bug,pinned,security,planned
20 | stale-issue-label: "stale"
21 | stale-pr-label: "stale"
22 | stale-issue-message: |
23 | This issue has been marked 'stale' due to lack of recent activity. If there is no further activity, the issue will be closed in another 30 days. Thank you for your contribution!
24 |
25 | Please read [this blog post](https://www.jeffgeerling.com/blog/2020/enabling-stale-issue-bot-on-my-github-repositories) to see the reasons why I mark issues as stale.
26 | close-issue-message: |
27 | This issue has been closed due to inactivity. If you feel this is in error, please reopen the issue or file a new issue with the relevant details.
28 | stale-pr-message: |
29 | This pr has been marked 'stale' due to lack of recent activity. If there is no further activity, the issue will be closed in another 30 days. Thank you for your contribution!
30 |
31 | Please read [this blog post](https://www.jeffgeerling.com/blog/2020/enabling-stale-issue-bot-on-my-github-repositories) to see the reasons why I mark issues as stale.
32 | close-pr-message: |
33 | This pr has been closed due to inactivity. If you feel this is in error, please reopen the issue or file a new issue with the relevant details.
34 | repo-token: ${{ secrets.GITHUB_TOKEN }}
35 |
--------------------------------------------------------------------------------
/.gitignore:
--------------------------------------------------------------------------------
1 | inventory
2 |
--------------------------------------------------------------------------------
/.yamllint:
--------------------------------------------------------------------------------
1 | ---
2 | extends: default
3 |
4 | rules:
5 | line-length:
6 | max: 120
7 | level: warning
8 |
9 | ignore: |
10 | .github/workflows/stale.yml
11 |
--------------------------------------------------------------------------------
/LICENSE:
--------------------------------------------------------------------------------
1 | MIT License
2 |
3 | Copyright (c) 2020 Jeff Geerling
4 |
5 | Permission is hereby granted, free of charge, to any person obtaining a copy
6 | of this software and associated documentation files (the "Software"), to deal
7 | in the Software without restriction, including without limitation the rights
8 | to use, copy, modify, merge, publish, distribute, sublicense, and/or sell
9 | copies of the Software, and to permit persons to whom the Software is
10 | furnished to do so, subject to the following conditions:
11 |
12 | The above copyright notice and this permission notice shall be included in all
13 | copies or substantial portions of the Software.
14 |
15 | THE SOFTWARE IS PROVIDED "AS IS", WITHOUT WARRANTY OF ANY KIND, EXPRESS OR
16 | IMPLIED, INCLUDING BUT NOT LIMITED TO THE WARRANTIES OF MERCHANTABILITY,
17 | FITNESS FOR A PARTICULAR PURPOSE AND NONINFRINGEMENT. IN NO EVENT SHALL THE
18 | AUTHORS OR COPYRIGHT HOLDERS BE LIABLE FOR ANY CLAIM, DAMAGES OR OTHER
19 | LIABILITY, WHETHER IN AN ACTION OF CONTRACT, TORT OR OTHERWISE, ARISING FROM,
20 | OUT OF OR IN CONNECTION WITH THE SOFTWARE OR THE USE OR OTHER DEALINGS IN THE
21 | SOFTWARE.
22 |
--------------------------------------------------------------------------------
/README.md:
--------------------------------------------------------------------------------
1 | # Raspberry Pi Webcam
2 |
3 | [](https://github.com/geerlingguy/pi-webcam/actions?query=workflow%3ACI)
4 |
5 | 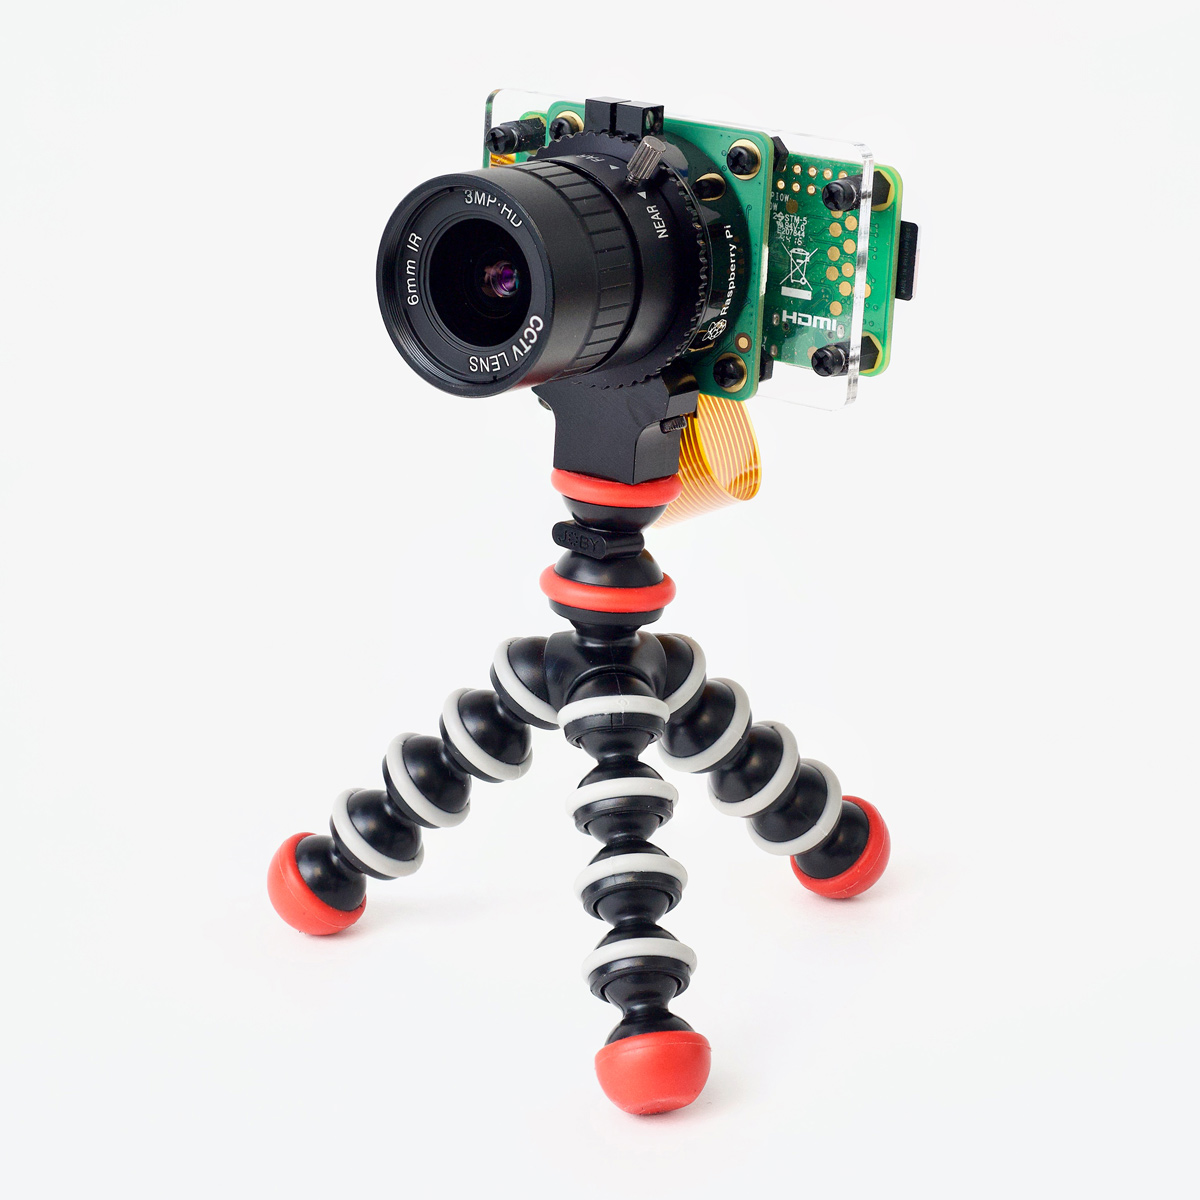
6 |
7 | Inspired by David Hunt's blog post showing how to use a [Raspberry Pi Zero with a Pi Camera as a USB Webcam](http://www.davidhunt.ie/raspberry-pi-zero-with-pi-camera-as-usb-webcam/), as well as [justinschuldt's gist](https://gist.github.com/justinschuldt/36469e2a89d95ef158a8c4df091e9cb4), I wanted to make my Raspberry Pi do the same thing, but automated and with all the scripts wrapped in version control, since the blog post was a little bit vague in some areas.
8 |
9 | This Ansible playbook can be run on _most_ Raspberry Pis to set it up as a USB webcam.
10 |
11 | What does that mean? Well, after running the playbook:
12 |
13 | - You plug the Pi into your computer
14 | - You wait until it boots
15 | - **Bingo!** Webcam usable in any software (Zoom, Teams, Meet, OBS, QuickTime, etc.)
16 |
17 | It works on Mac, Windows, and all the flavors of Linux I've tested so far. It even works on another Raspberry Pi (I've tested it on a Pi 4 and Pi 400).
18 |
19 | ## Video overview of this project
20 |
21 | I published a video in November 2020 detailing how to set up your Pi Webcam using this project. Click the thumbnail below to view it:
22 |
23 | 
24 |
25 | ## Caveats
26 |
27 | The playbook is meant to run on a brand new installation of Raspbian that has not had any configuration changes via `raspi-config` or any other tools, though it _should_ work correctly with an existing installation.
28 |
29 | Note: **This modifies your boot config**, and as such you _should not run this playbook on a microSD or other boot volume you're not ready to reformat and re-flash!_
30 |
31 | ## Setting up the Hardware
32 |
33 | It doesn't matter if you set up the software or hardware first, you just need to do both to have a functional webcam.
34 |
35 | There are a number of different components you can purchase instead of these, but here's the list of what I'm using in my 'official' version that is well-tested and that I use frequently on my Mac and Windows laptops:
36 |
37 | - [Raspberry Pi Zero W](https://www.raspberrypi.org/products/raspberry-pi-zero-w/) (can also use Zero)
38 | - [Raspberry Pi High Quality Camera](https://www.raspberrypi.org/products/raspberry-pi-high-quality-camera/)
39 | - [Raspberry Pi Zero camera cable](https://thepihut.com/products/raspberry-pi-zero-camera-adapter)
40 | - [6mm wide-angle lens for HQ Camera](https://thepihut.com/products/raspberry-pi-high-quality-camera-lens)
41 | - [Pi Hut Pi Zero HQ Camera mounting plate](https://thepihut.com/products/mounting-plate-for-high-quality-camera)
42 |
43 | Once you have everything, it's a matter of putting it all together.
44 |
45 | Check out my video on YouTube for a detailed assembly and setup guide: [Raspberry Pi Zero is a PRO HQ webcam for less than $100!](https://www.youtube.com/watch?v=8fcbP7lEdzY)
46 |
47 | ### Mounting the webcam
48 |
49 | The HQ Camera includes a female tripod socket, so any tripod or mounting arm will do. I've used a variety of mounts depending on the purpose, for example:
50 |
51 | - [SmallRig Ballhead Clamp Mount](https://amzn.to/33828gy): To mount the cam above my monitor on my monitor arm
52 | - [Joby GorillaPod Magnetic Mini](https://amzn.to/3nNw8pX): Useful in a huge variety of situations
53 | - [Joby GorillaPod 5K stand and ballhead](https://amzn.to/2IZa4Kd): Rock solid and a little taller, but it's definitely overkill
54 | - [25 inch flexible gooseneck webcam desk mount](https://amzn.to/3nOrxDO): Can mount the camera any which way using this, especially great for top-down shots
55 |
56 | ## Setting up the Software
57 |
58 | There are two ways you can run this automated setup. You can either run everything on the Raspberry Pi itself (e.g. if you plug in a keyboard, mouse, and monitor), or you can run it from another computer.
59 |
60 | ### Setup on the Raspberry Pi
61 |
62 | > **Pro Tip**: If you want to use a Pi Zero for the webcam, and don't want to wait half an hour for it to run all this automation, you can put the flashed microSD card into a newer Pi (like the Pi 4) and do all this work there, then when it's done pull the card and pop it into a Pi Zero.
63 |
64 | 1. Flash the latest Raspberry Pi OS to a microSD card.
65 | 1. Once Raspbian is loaded on the card, insert the card in your Pi, and plug in your Pi to boot it up.
66 | 1. Follow the setup wizard, and if you want to easily be able to log into the Pi later, connect to a WiFi network, and also run the `raspi-config` tool and enable SSH.
67 | 1. The Raspberry Pi should ask to be restarted. Go ahead and restart now, and wait for it to boot back up.
68 | 1. Open the Terminal application (in the launcher or in Menu > Accessories > Terminal).
69 | 1. Install Ansible and Git: `sudo apt update && sudo apt install -y python3-dev python3-pip libyaml-dev libffi-dev git && sudo pip3 install --no-binary pyyaml ansible` (**Warning**: this can take a while, especially on slower Pis!).
70 | 1. Clone this repository to your Pi: `git clone https://github.com/geerlingguy/pi-webcam.git`
71 | 1. Go into the repository directory: `cd pi-webcam`
72 | 1. Use the local inventory file: `cp inventory-local.example inventory`
73 | 1. Run the Ansible playbook: `ansible-playbook main.yml`
74 | 1. You can shutdown the Pi at this point.
75 |
76 | ### Setup from another Computer
77 |
78 | 1. Make sure you have [Ansible installed](https://docs.ansible.com/ansible/latest/installation_guide/intro_installation.html) on your computer.
79 | 1. Flash the latest Raspberry Pi OS a microSD card. Make sure you added an `ssh` file to the boot volume so SSH is enabled on first boot.
80 | 1. Once Raspbian is loaded on the card and you have the `ssh` file in the boot volume, insert the card in your Pi, and plug in your Pi to boot it up.
81 | 1. Make sure you can log into the Pi via SSH. Ideally, add your SSH key to the Pi using `ssh-copy-id`. If you don't, make sure to add the `-k` parameter to the `ansible-playbook` command later so you can enter the SSH password.
82 | 1. Clone or download this repository to your computer.
83 | 1. Use the ssh inventory file: `cp inventory-ssh.example inventory`
84 | 1. Update the IP address in `inventory` to match the IP address or hostname of your Raspberry Pi.
85 | 1. Edit the `config.yml` file to your liking (the defaults should be fine though).
86 | 1. Run the Ansible playbook:
87 |
88 | ```
89 | ansible-playbook main.yml
90 | ```
91 |
92 | 1. You can shutdown the Pi at this point (log in via SSH then `sudo shutdown now`).
93 |
94 | ## Plugging in the Camera
95 |
96 | You could've done this earlier, but if you haven't yet, plug the camera module into the Raspberry Pi using the appropriate camera connector.
97 |
98 | ## Using the Pi as a webcam
99 |
100 | At this point, it _should_ (assuming everything worked) be set up as a USB webcam.
101 |
102 | All you need to do is grab a USB cable and plug the Pi into any USB port on your computer. But which port do you plug into on the Pi? Well, I have a handy little table here:
103 |
104 | | Pi Model | Which USB Port for device mode Webcam use? |
105 | | --- | --- |
106 | | Pi Zero / Pi Zero W | 'USB' port (next to 'PWR IN') |
107 | | Pi A/A+ | 'USB' port (you need a non standard Type-A to Type-A USB cable) |
108 | | Pi 4 | USB-C 'Power' port |
109 |
110 | Once it's plugged in, you need to wait 30 seconds or so before the Pi will be booted and fully ready, then you can open any video recording/conferencing software, go to the camera selection, and BOOM! Select the 'Pi Webcam'.
111 |
112 | > _What about the other Pi models?_ Unfortunately, other Pi models do not have full support for Device mode, so they cannot be used as a webcam.
113 |
114 | ### Powering down the Pi
115 |
116 | If you want, and you still have WiFi enabled, or the Pi is otherwise connected to your network, you can log into it via SSH and run `sudo shutdown now` to power it off cleanly.
117 |
118 | But I like living on the edge... it's not like the thing is writing a ton of data to the microSD card. When I'm finished using it as a webcam, I just unplug it. Simple as that.
119 |
120 | If, for some strange reason, it did end up getting corrupted, I could just re-run this automation to set it up again. No big deal! I haven't had that happen yet, though.
121 |
122 | ## Known issues
123 |
124 | Well... most of the known issues have to do with the other projects _this_ project relies on:
125 |
126 | - If you're not using a Mac, you may need to adjust the brightness setting in the `uvc-gadget.c` file and re-compile it manually. I'm looking into a better way to allow this to be configured.
127 | - The upstream repository providing the `uvc-gadget` application currently defaults to 720p resolution, which is great for most use cases. You can stream at 1080p, though the Pi Zero and older Pis may drop frames at that resolution. Follow [this issue](https://github.com/geerlingguy/pi-webcam/issues/4) for progress making resolution more easily configurable.
128 | - The Pi 4 model B currently locks up when you try to use USB Device mode and enable the webcam for some reason. You can run the [2020-02-07 Raspbian release](http://downloads.raspberrypi.org/raspbian/images/raspbian-2020-02-07/) to work around this bug for now. Follow [this issue](https://github.com/geerlingguy/pi-webcam/issues/5) for progress resolving this bug.
129 | - This stuff is a little bit of a complicated ball of string, so future Raspberry Pi OS and kernel updates could cause issues. I would not run this on a Raspberry Pi that is controlling a breathing machine or something like that.
130 |
131 | Yadda, yadda, standard "if something breaks don't blame me" disclaimer. The worst thing I've done to my Pi in testing this so far is accidentally breaking off the locking connector for the camera cable. Oops.
132 |
133 | ## License
134 |
135 | MIT.
136 |
137 | ## Author
138 |
139 | I'm [Jeff Geerling](https://www.jeffgeerling.com), and I approve of this repository.
140 |
--------------------------------------------------------------------------------
/ansible.cfg:
--------------------------------------------------------------------------------
1 | [defaults]
2 | nocows = True
3 | inventory = inventory
4 |
--------------------------------------------------------------------------------
/config.yml:
--------------------------------------------------------------------------------
1 | ---
2 | ##
3 | # Common settings.
4 | ##
5 |
6 | # TODO: See https://github.com/geerlingguy/pi-webcam/issues/4
7 |
8 | ##
9 | # Less common settings.
10 | ##
11 |
12 | # The repository from which uvc-gadget will be cloned. Note that if a different
13 | # fork of uvc-gadget is used, some of the configuration may need to be disabled.
14 | uvc_gadget_repo: https://github.com/geerlingguy/uvc-gadget.git
15 | uvc_gadget_repo_version: master
16 |
17 | # Whether to enable piwebcam at boot or not.
18 | piwebcam_boot_enabled: true
19 |
20 | # Changes to be made to the config.txt file.
21 | config_txt_changes:
22 | # Enable USB OTG mode.
23 | - option: dtoverlay
24 | value: dwc2
25 | # Enable the camera.
26 | - option: start_x
27 | value: '1'
28 | # Ensure GPU has enough memory for camera.
29 | - option: gpu_mem
30 | value: '128'
31 |
--------------------------------------------------------------------------------
/files/pi-video-youtube.jpg:
--------------------------------------------------------------------------------
https://raw.githubusercontent.com/geerlingguy/pi-webcam/4f90fec93daaffaabfbffcad6009d444af59252d/files/pi-video-youtube.jpg
--------------------------------------------------------------------------------
/files/pi-webcam-tripod.jpg:
--------------------------------------------------------------------------------
https://raw.githubusercontent.com/geerlingguy/pi-webcam/4f90fec93daaffaabfbffcad6009d444af59252d/files/pi-webcam-tripod.jpg
--------------------------------------------------------------------------------
/inventory-local.example:
--------------------------------------------------------------------------------
1 | [pi]
2 | 127.0.0.1 ansible_connection=local
3 |
--------------------------------------------------------------------------------
/inventory-ssh.example:
--------------------------------------------------------------------------------
1 | [pi]
2 | 10.0.100.94 ansible_user=pi
3 |
--------------------------------------------------------------------------------
/main.yml:
--------------------------------------------------------------------------------
1 | ---
2 | - hosts: pi
3 | become: true
4 | gather_facts: false
5 |
6 | vars_files:
7 | - config.yml
8 |
9 | pre_tasks:
10 | - name: Ensure git is installed.
11 | package: name=git state=present
12 |
13 | tasks:
14 | - include_tasks: tasks/uvc-gadget.yml
15 | - include_tasks: tasks/boot-config.yml
16 | - include_tasks: tasks/piwebcam.yml
17 |
--------------------------------------------------------------------------------
/tasks/boot-config.yml:
--------------------------------------------------------------------------------
1 | ---
2 | - name: Ensure OTG functionality is enabled in cmdline.txt
3 | lineinfile:
4 | path: /boot/cmdline.txt
5 | backrefs: true
6 | regexp: '^(console=.*)(?