11 |
12 |
22 |
23 |
24 |
25 |
26 |
27 |
28 |
--------------------------------------------------------------------------------
/demo/widget/forms.py:
--------------------------------------------------------------------------------
1 | from django import forms
2 |
3 | from image_uploader_widget.widgets import ImageUploaderWidget
4 |
5 | from .models import Custom
6 |
7 |
8 | class TestForm(forms.ModelForm):
9 | class Meta:
10 | widgets = {
11 | "image": ImageUploaderWidget(),
12 | }
13 | fields = "__all__"
14 |
15 |
16 | class TestCustomForm(forms.ModelForm):
17 | class Meta:
18 | model = Custom
19 | widgets = {
20 | "image": ImageUploaderWidget(
21 | drop_icon="@drop_icon@",
22 | drop_text="@drop_text@",
23 | empty_icon="@empty_icon@",
24 | empty_text="@empty_text@",
25 | ),
26 | }
27 | fields = "__all__"
28 |
--------------------------------------------------------------------------------
/docs/widget/07-force-color-scheme.md:
--------------------------------------------------------------------------------
1 | # Force dark or light color scheme
2 |
3 | On the [ADR 0006](../development/architecture-decision-records/0006-why-enforce-light-theme-by-class.md) we discuted a way to force color scheme (`dark` or `light`) to ensure widget color scheme outside of `django-admin`. The two cases bellow is tested using [UI regression](../development/architecture-decision-records/0002-why-ui-regression-tests.md) tests.
4 |
5 |
6 | ## Light theme
7 |
8 | To enforce light widget, use `.iuw-light` class:
9 |
10 | ```html
11 |
12 | {{ form }}
13 |
14 | ```
15 |
16 | ## Dark theme
17 |
18 | To enforce dark widget, use `.iuw-dark` class:
19 |
20 | ```html
21 |
22 | {{ form }}
23 |
24 | ```
25 |
--------------------------------------------------------------------------------
/.github/workflows/publish.yml:
--------------------------------------------------------------------------------
1 | name: Publish Python distribution to PyPI
2 |
3 | on:
4 | release:
5 | types: [created]
6 |
7 | jobs:
8 | build-and-publish:
9 | runs-on: ubuntu-latest
10 | steps:
11 | - uses: actions/checkout@v3
12 |
13 | - name: Set up Python 3.9
14 | uses: actions/setup-python@v5
15 | with:
16 | python-version: 3.9
17 |
18 | - name: Install pypa/build
19 | run: python -m pip install build --user
20 |
21 | - name: Build a binary wheel and a source tarball
22 | run: python -m build --sdist --wheel --outdir dist/
23 |
24 | - name: Publish distribution to PyPI
25 | uses: pypa/gh-action-pypi-publish@master
26 | with:
27 | password: ${{ secrets.PYPI_API_TOKEN }}
28 |
--------------------------------------------------------------------------------
/docs/inline_admin/04-custom-text-and-icons.md:
--------------------------------------------------------------------------------
1 | # Custom Text and Icons
2 |
3 | To customize the text and the icons of the inline editor is a little bit faster too. We can set some variables on the `InlineAdmin` of your model, like this:
4 |
5 | ```python
6 | class CustomInlineEditor(ImageUploaderInline):
7 | model = models.CustomInlineItem
8 | add_image_text = "add_image_text"
9 | drop_text = "drop_text"
10 | empty_text = "empty_text"
11 |
12 | def get_empty_icon(self):
13 | return render(...)
14 |
15 | def get_add_icon(self):
16 | return render(...)
17 |
18 | def get_drop_icon(self):
19 | return render(...)
20 |
21 | @admin.register(models.CustomInline)
22 | class CustomInlineAdmin(admin.ModelAdmin):
23 | inlines = [CustomInlineEditor]
24 | ```
25 |
--------------------------------------------------------------------------------
/image_uploader_widget/templates/image_uploader_widget/admin/inline_image_uploader_preview_widget.html:
--------------------------------------------------------------------------------
1 | {% if widget.is_initial %}
2 | {% with url=widget.value.url can_preview=True required=False %}
3 | {% include 'image_uploader_widget/admin/inline_image_uploader_preview.html' %}
4 | {% endwith %}
5 | {% else %}
6 | {% with url=None can_preview=True required=False %}
7 | {% include 'image_uploader_widget/admin/inline_image_uploader_preview.html' %}
8 | {% endwith %}
9 | {% endif %}
10 |
11 | {% if not widget.required %}
12 |
13 | {% endif %}
14 |
15 |
--------------------------------------------------------------------------------
/docs/widget/04-accept.md:
--------------------------------------------------------------------------------
1 | # Change Accept Formats
2 |
3 | When working with **HTML** `` element, we have an `accept=""` attribute that works defining the visible file types into the file picker dialog. An better, and complete, description of this attribute can be found at [MDN](https://developer.mozilla.org/en-US/docs/Web/HTML/Attributes/accept).
4 |
5 | To define this attribute, with the `ImageUploaderWidget`, we can set the `attrs` property when instantiate the `ImageUploaderWidget`, like:
6 |
7 | ```python
8 | from django import forms
9 | from image_uploader_widget.widgets import ImageUploaderWidget
10 | from .models import CustomWidget
11 |
12 | class TestForm(forms.ModelForm):
13 | class Meta:
14 | widgets = {
15 | 'image': ImageUploaderWidget(attrs={ 'accept': 'image/png' }),
16 | }
17 | fields = '__all__'
18 | ```
19 |
--------------------------------------------------------------------------------
/docs/array_field/04-force-color-scheme.md:
--------------------------------------------------------------------------------
1 | # Force dark or light color scheme
2 |
3 | On the [ADR 0006](../development/architecture-decision-records/0006-why-enforce-light-theme-by-class.md) we discuted a way to force color scheme (`dark` or `light`) to ensure widget color scheme outside of `django-admin`. The two cases bellow is tested using [UI regression](../development/architecture-decision-records/0002-why-ui-regression-tests.md) tests. This is the same way that we implemented on default widget and this is [documented here](../widget/07-force-color-scheme.md).
4 |
5 |
6 | ## Light theme
7 |
8 | To enforce light widget, use `.iuw-light` class:
9 |
10 | ```html
11 |
12 | {{ form }}
13 |
14 | ```
15 |
16 | ## Dark theme
17 |
18 | To enforce dark widget, use `.iuw-dark` class:
19 |
20 | ```html
21 |
22 | {{ form }}
23 |
24 | ```
25 |
--------------------------------------------------------------------------------
/docs/widget/08-custom-colors.md:
--------------------------------------------------------------------------------
1 | # Custom Colors
2 |
3 | To customize the image uploader widget colors you can use your own css file to override the css variables defined by the `image-uploader-widget.css`:
4 |
5 | ```scss
6 | body {
7 | --iuw-background: #FFF;
8 | --iuw-border-color: #CCC;
9 | --iuw-color: #333;
10 | --iuw-placeholder-text-color: #AAA;
11 | --iuw-placeholder-destak-color: #417690;
12 | --iuw-dropzone-background: rgba(255, 255, 255, 0.8);
13 | --iuw-image-preview-border: #BFBFBF;
14 | --iuw-image-preview-shadow: rgba(0, 0, 0, 0.3);
15 | --iuw-add-image-background: #EFEFEF;
16 | --iuw-add-image-color: #AAA;
17 | }
18 | ```
19 |
20 | **Observation**: To see better the variables name, check the css file at the GitHub repository: [here](https://github.com/inventare/django-image-uploader-widget/blob/main/image_uploader_widget/static/image_uploader_widget/css/image-uploader-widget.css).
21 |
--------------------------------------------------------------------------------
/demo/array_field/forms.py:
--------------------------------------------------------------------------------
1 | from django import forms
2 | from django.core.exceptions import ValidationError
3 |
4 | from .models import TestWithArrayField
5 |
6 |
7 | class TestWithArrayFieldForm(forms.ModelForm):
8 | old_values = []
9 |
10 | def map_is_valid_images(self, value):
11 | if not isinstance(value, str):
12 | return False
13 | return value not in self.old_values
14 |
15 | def clean(self):
16 | data = super().clean()
17 |
18 | self.old_values = []
19 | if self.instance is not None:
20 | self.old_values = self.instance.images
21 |
22 | has_changed = any(list(map(self.map_is_valid_images, data.get("images"))))
23 | if has_changed:
24 | raise ValidationError("One of the non-changed value is corrupted.")
25 |
26 | return data
27 |
28 | class Meta:
29 | model = TestWithArrayField
30 | fields = "__all__"
31 |
--------------------------------------------------------------------------------
/docs/inline_admin/05-custom-colors.md:
--------------------------------------------------------------------------------
1 | # Custom Colors
2 |
3 | To customize the image uploader inline colors you can use your own css file to override the css variables defined by the `image-uploader-inline.css`. See an example:
4 |
5 | ```scss
6 | body {
7 | --iuw-background: #FFF;
8 | --iuw-border-color: #CCC;
9 | --iuw-color: #333;
10 | --iuw-placeholder-text-color: #AAA;
11 | --iuw-placeholder-destak-color: #417690;
12 | --iuw-dropzone-background: rgba(255, 255, 255, 0.8);
13 | --iuw-image-preview-border: #BFBFBF;
14 | --iuw-image-preview-shadow: rgba(0, 0, 0, 0.3);
15 | --iuw-add-image-background: #EFEFEF;
16 | --iuw-add-image-color: #AAA;
17 | }
18 | ```
19 |
20 | **Observation**: To see better the variables name, check the css file at the GitHub repository: [here](https://github.com/inventare/django-image-uploader-widget/blob/main/image_uploader_widget/static/image_uploader_widget/css/image-uploader-inline.css).
21 |
--------------------------------------------------------------------------------
/docs/array_field/05-max-images.md:
--------------------------------------------------------------------------------
1 | # Max number of images
2 |
3 | !!! warning "Version Information"
4 |
5 | Introduced at the 1.1.0 version.
6 |
7 | !!! warning "Database Information"
8 |
9 | Supported only on PostgreSQL Database's.
10 |
11 | We introduced a `kwarg` called `max_images` on `ImageListField` field to limit the number of images that user can choose by picker. The default value is `1000` (only because this value are, previous, hardcoded value on the html template). The usage is:
12 |
13 | ```python
14 | from django.db import models
15 | from image_uploader_widget.postgres import ImageListField
16 |
17 | class TestWithArrayField(models.Model):
18 | images = ImageListField(blank=True, null=True, max_images=2, upload_to="admin_test")
19 |
20 | class Meta:
21 | verbose_name = "Test With Array Field"
22 | ```
23 |
24 | !!! warning "Validation"
25 |
26 | The limit, for now, is only on front-end widget. If you want to validate in server-side, do it by yourself for now.
27 |
--------------------------------------------------------------------------------
/demo/inline/models.py:
--------------------------------------------------------------------------------
1 | from django.db import models
2 |
3 |
4 | class Inline(models.Model):
5 | class Meta:
6 | verbose_name = "(Inline) Default"
7 |
8 |
9 | class InlineItem(models.Model):
10 | parent = models.ForeignKey(Inline, related_name="items", on_delete=models.CASCADE)
11 | image = models.ImageField("Image")
12 |
13 |
14 | class OrderedInline(models.Model):
15 | class Meta:
16 | verbose_name = "(Inline) Ordered"
17 |
18 |
19 | class OrderedInlineItem(models.Model):
20 | parent = models.ForeignKey(
21 | OrderedInline, related_name="items", on_delete=models.CASCADE
22 | )
23 | image = models.ImageField("Image", upload_to="admin_test")
24 | order = models.PositiveIntegerField("Order", default=1)
25 |
26 |
27 | class CustomInline(models.Model):
28 | class Meta:
29 | verbose_name = "(Inline) Custom"
30 |
31 |
32 | class CustomInlineItem(models.Model):
33 | parent = models.ForeignKey(
34 | CustomInline, related_name="items", on_delete=models.CASCADE
35 | )
36 | image = models.ImageField("Image")
37 |
--------------------------------------------------------------------------------
/LICENSE:
--------------------------------------------------------------------------------
1 | MIT License
2 |
3 | Copyright (c) 2021 Eduardo José de Oliveira
4 |
5 | Permission is hereby granted, free of charge, to any person obtaining a copy
6 | of this software and associated documentation files (the "Software"), to deal
7 | in the Software without restriction, including without limitation the rights
8 | to use, copy, modify, merge, publish, distribute, sublicense, and/or sell
9 | copies of the Software, and to permit persons to whom the Software is
10 | furnished to do so, subject to the following conditions:
11 |
12 | The above copyright notice and this permission notice shall be included in all
13 | copies or substantial portions of the Software.
14 |
15 | THE SOFTWARE IS PROVIDED "AS IS", WITHOUT WARRANTY OF ANY KIND, EXPRESS OR
16 | IMPLIED, INCLUDING BUT NOT LIMITED TO THE WARRANTIES OF MERCHANTABILITY,
17 | FITNESS FOR A PARTICULAR PURPOSE AND NONINFRINGEMENT. IN NO EVENT SHALL THE
18 | AUTHORS OR COPYRIGHT HOLDERS BE LIABLE FOR ANY CLAIM, DAMAGES OR OTHER
19 | LIABILITY, WHETHER IN AN ACTION OF CONTRACT, TORT OR OTHERWISE, ARISING FROM,
20 | OUT OF OR IN CONNECTION WITH THE SOFTWARE OR THE USE OR OTHER DEALINGS IN THE
21 | SOFTWARE.
--------------------------------------------------------------------------------
/demo/inline/admin.py:
--------------------------------------------------------------------------------
1 | from django.contrib import admin
2 |
3 | from image_uploader_widget.admin import ImageUploaderInline, OrderedImageUploaderInline
4 |
5 | from . import models
6 |
7 |
8 | class InlineEditor(ImageUploaderInline):
9 | model = models.InlineItem
10 | max_num = 2
11 |
12 |
13 | @admin.register(models.Inline)
14 | class InlineAdmin(admin.ModelAdmin):
15 | inlines = [InlineEditor]
16 |
17 |
18 | class OrderedInlineEditor(OrderedImageUploaderInline):
19 | model = models.OrderedInlineItem
20 |
21 |
22 | @admin.register(models.OrderedInline)
23 | class OrderedInlineAdmin(admin.ModelAdmin):
24 | inlines = [OrderedInlineEditor]
25 |
26 |
27 | class CustomInlineEditor(ImageUploaderInline):
28 | model = models.CustomInlineItem
29 | add_image_text = "add_image_text"
30 | drop_text = "drop_text"
31 | empty_text = "empty_text"
32 |
33 | def get_empty_icon(self):
34 | return "empty_icon"
35 |
36 | def get_add_icon(self):
37 | return "add_icon"
38 |
39 | def get_drop_icon(self):
40 | return "drop_icon"
41 |
42 |
43 | @admin.register(models.CustomInline)
44 | class CustomInlineAdmin(admin.ModelAdmin):
45 | inlines = [CustomInlineEditor]
46 |
--------------------------------------------------------------------------------
/demo/array_field/migrations/0001_initial.py:
--------------------------------------------------------------------------------
1 | # Generated by Django 5.2 on 2025-04-23 01:20
2 |
3 | from django.db import migrations, models
4 |
5 | import image_uploader_widget.postgres.fields
6 |
7 |
8 | class Migration(migrations.Migration):
9 |
10 | initial = True
11 |
12 | dependencies = []
13 |
14 | operations = [
15 | migrations.CreateModel(
16 | name="TestWithArrayField",
17 | fields=[
18 | (
19 | "id",
20 | models.AutoField(
21 | auto_created=True,
22 | primary_key=True,
23 | serialize=False,
24 | verbose_name="ID",
25 | ),
26 | ),
27 | (
28 | "images",
29 | image_uploader_widget.postgres.fields.ImageListField(
30 | base_field=models.ImageField(
31 | max_length=150, upload_to="admin_test"
32 | ),
33 | blank=True,
34 | max_length=None,
35 | null=True,
36 | size=None,
37 | upload_to="admin_test",
38 | ),
39 | ),
40 | ],
41 | options={
42 | "verbose_name": "(Array Field) Default",
43 | },
44 | ),
45 | ]
46 |
--------------------------------------------------------------------------------
/.github/workflows/docs.yml:
--------------------------------------------------------------------------------
1 | name: documentation
2 |
3 | on:
4 | pull_request:
5 | branches: [main]
6 | push:
7 | branches: [main]
8 |
9 | jobs:
10 | checks:
11 | if: github.event_name != 'push'
12 | runs-on: ubuntu-latest
13 | steps:
14 | - name: Clone Repository
15 | uses: actions/checkout@v3
16 |
17 | - name: Set up Python
18 | uses: actions/setup-python@v5
19 | with:
20 | python-version: 3.11
21 |
22 | - name: Install Dependencies
23 | run: pip install .[docs]
24 |
25 | - name: Test build
26 | run: mkdocs build
27 |
28 | gh-release:
29 | if: github.event_name != 'pull_request'
30 | runs-on: ubuntu-latest
31 | steps:
32 | - name: Clone Repository
33 | uses: actions/checkout@v3
34 |
35 | - name: Configure Git Credentials
36 | run: |
37 | git config user.name github-actions[bot]
38 | git config user.email 41898282+github-actions[bot]@users.noreply.github.com
39 |
40 | - name: Set up Python
41 | uses: actions/setup-python@v5
42 | with:
43 | python-version: 3.11
44 |
45 | - name: Install Dependencies
46 | run: pip install .[docs]
47 |
48 | - name: Build
49 | run: mkdocs build
50 |
51 | - name: Deploy to GitHub Pages
52 | uses: peaceiris/actions-gh-pages@v3
53 | with:
54 | github_token: ${{ secrets.GH_PAGES_DEPLOY }}
55 | publish_dir: ./site
56 |
--------------------------------------------------------------------------------
/mkdocs.yml:
--------------------------------------------------------------------------------
1 | site_name: image-uploader-widget
2 | site_url: https://inventare.github.io/django-image-uploader-widget
3 | repo_url: https://github.com/inventare/django-image-uploader-widget
4 | repo_name: inventare/django-image-uploader-widget
5 |
6 | theme:
7 | name: material
8 | palette:
9 | scheme: slate
10 | primary: blue
11 | icon:
12 | repo: fontawesome/brands/github
13 | logo: material/image
14 | favicon: _images/favicon.png
15 | features:
16 | - navigation.tabs
17 | - navigation.tabs.sticky
18 | - navigation.top
19 | - search.suggest
20 | - search.highlight
21 |
22 | markdown_extensions:
23 | - tables
24 | - admonition
25 | - attr_list
26 | - md_in_html
27 | - pymdownx.highlight:
28 | anchor_linenums: true
29 | linenums: true
30 | linenums_style: pymdownx-inline
31 | - pymdownx.superfences
32 | - pymdownx.emoji:
33 | emoji_index: !!python/name:material.extensions.emoji.twemoji
34 | emoji_generator: !!python/name:material.extensions.emoji.to_svg
35 |
36 | extra_css:
37 | - _stylesheets/extra.css
38 |
39 | plugins:
40 | - glightbox
41 | - awesome-pages
42 | - search
43 |
44 | extra:
45 | homepage: https://inventare.github.io/django-image-uploader-widget/
46 |
47 | nav:
48 | - index.md
49 | - Widget:
50 | - ... | flat | widget/*.md
51 | - Specific Cases:
52 | - ... | flat | widget/specific-cases/*.md
53 | - ArrayField:
54 | - ... | flat | array_field/*.md
55 | - HTMX:
56 | - ... | flat | htmx/*.md
57 | - Inline Admin:
58 | - ... | flat | inline_admin/*.md
59 |
--------------------------------------------------------------------------------
/image_uploader_widget/locale/pt_BR/LC_MESSAGES/django.po:
--------------------------------------------------------------------------------
1 | msgid ""
2 | msgstr ""
3 | "Project-Id-Version: image_uploader_widget\n"
4 | "Report-Msgid-Bugs-To: \n"
5 | "POT-Creation-Date: 2024-04-02 20:50-0300\n"
6 | "Language: pt_BR\n"
7 | "MIME-Version: 1.0\n"
8 | "Content-Type: text/plain; charset=UTF-8\n"
9 | "Content-Transfer-Encoding: 8bit\n"
10 | "Plural-Forms: nplurals=2; plural=(n > 1);\n"
11 |
12 | #: image_uploader_widget/postgres/forms.py:13
13 | #, python-format
14 | msgid "Item %(name)s in the array did not validate:"
15 | msgstr "O item %(name)s na matriz não validou:"
16 |
17 | #: image_uploader_widget/templates/admin/edit_inline/image_uploader.html:48
18 | #: image_uploader_widget/templates/postgres/widgets/image_array.html:102
19 | msgid "Add image"
20 | msgstr "Adicionar Imagem"
21 |
22 | #: image_uploader_widget/templates/admin/edit_inline/image_uploader.html:62
23 | #: image_uploader_widget/templates/postgres/widgets/image_array.html:116
24 | msgid "Drop your images here or click to select..."
25 | msgstr "Solte suas imagens aqui ou clique para selecionar..."
26 |
27 | #: image_uploader_widget/templates/admin/edit_inline/image_uploader.html:76
28 | #: image_uploader_widget/templates/postgres/widgets/image_array.html:130
29 | msgid "Drop your images here..."
30 | msgstr "Solte suas imagens aqui..."
31 |
32 | #: image_uploader_widget/templates/admin/widgets/image_uploader_widget.html:16
33 | msgid "Drop your image here..."
34 | msgstr "Solte sua imagem aqui..."
35 |
36 | #: image_uploader_widget/templates/admin/widgets/image_uploader_widget.html:30
37 | msgid "Drop your image here or click to select one..."
38 | msgstr "Solte sua imagem aqui ou clique para selecionar uma..."
39 |
--------------------------------------------------------------------------------
/image_uploader_widget/locale/es/LC_MESSAGES/django.po:
--------------------------------------------------------------------------------
1 | msgid ""
2 | msgstr ""
3 | "Project-Id-Version: image_uploader_widget\n"
4 | "Report-Msgid-Bugs-To: \n"
5 | "POT-Creation-Date: 2024-04-02 20:52-0300\n"
6 | "Language: es\n"
7 | "MIME-Version: 1.0\n"
8 | "Content-Type: text/plain; charset=UTF-8\n"
9 | "Content-Transfer-Encoding: 8bit\n"
10 | "Plural-Forms: nplurals=2; plural=(n > 1);\n"
11 |
12 | #: image_uploader_widget/postgres/forms.py:13
13 | #, python-format
14 | msgid "Item %(name)s in the array did not validate:"
15 | msgstr "El elemento %(nth)s del arreglo no se pudo validar:"
16 |
17 | #: image_uploader_widget/templates/admin/edit_inline/image_uploader.html:48
18 | #: image_uploader_widget/templates/postgres/widgets/image_array.html:102
19 | msgid "Add image"
20 | msgstr "Añadir imagen"
21 |
22 | #: image_uploader_widget/templates/admin/edit_inline/image_uploader.html:62
23 | #: image_uploader_widget/templates/postgres/widgets/image_array.html:116
24 | msgid "Drop your images here or click to select..."
25 | msgstr "Suelte sus imágenes aquí o haga clic para seleccionar..."
26 |
27 | #: image_uploader_widget/templates/admin/edit_inline/image_uploader.html:76
28 | #: image_uploader_widget/templates/postgres/widgets/image_array.html:130
29 | msgid "Drop your images here..."
30 | msgstr "Suelte sus imagenes aquí..."
31 |
32 | #: image_uploader_widget/templates/admin/widgets/image_uploader_widget.html:16
33 | msgid "Drop your image here..."
34 | msgstr "Suelta tu imagen aquí..."
35 |
36 | #: image_uploader_widget/templates/admin/widgets/image_uploader_widget.html:30
37 | msgid "Drop your image here or click to select one..."
38 | msgstr "Suelta tu imagen aquí o haz clic para seleccionar una..."
39 |
--------------------------------------------------------------------------------
/image_uploader_widget/templates/image_uploader_widget/parts/preview.html:
--------------------------------------------------------------------------------
1 | {% if url %}
2 |
53 |
54 | { loading=lazy }
55 |
56 |
57 |
--------------------------------------------------------------------------------
/image_uploader_widget/locale/ru/LC_MESSAGES/django.po:
--------------------------------------------------------------------------------
1 | msgid ""
2 | msgstr ""
3 | "Project-Id-Version: image_uploader_widget\n"
4 | "Report-Msgid-Bugs-To: \n"
5 | "POT-Creation-Date: 2024-04-02 20:52-0300\n"
6 | "Language: ru\n"
7 | "MIME-Version: 1.0\n"
8 | "Content-Type: text/plain; charset=UTF-8\n"
9 | "Content-Transfer-Encoding: 8bit\n"
10 | "Plural-Forms: nplurals=3; plural=(n%10==1 && n%100!=11 ? 0 : n%10>=2 && "
11 | "n%10<=4 && (n%100<10 || n%100>=20) ? 1 : 2);\n"
12 |
13 | #: image_uploader_widget/postgres/forms.py:13
14 | #, python-format
15 | msgid "Item %(name)s in the array did not validate:"
16 | msgstr "Элемент %(nth)s в массиве не прошёл проверку:"
17 |
18 | #: image_uploader_widget/templates/admin/edit_inline/image_uploader.html:48
19 | #: image_uploader_widget/templates/postgres/widgets/image_array.html:102
20 | msgid "Add image"
21 | msgstr "Добавить изображение"
22 |
23 | #: image_uploader_widget/templates/admin/edit_inline/image_uploader.html:62
24 | #: image_uploader_widget/templates/postgres/widgets/image_array.html:116
25 | msgid "Drop your images here or click to select..."
26 | msgstr "Перетащите изображения сюда или выберите..."
27 |
28 | #: image_uploader_widget/templates/admin/edit_inline/image_uploader.html:76
29 | #: image_uploader_widget/templates/postgres/widgets/image_array.html:130
30 | msgid "Drop your images here..."
31 | msgstr "Перетащите изображения сюда..."
32 |
33 | #: image_uploader_widget/templates/admin/widgets/image_uploader_widget.html:16
34 | msgid "Drop your image here..."
35 | msgstr "Перетащите изображение сюда..."
36 |
37 | #: image_uploader_widget/templates/admin/widgets/image_uploader_widget.html:30
38 | msgid "Drop your image here or click to select one..."
39 | msgstr "Перетащите изображение сюда или выберите..."
40 |
--------------------------------------------------------------------------------
/docs/widget/06-custom-text-and-icons.md:
--------------------------------------------------------------------------------
1 | # Custom Text and Icons
2 |
3 | To customize the image uploader widget, you can set some variables (this feature is based on the issue [#77](https://github.com/inventare/django-image-uploader-widget/issues/77)). In this page we talk about how to, easy, change the texts and icons on that lib.
4 |
5 | For the widget, to customize the icon and the text we need to set some variables in the `ImageUploaderWidget` constructor, like it:
6 |
7 | ```python
8 | # ...
9 | class TestCustomForm(forms.ModelForm):
10 | class Meta:
11 | model = CustomWidget
12 | widgets = {
13 | 'image': ImageUploaderWidget(
14 | drop_icon="",
15 | drop_text="Custom Drop Text",
16 | empty_icon="",
17 | empty_text="Custom Empty Marker Text",
18 | ),
19 | }
20 | fields = '__all__'
21 | ```
22 |
23 | In this example, we set all four properties (`drop_icon`, `drop_text`, `empty_icon` and `empty_text`) for the widget. In the icons is possible to use the `django.shortcuts.render` ([REF](https://docs.djangoproject.com/en/4.1/topics/http/shortcuts/#render)) to renderize the icon from an HTML template.
24 |
25 | Another way for customize it is create an new widget class based on that and use it for your forms:
26 |
27 |
28 | ```python
29 | class MyCustomWidget(ImageUploaderWidget):
30 | drop_text = ""
31 | empty_text = ""
32 |
33 | def get_empty_icon(self):
34 | return render(...)
35 |
36 | def get_drop_icon(self):
37 | return render(...)
38 |
39 | class TestCustomForm(forms.ModelForm):
40 | class Meta:
41 | model = CustomWidget
42 | widgets = {
43 | 'image': MyCustomWidget()
44 | }
45 | fields = '__all__'
46 | ```
47 |
--------------------------------------------------------------------------------
/demo/widget/admin.py:
--------------------------------------------------------------------------------
1 | from django.contrib import admin
2 |
3 | from . import forms, models
4 |
5 |
6 | @admin.register(models.NonRequired)
7 | class NonRequiredAdmin(admin.ModelAdmin):
8 | form = forms.TestForm
9 |
10 |
11 | class NonRequiredStackedInlineItemAdmin(admin.StackedInline):
12 | model = models.NonRequiredStackedInlineItem
13 | form = forms.TestForm
14 | extra = 0
15 |
16 |
17 | @admin.register(models.NonRequiredStackedInline)
18 | class NonRequiredStackedInlineAdmin(admin.ModelAdmin):
19 | inlines = [NonRequiredStackedInlineItemAdmin]
20 |
21 |
22 | class NonRequiredTabularInlineItemAdmin(admin.TabularInline):
23 | model = models.NonRequiredTabularInlineItem
24 | form = forms.TestForm
25 | extra = 0
26 |
27 |
28 | @admin.register(models.NonRequiredTabularInline)
29 | class TestNonRequiredTabularInlineAdmin(admin.ModelAdmin):
30 | inlines = [NonRequiredTabularInlineItemAdmin]
31 |
32 |
33 | @admin.register(models.Required)
34 | class RequiredAdmin(admin.ModelAdmin):
35 | form = forms.TestForm
36 |
37 |
38 | class RequiredStackedInlineItemAdmin(admin.StackedInline):
39 | model = models.RequiredStackedInlineItem
40 | form = forms.TestForm
41 | extra = 0
42 |
43 |
44 | @admin.register(models.RequiredStackedInline)
45 | class RequiredStackedInlineAdmin(admin.ModelAdmin):
46 | inlines = [RequiredStackedInlineItemAdmin]
47 |
48 |
49 | class RequiredTabularInlineItemAdmin(admin.TabularInline):
50 | model = models.RequiredTabularInlineItem
51 | form = forms.TestForm
52 | extra = 0
53 |
54 |
55 | @admin.register(models.RequiredTabularInline)
56 | class RequiredTabularInlineAdmin(admin.ModelAdmin):
57 | inlines = [RequiredTabularInlineItemAdmin]
58 |
59 |
60 | @admin.register(models.Custom)
61 | class CustomAdmin(admin.ModelAdmin):
62 | form = forms.TestCustomForm
63 |
--------------------------------------------------------------------------------
/image_uploader_widget/widgets.py:
--------------------------------------------------------------------------------
1 | from django import forms
2 | from django.forms import widgets
3 |
4 |
5 | class ImageUploaderWidget(widgets.ClearableFileInput):
6 | template_name = "image_uploader_widget/widget/image_uploader_widget.html"
7 | drop_text = ""
8 | empty_text = ""
9 | empty_icon = ""
10 | drop_icon = ""
11 |
12 | def __init__(
13 | self, drop_text="", empty_text="", empty_icon="", drop_icon="", attrs=None
14 | ):
15 | self.drop_text = drop_text
16 | self.empty_text = empty_text
17 | self.empty_icon = empty_icon
18 | self.drop_icon = drop_icon
19 | super(ImageUploaderWidget, self).__init__(attrs)
20 |
21 | def get_drop_text(self):
22 | return self.drop_text
23 |
24 | def get_empty_text(self):
25 | return self.empty_text
26 |
27 | def get_empty_icon(self):
28 | return self.empty_icon
29 |
30 | def get_drop_icon(self):
31 | return self.drop_icon
32 |
33 | def get_context(self, name, value, attrs=None):
34 | context = super(ImageUploaderWidget, self).get_context(name, value, attrs)
35 | if not context:
36 | context = {}
37 |
38 | return {
39 | **context,
40 | "custom": {
41 | "drop_text": self.get_drop_text(),
42 | "empty_text": self.get_empty_text(),
43 | "empty_icon": self.get_empty_icon(),
44 | "drop_icon": self.get_drop_icon(),
45 | },
46 | }
47 |
48 | @property
49 | def media(self):
50 | return forms.Media(
51 | js=(
52 | "image_uploader_widget/js/image-uploader-modal.js",
53 | "image_uploader_widget/js/image-uploader-widget.js",
54 | ),
55 | css={
56 | "screen": ("image_uploader_widget/css/image-uploader-widget.css",),
57 | },
58 | )
59 |
--------------------------------------------------------------------------------
/docs/array_field/02-prevent-raw-change.md:
--------------------------------------------------------------------------------
1 | # Prevent Raw Images Path Change
2 |
3 | Like various other `multiple` instances or values support, we have an tiny problem at this component, for now: when we save a form with some "unchanged" values, i.e., with the current file path string instead of an uploaded file, this string is used to store in the database. Is planed, in the future, change this to use the original array values to confirm the sended values. But, for this first version, this is a issue that is not resolved.
4 |
5 | Example of how this works: navigate to widget change, and find for the hidden input with `-RAW` name. Change the value to another and saves. The wrong value is correctly saved.
6 |
7 |
8 |
9 | 
10 |
11 |
12 |
13 | ## How to prevent this behaviour?
14 |
15 | One of the way to prevent this behaviour is create a custom `ModelForm` and raises a `ValidationError` for string values that is not present on the original value. See a example:
16 |
17 | ```python
18 | from django import forms
19 | from django.core.exceptions import ValidationError
20 |
21 |
22 | class TestWithArrayFieldForm(forms.ModelForm):
23 | old_values = []
24 |
25 | def map_is_valid_images(self, value):
26 | if not isinstance(value, str):
27 | return False
28 | return value not in self.old_values
29 |
30 | def clean(self):
31 | data = super().clean()
32 |
33 | self.old_values = []
34 | if self.instance is not None:
35 | self.old_values = self.instance.images
36 |
37 | has_changed = any(list(map(self.map_is_valid_images, data.get('images'))))
38 | if has_changed:
39 | raise ValidationError('One of the non-changed value is corrupted.')
40 |
41 | return data
42 |
43 | class Meta:
44 | model = TestWithArrayField
45 | fields = "__all__"
46 | ```
47 |
--------------------------------------------------------------------------------
/demo/widget/models.py:
--------------------------------------------------------------------------------
1 | from django.db import models
2 |
3 | # Optional
4 |
5 |
6 | class NonRequired(models.Model):
7 | image = models.ImageField("Image", null=True, blank=True)
8 |
9 | def __str__(self):
10 | return "Example Model"
11 |
12 | class Meta:
13 | verbose_name = "(Widget) Non Required"
14 |
15 |
16 | class NonRequiredStackedInline(models.Model):
17 | class Meta:
18 | verbose_name = "(Widget) Non Required inside Stacked Inline"
19 |
20 |
21 | class NonRequiredStackedInlineItem(models.Model):
22 | parent = models.ForeignKey(NonRequiredStackedInline, on_delete=models.CASCADE)
23 | image = models.ImageField("Image", null=True, blank=True)
24 |
25 |
26 | class NonRequiredTabularInline(models.Model):
27 | class Meta:
28 | verbose_name = "(Widget) Non Required inside Tabular Inline"
29 |
30 |
31 | class NonRequiredTabularInlineItem(models.Model):
32 | parent = models.ForeignKey(NonRequiredTabularInline, on_delete=models.CASCADE)
33 | image = models.ImageField("Image", null=True, blank=True)
34 |
35 |
36 | # Required
37 |
38 |
39 | class Required(models.Model):
40 | image = models.ImageField("Image")
41 |
42 | def __str__(self):
43 | return "Example Model"
44 |
45 | class Meta:
46 | verbose_name = "(Widget) Required"
47 |
48 |
49 | class RequiredStackedInline(models.Model):
50 | class Meta:
51 | verbose_name = "(Widget) Required inside Stacked Inline"
52 |
53 |
54 | class RequiredStackedInlineItem(models.Model):
55 | parent = models.ForeignKey(RequiredStackedInline, on_delete=models.CASCADE)
56 | image = models.ImageField("Image")
57 |
58 |
59 | class RequiredTabularInline(models.Model):
60 | class Meta:
61 | verbose_name = "(Widget) Required inside Tabular Inline"
62 |
63 |
64 | class RequiredTabularInlineItem(models.Model):
65 | parent = models.ForeignKey(RequiredTabularInline, on_delete=models.CASCADE)
66 | image = models.ImageField("Image")
67 |
68 |
69 | # Custom
70 |
71 |
72 | class Custom(models.Model):
73 | image = models.ImageField("Image")
74 |
75 | class Meta:
76 | verbose_name = "(Widget) Custom"
77 |
--------------------------------------------------------------------------------
/docs/array_field/01-tutorial.md:
--------------------------------------------------------------------------------
1 | # Getting Started
2 |
3 | !!! warning "Version Information"
4 |
5 | Introduced at the 0.5.0 version.
6 |
7 | !!! warning "Database Information"
8 |
9 | Supported only on PostgreSQL Database's.
10 |
11 | The `widget` only supports `ImageField` and this is a limitation to upload only one image per widget. The `inline admin` support multiple images upload but it is only supported by the `django.contrib.admin` pages.
12 |
13 | Some comments, like the [Discussion #97](https://github.com/inventare/django-image-uploader-widget/discussions/97), [Issue #146](https://github.com/inventare/django-image-uploader-widget/issues/146) and [Issue #110](https://github.com/inventare/django-image-uploader-widget/issues/110) make some feature requests and the [Issue #146](https://github.com/inventare/django-image-uploader-widget/issues/146) takes one proposition: uses the `ArrayField`. The `ArrayField` is a `PostgreSQL` specific field and support for storing multiple values into one field.
14 |
15 | ## Experimental for Now?
16 |
17 | Currently, we have added support, addaptating the `inline admin` feature to work widget-like and add support for the `ArrayField` to store images using the `storage` and save it path to an `ArrayField`. This is, really, a little experimental for now, and can contains some bugs. If your found one: open a Issue reporting.
18 |
19 | !!! warning "Attention Point"
20 |
21 | See the attention point on the [Prevent Raw Images Path Change](./02-prevent-raw-change.md) page.
22 |
23 | ## Usage
24 |
25 | Instead of `widget` or `inline admin` that we only set the `widget` and `inline admin` for the created model, in this part, we need to customize the model.
26 |
27 | ```python
28 | from django.db import models
29 | from image_uploader_widget.postgres import ImageListField
30 |
31 | class TestWithArrayField(models.Model):
32 | images = ImageListField(blank=True, null=True, upload_to="admin_test")
33 |
34 | class Meta:
35 | verbose_name = "Test With Array Field"
36 | ```
37 |
38 | This is really simple and is not needed to create more customizations. The widget and form is automatic created for the custom multiple images widget.
39 |
--------------------------------------------------------------------------------
/pyproject.toml:
--------------------------------------------------------------------------------
1 | [project]
2 | requires-python = ">= 3.8"
3 | name = 'django-image-uploader-widget'
4 | version = '1.1.0'
5 | description='Simple Image Uploader Widget for Django-Admin'
6 | dependencies = [
7 | 'django>=4.2',
8 | 'Pillow',
9 | ]
10 | authors = [{name = "Eduardo Oliveira", email = "eduardo_y05@outlook.com"}]
11 | maintainers = [{name = "Eduardo Oliveira", email = "eduardo_y05@outlook.com"}]
12 | readme = "README.md"
13 | license = {file = "LICENSE"}
14 | keywords = ["django", "admin", "widget", "image", "uploader"]
15 | classifiers = [
16 | 'Development Status :: 5 - Production/Stable',
17 | 'Environment :: Web Environment',
18 | 'Framework :: Django',
19 | 'Intended Audience :: Developers',
20 | 'License :: OSI Approved :: MIT License',
21 | 'Operating System :: OS Independent',
22 | 'Programming Language :: Python',
23 | 'Programming Language :: Python :: 3',
24 | 'Programming Language :: Python :: 3.8',
25 | 'Programming Language :: Python :: 3.9',
26 | 'Programming Language :: Python :: 3.10',
27 | 'Programming Language :: Python :: 3.11',
28 | 'Programming Language :: Python :: 3.12',
29 | ]
30 |
31 | [project.optional-dependencies]
32 | dev = ["black", "isort", "pre-commit", "poethepoet"]
33 | test = ["playwright==1.48.0"]
34 | docs = ["mkdocs", "mkdocs-material", "mkdocs-glightbox", "mkdocs-awesome-pages-plugin"]
35 |
36 | [project.urls]
37 | homepage = "https://github.com/inventare/django-image-uploader-widget"
38 | documentation = "https://inventare.github.io/django-image-uploader-widget/"
39 |
40 | [build-system]
41 | requires = ["setuptools", "build"]
42 | build-backend = "setuptools.build_meta"
43 |
44 | [tool.black]
45 | line-length = 88
46 | target-version = ['py310']
47 |
48 | [tool.isort]
49 | profile = 'black'
50 |
51 | [tool.setuptools]
52 | include-package-data = true
53 | zip-safe = false
54 | packages = ["image_uploader_widget"]
55 |
56 | [tool.poe.tasks.test_pg]
57 | cmd = "python manage.py test"
58 | env = { DATABASE_USE_POSTGRES = "1" }
59 |
60 | [tool.poe.tasks.test_pg_currently]
61 | cmd = "python manage.py test --tag currently"
62 | env = { DATABASE_USE_POSTGRES = "1" }
63 |
64 | [tool.poe.tasks.run_pg]
65 | cmd = "python manage.py runserver"
66 | env = { DATABASE_USE_POSTGRES = "1" }
67 |
68 | [tool.poe.tasks.docs]
69 | cmd = "mkdocs serve"
70 |
--------------------------------------------------------------------------------
/image_uploader_widget/static/image_uploader_widget/js/image-uploader-modal.js:
--------------------------------------------------------------------------------
1 | const IUWPreviewModal = {
2 | openPreviewModal: function() {
3 | const modal = document.getElementById('iuw-modal-element');
4 | if (!modal) {
5 | return;
6 | }
7 | setTimeout(function() {
8 | modal.classList.add('visible');
9 | modal.classList.remove('hide');
10 | document.body.style.overflow = 'hidden';
11 | }, 50);
12 | },
13 | closePreviewModal: function() {
14 | document.body.style.overflow = 'auto';
15 | const modal = document.getElementById('iuw-modal-element');
16 | if (modal) {
17 | modal.classList.remove('visible');
18 | modal.classList.add('hide');
19 | setTimeout(function() {
20 | modal.parentElement.removeChild(modal);
21 | }, 300);
22 | }
23 | },
24 | onModalClick: function (e) {
25 | if (e && e.target) {
26 | const element = e.target;
27 | if (element.closest('img.iuw-modal-image-preview-item')) {
28 | return;
29 | }
30 | }
31 | IUWPreviewModal.closePreviewModal();
32 | },
33 | createPreviewModal: function (image) {
34 | image.className = '';
35 | image.classList.add('iuw-modal-image-preview-item');
36 |
37 | const modal = document.createElement('div');
38 | modal.id = 'iuw-modal-element';
39 | modal.classList.add('iuw-modal', 'hide');
40 | modal.addEventListener('click', IUWPreviewModal.onModalClick);
41 |
42 | const preview = document.createElement('div');
43 | preview.classList.add('iuw-modal-image-preview');
44 | preview.innerHTML = '';
45 | preview.appendChild(image);
46 | modal.appendChild(preview);
47 |
48 | document.body.appendChild(modal);
49 | return modal;
50 | }
51 | };
52 |
--------------------------------------------------------------------------------
/docs/widget/specific-cases/01-crispy-forms.md:
--------------------------------------------------------------------------------
1 | # Usage with django-crispy-forms
2 |
3 | The `django-crispy-forms` not support, out of box, custom widgets and this is a problem of `django-crispy-forms`. Howere, inspired by [#203](https://github.com/inventare/django-image-uploader-widget/issues/203) issue, we decided to learn about the `crispy` package and document how to made custom widget work with it.
4 |
5 | ## FormHelper
6 |
7 | The easy way to make a custom widget to work with `django-crispy-forms` is to define a `FormHelper` inside the `Form` instance:
8 |
9 | ```python
10 | from crispy_forms.helper import FormHelper
11 | from crispy_forms.layout import Layout, Div
12 | from django import forms
13 |
14 | class TestCrispyRequiredForm(forms.ModelForm):
15 | def __init__(self, *args, **kwargs):
16 | super().__init__(*args, **kwargs)
17 | self.helper = FormHelper(self)
18 | self.helper.layout = Layout(
19 | Row(
20 | Column(
21 | Div('image', template='image_uploader_widget/widget/image_uploader_widget.html'),
22 | css_class='form-group col-md-6 mb-0',
23 | ),
24 | css_class='form-row'
25 | ),
26 | )
27 |
28 | class Meta:
29 | model = TestRequired
30 | widgets = {
31 | "image": ImageUploaderWidget(),
32 | }
33 | fields = "__all__"
34 | ```
35 |
36 | The definition of the `ImageUploaderWidget()` inside the `widgets` meta property is important to render the correct media styles:
37 |
38 | ```html
39 | {% load crispy_forms_tags %}
40 |
41 |
42 |
43 |
44 |
45 |
60 |
65 | ```
66 |
67 | The JavaScript and Styles is inserted by `{{ form.media }}` and the `ImageUploaderWidget` should works.
68 |
--------------------------------------------------------------------------------
/image_uploader_widget/postgres/forms.py:
--------------------------------------------------------------------------------
1 | from itertools import chain
2 |
3 | from django import forms
4 | from django.contrib.postgres.utils import prefix_validation_error
5 | from django.core.exceptions import ValidationError
6 | from django.utils.translation import gettext_lazy as _
7 |
8 | from .widget import ImageUploaderArrayWidget
9 |
10 |
11 | class ImageListFormField(forms.Field):
12 | default_error_messages = {
13 | "item_invalid": _("Item %(name)s in the array did not validate:"),
14 | }
15 |
16 | def __init__(self, max_images=1000, **kwargs):
17 | kwargs.pop("base_field")
18 | self.max_length = kwargs.pop("max_length") or 150
19 |
20 | self.required = False
21 | self.base_field = forms.ImageField(max_length=self.max_length)
22 | widget = ImageUploaderArrayWidget(max_images=max_images)
23 | kwargs.setdefault("widget", widget)
24 | super().__init__(**kwargs)
25 |
26 | def to_python(self, value):
27 | value = super().to_python(value)
28 | return [self.base_field.to_python(item) for item in value]
29 |
30 | def clean(self, value):
31 | cleaned_data = []
32 | errors = []
33 |
34 | max_size = len(value)
35 | for index in range(max_size):
36 | item = value[index]
37 | if isinstance(item, str):
38 | cleaned_data.append(item)
39 | continue
40 |
41 | file_name = item.name
42 | try:
43 | cleaned_item = self.base_field.clean(item)
44 | cleaned_data.append(cleaned_item)
45 | except ValidationError as error:
46 | errors.append(
47 | prefix_validation_error(
48 | error,
49 | self.error_messages["item_invalid"],
50 | code="item_invalid",
51 | params={"name": file_name},
52 | )
53 | )
54 | cleaned_data.append(None)
55 | else:
56 | errors.append(None)
57 |
58 | errors = list(filter(None, errors))
59 | if errors:
60 | raise ValidationError(list(chain.from_iterable(errors)))
61 | return cleaned_data
62 |
63 | def has_changed(self, initial, data):
64 | try:
65 | data = self.to_python(data)
66 | except ValidationError:
67 | pass
68 | else:
69 | if initial in self.empty_values and data in self.empty_values:
70 | return False
71 | return super().has_changed(initial, data)
72 |
--------------------------------------------------------------------------------
/docs/htmx/01-widget.md:
--------------------------------------------------------------------------------
1 | # Out of box HTMX Support for Widget
2 |
3 | !!! warning "Version Information"
4 |
5 | Introduced at the 0.6.0 version.
6 |
7 | The HTMX is, now, out of box supported, for **widget** and **array field widget**. Even though it has support out of the box, some precautions need to be taken. The media (*scripts* and *styles* of the widget) needs to be loaded in the parent document:
8 |
9 | ## Behaviour
10 |
11 | On the version `0.6.0` the **JavaScript** of the widget was rewrited using event **Event bubbling** and the render part is moved to template system to support the widget behaviour without initialization needed.
12 |
13 | ## Usage Example
14 |
15 | This usage example is taken form `tests` application that is used to run our e2e test cases. The parent view and template is created using:
16 |
17 | ```python
18 | # views.py
19 | def render_parent(request):
20 | form = TestRequiredForm()
21 | form2 = TestWithArrayFieldForm()
22 | context = {
23 | "media": form.media + form2.media,
24 | }
25 | template = "test_htmx.html"
26 | return render(request, template, context=context)
27 | ```
28 |
29 | ```html
30 |
31 |
32 |
33 |
34 |
35 |
36 |
61 |
62 |
64 | ...
63 |
10 |
11 | { loading=lazy }
12 |
13 |
14 |
15 | ## Adding Order Field to Model
16 |
17 | Add a `PositiveIntegerField` to the model to store the order of the images inside the admin.
18 |
19 | ```python
20 | # ecommerce/models.py
21 | from django.db import models
22 |
23 | class Product(models.Model):
24 | name = models.CharField(max_length=100)
25 |
26 | def __str__(self):
27 | return self.name
28 |
29 | class Meta:
30 | verbose_name = 'Product'
31 | verbose_name_plural = 'Products'
32 |
33 | class ProductImage(models.Model):
34 | product = models.ForeignKey(
35 | Product,
36 | related_name="images",
37 | on_delete=models.CASCADE
38 | )
39 | image = models.ImageField("image")
40 | order = models.PositiveIntegerField('Order', default=1)
41 |
42 | def __str__(self):
43 | return str(self.image)
44 |
45 | class Meta:
46 | verbose_name = 'Product Image'
47 | verbose_name_plural = 'Product Images'
48 | ```
49 |
50 | ## Change inline to OrderedImageUploaderInline
51 |
52 | Inside the `admin.py`, change the inline from `ImageUploaderInline` to `OrderedImageUploaderInline` and setup some configs:
53 |
54 | ```python
55 | # ecommerce/admin.py
56 | from django.contrib import admin
57 | from ecommerce.models import Product, ProductImage
58 | from image_uploader_widget.admin import ImageUploaderInline
59 |
60 | class ProductImageAdmin(OrderedImageUploaderInline):
61 | model = ProductImage
62 |
63 | @admin.register(Product)
64 | class ProductAdmin(admin.ModelAdmin):
65 | inlines = [ProductImageAdmin]
66 |
67 | ```
68 |
69 | ## Attributes
70 |
71 | | Attribute | Type | Default Value | Description |
72 | | ----------- | ----- | ------------- | --------------------------------------------------------------------------- |
73 | | order_field | `str` | `"order"` | The name of field that represents the order of images. |
74 | | template | `str` | `"admin/edit_inline/ordered_image_uploader.html"` | The template path to render the widget. |
75 |
76 | All the attributes from the `ImageUploaderInline` are present too. For example, is possible to change the name of the used `order_field` by adding it's attribute to the `OrderedImageUploaderInline`:
77 |
78 | ```python
79 | from image_uploader_widget.admin import ImageUploaderInline
80 |
81 | class MyInlineAdminAdmin(OrderedImageUploaderInline):
82 | model = MyModel
83 | order_field = "my_custom_field"
84 |
85 | ```
86 |
87 | ## Mobile Touch Support
88 |
89 | !!! warning "Version Information"
90 |
91 | Introduced at the 0.6.0 version.
92 |
93 | The original behaviour for `OrderedImageUploaderInline` is manual created and don't support mobile touch events. On the version `0.6.0` the sorting uses the [Sortable](https://sortablejs.github.io/Sortable/) and, then, the mobile touch events are supported.
94 |
--------------------------------------------------------------------------------
/demo/htmx/views.py:
--------------------------------------------------------------------------------
1 | from django.contrib.messages import SUCCESS, add_message
2 | from django.shortcuts import render
3 | from django.urls import reverse
4 |
5 | from demo.array_field.forms import TestWithArrayFieldForm
6 | from demo.array_field.models import TestWithArrayField
7 | from demo.widget.models import NonRequired, Required
8 |
9 | from .forms import NonRequiredForm, RequiredForm
10 |
11 |
12 | def widget_required(request, pk=None):
13 | instance = Required.objects.get(pk=pk) if pk else None
14 | if request.method == "POST":
15 | form = RequiredForm(instance=instance, data=request.POST, files=request.FILES)
16 | if form.is_valid():
17 | form.save()
18 | instance = form.instance
19 | form = RequiredForm(instance=instance)
20 | add_message(request, SUCCESS, "Saved")
21 | else:
22 | form = RequiredForm(instance=instance)
23 |
24 | context = {
25 | "form": form,
26 | "instance": instance,
27 | "post_url": reverse("required"),
28 | }
29 | template = "test_htmx_widget.html"
30 | return render(request, template, context=context)
31 |
32 |
33 | def widget_optional(request, pk=None):
34 | instance = NonRequired.objects.get(pk=pk) if pk else None
35 | if request.method == "POST":
36 | form = NonRequiredForm(
37 | instance=instance, data=request.POST, files=request.FILES
38 | )
39 | if form.is_valid():
40 | form.save()
41 | instance = form.instance
42 | form = NonRequiredForm(instance=instance)
43 | add_message(request, SUCCESS, "Saved")
44 | else:
45 | form = NonRequiredForm(instance=instance)
46 |
47 | context = {
48 | "form": form,
49 | "instance": instance,
50 | "post_url": reverse("optional"),
51 | }
52 | template = "test_htmx_widget.html"
53 | return render(request, template, context=context)
54 |
55 |
56 | def array_field_required(request, pk=None):
57 | instance = TestWithArrayField.objects.get(pk=pk) if pk else None
58 | if request.method == "POST":
59 | form = TestWithArrayFieldForm(
60 | instance=instance, data=request.POST, files=request.FILES
61 | )
62 | if form.is_valid():
63 | form.save()
64 | instance = form.instance
65 | form = TestWithArrayFieldForm(instance=instance)
66 | add_message(request, SUCCESS, "Saved")
67 | else:
68 | form = TestWithArrayFieldForm(instance=instance)
69 |
70 | context = {
71 | "form": form,
72 | "instance": instance,
73 | "post_url": reverse("array"),
74 | }
75 | template = "test_htmx_widget.html"
76 | return render(request, template, context=context)
77 |
78 |
79 | def base(request, extra_context=None):
80 | if not extra_context:
81 | extra_context = {}
82 | destination = request.GET.get("destination")
83 | form = RequiredForm()
84 | form2 = TestWithArrayFieldForm()
85 | context = {
86 | "destination": destination,
87 | "media": form.media + form2.media,
88 | **extra_context,
89 | }
90 | template = "test_htmx.html"
91 | return render(request, template, context=context)
92 |
93 |
94 | def base_light(request):
95 | return base(request, extra_context={"theme": "iuw-light"})
96 |
97 |
98 | def base_dark(request):
99 | return base(request, extra_context={"theme": "iuw-dark"})
100 |
--------------------------------------------------------------------------------
/docs/htmx/02-array_field.md:
--------------------------------------------------------------------------------
1 | # Out of box HTMX Support for Array Field
2 |
3 | !!! warning "Version Information"
4 |
5 | Introduced at the 0.6.0 version.
6 |
7 | ## Behaviour
8 |
9 | The behaviour for the out of box HTMX support for Array Field is a little bit different of the **widget**. The **array field** uses the base of inline admin to render the widget and the *drag and drop* support request initialization. Then to add out of box support, we decided to handle the initialization inside the `htmx:afterSwap` event:
10 |
11 | ```javascript
12 | // image-uploader-inline.js
13 | //
14 | // ...
15 | //
16 | document.addEventListener('DOMContentLoaded', function() {
17 | initialize();
18 | });
19 | document.addEventListener('htmx:afterSwap', function(ev) {
20 | initialize(ev.target);
21 | })
22 | ```
23 |
24 | ## Usage example
25 |
26 | The usage example is the same of the widget. The parent view and template is created using:
27 |
28 | ```python
29 | # views.py
30 | def render_parent(request):
31 | form = TestRequiredForm()
32 | form2 = TestWithArrayFieldForm()
33 | context = {
34 | "media": form.media + form2.media,
35 | }
36 | template = "test_htmx.html"
37 | return render(request, template, context=context)
38 | ```
39 |
40 | ```html
41 |
42 |
43 |
44 |
45 |
46 |
47 |
165 |
166 | { loading=lazy }
167 |
168 |
169 |
--------------------------------------------------------------------------------
/docs/index.md:
--------------------------------------------------------------------------------
1 | # Getting started
2 |
3 | The **django-image-uploader-widget** is a set of **django** widget and **django-admin** inline editor to handle better image uploads with a little bit modern user interface.
4 |
5 |
6 |
7 | { loading=lazy }
8 |
9 |
10 |
11 | ## Features
12 |
13 | - Support required and optional `ImageField`;
14 | - Support for `ImageField` inside inlines of **django-admin**.
15 | - Support preview modal;
16 | - Support custom inline for **django-admin** multiple images uploader.
17 | - Support reordering inside **django-admin** custom inline for multiple uploads.
18 | - Support `ArrayField` for `PostgreSQL` database.
19 | - Support upload by dropping file.
20 | - Out of box HTMX support.
21 |
22 | ## Requirements
23 |
24 | - Python 3.8+
25 | - Django 3.2+
26 |
27 | ## Getting Started
28 |
29 | To get started, install this plugin with the pip package manager:
30 |
31 | ```sh
32 | pip install django-image-uploader-widget
33 | ```
34 |
35 | !!! warning "Version Information"
36 |
37 | On the `1.0.0` release of this package we droped the support for `Django 3.2`, `Django 4.0` and `Django 4.1`. We, currently, maintain the support for `Django 4.2` (LTS), `Django 5.0` and `Django 5.1`. Then, if you are using `Django 3.2`, `4.0` or `4.1`, installs `0.7.1` version:
38 |
39 | ```bash
40 | pip install django-image-uploader-widget==0.7.1
41 | ```
42 |
43 | then, go to the `settings.py` file and add the `image_uploader_widget` to the installed apps:
44 |
45 | ```python
46 | INSTALLED_APPS = [
47 | # ...
48 | 'image_uploader_widget',
49 | # ...
50 | ]
51 | ```
52 |
53 | ## Basic Usage
54 |
55 | ### With Admin
56 |
57 | The `ImageUploaderWidget` is a class that implements a custom widget for single image uploader and can be used inside the `formfield_overrides` attribute inside the `ModelAdmin` class.
58 |
59 | ```python
60 | # admin.py
61 | from django.contrib import admin
62 | from django.db import models
63 | from image_uploader_widget.widgets import ImageUploaderWidget
64 | from .models import YourModel
65 |
66 |
67 | @admin.register(YourModel)
68 | class YourModelAdmin(admin.ModelAdmin):
69 | formfield_overrides = {
70 | models.ImageField: {'widget': ImageUploaderWidget},
71 | }
72 | ```
73 | See the [documentation](./widget/01-resumed.md) for more complex usage's.
74 |
75 |
76 | ### With ModelForm
77 |
78 | The `ImageUploaderWidget` can be used inside the `widgets` Meta attribute of a `Form`/`ModelForm`:
79 |
80 | ```python
81 | # forms.py
82 | from django import forms
83 | from image_uploader_widget.widgets import ImageUploaderWidget
84 |
85 | class ExampleForm(forms.ModelForm):
86 | class Meta:
87 | widgets = {
88 | 'image': ImageUploaderWidget(),
89 | }
90 | fields = '__all__'
91 | ```
92 |
93 | See the [documentation](./widget/01-resumed.md) for more complex usage's.
94 |
95 | ### Custom Inline Admin
96 |
97 | The `ImageUploaderInline` is implemented with the base of the `admin.StackedInline` to create an custom django-admin to work with multiple images upload using a model only to store the images:
98 |
99 | ```python
100 | # models.py
101 |
102 | class Product(models.Model):
103 | # ...
104 |
105 | class ProductImage(models.Model):
106 | product = models.ForeignKey(
107 | Product,
108 | related_name="images",
109 | on_delete=models.CASCADE
110 | )
111 | image = models.ImageField("image")
112 | # ...
113 | ```
114 |
115 | ```python
116 | # admin.py
117 | from django.contrib import admin
118 | from image_uploader_widget.admin import ImageUploaderInline
119 | from .models import Product, ProductImage
120 |
121 | class ProductImageAdmin(ImageUploaderInline):
122 | model = ProductImage
123 |
124 | @admin.register(Product)
125 | class ProductAdmin(admin.ModelAdmin):
126 | inlines = [ProductImageAdmin]
127 | ```
128 |
129 | See the [documentation](./inline_admin/01-tutorial.md) for more complex usage's.
130 |
131 | ### Array Field
132 |
133 | The ArrayField support is made by a custom field, called `ImageListField`. Then, to use it, we need to change the field from default `ArrayField` to `ImageListField`. The reason for it is: the default `ArrayField` with `ImageField` not works and some part of the behaviour of the `ImageField` is implemented inside the `ImageListField`.
134 |
135 | ```python
136 | # models.py
137 | from django.db import models
138 | from image_uploader_widget.postgres import ImageListField
139 |
140 | class TestWithArrayField(models.Model):
141 | images = ImageListField(blank=True, null=True, upload_to="admin_test")
142 |
143 | class Meta:
144 | verbose_name = "Test With Array Field"
145 | ```
146 |
147 | See the [documentation](./array_field/01-tutorial.md) for more complex usage's.
148 |
149 |
150 | ## Preview
151 |
152 | Bellow we have some preview screenshots for the widget and inline admin editor.
153 |
154 | ### Dark Theme
155 |
156 | Preview of the widget in dark theme.
157 |
158 |
159 |
160 | 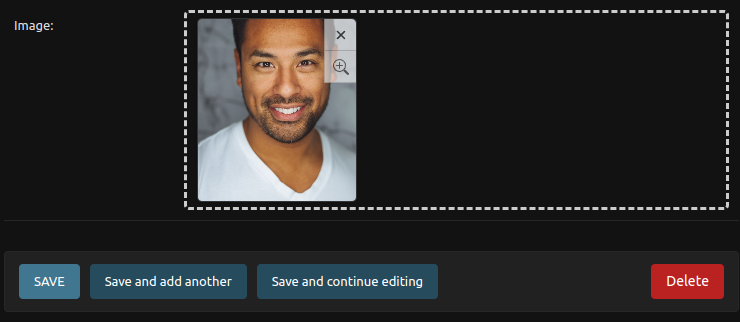
161 |
162 |
163 |
164 |
165 |
166 | 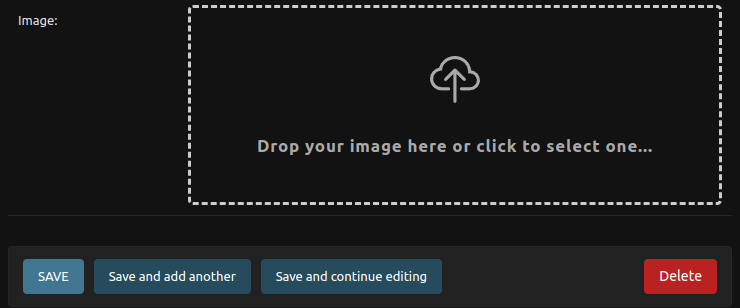
167 |
168 |
169 |
170 | ### Light Theme
171 |
172 | Preview of the widget in light theme.
173 |
174 |
175 |
176 | 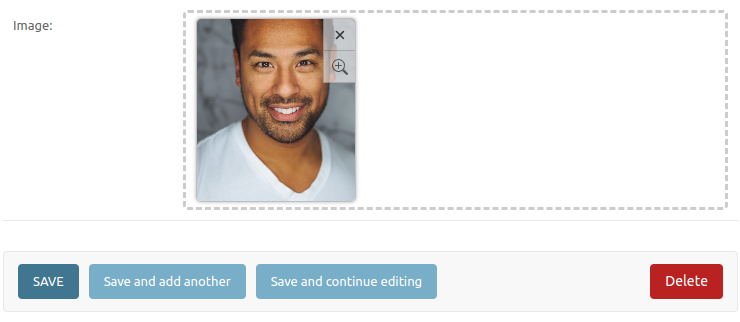
177 |
178 |
179 |
180 |
181 |
182 | 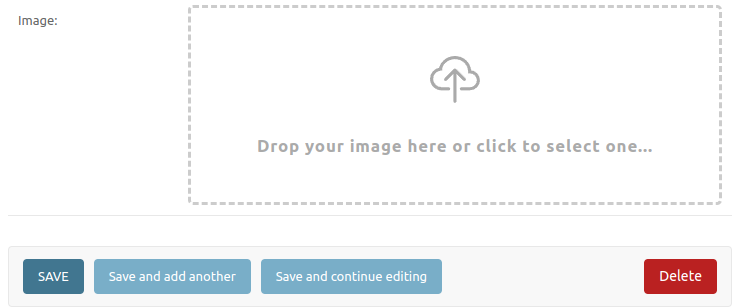
183 |
184 |
185 |
186 | ## Behaviour
187 |
188 | Preview of the behaviour of the widget and inlines.
189 |
190 |
191 |
192 | 
193 |
194 |
195 |
196 |
197 |
198 | 
199 |
200 |
201 |
--------------------------------------------------------------------------------
/image_uploader_widget/templates/image_uploader_widget/admin/inline_image_uploader.html:
--------------------------------------------------------------------------------
1 | {% load i18n admin_urls static %}
2 |
3 |
14 | {% if inline_admin_formset.formset.max_num == 1 %}
15 |
16 | {% else %}
17 |
18 | {% endif %}
19 |
20 |
122 |
--------------------------------------------------------------------------------
/README.md:
--------------------------------------------------------------------------------
1 |
21 | {{ inline_admin_formset.formset.management_form }}
22 | {{ inline_admin_formset.formset.non_form_errors }}
23 |
24 |
121 |
25 | {% for inline_admin_form in inline_admin_formset %}
26 |
52 | {% endfor %}
53 |
54 |
55 |
56 | {% if inline_admin_formset.formset.add_icon %}
57 | {{ inline_admin_formset.formset.add_icon|safe }}
58 | {% else %}
59 |
73 | {% endif %}
74 |
75 | {% if inline_admin_formset.formset.add_image_text %}
76 | {{ inline_admin_formset.formset.add_image_text }}
77 | {% else %}
78 | {% translate 'Add image' %}
79 | {% endif %}
80 |
81 |
82 |
83 |
84 | {% if inline_admin_formset.formset.empty_icon %}
85 | {{ inline_admin_formset.formset.empty_icon|safe }}
86 | {% else %}
87 |
88 | {% endif %}
89 |
90 | {% if inline_admin_formset.formset.empty_text %}
91 | {{ inline_admin_formset.formset.empty_text }}
92 | {% else %}
93 | {% translate 'Drop your images here or click to select...' %}
94 | {% endif %}
95 |
96 |
97 |
98 |
99 | {% if inline_admin_formset.formset.drop_icon %}
100 | {{ inline_admin_formset.formset.drop_icon|safe }}
101 | {% else %}
102 |
103 | {% endif %}
104 |
105 | {% if inline_admin_formset.formset.drop_text %}
106 | {{ inline_admin_formset.formset.drop_text }}
107 | {% else %}
108 | {% translate 'Drop your images here...' %}
109 | {% endif %}
110 |
111 |
112 |
113 |
120 | django-image-uploader-widget
2 | 3 |
4 |  5 |
5 |
8 |
9 |
10 |


13 |
152 |
--------------------------------------------------------------------------------
/demo/widget/migrations/0001_initial.py:
--------------------------------------------------------------------------------
1 | # Generated by Django 5.2 on 2025-04-23 01:11
2 |
3 | import django.db.models.deletion
4 | from django.db import migrations, models
5 |
6 |
7 | class Migration(migrations.Migration):
8 |
9 | initial = True
10 |
11 | dependencies = []
12 |
13 | operations = [
14 | migrations.CreateModel(
15 | name="Custom",
16 | fields=[
17 | (
18 | "id",
19 | models.AutoField(
20 | auto_created=True,
21 | primary_key=True,
22 | serialize=False,
23 | verbose_name="ID",
24 | ),
25 | ),
26 | ("image", models.ImageField(upload_to="", verbose_name="Image")),
27 | ],
28 | options={
29 | "verbose_name": "(Widget) Custom",
30 | },
31 | ),
32 | migrations.CreateModel(
33 | name="NonRequired",
34 | fields=[
35 | (
36 | "id",
37 | models.AutoField(
38 | auto_created=True,
39 | primary_key=True,
40 | serialize=False,
41 | verbose_name="ID",
42 | ),
43 | ),
44 | (
45 | "image",
46 | models.ImageField(
47 | blank=True, null=True, upload_to="", verbose_name="Image"
48 | ),
49 | ),
50 | ],
51 | options={
52 | "verbose_name": "(Widget) Non Required",
53 | },
54 | ),
55 | migrations.CreateModel(
56 | name="NonRequiredStackedInline",
57 | fields=[
58 | (
59 | "id",
60 | models.AutoField(
61 | auto_created=True,
62 | primary_key=True,
63 | serialize=False,
64 | verbose_name="ID",
65 | ),
66 | ),
67 | ],
68 | options={
69 | "verbose_name": "(Widget) Non Required inside Stacked Inline",
70 | },
71 | ),
72 | migrations.CreateModel(
73 | name="NonRequiredTabularInline",
74 | fields=[
75 | (
76 | "id",
77 | models.AutoField(
78 | auto_created=True,
79 | primary_key=True,
80 | serialize=False,
81 | verbose_name="ID",
82 | ),
83 | ),
84 | ],
85 | options={
86 | "verbose_name": "(Widget) Non Required inside Tabular Inline",
87 | },
88 | ),
89 | migrations.CreateModel(
90 | name="Required",
91 | fields=[
92 | (
93 | "id",
94 | models.AutoField(
95 | auto_created=True,
96 | primary_key=True,
97 | serialize=False,
98 | verbose_name="ID",
99 | ),
100 | ),
101 | ("image", models.ImageField(upload_to="", verbose_name="Image")),
102 | ],
103 | options={
104 | "verbose_name": "(Widget) Required",
105 | },
106 | ),
107 | migrations.CreateModel(
108 | name="RequiredStackedInline",
109 | fields=[
110 | (
111 | "id",
112 | models.AutoField(
113 | auto_created=True,
114 | primary_key=True,
115 | serialize=False,
116 | verbose_name="ID",
117 | ),
118 | ),
119 | ],
120 | options={
121 | "verbose_name": "(Widget) Required inside Stacked Inline",
122 | },
123 | ),
124 | migrations.CreateModel(
125 | name="RequiredTabularInline",
126 | fields=[
127 | (
128 | "id",
129 | models.AutoField(
130 | auto_created=True,
131 | primary_key=True,
132 | serialize=False,
133 | verbose_name="ID",
134 | ),
135 | ),
136 | ],
137 | options={
138 | "verbose_name": "(Widget) Required inside Tabular Inline",
139 | },
140 | ),
141 | migrations.CreateModel(
142 | name="NonRequiredStackedInlineItem",
143 | fields=[
144 | (
145 | "id",
146 | models.AutoField(
147 | auto_created=True,
148 | primary_key=True,
149 | serialize=False,
150 | verbose_name="ID",
151 | ),
152 | ),
153 | (
154 | "image",
155 | models.ImageField(
156 | blank=True, null=True, upload_to="", verbose_name="Image"
157 | ),
158 | ),
159 | (
160 | "parent",
161 | models.ForeignKey(
162 | on_delete=django.db.models.deletion.CASCADE,
163 | to="widget.nonrequiredstackedinline",
164 | ),
165 | ),
166 | ],
167 | ),
168 | migrations.CreateModel(
169 | name="NonRequiredTabularInlineItem",
170 | fields=[
171 | (
172 | "id",
173 | models.AutoField(
174 | auto_created=True,
175 | primary_key=True,
176 | serialize=False,
177 | verbose_name="ID",
178 | ),
179 | ),
180 | (
181 | "image",
182 | models.ImageField(
183 | blank=True, null=True, upload_to="", verbose_name="Image"
184 | ),
185 | ),
186 | (
187 | "parent",
188 | models.ForeignKey(
189 | on_delete=django.db.models.deletion.CASCADE,
190 | to="widget.nonrequiredtabularinline",
191 | ),
192 | ),
193 | ],
194 | ),
195 | migrations.CreateModel(
196 | name="RequiredStackedInlineItem",
197 | fields=[
198 | (
199 | "id",
200 | models.AutoField(
201 | auto_created=True,
202 | primary_key=True,
203 | serialize=False,
204 | verbose_name="ID",
205 | ),
206 | ),
207 | ("image", models.ImageField(upload_to="", verbose_name="Image")),
208 | (
209 | "parent",
210 | models.ForeignKey(
211 | on_delete=django.db.models.deletion.CASCADE,
212 | to="widget.requiredstackedinline",
213 | ),
214 | ),
215 | ],
216 | ),
217 | migrations.CreateModel(
218 | name="RequiredTabularInlineItem",
219 | fields=[
220 | (
221 | "id",
222 | models.AutoField(
223 | auto_created=True,
224 | primary_key=True,
225 | serialize=False,
226 | verbose_name="ID",
227 | ),
228 | ),
229 | ("image", models.ImageField(upload_to="", verbose_name="Image")),
230 | (
231 | "parent",
232 | models.ForeignKey(
233 | on_delete=django.db.models.deletion.CASCADE,
234 | to="widget.requiredtabularinline",
235 | ),
236 | ),
237 | ],
238 | ),
239 | ]
240 |
--------------------------------------------------------------------------------
/docs/widget/02-tutorial.md:
--------------------------------------------------------------------------------
1 | # Full Usage Tutorial
2 |
3 | First, we need of some context: the image uploader widget is a widget to handle image uploading with a beautiful interface with click to select file and a drop file behaviour handler. It is used with django forms.
4 |
5 | This is a more long and for newbies tutorial of how to use this widget. If you is an advanced user, see the [Resumed](./01-resumed.md) version.
6 |
7 | To write this tutorial of this documentation we go to create an empty django project, then if you don't want to see this part, skip to [using the widget section](#installing-the-widget). Another information is: we're assuming you already know the basics of **django** and already have it installed in your machine.
8 |
9 | ## Creating a django project
10 |
11 | First, create a project folder. Here we call it as `my-ecommerce`:
12 |
13 | ```bash
14 | mkdir my-ecommerce
15 | cd my-ecommerce
16 | ```
17 |
18 | And, now, create a django project in this folder:
19 |
20 | ```bash
21 | django-admin startproject core .
22 | ```
23 |
24 | And, then, we have the folder structure:
25 |
26 | ```
27 | | - my-ecommerce
28 | | - core
29 | | - asgi.py
30 | | - __init__.py
31 | | - settings.py
32 | | - urls.py
33 | | - wsgi.py
34 | | - manage.py
35 | ```
36 |
37 | Create our **django** application by running the command:
38 |
39 | ```
40 | python manage.py startapp ecommerce
41 | ```
42 |
43 | And, now, we have a new, and more complex, folder structure:
44 |
45 | ```
46 | | - my-ecommerce
47 | | - core
48 | | - asgi.py
49 | | - __init__.py
50 | | - settings.py
51 | | - urls.py
52 | | - wsgi.py
53 | | - ecommerce
54 | | - migrations
55 | | - __init__.py
56 | | - admin.py
57 | | - apps.py
58 | | - __init__.py
59 | | - models.py
60 | | - tests.py
61 | | - views.py
62 | | - manage.py
63 | ```
64 |
65 | ## Installing the widget
66 |
67 | To install the widget, is possible to use the same instructions of the [Getting started](../index.md), and the first step is to install the package with pip:
68 |
69 | ```bash
70 | pip install django-image-uploader-widget
71 | ```
72 |
73 | !!! warning "Version Information"
74 |
75 | On the `1.0.0` release of this package we droped the support for `Django 3.2`, `Django 4.0` and `Django 4.1`. We, currently, maintain the support for `Django 4.2` (LTS), `Django 5.0` and `Django 5.1`. Then, if you are using `Django 3.2`, `4.0` or `4.1`, installs `0.7.1` version:
76 |
77 | ```bash
78 | pip install django-image-uploader-widget==0.7.1
79 | ```
80 |
81 | then, add it to the `INSTALLED_APPS` on the `settings.py`, in the case of this example: `core/settings.py` file. To understand better the Applications, see the django documentation: [Applications](https://docs.djangoproject.com/en/3.2/ref/applications/).
82 |
83 | ```python
84 | # core/settings.py
85 | # ...
86 |
87 | INSTALLED_APPS = [
88 | 'django.contrib.admin',
89 | 'django.contrib.auth',
90 | 'django.contrib.contenttypes',
91 | 'django.contrib.sessions',
92 | 'django.contrib.messages',
93 | 'django.contrib.staticfiles',
94 | 'image_uploader_widget',
95 | ]
96 |
97 | # ...
98 | ```
99 |
100 | !!! info "Observation"
101 |
102 | Note that the application name to be added on the `INSTALLED_APPS` are not equals to the pip package name / install name.
103 |
104 | ## Using the widget
105 |
106 | We have two basic modes to use this widget:
107 |
108 | 1. creating a ORM `Model` and using an `ModelForm` to it setting the widget.
109 |
110 | 2. creating an custom `Form` with any other behaviour.
111 |
112 | ### With ModelForm
113 |
114 | First, go to our ecommerce app models `ecommerce/models.py` and create a basic django model with an `ImageField`:
115 |
116 | ```python
117 | # ecommerce/models.py
118 | from django.db import models
119 |
120 | class Product(models.Model):
121 | name = models.CharField(max_length=100)
122 | image = models.ImageField()
123 |
124 | def __str__(self):
125 | return self.name
126 |
127 | class Meta:
128 | verbose_name = 'Product'
129 | verbose_name_plural = 'Products'
130 | ```
131 |
132 | Now, we go to create our `ModelForm`. Create a empty file on `ecommerce/forms.py` to store our django forms. And create our own `ProductForm`:
133 |
134 | ```python
135 | # ecommerce/forms.py
136 | from django.forms import ModelForm
137 | from ecommerce.models import Product
138 |
139 | class ProductForm(ModelForm):
140 | class Meta:
141 | model = Product
142 | fields = ['name', 'image']
143 | ```
144 |
145 | And, here, we can declare the widget that our `image` field uses:
146 |
147 | ```python
148 | # ecommerce/forms.py
149 | from django.forms import ModelForm
150 | from ecommerce.models import Product
151 | from image_uploader_widget.widgets import ImageUploaderWidget
152 |
153 | class ProductForm(ModelForm):
154 | class Meta:
155 | model = Product
156 | fields = ['name', 'image']
157 | widgets = {
158 | 'image': ImageUploaderWidget()
159 | }
160 | ```
161 |
162 | #### Creating and applying migrations
163 |
164 | Our Model, declared in the above section, needs to be inserted on our database using the [migrations](https://docs.djangoproject.com/en/3.2/topics/migrations/). To create our migrations, we need to add our `ecommerce` app to `INSTALLED_APPS` on the `settings.py`:
165 |
166 | ```python
167 | # core/settings.py
168 | # ...
169 |
170 | INSTALLED_APPS = [
171 | 'django.contrib.admin',
172 | 'django.contrib.auth',
173 | 'django.contrib.contenttypes',
174 | 'django.contrib.sessions',
175 | 'django.contrib.messages',
176 | 'django.contrib.staticfiles',
177 | 'image_uploader_widget',
178 | 'ecommerce',
179 | ]
180 |
181 | # ...
182 | ```
183 |
184 | Now, we go to create the migrations using the command:
185 |
186 | ```bash
187 | python manage.py makemigrations
188 | ```
189 |
190 | If you found an `ecommerce.Product.image: (fields.E210) Cannot use ImageField because Pillow is not installed.` error, just run an:
191 |
192 | ```bash
193 | pip install Pillow
194 | ```
195 |
196 | and re-run the makemigrations command. Now, we go to apply the migrations with:
197 |
198 | ```bash
199 | python manage.py migrate
200 | ```
201 |
202 | And, now, we can run the development server to see our next steps coding:
203 |
204 | ```bash
205 | python manage.py runserver
206 | ```
207 |
208 | #### See it in the action
209 |
210 | To see the widget in action, just go to the ecommerce app and create, in the `views.py`, an view that renders an form:
211 |
212 | ```python
213 | # ecommerce/views.py
214 | from django.shortcuts import render
215 | from ecommerce.forms import ProductForm
216 |
217 | def test_widget(request):
218 | context = { 'form': ProductForm() }
219 | return render(request, 'test_widget.html', context)
220 | ```
221 |
222 | Now, we can create an `templates` folder in the `ecommerce` application and inside it we need to create a `test_widget.html`:
223 |
224 | ```html
225 |
226 |
227 |
228 |
229 |
230 |
231 |
232 |
14 |
15 |
16 |
17 |
18 |
19 |
151 |
20 | {% for item in widget.subwidgets %}
21 |
64 | {% endfor %}
65 |
66 |
96 |
97 |
98 |
99 | {% if add_icon %}
100 | {{ add_icon|safe }}
101 | {% else %}
102 |
103 | {% endif %}
104 |
105 | {% if add_image_text %}
106 | {{ add_image_text }}
107 | {% else %}
108 | {% translate 'Add image' %}
109 | {% endif %}
110 |
111 |
112 |
113 |
114 | {% if empty_icon %}
115 | {{ empty_icon|safe }}
116 | {% else %}
117 |
118 | {% endif %}
119 |
120 | {% if empty_text %}
121 | {{ empty_text }}
122 | {% else %}
123 | {% translate 'Drop your images here or click to select...' %}
124 | {% endif %}
125 |
126 |
127 |
128 |
129 | {% if drop_icon %}
130 | {{ drop_icon|safe }}
131 | {% else %}
132 |
133 | {% endif %}
134 |
135 | {% if drop_text %}
136 | {{ drop_text }}
137 | {% else %}
138 | {% translate 'Drop your images here...' %}
139 | {% endif %}
140 |
141 |
142 |
143 |
150 |
260 |
261 | { loading=lazy }
262 |
263 |
264 |
265 |
266 | ### With Form and custom behaviour
267 |
268 | It's very like the above item and we need only to change some things in the `forms.py`:
269 |
270 | ```python
271 | from django import forms
272 | from ecommerce.models import Product
273 | from image_uploader_widget.widgets import ImageUploaderWidget
274 |
275 | class ProductForm(forms.Form):
276 | image = forms.ImageField(widget=ImageUploaderWidget())
277 |
278 | class Meta:
279 | fields = ['image']
280 | ```
281 |
282 | And we not need to change nothing more. It works.
283 |
284 | ### Comments about using with django-admin
285 |
286 | The use with **django-admin** is very like it: we only needs to create `ModelForm` for our models and in the `ModelAdmin` ([django documentation](https://docs.djangoproject.com/en/3.2/ref/contrib/admin/#django.contrib.admin.ModelAdmin)) we set our form ([here is an example](https://docs.djangoproject.com/en/3.2/ref/contrib/admin/#django.contrib.admin.ModelAdmin.form)).
287 |
--------------------------------------------------------------------------------
/image_uploader_widget/static/image_uploader_widget/css/image-uploader-widget.css:
--------------------------------------------------------------------------------
1 | html[data-theme="light"], :root {
2 | --iuw-background: #FFF;
3 | --iuw-border-color: #CCC;
4 | --iuw-color: #333;
5 | --iuw-placeholder-text-color: #AAA;
6 | --iuw-placeholder-destak-color: #417690;
7 | --iuw-dropzone-background: rgba(255, 255, 255, 0.8);
8 | --iuw-image-preview-border: #BFBFBF;
9 | --iuw-image-preview-shadow: rgba(0, 0, 0, 0.3);
10 | --iuw-add-image-background: #EFEFEF;
11 | --iuw-add-image-color: #AAA;
12 | }
13 |
14 | @media (prefers-color-scheme: dark) {
15 | :root {
16 | --iuw-background: #121212;
17 | --iuw-border-color: #CCC;
18 | --iuw-color: #333;
19 | --iuw-placeholder-text-color: #AAA;
20 | --iuw-placeholder-destak-color: #417690;
21 | --iuw-dropzone-background: rgba(0, 0, 0, 0.8);
22 | --iuw-image-preview-border: #333;
23 | --iuw-image-preview-shadow: rgba(0, 0, 0, 0.3);
24 | --iuw-add-image-background: #333;
25 | --iuw-add-image-color: #CCC;
26 | }
27 | }
28 |
29 | html[data-theme="dark"] {
30 | --iuw-background: #121212;
31 | --iuw-border-color: #CCC;
32 | --iuw-color: #333;
33 | --iuw-placeholder-text-color: #AAA;
34 | --iuw-placeholder-destak-color: #417690;
35 | --iuw-dropzone-background: rgba(0, 0, 0, 0.8);
36 | --iuw-image-preview-border: #333;
37 | --iuw-image-preview-shadow: rgba(0, 0, 0, 0.3);
38 | --iuw-add-image-background: #333;
39 | --iuw-add-image-color: #CCC;
40 | }
41 |
42 | .iuw-light {
43 | --iuw-background: #FFF;
44 | --iuw-border-color: #CCC;
45 | --iuw-color: #333;
46 | --iuw-placeholder-text-color: #AAA;
47 | --iuw-placeholder-destak-color: #417690;
48 | --iuw-dropzone-background: rgba(255, 255, 255, 0.8);
49 | --iuw-image-preview-border: #BFBFBF;
50 | --iuw-image-preview-shadow: rgba(0, 0, 0, 0.3);
51 | --iuw-add-image-background: #EFEFEF;
52 | --iuw-add-image-color: #AAA;
53 | }
54 | .iuw-dark {
55 | --iuw-background: #121212;
56 | --iuw-border-color: #CCC;
57 | --iuw-color: #333;
58 | --iuw-placeholder-text-color: #AAA;
59 | --iuw-placeholder-destak-color: #417690;
60 | --iuw-dropzone-background: rgba(0, 0, 0, 0.8);
61 | --iuw-image-preview-border: #333;
62 | --iuw-image-preview-shadow: rgba(0, 0, 0, 0.3);
63 | --iuw-add-image-background: #333;
64 | --iuw-add-image-color: #CCC;
65 | }
66 |
67 | @keyframes arrow-flashing {
68 | from {
69 | opacity: 0;
70 | transform: scale(0) translateY(12px);
71 | }
72 | to {
73 | opacity: 1;
74 | transform: scale(1) translateY(0);
75 | }
76 | }
77 |
78 | .iuw-root, .iuw-root * {
79 | box-sizing: border-box;
80 | }
81 |
82 | .iuw-root {
83 | /* behaviour */
84 | user-select: none;
85 | /* sizing */
86 | flex: 1;
87 | min-width: 300px;
88 | height: 200px;
89 | /* shape */
90 | border-radius: 5px;
91 | padding: 5px;
92 | /* styles */
93 | background-color: var(--iuw-background);
94 | border: 3px dashed var(--iuw-border-color);
95 | color: var(--iuw-color);
96 | /* positioning */
97 | position: relative;
98 | /* overflowing */
99 | overflow-y: hidden;
100 | overflow-x: auto;
101 | /* childs */
102 | display: flex;
103 | flex-direction: row;
104 | align-items: stretch;
105 | /* empty label */
106 | /* drop label */
107 | /* image preview */
108 | }
109 | .iuw-root input[type=file],
110 | .iuw-root input[type=checkbox] {
111 | display: none;
112 | }
113 | .iuw-root .iuw-empty {
114 | /* positioning */
115 | position: absolute;
116 | left: 0;
117 | right: 0;
118 | bottom: 0;
119 | top: 0;
120 | z-index: 50;
121 | /* display */
122 | display: flex;
123 | flex-direction: column;
124 | align-items: center;
125 | justify-content: center;
126 | /* text */
127 | text-align: center;
128 | font-size: 1.3em;
129 | font-weight: bold;
130 | letter-spacing: 0.05em;
131 | color: var(--iuw-placeholder-text-color);
132 | /* behaviour */
133 | cursor: pointer;
134 | /* animations */
135 | height: 0;
136 | opacity: 0;
137 | overflow: hidden;
138 | transition: opacity 0.3s ease, height 0.3s ease;
139 | /* childs */
140 | }
141 | .iuw-root .iuw-empty > svg {
142 | width: 50px;
143 | height: 50px;
144 | margin-bottom: 30px;
145 | transition: width 0.3s ease, height 0.3s ease, margin 0.3s ease;
146 | }
147 | .iuw-root .iuw-empty:hover > svg {
148 | width: 80px;
149 | height: 80px;
150 | margin-bottom: 10px;
151 | }
152 | .iuw-root .iuw-empty > span {
153 | text-align: center;
154 | }
155 | .iuw-root .iuw-empty > span span {
156 | color: var(--iuw-placeholder-destak-color);
157 | }
158 | .iuw-root.empty .iuw-image-preview {
159 | display: none;
160 | }
161 | .iuw-root.empty .iuw-empty {
162 | height: 100%;
163 | opacity: 1;
164 | }
165 | .iuw-root.drop-zone .iuw-empty {
166 | height: 0;
167 | opacity: 0;
168 | }
169 | .iuw-root .iuw-drop-label {
170 | /* positioning */
171 | position: absolute;
172 | left: 0;
173 | top: 0;
174 | right: 0;
175 | bottom: 0;
176 | z-index: 55;
177 | /* style */
178 | background: var(--iuw-dropzone-background);
179 | /* display */
180 | display: flex;
181 | flex-direction: column;
182 | align-items: center;
183 | justify-content: center;
184 | /* text */
185 | text-align: center;
186 | font-size: 1.3em;
187 | font-weight: bold;
188 | letter-spacing: 0.05em;
189 | color: var(--iuw-placeholder-text-color);
190 | /* behaviour */
191 | cursor: grabbing;
192 | /* animations */
193 | height: 0;
194 | opacity: 0;
195 | overflow: hidden;
196 | transition: opacity 0.3s ease, height 0.3s ease;
197 | /* childs */
198 | }
199 | .iuw-root .iuw-drop-label > svg {
200 | width: 90px;
201 | height: 90px;
202 | margin-bottom: 20px;
203 | transition: width 0.3s ease, height 0.3s ease, margin 0.3s ease;
204 | }
205 | .iuw-root .iuw-drop-label > svg path:last-child {
206 | transform-origin: 50% 100%;
207 | animation: arrow-flashing 1.1s;
208 | animation-timing-function: ease-in;
209 | animation-fill-mode: both;
210 | animation-iteration-count: infinite;
211 | animation-delay: 0.3s;
212 | }
213 | .iuw-root .iuw-drop-label > span {
214 | text-align: center;
215 | }
216 | .iuw-root .iuw-drop-label > span span {
217 | color: var(--iuw-placeholder-destak-color);
218 | }
219 | .iuw-root.drop-zone .iuw-drop-label {
220 | height: 100%;
221 | opacity: 1;
222 | }
223 | .iuw-root .iuw-image-preview {
224 | /* style */
225 | border: 1px solid var(--iuw-image-preview-border);
226 | box-shadow: 0 0 4px 0 var(--iuw-image-preview-shadow);
227 | /* shape */
228 | width: 160px;
229 | margin: 0 5px;
230 | border-radius: 5px;
231 | overflow: hidden;
232 | /* behaviour */
233 | cursor: pointer;
234 | /* positioning */
235 | position: relative;
236 | /* childs */
237 | }
238 | .iuw-root .iuw-image-preview img {
239 | /* sizing */
240 | width: 100%;
241 | height: 100%;
242 | /* display mode */
243 | object-fit: cover;
244 | object-position: center;
245 | }
246 | .iuw-root .iuw-image-preview .iuw-delete-icon,
247 | .iuw-root .iuw-image-preview .iuw-preview-icon {
248 | /* shape */
249 | width: 32px;
250 | height: 32px;
251 | border-radius: 0 5px 0 0;
252 | /* styles */
253 | border: 1px solid #BFBFBF;
254 | border-top: none;
255 | border-right: none;
256 | background-color: #F5F5F5;
257 | opacity: 0.6;
258 | /* positioning */
259 | position: absolute;
260 | right: 0;
261 | top: 0;
262 | z-index: 45;
263 | /* display */
264 | display: flex;
265 | flex-direction: column;
266 | align-items: center;
267 | justify-content: center;
268 | /* animations */
269 | transition: opacity 0.3s ease;
270 | /* icon */
271 | }
272 | .iuw-root .iuw-image-preview .iuw-delete-icon svg,
273 | .iuw-root .iuw-image-preview .iuw-preview-icon svg {
274 | width: 16px;
275 | height: auto;
276 | transform: none;
277 | transition: transform 0.3s ease;
278 | }
279 | .iuw-root .iuw-image-preview .iuw-delete-icon:hover,
280 | .iuw-root .iuw-image-preview .iuw-preview-icon:hover {
281 | opacity: 1;
282 | }
283 | .iuw-root .iuw-image-preview .iuw-delete-icon:hover svg,
284 | .iuw-root .iuw-image-preview .iuw-preview-icon:hover svg {
285 | transform: scale(1.3);
286 | }
287 | .iuw-root .iuw-image-preview .iuw-preview-icon:not(.iuw-only-preview) {
288 | top: 32px;
289 | border-radius: 0;
290 | }
291 |
292 | @keyframes arrow-flashing {
293 | from {
294 | opacity: 0;
295 | transform: scale(0) translateY(12px);
296 | }
297 | to {
298 | opacity: 1;
299 | transform: scale(1) translateY(0);
300 | }
301 | }
302 | /*****/
303 | /*****/
304 | /*****/
305 | :root {
306 | --iuw-modal-overlay: rgba(0, 0, 0, 0.6);
307 | --iuw-modal-image-background: #FFF;
308 | --iuw-modal-closebutton-background: #FFF;
309 | --iuw-modal-closebutton-shadow: rgba(0, 0, 0, 0.2);
310 | --iuw-modal-closebutton-color: #333;
311 | }
312 |
313 | #iuw-modal-element {
314 | /* position */
315 | position: fixed;
316 | z-index: 150;
317 | left: 0;
318 | top: 0;
319 | /* size */
320 | width: 100%;
321 | height: 100vh;
322 | /* styles */
323 | background: var(--iuw-modal-overlay);
324 | /* behaviour */
325 | user-select: none;
326 | cursor: pointer;
327 | /* display */
328 | display: flex;
329 | align-items: center;
330 | justify-content: center;
331 | /* animations */
332 | }
333 | #iuw-modal-element.visible {
334 | transition: opacity 0.3s;
335 | }
336 | #iuw-modal-element.hide {
337 | transition: opacity 0.3s;
338 | opacity: 0;
339 | }
340 | #iuw-modal-element .iuw-modal-image-preview {
341 | width: 90%;
342 | height: 80%;
343 | position: relative;
344 | }
345 | #iuw-modal-element .iuw-modal-image-preview img {
346 | background: var(--iuw-modal-image-background);
347 | width: 100%;
348 | height: 100%;
349 | object-fit: contain;
350 | object-position: center;
351 | cursor: default;
352 | }
353 | #iuw-modal-element .iuw-modal-image-preview .iuw-modal-close {
354 | position: absolute;
355 | right: 0;
356 | top: 0;
357 | transform: translate(50%, -50%);
358 | width: 40px;
359 | height: 40px;
360 | border-radius: 50%;
361 | display: flex;
362 | align-items: center;
363 | justify-content: center;
364 | background: var(--iuw-modal-closebutton-background);
365 | filter: drop-shadow(0 0 5px var(--iuw-modal-closebutton-shadow));
366 | }
367 | #iuw-modal-element .iuw-modal-image-preview .iuw-modal-close svg {
368 | width: 18px;
369 | height: auto;
370 | fill: var(--iuw-modal-closebutton-color);
371 | }
372 | @media (max-width: 768px) {
373 | #iuw-modal-element .iuw-modal-image-preview .iuw-modal-close {
374 | transform: none;
375 | box-shadow: none;
376 | border-radius: unset;
377 | }
378 | }
379 |
--------------------------------------------------------------------------------
/image_uploader_widget/static/image_uploader_widget/js/image-uploader-inline.js:
--------------------------------------------------------------------------------
1 | window.dragCounter = 0;
2 | window.draggingEditor = null;
3 |
4 | function updateEmptyState(root) {
5 | const items = root.querySelectorAll('.inline-related:not(.empty-form):not(.deleted)');
6 | root.classList.toggle('empty', items.length == 0);
7 | }
8 |
9 | function updateElementIndex(element, prefix, index) {
10 | const findRegex = new RegExp('(' + prefix + '-(\\d+|__prefix__))');
11 | const replacement = prefix + '-' + index;
12 | // replace at [for]
13 | const forAttr = element.getAttribute('for');
14 | if (forAttr) {
15 | element.setAttribute('for', forAttr.replace(findRegex, replacement));
16 | }
17 | // replace at [id]
18 | const idAttr = element.getAttribute('id');
19 | if (idAttr) {
20 | element.setAttribute('id', idAttr.replace(findRegex, replacement));
21 | }
22 | // replace at [name]
23 | const nameAttr = element.getAttribute('name');
24 | if (nameAttr) {
25 | element.setAttribute('name', nameAttr.replace(findRegex, replacement));
26 | }
27 | }
28 |
29 | function updateAllElementsIndexes(element, prefix, index) {
30 | updateElementIndex(element, prefix, index);
31 | const elements = element.querySelectorAll('*');
32 | for (const child of elements) {
33 | updateElementIndex(child, prefix, index);
34 | }
35 | }
36 |
37 | function getPrefix(root) {
38 | const inlineGroup = root.closest('.inline-group');
39 | return inlineGroup.getAttribute('data-prefix');
40 | }
41 |
42 | function updateOrderFields(root) {
43 | const inlineGroup = root.closest('.inline-group');
44 | const orderField = inlineGroup.getAttribute('data-order-field');
45 | if (!orderField) {
46 | return;
47 | }
48 | const template = root.querySelector('.inline-related.empty-form');
49 |
50 | const orderSelector = 'input[name$="' + orderField + '"]';
51 | Array
52 | .from(root.querySelectorAll('.inline-related:not(.empty-form):not(.deleted)'))
53 | .map(function(item){
54 | const orderField = item.querySelector(orderSelector);
55 | return {
56 | item: item,
57 | order: parseInt(orderField.value),
58 | };
59 | })
60 | .sort(function(a, b) {
61 | return a.order - b.order;
62 | })
63 | .map(function(item, index) {
64 | return {
65 | item: item.item,
66 | order: index + 1,
67 | }
68 | })
69 | .forEach(function(item){
70 | const orderField = item.item.querySelector(orderSelector);
71 | orderField.value = item.order;
72 |
73 | const parent = item.item.parentElement;
74 | parent.removeChild(item.item);
75 | parent.appendChild(item.item, template);
76 | });
77 | }
78 |
79 | function updateAllIndexes(root) {
80 | const prefix = getPrefix(root);
81 | const elements = root.querySelectorAll('.inline-related:not(.empty-form)');
82 |
83 | let index = 0;
84 | for (const item of elements) {
85 | updateAllElementsIndexes(item, prefix, index);
86 | index += 1;
87 | }
88 |
89 | const totalForms = document.querySelector('#id_' + prefix + '-TOTAL_FORMS');
90 | const maxNumForms = document.querySelector('#id_' + prefix + '-MAX_NUM_FORMS');
91 | const maxCount = maxNumForms.value === '' ? Number.MAX_SAFE_INTEGER : parseInt(maxNumForms.value, 10)
92 |
93 | totalForms.value = index.toString();
94 | root.querySelector('.iuw-add-image-btn').classList.toggle('visible-by-number', maxCount - elements.length > 0);
95 |
96 | updateEmptyState(root);
97 | updateOrderFields(root);
98 | }
99 |
100 | function getNext(root, prefix) {
101 | let next = 1;
102 | while (!!root.querySelector('#' + prefix + '-' + next)) {
103 | next = next + 1;
104 | }
105 | return next;
106 | }
107 |
108 | function cloneFromEmptyTemplate(root) {
109 | const template = root.querySelector('.inline-related.empty-form');
110 | if (!template) {
111 | return null;
112 | }
113 |
114 | const prefix = getPrefix(root);
115 | const row = template.cloneNode(true);
116 | row.classList.remove('empty-form', 'last-related');
117 | row.setAttribute('data-candelete', 'true');
118 | row.id = prefix + '-' + getNext(root, prefix);
119 |
120 | template.parentElement.appendChild(row);
121 |
122 | const inlineGroup = root.closest('.inline-group');
123 | const orderField = inlineGroup.getAttribute('data-order-field');
124 | if (!orderField) {
125 | return row;
126 | }
127 | const orderSelector = 'input[name$="' + orderField + '"]';
128 | const inputs = inlineGroup.querySelectorAll(orderSelector)
129 | let order = 1;
130 | for (const input of inputs) {
131 | if (parseInt(input.value, 10) >= order) {
132 | order = parseInt(input.value, 10) + 1;
133 | }
134 | }
135 | row.querySelector(orderSelector).value = order;
136 |
137 | return row;
138 | }
139 |
140 | function handleAddNewImage(root, tempFileInput, inputFile = null) {
141 | files = inputFile ? [inputFile] : (tempFileInput.files || []);
142 | if (!files.length) {
143 | return;
144 | }
145 | for (const file of files) {
146 | if (!file.type.startsWith('image/')) {
147 | continue;
148 | }
149 | if (!root.querySelector('.iuw-add-image-btn').classList.contains('visible-by-number')) {
150 | break;
151 | };
152 | const row = cloneFromEmptyTemplate(root);
153 | const img = document.createElement('img');
154 | img.src = URL.createObjectURL(file);
155 | row.appendChild(img);
156 | const rowFileInput = row.querySelector('input[type=file]');
157 |
158 | const dataTransferList = new DataTransfer();
159 | dataTransferList.items.add(file);
160 | rowFileInput.files = dataTransferList.files;
161 |
162 | updateAllIndexes(root);
163 | }
164 |
165 | if (!tempFileInput) {
166 | return;
167 | }
168 | tempFileInput.value = null
169 | }
170 |
171 | document.addEventListener('change', function(evt) {
172 | const root = evt.target.closest('.iuw-inline-root');
173 | if (!root) { return; }
174 |
175 | const inlineRelated = evt.target.closest('.inline-related:not(.empty-form),.temp_file');
176 | if (!inlineRelated) { return; }
177 |
178 | const fileInput = evt.target.closest('input[type="file"]')
179 | if (!fileInput?.files.length) { return; }
180 |
181 | if (fileInput.classList.contains('temp_file')) {
182 | return handleAddNewImage(root, fileInput);
183 | }
184 |
185 | const [file] = fileInput.files;
186 | const imgTag = inlineRelated.querySelector('img');
187 | imgTag.src = URL.createObjectURL(file);
188 | });
189 |
190 | function handlePreviewImage(previewItem) {
191 | let image = previewItem.querySelector('img');
192 | if (!image) {
193 | return;
194 | }
195 | image = image.cloneNode(true);
196 | IUWPreviewModal.createPreviewModal(image);
197 | IUWPreviewModal.openPreviewModal();
198 | }
199 |
200 | function handleRemoveImage(previewItem) {
201 | const root = previewItem.closest('.iuw-inline-root');
202 |
203 | if (previewItem.classList.contains('has_original')) {
204 | previewItem.classList.add('deleted');
205 | const checkboxInput = previewItem.querySelector('input[type=checkbox]');
206 | checkboxInput.checked = true;
207 | } else {
208 | previewItem.parentElement.removeChild(previewItem);
209 | }
210 |
211 | updateAllIndexes(root);
212 | }
213 |
214 | document.addEventListener('click', function(evt) {
215 | const target = evt.target;
216 | const root = target.closest('.iuw-inline-root');
217 | if (!root) {
218 | return;
219 | }
220 |
221 | const emptyMarker = target.closest('.iuw-empty');
222 | if (emptyMarker) {
223 | return root.querySelector('.temp_file').click();
224 | }
225 |
226 | const deleteButton = target.closest('.iuw-delete-icon');
227 | if (deleteButton) {
228 | return handleRemoveImage(target.closest('.inline-related'));
229 | }
230 |
231 | if (target.closest('.iuw-add-image-btn')) {
232 | root.querySelector('.temp_file').click();
233 | return;
234 | }
235 |
236 | if (target.closest('.iuw-preview-icon')) {
237 | return handlePreviewImage(target.closest('.inline-related'));
238 | }
239 |
240 | const inlineRelated = target.closest('.inline-related');
241 | if (inlineRelated) {
242 | const fileInput = inlineRelated.querySelector('input[type="file"]');
243 | fileInput.click();
244 | }
245 | });
246 |
247 | document.addEventListener('dragenter', function(evt) {
248 | const root = evt.target.closest('.iuw-inline-root');
249 | if (!root) { return; }
250 | if (root.classList.contains('dragging')) { return; }
251 |
252 | window.dragCounter = window.dragCounter + 1;
253 | window.draggingEditor = root;
254 | root.classList.add('drop-zone');
255 | });
256 |
257 | document.addEventListener('dragover', function(evt) {
258 | const root = evt.target.closest('.iuw-inline-root');
259 | if (!root) { return; }
260 |
261 | evt.preventDefault();
262 | });
263 |
264 | document.addEventListener('dragleave', function(evt) {
265 | window.dragCounter = window.dragCounter - 1;
266 | if (window.dragCounter > 0) {
267 | return;
268 | }
269 | if (!window.draggingEditor) {
270 | return;
271 | }
272 | if (evt.relatedTarget && evt.relatedTarget.closest('.iuw-inline-root') === window.draggingEditor) {
273 | return;
274 | }
275 |
276 | const root = window.draggingEditor;
277 | root.classList.remove('drop-zone');
278 | });
279 |
280 | document.addEventListener('dragend', function(evt) {
281 | window.dragCounter = window.dragCounter - 1;
282 | if (window.dragCounter > 0) {
283 | return;
284 | }
285 | if (!window.draggingEditor) {
286 | return;
287 | }
288 | if (evt.relatedTarget && evt.relatedTarget.closest('.iuw-inline-root') === window.draggingEditor) {
289 | return;
290 | }
291 |
292 | const root = window.draggingEditor;
293 | if (root.classList.contains('dragging')) { return; }
294 |
295 | root.classList.remove('drop-zone');
296 | });
297 |
298 | document.addEventListener('drop', function(evt) {
299 | const root = window.draggingEditor;
300 | if (!root) { return; }
301 |
302 | if (root.classList.contains('dragging')) { return; }
303 |
304 | evt.preventDefault();
305 | window.draggingEditor = null;
306 | root.classList.remove('drop-zone');
307 |
308 | if (!evt.dataTransfer.files.length) {
309 | return;
310 | }
311 | for (const file of evt.dataTransfer.files) {
312 | handleAddNewImage(root, null, file);
313 | }
314 | });
315 |
316 | function handleFinishOrdering (previewsContainer) {
317 | const root = previewsContainer.closest('.iuw-inline-root');
318 | root.classList.remove('dragging');
319 | const inlineGroup = previewsContainer.closest('.inline-group');
320 | const orderField = inlineGroup.getAttribute('data-order-field');
321 | if (!orderField) {
322 | return;
323 | }
324 | const orderSelector = 'input[name$="' + orderField + '"]';
325 |
326 | const inlines = previewsContainer.querySelectorAll('.inline-related');
327 | let order = 1;
328 | for (const inline of inlines) {
329 | const orderInput = inline.querySelector(orderSelector)
330 | orderInput.value = order;
331 | }
332 |
333 | updateAllIndexes(root);
334 | }
335 |
336 | function handleBeginOrdering(previewsContainer) {
337 | const root = previewsContainer.closest('.iuw-inline-root');
338 | root.classList.add('dragging');
339 | }
340 |
341 | function initialize(doc) {
342 | if (!doc) {
343 | doc = document;
344 | }
345 | const items = Array.from(doc.querySelectorAll('.iuw-inline-root .previews'));
346 | for (const item of items) {
347 | const root = item.closest('.iuw-inline-root');
348 | const inlineGroup = root.closest('.inline-group');
349 | updateAllIndexes(root);
350 |
351 | if (!inlineGroup.getAttribute('data-order-field')) {
352 | continue;
353 | }
354 |
355 | new Sortable(item, {
356 | onStart: function(evt) {
357 | handleBeginOrdering(evt.to);
358 | },
359 | onEnd: function(evt) {
360 | handleFinishOrdering(evt.to);
361 | }
362 | });
363 | }
364 | }
365 |
366 | document.addEventListener('DOMContentLoaded', function() {
367 | initialize();
368 | });
369 | document.addEventListener('htmx:afterSwap', function(ev) {
370 | initialize(ev.target);
371 | })
372 |
--------------------------------------------------------------------------------
/image_uploader_widget/static/image_uploader_widget/css/image-uploader-inline.css:
--------------------------------------------------------------------------------
1 | html[data-theme="light"], :root {
2 | --iuw-background: #FFF;
3 | --iuw-border-color: #CCC;
4 | --iuw-color: #333;
5 | --iuw-placeholder-text-color: #AAA;
6 | --iuw-placeholder-destak-color: #417690;
7 | --iuw-dropzone-background: rgba(255, 255, 255, 0.8);
8 | --iuw-image-preview-border: #BFBFBF;
9 | --iuw-image-preview-shadow: rgba(0, 0, 0, 0.3);
10 | --iuw-add-image-background: #EFEFEF;
11 | --iuw-add-image-color: #AAA;
12 | }
13 | @media (prefers-color-scheme: dark) {
14 | :root {
15 | --iuw-background: #121212;
16 | --iuw-border-color: #CCC;
17 | --iuw-color: #333;
18 | --iuw-placeholder-text-color: #AAA;
19 | --iuw-placeholder-destak-color: #417690;
20 | --iuw-dropzone-background: rgba(0, 0, 0, 0.8);
21 | --iuw-image-preview-border: #333;
22 | --iuw-image-preview-shadow: rgba(0, 0, 0, 0.3);
23 | --iuw-add-image-background: #333;
24 | --iuw-add-image-color: #CCC;
25 | }
26 | }
27 | html[data-theme="dark"] {
28 | --iuw-background: #121212;
29 | --iuw-border-color: #CCC;
30 | --iuw-color: #333;
31 | --iuw-placeholder-text-color: #AAA;
32 | --iuw-placeholder-destak-color: #417690;
33 | --iuw-dropzone-background: rgba(0, 0, 0, 0.8);
34 | --iuw-image-preview-border: #333;
35 | --iuw-image-preview-shadow: rgba(0, 0, 0, 0.3);
36 | --iuw-add-image-background: #333;
37 | --iuw-add-image-color: #CCC;
38 | }
39 |
40 | .iuw-light {
41 | --iuw-background: #FFF;
42 | --iuw-border-color: #CCC;
43 | --iuw-color: #333;
44 | --iuw-placeholder-text-color: #AAA;
45 | --iuw-placeholder-destak-color: #417690;
46 | --iuw-dropzone-background: rgba(255, 255, 255, 0.8);
47 | --iuw-image-preview-border: #BFBFBF;
48 | --iuw-image-preview-shadow: rgba(0, 0, 0, 0.3);
49 | --iuw-add-image-background: #EFEFEF;
50 | --iuw-add-image-color: #AAA;
51 | }
52 | .iuw-dark {
53 | --iuw-background: #121212;
54 | --iuw-border-color: #CCC;
55 | --iuw-color: #333;
56 | --iuw-placeholder-text-color: #AAA;
57 | --iuw-placeholder-destak-color: #417690;
58 | --iuw-dropzone-background: rgba(0, 0, 0, 0.8);
59 | --iuw-image-preview-border: #333;
60 | --iuw-image-preview-shadow: rgba(0, 0, 0, 0.3);
61 | --iuw-add-image-background: #333;
62 | --iuw-add-image-color: #CCC;
63 | }
64 |
65 | @keyframes arrow-flashing {
66 | from {
67 | opacity: 0;
68 | transform: scale(0) translateY(12px);
69 | }
70 | to {
71 | opacity: 1;
72 | transform: scale(1) translateY(0);
73 | }
74 | }
75 | .iuw-inline-root, .iuw-inline-root * {
76 | box-sizing: border-box;
77 | }
78 |
79 | .iuw-inline-root {
80 | /* behaviour */
81 | user-select: none;
82 | /* sizing */
83 | min-width: 300px;
84 | height: 200px;
85 | /* shape */
86 | border-radius: 5px;
87 | padding: 5px;
88 | /* styles */
89 | background-color: var(--iuw-background);
90 | border: 3px dashed var(--iuw-border-color);
91 | color: var(--iuw-color);
92 | /* positioning */
93 | position: relative;
94 | /* overflowing */
95 | overflow-y: hidden;
96 | overflow-x: auto;
97 | /* childs */
98 | display: flex;
99 | flex-direction: row;
100 | align-items: stretch;
101 | /* empty label */
102 | /* drop label */
103 | /* image preview */
104 | /* images carousel */
105 | /* add button */
106 | }
107 | .iuw-inline-root input[type=file],
108 | .iuw-inline-root input[type=checkbox],
109 | .iuw-inline-root input[type=number] {
110 | display: none;
111 | }
112 | .iuw-inline-root .iuw-empty {
113 | /* positioning */
114 | position: absolute;
115 | left: 0;
116 | right: 0;
117 | bottom: 0;
118 | top: 0;
119 | z-index: 50;
120 | /* display */
121 | display: flex;
122 | flex-direction: column;
123 | align-items: center;
124 | justify-content: center;
125 | /* text */
126 | text-align: center;
127 | font-size: 1.3em;
128 | font-weight: bold;
129 | letter-spacing: 0.05em;
130 | color: var(--iuw-placeholder-text-color);
131 | /* behaviour */
132 | cursor: pointer;
133 | /* animations */
134 | height: 0;
135 | opacity: 0;
136 | overflow: hidden;
137 | transition: opacity 0.3s ease, height 0.3s ease;
138 | /* childs */
139 | }
140 | .iuw-inline-root .iuw-empty > svg {
141 | width: 50px;
142 | height: 50px;
143 | margin-bottom: 30px;
144 | transition: width 0.3s ease, height 0.3s ease, margin 0.3s ease;
145 | }
146 | .iuw-inline-root .iuw-empty:hover > svg {
147 | width: 80px;
148 | height: 80px;
149 | margin-bottom: 10px;
150 | }
151 | .iuw-inline-root .iuw-empty > span {
152 | text-align: center;
153 | }
154 | .iuw-inline-root .iuw-empty > span span {
155 | color: var(--iuw-placeholder-destak-color);
156 | }
157 | .iuw-inline-root.empty .iuw-empty {
158 | height: 100%;
159 | opacity: 1;
160 | }
161 | .iuw-inline-root.drop-zone .iuw-empty {
162 | height: 0;
163 | opacity: 0;
164 | }
165 | .iuw-inline-root .iuw-drop-label {
166 | /* positioning */
167 | position: absolute;
168 | left: 0;
169 | top: 0;
170 | right: 0;
171 | bottom: 0;
172 | z-index: 55;
173 | /* style */
174 | background: var(--iuw-dropzone-background);
175 | /* display */
176 | display: flex;
177 | flex-direction: column;
178 | align-items: center;
179 | justify-content: center;
180 | /* text */
181 | text-align: center;
182 | font-size: 1.3em;
183 | font-weight: bold;
184 | letter-spacing: 0.05em;
185 | color: var(--iuw-placeholder-text-color);
186 | /* behaviour */
187 | cursor: grabbing;
188 | /* animations */
189 | height: 0;
190 | opacity: 0;
191 | overflow: hidden;
192 | transition: opacity 0.3s ease, height 0.3s ease;
193 | /* childs */
194 | }
195 | .iuw-inline-root .iuw-drop-label > svg {
196 | width: 90px;
197 | height: 90px;
198 | margin-bottom: 20px;
199 | transition: width 0.3s ease, height 0.3s ease, margin 0.3s ease;
200 | }
201 | .iuw-inline-root .iuw-drop-label > svg.bi-cloud-upload path:last-child {
202 | transform-origin: 50% 100%;
203 | animation: arrow-flashing 1.1s;
204 | animation-timing-function: ease-in;
205 | animation-fill-mode: both;
206 | animation-iteration-count: infinite;
207 | animation-delay: 0.3s;
208 | }
209 | .iuw-inline-root .iuw-drop-label > span {
210 | text-align: center;
211 | }
212 | .iuw-inline-root .iuw-drop-label > span span {
213 | color: var(--iuw-placeholder-destak-color);
214 | }
215 | .iuw-inline-root.drop-zone .iuw-drop-label {
216 | height: 100%;
217 | opacity: 1;
218 | }
219 | .iuw-inline-root .inline-related {
220 | /* style */
221 | border: 1px solid var(--iuw-image-preview-border);
222 | box-shadow: 0 0 4px 0 var(--iuw-image-preview-shadow);
223 | /* shape */
224 | width: 160px;
225 | margin: 0 5px;
226 | border-radius: 5px;
227 | overflow: hidden;
228 | /* behaviour */
229 | cursor: pointer;
230 | /* positioning */
231 | position: relative;
232 | transition: opacity 0.2s ease-in;
233 | }
234 | .iuw-inline-root .inline-related.dragging {
235 | opacity: 0.1;
236 | filter: blur(2px);
237 | }
238 | .iuw-inline-root .inline-related img {
239 | /* sizing */
240 | width: 100%;
241 | height: 100%;
242 | /* display mode */
243 | object-fit: cover;
244 | object-position: center;
245 | }
246 | .iuw-inline-root .inline-related .iuw-delete-icon,
247 | .iuw-inline-root .inline-related .iuw-preview-icon {
248 | /* shape */
249 | width: 32px;
250 | height: 32px;
251 | border-radius: 0 5px 0 0;
252 | /* styles */
253 | border: 1px solid #BFBFBF;
254 | border-top: none;
255 | border-right: none;
256 | background-color: #F5F5F5;
257 | opacity: 0.6;
258 | /* positioning */
259 | position: absolute;
260 | right: 0;
261 | top: 0;
262 | z-index: 45;
263 | /* display */
264 | display: flex;
265 | flex-direction: column;
266 | align-items: center;
267 | justify-content: center;
268 | /* animations */
269 | transition: opacity 0.3s ease;
270 | /* icon */
271 | }
272 | .iuw-inline-root .inline-related .iuw-delete-icon svg,
273 | .iuw-inline-root .inline-related .iuw-preview-icon svg {
274 | width: 16px;
275 | height: auto;
276 | transform: none;
277 | transition: transform 0.3s ease;
278 | }
279 | .iuw-inline-root .inline-related .iuw-delete-icon:hover,
280 | .iuw-inline-root .inline-related .iuw-preview-icon:hover {
281 | opacity: 1;
282 | }
283 | .iuw-inline-root .inline-related .iuw-delete-icon:hover svg,
284 | .iuw-inline-root .inline-related .iuw-preview-icon:hover svg {
285 | transform: scale(1.3);
286 | }
287 | .iuw-inline-root .inline-related .iuw-preview-icon:not(.iuw-only-preview) {
288 | top: 32px;
289 | border-radius: 0;
290 | }
291 | .iuw-inline-root .inline-related.empty-form {
292 | display: none;
293 | }
294 | .iuw-inline-root .inline-related.deleted {
295 | display: none;
296 | }
297 | .iuw-inline-root > div {
298 | height: 100%;
299 | width: auto;
300 | display: flex;
301 | flex-direction: row;
302 | align-items: stretch;
303 | }
304 | .iuw-inline-root .iuw-add-image-btn {
305 | /* shape */
306 | border-radius: 5px;
307 | padding: 15px;
308 | width: 160px;
309 | max-width: 160px;
310 | min-width: 160px;
311 | /* styles */
312 | border: 1px solid var(--iuw-image-preview-border);
313 | box-shadow: 0 0 4px 0 var(--iuw-image-preview-shadow);
314 | background: var(--iuw-add-image-background);
315 | color: var(--iuw-add-image-color);
316 | /* display */
317 | display: flex;
318 | flex-direction: column;
319 | align-items: center;
320 | justify-content: center;
321 | display: none;
322 | /* behaviour */
323 | cursor: pointer;
324 | }
325 | .iuw-inline-root .iuw-add-image-btn svg {
326 | fill: var(--iuw-add-image-color);
327 | margin-bottom: 30px;
328 | width: 60px;
329 | height: auto;
330 | transition: margin 0.3s ease, width 0.3s ease, height 0.3s ease;
331 | }
332 | .iuw-inline-root .iuw-add-image-btn:hover svg {
333 | margin-bottom: 10px;
334 | width: 80px;
335 | height: auto;
336 | }
337 | .iuw-inline-root .iuw-add-image-btn > span {
338 | font-weight: bold;
339 | text-align: center;
340 | font-size: 1rem;
341 | }
342 | .iuw-inline-root:not(.empty) .iuw-add-image-btn:not(.visible-by-number) {
343 | display: none;
344 | }
345 | .iuw-inline-root:not(.empty) .iuw-add-image-btn.visible-by-number {
346 | display: flex;
347 | }
348 | .iuw-inline-root.empty .iuw-add-image-btn {
349 | display: none;
350 | }
351 |
352 | @keyframes arrow-flashing {
353 | from {
354 | opacity: 0;
355 | transform: scale(0) translateY(12px);
356 | }
357 | to {
358 | opacity: 1;
359 | transform: scale(1) translateY(0);
360 | }
361 | }
362 | /*****/
363 | /*****/
364 | /*****/
365 | :root {
366 | --iuw-modal-overlay: rgba(0, 0, 0, 0.6);
367 | --iuw-modal-image-background: #FFF;
368 | --iuw-modal-closebutton-background: #FFF;
369 | --iuw-modal-closebutton-shadow: rgba(0, 0, 0, 0.2);
370 | --iuw-modal-closebutton-color: #333;
371 | }
372 |
373 | #iuw-modal-element {
374 | /* position */
375 | position: fixed;
376 | z-index: 150;
377 | left: 0;
378 | top: 0;
379 | /* size */
380 | width: 100%;
381 | height: 100vh;
382 | /* styles */
383 | background: var(--iuw-modal-overlay);
384 | /* behaviour */
385 | user-select: none;
386 | cursor: pointer;
387 | /* display */
388 | display: flex;
389 | align-items: center;
390 | justify-content: center;
391 | /* animations */
392 | }
393 | #iuw-modal-element.visible {
394 | transition: opacity 0.3s;
395 | }
396 | #iuw-modal-element.hide {
397 | transition: opacity 0.3s;
398 | opacity: 0;
399 | }
400 | #iuw-modal-element .iuw-modal-image-preview {
401 | width: 90%;
402 | height: 80%;
403 | position: relative;
404 | }
405 | #iuw-modal-element .iuw-modal-image-preview img {
406 | background: var(--iuw-modal-image-background);
407 | width: 100%;
408 | height: 100%;
409 | object-fit: contain;
410 | object-position: center;
411 | cursor: default;
412 | }
413 | #iuw-modal-element .iuw-modal-image-preview .iuw-modal-close {
414 | position: absolute;
415 | right: 0;
416 | top: 0;
417 | transform: translate(50%, -50%);
418 | width: 40px;
419 | height: 40px;
420 | border-radius: 50%;
421 | display: flex;
422 | align-items: center;
423 | justify-content: center;
424 | background: var(--iuw-modal-closebutton-background);
425 | filter: drop-shadow(0 0 5px var(--iuw-modal-closebutton-shadow));
426 | }
427 | #iuw-modal-element .iuw-modal-image-preview .iuw-modal-close svg {
428 | width: 18px;
429 | height: auto;
430 | fill: var(--iuw-modal-closebutton-color);
431 | }
432 |
433 | .iuw-inline-admin-formset {
434 | flex: 1;
435 | }
436 | @media (max-width: 768px) {
437 | #iuw-modal-element .iuw-modal-image-preview .iuw-modal-close {
438 | transform: none;
439 | box-shadow: none;
440 | border-radius: unset;
441 | }
442 | }
443 |
--------------------------------------------------------------------------------