├── .gitignore
├── ATM Machine
├── ATM machine.py
└── README.md
├── Acronym Generator
├── README.md
└── acronym.py
├── Alarm Clock
├── README.md
└── main.py
├── Audio Book
├── README.md
└── audio_book.py
├── Automating Whatsapp
├── Automate Whatsapp.py
└── README.md
├── BMI Calculator
├── README.md
└── bmi_calculator.py
├── Basic Web Scraping
├── README.md
└── basic web scraping.py
├── Chatty Bot
├── README.md
└── chatty bot.py
├── Chess Game
├── Chess Game.py
└── README.md
├── Colored Text
├── Colorama.png
├── Colored_Text.py
└── README.md
├── Creating Table
├── Create_Table.py
└── README.md
├── Data Visualization of PUBG Dataset
├── Data_Visualization_of_PUBG_Dataset.ipynb
└── README.md
├── Dice Rolling Simulator
├── Data flair dice.py
├── README.md
├── die1.PNG
├── die2.PNG
├── die3.PNG
├── die4.PNG
├── die5.PNG
└── die6.PNG
├── Dice Simulator
├── Dice_Simulator.py
└── README.md
├── Downloading Image
├── Download_Image.py
└── README.md
├── Email Slicer
├── Email_Slicer.py
└── README.md
├── Face Mask Detection
├── Face Mask Detection using openCV.py
└── README.md
├── Grammar Correction
├── README.md
└── main.py
├── Infinity
├── README.md
└── infinity.py
├── Iron Man Helmet
├── README.md
└── helmet.py
├── Language Translator
├── README.md
└── python-language-translator.py
├── Password Generator
├── Password Generator.py
└── README.md
├── QR Code Generator
├── QR-Code_Generator.py
├── README.md
└── youtube.svg
├── README.md
├── Random Number Guessing Game
├── README.md
└── random_no_guessing_game.py
├── Random Pattern Generator
├── Box Pattern.png
├── Box Pattern.py
├── Circle.py
├── Doraemon.py.py
├── Flower Pattern.JPG
├── Flower Pattern.py
├── Google_Logo.png
├── Google_Logo.py
├── Hexagonal Pattern.png
├── Hexagonal Pattern.py
├── README.md
├── Rangoli Pattern.png
├── Rangoli Pattern.py
├── Screenshot (303).png
├── Spirograph.png
├── Spirograph.py
├── Star Pattern.png
├── Star Pattern.py
├── Tri-Color.png
├── Vibrating_Circle.png
├── Vibrating_Circle.py
└── tri-color.py
├── Rock Paper Scissor Game
├── README.md
├── main.py
└── rock_paper_scissor_game.py
├── Shiv Ling
├── README.md
└── mahadev.py
├── Spotify Playlist Generator
├── README.md
└── Spotify playlist generator.py
├── Stop Sign Detection
├── README.md
├── Stop_sign_detection.py
├── image.jpg
├── stop_data.xml
└── stop_recognition_output.png
├── Story Generator
├── README.md
└── Story_Generator.py
├── Take Screenshot
├── README.md
└── Screenshot.py
├── Tic-Tac-Toe-Game
├── README.md
└── Tic-Tac-Toe-Game.py
├── Todo List Application
├── .idea
│ ├── file
│ ├── inspectionProfiles
│ │ ├── file.txt
│ │ └── profiles_settings.xml
│ ├── misc.xml
│ ├── modules.xml
│ ├── todolist.iml
│ └── workspace.xml
├── README.md
└── main.py
├── Udemy Web Scrapping
├── README.md
├── Udemy.py
└── udemy.csv
├── YouTube Trending Video Analysis
├── README.md
└── youtube_trending_videos_analysis.ipynb
└── YouTube Video Downloader
├── README.md
└── main.py
/.gitignore:
--------------------------------------------------------------------------------
1 | # Byte-compiled / optimized / DLL files
2 | __pycache__/
3 | *.py[cod]
4 | *$py.class
5 |
6 | # C extensions
7 | *.so
8 |
9 | # Distribution / packaging
10 | .Python
11 | build/
12 | develop-eggs/
13 | dist/
14 | downloads/
15 | eggs/
16 | .eggs/
17 | lib/
18 | lib64/
19 | parts/
20 | sdist/
21 | var/
22 | wheels/
23 | pip-wheel-metadata/
24 | share/python-wheels/
25 | *.egg-info/
26 | .installed.cfg
27 | *.egg
28 | MANIFEST
29 |
30 | # PyInstaller
31 | # Usually these files are written by a python script from a template
32 | # before PyInstaller builds the exe, so as to inject date/other infos into it.
33 | *.manifest
34 | *.spec
35 |
36 | # Installer logs
37 | pip-log.txt
38 | pip-delete-this-directory.txt
39 |
40 | # Unit test / coverage reports
41 | htmlcov/
42 | .tox/
43 | .nox/
44 | .coverage
45 | .coverage.*
46 | .cache
47 | nosetests.xml
48 | coverage.xml
49 | *.cover
50 | *.py,cover
51 | .hypothesis/
52 | .pytest_cache/
53 |
54 | # Translations
55 | *.mo
56 | *.pot
57 |
58 | # Django stuff:
59 | *.log
60 | local_settings.py
61 | db.sqlite3
62 | db.sqlite3-journal
63 |
64 | # Flask stuff:
65 | instance/
66 | .webassets-cache
67 |
68 | # Scrapy stuff:
69 | .scrapy
70 |
71 | # Sphinx documentation
72 | docs/_build/
73 |
74 | # PyBuilder
75 | target/
76 |
77 | # Jupyter Notebook
78 | .ipynb_checkpoints
79 |
80 | # IPython
81 | profile_default/
82 | ipython_config.py
83 |
84 | # pyenv
85 | .python-version
86 |
87 | # pipenv
88 | # According to pypa/pipenv#598, it is recommended to include Pipfile.lock in version control.
89 | # However, in case of collaboration, if having platform-specific dependencies or dependencies
90 | # having no cross-platform support, pipenv may install dependencies that don't work, or not
91 | # install all needed dependencies.
92 | #Pipfile.lock
93 |
94 | # PEP 582; used by e.g. github.com/David-OConnor/pyflow
95 | __pypackages__/
96 |
97 | # Celery stuff
98 | celerybeat-schedule
99 | celerybeat.pid
100 |
101 | # SageMath parsed files
102 | *.sage.py
103 |
104 | # Environments
105 | .env
106 | .venv
107 | env/
108 | venv/
109 | ENV/
110 | env.bak/
111 | venv.bak/
112 |
113 | # Spyder project settings
114 | .spyderproject
115 | .spyproject
116 |
117 | # Rope project settings
118 | .ropeproject
119 |
120 | # mkdocs documentation
121 | /site
122 |
123 | # mypy
124 | .mypy_cache/
125 | .dmypy.json
126 | dmypy.json
127 |
128 | # Pyre type checker
129 | .pyre/
130 |
--------------------------------------------------------------------------------
/ATM Machine/ATM machine.py:
--------------------------------------------------------------------------------
1 | balance = 1000
2 | print("""
3 | Welcome to ATM Machine
4 |
5 | Choose Transaction
6 |
7 | 1)BALANCE
8 | 2)WITHDRAW
9 | 3)DEPOSIT
10 | 4)EXIT
11 |
12 | """)
13 | option = int(input("Enter Transaction "))
14 |
15 | if(option == 1):
16 | print("Your balance is ", balance)
17 | elif(option==2):
18 | withdraw = float(input("Enter amount to withdraw "))
19 | if(balance > withdraw):
20 | total = balance - withdraw
21 | print("success")
22 | print("your new balance is :",total)
23 | else:
24 | print("insufficient Balance")
25 | elif(option==3):
26 | deposit = float(input("Enter amount to deposit "))
27 | totalbalance = balance + deposit
28 | print("success")
29 | print("total balnace now is: ", totalbalance)
30 | elif(option==4):
31 | exit()
32 | else:
33 | print("no selected transaction")
34 |
--------------------------------------------------------------------------------
/ATM Machine/README.md:
--------------------------------------------------------------------------------
1 |
2 |
--------------------------------------------------------------------------------
/Acronym Generator/README.md:
--------------------------------------------------------------------------------
1 | # Acronym Generator🔥
2 |
3 | - An acronym is a short form of a word created by long words or phrases such as NLP for natural language processing.
4 |
5 | ## 📌Create Acronyms using Python
6 |
7 | - To create acronyms using Python, you need to write a python program that generates a short form of a word from a given sentence. You can do this by splitting and indexing to get the first word and then combine it. Let’s see how to create an acronym using Python:
8 |
9 | **Code:**
10 |
11 | user_input = input("Enter your sentence: ")
12 |
13 | text = user_input.split()
14 |
15 | acronym = ""
16 |
17 | for i in text:
18 | acronym += i[0].upper()
19 |
20 | print(acronym)
21 |
22 | **Output:**
23 |
24 | Enter your sentence: artificial intelligence
25 |
26 | AI
27 |
28 | Enter your sentence: natural language processing
29 |
30 | NLP
31 |
32 | - In the above code, I am first taking a string user input, then I am using the split() function in Python for splitting the sentence. Then I declared a new variable ‘acronym’ to store the actual acronym of a phrase.
33 |
34 | - Then at the end, I am running a for loop over the variable ‘text’ which represents the split of user input. While running the for loop we are storing the index value of i[0] of every word after a split and turning it into an uppercase format by using the upper() function.
35 |
36 |
37 | ## 📌Summary
38 |
39 | - This is a great python program to test your logical skills. These types of programs contribute a lot to your coding interviews. So you should keep trying such programs to develop a good understanding of creating algorithms to perform well in your coding interviews.
40 |
--------------------------------------------------------------------------------
/Acronym Generator/acronym.py:
--------------------------------------------------------------------------------
1 | user_input = input("Enter your sentence ")
2 |
3 | text = user_input.split()
4 |
5 | acronym = ""
6 |
7 | for i in text:
8 | acronym += i[0].upper()
9 |
10 | print(acronym)
--------------------------------------------------------------------------------
/Alarm Clock/README.md:
--------------------------------------------------------------------------------
1 | # Alarm Clock🔥
2 |
3 | An alarm clock is a clock with a function that can be activated to ring at a time set in advance, used to wake someone up. Here a Python program to create an alarm clock with Python.
4 |
5 | ## 📌How to Create an Alarm Clock with Python?
6 |
7 | As the title suggests, our task here is to write a python script that creates an alarm clock. For this task, I will be using the DateTime, OS, Time module in Python to create an alarm clock.
8 |
9 | The DateTime and OS module comes pre-installed in the Python programming language so you can easily import it in your program. Now let’s see how to write a program to create an alarm with Python.
10 |
11 | ## 📌Alarm Clock with Python
12 |
13 | Before writing the program you should know that you also need an alarm tone which will ring at the time of the alarm. So you can download any alarm tune or you can use simple your music gallary songs. Now as we are ready with the libraries and the alarm song, let’s see how to write a program to create an alarm clock with Python:
14 |
15 | ### Code:
16 |
17 | import os
18 | import datetime
19 | import time
20 |
21 | year, month, day = input("Enter the date = ").split("/") #splitting input values by'/'
22 |
23 | hour, minutes, second = input("Enter the Time = ").split(":") #splitting input values by':'
24 |
25 | shedule_date = datetime.date(int(day), int(month), int(year)) #converting input values into interger
26 |
27 | n = 1
28 |
29 | while n > 0:
30 |
31 | if time.localtime().tm_hour == int(hour) and time.localtime().tm_min == int(minutes) and time.localtime().tm_sec == int(second) and datetime.date.today() == shedule_date:
32 |
33 | os.startfile("C:\\Users\\KISHAN\\Music\\Chogada.mp3") #Enter the path of a song or ringtone where it is placed in your system
34 |
35 | break
36 |
37 | else:
38 |
39 | n +=1
40 |
41 |
42 | The user input should be in a format of hours: minutes: and then seconds. You will start listening to the song as you will reach the time that has been set. To test your code set the time 2 or 3 minutes later from the time you are giving the user input.
43 |
44 | ## 📌Summary
45 | This idea can be implemented in software applications also, so you now have an idea of what can be a good Python project other than just designing the User interface of an application.
46 |
--------------------------------------------------------------------------------
/Alarm Clock/main.py:
--------------------------------------------------------------------------------
1 | import os
2 | import datetime
3 | import time
4 |
5 | year, month, day = input("Enter the date = ").split("/") #splitting input values by'/'
6 |
7 | hour, minutes, second = input("Enter the Time = ").split(":") #splitting input values by':'
8 |
9 | shedule_date = datetime.date(int(day), int(month), int(year)) #converting input values into interger
10 |
11 | n = 1
12 |
13 | while n > 0:
14 |
15 | if time.localtime().tm_hour == int(hour) and time.localtime().tm_min == int(minutes) and time.localtime().tm_sec == int(second) and datetime.date.today() == shedule_date:
16 |
17 | os.startfile("C:\\Users\\KISHAN\\Music\\Chogada.mp3") #Enter the path of a song or ringtone where it is placed in your system
18 |
19 | break
20 |
21 | else:
22 |
23 | n +=1
24 |
--------------------------------------------------------------------------------
/Audio Book/README.md:
--------------------------------------------------------------------------------
1 | # Audio Book Using Python🔥
2 |
3 | An audiobook is a recording or voiceover of a book or other work read aloud. You can listen to audiobooks on any smartphone, tablet, computer, home speaker system, or in-car entertainment system. So, let's learn how to create an audiobook with Python.
4 |
5 | ## 📌Let’s Create an Audiobook with Python
6 | - Python has a large collection of libraries due to the very active community which serves various purposes. Here we need to use two libraries **pyttsx3** and **PyPDF2** to create an audiobook with Python.
7 |
8 | - Both the above libraries can be easily installed by using the pip command.
9 |
10 | pip install PyPDF2
11 | pip install pyttsx3
12 |
13 | ## 📌Reading the PDF File
14 | PyPDF2 allows manipulation of pdf in memory. This python library is capable of tasks such as:
15 | - extract information about the document, such as title, author, etc.
16 | - document division by page
17 | - merge documents per page
18 | - cropping pages
19 | - merge multiple pages into one page
20 | - encrypt and decrypt PDF files
21 | - and more.
22 |
23 | I will use this library to split the pdf file page by page, then read the text on each page, then send the text to the next step in the process to create an audiobook with Python.
24 |
25 | import PyPDF2
26 | pdfReader = PyPDF2.PdfFileReader(open('file.pdf', 'rb'))
27 |
28 | The pyttsx3 library is capable of converting text to speech offline. The text that we read from a pdf is then fed as an input to the text-to-speech engine:
29 |
30 | import pyttsx3
31 | speaker = pyttsx3.init()
32 |
33 | Now the next step in the process is to loop the process for each page of the pdf file and stop the pyttsx3 speaker engine last:
34 |
35 | for page_num in range(pdfReader.numPages):
36 | text = pdfReader.getPage(page_num).extractText()
37 | speaker.say(text)
38 | speaker.runAndWait()
39 | speaker.stop()
40 |
41 | This is how we can build an audiobook with Python in a few lines of code.
42 |
--------------------------------------------------------------------------------
/Audio Book/audio_book.py:
--------------------------------------------------------------------------------
1 | import PyPDF2
2 | import pyttsx3
3 |
4 | pdfReader = PyPDF2.PdfFileReader(open("C:\\Users\\KISHAN\\Downloads\\New folder\\An Introductiom To AI.pdf", 'rb'))
5 |
6 | speaker = pyttsx3.init()
7 |
8 | for num_page in range(pdfReader.numPages):
9 | text = pdfReader.getPage(num_page).extractText()
10 | speaker.say(text)
11 | speaker.runAndWait()
12 |
13 | speaker.stop()
--------------------------------------------------------------------------------
/Automating Whatsapp/Automate Whatsapp.py:
--------------------------------------------------------------------------------
1 | import pywhatkit as kt
2 | import getpass as gp
3 |
4 | #display welcome msg
5 | print("Let's Automate Whatsapp!")
6 |
7 | #capture the target phone number
8 | p_num = gp.getpass(prompt='Phoneumber: ', stream=None)
9 |
10 | #capture the message
11 | msg = "Let's join MLH for Local Hack Day"
12 |
13 | # call the method
14 | kt.sendwhatmsg(p_num, msg, 10, 25)
--------------------------------------------------------------------------------
/Automating Whatsapp/README.md:
--------------------------------------------------------------------------------
1 |
2 |
--------------------------------------------------------------------------------
/BMI Calculator/README.md:
--------------------------------------------------------------------------------
1 | # BMI Calculator🔥
2 |
3 | ## 📌What is Body Mass Index (BMI)?
4 |
5 | - BMI is a measure of relative weight based on an individual’s mass and height. Today, Body Mass Index is commonly used to classify people as underweight, overweight, and even with obesity. Also, it is adopted by countries to promote healthy eating.
6 |
7 | - BMI can be considered as an alternative for direct measurements of body fat. Besides, BMI is an inexpensive and easy-to-perform method of screening for weight classes that may cause health problems.
8 |
9 | ## 📌BMI Calculator with Python
10 |
11 | - The body mass index is calculated by dividing an individual’s weight in kilograms by their height in meters, then dividing the answer again by their height. Now let’s see how to create a BMI calculator with Python:
12 |
13 | ### Code:
14 |
15 | height = float(input("Enter your height in centimeters (cms) "))
16 |
17 | weight = float(input("Enter your weight in kg "))
18 |
19 | height = height / 100
20 |
21 | BMI = weight / (height ** 2)
22 |
23 | print("Your Body Mass Index is ",BMI)
24 |
25 | if BMI > 0:
26 | if BMI <= 16:
27 | print("You are severley underweight")
28 |
29 | elif BMI <= 18:
30 | print("You are underweight")
31 |
32 | elif BMI <= 25:
33 | print("You are Healthy")
34 |
35 | elif BMI <= 30:
36 | print("You are overweight")
37 |
38 | else:
39 | print("You are severley overweight")
40 |
41 | else:
42 | print("Please enter correct values")
43 |
44 |
45 | ### Output:
46 |
47 | Enter your height in centimeters (cms) 170
48 | Enter your Weight in Kg 67
49 | Your Body Mass Index is 23.18339100346021
50 | You are Healthy
51 |
--------------------------------------------------------------------------------
/BMI Calculator/bmi_calculator.py:
--------------------------------------------------------------------------------
1 | height = float(input("Enter your height in centimeters (cms) "))
2 |
3 | weight = float(input("Enter your weight in kg "))
4 |
5 | height = height / 100
6 |
7 | BMI = weight / (height ** 2)
8 |
9 | print("Your Body Mass Index is ",BMI)
10 |
11 | if BMI > 0:
12 | if BMI <= 16:
13 | print("You are severley underweight")
14 |
15 | elif BMI <= 18:
16 | print("You are underweight")
17 |
18 | elif BMI <= 25:
19 | print("You are Healthy")
20 |
21 | elif BMI <= 30:
22 | print("You are overweight")
23 |
24 | else:
25 | print("You are severley overweight")
26 |
27 | else:
28 | print("Please enter correct values")
--------------------------------------------------------------------------------
/Basic Web Scraping/README.md:
--------------------------------------------------------------------------------
1 |
2 |
--------------------------------------------------------------------------------
/Basic Web Scraping/basic web scraping.py:
--------------------------------------------------------------------------------
1 | #printing the text..
2 | import requests
3 | import bs4
4 | link =input("Enter the url: ")
5 | page =requests.get(link)
6 | print(page.text)
7 |
8 | #print the text in a readable form..
9 | soup =bs4.BeautifulSoup(page.text,'html.parser')
10 | text_format =soup.prettify()
11 | print(text_format)
12 |
13 | #print the list of image tag....
14 | image_list =soup.find_all('img')
15 | print(image_list)
16 |
17 | #print the no of image tag.....
18 | count_the_image =len(image_list)
19 | print(count_the_image)
20 |
21 |
22 |
23 |
--------------------------------------------------------------------------------
/Chatty Bot/README.md:
--------------------------------------------------------------------------------
1 |
2 |
--------------------------------------------------------------------------------
/Chatty Bot/chatty bot.py:
--------------------------------------------------------------------------------
1 | def print_message():
2 | print ("I'm sorry, I did not understand your selection. Please enter the corresponding letter for your response.")
3 |
4 | def extra_options():
5 | res = input('Do you want a mug for here, a cup to-go, or a refill of your own cup? \n[a] I\'ll have it here in a mug. \n[b] I ll take a plastic cup to go! \n[c] I brought my own! > ').lower()
6 |
7 | if res == 'a':
8 | print('Awesome! Your order will be ready in a mug soon!')
9 | elif res == 'b':
10 | print('Okay, no problem! We\'ll get you a plastic cup.')
11 | elif res == 'c':
12 | print('Great! We\'ll fill up your reusable cup.')
13 | else:
14 | print_message()
15 | return extra_options()
16 |
17 | def get_drink_type():
18 | res = input("What type of drink would you like? \n[a] Brewed Coffee \n[b] Mocha \n[c] Latte \n>").lower()
19 | if res == 'a':
20 | return 'brewed coffee'
21 | elif res == 'b':
22 | return 'mocha'
23 | elif res == 'c':
24 | return order_latte()
25 | else:
26 | print_message()
27 | return get_drink_type()
28 |
29 | def order_latte():
30 | milk = input("And what kind of milk for your latte? \n[a] 2% milk \n[b] Non-fat milk \n[c] Soy milk \n[d] Almond milk \n[e] Oatmilk \n[f] Hemp milk>").lower()
31 | if milk == 'a':
32 | return 'latte'
33 | elif milk == 'b':
34 | return 'non-fat latte'
35 | elif milk == 'c':
36 | return 'soy latte'
37 | elif milk == 'd':
38 | return 'almond latte'
39 | elif milk == 'e':
40 | return 'oat latte'
41 | elif milk == 'f':
42 | return 'hemp latte'
43 | else:
44 | print_message()
45 | return order_latte()
46 |
47 | def extra_options():
48 | res = input('Would you like a plastic cup or did you bring your own reusable cup? \n[a] I\'ll need a cup. \n[b] Brought my own! \n> ')
49 |
50 | if res == 'a':
51 | print('Okay, no problem! We\'ll get you a plastic cup.')
52 | elif res == 'b':
53 | print('Great! We\'ll fill up your reusable cup.')
54 | else:
55 | print_message()
56 | return extra_options()
57 |
58 |
59 | def get_drink_type():
60 | res = input("What type of drink would you like? \n[a] Brewed Coffee \n[b] Mocha \n[c] Latte \n>").lower()
61 | if res == 'a':
62 | return 'brewed coffee'
63 | elif res == 'b':
64 | return 'mocha'
65 | elif res == 'c':
66 | return order_latte()
67 | else:
68 | print_message()
69 | return get_drink_type()
70 |
71 | def get_size():
72 | res = input('What size drink can I get for you? \n[a] Small \n[b] Medium \n[c] Large \n> ').lower()
73 | if res == 'a':
74 | return 'small'
75 | elif res == 'b':
76 | return 'medium'
77 | elif res == 'c':
78 | return 'large'
79 | else:
80 | print_message()
81 | return get_size()
82 |
83 | def coffee_bot():
84 | print("Welcome to the cafe!")
85 | size = get_size()
86 | drink_type = get_drink_type()
87 | print("Alright, that's a {} {}.".format(size, drink_type))
88 |
89 | extra_options()
90 |
91 | name = input("Can I get your name please?")
92 | print("Thanks, {}! Your drink will be ready shortly".format(name))
93 |
94 | coffee_bot()
--------------------------------------------------------------------------------
/Chess Game/Chess Game.py:
--------------------------------------------------------------------------------
1 | import random
2 |
3 | class Board:
4 | #A class to represent the chess board
5 | squares = {}
6 |
7 | #Probably a better way for board to have access to players
8 | players = []
9 |
10 | #Creates all squares and adds them to the board
11 | def populateSquares(self):
12 | # print("here")
13 | for x in range(8):
14 | for y in range(8):
15 | number = x * 8 + y
16 | pos = [x, y]
17 |
18 | # if (y == 1):
19 | # occ = Pawn(pos,"White")
20 | # self.players[0].pieces.append(occ)
21 | # elif (y == 6):
22 | # occ = Pawn(pos,"Black")
23 | # self.players[1].pieces.append(occ)
24 | if (y == 0):
25 | occ = self.populateKingRow(0,pos,"White")
26 | self.players[0].pieces.append(occ)
27 | elif (y == 7):
28 | occ = self.populateKingRow(7,pos,"Black")
29 | self.players[1].pieces.append(occ)
30 | else:
31 | occ = None
32 |
33 | #Even rows have black - white pattern
34 | if (x % 2 == 0):
35 | if (y % 2 == 0):
36 | color = "Black"
37 | else: color = "White"
38 | #Odd rows have white - black pattern
39 | else:
40 | if (y % 2 == 0):
41 | color = "White"
42 | else: color = "Black"
43 |
44 | self.squares[number] = (Square(pos, occ, color))
45 |
46 | #Populates given row with classic pieces (non pawns)
47 | def populateKingRow(self, row, pos, color):
48 | if (pos[1] == row):
49 | if (pos[0] == 0 or pos[0] == 7):
50 | return Rook(pos, color)
51 | elif (pos[0] == 1 or pos[0] == 6):
52 | return Knight(pos, color)
53 | elif (pos[0] == 2 or pos[0] == 5):
54 | return Bishop(pos, color)
55 | elif (pos[0] == 3):
56 | return Queen(pos, color)
57 | else:
58 | return King(pos, color)
59 |
60 | def getSquareAtPos(self, pos):
61 | num = pos[0] * 8 + pos[1]
62 |
63 | #If pos is out of bounds then return None
64 | if (num > 63 or num < 0):
65 | return None
66 | return self.squares[num]
67 |
68 | def getPieceAtPos(self, pos):
69 | square = self.getSquareAtPos(pos)
70 | return square.occupied
71 |
72 | def getPlayer(self, color):
73 | if color == "White":
74 | return self.players[0]
75 | return self.players[1]
76 |
77 | class Square:
78 | number = int
79 | position = [int, int]
80 | occupied = None
81 | color = str
82 |
83 | def __init__(self, pos, occ, color):
84 | self.position = pos
85 | self.occupied = occ
86 | self.color = color
87 |
88 | class Piece:
89 | name = str
90 | position = [int, int]
91 | color = str
92 |
93 | #Returns whether int1 and int 2 or both positive or negative
94 | def samePolarity(self, int1, int2):
95 | if int1 > 0:
96 | if int2 > 0:
97 | return True
98 | if int1 < 0:
99 | if int2 < 0:
100 | return True
101 | return False
102 |
103 | #Returns whether moving to this square will put yourself in check
104 | def selfCheck(self, board, square):
105 | player = board.getPlayer(self.color)
106 | opponent = player.getOpponent(board)
107 | #If this piece is players King
108 | if self.name == "King":
109 | pass
110 | else:
111 | #Get the players King
112 | king = None
113 | for piece in player.pieces:
114 | if piece.name == "King":
115 | king = piece
116 | break
117 |
118 | posDif = [self.position[0] - king.position[0],
119 | self.position[1] - king.position[1]]
120 |
121 | #in the same column as King
122 | if self.position[0] == king.position[0]:
123 | if square.position[0] == self.position[0]: #if square is in same column, king is still safe
124 | return False
125 | if posDif[1] > 0: #if piece is above King
126 | increment = 1
127 | else: #piece is below King
128 | increment = -1
129 | newPos = self.position.copy()
130 | newPos[1] += increment
131 | newSquare = board.getSquareAtPos(newPos)
132 | while newSquare != None: #while on a square in bounds
133 | piece = newSquare.occupied
134 | if piece != None: #if it has a piece on it
135 | if piece.color == player.color: #if another of players pieces is blocking King
136 | return False
137 | else:
138 | if (piece.name == "Rook" or piece.name == "Queen"): #if it is an enemy Rook or Queen
139 | return True
140 | newPos[1] += increment
141 | newSquare = board.getSquareAtPos(newPos)
142 | return False
143 |
144 | #in the same row as King
145 | if self.position[1] == king.position[1]:
146 | if square.position[1] == self.position[1]: #if move is in same row, king is still safe
147 | return False
148 | if posDif[0] > 0: #if piece is right of King
149 | increment = 1
150 | else: #piece is left of King
151 | increment = -1
152 | newPos = self.position.copy()
153 | newPos[0] += increment
154 | newSquare = board.getSquareAtPos(newPos)
155 | while newSquare != None: #while on a square in bounds
156 | piece = newSquare.occupied
157 | if piece != None: #if it has a piece on it
158 | if piece.color == player.color: #if another of players pieces is blocking King
159 | return False
160 | else:
161 | if (piece.name == "Rook" or piece.name == "Queen"): #if it is an enemy Rook or Queen
162 | return True
163 | newPos[0] += increment
164 | newSquare = board.getSquareAtPos(newPos)
165 | return False
166 |
167 | #diagonal to King
168 | if abs(posDif[0]) == abs(posDif[1]):
169 | squareDif = [square.position[0] - king.position[0],
170 | square.position[1] - king.position[1]]
171 | #If square in the same diagonal
172 | if self.samePolarity(posDif[0], squareDif[0]) and samePolarity(posDif[1], squareDif[1]):
173 | return False
174 | if posDif[0] > 0: #if piece is right of King
175 | incrementX = 1
176 | else: #piece is left of King
177 | incrementX = -1
178 | if posDif[1] > 0: #if piece is above King
179 | incrementY = 1
180 | else: #piece is below King
181 | incrementY = -1
182 | newPos = self.position.copy()
183 | newPos[0] += incrementX
184 | newPos[1] += incrementY
185 | newSquare = board.getSquareAtPos(newPos)
186 | while newSquare != None: #while on a square in bounds
187 | piece = newSquare.occupied
188 | if piece != None: #if it has a piece on it
189 | if piece.color == player.color: #if another of players pieces is blocking King
190 | return False
191 | else:
192 | if (piece.name == "Bishop" or piece.name == "Queen"): #if it is an enemy Rook or Queen
193 | return True
194 | newPos[0] += incrementX
195 | newPos[1] += incrementY
196 | newSquare = board.getSquareAtPos(newPos)
197 | return False
198 |
199 |
200 |
201 | #Checks that the square reached by pos is a valid square for this piece"""
202 | def isSquareValid(self, board, square):
203 | if square == None:
204 | return False
205 |
206 | if self.selfCheck(board, square):
207 | print("Cannot put yourself in check")
208 | return False
209 |
210 | #Is that square occupied by another of your pieces?
211 | piece = square.occupied
212 | if (piece != None and piece.color == self.color):
213 | return False
214 |
215 | #Pawns cannot attack up
216 | if (piece != None and self.name == "Pawn" and piece.position[0] == self.position[0]):
217 | return False
218 |
219 | #Pawns cannot move diagonally unless capturing
220 | if (piece == None and self.name == "Pawn" and
221 | (square.position[0] == self.position[0] + 1 or square.position[0] == self.position[0] - 1)):
222 | return False
223 |
224 | return True
225 |
226 | """ Checks whether every square in a line determined by change in x and y is valid """
227 | def isLineValid(self, board, changeInX, changeInY, range):
228 | if (range == 0): range = 7
229 | validSquares = []
230 | newPos = self.position.copy()
231 | newPos[0] += changeInX
232 | newPos[1] += changeInY
233 | count = 0
234 | while self.isSquareValid(board, board.getSquareAtPos(newPos)) and count < range:
235 | square = board.getSquareAtPos(newPos)
236 |
237 | #if current square has an enemy on it break
238 | if (square.occupied != None):
239 | validSquares.append(square)
240 | return validSquares
241 | else:
242 | validSquares.append(square)
243 | newPos[0] += changeInX
244 | newPos[1] += changeInY
245 | count += 1
246 | return validSquares
247 |
248 |
249 | #Moves the piece to designated square if possible
250 | # returns True if move was valid, False if not
251 | def move(self, board, square, player):
252 | if (self.color != player.color):
253 | print("Not your piece")
254 | return False
255 | validMoves = self.getValidMoves(board)
256 | if square in validMoves:
257 | #Remove Piece from current square
258 | board.getSquareAtPos(self.position).occupied = None
259 | #If square has an enemy piece on it, capture it
260 | if (square.occupied != None):
261 | player.capturedPieces.append(square.occupied)
262 | #Move Piece to new square
263 | self.position = square.position
264 | #Mark that square is occupied by this piece
265 | square.occupied = self
266 | return True
267 | else:
268 | print("Not a valid move")
269 | return False
270 |
271 | class Pawn(Piece):
272 | def __init__(self, pos, col):
273 | self.position = pos
274 | self.color = col
275 | self.name = "Pawn"
276 |
277 | def getValidMoves(self, board):
278 | validMoves = []
279 | #Up or forward depends on color
280 | if (self.color == "White"):
281 | up = 1
282 | else:
283 | up = -1
284 | #If the pawn has not moved
285 | if ((self.color == "White" and self.position[1] == 1) or
286 | (self.color == "Black" and self.position[1] == 6)):
287 | validMoves.extend(super().isLineValid(board, 0, up, 2)) #Can move up 2
288 | else:
289 | validMoves.extend(super().isLineValid(board, 0, up, 1)) #Up
290 | validMoves.extend(super().isLineValid(board, 1, up, 1)) #Right Diagonal
291 | validMoves.extend(super().isLineValid(board, -1, up, 1)) #Left Diagonal
292 | return validMoves
293 |
294 | class Rook(Piece):
295 | def __init__(self, pos, col):
296 | self.position = pos
297 | self.color = col
298 | self.name = "Rook"
299 |
300 | def getValidMoves(self, board):
301 | validMoves = []
302 | validMoves.extend(super().isLineValid(board, 1, 0, 0)) #Right
303 | validMoves.extend(super().isLineValid(board, -1, 0, 0)) #Left
304 | validMoves.extend(super().isLineValid(board, 0, 1, 0)) #Up
305 | validMoves.extend(super().isLineValid(board, 0, -1, 0)) #Down
306 | return validMoves
307 |
308 | class Knight(Piece):
309 | def __init__(self, pos, col):
310 | self.position = pos
311 | self.color = col
312 | self.name = "Knight"
313 |
314 | def getValidMoves(self, board):
315 | pos = self.position.copy()
316 | xPos = pos[0]
317 | yPos = pos[1]
318 | validMoves = []
319 | possibleMoves = [[xPos + 2, yPos + 1],
320 | [xPos + 2, yPos - 1],
321 | [xPos - 2, yPos + 1],
322 | [xPos - 2, yPos - 1],
323 | [xPos + 1, yPos + 2],
324 | [xPos - 1, yPos + 2],
325 | [xPos + 1, yPos - 2],
326 | [xPos - 1, yPos - 2]]
327 | for move in possibleMoves:
328 | square = board.getSquareAtPos(move)
329 | if (self.isSquareValid(board, square)):
330 | validMoves.append(square)
331 | return validMoves
332 |
333 | class Bishop(Piece):
334 | def __init__(self, pos, col):
335 | self.position = pos
336 | self.color = col
337 | self.name = "Bishop"
338 |
339 | def getValidMoves(self, board):
340 | validMoves = []
341 | validMoves.extend(super().isLineValid(board, 1, 1, 0)) #Right Forward Diag
342 | validMoves.extend(super().isLineValid(board, -1, 1, 0)) #Left Forward Diag
343 | validMoves.extend(super().isLineValid(board, 1, -1, 0)) #Right Back Diag
344 | validMoves.extend(super().isLineValid(board, -1, -1, 0)) #Left Back Diag
345 | return validMoves
346 |
347 | class Queen(Piece):
348 | def __init__(self, pos, col):
349 | self.position = pos
350 | self.color = col
351 | self.name = "Queen"
352 |
353 | def getValidMoves(self, board):
354 | validMoves = []
355 | validMoves.extend(super().isLineValid(board, 1, 0, 0)) #Right
356 | validMoves.extend(super().isLineValid(board, -1, 0, 0)) #Left
357 | validMoves.extend(super().isLineValid(board, 0, 1, 0)) #Up
358 | validMoves.extend(super().isLineValid(board, 0, -1, 0)) #Down
359 | validMoves.extend(super().isLineValid(board, 1, 1, 0)) #Right Forward Diag
360 | validMoves.extend(super().isLineValid(board, -1, 1, 0)) #Left Forward Diag
361 | validMoves.extend(super().isLineValid(board, 1, -1, 0)) #Right Back Diag
362 | validMoves.extend(super().isLineValid(board, -1, -1, 0)) #Left Back Diag
363 | return validMoves
364 |
365 | class King(Piece):
366 | def __init__(self, pos, col):
367 | self.position = pos
368 | self.color = col
369 | self.name = "King"
370 |
371 | def getValidMoves(self, board):
372 | validMoves = []
373 | validMoves.extend(super().isLineValid(board, 1, 0, 1)) #Right
374 | validMoves.extend(super().isLineValid(board, -1, 0, 1)) #Left
375 | validMoves.extend(super().isLineValid(board, 0, 1, 1)) #Up
376 | validMoves.extend(super().isLineValid(board, 0, -1, 1)) #Down
377 | validMoves.extend(super().isLineValid(board, 1, 1, 1)) #Right Forward Diag
378 | validMoves.extend(super().isLineValid(board, -1, 1, 1)) #Left Forward Diag
379 | validMoves.extend(super().isLineValid(board, 1, -1, 1)) #Right Back Diag
380 | validMoves.extend(super().isLineValid(board, -1, -1, 1)) #Left Back Diag
381 | return validMoves
382 |
383 | class Player:
384 | color = str
385 | pieces = []
386 | capturedPieces = []
387 |
388 | def __init__(self, color):
389 | self.color = color
390 | self.pieces = []
391 | self.capturedPieces = []
392 |
393 | def getOpponent(self, board):
394 | opponent = (board.players[1] if board.players[0] == self else board.players[0])
395 | return opponent
396 |
397 |
398 | def drawBoard(board):
399 | print(" ")
400 | print(" ")
401 | print("Black Captured: ", end = "")
402 | for captured in board.players[1].capturedPieces:
403 | print(captured.name[:4], end = " ")
404 | print(" ")
405 | print(" ")
406 | for y in range(9):
407 | #print guide numbers before each row
408 | if (y < 8):
409 | print(8-y, end = " ")
410 | else:
411 | print(" ", end = " ")
412 | for x in range(8):
413 | #If on the last row print guide letters
414 | if (y==8):
415 | print (" " +numToLetter(x) + " ", end = "")
416 | else:
417 | invrow = 7-y
418 | square = board.getSquareAtPos([x, invrow])
419 | if (square.occupied == None):
420 | print("| " + square.color[0] + ' |', end = "")
421 | else:
422 | print("|" + square.occupied.name[0:4] + ' |', end = "")
423 | if (x == 7):
424 | print(" ")
425 | print(" ")
426 | print(" ")
427 | print("White captured: ", end = "")
428 | for captured in board.players[0].capturedPieces:
429 | print(captured.name[:4], end = " ")
430 | print(" ")
431 | print(" ")
432 |
433 | #Converts number of row to a letter
434 | def numToLetter(num):
435 | if (num == 0):
436 | num = "A"
437 | elif (num == 1):
438 | num = "B"
439 | elif (num == 2):
440 | num = "C"
441 | elif (num == 3):
442 | num = "D"
443 | elif (num == 4):
444 | num = "E"
445 | elif (num == 5):
446 | num = "F"
447 | elif (num == 6):
448 | num = "G"
449 | elif (num == 7):
450 | num = "H"
451 | else:
452 | print("Number: " + num + " is not valid")
453 | return
454 | return num
455 |
456 | #Converts letter of a row to a number
457 | def letterToNum(letter):
458 | if (letter == "A"):
459 | letter = 0
460 | elif (letter == "B"):
461 | letter = 1
462 | elif (letter == "C"):
463 | letter = 2
464 | elif (letter == "D"):
465 | letter = 3
466 | elif (letter == "E"):
467 | letter = 4
468 | elif (letter == "F"):
469 | letter = 5
470 | elif (letter == "G"):
471 | letter = 6
472 | elif (letter == "H"):
473 | letter = 7
474 | else:
475 | print("Letter: " + letter + " is not valid")
476 | return
477 | return letter
478 |
479 |
480 | #Converts traditional chess positions (i.e A8) to positions
481 | def alphaNumMoveToPos(text):
482 | letter = text[0].capitalize()
483 | number = text[1]
484 | #convert letters to x
485 | letter = letterToNum(letter)
486 | #convert numbers from 1-8 to 0-7
487 | if (number.isnumeric()):
488 | number = int(number) - 1
489 | if (number > 7 or number < 0):
490 | print("Number: " + number + " is not valid")
491 | return
492 | else:
493 | print("Number: " + number + " is not valid")
494 | return
495 | return [letter, number]
496 |
497 | #Parses the text into a move and moves the pieces
498 | #Returns whether the move was valid
499 | def parseMove(text, board, player):
500 | try:
501 | trimText = text.strip()
502 | piecePos = alphaNumMoveToPos(trimText[0:2])
503 | targetSquare = alphaNumMoveToPos(trimText[3:])
504 | except:
505 | print("Move not Valid")
506 | return False
507 |
508 | if (piecePos == None or targetSquare == None):
509 | return False
510 | piece = board.getPieceAtPos(piecePos)
511 | if piece == None:
512 | return False
513 | square = board.getSquareAtPos(targetSquare)
514 | validMove = piece.move(board, square, player)
515 | return validMove
516 |
517 |
518 |
519 | def startGame():
520 | #Create the board
521 | board = Board()
522 |
523 | #Create Players and assign them random color
524 | colors = ["White", "Black"]
525 | playerColor = random.randint(0, 1)
526 | player1 = Player(colors[playerColor])
527 | player2 = Player(colors[1-playerColor])
528 |
529 | #Probably a cleaner way to pass players into move function, Fine for now
530 | if (player1.color == "White"):
531 | whitePlayer = player1
532 | blackPlayer = player2
533 | else:
534 | whitePlayer = player2
535 | blackPlayer = player1
536 |
537 | board.players = [whitePlayer, blackPlayer]
538 | board.populateSquares()
539 | drawBoard(board)
540 |
541 | gameOver = False
542 | whiteTurn = True
543 | while not gameOver:
544 | if (whiteTurn):
545 | move = input("White's move:")
546 | if (move == "end"):
547 | gameOver = True
548 | return
549 | validMove = parseMove(move, board, whitePlayer)
550 | else:
551 | move = input("Black's move:")
552 | if (move == "end"):
553 | gameOver = True
554 | return
555 | validMove = parseMove(move, board, blackPlayer)
556 | if (validMove):
557 | whiteTurn = not whiteTurn
558 | drawBoard(board)
559 |
560 | startGame()
--------------------------------------------------------------------------------
/Chess Game/README.md:
--------------------------------------------------------------------------------
1 |
2 |
--------------------------------------------------------------------------------
/Colored Text/Colorama.png:
--------------------------------------------------------------------------------
https://raw.githubusercontent.com/kishanrajput23/Personal-Python-Projects/01428ea3a57d226cb45ac4ffb62e5b632a2267fe/Colored Text/Colorama.png
--------------------------------------------------------------------------------
/Colored Text/Colored_Text.py:
--------------------------------------------------------------------------------
1 | import colorama
2 | from colorama import Fore,Back,Style
3 | colorama.init()
4 | print(Fore.GREEN+"HELLO FRIENDS WELCOME TO OUR CODING BUDDIES CHANNEL")
5 | print(Back.BLUE+"Hi Friends my name Kritika")
6 | print(Fore.RED+Back.GREEN+"This Is Our Coding Buddies Channel")
7 | print(Style.BRIGHT+"Do Like Share And Subscribe")
8 |
--------------------------------------------------------------------------------
/Colored Text/README.md:
--------------------------------------------------------------------------------
1 | # Print Colored Text with Python🔥
2 |
3 | In Python the Colorama module allows us to easily create colored terminal text and I will take you through a tutorial on how to print Colored Text with Python by using the Colorama module in Python.
4 |
5 | ## 📌What is Colorama in Python?
6 | Using the Colorama module we can print colored text with Python. We can use it and call its built-in variables which are aliases for the desired ANSI codes. This makes our code more readable and works better with Windows command prompts after calling colorama.init() at the start of your script.
7 |
8 | The Colorama module offers three main formatting options: Fore, Back, and Style. These allow us to change the foreground or background text color and style. The colors available for the foreground and background are black, red, green, yellow, blue, magenta, cyan, and white.
9 |
10 | ## 📌Print Colored Text with Python
11 | Traditionally, printing full-colour text to the terminal is accomplished by a series of escape characters on Linux or OS X systems. However, this will not work for Windows operating systems. Now let’s see how to print coloured text with Python using the Colorama module:
12 |
13 | **Code**
14 |
15 | import colorama
16 | from colorama import Fore,Back,Style
17 | colorama.init()
18 | print(Fore.GREEN+"HELLO FRIENDS WELCOME TO OUR CODING BUDDIES CHANNEL")
19 | print(Back.BLUE+"Hi Friends my name Kishan")
20 | print(Fore.RED+Back.GREEN+"This Is Our Coding Buddies Channel")
21 | print(Style.BRIGHT+"Do Like Share And Subscribe")
22 | **Output**
23 |
24 |
25 |
26 | It is also possible to change other text properties using ANSI escape characters, for example, if we wanted to make the text darker or lighter. You can try ut out.
27 |
28 |
--------------------------------------------------------------------------------
/Creating Table/Create_Table.py:
--------------------------------------------------------------------------------
1 | from prettytable import PrettyTable
2 | my_Table=PrettyTable(["S.no","Company_name","E.Name","Experience"])
3 | #Adding the row in table..
4 | my_Table.add_row(["1","TCS","Suhana","2 years"])
5 | my_Table.add_row(["2","TCS","Pragati","3 years"])
6 | my_Table.add_row(["3","TCS","Mohit","4 years"])
7 | my_Table.add_row(["4","TCS","Rohit","5 years"])
8 | #deleting the row from table...
9 | my_Table.del_row(0)
10 | #Clear the all rows....
11 | my_Table.clear_rows()
12 | print(my_Table)
13 |
--------------------------------------------------------------------------------
/Creating Table/README.md:
--------------------------------------------------------------------------------
1 |
2 |
--------------------------------------------------------------------------------
/Data Visualization of PUBG Dataset/README.md:
--------------------------------------------------------------------------------
1 |
2 |
--------------------------------------------------------------------------------
/Dice Rolling Simulator/Data flair dice.py:
--------------------------------------------------------------------------------
1 | import tkinter
2 | from PIL import Image, ImageTk
3 | import random
4 |
5 | # toplevel widget which represents the main window of an application
6 | root = tkinter.Tk()
7 | root.geometry('400x400')
8 | root.title('Data Flair Roll the Dice')
9 |
10 | # Adding label into the frame
11 | l0 = tkinter.Label(root, text="")
12 | l0.pack()
13 |
14 | # adding label with different font and formatting
15 | l1 = tkinter.Label(root, text="Hello from Data Flair!", fg = "light green",
16 | bg = "dark green",
17 | font = "Helvetica 16 bold italic")
18 | l1.pack()
19 |
20 | # images
21 | dice = ['die1.png', 'die2.png', 'die3.png', 'die4.png', 'die5.png', 'die6.png']
22 | # simulating the dice with random numbers between 0 to 6 and generating image
23 | image1 = ImageTk.PhotoImage(Image.open(random.choice(dice)))
24 |
25 | # construct a label widget for image
26 | label1 = tkinter.Label(root, image=image1)
27 | label1.image = image1
28 |
29 | # packing a widget in the parent widget
30 | label1.pack( expand=True)
31 |
32 | # function activated by button
33 | def rolling_dice():
34 | image1 = ImageTk.PhotoImage(Image.open(random.choice(dice)))
35 | # update image
36 | label1.configure(image=image1)
37 | # keep a reference
38 | label1.image = image1
39 |
40 |
41 | # adding button, and command will use rolling_dice function
42 | button = tkinter.Button(root, text='Roll the Dice', fg='blue', command=rolling_dice)
43 |
44 | # pack a widget in the parent widget
45 | button.pack( expand=True)
46 |
47 | # call the mainloop of Tk
48 | # keeps window open
49 | root.mainloop()
--------------------------------------------------------------------------------
/Dice Rolling Simulator/README.md:
--------------------------------------------------------------------------------
1 |
2 |
--------------------------------------------------------------------------------
/Dice Rolling Simulator/die1.PNG:
--------------------------------------------------------------------------------
https://raw.githubusercontent.com/kishanrajput23/Personal-Python-Projects/01428ea3a57d226cb45ac4ffb62e5b632a2267fe/Dice Rolling Simulator/die1.PNG
--------------------------------------------------------------------------------
/Dice Rolling Simulator/die2.PNG:
--------------------------------------------------------------------------------
https://raw.githubusercontent.com/kishanrajput23/Personal-Python-Projects/01428ea3a57d226cb45ac4ffb62e5b632a2267fe/Dice Rolling Simulator/die2.PNG
--------------------------------------------------------------------------------
/Dice Rolling Simulator/die3.PNG:
--------------------------------------------------------------------------------
https://raw.githubusercontent.com/kishanrajput23/Personal-Python-Projects/01428ea3a57d226cb45ac4ffb62e5b632a2267fe/Dice Rolling Simulator/die3.PNG
--------------------------------------------------------------------------------
/Dice Rolling Simulator/die4.PNG:
--------------------------------------------------------------------------------
https://raw.githubusercontent.com/kishanrajput23/Personal-Python-Projects/01428ea3a57d226cb45ac4ffb62e5b632a2267fe/Dice Rolling Simulator/die4.PNG
--------------------------------------------------------------------------------
/Dice Rolling Simulator/die5.PNG:
--------------------------------------------------------------------------------
https://raw.githubusercontent.com/kishanrajput23/Personal-Python-Projects/01428ea3a57d226cb45ac4ffb62e5b632a2267fe/Dice Rolling Simulator/die5.PNG
--------------------------------------------------------------------------------
/Dice Rolling Simulator/die6.PNG:
--------------------------------------------------------------------------------
https://raw.githubusercontent.com/kishanrajput23/Personal-Python-Projects/01428ea3a57d226cb45ac4ffb62e5b632a2267fe/Dice Rolling Simulator/die6.PNG
--------------------------------------------------------------------------------
/Dice Simulator/Dice_Simulator.py:
--------------------------------------------------------------------------------
1 | import random
2 |
3 | user = input("Do you want to roll the dice ")
4 |
5 | while user == "y":
6 |
7 | k = random.randint(1,6)
8 |
9 | if k == 1:
10 | print(" --------- ")
11 | print("| |")
12 | print("| 0 |")
13 | print("| |")
14 | print(" --------- ")
15 |
16 | if k == 2:
17 | print(" --------- ")
18 | print("| 0 |")
19 | print("| |")
20 | print("| 0 |")
21 | print(" --------- ")
22 |
23 | if k == 3:
24 | print(" --------- ")
25 | print("| 0 |")
26 | print("| 0 |")
27 | print("| 0 |")
28 | print(" --------- ")
29 |
30 | if k == 4:
31 | print(" --------- ")
32 | print("| 0 0 |")
33 | print("| |")
34 | print("| 0 0 |")
35 | print(" --------- ")
36 |
37 | if k == 5:
38 | print(" --------- ")
39 | print("| 0 0 |")
40 | print("| 0 |")
41 | print("| 0 0 |")
42 | print(" --------- ")
43 |
44 | if k == 6:
45 | print(" ---------- ")
46 | print("| 0 0 |")
47 | print("| 0 0 |")
48 | print("| 0 0 |")
49 | print(" ---------- ")
50 |
51 | user = input("Do you want to roll again the dice ")
52 |
--------------------------------------------------------------------------------
/Dice Simulator/README.md:
--------------------------------------------------------------------------------
1 |
2 |
--------------------------------------------------------------------------------
/Downloading Image/Download_Image.py:
--------------------------------------------------------------------------------
1 | import requests
2 | url =input("Enter the image of url ")
3 | post =requests.get(url)
4 |
5 | #file handling....
6 | open('ramshyam.jpg','wb').write(post.content)
7 | print("FILE DOWNLOAD SUCCESSFULLY.....")
8 |
--------------------------------------------------------------------------------
/Downloading Image/README.md:
--------------------------------------------------------------------------------
1 |
2 |
--------------------------------------------------------------------------------
/Email Slicer/Email_Slicer.py:
--------------------------------------------------------------------------------
1 | """
2 | coding_buddies2021@gmail.com
3 |
4 | user name = coding_buddies2021
5 |
6 | domain name = gmail.com
7 | """
8 |
9 | #taking email id from the user
10 | emailId = input("Enter your email address ").strip()
11 |
12 | #getting username from the email id
13 | user_name = emailId[:emailId.index("@")]
14 |
15 | #getting domain name from the email id
16 | domain_name = emailId[emailId.index("@")+1:]
17 |
18 | #storing username and domain name in final output variable
19 | final_output = f"Your username is {user_name} and your domain name is {domain_name}"
20 |
21 | #printing final output
22 | print(final_output)
--------------------------------------------------------------------------------
/Email Slicer/README.md:
--------------------------------------------------------------------------------
1 | # Email Slicer🔥
2 |
3 | - An Email slicer is a very useful program for separating the username and domain name of an email address. I will be explaining you how to write a program to create an Email Slicer with Python.
4 |
5 | ## 📌Email Slicer with Python
6 | - To create an email slicer with Python, our task is to write a program that can retrieve the username and the domain name of the email. For example, let's take an email like "codingbuddies2021@gmail.com".
7 |
8 | Here, **Username :** codingbuddies2021\
9 | **Domain name :** gmail.com
10 |
11 | - So we need to divide the email into two strings using ‘@’ as the separator. Let’s see how to separate the email and domain name with Python:
12 |
13 | **Code:**
14 |
15 | #taking email id from the user
16 | emailId = input("Enter your email address ").strip()
17 |
18 | #getting username from the email id
19 | user_name = emailId[:emailId.index("@")]
20 |
21 | #getting domain name from the email id
22 | domain_name = emailId[emailId.index("@")+1:]
23 |
24 | #storing username and domain name in final output variable
25 | final_output = f"Your username is {user_name} and your domain name is {domain_name}"
26 |
27 | #printing final output
28 | print(final_output)
29 |
30 | **Output:**
31 |
32 | Enter your email address codingbuddies2021@gmail.com
33 |
34 | Your username is codingbuddies2021 and your domain name is gmail.com
35 |
36 | - The code above is very simple and easy to understand. We take user input and use the strip function at the same time to remove white space if any. Then we are finding the index of ‘@’ symbol of the user input. Then we store the index into a variable known as domain_name to split the email into two parts; the user name and the domain.
37 |
38 | - Finally, we are just formatting to print the output. The above code can be enhanced with more ideas depending on your needs. As a beginner, you must try these types of programs to improve your coding skills. In the long run, it will also help you build your algorithms and increase your ability to think logically.
39 |
--------------------------------------------------------------------------------
/Face Mask Detection/Face Mask Detection using openCV.py:
--------------------------------------------------------------------------------
1 | import cv2
2 | import os
3 | from tensorflow.keras.preprocessing.image import img_to_array
4 | from tensorflow.keras.models import load_model
5 | from tensorflow.keras.applications.mobilenet_v2 import preprocess_input
6 | import numpy as np
7 |
8 | cascPath = os.path.dirname(
9 | cv2.__file__) + "/data/haarcascade_frontalface_alt2.xml"
10 | faceCascade = cv2.CascadeClassifier(cascPath)
11 | model = load_model("mask_recog1.h5")
12 |
13 | video_capture = cv2.VideoCapture(0)
14 | while True:
15 | # Capture frame-by-frame
16 | ret, frame = video_capture.read()
17 | gray = cv2.cvtColor(frame, cv2.COLOR_BGR2GRAY)
18 | faces = faceCascade.detectMultiScale(gray,
19 | scaleFactor=1.1,
20 | minNeighbors=5,
21 | minSize=(60, 60),
22 | flags=cv2.CASCADE_SCALE_IMAGE)
23 | faces_list=[]
24 | preds=[]
25 | for (x, y, w, h) in faces:
26 | face_frame = frame[y:y+h,x:x+w]
27 | face_frame = cv2.cvtColor(face_frame, cv2.COLOR_BGR2RGB)
28 | face_frame = cv2.resize(face_frame, (224, 224))
29 | face_frame = img_to_array(face_frame)
30 | face_frame = np.expand_dims(face_frame, axis=0)
31 | face_frame = preprocess_input(face_frame)
32 | faces_list.append(face_frame)
33 | if len(faces_list)>0:
34 | preds = model.predict(faces_list)
35 | for pred in preds:
36 | (mask, withoutMask) = pred
37 | label = "Mask" if mask > withoutMask else "No Mask"
38 | color = (0, 255, 0) if label == "Mask" else (0, 0, 255)
39 | label = "{}: {:.2f}%".format(label, max(mask, withoutMask) * 100)
40 | cv2.putText(frame, label, (x, y- 10),
41 | cv2.FONT_HERSHEY_SIMPLEX, 0.45, color, 2)
42 |
43 | cv2.rectangle(frame, (x, y), (x + w, y + h),color, 2)
44 | # Display the resulting frame
45 | cv2.imshow('Video', frame)
46 | if cv2.waitKey(1) & 0xFF == ord('q'):
47 | break
48 | video_capture.release()
49 | cv2.destroyAllWindows()
--------------------------------------------------------------------------------
/Face Mask Detection/README.md:
--------------------------------------------------------------------------------
1 |
2 |
--------------------------------------------------------------------------------
/Grammar Correction/README.md:
--------------------------------------------------------------------------------
1 | # Grammar Correction Using Python🔥
2 |
3 | ## 📌How to use Python for Grammar Correction?
4 |
5 | - There are so many applications that help you to correct your grammatical mistakes while writing. Grammarly is one of the best examples of such applications. It can correct every error while writing and helps you to complete your articles, emails, or any piece of writing without any errors.
6 |
7 | - So can we use Python for the task of grammar correction? Yes, we can! The Gingerit library in Python is an open-source library that contains all the features that Grammarly provides. You can easily install it by using the pip command; pip install gingerit. In the section below, I will take you through how to use the gingerit library for the task of Grammar correction using Python.
8 |
9 |
10 | ## 📌Grammar Correction With Python
11 |
12 | - By using the gingerit library in Python you can eliminate all the grammatical mistakes, fix your spellings and punctuation errors and at the end, it helps you to enhance your text. Now let’s see how to use this library for the task of grammar correction using Python:
13 |
14 | ### Code:
15 |
16 | from gingerit.gingerit import GingerIt
17 |
18 | text = input("Entr your text ")
19 |
20 | corrected_text = GingerIt().parse(text)
21 |
22 | print(corrected_text['result'])
23 |
24 | ### Output:
25 |
26 | Enter your text: My name are Kishan.
27 | My name is Kishan.
28 |
29 | - In the above code, I am first importing the GingerIt function from the gingerit library, then I am storing a sentence as user input in the variable ‘text’. Then I am initializing the GingerIt() function on the input text. This function returns a dictionary of the text and the result, so to print the final output, I have selected ‘result’ to show the corrected text.
30 |
31 | ## 📌Summary
32 |
33 | - So this is how we can use Python to correct grammatical mistakes from any piece of text. The Gingerit library in Python can be used to enhance your writing by correcting all the mistakes in a few lines of code.
34 |
--------------------------------------------------------------------------------
/Grammar Correction/main.py:
--------------------------------------------------------------------------------
1 | from gingerit.gingerit import GingerIt
2 |
3 | text = input("Enter your text ")
4 |
5 | corrected_text = GingerIt().parse(text)
6 |
7 | print(corrected_text["result"])
8 |
9 |
--------------------------------------------------------------------------------
/Infinity/README.md:
--------------------------------------------------------------------------------
1 | # INFINITY
2 |
3 | A turtle scripts that creates the infitity symbol.
4 |
5 | 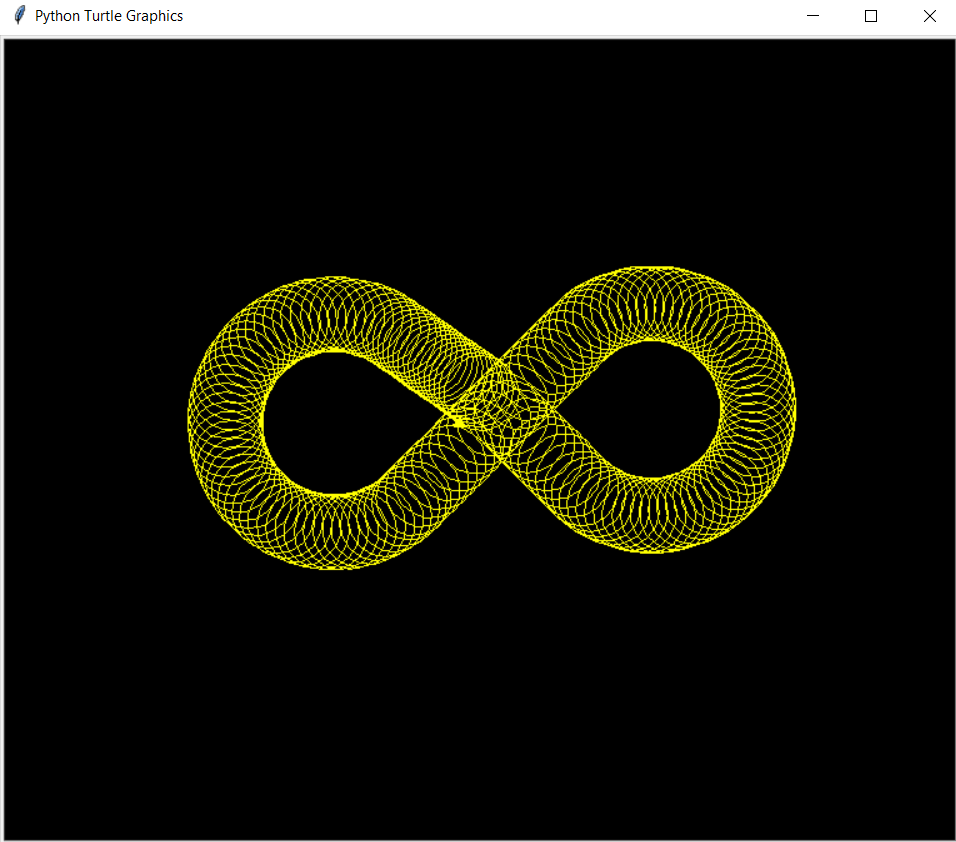
6 |
--------------------------------------------------------------------------------
/Infinity/infinity.py:
--------------------------------------------------------------------------------
1 | from turtle import *
2 |
3 | def setup():
4 | bgcolor("black")
5 | color("red")
6 | speed(11)
7 | right(45)
8 |
9 | if __name__ == '__main__':
10 | setup()
11 |
12 | for i in range(150):
13 | circle(30)
14 |
15 | if 7 < i < 62:
16 | left(5)
17 | if 80 < i < 133:
18 | right(5)
19 | if i < 80:
20 | forward(10)
21 | else:
22 | forward(5)
23 | turtle.done()
24 |
--------------------------------------------------------------------------------
/Iron Man Helmet/README.md:
--------------------------------------------------------------------------------
1 | # Iron Man Helmet
2 |
3 | 
4 |
--------------------------------------------------------------------------------
/Iron Man Helmet/helmet.py:
--------------------------------------------------------------------------------
1 | import turtle
2 |
3 | # Top Part
4 | piece1 = [[(-40, 120), (-70, 260), (-130, 230), (-170, 200), (-170, 100), (-160, 40), (-170, 10), (-150, -10), (-140, 10), (-40, -20), (0, -20)],[(0, -20), (40, -20), (140, 10), (150, -10), (170, 10), (160, 40), (170, 100), (170, 200), (130, 230), (70, 260), (40, 120), (0, 120)]]
5 |
6 | # Middle Part
7 | piece2 = [[(-40, -30), (-50, -40), (-100, -46), (-130, -40), (-176, 0), (-186, -30), (-186, -40), (-120, -170), (-110, -210), (-80, -230), (-64, -210), (0, -210)],[(0, -210), (64, -210), (80, -230), (110, -210), (120, -170), (186, -40), (186, -30), (176, 0), (130, -40), (100, -46), (50, -40), (40, -30), (0, -30)]]
8 |
9 | #Bottom Part
10 | piece3 = [[(-60, -220), (-80, -240), (-110, -220), (-120, -250),(-90, -280), (-60, -260), (-30, -260), (-20, -250), (0, -250)],[(0, -250), (20, -250), (30, -260), (60, -260), (90, -280), (120, -250),(110, -220), (80, -240), (60, -220), (0, -220)]]
11 |
12 | turtle.hideturtle()
13 | turtle.bgcolor('#ba161e') #Dark Red
14 | turtle.setup(500,600)
15 | turtle.title("I AM AN IRONMAN")
16 |
17 | piece1Goto=(0,120)
18 | piece2Goto=(0,-30)
19 | piece3Goto=(0,-220)
20 |
21 | turtle.speed(2)
22 |
23 | def draw_piece(piece,pieceGoto):
24 | turtle.penup()
25 | turtle.goto(pieceGoto)
26 | turtle.pendown()
27 | turtle.color('#fab104') #Light Yellow
28 | turtle.begin_fill()
29 | for i in range(len(piece[0])):
30 | x,y=piece[0][i]
31 | turtle.goto(x,y)
32 |
33 | for i in range(len(piece[1])):
34 | x,y=piece[1][i]
35 | turtle.goto(x,y)
36 | turtle.end_fill()
37 |
38 | draw_piece(piece1,piece1Goto)
39 | draw_piece(piece2,piece2Goto)
40 | draw_piece(piece3,piece3Goto)
41 |
42 | turtle.hideturtle()
43 | turtle.done()
44 |
--------------------------------------------------------------------------------
/Language Translator/README.md:
--------------------------------------------------------------------------------
1 |
2 |
--------------------------------------------------------------------------------
/Language Translator/python-language-translator.py:
--------------------------------------------------------------------------------
1 | from tkinter import *
2 | from tkinter import ttk
3 | from googletrans import Translator , LANGUAGES
4 |
5 | root = Tk()
6 | root.geometry('1080x400')
7 | root.resizable(0,0)
8 | root.title("Project Gurukul--Language Translator")
9 | root.config(bg = 'ghost white')
10 |
11 | #heading
12 | Label(root, text = "LANGUAGE TRANSLATOR", font = "arial 20 bold", bg='white smoke').pack()
13 | Label(root,text ="Project Gurukul", font = 'arial 20 bold', bg ='white smoke' , width = '20').pack(side = 'bottom')
14 |
15 |
16 |
17 | #INPUT AND OUTPUT TEXT WIDGET
18 | Label(root,text ="Enter Text", font = 'arial 13 bold', bg ='white smoke').place(x=200,y=60)
19 | Input_text = Text(root,font = 'arial 10', height = 11, wrap = WORD, padx=5, pady=5, width = 60)
20 | Input_text.place(x=30,y = 100)
21 |
22 |
23 | Label(root,text ="Output", font = 'arial 13 bold', bg ='white smoke').place(x=780,y=60)
24 | Output_text = Text(root,font = 'arial 10', height = 11, wrap = WORD, padx=5, pady= 5, width =60)
25 | Output_text.place(x = 600 , y = 100)
26 |
27 |
28 |
29 | ##################
30 | language = list(LANGUAGES.values())
31 |
32 | src_lang = ttk.Combobox(root, values= language, width =22)
33 | src_lang.place(x=20,y=60)
34 | src_lang.set('choose input language')
35 |
36 | dest_lang = ttk.Combobox(root, values= language, width =22)
37 | dest_lang.place(x=890,y=60)
38 | dest_lang.set('choose output language')
39 | ######################################## Define function #######
40 |
41 | def Translate():
42 | translator = Translator()
43 | translated=translator.translate(text= Input_text.get(1.0, END) , src = src_lang.get(), dest = dest_lang.get())
44 | Output_text.delete(1.0, END)
45 | Output_text.insert(END, translated.text)
46 |
47 |
48 |
49 |
50 | ########## Translate Button ########
51 | trans_btn = Button(root, text = 'Translate',font = 'arial 12 bold',pady = 5,command = Translate , bg = 'royal blue1', activebackground = 'sky blue')
52 | trans_btn.place(x = 490, y = 180)
53 |
54 |
55 | root.mainloop()
56 |
57 |
--------------------------------------------------------------------------------
/Password Generator/Password Generator.py:
--------------------------------------------------------------------------------
1 | import random
2 | print('Welcome to our Password Generator')
3 | print('=================================')
4 |
5 | chars ='abcdefghijklmnopqrstuvwxyzABCDEFGHIJKLMNOPQRSTUVWXYZ!@#$%^&*?0123456789'
6 |
7 | number =input('Amount of Password generate: ')
8 | number =int(number)
9 |
10 | length =input('Enter the length of Password Generate: ')
11 | length =int(length)
12 |
13 | print('\nhere is your Password')
14 | for pwd in range(number):
15 | Passwords =''
16 | for c in range(length):
17 | Passwords += random.choice(chars)
18 | print(Passwords)
19 |
20 |
21 |
--------------------------------------------------------------------------------
/Password Generator/README.md:
--------------------------------------------------------------------------------
1 | # Password Generator🔥
2 |
3 | - To create a password with Python, we need to create a program that takes the length of the password and generates a random password of the same length apart from this our program also generates as many passwords as we want with same length.
4 |
5 | ## 📌Python Program to Generate Password
6 |
7 | - To write a Python program to create a password, declare a string of numbers + uppercase + lowercase + special characters. Take a random sample of the string of a length given by the user
8 |
9 | **Code:**
10 |
11 | import random
12 | print('Welcome to our Password Generator')
13 | print('=================================')
14 |
15 | chars ='abcdefghijklmnopqrstuvwxyzABCDEFGHIJKLMNOPQRSTUVWXYZ!@#$%^&*?0123456789'
16 |
17 | number =input('Amount of Password generate: ')
18 | number =int(number)
19 |
20 | length =input('Enter the length of Password Generate: ')
21 | length =int(length)
22 |
23 | print('\nhere is your Password')
24 | for pwd in range(number):
25 | Passwords =''
26 | for c in range(length):
27 | Passwords += random.choice(chars)
28 | print(Passwords)
29 |
30 | **Output:**
31 |
32 | Welcome to our Password Generator
33 | =================================
34 | Amount of Password generate: 5
35 | Enter the length of Password Generate: 8
36 |
37 | here is your Password
38 | ag#ZmCmM
39 | 0Kf?z*nl
40 | *&U31t6W
41 | 0fyIC&#b
42 | JFkDnOU^
43 |
44 | - In the above code, I first imported the random module in Python, then I asked for user input for the amount of the password he/she want. After that I asked for user input for the length of the password. Then I use a for loop here which should run as many times as many times we want amount of password generated.
45 |
46 | - Then in the for loop I created a variable named as "Passwords" and define it with blank string. Then again I'm using a for loop here which should run as many times as length of password we want. After that I stored the letters, numbers and special characters that I want to be considered while generating a password which will finally generate a random password and prints it.
47 |
48 | ## 📌Summary
49 | - There are a few areas where the above code could be improved upon, but at a basic level, it meets many secure password generation requirements by today’s standards. As a newbie to Python or any other language, you should keep trying these types of programs as they help you explore more functions and in the long run will help you design your algorithms.
50 |
--------------------------------------------------------------------------------
/QR Code Generator/QR-Code_Generator.py:
--------------------------------------------------------------------------------
1 | import qrcode
2 | url='Coding Buddies'
3 | code_image =qrcode.make(url)
4 | code_image.save('Enter your Location')
5 |
--------------------------------------------------------------------------------
/QR Code Generator/README.md:
--------------------------------------------------------------------------------
1 | # QR Code Generator Using Python🔥
2 |
3 | QR is short for Quick Response, and they are named so because they can be read quickly by a cell phone. They are used to take information from transitory media and put it on your cell phone.
4 |
5 | ## 📌What is a QR code?
6 |
7 | - QR codes are used to encode and decode the data into a machine-readable form. The use of camera phones to read two-dimensional barcodes for various purposes is currently a popular topic in both types of research and practical applications.
8 |
9 | - It contains a grid of black squares on a white background, which can be read by any imaging device such as a camera, and processed to extract the required data from the patterns that are present in the horizontal components of the image.
10 |
11 | ## 📌QR Codes with Python
12 |
13 | - In this section, I will take you through a tutorial on how to generate QR codes with Python. To generate QR Codes with Python you need to install only one Python library for this task:
14 |
15 | pip install pyqrcode
16 |
17 | Now let’s see how to create a QR Code with Python programming language:
18 |
19 | **Code**
20 |
21 | import qrcode
22 |
23 | url='Coding Buddies' # String which represent the QR code
24 |
25 | code_image =qrcode.make(url) # Generate QR code
26 |
27 | code_image.save('Enter your Location') # Create and save the png file at given location
28 |
29 |
30 | **Generated QR-Code**
31 |
32 |
33 |
34 | Now we finally built it.👍
35 |
--------------------------------------------------------------------------------
/QR Code Generator/youtube.svg:
--------------------------------------------------------------------------------
1 |
2 |
3 |
--------------------------------------------------------------------------------
/README.md:
--------------------------------------------------------------------------------
1 | # Personal Python Projects🔥
2 |
3 |
--------------------------------------------------------------------------------
/Random Number Guessing Game/README.md:
--------------------------------------------------------------------------------
1 |
2 |
--------------------------------------------------------------------------------
/Random Number Guessing Game/random_no_guessing_game.py:
--------------------------------------------------------------------------------
1 | import random
2 |
3 | num = random.randint(1, 100)
4 |
5 | user_input = 0
6 |
7 | count = 0
8 |
9 | while user_input != num:
10 | user_input = int(input("Enter your guess "))
11 |
12 | if user_input < num:
13 | print("Your number is less")
14 | print("Try Again")
15 |
16 | elif user_input > num:
17 | print("Your number is much")
18 | print("Try Again")
19 |
20 | else:
21 | print("Congratulations you guessed the right number")
22 |
23 | count += 1
24 |
25 | print("Kudos to you!!")
26 | print("You took", str(count), "trials for guessing the correct number")
--------------------------------------------------------------------------------
/Random Pattern Generator/Box Pattern.png:
--------------------------------------------------------------------------------
https://raw.githubusercontent.com/kishanrajput23/Personal-Python-Projects/01428ea3a57d226cb45ac4ffb62e5b632a2267fe/Random Pattern Generator/Box Pattern.png
--------------------------------------------------------------------------------
/Random Pattern Generator/Box Pattern.py:
--------------------------------------------------------------------------------
1 | import turtle
2 | from random import randint
3 | turtle.speed(0)
4 | turtle.bgcolor('black')
5 | x=1
6 | while x < 300:
7 | r = randint(0,255)
8 | g = randint(0,255)
9 | b = randint(0,255)
10 |
11 | turtle.colormode(255)
12 | turtle.pencolor(b,g,r)
13 | turtle.fd(50 + x)
14 | turtle.rt(1000)
15 | x = x + 1
16 |
17 | turtle.exitonclick()
--------------------------------------------------------------------------------
/Random Pattern Generator/Circle.py:
--------------------------------------------------------------------------------
1 | import turtle
2 |
3 | from turtle import *
4 |
5 | bgcolor("black")
6 | speed(0)
7 | hideturtle()
8 |
9 | for i in range(120):
10 | color("red")
11 | circle(i)
12 | color("orange")
13 | circle(i*0.8)
14 | right(3)
15 | forward(3)
16 | done()
17 |
--------------------------------------------------------------------------------
/Random Pattern Generator/Doraemon.py.py:
--------------------------------------------------------------------------------
1 | from turtle import *
2 | import turtle
3 | wn = turtle.Screen()
4 | wn.setup(width=1000, height=800)
5 |
6 | def my_goto(x, y):
7 | penup()
8 | goto(x, y)
9 | pendown()
10 |
11 |
12 | def eyes():
13 | fillcolor("#ffffff")
14 | begin_fill()
15 |
16 | tracer(False)
17 | a = 2.5
18 | for i in range(120):
19 | if 0 <= i < 30 or 60 <= i < 90:
20 | a -= 0.05
21 | lt(3)
22 | fd(a)
23 | else:
24 | a += 0.05
25 | lt(3)
26 | fd(a)
27 | tracer(True)
28 | end_fill()
29 |
30 |
31 |
32 | def beard():
33 | my_goto(-32, 135)
34 | seth(165)
35 | fd(60)
36 |
37 | my_goto(-32, 125)
38 | seth(180)
39 | fd(60)
40 |
41 | my_goto(-32, 115)
42 | seth(193)
43 | fd(60)
44 |
45 | my_goto(37, 135)
46 | seth(15)
47 | fd(60)
48 |
49 | my_goto(37, 125)
50 | seth(0)
51 | fd(60)
52 |
53 | my_goto(37, 115)
54 | seth(-13)
55 | fd(60)
56 |
57 |
58 | def mouth():
59 | my_goto(5, 148)
60 | seth(270)
61 | fd(100)
62 | seth(0)
63 | circle(120, 50)
64 | seth(230)
65 | circle(-120, 100)
66 |
67 |
68 | def scarf():
69 | fillcolor('#e70010')
70 | begin_fill()
71 | seth(0)
72 | fd(200)
73 | circle(-5, 90)
74 | fd(10)
75 | circle(-5, 90)
76 | fd(207)
77 | circle(-5, 90)
78 | fd(10)
79 | circle(-5, 90)
80 | end_fill()
81 |
82 |
83 | def nose():
84 | my_goto(-10, 158)
85 | seth(315)
86 | fillcolor('#e70010')
87 | begin_fill()
88 | circle(20)
89 | end_fill()
90 |
91 |
92 | def black_eyes():
93 | seth(0)
94 | my_goto(-20, 195)
95 | fillcolor('#000000')
96 | begin_fill()
97 | circle(13)
98 | end_fill()
99 |
100 | pensize(6)
101 | my_goto(20, 205)
102 | seth(75)
103 | circle(-10, 150)
104 | pensize(3)
105 |
106 | my_goto(-17, 200)
107 | seth(0)
108 | fillcolor('#ffffff')
109 | begin_fill()
110 | circle(5)
111 | end_fill()
112 | my_goto(0, 0)
113 |
114 |
115 |
116 |
117 | def face():
118 |
119 | fd(183)
120 | lt(45)
121 | fillcolor('#ffffff')
122 | begin_fill()
123 | circle(120, 100)
124 | seth(180)
125 | # print(pos())
126 | fd(121)
127 | pendown()
128 | seth(215)
129 | circle(120, 100)
130 | end_fill()
131 | my_goto(63.56,218.24)
132 | seth(90)
133 | eyes()
134 | seth(180)
135 | penup()
136 | fd(60)
137 | pendown()
138 | seth(90)
139 | eyes()
140 | penup()
141 | seth(180)
142 | fd(64)
143 |
144 |
145 | def head():
146 | penup()
147 | circle(150, 40)
148 | pendown()
149 | fillcolor('#00a0de')
150 | begin_fill()
151 | circle(150, 280)
152 | end_fill()
153 |
154 |
155 | def Doraemon():
156 | head()
157 | scarf()
158 | face()
159 | black_eyes()
160 | nose()
161 | mouth()
162 | beard()
163 | my_goto(0, 0)
164 | seth(0)
165 | penup()
166 | circle(150, 50)
167 | pendown()
168 | seth(30)
169 | fd(40)
170 | seth(70)
171 | circle(-30, 270)
172 |
173 |
174 | fillcolor('#00a0de')
175 | begin_fill()
176 |
177 | seth(230)
178 | fd(80)
179 | seth(90)
180 | circle(1000, 1)
181 | seth(-89)
182 | circle(-1000, 10)
183 |
184 | # print(pos())
185 |
186 | seth(180)
187 | fd(70)
188 | seth(90)
189 | circle(30, 180)
190 | seth(180)
191 | fd(70)
192 |
193 | # print(pos())
194 | seth(100)
195 | circle(-1000, 9)
196 |
197 | seth(-86)
198 | circle(1000, 2)
199 | seth(230)
200 | fd(40)
201 |
202 | # print(pos())
203 |
204 |
205 | circle(-30, 230)
206 | seth(45)
207 | fd(81)
208 | seth(0)
209 | fd(203)
210 | circle(5, 90)
211 | fd(10)
212 | circle(5, 90)
213 | fd(7)
214 | seth(40)
215 | circle(150, 10)
216 | seth(30)
217 | fd(40)
218 | end_fill()
219 |
220 | seth(70)
221 | fillcolor('#ffffff')
222 | begin_fill()
223 | circle(-30)
224 | end_fill()
225 |
226 | my_goto(103.74, -182.59)
227 | seth(0)
228 | fillcolor('#ffffff')
229 | begin_fill()
230 | fd(15)
231 | circle(-15, 180)
232 | fd(90)
233 | circle(-15, 180)
234 | fd(10)
235 | end_fill()
236 |
237 | my_goto(-96.26, -182.59)
238 | seth(180)
239 | fillcolor('#ffffff')
240 | begin_fill()
241 | fd(15)
242 | circle(15, 180)
243 | fd(90)
244 | circle(15, 180)
245 | fd(10)
246 | end_fill()
247 |
248 | my_goto(-133.97, -91.81)
249 | seth(50)
250 | fillcolor('#ffffff')
251 | begin_fill()
252 | circle(30)
253 | end_fill()
254 |
255 | my_goto(-103.42, 15.09)
256 | seth(0)
257 | fd(38)
258 | seth(230)
259 | begin_fill()
260 | circle(90, 260)
261 | end_fill()
262 |
263 | my_goto(5, -40)
264 | seth(0)
265 | fd(70)
266 | seth(-90)
267 | circle(-70, 180)
268 | seth(0)
269 | fd(70)
270 |
271 | my_goto(-103.42, 15.09)
272 | fd(90)
273 | seth(70)
274 | fillcolor('#ffd200')
275 | # print(pos())
276 | begin_fill()
277 | circle(-20)
278 | end_fill()
279 | seth(170)
280 | fillcolor('#ffd200')
281 | begin_fill()
282 | circle(-2, 180)
283 | seth(10)
284 | circle(-100, 22)
285 | circle(-2, 180)
286 | seth(180-10)
287 | circle(100, 22)
288 | end_fill()
289 | goto(-13.42, 15.09)
290 | seth(250)
291 | circle(20, 110)
292 | seth(90)
293 | fd(15)
294 | dot(10)
295 | my_goto(0, -150)
296 |
297 |
298 |
299 | if __name__ == '__main__':
300 | pensize(3)
301 | speed(9)
302 | Doraemon()
303 | my_goto(100, -300)
304 | write('@python.for.fun', font=("Bradley Hand ITC", 30, "bold"))
305 | mainloop()
--------------------------------------------------------------------------------
/Random Pattern Generator/Flower Pattern.JPG:
--------------------------------------------------------------------------------
https://raw.githubusercontent.com/kishanrajput23/Personal-Python-Projects/01428ea3a57d226cb45ac4ffb62e5b632a2267fe/Random Pattern Generator/Flower Pattern.JPG
--------------------------------------------------------------------------------
/Random Pattern Generator/Flower Pattern.py:
--------------------------------------------------------------------------------
1 | import turtle
2 | from random import randint
3 | turtle.speed(0)
4 | turtle.bgcolor('black')
5 | x=1
6 | while x < 300:
7 | r = randint(0,255)
8 | g = randint(0,255)
9 | b = randint(0,255)
10 |
11 | turtle.colormode(255)
12 | turtle.pencolor(r,g,b)
13 | turtle.fd(50 + x)
14 | turtle.rt(911)
15 | x = x + 1
16 |
17 | turtle.exitonclick()
--------------------------------------------------------------------------------
/Random Pattern Generator/Google_Logo.png:
--------------------------------------------------------------------------------
https://raw.githubusercontent.com/kishanrajput23/Personal-Python-Projects/01428ea3a57d226cb45ac4ffb62e5b632a2267fe/Random Pattern Generator/Google_Logo.png
--------------------------------------------------------------------------------
/Random Pattern Generator/Google_Logo.py:
--------------------------------------------------------------------------------
1 | import turtle
2 |
3 | from turtle import *
4 |
5 | gg = turtle.Turtle()
6 | turtle.bgcolor("black")
7 | gg.color("#4285F4","#4285F4")
8 | gg.pensize(5)
9 | #gg.speed(0)
10 |
11 | # [ google color codes ]
12 | # red = #DB4437
13 | # blue = #4285F4
14 | # green = #0F9D58
15 | # yellow = #F4B400
16 |
17 | def google():
18 | gg.forward(120)
19 | gg.right(90)
20 | gg.circle(-150,50)
21 | gg.color("#0F9D58")
22 | gg.circle(-150,100)
23 | gg.color("#F4B400")
24 | gg.circle(-150,60)
25 | gg.color("#DB4437","#DB4437")
26 | gg.begin_fill()
27 | gg.circle(-150,100)
28 | gg.right(90)
29 | gg.forward(50)
30 | gg.right(90)
31 | gg.circle(100,100)
32 | gg.right(90)
33 | gg.forward(50)
34 | gg.end_fill()
35 | gg.begin_fill()
36 | gg.color("#F4B400","#F4B400")
37 | gg.right(180)
38 | gg.forward(50)
39 | gg.right(90)
40 | gg.circle(100,60)
41 | gg.right(90)
42 | gg.forward(50)
43 | gg.right(90)
44 | gg.circle(-150,60)
45 | gg.end_fill()
46 | gg.right(90)
47 | gg.forward(50)
48 | gg.right(90)
49 | gg.circle(100,60)
50 | gg.color("#0F9D58","#0F9D58")
51 | gg.begin_fill()
52 | gg.circle(100,100)
53 | gg.right(90)
54 | gg.forward(50)
55 | gg.right(90)
56 | gg.circle(-150,100)
57 | gg.right(90)
58 | gg.forward(50)
59 | gg.end_fill()
60 | gg.right(90)
61 | gg.circle(100,100)
62 | gg.color("#4285F4","#4285F4")
63 | gg.begin_fill()
64 | gg.circle(100,25)
65 | gg.left(115)
66 | gg.forward(65)
67 | gg.right(90)
68 | gg.forward(42)
69 | gg.right(90)
70 | gg.forward(124)
71 | gg.right(90)
72 | gg.circle(-150,50)
73 | gg.right(90)
74 | gg.forward(50)
75 | gg.end_fill()
76 |
77 | google()
78 | gg.hideturtle()
79 | turtle.done()
--------------------------------------------------------------------------------
/Random Pattern Generator/Hexagonal Pattern.png:
--------------------------------------------------------------------------------
https://raw.githubusercontent.com/kishanrajput23/Personal-Python-Projects/01428ea3a57d226cb45ac4ffb62e5b632a2267fe/Random Pattern Generator/Hexagonal Pattern.png
--------------------------------------------------------------------------------
/Random Pattern Generator/Hexagonal Pattern.py:
--------------------------------------------------------------------------------
1 | import turtle
2 |
3 | t = turtle.Turtle()
4 |
5 | s = turtle.Screen()
6 |
7 | list1 = ["pink","red","orange","blue","green"]
8 |
9 | s.bgcolor("black")
10 |
11 | for i in range(100):
12 | t.color(list1[i%5])
13 | t.pensize(i/10+1)
14 | t.forward(i)
15 | t.left(59)
--------------------------------------------------------------------------------
/Random Pattern Generator/README.md:
--------------------------------------------------------------------------------
1 | # Arts using python's turtle module🔥
2 |
3 | # 📌Doraemon:
4 |
5 |
6 |
7 | # 📌Tri-Color Pattern:
8 |
9 |
10 |
11 | # 📌Google Logo:
12 |
13 |
14 |
15 | # 📌Star Pattern:
16 |
17 |
18 |
19 | # 📌Vibrating Circle:
20 |
21 |
22 |
23 | # 📌Rangoli Pattern:
24 |
25 |
26 |
27 | # 📌Spirograph:
28 |
29 |
30 |
31 | # 📌Hexagonal Pattern:
32 |
33 |
34 |
35 | # 📌Flower Pattern:
36 |
37 |
38 |
39 | # 📌Box Pattern:
40 |
41 |
42 |
43 | # 📌Cicle Pattern:
44 |
45 | 
46 |
--------------------------------------------------------------------------------
/Random Pattern Generator/Rangoli Pattern.png:
--------------------------------------------------------------------------------
https://raw.githubusercontent.com/kishanrajput23/Personal-Python-Projects/01428ea3a57d226cb45ac4ffb62e5b632a2267fe/Random Pattern Generator/Rangoli Pattern.png
--------------------------------------------------------------------------------
/Random Pattern Generator/Rangoli Pattern.py:
--------------------------------------------------------------------------------
1 | import turtle
2 | import math
3 | import random
4 | wn = turtle.Screen()
5 | wn.bgcolor('black')
6 | Albert = turtle.Turtle()
7 | Albert.speed(0)
8 | Albert.color('white')
9 | rotate=int(360)
10 | def drawCircles(t,size):
11 | for i in range(10):
12 | t.circle(size)
13 | size=size-4
14 | def drawSpecial(t,size,repeat):
15 | for i in range (repeat):
16 | drawCircles(t,size)
17 | t.right(360/repeat)
18 | drawSpecial(Albert,100,10)
19 | Steve = turtle.Turtle()
20 | Steve.speed(0)
21 | Steve.color('yellow')
22 | rotate=int(90)
23 | def drawCircles(t,size):
24 | for i in range(4):
25 | t.circle(size)
26 | size=size-10
27 | def drawSpecial(t,size,repeat):
28 | for i in range (repeat):
29 | drawCircles(t,size)
30 | t.right(360/repeat)
31 | drawSpecial(Steve,100,10)
32 | Barry = turtle.Turtle()
33 | Barry.speed(0)
34 | Barry.color('blue')
35 | rotate=int(80)
36 | def drawCircles(t,size):
37 | for i in range(4):
38 | t.circle(size)
39 | size=size-5
40 | def drawSpecial(t,size,repeat):
41 | for i in range (repeat):
42 | drawCircles(t,size)
43 | t.right(360/repeat)
44 | drawSpecial(Barry,100,10)
45 | Terry = turtle.Turtle()
46 | Terry.speed(0)
47 | Terry.color('orange')
48 | rotate=int(90)
49 | def drawCircles(t,size):
50 | for i in range(4):
51 | t.circle(size)
52 | size=size-19
53 | def drawSpecial(t,size,repeat):
54 | for i in range (repeat):
55 | drawCircles(t,size)
56 | t.right(360/repeat)
57 | drawSpecial(Terry,100,10)
58 | Will = turtle.Turtle()
59 | Will.speed(0)
60 | Will.color('pink')
61 | rotate=int(90)
62 | def drawCircles(t,size):
63 | for i in range(4):
64 | t.circle(size)
65 | size=size-20
66 | def drawSpecial(t,size,repeat):
67 | for i in range (repeat):
68 | drawCircles(t,size)
69 | t.right(360/repeat)
70 | drawSpecial(Will,100,10)
--------------------------------------------------------------------------------
/Random Pattern Generator/Screenshot (303).png:
--------------------------------------------------------------------------------
https://raw.githubusercontent.com/kishanrajput23/Personal-Python-Projects/01428ea3a57d226cb45ac4ffb62e5b632a2267fe/Random Pattern Generator/Screenshot (303).png
--------------------------------------------------------------------------------
/Random Pattern Generator/Spirograph.png:
--------------------------------------------------------------------------------
https://raw.githubusercontent.com/kishanrajput23/Personal-Python-Projects/01428ea3a57d226cb45ac4ffb62e5b632a2267fe/Random Pattern Generator/Spirograph.png
--------------------------------------------------------------------------------
/Random Pattern Generator/Spirograph.py:
--------------------------------------------------------------------------------
1 | import turtle
2 | # Creating turtle
3 | t = turtle.Turtle()
4 | s = turtle.Screen()
5 | s.bgcolor("black")
6 | t.pencolor("red")
7 | t.pensize(2)
8 | t.speed(0)
9 |
10 | while (True):
11 | for i in range(6):
12 | for colors in ["red", "blue", "magenta", "green", "yellow", "white"]:
13 | turtle.color(colors)
14 | turtle.circle(100)
15 | turtle.left(10)
16 |
17 |
18 | turtle.hideturtle()
19 | turtle.mainloop()
--------------------------------------------------------------------------------
/Random Pattern Generator/Star Pattern.png:
--------------------------------------------------------------------------------
https://raw.githubusercontent.com/kishanrajput23/Personal-Python-Projects/01428ea3a57d226cb45ac4ffb62e5b632a2267fe/Random Pattern Generator/Star Pattern.png
--------------------------------------------------------------------------------
/Random Pattern Generator/Star Pattern.py:
--------------------------------------------------------------------------------
1 | import turtle
2 | import random
3 |
4 | turtle.speed(speed ='fastest')
5 |
6 | def draw(n, x, angle):
7 | # loop for number of stars
8 | for i in range(n):
9 |
10 | turtle.colormode(255)
11 |
12 | # choosing random integers
13 | # between 0 and 255
14 | # to generate random rgb values
15 | a = random.randint(0, 255)
16 | b = random.randint(0, 255)
17 | c = random.randint(0, 255)
18 |
19 | # setting the outline
20 | # and fill colour
21 | turtle.pencolor(a, b, c)
22 | turtle.fillcolor(a, b, c)
23 |
24 | # begins filling the star
25 | turtle.begin_fill()
26 |
27 | # loop for drawing each star
28 | for j in range(5):
29 |
30 | turtle.forward(5 * n-5 * i)
31 | turtle.right(x)
32 | turtle.forward(5 * n-5 * i)
33 | turtle.right(72 - x)
34 |
35 | # colour filling complete
36 | turtle.end_fill()
37 |
38 | # rotating for
39 | # the next star
40 | turtle.rt(angle)
41 |
42 |
43 | # setting the parameters
44 | n = 30 # number of stars
45 | x = 144 # exterior angle of each star
46 | angle = 18 # angle of rotation for the spiral
47 |
48 | draw(n, x, angle)
--------------------------------------------------------------------------------
/Random Pattern Generator/Tri-Color.png:
--------------------------------------------------------------------------------
https://raw.githubusercontent.com/kishanrajput23/Personal-Python-Projects/01428ea3a57d226cb45ac4ffb62e5b632a2267fe/Random Pattern Generator/Tri-Color.png
--------------------------------------------------------------------------------
/Random Pattern Generator/Vibrating_Circle.png:
--------------------------------------------------------------------------------
https://raw.githubusercontent.com/kishanrajput23/Personal-Python-Projects/01428ea3a57d226cb45ac4ffb62e5b632a2267fe/Random Pattern Generator/Vibrating_Circle.png
--------------------------------------------------------------------------------
/Random Pattern Generator/Vibrating_Circle.py:
--------------------------------------------------------------------------------
1 | import turtle
2 | # Creating turtle
3 | t = turtle.Turtle()
4 | s = turtle.Screen()
5 | s.bgcolor("black")
6 | t.pencolor("white")
7 |
8 | a = 0
9 | b = 0
10 | t.speed(0)
11 | t.penup()
12 | t.goto(0,200)
13 | t.pendown()
14 | while(True):
15 | t.forward(a)
16 | t.right(b)
17 | a+=3
18 | b+=1
19 | if b == 210:
20 | break
21 | t.hideturtle()
22 |
23 | turtle.done()
--------------------------------------------------------------------------------
/Random Pattern Generator/tri-color.py:
--------------------------------------------------------------------------------
1 | import turtle
2 | from turtle import*
3 |
4 | #screen for output
5 | screen = turtle.Screen()
6 |
7 | # Defining a turtle Instance
8 | t = turtle.Turtle()
9 | speed(0)
10 |
11 | # initially penup()
12 | t.penup()
13 | t.goto(-400, 250)
14 | t.pendown()
15 |
16 | # Orange Rectangle
17 | #white rectangle
18 | t.color("orange")
19 | t.begin_fill()
20 | t.forward(800)
21 | t.right(90)
22 | t.forward(167)
23 | t.right(90)
24 | t.forward(800)
25 | t.end_fill()
26 | t.left(90)
27 | t.forward(167)
28 |
29 | # Green Rectangle
30 | t.color("green")
31 | t.begin_fill()
32 | t.forward(167)
33 | t.left(90)
34 | t.forward(800)
35 | t.left(90)
36 | t.forward(167)
37 | t.end_fill()
38 |
39 | # Big Blue Circle
40 | t.penup()
41 | t.goto(70, 0)
42 | t.pendown()
43 | t.color("navy")
44 | t.begin_fill()
45 | t.circle(70)
46 | t.end_fill()
47 |
48 | # Big White Circle
49 | t.penup()
50 | t.goto(60, 0)
51 | t.pendown()
52 | t.color("white")
53 | t.begin_fill()
54 | t.circle(60)
55 | t.end_fill()
56 |
57 | # Mini Blue Circles
58 | t.penup()
59 | t.goto(-57, -8)
60 | t.pendown()
61 | t.color("navy")
62 | for i in range(24):
63 | t.begin_fill()
64 | t.circle(3)
65 | t.end_fill()
66 | t.penup()
67 | t.forward(15)
68 | t.right(15)
69 | t.pendown()
70 |
71 | # Small Blue Circle
72 | t.penup()
73 | t.goto(20, 0)
74 | t.pendown()
75 | t.begin_fill()
76 | t.circle(20)
77 | t.end_fill()
78 | # Spokes
79 | t.penup()
80 | t.goto(0, 0)
81 | t.pendown()
82 | t.pensize(2)
83 | for i in range(24):
84 | t.forward(60)
85 | t.backward(60)
86 | t.left(15)
87 |
88 | #to hold the
89 | #output window
90 | turtle.done()
91 |
--------------------------------------------------------------------------------
/Rock Paper Scissor Game/README.md:
--------------------------------------------------------------------------------
1 | # Rock Paper Scissor Game🔥
2 |
3 | - In the rock, paper and scissors game our goal is to create a command-line game where a user has the option to choose between rock, paper and scissors and if the user wins the score is added, and at the end when the user finishes the game, the score is shown to the user.
4 |
5 | ## 📌Rock, Paper and Scissors Game with Python
6 |
7 | - To create the Rock, Paper and Scissors game with Python, we need to take the user’s choice and then we need to compare it with the computer choice which is taken using the random module in Python from a list of choices, and if the user wins then the score will increase by 1:
8 |
9 | ### Code:
10 |
11 | import random
12 |
13 | choices = ["Rock", "Paper", "Scissor"]
14 |
15 | player = False
16 | cpu_score = 0
17 | player_score = 0
18 |
19 | while True:
20 | player = input("Enter your choice ").capitalize()
21 |
22 | computer = random.choice(choices)
23 |
24 | if computer == player:
25 | print("Its tie now...")
26 |
27 | elif player == "Rock":
28 | if computer == "Paper":
29 | print("You lose...", computer, "covers", player)
30 | cpu_score += 1
31 |
32 | else:
33 | print("You won...", player, "smashes", computer)
34 | player_score += 1
35 |
36 | elif player == "Paper":
37 | if computer == "Rock":
38 | print("You won...", player, "covers", computer)
39 | player_score += 1
40 |
41 | else:
42 | print("You lose...", computer, "cut", player)
43 | cpu_score += 1
44 |
45 | elif player == "Scissor":
46 | if computer == "Paper":
47 | print("You won...", player, "cut", computer)
48 | player_score += 1
49 |
50 | else:
51 | print("You lose...", computer, "smashes", player)
52 | cpu_score += 1
53 |
54 | elif player == "End":
55 | print("The final scores are ")
56 | print(f"CPU Score {cpu_score}")
57 | print(f"Player Score {player_score}")
58 | break
59 |
60 |
61 | ### Output:
62 |
63 | Enter your choice rock
64 | Its tie now...
65 | Enter your choice paper
66 | You won... Paper covers Rock
67 | Enter your choice scissors
68 | You lose... Rock smashes Scissors
69 | Enter your choice end
70 | The final scores are
71 | CPU Score 1
72 | Player Score 1
73 |
74 | ## 📌Summary
75 |
76 | - Creating these types of games will help a beginner to think logically. You can even use this idea to make your own game. In the end, creating these types of programs will help you create your algorithms, which is a very important skill for coding interviews and competitive programming.
77 |
--------------------------------------------------------------------------------
/Rock Paper Scissor Game/main.py:
--------------------------------------------------------------------------------
1 | import random
2 |
3 | randNo = random.randint(1,3)
4 | if randNo == 1:
5 | computer_choose = "r" # if randNo is equal to 1 then it will store 'r' as computer choice
6 | if randNo == 2:
7 | computer_choose = "p" # if randNo is equal to 2 then it will store 'p' as computer choice
8 | if randNo == 3:
9 | computer_choose = "s" # if randNo is equal to 3 then it will store 's' as computer choice
10 |
11 | # Defining gameWin function for performing major task for this game.
12 |
13 | def gameWin(computer_choose, user_input):
14 | if computer_choose == user_input:
15 | return None
16 | elif computer_choose == "r":
17 | if user_input == "p":
18 | return True
19 | elif user_input == "s":
20 | return False
21 |
22 | elif computer_choose == "p":
23 | if user_input == "r":
24 | return False
25 | elif user_input == "s":
26 | return True
27 |
28 | elif computer_choose == "s":
29 | if user_input == "r":
30 | return True
31 | elif user_input == "p":
32 | return False
33 |
34 | print("Computer Choosed already from Rock('r') or Paper('p') or Scissor('s')")
35 |
36 | print("Now your turn to choose")
37 |
38 | user_input = input("Choose from Rock('r') or Paper('p') or Scissor('s') ") #taking input from the user
39 |
40 | # It shows the user what computer choose from rock, paper or scissor.
41 | print("Computer choosed " + computer_choose)
42 |
43 | # It shows the user what he/she choose from rock, paper or scissor.
44 | print("You Choosed " + user_input)
45 |
46 |
47 | # This block of if-else statement will find out conditon of gameWin function
48 |
49 | if gameWin(computer_choose, user_input) == None:
50 | print("It tie now")
51 |
52 | elif gameWin(computer_choose, user_input):
53 | print("Congratulations You Won!!!")
54 |
55 | else:
56 | print("You Lose!")
57 |
--------------------------------------------------------------------------------
/Rock Paper Scissor Game/rock_paper_scissor_game.py:
--------------------------------------------------------------------------------
1 | import random
2 |
3 | choices = ["Rock", "Paper", "Scissor"]
4 |
5 | player = False
6 | cpu_score = 0
7 | player_score = 0
8 |
9 | while True:
10 | player = input("Enter your choice ").capitalize()
11 |
12 | computer = random.choice(choices)
13 |
14 | if computer == player:
15 | print("Its tie now...")
16 |
17 | elif player == "Rock":
18 | if computer == "Paper":
19 | print("You lose...", computer, "covers", player)
20 | cpu_score += 1
21 |
22 | else:
23 | print("You won...", player, "smashes", computer)
24 | player_score += 1
25 |
26 | elif player == "Paper":
27 | if computer == "Rock":
28 | print("You won...", player, "covers", computer)
29 | player_score += 1
30 |
31 | else:
32 | print("You lose...", computer, "cut", player)
33 | cpu_score += 1
34 |
35 | elif player == "Scissor":
36 | if computer == "Paper":
37 | print("You won...", player, "cut", computer)
38 | player_score += 1
39 |
40 | else:
41 | print("You lose...", computer, "smashes", player)
42 | cpu_score += 1
43 |
44 | elif player == "End":
45 | print("The final scores are ")
46 | print(f"CPU Score {cpu_score}")
47 | print(f"Player Score {player_score}")
48 | break
--------------------------------------------------------------------------------
/Shiv Ling/README.md:
--------------------------------------------------------------------------------
1 | # ShivLing
2 |
3 | 
4 |
--------------------------------------------------------------------------------
/Shiv Ling/mahadev.py:
--------------------------------------------------------------------------------
1 | import turtle
2 |
3 | turtle.speed(0)
4 | turtle.hideturtle()
5 | turtle.setup(800,600)
6 | turtle.title('Shiva Linga')
7 | turtle.speed(1)
8 | turtle.up()
9 | turtle.hideturtle()
10 |
11 | def my_goto(x, y):
12 | turtle.pencolor("orange")
13 | turtle.penup()
14 | turtle.goto(x, y)
15 | turtle.pendown()
16 |
17 | def round_rectangle(center_x,center_y,width,height,cornersize):
18 | turtle.up()
19 | turtle.goto(center_x-width/2+cornersize,center_y-height/2)
20 | turtle.down()
21 | for _ in range(2):
22 | turtle.fillcolor("black")
23 | turtle.begin_fill()
24 | turtle.fd(width-2*cornersize)
25 | turtle.circle(cornersize,90)
26 | turtle.fd(height-2*cornersize)
27 | turtle.circle(cornersize,90)
28 | turtle.end_fill()
29 |
30 |
31 | def round_rectangle(center_x,center_y,width,height,cornersize):
32 | turtle.up()
33 | turtle.goto(center_x-width/2+cornersize,center_y-height/2)
34 | turtle.down()
35 | for _ in range(2):
36 | turtle.fillcolor("black")
37 | turtle.begin_fill()
38 | turtle.fd(width-2*cornersize)
39 | turtle.circle(cornersize,90)
40 | turtle.fd(height-2*cornersize)
41 | turtle.circle(cornersize,90)
42 | turtle.end_fill()
43 |
44 | round_rectangle(0,0,200,300,80)
45 |
46 | turtle.fillcolor('black')
47 | turtle.begin_fill()
48 |
49 |
50 |
51 | turtle.goto(-35, 40)
52 | turtle.penup()
53 | turtle.fillcolor('white')
54 | turtle.begin_fill()
55 | turtle.forward(80)
56 | turtle.left(90)
57 | turtle.forward(10)
58 | turtle.left(90)
59 | turtle.forward(80)
60 | turtle.left(90)
61 | turtle.forward(10)
62 | turtle.left(90)
63 |
64 |
65 | turtle.goto(-35, 80)
66 | turtle.forward(80)
67 | turtle.left(90)
68 | turtle.forward(10)
69 | turtle.left(90)
70 | turtle.forward(80)
71 | turtle.left(90)
72 | turtle.forward(10)
73 | turtle.left(90)
74 |
75 | turtle.goto(-35, 60)
76 | turtle.forward(80)
77 | turtle.left(90)
78 | turtle.forward(10)
79 | turtle.left(90)
80 | turtle.forward(80)
81 | turtle.left(90)
82 | turtle.forward(10)
83 | turtle.left(90)
84 |
85 | turtle.pendown()
86 | turtle.end_fill()
87 |
88 |
89 | turtle.fillcolor('red')
90 | turtle.begin_fill()
91 |
92 | turtle.goto(5,50)
93 | turtle.penup()
94 | r = 15
95 | turtle.circle(r)
96 | turtle.pendown()
97 | turtle.end_fill()
98 |
99 | turtle.goto(-150, -175)
100 | turtle.penup()
101 | turtle.pencolor("black")
102 | turtle.fillcolor("black")
103 | turtle.begin_fill()
104 | round_rectangle(90,-125,600,100,50)
105 | turtle.pendown()
106 |
107 |
108 | my_goto(-300, -300)
109 | turtle.write('BY :- Coding_Buddies4', font=("Bradley Hand ITC", 50, "bold"))
110 |
111 |
112 | my_goto(-150,150)
113 | turtle.write('हर हर महादेव', font=("Bradley Hand ITC", 50, "bold"))
114 | turtle.done()
--------------------------------------------------------------------------------
/Spotify Playlist Generator/README.md:
--------------------------------------------------------------------------------
1 |
2 |
--------------------------------------------------------------------------------
/Spotify Playlist Generator/Spotify playlist generator.py:
--------------------------------------------------------------------------------
1 | import sys
2 | import os
3 | import spotipy
4 | import spotipy.util as util
5 | from random import randint
6 | #Enviromental variables
7 | os.environ["SPOTIPY_CLIENT_ID"] = ""
8 | os.environ["SPOTIPY_CLIENT_SECRET"] = ""
9 | os.environ["SPOTIPY_REDIRECT_URI"] = "http://localhost/"
10 | #The scopes that we need for read and write.
11 | scope = 'user-library-read playlist-modify-public'
12 |
13 | #We receive username when running the script, also you can set it manually.
14 | if len(sys.argv) > 1:
15 | username = sys.argv[1]
16 | else:
17 | print ("Usage: %s username") % (sys.argv[0],)
18 | sys.exit()
19 |
20 | token = util.prompt_for_user_token(username, scope)
21 | tracks=[]
22 | if token:
23 | sp = spotipy.Spotify(auth=token)
24 | #The number in range, is the number of songs that you want in your playlist
25 | for a in range(50):
26 | #'library_size' represents the number of songs that you have in your library (not necesary the exact amount).
27 | library_size=50
28 | ran=randint(0,library_size)
29 | results = sp.current_user_saved_tracks(limit=1, offset=ran)
30 | for item in results['items']:
31 | track = item['track']
32 | tracks.append(track['id'])
33 | #print (str(a+1)+".- "+track['id']+" "+str(track['name'].encode('ascii', 'ignore')) + ' - ' + str(track['artists'][0]['name'].encode('ascii', 'ignore')))
34 | sp.trace = False
35 | results = sp.user_playlist_replace_tracks(username, 'playlist_id', tracks)
36 | print (results)
37 | else:
38 | print ("Can't get token for", username)
--------------------------------------------------------------------------------
/Stop Sign Detection/README.md:
--------------------------------------------------------------------------------
1 |
2 |
--------------------------------------------------------------------------------
/Stop Sign Detection/Stop_sign_detection.py:
--------------------------------------------------------------------------------
1 | import cv2
2 | from matplotlib import pyplot as plt
3 |
4 | # Opening image
5 | img = cv2.imread("image.jpg")
6 |
7 | # OpenCV opens images as BRG
8 | # but we want it as RGB We'll
9 | # also need a grayscale version
10 | img_gray = cv2.cvtColor(img, cv2.COLOR_BGR2GRAY)
11 | img_rgb = cv2.cvtColor(img, cv2.COLOR_BGR2RGB)
12 |
13 |
14 | # Use minSize because for not
15 | # bothering with extra-small
16 | # dots that would look like STOP signs
17 | stop_data = cv2.CascadeClassifier('stop_data.xml')
18 |
19 | found = stop_data.detectMultiScale(img_gray,
20 | minSize =(20, 20))
21 |
22 | # Don't do anything if there's
23 | # no sign
24 | amount_found = len(found)
25 |
26 | if amount_found != 0:
27 |
28 | # There may be more than one
29 | # sign in the image
30 | for (x, y, width, height) in found:
31 |
32 | # We draw a green rectangle around
33 | # every recognized sign
34 | cv2.rectangle(img_rgb, (x, y),
35 | (x + height, y + width),
36 | (0, 255, 0), 5)
37 |
38 | # Creates the environment of
39 | # the picture and shows it
40 | plt.subplot(1, 1, 1)
41 | plt.imshow(img_rgb)
42 | plt.show()
--------------------------------------------------------------------------------
/Stop Sign Detection/image.jpg:
--------------------------------------------------------------------------------
https://raw.githubusercontent.com/kishanrajput23/Personal-Python-Projects/01428ea3a57d226cb45ac4ffb62e5b632a2267fe/Stop Sign Detection/image.jpg
--------------------------------------------------------------------------------
/Stop Sign Detection/stop_recognition_output.png:
--------------------------------------------------------------------------------
https://raw.githubusercontent.com/kishanrajput23/Personal-Python-Projects/01428ea3a57d226cb45ac4ffb62e5b632a2267fe/Stop Sign Detection/stop_recognition_output.png
--------------------------------------------------------------------------------
/Story Generator/README.md:
--------------------------------------------------------------------------------
1 | # Story Generator🔥
2 |
3 | Do you think the most complex use of the random module in Python is random sampling? No, we can also generate random stories or anything beyond that using the random module.
4 |
5 | ## 📌Story Generator with Python
6 | Our task is to generate a random story every time the user runs the program. I will first store the parts of the stories in different lists, then the Random module can be used to select the random parts of the story stored in different lists:
7 |
8 | **Code**
9 |
10 | import random
11 | when = ['A few years ago', 'Yesterday', 'Last night', 'A long time ago','On 20th Jan']
12 | who = ['a rabbit', 'an elephant', 'a mouse', 'a turtle','a cat']
13 | name = ['Ali', 'Miriam','daniel', 'Hoouk', 'Starwalker']
14 | residence = ['Barcelona','India', 'Germany', 'Venice', 'England']
15 | went = ['cinema', 'university','seminar', 'school', 'laundry']
16 | happened = ['made a lot of friends','Eats a burger', 'found a secret key', 'solved a mistery', 'wrote a book']
17 | print(random.choice(when) + ', ' + random.choice(who) + ' that lived in ' + random.choice(residence) + ', went to the ' + random.choice(went) + ' and ' + random.choice(happened))
18 |
19 | **Output:**
20 |
21 | On 20th Jan, a rabbit that lived in Germany, went to the laundry and made a lot of friends
22 |
23 | Here, I first imported the random module and then I created parts of the stories in different lists, then I only selected the parts of the lists at random to generate a random story.
24 |
25 | As a beginner, you look for creating software applications more, which is not wrong. But spending more time with programs which required you to think logically will always help you no matter what aspect of programming interests you.
26 |
27 | ## 📌Summary
28 | There are a few areas where the above code could be improved upon, but at a basic level, it meets many secure password generation requirements by today’s standards.
29 |
30 | As a newbie to Python or any other language, you should keep trying these types of programs as they help you explore more functions and in the long run will help you design your algorithms and doing a great job in coding interviews.
31 |
--------------------------------------------------------------------------------
/Story Generator/Story_Generator.py:
--------------------------------------------------------------------------------
1 | import random
2 | when = ['A few years ago', 'Yesterday', 'Last night', 'A long time ago','On 20th Jan']
3 | who = ['a rabbit', 'an elephant', 'a mouse', 'a turtle','a cat']
4 | name = ['Ali', 'Miriam','daniel', 'Hoouk', 'Starwalker']
5 | residence = ['Barcelona','India', 'Germany', 'Venice', 'England']
6 | went = ['cinema', 'university','seminar', 'school', 'laundry']
7 | happened = ['made a lot of friends','Eats a burger', 'found a secret key', 'solved a mistery', 'wrote a book']
8 | print(random.choice(when) + ', ' + random.choice(who) + ' that lived in ' + random.choice(residence) + ', went to the ' + random.choice(went) + ' and ' + random.choice(happened))
9 |
--------------------------------------------------------------------------------
/Take Screenshot/README.md:
--------------------------------------------------------------------------------
1 | # Take Screenshot Using Pyhton🔥
2 |
3 | ## 📌Introduction
4 |
5 | - Screenshot, also known as screen capture, is a digital image that shows the contents of a computer display. A common screenshot is created by the operating system or software running on the device. Taking, saving, and sharing screenshots can be extremely helpful.
6 |
7 | ## 📌Steps to Take a Screenshot using Python
8 |
9 | - **👉Step 1: Install the pyautogui package**
10 |
11 | To start, you’ll need to install the [pyautogui](https://pyautogui.readthedocs.io/en/latest/) package using the following command (under Windows):
12 |
13 | pip install pyautogui
14 |
15 | **🔸What is PyAutoGUI**
16 |
17 | PyAutoGUI lets your Python scripts control the mouse and keyboard to automate interactions with other applications.
18 |
19 | **✨Features**
20 |
21 | **(a)** Moving the mouse and clicking or typing in the windows of other applications.
22 |
23 | **(b)** Sending keystrokes to applications (for example, to fill out forms).
24 |
25 | **(c)** Take screenshots, and given an image (for example, of a button or checkbox), find it on the screen.
26 |
27 | **(d)** Locate an application’s window, and move, resize, maximize, minimize, or close it (Windows-only, currently)
28 |
29 | **(e)** Display message boxes for user interaction while your GUI automation script runs.
30 |
31 |
32 | - **👉Step 2: Capture the path to save the screenshot**
33 |
34 | Next, capture the full path where the screenshot will be saved on your computer.
35 |
36 | In my case, I decided to save the screenshot under the following path:
37 |
38 | C:\Users\KISHAN\Desktop\screenshot1.png
39 |
40 | Here, the file name is screenshot1, while the file type is png (alternatively, you can set the file type to jpg).
41 |
42 | - **👉Step 3: Take the screenshot using Python**
43 |
44 | For the final step, you’ll need to use the template below in order to take the screenshot using Python:
45 |
46 | import pyautogui
47 |
48 | myscreenshot = pyautogui.screenshot()
49 |
50 | myscreenshot.save("Enter your location")
51 |
52 | Now, when you run the code the screenshot will automatically save at your provided location with the name of you provided in the code.
53 |
54 | That’s it! simple, isn’t it?
55 |
56 |
--------------------------------------------------------------------------------
/Take Screenshot/Screenshot.py:
--------------------------------------------------------------------------------
1 | import pyautogui
2 | myscreenshot = pyautogui.screenshot()
3 | myscreenshot.save("Enter your location")
4 |
--------------------------------------------------------------------------------
/Tic-Tac-Toe-Game/README.md:
--------------------------------------------------------------------------------
1 |
2 |
--------------------------------------------------------------------------------
/Tic-Tac-Toe-Game/Tic-Tac-Toe-Game.py:
--------------------------------------------------------------------------------
1 | #Implementation of Two Player Tic-Tac-Toe game in Python.
2 |
3 | ''' We will make the board using dictionary
4 | in which keys will be the location(i.e : top-left,mid-right,etc.)
5 | and initialliy it's values will be empty space and then after every move
6 | we will change the value according to player's choice of move. '''
7 |
8 | theBoard = {'7': ' ' , '8': ' ' , '9': ' ' ,
9 | '4': ' ' , '5': ' ' , '6': ' ' ,
10 | '1': ' ' , '2': ' ' , '3': ' ' }
11 |
12 | board_keys = [key for key in theBoard]
13 |
14 | ''' We will have to print the updated board after every move in the game and
15 | thus we will make a function in which we'll define the printBoard function
16 | so that we can easily print the board everytime by calling this function. '''
17 |
18 | def printBoard(board):
19 | metrix = f"""
20 | board['7'] + '|' + board['8'] + '|' + board['9']
21 | -+-+-
22 | board['4'] + '|' + board['5'] + '|' + board['6']
23 | -+-+-
24 | board['1'] + '|' + board['2'] + '|' + board['3']
25 | """"
26 | print(metrix)
27 |
28 | #lets define a win function in order not to write it all over again when checking who won.
29 | def win_message(winner):
30 | printBoard(theBoard)
31 | print("\nGame Over.\n")
32 | print(f" **** {winner} won. ****")
33 |
34 | # Now we'll write the main function which has all the gameplay functionality.
35 | def game():
36 |
37 | turn = 'X'
38 | count = 0
39 |
40 | for i in range(10):
41 | printBoard(theBoard)
42 |
43 | move = input(f"It's your turn, {turn}. Move to which place?")
44 |
45 | if theBoard[move] == ' ':
46 | theBoard[move] = turn
47 | count += 1
48 | else:
49 | print("That place is already filled.\nMove to which place?")
50 | continue
51 |
52 | # Now we will check if player X or O has won,for every move after 5 moves.
53 | if count >= 5:
54 | if theBoard['7'] == theBoard['8'] == theBoard['9'] != ' ': # across the top
55 | win_message(turn)
56 | break
57 | elif theBoard['4'] == theBoard['5'] == theBoard['6'] != ' ': # across the middle
58 | win_message(turn)
59 | break
60 | elif theBoard['1'] == theBoard['2'] == theBoard['3'] != ' ': # across the bottom
61 | win_message(turn)
62 | break
63 | elif theBoard['1'] == theBoard['4'] == theBoard['7'] != ' ': # down the left side
64 | win_message(turn)
65 | break
66 | elif theBoard['2'] == theBoard['5'] == theBoard['8'] != ' ': # down the middle
67 | win_message(turn)
68 | break
69 | elif theBoard['3'] == theBoard['6'] == theBoard['9'] != ' ': # down the right side
70 | win_message(turn)
71 | break
72 | elif theBoard['7'] == theBoard['5'] == theBoard['3'] != ' ': # diagonal
73 | win_message(turn)
74 | break
75 | elif theBoard['1'] == theBoard['5'] == theBoard['9'] != ' ': # diagonal
76 | win_message(turn)
77 | break
78 |
79 | # If neither X nor O wins and the board is full, we'll declare the result as 'tie'.
80 | if count == 9:
81 | print("\nGame Over.\nIt's a Tie!!")
82 |
83 | # Now we have to change the player after every move.
84 | if turn == 'X':
85 | turn = 'O'
86 | else:
87 | turn = 'X'
88 |
89 | # Now we will ask if player wants to restart the game or not.
90 | restart = input("Do want to play Again?(y/n) ")
91 | if restart in ('y', 'Y'):
92 | for key in board_keys:
93 | theBoard[key] = " "
94 |
95 | game()
96 |
97 | if __name__ == "__main__":
98 | game()
99 |
--------------------------------------------------------------------------------
/Todo List Application/.idea/file:
--------------------------------------------------------------------------------
1 |
2 |
--------------------------------------------------------------------------------
/Todo List Application/.idea/inspectionProfiles/file.txt:
--------------------------------------------------------------------------------
1 |
2 |
--------------------------------------------------------------------------------
/Todo List Application/.idea/inspectionProfiles/profiles_settings.xml:
--------------------------------------------------------------------------------
1 |
2 |
3 |
4 |
5 |
6 |
--------------------------------------------------------------------------------
/Todo List Application/.idea/misc.xml:
--------------------------------------------------------------------------------
1 |
2 |
3 |
4 |
--------------------------------------------------------------------------------
/Todo List Application/.idea/modules.xml:
--------------------------------------------------------------------------------
1 |
2 |
3 |
4 |
5 |
6 |
7 |
8 |
--------------------------------------------------------------------------------
/Todo List Application/.idea/todolist.iml:
--------------------------------------------------------------------------------
1 |
2 |
3 |
4 |
5 |
6 |
7 |
8 |
--------------------------------------------------------------------------------
/Todo List Application/.idea/workspace.xml:
--------------------------------------------------------------------------------
1 |
2 |
3 |
4 |
5 |
6 |
7 |
8 |
9 |
10 |
11 |
16 |
17 |
18 |
19 |
20 |
21 |
22 |
23 |
24 |
25 |
26 |
27 |
28 |
29 |
30 |
31 |
32 |
33 |
34 |
35 |
36 |
37 |
38 |
39 |
40 |
41 |
42 |
43 |
44 |
45 |
46 |
47 |
48 |
49 |
50 |
51 |
52 |
53 |
54 |
55 |
65 |
66 |
67 |
68 |
69 |
70 |
71 |
72 | 1580417523930
73 |
74 |
75 | 1580417523930
76 |
77 |
78 |
79 |
80 |
81 |
82 |
83 |
84 |
85 |
86 |
87 |
88 |
89 |
90 |
91 |
92 |
93 |
94 |
95 |
96 |
97 |
98 |
99 |
100 |
101 |
102 |
103 |
104 |
105 |
106 |
107 |
108 |
109 |
110 |
111 |
112 |
113 |
--------------------------------------------------------------------------------
/Todo List Application/README.md:
--------------------------------------------------------------------------------
1 | ## Todo List Application
2 |
3 | **Dscription:-**
4 |
5 | The To do List In Python is a simple project developed using Python. This project is a GUI application which stores the list of works to do from the users input. This project is an interesting and simple project. The project is not completely functional. You can add, edit many more features in this project
6 |
7 | **About the system:-**
8 |
9 | This to do list application is designed to create your to do list with the required time and you can also get the notification/remainder when you have to to your task. Here, the module used is Tkinter()-It is a standard Python interface to the Tk GUI toolkit shipped with Python. Python with tkinter outputs the fastest and easiest way to create the GUI applications. Creating a GUI using tkinter is an easy task. Also, the design of this system is pretty simple so that the user won’t get any difficulties while working on it.
10 |
11 | **How To Run The Project?**
12 |
13 | To run this project, you must have installed **[Python](https://www.python.org/downloads/)** on your PC. After downloading it, follow the steps below:
14 |
15 | **Step1:** Clone this repository in your Local machine.
16 |
17 | **Step 2:** Go inside the project folder, open cmd then type main.py and enter to start the system.
18 |
19 | **OR**
20 |
21 | **Step 2:** Simply, double click the main.py file and you are ready to go.
22 |
--------------------------------------------------------------------------------
/Todo List Application/main.py:
--------------------------------------------------------------------------------
1 | import tkinter
2 | import threading
3 | from tkinter import messagebox
4 | import sys
5 |
6 | tasks = []
7 | timer = threading
8 | real_timer = threading
9 | ok_thread = True
10 |
11 |
12 | def get_entry(event=""):
13 | text = todo.get()
14 | hour = int(time.get())
15 | todo.delete(0, tkinter.END)
16 | time.delete(0, tkinter.END)
17 | todo.focus_set()
18 | add_list(text, hour)
19 | if 0 < hour < 999:
20 | update_list()
21 |
22 |
23 | def add_list(text, hour):
24 | tasks.append([text, hour])
25 | timer = threading.Timer(hour, time_passed, [text])
26 | timer.start()
27 |
28 |
29 | def update_list():
30 | if todolist.size() > 0:
31 | todolist.delete(0, "end")
32 | for task in tasks:
33 | todolist.insert("end", "[" + task[0] + "] Time left: " + str(task[1]) + " secondes")
34 |
35 |
36 | def time_passed(task):
37 | tkinter.messagebox.showinfo("Notification", "Time for : " + task)
38 |
39 |
40 | def real_time():
41 | if ok_thread:
42 | real_timer = threading.Timer(1.0, real_time)
43 | real_timer.start()
44 | for task in tasks:
45 | if task[1] == 0:
46 | tasks.remove(task)
47 | task[1] -= 1
48 | update_list()
49 |
50 |
51 | if __name__ == '__main__':
52 | # application
53 | app = tkinter.Tk()
54 | app.geometry("480x680")
55 | app.title("Todolist Remainder")
56 | app.rowconfigure(0, weight=1)
57 |
58 | # fenetre
59 | frame = tkinter.Frame(app)
60 | frame.pack()
61 |
62 | # widgets
63 | label = tkinter.Label(app, text="Enter work to do:",
64 | wraplength = 200,
65 | justify = tkinter.LEFT)
66 | label_hour = tkinter.Label(app, text="Enter time (secondes)",
67 | wraplength = 200,
68 | justify = tkinter.LEFT)
69 | todo = tkinter.Entry(app, width=30)
70 | time = tkinter.Entry(app, width=15)
71 | send = tkinter.Button(app, text='Add task', fg="#ffffff", bg='#6186AC', height=3, width=30, command=get_entry)
72 | quit = tkinter.Button(app, text='Exit', fg="#ffffff", bg='#EB6464', height=3, width=30, command=app.destroy)
73 | todolist = tkinter.Listbox(app)
74 | if tasks != "":
75 | real_time()
76 |
77 | # binding
78 | app.bind('', get_entry)
79 |
80 | # widgets placement
81 | label.place(x=0, y=10, width=200, height=25)
82 | label_hour.place(x=235, y=10, width=200, height=25)
83 | todo.place(x=62, y=30, width=200, height=25)
84 | time.place(x=275, y=30, width=50, height=25)
85 | send.place(x=62, y=60, width=50, height=25)
86 | quit.place(x=302, y=60, width=50, height=25)
87 | todolist.place(x=60, y = 100, width=300, height=300)
88 |
89 | app.mainloop()
90 | ok_thread = False
91 | sys.exit("FINISHED")
92 |
--------------------------------------------------------------------------------
/Udemy Web Scrapping/README.md:
--------------------------------------------------------------------------------
1 |
2 |
--------------------------------------------------------------------------------
/Udemy Web Scrapping/Udemy.py:
--------------------------------------------------------------------------------
1 | from bs4 import BeautifulSoup #Importing the Beautiful Soup Library
2 | import requests #Importing the requests library
3 | import time #Importing the time library
4 | import csv #Importing the csv module
5 | import json #Importing the JSON library
6 |
7 | host = 'https://www.udemy.com'
8 | courses_api_endpoint = '/api-2.0/discovery-units/all_courses/?p=1&page_size=16&category_id=%d&source_page=category_page&locale=en_US¤cy=eur&navigation_locale=en_US&skip_price=true&sos=pc&fl=cat'
9 | prices_api_endpoint = '/api-2.0/pricing/?course_ids=%s&fields[pricing_result]=price'
10 | headers = {'User-Agent':'Mozilla/5.0 (compatible; MSIE 10.0; Windows NT 6.1; WOW64; Trident/6.0)'}
11 |
12 | response = requests.get(host, headers=headers)
13 | front_page_soup = BeautifulSoup(response.text, 'lxml')
14 | top_categories = front_page_soup.select('a[data-purpose="category-card-title-link"]')
15 |
16 | with open('udemy.csv', 'w') as file:
17 | write = csv.writer(file)
18 | write.writerow(['No.',
19 | 'Category',
20 | 'URL',
21 | 'Name',
22 | 'Description',
23 | 'Author',
24 | 'Rating',
25 | 'Price',
26 | ])
27 | index = 0
28 | for top_category in top_categories:
29 | category_name = top_category.text
30 | category_url = host + top_category['href']
31 |
32 | response = requests.get(category_url, headers=headers)
33 | category_soup = BeautifulSoup(response.text, 'lxml')
34 | page_object = json.loads(category_soup.find('div', class_='ud-component--category--category')['data-component-props'])
35 | category_id = page_object['pageObject']['id']
36 |
37 | response = requests.get(host + courses_api_endpoint % category_id, headers=headers)
38 | data = json.loads(response.text)
39 | courses = data['unit']['items']
40 | courses_list = []
41 | ids = []
42 | for course in courses:
43 | index += 1
44 | id = str(course['id'])
45 | name = course['title']
46 | url = host + course['url']
47 | description = course['headline']
48 | rating = course['rating']
49 | author = ', '.join([instructor['display_name'] for instructor in course['visible_instructors']])
50 | courses_list.append([index, category_name, url, name, description, author, rating, ''])
51 | ids.append(id)
52 |
53 | ids_str = ','.join(ids)
54 | response = requests.get(host + prices_api_endpoint % ids_str, headers=headers)
55 | data = json.loads(response.text)
56 | prices = data['courses']
57 | for i in range(len(ids)):
58 | courses_list[i][-1] = prices[ids[i]]['price']['price_string']
59 |
60 | write.writerows(courses_list)
--------------------------------------------------------------------------------
/Udemy Web Scrapping/udemy.csv:
--------------------------------------------------------------------------------
1 | No.,Category,URL,Name,Description,Author,Rating,Price
2 | 1,Design,https://www.udemy.com/course/the-ultimate-drawing-course-beginner-to-advanced/,The Ultimate Drawing Course - Beginner to Advanced,Learn the #1 most important building block of all art,"Jaysen Batchelor, Quinton Batchelor",4.54082,€19.99
3 | 2,Design,https://www.udemy.com/course/character-art-school-complete-character-drawing/,Character Art School: Complete Character Drawing Course,"Learn How to Draw People and Character Designs Professionally, Drawing for Animation, Comics, Cartoons, Games and More!",Scott Harris,4.51255,€20.99
4 | 3,Design,https://www.udemy.com/course/blendertutorial/,Complete Blender Creator: Learn 3D Modelling for Beginners,"Use Blender to Create Beautiful 3D models for Video Games, 3D Printing & More. Beginners Level Course","GameDev.tv Team, Rick Davidson",4.60596,€24.99
5 | 4,Design,https://www.udemy.com/course/designit-design-thinking/,Design Thinking in 3 Steps,"Understand your audience, envision a creative solution, and test your prototype","Designit Strategic Design, Alan Cooper",4.44365,€189.99
6 | 5,Design,https://www.udemy.com/course/illustrator-cc-masterclass/,Illustrator CC 2020 MasterClass,Master Adobe Illustrator CC with this in-depth training for all levels.,Martin Perhiniak,4.5751,€19.99
7 | 6,Design,https://www.udemy.com/course/ui-ux-web-design-using-adobe-xd/,User Experience Design Essentials - Adobe XD UI UX Design,"Use XD to get a job in UI Design, User Interface, User Experience design, UX design & Web Design","Daniel Walter Scott, Instructor HQ",4.61084,€20.99
8 | 7,Design,https://www.udemy.com/course/ultimate-photoshop-training-from-beginner-to-pro/,Ultimate Photoshop Training: From Beginner to Pro,Master Photoshop CC 2020 without any previous knowledge with this easy-to-follow course,Cristian Doru Barin,4.64022,€19.99
9 | 8,Design,https://www.udemy.com/course/after-effects-kinetic-typography/,After Effects CC 2020: Complete Course from Novice to Expert,"Create stunning Motion Graphics, VFX Visual Effects & VFX Compositing with hands-on tutorials & 50+ practice projects.",Louay Zambarakji,4.62361,€22.99
10 | 9,Design,https://www.udemy.com/course/graphic-design-masterclass-everything-you-need-to-know/,Graphic Design Masterclass - Learn GREAT Design,"The Ultimate Graphic Design Course Which Covers Photoshop, Illustrator, InDesign,Design Theory, Branding and Logo Design",Lindsay Marsh,4.63559,€18.99
11 | 10,Design,https://www.udemy.com/course/adobe-photoshop-course/,Adobe Photoshop CC: Your Complete Beginner to Advanced Class,Learn the essential tools of Adobe Photoshop CC to jump right in and design beautiful graphics and photos in Photoshop.,"Phil Ebiner, Video School",4.53908,€22.99
12 | 11,Design,https://www.udemy.com/course/wordpress-for-beginners-course/,Wordpress for Beginners - Master Wordpress Quickly,"In 2020, build a beautiful responsive Wordpress site that looks great on all devices. No experience required.",Andrew Williams,4.47302,€22.99
13 | 12,Design,https://www.udemy.com/course/adobe-photoshop-cc-essentials-training-course/,Adobe Photoshop CC – Essentials Training Course,This Adobe Photoshop Essentials course will teach you Photoshop Retouching as well as Photoshop for graphic design.,"Daniel Walter Scott, Instructor HQ",4.71644,€18.99
14 | 13,Design,https://www.udemy.com/course/autocad-2018-course/,The complete AutoCAD 2018-21 course,A complete course for learning AutoCAD from scratch to professional level,Jaiprakash Pandey,4.57762,€19.99
15 | 14,Design,https://www.udemy.com/course/graphic-design-for-beginners/,"Graphic Design Bootcamp: Photoshop, Illustrator, InDesign","Bestselling Beginner Course! Use Photoshop, Illustrator, & InDesign for logo design, web design, poster design, and more",Derrick Mitchell,4.48195,€18.99
16 | 15,Design,https://www.udemy.com/course/web-design-for-beginners-real-world-coding-in-html-css/,Web Design for Beginners: Real World Coding in HTML & CSS,"Launch a career as a web designer by learning HTML5, CSS3, responsive design, Sass and more!",Brad Schiff,4.64591,€19.99
17 | 16,Design,https://www.udemy.com/course/adobe-illustrator-course/,Adobe Illustrator CC - Essentials Training Course,"Learn Adobe Illustrator CC graphic design, logo design, and more with this in-depth, practical, easy-to-follow course!","Video School, Phil Ebiner, Daniel Walter Scott, Instructor HQ",4.73849,€18.99
18 | 17,Development,https://www.udemy.com/course/complete-python-bootcamp/,2020 Complete Python Bootcamp: From Zero to Hero in Python,Learn Python like a Professional! Start from the basics and go all the way to creating your own applications and games!,Jose Portilla,4.57456,€11.99
19 | 18,Development,https://www.udemy.com/course/the-web-developer-bootcamp/,The Web Developer Bootcamp 2020,"COMPLETELY REDONE - The only course you need to learn web development - HTML, CSS, JS, Node, and More!",Colt Steele,4.65792,€11.99
20 | 19,Development,https://www.udemy.com/course/machinelearning/,Machine Learning A-Z™: Hands-On Python & R In Data Science,Learn to create Machine Learning Algorithms in Python and R from two Data Science experts. Code templates included.,"Kirill Eremenko, Hadelin de Ponteves, SuperDataScience Team, SuperDataScience Support",4.55076,€18.99
21 | 20,Development,https://www.udemy.com/course/the-complete-guide-to-angular-2/,Angular - The Complete Guide (2020 Edition),"Master Angular 10 (formerly ""Angular 2"") and build awesome, reactive web apps with the successor of Angular.js",Maximilian Schwarzmüller,4.5893,€13.99
22 | 21,Development,https://www.udemy.com/course/java-the-complete-java-developer-course/,Java Programming Masterclass for Software Developers,Learn Java In This Course And Become a Computer Programmer. Obtain valuable Core Java Skills And Java Certification,"Tim Buchalka, Tim Buchalka's Learn Programming Academy, Akinjole Abisola Joy, Joe Sikuea, Kirk DeMartini, Laura Lang",4.57053,€11.99
23 | 22,Development,https://www.udemy.com/course/react-the-complete-guide-incl-redux/,"React - The Complete Guide (incl Hooks, React Router, Redux)","Dive in and learn React.js from scratch! Learn Reactjs, Hooks, Redux, React Routing, Animations, Next.js and way more!","Academind by Maximilian Schwarzmüller, Maximilian Schwarzmüller",4.62617,€11.99
24 | 23,Development,https://www.udemy.com/course/the-complete-web-development-bootcamp/,The Complete 2020 Web Development Bootcamp,"Become a full-stack web developer with just one course. HTML, CSS, Javascript, Node, React, MongoDB and more!",Dr. Angela Yu,4.70562,€11.99
25 | 24,Development,https://www.udemy.com/course/python-for-data-science-and-machine-learning-bootcamp/,Python for Data Science and Machine Learning Bootcamp,"Learn how to use NumPy, Pandas, Seaborn , Matplotlib , Plotly , Scikit-Learn , Machine Learning, Tensorflow , and more!",Jose Portilla,4.60693,€18.99
26 | 25,Development,https://www.udemy.com/course/the-complete-javascript-course/,The Complete JavaScript Course 2020: Build Real Projects!,"Master JavaScript with the most complete course! Projects, challenges, quizzes, JavaScript ES6+, OOP, AJAX, Webpack",Jonas Schmedtmann,4.58764,€13.99
27 | 26,Development,https://www.udemy.com/course/unitycourse/,Complete C# Unity Game Developer 2D,"Learn Unity in C# & Code Your First Seven 2D Video Games for Web, Mac & PC. The Tutorials Cover Tilemap (35 hours)","Ben Tristem, GameDev.tv Team, Rick Davidson",4.65085,€19.99
28 | 27,Development,https://www.udemy.com/course/the-data-science-course-complete-data-science-bootcamp/,The Data Science Course 2020: Complete Data Science Bootcamp,"Complete Data Science Training: Mathematics, Statistics, Python, Advanced Statistics in Python, Machine & Deep Learning","365 Careers, 365 Careers Team",4.51948,€18.99
29 | 28,Development,https://www.udemy.com/course/automate/,Automate the Boring Stuff with Python Programming,"A practical programming course for office workers, academics, and administrators who want to improve their productivity.",Al Sweigart,4.61797,€16.99
30 | 29,Development,https://www.udemy.com/course/the-complete-web-developer-course-2/,The Complete Web Developer Course 2.0,"Learn Web Development by building 25 websites and mobile apps using HTML, CSS, Javascript, PHP, Python, MySQL & more!","Rob Percival, Codestars by Rob Percival",4.51782,€17.99
31 | 30,Development,https://www.udemy.com/course/react-redux/,Modern React with Redux [2020 Update],"Master React v16.6.3 and Redux with React Router, Webpack, and Create-React-App. Includes Hooks!",Stephen Grider,4.67358,€11.99
32 | 31,Development,https://www.udemy.com/course/python-the-complete-python-developer-course/,Learn Python Programming Masterclass,This Python For Beginners Course Teaches You The Python Language Fast. Includes Python Online Training With Python 3,"Tim Buchalka, Jean-Paul Roberts, Tim Buchalka's Learn Programming Academy",4.55044,€16.99
33 | 32,Development,https://www.udemy.com/course/the-complete-nodejs-developer-course-2/,The Complete Node.js Developer Course (3rd Edition),"Learn Node.js by building real-world applications with Node, Express, MongoDB, Jest, and more!","Andrew Mead, Rob Percival",4.69497,€11.99
34 | 33,Marketing,https://www.udemy.com/course/learn-digital-marketing-course/,The Complete Digital Marketing Course - 12 Courses in 1,"Master Digital Marketing Strategy, Social Media Marketing, SEO, YouTube, Email, Facebook Marketing, Analytics & More!","Rob Percival, Daragh Walsh, Codestars by Rob Percival",4.44716,€20.99
35 | 34,Marketing,https://www.udemy.com/course/the-ultimate-google-adwords-training-course/,Ultimate Google Ads Training 2020: Profit with Pay Per Click,Google Ads 2020: How our clients have transformed their sales using Google Ads & get your Google Ads certification!,Isaac Rudansky,4.67137,€20.99
36 | 35,Marketing,https://www.udemy.com/course/instagram-marketing-for-small-businesses/,Instagram Marketing 2020: Complete Guide To Instagram Growth,"Attract Hyper-Targeted Instagram Followers, Convert Followers to Paying Customers, & Expand your Brand Using Instagram","Benjamin Wilson, Entrepreneur Academy",4.42807,€20.99
37 | 36,Marketing,https://www.udemy.com/course/facebook-ads-facebook-marketing-mastery-guide/,Facebook Ads & Facebook Marketing MASTERY 2020 | Coursenvy ®,"Facebook Marketing from beginner to advanced! Join 100,000+ students who MASTERED Facebook and are Facebook Ads experts!",COURSE ENVY,4.41864,€21.99
38 | 37,Marketing,https://www.udemy.com/course/digital-marketing-masterclass/,Digital Marketing Masterclass - 23 Courses in 1,"Grow Your Business with Digital Marketing: Social Media Marketing, Facebook, Content, YouTube, Email Marketing, Websites","Phil Ebiner, Diego Davila, Video School",4.37675,€22.99
39 | 38,Marketing,https://www.udemy.com/course/sql-for-newbs/,SQL for Data Analysis: Weekender Crash Course for Beginners,"Using MySQL but applicable to Oracle SQL, Microsoft SQL Server, and PostgreSQL. Taught by a Data Scientist and PM.","A Course You'll Actually Finish, David Kim, Peter Sefton",4.27566,€18.99
40 | 39,Marketing,https://www.udemy.com/course/social-media-marketing-ads/,Social Media Marketing MASTERY | Learn Ads on 10+ Platforms,"MASTER online marketing on Twitter, Pinterest, Instagram, YouTube, Facebook, Google and more ad platforms! Coursenvy ®",COURSE ENVY,4.42162,€21.99
41 | 40,Marketing,https://www.udemy.com/course/google-analytics-certification/,Google Analytics Certification: Become Certified & Earn More,"Become Google Analytics Certified to Land a Job, Get Promoted or Start a New Career in Digital Marketing! 2020 Guide",Daragh Walsh,4.47445,€21.99
42 | 41,Marketing,https://www.udemy.com/course/seo-get-to-number1-in-google-search/,SEO 2020: Complete SEO Training + SEO for WordPress Websites,"Rank 1 on Google with Technical SEO, 1s Pagespeed, UX SEO, Backlink SEO, Keyword Research SEO + WordPress SEO Training",Arun Nagarathanam,4.35113,€21.99
43 | 42,Marketing,https://www.udemy.com/course/the-complete-copywriting-course/,The Complete Copywriting Course : Write to Sell Like a Pro,"Write Effective Sales Copy & Grow Your Business & Career // Access Timeless Copywriting Formulas, Templates & FREE Tools","Codestars by Rob Percival, Tamsin Henderson, Rob Percival",4.58395,€31.99
44 | 43,Marketing,https://www.udemy.com/course/learn-social-media-marketing-course/,Social Media Marketing - Complete Certificate Course,"The comprehensive social media course, beginner to advanced. Go viral, get started today!",SO ME Academy,4.27268,€21.99
45 | 44,Marketing,https://www.udemy.com/course/youtube-masterclass/,YouTube Masterclass - Your Complete Guide to YouTube,"Complete guide to starting a YouTube channel, getting more views & subscribers, and building a brand with videos!","Phil Ebiner, Michael Moyer, Video School",4.34246,€21.99
46 | 45,Marketing,https://www.udemy.com/course/clickbank-affiliate-marketing-success/,ClickBank Success – Affiliate Marketing Without A Website,Learn and model my proven system for success as a ClickBank affiliate. No hidden secrets - I reveal it all!,KC Tan,4.39793,€18.99
47 | 46,Marketing,https://www.udemy.com/course/instagram-masterclass-grow-your-account-complete-guide/,"Instagram Marketing 2020: Hashtags, Live, Stories, Ads &more","Watch me take an account from an idea to 40k followers in 4 months. 14 hours instruction, 8 hours of BTS videos",Evan Kimbrell,4.4548,€19.99
48 | 47,Marketing,https://www.udemy.com/course/growth-hacking-masterclass-become-a-digital-marketing-ninja/,[2020] Growth Hacking with Digital Marketing (Version 7.2),"Become a growth hacker! This course is used by teams at PayPal®, IBM®, Citibank® & many other successful organizations!","Davis Jones, Eazl (Official), Maja Voje",4.44148,€20.99
49 | 48,Marketing,https://www.udemy.com/course/copywriting-secrets/,Copywriting secrets - How to write copy that sells,Discover the secrets of copywriting success from the master. From novice to pro in easy stages,"Len Smith, Sean Kaye",4.44118,€21.99
50 | 49,IT and Software,https://www.udemy.com/course/aws-certified-solutions-architect-associate/,AWS Certified Solutions Architect - Associate 2020,Want to pass the AWS Solutions Architect - Associate Exam? Want to become Amazon Web Services Certified? Do this course!,"Ryan Kroonenburg, Mark Richman",4.52569,€16.99
51 | 50,IT and Software,https://www.udemy.com/course/learn-ethical-hacking-from-scratch/,Learn Ethical Hacking From Scratch,Become an ethical hacker that can hack computer systems like black hat hackers and secure them like security experts.,"Zaid Sabih, z Security",4.54725,€11.99
52 | 51,IT and Software,https://www.udemy.com/course/aws-certified-solutions-architect-associate-saa-c02/,Ultimate AWS Certified Solutions Architect Associate 2020,Pass the AWS Certified Solutions Architect Associate Certification SAA-C02. Complete Amazon Web Services Cloud training!,Stephane Maarek | AWS Certified Solutions Architect & Developer Associate,4.70373,€16.99
53 | 52,IT and Software,https://www.udemy.com/course/aws-certified-developer-associate/,AWS Certified Developer - Associate 2020,Do you want AWS certification? Do you want to be an AWS Certified Developer Associate? This AWS online course is for you,"Ryan Kroonenburg, Faye Ellis",4.36223,€13.99
54 | 53,IT and Software,https://www.udemy.com/course/the-complete-internet-security-privacy-course-volume-1/,The Complete Cyber Security Course : Hackers Exposed!,"Volume 1 : Become a Cyber Security Specialist, Learn How to Stop Hackers, Prevent Hacking, Learn IT Security & INFOSEC",Nathan House,4.4828,€16.99
55 | 54,IT and Software,https://www.udemy.com/course/new-comptia-a-2019-certification-1001-the-total-course/,TOTAL: CompTIA A+ Certification (220-1001).,"Course 1: Everything you need to pass the A+ Certification Core 1 (220-1001) Exam, from Mike Meyers and Total Seminars.","Total Seminars • 500,000+ Enrollments, Mike Meyers",4.71277,€14.99
56 | 55,IT and Software,https://www.udemy.com/course/aws-certified-developer-associate-dva-c01/,Ultimate AWS Certified Developer Associate 2020 - NEW!,Become an AWS Certified Developer! Learn all Amazon Web Services Developer topics. PASS the AWS Certified Developer Exam,Stephane Maarek | AWS Certified Solutions Architect & Developer Associate,4.68658,€20.99
57 | 56,IT and Software,https://www.udemy.com/course/penetration-testing/,The Complete Ethical Hacking Course: Beginner to Advanced!,"Learn how to do ethical hacking, penetration testing, web testing, and wifi hacking using kali linux!",Ermin Kreponic,4.25592,€14.99
58 | 57,IT and Software,https://www.udemy.com/course/ccna-complete/,Cisco CCNA 200-301 – The Complete Guide to Getting Certified,The top rated CCNA course online and only one where all questions get a response. Full lab exercises included.,Neil Anderson,4.75102,€12.99
59 | 58,IT and Software,https://www.udemy.com/course/comptia-security-certification-sy0-501-the-total-course/,TOTAL: CompTIA Security+ Certification (SY0-501).,"Everything you need to pass the CompTIA Security+ SY0-501 Exam, from Mike Meyers. CompTIA expert and bestselling author.","Total Seminars • 500,000+ Enrollments, Mike Meyers",4.63328,€23.99
60 | 59,IT and Software,https://www.udemy.com/course/learn-linux-in-5-days/,Learn Linux in 5 Days and Level Up Your Career,Use the in-demand Linux skills you learn in this course to get promoted or start a new career as a Linux professional.,Jason Cannon,4.49297,€11.99
61 | 60,IT and Software,https://www.udemy.com/course/ccna-on-demand-video-boot-camp/,CCNA 2020 200-125 Video Boot Camp With Chris Bryant,"Join The 90,000+ Students Who Are Learning Real-World Skills AND Earning Their CCNA!",Chris Bryant,4.50678,€12.99
62 | 61,IT and Software,https://www.udemy.com/course/complete-networking-fundamentals-course-ccna-start/,The Complete Networking Fundamentals Course. Your CCNA start,Learn about networking and start your journey to Cisco 200-301 Certification.,"David Bombal, Experts with David Bombal",4.60093,€19.99
63 | 62,IT and Software,https://www.udemy.com/course/the-complete-oracle-sql-certification-course/,The Complete Oracle SQL Certification Course,"Don't Just Learn the SQL Language, Become Job-Ready and Launch Your Career as a Certified Oracle SQL Developer!",Imtiaz Ahmad,4.5466,€18.99
64 | 63,IT and Software,https://www.udemy.com/course/70534-azure/,AZ-300/AZ-303 Azure Architecture Technologies Exam Prep 2020,Prove your Azure Architect Technology skills to the world. Complete AZ-300 & AZ-303 course. Update as of Sep 2020.,"Scott Duffy • 415.000+ Students, Software Architect.ca",4.46742,€14.99
65 | 64,IT and Software,https://www.udemy.com/course/salesforce-administrator/,The Complete Salesforce Classic Administrator Certification,"Salesforce Admin 60 Question Practice Test Included! Join 70,000+ students.","Mike Wheeler, Aaron Wheeler",4.40701,€11.99
66 | 65,Personal Development,https://www.udemy.com/course/reikicourse/,"Reiki Level I, II and Master/Teacher Program","Learn Reiki Levels 1, 2 and Master Level to become a Certified Traditional Usui Reiki Practitioner/Instructor",Lisa Powers,4.69297,€18.99
67 | 66,Personal Development,https://www.udemy.com/course/become-a-superlearner-2-speed-reading-memory-accelerated-learning/,Become a SuperLearner® 2: Learn Speed Reading & Boost Memory,The original course to learn faster & more easily using the skills of the worlds fastest readers & memory record holders,"Jonathan Levi, Lev Goldentouch, Anna Goldentouch, SuperHuman Academy®",4.51436,€23.99
68 | 67,Personal Development,https://www.udemy.com/course/life-coaching-online-certification-course-life-coach-training/,Life Coaching Certificate Course (Beginner to Advanced),This certified Life Coaching training course gives the essential training you need to become a highly-skilled Life Coach,"Kain Ramsay, Achology Ltd",4.56394,€18.99
69 | 68,Personal Development,https://www.udemy.com/course/investing-in-stocks/,Investing In Stocks The Complete Course! (11 Hour),"Master Investing in the Stock Market with Stocks, Mutual Funds, ETF, from a Top Instructor & Millionaire Stock Portfolio","Steve Ballinger, MBA",4.4307,€19.99
70 | 69,Personal Development,https://www.udemy.com/course/nlp-practitioner-neuro-linguistic-programming-online-course/,NLP Practitioner Certification Course (Beginner to Advanced),"Dive deep into the psychology of the human mind, behaviour, and become certified in Neuro-Linguistic Programming (NLP)","Kain Ramsay, Achology Ltd",4.47392,€18.99
71 | 70,Personal Development,https://www.udemy.com/course/storytellingtoinfluence/,Storytelling to Influence,How to use stories to influence any audience!,Jeff Tan,4.2584,€18.99
72 | 71,Personal Development,https://www.udemy.com/course/productivity-and-time-management/,Productivity and Time Management for the Overwhelmed,A complete productivity and time management course designed to help you reduce your overwhelm and increase your results.,Josh Paulsen,4.45577,€18.99
73 | 72,Personal Development,https://www.udemy.com/course/reiki-master-certification-energy-healing/,"Reiki Level I, II and Master Certification - Energy Healing","Become a Certified Usui Reiki Practitioner - Heal Yourself, Family, Friends, Clients, Pets and More with Energy Healing!",Melissa Crowhurst,4.72344,€19.99
74 | 73,Personal Development,https://www.udemy.com/course/the-secrets-of-body-language-webinar/,The Secrets of Body Language,Learn how to interpret the body language of the people around you while perfecting your own nonverbal communication.,"Vanessa Van Edwards, Science of People",4.40316,€19.99
75 | 74,Personal Development,https://www.udemy.com/course/neuroplasticity/,Neuroplasticity: How To Rewire Your Brain,"How to develop mental flexibility, change habits, stop procrastination and alter memories based on neuroscience research",Gregory Caremans - Brain Academy,4.66803,€21.99
76 | 75,Personal Development,https://www.udemy.com/course/1000-watt-presence/,Radiate Confidence: How to Create a 1000 Watt Presence,"Helping you unlock your inner light, or presence, so you can easily, effortlessly connect with everyone you meet.",Alexa Fischer,4.48445,€18.99
77 | 76,Personal Development,https://www.udemy.com/course/mindfulness-training-course-online-mindfulness-practitioner/,"Mindfulness Certificate Course (Level I, II, III and Master)","Become certified in Mindfulness, a wisdom-based life discipline that enables profound personal growth and development.","Kain Ramsay, Achology Ltd",4.50825,€19.99
78 | 77,Personal Development,https://www.udemy.com/course/self-confidence-40-minute-confidence-self-esteem-guide/,SELF-CONFIDENCE: 40-minute Confidence & Self Esteem Guide,"Boost Your Confidence and Self Esteem, Handle Fear of Rejection, Learn Powerful Body Language, Feel Great About Yourself",Jimmy Naraine,4.44681,€20.99
79 | 78,Personal Development,https://www.udemy.com/course/stress-management-40-easy-ways-to-deal-with-stress/,Stress Management: 40+ easy ways to deal with stress,"Stress relief and burnout prevention. Don't let stress control your life. Beat anxiety and worries. Live, Laugh, Love.",Gregory Caremans - Brain Academy,4.46219,€18.99
80 | 79,Personal Development,https://www.udemy.com/course/a-practical-guide-to-negotiating/,Successful Negotiation: Master Your Negotiating Skills,Master negotiation with these negotiating tips,Chris Croft,4.53286,€23.99
81 | 80,Personal Development,https://www.udemy.com/course/technical_analysis/,Technical Analysis MasterClass:Trading By Technical Analysis,"Stock Market Technical Analysis Secrets for Forex , Stock Trading , Options , Swing Trading & Day Trading + ASSIGNMENTS","Jyoti Bansal (NCFM,NISM Certified Technical Analyst & Investment Adviser ), Jyoti Bansal Analysis",4.4362,€23.99
82 | 81,Business,https://www.udemy.com/course/the-complete-sql-bootcamp/,The Complete SQL Bootcamp 2020: Go from Zero to Hero,Become an expert at SQL!,Jose Portilla,4.68111,€18.99
83 | 82,Business,https://www.udemy.com/course/tableau10/,Tableau 2020 A-Z: Hands-On Tableau Training for Data Science,Learn Tableau 2020 for data science step by step. Real-life data analytics exercises & quizzes included. Learn by doing!,"Kirill Eremenko, SuperDataScience Team",4.59632,€18.99
84 | 83,Business,https://www.udemy.com/course/pmp-pmbok6-35-pdus/,PMP Exam Prep Seminar - PMBOK Guide 6,PMP Exam Prep Seminar - Earn 35 PDUs by completing the entire PMP course,Joseph Phillips,4.5958,€20.99
85 | 84,Business,https://www.udemy.com/course/the-complete-financial-analyst-course/,The Complete Financial Analyst Course 2020,"Excel, Accounting, Financial Statement Analysis, Business Analysis, Financial Math, PowerPoint: Everything is Included!",365 Careers,4.54444,€21.99
86 | 85,Business,https://www.udemy.com/course/an-entire-mba-in-1-courseaward-winning-business-school-prof/,An Entire MBA in 1 Course:Award Winning Business School Prof,** #1 Best Selling Business Course! ** Everything You Need to Know About Business from Start-up to IPO,Chris Haroun,4.48544,€24.99
87 | 86,Business,https://www.udemy.com/course/powerbi-complete-introduction/,Microsoft Power BI - A Complete Introduction [2020 EDITION],"Learn how to use Microsoft's Power BI Tools, including Power BI Desktop, Power BI Pro (Service) and PowerBI Developer","Manuel Lorenz, Academind by Maximilian Schwarzmüller, Maximilian Schwarzmüller",4.55588,€19.99
88 | 87,Business,https://www.udemy.com/course/agile-crash-course/,Agile Crash Course: Agile Project Management; Agile Delivery,Get Agile Certified & Learn about the key and most important concepts and tools of Agile Project Management (Scrum),Mauricio Rubio - Agile Guru & Founder of AgileKB | Ureducation,4.31691,€18.99
89 | 88,Business,https://www.udemy.com/course/beginner-to-pro-in-excel-financial-modeling-and-valuation/,Beginner to Pro in Excel: Financial Modeling and Valuation,Financial Modeling in Excel that would allow you to walk into a job and be a rockstar from day one!,365 Careers,4.55938,€21.99
90 | 89,Business,https://www.udemy.com/course/become-a-product-manager-learn-the-skills-get-a-job/,Become a Product Manager | Learn the Skills & Get the Job,"The most complete course available on Product Management. 13+ hours of videos, activities, interviews, & more","Cole Mercer, Evan Kimbrell",4.49234,€23.99
91 | 90,Business,https://www.udemy.com/course/the-business-intelligence-analyst-course-2018/,The Business Intelligence Analyst Course 2020,"The skills you need to become a BI Analyst - Statistics, Database theory, SQL, Tableau – Everything is included",365 Careers,4.49073,€18.99
92 | 91,Business,https://www.udemy.com/course/microsoft-power-bi-up-running-with-power-bi-desktop/,Microsoft Power BI - Up & Running With Power BI Desktop,"Transform, analyze & visualize data with Microsoft Power BI Desktop: hands-on demos, projects & 1-on-1 Power BI support","Maven Analytics, Chris Dutton, Aaron Parry",4.64329,€18.99
93 | 92,Business,https://www.udemy.com/course/business-analysis-ba/,Business Analysis Fundamentals,"Set yourself up for success, learn the key business analysis concepts to thrive in your Business Analyst career",The BA Guide | Jeremy Aschenbrenner,4.48027,€18.99
94 | 93,Business,https://www.udemy.com/course/practical-leadership/,Leadership: Practical Leadership Skills,Master leadership skills and leadership techniques with this highly practical advice and training,Chris Croft,4.61211,€18.99
95 | 94,Business,https://www.udemy.com/course/foundation-course/,The Complete Foundation Stock Trading Course,"Learn To Trade The Stock Market by A Trading Firm CEO. Inc: Technical Analysis, Candlesticks, Stocks, Day Trading +++","Mohsen Hassan, bloom team",4.53618,€18.99
96 | 95,Business,https://www.udemy.com/course/sql-mysql-for-data-analytics-and-business-intelligence/,SQL - MySQL for Data Analytics and Business Intelligence,"SQL that will get you hired – SQL for Business Analysis, Marketing, and Data Management",365 Careers,4.57243,€18.99
97 | 96,Business,https://www.udemy.com/course/the-complete-financial-analyst-training-and-investing-course/,The Complete Financial Analyst Training & Investing Course,"Succeed as a Financial Analyst &Investor by Award Winning MBA Prof who worked @Goldman, in Hedge Funds & Venture Capital",Chris Haroun,4.51255,€19.99
98 | 97,Photography,https://www.udemy.com/course/photography-masterclass-complete-guide-to-photography/,Photography Masterclass: A Complete Guide to Photography,The Best Online Professional Photography Class: How to Take Amazing Photos for Beginners & Advanced Photographers,"Phil Ebiner, William Carnahan, Video School, Sam Shimizu-Jones",4.68396,€18.99
99 | 98,Photography,https://www.udemy.com/course/adobe-premiere-pro-video-editing/,Premiere Pro CC for Beginners: Video Editing in Premiere,Learn how to edit videos in Adobe Premiere Pro with these easy-to-follow Premiere Pro video editing tutorials.,"Phil Ebiner, Video School",4.60821,€19.99
100 | 99,Photography,https://www.udemy.com/course/iphonephotography/,iPhone Photography | Take Professional Photos On Your iPhone,Your Online Guide to Taking Stunning iPhone Photography Like a Professional Digital Photographer,Dale McManus,4.70325,€23.99
101 | 100,Photography,https://www.udemy.com/course/video-production-bootcamp/,The Complete Video Production Bootcamp,"Make better videos with the ultimate course on video production, planning, cinematography, editing & distribution.","Phil Ebiner, William Carnahan, Sam Shimizu-Jones, Video School",4.46542,€18.99
102 | 101,Photography,https://www.udemy.com/course/adobe-lightroom/,Adobe Lightroom Classic CC & CC: Photo Editing Masterclass,"Your complete guide to editing beautiful photos in Adobe Lightroom Classic CC and Adobe Lightroom CC, both versions!","Phil Ebiner, Jon H., Video School",4.35806,€19.99
103 | 102,Photography,https://www.udemy.com/course/jp-nikon-dslr-for-beginners/,Beginner Nikon Digital SLR (DSLR) Photography,Learn how to use your camera intuitively. Learn through doing rather than memorizing.,JP Teaches Photo .,4.55572,€23.99
104 | 103,Photography,https://www.udemy.com/course/affinityphoto-solid-foundations/,Affinity Photo: Solid Foundations,The best selling beginners guide to Affinity Photo - complete with a 50 page PDF to aid your study!,Simon Foster,4.58707,€23.99
105 | 104,Photography,https://www.udemy.com/course/your-road-to-better-photography/,Your Road to Better Photography,Photography Made Simple!,Corey Reese,3.92737,€18.99
106 | 105,Photography,https://www.udemy.com/course/incrediblevideocreator/,Complete Filmmaker Guide: Become an Incredible Video Creator,Get 7 Years of Filmmaking Experience - Everything from Pre-Production to Editing - in 5 Hours,Julian Melanson,4.35872,€20.99
107 | 106,Photography,https://www.udemy.com/course/online-cinematography-course-filmmaking-video-production-lighting/,Cinematography Course: Shoot Better Video with Any Camera,Shoot better video by learning the video production techniques used by Hollywood filmmakers. And get paid to do it!,"Phil Ebiner, William Carnahan, Video School",4.28373,€20.99
108 | 107,Photography,https://www.udemy.com/course/adobe-lightroom-classic-cc-photo-editing-course/,Adobe Lightroom CC Photo Editing: Your Lightroom Masterclass,Learn how to make your photos look amazing with this Adobe Lightroom Classic CC and Lightroom CC photo editing course.,"Phil Ebiner, Video School",4.5477,€18.99
109 | 108,Photography,https://www.udemy.com/course/mastering-architecture-and-real-estate-photography/,Mastering Architecture and Real Estate Photography,"Start a business photographing real estate photography jobs for architects, builders, and real estate agents",Charlie Borland,4.4288,€19.99
110 | 109,Photography,https://www.udemy.com/course/food-photography/,Food Photography: Capturing Food in Your Kitchen,"With DIY Food Photography, you'll be taking better photos in no time with what you have in your own kitchen!","Phil Ebiner, William Carnahan, Video School",4.34228,€23.99
111 | 110,Photography,https://www.udemy.com/course/digital-photography-for-beginners-with-dslr-cameras/,Digital Photography for Beginners with DSLR cameras,Learn how to take stunning photographs by mastering both the technical and creative sides of digital photography.,Villiers Steyn,4.58247,€23.99
112 | 111,Photography,https://www.udemy.com/course/beginner-canon-digital-slr-dslr-photography-class-jp/,Beginner Canon Digital SLR (DSLR) Photography,Learn how to use your camera intuitively. Learn through doing rather than memorizing.,JP Teaches Photo .,4.64295,€18.99
113 | 112,Photography,https://www.udemy.com/course/davinci-resolve-15-course/,Video Editing in DaVinci Resolve 16: Beginner to Advanced,Learn Video Editing in DaVinci Resolve 16 with Color Correction & Color Grading & Visual Effects in DaVinci Resolve 16,Louay Zambarakji,4.57546,€18.99
114 | 113,Music,https://www.udemy.com/course/pianoforall-incredible-new-way-to-learn-piano-keyboard/,Pianoforall - Incredible New Way To Learn Piano & Keyboard,"Learn Piano in WEEKS not years. Play-By-Ear & learn to Read Music. Pop, Blues, Jazz, Ballads, Improvisation, Classical",Robin Hall,4.63385,€20.99
115 | 114,Music,https://www.udemy.com/course/complete-guitar-system-beginner-to-advanced/,Complete Guitar System - Beginner to Advanced,All-in-one Guitar Course With a Proven Step-by-step Learning System.,Erich Andreas,4.51818,€18.99
116 | 115,Music,https://www.udemy.com/course/music-theory-complete/,"Music Theory Comprehensive Complete! (Levels 1, 2, & 3)","A Complete College-Level Music Theory Curriculum. This edition of the course includes levels 1, 2, & 3.",Jason Allen,4.59912,€22.99
117 | 116,Music,https://www.udemy.com/course/music-production-in-logic-pro-x-course/,Music + Audio Production in Logic Pro X - The Complete Guide,"Become a master at using Logic Pro X | Understand music production | Learn to record, edit & mix audio to a pro standard",Make Pro Music,4.49784,€20.99
118 | 117,Music,https://www.udemy.com/course/thecompletelogicprox/,Music Production in Logic Pro X - The Complete Course!,"Join Successful Music Production + Logic Pro X students in Creating, Recording, Mixing Music + Mastering in Logic Pro X","Tomas George, Christopher Carvalho, Ian Alexander, Digital Music Masters",4.6279,€22.99
119 | 118,Music,https://www.udemy.com/course/music-theory-for-electronic-music-complete-parts-1-2-3/,"Music Theory for Electronic Music COMPLETE: Parts 1, 2, & 3","Electronic music theory, digital music theory, and dance music theory. Learn music theory with ableton live and more!",Jason Allen,4.62235,€22.99
120 | 119,Music,https://www.udemy.com/course/the-professional-guitar-masterclass/,The Professional Guitar Masterclass,Learn The Tools Used By The World's Top Professional Guitar Players.,Michael Palmisano,4.44425,€18.99
121 | 120,Music,https://www.udemy.com/course/benhewlettharmonicatuitionultimate-harmonica-course/,"Learn to play HARMONICA, the easiest instrument to pick up!","Ultimate diatonic harmonica lessons, blues, country music, rock; you will learn how to play on/off stage, solo/group",Ben Hewlett,4.47195,€20.99
122 | 121,Music,https://www.udemy.com/course/beginner-guitar-masterclass/,Ultimate Beginner Guitar Masterclass (2020 Update),Beginner guitar lessons. Go from knowing nothing about the guitar and learn to play songs everbody loves in just weeks,Henry Olsen,4.62297,€19.99
123 | 122,Music,https://www.udemy.com/course/become-a-great-singer-your-complete-vocal-training-system/,BECOME A GREAT SINGER: Your Complete Vocal Training System,"Immediately Improve Your Singing. (Any Level, Any Style)",Robert Lunte,4.16163,€18.99
124 | 123,Music,https://www.udemy.com/course/fl-studio/,FL Studio 20 - Music Production In FL Studio for Mac & PC,"Music Production in FL Studio 20 - Learn How To Manage FL Studio in Just One Day - Creating Music, Mixing & Mastering","Martin Svensson, Music-Prod.com Education",4.60946,€20.99
125 | 124,Music,https://www.udemy.com/course/abletonlive10/,Music Production in Ableton Live 10 - The Complete Course!,"Learn Music Production in Ableton Live 10 Today and Understand how to Create, Record and Edit Your Own Music + Live Sets","Tomas George, Digital Music Masters",4.51912,€21.99
126 | 125,Music,https://www.udemy.com/course/ultimate-ableton-live-complete/,"Ultimate Ableton Live 9 COMPLETE: Parts 1, 2, & 3","Learning Ableton Live the right way: From the basics to the advanced, from Ableton Certified Trainer J. Anthony Allen.",Jason Allen,4.45613,€22.99
127 | 126,Music,https://www.udemy.com/course/sight-reading/,Read Music FAST!,Learn to read music using my unique method: just see a note on a piano score and play it on the keyboard straight away,Benedict Westenra,4.67762,€19.99
128 | 127,Music,https://www.udemy.com/course/online-dj-course/,How to Become a DJ - Learn How to Start DJing Online Today,"Professional DJ School - 11 hours of high-quality content. Former students on: Armada, Spinnin, Ultra, Revealed, & more!",Ross Palmer,4.55292,€20.99
129 | 128,Music,https://www.udemy.com/course/gamemusiccourse/,Game Music Composition: Make Music For Games From Scratch,"Learn to compose music for any and every type of video game, from complete beginner to competent game music composer",Karleen Heong,4.51312,€21.99
130 |
--------------------------------------------------------------------------------
/YouTube Trending Video Analysis/README.md:
--------------------------------------------------------------------------------
1 |
2 |
--------------------------------------------------------------------------------
/YouTube Video Downloader/README.md:
--------------------------------------------------------------------------------
1 |
2 |
--------------------------------------------------------------------------------
/YouTube Video Downloader/main.py:
--------------------------------------------------------------------------------
1 | from pytube import YouTube
2 |
3 | url = "https://www.youtube.com/watch?v=1MBR39rTEs8" #Enter the url of the video you want to download
4 |
5 | video = YouTube(url)
6 |
7 | print(video.title) #prints the title of the youtube video
8 |
9 | print(video.thumbnail_url) #prints the link of the youtube thumbnail image
10 |
11 | print(video.views) #prints the views of the video
12 |
13 | print(video.description) #prints the description of the video
14 |
15 | video = video.streams.get_highest_resolution()
16 |
17 | video.download() #downloads the video in your current directory
18 |
--------------------------------------------------------------------------------
 25 |
26 | It is also possible to change other text properties using ANSI escape characters, for example, if we wanted to make the text darker or lighter. You can try ut out.
27 |
28 |
--------------------------------------------------------------------------------
/Creating Table/Create_Table.py:
--------------------------------------------------------------------------------
1 | from prettytable import PrettyTable
2 | my_Table=PrettyTable(["S.no","Company_name","E.Name","Experience"])
3 | #Adding the row in table..
4 | my_Table.add_row(["1","TCS","Suhana","2 years"])
5 | my_Table.add_row(["2","TCS","Pragati","3 years"])
6 | my_Table.add_row(["3","TCS","Mohit","4 years"])
7 | my_Table.add_row(["4","TCS","Rohit","5 years"])
8 | #deleting the row from table...
9 | my_Table.del_row(0)
10 | #Clear the all rows....
11 | my_Table.clear_rows()
12 | print(my_Table)
13 |
--------------------------------------------------------------------------------
/Creating Table/README.md:
--------------------------------------------------------------------------------
1 |
2 |
--------------------------------------------------------------------------------
/Data Visualization of PUBG Dataset/README.md:
--------------------------------------------------------------------------------
1 |
2 |
--------------------------------------------------------------------------------
/Dice Rolling Simulator/Data flair dice.py:
--------------------------------------------------------------------------------
1 | import tkinter
2 | from PIL import Image, ImageTk
3 | import random
4 |
5 | # toplevel widget which represents the main window of an application
6 | root = tkinter.Tk()
7 | root.geometry('400x400')
8 | root.title('Data Flair Roll the Dice')
9 |
10 | # Adding label into the frame
11 | l0 = tkinter.Label(root, text="")
12 | l0.pack()
13 |
14 | # adding label with different font and formatting
15 | l1 = tkinter.Label(root, text="Hello from Data Flair!", fg = "light green",
16 | bg = "dark green",
17 | font = "Helvetica 16 bold italic")
18 | l1.pack()
19 |
20 | # images
21 | dice = ['die1.png', 'die2.png', 'die3.png', 'die4.png', 'die5.png', 'die6.png']
22 | # simulating the dice with random numbers between 0 to 6 and generating image
23 | image1 = ImageTk.PhotoImage(Image.open(random.choice(dice)))
24 |
25 | # construct a label widget for image
26 | label1 = tkinter.Label(root, image=image1)
27 | label1.image = image1
28 |
29 | # packing a widget in the parent widget
30 | label1.pack( expand=True)
31 |
32 | # function activated by button
33 | def rolling_dice():
34 | image1 = ImageTk.PhotoImage(Image.open(random.choice(dice)))
35 | # update image
36 | label1.configure(image=image1)
37 | # keep a reference
38 | label1.image = image1
39 |
40 |
41 | # adding button, and command will use rolling_dice function
42 | button = tkinter.Button(root, text='Roll the Dice', fg='blue', command=rolling_dice)
43 |
44 | # pack a widget in the parent widget
45 | button.pack( expand=True)
46 |
47 | # call the mainloop of Tk
48 | # keeps window open
49 | root.mainloop()
--------------------------------------------------------------------------------
/Dice Rolling Simulator/README.md:
--------------------------------------------------------------------------------
1 |
2 |
--------------------------------------------------------------------------------
/Dice Rolling Simulator/die1.PNG:
--------------------------------------------------------------------------------
https://raw.githubusercontent.com/kishanrajput23/Personal-Python-Projects/01428ea3a57d226cb45ac4ffb62e5b632a2267fe/Dice Rolling Simulator/die1.PNG
--------------------------------------------------------------------------------
/Dice Rolling Simulator/die2.PNG:
--------------------------------------------------------------------------------
https://raw.githubusercontent.com/kishanrajput23/Personal-Python-Projects/01428ea3a57d226cb45ac4ffb62e5b632a2267fe/Dice Rolling Simulator/die2.PNG
--------------------------------------------------------------------------------
/Dice Rolling Simulator/die3.PNG:
--------------------------------------------------------------------------------
https://raw.githubusercontent.com/kishanrajput23/Personal-Python-Projects/01428ea3a57d226cb45ac4ffb62e5b632a2267fe/Dice Rolling Simulator/die3.PNG
--------------------------------------------------------------------------------
/Dice Rolling Simulator/die4.PNG:
--------------------------------------------------------------------------------
https://raw.githubusercontent.com/kishanrajput23/Personal-Python-Projects/01428ea3a57d226cb45ac4ffb62e5b632a2267fe/Dice Rolling Simulator/die4.PNG
--------------------------------------------------------------------------------
/Dice Rolling Simulator/die5.PNG:
--------------------------------------------------------------------------------
https://raw.githubusercontent.com/kishanrajput23/Personal-Python-Projects/01428ea3a57d226cb45ac4ffb62e5b632a2267fe/Dice Rolling Simulator/die5.PNG
--------------------------------------------------------------------------------
/Dice Rolling Simulator/die6.PNG:
--------------------------------------------------------------------------------
https://raw.githubusercontent.com/kishanrajput23/Personal-Python-Projects/01428ea3a57d226cb45ac4ffb62e5b632a2267fe/Dice Rolling Simulator/die6.PNG
--------------------------------------------------------------------------------
/Dice Simulator/Dice_Simulator.py:
--------------------------------------------------------------------------------
1 | import random
2 |
3 | user = input("Do you want to roll the dice ")
4 |
5 | while user == "y":
6 |
7 | k = random.randint(1,6)
8 |
9 | if k == 1:
10 | print(" --------- ")
11 | print("| |")
12 | print("| 0 |")
13 | print("| |")
14 | print(" --------- ")
15 |
16 | if k == 2:
17 | print(" --------- ")
18 | print("| 0 |")
19 | print("| |")
20 | print("| 0 |")
21 | print(" --------- ")
22 |
23 | if k == 3:
24 | print(" --------- ")
25 | print("| 0 |")
26 | print("| 0 |")
27 | print("| 0 |")
28 | print(" --------- ")
29 |
30 | if k == 4:
31 | print(" --------- ")
32 | print("| 0 0 |")
33 | print("| |")
34 | print("| 0 0 |")
35 | print(" --------- ")
36 |
37 | if k == 5:
38 | print(" --------- ")
39 | print("| 0 0 |")
40 | print("| 0 |")
41 | print("| 0 0 |")
42 | print(" --------- ")
43 |
44 | if k == 6:
45 | print(" ---------- ")
46 | print("| 0 0 |")
47 | print("| 0 0 |")
48 | print("| 0 0 |")
49 | print(" ---------- ")
50 |
51 | user = input("Do you want to roll again the dice ")
52 |
--------------------------------------------------------------------------------
/Dice Simulator/README.md:
--------------------------------------------------------------------------------
1 |
2 |
--------------------------------------------------------------------------------
/Downloading Image/Download_Image.py:
--------------------------------------------------------------------------------
1 | import requests
2 | url =input("Enter the image of url ")
3 | post =requests.get(url)
4 |
5 | #file handling....
6 | open('ramshyam.jpg','wb').write(post.content)
7 | print("FILE DOWNLOAD SUCCESSFULLY.....")
8 |
--------------------------------------------------------------------------------
/Downloading Image/README.md:
--------------------------------------------------------------------------------
1 |
2 |
--------------------------------------------------------------------------------
/Email Slicer/Email_Slicer.py:
--------------------------------------------------------------------------------
1 | """
2 | coding_buddies2021@gmail.com
3 |
4 | user name = coding_buddies2021
5 |
6 | domain name = gmail.com
7 | """
8 |
9 | #taking email id from the user
10 | emailId = input("Enter your email address ").strip()
11 |
12 | #getting username from the email id
13 | user_name = emailId[:emailId.index("@")]
14 |
15 | #getting domain name from the email id
16 | domain_name = emailId[emailId.index("@")+1:]
17 |
18 | #storing username and domain name in final output variable
19 | final_output = f"Your username is {user_name} and your domain name is {domain_name}"
20 |
21 | #printing final output
22 | print(final_output)
--------------------------------------------------------------------------------
/Email Slicer/README.md:
--------------------------------------------------------------------------------
1 | # Email Slicer🔥
2 |
3 | - An Email slicer is a very useful program for separating the username and domain name of an email address. I will be explaining you how to write a program to create an Email Slicer with Python.
4 |
5 | ## 📌Email Slicer with Python
6 | - To create an email slicer with Python, our task is to write a program that can retrieve the username and the domain name of the email. For example, let's take an email like "codingbuddies2021@gmail.com".
7 |
8 | Here, **Username :** codingbuddies2021\
9 | **Domain name :** gmail.com
10 |
11 | - So we need to divide the email into two strings using ‘@’ as the separator. Let’s see how to separate the email and domain name with Python:
12 |
13 | **Code:**
14 |
15 | #taking email id from the user
16 | emailId = input("Enter your email address ").strip()
17 |
18 | #getting username from the email id
19 | user_name = emailId[:emailId.index("@")]
20 |
21 | #getting domain name from the email id
22 | domain_name = emailId[emailId.index("@")+1:]
23 |
24 | #storing username and domain name in final output variable
25 | final_output = f"Your username is {user_name} and your domain name is {domain_name}"
26 |
27 | #printing final output
28 | print(final_output)
29 |
30 | **Output:**
31 |
32 | Enter your email address codingbuddies2021@gmail.com
33 |
34 | Your username is codingbuddies2021 and your domain name is gmail.com
35 |
36 | - The code above is very simple and easy to understand. We take user input and use the strip function at the same time to remove white space if any. Then we are finding the index of ‘@’ symbol of the user input. Then we store the index into a variable known as domain_name to split the email into two parts; the user name and the domain.
37 |
38 | - Finally, we are just formatting to print the output. The above code can be enhanced with more ideas depending on your needs. As a beginner, you must try these types of programs to improve your coding skills. In the long run, it will also help you build your algorithms and increase your ability to think logically.
39 |
--------------------------------------------------------------------------------
/Face Mask Detection/Face Mask Detection using openCV.py:
--------------------------------------------------------------------------------
1 | import cv2
2 | import os
3 | from tensorflow.keras.preprocessing.image import img_to_array
4 | from tensorflow.keras.models import load_model
5 | from tensorflow.keras.applications.mobilenet_v2 import preprocess_input
6 | import numpy as np
7 |
8 | cascPath = os.path.dirname(
9 | cv2.__file__) + "/data/haarcascade_frontalface_alt2.xml"
10 | faceCascade = cv2.CascadeClassifier(cascPath)
11 | model = load_model("mask_recog1.h5")
12 |
13 | video_capture = cv2.VideoCapture(0)
14 | while True:
15 | # Capture frame-by-frame
16 | ret, frame = video_capture.read()
17 | gray = cv2.cvtColor(frame, cv2.COLOR_BGR2GRAY)
18 | faces = faceCascade.detectMultiScale(gray,
19 | scaleFactor=1.1,
20 | minNeighbors=5,
21 | minSize=(60, 60),
22 | flags=cv2.CASCADE_SCALE_IMAGE)
23 | faces_list=[]
24 | preds=[]
25 | for (x, y, w, h) in faces:
26 | face_frame = frame[y:y+h,x:x+w]
27 | face_frame = cv2.cvtColor(face_frame, cv2.COLOR_BGR2RGB)
28 | face_frame = cv2.resize(face_frame, (224, 224))
29 | face_frame = img_to_array(face_frame)
30 | face_frame = np.expand_dims(face_frame, axis=0)
31 | face_frame = preprocess_input(face_frame)
32 | faces_list.append(face_frame)
33 | if len(faces_list)>0:
34 | preds = model.predict(faces_list)
35 | for pred in preds:
36 | (mask, withoutMask) = pred
37 | label = "Mask" if mask > withoutMask else "No Mask"
38 | color = (0, 255, 0) if label == "Mask" else (0, 0, 255)
39 | label = "{}: {:.2f}%".format(label, max(mask, withoutMask) * 100)
40 | cv2.putText(frame, label, (x, y- 10),
41 | cv2.FONT_HERSHEY_SIMPLEX, 0.45, color, 2)
42 |
43 | cv2.rectangle(frame, (x, y), (x + w, y + h),color, 2)
44 | # Display the resulting frame
45 | cv2.imshow('Video', frame)
46 | if cv2.waitKey(1) & 0xFF == ord('q'):
47 | break
48 | video_capture.release()
49 | cv2.destroyAllWindows()
--------------------------------------------------------------------------------
/Face Mask Detection/README.md:
--------------------------------------------------------------------------------
1 |
2 |
--------------------------------------------------------------------------------
/Grammar Correction/README.md:
--------------------------------------------------------------------------------
1 | # Grammar Correction Using Python🔥
2 |
3 | ## 📌How to use Python for Grammar Correction?
4 |
5 | - There are so many applications that help you to correct your grammatical mistakes while writing. Grammarly is one of the best examples of such applications. It can correct every error while writing and helps you to complete your articles, emails, or any piece of writing without any errors.
6 |
7 | - So can we use Python for the task of grammar correction? Yes, we can! The Gingerit library in Python is an open-source library that contains all the features that Grammarly provides. You can easily install it by using the pip command; pip install gingerit. In the section below, I will take you through how to use the gingerit library for the task of Grammar correction using Python.
8 |
9 |
10 | ## 📌Grammar Correction With Python
11 |
12 | - By using the gingerit library in Python you can eliminate all the grammatical mistakes, fix your spellings and punctuation errors and at the end, it helps you to enhance your text. Now let’s see how to use this library for the task of grammar correction using Python:
13 |
14 | ### Code:
15 |
16 | from gingerit.gingerit import GingerIt
17 |
18 | text = input("Entr your text ")
19 |
20 | corrected_text = GingerIt().parse(text)
21 |
22 | print(corrected_text['result'])
23 |
24 | ### Output:
25 |
26 | Enter your text: My name are Kishan.
27 | My name is Kishan.
28 |
29 | - In the above code, I am first importing the GingerIt function from the gingerit library, then I am storing a sentence as user input in the variable ‘text’. Then I am initializing the GingerIt() function on the input text. This function returns a dictionary of the text and the result, so to print the final output, I have selected ‘result’ to show the corrected text.
30 |
31 | ## 📌Summary
32 |
33 | - So this is how we can use Python to correct grammatical mistakes from any piece of text. The Gingerit library in Python can be used to enhance your writing by correcting all the mistakes in a few lines of code.
34 |
--------------------------------------------------------------------------------
/Grammar Correction/main.py:
--------------------------------------------------------------------------------
1 | from gingerit.gingerit import GingerIt
2 |
3 | text = input("Enter your text ")
4 |
5 | corrected_text = GingerIt().parse(text)
6 |
7 | print(corrected_text["result"])
8 |
9 |
--------------------------------------------------------------------------------
/Infinity/README.md:
--------------------------------------------------------------------------------
1 | # INFINITY
2 |
3 | A turtle scripts that creates the infitity symbol.
4 |
5 | 
6 |
--------------------------------------------------------------------------------
/Infinity/infinity.py:
--------------------------------------------------------------------------------
1 | from turtle import *
2 |
3 | def setup():
4 | bgcolor("black")
5 | color("red")
6 | speed(11)
7 | right(45)
8 |
9 | if __name__ == '__main__':
10 | setup()
11 |
12 | for i in range(150):
13 | circle(30)
14 |
15 | if 7 < i < 62:
16 | left(5)
17 | if 80 < i < 133:
18 | right(5)
19 | if i < 80:
20 | forward(10)
21 | else:
22 | forward(5)
23 | turtle.done()
24 |
--------------------------------------------------------------------------------
/Iron Man Helmet/README.md:
--------------------------------------------------------------------------------
1 | # Iron Man Helmet
2 |
3 | 
4 |
--------------------------------------------------------------------------------
/Iron Man Helmet/helmet.py:
--------------------------------------------------------------------------------
1 | import turtle
2 |
3 | # Top Part
4 | piece1 = [[(-40, 120), (-70, 260), (-130, 230), (-170, 200), (-170, 100), (-160, 40), (-170, 10), (-150, -10), (-140, 10), (-40, -20), (0, -20)],[(0, -20), (40, -20), (140, 10), (150, -10), (170, 10), (160, 40), (170, 100), (170, 200), (130, 230), (70, 260), (40, 120), (0, 120)]]
5 |
6 | # Middle Part
7 | piece2 = [[(-40, -30), (-50, -40), (-100, -46), (-130, -40), (-176, 0), (-186, -30), (-186, -40), (-120, -170), (-110, -210), (-80, -230), (-64, -210), (0, -210)],[(0, -210), (64, -210), (80, -230), (110, -210), (120, -170), (186, -40), (186, -30), (176, 0), (130, -40), (100, -46), (50, -40), (40, -30), (0, -30)]]
8 |
9 | #Bottom Part
10 | piece3 = [[(-60, -220), (-80, -240), (-110, -220), (-120, -250),(-90, -280), (-60, -260), (-30, -260), (-20, -250), (0, -250)],[(0, -250), (20, -250), (30, -260), (60, -260), (90, -280), (120, -250),(110, -220), (80, -240), (60, -220), (0, -220)]]
11 |
12 | turtle.hideturtle()
13 | turtle.bgcolor('#ba161e') #Dark Red
14 | turtle.setup(500,600)
15 | turtle.title("I AM AN IRONMAN")
16 |
17 | piece1Goto=(0,120)
18 | piece2Goto=(0,-30)
19 | piece3Goto=(0,-220)
20 |
21 | turtle.speed(2)
22 |
23 | def draw_piece(piece,pieceGoto):
24 | turtle.penup()
25 | turtle.goto(pieceGoto)
26 | turtle.pendown()
27 | turtle.color('#fab104') #Light Yellow
28 | turtle.begin_fill()
29 | for i in range(len(piece[0])):
30 | x,y=piece[0][i]
31 | turtle.goto(x,y)
32 |
33 | for i in range(len(piece[1])):
34 | x,y=piece[1][i]
35 | turtle.goto(x,y)
36 | turtle.end_fill()
37 |
38 | draw_piece(piece1,piece1Goto)
39 | draw_piece(piece2,piece2Goto)
40 | draw_piece(piece3,piece3Goto)
41 |
42 | turtle.hideturtle()
43 | turtle.done()
44 |
--------------------------------------------------------------------------------
/Language Translator/README.md:
--------------------------------------------------------------------------------
1 |
2 |
--------------------------------------------------------------------------------
/Language Translator/python-language-translator.py:
--------------------------------------------------------------------------------
1 | from tkinter import *
2 | from tkinter import ttk
3 | from googletrans import Translator , LANGUAGES
4 |
5 | root = Tk()
6 | root.geometry('1080x400')
7 | root.resizable(0,0)
8 | root.title("Project Gurukul--Language Translator")
9 | root.config(bg = 'ghost white')
10 |
11 | #heading
12 | Label(root, text = "LANGUAGE TRANSLATOR", font = "arial 20 bold", bg='white smoke').pack()
13 | Label(root,text ="Project Gurukul", font = 'arial 20 bold', bg ='white smoke' , width = '20').pack(side = 'bottom')
14 |
15 |
16 |
17 | #INPUT AND OUTPUT TEXT WIDGET
18 | Label(root,text ="Enter Text", font = 'arial 13 bold', bg ='white smoke').place(x=200,y=60)
19 | Input_text = Text(root,font = 'arial 10', height = 11, wrap = WORD, padx=5, pady=5, width = 60)
20 | Input_text.place(x=30,y = 100)
21 |
22 |
23 | Label(root,text ="Output", font = 'arial 13 bold', bg ='white smoke').place(x=780,y=60)
24 | Output_text = Text(root,font = 'arial 10', height = 11, wrap = WORD, padx=5, pady= 5, width =60)
25 | Output_text.place(x = 600 , y = 100)
26 |
27 |
28 |
29 | ##################
30 | language = list(LANGUAGES.values())
31 |
32 | src_lang = ttk.Combobox(root, values= language, width =22)
33 | src_lang.place(x=20,y=60)
34 | src_lang.set('choose input language')
35 |
36 | dest_lang = ttk.Combobox(root, values= language, width =22)
37 | dest_lang.place(x=890,y=60)
38 | dest_lang.set('choose output language')
39 | ######################################## Define function #######
40 |
41 | def Translate():
42 | translator = Translator()
43 | translated=translator.translate(text= Input_text.get(1.0, END) , src = src_lang.get(), dest = dest_lang.get())
44 | Output_text.delete(1.0, END)
45 | Output_text.insert(END, translated.text)
46 |
47 |
48 |
49 |
50 | ########## Translate Button ########
51 | trans_btn = Button(root, text = 'Translate',font = 'arial 12 bold',pady = 5,command = Translate , bg = 'royal blue1', activebackground = 'sky blue')
52 | trans_btn.place(x = 490, y = 180)
53 |
54 |
55 | root.mainloop()
56 |
57 |
--------------------------------------------------------------------------------
/Password Generator/Password Generator.py:
--------------------------------------------------------------------------------
1 | import random
2 | print('Welcome to our Password Generator')
3 | print('=================================')
4 |
5 | chars ='abcdefghijklmnopqrstuvwxyzABCDEFGHIJKLMNOPQRSTUVWXYZ!@#$%^&*?0123456789'
6 |
7 | number =input('Amount of Password generate: ')
8 | number =int(number)
9 |
10 | length =input('Enter the length of Password Generate: ')
11 | length =int(length)
12 |
13 | print('\nhere is your Password')
14 | for pwd in range(number):
15 | Passwords =''
16 | for c in range(length):
17 | Passwords += random.choice(chars)
18 | print(Passwords)
19 |
20 |
21 |
--------------------------------------------------------------------------------
/Password Generator/README.md:
--------------------------------------------------------------------------------
1 | # Password Generator🔥
2 |
3 | - To create a password with Python, we need to create a program that takes the length of the password and generates a random password of the same length apart from this our program also generates as many passwords as we want with same length.
4 |
5 | ## 📌Python Program to Generate Password
6 |
7 | - To write a Python program to create a password, declare a string of numbers + uppercase + lowercase + special characters. Take a random sample of the string of a length given by the user
8 |
9 | **Code:**
10 |
11 | import random
12 | print('Welcome to our Password Generator')
13 | print('=================================')
14 |
15 | chars ='abcdefghijklmnopqrstuvwxyzABCDEFGHIJKLMNOPQRSTUVWXYZ!@#$%^&*?0123456789'
16 |
17 | number =input('Amount of Password generate: ')
18 | number =int(number)
19 |
20 | length =input('Enter the length of Password Generate: ')
21 | length =int(length)
22 |
23 | print('\nhere is your Password')
24 | for pwd in range(number):
25 | Passwords =''
26 | for c in range(length):
27 | Passwords += random.choice(chars)
28 | print(Passwords)
29 |
30 | **Output:**
31 |
32 | Welcome to our Password Generator
33 | =================================
34 | Amount of Password generate: 5
35 | Enter the length of Password Generate: 8
36 |
37 | here is your Password
38 | ag#ZmCmM
39 | 0Kf?z*nl
40 | *&U31t6W
41 | 0fyIC&#b
42 | JFkDnOU^
43 |
44 | - In the above code, I first imported the random module in Python, then I asked for user input for the amount of the password he/she want. After that I asked for user input for the length of the password. Then I use a for loop here which should run as many times as many times we want amount of password generated.
45 |
46 | - Then in the for loop I created a variable named as "Passwords" and define it with blank string. Then again I'm using a for loop here which should run as many times as length of password we want. After that I stored the letters, numbers and special characters that I want to be considered while generating a password which will finally generate a random password and prints it.
47 |
48 | ## 📌Summary
49 | - There are a few areas where the above code could be improved upon, but at a basic level, it meets many secure password generation requirements by today’s standards. As a newbie to Python or any other language, you should keep trying these types of programs as they help you explore more functions and in the long run will help you design your algorithms.
50 |
--------------------------------------------------------------------------------
/QR Code Generator/QR-Code_Generator.py:
--------------------------------------------------------------------------------
1 | import qrcode
2 | url='Coding Buddies'
3 | code_image =qrcode.make(url)
4 | code_image.save('Enter your Location')
5 |
--------------------------------------------------------------------------------
/QR Code Generator/README.md:
--------------------------------------------------------------------------------
1 | # QR Code Generator Using Python🔥
2 |
3 | QR is short for Quick Response, and they are named so because they can be read quickly by a cell phone. They are used to take information from transitory media and put it on your cell phone.
4 |
5 | ## 📌What is a QR code?
6 |
7 | - QR codes are used to encode and decode the data into a machine-readable form. The use of camera phones to read two-dimensional barcodes for various purposes is currently a popular topic in both types of research and practical applications.
8 |
9 | - It contains a grid of black squares on a white background, which can be read by any imaging device such as a camera, and processed to extract the required data from the patterns that are present in the horizontal components of the image.
10 |
11 | ## 📌QR Codes with Python
12 |
13 | - In this section, I will take you through a tutorial on how to generate QR codes with Python. To generate QR Codes with Python you need to install only one Python library for this task:
14 |
15 | pip install pyqrcode
16 |
17 | Now let’s see how to create a QR Code with Python programming language:
18 |
19 | **Code**
20 |
21 | import qrcode
22 |
23 | url='Coding Buddies' # String which represent the QR code
24 |
25 | code_image =qrcode.make(url) # Generate QR code
26 |
27 | code_image.save('Enter your Location') # Create and save the png file at given location
28 |
29 |
30 | **Generated QR-Code**
31 |
32 |
25 |
26 | It is also possible to change other text properties using ANSI escape characters, for example, if we wanted to make the text darker or lighter. You can try ut out.
27 |
28 |
--------------------------------------------------------------------------------
/Creating Table/Create_Table.py:
--------------------------------------------------------------------------------
1 | from prettytable import PrettyTable
2 | my_Table=PrettyTable(["S.no","Company_name","E.Name","Experience"])
3 | #Adding the row in table..
4 | my_Table.add_row(["1","TCS","Suhana","2 years"])
5 | my_Table.add_row(["2","TCS","Pragati","3 years"])
6 | my_Table.add_row(["3","TCS","Mohit","4 years"])
7 | my_Table.add_row(["4","TCS","Rohit","5 years"])
8 | #deleting the row from table...
9 | my_Table.del_row(0)
10 | #Clear the all rows....
11 | my_Table.clear_rows()
12 | print(my_Table)
13 |
--------------------------------------------------------------------------------
/Creating Table/README.md:
--------------------------------------------------------------------------------
1 |
2 |
--------------------------------------------------------------------------------
/Data Visualization of PUBG Dataset/README.md:
--------------------------------------------------------------------------------
1 |
2 |
--------------------------------------------------------------------------------
/Dice Rolling Simulator/Data flair dice.py:
--------------------------------------------------------------------------------
1 | import tkinter
2 | from PIL import Image, ImageTk
3 | import random
4 |
5 | # toplevel widget which represents the main window of an application
6 | root = tkinter.Tk()
7 | root.geometry('400x400')
8 | root.title('Data Flair Roll the Dice')
9 |
10 | # Adding label into the frame
11 | l0 = tkinter.Label(root, text="")
12 | l0.pack()
13 |
14 | # adding label with different font and formatting
15 | l1 = tkinter.Label(root, text="Hello from Data Flair!", fg = "light green",
16 | bg = "dark green",
17 | font = "Helvetica 16 bold italic")
18 | l1.pack()
19 |
20 | # images
21 | dice = ['die1.png', 'die2.png', 'die3.png', 'die4.png', 'die5.png', 'die6.png']
22 | # simulating the dice with random numbers between 0 to 6 and generating image
23 | image1 = ImageTk.PhotoImage(Image.open(random.choice(dice)))
24 |
25 | # construct a label widget for image
26 | label1 = tkinter.Label(root, image=image1)
27 | label1.image = image1
28 |
29 | # packing a widget in the parent widget
30 | label1.pack( expand=True)
31 |
32 | # function activated by button
33 | def rolling_dice():
34 | image1 = ImageTk.PhotoImage(Image.open(random.choice(dice)))
35 | # update image
36 | label1.configure(image=image1)
37 | # keep a reference
38 | label1.image = image1
39 |
40 |
41 | # adding button, and command will use rolling_dice function
42 | button = tkinter.Button(root, text='Roll the Dice', fg='blue', command=rolling_dice)
43 |
44 | # pack a widget in the parent widget
45 | button.pack( expand=True)
46 |
47 | # call the mainloop of Tk
48 | # keeps window open
49 | root.mainloop()
--------------------------------------------------------------------------------
/Dice Rolling Simulator/README.md:
--------------------------------------------------------------------------------
1 |
2 |
--------------------------------------------------------------------------------
/Dice Rolling Simulator/die1.PNG:
--------------------------------------------------------------------------------
https://raw.githubusercontent.com/kishanrajput23/Personal-Python-Projects/01428ea3a57d226cb45ac4ffb62e5b632a2267fe/Dice Rolling Simulator/die1.PNG
--------------------------------------------------------------------------------
/Dice Rolling Simulator/die2.PNG:
--------------------------------------------------------------------------------
https://raw.githubusercontent.com/kishanrajput23/Personal-Python-Projects/01428ea3a57d226cb45ac4ffb62e5b632a2267fe/Dice Rolling Simulator/die2.PNG
--------------------------------------------------------------------------------
/Dice Rolling Simulator/die3.PNG:
--------------------------------------------------------------------------------
https://raw.githubusercontent.com/kishanrajput23/Personal-Python-Projects/01428ea3a57d226cb45ac4ffb62e5b632a2267fe/Dice Rolling Simulator/die3.PNG
--------------------------------------------------------------------------------
/Dice Rolling Simulator/die4.PNG:
--------------------------------------------------------------------------------
https://raw.githubusercontent.com/kishanrajput23/Personal-Python-Projects/01428ea3a57d226cb45ac4ffb62e5b632a2267fe/Dice Rolling Simulator/die4.PNG
--------------------------------------------------------------------------------
/Dice Rolling Simulator/die5.PNG:
--------------------------------------------------------------------------------
https://raw.githubusercontent.com/kishanrajput23/Personal-Python-Projects/01428ea3a57d226cb45ac4ffb62e5b632a2267fe/Dice Rolling Simulator/die5.PNG
--------------------------------------------------------------------------------
/Dice Rolling Simulator/die6.PNG:
--------------------------------------------------------------------------------
https://raw.githubusercontent.com/kishanrajput23/Personal-Python-Projects/01428ea3a57d226cb45ac4ffb62e5b632a2267fe/Dice Rolling Simulator/die6.PNG
--------------------------------------------------------------------------------
/Dice Simulator/Dice_Simulator.py:
--------------------------------------------------------------------------------
1 | import random
2 |
3 | user = input("Do you want to roll the dice ")
4 |
5 | while user == "y":
6 |
7 | k = random.randint(1,6)
8 |
9 | if k == 1:
10 | print(" --------- ")
11 | print("| |")
12 | print("| 0 |")
13 | print("| |")
14 | print(" --------- ")
15 |
16 | if k == 2:
17 | print(" --------- ")
18 | print("| 0 |")
19 | print("| |")
20 | print("| 0 |")
21 | print(" --------- ")
22 |
23 | if k == 3:
24 | print(" --------- ")
25 | print("| 0 |")
26 | print("| 0 |")
27 | print("| 0 |")
28 | print(" --------- ")
29 |
30 | if k == 4:
31 | print(" --------- ")
32 | print("| 0 0 |")
33 | print("| |")
34 | print("| 0 0 |")
35 | print(" --------- ")
36 |
37 | if k == 5:
38 | print(" --------- ")
39 | print("| 0 0 |")
40 | print("| 0 |")
41 | print("| 0 0 |")
42 | print(" --------- ")
43 |
44 | if k == 6:
45 | print(" ---------- ")
46 | print("| 0 0 |")
47 | print("| 0 0 |")
48 | print("| 0 0 |")
49 | print(" ---------- ")
50 |
51 | user = input("Do you want to roll again the dice ")
52 |
--------------------------------------------------------------------------------
/Dice Simulator/README.md:
--------------------------------------------------------------------------------
1 |
2 |
--------------------------------------------------------------------------------
/Downloading Image/Download_Image.py:
--------------------------------------------------------------------------------
1 | import requests
2 | url =input("Enter the image of url ")
3 | post =requests.get(url)
4 |
5 | #file handling....
6 | open('ramshyam.jpg','wb').write(post.content)
7 | print("FILE DOWNLOAD SUCCESSFULLY.....")
8 |
--------------------------------------------------------------------------------
/Downloading Image/README.md:
--------------------------------------------------------------------------------
1 |
2 |
--------------------------------------------------------------------------------
/Email Slicer/Email_Slicer.py:
--------------------------------------------------------------------------------
1 | """
2 | coding_buddies2021@gmail.com
3 |
4 | user name = coding_buddies2021
5 |
6 | domain name = gmail.com
7 | """
8 |
9 | #taking email id from the user
10 | emailId = input("Enter your email address ").strip()
11 |
12 | #getting username from the email id
13 | user_name = emailId[:emailId.index("@")]
14 |
15 | #getting domain name from the email id
16 | domain_name = emailId[emailId.index("@")+1:]
17 |
18 | #storing username and domain name in final output variable
19 | final_output = f"Your username is {user_name} and your domain name is {domain_name}"
20 |
21 | #printing final output
22 | print(final_output)
--------------------------------------------------------------------------------
/Email Slicer/README.md:
--------------------------------------------------------------------------------
1 | # Email Slicer🔥
2 |
3 | - An Email slicer is a very useful program for separating the username and domain name of an email address. I will be explaining you how to write a program to create an Email Slicer with Python.
4 |
5 | ## 📌Email Slicer with Python
6 | - To create an email slicer with Python, our task is to write a program that can retrieve the username and the domain name of the email. For example, let's take an email like "codingbuddies2021@gmail.com".
7 |
8 | Here, **Username :** codingbuddies2021\
9 | **Domain name :** gmail.com
10 |
11 | - So we need to divide the email into two strings using ‘@’ as the separator. Let’s see how to separate the email and domain name with Python:
12 |
13 | **Code:**
14 |
15 | #taking email id from the user
16 | emailId = input("Enter your email address ").strip()
17 |
18 | #getting username from the email id
19 | user_name = emailId[:emailId.index("@")]
20 |
21 | #getting domain name from the email id
22 | domain_name = emailId[emailId.index("@")+1:]
23 |
24 | #storing username and domain name in final output variable
25 | final_output = f"Your username is {user_name} and your domain name is {domain_name}"
26 |
27 | #printing final output
28 | print(final_output)
29 |
30 | **Output:**
31 |
32 | Enter your email address codingbuddies2021@gmail.com
33 |
34 | Your username is codingbuddies2021 and your domain name is gmail.com
35 |
36 | - The code above is very simple and easy to understand. We take user input and use the strip function at the same time to remove white space if any. Then we are finding the index of ‘@’ symbol of the user input. Then we store the index into a variable known as domain_name to split the email into two parts; the user name and the domain.
37 |
38 | - Finally, we are just formatting to print the output. The above code can be enhanced with more ideas depending on your needs. As a beginner, you must try these types of programs to improve your coding skills. In the long run, it will also help you build your algorithms and increase your ability to think logically.
39 |
--------------------------------------------------------------------------------
/Face Mask Detection/Face Mask Detection using openCV.py:
--------------------------------------------------------------------------------
1 | import cv2
2 | import os
3 | from tensorflow.keras.preprocessing.image import img_to_array
4 | from tensorflow.keras.models import load_model
5 | from tensorflow.keras.applications.mobilenet_v2 import preprocess_input
6 | import numpy as np
7 |
8 | cascPath = os.path.dirname(
9 | cv2.__file__) + "/data/haarcascade_frontalface_alt2.xml"
10 | faceCascade = cv2.CascadeClassifier(cascPath)
11 | model = load_model("mask_recog1.h5")
12 |
13 | video_capture = cv2.VideoCapture(0)
14 | while True:
15 | # Capture frame-by-frame
16 | ret, frame = video_capture.read()
17 | gray = cv2.cvtColor(frame, cv2.COLOR_BGR2GRAY)
18 | faces = faceCascade.detectMultiScale(gray,
19 | scaleFactor=1.1,
20 | minNeighbors=5,
21 | minSize=(60, 60),
22 | flags=cv2.CASCADE_SCALE_IMAGE)
23 | faces_list=[]
24 | preds=[]
25 | for (x, y, w, h) in faces:
26 | face_frame = frame[y:y+h,x:x+w]
27 | face_frame = cv2.cvtColor(face_frame, cv2.COLOR_BGR2RGB)
28 | face_frame = cv2.resize(face_frame, (224, 224))
29 | face_frame = img_to_array(face_frame)
30 | face_frame = np.expand_dims(face_frame, axis=0)
31 | face_frame = preprocess_input(face_frame)
32 | faces_list.append(face_frame)
33 | if len(faces_list)>0:
34 | preds = model.predict(faces_list)
35 | for pred in preds:
36 | (mask, withoutMask) = pred
37 | label = "Mask" if mask > withoutMask else "No Mask"
38 | color = (0, 255, 0) if label == "Mask" else (0, 0, 255)
39 | label = "{}: {:.2f}%".format(label, max(mask, withoutMask) * 100)
40 | cv2.putText(frame, label, (x, y- 10),
41 | cv2.FONT_HERSHEY_SIMPLEX, 0.45, color, 2)
42 |
43 | cv2.rectangle(frame, (x, y), (x + w, y + h),color, 2)
44 | # Display the resulting frame
45 | cv2.imshow('Video', frame)
46 | if cv2.waitKey(1) & 0xFF == ord('q'):
47 | break
48 | video_capture.release()
49 | cv2.destroyAllWindows()
--------------------------------------------------------------------------------
/Face Mask Detection/README.md:
--------------------------------------------------------------------------------
1 |
2 |
--------------------------------------------------------------------------------
/Grammar Correction/README.md:
--------------------------------------------------------------------------------
1 | # Grammar Correction Using Python🔥
2 |
3 | ## 📌How to use Python for Grammar Correction?
4 |
5 | - There are so many applications that help you to correct your grammatical mistakes while writing. Grammarly is one of the best examples of such applications. It can correct every error while writing and helps you to complete your articles, emails, or any piece of writing without any errors.
6 |
7 | - So can we use Python for the task of grammar correction? Yes, we can! The Gingerit library in Python is an open-source library that contains all the features that Grammarly provides. You can easily install it by using the pip command; pip install gingerit. In the section below, I will take you through how to use the gingerit library for the task of Grammar correction using Python.
8 |
9 |
10 | ## 📌Grammar Correction With Python
11 |
12 | - By using the gingerit library in Python you can eliminate all the grammatical mistakes, fix your spellings and punctuation errors and at the end, it helps you to enhance your text. Now let’s see how to use this library for the task of grammar correction using Python:
13 |
14 | ### Code:
15 |
16 | from gingerit.gingerit import GingerIt
17 |
18 | text = input("Entr your text ")
19 |
20 | corrected_text = GingerIt().parse(text)
21 |
22 | print(corrected_text['result'])
23 |
24 | ### Output:
25 |
26 | Enter your text: My name are Kishan.
27 | My name is Kishan.
28 |
29 | - In the above code, I am first importing the GingerIt function from the gingerit library, then I am storing a sentence as user input in the variable ‘text’. Then I am initializing the GingerIt() function on the input text. This function returns a dictionary of the text and the result, so to print the final output, I have selected ‘result’ to show the corrected text.
30 |
31 | ## 📌Summary
32 |
33 | - So this is how we can use Python to correct grammatical mistakes from any piece of text. The Gingerit library in Python can be used to enhance your writing by correcting all the mistakes in a few lines of code.
34 |
--------------------------------------------------------------------------------
/Grammar Correction/main.py:
--------------------------------------------------------------------------------
1 | from gingerit.gingerit import GingerIt
2 |
3 | text = input("Enter your text ")
4 |
5 | corrected_text = GingerIt().parse(text)
6 |
7 | print(corrected_text["result"])
8 |
9 |
--------------------------------------------------------------------------------
/Infinity/README.md:
--------------------------------------------------------------------------------
1 | # INFINITY
2 |
3 | A turtle scripts that creates the infitity symbol.
4 |
5 | 
6 |
--------------------------------------------------------------------------------
/Infinity/infinity.py:
--------------------------------------------------------------------------------
1 | from turtle import *
2 |
3 | def setup():
4 | bgcolor("black")
5 | color("red")
6 | speed(11)
7 | right(45)
8 |
9 | if __name__ == '__main__':
10 | setup()
11 |
12 | for i in range(150):
13 | circle(30)
14 |
15 | if 7 < i < 62:
16 | left(5)
17 | if 80 < i < 133:
18 | right(5)
19 | if i < 80:
20 | forward(10)
21 | else:
22 | forward(5)
23 | turtle.done()
24 |
--------------------------------------------------------------------------------
/Iron Man Helmet/README.md:
--------------------------------------------------------------------------------
1 | # Iron Man Helmet
2 |
3 | 
4 |
--------------------------------------------------------------------------------
/Iron Man Helmet/helmet.py:
--------------------------------------------------------------------------------
1 | import turtle
2 |
3 | # Top Part
4 | piece1 = [[(-40, 120), (-70, 260), (-130, 230), (-170, 200), (-170, 100), (-160, 40), (-170, 10), (-150, -10), (-140, 10), (-40, -20), (0, -20)],[(0, -20), (40, -20), (140, 10), (150, -10), (170, 10), (160, 40), (170, 100), (170, 200), (130, 230), (70, 260), (40, 120), (0, 120)]]
5 |
6 | # Middle Part
7 | piece2 = [[(-40, -30), (-50, -40), (-100, -46), (-130, -40), (-176, 0), (-186, -30), (-186, -40), (-120, -170), (-110, -210), (-80, -230), (-64, -210), (0, -210)],[(0, -210), (64, -210), (80, -230), (110, -210), (120, -170), (186, -40), (186, -30), (176, 0), (130, -40), (100, -46), (50, -40), (40, -30), (0, -30)]]
8 |
9 | #Bottom Part
10 | piece3 = [[(-60, -220), (-80, -240), (-110, -220), (-120, -250),(-90, -280), (-60, -260), (-30, -260), (-20, -250), (0, -250)],[(0, -250), (20, -250), (30, -260), (60, -260), (90, -280), (120, -250),(110, -220), (80, -240), (60, -220), (0, -220)]]
11 |
12 | turtle.hideturtle()
13 | turtle.bgcolor('#ba161e') #Dark Red
14 | turtle.setup(500,600)
15 | turtle.title("I AM AN IRONMAN")
16 |
17 | piece1Goto=(0,120)
18 | piece2Goto=(0,-30)
19 | piece3Goto=(0,-220)
20 |
21 | turtle.speed(2)
22 |
23 | def draw_piece(piece,pieceGoto):
24 | turtle.penup()
25 | turtle.goto(pieceGoto)
26 | turtle.pendown()
27 | turtle.color('#fab104') #Light Yellow
28 | turtle.begin_fill()
29 | for i in range(len(piece[0])):
30 | x,y=piece[0][i]
31 | turtle.goto(x,y)
32 |
33 | for i in range(len(piece[1])):
34 | x,y=piece[1][i]
35 | turtle.goto(x,y)
36 | turtle.end_fill()
37 |
38 | draw_piece(piece1,piece1Goto)
39 | draw_piece(piece2,piece2Goto)
40 | draw_piece(piece3,piece3Goto)
41 |
42 | turtle.hideturtle()
43 | turtle.done()
44 |
--------------------------------------------------------------------------------
/Language Translator/README.md:
--------------------------------------------------------------------------------
1 |
2 |
--------------------------------------------------------------------------------
/Language Translator/python-language-translator.py:
--------------------------------------------------------------------------------
1 | from tkinter import *
2 | from tkinter import ttk
3 | from googletrans import Translator , LANGUAGES
4 |
5 | root = Tk()
6 | root.geometry('1080x400')
7 | root.resizable(0,0)
8 | root.title("Project Gurukul--Language Translator")
9 | root.config(bg = 'ghost white')
10 |
11 | #heading
12 | Label(root, text = "LANGUAGE TRANSLATOR", font = "arial 20 bold", bg='white smoke').pack()
13 | Label(root,text ="Project Gurukul", font = 'arial 20 bold', bg ='white smoke' , width = '20').pack(side = 'bottom')
14 |
15 |
16 |
17 | #INPUT AND OUTPUT TEXT WIDGET
18 | Label(root,text ="Enter Text", font = 'arial 13 bold', bg ='white smoke').place(x=200,y=60)
19 | Input_text = Text(root,font = 'arial 10', height = 11, wrap = WORD, padx=5, pady=5, width = 60)
20 | Input_text.place(x=30,y = 100)
21 |
22 |
23 | Label(root,text ="Output", font = 'arial 13 bold', bg ='white smoke').place(x=780,y=60)
24 | Output_text = Text(root,font = 'arial 10', height = 11, wrap = WORD, padx=5, pady= 5, width =60)
25 | Output_text.place(x = 600 , y = 100)
26 |
27 |
28 |
29 | ##################
30 | language = list(LANGUAGES.values())
31 |
32 | src_lang = ttk.Combobox(root, values= language, width =22)
33 | src_lang.place(x=20,y=60)
34 | src_lang.set('choose input language')
35 |
36 | dest_lang = ttk.Combobox(root, values= language, width =22)
37 | dest_lang.place(x=890,y=60)
38 | dest_lang.set('choose output language')
39 | ######################################## Define function #######
40 |
41 | def Translate():
42 | translator = Translator()
43 | translated=translator.translate(text= Input_text.get(1.0, END) , src = src_lang.get(), dest = dest_lang.get())
44 | Output_text.delete(1.0, END)
45 | Output_text.insert(END, translated.text)
46 |
47 |
48 |
49 |
50 | ########## Translate Button ########
51 | trans_btn = Button(root, text = 'Translate',font = 'arial 12 bold',pady = 5,command = Translate , bg = 'royal blue1', activebackground = 'sky blue')
52 | trans_btn.place(x = 490, y = 180)
53 |
54 |
55 | root.mainloop()
56 |
57 |
--------------------------------------------------------------------------------
/Password Generator/Password Generator.py:
--------------------------------------------------------------------------------
1 | import random
2 | print('Welcome to our Password Generator')
3 | print('=================================')
4 |
5 | chars ='abcdefghijklmnopqrstuvwxyzABCDEFGHIJKLMNOPQRSTUVWXYZ!@#$%^&*?0123456789'
6 |
7 | number =input('Amount of Password generate: ')
8 | number =int(number)
9 |
10 | length =input('Enter the length of Password Generate: ')
11 | length =int(length)
12 |
13 | print('\nhere is your Password')
14 | for pwd in range(number):
15 | Passwords =''
16 | for c in range(length):
17 | Passwords += random.choice(chars)
18 | print(Passwords)
19 |
20 |
21 |
--------------------------------------------------------------------------------
/Password Generator/README.md:
--------------------------------------------------------------------------------
1 | # Password Generator🔥
2 |
3 | - To create a password with Python, we need to create a program that takes the length of the password and generates a random password of the same length apart from this our program also generates as many passwords as we want with same length.
4 |
5 | ## 📌Python Program to Generate Password
6 |
7 | - To write a Python program to create a password, declare a string of numbers + uppercase + lowercase + special characters. Take a random sample of the string of a length given by the user
8 |
9 | **Code:**
10 |
11 | import random
12 | print('Welcome to our Password Generator')
13 | print('=================================')
14 |
15 | chars ='abcdefghijklmnopqrstuvwxyzABCDEFGHIJKLMNOPQRSTUVWXYZ!@#$%^&*?0123456789'
16 |
17 | number =input('Amount of Password generate: ')
18 | number =int(number)
19 |
20 | length =input('Enter the length of Password Generate: ')
21 | length =int(length)
22 |
23 | print('\nhere is your Password')
24 | for pwd in range(number):
25 | Passwords =''
26 | for c in range(length):
27 | Passwords += random.choice(chars)
28 | print(Passwords)
29 |
30 | **Output:**
31 |
32 | Welcome to our Password Generator
33 | =================================
34 | Amount of Password generate: 5
35 | Enter the length of Password Generate: 8
36 |
37 | here is your Password
38 | ag#ZmCmM
39 | 0Kf?z*nl
40 | *&U31t6W
41 | 0fyIC&#b
42 | JFkDnOU^
43 |
44 | - In the above code, I first imported the random module in Python, then I asked for user input for the amount of the password he/she want. After that I asked for user input for the length of the password. Then I use a for loop here which should run as many times as many times we want amount of password generated.
45 |
46 | - Then in the for loop I created a variable named as "Passwords" and define it with blank string. Then again I'm using a for loop here which should run as many times as length of password we want. After that I stored the letters, numbers and special characters that I want to be considered while generating a password which will finally generate a random password and prints it.
47 |
48 | ## 📌Summary
49 | - There are a few areas where the above code could be improved upon, but at a basic level, it meets many secure password generation requirements by today’s standards. As a newbie to Python or any other language, you should keep trying these types of programs as they help you explore more functions and in the long run will help you design your algorithms.
50 |
--------------------------------------------------------------------------------
/QR Code Generator/QR-Code_Generator.py:
--------------------------------------------------------------------------------
1 | import qrcode
2 | url='Coding Buddies'
3 | code_image =qrcode.make(url)
4 | code_image.save('Enter your Location')
5 |
--------------------------------------------------------------------------------
/QR Code Generator/README.md:
--------------------------------------------------------------------------------
1 | # QR Code Generator Using Python🔥
2 |
3 | QR is short for Quick Response, and they are named so because they can be read quickly by a cell phone. They are used to take information from transitory media and put it on your cell phone.
4 |
5 | ## 📌What is a QR code?
6 |
7 | - QR codes are used to encode and decode the data into a machine-readable form. The use of camera phones to read two-dimensional barcodes for various purposes is currently a popular topic in both types of research and practical applications.
8 |
9 | - It contains a grid of black squares on a white background, which can be read by any imaging device such as a camera, and processed to extract the required data from the patterns that are present in the horizontal components of the image.
10 |
11 | ## 📌QR Codes with Python
12 |
13 | - In this section, I will take you through a tutorial on how to generate QR codes with Python. To generate QR Codes with Python you need to install only one Python library for this task:
14 |
15 | pip install pyqrcode
16 |
17 | Now let’s see how to create a QR Code with Python programming language:
18 |
19 | **Code**
20 |
21 | import qrcode
22 |
23 | url='Coding Buddies' # String which represent the QR code
24 |
25 | code_image =qrcode.make(url) # Generate QR code
26 |
27 | code_image.save('Enter your Location') # Create and save the png file at given location
28 |
29 |
30 | **Generated QR-Code**
31 |
32 |  33 |
34 | Now we finally built it.👍
35 |
--------------------------------------------------------------------------------
/QR Code Generator/youtube.svg:
--------------------------------------------------------------------------------
1 |
2 |
3 |
--------------------------------------------------------------------------------
/README.md:
--------------------------------------------------------------------------------
1 | # Personal Python Projects🔥
2 |
3 |
--------------------------------------------------------------------------------
/Random Number Guessing Game/README.md:
--------------------------------------------------------------------------------
1 |
2 |
--------------------------------------------------------------------------------
/Random Number Guessing Game/random_no_guessing_game.py:
--------------------------------------------------------------------------------
1 | import random
2 |
3 | num = random.randint(1, 100)
4 |
5 | user_input = 0
6 |
7 | count = 0
8 |
9 | while user_input != num:
10 | user_input = int(input("Enter your guess "))
11 |
12 | if user_input < num:
13 | print("Your number is less")
14 | print("Try Again")
15 |
16 | elif user_input > num:
17 | print("Your number is much")
18 | print("Try Again")
19 |
20 | else:
21 | print("Congratulations you guessed the right number")
22 |
23 | count += 1
24 |
25 | print("Kudos to you!!")
26 | print("You took", str(count), "trials for guessing the correct number")
--------------------------------------------------------------------------------
/Random Pattern Generator/Box Pattern.png:
--------------------------------------------------------------------------------
https://raw.githubusercontent.com/kishanrajput23/Personal-Python-Projects/01428ea3a57d226cb45ac4ffb62e5b632a2267fe/Random Pattern Generator/Box Pattern.png
--------------------------------------------------------------------------------
/Random Pattern Generator/Box Pattern.py:
--------------------------------------------------------------------------------
1 | import turtle
2 | from random import randint
3 | turtle.speed(0)
4 | turtle.bgcolor('black')
5 | x=1
6 | while x < 300:
7 | r = randint(0,255)
8 | g = randint(0,255)
9 | b = randint(0,255)
10 |
11 | turtle.colormode(255)
12 | turtle.pencolor(b,g,r)
13 | turtle.fd(50 + x)
14 | turtle.rt(1000)
15 | x = x + 1
16 |
17 | turtle.exitonclick()
--------------------------------------------------------------------------------
/Random Pattern Generator/Circle.py:
--------------------------------------------------------------------------------
1 | import turtle
2 |
3 | from turtle import *
4 |
5 | bgcolor("black")
6 | speed(0)
7 | hideturtle()
8 |
9 | for i in range(120):
10 | color("red")
11 | circle(i)
12 | color("orange")
13 | circle(i*0.8)
14 | right(3)
15 | forward(3)
16 | done()
17 |
--------------------------------------------------------------------------------
/Random Pattern Generator/Doraemon.py.py:
--------------------------------------------------------------------------------
1 | from turtle import *
2 | import turtle
3 | wn = turtle.Screen()
4 | wn.setup(width=1000, height=800)
5 |
6 | def my_goto(x, y):
7 | penup()
8 | goto(x, y)
9 | pendown()
10 |
11 |
12 | def eyes():
13 | fillcolor("#ffffff")
14 | begin_fill()
15 |
16 | tracer(False)
17 | a = 2.5
18 | for i in range(120):
19 | if 0 <= i < 30 or 60 <= i < 90:
20 | a -= 0.05
21 | lt(3)
22 | fd(a)
23 | else:
24 | a += 0.05
25 | lt(3)
26 | fd(a)
27 | tracer(True)
28 | end_fill()
29 |
30 |
31 |
32 | def beard():
33 | my_goto(-32, 135)
34 | seth(165)
35 | fd(60)
36 |
37 | my_goto(-32, 125)
38 | seth(180)
39 | fd(60)
40 |
41 | my_goto(-32, 115)
42 | seth(193)
43 | fd(60)
44 |
45 | my_goto(37, 135)
46 | seth(15)
47 | fd(60)
48 |
49 | my_goto(37, 125)
50 | seth(0)
51 | fd(60)
52 |
53 | my_goto(37, 115)
54 | seth(-13)
55 | fd(60)
56 |
57 |
58 | def mouth():
59 | my_goto(5, 148)
60 | seth(270)
61 | fd(100)
62 | seth(0)
63 | circle(120, 50)
64 | seth(230)
65 | circle(-120, 100)
66 |
67 |
68 | def scarf():
69 | fillcolor('#e70010')
70 | begin_fill()
71 | seth(0)
72 | fd(200)
73 | circle(-5, 90)
74 | fd(10)
75 | circle(-5, 90)
76 | fd(207)
77 | circle(-5, 90)
78 | fd(10)
79 | circle(-5, 90)
80 | end_fill()
81 |
82 |
83 | def nose():
84 | my_goto(-10, 158)
85 | seth(315)
86 | fillcolor('#e70010')
87 | begin_fill()
88 | circle(20)
89 | end_fill()
90 |
91 |
92 | def black_eyes():
93 | seth(0)
94 | my_goto(-20, 195)
95 | fillcolor('#000000')
96 | begin_fill()
97 | circle(13)
98 | end_fill()
99 |
100 | pensize(6)
101 | my_goto(20, 205)
102 | seth(75)
103 | circle(-10, 150)
104 | pensize(3)
105 |
106 | my_goto(-17, 200)
107 | seth(0)
108 | fillcolor('#ffffff')
109 | begin_fill()
110 | circle(5)
111 | end_fill()
112 | my_goto(0, 0)
113 |
114 |
115 |
116 |
117 | def face():
118 |
119 | fd(183)
120 | lt(45)
121 | fillcolor('#ffffff')
122 | begin_fill()
123 | circle(120, 100)
124 | seth(180)
125 | # print(pos())
126 | fd(121)
127 | pendown()
128 | seth(215)
129 | circle(120, 100)
130 | end_fill()
131 | my_goto(63.56,218.24)
132 | seth(90)
133 | eyes()
134 | seth(180)
135 | penup()
136 | fd(60)
137 | pendown()
138 | seth(90)
139 | eyes()
140 | penup()
141 | seth(180)
142 | fd(64)
143 |
144 |
145 | def head():
146 | penup()
147 | circle(150, 40)
148 | pendown()
149 | fillcolor('#00a0de')
150 | begin_fill()
151 | circle(150, 280)
152 | end_fill()
153 |
154 |
155 | def Doraemon():
156 | head()
157 | scarf()
158 | face()
159 | black_eyes()
160 | nose()
161 | mouth()
162 | beard()
163 | my_goto(0, 0)
164 | seth(0)
165 | penup()
166 | circle(150, 50)
167 | pendown()
168 | seth(30)
169 | fd(40)
170 | seth(70)
171 | circle(-30, 270)
172 |
173 |
174 | fillcolor('#00a0de')
175 | begin_fill()
176 |
177 | seth(230)
178 | fd(80)
179 | seth(90)
180 | circle(1000, 1)
181 | seth(-89)
182 | circle(-1000, 10)
183 |
184 | # print(pos())
185 |
186 | seth(180)
187 | fd(70)
188 | seth(90)
189 | circle(30, 180)
190 | seth(180)
191 | fd(70)
192 |
193 | # print(pos())
194 | seth(100)
195 | circle(-1000, 9)
196 |
197 | seth(-86)
198 | circle(1000, 2)
199 | seth(230)
200 | fd(40)
201 |
202 | # print(pos())
203 |
204 |
205 | circle(-30, 230)
206 | seth(45)
207 | fd(81)
208 | seth(0)
209 | fd(203)
210 | circle(5, 90)
211 | fd(10)
212 | circle(5, 90)
213 | fd(7)
214 | seth(40)
215 | circle(150, 10)
216 | seth(30)
217 | fd(40)
218 | end_fill()
219 |
220 | seth(70)
221 | fillcolor('#ffffff')
222 | begin_fill()
223 | circle(-30)
224 | end_fill()
225 |
226 | my_goto(103.74, -182.59)
227 | seth(0)
228 | fillcolor('#ffffff')
229 | begin_fill()
230 | fd(15)
231 | circle(-15, 180)
232 | fd(90)
233 | circle(-15, 180)
234 | fd(10)
235 | end_fill()
236 |
237 | my_goto(-96.26, -182.59)
238 | seth(180)
239 | fillcolor('#ffffff')
240 | begin_fill()
241 | fd(15)
242 | circle(15, 180)
243 | fd(90)
244 | circle(15, 180)
245 | fd(10)
246 | end_fill()
247 |
248 | my_goto(-133.97, -91.81)
249 | seth(50)
250 | fillcolor('#ffffff')
251 | begin_fill()
252 | circle(30)
253 | end_fill()
254 |
255 | my_goto(-103.42, 15.09)
256 | seth(0)
257 | fd(38)
258 | seth(230)
259 | begin_fill()
260 | circle(90, 260)
261 | end_fill()
262 |
263 | my_goto(5, -40)
264 | seth(0)
265 | fd(70)
266 | seth(-90)
267 | circle(-70, 180)
268 | seth(0)
269 | fd(70)
270 |
271 | my_goto(-103.42, 15.09)
272 | fd(90)
273 | seth(70)
274 | fillcolor('#ffd200')
275 | # print(pos())
276 | begin_fill()
277 | circle(-20)
278 | end_fill()
279 | seth(170)
280 | fillcolor('#ffd200')
281 | begin_fill()
282 | circle(-2, 180)
283 | seth(10)
284 | circle(-100, 22)
285 | circle(-2, 180)
286 | seth(180-10)
287 | circle(100, 22)
288 | end_fill()
289 | goto(-13.42, 15.09)
290 | seth(250)
291 | circle(20, 110)
292 | seth(90)
293 | fd(15)
294 | dot(10)
295 | my_goto(0, -150)
296 |
297 |
298 |
299 | if __name__ == '__main__':
300 | pensize(3)
301 | speed(9)
302 | Doraemon()
303 | my_goto(100, -300)
304 | write('@python.for.fun', font=("Bradley Hand ITC", 30, "bold"))
305 | mainloop()
--------------------------------------------------------------------------------
/Random Pattern Generator/Flower Pattern.JPG:
--------------------------------------------------------------------------------
https://raw.githubusercontent.com/kishanrajput23/Personal-Python-Projects/01428ea3a57d226cb45ac4ffb62e5b632a2267fe/Random Pattern Generator/Flower Pattern.JPG
--------------------------------------------------------------------------------
/Random Pattern Generator/Flower Pattern.py:
--------------------------------------------------------------------------------
1 | import turtle
2 | from random import randint
3 | turtle.speed(0)
4 | turtle.bgcolor('black')
5 | x=1
6 | while x < 300:
7 | r = randint(0,255)
8 | g = randint(0,255)
9 | b = randint(0,255)
10 |
11 | turtle.colormode(255)
12 | turtle.pencolor(r,g,b)
13 | turtle.fd(50 + x)
14 | turtle.rt(911)
15 | x = x + 1
16 |
17 | turtle.exitonclick()
--------------------------------------------------------------------------------
/Random Pattern Generator/Google_Logo.png:
--------------------------------------------------------------------------------
https://raw.githubusercontent.com/kishanrajput23/Personal-Python-Projects/01428ea3a57d226cb45ac4ffb62e5b632a2267fe/Random Pattern Generator/Google_Logo.png
--------------------------------------------------------------------------------
/Random Pattern Generator/Google_Logo.py:
--------------------------------------------------------------------------------
1 | import turtle
2 |
3 | from turtle import *
4 |
5 | gg = turtle.Turtle()
6 | turtle.bgcolor("black")
7 | gg.color("#4285F4","#4285F4")
8 | gg.pensize(5)
9 | #gg.speed(0)
10 |
11 | # [ google color codes ]
12 | # red = #DB4437
13 | # blue = #4285F4
14 | # green = #0F9D58
15 | # yellow = #F4B400
16 |
17 | def google():
18 | gg.forward(120)
19 | gg.right(90)
20 | gg.circle(-150,50)
21 | gg.color("#0F9D58")
22 | gg.circle(-150,100)
23 | gg.color("#F4B400")
24 | gg.circle(-150,60)
25 | gg.color("#DB4437","#DB4437")
26 | gg.begin_fill()
27 | gg.circle(-150,100)
28 | gg.right(90)
29 | gg.forward(50)
30 | gg.right(90)
31 | gg.circle(100,100)
32 | gg.right(90)
33 | gg.forward(50)
34 | gg.end_fill()
35 | gg.begin_fill()
36 | gg.color("#F4B400","#F4B400")
37 | gg.right(180)
38 | gg.forward(50)
39 | gg.right(90)
40 | gg.circle(100,60)
41 | gg.right(90)
42 | gg.forward(50)
43 | gg.right(90)
44 | gg.circle(-150,60)
45 | gg.end_fill()
46 | gg.right(90)
47 | gg.forward(50)
48 | gg.right(90)
49 | gg.circle(100,60)
50 | gg.color("#0F9D58","#0F9D58")
51 | gg.begin_fill()
52 | gg.circle(100,100)
53 | gg.right(90)
54 | gg.forward(50)
55 | gg.right(90)
56 | gg.circle(-150,100)
57 | gg.right(90)
58 | gg.forward(50)
59 | gg.end_fill()
60 | gg.right(90)
61 | gg.circle(100,100)
62 | gg.color("#4285F4","#4285F4")
63 | gg.begin_fill()
64 | gg.circle(100,25)
65 | gg.left(115)
66 | gg.forward(65)
67 | gg.right(90)
68 | gg.forward(42)
69 | gg.right(90)
70 | gg.forward(124)
71 | gg.right(90)
72 | gg.circle(-150,50)
73 | gg.right(90)
74 | gg.forward(50)
75 | gg.end_fill()
76 |
77 | google()
78 | gg.hideturtle()
79 | turtle.done()
--------------------------------------------------------------------------------
/Random Pattern Generator/Hexagonal Pattern.png:
--------------------------------------------------------------------------------
https://raw.githubusercontent.com/kishanrajput23/Personal-Python-Projects/01428ea3a57d226cb45ac4ffb62e5b632a2267fe/Random Pattern Generator/Hexagonal Pattern.png
--------------------------------------------------------------------------------
/Random Pattern Generator/Hexagonal Pattern.py:
--------------------------------------------------------------------------------
1 | import turtle
2 |
3 | t = turtle.Turtle()
4 |
5 | s = turtle.Screen()
6 |
7 | list1 = ["pink","red","orange","blue","green"]
8 |
9 | s.bgcolor("black")
10 |
11 | for i in range(100):
12 | t.color(list1[i%5])
13 | t.pensize(i/10+1)
14 | t.forward(i)
15 | t.left(59)
--------------------------------------------------------------------------------
/Random Pattern Generator/README.md:
--------------------------------------------------------------------------------
1 | # Arts using python's turtle module🔥
2 |
3 | # 📌Doraemon:
4 |
5 |
33 |
34 | Now we finally built it.👍
35 |
--------------------------------------------------------------------------------
/QR Code Generator/youtube.svg:
--------------------------------------------------------------------------------
1 |
2 |
3 |
--------------------------------------------------------------------------------
/README.md:
--------------------------------------------------------------------------------
1 | # Personal Python Projects🔥
2 |
3 |
--------------------------------------------------------------------------------
/Random Number Guessing Game/README.md:
--------------------------------------------------------------------------------
1 |
2 |
--------------------------------------------------------------------------------
/Random Number Guessing Game/random_no_guessing_game.py:
--------------------------------------------------------------------------------
1 | import random
2 |
3 | num = random.randint(1, 100)
4 |
5 | user_input = 0
6 |
7 | count = 0
8 |
9 | while user_input != num:
10 | user_input = int(input("Enter your guess "))
11 |
12 | if user_input < num:
13 | print("Your number is less")
14 | print("Try Again")
15 |
16 | elif user_input > num:
17 | print("Your number is much")
18 | print("Try Again")
19 |
20 | else:
21 | print("Congratulations you guessed the right number")
22 |
23 | count += 1
24 |
25 | print("Kudos to you!!")
26 | print("You took", str(count), "trials for guessing the correct number")
--------------------------------------------------------------------------------
/Random Pattern Generator/Box Pattern.png:
--------------------------------------------------------------------------------
https://raw.githubusercontent.com/kishanrajput23/Personal-Python-Projects/01428ea3a57d226cb45ac4ffb62e5b632a2267fe/Random Pattern Generator/Box Pattern.png
--------------------------------------------------------------------------------
/Random Pattern Generator/Box Pattern.py:
--------------------------------------------------------------------------------
1 | import turtle
2 | from random import randint
3 | turtle.speed(0)
4 | turtle.bgcolor('black')
5 | x=1
6 | while x < 300:
7 | r = randint(0,255)
8 | g = randint(0,255)
9 | b = randint(0,255)
10 |
11 | turtle.colormode(255)
12 | turtle.pencolor(b,g,r)
13 | turtle.fd(50 + x)
14 | turtle.rt(1000)
15 | x = x + 1
16 |
17 | turtle.exitonclick()
--------------------------------------------------------------------------------
/Random Pattern Generator/Circle.py:
--------------------------------------------------------------------------------
1 | import turtle
2 |
3 | from turtle import *
4 |
5 | bgcolor("black")
6 | speed(0)
7 | hideturtle()
8 |
9 | for i in range(120):
10 | color("red")
11 | circle(i)
12 | color("orange")
13 | circle(i*0.8)
14 | right(3)
15 | forward(3)
16 | done()
17 |
--------------------------------------------------------------------------------
/Random Pattern Generator/Doraemon.py.py:
--------------------------------------------------------------------------------
1 | from turtle import *
2 | import turtle
3 | wn = turtle.Screen()
4 | wn.setup(width=1000, height=800)
5 |
6 | def my_goto(x, y):
7 | penup()
8 | goto(x, y)
9 | pendown()
10 |
11 |
12 | def eyes():
13 | fillcolor("#ffffff")
14 | begin_fill()
15 |
16 | tracer(False)
17 | a = 2.5
18 | for i in range(120):
19 | if 0 <= i < 30 or 60 <= i < 90:
20 | a -= 0.05
21 | lt(3)
22 | fd(a)
23 | else:
24 | a += 0.05
25 | lt(3)
26 | fd(a)
27 | tracer(True)
28 | end_fill()
29 |
30 |
31 |
32 | def beard():
33 | my_goto(-32, 135)
34 | seth(165)
35 | fd(60)
36 |
37 | my_goto(-32, 125)
38 | seth(180)
39 | fd(60)
40 |
41 | my_goto(-32, 115)
42 | seth(193)
43 | fd(60)
44 |
45 | my_goto(37, 135)
46 | seth(15)
47 | fd(60)
48 |
49 | my_goto(37, 125)
50 | seth(0)
51 | fd(60)
52 |
53 | my_goto(37, 115)
54 | seth(-13)
55 | fd(60)
56 |
57 |
58 | def mouth():
59 | my_goto(5, 148)
60 | seth(270)
61 | fd(100)
62 | seth(0)
63 | circle(120, 50)
64 | seth(230)
65 | circle(-120, 100)
66 |
67 |
68 | def scarf():
69 | fillcolor('#e70010')
70 | begin_fill()
71 | seth(0)
72 | fd(200)
73 | circle(-5, 90)
74 | fd(10)
75 | circle(-5, 90)
76 | fd(207)
77 | circle(-5, 90)
78 | fd(10)
79 | circle(-5, 90)
80 | end_fill()
81 |
82 |
83 | def nose():
84 | my_goto(-10, 158)
85 | seth(315)
86 | fillcolor('#e70010')
87 | begin_fill()
88 | circle(20)
89 | end_fill()
90 |
91 |
92 | def black_eyes():
93 | seth(0)
94 | my_goto(-20, 195)
95 | fillcolor('#000000')
96 | begin_fill()
97 | circle(13)
98 | end_fill()
99 |
100 | pensize(6)
101 | my_goto(20, 205)
102 | seth(75)
103 | circle(-10, 150)
104 | pensize(3)
105 |
106 | my_goto(-17, 200)
107 | seth(0)
108 | fillcolor('#ffffff')
109 | begin_fill()
110 | circle(5)
111 | end_fill()
112 | my_goto(0, 0)
113 |
114 |
115 |
116 |
117 | def face():
118 |
119 | fd(183)
120 | lt(45)
121 | fillcolor('#ffffff')
122 | begin_fill()
123 | circle(120, 100)
124 | seth(180)
125 | # print(pos())
126 | fd(121)
127 | pendown()
128 | seth(215)
129 | circle(120, 100)
130 | end_fill()
131 | my_goto(63.56,218.24)
132 | seth(90)
133 | eyes()
134 | seth(180)
135 | penup()
136 | fd(60)
137 | pendown()
138 | seth(90)
139 | eyes()
140 | penup()
141 | seth(180)
142 | fd(64)
143 |
144 |
145 | def head():
146 | penup()
147 | circle(150, 40)
148 | pendown()
149 | fillcolor('#00a0de')
150 | begin_fill()
151 | circle(150, 280)
152 | end_fill()
153 |
154 |
155 | def Doraemon():
156 | head()
157 | scarf()
158 | face()
159 | black_eyes()
160 | nose()
161 | mouth()
162 | beard()
163 | my_goto(0, 0)
164 | seth(0)
165 | penup()
166 | circle(150, 50)
167 | pendown()
168 | seth(30)
169 | fd(40)
170 | seth(70)
171 | circle(-30, 270)
172 |
173 |
174 | fillcolor('#00a0de')
175 | begin_fill()
176 |
177 | seth(230)
178 | fd(80)
179 | seth(90)
180 | circle(1000, 1)
181 | seth(-89)
182 | circle(-1000, 10)
183 |
184 | # print(pos())
185 |
186 | seth(180)
187 | fd(70)
188 | seth(90)
189 | circle(30, 180)
190 | seth(180)
191 | fd(70)
192 |
193 | # print(pos())
194 | seth(100)
195 | circle(-1000, 9)
196 |
197 | seth(-86)
198 | circle(1000, 2)
199 | seth(230)
200 | fd(40)
201 |
202 | # print(pos())
203 |
204 |
205 | circle(-30, 230)
206 | seth(45)
207 | fd(81)
208 | seth(0)
209 | fd(203)
210 | circle(5, 90)
211 | fd(10)
212 | circle(5, 90)
213 | fd(7)
214 | seth(40)
215 | circle(150, 10)
216 | seth(30)
217 | fd(40)
218 | end_fill()
219 |
220 | seth(70)
221 | fillcolor('#ffffff')
222 | begin_fill()
223 | circle(-30)
224 | end_fill()
225 |
226 | my_goto(103.74, -182.59)
227 | seth(0)
228 | fillcolor('#ffffff')
229 | begin_fill()
230 | fd(15)
231 | circle(-15, 180)
232 | fd(90)
233 | circle(-15, 180)
234 | fd(10)
235 | end_fill()
236 |
237 | my_goto(-96.26, -182.59)
238 | seth(180)
239 | fillcolor('#ffffff')
240 | begin_fill()
241 | fd(15)
242 | circle(15, 180)
243 | fd(90)
244 | circle(15, 180)
245 | fd(10)
246 | end_fill()
247 |
248 | my_goto(-133.97, -91.81)
249 | seth(50)
250 | fillcolor('#ffffff')
251 | begin_fill()
252 | circle(30)
253 | end_fill()
254 |
255 | my_goto(-103.42, 15.09)
256 | seth(0)
257 | fd(38)
258 | seth(230)
259 | begin_fill()
260 | circle(90, 260)
261 | end_fill()
262 |
263 | my_goto(5, -40)
264 | seth(0)
265 | fd(70)
266 | seth(-90)
267 | circle(-70, 180)
268 | seth(0)
269 | fd(70)
270 |
271 | my_goto(-103.42, 15.09)
272 | fd(90)
273 | seth(70)
274 | fillcolor('#ffd200')
275 | # print(pos())
276 | begin_fill()
277 | circle(-20)
278 | end_fill()
279 | seth(170)
280 | fillcolor('#ffd200')
281 | begin_fill()
282 | circle(-2, 180)
283 | seth(10)
284 | circle(-100, 22)
285 | circle(-2, 180)
286 | seth(180-10)
287 | circle(100, 22)
288 | end_fill()
289 | goto(-13.42, 15.09)
290 | seth(250)
291 | circle(20, 110)
292 | seth(90)
293 | fd(15)
294 | dot(10)
295 | my_goto(0, -150)
296 |
297 |
298 |
299 | if __name__ == '__main__':
300 | pensize(3)
301 | speed(9)
302 | Doraemon()
303 | my_goto(100, -300)
304 | write('@python.for.fun', font=("Bradley Hand ITC", 30, "bold"))
305 | mainloop()
--------------------------------------------------------------------------------
/Random Pattern Generator/Flower Pattern.JPG:
--------------------------------------------------------------------------------
https://raw.githubusercontent.com/kishanrajput23/Personal-Python-Projects/01428ea3a57d226cb45ac4ffb62e5b632a2267fe/Random Pattern Generator/Flower Pattern.JPG
--------------------------------------------------------------------------------
/Random Pattern Generator/Flower Pattern.py:
--------------------------------------------------------------------------------
1 | import turtle
2 | from random import randint
3 | turtle.speed(0)
4 | turtle.bgcolor('black')
5 | x=1
6 | while x < 300:
7 | r = randint(0,255)
8 | g = randint(0,255)
9 | b = randint(0,255)
10 |
11 | turtle.colormode(255)
12 | turtle.pencolor(r,g,b)
13 | turtle.fd(50 + x)
14 | turtle.rt(911)
15 | x = x + 1
16 |
17 | turtle.exitonclick()
--------------------------------------------------------------------------------
/Random Pattern Generator/Google_Logo.png:
--------------------------------------------------------------------------------
https://raw.githubusercontent.com/kishanrajput23/Personal-Python-Projects/01428ea3a57d226cb45ac4ffb62e5b632a2267fe/Random Pattern Generator/Google_Logo.png
--------------------------------------------------------------------------------
/Random Pattern Generator/Google_Logo.py:
--------------------------------------------------------------------------------
1 | import turtle
2 |
3 | from turtle import *
4 |
5 | gg = turtle.Turtle()
6 | turtle.bgcolor("black")
7 | gg.color("#4285F4","#4285F4")
8 | gg.pensize(5)
9 | #gg.speed(0)
10 |
11 | # [ google color codes ]
12 | # red = #DB4437
13 | # blue = #4285F4
14 | # green = #0F9D58
15 | # yellow = #F4B400
16 |
17 | def google():
18 | gg.forward(120)
19 | gg.right(90)
20 | gg.circle(-150,50)
21 | gg.color("#0F9D58")
22 | gg.circle(-150,100)
23 | gg.color("#F4B400")
24 | gg.circle(-150,60)
25 | gg.color("#DB4437","#DB4437")
26 | gg.begin_fill()
27 | gg.circle(-150,100)
28 | gg.right(90)
29 | gg.forward(50)
30 | gg.right(90)
31 | gg.circle(100,100)
32 | gg.right(90)
33 | gg.forward(50)
34 | gg.end_fill()
35 | gg.begin_fill()
36 | gg.color("#F4B400","#F4B400")
37 | gg.right(180)
38 | gg.forward(50)
39 | gg.right(90)
40 | gg.circle(100,60)
41 | gg.right(90)
42 | gg.forward(50)
43 | gg.right(90)
44 | gg.circle(-150,60)
45 | gg.end_fill()
46 | gg.right(90)
47 | gg.forward(50)
48 | gg.right(90)
49 | gg.circle(100,60)
50 | gg.color("#0F9D58","#0F9D58")
51 | gg.begin_fill()
52 | gg.circle(100,100)
53 | gg.right(90)
54 | gg.forward(50)
55 | gg.right(90)
56 | gg.circle(-150,100)
57 | gg.right(90)
58 | gg.forward(50)
59 | gg.end_fill()
60 | gg.right(90)
61 | gg.circle(100,100)
62 | gg.color("#4285F4","#4285F4")
63 | gg.begin_fill()
64 | gg.circle(100,25)
65 | gg.left(115)
66 | gg.forward(65)
67 | gg.right(90)
68 | gg.forward(42)
69 | gg.right(90)
70 | gg.forward(124)
71 | gg.right(90)
72 | gg.circle(-150,50)
73 | gg.right(90)
74 | gg.forward(50)
75 | gg.end_fill()
76 |
77 | google()
78 | gg.hideturtle()
79 | turtle.done()
--------------------------------------------------------------------------------
/Random Pattern Generator/Hexagonal Pattern.png:
--------------------------------------------------------------------------------
https://raw.githubusercontent.com/kishanrajput23/Personal-Python-Projects/01428ea3a57d226cb45ac4ffb62e5b632a2267fe/Random Pattern Generator/Hexagonal Pattern.png
--------------------------------------------------------------------------------
/Random Pattern Generator/Hexagonal Pattern.py:
--------------------------------------------------------------------------------
1 | import turtle
2 |
3 | t = turtle.Turtle()
4 |
5 | s = turtle.Screen()
6 |
7 | list1 = ["pink","red","orange","blue","green"]
8 |
9 | s.bgcolor("black")
10 |
11 | for i in range(100):
12 | t.color(list1[i%5])
13 | t.pensize(i/10+1)
14 | t.forward(i)
15 | t.left(59)
--------------------------------------------------------------------------------
/Random Pattern Generator/README.md:
--------------------------------------------------------------------------------
1 | # Arts using python's turtle module🔥
2 |
3 | # 📌Doraemon:
4 |
5 | .png) 6 |
7 | # 📌Tri-Color Pattern:
8 |
9 |
6 |
7 | # 📌Tri-Color Pattern:
8 |
9 |  10 |
11 | # 📌Google Logo:
12 |
13 |
10 |
11 | # 📌Google Logo:
12 |
13 |  18 |
19 | # 📌Vibrating Circle:
20 |
21 |
18 |
19 | # 📌Vibrating Circle:
20 |
21 |  22 |
23 | # 📌Rangoli Pattern:
24 |
25 |
22 |
23 | # 📌Rangoli Pattern:
24 |
25 |  26 |
27 | # 📌Spirograph:
28 |
29 |
26 |
27 | # 📌Spirograph:
28 |
29 |  30 |
31 | # 📌Hexagonal Pattern:
32 |
33 |
30 |
31 | # 📌Hexagonal Pattern:
32 |
33 |  34 |
35 | # 📌Flower Pattern:
36 |
37 |
34 |
35 | # 📌Flower Pattern:
36 |
37 |  38 |
39 | # 📌Box Pattern:
40 |
41 |
38 |
39 | # 📌Box Pattern:
40 |
41 |  42 |
43 | # 📌Cicle Pattern:
44 |
45 | 
46 |
--------------------------------------------------------------------------------
/Random Pattern Generator/Rangoli Pattern.png:
--------------------------------------------------------------------------------
https://raw.githubusercontent.com/kishanrajput23/Personal-Python-Projects/01428ea3a57d226cb45ac4ffb62e5b632a2267fe/Random Pattern Generator/Rangoli Pattern.png
--------------------------------------------------------------------------------
/Random Pattern Generator/Rangoli Pattern.py:
--------------------------------------------------------------------------------
1 | import turtle
2 | import math
3 | import random
4 | wn = turtle.Screen()
5 | wn.bgcolor('black')
6 | Albert = turtle.Turtle()
7 | Albert.speed(0)
8 | Albert.color('white')
9 | rotate=int(360)
10 | def drawCircles(t,size):
11 | for i in range(10):
12 | t.circle(size)
13 | size=size-4
14 | def drawSpecial(t,size,repeat):
15 | for i in range (repeat):
16 | drawCircles(t,size)
17 | t.right(360/repeat)
18 | drawSpecial(Albert,100,10)
19 | Steve = turtle.Turtle()
20 | Steve.speed(0)
21 | Steve.color('yellow')
22 | rotate=int(90)
23 | def drawCircles(t,size):
24 | for i in range(4):
25 | t.circle(size)
26 | size=size-10
27 | def drawSpecial(t,size,repeat):
28 | for i in range (repeat):
29 | drawCircles(t,size)
30 | t.right(360/repeat)
31 | drawSpecial(Steve,100,10)
32 | Barry = turtle.Turtle()
33 | Barry.speed(0)
34 | Barry.color('blue')
35 | rotate=int(80)
36 | def drawCircles(t,size):
37 | for i in range(4):
38 | t.circle(size)
39 | size=size-5
40 | def drawSpecial(t,size,repeat):
41 | for i in range (repeat):
42 | drawCircles(t,size)
43 | t.right(360/repeat)
44 | drawSpecial(Barry,100,10)
45 | Terry = turtle.Turtle()
46 | Terry.speed(0)
47 | Terry.color('orange')
48 | rotate=int(90)
49 | def drawCircles(t,size):
50 | for i in range(4):
51 | t.circle(size)
52 | size=size-19
53 | def drawSpecial(t,size,repeat):
54 | for i in range (repeat):
55 | drawCircles(t,size)
56 | t.right(360/repeat)
57 | drawSpecial(Terry,100,10)
58 | Will = turtle.Turtle()
59 | Will.speed(0)
60 | Will.color('pink')
61 | rotate=int(90)
62 | def drawCircles(t,size):
63 | for i in range(4):
64 | t.circle(size)
65 | size=size-20
66 | def drawSpecial(t,size,repeat):
67 | for i in range (repeat):
68 | drawCircles(t,size)
69 | t.right(360/repeat)
70 | drawSpecial(Will,100,10)
--------------------------------------------------------------------------------
/Random Pattern Generator/Screenshot (303).png:
--------------------------------------------------------------------------------
https://raw.githubusercontent.com/kishanrajput23/Personal-Python-Projects/01428ea3a57d226cb45ac4ffb62e5b632a2267fe/Random Pattern Generator/Screenshot (303).png
--------------------------------------------------------------------------------
/Random Pattern Generator/Spirograph.png:
--------------------------------------------------------------------------------
https://raw.githubusercontent.com/kishanrajput23/Personal-Python-Projects/01428ea3a57d226cb45ac4ffb62e5b632a2267fe/Random Pattern Generator/Spirograph.png
--------------------------------------------------------------------------------
/Random Pattern Generator/Spirograph.py:
--------------------------------------------------------------------------------
1 | import turtle
2 | # Creating turtle
3 | t = turtle.Turtle()
4 | s = turtle.Screen()
5 | s.bgcolor("black")
6 | t.pencolor("red")
7 | t.pensize(2)
8 | t.speed(0)
9 |
10 | while (True):
11 | for i in range(6):
12 | for colors in ["red", "blue", "magenta", "green", "yellow", "white"]:
13 | turtle.color(colors)
14 | turtle.circle(100)
15 | turtle.left(10)
16 |
17 |
18 | turtle.hideturtle()
19 | turtle.mainloop()
--------------------------------------------------------------------------------
/Random Pattern Generator/Star Pattern.png:
--------------------------------------------------------------------------------
https://raw.githubusercontent.com/kishanrajput23/Personal-Python-Projects/01428ea3a57d226cb45ac4ffb62e5b632a2267fe/Random Pattern Generator/Star Pattern.png
--------------------------------------------------------------------------------
/Random Pattern Generator/Star Pattern.py:
--------------------------------------------------------------------------------
1 | import turtle
2 | import random
3 |
4 | turtle.speed(speed ='fastest')
5 |
6 | def draw(n, x, angle):
7 | # loop for number of stars
8 | for i in range(n):
9 |
10 | turtle.colormode(255)
11 |
12 | # choosing random integers
13 | # between 0 and 255
14 | # to generate random rgb values
15 | a = random.randint(0, 255)
16 | b = random.randint(0, 255)
17 | c = random.randint(0, 255)
18 |
19 | # setting the outline
20 | # and fill colour
21 | turtle.pencolor(a, b, c)
22 | turtle.fillcolor(a, b, c)
23 |
24 | # begins filling the star
25 | turtle.begin_fill()
26 |
27 | # loop for drawing each star
28 | for j in range(5):
29 |
30 | turtle.forward(5 * n-5 * i)
31 | turtle.right(x)
32 | turtle.forward(5 * n-5 * i)
33 | turtle.right(72 - x)
34 |
35 | # colour filling complete
36 | turtle.end_fill()
37 |
38 | # rotating for
39 | # the next star
40 | turtle.rt(angle)
41 |
42 |
43 | # setting the parameters
44 | n = 30 # number of stars
45 | x = 144 # exterior angle of each star
46 | angle = 18 # angle of rotation for the spiral
47 |
48 | draw(n, x, angle)
--------------------------------------------------------------------------------
/Random Pattern Generator/Tri-Color.png:
--------------------------------------------------------------------------------
https://raw.githubusercontent.com/kishanrajput23/Personal-Python-Projects/01428ea3a57d226cb45ac4ffb62e5b632a2267fe/Random Pattern Generator/Tri-Color.png
--------------------------------------------------------------------------------
/Random Pattern Generator/Vibrating_Circle.png:
--------------------------------------------------------------------------------
https://raw.githubusercontent.com/kishanrajput23/Personal-Python-Projects/01428ea3a57d226cb45ac4ffb62e5b632a2267fe/Random Pattern Generator/Vibrating_Circle.png
--------------------------------------------------------------------------------
/Random Pattern Generator/Vibrating_Circle.py:
--------------------------------------------------------------------------------
1 | import turtle
2 | # Creating turtle
3 | t = turtle.Turtle()
4 | s = turtle.Screen()
5 | s.bgcolor("black")
6 | t.pencolor("white")
7 |
8 | a = 0
9 | b = 0
10 | t.speed(0)
11 | t.penup()
12 | t.goto(0,200)
13 | t.pendown()
14 | while(True):
15 | t.forward(a)
16 | t.right(b)
17 | a+=3
18 | b+=1
19 | if b == 210:
20 | break
21 | t.hideturtle()
22 |
23 | turtle.done()
--------------------------------------------------------------------------------
/Random Pattern Generator/tri-color.py:
--------------------------------------------------------------------------------
1 | import turtle
2 | from turtle import*
3 |
4 | #screen for output
5 | screen = turtle.Screen()
6 |
7 | # Defining a turtle Instance
8 | t = turtle.Turtle()
9 | speed(0)
10 |
11 | # initially penup()
12 | t.penup()
13 | t.goto(-400, 250)
14 | t.pendown()
15 |
16 | # Orange Rectangle
17 | #white rectangle
18 | t.color("orange")
19 | t.begin_fill()
20 | t.forward(800)
21 | t.right(90)
22 | t.forward(167)
23 | t.right(90)
24 | t.forward(800)
25 | t.end_fill()
26 | t.left(90)
27 | t.forward(167)
28 |
29 | # Green Rectangle
30 | t.color("green")
31 | t.begin_fill()
32 | t.forward(167)
33 | t.left(90)
34 | t.forward(800)
35 | t.left(90)
36 | t.forward(167)
37 | t.end_fill()
38 |
39 | # Big Blue Circle
40 | t.penup()
41 | t.goto(70, 0)
42 | t.pendown()
43 | t.color("navy")
44 | t.begin_fill()
45 | t.circle(70)
46 | t.end_fill()
47 |
48 | # Big White Circle
49 | t.penup()
50 | t.goto(60, 0)
51 | t.pendown()
52 | t.color("white")
53 | t.begin_fill()
54 | t.circle(60)
55 | t.end_fill()
56 |
57 | # Mini Blue Circles
58 | t.penup()
59 | t.goto(-57, -8)
60 | t.pendown()
61 | t.color("navy")
62 | for i in range(24):
63 | t.begin_fill()
64 | t.circle(3)
65 | t.end_fill()
66 | t.penup()
67 | t.forward(15)
68 | t.right(15)
69 | t.pendown()
70 |
71 | # Small Blue Circle
72 | t.penup()
73 | t.goto(20, 0)
74 | t.pendown()
75 | t.begin_fill()
76 | t.circle(20)
77 | t.end_fill()
78 | # Spokes
79 | t.penup()
80 | t.goto(0, 0)
81 | t.pendown()
82 | t.pensize(2)
83 | for i in range(24):
84 | t.forward(60)
85 | t.backward(60)
86 | t.left(15)
87 |
88 | #to hold the
89 | #output window
90 | turtle.done()
91 |
--------------------------------------------------------------------------------
/Rock Paper Scissor Game/README.md:
--------------------------------------------------------------------------------
1 | # Rock Paper Scissor Game🔥
2 |
3 | - In the rock, paper and scissors game our goal is to create a command-line game where a user has the option to choose between rock, paper and scissors and if the user wins the score is added, and at the end when the user finishes the game, the score is shown to the user.
4 |
5 | ## 📌Rock, Paper and Scissors Game with Python
6 |
7 | - To create the Rock, Paper and Scissors game with Python, we need to take the user’s choice and then we need to compare it with the computer choice which is taken using the random module in Python from a list of choices, and if the user wins then the score will increase by 1:
8 |
9 | ### Code:
10 |
11 | import random
12 |
13 | choices = ["Rock", "Paper", "Scissor"]
14 |
15 | player = False
16 | cpu_score = 0
17 | player_score = 0
18 |
19 | while True:
20 | player = input("Enter your choice ").capitalize()
21 |
22 | computer = random.choice(choices)
23 |
24 | if computer == player:
25 | print("Its tie now...")
26 |
27 | elif player == "Rock":
28 | if computer == "Paper":
29 | print("You lose...", computer, "covers", player)
30 | cpu_score += 1
31 |
32 | else:
33 | print("You won...", player, "smashes", computer)
34 | player_score += 1
35 |
36 | elif player == "Paper":
37 | if computer == "Rock":
38 | print("You won...", player, "covers", computer)
39 | player_score += 1
40 |
41 | else:
42 | print("You lose...", computer, "cut", player)
43 | cpu_score += 1
44 |
45 | elif player == "Scissor":
46 | if computer == "Paper":
47 | print("You won...", player, "cut", computer)
48 | player_score += 1
49 |
50 | else:
51 | print("You lose...", computer, "smashes", player)
52 | cpu_score += 1
53 |
54 | elif player == "End":
55 | print("The final scores are ")
56 | print(f"CPU Score {cpu_score}")
57 | print(f"Player Score {player_score}")
58 | break
59 |
60 |
61 | ### Output:
62 |
63 | Enter your choice rock
64 | Its tie now...
65 | Enter your choice paper
66 | You won... Paper covers Rock
67 | Enter your choice scissors
68 | You lose... Rock smashes Scissors
69 | Enter your choice end
70 | The final scores are
71 | CPU Score 1
72 | Player Score 1
73 |
74 | ## 📌Summary
75 |
76 | - Creating these types of games will help a beginner to think logically. You can even use this idea to make your own game. In the end, creating these types of programs will help you create your algorithms, which is a very important skill for coding interviews and competitive programming.
77 |
--------------------------------------------------------------------------------
/Rock Paper Scissor Game/main.py:
--------------------------------------------------------------------------------
1 | import random
2 |
3 | randNo = random.randint(1,3)
4 | if randNo == 1:
5 | computer_choose = "r" # if randNo is equal to 1 then it will store 'r' as computer choice
6 | if randNo == 2:
7 | computer_choose = "p" # if randNo is equal to 2 then it will store 'p' as computer choice
8 | if randNo == 3:
9 | computer_choose = "s" # if randNo is equal to 3 then it will store 's' as computer choice
10 |
11 | # Defining gameWin function for performing major task for this game.
12 |
13 | def gameWin(computer_choose, user_input):
14 | if computer_choose == user_input:
15 | return None
16 | elif computer_choose == "r":
17 | if user_input == "p":
18 | return True
19 | elif user_input == "s":
20 | return False
21 |
22 | elif computer_choose == "p":
23 | if user_input == "r":
24 | return False
25 | elif user_input == "s":
26 | return True
27 |
28 | elif computer_choose == "s":
29 | if user_input == "r":
30 | return True
31 | elif user_input == "p":
32 | return False
33 |
34 | print("Computer Choosed already from Rock('r') or Paper('p') or Scissor('s')")
35 |
36 | print("Now your turn to choose")
37 |
38 | user_input = input("Choose from Rock('r') or Paper('p') or Scissor('s') ") #taking input from the user
39 |
40 | # It shows the user what computer choose from rock, paper or scissor.
41 | print("Computer choosed " + computer_choose)
42 |
43 | # It shows the user what he/she choose from rock, paper or scissor.
44 | print("You Choosed " + user_input)
45 |
46 |
47 | # This block of if-else statement will find out conditon of gameWin function
48 |
49 | if gameWin(computer_choose, user_input) == None:
50 | print("It tie now")
51 |
52 | elif gameWin(computer_choose, user_input):
53 | print("Congratulations You Won!!!")
54 |
55 | else:
56 | print("You Lose!")
57 |
--------------------------------------------------------------------------------
/Rock Paper Scissor Game/rock_paper_scissor_game.py:
--------------------------------------------------------------------------------
1 | import random
2 |
3 | choices = ["Rock", "Paper", "Scissor"]
4 |
5 | player = False
6 | cpu_score = 0
7 | player_score = 0
8 |
9 | while True:
10 | player = input("Enter your choice ").capitalize()
11 |
12 | computer = random.choice(choices)
13 |
14 | if computer == player:
15 | print("Its tie now...")
16 |
17 | elif player == "Rock":
18 | if computer == "Paper":
19 | print("You lose...", computer, "covers", player)
20 | cpu_score += 1
21 |
22 | else:
23 | print("You won...", player, "smashes", computer)
24 | player_score += 1
25 |
26 | elif player == "Paper":
27 | if computer == "Rock":
28 | print("You won...", player, "covers", computer)
29 | player_score += 1
30 |
31 | else:
32 | print("You lose...", computer, "cut", player)
33 | cpu_score += 1
34 |
35 | elif player == "Scissor":
36 | if computer == "Paper":
37 | print("You won...", player, "cut", computer)
38 | player_score += 1
39 |
40 | else:
41 | print("You lose...", computer, "smashes", player)
42 | cpu_score += 1
43 |
44 | elif player == "End":
45 | print("The final scores are ")
46 | print(f"CPU Score {cpu_score}")
47 | print(f"Player Score {player_score}")
48 | break
--------------------------------------------------------------------------------
/Shiv Ling/README.md:
--------------------------------------------------------------------------------
1 | # ShivLing
2 |
3 | 
4 |
--------------------------------------------------------------------------------
/Shiv Ling/mahadev.py:
--------------------------------------------------------------------------------
1 | import turtle
2 |
3 | turtle.speed(0)
4 | turtle.hideturtle()
5 | turtle.setup(800,600)
6 | turtle.title('Shiva Linga')
7 | turtle.speed(1)
8 | turtle.up()
9 | turtle.hideturtle()
10 |
11 | def my_goto(x, y):
12 | turtle.pencolor("orange")
13 | turtle.penup()
14 | turtle.goto(x, y)
15 | turtle.pendown()
16 |
17 | def round_rectangle(center_x,center_y,width,height,cornersize):
18 | turtle.up()
19 | turtle.goto(center_x-width/2+cornersize,center_y-height/2)
20 | turtle.down()
21 | for _ in range(2):
22 | turtle.fillcolor("black")
23 | turtle.begin_fill()
24 | turtle.fd(width-2*cornersize)
25 | turtle.circle(cornersize,90)
26 | turtle.fd(height-2*cornersize)
27 | turtle.circle(cornersize,90)
28 | turtle.end_fill()
29 |
30 |
31 | def round_rectangle(center_x,center_y,width,height,cornersize):
32 | turtle.up()
33 | turtle.goto(center_x-width/2+cornersize,center_y-height/2)
34 | turtle.down()
35 | for _ in range(2):
36 | turtle.fillcolor("black")
37 | turtle.begin_fill()
38 | turtle.fd(width-2*cornersize)
39 | turtle.circle(cornersize,90)
40 | turtle.fd(height-2*cornersize)
41 | turtle.circle(cornersize,90)
42 | turtle.end_fill()
43 |
44 | round_rectangle(0,0,200,300,80)
45 |
46 | turtle.fillcolor('black')
47 | turtle.begin_fill()
48 |
49 |
50 |
51 | turtle.goto(-35, 40)
52 | turtle.penup()
53 | turtle.fillcolor('white')
54 | turtle.begin_fill()
55 | turtle.forward(80)
56 | turtle.left(90)
57 | turtle.forward(10)
58 | turtle.left(90)
59 | turtle.forward(80)
60 | turtle.left(90)
61 | turtle.forward(10)
62 | turtle.left(90)
63 |
64 |
65 | turtle.goto(-35, 80)
66 | turtle.forward(80)
67 | turtle.left(90)
68 | turtle.forward(10)
69 | turtle.left(90)
70 | turtle.forward(80)
71 | turtle.left(90)
72 | turtle.forward(10)
73 | turtle.left(90)
74 |
75 | turtle.goto(-35, 60)
76 | turtle.forward(80)
77 | turtle.left(90)
78 | turtle.forward(10)
79 | turtle.left(90)
80 | turtle.forward(80)
81 | turtle.left(90)
82 | turtle.forward(10)
83 | turtle.left(90)
84 |
85 | turtle.pendown()
86 | turtle.end_fill()
87 |
88 |
89 | turtle.fillcolor('red')
90 | turtle.begin_fill()
91 |
92 | turtle.goto(5,50)
93 | turtle.penup()
94 | r = 15
95 | turtle.circle(r)
96 | turtle.pendown()
97 | turtle.end_fill()
98 |
99 | turtle.goto(-150, -175)
100 | turtle.penup()
101 | turtle.pencolor("black")
102 | turtle.fillcolor("black")
103 | turtle.begin_fill()
104 | round_rectangle(90,-125,600,100,50)
105 | turtle.pendown()
106 |
107 |
108 | my_goto(-300, -300)
109 | turtle.write('BY :- Coding_Buddies4', font=("Bradley Hand ITC", 50, "bold"))
110 |
111 |
112 | my_goto(-150,150)
113 | turtle.write('हर हर महादेव', font=("Bradley Hand ITC", 50, "bold"))
114 | turtle.done()
--------------------------------------------------------------------------------
/Spotify Playlist Generator/README.md:
--------------------------------------------------------------------------------
1 |
2 |
--------------------------------------------------------------------------------
/Spotify Playlist Generator/Spotify playlist generator.py:
--------------------------------------------------------------------------------
1 | import sys
2 | import os
3 | import spotipy
4 | import spotipy.util as util
5 | from random import randint
6 | #Enviromental variables
7 | os.environ["SPOTIPY_CLIENT_ID"] = ""
8 | os.environ["SPOTIPY_CLIENT_SECRET"] = ""
9 | os.environ["SPOTIPY_REDIRECT_URI"] = "http://localhost/"
10 | #The scopes that we need for read and write.
11 | scope = 'user-library-read playlist-modify-public'
12 |
13 | #We receive username when running the script, also you can set it manually.
14 | if len(sys.argv) > 1:
15 | username = sys.argv[1]
16 | else:
17 | print ("Usage: %s username") % (sys.argv[0],)
18 | sys.exit()
19 |
20 | token = util.prompt_for_user_token(username, scope)
21 | tracks=[]
22 | if token:
23 | sp = spotipy.Spotify(auth=token)
24 | #The number in range, is the number of songs that you want in your playlist
25 | for a in range(50):
26 | #'library_size' represents the number of songs that you have in your library (not necesary the exact amount).
27 | library_size=50
28 | ran=randint(0,library_size)
29 | results = sp.current_user_saved_tracks(limit=1, offset=ran)
30 | for item in results['items']:
31 | track = item['track']
32 | tracks.append(track['id'])
33 | #print (str(a+1)+".- "+track['id']+" "+str(track['name'].encode('ascii', 'ignore')) + ' - ' + str(track['artists'][0]['name'].encode('ascii', 'ignore')))
34 | sp.trace = False
35 | results = sp.user_playlist_replace_tracks(username, 'playlist_id', tracks)
36 | print (results)
37 | else:
38 | print ("Can't get token for", username)
--------------------------------------------------------------------------------
/Stop Sign Detection/README.md:
--------------------------------------------------------------------------------
1 |
2 |
--------------------------------------------------------------------------------
/Stop Sign Detection/Stop_sign_detection.py:
--------------------------------------------------------------------------------
1 | import cv2
2 | from matplotlib import pyplot as plt
3 |
4 | # Opening image
5 | img = cv2.imread("image.jpg")
6 |
7 | # OpenCV opens images as BRG
8 | # but we want it as RGB We'll
9 | # also need a grayscale version
10 | img_gray = cv2.cvtColor(img, cv2.COLOR_BGR2GRAY)
11 | img_rgb = cv2.cvtColor(img, cv2.COLOR_BGR2RGB)
12 |
13 |
14 | # Use minSize because for not
15 | # bothering with extra-small
16 | # dots that would look like STOP signs
17 | stop_data = cv2.CascadeClassifier('stop_data.xml')
18 |
19 | found = stop_data.detectMultiScale(img_gray,
20 | minSize =(20, 20))
21 |
22 | # Don't do anything if there's
23 | # no sign
24 | amount_found = len(found)
25 |
26 | if amount_found != 0:
27 |
28 | # There may be more than one
29 | # sign in the image
30 | for (x, y, width, height) in found:
31 |
32 | # We draw a green rectangle around
33 | # every recognized sign
34 | cv2.rectangle(img_rgb, (x, y),
35 | (x + height, y + width),
36 | (0, 255, 0), 5)
37 |
38 | # Creates the environment of
39 | # the picture and shows it
40 | plt.subplot(1, 1, 1)
41 | plt.imshow(img_rgb)
42 | plt.show()
--------------------------------------------------------------------------------
/Stop Sign Detection/image.jpg:
--------------------------------------------------------------------------------
https://raw.githubusercontent.com/kishanrajput23/Personal-Python-Projects/01428ea3a57d226cb45ac4ffb62e5b632a2267fe/Stop Sign Detection/image.jpg
--------------------------------------------------------------------------------
/Stop Sign Detection/stop_recognition_output.png:
--------------------------------------------------------------------------------
https://raw.githubusercontent.com/kishanrajput23/Personal-Python-Projects/01428ea3a57d226cb45ac4ffb62e5b632a2267fe/Stop Sign Detection/stop_recognition_output.png
--------------------------------------------------------------------------------
/Story Generator/README.md:
--------------------------------------------------------------------------------
1 | # Story Generator🔥
2 |
3 | Do you think the most complex use of the random module in Python is random sampling? No, we can also generate random stories or anything beyond that using the random module.
4 |
5 | ## 📌Story Generator with Python
6 | Our task is to generate a random story every time the user runs the program. I will first store the parts of the stories in different lists, then the Random module can be used to select the random parts of the story stored in different lists:
7 |
8 | **Code**
9 |
10 | import random
11 | when = ['A few years ago', 'Yesterday', 'Last night', 'A long time ago','On 20th Jan']
12 | who = ['a rabbit', 'an elephant', 'a mouse', 'a turtle','a cat']
13 | name = ['Ali', 'Miriam','daniel', 'Hoouk', 'Starwalker']
14 | residence = ['Barcelona','India', 'Germany', 'Venice', 'England']
15 | went = ['cinema', 'university','seminar', 'school', 'laundry']
16 | happened = ['made a lot of friends','Eats a burger', 'found a secret key', 'solved a mistery', 'wrote a book']
17 | print(random.choice(when) + ', ' + random.choice(who) + ' that lived in ' + random.choice(residence) + ', went to the ' + random.choice(went) + ' and ' + random.choice(happened))
18 |
19 | **Output:**
20 |
21 | On 20th Jan, a rabbit that lived in Germany, went to the laundry and made a lot of friends
22 |
23 | Here, I first imported the random module and then I created parts of the stories in different lists, then I only selected the parts of the lists at random to generate a random story.
24 |
25 | As a beginner, you look for creating software applications more, which is not wrong. But spending more time with programs which required you to think logically will always help you no matter what aspect of programming interests you.
26 |
27 | ## 📌Summary
28 | There are a few areas where the above code could be improved upon, but at a basic level, it meets many secure password generation requirements by today’s standards.
29 |
30 | As a newbie to Python or any other language, you should keep trying these types of programs as they help you explore more functions and in the long run will help you design your algorithms and doing a great job in coding interviews.
31 |
--------------------------------------------------------------------------------
/Story Generator/Story_Generator.py:
--------------------------------------------------------------------------------
1 | import random
2 | when = ['A few years ago', 'Yesterday', 'Last night', 'A long time ago','On 20th Jan']
3 | who = ['a rabbit', 'an elephant', 'a mouse', 'a turtle','a cat']
4 | name = ['Ali', 'Miriam','daniel', 'Hoouk', 'Starwalker']
5 | residence = ['Barcelona','India', 'Germany', 'Venice', 'England']
6 | went = ['cinema', 'university','seminar', 'school', 'laundry']
7 | happened = ['made a lot of friends','Eats a burger', 'found a secret key', 'solved a mistery', 'wrote a book']
8 | print(random.choice(when) + ', ' + random.choice(who) + ' that lived in ' + random.choice(residence) + ', went to the ' + random.choice(went) + ' and ' + random.choice(happened))
9 |
--------------------------------------------------------------------------------
/Take Screenshot/README.md:
--------------------------------------------------------------------------------
1 | # Take Screenshot Using Pyhton🔥
2 |
3 | ## 📌Introduction
4 |
5 | - Screenshot, also known as screen capture, is a digital image that shows the contents of a computer display. A common screenshot is created by the operating system or software running on the device. Taking, saving, and sharing screenshots can be extremely helpful.
6 |
7 | ## 📌Steps to Take a Screenshot using Python
8 |
9 | - **👉Step 1: Install the pyautogui package**
10 |
11 | To start, you’ll need to install the [pyautogui](https://pyautogui.readthedocs.io/en/latest/) package using the following command (under Windows):
12 |
13 | pip install pyautogui
14 |
15 | **🔸What is PyAutoGUI**
16 |
17 | PyAutoGUI lets your Python scripts control the mouse and keyboard to automate interactions with other applications.
18 |
19 | **✨Features**
20 |
21 | **(a)** Moving the mouse and clicking or typing in the windows of other applications.
22 |
23 | **(b)** Sending keystrokes to applications (for example, to fill out forms).
24 |
25 | **(c)** Take screenshots, and given an image (for example, of a button or checkbox), find it on the screen.
26 |
27 | **(d)** Locate an application’s window, and move, resize, maximize, minimize, or close it (Windows-only, currently)
28 |
29 | **(e)** Display message boxes for user interaction while your GUI automation script runs.
30 |
31 |
32 | - **👉Step 2: Capture the path to save the screenshot**
33 |
34 | Next, capture the full path where the screenshot will be saved on your computer.
35 |
36 | In my case, I decided to save the screenshot under the following path:
37 |
38 | C:\Users\KISHAN\Desktop\screenshot1.png
39 |
40 | Here, the file name is screenshot1, while the file type is png (alternatively, you can set the file type to jpg).
41 |
42 | - **👉Step 3: Take the screenshot using Python**
43 |
44 | For the final step, you’ll need to use the template below in order to take the screenshot using Python:
45 |
46 | import pyautogui
47 |
48 | myscreenshot = pyautogui.screenshot()
49 |
50 | myscreenshot.save("Enter your location")
51 |
52 | Now, when you run the code the screenshot will automatically save at your provided location with the name of you provided in the code.
53 |
54 | That’s it! simple, isn’t it?
55 |
56 |
--------------------------------------------------------------------------------
/Take Screenshot/Screenshot.py:
--------------------------------------------------------------------------------
1 | import pyautogui
2 | myscreenshot = pyautogui.screenshot()
3 | myscreenshot.save("Enter your location")
4 |
--------------------------------------------------------------------------------
/Tic-Tac-Toe-Game/README.md:
--------------------------------------------------------------------------------
1 |
2 |
--------------------------------------------------------------------------------
/Tic-Tac-Toe-Game/Tic-Tac-Toe-Game.py:
--------------------------------------------------------------------------------
1 | #Implementation of Two Player Tic-Tac-Toe game in Python.
2 |
3 | ''' We will make the board using dictionary
4 | in which keys will be the location(i.e : top-left,mid-right,etc.)
5 | and initialliy it's values will be empty space and then after every move
6 | we will change the value according to player's choice of move. '''
7 |
8 | theBoard = {'7': ' ' , '8': ' ' , '9': ' ' ,
9 | '4': ' ' , '5': ' ' , '6': ' ' ,
10 | '1': ' ' , '2': ' ' , '3': ' ' }
11 |
12 | board_keys = [key for key in theBoard]
13 |
14 | ''' We will have to print the updated board after every move in the game and
15 | thus we will make a function in which we'll define the printBoard function
16 | so that we can easily print the board everytime by calling this function. '''
17 |
18 | def printBoard(board):
19 | metrix = f"""
20 | board['7'] + '|' + board['8'] + '|' + board['9']
21 | -+-+-
22 | board['4'] + '|' + board['5'] + '|' + board['6']
23 | -+-+-
24 | board['1'] + '|' + board['2'] + '|' + board['3']
25 | """"
26 | print(metrix)
27 |
28 | #lets define a win function in order not to write it all over again when checking who won.
29 | def win_message(winner):
30 | printBoard(theBoard)
31 | print("\nGame Over.\n")
32 | print(f" **** {winner} won. ****")
33 |
34 | # Now we'll write the main function which has all the gameplay functionality.
35 | def game():
36 |
37 | turn = 'X'
38 | count = 0
39 |
40 | for i in range(10):
41 | printBoard(theBoard)
42 |
43 | move = input(f"It's your turn, {turn}. Move to which place?")
44 |
45 | if theBoard[move] == ' ':
46 | theBoard[move] = turn
47 | count += 1
48 | else:
49 | print("That place is already filled.\nMove to which place?")
50 | continue
51 |
52 | # Now we will check if player X or O has won,for every move after 5 moves.
53 | if count >= 5:
54 | if theBoard['7'] == theBoard['8'] == theBoard['9'] != ' ': # across the top
55 | win_message(turn)
56 | break
57 | elif theBoard['4'] == theBoard['5'] == theBoard['6'] != ' ': # across the middle
58 | win_message(turn)
59 | break
60 | elif theBoard['1'] == theBoard['2'] == theBoard['3'] != ' ': # across the bottom
61 | win_message(turn)
62 | break
63 | elif theBoard['1'] == theBoard['4'] == theBoard['7'] != ' ': # down the left side
64 | win_message(turn)
65 | break
66 | elif theBoard['2'] == theBoard['5'] == theBoard['8'] != ' ': # down the middle
67 | win_message(turn)
68 | break
69 | elif theBoard['3'] == theBoard['6'] == theBoard['9'] != ' ': # down the right side
70 | win_message(turn)
71 | break
72 | elif theBoard['7'] == theBoard['5'] == theBoard['3'] != ' ': # diagonal
73 | win_message(turn)
74 | break
75 | elif theBoard['1'] == theBoard['5'] == theBoard['9'] != ' ': # diagonal
76 | win_message(turn)
77 | break
78 |
79 | # If neither X nor O wins and the board is full, we'll declare the result as 'tie'.
80 | if count == 9:
81 | print("\nGame Over.\nIt's a Tie!!")
82 |
83 | # Now we have to change the player after every move.
84 | if turn == 'X':
85 | turn = 'O'
86 | else:
87 | turn = 'X'
88 |
89 | # Now we will ask if player wants to restart the game or not.
90 | restart = input("Do want to play Again?(y/n) ")
91 | if restart in ('y', 'Y'):
92 | for key in board_keys:
93 | theBoard[key] = " "
94 |
95 | game()
96 |
97 | if __name__ == "__main__":
98 | game()
99 |
--------------------------------------------------------------------------------
/Todo List Application/.idea/file:
--------------------------------------------------------------------------------
1 |
2 |
--------------------------------------------------------------------------------
/Todo List Application/.idea/inspectionProfiles/file.txt:
--------------------------------------------------------------------------------
1 |
2 |
--------------------------------------------------------------------------------
/Todo List Application/.idea/inspectionProfiles/profiles_settings.xml:
--------------------------------------------------------------------------------
1 |
42 |
43 | # 📌Cicle Pattern:
44 |
45 | 
46 |
--------------------------------------------------------------------------------
/Random Pattern Generator/Rangoli Pattern.png:
--------------------------------------------------------------------------------
https://raw.githubusercontent.com/kishanrajput23/Personal-Python-Projects/01428ea3a57d226cb45ac4ffb62e5b632a2267fe/Random Pattern Generator/Rangoli Pattern.png
--------------------------------------------------------------------------------
/Random Pattern Generator/Rangoli Pattern.py:
--------------------------------------------------------------------------------
1 | import turtle
2 | import math
3 | import random
4 | wn = turtle.Screen()
5 | wn.bgcolor('black')
6 | Albert = turtle.Turtle()
7 | Albert.speed(0)
8 | Albert.color('white')
9 | rotate=int(360)
10 | def drawCircles(t,size):
11 | for i in range(10):
12 | t.circle(size)
13 | size=size-4
14 | def drawSpecial(t,size,repeat):
15 | for i in range (repeat):
16 | drawCircles(t,size)
17 | t.right(360/repeat)
18 | drawSpecial(Albert,100,10)
19 | Steve = turtle.Turtle()
20 | Steve.speed(0)
21 | Steve.color('yellow')
22 | rotate=int(90)
23 | def drawCircles(t,size):
24 | for i in range(4):
25 | t.circle(size)
26 | size=size-10
27 | def drawSpecial(t,size,repeat):
28 | for i in range (repeat):
29 | drawCircles(t,size)
30 | t.right(360/repeat)
31 | drawSpecial(Steve,100,10)
32 | Barry = turtle.Turtle()
33 | Barry.speed(0)
34 | Barry.color('blue')
35 | rotate=int(80)
36 | def drawCircles(t,size):
37 | for i in range(4):
38 | t.circle(size)
39 | size=size-5
40 | def drawSpecial(t,size,repeat):
41 | for i in range (repeat):
42 | drawCircles(t,size)
43 | t.right(360/repeat)
44 | drawSpecial(Barry,100,10)
45 | Terry = turtle.Turtle()
46 | Terry.speed(0)
47 | Terry.color('orange')
48 | rotate=int(90)
49 | def drawCircles(t,size):
50 | for i in range(4):
51 | t.circle(size)
52 | size=size-19
53 | def drawSpecial(t,size,repeat):
54 | for i in range (repeat):
55 | drawCircles(t,size)
56 | t.right(360/repeat)
57 | drawSpecial(Terry,100,10)
58 | Will = turtle.Turtle()
59 | Will.speed(0)
60 | Will.color('pink')
61 | rotate=int(90)
62 | def drawCircles(t,size):
63 | for i in range(4):
64 | t.circle(size)
65 | size=size-20
66 | def drawSpecial(t,size,repeat):
67 | for i in range (repeat):
68 | drawCircles(t,size)
69 | t.right(360/repeat)
70 | drawSpecial(Will,100,10)
--------------------------------------------------------------------------------
/Random Pattern Generator/Screenshot (303).png:
--------------------------------------------------------------------------------
https://raw.githubusercontent.com/kishanrajput23/Personal-Python-Projects/01428ea3a57d226cb45ac4ffb62e5b632a2267fe/Random Pattern Generator/Screenshot (303).png
--------------------------------------------------------------------------------
/Random Pattern Generator/Spirograph.png:
--------------------------------------------------------------------------------
https://raw.githubusercontent.com/kishanrajput23/Personal-Python-Projects/01428ea3a57d226cb45ac4ffb62e5b632a2267fe/Random Pattern Generator/Spirograph.png
--------------------------------------------------------------------------------
/Random Pattern Generator/Spirograph.py:
--------------------------------------------------------------------------------
1 | import turtle
2 | # Creating turtle
3 | t = turtle.Turtle()
4 | s = turtle.Screen()
5 | s.bgcolor("black")
6 | t.pencolor("red")
7 | t.pensize(2)
8 | t.speed(0)
9 |
10 | while (True):
11 | for i in range(6):
12 | for colors in ["red", "blue", "magenta", "green", "yellow", "white"]:
13 | turtle.color(colors)
14 | turtle.circle(100)
15 | turtle.left(10)
16 |
17 |
18 | turtle.hideturtle()
19 | turtle.mainloop()
--------------------------------------------------------------------------------
/Random Pattern Generator/Star Pattern.png:
--------------------------------------------------------------------------------
https://raw.githubusercontent.com/kishanrajput23/Personal-Python-Projects/01428ea3a57d226cb45ac4ffb62e5b632a2267fe/Random Pattern Generator/Star Pattern.png
--------------------------------------------------------------------------------
/Random Pattern Generator/Star Pattern.py:
--------------------------------------------------------------------------------
1 | import turtle
2 | import random
3 |
4 | turtle.speed(speed ='fastest')
5 |
6 | def draw(n, x, angle):
7 | # loop for number of stars
8 | for i in range(n):
9 |
10 | turtle.colormode(255)
11 |
12 | # choosing random integers
13 | # between 0 and 255
14 | # to generate random rgb values
15 | a = random.randint(0, 255)
16 | b = random.randint(0, 255)
17 | c = random.randint(0, 255)
18 |
19 | # setting the outline
20 | # and fill colour
21 | turtle.pencolor(a, b, c)
22 | turtle.fillcolor(a, b, c)
23 |
24 | # begins filling the star
25 | turtle.begin_fill()
26 |
27 | # loop for drawing each star
28 | for j in range(5):
29 |
30 | turtle.forward(5 * n-5 * i)
31 | turtle.right(x)
32 | turtle.forward(5 * n-5 * i)
33 | turtle.right(72 - x)
34 |
35 | # colour filling complete
36 | turtle.end_fill()
37 |
38 | # rotating for
39 | # the next star
40 | turtle.rt(angle)
41 |
42 |
43 | # setting the parameters
44 | n = 30 # number of stars
45 | x = 144 # exterior angle of each star
46 | angle = 18 # angle of rotation for the spiral
47 |
48 | draw(n, x, angle)
--------------------------------------------------------------------------------
/Random Pattern Generator/Tri-Color.png:
--------------------------------------------------------------------------------
https://raw.githubusercontent.com/kishanrajput23/Personal-Python-Projects/01428ea3a57d226cb45ac4ffb62e5b632a2267fe/Random Pattern Generator/Tri-Color.png
--------------------------------------------------------------------------------
/Random Pattern Generator/Vibrating_Circle.png:
--------------------------------------------------------------------------------
https://raw.githubusercontent.com/kishanrajput23/Personal-Python-Projects/01428ea3a57d226cb45ac4ffb62e5b632a2267fe/Random Pattern Generator/Vibrating_Circle.png
--------------------------------------------------------------------------------
/Random Pattern Generator/Vibrating_Circle.py:
--------------------------------------------------------------------------------
1 | import turtle
2 | # Creating turtle
3 | t = turtle.Turtle()
4 | s = turtle.Screen()
5 | s.bgcolor("black")
6 | t.pencolor("white")
7 |
8 | a = 0
9 | b = 0
10 | t.speed(0)
11 | t.penup()
12 | t.goto(0,200)
13 | t.pendown()
14 | while(True):
15 | t.forward(a)
16 | t.right(b)
17 | a+=3
18 | b+=1
19 | if b == 210:
20 | break
21 | t.hideturtle()
22 |
23 | turtle.done()
--------------------------------------------------------------------------------
/Random Pattern Generator/tri-color.py:
--------------------------------------------------------------------------------
1 | import turtle
2 | from turtle import*
3 |
4 | #screen for output
5 | screen = turtle.Screen()
6 |
7 | # Defining a turtle Instance
8 | t = turtle.Turtle()
9 | speed(0)
10 |
11 | # initially penup()
12 | t.penup()
13 | t.goto(-400, 250)
14 | t.pendown()
15 |
16 | # Orange Rectangle
17 | #white rectangle
18 | t.color("orange")
19 | t.begin_fill()
20 | t.forward(800)
21 | t.right(90)
22 | t.forward(167)
23 | t.right(90)
24 | t.forward(800)
25 | t.end_fill()
26 | t.left(90)
27 | t.forward(167)
28 |
29 | # Green Rectangle
30 | t.color("green")
31 | t.begin_fill()
32 | t.forward(167)
33 | t.left(90)
34 | t.forward(800)
35 | t.left(90)
36 | t.forward(167)
37 | t.end_fill()
38 |
39 | # Big Blue Circle
40 | t.penup()
41 | t.goto(70, 0)
42 | t.pendown()
43 | t.color("navy")
44 | t.begin_fill()
45 | t.circle(70)
46 | t.end_fill()
47 |
48 | # Big White Circle
49 | t.penup()
50 | t.goto(60, 0)
51 | t.pendown()
52 | t.color("white")
53 | t.begin_fill()
54 | t.circle(60)
55 | t.end_fill()
56 |
57 | # Mini Blue Circles
58 | t.penup()
59 | t.goto(-57, -8)
60 | t.pendown()
61 | t.color("navy")
62 | for i in range(24):
63 | t.begin_fill()
64 | t.circle(3)
65 | t.end_fill()
66 | t.penup()
67 | t.forward(15)
68 | t.right(15)
69 | t.pendown()
70 |
71 | # Small Blue Circle
72 | t.penup()
73 | t.goto(20, 0)
74 | t.pendown()
75 | t.begin_fill()
76 | t.circle(20)
77 | t.end_fill()
78 | # Spokes
79 | t.penup()
80 | t.goto(0, 0)
81 | t.pendown()
82 | t.pensize(2)
83 | for i in range(24):
84 | t.forward(60)
85 | t.backward(60)
86 | t.left(15)
87 |
88 | #to hold the
89 | #output window
90 | turtle.done()
91 |
--------------------------------------------------------------------------------
/Rock Paper Scissor Game/README.md:
--------------------------------------------------------------------------------
1 | # Rock Paper Scissor Game🔥
2 |
3 | - In the rock, paper and scissors game our goal is to create a command-line game where a user has the option to choose between rock, paper and scissors and if the user wins the score is added, and at the end when the user finishes the game, the score is shown to the user.
4 |
5 | ## 📌Rock, Paper and Scissors Game with Python
6 |
7 | - To create the Rock, Paper and Scissors game with Python, we need to take the user’s choice and then we need to compare it with the computer choice which is taken using the random module in Python from a list of choices, and if the user wins then the score will increase by 1:
8 |
9 | ### Code:
10 |
11 | import random
12 |
13 | choices = ["Rock", "Paper", "Scissor"]
14 |
15 | player = False
16 | cpu_score = 0
17 | player_score = 0
18 |
19 | while True:
20 | player = input("Enter your choice ").capitalize()
21 |
22 | computer = random.choice(choices)
23 |
24 | if computer == player:
25 | print("Its tie now...")
26 |
27 | elif player == "Rock":
28 | if computer == "Paper":
29 | print("You lose...", computer, "covers", player)
30 | cpu_score += 1
31 |
32 | else:
33 | print("You won...", player, "smashes", computer)
34 | player_score += 1
35 |
36 | elif player == "Paper":
37 | if computer == "Rock":
38 | print("You won...", player, "covers", computer)
39 | player_score += 1
40 |
41 | else:
42 | print("You lose...", computer, "cut", player)
43 | cpu_score += 1
44 |
45 | elif player == "Scissor":
46 | if computer == "Paper":
47 | print("You won...", player, "cut", computer)
48 | player_score += 1
49 |
50 | else:
51 | print("You lose...", computer, "smashes", player)
52 | cpu_score += 1
53 |
54 | elif player == "End":
55 | print("The final scores are ")
56 | print(f"CPU Score {cpu_score}")
57 | print(f"Player Score {player_score}")
58 | break
59 |
60 |
61 | ### Output:
62 |
63 | Enter your choice rock
64 | Its tie now...
65 | Enter your choice paper
66 | You won... Paper covers Rock
67 | Enter your choice scissors
68 | You lose... Rock smashes Scissors
69 | Enter your choice end
70 | The final scores are
71 | CPU Score 1
72 | Player Score 1
73 |
74 | ## 📌Summary
75 |
76 | - Creating these types of games will help a beginner to think logically. You can even use this idea to make your own game. In the end, creating these types of programs will help you create your algorithms, which is a very important skill for coding interviews and competitive programming.
77 |
--------------------------------------------------------------------------------
/Rock Paper Scissor Game/main.py:
--------------------------------------------------------------------------------
1 | import random
2 |
3 | randNo = random.randint(1,3)
4 | if randNo == 1:
5 | computer_choose = "r" # if randNo is equal to 1 then it will store 'r' as computer choice
6 | if randNo == 2:
7 | computer_choose = "p" # if randNo is equal to 2 then it will store 'p' as computer choice
8 | if randNo == 3:
9 | computer_choose = "s" # if randNo is equal to 3 then it will store 's' as computer choice
10 |
11 | # Defining gameWin function for performing major task for this game.
12 |
13 | def gameWin(computer_choose, user_input):
14 | if computer_choose == user_input:
15 | return None
16 | elif computer_choose == "r":
17 | if user_input == "p":
18 | return True
19 | elif user_input == "s":
20 | return False
21 |
22 | elif computer_choose == "p":
23 | if user_input == "r":
24 | return False
25 | elif user_input == "s":
26 | return True
27 |
28 | elif computer_choose == "s":
29 | if user_input == "r":
30 | return True
31 | elif user_input == "p":
32 | return False
33 |
34 | print("Computer Choosed already from Rock('r') or Paper('p') or Scissor('s')")
35 |
36 | print("Now your turn to choose")
37 |
38 | user_input = input("Choose from Rock('r') or Paper('p') or Scissor('s') ") #taking input from the user
39 |
40 | # It shows the user what computer choose from rock, paper or scissor.
41 | print("Computer choosed " + computer_choose)
42 |
43 | # It shows the user what he/she choose from rock, paper or scissor.
44 | print("You Choosed " + user_input)
45 |
46 |
47 | # This block of if-else statement will find out conditon of gameWin function
48 |
49 | if gameWin(computer_choose, user_input) == None:
50 | print("It tie now")
51 |
52 | elif gameWin(computer_choose, user_input):
53 | print("Congratulations You Won!!!")
54 |
55 | else:
56 | print("You Lose!")
57 |
--------------------------------------------------------------------------------
/Rock Paper Scissor Game/rock_paper_scissor_game.py:
--------------------------------------------------------------------------------
1 | import random
2 |
3 | choices = ["Rock", "Paper", "Scissor"]
4 |
5 | player = False
6 | cpu_score = 0
7 | player_score = 0
8 |
9 | while True:
10 | player = input("Enter your choice ").capitalize()
11 |
12 | computer = random.choice(choices)
13 |
14 | if computer == player:
15 | print("Its tie now...")
16 |
17 | elif player == "Rock":
18 | if computer == "Paper":
19 | print("You lose...", computer, "covers", player)
20 | cpu_score += 1
21 |
22 | else:
23 | print("You won...", player, "smashes", computer)
24 | player_score += 1
25 |
26 | elif player == "Paper":
27 | if computer == "Rock":
28 | print("You won...", player, "covers", computer)
29 | player_score += 1
30 |
31 | else:
32 | print("You lose...", computer, "cut", player)
33 | cpu_score += 1
34 |
35 | elif player == "Scissor":
36 | if computer == "Paper":
37 | print("You won...", player, "cut", computer)
38 | player_score += 1
39 |
40 | else:
41 | print("You lose...", computer, "smashes", player)
42 | cpu_score += 1
43 |
44 | elif player == "End":
45 | print("The final scores are ")
46 | print(f"CPU Score {cpu_score}")
47 | print(f"Player Score {player_score}")
48 | break
--------------------------------------------------------------------------------
/Shiv Ling/README.md:
--------------------------------------------------------------------------------
1 | # ShivLing
2 |
3 | 
4 |
--------------------------------------------------------------------------------
/Shiv Ling/mahadev.py:
--------------------------------------------------------------------------------
1 | import turtle
2 |
3 | turtle.speed(0)
4 | turtle.hideturtle()
5 | turtle.setup(800,600)
6 | turtle.title('Shiva Linga')
7 | turtle.speed(1)
8 | turtle.up()
9 | turtle.hideturtle()
10 |
11 | def my_goto(x, y):
12 | turtle.pencolor("orange")
13 | turtle.penup()
14 | turtle.goto(x, y)
15 | turtle.pendown()
16 |
17 | def round_rectangle(center_x,center_y,width,height,cornersize):
18 | turtle.up()
19 | turtle.goto(center_x-width/2+cornersize,center_y-height/2)
20 | turtle.down()
21 | for _ in range(2):
22 | turtle.fillcolor("black")
23 | turtle.begin_fill()
24 | turtle.fd(width-2*cornersize)
25 | turtle.circle(cornersize,90)
26 | turtle.fd(height-2*cornersize)
27 | turtle.circle(cornersize,90)
28 | turtle.end_fill()
29 |
30 |
31 | def round_rectangle(center_x,center_y,width,height,cornersize):
32 | turtle.up()
33 | turtle.goto(center_x-width/2+cornersize,center_y-height/2)
34 | turtle.down()
35 | for _ in range(2):
36 | turtle.fillcolor("black")
37 | turtle.begin_fill()
38 | turtle.fd(width-2*cornersize)
39 | turtle.circle(cornersize,90)
40 | turtle.fd(height-2*cornersize)
41 | turtle.circle(cornersize,90)
42 | turtle.end_fill()
43 |
44 | round_rectangle(0,0,200,300,80)
45 |
46 | turtle.fillcolor('black')
47 | turtle.begin_fill()
48 |
49 |
50 |
51 | turtle.goto(-35, 40)
52 | turtle.penup()
53 | turtle.fillcolor('white')
54 | turtle.begin_fill()
55 | turtle.forward(80)
56 | turtle.left(90)
57 | turtle.forward(10)
58 | turtle.left(90)
59 | turtle.forward(80)
60 | turtle.left(90)
61 | turtle.forward(10)
62 | turtle.left(90)
63 |
64 |
65 | turtle.goto(-35, 80)
66 | turtle.forward(80)
67 | turtle.left(90)
68 | turtle.forward(10)
69 | turtle.left(90)
70 | turtle.forward(80)
71 | turtle.left(90)
72 | turtle.forward(10)
73 | turtle.left(90)
74 |
75 | turtle.goto(-35, 60)
76 | turtle.forward(80)
77 | turtle.left(90)
78 | turtle.forward(10)
79 | turtle.left(90)
80 | turtle.forward(80)
81 | turtle.left(90)
82 | turtle.forward(10)
83 | turtle.left(90)
84 |
85 | turtle.pendown()
86 | turtle.end_fill()
87 |
88 |
89 | turtle.fillcolor('red')
90 | turtle.begin_fill()
91 |
92 | turtle.goto(5,50)
93 | turtle.penup()
94 | r = 15
95 | turtle.circle(r)
96 | turtle.pendown()
97 | turtle.end_fill()
98 |
99 | turtle.goto(-150, -175)
100 | turtle.penup()
101 | turtle.pencolor("black")
102 | turtle.fillcolor("black")
103 | turtle.begin_fill()
104 | round_rectangle(90,-125,600,100,50)
105 | turtle.pendown()
106 |
107 |
108 | my_goto(-300, -300)
109 | turtle.write('BY :- Coding_Buddies4', font=("Bradley Hand ITC", 50, "bold"))
110 |
111 |
112 | my_goto(-150,150)
113 | turtle.write('हर हर महादेव', font=("Bradley Hand ITC", 50, "bold"))
114 | turtle.done()
--------------------------------------------------------------------------------
/Spotify Playlist Generator/README.md:
--------------------------------------------------------------------------------
1 |
2 |
--------------------------------------------------------------------------------
/Spotify Playlist Generator/Spotify playlist generator.py:
--------------------------------------------------------------------------------
1 | import sys
2 | import os
3 | import spotipy
4 | import spotipy.util as util
5 | from random import randint
6 | #Enviromental variables
7 | os.environ["SPOTIPY_CLIENT_ID"] = ""
8 | os.environ["SPOTIPY_CLIENT_SECRET"] = ""
9 | os.environ["SPOTIPY_REDIRECT_URI"] = "http://localhost/"
10 | #The scopes that we need for read and write.
11 | scope = 'user-library-read playlist-modify-public'
12 |
13 | #We receive username when running the script, also you can set it manually.
14 | if len(sys.argv) > 1:
15 | username = sys.argv[1]
16 | else:
17 | print ("Usage: %s username") % (sys.argv[0],)
18 | sys.exit()
19 |
20 | token = util.prompt_for_user_token(username, scope)
21 | tracks=[]
22 | if token:
23 | sp = spotipy.Spotify(auth=token)
24 | #The number in range, is the number of songs that you want in your playlist
25 | for a in range(50):
26 | #'library_size' represents the number of songs that you have in your library (not necesary the exact amount).
27 | library_size=50
28 | ran=randint(0,library_size)
29 | results = sp.current_user_saved_tracks(limit=1, offset=ran)
30 | for item in results['items']:
31 | track = item['track']
32 | tracks.append(track['id'])
33 | #print (str(a+1)+".- "+track['id']+" "+str(track['name'].encode('ascii', 'ignore')) + ' - ' + str(track['artists'][0]['name'].encode('ascii', 'ignore')))
34 | sp.trace = False
35 | results = sp.user_playlist_replace_tracks(username, 'playlist_id', tracks)
36 | print (results)
37 | else:
38 | print ("Can't get token for", username)
--------------------------------------------------------------------------------
/Stop Sign Detection/README.md:
--------------------------------------------------------------------------------
1 |
2 |
--------------------------------------------------------------------------------
/Stop Sign Detection/Stop_sign_detection.py:
--------------------------------------------------------------------------------
1 | import cv2
2 | from matplotlib import pyplot as plt
3 |
4 | # Opening image
5 | img = cv2.imread("image.jpg")
6 |
7 | # OpenCV opens images as BRG
8 | # but we want it as RGB We'll
9 | # also need a grayscale version
10 | img_gray = cv2.cvtColor(img, cv2.COLOR_BGR2GRAY)
11 | img_rgb = cv2.cvtColor(img, cv2.COLOR_BGR2RGB)
12 |
13 |
14 | # Use minSize because for not
15 | # bothering with extra-small
16 | # dots that would look like STOP signs
17 | stop_data = cv2.CascadeClassifier('stop_data.xml')
18 |
19 | found = stop_data.detectMultiScale(img_gray,
20 | minSize =(20, 20))
21 |
22 | # Don't do anything if there's
23 | # no sign
24 | amount_found = len(found)
25 |
26 | if amount_found != 0:
27 |
28 | # There may be more than one
29 | # sign in the image
30 | for (x, y, width, height) in found:
31 |
32 | # We draw a green rectangle around
33 | # every recognized sign
34 | cv2.rectangle(img_rgb, (x, y),
35 | (x + height, y + width),
36 | (0, 255, 0), 5)
37 |
38 | # Creates the environment of
39 | # the picture and shows it
40 | plt.subplot(1, 1, 1)
41 | plt.imshow(img_rgb)
42 | plt.show()
--------------------------------------------------------------------------------
/Stop Sign Detection/image.jpg:
--------------------------------------------------------------------------------
https://raw.githubusercontent.com/kishanrajput23/Personal-Python-Projects/01428ea3a57d226cb45ac4ffb62e5b632a2267fe/Stop Sign Detection/image.jpg
--------------------------------------------------------------------------------
/Stop Sign Detection/stop_recognition_output.png:
--------------------------------------------------------------------------------
https://raw.githubusercontent.com/kishanrajput23/Personal-Python-Projects/01428ea3a57d226cb45ac4ffb62e5b632a2267fe/Stop Sign Detection/stop_recognition_output.png
--------------------------------------------------------------------------------
/Story Generator/README.md:
--------------------------------------------------------------------------------
1 | # Story Generator🔥
2 |
3 | Do you think the most complex use of the random module in Python is random sampling? No, we can also generate random stories or anything beyond that using the random module.
4 |
5 | ## 📌Story Generator with Python
6 | Our task is to generate a random story every time the user runs the program. I will first store the parts of the stories in different lists, then the Random module can be used to select the random parts of the story stored in different lists:
7 |
8 | **Code**
9 |
10 | import random
11 | when = ['A few years ago', 'Yesterday', 'Last night', 'A long time ago','On 20th Jan']
12 | who = ['a rabbit', 'an elephant', 'a mouse', 'a turtle','a cat']
13 | name = ['Ali', 'Miriam','daniel', 'Hoouk', 'Starwalker']
14 | residence = ['Barcelona','India', 'Germany', 'Venice', 'England']
15 | went = ['cinema', 'university','seminar', 'school', 'laundry']
16 | happened = ['made a lot of friends','Eats a burger', 'found a secret key', 'solved a mistery', 'wrote a book']
17 | print(random.choice(when) + ', ' + random.choice(who) + ' that lived in ' + random.choice(residence) + ', went to the ' + random.choice(went) + ' and ' + random.choice(happened))
18 |
19 | **Output:**
20 |
21 | On 20th Jan, a rabbit that lived in Germany, went to the laundry and made a lot of friends
22 |
23 | Here, I first imported the random module and then I created parts of the stories in different lists, then I only selected the parts of the lists at random to generate a random story.
24 |
25 | As a beginner, you look for creating software applications more, which is not wrong. But spending more time with programs which required you to think logically will always help you no matter what aspect of programming interests you.
26 |
27 | ## 📌Summary
28 | There are a few areas where the above code could be improved upon, but at a basic level, it meets many secure password generation requirements by today’s standards.
29 |
30 | As a newbie to Python or any other language, you should keep trying these types of programs as they help you explore more functions and in the long run will help you design your algorithms and doing a great job in coding interviews.
31 |
--------------------------------------------------------------------------------
/Story Generator/Story_Generator.py:
--------------------------------------------------------------------------------
1 | import random
2 | when = ['A few years ago', 'Yesterday', 'Last night', 'A long time ago','On 20th Jan']
3 | who = ['a rabbit', 'an elephant', 'a mouse', 'a turtle','a cat']
4 | name = ['Ali', 'Miriam','daniel', 'Hoouk', 'Starwalker']
5 | residence = ['Barcelona','India', 'Germany', 'Venice', 'England']
6 | went = ['cinema', 'university','seminar', 'school', 'laundry']
7 | happened = ['made a lot of friends','Eats a burger', 'found a secret key', 'solved a mistery', 'wrote a book']
8 | print(random.choice(when) + ', ' + random.choice(who) + ' that lived in ' + random.choice(residence) + ', went to the ' + random.choice(went) + ' and ' + random.choice(happened))
9 |
--------------------------------------------------------------------------------
/Take Screenshot/README.md:
--------------------------------------------------------------------------------
1 | # Take Screenshot Using Pyhton🔥
2 |
3 | ## 📌Introduction
4 |
5 | - Screenshot, also known as screen capture, is a digital image that shows the contents of a computer display. A common screenshot is created by the operating system or software running on the device. Taking, saving, and sharing screenshots can be extremely helpful.
6 |
7 | ## 📌Steps to Take a Screenshot using Python
8 |
9 | - **👉Step 1: Install the pyautogui package**
10 |
11 | To start, you’ll need to install the [pyautogui](https://pyautogui.readthedocs.io/en/latest/) package using the following command (under Windows):
12 |
13 | pip install pyautogui
14 |
15 | **🔸What is PyAutoGUI**
16 |
17 | PyAutoGUI lets your Python scripts control the mouse and keyboard to automate interactions with other applications.
18 |
19 | **✨Features**
20 |
21 | **(a)** Moving the mouse and clicking or typing in the windows of other applications.
22 |
23 | **(b)** Sending keystrokes to applications (for example, to fill out forms).
24 |
25 | **(c)** Take screenshots, and given an image (for example, of a button or checkbox), find it on the screen.
26 |
27 | **(d)** Locate an application’s window, and move, resize, maximize, minimize, or close it (Windows-only, currently)
28 |
29 | **(e)** Display message boxes for user interaction while your GUI automation script runs.
30 |
31 |
32 | - **👉Step 2: Capture the path to save the screenshot**
33 |
34 | Next, capture the full path where the screenshot will be saved on your computer.
35 |
36 | In my case, I decided to save the screenshot under the following path:
37 |
38 | C:\Users\KISHAN\Desktop\screenshot1.png
39 |
40 | Here, the file name is screenshot1, while the file type is png (alternatively, you can set the file type to jpg).
41 |
42 | - **👉Step 3: Take the screenshot using Python**
43 |
44 | For the final step, you’ll need to use the template below in order to take the screenshot using Python:
45 |
46 | import pyautogui
47 |
48 | myscreenshot = pyautogui.screenshot()
49 |
50 | myscreenshot.save("Enter your location")
51 |
52 | Now, when you run the code the screenshot will automatically save at your provided location with the name of you provided in the code.
53 |
54 | That’s it! simple, isn’t it?
55 |
56 |
--------------------------------------------------------------------------------
/Take Screenshot/Screenshot.py:
--------------------------------------------------------------------------------
1 | import pyautogui
2 | myscreenshot = pyautogui.screenshot()
3 | myscreenshot.save("Enter your location")
4 |
--------------------------------------------------------------------------------
/Tic-Tac-Toe-Game/README.md:
--------------------------------------------------------------------------------
1 |
2 |
--------------------------------------------------------------------------------
/Tic-Tac-Toe-Game/Tic-Tac-Toe-Game.py:
--------------------------------------------------------------------------------
1 | #Implementation of Two Player Tic-Tac-Toe game in Python.
2 |
3 | ''' We will make the board using dictionary
4 | in which keys will be the location(i.e : top-left,mid-right,etc.)
5 | and initialliy it's values will be empty space and then after every move
6 | we will change the value according to player's choice of move. '''
7 |
8 | theBoard = {'7': ' ' , '8': ' ' , '9': ' ' ,
9 | '4': ' ' , '5': ' ' , '6': ' ' ,
10 | '1': ' ' , '2': ' ' , '3': ' ' }
11 |
12 | board_keys = [key for key in theBoard]
13 |
14 | ''' We will have to print the updated board after every move in the game and
15 | thus we will make a function in which we'll define the printBoard function
16 | so that we can easily print the board everytime by calling this function. '''
17 |
18 | def printBoard(board):
19 | metrix = f"""
20 | board['7'] + '|' + board['8'] + '|' + board['9']
21 | -+-+-
22 | board['4'] + '|' + board['5'] + '|' + board['6']
23 | -+-+-
24 | board['1'] + '|' + board['2'] + '|' + board['3']
25 | """"
26 | print(metrix)
27 |
28 | #lets define a win function in order not to write it all over again when checking who won.
29 | def win_message(winner):
30 | printBoard(theBoard)
31 | print("\nGame Over.\n")
32 | print(f" **** {winner} won. ****")
33 |
34 | # Now we'll write the main function which has all the gameplay functionality.
35 | def game():
36 |
37 | turn = 'X'
38 | count = 0
39 |
40 | for i in range(10):
41 | printBoard(theBoard)
42 |
43 | move = input(f"It's your turn, {turn}. Move to which place?")
44 |
45 | if theBoard[move] == ' ':
46 | theBoard[move] = turn
47 | count += 1
48 | else:
49 | print("That place is already filled.\nMove to which place?")
50 | continue
51 |
52 | # Now we will check if player X or O has won,for every move after 5 moves.
53 | if count >= 5:
54 | if theBoard['7'] == theBoard['8'] == theBoard['9'] != ' ': # across the top
55 | win_message(turn)
56 | break
57 | elif theBoard['4'] == theBoard['5'] == theBoard['6'] != ' ': # across the middle
58 | win_message(turn)
59 | break
60 | elif theBoard['1'] == theBoard['2'] == theBoard['3'] != ' ': # across the bottom
61 | win_message(turn)
62 | break
63 | elif theBoard['1'] == theBoard['4'] == theBoard['7'] != ' ': # down the left side
64 | win_message(turn)
65 | break
66 | elif theBoard['2'] == theBoard['5'] == theBoard['8'] != ' ': # down the middle
67 | win_message(turn)
68 | break
69 | elif theBoard['3'] == theBoard['6'] == theBoard['9'] != ' ': # down the right side
70 | win_message(turn)
71 | break
72 | elif theBoard['7'] == theBoard['5'] == theBoard['3'] != ' ': # diagonal
73 | win_message(turn)
74 | break
75 | elif theBoard['1'] == theBoard['5'] == theBoard['9'] != ' ': # diagonal
76 | win_message(turn)
77 | break
78 |
79 | # If neither X nor O wins and the board is full, we'll declare the result as 'tie'.
80 | if count == 9:
81 | print("\nGame Over.\nIt's a Tie!!")
82 |
83 | # Now we have to change the player after every move.
84 | if turn == 'X':
85 | turn = 'O'
86 | else:
87 | turn = 'X'
88 |
89 | # Now we will ask if player wants to restart the game or not.
90 | restart = input("Do want to play Again?(y/n) ")
91 | if restart in ('y', 'Y'):
92 | for key in board_keys:
93 | theBoard[key] = " "
94 |
95 | game()
96 |
97 | if __name__ == "__main__":
98 | game()
99 |
--------------------------------------------------------------------------------
/Todo List Application/.idea/file:
--------------------------------------------------------------------------------
1 |
2 |
--------------------------------------------------------------------------------
/Todo List Application/.idea/inspectionProfiles/file.txt:
--------------------------------------------------------------------------------
1 |
2 |
--------------------------------------------------------------------------------
/Todo List Application/.idea/inspectionProfiles/profiles_settings.xml:
--------------------------------------------------------------------------------
1 |