├── .Rhistory
├── 1-why-study.md
├── .gitignore
├── images
├── boo.md
├── RQM.png
├── git.png
├── gh04.png
├── gh05.png
├── gh06.png
├── gh07.png
├── gh08.png
├── gh09.png
├── gh10.png
├── gh11.png
├── gh12.png
├── gh13.png
├── gh14.png
├── gh15.png
└── paperb.png
├── mybook.pdf
├── .travis.yml
├── book.json
├── deploy.sh
├── 3.5-feature.md
├── portuguese
├── 3.5-feature-pt.md
├── 7-the-end-pt.md
├── 4-open-reasearch101-pt.md
├── 3-using-github-pt.md
├── 3.6-google-cal-pt.md
├── 6.4-assignment-personas-pt.md
├── 4.8-challenges-pt.md
├── 4.2-open-pub-pt.md
├── 4.1-why-open-pt.md
├── 3.2-know-github-pt.md
├── 2.3-first-meeting-pt.md
├── SUMMARY-pt.md
├── 6.2-planning-pt.md
├── 4.4-code-review-pt.md
├── 3.3-get-online-pt.md
├── 1.1-lead-role-pt.md
├── 4.5-open-data-pt.md
├── 3.4-add-event-pt.md
├── 2-teach-facilitate-pt.md
├── 2.1-leading-session-pt.md
├── 6-growing-pt.md
├── 1-about-study-groups-pt.md
├── 6.1-coms-pt.md
├── 1.2-write-a-readme-pt.md
├── 4.6-collab-pt.md
├── 4.3-repro-pt.md
├── 3.1-collab-vers-github-pt.md
├── 4.7-public-com-pt.md
├── 6.3-personas-pt.md
├── README-pt.md
├── 5-what-mozilla-pt.md
└── 2.2-options-sessions-pt.md
├── 4-open-research101.md
├── 7-the-end.md
├── 3-using-github.md
├── 3.6-google-cal.md
├── 6.4-assignment-personas.md
├── 4.8-challenges.md
├── 4.2-open-pub.md
├── ROADMAP.md
├── 4.4-code-review.md
├── 4.1-why-open.md
├── 2.3-first-meeting.md
├── 3.2-know-github.md
├── SUMMARY.md
├── 6.2-planning.md
├── 4.5-open-data.md
├── 1.1-lead-role.md
├── 3.4-add-event.md
├── 3.3-get-online.md
├── 6-growing.md
├── 2-teach-facilitate.md
├── 2.1-leading-session.md
├── 1-about-study-groups.md
├── 6.1-coms.md
├── 1.3-writing-a-coc.md
├── 1.3-write-a-coc-pt.md
├── 1.2-write-a-readme.md
├── 4.6-collab.md
├── 3.1-collab-vers-github.md
├── 4.3-repro.md
├── 4.7-public-com.md
├── 6.3-personas.md
├── README.md
├── 5-what-mozilla.md
├── 2.2-options-sessions.md
└── LICENSE
/.Rhistory:
--------------------------------------------------------------------------------
1 |
--------------------------------------------------------------------------------
/1-why-study.md:
--------------------------------------------------------------------------------
1 |
2 |
--------------------------------------------------------------------------------
/.gitignore:
--------------------------------------------------------------------------------
1 | gh-pages/
2 |
--------------------------------------------------------------------------------
/images/boo.md:
--------------------------------------------------------------------------------
1 | wheeeeee!
2 |
--------------------------------------------------------------------------------
/mybook.pdf:
--------------------------------------------------------------------------------
https://raw.githubusercontent.com/mozillascience/study-group-orientation/HEAD/mybook.pdf
--------------------------------------------------------------------------------
/images/RQM.png:
--------------------------------------------------------------------------------
https://raw.githubusercontent.com/mozillascience/study-group-orientation/HEAD/images/RQM.png
--------------------------------------------------------------------------------
/images/git.png:
--------------------------------------------------------------------------------
https://raw.githubusercontent.com/mozillascience/study-group-orientation/HEAD/images/git.png
--------------------------------------------------------------------------------
/images/gh04.png:
--------------------------------------------------------------------------------
https://raw.githubusercontent.com/mozillascience/study-group-orientation/HEAD/images/gh04.png
--------------------------------------------------------------------------------
/images/gh05.png:
--------------------------------------------------------------------------------
https://raw.githubusercontent.com/mozillascience/study-group-orientation/HEAD/images/gh05.png
--------------------------------------------------------------------------------
/images/gh06.png:
--------------------------------------------------------------------------------
https://raw.githubusercontent.com/mozillascience/study-group-orientation/HEAD/images/gh06.png
--------------------------------------------------------------------------------
/images/gh07.png:
--------------------------------------------------------------------------------
https://raw.githubusercontent.com/mozillascience/study-group-orientation/HEAD/images/gh07.png
--------------------------------------------------------------------------------
/images/gh08.png:
--------------------------------------------------------------------------------
https://raw.githubusercontent.com/mozillascience/study-group-orientation/HEAD/images/gh08.png
--------------------------------------------------------------------------------
/images/gh09.png:
--------------------------------------------------------------------------------
https://raw.githubusercontent.com/mozillascience/study-group-orientation/HEAD/images/gh09.png
--------------------------------------------------------------------------------
/images/gh10.png:
--------------------------------------------------------------------------------
https://raw.githubusercontent.com/mozillascience/study-group-orientation/HEAD/images/gh10.png
--------------------------------------------------------------------------------
/images/gh11.png:
--------------------------------------------------------------------------------
https://raw.githubusercontent.com/mozillascience/study-group-orientation/HEAD/images/gh11.png
--------------------------------------------------------------------------------
/images/gh12.png:
--------------------------------------------------------------------------------
https://raw.githubusercontent.com/mozillascience/study-group-orientation/HEAD/images/gh12.png
--------------------------------------------------------------------------------
/images/gh13.png:
--------------------------------------------------------------------------------
https://raw.githubusercontent.com/mozillascience/study-group-orientation/HEAD/images/gh13.png
--------------------------------------------------------------------------------
/images/gh14.png:
--------------------------------------------------------------------------------
https://raw.githubusercontent.com/mozillascience/study-group-orientation/HEAD/images/gh14.png
--------------------------------------------------------------------------------
/images/gh15.png:
--------------------------------------------------------------------------------
https://raw.githubusercontent.com/mozillascience/study-group-orientation/HEAD/images/gh15.png
--------------------------------------------------------------------------------
/images/paperb.png:
--------------------------------------------------------------------------------
https://raw.githubusercontent.com/mozillascience/study-group-orientation/HEAD/images/paperb.png
--------------------------------------------------------------------------------
/.travis.yml:
--------------------------------------------------------------------------------
1 | language: node_js
2 | install: npm install -g gitbook-cli
3 | before_script: gitbook install
4 | node_js:
5 | - '6.0'
6 | script: gitbook build
7 | after_success:
8 | - bash deploy.sh
--------------------------------------------------------------------------------
/book.json:
--------------------------------------------------------------------------------
1 | {
2 | "gitbook": "2.0.1",
3 | "plugins": ["edit-link", "ga"],
4 | "pluginsConfig": {
5 | "edit-link": {
6 | "base": "https://github.com/mozillascience/study-group-onboarding/edit/master",
7 | "label": "Edit"
8 | },
9 | "ga": {
10 | "token": "UA-49796218-49"
11 | }
12 | }
13 | }
--------------------------------------------------------------------------------
/deploy.sh:
--------------------------------------------------------------------------------
1 | #!/bin/bash
2 |
3 | set -o errexit -o nounset
4 |
5 | rev=$(git rev-parse --short HEAD)
6 |
7 | cd _book
8 |
9 | git init
10 | git config user.name "Aurelia Moser"
11 | git config user.email "auremoser@gmail.com"
12 |
13 | git remote add upstream "https://$GH_TOKEN@github.com/mozillascience/study-group-onboarding.git"
14 | git fetch upstream
15 | git reset upstream/gh-pages
16 |
17 | touch .
18 |
19 | git add -A .
20 | git commit -m "rebuild pages at ${rev}"
21 | git push -q upstream HEAD:gh-pages
--------------------------------------------------------------------------------
/3.5-feature.md:
--------------------------------------------------------------------------------
1 | ##3.5 Assignment: Feature Your Community in the 'Who We Are' Section
2 |
3 | Your website includes a gallery of participants in your Study Group; adding people here is a great way to show off your community and highlight your new friends and colleagues. To add someone to the list:
4 |
5 | 1. Edit the _data/members.yml file by adding the following section for them:
6 | * name: their human name
7 | * affiliation: school, lab, department, business....
8 | * github: their GitHub handle
9 | * interests (list one to three different interests)
10 | 2. Commit the file and your community members should appear in the gallery!
11 |
--------------------------------------------------------------------------------
/portuguese/3.5-feature-pt.md:
--------------------------------------------------------------------------------
1 | ## 3.5 Tarefa: Descreva sua comunidade na sessão “Who We Are”
2 |
3 | O site do seu Grupo de Estudos inclui uma galeria de participantes. Adicionar pessoas aqui é uma ótima maneira de mostrar seu grupo a comunidade além de destacar seus novos amigos e colegas engajando-os no Grupo de Estudos. Para adicionar alguém à lista siga os passos:
4 |
5 | Edite o arquivo _data/members.yml adicionando uma nova sessão:
6 | * name: o nome natural do membro
7 | * affiliation: escola, laboratório, departamento, empresa…
8 | * github: o github pessoal do membro
9 | * interests: uma lista de três diferentes interesses.
10 |
11 | 2. Commit as alterações no seu repositório que as mudanças aparecerão na galeria do seu website!
12 |
--------------------------------------------------------------------------------
/4-open-research101.md:
--------------------------------------------------------------------------------
1 | #Open Science/Open Research 101
2 |
3 | Open science is a different approach to the practice of scientific research, aimed at making research more understandable, useful, and impactful. When you’re doing open science you:
4 |
5 | * **Clearly document all research methods, processes, observations, code, and data; make these freely, publicly available for reuse and redistribution**
6 |
7 | * **Collaborate with researchers from within your discipline and across disciplines, often via the world wide web**
8 |
9 | * **Make research communications widely available and accessible to the public, encouraging public engagement and participation in research.**
10 |
11 | These open practices are not just specific to science-- in fact, they are applicable to any kind of research! The next several sections introduce and explore Open Science concepts and practices in more detail.
12 |
--------------------------------------------------------------------------------
/7-the-end.md:
--------------------------------------------------------------------------------
1 | #Whew! You did it!
2 | Thank you for completeing the Study Group Lead Orientation, and congratulations!
3 |
4 | We've got lots planned for the Study Group program-- more resources are coming your way, and we hope soon to begin to organize regional events, workshops, and meet-ups where different groups can get together. Please come to the Study Group calls to learn more. And please let us know how you're doing... say hello and give us an update about your group (successes and struggles both welcome) on the [mozillascience/studyGroup Gitter chat](https://gitter.im/mozillascience/studyGroup).
5 |
6 | Feel free to add an issue to this repo if you have comments, ideas, or feedback on this training series, and please jump in and help out with some of our [issues](https://github.com/mozillascience/study-group-onboarding/issues)-- we're always looking for help and contributions to improve these materials.
7 |
--------------------------------------------------------------------------------
/portuguese/7-the-end-pt.md:
--------------------------------------------------------------------------------
1 | # Uou! Você conseguiu!
2 |
3 | Obrigado por completar esse guia de Orientação para o Grupo de Estudos, parabéns!
4 |
5 | Estamos muito planejados para o programa do Grupo de Estudos - mais recursos estão chegando ao seu caminho e esperamos que em breve comecemos a organizar eventos regionais, workshops e encontros onde diferentes grupos podem se unir. Por favor, venha para chamadas do Grupo de Estudo para saber mais. E por favor, deixe-nos saber como você está fazendo ... diga olá e nos dê uma atualização sobre seu grupo no chat do Gitter [mozillascience/studyGroup](https://gitter.im/mozillascience/studyGroup).
6 |
7 | Sinta-se livre para adicionar um problema ao nosso repo. Ideias, comentários ou feedbacks sobre este guia, por favor, relate nas [issues do nosso repo](https://github.com/mozillascience/study-group-onboarding/issues)--estamos sempre à procura de ajuda e contribuições para melhorar esses materiais.
--------------------------------------------------------------------------------
/portuguese/4-open-reasearch101-pt.md:
--------------------------------------------------------------------------------
1 | # Open Science/Open Research #
2 | ###### Ciência Aberta / Pesquisa Aberta
3 |
4 | A ciência aberta é uma abordagem diferente da prática da pesquisa científica, visando tornar a pesquisa mais compreensível, útil e impactante.
5 | Quando você está fazendo ciência aberta você:
6 |
7 | * **Documenta claramente todos os métodos, processos, observações, código e dados de pesquisa; faça isso livremente, publicamente disponível para reutilização e redistribuição;**
8 |
9 | * **Colabora com pesquisadores da sua disciplina e de todas as disciplinas, muitas vezes através da internet;**
10 |
11 | * **Torna as comunicações de pesquisa amplamente disponíveis e acessíveis ao público, incentivando o envolvimento e a participação na pesquisa.;**
12 |
13 |
14 | Estas práticas "open" não específicas apenas da ciência -- ou seja, elas são aplicáveis em todos os tipos de pesquisa! Nas próximas secções vamos intruduzir e explorar conceitos e práticas de Ciência Aberta!
15 |
--------------------------------------------------------------------------------
/3-using-github.md:
--------------------------------------------------------------------------------
1 | #3. Using GitHub
2 |
3 | In addition to being a physical space for collaboration and learning, your Study Group will likely generate some content--
4 | code, lessons, materials, as well as discussions, questions, announcements, planning documents, and more. For all these materials to be as useful and accessible to all your members as possible--- and to enable your members to contribute to them--they should live on the world wide web. **We recommend using the web-based software platform called GitHub, which is designed for collaboration and version control. GitHub is a place to discuss changes and issues related to that content, and collaborate on creating more content together.** You’ll store the collection of files related to your Study Group, called a repository, on GitHub. GitHub also is the software that will power your Study Group Website. While GitHub was developed by and for software engineers, you **don't** have to be an expert coder to use it. This section will take you through some of the basics.
5 |
6 |
7 |
--------------------------------------------------------------------------------
/portuguese/3-using-github-pt.md:
--------------------------------------------------------------------------------
1 | # Usando o GitHub
2 |
3 | Além de ser um ambiente físico para a colaboração e aprendizagem, seu Grupo de Estudos provavelmente vai gerar conteúdo -- códigos, lições, materiais de aprendizagem, discussões, questões, anúncios, documentos de planejamento, e muito mais.
4 | Para todos estes materiais serem úteis e acessíveis para todos os membros --- e permitir que seus membros contribuam com eles -- eles devem estar disponíveis na internet.
5 | **Nós recomendamos fortemente o uso da plataforma chamada GitHub, que foi projetada para a colaboração e controle de versão de arquivos. O GitHub é um local para discutir mudanças e problemas relacionados à algum conteúdo, além de poder colaborar criando mais conteúdo juntos.**
6 | Você vai armazenar a coleção de arquivos relacionados ao seu Grupo de Estudos em um repositório do GitHub. GitHub também é o software responsável por hospedar o WebSite do seu Grupo de Estudos. Enquanto que o GitHub foi desenvolvido por engenheiros de software, você **não** precisa ser um expert para usá-lo. Esta sessão irá ajudá-lo em alguns conceitos básicos.
7 |
--------------------------------------------------------------------------------
/3.6-google-cal.md:
--------------------------------------------------------------------------------
1 | ##3.6 Optional Assignment: Set up a Google Calendar for your Study Group
2 | If you'd like to offer your community a calendar of events they can import into their own calendars, try using a Google Calendar. To set up, make a new google account, and update the variables in _config.yml under the heading 'Setup Google Calendar'.
3 |
4 | You can add events to your calendar by hand, but if you'd like to manage it automatically, there's a script to do so in scripts/updateCalendar.py; instructions for use are at the top of that file and mentioned here as well.
5 |
6 | - Follow this link and setup the credentials (follow step 1 and step 2): https://developers.google.com/google-apps/calendar/quickstart/python
7 | (In step 2: Download .JSON file in working (scripts) directory).
8 | - Update the variables in scripts/updateCalender.py:
9 | (APPLICATION_NAME, CALENDAR_ID, TIME_ZONE_SRT) => (Google Calendar API Quickstart, USER@gmail.com, America/Vancouver)
10 | - Run from scripts/ using: python updateCalendar.py --noauth_local_webserver
11 | - The sample will attempt to open a new window or tab in your default browser. If this fails, copy the URL from the console and manually open it in your browser.
12 |
--------------------------------------------------------------------------------
/6.4-assignment-personas.md:
--------------------------------------------------------------------------------
1 | #Assignment: Create a Persona & Pathway
2 |
3 | 1. **Brainstorm.** Read through the two following questions and come up with answers. You can do this individually or as a group. If working in a group, brainstorm individually and share afterwards. Sticky notes are great for this task, for recording ideas during the brainstorm, and sharing and organizing the group’s ideas. Spend about 3 minutes on each question.
4 | * Who is the person you'd like to attract to your Study Group? Think of skills and attributes-- but, since this is an imaginary person, also give them identifying details, a brief life story, etc.
5 | * What are that person's motivations and needs? Think of what might draw them to your Group, what value they would gain from it, how it fits into their long term goals.
6 | 4. **Create a short written description of your persona.** Spend about 4 minutes on this task. If you like, draw a picture of this person!
7 | 5. **Plan a Pathway.** Using the structure above (Discovery → Leadership), describe a pathway for your persona. What are the steps to move through the group? What could be stumbling blocks for user?
8 | 6. **List your Solutions.** For each potential stumbling block or barrier your user might encounter, list a solution that you'll work into your design of your group or project.
9 |
--------------------------------------------------------------------------------
/portuguese/3.6-google-cal-pt.md:
--------------------------------------------------------------------------------
1 | ## 3.6 Tarefa Opcional: Configure o Google Calendar para seu Grupo de Estudos
2 |
3 | Se você quiser oferecer à sua comunidade um calendário de eventos em que eles possam importar os dados para seus calendários pessoais, tente utilizar o Google Calendar.
4 | Para configurá-lo, faça uma nova conta Google e atualize as variáveis em _config.yml sob o título de 'Setup Google Calendar'.
5 |
6 | Você pode adicionar eventos ao seu calendário manualmente, mas se você quiser gerenciá-lo automaticamente, há um script para ajudá-lo no diretório scripts / updateCalendar.py;
7 |
8 | As instruções de uso estão no topo desse arquivo e também mencionadas aqui.
9 |
10 | - Vá neste link e configure as credenciais (etapas 1 e 2): https://developers.google.com/google-apps/calendar/quickstart/python
11 | (No passo 2: Baixe o arquivo .JSON no diretório (scripts)).
12 |
13 | - Atualize as variáveis no scripts / updateCalender.py: (APPLICATION_NAME, CALENDAR_ID, TIME_ZONE_SRT) => (Google Calendar API Quickstart, USER@gmail.com, América / Vancouver)
14 |
15 | - Execute os scripts utilizando : ``` python updateCalendar.py --noauth_local_webserver ```;
16 |
17 | - Será aberto uma nova janela ou guia no seu navegador padrão. Se isso falhar, copie o URL do console e abra-o manualmente no seu navegador;
18 |
--------------------------------------------------------------------------------
/4.8-challenges.md:
--------------------------------------------------------------------------------
1 | ##4.8 Challenges to Open
2 |
3 | Research culture and practice is changing, as technologies, institutions, and funder requirements change. We think open research practice is the best approach for doing better, more useful, more powerful research. But like any change, it’s controversial.
4 |
5 | Many senior researchers came up in and succeeded the old system, and are skeptical of anything new. Many publishers rely on a business model that is predicated on closed, paywalled content. And the fact that many researchers feel they must “publish or perish” can discourage collaboration and the open sharing of useful data and methods.
6 |
7 | Have you heard some other challenges? Got your own great arguments for open research practice? [Tell us about them here.](https://github.com/mozillascience/study-group-orientation/issues/29)
8 |
9 | Finally, as noted at the start of this section, it may not be possible or be practical for you to run out and make all your research open and reproducible immediately. Start at a pace that makes sense for you: think about your own particular research situation and your institution, find an open practice or two that makes sense for your work, try them out and see how things go. Christie’s Bahlai’s blog post on [“Baby Steps for the Open Curious”](https://practicaldatamanagement.wordpress.com/2014/10/23/baby-steps-for-the-open-curious/) discusses how you can get started.
10 |
11 |
--------------------------------------------------------------------------------
/portuguese/6.4-assignment-personas-pt.md:
--------------------------------------------------------------------------------
1 | #Tarefa: Criar uma Persona e Caminhos
2 |
3 | 1. ** Brainstorm. ** Leia as duas perguntas a seguir e forneça respostas. Você pode fazer isso individualmente ou em grupo. Se estiver trabalhando em um grupo, faça um brainstorm individualmente e compartilhe depois. As notas fixas são ótimas para essa tarefa, para gravar idéias durante o brainstorm e compartilhar e organizar as idéias do grupo. Passe aproximadamente 3 minutos em cada pergunta.
4 | * Quem é a pessoa que gostaria de atrair para o seu Grupo de Estudos? Pense em habilidades e atributos - mas, como essa é uma pessoa imaginária, também lhes dê detalhes de identificação, uma breve história de vida, etc.
5 | * Quais são as motivações e necessidades dessa pessoa? Pense no que pode atraí-los para o seu Grupo, o valor que eles ganhariam, como ele se encaixa em seus objetivos de longo prazo.
6 | 4. ** Crie uma breve descrição escrita da sua personalidade. ** Passe aproximadamente 4 minutos nesta tarefa. Se você gosta, desenhe uma imagem dessa pessoa!
7 | 5. ** Planeje um Caminho. ** Usando a estrutura acima (Descoberta → Liderança), descreva um caminho para sua persona. Quais são os passos para percorrer o grupo? O que poderia ser um obstáculo para o usuário?
8 | 6. ** Liste suas soluções. ** Para cada obstáculo potencial ou barreira que seu usuário possa encontrar, liste uma solução que você irá trabalhar em seu projeto de seu grupo ou projeto.
--------------------------------------------------------------------------------
/4.2-open-pub.md:
--------------------------------------------------------------------------------
1 | ##4.2 Open Publication and Open Access
2 | Currently, publication in a peer-reviewed journal is the primary measure of any researcher’s work and career. This system has been around for centuries, and is intended to rigorously vet research and provide a platform for sharing discoveries-- a very important aim! But the intense pressure to “publish or perish,” the revenue-focused business model of academic publishers, and the rapid decline of print publishing has resulted in a system that’s flawed and problematic, and in many ways out-of-date.
3 |
4 | The **Open Access movement, which asserts that all research outputs be freely available online with no restrictions, and available for reuse with minimal or no restrictions,** has emerged in response to the current system. The following video, from PHD comics, provides an introduction to Open Access and critique of the traditional publishing system.
5 |
6 |
7 |
8 | The Open Publication movement seeks to answer the following questions: How can the current system be transformed so it’s more effective and open? What are some new strategies and platforms to share and find research findings, for maximum accessibility, reuse and impact? What can emerging researchers do to make their publications as freely available as possible to other researchers, and the public?
9 |
--------------------------------------------------------------------------------
/ROADMAP.md:
--------------------------------------------------------------------------------
1 | Welcome to our roadmap for creating and releasing the Study Group Orientation materials.
2 |
3 |
4 | ### MARKETING:
5 |
6 | - Advertise on Twitter
7 | - Write a blogpost
8 | - Mention in call
9 | - Ping last four who forked study group
10 | - Set up 3 consecutive office hour mtgs and get Study Group Leads to sit in
11 | - Tom, Madeline, Amy?
12 | - Late October
13 |
14 | ### TIMELINE
15 |
16 | #### OCT
17 |
18 | - 3-7: Put into GitHub
19 | - 3-7: Tweet abt Study Group Call -> Ada Lovelace and Study Group Orientation release
20 | - 7: Announce release and review on Study Group Call
21 | Ask leads to volunteer to sit in on one or more of office hours
22 | - 13-14: Reach out to last four (5-6) who forked study group repo to participate in three consecutive office hr mtgs to go through materials
23 | - 17-21: Introductory office hr mtg w/ Study Group volunteers, overview, background, expectations, pre-assessment
24 |
25 | #### NOV
26 |
27 | - 1-4: First office hour
28 | - 7-10: Second office hour
29 | - 14-18: Third office hour, post-assessment
30 | - 21-22: Review pre/post-assessment;
31 | - 28- Dec 2: Reiterate; Blogpost (and Tweet) on pilot and announce sign-up for January orientation (limit to X#?)
32 |
33 | #### DEC
34 |
35 | - Twitter campaign on signing up for January orientation
36 | - 5-9: Study group demo / feedback session during Hawaii
37 |
38 | #### JAN
39 |
40 | Weekly hour-long onboarding sessions Days/Times TBD based on registrations x4?
41 |
--------------------------------------------------------------------------------
/portuguese/4.8-challenges-pt.md:
--------------------------------------------------------------------------------
1 | #4.8 Desafios
2 |
3 | A cultura e a prática de pesquisa estão mudando, à medida que as tecnologias, as instituições e os requisitos do financiador mudam. Pensamos que a prática de pesquisa aberta é a melhor abordagem para fazer pesquisas melhores, mais úteis e mais poderosas. Mas, como qualquer mudança, é controverso.
4 |
5 | Muitos pesquisadores seniores surgiram e cresceream no antigo sistema, e são céticos para qualquer coisa nova. Além disso, muitos editores dependem de um modelo de negócios que se baseia em conteúdo fechado e pago. E o fato de muitos pesquisadores acharem que devem "publicar ou perecer" podem desencorajar a colaboração e o compartilhamento aberto de dados e métodos úteis.
6 |
7 | Você já ouviu falar sobre outros desafios? Tem seus próprios grandes argumentos para a prática de pesquisa aberta? [Conte-nos sobre eles aqui.](https://github.com/mozillascience/study-group-orientation/issues/29)
8 |
9 | Finalmente, como observado no início deste guia, pode não ser possível ou ser prático para você acabar e tornar toda sua pesquisa aberta e reprodutível imediatamente. Comece a um ritmo que faça sentido para você: pense em sua própria situação de pesquisa específica e em sua instituição, encontre uma prática aberta ou duas que faça sentido para o seu trabalho, experimente e veja como as coisas funcionam.a Christie's Bahlai's discuti no [seu blog](https://practicaldatamanagement.wordpress.com/2014/10/23/baby-steps-for-the-open-curious/) como começar a prática da Pesquisa Aberta.
--------------------------------------------------------------------------------
/4.4-code-review.md:
--------------------------------------------------------------------------------
1 | ##4.4 Code Review
2 | As research becomes more and more powered by data and focused on data analysis, the ability to write and skillfully use code (whether in R, python, or your language of choice) to process that data is key. Documenting and vetting the code you use is a critical part of ensuring your research is reproducible by others. As genomics researcher Titus Brown says in his blog post ["A few thoughts on code review of scientific code:"](http://ivory.idyll.org/blog/on-code-review-of-scientific-code.html)
3 |
4 | “...as soon as "theory" touches "real data" there is a gulf of unknown size between the theory and the data. Code is what bridges that gap, and specifies how edge cases, weird features of the data, and unknown unknowns are handled or ignored.”
5 |
6 | Because the outcome of your analysis is dependent on the design and performance of your code, it’s critical that your code is validated. A code review is when you allow someone who has programming expertise to read over and comment on the code you’ve written. By getting another pair of eyes on your code, you can:
7 |
8 | * **Catch any errors or bugs, verify assumptions and logic, and get feedback to improve your documentation**
9 | * **Ensure that your code can be understood by others**
10 | * **(Eventually) minimize the amount of time you coding by participating in the collaborative development and sharing of valid code with other researchers.**
11 |
12 | The friendly, peer to peer learning environment of a Mozilla Study Group is the perfect setting for informal code review.
13 |
--------------------------------------------------------------------------------
/portuguese/4.2-open-pub-pt.md:
--------------------------------------------------------------------------------
1 | ## Publicação Aberta e Acesso Aberto
2 |
3 | Atualmente, a publicação em uma revista revisada pelos pares é a principal medida do trabalho e da carreira de qualquer pesquisador. Este sistema existe há séculos e tem como objetivo investigar rigorosamente a pesquisa e fornecer uma plataforma para compartilhar descobertas - um objetivo muito importante! Mas a intensa pressão para "publicar ou perecer", o modelo de negócios focado na receita de editores acadêmicos e o rápido declínio da publicação impressa resultaram em um sistema falido e problemático e, em muitos aspectos, desatualizado.
4 |
5 | O ** movimento de Acesso Aberto, que afirma que todos os resultados da pesquisa podem ser disponíveis gratuitamente, online sem restrições e disponíveis para reutilização com restrições mínimas, ** emergiu em resposta ao sistema atual. O seguinte vídeo, de PHD Comics, fornece uma introdução ao Open Access e a crítica do sistema de publicação tradicional.
6 |
7 |
8 |
9 |
10 | O movimento da Publicação Aberta busca responder as seguintes questões: como o sistema atual pode ser transformado para ser mais efetivo e aberto? Quais são algumas novas estratégias e plataformas para compartilhar e encontrar resultados de pesquisa, para maximizar a acessibilidade, reutilização e impacto? O que os pesquisadores emergentes podem fazer para tornar suas publicações tão livremente disponíveis quanto possível para outros pesquisadores e o público?
--------------------------------------------------------------------------------
/4.1-why-open.md:
--------------------------------------------------------------------------------
1 | ##4.1 Why Open Science and Open Research?
2 |
3 | Whether you're studying the human genome, black holes, deep-sea ecology, or the cultural implications of climate change, research is the practice and process of learning and creating knowledge. Researchers always build on (or transform) our existing understanding of the world. **When a researcher shares an insight or discovery, makes her data available on the web, or makes the details of a new experimental technique or tool public so others can use and reuse it, she empowers both fellow researchers and citizens, furthering our collective knowledge...** knowledge that can be used to solve problems, save lives, and inspire and amaze us all. The more research data, knowledge, methods, tools and skills made widely and openly available to all, the better.
4 |
5 | While the idea of “open” (drawing inspiration from the open-source movement in software engineering) has taken root in the sciences recently, it is relevant and useful to any kind of research: economics, psychology, sociology, the humanities-- you name it.
6 |
7 | **Making your research open will likely require some shifts and changes in how you’re currently doing research, but you don’t have to rush in and do it all at once!** The following sections provide a bit more information about some key concepts in open science, and links and resources for you to explore and learn more, and decide which of these open practices make sense for you and your work.
8 |
9 | As you read through this module, you might encounter some unfamiliar terms. This handy Open Research Glossary https://docs.google.com/document/d/1uXZzyXPHNcjCPiR5qkzEuB5u2PUIYQzq0mrG9BtD-Qo/edit#heading=h.tsneh02k2pc8 should help with definitions!
10 |
--------------------------------------------------------------------------------
/portuguese/4.1-why-open-pt.md:
--------------------------------------------------------------------------------
1 | ## 4.1 Por que Open Science/Ciência Aberta?
2 |
3 | Se você está estudando o genoma humano, buracos negros, ecologia submarina ou as implicações culturais das mudanças climáticas, a pesquisa é a prática e o processo de aprender e produzir conhecimento. Pesquisadores sempre estão desenvolvendo (ou transformando) nossa compreensão de mundo.
4 | **Quando um pesquisador compartilha um novo insight ou descoberta, torna seus dados disponíveis na internet, ou torna público os detalhes de um experimento ou ferramenta para que outros possam reutilizar, ele permite que pesquisadores e cidadãos promovam o conhecimento coletivo…**
5 | Conhecimento esse que pode ser utilizado para resolver problemas, salvar vidas e inspirar outros pesquisadores. Quanto mais informações compartilhadas com todos, melhor.
6 |
7 | Enquanto que a idéia de “open” (inspiração que veio do movimento open source na engenharia de software) recentemente tem se tornado fundamental nas ciências, onde se apresenta útil em qualquer área: economia, psicologia, sociologia, humanidades…
8 |
9 | ** Fazer da sua pesquisa, uma pesquisa aberta provavelmente exigirá algum tempo de dedicação e mudanças na sua metodologia, mas você não precisa se precipitar e fazer tudo de uma vez! ** As seções seguintes abordam informações e conceitos chaves da ciência aberta, além de links e recursos para que você possa explorar e aprender mais, ajudando a decidir quais práticas da pesquisa aberta fazem mais sentido para seu trabalho.
10 |
11 | Ao ler este módulo você se encontrará com termos desconhecidos. Este glossário de Open Research pode te ajudar a compreender as [definições](https://docs.google.com/document/d/1uXZzyXPHNcjCPiR5qkzEuB5u2PUIYQzq0mrG9BtD-Qo/edit#heading=h.tsneh02k2pc8).
12 |
--------------------------------------------------------------------------------
/2.3-first-meeting.md:
--------------------------------------------------------------------------------
1 | ##2.3 Planning your first meeting##
2 | Now that you’ve got a sense of what a Study Group session can look like, you’re ready to plan your first meeting! Here's a list of planning tasks to help you get started.
3 |
4 | * **Do a bit of audience research.** Poll some potential attendees to see if there’s a topic that most people want to learn (like R or Python). If so, you can start with that. Or, check out our list of suggested first sessions.
5 | * **Find a meeting space.** You can use a free classroom space or conference room, or you can meet in a common area like a student center, library, or even a local bar or cafe. Keep in mind the noise level and access to power and wi-fi.
6 | * **Pick a time.** Schedule meetings when people are most likely to be around and free-- perhaps there’s an obvious space in the schedule (after a lab meeting or a certain required course) when most people are on campus.
7 | * **Decide how long you’ll meet.**Depending on schedules, and what you want to get done, your study group could meet for an hour, an hour and a half, or more.
8 | * **Send reminders.**Send out a quick email and/or tweet the day before each meeting, so people know it’s on!
9 | * **Be ready to welcome everyone!** A successful Study Group requires a set of members who know eachother and feel comfortable together-- start creating a postitve, friendly environment from the first meeting.
10 | * **Meet regularly.** Mention your next meeting at the close of the first meeting! It may help to hold meetings on the same day of the week and at the same time each time you meet, so members can plan in advance and are more likely to remember meetings.
11 |
12 | See Section 6 for more about scheduling over the longer term, and for tips for good Group communication.
13 |
--------------------------------------------------------------------------------
/portuguese/3.2-know-github-pt.md:
--------------------------------------------------------------------------------
1 | ## Conhecendo o GitHub ##
2 |
3 | Há muito o que saber sobre o GitHub: possui ótimos recursos de gerenciamento de projetos, uma plataforma social e ferramentas de comunicação que são úteis para qualquer projeto onde um grupo de pessoas esteja trabalhando juntos no mesmo conjunto de documentos.
4 |
5 | ** Por conta do GitHub ser online, ele foi projetado para compartilhar seu trabalho e permitir que pessoas “forkem” seu projeto -- ou seja, permite que criem cópias do seu trabalho para testar, modificar e reusar bem como sentirem necessidade.**
6 |
7 | Isso é exatamente o que você fará para criar um site para o seu grupo - você vai pegar o Repo do Grupo de Estudos e fazer uma cópia no seu próprio espaço no GitHub (as instruções detalhadas estão abaixo, na seção sobre Atribuição de Tarefas).
8 |
9 | Antes de ir adiante precisamos conversar um pouco sobre o Git. Como mencionado anteriormente, o Git é um software de linha de comando que age por trás do GitHub e atualmente lida com o trabalho de controle de versão. Você pode usar o Git sem necessariamente utilizar o GitHub, muitos engenheiros de software e pesquisadores fazem isto. É assim que o Git aparece para o usuário:
10 |
11 | 
12 |
13 | Todavia, para quase todas as suas necessidades iniciais de colaboração - e para configurar seu site do grupo de estudo - você não usará diretamente a linha de comando do Git. Usará a interface da web do GitHub (com o Git executando em segundo plano). Essa interface é um pouco mais amigável:
14 |
15 | 
16 |
17 |
18 | Aqui vai um vídeo sobre uma rápida demonstração a interface do GitHub pelo Abby Cabunoc Mayes - Gerente de Engajamento de Desenvolvedor Mozilla e defensor da OpenScience.
19 |
--------------------------------------------------------------------------------
/3.2-know-github.md:
--------------------------------------------------------------------------------
1 | ##3.2 Getting to Know GitHub##
2 | There's lots to know about GitHub-- it has terrific project management features, a social platform, and communication tools that are useful for any project where a group of people are working together on the same set of documents.
3 |
4 | **Because GitHub is online, it’s designed to share your work, and allows other people to “fork” your project-- meaning they can create an independent copy of your work to test, modify, remix and reuse it.** That’s exactly what you’ll do to make a website for your group-- you’ll fork the Study Group Repo and to make a copy in your own space on GitHub (detailed instructions are below, in the Assignment section).
5 |
6 | Before we go any further, we need to talk for a moment about Git. As mentioned above, Git is the command line software that powers GitHub and actually handles the version control work. When you use GitHub, Git is working behind the scenes. You can also use Git without ever using GitHub, and many software engineers and research coders do. This is what Git looks like to a user:
7 |
8 | 
9 |
10 | But, for nearly all your initial collaboration needs-- and to set up your study group website-- you don’t won’t use the command line and Git directly. You’ll use the GitHub web interface (with Git running in the background). That interface looks a bit friendlier, like this:
11 |
12 | 
13 |
14 | Here’s a quick tour of the GitHub interface by Abby Cabunoc Mayes, Mozilla’s Developer Engagement Manager and open source/open research advocate.
15 |
16 |
17 |
18 | Now that you’ve got a sense of what GitHub can do, and where things are in the interface, let’s get your Study Group Repository and website up and running!
19 |
--------------------------------------------------------------------------------
/SUMMARY.md:
--------------------------------------------------------------------------------
1 | Table of Contents
2 |
3 | 1. [About Study Groups](1-about-study-groups.md)
4 | * [The Study Group Lead Role](1.1-lead-role.md)
5 | * [Assignment: Write A README](1.2-write-a-readme.md)
6 | * [Assignment: Write a Code of Conduct](1.3-writing-a-coc.md)
7 |
8 | 2. [Teaching and Facilitation](2-teach-facilitate.md)
9 | * [Leading A Session](2.1-leading-session.md)
10 | * [Options for Sessions](2.2-options-sessions.md)
11 | * [Your First Meeting](2.3-first-meeting.md)
12 |
13 | 3. [Using GitHub](3-using-github.md)
14 | * [Collaboration, Version Control, & GitHub](3.1-collab-vers-github.md)
15 | * [Getting to Know GitHub](3.2-know-github.md)
16 | * [Assignment: Get your Website & Repo Online!](3.3-get-online.md)
17 | * [Assignment: Add an Event!](3.4-add-event.md)
18 | * [Assignment: Feature Your Community](3.5-feature.md)
19 | * [Optional Assignment: Set Up A Google Calendar](3.6-google-cal.md)
20 |
21 | 4. [Open Science and Open Research 101](4-open-research101.md)
22 | * [Why Open Research?](4.1-why-open.md)
23 | * [Open Publication and Open Access](4.2-open-pub.md)
24 | * [Reproducibility](4.3-repro.md)
25 | * [Code Review](4.4-code-review.md)
26 | * [Data Sharing](4.5-open-data.md)
27 | * [Collaboration & Open Source Projects](4.6-collab.md)
28 | * [Public Communication of Research](4.7-public-com.md)
29 | * [Challenges to Open (& Some Responses)](4.8-challenges.md)
30 |
31 | 5. [What's the Mozilla Science Lab, and who is Mozilla?](5-what-mozilla.md)
32 |
33 | 6. [Growing Your Group](6-growing.md)
34 | * [Communication Channels for Study Groups](6.1-coms.md)
35 | * [Scheduling, Planning, & Rhythm](6.2-planning.md)
36 | * [Using Personas Grow Your Community](6.3-personas.md)
37 | * [Assignment: Create a Persona & Pathway](6.4-assignment-personas.md)
38 |
39 | 7. [The end! Next Steps](7-the-end.md)
40 |
41 |
42 |
--------------------------------------------------------------------------------
/6.2-planning.md:
--------------------------------------------------------------------------------
1 | #Scheduling, Planning, and Rhythm
2 |
3 | It feel be daunting to plan for an entire semester of Study Group sessions. Remember, you don’t have to map out the content for an entire semester of sessions and before you begin-- you can plan a few sessions, see what works, what the needs and skills are in the Group. Here are a few tips for planning:
4 |
5 |
6 | * **Survey your Group.** Find out what people most want and need to learn, and tailor your sessions and content to meet those needs.
7 | * **Be consistent.** Regular meetings will ensure that your Group has a chance to stabilize and grow. Depending on the availability of your members, weekly or every other week meetings may work best.
8 | * **Be realistic.** Give yourself plenty of time in sessions and over the semester to tackle topics, troubleshoot, and work through examples. It’s easy to overestimate what you can cover.
9 | * **Start at the right level.** Take on activities that are targeted for your group-- don’t dive into advanced material if most of your members are at a beginner or intermediate level.
10 | * **Use existing resources.** Explore the Study Group lessons repo, and ask other Leads what's worked best for them.
11 | * **Listen to feedback.** Be sure to ask group members, or send out a quick survey to find out what people want to learn. Find out how people feel about sessions and formats you've already tried. Be flexible and responsive to requests.
12 | * **Expect ebbs and flows.** Your Group will probably follow the rhythm of your institution’s schedule-- during busy times, you might not get many attendees.
13 | * **Mix it up!** If you can, bring in guest speakers or teachers to get the members working on a new topic.
14 | * **End the period (semester, term, or quarter) with a party.** Thank members for participating and ask them what they'd like to do next term; this party is a hacky hour with lots of advertising push, and a celebratory end of semester/term/quarter feel.
15 |
--------------------------------------------------------------------------------
/portuguese/2.3-first-meeting-pt.md:
--------------------------------------------------------------------------------
1 | ## 2.3 Planejando sua primeira reunião ##
2 |
3 | Agora que você compreende como uma sessão do Grupo de estudos deve ser, você está pronto para planejar a primeira reunião do grupo. Listamos algumas tarefas para te ajudar nesse começo.
4 |
5 | * **Pesquise sobre sua audiência.** Converse com alguns possíveis participantes sobre o tópico (ou assunto) que eles mais querem aprender (como R ou Python), se assim for, você pode começar com isso. Ou, checar a lista de assunto sugeridos para esta primeira sessão.
6 |
7 | * **Encontre um local para a reunião.** Você pode utilizar uma de sala de aula vazia à uma sala de conferência, ou ainda pode fazer a reunião em local comum como as áreas de convivência, livrarias, bibliotecas ou algum local como bar ou café. Leve em consideração o ruído externo, acesso à energia e wi-fi.
8 |
9 | * **Agende previamente.** Marque reuniões em um horário em que todos (ou a maioria) estejam livres -- talvez em algum horário livre do cronograma de todos (após reuniões de laboratório ou de aulas) onde a maioria dos pessoal esteja ainda no campus.
10 |
11 | * **Decida o quanto a reunião irá demorar.** Em razão dos horários e do que deseja fazer, você pode marcar uma reunião de uma hora, uma hora e meia, ou mais.
12 |
13 | * **Mande avisos.** Envie mensagens (email, tweet) um dia antes da reunião para que as pessoas se lembrem e se preparem.
14 |
15 | * **Esteja pronto para recepcionar a todos!** O sucesso de um grupo de estudos requer que os membros conheçam uns aos outros e se sintam confortáveis juntos. Comece criando um ambiente positivo e amigável para a primeira reunião.
16 |
17 | * **Reuniam-se com regularidade** Cite o horário e a agenda da próxima reunião no final da sua primeira reunião! Isso ajuda a todos a se prepararem e planejarem para a próxima reunião.
18 |
19 | Consulte a Seção 6 para saber mais sobre o agendamento de reunião a longo prazo e para dicas sobre uma boa comunicação do grupo.
20 |
--------------------------------------------------------------------------------
/portuguese/SUMMARY-pt.md:
--------------------------------------------------------------------------------
1 | Índice
2 |
3 | 1. [Sobre os Grupos de Estudos] (1-about-study-groups.md)
4 | * [O papel do líder do grupo de estudo] (1.1-lead-role.md)
5 | * [Atribuição: Escreva um README] (1.2-write-a-readme.md)
6 | * [Atribuição: Escreva um Código de Conduta] (1.3-writing-a-coc.md)
7 |
8 | 2. [Ensino e Facilitação] (2-teach-facilitate.md)
9 | * [Leading A Session] (2.1-leading-session.md)
10 | * [Opções para Sessões] (2.2-options-sessions.md)
11 | * [Sua Primeira Reunião] (2.3- primeiro-meeting.md)
12 |
13 | 3. [Usando o GitHub] (3-using-github.md)
14 | * [Colaboração, Controle de versão e GitHub] (3.1-collab-vers-github.md)
15 | * [Conhecendo o GitHub] (3.2-know-github.md)
16 | * [Atribuição: Obter o seu site e Repo Online!] (3.3-get-online.md)
17 | * [Atribuição: Adicionar um Evento!] (3.4-add-event.md)
18 | * [Atribuição: Caracterize sua comunidade] (3.5-feature.md)
19 | * [Atribuição opcional: Configurar um calendário do Google] (3.6-google-cal.md)
20 |
21 | 4. [Ciência aberta e pesquisa aberta] (4-open-research101.md)
22 | * [Por que abrir a pesquisa?] (4.1-why-open.md)
23 | * [Publicação aberta e Acesso aberto] (4.2-open-pub.md)
24 | * [Reprodutibilidade] (4.3-repro.md)
25 | * [Revisão do Código] (4.4-code-review.md)
26 | * [Compartilhamento de dados] (4.5-open-data.md)
27 | * [Colaboração e projetos de código aberto] (4.6-collab.md)
28 | * [Public Communication of Research] (4.7-public-com.md)
29 | * [Desafios para Abrir (& Algumas Respostas)] (4.8-challenges.md)
30 |
31 | 5. [O que é o Mozilla Science Lab e quem é o Mozilla?] (5-what-mozilla.md)
32 |
33 | 6. [Crescendo Seu Grupox] (6-growing.md)
34 | * [Canais de comunicação para grupos de estudo] (6.1-coms.md)
35 | * [Agendamento, Planejamento e Ritmo] (6.2-planning.md)
36 | * [Usando Personas Grow Your Community] (6.3-personas.md)
37 | * [Atribuição: Criar uma Persona & Pathway] (6.4-assignment-personas.md)
38 |
39 | 7. [O fim! Próximas etapas] (7-the-end.md)
--------------------------------------------------------------------------------
/4.5-open-data.md:
--------------------------------------------------------------------------------
1 | #4.5 Open Data and Data Sharing
2 | In the section above, we mentioned that sharing is a key aspect of reproducible research, and helps to ensure the validity and trustworthiness of results. The notion of data sharing and “open data” are central to open research. The Open Knowledge Foundation, an organization dedicated to bringing “openness” to the mainstream, defines the following key factors that make data “open”:
3 |
4 | * **Access & availability** - data is available to all in a convenient and modifiable form
5 | * **Re-use & redistribution** - terms of use allow for reusing, remixing and redistributing the data
6 | * **Universal participation** - there are no restrictions on who may do any of the above with the data
7 |
8 | In a nutshell, open data is data that is made freely and easily available to anyone to use, reuse and distribute. But why should you take your carefully collected, hard-earned data, and set it free on the internet, for strangers to reuse, remix, and redistribute? There are so many reasons. This TED Talk from Data Librarian Kristin Briney covers just a few of them:
9 |
10 |
11 |
12 | In addition, many research funders require grantees to share their data! So it’s not only great open research practice, it’s also the law. Opening your data requires some careful planning, great documentation, and a good repository (or online storage site where users can freely access your data). The process can be daunting. Luckily, [Mozilla Science Lab is creating a series of primers](https://mozillascience.github.io/open-data-primers/index.html) to help you understand more about why open data is so great, and to help you easily and successfully share your data. [Mozilla Science Lab also offers guidance for those interested in leading hands-on, in-person workshops on data sharing and data management](https://github.com/mozillascience/open-data-primers/issues/3)-- contact us here if you'd like more info.
13 |
--------------------------------------------------------------------------------
/portuguese/6.2-planning-pt.md:
--------------------------------------------------------------------------------
1 | #Agendamento, Planejamento e Ritmo
2 |
3 | Parece assustador planejar todo um semestre de sessões do Grupo de Estudos. Lembre-se, você não precisa mapear o conteúdo por um semestre inteiro de sessões antes de começa-lo - você pode planejar algumas sessões, ver o que funciona, quais são as necessidades e habilidades no Grupo. Aqui estão algumas dicas para o planejamento:
4 |
5 |
6 | * ** Entreviste seu grupo. ** Descubra o que as pessoas mais desejam e precisam aprender e adapte suas sessões e conteúdo para atender a essas necessidades.
7 | * ** Seja consistente. ** Reuniões regulares assegurarão que seu Grupo tenha a chance de se estabilizar e crescer. Dependendo da disponibilidade de seus membros, as reuniões semanais ou quinzenais podem funcionar melhor.
8 | * ** Seja realista. ** Dê-se muito tempo nas sessões e ao longo do semestre para abordar tópicos, solucionar problemas e trabalhar com exemplos. É fácil superestimar o que você pode cobrir.
9 | * ** Comece no nível certo. ** Execute atividades que são direcionadas para seu grupo - não mergulhe em material avançado se a maioria de seus membros estiverem em um nível iniciante ou intermediário.
10 | * ** Use os recursos existentes. ** Explore o repo de aulas do Grupo de Estudo e peça a outros Leads o que funcionou melhor para eles.
11 | * ** Ouça os comentários. ** Certifique-se de perguntar aos membros do grupo ou envie uma pesquisa rápida para descobrir o que as pessoas querem aprender. Descubra como as pessoas se sentem sobre sessões e formatos que você já tentou. Seja flexível e receptivo aos pedidos.
12 | * ** Espere ebbs e flui. ** Seu Grupo provavelmente seguirá o ritmo da agenda da sua instituição - durante as horas agudas, você pode não receber muitos participantes.
13 | * ** Misture! ** Se você puder, traga oradores convidados ou professores para que os membros trabalhem em um novo tópico.
14 | * ** Fim do período (semestre, prazo ou quarto) com uma festa. ** Agradeça os membros por participar e pergunte o que eles gostariam de fazer no próximo ciclo; esta festa é uma hora de uma grande atividade de publicidade e proporcionar um final de comemoração de semestre / trimestre.
--------------------------------------------------------------------------------
/1.1-lead-role.md:
--------------------------------------------------------------------------------
1 | # 1.1 The Study Group Lead Role
2 |
3 | The work you’ll do as a Study Group lead will ramp up slowly, because most groups start small. Your tasks will change over time as your group grows and changes. As Study Group Lead, you’ll do a mix of the following tasks:
4 |
5 | * **Outreach and communications**, as you find your first few members and getabout the group, and as you publicize each of the group’s meetings and events;
6 | * **Logistics and event coordination**, as you organize group meetings and events;
7 | * **Strategy and planning**, as you create a schedule and plan for your group over a semester or year, and tweak that plan to respond to the needs of your group;
8 | * **Teaching**, as you prepare some of the materials and facilitate skill-sharing sessions for your group;
9 | * **Community-building**, as you find ways to invite new members in and expand your group;
10 | * **Mentoring**, as you create a group that leverages the skills and abilities of all members in co-teaching, co-facilitating, and co-organizing-- in other words, you get lots of help!
11 |
12 | This last point about sharing responsibility and mentoring others to help lead is very important for the long-term survival of your Study Group! Bringing on others to co-lead will help you create a sustainable group, one that will live on if you decide to move on to a new job or a different institution.
13 |
14 | **You’re not required to be an expert coder to lead a Study Group!** Some coding experience is helpful, but you mostly need to be curious, motivated, and willing to jump in, get your hands dirty, and learn and share with other group members. To lead a successful Group, you’ll also need to be consistent (showing up on time, holding regular meetings). You’ll need to be patient and persistent while your Group gets off the ground, and willing to dedicate time to the project-- usually about a few hours a week.
15 |
16 | **In return you’ll get valuable experience in communications, event planning, teaching, and working collaboratively with other researchers, not to mention improving your own research practice! And you’ll expand your professional network and connections into a broader research community.**
17 |
--------------------------------------------------------------------------------
/portuguese/4.4-code-review-pt.md:
--------------------------------------------------------------------------------
1 | ##4.4 Revisão de Código
2 |
3 | Como pesquisador estamos mais e mais empoderados pelos dados e focados na análise dos dados, a habilidade chave de escrever e utilizar códigos (seja em R, python, ou outra linguagem da sua escolha) para processar esses dados.
4 | Documentar o código que você está utilizando é uma parte primordial para tornar sua pesquisa reprodutível pelos outros. Como Titus Brown, pesquisador genôma, diz em um post em seu blog ["A few thoughts on code review of scientific code:"](http://ivory.idyll.org/blog/on-code-review-of-scientific-code.html) (Alguns pensamentos sobre revisão de código científico:).
5 |
6 |
7 |
8 |
9 |
10 | “...as soon as "theory" touches "real data" there is a gulf of unknown size between the theory and the data. Code is what bridges that gap, and specifies how edge cases, weird features of the data, and unknown unknowns are handled or ignored.”
11 |
12 | Because the outcome of your analysis is dependent on the design and performance of your code, it’s critical that your code is validated. A code review is when you allow someone who has programming expertise to read over and comment on the code you’ve written. By getting another pair of eyes on your code, you can:
13 |
14 | * **Catch any errors or bugs, verify assumptions and logic, and get feedback to improve your documentation**
15 | * **Ensure that your code can be understood by others**
16 | * **(Eventually) minimize the amount of time you coding by participating in the collaborative development and sharing of valid code with other researchers.**
17 |
18 | The friendly, peer to peer learning environment of a Mozilla Study Group is the perfect setting for informal code review.
19 |
--------------------------------------------------------------------------------
/portuguese/3.3-get-online-pt.md:
--------------------------------------------------------------------------------
1 | ## 3.3 Tarefa: criar o Site e o Repositório do seu Grupo de Estudos!
2 |
3 | Tudo que você precisa saber para configurar o website do seu Grupo de Estudos Mozilla para organizar eventos está aqui - siga os passos a seguir que tudo estará funcionando em breve.
4 |
5 | 1. Faça uma conta no GitHub. É gratuito!
6 |
7 | 2. Fork este repositório. No canto superior direito desta página, há um botão que diz 'Fork'; clique-o! Isso faz sua própria cópia de todas essas coisas no seu espaço no GitHub; Quando a cópia estiver concluída, o GitHub irá automaticamente redirecioná-lo para lá.
8 |
9 | 3. Ative o Rastreador de Issues. Um rastreador de issues é um quadro de mensagens sobre problemas que o GitHub configura para cada repositório; você usará para publicar informações sobre seu evento e conversar com seus participantes.
10 |
11 | * Para ativá-lo:
12 | * Clique em “Configurações” no canto superior da barra do seu repositório;
13 | *Clique no checkbox ao lado ‘Issues’
14 | * volte para o seu repo clicando no nome do grupo de estudo na parte superior da página.
15 | Edite seu arquivo README. Lembre-se do texto sobre o seu grupo que você escreveu na primeira sessão? No seu diretório de arquivos, clique em README.md e edite o texto genérico para incluir todas as informações específicas sobre seu grupo e sobre o que ele trata. Se você quiser fazer um pouco de formatação extravagante (títulos, negrito, itálico, etc.), você pode usar essas dicas do [GitHub Markdown toolbar] (https://help.github.com/articles/about-writing-and-formatting-on-github/).
16 |
17 | 4. Edite o arquivo _config.yml do seu novo repositório;
18 |
19 | *clique em _config.yml
20 | *click no pequeno pincel no canto superior direito;
21 | *sigas as instruções presentes no arquivo para editá-lo;
22 | quando tudo estiver pronto clique em “Commit Changes” no topo da página.
23 |
24 | 6. É isso, você terminou! Você pode ver o seu novo site em https://seuUsername.github.io/studyGroup/, onde seuUsername é o nome de usuário do qual você se inscreveu para o GitHub. Se esta é sua primeira vez que faz uma página na GitHub, pode levar 30 minutos para que as coisas executem nos computadores da GitHub - não se preocupe, está tudo bem! Seu site ficará pronto em breve!
25 |
--------------------------------------------------------------------------------
/3.4-add-event.md:
--------------------------------------------------------------------------------
1 | ##3.5 Assignment: Add an Event!
2 | When you're ready to list a new event for your Study Group, follow these steps, or watch this video where we walk you through event listing.
3 |
4 | 1. Make a new Issue to describe your event.
5 | 2. Click on 'Issues' over on the right sidebar of your repo,
6 | 3. Click the green 'New Issue' button near the top right
7 | 4. You'll then see a form where you can give your event a title and a description - fill these out with all the relevant information:
8 | * Where will your event be? Include a link to a map.
9 | * When will it be? Date and time.
10 | * What people should do to prepare beforehand (install any dependencies, set something up, etc)
11 | 5. Go to the _posts directory. It'll be at https://github.com/yourUserName/studyGroup/tree/gh-pages/_posts - or you can click on _posts in your repo.
12 | 6. Make a new file by clicking on the + sign beside _posts/ Name it like the following:
13 | YYYY-MM-DD-word.markdown, where YYYY-MM-DD is the date of your event, and word is anything you want.
14 |
15 | title: Study Group Meetup
16 | text: a one sentence description of your event
17 | location: Hacky Hour Stadium
18 | link: https://github.com/yourUserName/studyGroup/issues/1234
19 | date: 2016-01-04
20 | startTime: '15:00'
21 | endTime: '16:00'
22 |
23 | 7. Change all the fields to describe your event; make sure the link is the address of the issue you created When you're done, click 'Commit Changes' at the bottom.
24 |
25 | That's it! Your event is now listed on your webpage, and there's a discussion thread where people can ask questions and discuss the details. Events will be automatically removed from the schedule on the webpage when they're more than a week in the past - but the issue you created will always be there as a record of what you've done.
26 |
27 | **Event Listing Gotchas!** Here are a few things to look out for when listing an event:
28 |
29 | * Did you remember to include the --- above and below? The website builder needs those.
30 | * Can't find the issue tracker? Remember to turn it on under the 'Settings' menu on the right.
31 | * The seven fields need to be on exactly one line each; some text editors will insert line breaks into lines that are too long; remove these if so.
32 |
--------------------------------------------------------------------------------
/3.3-get-online.md:
--------------------------------------------------------------------------------
1 | ##3.3 Assignment: Get your Study Group Website and Repo Up and Running!
2 |
3 | Everything you need to set up your own Mozilla Study Group website for organizing events is right here - follow the following steps and you'll be up and running soon.
4 |
5 | 1. Make yourself an account on GitHub. The free one is just fine.
6 | 2. Fork this repository. Up in the top right corner of this page, there's a button that says 'Fork'; press it! This makes your very own copy of all this stuff in your space on GitHub; when the copy is done, GitHub will automatically take you there.
7 | 3. Turn on the Issue Tracker. An issue tracker is a message board GitHub sets up for every repository; you'll use it to post information about your event and talk to your participants.
8 | To turn it on:
9 | * click on 'Settings' in the right sidebar of your repo;
10 | * click the checkbox beside 'Issues'
11 | * head back to your repo by clicking on the big studyGroup at the top of the page.
12 | 4. Edit your README file. Remember the text about your group that you wrote back in Section 1? In your directory of files, click on README.md and edit the generic text to include all the specific info about your group and what it's all about. If you'd like to do a bit of fancy formatting (headings, bold, italics, etc) you can use the built-in [GitHub Markdown toolbar] (https://help.github.com/articles/about-writing-and-formatting-on-github/).
13 | 5. Edit the _config.yml file in your new repository:
14 | * click on _config.yml;
15 | * click on the little pencil near the top right;
16 | * follow the instructions in the file on how to edit it;
17 | * when you're done, press the green 'Commit Changes' button at the bottom of the page.
18 | 6. That's it, you're done! You can see your new website at https://yourUserName.github.io/studyGroup/, where yourUserName is the user name you signed up for GitHub with. If this is your first time making a webpage on GitHub, it might take 30 minutes for things to percolate through GitHub's computers - don't worry, it's all good! Check back later and your website should be up and running.
19 |
20 | If you have any trouble with the above steps, let us know on the [Gitter chat mozillascience/studyGroup](https://gitter.im/mozillascience/studyGroup) or in an issue, and we'll help you out!
21 |
--------------------------------------------------------------------------------
/portuguese/1.1-lead-role-pt.md:
--------------------------------------------------------------------------------
1 | # 1.1 O Papel principal do Grupo de Estudos
2 |
3 | O trabalho que você fará como líder de um Grupo de Estudos aumentará gradativamente, porque a maioria dos grupos começam pequenos. Suas tarefas mudarão de acordo com o tempo e o crescimento do seu grupo. Como um Líder de Grupo de Estudos, você desempenhará um misto das seguintes funções:
4 |
5 | * **Divulgação e Comunicação**, como você encontra seus primeiros membros e como você divulga as reuniões e eventos do seu grupo.
6 | * **Logística e organização de eventos**, como você organiza as reuniões e eventos do seu grupo?
7 | * **Strategy and planning**, como você cria um cronograma e planeja seu grupo ao longo de um semestre ou ano e como você ajusta esse cronograma as necessidades do seu grupo;
8 | * **Ensino**, você vai preparar alguns materiais e facilitar o compartilhamento de habilidades durante as sessões do seu grupo;
9 | * **Construção da Comunidade**, a medida que você expande seu grupo;
10 | * **Monitoria**, à medidade que o grupo aumenta a habilidade de todos em co-ensino e co-facilitação. Em outras palavras, você recebe muita ajuda!
11 |
12 | Este último ponto sobre a partilha de responsabilidade e orientação com outras pessoas é muito importante para a sobrivência a longo prazo do seu Grupo de Estudos! Trazendo outras pessoas para co-liderar você irá ajudar a criar um grupo orgânico e auto-sustentável, que irá continuar mesmo sem sua presença.
13 |
14 | **Não é um pré-requisito que você seja um expert em código para liderar um Grupo de Estudos!** Alguma experiência em codificação é interessante e ajuda, mas o mais importante é você ser curioso, motivado e disposto a sujar as mãos para aprender e compartilhar com os outros membros do grupo. Para liderar um Grupo de sucesso, você também precisa ser consistente (aparecendo nas horas corretas e com reuniões regulares). Você vai precisar ser paciente e persistente enquanto seu grupo cresce além de estar disposto a dedicar tempo ao seu projeto - geralmente algumas horas por semana.
15 |
16 | **Em troca de tudo isso, você vai obter experiência em comunicação, planejamento de eventos, ensino e de trabalho colaborativo com outros pesquisadores, sem mencionar a melhoria na sua prática de pesquisa! E você vai poder expandir sua rede de contatos profissionais dentro da comunidade de pesquisadores.**
--------------------------------------------------------------------------------
/portuguese/4.5-open-data-pt.md:
--------------------------------------------------------------------------------
1 | # 4.5 Open Data e compartilhamento de dados
2 |
3 | Na seção acima, mencionamos que compartilhar é um aspecto fundamental da pesquisa reprodutível e ajuda a garantir a validade e confiabilidade dos resultados. A noção de compartilhamento de dados e "dados abertos" são fundamentais para a pesquisa aberta. A Open Knowledge Foundation, uma organização dedicada a trazer "abertura" para o mundo das pesquisas acadêmicas, define os seguintes fatores-chave que tornam os dados "abertos":
4 |
5 | * ** Acesso e disponibilidade ** - os dados estão disponíveis para todos em uma forma conveniente e modificável;
6 | * ** Reutilização e redistribuição ** - os termos de uso permitem reutilizar, remixar e redistribuir os dados;
7 | * ** Participação universal ** - não há restrições sobre quem pode fazer qualquer um dos itens acima com os dados;
8 |
9 | Em poucas palavras, os dados abertos são dados que são feitos livremente e facilmente acessíveis a qualquer pessoa para usar, reutilizar e distribuir. Mas por que você deve tirar seus dados cuidadosamente coletados e devidos, e liberá-lo na internet, para estranhos reutilizar, remixar e redistribuir? Há tantas razões. Este TED Talk da bibliotecária de dados Kristin Briney cobre apenas alguns deles:
10 |
11 |
10 |
11 | Here are a few more tips for facilitating Group meetings:
12 |
13 | * **Arrive Early.** Get to the meeting space 10 minutes before the start time so you can set up, and be sure to give arriving members some time to greet each other and get settled before you jump into the session.
14 | * **Greet newcomers** Say hello! Introduce yourself to any newcomers and welcome them to the Group, or have someone assigned to do so at each session.
15 | * **Make Introductions.** Ask participants to introduce themselves to the Group. Ask them to briefly describe their research practice, tools they use, and any skills they have, or want to gain. This is a great way to discover common interests among members.
16 | * **Be relaxed and friendly.** Make sure your tone of voice and body language are open and positive.
17 | * **Encourage questions!** Making time for dialog and questions speeds learning for all members as you come to answers together. There are no stupid questions!
18 | * **Slow down.** Slow the pace of lessons and presentations down if people seem to be struggling-- there’s no rush.
19 | * **Share successes AND failures.** If something isn’t working, encourage members to share! It’s an opportunity to practice debugging skills together. The more eyes on the problem, the better!
20 | * **Orient newcomers to Group Systems** Make sure newcomers know where the website is, and tell them about the GitHub repo, email lists, social media feeds and groups, and any other systems you use.
21 |
--------------------------------------------------------------------------------
/2.1-leading-session.md:
--------------------------------------------------------------------------------
1 | ## 2.1 Leading a Session ##
2 | **The most successful, sustainable Study Groups leverage the experience, skills, and interest of the entire group.**
3 |
4 | Remember, as Study Group Lead you are *not* expected to teach all or even most of the sessions. A member doesn’t have to an expert in a topic to lead a session-- they just need to be motivated, have a bit of background and a willingness to explore the topic with others. The relaxed, non-competitive tone you create for your study group should help members feel comfortable stepping up to lead sessions. If you think a member might have a certain skill or technology to share, invite them to lead a session on it. **Leading a session is a great way for those new to teaching to get some practice in a low-stakes environment-- experience that can be very valuable in an academic career!**
5 |
6 | To help you plan sessions and organize your materials, and to ensure that all is usable and useful for others, we’ve created this **[Lesson Template](https://github.com/mozillascience/studyGroup/blob/gh-pages/lesson-template.md)** ([Indonesian translation](https://github.com/mozillascience/studyGroup/blob/gh-pages/lesson-template-id.md).) It's part of the Study Group Repository) for you to use to structure any notes, guides, challenges, or examples you share in session. Once you’ve created your lesson notes using the template, and tested out your lesson with your Study Group, we hope you’ll add it to the Study Group Lesson repository. This repo enables skills-sharing among Study Groups worldwide. Anyone can access these open resources; it’s a way of maximizing the learning potential and power of all our Groups, worldwide. **[Explore the Lesson Repository here](https://github.com/mozillascience/studyGroupLessons)**.
7 |
8 | In additon to the template, we've detailed formats and provided tips for new session leaders in the next section. Share these with any prospective leads. Remind members that it’s most useful and authentic to see how they use a tool or skill in their research practice; they don’t need to present an in-depth, advanced 90 minute lecture on a topic.
9 |
10 | Each session will be a bit different, but here are three excellent guiding principles for leading a session, developed by the University of Toronto Study Group:
11 |
12 | * **Keep the code you’re working with as simple as possible while still covering the concept.**
13 | * **When making the code, make no or few assumptions about the knowledge of the audience.**
14 | * **Keep the code generalizable. Members may come from diverse fields of research. What we share is the need to code.**
15 |
16 | Do you have tips or suggestions for running sessions we haven't mentioned here? [Tell us about it here!](https://github.com/mozillascience/study-group-onboarding/issues/10)
17 |
--------------------------------------------------------------------------------
/1-about-study-groups.md:
--------------------------------------------------------------------------------
1 | #About Study Groups
2 |
3 | A Mozilla Study Group is a regular, in-person, informal meet-up where people get together to learn to code and to explore open research practice-- strategies for maximizing the quality and impact of research in any field, from astrophysics to sociology. Coding skills in particular are increasingly important in data-rich research environments, but many of us don’t have formal training in computer science... and the tools and technologies we need are all constantly changing. **Mozilla Study Groups are peer-to-peer learning environments for skill-sharing, idea discovery, community support, and collaboration.**
4 |
5 | Here’s what a few different study groups look like in real life:
6 |
7 | From Sara, at the University of Wisconsin Study Group in Madison, Wisconsin, in the USA:
8 |
9 |
10 |
11 | From Tom, at Boston University's Study Group in Boston, Massachusetts in the USA:
12 |
13 |
14 |
15 | #### Why join a Study group?
16 |
17 | * Learn and share new coding skills you need, learn and problem-solve faster with others
18 | * Super-power your research through collaboration and open science best practices
19 | * Be part of the discussion around transforming research practice
20 | * Connect to a network of research leaders across disciplines
21 | * Make friends and become part of a supportive learning community
22 |
23 | #### Why start a Study Group?
24 | * Learn teaching and facilitation skills, community building skills
25 | * Get support and mentoring from Mozilla Science Lab and the Mozilla network
26 | * Show leadership in your community, gain skills to advance your career
27 | * Access resources like our beautiful website template and library of coding lessons
28 | * Add some open source sparkle to your work by association with the Mozilla brand
29 |
30 | There are Mozilla Study Groups all around the world, many at academic institutions and research organizations. Anyone can start a group. The format and schedule for study groups is flexible: you can modify it to fit the needs of your members. It’s all up to you!
31 |
32 | Mozilla Science Lab helps out by providing this training, an easy-to-use template for a website, templates for advertising materials, and by managing an awesome collection of lessons created by Study Group members from around the world. We organize regular calls where study group members can connect and share what they’ve been doing with others. MSL also supports other community events and gatherings (you’ll learn more about these in Section 6).
33 |
34 | Continue to the next section to learn more about the Study Group Lead.
35 |
--------------------------------------------------------------------------------
/portuguese/2-teach-facilitate-pt.md:
--------------------------------------------------------------------------------
1 | # Ensino para os Grupos de Estudo
2 |
3 | O maior sucesso dos Grupos de Estudos são seus ambientes receptivos, amigáveis e agradáveis. **Pessoas totalmente novatas no mundo da codificação podem se sentir confortáveis, e as vezes (ou muitas) eles irão se confundir, o que se é esperado ao aprender uma nova ferramenta ou conceito -- faz parte do processo de aprendizado. **
4 |
5 | Este não é um local para mostrar suas próprias habilidades ou superar os outros em algum aspecto, mas sim uma mini comununidade onde todos estão trabalhando para ajudar uns aos outros a aprenderem. Isto ajuda ao Líder do Grupo criar um espaço com esta intenção, o que não pode ser típico em alguns ambientes de pesquisa e trabalho. Mesmo que outro membro esteja apresentando algum material, o Líder deve assumir um papel de facilitador, garantindo que a reunião ocorra bem e dentro dos preceitos do Grupo.
6 |
7 | No seguinte vídeo, Madeleine Bonsma-Fisher, do Grupo Coders da Universidade de Toronto, fala sobre como ela trabalhou para criar um ambiente receptivo no seu Grupo de Estudos.
8 |
9 |
10 |
11 | Aqui estão algumas dicas para facilitar as reuniões do Grupo:
12 |
13 | * **Chegue cedo.** Chegue no local da reunião dez minutos antes para que você possa ajeitar quaisquer detalhes e dê algum tempo antes da reunião para que os membros que estão chegando se cumprimentem.
14 | * **Conheça os novatos** Diga Olá aos novatos! Apresente-se a qualquer novato e dê aos boas vidas pelo grupo, ou deixe alguém responsável por isto a cada reunião.
15 | * **Faça apresentaçãoes** Peça para os membros participantes da reunião para se apresentarem. Peça para eles descreverem as pesquisa que praticam, as ferramentas que usam e as habilidades que possuem ou que querem ganhar. Esta é uma ótima oportunidade para descobrir interesses em comuns entre os membros.
16 | * **Esteja relaxado e confiante** Garanta que sua entonação de voz e leitura corporal seja a mais aberta e positiva possível.
17 | * **Anime os Debates** Permita que haja tempo para diálogo e questões sobre assunto. Debates permitem um aprendizado rápido para todos os membros a medida que as perguntas são respondidas juntas. Não existe perguntas estúpidas.
18 | * **Vá devagar** As lições e apresentações devem ser passo à passo. Você não está numa luta -- não há pressa.
19 | * **Compartilhe os sucessos e as falhas** Se alguma coisa não está funcionando encoraje os membros a compartilharem seus problemas. Está é uma boa oportunidade para todos praticarem a ativdade de encontrarem bugs. Quanto mais olhos no problema, melhor!
20 | * **Oriente os novatos nos sistemas do Grupo** Tenha certeza que os novatos conhecer como o website funciona, como o GitHub repo trabalha, listas de email, mídias sociais do grupo e quaisquer outros sistemas que seu grupo use.
--------------------------------------------------------------------------------
/portuguese/2.1-leading-session-pt.md:
--------------------------------------------------------------------------------
1 | ## Conduzindo uma reunião
2 |
3 | **Os Grupos de Estudos mais bem sucedidos aproveitam a experiência, as habilidades e o interesse de todo o grupo. **
4 |
5 | Lembre-se, como um Líder de um Grupo de Estudos **não** espere que você vai liderar ou ensinar a maioria das sessões. Não é necessário ser um expert em um determinado assunto para dirigir a sessão sobre o mesmo -- basta apenas que a pessoa esteja motiva e tenha vontade de explorar o tópico junto com os colegas. O tom descontraído e não competitivo que você cria no grupo ajuda alguns membros a se sentirem confortáveis para liderar suas proprias sessões. Se você acha que um determinado membro possui uma certa habilidade ou conhecimento em alguma tecnologia para compartilhar, convide-o para liderar uma sessão sobre. Liderar uma sessão é uma ótima maneira para aprender a dialogar em algum ambiente de baixa participação - essa experiência pode ser muito valiosa em uma carreira acadêmica.
6 |
7 | Para te ajudar a organizar as sessões e materiais das reuniões além de tornar tudo utilizável e reusável, nós criamos um **[Template de Lição](https://github.com/mozillascience/studyGroup/blob/gh-pages/lesson-template-pt.md)**. Este template faz parte do repositório do Grupo de Estudos para que você possa estruturar notas, guias, desafios e exemplos que você queira compartilhar na sua sessão. Uma vez que você criou as notas da lição usando o nosso template, esperamos que você o adicione ao repositório das Lições do Grupo de estudo. Este repositório permite a partilha de competências entre os Grupos de Estudos em todo o mundo,qualquer um pode acessar esses recursos para aprenderem. É uma maneira de maximizar o potencial de aprendizagem e o poder de nosso Grupos em todo o globo. [Veja um pouco dessas lições aqui](https://github.com/mozillascience/studyGroupLessons).
8 |
9 | Em complemento ao modelo, nós detalhamos e oferecemos dicas para os novos líderes na próxima sessão. Lembre-se de conversar com os membros que irão apresentar a sessão que é mais útil e autêntico ver como eles usam uma ferramenta ou habildiade em suas práticas de pesquisa do que 90 minutos de leitura aprofundada sobre um determinado tópico.
10 |
11 | Cada sessão terá sua particularidade, mas aqui vão três excelentes princípios para guiar a reunião, desenvolvido pelo Grupo de Estudos da Universidade de Toronto:
12 |
13 | * **Mantenha o código que você está trabalhando o mais simples possível enquanto estiver cobrindo o conceito.**
14 | * **Ao escrever o código não faça nenhum pressuposto sobre o conhecimento prévio da audiência que está te assistindo.**
15 | * **Mantenha o código o mais generalizável possível. Membros podem ter diversas atuações na pesquisa, o que deve ser compartilhado é a necessidade de codificar.**
16 |
17 | Você possui alguma dica ou sugestão para a execução das reuniões que não mencionamos aqui? [Conte-nos sobre aqui!](https://github.com/mozillascience/study-group-onboarding/issues/10)
--------------------------------------------------------------------------------
/portuguese/6-growing-pt.md:
--------------------------------------------------------------------------------
1 | #Crescendo seu grupo
2 |
3 | Está certo começar pequeno ... no início, um grupo de estudo pode ser de apenas algumas pessoas trabalhando juntas. Você não precisa de dezenas de membros para ter sua primeira reunião. Por outro lado, alguns Grupos de Estudos começam grande, com muita zumbido e excitação, mas os participantes perdem o interesse depois de algumas semanas.
4 |
5 | Seu grupo de estudo se estabilizará e crescerá - pode demorar algum tempo. Aqui estão algumas dicas sobre divulgação para grupos novos e em crescimento.
6 |
7 | * ** Comece com pessoas que você conhece. ** Convide pessoas do seu laboratório ou de suas aulas. Uma conversa cara a cara é a melhor maneira de se conectar e conseguir alguém entusiasmado com o Grupo.
8 | * ** Envie uma explosão de e-mail. ** Envie um anúncio para sua lista de e-mail de laboratório, listas de departamento e departamentos relacionados. Se existe uma associação de estudantes de pós-graduação no campus, esse é um ótimo lugar para anunciar também.
9 | * ** Comunique-se claramente. ** Isto significa certificar-se de que todos os eventos e emails incluem tempo, lugar (com link para um mapa) e uma breve descrição do evento.
10 | * ** Envie atualizações e lembretes. ** Parte do seu papel como líder do Grupo de Estudos é ser uma líder de torcida para o grupo, manter as pessoas excitadas e envolvidas e, o mais importante, deixar que saibam que as reuniões estão acontecendo!
11 | * ** Faça amizades com seus bibliotecários e administradores do departamento. ** Essas pessoas podem encaminhar outros para o grupo, podem ajudá-lo a encontrar espaço para reuniões e equipamentos de A / V, e pode ajudar se você decida realizar um evento maior ou oficina da tarde.
12 | * ** Contato com grupos com idéias semelhantes. ** Sua instituição pode ter um departamento de informática de pesquisa ou grupo com interesses comuns. Acesse alguém desse grupo para ver se eles podem ser interessantes em participar ou liderar sessões em seu Grupo de Estudo.
13 | * ** Envie a palavra aos colegas recém-chegados. ** Peça ao seu administrador do departamento se o seu grupo pode ser mencionado em pacotes de boas-vindas para novos alunos ou pesquisadores.
14 | * ** Anuncie em torno do campus. ** Distribua panfletos e coloque cartazes anunciando o grupo.
15 | * ** Olhe para fora do seu campo de estudo para encontrar membros em potencial. ** Pesquisadores de todos os campos (ciências da vida e física, humanidades, ciências sociais) trabalham com dados e enfrentam desafios semelhantes. Um grupo diversificado fará discussões animadas e surpreendentes.
16 | * ** Planeje um Evento de Diversão! ** Jogue um Demo Party ou Hacky Hour - esses eventos sociais de baixa pressão são ótimas maneiras de apresentar membros potenciais ao Grupo.
17 | * **Persistir! Continue procurando e encoraje as pessoas a vir! ** Defina um objetivo para convidar pessoalmente uma nova pessoa a cada vez e encorajar outros membros a trazer amigos ou colegas de trabalho.
--------------------------------------------------------------------------------
/6.1-coms.md:
--------------------------------------------------------------------------------
1 | #Communication Channels for Study Groups
2 | You can direct newcomers and regular members to your awesome Study Group website for basic info and a calendar of events, but you’ll want to actively reach out to members and potential members on a regular basis. You have many possible tools and channels for reaching your members: emails and email lists, social media platforms like Twitter or Facebook, your GitHub repo… and, of course face to face conversations! Use the tools that work best for your community of members. **You might want to ask your members what communication channels they prefer, and use those favored by most people in your group.**
3 |
4 | If lots of your members are active on Twitter, setting up an account for your Study Group and Tweeting out event reminders or requests for session ideas, or just Study-Group relevant news (like articles or blog posts about coding or open science) might be the best way to reach members and create buzz. If more of your members are active on Facebook, start a page for your Group there. Email can be a really effective way to reach your members, if they check it regularly and their inboxes aren’t already to crowded. If email works for your Group, maintain a mailing list and send out announcements. A personal email is always a great way to encourage a member who’s missed a session or two. **Personal messages and conversations also work really well when you’re requesting help running an event or finding a session facilitator.**
5 |
6 | Nobody will come to your events if you don't let people know about them! Follow these steps to effectively communicate about each individual event (this list is GitHub-focused, but if your members tend to gravitate towards an other mode of communication, post or send reminders where your members will find them!)
7 |
8 | * As early as possible and at least one week in advance, list your event on your website (detailed instructions are in Section 3 of this training).
9 | * Focus on the issue tracker. There can be a lot of links and information for an event - location, lesson notes, examples to download - stay organized by putting all the relevant information in an issue for that event, and direct all attention to this issue in subsequent communications.
10 | * At the start of the week, send a reminder email to all the mailing lists you have access to, pointing out the events happening that week (remember to include links to the issues describing the events, as well as a link to your Code of Conduct, and tell people to bring their friends!).
11 | * The morning of the event, comment on the issue describing the event - even a simple 'Looking forward to this today!' is enough, since that will send a notification to everyone watching your repo.
12 | * Consider webcasting your demos, so people can participate remotely. The easiest way to go about this is using Google Hangouts on Air, which directly streams your webcast to YouTube.
13 | *Don't forget to ask people to watch your GitHub repo! That way, they'll get updates about everything your Study Group is doing.
14 |
--------------------------------------------------------------------------------
/portuguese/1-about-study-groups-pt.md:
--------------------------------------------------------------------------------
1 | # Sobre o Grupo de Estudos Mozilla
2 |
3 | Um Grupo de Estudos Mozilla é um encontro regular pessoal e informal, onde as pessoas se reúnem para aprenderem a codificar e explorar práticas de pesquisa -- estratégias para maximizar a qualidade e o impacto da pesquisa em qualquer campo, da astrofísica à sociologia. As habilidades de codificação são cada vez mais requeridas em ambientes de pesquisas ricos em dados mas, muitos de nós não possui um treinamento formal em ciência da computação... e além disto, as ferramentas e tecnologias que precisamos estão mudando constantemente.**O Grupos de Estudo Mozilla é um ambiente de aprendizado peer-to-peer para compartilhar habilidades, descoberta de idéias, apoio comunitário e colaboração. **
4 |
5 | Veja como alguns grupos de estudos são na vida real.
6 |
7 | De Sara, do Grupo de Estudos da Universidade de Wisconsin em Madison, no Estados Unidos:
8 |
9 | [](http://www.youtube.com/watch?v=PgIHe5qo5Xg")
10 |
11 | De Tom, do Grupo de Estudos da Universidade de Boston em Boston, Massachusetts nos Estados Unidos:
12 |
13 | [](http://www.youtube.com/watch?v=NwCdIIlhlIE")
14 |
15 | #### Por que se juntar a um Grupo de Estudos?
16 |
17 | * Aprenda e compartilhe novas habilidades de codificação além de resolver problemas mais rapido com ajuda de outras pessoas;
18 | * Empodere sua pesquisa através da colaboração e das melhores técnicas de ciência aberta;
19 | * Faça parte da discussão sobre a transformação das práticas de pesquisa;
20 | * Conecte-se com uma rede de líderes de pesquisa em todas as áreas do conhecimento;
21 | * Faça amigos e faça parte de uma comunidade de suporte mútuo;
22 |
23 | #### Por que começar um Grupo de Estudos?
24 |
25 | * Aprenda habilidades de ensino, facilitação e construção da comunidade;
26 | * Tenha apoio e orientação do Mozilla Science Lab e da organização Mozilla;
27 | * Mostre liderança na sua comunidade, ganhe habilidades para alavancar sua carreira;
28 | * Obtenha acesso a recursos como nosso belo website e livraria de lições de código;
29 | * Adicione um toque de comunidade aberta ao seu trabalho ao se associar a marca Mozilla;
30 |
31 | Existem diversos Grupos de Estudo Mozilla ao redor de todo o mundo, muitas instituições acadêmicas e organizações de pesquisa fazem parte. Qualquer um pode começar um grupo. O formato e o cronograma do grupo de estudo é flexível: você pode modificá-lo para atender as necessidades do seu grupo da maneira que achar apropriada. Esta tudo nas suas mãos!
32 |
33 | O Mozilla Science Lab ajuda você provendo treinamento, um template de website facil de utilizar, templates para materiais publicitários e uma incrível coleção de lições criadas por membros de Grupo de Estudos de todo o mundo. Nós organizamos conferências regulares para poder conectar e compartilhar o que seu grupo tem feito com os outros. O MSL também apoia outros eventos e encontros da comunidade (você irá aprender mais sobre isso na Seção 6).
34 |
35 |
--------------------------------------------------------------------------------
/1.3-writing-a-coc.md:
--------------------------------------------------------------------------------
1 | # 1.3 Assignment: Writing a Code of Conduct
2 |
3 | Mozilla Study Groups should be welcoming environments for all participants, regardless of their gender, ethnic background, sexual orientation, age, skill level, preference for text editor or coding langauge, etc. Study Groups should get everyone learning together!
4 |
5 | Take some time to think the learning environment you'd like to create by writing a **Code of Conduct**, also known sometimes as **Participation Guidelines.** This document describes your ideal Group culture, and defines social norms and responsibilities for members of your Group. The guidelines apply to in person interactions and those that happen online, in forums, chat, via email and in your Study Group repositories.
6 |
7 | It may seem unnecessary to have these, but when working in a collaborative group, it is always possible (and maybe inevitable) that tensions may arise! You may have seen this in your own research labs or classes. A Code of Conduct puts people in the right mindset to work together.
8 |
9 | A Code of Conduct should:
10 |
11 | * Establish the positive behaviors encouraged by the community
12 | * Make clear which behaviors are unacceptable and discouraged
13 | * Define a process by which any problems will be handled.
14 |
15 | ##Write your Code of Conduct
16 |
17 | 1. **Brainstorm.** Reflect on the following questions.
18 | * **What core words would you associate with the Group you hope to create?** These could be values, ideals, or characteristics, and behaviors. Try to keep these to one word answers, if possible. (Examples: friendly, productive, relaxed sharing, helping, asking questions, etc).
19 | * **What behaviors to discourage?** Be specific enough to be useful here. (interrupting, put-downs, unwanted physical contact, sexist comments)
20 | * **What should someone do if they have an issue or problem with a behavior in the group?** This may be as simple as speaking to the group leader, or sending a email or text. Be explicit in these steps. It’s OK (and encouraged) to have a few different options for reporting issues.
21 | * **What consequences are there for violating the code?** It’s important the consequences are real and appropriate to the situation. People might be warned, or asked to leave the session, or they may be asked to leave the Group.
22 | * **Who decides what does and does not violate the code? What's an example of how this might be done?** As Group Lead, you're primarily responsible for making sure the group goes well, but as you add members, you might ask another trusted member to help you make these decisions.
23 |
24 | 2. **Refine and Remix**
25 | Using the information you’ve collected in the brainstorm above, write your own Code of Conduct. Remember, Codes of Conduct are about creating a welcoming and safe, and postive environment as much as they are about discouraging bad behavior. As you write be sure to highight the desired values of the group. You're also welcome to refer to or remix our [Code of Conduct](https://science.mozilla.org/code-of-conduct).
26 |
27 | 3. **Share and Discuss**
28 | If you already have a few members, share these and discuss them, and revise as needed.
29 |
--------------------------------------------------------------------------------
/1.3-write-a-coc-pt.md:
--------------------------------------------------------------------------------
1 | # 1.3 Tarefas: Escreva um Código de Conduta
2 |
3 | Um Grupo de Estudo Mozilla deve ter um ambiente receptivo para todos os participantes, independemente para todos os participantes, independentemente do gênero, origem étnica, orientação sexual, idade, nível de habilidade, preferência por editor ou linguagem de programação. Os Grupos de Estudo devem fazer com que todos aprendam juntos!
4 |
5 | Reserve um tempo para pensar num ambiente de aprendizado que você quer criar escrevendo um **Código de Conduta**, também conhecido como **Guia do Participante.** Este documento descreve uma cultura de grupo ideal, e define as normas sociais e responsabilidades para os membros do seu Grupo. As diretrizes desse guiam se aplicam à todas interações socias, que ocorrem online, fóruns, bate-papo, email e em seus repositórios do Grupo de Estudos.
6 |
7 | Pode aparecer desnecessário mas, quando se trabalha em um grupo colaborativo, é possível (talvez inevitável) que tensões possam ocorrer. Você pode ter observado fenômenos semelhantes no seu laboratório ou classe. Um Código de Conduta permite que as pessoas fiquem na mesma mentalidade para trabalharem juntas.
8 |
9 | Um Código de Conduta deve:
10 |
11 | * Estabelecer os comportamentos positivos encorajados pela comunidade;
12 | * Deixar claro quais são os comportamentos inaceitáveis e desencorajados;
13 | * Definaum processo para tratar quaisquer problemas que possam aparecer;
14 |
15 |
16 | ## Escreva seu Código de Conduta
17 |
18 | 1. **Brainstorm.** Reflixa sobre as seguintes questões.
19 | * **Quais as principais palavras que você gostaria de associar ao seu grupo?** Podem ser idéias, valores ou características e comportamentos do seu grupo. Tente manter essas respostas em apenas uma palavra se possível. (Exemplos: amizades, produtividade, compartilhamento, ajuda, perguntas, etc).
20 | * **Quais os comportamentos são desencorajados?** Seja específico aqui. (interrupções, contato físico não permitido, comentários sexistas).
21 | * **O que uma pessoa deve fazer se ela observar um mal comportamento no grupo?** Isto pode ser resolvido com uma simples conversa com o líder do grupo, através de email ou texto. Seja explícito quanto a esses passos. É encorajado possuir algumas opções para relato de problemas.
22 | * **Quais as consequências por violar o código de conduta?** É importante que as consequências sejam reais e apropriadas a cada situação. As pessoas podem receber avisos ou podem ser convidadas a deixar o Grupo.
23 | * **Quem decide quem viola ou não viola o código de conduta?** Como líder do grupo, você é o principal responsável por certificar que o grupo vai bem, porém, você pode dividir esta atividade com algum membro confiável para ajudá-lo a tomar as melhores decisões.
24 |
25 | 2. **Refine e adicione mais informações**
26 | Use as informações que você coletou no brainstorm acima e escreva o seu Código de Conduta. Lembre, Código de Conduta é sobre a criar e manter um ambiente amigável e aberto, desencorajando qualquer comportamento desanimador. A medida que você escreve, tenha certeza de maximizar os valores do grupo. Você pode se referir e buscar informações no nosso [Código de Conduta](https://science.mozilla.org/code-of-conduct).
27 |
28 | 3. **Compartilhe e Discuta sobre*
29 | Se você já possui alguns membros no grupo, compartilhe e discuta com ele o Código de Conduta. Revise se surgir alguma alteração necessária.
30 |
31 |
--------------------------------------------------------------------------------
/portuguese/6.1-coms-pt.md:
--------------------------------------------------------------------------------
1 | # Canais de comunicação para os grupos de estudo
2 |
3 | Você pode direcionar os recém-chegados e os membros regulares para o seu site do Grupo de Estudos para informações básicas e um calendário de eventos, mas você vai querer alcançar ativamente membros e potenciais regulmembrosarmente. Você tem muitas ferramentas e canais possíveis para alcançar seus membros: e-mails e listas de e-mail, plataformas de redes sociais como o Twitter ou o Facebook, o nosso renomado GitHub ... e, claro, conversas cara a cara! Use as ferramentas que melhor funcionam para a sua comunidade. ** Você pode querer perguntar aos seus membros quais os canais de comunicação que eles preferem e usar aqueles que são favorecidos pela maioria das pessoas do seu grupo. **
4 |
5 | Se muitos dos seus membros estiverem ativos no Twitter, criando uma conta para o seu grupo de estudo e Tweeting para lembretes de eventos ou solicitações de idéias de sessão, ou apenas as notícias relevantes do Grupo de Estudos (como artigos ou postagens de blog sobre codificação ou ciência aberta) podem ser a melhor maneira de alcançar membros e criar vínculos. Se mais de seus membros estiverem ativos no Facebook, inicie uma página para o seu Grupo lá. O email pode ser uma maneira realmente eficaz de alcançar seus membros, se eles verificarem regularmente e suas caixas de entrada já não estão cheias. Se o email funcionar para o seu Grupo, mantenha uma lista de correspondência e envie anúncios. Um e-mail pessoal é sempre uma ótima maneira de encorajar um membro que perdeu uma sessão ou dois. ** Mensagens e conversas pessoais também funcionam muito bem quando você está solicitando ajuda executando um evento ou encontrando um facilitador de sessão. **
6 |
7 | Ninguém virá para seus eventos se você não deixar as pessoas saber sobre eles! Siga estas etapas para se comunicar efetivamente sobre cada evento individual (esta lista é focada no GitHub, mas se seus membros tendem a gravitar em relação a outro modo de comunicação, publicar ou enviar lembretes onde seus membros os encontrarão!)
8 |
9 | * O mais cedo possível e pelo menos uma semana de antecedência, liste seu evento em seu site (instruções detalhadas estão na seção 3 deste treinamento).
10 | * Concentre-se no rastreador de problemas. Pode haver muitos links e informações para um evento - localização, notas de aula, exemplos para download - permaneça organizado colocando todas as informações relevantes em um problema para esse evento e direcione toda a atenção para este problema em comunicações subseqüentes.
11 | * No início da semana, envie um e-mail de lembrete para todas as listas de correspondência com as quais você acessou, apontando os eventos que acontecem na semana (lembre-se de incluir links para os problemas que descrevem os eventos, bem como um link para o seu Código de Conduta e conte às pessoas para trazer seus amigos!).
12 | * Na manhã do evento, comente sobre a questão que descreve o evento - mesmo um simples "Ansioso para isso hoje!" é suficiente, pois isso enviará uma notificação a todos assistindo seu repo.
13 | * Considere redesenhar suas demonstrações na web, para que as pessoas possam participar de forma remota. A maneira mais fácil de usar isso é usar o Google Hangouts on Air, que transmite diretamente o seu webcast para o YouTube.
14 | * Não se esqueça de pedir às pessoas que vejam o seu depósito GitHub! Dessa forma, eles receberão atualizações sobre tudo o que seu Grupo de Estudos está fazendo.
--------------------------------------------------------------------------------
/1.2-write-a-readme.md:
--------------------------------------------------------------------------------
1 | #1.2 Assignment: Write a README file to Welcome All Members
2 | The README file (whose name by convention is written in all-caps, and represents a request to one and all--- “read me!”) is one of the first things that potential members will encounter when learning about your Group. This file will live on the web, as part of a collection of working documents on your Group, called a “repository” (you'll set this up in Section 3).
3 |
4 | **The aim of the README is to welcome, orient, and encourage newcomers to participate.** You’ll likely start out with a few members you know well, people from your lab or department. It’s fine to start in familiar territory-- most groups do. But your Study Group should welcome anyone who’s interested and shares your goals of learning to code together, and improving research through open practice.
5 |
6 | If you make your group welcoming to researchers in other departments, labs, and disciplines, you’ll likely find that researchers of all stripes want to learn the same or similar tools, and share the same kinds of research problems around data analysis and visualization, data management, collaborative workflows, and much more. **Don’t feel limited by your field or area of expertise-- this is a great opportunity to make interdisciplinary connections!** As you write your Group's README, keep a diverse audience in mind.
7 |
8 | ##Write your README
9 | IN your README, Be sure to:
10 |
11 | * **Say hello!** Welcome people to the Group. It’s great to introduce yourself here, so people know they’re dealing with a person or group of real people. Let potential members know you’re excited that they’re here to learn more.
12 | * **Write a SHORT group description.** In your own words. Try to phrase this so it’s understandable and appealing to a wide variety of people, not just those in your field. Maybe add sentence or two about your focus for the semester or year, etc. If you're having trouble getting started, here's some basic text-- feel free to copy-paste and edit: *"This Mozilla Study Groups is a fun, informal meetups of friends and colleagues to share skills, stories and ideas on using code for research, and exploring open research practices. The goal is to create a friendly, no-pressure environment where people can share their work, ask for help on a coding problem, and learn and work together with their peers."*
13 | * **Include some key details.** Note any regular meeting times and places, contact people, etc.
14 | * **Ask for what you need!** If your group wants to learn or work on a certain topic, but doesn't have the expertise, mention that here-- that way, perspective members can see if their skills are needed!
15 | * **Test your README for jargon** When you’re working in any field, whether it’s software engineering or astrophysics, you’ll learn and use jargon -- terms that have a special meaning to your field but likely won’t make sense to anyone who isn’t part of that field. Too much jargon can confuse newcomers, so use simple langauge and define all potentailly confusing terms here.
16 | * **Spread the word about the program** While you repo will be used mostly by your own Group's members, some visitors may be interested in starting a group of your own. We'd appreciate it if you'd include the following text, or something like it, to encourage new groups to form. *"If you're interested in starting a group of your own, you can check out the [Study Group Repository on GitHub](https://github.com/mozillascience/studyGroup/blob/gh-pages/README.md) or our [Study Group Orientation Guide](https://mozillascience.github.io/study-group-orientation)."*
17 |
18 |
19 | **Hang on to the README you just wrote! You'll use it in Section 3, when you get your Group's Website and Repo online.**
20 |
--------------------------------------------------------------------------------
/4.6-collab.md:
--------------------------------------------------------------------------------
1 | ##4.6 Collaboration in Open Research & Open Source
2 | The idea of “open research” is inspired in part by the open source movement in software engineering. Open source software is often developed collaboratively by engineers and designers who are inspired and motivated by the project’s vision to contribute time and expertise. **Collaboration increases the skills and resources devoted to achieving a common goal, and diversifies the perspectives and problem-solving capabilities of the group working toward that goal.** Collaboration in the open source world has elements in common with formal collaboration that’s common in academic research. In both models, collaborators must effectively:
3 |
4 | * **Define a common goal (this may take some negotiation)**
5 | * **Create good working relationships among collaborators**
6 | * **Share resources (expertise, equipment, materials, data, code, work hours)**
7 | * **Communicate regularly about process and progress**
8 | * **Share decisionmaking about the project’s direction**
9 | * **Give clear, fair credit to all contributions to the project.**
10 |
11 | In the open source world, barriers to collaboration can be very low. Here are some of the things that open source projects do to make sustained collaboration easier:
12 |
13 | * **Post source code and clear documentation in an open repository**
14 | * **Choose version control software (like GitHub) that enables logging and documenting every contribution, so it’s clear who did what**
15 | * **Use an online platform (like GitHub) for collaboration, so anyone with a web browser and some skills can communicate with project leaders and contribute**
16 | * **Leverage the project management, communication, and discussion features of online tools (again, like GitHub!) to streamline work**
17 | * **Build mentorship into the project plan, so new contributors can make connections in the field, sharpen their skills, and “level up”-- these are great motivators for participation!**
18 |
19 | With encouragement, on open source projects we’ve seen groups of contributors coalesce into sizable communities that advocate for the project and persevere through difficulties.
20 |
21 | While research collaborations have their own constraints and particular requirements, many collaboration tools and practices from open source can useful in open research.
22 | Collaboration is not without its challenges and pitfalls: lots of researchers struggle with questions of authorship, who will take the role of lead or champion, and which technologies to use for collaboration and communication. **Mozilla Science Lab offers support, resources and learning materials, such as our Working Open Workshops, and the Open Leadership Training Series, to teach best practices for working open and help foster effective collaboration.**
23 |
24 | In your Mozilla Study Group you can boost collaboration skills by sharing expertise, reviewing each other’s code, working in GitHub to facilitate discussion and organize group meetings, events, and content. Groups may also take on a project together, like creating a specialized code library, a series of lessons on a certain tool or topic, or even working to publish a paper together.
25 |
26 | **In 2015, Mozilla fellow Dr. Christie Bahlai developed a course called "Reproducible Quantitative Methods"that emphasizes collaboration skills and data re-use.**
27 |
28 | 
29 |
30 | Here's more from Christie about that course.
31 |
32 |
33 |
34 | A [comprehensive instructor guide](https://cbahlai.github.io/rqm-template/) is available for the course, and free to be remixed and reused. We encourage Study Groups to use these materials in whatever way works best for their group!
35 |
--------------------------------------------------------------------------------
/3.1-collab-vers-github.md:
--------------------------------------------------------------------------------
1 | ##3.1 Collaboration, Version Control, & GitHub
2 | One of the main challenges in working with many people on a single project-- whether it’s planning and running multi-institution research initiative to collect and analyze data or the process of co-creating, sharing, and updating learning materials for your study group-- is **“version control,” the task of managing the many contributions your group makes to shared working documents.**
3 |
4 | Your contributors may be spread around the world or working in the same room; they may be working simultaneously or asynchronously. No matter how your group is organized, the work of many contributors needs to be wrangled into a single project. Version control manages this process: it stores a history of changes and who made them, allowing you to revert or go back to earlier versions of those documents, and understand how contributions by different contributors have changed the project over time. You may have used word processing software that has a “changes,” “history” or “revisions” feature, which also allows you to see and revisit any changes to the document: this, too, is a form of version control. **If you’ve never used GitHub or any other specialized version control software before, it may help to look at some diagrams and define some new terms before you get started.**
5 |
6 | When we code, write text, or create any kind of content using computers, we end up with **a collection of files in a folder or directory, also known as a repository, or “repo.”**
7 |
8 | 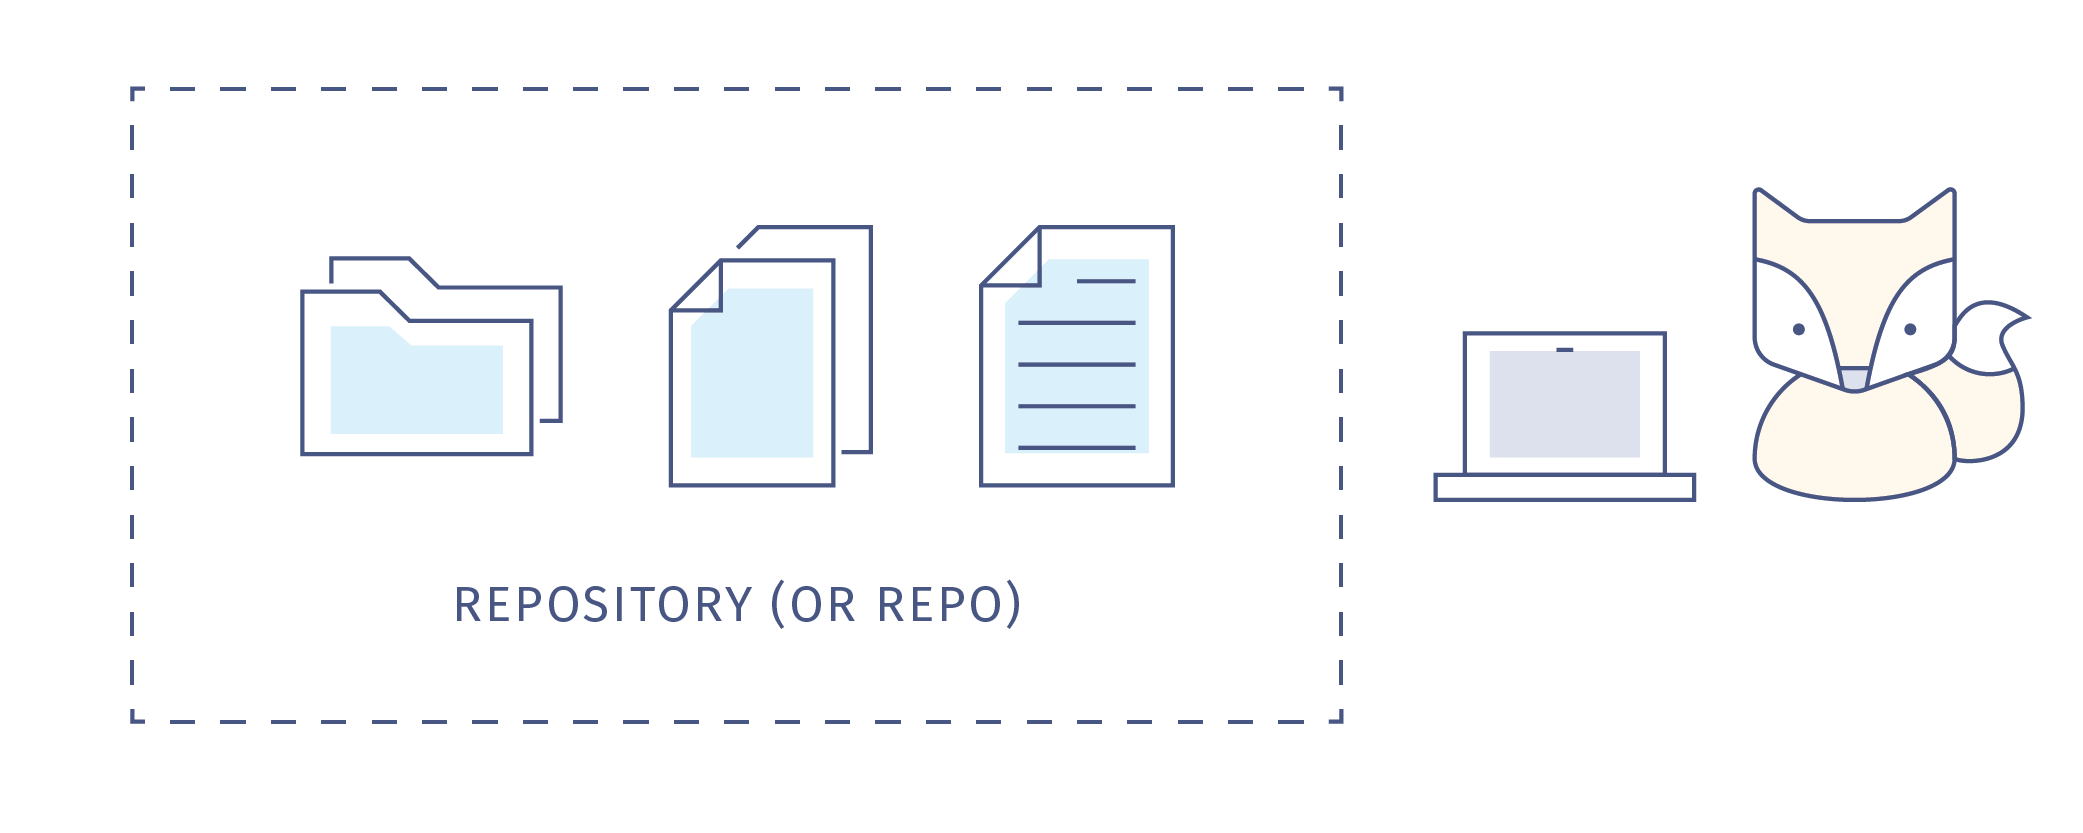
9 |
10 | Even if you’re working alone, you’re probably going to make lots of changes to your content or code as you go-- you'll change some wording or functionality and leave others untouched, you'll make mistakes while you experiment with new ideas.
11 |
12 | 
13 |
14 |
15 | You might make multiple copies of your files to preserve a version that's working while you try to improve it or add functionality, but keeping track of all these versions and the differences between them becomes difficult.
16 |
17 | 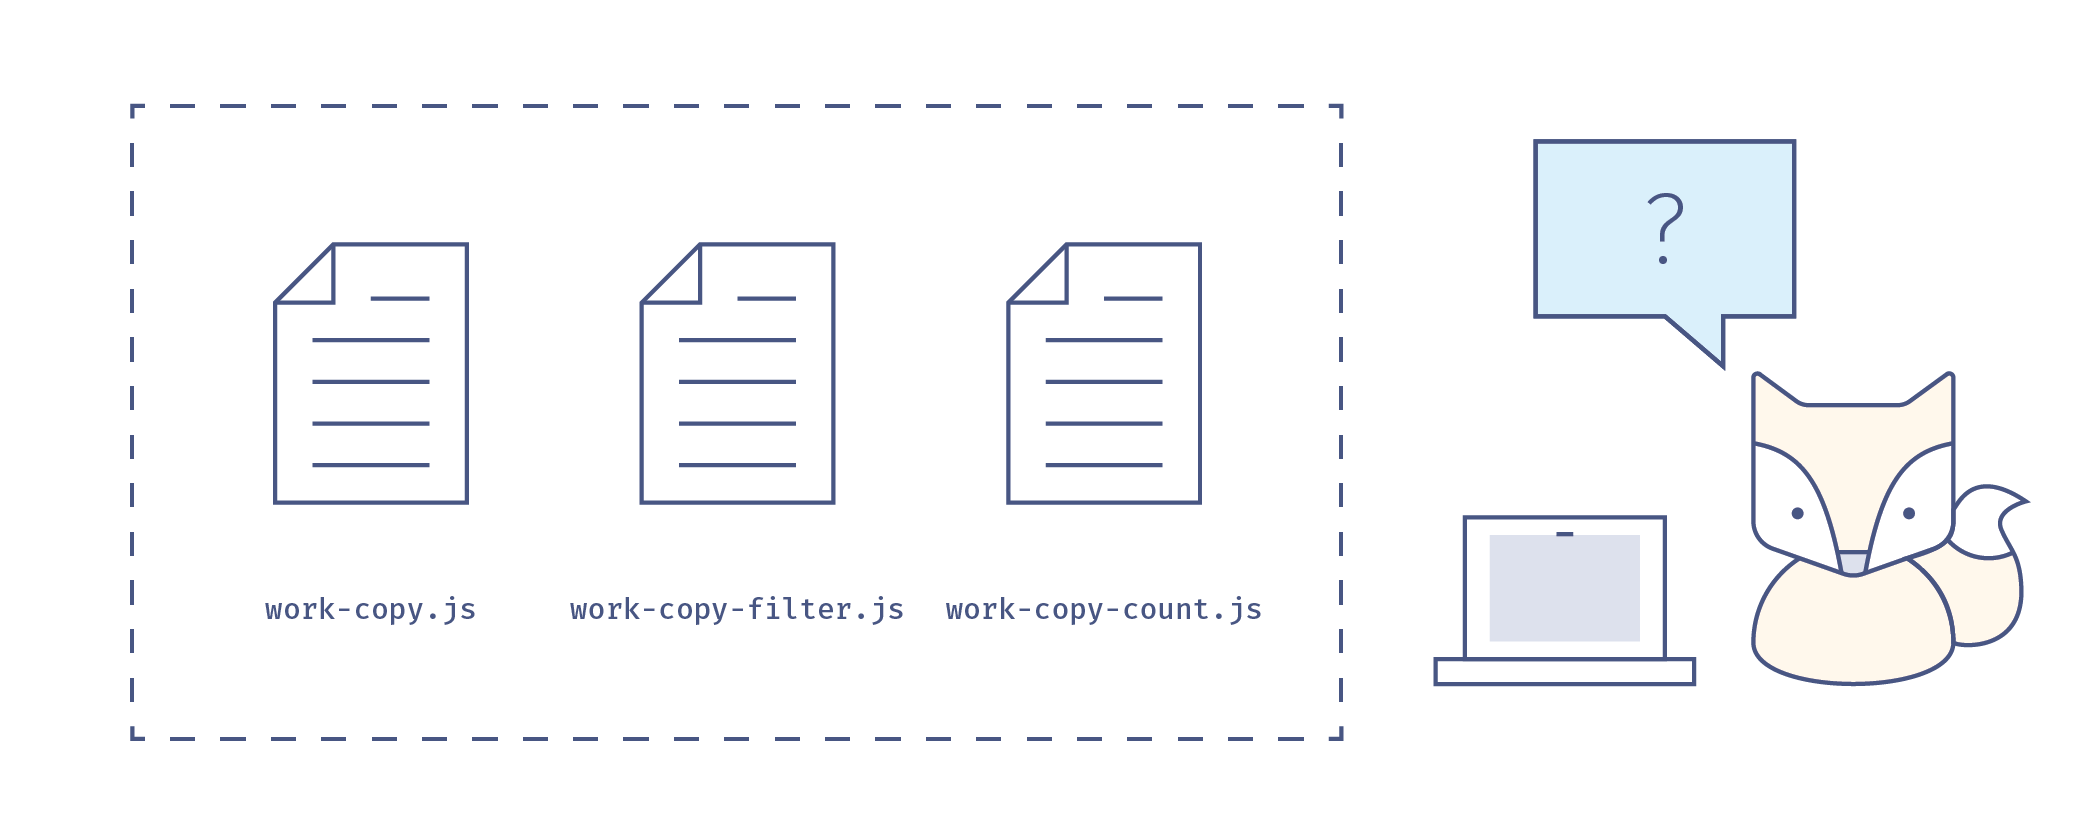
18 |
19 | **You need version control.** Imagine your document has a life story. Version control is like a time machine, it can take you back to the moment your document was born, or any other point in time when you or a collaborator saved that document. **You don’t save copies of your document, you just save the the life story of the document, or its timeline.**
20 |
21 | 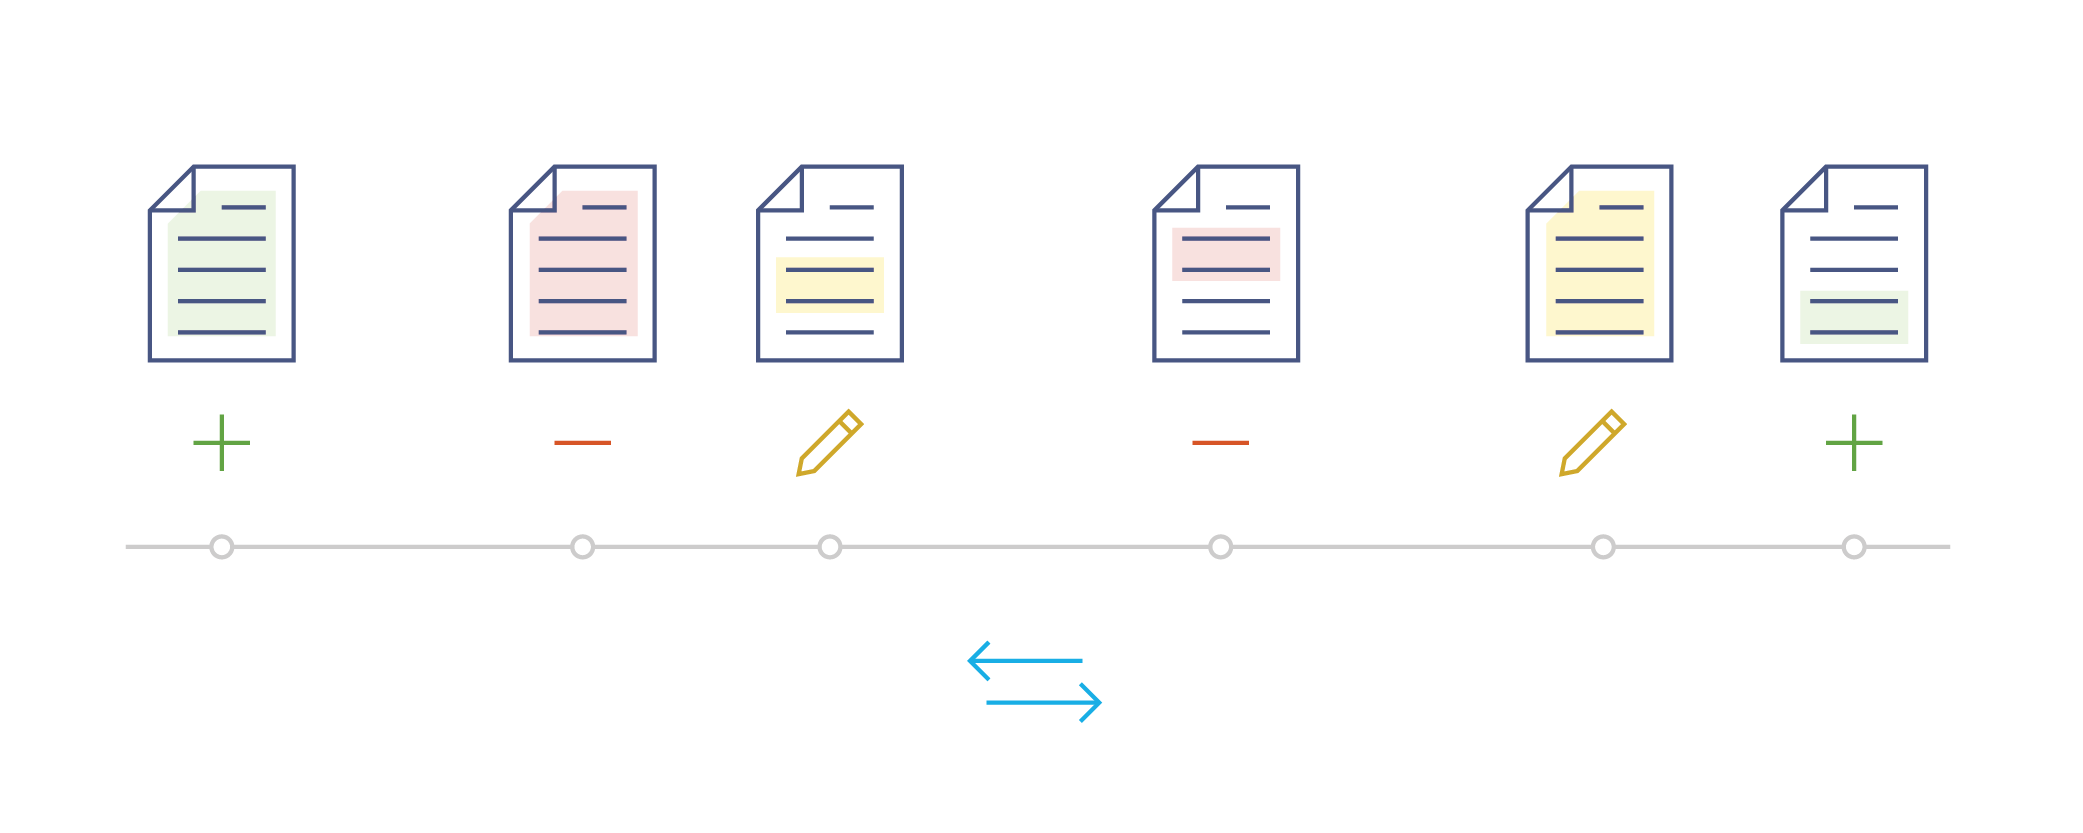
22 |
23 | What’s on the timeline? For our purposes, **let’s call any saved change a commit.** The life story of your document is a timeline of commits.
24 |
25 | 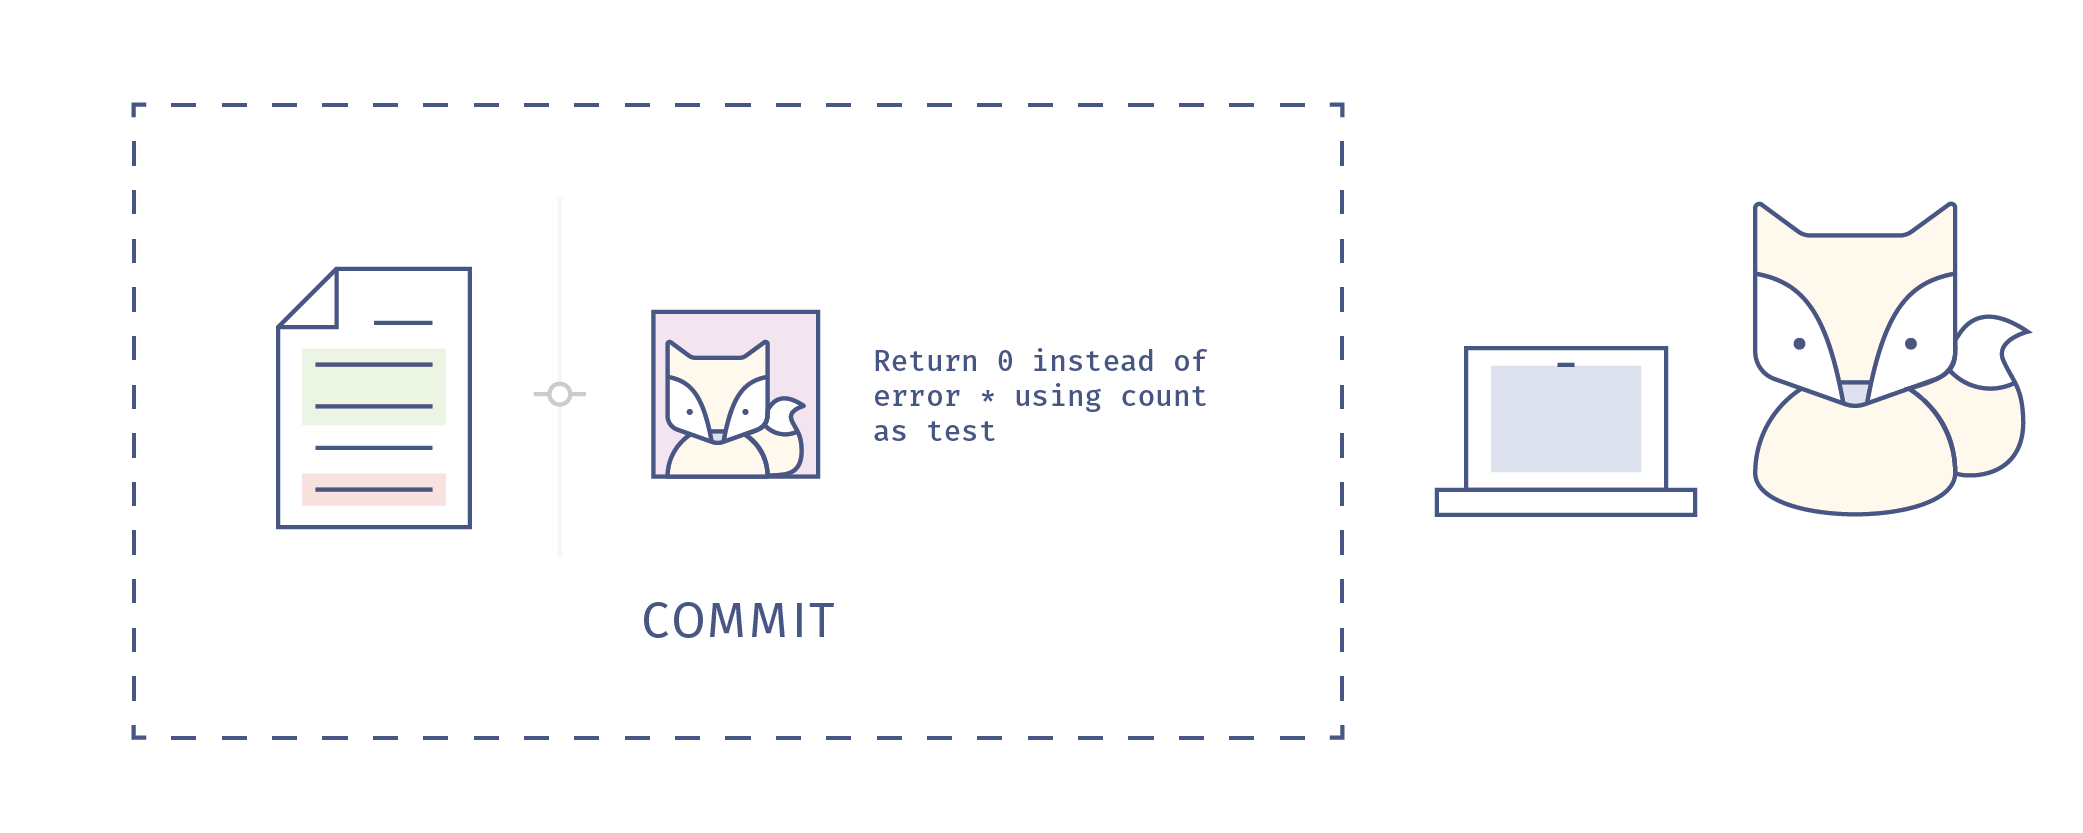
26 |
27 | When we share and work on projects with collaborators, managing the changes, or commits that multiple collaborators working in different places at different times make to a single set of documents becomes very, very important.
28 |
29 | 
30 |
31 | And when we’re working with multiple collaborators, everybody needs to know and understand what commits are being incorporated into the repository and why, so good communication becomes very very important. The great news is that there’s a piece of version control software to help us both manage and communicate with our collaborators about commits to our project-- that software is called Git, and it’s the basis for GitHub, the platform your study group repository and website will live.
32 |
--------------------------------------------------------------------------------
/4.3-repro.md:
--------------------------------------------------------------------------------
1 | ##4.3 Reproducibility
2 |
3 | You’re preparing your research for publication and the temptation may be to focus on the results and discussion sections of your paper-- after all, that’s what will make the biggest splash! **But consider how to use publication to make your work reproducible, so that other researchers successfully recreate your results using your data, code and methods.** (Reproducing the results of a study is a bit different than replicating a study, where another researcher uses your methods and your code but collects or generates a new data set. Both replication and reproduction are things another researcher may try to verify the results of a published study. For more on the reproducibility versus replicability, see [“A Statistical Definition for Reproducibility and Replicability,”](http://biorxiv.org/content/biorxiv/early/2016/07/29/066803.full.pdf) by Patil et al.)
4 |
5 | By making your work reproducible, you:
6 |
7 | * **Increase the usefulness of your research by enabling others to easily build on your results, and re-use your research materials**
8 | * **Ensure validity and trust in your results, and help to support the validity of future studies that are based on your work**
9 | * **Increase accuracy, trust, and confidence in your field broadly.**
10 |
11 | Publishing studies that can be reproduced or replicated may seem like a no-brainer. But it’s not an inevitable outcome of every publication. In 2012, cancer researchers Begley and Ellis published a comment in the journal Nature, called [“Drug development: Raise standards for preclinical cancer research.”](http://www.nature.com/nature/journal/v483/n7391/full/483531a.html) The article describes a crisis in the quality of scientific literature in cancer research. Working over a period of 10 years, Begley and his team at Amgen labs attempted to replicate the results of 53 known “landmark” studies in the field, but were only able to confirm results in 6 of those studies (11%).
12 |
13 | Some of these non-replicable studies had resulted in hundreds of secondary publications, building on unconfirmed results and likely leading to the development and eventually the testing of ineffective drugs in cancer patients. Certainly, drug development is a complex problem, with models and technologies that are challenging to work with. **But the intense pressure to publish early and often can result in the submission of studies without the level of documentation that allows for either reproduction or replication of results, and doesn’t tell the full story of the research.** A glance at the website [Retraction Watch](http://retractionwatch.com/), a project of the Center for Scientific Integrity, shows that the problem of publishing unverifiable results isn’t confined to oncology research. For one perspective on how this plays out in different fields, see Roger Peng’s blog post ["A Simple Explanation for the Replication Crisis in Science"](http://simplystatistics.org/2016/08/24/replication-crisis/).
14 |
15 | In their comment, Begley and Ellis call for more rigorous documentation practices, such as the inclusion of all experimental methods and data from all trials of a given drug in a published paper about that drug-- not just the few trials that succeeded. **A truly reproducible study should contain a complete narrative of the research, and include well-documented methods, code, and data.**
16 |
17 | There are a number of tools and practices that can help you tell a coherent research story, without gaps or fuzzy areas. See biostatistician Karl Broman’s terrific tutorial, [“Initial Steps Toward Reproducible Research”](http://kbroman.org/steps2rr/) for more on how you might get started. Another great resource is anthropologist Ben Marwick’s presentation [“Reproducible Research: A View from the Social Sciences.”](http://benmarwick.github.io/UW-eScience-reproducibility-social-sciences/#/) As mentioned in the introduction to this section, **you don’t have to adopt every best practice in reproducibility at once! Find the ones that seem most promising for your work, and give them a try.**
18 |
--------------------------------------------------------------------------------
/4.7-public-com.md:
--------------------------------------------------------------------------------
1 | ##4.7 Public Communication of Research
2 |
3 | You cannot truly practice openness in research without considering the public communication of your work (sometimes also called “public engagement” or “outreach”). Public engagement is not just about communicating the conclusions of your research with interested audiences. It also involves engaging with members of wider society regarding the social, ethical and philosophical aspects of your research – sometimes even before you have begun your project! But why spend time discussing your research with those outside your field, people who aren’t even researchers? **Public communication of your research makes it more impactful and useful to others. And it also fulfils the implicit obligation we have as researchers to share the knowledge we acquire on behalf of humanity at large.**
4 |
5 | The motivations for public communication of research and the methods of doing so have evolved over the years. While older models featured one-way communication – from scientists to the public, in the form of lectures and popular articles – the recent model of “public engagement” recommends a two-way approach. Leaving aside the ideological, political and sociological reasons for participating in public communication of research, let’s look at how public communication can benefit your research. Public communication can:
6 |
7 | * **Make your research more responsive and actionable**
8 | Research is a complex process-- especially in fields closely related to human lives, like medicine or climate science-- and researchers may not fully understand all the social and environmental factors that may affect their work. Discussions with patient groups or local disaster-response teams, for example, can help researchers confirm assumptions or discover issues that might need further investigation. Also, not everyone follows research news, even in fields that may have a significant impact on their lives. By reaching out and engaging the public in conversations related to your work, you can help bring new results to those audiences who may be directly affected by them.
9 | * **Help measure the impact of your research**
10 | Researchers are now acknowledging that the traditional metrics of measuring impact of research –– citations –– are not particularly meaningful in the modern age, where content may be consumed over the web, discussed via social media and written about in blogs. Alternative metrics are now being given their due. By being part of the conversation using the tools the web has made available, you can increase the impact of your research and also measure the audiences it reaches.
11 | * **Ensure your research has sustained support and funding**
12 | This is a slightly more self-centred reason, but your brightest ideas may not see the light of day without the funding to back your work. In a democratic society, an engaged public plays a crucial role in determining funding policies for research. Engagement can help you reach out to interested groups and cultivate new connections. Furthering public interest in research benefits not just science as a whole, but also your own endeavours.
13 |
14 | You can lend your voice to public communication of research in a variety of ways. You might organize public visits to your research facility or laboratory, or hold public demonstrations of research technologies and methods. Consider speaking at a local school about research practice in general, to inspire future researchers. Or you could work with teachers on developing school curricula. You can reach remote audiences on the web, by blogging about your research and its ups and downs, by discussing your subject on social media sites like Twitter and Facebook, or even hosting your own YouTube channel.
15 |
16 | Citizen-science initiatives such as Zooniverse invite active partiicpation and bring research into people’s homes –– find out how you can crowd-source your latest data collection or analysis. And you might engage with local politicians, members of industry, artists, and museums to discuss possible collaborations on public events, exhibitions, etc. You will likely find the possibilities very rewarding!
17 |
--------------------------------------------------------------------------------
/portuguese/1.2-write-a-readme-pt.md:
--------------------------------------------------------------------------------
1 | # Tarefa: Escreva um arquivo REDME para dar boas vindas à todos os Membros
2 |
3 | O arquivo README (*Leia-me em Inglês*, escrito em caixa alta por conversão, e represta um pedido que todos e todas leiam) é uma das primeiras coisas que um membro em potencial vai encontrar quando pesquisa sobre seu Grupo de Estudos. Este arquivo ficará na web como parte de uma coleção de documentos do seu Grupo, chamdo de "repositório" (você vai saber mais sobre na seção 3).
4 |
5 | **O propósito do REAME é dar boas vindas, orientar e encorajar novas pessoas a participar.** Você provavelmente irá começar com alguns poucos membros que conhece bem como pessoas do seu laboratório ou departamento. É bom começar num território familiar que você pode controlar -- a maioria dos grupos são assim. Mas, seu Grupo de Estudos deve ser aberto a qualquer um que tenha interesse em compartilhar seus objetivos e de apredender a codificar juntos, melhorando a pesquisa através de técnicas de ciência aberta.
6 |
7 | Se você faz seu grupo ser receptivo a pesquisadores de outros departamentos, laboratórios e disciplinas, você provavelmente vai se deparar com pesquisadores de todos os tipos buscando aprender as mesmas ferramentas (ou similares), e compartilhando os mesmos problemas acerca de problemas sobre análise e visualização de dados, gerenciamento de dados, workflows colaborativos e muitos mais. **Não se sinta limitado apenas a sua área ou expertise -- esta é uma ótima oportunidade de fazer conexões interdisciplinares!** Assim, ao escreva o README para um público diversificado.
8 |
9 | ## Escreva em seu README
10 |
11 | Em seu README, tenha certeza de que:
12 |
13 | * **Diga Olá** É ótimo se apresentar, as pessoas precisam saber se estão lidando com uma pessoas ou um grupo de pessoas. Deixe todos os potenciais membros entusiasmados para estarem aqui para aprender mais.
14 | * **Escreva uma curta descrição sobre o seu grupo.** Com suas palavras, tente pronunciar isso de maneira compreensível e atraente para um público diverso, não apenas relacionadas a sua área. Talvez adicionar uma ou duas setenças sobre o foco fo grupo durante o semestre ou ano. Se você está tendo dificuldades para começar aqui vai um texto basico -- sinta-se livra para copiar e editar: *"Este Grupo de Estudos Mozilla é uma divertida e informal reunião com amigos e colegas para compartilhar habilidades, histórias e idéias utilizando a codificação e explorando as práticas de pesquisa aberta. O objetivo é criar um ambiente amigável, sem pressões, para que pessoas possam compartilhar seus trabalhos, pedir ajuda em algum problema relacionado a código, e aprender a trabalhar com seus semelhantes."*
15 | * **Inclua alguns aspectos chaves.** Deixe evidente o horário e locais das reuniões regulares, contatos pessoas, etc.
16 | * **Peça pelo o que você precisa.** Se seu grupo quer aprender ou trabalhar em algum tópico, mas não possui o conhecimento necessário, deixe isso evidente! -- Esta é uma maneira para que prováveis membros possam ver se suas habilidades são necessárias.
17 | * **Teste seu README contra jargões.** Quando você trabalha em qualquer que seja a área, de engenharia de software à astrofísica, você provavelmente aprende e usa jargões -- termos que possuem um significado especial para sua ára mas, normalmente não fazem sentido para alguem que não faz parte desta área. Muitos jargões confudem os novatos, então tente utilizar uma linguagem simples para não causar confusão.
18 | * **Divulge sobre o programa** Enquanto você utiliza seu repositório com frequência, alguns visitantes podem estar interessados em iniciar o seu próprio grupo de estudos. Agradeceríamos se o seguinte texto, ou algo parecido, fosse incluido no texto para encorajar novos a fundação de novos grupos. *"Se você tem interesse em começar um grupo por sua conta, você pode dar uma ler mais no [Repositório do Grupo de Esudo no Github](https://github.com/mozillascience/studyGroup/blob/gh-pages/README-pt.md) ou no nosso [Guia de Orientação dos Grupos de Estudo](https://mozillascience.github.io/study-group-orientation)."*
19 |
20 | **Guarde este README que você acabou de escrever. Ele será necessário na seção 3, quando você receber o website eo repositório online do seu grupo.**
--------------------------------------------------------------------------------
/portuguese/4.6-collab-pt.md:
--------------------------------------------------------------------------------
1 | ## 4.6 Colaboração em Pesquisa Aberta e Open Source
2 |
3 | A idéia de "pesquisa aberta" é inspirada em parte pelo movimento de código aberto em engenharia de software. O software de código aberto é muitas vezes desenvolvido de forma colaborativa por engenheiros e designers que são inspirados e motivados pela visão do projeto para contribuir com o tempo e experiência. ** A colaboração aumenta as habilidades e os recursos dedicados a alcançar um objetivo comum e diversifica as perspectivas e as capacidades de resolução de problemas do grupo que trabalha nesse objetivo. ** A colaboração no mundo de código aberto tem elementos em comum com a colaboração formal que é comum em Pesquisa acadêmica. Em ambos os modelos, os colaboradores devem efetivamente:
4 |
5 | * ** Definir um objetivo comum (isso pode levar alguma negociação) **
6 | * ** Criar boas relações de trabalho entre os colaboradores **
7 | * ** Compartilhar recursos (expertise, equipamentos, materiais, dados, código, horas de trabalho) **
8 | * ** Comunicar-se regularmente sobre o processo e o progresso **
9 | * ** Compartilhar a tomada de decisão sobre a direção do projeto **
10 | * ** Dar crédito claro e justo a todas as contribuições para o projeto. **
11 |
12 | No mundo de código aberto, as barreiras para à colaboração podem ser muito baixas. Aqui estão algumas das coisas que os projetos de código aberto fazem para facilitar a colaboração sustentada:
13 |
14 | * ** Publicação do código fonte e da documentação em um repositório aberto **
15 | * ** Escolha de um software de controle de versão (como o GitHub) que permite registrar e documentar cada contribuição, para deixar claro quem fez o que **
16 | * ** Use uma plataforma on-line (como o GitHub) para colaboração, para que qualquer pessoa com um navegador web e algumas habilidades possam se comunicar com líderes de projetos e contribuir com os mesmos **
17 | * ** Aproveite os recursos de gerenciamento de projetos, comunicação e discussão de ferramentas on-line (novamente, como o GitHub!) Para simplificar o trabalho **
18 | * ** Construa mentoria no plano do projeto, de modo que novos contribuintes podem fazer conexões no campo, aprimorar suas habilidades e "nivelar" seus conhecimentos - estes são alguns dos grandes motivadores para participar! **
19 |
20 | Com o encorajamento, em projetos de código aberto, vimos grupos de contribuintes reunir-se em comunidades consideráveis que defendem o projeto e perseveram através das dificuldades.
21 |
22 | Embora as colaborações de pesquisa tenham suas próprias restrições e requisitos particulares, muitas ferramentas e práticas de colaboração de código aberto podem ser úteis em pesquisas abertas.
23 |
24 | A colaboração também possui seus desafios e dificuldades: muitos pesquisadores lutam com questões de autoria, que assumirão o papel de líder ou campeão e quais tecnologias usar para colaboração e comunicação. ** O Mozilla Science Lab oferece suporte, recursos e materiais de aprendizagem, como nossos Workshops Abertos de Trabalho e a Série de Treinamento de Liderança Aberta, para ensinar práticas recomendadas para trabalhar e ajudar a promover uma colaboração efetiva. **
25 |
26 | No seu Grupo de Estudos, você pode aumentar as habilidades de colaboração compartilhando experiência, revisando o código de cada um, trabalhando no GitHub para facilitar a discussão e organizar reuniões, eventos e conteúdo de grupos. Os grupos também podem assumir um projeto em conjunto, como criar uma biblioteca de código especializada, uma série de lições sobre uma determinada ferramenta ou tópico, ou mesmo trabalhar para publicar um documento em conjunto.
27 |
28 | ** Em 2015, o Dr. Christie Bahlai da Mozilla desenvolveu um curso chamado "Métodos Quantitativos e Reprodutíveis" que enfatiza as habilidades de colaboração e a reutilização de dados. **
29 |
30 | ! [imagem da página do curso] (images / RQM.png)
31 |
32 | Aqui está mais sobre Christie sobre esse curso.
33 |
34 |
22 |
23 | If there's a Group nearby, get in touch with them and attend a meeting. If not, keep reading!
24 |
25 | ## How to Connect, and Get Help!
26 | We encourage Study Group Leads from different groups to connect and share resources! We aim to gather a group of aspiring Study Group Leads to work through this training twice a year, roughly aligned with the Fall-Spring Academic Calendar.
27 |
28 | If you're joining us at one of those times, please join us for **Office Hours** ([check the schedule here](https://github.com/mozillascience/study-group-onboarding/blob/master/ROADMAP.md)). A Mozilla Staff memeber and a seasoned Study Group Lead will be available by video chat or phone to answer your questions.
29 |
30 | You can also join our **[Chat room on Gitter mozillascience/studyGroup](https://gitter.im/mozillascience/studyGroup)**, a web-based chat client that's associated with the Study Group Rep. Sign-up using your GitHub ID to join! The Gitter chatroom is open 24 hours a day, and it's a great place to ask questions, share news and ideas, and just hang out with other Study Group Leads. (If you've never used GitHub before, that's OK! You'll learn all about it in Section 3 of this training!)
31 |
32 | We hold regular **Study Group Calls** to share and discuss new resources, materials and ideas for Study Groups, to plan Sprints and other inter-group collaborations, and to network and connect! These are video conference calls, but you can also dial in toll-free by phone. Check our Events page for the details about the next call.
33 |
34 | Finally, if you have a question or problem, you can reach out to **Zannah Marsh, Mozilla's Learning Strategist, or Aurelia Moser, Mozilla's Community Lead**. The best way to do this is file a [GitHub issue in this Study Group Orientation repository](https://github.com/mozillascience/study-group-onboarding/issues), or [ping us on the Gitter Chat](https://gitter.im/mozillascience/studyGroup). This is basically a comment or question that we'll see and respond to. (Again, it's OK if you're not familar with GitHub and GitHub issues-- all will be explained in Section 3.)
35 |
36 | ## Help us grow and improve this book!
37 | Check out our[issues (a list of items that need help or fixing)](https://github.com/mozillascience/study-group-onboarding/issues), to see what you can do to improve or add to these materials. If you're new to GitHub, again, a quick look at section 3 should help explain how this works. **We'd love your help!**
38 |
39 |
--------------------------------------------------------------------------------
/portuguese/6.3-personas-pt.md:
--------------------------------------------------------------------------------
1 | #Usando pessoas para crescer seu grupo
2 |
3 | Uma "persona" é uma ferramenta comumente usada no mundo do design, para ajudar a criar produtos e experiências que funcionam para usuários do mundo real (também conhecido como "design centrado no usuário"). Você usaria uma personalidade quando quiser melhorar sua experiência de grupo para os membros, atrair uma audiência que ainda não está trazendo, ou tentar entender por que as pessoas podem se afastar do seu grupo.
4 |
5 | Para recapitular, a persona é uma descrição de um usuário. Personas devem:
6 | * descreva um usuário imaginário
7 | * basear-se em observações ou entendimentos de potenciais reais ou usuários atuais
8 | * seja detalhado o suficiente para que seja real para o designer, para que eles possam imaginar as necessidades e respostas de uma persona para um produto (ou, neste caso, processo de contribuição)
9 |
10 | ## Persona Simples
11 | Aqui está uma amostra de personalidade criada pela equipe da MSL para pensar sobre os usuários do Programa do Grupo de Estudos.
12 |
13 | * Rashid é um estudante de doutorado em astronomia em uma universidade no sul da Inglaterra. Ele é extrovertido e uma cômoda rústica, favorecendo jeans fofos e cardigans coloridos. Ele mora em habitação no campus e depois de um longo dia no laboratório, ele geralmente corre para casa para ver sua esposa e seu filho. Rashid tomou um curso de introdução de programação Java há muito tempo, como um graduado, mas sua pesquisa agora exige habilidades Python. Por causa da natureza competitiva de seu laboratório, ele reluta em pedir ajuda aos colegas. Ele segue o Mozilla Science Labs no Twitter, tem alguma exposição e interesse para a Open Science, mas é hesitante em compartilhar seus dados por medo de ser "escavado" em uma descoberta importante. *
14 |
15 |
16 | ## Sobre os caminhos
17 | Uma vez que você criou uma persona, você pode imaginar como eles podem interagir com o nosso projeto - o caminho para se envolver e sustentar o envolvimento. Este processo de engajamento provavelmente tem algumas fases.
18 |
19 | * ** Descoberta ** - Como eles ouviram pela primeira vez sobre o grupo.
20 | * ** Primeiro Contato ** - Como eles primeiro se envolvem com o grupo, sua interação inicial.
21 | * ** Participação ** - Como eles participam ou contribuem pela primeira vez.
22 | * ** Participação Sustentável ** - Como sua contribuição ou envolvimento pode continuar.
23 | * ** Participação em rede ** - Como eles podem rede dentro da comunidade.
24 | * ** Liderança ** - Como eles podem assumir alguma responsabilidade adicional no grupo, ou começar a liderar.
25 |
26 | Se você está trabalhando com uma pessoa boa, você pode ver claramente uma progressão de etapas. Aqui está um exemplo (usando Rashid).
27 |
28 | * Descoberta - No início do semestre, Rashid vê um grupo de estudo de propaganda de cartazes em torno do campus.
29 | * Primeiro contato - Ele participa da terceira reunião do Grupo, e é encorajado a retornar pessoalmente em um email de acompanhamento do Líder do Grupo de Estudos.
30 | * Participação - Ele faz e responde perguntas durante a sessão de ajuda.
31 | * Participação Sustentável - Ele freqüenta várias sessões de co-trabalho ao longo do semestre.
32 | * Participação em rede - Ele convida alguns de seus colegas de seu laboratório para uma sessão.
33 | * Liderança - Ele concorda em apresentar uma sessão de introdução em Java e cria um recurso de aprendizagem para contribuir com o repo do grupo.
34 |
35 | Quando você pensa através de um caminho, você deve começar a perceber o que precisa estar no lugar para mover sua pessoa para a frente. ** Você começará a ver armadilhas potenciais para sua personalidade, em termos de habilidades, tempo e motivação. ** Na história de Rashid, alguns dos desafios podem ser:
36 |
37 | * falta de consciência sobre o grupo,
38 | * alguma relutância em continuar a frequentar, não se sentindo bem em casa desde que ele se juntou no meio do caminho
39 | * falta de conhecimento do GitHub
40 | * conflito de tempo e programação da família
41 | * falta de consciência por parte do Grupo de Estudos liderar as habilidades de Rashid e o que ele pode contribuir
42 |
43 | Depois de ter uma idéia dessa história, você pode começar a listar soluções para esses desafios:
44 |
45 | * Divulgue reuniões de grupos através de cartazes em torno do campus, bem como no Twitter e por explosões de e-mail.
46 | * Coletar e-mails de novos participantes do grupo para mensagens de acompanhamento - mensagens pessoais podem funcionar melhor para novos participantes que não tem certeza
47 | * Oferecer uma introdução on-line ao GitHub para aqueles que se juntam no meio do semestre e perdeu as primeiras sessões, e certifique-se de explicar os sistemas de comunicação do Grupo para os recém-chegados
48 | * Programe reuniões do grupo para dias e tardes para evitar conflitos com horários familiares
49 | * Fale com os recém-chegados para descobrir quais habilidades eles têm para oferecer ao grupo
50 |
51 | Você provavelmente precisará de mais de uma persona para o seu projeto, pois diferentes grupos de usuários terão diferentes necessidades e motivações.
--------------------------------------------------------------------------------
/5-what-mozilla.md:
--------------------------------------------------------------------------------
1 | #What’s the Mozilla Science Lab? And who's Mozilla?
2 |
3 | ##Meet the Mozilla Science Lab##
4 | The Study Group Orientation materials were developed by the Mozilla Science Lab (MSL), with lots of help from members of the MSL community. The Mozilla Science Lab’s mission is to help scientists and researchers (anyone from students to established researchers to citizen scientists) to work openly and do better research, more research, and make that research more useful by sharing it widely.
5 |
6 | Although our name suggests otherwise, MSL is not a brick and mortar laboratory, nor do MSL staff regularly do scientific research. We do work in an iterative, experimental way, building on learning and constantly evaluating our outcomes and fine-tuning our programs. **Our community includes scientists, researchers, designers, developers, and librarians, all working to making research open and accessible.**
7 |
8 | MSL seeks to promote open research through:
9 |
10 | * **Fellowships**. We offer a 10-month, funded fellowship for researchers who want to influence the future of open science and data sharing within their communities. Fellows receive training around open source, data sharing, open science policy, and licensing. Fellows work on their own open projects and create code, learning resources, and trainings to support open practice at their institutions and in their local communities.
11 | * **Mentorship**. In our mentorship programs, participants connect with experienced mentors to gain open leadership skills and advance their research projects
12 | * **Project-based learning**. In addition to our Study Group program, we produce learning materials and workshops on Open Data and open practice designed specifically for researchers and project leads; our online Projects directory is a curated collection of open source, web-based tools to help you do better science.
13 |
14 | In addition to the Study Group calls, MSL also has regular Community calls open to all-- drop in to meet fellow community members and learn about exciting topics in the world of open research. Explore the MSL website to learn more about our offerings.
15 |
16 | ##Oh by the way, we’re from Mozilla!##
17 | The Mozilla Science Lab is a program of the non-profit Mozilla Foundation. You may recognize the name Mozilla-- we’re the group of people, organized as a non-profit, public charity-- best known for making the Firefox web browser. Mozilla’s Firefox is an open source project, which means the source code is freely, publicly available and anyone who would like to can help develop the project. Firefox was created and is sustained by the Mozilla staff and a collaborative community of volunteers, called “contributors.” Currently, 1/5th of the web's traffic comes through the Firefox browser, giving some of the big corporate browsers a bit of competition! **Many open practices-- such as the use of the web as a collaboration tool and a space to share code, resources, and data-- were created, tested, and refined by software developers working on open-source projects like Firefox.**
18 |
19 | The open source movement showed that scrappy, self-organized groups of passionate volunteers could collaborate to develop viable alternatives to proprietary software, and even compete against huge corporations! The principles of participation, self-organization, flexibility, and open sharing of resources are at the heart of Mozilla’s Study Group Program, and the open source ethos drive’s Mozilla’s commitment to open science and its Science Lab program.
20 |
21 | In addition to developing Firefox and supporting the Science Lab, Mozilla fights for what we call the “open web.” We’re doing this by championing:
22 |
23 | * **Inclusion**: an accessible, free Internet for all
24 | * **Privacy**: user control of their own data on the web
25 | * **Web literacy**: the ability for everyone to meaningfully
26 | * Read: navigate the web, and find, evaluate, and synthesize web content
27 | * Write: code, design, compose, revise and remix content for the web
28 | * Participate: connect with online communities, share, contribute, and work collaboratively on the web
29 | * **Decentralization**: internet technologies and platforms based on open standards, allowing for the seamless flow and transfer of information and content
30 | * **Open Innovation**: the web as a space for new ideas and creativity, where all users can create, innovate, and compete online without asking permission.
31 |
32 | To drive this work, Mozilla coordinates and staffs programs to work directly with interested, motivated community members on Learning, Advocacy, Science, the emerging Internet of Things, and Women in Web Literacy. We think of this constellation of programs and the amazing community leaders (like you) who work with us as the Mozilla Leadership Network. Members of the network are leading projects as diverse as improving civic engagement, creating better educational experiences, building more human technologies, and making scientific research more collaborative and efficient (through data sharing, open projects, and Study Groups, just like yours!).
33 |
34 | To see what’s exciting and new in Mozilla’s network, check out [Network Pulse](https://mozilla.github.io/network-pulse/), a space for updates and information on network projects and activities. As a Study Group lead, you’re a member of our Network, and encouraged to take advantage of resources, trainings, and make connections with others in the Network.
35 |
--------------------------------------------------------------------------------
/portuguese/README-pt.md:
--------------------------------------------------------------------------------
1 | # Bem-vindo à Orientação do Grupo de Estudos da Mozilla Science Lab!
2 |
3 | ###Olá! Obrigado pela visita.
4 |
5 | Você está lendo um [manual on-line] (https://mozillascience.github.io/study-group-onboarding/) para a Orientação do Grupo de Estudos. ** Um grupo de estudo da Mozilla é um encontro informal, em pessoa, para cientistas e pesquisadores que desejam saber mais sobre código e práticas de pesquisa aberta. ** Este treinamento irá ajudá-lo a iniciar seu próprio Grupo de Estudos. Você pode acessar a totalidade deste treinamento como um pdf através deste [gitbook] (https://github.com/mozillascience/study-group-orientation/blob/master/mybook.pdf), embora a qualidade das imagens não seja tão boa.
6 |
7 | ## Como usar este treinamento e o que esperar
8 |
9 | ** Esta série de treinamentos foi projetada para ser concluída on-line, como uma experiência de treinamento solo, feita em seu próprio ritmo. ** Existem cinco seções, algumas com vídeos e trabalhos ou atividades para ler e trabalhar. Você provavelmente precisará ~ 4 a 6 horas para completar este treinamento. Se você quiser se conectar com os Leads de Estudos de Estudos experientes ou outros recém-chegados como você, para fazer a rede e comparar notas, veja abaixo, em "Como se conectar e obter ajuda"!
10 |
11 | ** Aqui está o que está no livro: **
12 | * Na primeira seção, você terá uma idéia do que são os Grupos de Estudos sobre o assunto e por que você pode querer liderar um.
13 | * Na Seção 2, você receberá dicas sobre como facilitar grandes reuniões do grupo e aprender sobre formatos para sessões.
14 | * Na Seção 3, nós o acompanharemos como trabalhar com a plataforma de colaboração GitHub. Você configurará o site GitHub do seu projeto do grupo e uma coleção de arquivos chamado repositório. Isso permitirá que você trabalhe em conjunto e compartilhe materiais e códigos.
15 | * Na Seção 4, você terá uma introdução do turbilhão a algumas das principais questões e recursos relacionados à pesquisa "aberta".
16 | * Na Seção 5, você aprenderá mais sobre o Mozilla, o Laboratório de Ciências da Mozilla e por que estamos tão entusiasmados com os Grupos de Estudos e com a pesquisa aberta.
17 | * E, finalmente, na Seção 6, você receberá dicas sobre como crescer seu grupo, desde estratégias de comunicação e recrutamento até sessões de planejamento e reuniões a longo prazo.
18 |
19 | Antes de começar, verifique o nosso mapa para ver se já existe um Grupo de Estudo na sua área.
20 |
21 |