7 | {{ config.repo_name }}
8 |
9 |
10 |
--------------------------------------------------------------------------------
/docs/writing-emacs-lisp/index.md:
--------------------------------------------------------------------------------
1 | # Writing Emacs Lisp
2 |
3 | You do not need to learn how to write Emacs Lisp to use thousands of commands that Spacemacs already provides.
4 |
5 | If you do want to do some extensive customisation, beyond creating a simple layer, then here are some useful resources to get started.
6 |
7 |
8 |
9 | ## Example: writing an interactive game
10 |
11 | {% youtube %}
12 | https://youtu.be/gk39mp8Vy4M?autoplay=1loop=1
13 | {% endyoutube %}
14 |
--------------------------------------------------------------------------------
/draft-docs/clojurescript/css-rainbow-colors.md:
--------------------------------------------------------------------------------
1 | # Rainbow Colors for CSS highlighting
2 |
3 | When editing a CSS file, any values used for colours can be shown on a background colour that the colour code represents.
4 |
5 | Toggle the rainbow color mode using the following command
6 |
7 | ```clojure
8 | M-x rainbow-mode
9 | ```
10 |
11 | This function is contained in the package [rainbow-mode.el](https://julien.danjou.info/projects/emacs-packages#rainbow-mode)
12 |
13 |
--------------------------------------------------------------------------------
/.gitignore:
--------------------------------------------------------------------------------
1 | # Exclude all files from root directory
2 | /*
3 |
4 | # ------------------------
5 | # Common project files
6 | !CHANGELOG.md
7 | !README.md
8 | !LICENSE
9 |
10 | # ------------------------
11 | # Include MkDocs files
12 | !docs/
13 | !includes/
14 | !overrides/
15 | !mkdocs.yml
16 |
17 | # ------------------------
18 | # Project automation
19 | !Makefile
20 |
21 | # ------------------------
22 | # Version Control
23 | !.gitignore
24 | !.gitattributes
25 | !.github/
26 |
27 |
--------------------------------------------------------------------------------
/docs/structural-editing/lisp-state/raising.md:
--------------------------------------------------------------------------------
1 | # Raising expressions
2 |
3 | Instead of barfing out an expression from its parent and then deleting the parent, you can raise a nested expression and replace its parent all in one go.
4 |
5 |
6 | | Key | Description |
7 | |-----|----------------------------------------------------|
8 | | `r` | raise the current expression to replace its parent |
9 |
10 |
11 |
12 |
--------------------------------------------------------------------------------
/.github/config/markdown-link-check.json:
--------------------------------------------------------------------------------
1 | {
2 | "ignorePatterns": [
3 | {
4 | "pattern": "^http://localhost"
5 | },
6 | {
7 | "pattern": "^mailto:*"
8 | },
9 | {
10 | "pattern": "^#*"
11 | },
12 | {
13 | "pattern": "^https://127.0.0.0/"
14 | }
15 | ],
16 | "timeout": "20s",
17 | "retryOn429": true,
18 | "retryCount": 5,
19 | "fallbackRetryDelay": "30s",
20 | "aliveStatusCodes": [
21 | 200,
22 | 206
23 | ]
24 | }
25 |
--------------------------------------------------------------------------------
/.github/config/gitleaks.toml:
--------------------------------------------------------------------------------
1 | title = "gitleaks config"
2 |
3 | [allowlist]
4 | description = "global allow lists"
5 | paths = [
6 | '''gitleaks.toml''',
7 | '''(.*?)(jpg|gif|doc|docx|zip|xls|pdf|bin|svg|socket)$''',
8 | '''(go.mod|go.sum)$''',
9 | '''gradle.lockfile''',
10 | '''node_modules''',
11 | '''package-lock.json''',
12 | '''pnpm-lock.yaml''',
13 | '''Database.refactorlog''',
14 | '''vendor''',
15 | ]
16 |
17 | [[rules]]
18 | description = "AWS Example API Key"
19 | id = "aws-example-api-key"
20 | regex = '''AKIAIOSFODNN7EXAMPLE'''
21 | keywords = [
22 | "awstoken",
23 | ]
24 |
--------------------------------------------------------------------------------
/docs/documentation/apropos.md:
--------------------------------------------------------------------------------
1 | # Find similar named functions with cider-apropos
2 |
3 | ++comma++ ++"h"++ ++"a"++ shows a helm pop-up with a search pattern, showing functions that are relevant to the search pattern.
4 |
5 | 
6 |
7 |
8 | !!! HINT "Requires REPL"
9 | A REPL session must be connected to the project for cider-apropos to work
10 |
11 | ++enter++ to select the function and its docstring is displayed.
12 |
13 | 
14 |
--------------------------------------------------------------------------------
/docs/reference/keybindings/index.md:
--------------------------------------------------------------------------------
1 | # Reference: Keybindings
2 |
3 | ## Useful Spacemacs commands
4 |
5 | 6 | SPC q q - quit 7 | SPC w / - split window vertically 8 | SPC w - - split window horizontally 9 | SPC 1 - switch to window 1 10 | SPC 2 - switch to window 2 11 | SPC w d - delete current window 12 | SPC TAB - switch to previous buffer 13 | SPC b b - switch buffers 14 | SPC f f - find a file 15 | SPC f s - save a file (:w also works) 16 | SPC p p - open project 17 | SPC p h - find a file in current project 18 | SPC b d - delete current buffer 19 | SPC b M - move buffer to another window 20 | SPC v - enter expand-region mode 21 |22 | -------------------------------------------------------------------------------- /docs/testing/unit-testing/refactor-unit-tests.md: -------------------------------------------------------------------------------- 1 | # Refactor Unit Tests 2 | Before changing the names of tests defined with deftest, those tests should be un-evaluated, i.e. removed from the running REPL. Otherwise the tests will keep running and provide incorrect reports. 3 | 4 | , e u with the cursor on a `deftest` expression will remove that test from the REPL. A prompt in the mini-buffer is shown to confirm the removal. 5 | 6 | The name used for any `deftest` can be un-evaluated, assuming it has been evaluated at least once. So if a test is failing in the test report but does not exist in the code it can be removed without having to restart the REPL. 7 | -------------------------------------------------------------------------------- /docs/external-repl/repl-command-menu.md: -------------------------------------------------------------------------------- 1 | # REPL Command Menu 2 | 3 | With the Clojure REPL buffer active, you can use the `,` character (in Vim Insert or Emacs state) to open a menu of REPL related commands 4 | 5 | | Vim Insert | Emacs | Description | 6 | |------------|-------|------------------------| 7 | | `,` | `,` | Open REPL Command menu | 8 | 9 | 10 |  11 | 12 | 13 | > ####HINT::Vim Insert or Emacs state only 14 | > `,` in Vim Normal state opens the Clojure major mode menu. 15 | > 16 | > `i` to change to Vim Insert state 17 | > 18 | > `C-z` to change to Emacs state 19 | -------------------------------------------------------------------------------- /docs/introduction/why-spacemacs/why-evil.md: -------------------------------------------------------------------------------- 1 | # Evil Vim Style Editing 2 | 3 | Evil provide Vim style editing across all languages and modes in Emacs, simplifying the editing of files and keyboard shortcuts (keybindings) 4 | 5 | Vim is a language for manipulating text files that goes far beyond editing files. Learning this simple language removes cognitive load. Speak vim and your fingers efficiently make the changes you want. 6 | 7 | Multi-modal editing simplifies keybindings for everything, keeping your hands centered on the keyboard and increasing your productivity. Multi-modal approach minimizing the need for key chords that are slower and a common source of repetitive strain e.g. `C-c C-x M-j` 8 | -------------------------------------------------------------------------------- /docs/debug-clojure/inspect-values.md: -------------------------------------------------------------------------------- 1 | # Inspecting values in Clojure 2 | 3 | The Clojure layer includes the `cider-inspector` 4 | 5 | `, d v` opens the `cider-inspector` on the current symbol, allowing you to traverse its value. 6 | 7 | !!! HINT "Clojure Inspector in more detail" 8 | The `cider-inspector` is covered in more detail in the [Evaluate Clojure > Inspect section](/spacemacs/evaluating-clojure/inspect/) 9 | 10 | 11 |
12 | 13 |
14 | -------------------------------------------------------------------------------- /.github/FUNDING.yaml: -------------------------------------------------------------------------------- 1 | --- 2 | # GitHub Supported funding model platforms 3 | 4 | github: [practicali-john] 5 | # patreon: # Replace with a single Patreon username 6 | # open_collective: # Replace with a single Open Collective username 7 | # ko_fi: # Replace with a single Ko-fi username 8 | # tidelift: # Replace with a single Tidelift platform-name/package-name e.g., npm/babel 9 | # community_bridge: # Replace with a single Community Bridge project-name e.g., cloud-foundry 10 | # liberapay: # Replace with a single Liberapay username 11 | # issuehunt: # Replace with a single IssueHunt username 12 | # otechie: # Replace with a single Otechie username 13 | # custom: # Replace with up to 4 custom sponsorship URLs e.g., ['link1', 'link2'] 14 | -------------------------------------------------------------------------------- /docs/org-mode/tables.md: -------------------------------------------------------------------------------- 1 | # Org-mode Tables 2 | 3 | Org comes with a fast and intuitive table editor. Spreadsheet-like calculations are supported using the Emacs calc package (see Calc in GNU Emacs Calculator Manual). 4 | 5 | This guide covers just the simple tables you can create when documenting your application or service. 6 | 7 | The [Org-mode manual](https://orgmode.org/manual/Tables.html) covers tables in more detail, including: 8 | 9 | * Built-in table editor for simple tables 10 | * Column width and alignment, to overrule the automatic settings 11 | * Column groups, grouping to trigger vertical lines 12 | * Orgtbl mode, table editor as minor mode 13 | * Table editor spreadsheet capabilities 14 | * Org-Plot, plotting graphs from org tables 15 | -------------------------------------------------------------------------------- /docs/evaluating-clojure/enlighten.md: -------------------------------------------------------------------------------- 1 | # Showing Intermediary values - Enlighten mode 2 | 3 | As a homage to [LightTable](https://lighttable.com) live evaluation, you can enable `enlighten` minor mode to show the intermediary values during evaluation. 4 | 5 | | Evil Normal | Description | 6 | |-------------|----------------------------------------------------| 7 | | `, T e` | Toggle Enlighten mode, showing intermediate values | 8 | 9 | This provides a basic version of the [Cider inspector](inspect.md) which is always on (until you toggle it off). 10 | 11 | [](/images/spacemacs-clojure-evaluation-enlighten-example.png) 12 | -------------------------------------------------------------------------------- /docs/navigating-code/markers.md: -------------------------------------------------------------------------------- 1 | # Navigating using markers 2 | 3 | Markers are used to create adhoc places to jump to in your buffer. 4 | 5 | `m` and a character defines the name of the marker. For example, `m a` defines a marker called `a` 6 | 7 | `'` and a character jumps to that marker, so `' a` jumps to the marker called `a` 8 | 9 | `' '` will jump back to the point where the last change was made. 10 | 11 | !!! HINT "Only one marker, use the same character" 12 | Marker names are case-specific, so in theory you have have up to 52 markers. 13 | 14 | Recommend only using one marker and the same character for the marker each time, as this will ingrain the action. Using `a` as the marker is quicker as its on the opposite hand to `m` and `'` 15 | -------------------------------------------------------------------------------- /overrides/404.html: -------------------------------------------------------------------------------- 1 | 4 | 5 | 6 | {% extends "main.html" %} 7 | 8 | 9 | {% block content %} 10 |This is not the page you are looking for
11 | 12 |13 | Sorry we have arrived at a page that does not exist... 14 |
15 | 16 |17 | Practicalli website are published using Material for MkDocs 18 |
19 | 20 |21 | Use the Search bar at the top of the page or left navigation to find the relevant content. 22 |
23 | 24 |
25 |
26 |  27 |
28 |
27 |
28 |
12 | 13 |
14 | 15 | 16 | !!! Hint "Restart Spacemacs after larger changes" 17 | ++spc++ ++"q"++ ++"r"++ to restart Spacemacs when significant changes are made or something is not working correctly 18 | -------------------------------------------------------------------------------- /docs/spacemacs-basics/spell-checking.md: -------------------------------------------------------------------------------- 1 | # Spell checking in Spacemacs 2 | 3 | The `spell-checking` layer provides 'on-the-fly' spell checking, highlighting incorrect spelling of words as you type. 4 | 5 | `SPC S` is the spell check menu. 6 | 7 |  8 | 9 | 10 | ## Spell check the current word 11 | 12 | `SPC S s RET` is a quick way to fix the spelling of the current word as most of the time the correct spelling is at the top of the list. 13 | 14 | `SPC S s` checks the current word under the cursor. A list of possible spellings displays in a popup. Use `C-j`/`C-k` to navigate the spellings and `RET` to select the spelling to use. 15 | 16 | 17 | ## Requirements 18 | 19 | Add the `spell-checking` layer to the layer list in `~/.spacemacs`. 20 | 21 | The `spell-checking` layer uses the [flyspell tool](https://github.com/emacs-mirror/emacs/blob/master/lisp/textmodes/flyspell.el) in Emacs and an external binary 22 | 23 | Install an external spell checking binaries that is supported by flyspell: ispell, hunspell, aspell. On Unix systems this binary is probably installed already. 24 | -------------------------------------------------------------------------------- /docs/source-control/magit/remote-repositories/configure-default-upstream.md: -------------------------------------------------------------------------------- 1 | # Configure default upstream remote branch 2 | 3 | The first time you pull changes from a repository (or if cloning via Magit), the default upstream remote and branch is set. 4 | 5 | `F u` will pull all the changes from the default upstream remote branch. 6 | 7 |  8 | 9 | 10 | ## Changing the default remote 11 | 12 | To change the default upstream, first unset the default value and then add a new default. 13 | 14 | `F` to open the pull menu 15 | 16 | `C` to open the configuration of the local repository 17 | 18 |  19 | 20 | `u` to unset the default upstream branch (removed the description too) 21 | 22 | `u` to add a new upstream branch as the default, showing a list of all possible remote branches. 23 | 24 | `RTN` to choose a branch 25 | 26 | `G-g` to close the configuration menu. Then either `u` to pull from the new default upstream branch, or `C-g` to exit the pull menu. 27 | -------------------------------------------------------------------------------- /docs/misc/unicode-characters.md: -------------------------------------------------------------------------------- 1 | # Unicode Characters 2 | 3 | `SPC i u` shows a pop-up list of [Unicode characters](https://en.wikipedia.org/wiki/Universal_Coded_Character_Set) by name, with each name also showing the unicode character. 4 | 5 | The first time `SPC i u` is called the unicode characters are loaded, as spacemacs doesn't load them in by default. Loading should only take a second. 6 | 7 | As the popup list can be narrowed by typing part or all of the name of characters. The list shows a fuzzy match of unicode names that match. 8 | 9 | | Keybindings | Description | 10 | |-------------|----------------------------------------------------------------------------------| 11 | | `SPC i u` | Loads unicode characters and lists them in a popup window. Uses helm completion | 12 | 13 | 14 | [](/images/spacemacs-unicode-popup.png) 15 | 16 | 17 | ## Classic Emacs Unicode 8 18 | 19 | `C-c 8 RET` is the classic way to add Unicode 8 characters, which seems to show different symbols, is that unicode 8 and the other unicode 16 perhaps? 20 | -------------------------------------------------------------------------------- /docs/source-control/index.md: -------------------------------------------------------------------------------- 1 | # Source Control Introduction 2 | 3 | Source control in Spacemacs supports Git repositories and services including GitHub, GitLab and Perforce. 4 | 5 | Magit is a graphical Git client in Spacemacs that provides all the features of the Git command line client. 6 | 7 | Highlight changes in file buffers and the local Git repository can be shown in the fringe. 8 | 9 |  10 | 11 | 12 | ## Configure Spacemacs for Source Control 13 | 14 |15 | 16 |
17 | 18 | 19 | !!! HINT "GitHub layer deprecated" 20 | The Spacemacs `github` layer has been [marked as deprecated](https://github.com/syl20bnr/spacemacs/pull/15381) as all the working packages are provided by the `git` layer. 21 | -------------------------------------------------------------------------------- /docs/spacemacs-basics/vim-style/common-evil.md: -------------------------------------------------------------------------------- 1 | # Common Tasks using Evil vim-style editing 2 | 3 | 4 | ## Copy Cut Paste 5 | 6 | Copy, cut and paste commands use the Emacs kill-ring, which maintains a complete history of values cut or copied since Emacs was started. 7 | 8 | 9 | ### Copy - yank 10 | 11 | Copy is known as yank in Emacs terminology. 12 | 13 | `y` to yank the currently selected text into the kill-ring, typically used with visual select and [motions](speaking-evil.md) 14 | 15 | `y y` to yank the current line 16 | 17 | > Cut commands followed by `u` to undo are effectively the same as using copy 18 | 19 | 20 | ### Cut 21 | 22 | `d` 23 | 24 | 25 | ### Paste 26 | 27 | `p` to paste the contents of the kill-ring 28 | 29 | `C-j` and `C-k` scroll through the kill-ring history, allowing previously cut and copied values to be selected 30 | 31 | > `p` copies any selected text into the kill-ring and will be pasted the next time `p` is pressed 32 | 33 | `P` pastes the contents of the kill-ring, without copying selected text. Use `P` if replacing the same text in several places or consider using [iedit to replace multiple selections](../evil-tools/iedit-in-action.md) 34 | -------------------------------------------------------------------------------- /docs/spacemacs-basics/evil-tools/replacing-text-across-projects.md: -------------------------------------------------------------------------------- 1 | # Replacing text across projects 2 | 3 | If you have `ripgrep`, `ag` (silver searcher), `pt` or `ack` installed, replacing an occurrence of text in 4 | several files can be performed via [:fontawesome-brands-github: helm-ag](https://github.com/syohex/emacs-helm-ag). 5 | 6 | 7 | ## Example 8 | 9 | To replace all `foo` occurrences by `bar` in your current project: 10 | 11 | `SPC /` followed by a search pattern, which displays a helm popup showing all matching text across all your project files 12 | 13 | `C-c C-e` opens a new buffer with all the search results, which you can edit. 14 | 15 | `SPC s e` on a selected piece of text will highlight all occurrences in the search results and allow you to change them all concurrently. 16 | 17 | `ESC` or `fd` to leave iedit state (twice if in Evil insert mode). 18 | 19 | `C-c C-c` to commit the changes you have just made, which will automatically update all the files in your project with these changes. `C-c C-k` if you want to cancel your changes instead. 20 | 21 | 22 | !!! TODO "Add animated gif / video example" 23 | 24 | 25 | !!! INFO "`helm-ag` works with all search tools, except grep" 26 | -------------------------------------------------------------------------------- /docs/os-specific-config/macosx.md: -------------------------------------------------------------------------------- 1 | # MacOSX Specific configuration 2 | 3 | ## MacOSX Layer 4 | The [OSX layer](https://develop.spacemacs.org/layers/+os/osx/README.html) globally defines common macOS key bindings. 5 | * `⌘` is set to `hyper` and `⌥` is set to `meta` 6 | * In dired use `gls` instead of `ls` 7 | * Fix separator colors of Spaceline mode-line 8 | 9 | 10 | ## Disable touchpad zoom gestures 11 | The touchpad on a Mac included gestures to zoom the font. If you find the touchpad gestures unwanted, they can be disabled by setting their key binding to `nil`. 12 | ```elisp 13 | (define-key global-map (kbd "21 | 22 |
23 | -------------------------------------------------------------------------------- /docs/source-control/magit/remote-repositories/configure-default-push.md: -------------------------------------------------------------------------------- 1 | # Configure default push remote branch 2 | 3 | The first time you pull changes from a repository, or clone via Magit, a prompt in the mini-buffer asks if the current remote branch should be used as the default remote repository to push to. 4 | 5 | `P p` will push changes to the default push remote repository. A list of remotes is shown if no default remote is set. 6 | 7 |  8 | 9 | 10 | ## Changing the default remote 11 | 12 | The default push remote can be selected from remote repositories added as a remote, by cloning or using the `M` remote menu in the Magit Status buffer. 13 | 14 | `P` to open the push menu 15 | 16 | `C` to open the configuration of the local repository 17 | 18 |  19 | 20 | `P` to toggle the default upstream branch between remotes 21 | 22 | `u` to add a new upstream branch as the default, showing a list of all possible remote branches. 23 | 24 | `RTN` to choose a branch 25 | 26 | `G-g` to close the configuration menu. Then either `u` to pull from the new default upstream branch, or `C-g` to exit the pull menu. 27 | -------------------------------------------------------------------------------- /docs/database-access/index.md: -------------------------------------------------------------------------------- 1 | # Database Access from Emacs 2 | 3 | Add the [Spacemacs SQL layer](add-sql-layer-and-lsp.md) to use Emacs as an SQL database client, defining connections to access databases and running SQL queries. 4 | 5 | sqls language server (LSP) as an SQL layer backend provides autocompletion, code actions, documentation and formatting. sqlint (linting) and sqlfmt (formatting) are also supported when installed. 6 | 7 | Syntax highlighting for SQL queries supports the dialects of ANSI, DB2, Informix, Ingres, Interbase, Linter, Microsoft, MySQL, Oracle, Postgres, Solid, SQLite, Sybase, Vertica. 8 | 9 | SQLi is integrated in Emacs and supports these databases if their client executable is available on the Emacs PATH 10 | 11 | Connection configuration can be defined for a specific database, e.g. `sql-mysql-login-params`. Multiple database connections are defined using the `sql-connection-alist` variable. 12 | 13 | ++spc++ ++"f"++ ++"e"++ ++"d"++ to open the Spacemacs configuration and add database connection configuration to the `dotspacemacs/user-config` section. 14 | 15 | ++spc++ ++"h"++ ++spc++ `sql-help` for help with SQL query syntax. 16 | 17 | ## Resources 18 | 19 | * [MySQL installation guide](https://dev.mysql.com/doc/mysql-installation-excerpt/8.0/en/) documents many options for installing MySQL 20 | -------------------------------------------------------------------------------- /docs/debug-clojure/core-async.md: -------------------------------------------------------------------------------- 1 | ## Debug core.async 2 | 3 | 4 | Push extra information onto the channel that can be ignored when debugging is not required. 5 | 6 | 7 | ## ClojureScript: Output to Browser console log 8 | 9 | You can't have the put operation in the call stack of a dispatch error. That is why it is async. 10 | 11 | You need to e. g. pr-str the dispatched value and make an educated guess where it was sent from. If the error happens while calling put it usually means you you called put on sth. that is not a channel. 12 | 13 | Use an expression to wrap a form 14 | 15 | ```clojure 16 | (doto form (->> (pr-str) (str "DEBUG: ") js/console.log)) 17 | ``` 18 | 19 | Logging to the console tends to be more effective than breakpoint debugging in the browser developer tools. 20 | 21 | Add more detail such as function name, vars and even line number 22 | 23 | Emacs Lisp function to wrap a form with the console log expression 24 | 25 | ```elisp 26 | (defun cljs-dbg () 27 | (interactive) 28 | (forward-char) 29 | (beginning-of-sexp) 30 | (insert "(doto ") 31 | (end-of-sexp) 32 | (insert " (->> pr-str (str \"DEBUG: \") js/console.log))")) 33 | 34 | (global-set-key (kbd "C-c C-d") 'cljs-dbg) 35 | ``` 36 | 37 | Use structured editing raise to raise the original form to remove the debug code. 38 | -------------------------------------------------------------------------------- /overrides/partials/palette.html: -------------------------------------------------------------------------------- 1 | 2 | 3 | 4 | 5 | 37 | -------------------------------------------------------------------------------- /docs/source-control/magit/create-local-repository.md: -------------------------------------------------------------------------------- 1 | # Create a local Git repository 2 | 3 | `SPC g i` creates a local git repository, prompting for root directory in which to create it. 4 | 5 |  6 | 7 | Once magit created the git repository it automatically opens `magit-status`. 8 | 9 |  10 | 11 | 12 | ## Using Magit Status to create a local repository 13 | 14 | `SPC g s` on a project that has no git version control will prompt you for a directory that contains a git repository. If you select a directory without a `.git` repository, a prompt in the mini-buffer will ask if a git repository should be created. 15 | 16 | If [`magit-repository-directories` is configured in `.spacemacs`](https://practicalli.github.io/spacemacs/source-control/magit/list-local-repositories.html), then only a list of existing repositories are listed. Type `.` to initialize a new git repository in the current project. Magit will prompt you in the mini-buffer to confirm you wish to create this git repository. 17 | 18 | `SPC g i` is the recommended approach to initialize a new git repository once `magit-repository-directories` is set. 19 | 20 |  21 | -------------------------------------------------------------------------------- /docs/markdown-mode/index.md: -------------------------------------------------------------------------------- 1 | # Markdown Mode 2 | 3 | [Markdown](https://en.wikipedia.org/wiki/Markdown) is a text format that provides very simple structure for documents. Markdown is often used for README files in code repositories. 4 | 5 | * [Markdown guide](https://www.markdownguide.org/getting-started/) 6 | 7 |  8 | 9 | 10 |  11 | 12 | 13 | ## Adding formatting 14 | 15 | ++comma++ ++"x"++ opens the text sub-menu to add formatting to markdown. Commonly used commands include: 16 | 17 | ++comma++ ++"x"++ ++"b"++ to add bold text, `****`. Use with visual select to make existing code bold 18 | 19 | ++comma++ ++"x"++ ++"q"++ to insert a block quote, `>` 20 | 21 | ++comma++ ++"x"++ ++b++ to insert a checkbox `* [ ]` 22 | 23 | ++comma++ ++"x"++ ++c++ and select a language to insert a markdown code block 24 | 25 | ++comma++ ++"x"++ ++"k"++ to insert a keyboard tag , used with CSS to render keyboard keys 26 | 27 | 28 | ## Headings 29 | 30 | Define up to 6 levels of headings to help organize the content, collapsing headings to focus on specific parts. 31 | 32 | ++comma++ ++"j"++ ++1++ to insert a heading, `##`. Headings 1 to 6 are supported 33 | 34 | ++tab++ to expand / collapse a single headings 35 | 36 | ++shift++ ++tab++ to expand / collapse all headings 37 | -------------------------------------------------------------------------------- /docs/source-control/magit/index.md: -------------------------------------------------------------------------------- 1 | # MaGit - Version Control 2 | 3 | Magit is simple to use and powerful Git client which provides equivalents for all Git CLI commands and even has a git command line option. 4 | 5 | [Magit status](status.md) allows fine-grained staging of changes within visual diffs for files, hunks or just a single line. Commit, amend, squash and rebase to your local repository. Browse the commit history log which can also be used to reset commits, interactive rebase and cherry pick changes. 6 | 7 | Magit can push and pull changes with [remote repositories](remote-repositories/) and using [Forge](forge/) can also manage issue and pull request too. 8 | 9 | ++spc++ ++"g"++ opens the Git menu. 10 | 11 | ++spc++ ++"g"++++"s"++ is the equivalent of `git status` and opens the Magit client, providing full control over local and remote Git repositories. 12 | 13 | ++question++ shows the top level command menu in the Magit status buffer. 14 | 15 | 16 | ## Magit overview 17 | 18 | Here is a quick demonstration of Magit in action where we stage and commit changes locally, then push those commits to Github. 19 | 20 |21 | 22 |
23 | -------------------------------------------------------------------------------- /.github/pull_request_template.md: -------------------------------------------------------------------------------- 1 | :memo: Description 2 | 3 | 4 | :white_check_mark: Checklist 5 | 6 | - [ ] Commits should be cryptographically signed (SSH or GPG) 7 | 8 | 9 | ## Practicalli Guidelines 10 | 11 | Please follow these guidelines when submitting a pull request 12 | 13 | - refer to all relevant issues, using `#` followed by the issue number (or paste full link to the issue) 14 | - PR should contain the smallest possible change 15 | - PR should contain a very specific change 16 | - PR should contain only a single commit (squash your commits locally if required) 17 | - Avoid multiple changes across multiple files (raise an issue so we can discuss) 18 | - Avoid a long list of spelling or grammar corrections. These take too long to review and cherry pick. 19 | 20 | ## Submitting articles 21 | 22 | [Create an issue using the article template](https://github.com/practicalli/blog-content/issues/new?assignees=&labels=article&template=article.md&title=Suggested+article+title), 23 | providing as much detail as possible. 24 | 25 | ## Website design 26 | 27 | Suggestions about website design changes are most welcome, especially in terms of usability and accessibility. 28 | 29 | Please raise an issue so we can discuss changes first, especially changes related to aesthetics. 30 | 31 | ## Review process 32 | 33 | All pull requests are reviewed by @practicalli-johnny and feedback provided, usually the same day but please be patient. 34 | -------------------------------------------------------------------------------- /.github/workflows/changelog-check.yaml: -------------------------------------------------------------------------------- 1 | --- 2 | # Check CHANGELOG.md file updated for every pull request 3 | 4 | name: Changelog Check 5 | on: 6 | pull_request: 7 | paths-ignore: 8 | - "README.md" 9 | types: [opened, synchronize, reopened, ready_for_review, labeled, unlabeled] 10 | 11 | jobs: 12 | changelog: 13 | name: Changelog Update Check 14 | runs-on: ubuntu-latest 15 | steps: 16 | - run: echo "🚀 Job automatically triggered by ${{ github.event_name }}" 17 | - run: echo "🐧 Job running on ${{ runner.os }} server" 18 | - run: echo "🐙 Using ${{ github.ref }} branch from ${{ github.repository }} repository" 19 | 20 | # Git Checkout 21 | - name: Checkout Code 22 | uses: actions/checkout@v4 23 | with: 24 | fetch-depth: 0 25 | sparse-checkout: | 26 | docs 27 | overrides 28 | .github 29 | CHANGELOG.md 30 | - run: echo "🐙 Sparse Checkout of ${{ github.repository }} repository to the CI runner." 31 | 32 | # Changelog Enforcer 33 | - name: Changelog Enforcer 34 | uses: dangoslen/changelog-enforcer@v3 35 | with: 36 | changeLogPath: "CHANGELOG.md" 37 | skipLabels: "skip-changelog-check" 38 | 39 | # Summary and status 40 | - run: echo "🎨 Changelog Enforcer quality checks completed" 41 | - run: echo "🍏 Job status is ${{ job.status }}." 42 | -------------------------------------------------------------------------------- /docs/source-control/magit/forge/index.md: -------------------------------------------------------------------------------- 1 | # Magit Forge - issues, PRs and forking 2 | 3 | Magit Forge connects to the GitHub & GitLab via their open APIs, collectively referred to as forges. 4 | 5 | Topics (the collective name for issues and pull requests) from a repository can be created, edited, commented upon and assigned to people. 6 | 7 | Magic Forge uses the APIs of these forges to manage issue and pull requests, collectively referred to as topics. 8 | 9 | `@ a` to add a repository from the current project to a local database, to cache a list of topics (issues and pull requests) from a remote repository. 10 | 11 | Issues, pull requests and forks can be created on a remote repository, once the repository has been added to the local dictionary. 12 | 13 | `@` opens the forge menu from the Magit Status buffer, `, g s`, and therefore requires a local Git repository. 14 | 15 | 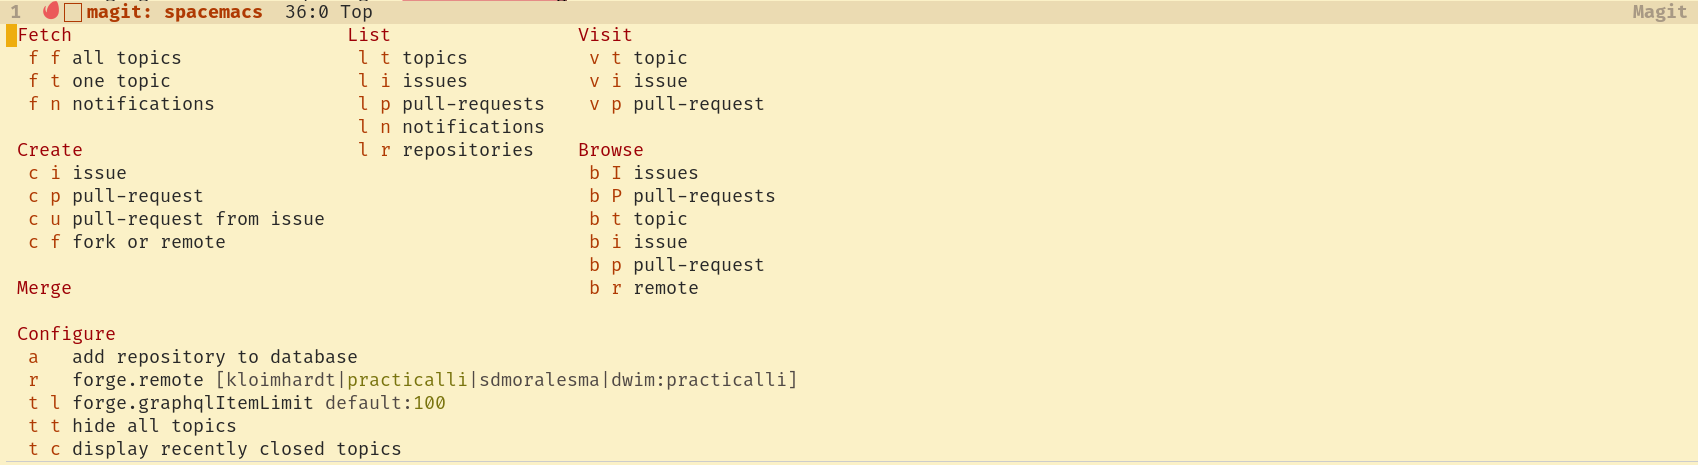 16 | 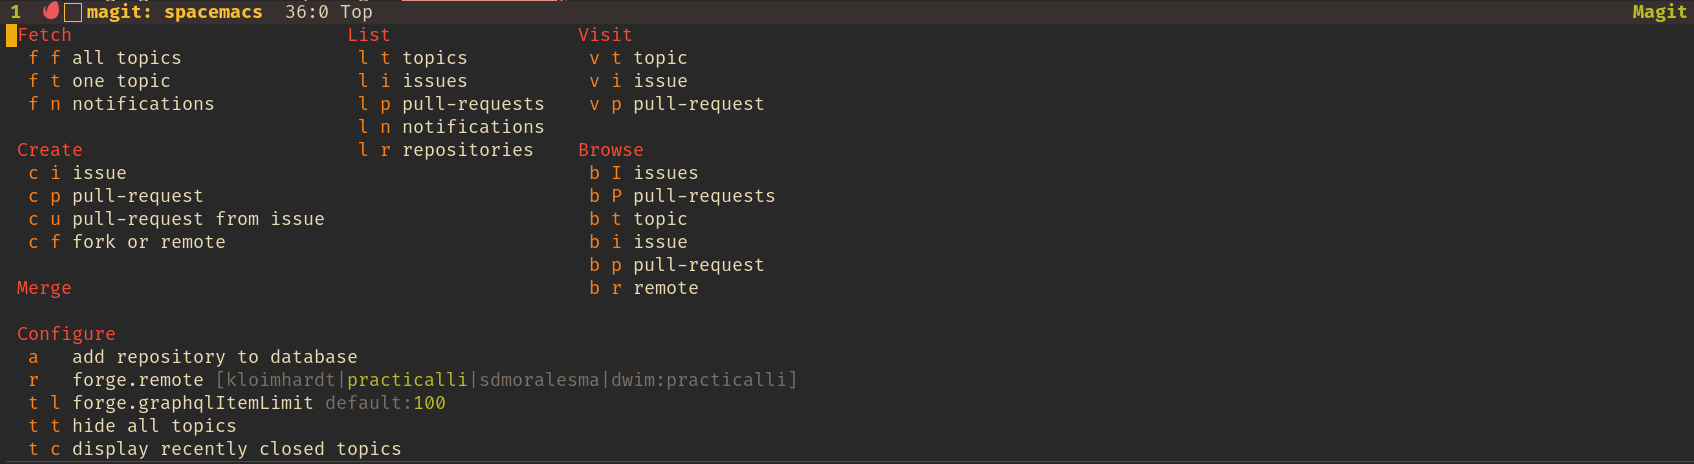 17 | 18 | !!! INFO "Forge Configuration required" 19 | [Create an encrypted `.authinfo.gpg` file for connection details of each forge used](/source-control/forge-configuration.md) before using the Magit Forge commands. 20 | -------------------------------------------------------------------------------- /docs/org-mode/linking.md: -------------------------------------------------------------------------------- 1 | # Linking to files and websites 2 | 3 | ++comma++ ++"i"++ ++"l"++ adds a file or URL link. Helm pop-up prompts for the filename or URL, then link text and optionally tool tip text. 4 | 5 | ++ctrl+"y"++ pastes the contents of the kill ring into the helm prompt, so you can easily paste URL's from your browser. 6 | 7 | The Link prompt provides a recent history of links you have added. 8 | 9 | Links to files will open in Spacemacs. Website links will open in your default browser. 10 | 11 | 12 | ## org-cliplink 13 | 14 | ++comma++ ++"i"++ ++l++ adds an org-mode style link using the current value of the clipboard using [`org-cliplink`](https://github.com/rexim/org-cliplink). 15 | 16 |  17 | 18 | 19 | ## Help linking to files 20 | 21 | ++spc++ ++"a"++ ++"o"++++"l"++ (`org-store-link`) function gets the path and filename of the current file, appending the contents of the current line of that file to the link. 22 | 23 | ++comma++ ++"i"++ ++"l"++ will show the stored link in the helm prompt for the Link. 24 | 25 | `M-x org-insert-last-stored-link` will also add a link to a file using the information from `org-store-link`. 26 | 27 | 31 | -------------------------------------------------------------------------------- /docs/org-mode/lists-and-checkboxes.md: -------------------------------------------------------------------------------- 1 | # Lists and Checkboxes 2 | 3 | List and Checkboxes are useful for organizing and tracking tasks. 4 | 5 | ## Using lists 6 | 7 | `-` creates a list item in Evil insert mode 8 | 9 | `o` on a list item creates a new list item below when in Evil normal mode. `O` creates a checkbox above. 10 | 11 | `M ->` on a list item creates a sub-list and `M <-` promotes a list item 12 | 13 | 14 | ## Using checkboxes 15 | 16 | `- [ ]` creates a list item as a checkbox 17 | 18 | `o` on a checkbox item creates a new checkbox item below when in Evil normal mode. `O` creates a checkbox above. 19 | 20 | `M ->` on a list item creates a sub-list and `M <-` promotes a list item 21 | 22 | `, T c` toggles the mark in the checkbox (unless the checkbox has children) 23 | 24 | When a child checkbox is marked, the parent has a dash to show partial completion. When all child checkboxes are crossed, then the parent is automatically crossed. 25 | 26 | 27 | ## Tracking checkbox completion 28 | 29 | Add `[/]` to the end of a heading that contains checkboxes to track the number of completed checkboxes and the total number of checkboxes. 30 | 31 | Totals will automatically update when the status of a checkbox updates. 32 | 33 | `C-c` when the cursor is on one of the `[x/x]` header totals will update all the totals for all the org-mode buffer. 34 | 35 |  36 | -------------------------------------------------------------------------------- /docs/org-mode/index.md: -------------------------------------------------------------------------------- 1 | # Org-mode 2 | 3 | Org-mode provides a simple way of creating rich documentation and exporting to multiple formats. 4 | 5 | Org-mode can also manage tasks (TODO lists), keep your schedule (org-agenda) and [literate programming](https://en.wikipedia.org/wiki/Literate_programming){target=_blank} 6 | 7 | 8 | ## Examples of what Org-mode can do 9 | 10 |11 | 12 |
13 | 14 | * [Getting started with Org Mode](https://www.youtube.com/watch?v=SzA2YODtgK4){target=_blank} - covers more than what you need to start with 15 | * [Org-mode todo states](https://www.youtube.com/watch?v=Ck9HXMkNGGY){target=_blank} - interesting ideas with org-mode todo states 16 | * [Overview of Org Mode - Hack Emacs](https://www.youtube.com/watch?v=SzA2YODtgK4){target=_blank} - older, but has more examples 17 | 18 | 19 | ## Getting started with org 20 | 21 | Open or create a new file with a `.org` filename extension to start org-mode major mode. 22 | 23 | For example, if you want to write a guide to your project, you could create an org-mode file called `user-guide.org`. When you open this file in Spacemacs, org-mode is selected as the major mode for editing. 24 | 25 |  26 | -------------------------------------------------------------------------------- /docs/termux/index.md: -------------------------------------------------------------------------------- 1 | # Spacemacs on Termux 2 | 3 | A smart phone or tablet and an external keyboard can make an excellent ultra-portable development environment, especially when travelling with limited space or weight constraints. 4 | 5 | Termux can be [installed using the F-Droid marketplace](fdroid-install.md){target=_blank}, which is as easy as installing any other Android app. 6 | 7 | !!! WARNING "Do not install Termux App from the Google Play store" 8 | The Termux App in Google Play store is out of date and will simply not work properly and probably not at all 9 | 10 | 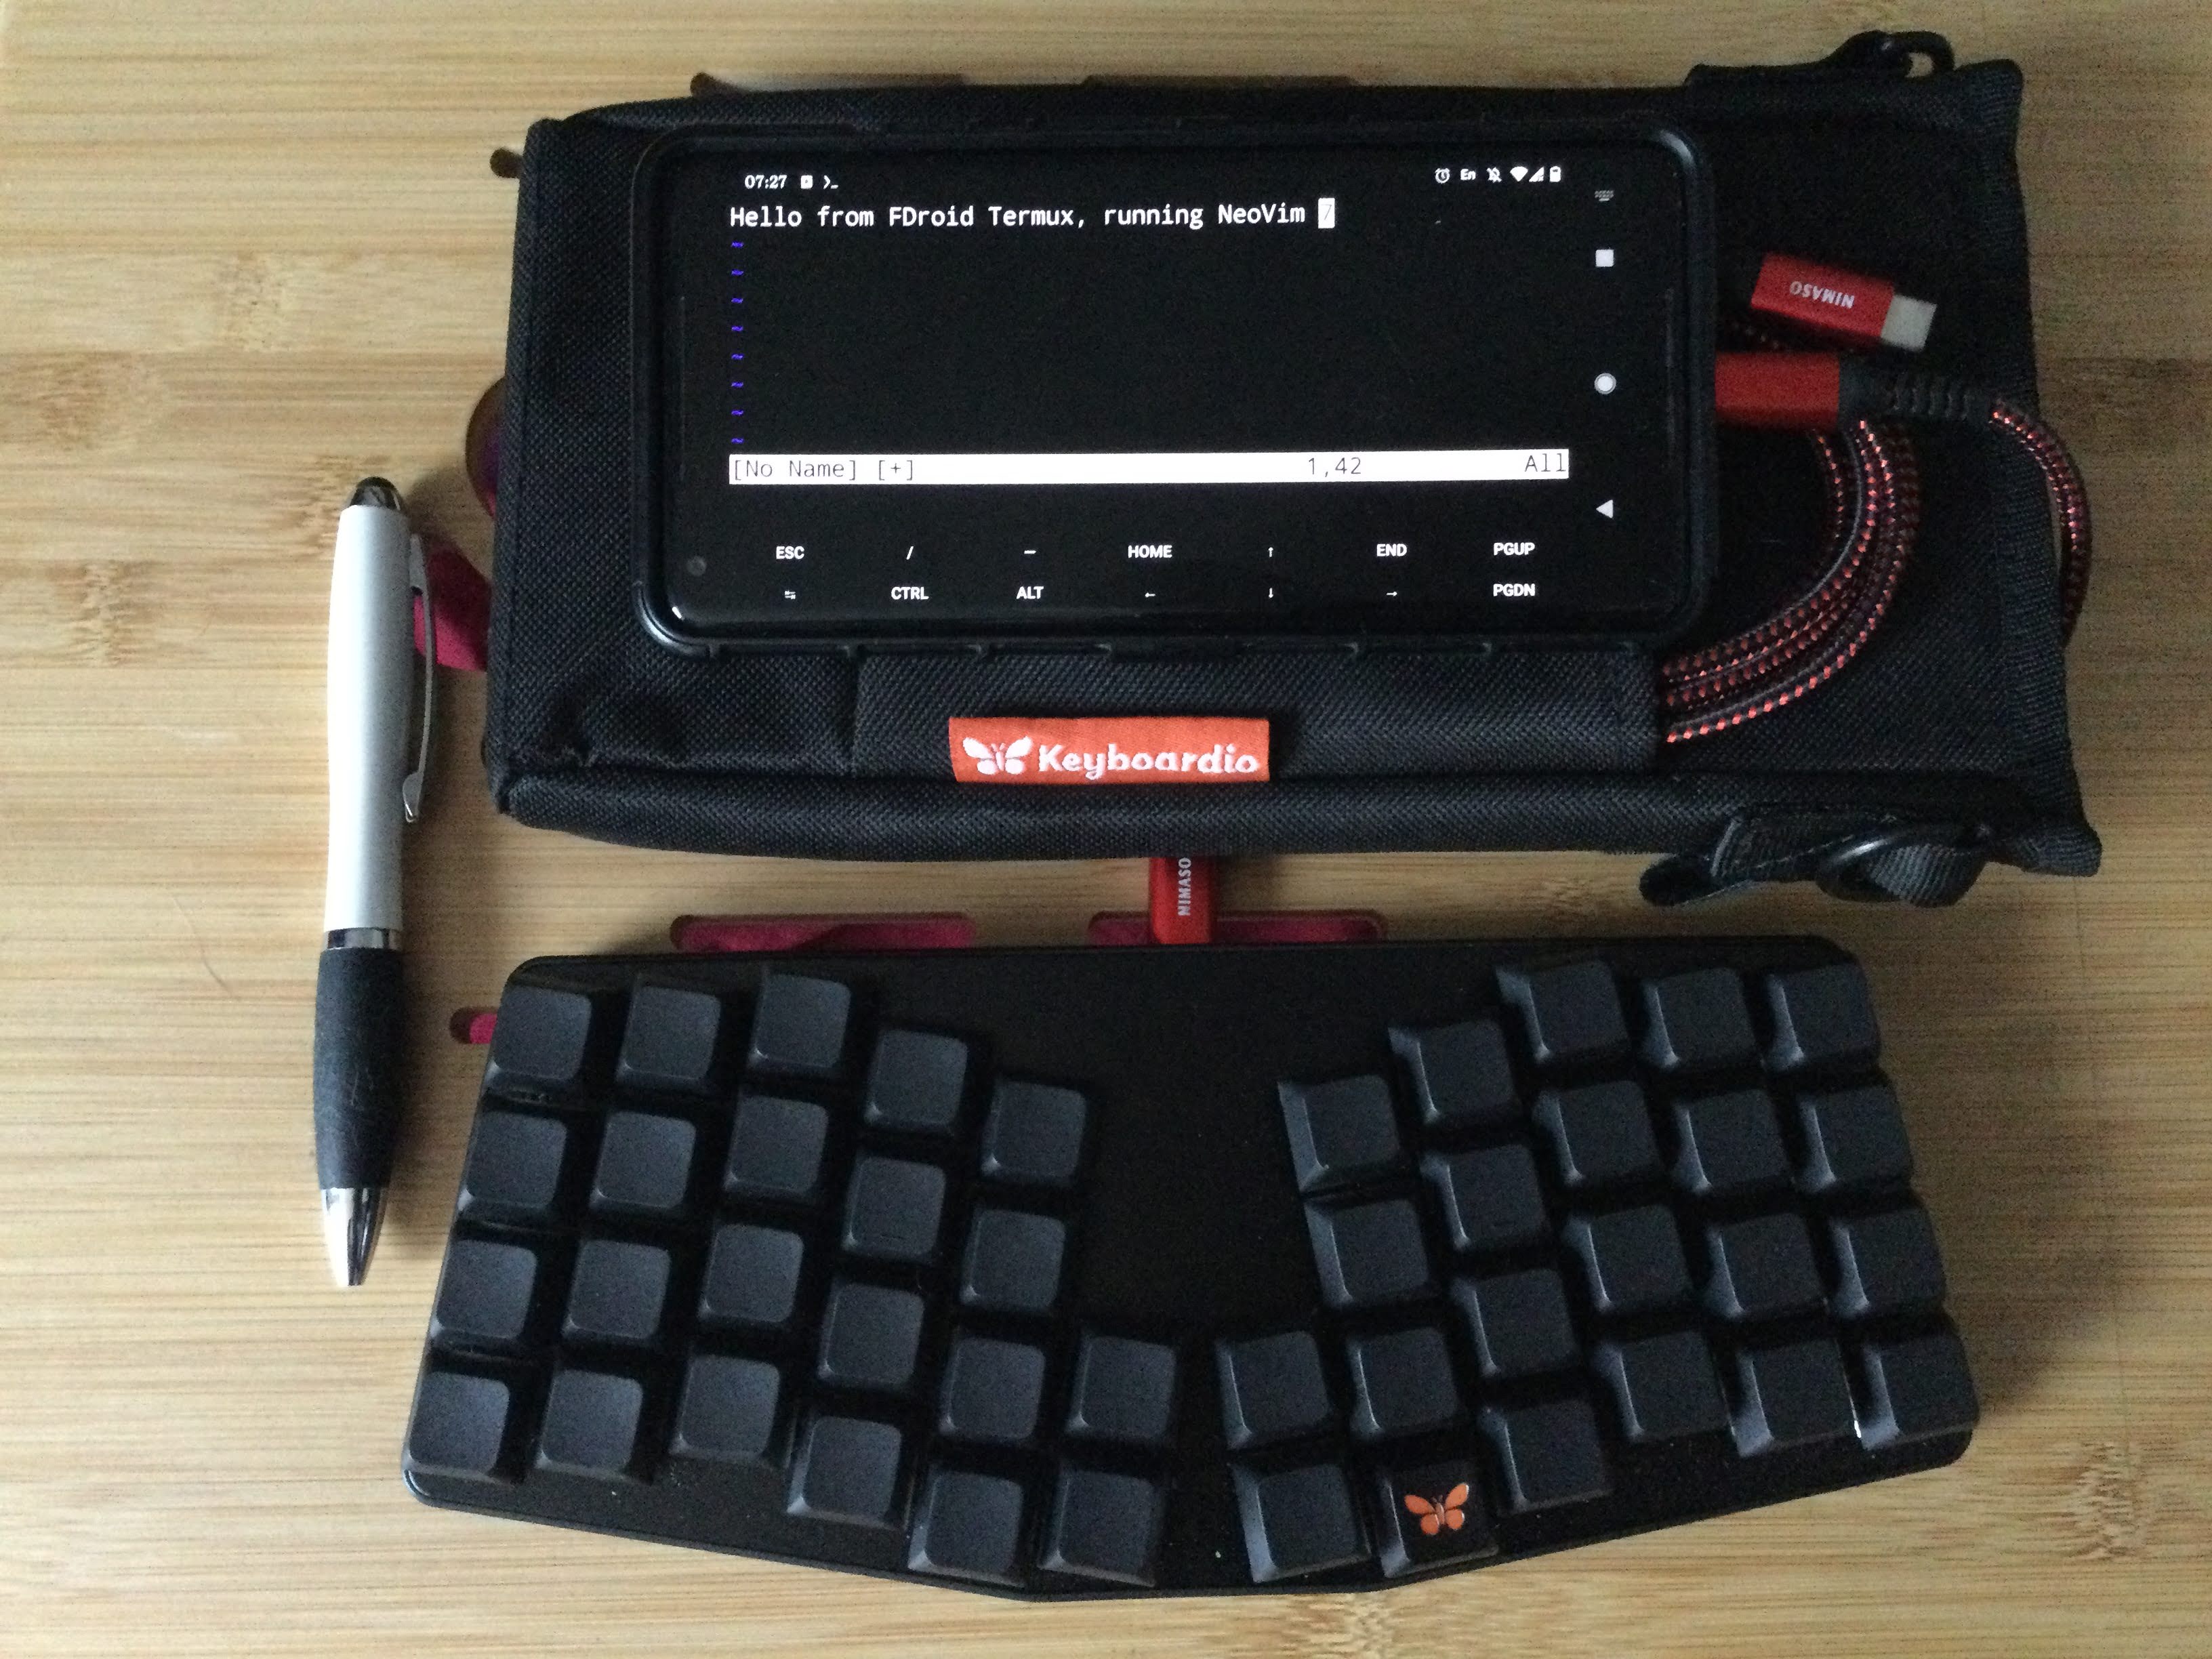 11 | 12 | 13 | ## Running Termux 14 | 15 | Run Termux from the app launcher added as an android app by the F-Droid install. 16 | 17 | A help menu will show the basic command needed to work with packages. 18 | 19 | Software keys for Termux specific controls are shown. Keys can be toggled with the `Volume Up + q` key combination. 20 | 21 | 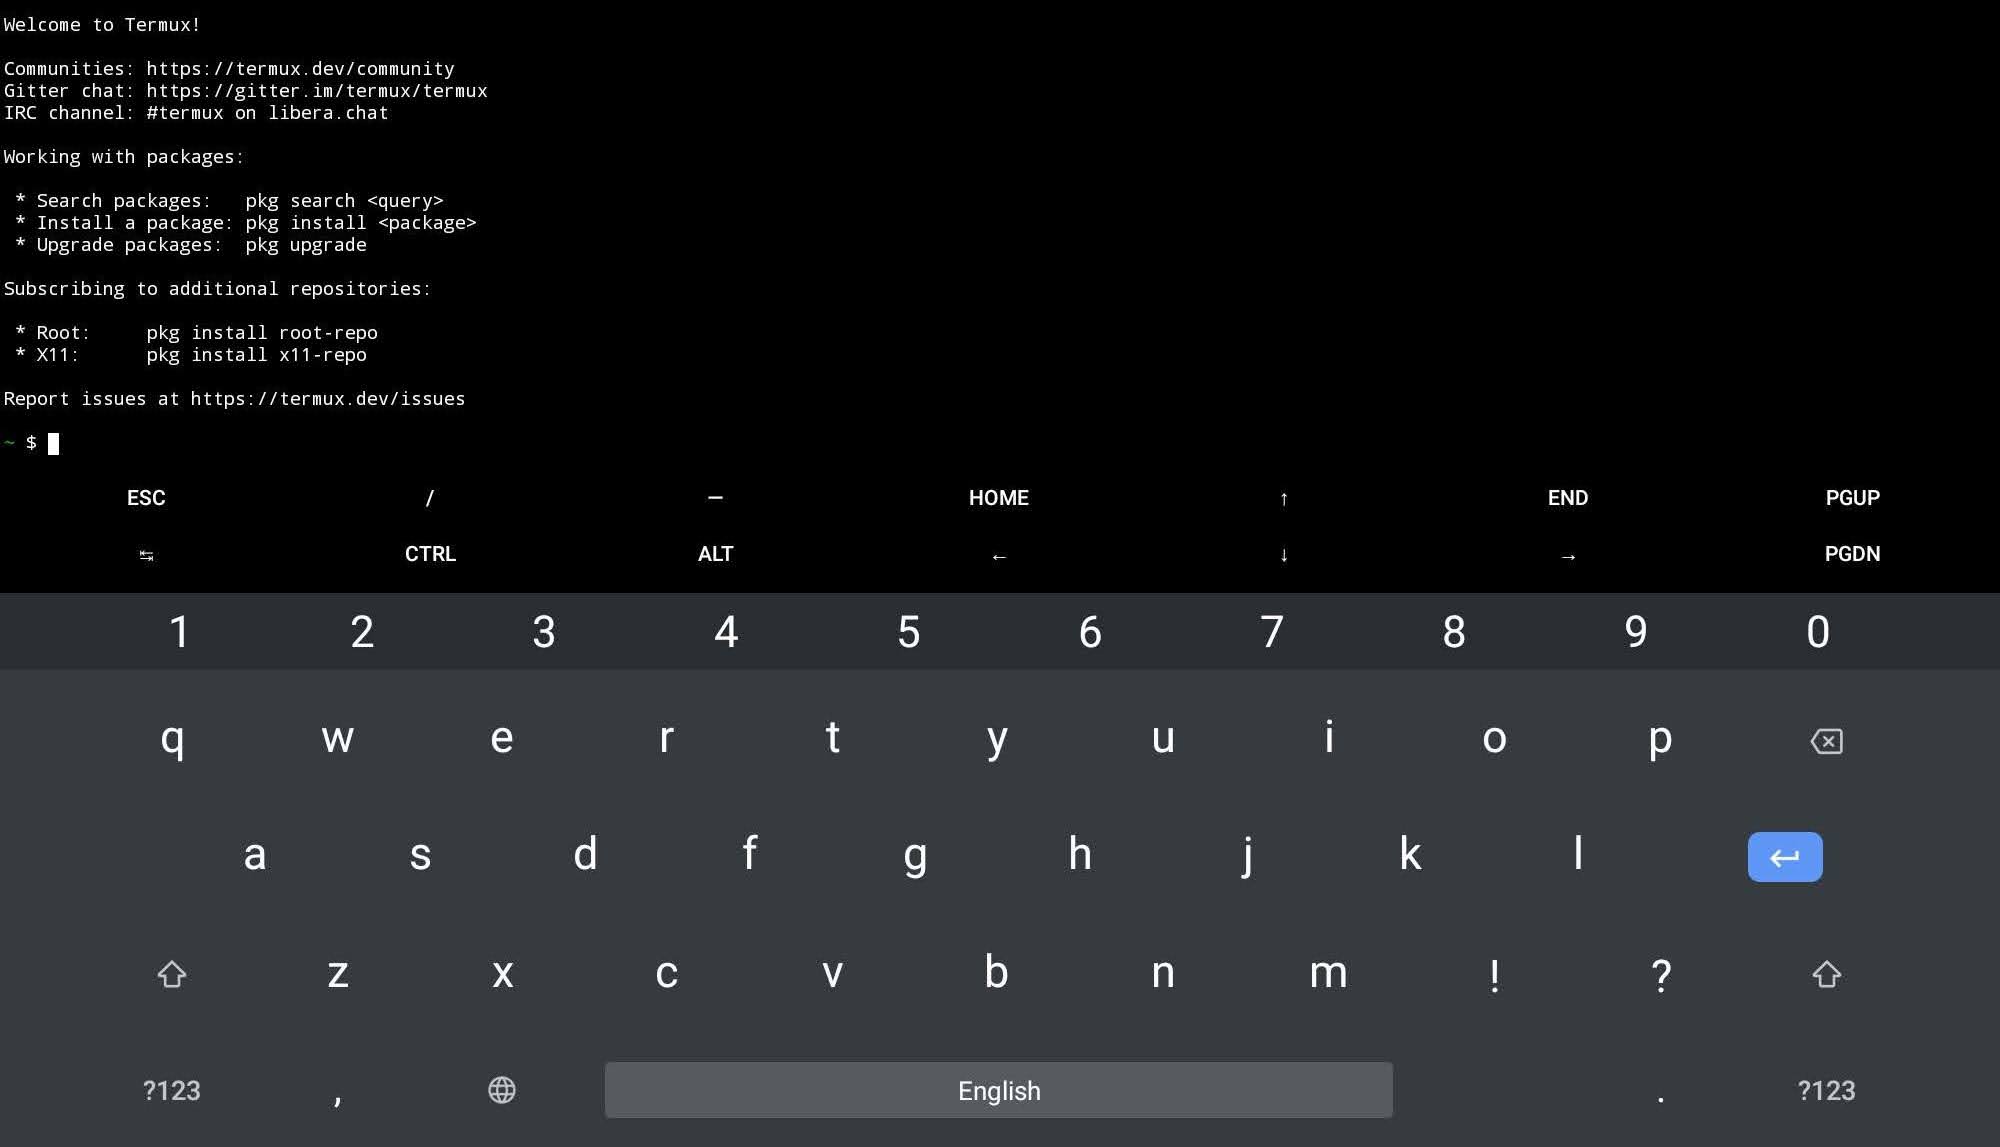 22 | 23 | > Termux may not display in fullscreen when Android productivity mode, usually activated on tablets when physical keyboard or mouse is attached. Disabling productivity mode in the Android settings is recommended. 24 | -------------------------------------------------------------------------------- /docs/source-control/magit/remote-repositories/checkout-remote-branch.md: -------------------------------------------------------------------------------- 1 | # Magit checkout remote branches 2 | 3 | Git works with local branches. Local branches can be pushed to a shared repository (GitHub, GitLab, Bitbucket, etc.). 4 | 5 | When checking out a remote branch, Magit will create a local tracking branch which is automatic checked out. Changes can then be committed to this local tracking branch. Push the local tracking branch to the remote repository to share the new commits. 6 | 7 | 8 | ## Checkout local tracking branch for a remote branch 9 | 10 | `SPC g s` calls `magit-status` and opens the Magit Git Status buffer 11 | 12 | `b` opens the branch menu in the magit status buffer 13 | 14 | `l` creates a local tracking branch with the unqualified name of the remote branch 15 | 16 | e.g. if the remote branch is called `practicalli/cli-alias-updates` then the local tracking branch is called `cli-alias-updates` 17 | 18 | Magit Status buffer should now show the local branch, e.g. `cli-alaiases-updates`, as the **Head** reference. 19 | 20 | 21 | ## Using Magit command line 22 | 23 | `! !` opens a Git command line in the Magit status buffer 24 | 25 |  26 | 27 | Run the Git `checkout` command using the `--track` option to create a local branch with the same name as the remote branch. 28 | 29 | ```shell 30 | git checkout --track practicalli/cli-alias-updates 31 | ``` 32 | 33 | Magit Status buffer should now show the local branch as the **Head** reference. 34 | -------------------------------------------------------------------------------- /docs/install-spacemacs/emacsclient-git-commit-messages.md: -------------------------------------------------------------------------------- 1 | # Emacsclient for Git commit messages 2 | 3 | Configure the `core.editor` property with `emacsclient` to open Emacs for editing Git commit messages (assuming you do not specify the `-m "commit message"`option to the `git` command). 4 | 5 | You can run `emacsclient` in one of several ways (try these approaches until you find which one worked best for your operating system). 6 | 7 | 1) in the same terminal as your `git` command, preferably with Emacs persistent server running. 8 | 9 | ```shell 10 | git config --global core.editor "emacsclient --tty" 11 | ``` 12 | 13 | 2) create a new Emacs frame, if you have Emacs persistent server running. 14 | 15 | ```shell 16 | git config --global core.editor "emacsclient --no-wait --create-frame" 17 | ``` 18 | 19 | 3) open in an existing Emacs application, if you are always running Emacs. 20 | 21 | ```shell 22 | git config --global core.editor "emacsclient --no-wait" 23 | ``` 24 | 25 | 4) Running Emacs as a daemon 26 | 27 | ```shell 28 | git config --global core.editor "emacsclient --alternate-editor" 29 | ``` 30 | 31 | Or configure an operating system environment variable called `ALTERNATE_EDITOR` as an empty string, `""`, which will call `emacs --daemon` if emacs is not running. 32 | 33 | 34 | !!! WARNING "Beware of old Emacs installs shipped with MacOSX" 35 | If `emacsclient` is not working correctly, check to see which Emacs version it run, `SPC SPC emacs-version`. Some MacOSX versions shipped with a very old version of Emacs (version 22). 36 | -------------------------------------------------------------------------------- /docs/spacemacs-basics/working-with-projects/tidying-up-buffers.md: -------------------------------------------------------------------------------- 1 | # Tidying up buffers 2 | 3 | Sometimes you want to close several buffers and not just the current buffer with `SPC b d`. 4 | 5 | `SPC b b` displays a list of open buffers in a popup window. 6 | 7 | `M-SPC` opens the Helm transient menu on the buffer popup window, allowing you to navigate using `j` and `k` keys. 8 | 9 | `M-D` will prompt you to kill the buffer the cursor is currently on. 10 | 11 | `t` will mark the buffer the cursor is currently on. 12 | 13 | `T` will mark all buffers listed in the popup. 14 | 15 | `M-D` will prompt you in turn to delete all the marked buffers. 16 | 17 | 18 | ## Actions 19 | 20 | There are a range of actions you can run from the Helm transient state or even when you just have the buffer list popup open. 21 | 22 | `a` switches to the actions page 23 | 24 | `C-z` displays list of available actions for a buffer 25 | 26 | [](/images/spacemacs-buffers-helm-actions.png) 27 | 28 | 29 | # Helm Transient state menu 30 | `M-SPC` to open Helm transient state menu, simplifying the keybindings for tidying up lots of buffers. 31 | 32 | [](/images/spacemacs-helm-transient-state-menu.png) 33 | 34 | 35 | !!! HINT "Gnome Desktop keybinding conflict" 36 | `M-SPC` is used by the Gnome desktop for the window menu, so recommend you change the Gnome keyboard settings to use a different binding, i.e. `Super w`. 37 | -------------------------------------------------------------------------------- /docs/spacemacs-basics/evil-tools/helm-swoop.md: -------------------------------------------------------------------------------- 1 | # Helm-swoop 2 | 3 | [Helm-swoop](https://develop.spacemacs.org/layers/+completion/helm/README.html#helm-swoop) provides an easy way to navigate through code, based on search results 4 | 5 | Search a buffer (Clojure namespace) or project and use the results to navigate to the locations in the code for each match found. 6 | 7 | `SPC s s` to search using currently selected region, or prompts for search text if nothing selected. `j` and `k` to navigate the search results and show the line in the file the search corresponds to. 8 | 9 | `SPC s S` assumes word under cursor is the symbol you wish to search for. 10 | 11 | helm-swoop is also available in the [:fontawesome-solid-book-open: symbol highlight transient menu](/spacemacs/navigating-code/names-symbols/). 12 | 13 | 14 | | Keybindings | Description | 15 | |-------------|------------------------------| 16 | | `SPC s C` | clear helm-swoop own cache | 17 | | `SPC s s` | execute helm-swoop | 18 | | `SPC s S` | execute helm-multi-swoop | 19 | | `SPC s C-s` | execute helm-multi-swoop-all | 20 | 21 | For example, navigate to a function definition and all the places that function is called in a project using helm-multi-swoop. 22 | 23 |  24 | 25 | !!! HINT "Refactor code" 26 | [:fontawesome-solid-book-open: Refactor section](/spacemacs/refactor/) provides examples of using helm-ag, helm-swoop, iedit, narrowing and clj-refactor. 27 | -------------------------------------------------------------------------------- /docs/clojure-development/project-configuration/monorepo-nested-projects.md: -------------------------------------------------------------------------------- 1 | # Monorepo and nested projects 2 | 3 | A [monorepo](https://en.wikipedia.org/wiki/Monorepo) is a collection related project directories within one source control repository. 4 | 5 | As the monorepo root is not the root of a Clojure project, `SPC p a` the `projectile-toggle-between-implementation-and-test` does not know the type of project. A `.dir-locals.el` configuration file can be used to define the type of projects the monorepo contains. 6 | 7 | `SPC p e` creates a `.dir-locals.el` file in the root of the project. 8 | 9 | Type `projectile-project-type` and select that configuration option. 10 | 11 | Type `clojure-cli` for the value (or `lein-test` for Leiningen projects) 12 | 13 | `SPC f s` to save the file. 14 | 15 | The `.dir-locals.el` file should now contain the following 16 | 17 | ```elisp 18 | ((clojure-mode . ((projectile-project-type . clojure-cli)))) 19 | ``` 20 | 21 | [practicalli/exercism-clojure-guides](https://github.com/practicalli/exercism-clojure-guides){target=_blank} is an example of a monorepo. 22 | 23 | !!! HINT "Clojure project types" 24 | `clojure-cli` works for Clojure CLI projects and `lein-test` for Leiningen project. If you have mixed projects, use `clojure-cli` and place a `deps.edn` file containing an empty hash-map, `{}`. Select Leiningen when running the `cider-jack-in-*` commands. 25 | 26 | Clojure project types for projectile are define in [projectile.el of the projectile project](https://github.com/bbatsov/projectile/blob/master/projectile.el#L2670-L2683). 27 | -------------------------------------------------------------------------------- /docs/install-spacemacs/maximised-full-screen.md: -------------------------------------------------------------------------------- 1 | # Maximised or Fullscreen at startup 2 | 3 | You can configure Emacs to start in maximised mode (just like maximising an applications window) or in fullscreen mode for minimum distraction. 4 | 5 | Change one of the following option in the `dotspacemacs/init` function of the Spacemacs configuration. The fullscreen option overrides the maximised option. 6 | 7 | ```emacs 8 | dotspacemacs-fullscreen-at-startup t 9 | 10 | dotspacemacs-maximized-at-startup t 11 | ``` 12 | 13 | > To find these lines quickly, use `SPC s s to search and start typing the name of the option. `C-j` to move down the matches, `C-k` to move up. `RET` to jump to the current line. 14 | 15 | Practicalli uses the following settings for these options: 16 | 17 | ```emacs 18 | ;; If non nil the frame is fullscreen when Emacs starts up. (default nil) 19 | ;; (Emacs 24.4+ only) 20 | dotspacemacs-fullscreen-at-startup nil 21 | ;; If non nil `spacemacs/toggle-fullscreen' will not use native fullscreen. 22 | ;; Use to disable fullscreen animations in OSX. (default nil) 23 | dotspacemacs-fullscreen-use-non-native nil 24 | ;; If non nil the frame is maximized when Emacs starts up. 25 | ;; Takes effect only if `dotspacemacs-fullscreen-at-startup' is nil. 26 | ;; (default nil) (Emacs 24.4+ only) 27 | dotspacemacs-maximized-at-startup t 28 | ``` 29 | 30 | 31 | !!! HINT "Option values" 32 | For all options, `t` represents true, `nil` represents false. 33 | Where a name is used for a value it should be preceded with a single quote character, eg, `'all` 34 | -------------------------------------------------------------------------------- /docs/source-control/magit/remote-repositories/pull-changes.md: -------------------------------------------------------------------------------- 1 | # Pull Changes 2 | 3 | Commits can be pulled or fetched from remote repositories. 4 | 5 | `SPC g s` to open Magit Status buffer 6 | 7 | `F` to open the pull menu 8 | 9 | `u` to pull from the upstream remote repository. If this is not currently set, then a prompt appears to select the default upstream. 10 | 11 | Use `e` to pull from a different repository. 12 | 13 | !!! HINT "Ensure you are on the correct local branch" 14 | The current local branch is shown at the top of the Magit Status buffer. 15 | 16 | `b b` displays a popup to select a different branch if you are not on the correct branch to pull changes into. 17 | 18 | 19 | ## Rebase when pull 20 | 21 | `SPC g s` to open Magit Status buffer 22 | 23 | `F` to open the pull menu 24 | 25 | `r` rebase changes that are not on the remote repository. 26 | 27 | `u` to pull from the upstream remote repository. If this is not currently set, then a prompt appears to select the default upstream. 28 | 29 | 30 | ## Rebase local commits 31 | 32 | `SPC g s` to open Magit Status buffer 33 | 34 | `F` to open the pull menu 35 | 36 | `-r` rebase local changes that are not on the remote repository. 37 | 38 | `u` to pull from the upstream remote repository. If this is not currently set, then a prompt appears to select the default upstream. 39 | 40 | If there are conflicts between the commits on the remote and local repositories then use the ediff tool or edit the files and delete the conflict markers and resolve conflicting text change. Save the change and `r` to resume the rebase. 41 | -------------------------------------------------------------------------------- /docs/navigating-code/find-usages.md: -------------------------------------------------------------------------------- 1 | # Find Usages 2 | 3 | Show all functions that reference a function or any var, matching on the namespace and symbol name. 4 | 5 | `cider-xref-fn-refs` - find use of a function under the cursor, showing results in a new buffer 6 | 7 | `cider-xref-fn-refs-select` - show the usages of the function at point in the mini-buffer 8 | 9 | `cider-xref-fn-deps` and `cider-xref-fn-deps-select` to navigate to the functions used by some function 10 | 11 |  12 | 13 | !!! TODO "Pull Request for Spacemacs key bindings" 14 | A Pull request should be created to add key binding to Spacemacs to launch these commands. 15 | 16 | 17 | ## Limitations 18 | 19 | Find usages only works for Clojure will show only data for evaluated namespaces. 20 | 21 | Only information that a function is used is provided, there is no information as to the precise location. 22 | 23 | Lambda functions do not currently work with find usages. 24 | 25 | 26 | ## Alternative approaches 27 | 28 | ++comma++ ++"r"++ ++"f"++ ++"u"++ find usages with clj-refactor.el 29 | 30 | ++spc++ ++slash++ `pattern` will show all matches to the `pattern` in a project. ++ctrl+"c"++ ++ctrl+"e"++ will open those results in a separate buffer and any edits will be applied to the original files. 31 | 32 | ## References 33 | 34 | * [Discovering Runtime Function References in Clojure](https://metaredux.com/posts/2019/05/04/discovering-runtime-function-references-in-clojure.html) 35 | * [Hard CIDER: find usages](https://metaredux.com/posts/2019/12/11/hard-cider-find-usages.html) 36 | -------------------------------------------------------------------------------- /docs/source-control/magit/remote-repositories/add-remote.md: -------------------------------------------------------------------------------- 1 | # Add remote repository to local repository 2 | 3 | Open Magit status using `SPC g s`. 4 | 5 | `M` opens the Remotes menu, showing a popup list of actions 6 | 7 | [](/images/spacemacs-magit-remotes-menu.png) 8 | 9 | `a` prompts for the remote name, e.g. origin or the name of the GitHub/GitLab account or organisation 10 | 11 | Followed by a prompt for the URL of the repository, e.g. a github / gitlab address. 12 | 13 | The final prompt asks to set this new remote as the default, saying yes adds this to the `P` push menu. 14 | 15 | 16 | ## Update remote 17 | 18 | `C` to configure a remote, a prompt lists the existing remotes by their name 19 | 20 | `C-j` / `C-k` to navigate the list of remote names, `RET` to select the remote to configure 21 | 22 | The current configuration of the remote is displayed 23 | 24 |  25 | 26 | `u` to change the URL used for the remote (i.e. if the remote has been renamed or a different remote is required) 27 | 28 | `U` to change the branch and references to fetch (refspec) 29 | 30 | `s` to set the url used for fetching from the remote, bound to the 31 | 32 | `S` refspec used when pushing to the remote 33 | 34 | `O` set to --tags and all tags are fetched or `--no-tags` then no tags are fetched 35 | 36 | * [Magit Manual: Remote Git Variables](https://magit.vc/manual/magit/Remote-Git-Variables.html) 37 | -------------------------------------------------------------------------------- /docs/spacemacs-basics/working-with-projects/managing-windows.md: -------------------------------------------------------------------------------- 1 | # Managing Windows 2 | 3 | Organise the number and location of buffers displayed, splitting horizontally and vertically with multiple rows and columns. 4 | 5 | Windows can be moved around and resized without resorting to using the mouse. 6 | 7 | ++spc++ ++"w"++ is the windows menu. 8 | 9 | 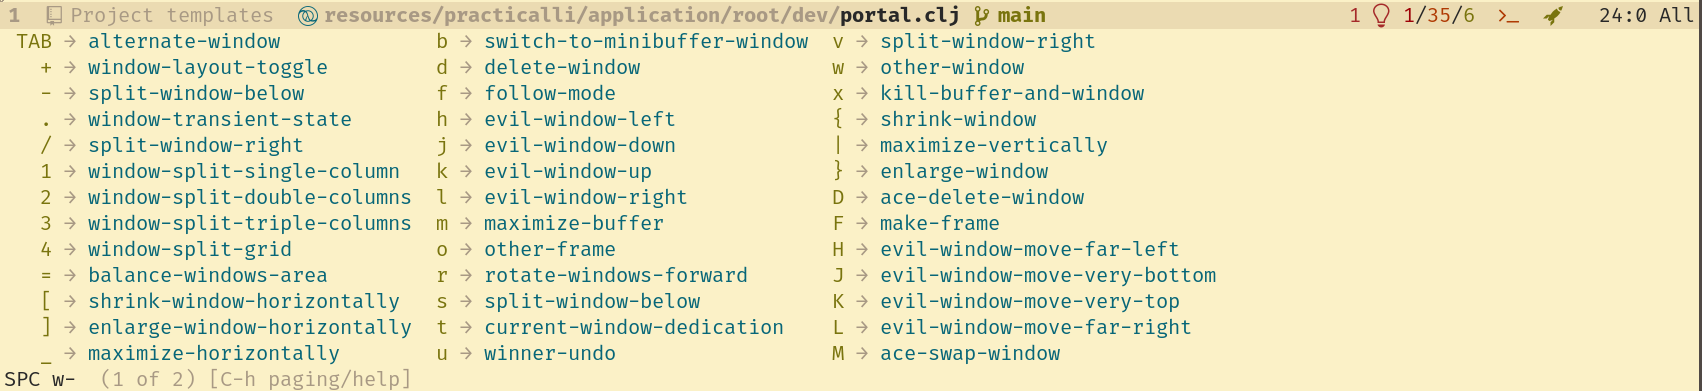 10 | 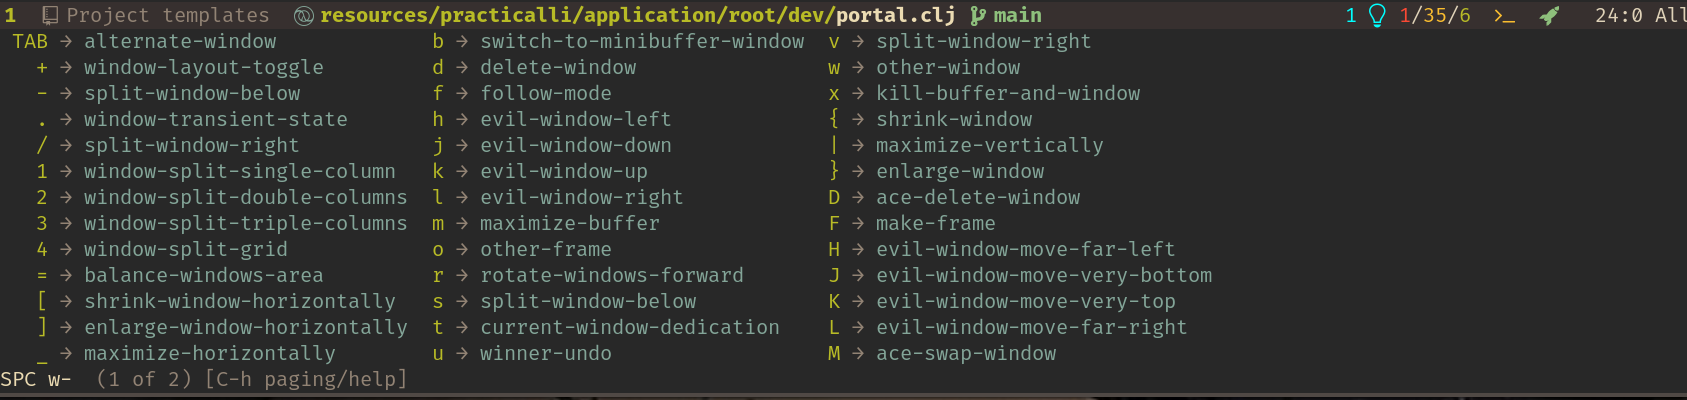 11 | 12 | ++spc++ ++"w"++ ++"u"++ to undo a change to the window layout. 13 | 14 | 15 | ## Golden Ratio 16 | 17 | ++spc++ ++"t"++ ++"g"++ toggles golden ratio mode 18 | 19 | Golden ratio automatically makes the active window the largest in the frame. Chainging windows will resize all windows to make the new active window the largest 20 | 21 | 22 | ## Windows Transient menu 23 | 24 | ++spc++ ++"w"++ ++period++ opens the Windows Transient state menu, enabling single character keybindings for window commands, simplifying multiple commands. 25 | 26 |  27 |  28 | -------------------------------------------------------------------------------- /docs/source-control/magit/timemachine.md: -------------------------------------------------------------------------------- 1 | # Git Timemachine 2 | 3 | ++spc++ ++"g"++++"t"++ opens the Git Timemachine transient state. 4 | 5 | Easily navigate backwards and forwards through the commit history of a file under Git Version Control. The buffer shows the file as it was in each change you select. 6 | 7 | [](/images/spacemacs-git-timemachine-menu.png) 8 | 9 | !!! HINT "Positioning the buffer content" 10 | Timemachine seems to work best when you have all the text visible in a buffer or you roughly know where the changes are in the file as you move between commits. 11 | 12 | 13 | Use the following keys to navigate through all the commits for the current file 14 | 15 | | Keybinding | Description | 16 | |------------|-------------------------------------------------| 17 | | ++"c"++ | Show the most recent commit for the file | 18 | | ++"g"++`g` | Go to nth commit | 19 | | ++"p"++`p` | Show previous commit | 20 | | ++"n"++`n` | Show next commit | 21 | | ++"t"++`t` | Go to revision by selected commit message | 22 | | ++"w"++`w` | Copy the abbreviated hash of the current commit | 23 | | ++w++`W` | Copy the full hash of the current commit | 24 | | ++"q"++`q` | Exit Timemachine transient state | 25 | 26 | 27 | ## Customise Timemachine 28 | 29 | `SPC SPC customize [git-timemachine]`. 30 | 31 | [](/images/spacemacs-git-timemachine-customize.png) 32 | -------------------------------------------------------------------------------- /docs/alternative-tooling/org-easy-templates.md: -------------------------------------------------------------------------------- 1 | # Org-mode Easy Templates 2 | 3 | !!! HINT "Additional configuration required" 4 | `(require 'org-tempo)` must be added to `dotspacemacs/user-config` in the `.spacemacs` file for Easy Templates to work. 5 | 6 | Org-mode [easy templates](https://www.gnu.org/software/emacs/manual/html_node/org/Easy-templates.html) provide source code block and other highlight sections. 7 | 8 | `<` followed by the template alias and then `TAB` will expand the block template. 9 | 10 | | Name | Template | Description | 11 | |------|-----------------------------------|----------------------| 12 | | s | #+BEGIN_SRC ... #+END_SRC | Adds a source block | 13 | | e | #+BEGIN_EXAMPLE ... #+END_EXAMPLE | | 14 | | q | #+BEGIN_QUOTE ... #+END_QUOTE | | 15 | | v | #+BEGIN_VERSE ... #+END_VERSE | | 16 | | c | #+BEGIN_CENTER ... #+END_CENTER | | 17 | | l | #+BEGIN_LaTeX ... #+END_LaTeX | LaTeX markup section | 18 | | L | #+LaTeX: | | 19 | | h | #+BEGIN_HTML ... #+END_HTML | HTML section | 20 | | H | #+HTML: | | 21 | | a | #+BEGIN_ASCII ... #+END_ASCII | | 22 | | A | #+ASCII: | | 23 | | i | #+INDEX: line | | 24 | | I | #+INCLUDE: line | | 25 | 26 | Add custom templates by adding to the `org-structure-template-alist` to Spacemacs configuration file. 27 | -------------------------------------------------------------------------------- /CHANGELOG.md: -------------------------------------------------------------------------------- 1 | # Changelog 2 | 3 | # Unreleased 4 | 5 | ## Added 6 | - dev: add scheduled stale issue & pull request check (monthly) 7 | 8 | ### Changed 9 | - Fixed key combination in `docs/install-spacemacs/change-font.md` 10 | - ci: spell lychee & repository trufflehog linters warn only (false positives) 11 | - clojure: update project configuration & examples 12 | - mkdocs: update emoji extension and readme for Material version 9.4 13 | - dev: action/checkout@v4 and sparse-checkout for Megalinter workflow 14 | - dev: action/checkout@v4 and sparse-checkout for publish-book workflow 15 | - dev: action/checkout@v4 and sparse-checkout for scheduled-version-check workflow 16 | - dev: action/checkout@v4 and sparse-checkout for changelog-check workflow 17 | - dev: update license to creative commons share-alike 18 | - emacs: move eshell configuration from install to emacs-lisp section 19 | - reference: move switch to develop to reference section (develop long been default branch) 20 | - basics: update space and comma menu screenshots 21 | - basics: emacs structure and golden ratio images, format tables 22 | - basics: file buffer project layout treemacs and ranger screenshots 23 | - basics: dird key bindings update 24 | - basics: layouts and workspaces key bindings and button links update 25 | - basics: managing buffers key bindings and screenshots 26 | - basics: managing windows video, key bindings and screenshots 27 | - clojure: evaluating screenshots 28 | - clojure: undef vars (symbols) update wording and screenshots 29 | - clojure: update wording and links on refresh repl state page 30 | - clojure: cider jack-in edit command screenshot 31 | - clojure: significant refactor of development workflow overview page 32 | -------------------------------------------------------------------------------- /docs/external-repl/connect-to-running-repl.md: -------------------------------------------------------------------------------- 1 | # Connect to a running Repl 2 | 3 | You can connect to a REPL started elsewhere, for example the command line with `lein repl`, then connect to it from inside Spacemacs. You will need to know: 4 | 5 | * host name / ip address 6 | * port the repl is listening too 7 | 8 | | Spacemacs | Major mode | Emacs | Evil | Command | 9 | |-------------|-------------|-----------|---------|-----------------| 10 | | `SPC m s c` | `M-RET s c` | `C-c M-c` | `, s c` | `cider-connect` | 11 | 12 | 13 | Use the `lein repl` command to run a new REPL on the command line. Then connect to that REPL using `M-x cider-connect` 14 | 15 |  16 | 17 | 18 | 19 | ## Configuration Required 20 | 21 | If you are going to connect to an external repl from Spacemacs, you will need to add the Leiningen plugin called `cider-nrepl` and the Clojure `tools.nrepl` library. Rather than add this to all projects, you add these to your Leiningen configuration `~/.lein/profiles.clj` file. The versions of each library also had to be kept in sync with updates in the Spacemacs Clojure layer. 22 | 23 | ```clojure 24 | {:dev {:plugins [[cider/cider-nrepl "0.15.0-SNAPSHOT"] 25 | [refactor-nrepl "2.3.0-SNAPSHOT"]] 26 | :dependencies [[org.clojure/tools.nrepl "0.2.12"]]}} 27 | ``` 28 | 29 | Without this configuration, you will see warning messages in the repl buffer stating that the versions of ... are out of sync. 30 | 31 |  32 | -------------------------------------------------------------------------------- /docs/improving-code/index.md: -------------------------------------------------------------------------------- 1 | # Improving Clojure code 2 | 3 | Clojure code should be kept readable and consistently use idiomatic style, which can be managed by using a few additional tools 4 | 5 | | Tool | Description | Usage | 6 | |-----------------|-----------------------------------|----------------------------| 7 | | Linter | Reports on code errors | Continuously | 8 | | Formatter | Formats the code for readability | Automatically | 9 | | Static analyser | Suggests idiomatic use of Clojure | Regularly (before pushing) | 10 | 11 | !!! HINT "Clojure style guide" 12 | Linting and formatting follow the practices documented in the [Clojure style guide](https://guide.clojure.style/){target=_blank}. 13 | 14 | 15 | ## Linting 16 | 17 | Linting tools can be added as a `flycheck` service so code is continually checked as you are writing it. Continuously linting picks up little bugs as you type and reduces the amount of debugging required, as you are changing errors as you make them. 18 | 19 | Linting will get rid of all the little errors and typos that are easily made, yet take time to find and fix. 20 | 21 | 22 | ## Static analyser 23 | 24 | Kibit is a commonly used static analyser for Clojure projects, suggesting changes to the code it analyses to make it more idiomatic. 25 | 26 | 27 | ## Formatting 28 | 29 | A consistent format of your code base makes it much more readable and therefore understandable by the development team. The `clojure-mode` does manage basic formatting of your code, especially code indentation. 30 | 31 | Spacemacs can be configured to automatically check and adjust any formatting as you type. 32 | -------------------------------------------------------------------------------- /docs/spacemacs-basics/working-with-projects/treemacs.md: -------------------------------------------------------------------------------- 1 | # Treemacs - Visualise your project structure 2 | 3 | You can easily view your project structure and navigate your project files with Treemacs. 4 | 5 | Show files and directories as a navigable tree in a buffer. Spacemacs uses a pop-up buffer to the left hand side of the frame to display treemacs. 6 | 7 | Toggling open the treemacs buffer will show the directory of the current buffer. 8 | 9 | Opening the treemacs project root will show the directory list for the project that the current buffer is part of. 10 | 11 | | Vim Normal | Emacs | Command | Description | 12 | |------------|-----------|----------------------------|--------------------------------| 13 | | `SPC f t` | `M-m f t` | treemacs-toggle | Show / hide treemacs buffer | 14 | | `SPC p t` | `M-m p t` | treemacs-find-project-root | Show project root in treemacs | 15 | | `SPC 0` | `M-m 0` | `select-window-0` | Switch to open treemacs buffer | 16 | 17 |  18 | 19 | 20 | ## Treemacs shows version control changes 21 | 22 | New and changed files are highlighted in Treemacs against the current version controlled changes in the project. 23 | 24 | Directory names turn blue when they contain changes. Filenames turn green when they are changed. 25 | 26 |  27 | 28 | 29 | ## Treemacs Keybindings 30 | 31 | Press `?` in the treemacs buffer to see the available keybindings to control treemacs and use more of its features. 32 | 33 |  34 | -------------------------------------------------------------------------------- /docs/install-spacemacs/emacsclient-server.md: -------------------------------------------------------------------------------- 1 | # emacsclient and persistent server 2 | 3 | `emacsclient` will instantly open files in Emacs once an Emacs server process is running. 4 | 5 | Emacs persistent server will run in the background, even when Emacs is not running, listening for requests to open files. 6 | 7 | !!! HINT "Run Spacemacs once per OS login" 8 | Emacs is typically run once and kept open, as its feature rich enough to do all your tasks from Emacs. Therefore the few seconds startup time is not seen as an issue. If you stop and start Emacs constantly, as you may do with Vim, then you will of course notice this short delay. 9 | 10 | 11 | ## Configure Emacs persistent server 12 | 13 | ++spc++ ++"f"++ ++"e"++ ++"d"++ to edit your `.spacemacs` configuration 14 | 15 | Set `dotspacemacs-enable-server` and `dotspacemacs-persistent-server` to `t` (true). 16 | 17 | ```elisp 18 | ;; If non-nil, start an Emacs server if one is not already running. 19 | ;; (default nil) 20 | dotspacemacs-enable-server t 21 | 22 | ;; Set the emacs server socket location. 23 | ;; If nil, uses whatever the Emacs default is, otherwise a directory path 24 | ;; like \"~/.emacs.d/server\". It has no effect if 25 | ;; `dotspacemacs-enable-server' is nil. 26 | ;; (default nil) 27 | dotspacemacs-server-socket-dir nil 28 | 29 | ;; If non-nil, advise quit functions to keep server open when quitting. 30 | ;; (default nil) 31 | dotspacemacs-persistent-server t 32 | ``` 33 | 34 | 35 | !!! WARNING "Old Emacs installs shipped with MacOSX" 36 | If `emacsclient` is not working correctly, check to see which Emacs version it run, `SPC SPC emacs-version`. Some MacOSX versions shipped with a very old version of Emacs (version 22). 37 | -------------------------------------------------------------------------------- /docs/source-control/magit/remote-repositories/push-changes.md: -------------------------------------------------------------------------------- 1 | # Push Changes 2 | 3 | Commits can be pushed to a remote repository using Magit Status buffer. 4 | 5 | !!! HINT "Ensure you are on the correct local branch" 6 | The current local branch is shown at the top of the Magit Status buffer. 7 | 8 | `b b` displays a popup to select a different branch if you are not on the correct branch to pull changes into. 9 | 10 | `SPC g s` to open Magit Status buffer 11 | 12 | `P` to open the pull menu 13 | 14 | `u` to pull from the upstream remote repository. If this is not currently set, then a prompt appears to select the default upstream. 15 | 16 | 17 | ## Push options 18 | 19 | Changing the local history with a commit amend, extend, reword, rebase or squash will prevent changes being pushed to a remote repository that has the original history unchanged. 20 | 21 | Magit will show `Unpulled from` and `Unpushed to` sections when the local and remote histories are different. 22 | 23 | The push menu has the `-f` switch to force a push with a lease (the recommended force type). 24 | 25 | !!! HINT "Fix rather than Force" 26 | Pushing a new commit that fixes an issue is usually preferable than re-writing history and forcing a push when working on a shared repository. 27 | 28 | Communicate clearly in advance and get agreement from other contributors if a force is the only option. 29 | 30 | 31 | ## Pushing changes to an open pull request 32 | 33 |34 | 35 |
36 | -------------------------------------------------------------------------------- /docs/external-repl/repl-history.md: -------------------------------------------------------------------------------- 1 | # REPL History 2 | 3 | Scroll back through the history in the REPL buffer, allowing evaluation of previously entered expressions. Any of the previous expressions can be edited before evaluating. 4 | 5 | In Evil Insert state or Emacs state: 6 | 7 | ++ctrl+arrow-up++ - scrolls backwards through the history 8 | 9 | ++ctrl+arrow-up++ - scrolls forwards through the history 10 | 11 | > History navigation not supported in Evil Normal state 12 | 13 | 14 | ## `cider-repl-history` complete history 15 | 16 | View the complete history of expressions in a separate buffer via the REPL Command menu, available when the REPL buffer is active. This does not include the history of results (use a data inspector such as Portal). 17 | 18 | In Evil Insert state or Emacs state: 19 | 20 | ++comma++ open the REPL command menu 21 | 22 | Type `history` at the REPL command menu prompt, press `RET` to select. 23 | 24 | A new buffer opens in Evil Normal mode and shows all the previous history, separated by comments. 25 | 26 | [Spacemacs Clojure REPL history](/images/spacemacs-clojure-repl-history-buffer.png) 27 | 28 | 29 | !!! Hint "Switch to Vim insert or Emacs state" 30 | The REPL History buffer only accepts commands when in Vim insert or Emacs state 31 | 32 | ++"i"++ evil insert state 33 | 34 | ++ctrl+"z"++ emacs state 35 | 36 | In Evil Insert or Emacs state: 37 | 38 | ++enter++ or ++spc++ will send the current expression under the cursor to the REPL buffer and close the repl-history buffer. 39 | 40 | In Evil Normal state: 41 | 42 | ++spc++ ++spc++ `cider-history-use-and-quit` sends the current expression to the REPL buffer and closes the REPL history. 43 | 44 | 45 |  46 | -------------------------------------------------------------------------------- /docs/spacemacs-basics/working-with-projects/open-and-create-files.md: -------------------------------------------------------------------------------- 1 | # Open and create Files & directories 2 | 3 | Open files or directories from anywhere on the file space. New files and directories can also be created by supplying unique names. 4 | 5 |6 | 7 |
8 | 9 | 10 | ## Opening a File 11 | 12 | ++spc++ ++"f"++ ++"f"++ runs the `spacemacs/helm-find-file` command which opens list of files and directories in the current directory. Typing a patter narrows the items in the list to those that fuzzy match. 13 | 14 | ++enter++ on a list item to open the file or navigate through to the directory contents. 15 | 16 | Key bindings for curor movement on the find file path 17 | 18 | | Key binding | Description | 19 | | ------------- | -------------------------------------------------- | 20 | | ++tab++ | select highlighted directory / complete filename | 21 | | ++ctrl+"h"++ | navigate to parent directory | 22 | | ++ctrl+"y"++ | paste kill ring into file path | 23 | | ++ctrl+"j"++ | Move cursor down list of directories & filenames | 24 | | ++ctrl+"k"++ | Move cursor up list of directories & filenames | 25 | 26 | 27 | ## Create a new file 28 | 29 | ++spc++ ++"f"++ ++"f"++ can also create a new file by typing full path and name of the new file. A prompt confirms that a new want a new file created. 30 | 31 | `SPC f s` to save the new file and a prompt asks if any intermediary directories should be created (if they do not already exist). 32 | 33 | -------------------------------------------------------------------------------- /.github/workflows/scheduled-version-check.yaml: -------------------------------------------------------------------------------- 1 | --- 2 | # ------------------------------------------ 3 | # Scheduled check of versions 4 | # - use as non-urgent report on versions 5 | # - Uses POSIX Cron syntax 6 | # - Minute [0,59] 7 | # - Hour [0,23] 8 | # - Day of the month [1,31] 9 | # - Month of the year [1,12] 10 | # - Day of the week ([0,6] with 0=Sunday) 11 | # 12 | # Using liquidz/anta to check: 13 | # - GitHub workflows 14 | # - deps.edn 15 | # ------------------------------------------ 16 | 17 | name: "Scheduled Version Check" 18 | on: 19 | schedule: 20 | # - cron: "0 4 * * *" # at 04:04:04 ever day 21 | # - cron: "0 4 * * 5" # at 04:04:04 ever Friday 22 | - cron: "0 4 1 * *" # at 04:04:04 on first day of month 23 | workflow_dispatch: # Run manually via GitHub Actions Workflow page 24 | 25 | jobs: 26 | scheduled-version-check: 27 | name: "Scheduled Version Check" 28 | runs-on: ubuntu-latest 29 | steps: 30 | - run: echo "🚀 Job automatically triggered by ${{ github.event_name }}" 31 | - run: echo "🐧 Job running on ${{ runner.os }} server" 32 | - run: echo "🐙 Using ${{ github.ref }} branch from ${{ github.repository }} repository" 33 | 34 | - name: Checkout Code 35 | uses: actions/checkout@v4 36 | with: 37 | fetch-depth: 0 38 | sparse-checkout: | 39 | .github 40 | - run: echo "🐙 ${{ github.repository }} repository sparse-checkout to the CI runner." 41 | - name: "Antq Check versions" 42 | uses: liquidz/antq-action@main 43 | with: 44 | excludes: "" 45 | skips: "boot clojure-cli pom shadow-cljs leiningen" 46 | 47 | # Summary 48 | - run: echo "🎨 library versions checked with liquidz/antq" 49 | - run: echo "🍏 Job status is ${{ job.status }}." 50 | -------------------------------------------------------------------------------- /docs/source-control/magit/list-local-repositories.md: -------------------------------------------------------------------------------- 1 | # List your local Git repositories 2 | 3 | `SPC g L` will list all the repositories along with basic status information (branches, dirty, etc). This is very useful as the number of created or cloned repositories grows on your computer. 4 | 5 |  6 | 7 | You first need to tell Magit where your repositories are on your computer. 8 | 9 | ## Configure the location of your Git repositories 10 | `magit-repository-directories` is used to define which directories Magit should search in to find your Git repositories. This configuration should be added to the `dotspacemacs/user-config` section of your `.spacemacs` file. 11 | 12 | In the following example the Git repositories are all under a directory called `projects` in your home directory. It also specifically adds the Spacemacs repository in `.emacs.d`. 13 | 14 | ```elisp 15 | (setq magit-repository-directories 16 | '(("~/.emacs.d" . 0) 17 | ("~/projects/" . 2))) 18 | ``` 19 | 20 | The number represents the depth of subdirectories in which magit searches for Git repositories in the specified directory. 21 | 22 | > ####Hint:: Setting repository directories changes Magit Status behaviour 23 | > `SPC g i` should be used to initialize a new git repository once `magit-repository-directories` is set. 24 | > 25 | > If you use `SPC g s` on a project that has no git version control, magit will prompt you for a git repository. Enter `.` to initialise a new git repository in the current project. Magit will prompt you in the mini-buffer to confirm you wish to create this git repository. 26 | > 27 |  28 | -------------------------------------------------------------------------------- /docs/spacemacs-basics/evil-z-menu.md: -------------------------------------------------------------------------------- 1 | # Evil Z menu 2 | 3 | `z` in normal mode opens a menu of convenient utilities 4 | 5 |  6 | 7 | 8 | ## Folding code, comments and other content 9 | 10 | Code folding is very useful for hiding different levels of detail, for example you could hide everything but the function names in a namespace, showing just the API for that namespace. 11 | 12 | Comments and documentation can be folded to help you focus on a specific part of the content. 13 | 14 | | Keybinding | Description | 15 | |------------|---------------------------------------------| 16 | | `z a` | toggle fold of code, comment, section, etc. | 17 | | `z c` | close fold | 18 | | `z o` | open fold | 19 | | `z O` | open fold recursive (capital o) | 20 | | `z r` | open folds | 21 | 22 | See [:fontawesome-solid-book-open: narrowing](/spacemacs/spacemacs-basics/evil-tools/narrowing.md) for a focused approach to editing. 23 | 24 | 25 | ## Scrolling 26 | 27 | Jump the current line to the center, top or bottom of the buffer. Evil equivalents of the Emacs `C-l` key bindings. 28 | 29 | | Keybinding | Description | 30 | |------------|---------------------------------------------| 31 | | `z b` | scroll the current line to bottom of buffer | 32 | | `z t` | scroll the current line to top of buffer | 33 | | `z z` | scroll the current line to center of buffer | 34 | | `z ^` | scroll top line to bottom | 35 | | `z +` | scroll bottom line to top | 36 | -------------------------------------------------------------------------------- /.github/workflows/publish-book.yaml: -------------------------------------------------------------------------------- 1 | --- 2 | name: Publish Book 3 | on: 4 | # Manually trigger workflow 5 | workflow_dispatch: 6 | 7 | # Run work flow conditional on linter workflow success 8 | workflow_run: 9 | workflows: 10 | - "MegaLinter" 11 | paths: 12 | - "docs/**" 13 | - "includes/**" 14 | - "overrides/**" 15 | - "mkdocs.yaml" 16 | branches: 17 | - main 18 | types: 19 | - completed 20 | 21 | permissions: 22 | contents: write 23 | 24 | jobs: 25 | publish-book: 26 | name: MkDocs Publish 27 | runs-on: ubuntu-latest 28 | steps: 29 | - run: echo "🚀 Job automatically triggered by ${{ github.event_name }}" 30 | - run: echo "🐧 Job running on ${{ runner.os }} server" 31 | - run: echo "🐙 Using ${{ github.ref }} branch from ${{ github.repository }} repository" 32 | 33 | - name: Checkout Code 34 | uses: actions/checkout@v4 35 | with: 36 | fetch-depth: 0 37 | sparse-checkout: | 38 | docs 39 | includes 40 | overrides 41 | - run: echo "🐙 ${{ github.repository }} repository sparse-checkout to the CI runner." 42 | 43 | - name: Setup Python 44 | uses: actions/setup-python@v5 45 | with: 46 | python-version: 3.x 47 | 48 | - name: Cache 49 | uses: actions/cache@v4 50 | with: 51 | key: ${{ github.ref }} 52 | path: .cache 53 | 54 | - run: pip install mkdocs-material mkdocs-callouts mkdocs-glightbox mkdocs-git-revision-date-localized-plugin mkdocs-redirects pillow cairosvg 55 | - run: mkdocs gh-deploy --force 56 | - run: echo "🐙 ." 57 | 58 | # Summary and status 59 | - run: echo "🎨 MkDocs Publish Book workflow completed" 60 | - run: echo "🍏 Job status is ${{ job.status }}." 61 | -------------------------------------------------------------------------------- /docs/install-spacemacs/manual-configuration.md: -------------------------------------------------------------------------------- 1 | # Manual Configuration 2 | 3 | When not using [:fontawesome-brands-github: practicalli/spacemacs-config](https://github.com/practicalli/spacemacs-config) configuration, use the Spacemacs configuration wizzard to set the preferred editing style and Spacemacs distribution. 4 | 5 | `~/.spacemacs` configuration file is created by the Spacemacs Wizard. 6 | 7 | ++spc++ ++"f"++ ++"e"++ ++"d"++ to open the `~/.spacemacs` configuration file for manual editing 8 | 9 | 10 | ## Spacemacs install Wizard 11 | 12 | Run Emacs as normal. 13 | 14 | Spacemacs prompts how it should configure the fundamentals of Spacemacs operation. 15 | 16 | For the preferred style, select *Among the stars aboard the Evil flagship (vim)* 17 | 18 |  19 | 20 | For the distribution, select *The Standard Distribution (spacemacs)* 21 | 22 |  23 | 24 | 25 | Spacemacs will now download all its Emacs packages and this will take several minutes, depending on the speed of your connection to the Internet. 26 | 27 | ++spc++ ++"q"++ ++"r"++ to restart Spacemacs once all the packages have downloaded. This is not strictly necessary, but helps ensure the packages are working correctly. 28 | 29 | 30 | ## Spacemacs is ready for action 31 | 32 | Spacemacs is now up and running and ready to take on the world. 33 | 34 | Next task is to configure Spacemacs for Clojure. 35 | 36 | ++spc++ ++"f"++ ++"e"++ ++"d"++ to open the `~/.spacemacs` configuration file for manual editing and customising layers any any other options. 37 | -------------------------------------------------------------------------------- /docs/reference/projectile.md: -------------------------------------------------------------------------------- 1 | ## Projectile project navigation and management 2 | 3 | [Projectile](https://docs.projectile.mx/projectile/) provides commands to navigate within a project and manage files and buffers as a project. 4 | 5 | A project is defined by any of the following: 6 | 7 | * a source control directory e.g. `.git` 8 | * programming language tools e.g. `deps.edn` 9 | * projectile configuration file, `.projectile` 10 | 11 | ## Commonly used commands 12 | 13 | `SPC p f` will find a file by name within the project scope 14 | 15 | `SPC p a` will alternate between a source code file and its unit test file 16 | 17 | `SPC p "` opens an external terminal at the root of the project, so external terminal commands can easily be run on the project, e.g. `clojure -M:repl/rebel` to start a terminal UI REPL 18 | 19 | `SPC ` 20 | 21 | 22 | ## Ignore files in project Projectile configuration file 23 | 24 | A `.projectile` file at the root of a project include file and directory name [patterns for Projectile to ignore](https://docs.projectile.mx/projectile/projects.html#ignoring-files), similar to a `.gitignore` file. 25 | 26 | Projectile will ignore patterns in a `.gitignore` file. however, there may be additional patterns that Projectile should ignore that Git should not 27 | 28 | Ignore files at the root of the project 29 | ```none 30 | -/log 31 | -/tmp 32 | -/public/uploads 33 | ``` 34 | 35 | Relative pathname ignores: 36 | ```none 37 | -tmp 38 | -*.port 39 | -*.yml 40 | ``` 41 | 42 | Ignore everything except certain sub-directories (not relevant for file names) 43 | 44 | ```none 45 | +/src/practicalli 46 | +/tests/practicalli 47 | ``` 48 | 49 | 50 | ## Projectile menu 51 | 52 | `SPC p` opens the projectile menu 53 | 54 |  55 | -------------------------------------------------------------------------------- /docs/debug-clojure/format-error-messages.md: -------------------------------------------------------------------------------- 1 | # Formatting Errors for clarity 2 | 3 | [io.aviso/pretty](https://github.com/AvisoNovate/pretty) is a library to highlight the most important error lines from a potentially long stack trace. 4 | 5 | Pretty error output features 6 | 7 | * Readable output for exceptions 8 | * ANSI font and background color support 9 | * Hex dump of binary data 10 | * Hex dump of binary deltas 11 | * Formatting data into columns 12 | 13 |  14 | 15 | 16 | ## In the REPL 17 | 18 | `io.aviso.repl` namespace contains functions for use in the REPL, which can copy stack traces from the system clipboard. 19 | 20 | `(install-pretty-exceptions)` function overrides several internal Clojure functions to enable formatted exceptions using `io.aviso.exception/write-exception` 21 | 22 | `(pretty-print)` parses the content of the clipboard as EDN and prints it in human readable form 23 | 24 | `(format-exception)` parse the stack trace and format it for readability 25 | 26 | Add the following in a comment block, typically in a `dev/user.clj` file or namespace that is generating a noticeable number of stack traces. 27 | 28 | ```clojure 29 | (comment 30 | (require '[io.aviso.repl as pretty]) 31 | 32 | (-> (pretty/copy) 33 | pretty/format-exception 34 | pretty/paste) 35 | ) 36 | ``` 37 | 38 | 39 | ## On the command line 40 | 41 | AvisoNovate/pretty can be used as [a Leiningen plugin for command line use](https://ioavisopretty.readthedocs.io/en/latest/lein-plugin.html) 42 | 43 | Add `pretty` as a profile to the project.clj or users .profiles.clj 44 | 45 | ```bash 46 | lein with-profiles +pretty run 47 | ``` 48 | 49 | 50 | 51 | -------------------------------------------------------------------------------- /docs/spacemacs-basics/evil-g-menu.md: -------------------------------------------------------------------------------- 1 | # Evil G menu 2 | 3 | `g` in normal mode opens a menu of convenient utilities. Practicalli uses this menu to comment existing lines, edit with multiple cursors, jumping to top or bottom of the buffer and joining lines together. 4 | 5 |  6 | 7 | 8 | ## Comment lines and regions 9 | `g c c` will comment the current line using the buffer major mode comment character(s). A prompt will ask if no comment character is set for the major mode. 10 | 11 | `g c` with a selected region will comment all lines with the major mode comment character(s) 12 | 13 | 14 | ## Multiple cursors 15 | `g r` is the menu for [:fontawesome-solid-book-open: multiple cursors](/spacemacs/spacemacs-basics/evil-tools/multiple-cursors/), allowing simultaneous editing at multiple points 16 | 17 | `12 gr j` will add a cursor to the 12 lines below the current cursor, using the same position in the line. Any edits are applied to all cursors. 18 | 19 | `g r q` will quit multiple cursors, returning to just one cursor. 20 | 21 | 22 | ## Jumping around 23 | `g g` jumps to the top of the buffer, `g G` to the bottom of the buffer 24 | 25 | `g d` to jump to the source code of a function definition, `g D` to open that in a different window. 26 | 27 | 28 | ## Moving text around 29 | `g J` joins the next line to the current line. 30 | 31 | 32 | ## Workspaces 33 | `g t` to switch to next [:fontawesome-solid-book-open: workspace](/spacemacs-basics/working-with-projects/layouts/), `g T` to switch to previous. 34 | 35 | 36 | ## Changing text case 37 | `g u` to change the current character or selection to lowercase, `g U` for uppercase. 38 | 39 | !!! HINT "Toggle case with `~`" 40 | `~` will toggle the case of the current character or selected region. 41 | -------------------------------------------------------------------------------- /docs/install-spacemacs/enhance-clojure-experience/evil-structural-editing.md: -------------------------------------------------------------------------------- 1 | # Evil Safe Structural Editing 2 | 3 | The Clojure layer also includes [evil-cleverparens](http://spacemacs.org/layers/+vim/evil-cleverparens/README.html) which ensures Clojure code structure is respected. 4 | 5 | Safe structural editing in Evil normal state respects structural editing too, meaning the standard evil commands can be used for cutting and deleting text without breaking Clojure or Lisp code structures. 6 | 7 | Safe structural editing is provided by the package [evil-cleverparens](https://github.com/luxbock/evil-cleverparens) which is included in the Clojure layer. By default this mode is not activated. 8 | 9 | | Spacemacs | Evil | Description | 10 | |-------------|---------|------------------------------------------------------------| 11 | | `SPC m T s` | `, T s` | Enable evil safe structural editing for the current buffer | 12 | 13 | `🆂` is displayed in the mode-line when safe structural editing is enabled. 14 | 15 | 16 | ## Configuration 17 | 18 | Enable for all Clojure buffers by adding the following function in `dotspacemacs/user-config` 19 | 20 | ```elisp 21 | (spacemacs/toggle-evil-safe-lisp-structural-editing-on-register-hook-clojure-mode) 22 | ``` 23 | 24 | Or to enable evil safe structural editing for all supported major modes, use this function instead: 25 | 26 | ```elisp 27 | (spacemacs/toggle-evil-safe-lisp-structural-editing-on-register-hooks) 28 | ``` 29 | 30 | 31 | ## Manually managing structure 32 | 33 | Although it is not structural editing, in Evil you can delete to a particular character. Clojure code inside of `()` can be deleted without deleting the closing `)` 34 | 35 | 1. Enter **normal** mode 36 | 2. Move to the starting point of the text you wish to delete 37 | 3. `d t )` - delete everything up to, but not including the closing parenthesis 38 | -------------------------------------------------------------------------------- /docs/install-spacemacs/enhance-clojure-experience/smartparens.md: -------------------------------------------------------------------------------- 1 | # Smartparens 2 | 3 | Clojure and other lisp languages are defined as data structures, so expressions always start with parentheses, `( )`. If there is an imbalanced pairing of open and closing parentheses, then the code fails to work and causes an error. 4 | 5 | [smartparens](https://github.com/Fuco1/smartparens/wiki#getting-started){target=_blank} in strict mode ensures balanced parentheses by adding a closing parentheses when you type an open parentheses. This works for `()`, `[]`, `{}` and `""`. 6 | 7 | ## Configure Smartparens 8 | 9 | Smartparens is part of the standard distribution of Spacemacs, so no install is necessary. 10 | 11 | Enable smartparens global strict mode to maintain the structure of Clojure and Emacs Lisp code, ensuring that a closing paren cannot be deleted without the content of that structure being deleted first. 12 | 13 | Smart closing parentheses means you can jump over closing structure characters by typing `)` 14 | 15 | Highlighting all delimiters gives a visual guide to pairs of structural characters, to complement the rainbow parens that also comes with the Clojure layer. 16 | 17 | 18 | ```clojure 19 | ;; If non-nil `smartparens-strict-mode' will be enabled in programming modes. 20 | ;; (default nil) 21 | dotspacemacs-smartparens-strict-mode t 22 | 23 | ;; If non-nil pressing the closing parenthesis `)' key in insert mode passes 24 | ;; over any automatically added closing parenthesis, bracket, quote, etc… 25 | ;; This can be temporary disabled by pressing `C-q' before `)'. (default nil) 26 | dotspacemacs-smart-closing-parenthesis t 27 | 28 | ;; Select a scope to highlight delimiters. Possible values are `any', 29 | ;; `current', `all' or `nil'. Default is `all' (highlight any scope and 30 | ;; emphasis the current one). (default 'all) 31 | dotspacemacs-highlight-delimiters 'all 32 | ``` 33 | -------------------------------------------------------------------------------- /docs/introduction/why-spacemacs/index.md: -------------------------------------------------------------------------------- 1 | # Why Spacemacs 2 | 3 | Spacemacs provides highly productive tooling for any software development, supporting numerous programming languages and tool configuration syntax (Dockerfile, Makefile, Yaml, etc) 4 | 5 | Spacemacs takes the raw power of Emacs and adds years of experience from the community. 6 | 7 | Spacemacs uses Vim-style modal editing, providing simple use and learn key bindings for common tasks, dramatically enhancing productivity and fun. 8 | 9 | Spacemacs is fast to startup and lightweight thanks to its lazy loading of features. So it only loads in those features you need. 10 | 11 |12 | 13 |
14 | 15 | 16 | 17 | The rest of this section goes into more details as to why you would choose Spacemacs for your developer life, including: 18 | 19 | * easy to configuration using [:fontawesome-solid-book-open: layers](layers.md) removing the need to configure individual packages 20 | * Clojure layer provides [:globe_with_meridians: CIDER](https://docs.cider.mx/) and clj-kondo support 21 | * [:fontawesome-solid-book-open: Consistently discoverable commands with mnemonic menu](mnemonic-menu.md) 22 | * [:fontawesome-solid-book-open: narrowing & completion](helm.md) to quickly find files and commands 23 | * [:fontawesome-solid-book-open: Effective editing with multiple states](states.md) 24 | * [:fontawesome-solid-book-open: Structural editing with Smartparens and Lisp mode](structural-editing.md) 25 | * [:fontawesome-solid-book-open: Fast project & file management with Projectile](project-file-navigation.md), simple window & buffer management 26 | -------------------------------------------------------------------------------- /docs/refactor/functions.md: -------------------------------------------------------------------------------- 1 | # Refactor functions 2 | 3 | The symbol highlight transient state and iedit tools can be used to make concurrent changes to multiple instances of the same piece of text, eg. a function name, a local let binding name, a def name, etc. 4 | 5 | We can use narrowing to just make changes within in a function or any selected region of text 6 | 7 | Move the cursor to the function you wish to refactor 8 | 9 | ++spc++ ++"n"++ ++"f"++ to narrow to that function. The buffer updates and only shows the text of that function, preventing changes happening elsewhere in the code. 10 | 11 | ++"*"++ or ++"#"++ to select a function name using the symbol highlight transient state on the current text under the cursor. This highlights all instances of that function name in the namespace. 12 | 13 | ++"e"++ starts iedit state, turning the cursor red. 14 | 15 | Make the changes to the highlighted text and all instances of that text will change. You can use Normal and Insert mode editing commands within iedit. 16 | 17 | ++esc+++ or ++"f"++ ++"f"++ to leave iedit mode (twice if you are in Evil Insert). 18 | 19 | ++spc++ ++"n"++ ++"w"++ to return to the full view of the buffer. 20 | 21 | !!! HINT "Narrowing a region of text" 22 | You can select a range to narrow to using ++"v"++ for the visual select mode. Then use ++spc++ ++"n"++ ++"r"++ to narrow to just the selected text for editing. 23 | ++spc++ ++"n"++ ++"w"++ to return to the full view of the buffer. 24 | 25 | 26 | ## Refactor similar function calls 27 | 28 | ++tab++ allows you to quickly change the name of a function call to one that is similar. 29 | 30 | For example, if you have used a call to `reduce` instead of `reductions` or other similarly named functions, pressing `TAB` with the cursor on `reduce` will display a popup listing alternative functions 31 | 32 |  33 | -------------------------------------------------------------------------------- /docs/introduction/additional-resources.md: -------------------------------------------------------------------------------- 1 | # Resources 2 | 3 | Additional support for learning Spacemacs and Clojure development. 4 | 5 | ## Spacemacs 6 | 7 | - [:globe_with_meridians: Spacemacs Website](http://develop.spacemacs.org/){target=_blank} 8 | - [:globe_with_meridians: Spacemacs ABC](https://www.youtube.com/playlist?list=PLrJ2YN5y27KLhd3yNs2dR8_inqtEiEweE){target=_blank} - walk-through of features in alphabetical order 9 | - [:globe_with_meridians: SimpleTutorials: Spacemacs](https://simpletutorials.com/c/2883/Spacemacs){target=_blank} 10 | 11 | 12 | ## Clojure Books 13 | 14 | [Practicalli Clojure](http://practical.li/clojure/){target=_blank .md-button} 15 | [Practicalli Clojure WebApps](http://practical.li/clojure-web-services/){target=_blank .md-button} 16 | [Practicalli Clojurescript](http://practical.li/clojurescript/){target=_blank .md-button} 17 | 18 | [:globe_with_meridians: Clojure cookbook](https://github.com/clojure-cookbook/clojure-cookbook){target=_blank .md-button} 19 | 20 | 21 | ## Clojure Challenges 22 | 23 | - [:globe_with_meridians: 4Ever Clojure exercises](https://4clojure.oxal.org/){target=_blank} & [:fontawesome-brands-youtube: 4Clojure walk-through videos](https://www.youtube.com/playlist?list=PLpr9V-R8ZxiDB_KGrbliCsCUrmcBvdW16){target=_blank} 24 | - [:globe_with_meridians: Exercism.io Clojure track](https://exercism.org/tracks/clojure){target=_blank} 25 | 26 | 27 | ## Clojure Reference 28 | 29 | - [:globe_with_meridians: Clojure.org](http://clojure.org){target=_blank}, [:globe_with_meridians: features](http://clojure.org/features){target=_blank} and [:globe_with_meridians: rational](http://clojure.org/rationale){target=_blank} 30 | - [:globe_with_meridians: Clojure documentation](http://clojure.org/documentation){target=_blank} 31 | - [:globe_with_meridians: Clojure Cheatsheet](http://clojure.org/cheatsheet){target=_blank} 32 | - [:globe_with_meridians: Clojure Toolbox](https://www.clojure-toolbox.com/) 33 | 34 | 35 | -------------------------------------------------------------------------------- /docs/org-mode/headings.md: -------------------------------------------------------------------------------- 1 | # Org-mode Headings 2 | 3 | Organise text content with multiple levels of headings. Focus on sections by expanding and folding the content under headings, to show the level of information required at a particular time. [TODO states](todo-states.md) can be applied to any level of headings. 4 | 5 | ++ctrl+enter++ to create a heading at the same level of parent (top level heading if no parent) 6 | 7 | ++ctrl+shift+enter++ to create a heading with the [TODO state](todo-states.md), providing a visual marker of progress. 8 | 9 | ++"o"++ on a heading creates a new line automatically indented for text, to which a list item, `-` or check box list, `- [ ]`, can be added. 10 | 11 |  12 | 13 | 14 | !!! HINT "Toggle checkboxes" 15 | ++comma++ ++t++ ++"c"++ toggles the state of org checkboxes 16 | 17 | 18 | ### Collapse / Expand headings 19 | 20 | ++tab++ expands / collapses the heading at the current cursor position. 21 | 22 | ++shift+tab++ will cycle through expanding and collapsing headings at different levels. 23 | 24 | 25 | ### Moving headings and content around 26 | 27 | Items can be moved to change the order they appear, avoiding the need to cut and paste. 28 | 29 | | Key binding | Description | 30 | |--------------|-------------------------------------------------| 31 | | ++meta+"h"++ | Promote heading (larger) | 32 | | ++meta+"l"++ | Demote heading (smaller) | 33 | | ++meta+h++ | Promote heading containing sub-headings | 34 | | ++meta+l++ | Demote heading containing sub-headings | 35 | | ++meta+"k"++ | Move heading up within the same level | 36 | | ++meta+"j"++ | Move heading down within the same level | 37 | | ++meta+k++ | Move heading up, jumping over parent headings | 38 | | ++meta+j++ | Move heading down, jumping over parent headings | 39 | -------------------------------------------------------------------------------- /docs/source-control/magit/version-highlighting.md: -------------------------------------------------------------------------------- 1 | # Highlight Version Control Changes 2 | 3 | Fringe markers show the difference between the working copy and the last commit. As you add code or refactor, the lines that you change are marked in the fringe. 4 | 5 | `SPC T d` toggles git fringe marks to indicate changes between working copy and latest commit. Default is off. 6 | 7 |  8 | 9 | To display fringe marks by default, add the following to the `dotspacemacs-configuration-layers` in your `.spacemacs` file 10 | 11 | ```elisp 12 | (version-control :variables 13 | version-control-diff-tool 'diff-hl 14 | version-control-global-margin t) 15 | ``` 16 | 17 | See [version control layer configuration](https://develop.spacemacs.org/layers/+source-control/version-control/README.html#configuration) for other options. 18 | 19 | ## Highlighting with Smeargle 20 | 21 | `SPC g H` toggle smeargle overlays showing historic changes based on time, with the oldest unchanged lines greyed out the most. Default is off. 22 | 23 | [Smeargle](https://github.com/syohex/emacs-smeargle) is a package that provides highlighting regions by last updated time. Older changes have a opaque white background and newer regions have a darker background. This is supposed to help you just focus on newer changes, as older changes are subtly faded into the background. 24 | 25 | 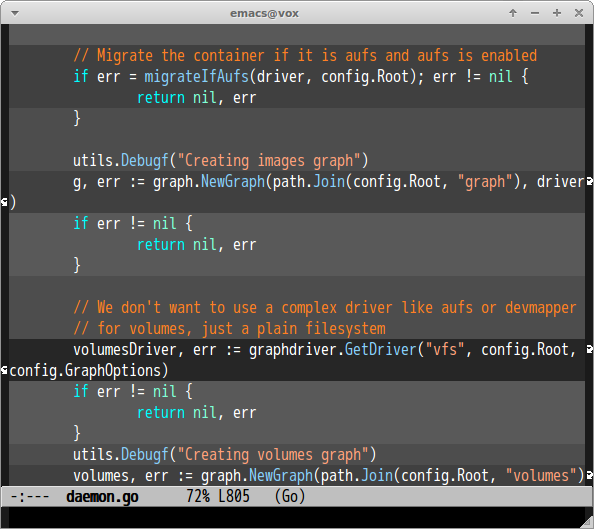 26 | 27 | 28 | ### Smeargle Transient State 29 | 30 | `SPC g r` enters Smeargle transient state 31 | 32 |  33 | 34 | TODO: describe the benefit of this transient state. 35 | 36 | https://github.com/syl20bnr/spacemacs/tree/develop/layers/%2Bsource-control/version-control#smerge-mode-transient-state 37 | -------------------------------------------------------------------------------- /docs/external-repl/show-repl-on-connect.md: -------------------------------------------------------------------------------- 1 | # Show REPL Buffer 2 | 3 | !!! HINT "Minimise use of REPL buffer" 4 | When developing code it is more effective to evaluate in the source code buffers. 5 | 6 | Spacemacs does not automatically show the Clojure REPL buffer when connecting to a REPL (`cider-jack-in-clj`). 7 | 8 | `, s s` opens and switches to the REPL buffer. Once the REPL buffer is open, `, s s` toggles focus between the REPL and source code buffers. 9 | 10 | Alternatively, `SPC b b` opens the buffer list. Typing `repl` narrows to REPL buffers. `C-j` and `C-k` navigate the buffer list and `RET` selects the buffer. 11 | 12 | A buffer for each Clojure REPL & ClojureScript REPL process will be shown in the buffer list. 13 | 14 | 15 | ## Configure REPL Buffer size limit 16 | 17 | By default, standard out (printlin and logs to console) will be printed in the REPL buffer. 18 | 19 | Logging into the REPL buffer, especially logs with verbose output, can slow down Emacs performance. 20 | 21 | Add `cider-repl-buffer-size-limit 100` to the `cider` layer to limit lines shown in REPL buffer. Only that number of lines will be retailed in the buffer, with any more lines automatically deleted. This should keep the REPL buffer more responsive. 22 | 23 | ```elisp 24 | (clojure :variables 25 | cider-repl-buffer-size-limit 100) 26 | ``` 27 | 28 | 29 | ## Show REPL buffer automatically 30 | 31 | To automatically show the REPL buffer once you have connected, add the following code to the `dotspacemacs/user-config` section of the `.spacemacs` file. 32 | 33 | ```elisp 34 | (clojure :variables 35 | cider-repl-pop-to-buffer-on-connect t) 36 | ``` 37 | 38 | The REPL buffer will open as an additional window in the current frame. 39 | 40 | 41 | ## Slow REPL buffer 42 | 43 | `SPC SPC fundamental-mode` will switch off the text formatting and help the REPL buffer should be faster to respond. 44 | 45 | `fundamental-mode` should be considered a last resource as it limits the usefulness of the REPL buffer. 46 | -------------------------------------------------------------------------------- /docs/snippets/yasnippets/create-snippets.md: -------------------------------------------------------------------------------- 1 | # Create snippets from existing text 2 | 3 | `helm-yas-create-snippet-on-region` is an effective way to create snippets from existing text. 4 | 5 |6 | 7 |
8 | 9 | Select a code block that you often create and using the yasnippets tools to create your own generic template 10 | 11 | 1. ++"v"++ for visual select and highlight the text for the snippet. Or use ++spc++ ++"v"++ and grow the selected region with ++"v"++ 12 | 2. ++spc++ ++spc++ `helm-yas-create-snippet-on-region` creates a new snippet 13 | 3. Enter the name you wish to refer to this snippet 14 | 4. Select the major mode you want to add the snippet too (eg. clojure, markdown, html) 15 | 5. Edit the text and delete any text that is not required 16 | 6. Add tab points in the snippet if relevant 17 | - `$1` initial cursor position, `$2` next cursor position on tab, `$0` end cursor position. 18 | 7. ++ctrl+"c"++ ++ctrl+"t"++ calls `yas-tryout-snippet` to test the snippet has the right behaviour 19 | 8. ++ctrl+"c"++ ++ctrl+"c"++ calls `yas-load-snippet-buffer-and-close` to load the snippet into the specified major mode and closes the snippet buffer 20 | 21 | 22 | ## Edit an existing snippet 23 | 24 | ++spc++ ++spc++ `yas/visit-snippet-file` displays a helm popup listing snippets. 25 | 26 | Enter a pattern to narrow the list or ++ctrl++ ++"j"++ and ++ctrl++ ++"k"++ to navigate the snippets. ++enter++ to select the snippet. 27 | 28 | Edit the snippet and ++spc++ ++"f"++ ++"s"++ to save file 29 | 30 | `C-c C-c` calls the function `yas-load-snippet-buffer-and-close` which loads the snippet into Spacemacs and closes the buffer. 31 | 32 | `C-c C-t` calls `yas-tryout-snippet` to test the snippet and check the placement of your tab stops. 33 | -------------------------------------------------------------------------------- /docs/testing/unit-testing/re-run-tests-from-test-report-buffer.md: -------------------------------------------------------------------------------- 1 | ## Re-run test from test results buffer 2 | A test report is only generated once any of the tests fail for the current REPL session. Once a test report has been created, further test runs will update the report. The test report is displayed in a new buffer. 3 | 4 |  5 | 6 | Tests can be re-run from the `*cider-test-results*` buffer, although this buffer does not support Evil normal state (PR's welcome). 7 | 8 | C-z to switch to Emacs state in order for these keybindings to work. 9 | 10 | | Keyboard shortcut | Description | 11 | |--------------------------------|-----------------------------------------------------------------------------| 12 | | g | Run test at point. | 13 | | n | Run tests for current namespace. | 14 | | l | Run tests for all loaded namespaces. | 15 | | p | Run tests for all project namespaces. This loads the additional namespaces. | 16 | | f | Re-run test failures/errors. | 17 | | M-p | Move point to previous test. | 18 | | M-n | Move point to next test. | 19 | | t or M-. | Jump to test definition. | 20 | | d | Display diff of actual vs expected. | 21 | | e | Display test error cause and stacktrace info. | 22 | -------------------------------------------------------------------------------- /docs/documentation/javadoc.md: -------------------------------------------------------------------------------- 1 | # Javadoc - Java API documentation 2 | 3 | ++comma++ ++"h"++ ++"j"++ shows javadoc information for a Java method or class, opening the relevant page on the Oracle website for Java. 4 | 5 |  6 | 7 | 8 | ## Include Java Sources 9 | 10 | Include the Java JDK sources when starting the REPL, to be able to navigate to the source definitions of Java methods. 11 | 12 | Download the Java JDK sources or install via the operating system package manager, e.g. `sudo apt install openjdk-17-source` 13 | 14 | Use an alias that adds the sources as an `:extra-deps` via a `:local/root` 15 | 16 | `:src/java17` alias includes the sources for Java 17 on the classpath, making them available for the Cider `clj-find-var` lookup. 17 | 18 | The alias assumes the sources are located at `/usr/lib/jvm/openjdk-17/lib/src.zip` 19 | 20 | `clojure -M:src/java17:repl/rebel` starts a rich terminal UI REPL including the Java sources on the class path. 21 | 22 | 23 | ## Navigate Java Source code 24 | 25 | ++comma++ ++"g"++ ++"g"++ to run the command `clj-find-var` which shows 26 | 27 | > Clojure LSP hijacks the `, g g` key binding, so use `SPC SPC clj-find-var` instead. 28 | 29 |  30 | 31 | Selecting a specific Java package (namespace) will open the Java source code in a buffer 32 | 33 |  34 | 35 | 36 | ## Clojure LSP Java Sources 37 | 38 | `:source-aliases` key in the Clojure LSP configuration can be used to add Java JDK sources to the Clojure LSP class path. 39 | 40 | An alias in the project `deps.edn` can be used to include the Java JDK sources 41 | 42 | ```clojure 43 | {:source-paths ["src" "test" "develop"] 44 | :source-aliases #{":src/java17"}} 45 | ``` 46 | 47 | > Clojure LSP currently doesn't use the user level `deps.edn` file, so the alias must be in the project `deps.edn` file. 48 | -------------------------------------------------------------------------------- /docs/navigating-code/names-symbols.md: -------------------------------------------------------------------------------- 1 | # Navigate names or symbols 2 | 3 | `#` or `*` enters **symbol highlight transient state** allowing you to jump between the current symbol name and any other instance in the buffer. 4 | 5 | [](/images/spacemacs-vim-normal-symbol-highlight-transient-state.png) 6 | 7 | `e` to start iedit state and edit all the symbols concurrently. This is so amazing. 8 | 9 | `/` will show a helm popup with all the instances of the symbol through out the project files, a quick way to search a project. 10 | 11 | 12 | `f` will show a helm popup with all the instances of the symbol in a specified file. 13 | 14 | `b` will show a helm popup with all the instances of the symbol through out all open buffers (global buffers, so even those in a different layer). 15 | 16 | `s` search a buffer and navigate to each location in code with the matching symbol by scrolling though the results. 17 | 18 | `SPC s c` clears symbol highlighting and search pattern highlighting. 19 | 20 | ## [Helm-swoop](https://develop.spacemacs.org/layers/+completion/helm/README.html#helm-swoop){target=_blank} 21 | 22 | Search a buffer (Clojure namespace) or project and use the results to navigate to the locations in the code for each match found. 23 | 24 | | Keybindings | Description | 25 | |-------------|------------------------------| 26 | | `SPC s C` | clear helm-swoop own cache | 27 | | `SPC s s` | execute helm-swoop | 28 | | `SPC s S` | execute helm-multi-swoop | 29 | | `SPC s C-s` | execute helm-multi-swoop-all | 30 | | `SPC s p` | search project | 31 | 32 | For example, navigate to a function definition and all the places that function is called in a project using helm-multi-swoop. 33 | 34 |  35 | 36 | !!! HINT "Refactor code" 37 | [Refactor section](/refactor/) provides examples of using helm-ag, helm-swoop, iedit, narrowing and clj-refactor. 38 | -------------------------------------------------------------------------------- /docs/termux/fdroid-install.md: -------------------------------------------------------------------------------- 1 | # Install Termux via the F-Droid App 2 | 3 | Visit the [FDroid app](https://f-droid.org/){target=_blank} website and download F-Droid, which saves an F-Droid.apk file. Android may display a security prompt stating the browser does not have permissions to install software. The popup should include a configure link that opens the Android settings to allow the browser to install software. 4 | 5 | F-Droid should now be installed and its icon added to the Android system alongside all other Android apps. 6 | 7 | Open the F-Droid App and allow it to update its repositories, to ensure the latest list of apps are shown. 8 | 9 | Search for the **Termux** application, clicking on the Termux name if more details are required. 10 | 11 | Select the Install button. 12 | 13 |  14 | 15 | When installing apps from F-Droid for the first time, a security prompt is show as F-Droid is an unknown source. 16 | 17 | Select *Settings* to open the Android settings and enable *Allow from this source* for the F-Droid app. 18 | 19 | 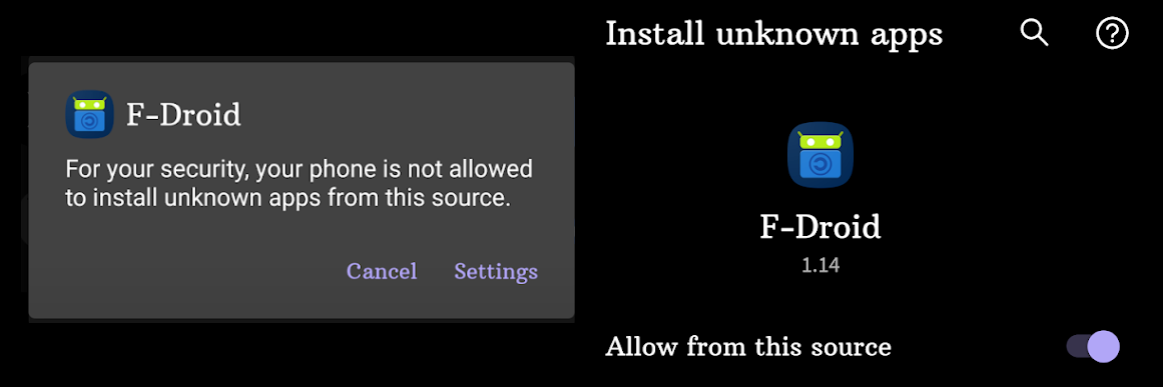 20 | 21 | 22 | A Termux App launcher will be added to the Android screen. Consider adding the Termux icon to the commonly used icons bar. 23 | 24 | 25 | ## Termux Styling 26 | 27 | Styling is a Termux plugin that provides a visually richer experience. Styling contains beautiful color schemes and powerline-reaqdy fonts to customise the appearance of the terminal 28 | 29 | Install the package via F-Droid 30 | 31 | 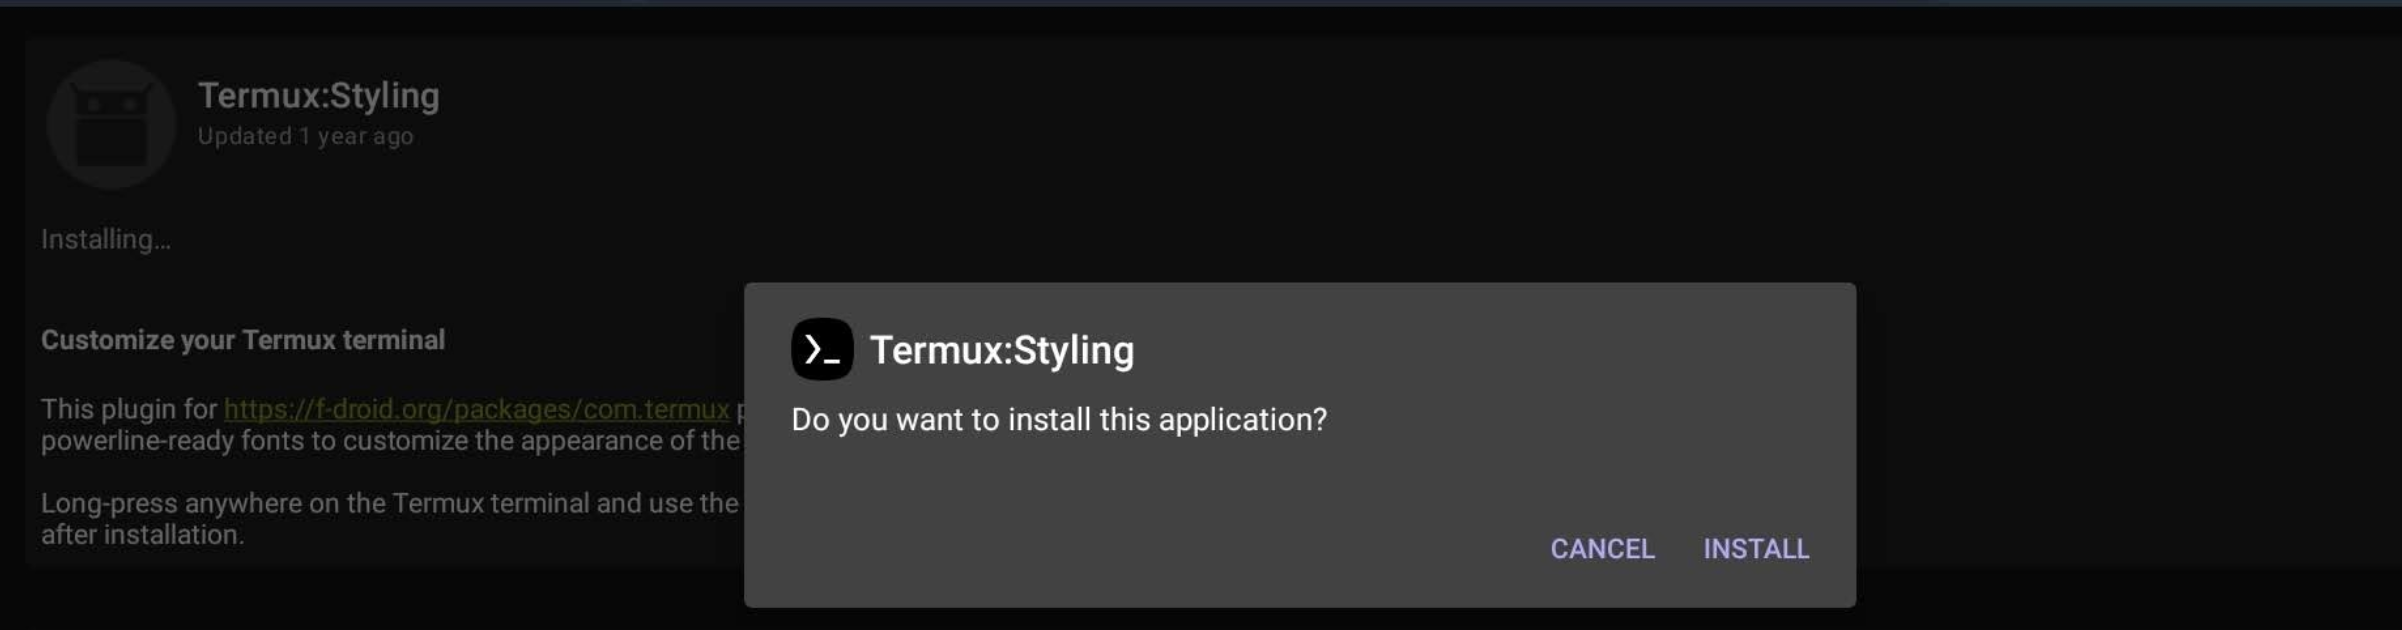 32 | 33 | > The styling menu is accessed via a long press on the Termux app screen, showing a **More > Style** option on the usual cut/copy/paste popup menu. Practicalli recommends `FiraCode` fonts. 34 | -------------------------------------------------------------------------------- /docs/reference/cider/index.md: -------------------------------------------------------------------------------- 1 | # Cider reference 2 | 3 | The following section complements the excellent [CIDER documentation](https://docs.cider.mx/) which are highly recommended. 4 | 5 | 6 | ## CIDER configuration variables 7 | 8 | Cider behaviour can easily be modified by changing [configuration variables](configuration-variables.md). 9 | 10 | 11 | ## Clojure Fancy Symbols 12 | 13 | Set the clojure layer variable `clojure-enable-fancify-symbols` to `t` and anonymous functions, partial functions and sets are represented with Greek-style symbols 14 | 15 | ```emacs tile="Spacemacs Configuration - dotspacemacs-configuration-layers" 16 | (clojure :variables 17 | clojure-enable-fancify-symbols t)) 18 | ``` 19 | 20 | !!! WARNING "Fancy symbols can cause confusion" 21 | Fancy symbols can be an engaging way to write clojure, although they may be an inconvenience especially when demonstrating or pairing on code to other people 22 | 23 | 24 | 25 | ## Aligning forms 26 | 27 | Automatic aligning of forms works with `clojure-mode` by configuring `aggressive-indent-mode`, however, this seriously conflicts with LSP formatting creating an unworkable editing experience. 28 | 29 | To auto-align arguments using clojure-mode, set `lsp-enable-on-type-formatting` to `nil` in the `lsp` layer configuration. Then add the following configuration in `dotspacemacs/user-config` section of `.spacemacs` 30 | 31 | ```emacs title="Spacemacs Configuration - dotspacemacs/user-config" 32 | ;; Indentation of function forms 33 | ;; https://github.com/clojure-emacs/clojure-mode#indentation-of-function-forms 34 | (setq clojure-indent-style 'align-arguments) 35 | ;; 36 | ;; Vertically align s-expressions 37 | ;; https://github.com/clojure-emacs/clojure-mode#vertical-alignment 38 | (setq clojure-align-forms-automatically t) 39 | ;; 40 | ;; Auto-indent code automatically 41 | ;; WARNING - really conflicts with LSP formatting - set lsp-enable-on-type-formatting to nil in lsp layer 42 | ;; https://emacsredux.com/blog/2016/02/07/auto-indent-your-code-with-aggressive-indent-mode/ 43 | (add-hook 'clojure-mode-hook #'aggressive-indent-mode) 44 | ``` 45 | -------------------------------------------------------------------------------- /.github/workflows/scheduled-stale-check.yaml: -------------------------------------------------------------------------------- 1 | # ---------------------------------------- 2 | # Scheduled stale issue & pull request check 3 | # 4 | # Adds 'stale' label after a set piece of time, 5 | # then closes stale issues & pull requests a short period after 6 | # 7 | # Using "Close Stale Issues" action 8 | # https://github.com/marketplace/actions/close-stale-issues 9 | # ---------------------------------------- 10 | 11 | name: 'Scheduled stale check' 12 | on: 13 | workflow_dispatch: 14 | schedule: 15 | - cron: "0 1 1 * *" # at 01:00 on first day of month 16 | 17 | jobs: 18 | stale: 19 | runs-on: ubuntu-latest 20 | steps: 21 | - run: echo "🚀 Job automatically triggered by ${{ github.event_name }}" 22 | - run: echo "🐧 Job running on ${{ runner.os }} server" 23 | - run: echo "🐙 Using ${{ github.ref }} branch from ${{ github.repository }} repository" 24 | 25 | - uses: actions/stale@v9 26 | with: 27 | stale-issue-message: 'After 30 days with no activity, the issue was automatically marked stale. Remove stale label or add a comment to prevent the issue being closed in 5 days.' 28 | stale-pr-message: 'After 45 days with no activity, the Pull Request was automatically marked stale. Remove stale label or comment to prevent the PR being closed in 10 days.' 29 | close-issue-message: 'This issue was closed because it has been stalled for 5 days with no activity.' 30 | close-pr-message: 'This PR was closed because it has been stalled for 10 days with no activity.' 31 | days-before-issue-stale: 30 32 | days-before-pr-stale: 45 33 | days-before-issue-close: 5 34 | days-before-pr-close: 10 35 | start-date: '2025-04-05T00:00:00Z' # only affect issues/PRs from date created (ISO 8601 or RFC 2822 format) 36 | any-of-labels: 'future,keep' # labels to keep 37 | exempt-issue-assignees: 'practicalli-johnny' 38 | exempt-pr-assignees: 'practicalli-johnny' 39 | 40 | # Summary 41 | - run: echo "🎨 Issues & Pull Request checked with actions/stale" 42 | - run: echo "🍏 Job status is ${{ job.status }}." 43 | -------------------------------------------------------------------------------- /docs/improving-code/batch-linting.md: -------------------------------------------------------------------------------- 1 | # Batch Linting 2 | 3 | squiggly can be used to provide live linting for Eastwood and kibit, however, squiggly continually reloads your code and can cause issues especially if your code has side effects when continually reloaded. 4 | 5 | Eastwood and kibit give a better experience when used in batch mode, either before push commits to a shared repository or with a CD/CI server. 6 | 7 | 8 | ## Quick usage 9 | 10 | Eastwood can be run from 11 | 12 | * [Clojure CLI tools - deps.edn](https://github.com/jonase/eastwood/blob/master/README.md#depsedn){target=_blank} 13 | * [Leiningen](https://github.com/jonase/eastwood/blob/master/README.md#installation--quick-usage){target=_blank} 14 | * [a REPL](https://github.com/jonase/eastwood/blob/master/README.md#running-eastwood-in-a-repl){target=_blank} 15 | 16 | 17 | ## Clojure CLI 18 | 19 | Define an alias for the Eastwood library and namespace. 20 | 21 | ```clojure 22 | {:aliases 23 | {:eastwood 24 | {:main-opts ["-m" "eastwood.lint" {:source-paths ["src"]}] 25 | :extra-deps {jonase/eastwood {:mvn/version "RELEASE"}}}}} 26 | ``` 27 | 28 | Run Clojure with the `eastwood` alias to lint your project 29 | 30 | ```shell 31 | clojure -M:lint/eastwood 32 | ``` 33 | 34 | An example output is as follows: 35 | 36 | ```shell 37 | == Eastwood 0.2.4 Clojure 1.9.0-alpha16 JVM 1.8.0_31 38 | Directories scanned for source files: 39 | src test 40 | == Linting app.routes.users == 41 | src/app/routes/users.clj:133:43: suspicious-expression: -> called with 1 args. (-> x) always returns x. Perhaps there are misplaced parentheses? 42 | src/app/routes/users.clj:115:3: constant-test: Test expression is always logical true or always logical false: true in form (if true (do (users/update-user-password {:hash (:id params), :pass (:pass params)}) (ok)) (bad-request)) 43 | == Linting app.routes.login == 44 | == Linting app.helpers.helpers == 45 | == Linting app.routes.inbox == 46 | == Linting app.middleware == 47 | ``` 48 | 49 | You can see from the example output that Eastwood found an issue with users.clj line 133. 50 | 51 | The issue is caused by an expression threading x into nothing. 52 | -------------------------------------------------------------------------------- /docs/evaluating-clojure/expressions.md: -------------------------------------------------------------------------------- 1 | # Evaluating individual Expressions 2 | 3 | Evaluating individual expressions is a very effective way to test the actions of your code as you write it. This approach helps keep expressions as simple as possible, leading to more effective Clojure code. 4 | 5 | ++comma++ ++"e"++ ++"f"++ is the most commonly used command and evaluates the current top-level expression. The cursor can be anywhere inside the expression or nested expressions. 6 | 7 | When defining functions, ++comma++ ++"e"++ ++"f"++ to evaluate them. Then underneath the function definition, write a call to that function with appropriate arguments and evaluate that expression to test your function. 8 | 9 |10 | 11 |
12 | 13 | 14 | ## Deconstructing / Exploring a code base 15 | 16 | Understanding Clojure code can sometime require you to evaluate only parts of an expression. These are the commands that help with that. 17 | 18 | ++comma++ ++"e"++ ++"e"++ evaluates the expression before the cursor and is very useful for evaluating nested expressions. You can also copy a nested expression `SPC v v` and paste it outside the parent expression and evaluate it with different values to see how it behaves. 19 | 20 | ++comma++ ++"e"++ ++semi-colon++ evaluates the current top-level expression and prints result as a comment. Very useful when developing new code or working with less familiar functions and useful to keep a living document in a design journal or spike. 21 | 22 | 23 | ## Replace code with result 24 | 25 | A powerful way to understand your code or explain to others what an expression does is to replace the code with result of its evaluation. This technique is especially useful for expressions that are nested within another expressions. 26 | 27 | ++comma++ ++"e"++ ++"w"++ - replace previous expression with its return value 28 | 29 | ++"u"++ to undo these changes and return to the original code. 30 | -------------------------------------------------------------------------------- /docs/documentation/cider-doc.md: -------------------------------------------------------------------------------- 1 | # Cider doc 2 | 3 | View the documentation for function definitions and other vars, including links to browse the Clojure specification and source code. 4 | 5 | !!! HINT "Evaluate a namespace to enable Help" 6 | Help only works for special forms (`def`, `if`, etc.) until any namespace from a project is first evaluated. 7 | 8 | ++comma++ ++single-quote++ (`sesman-start`) to start or connect to a REPL process 9 | 10 | ++comma++ ++"e"++ ++"f"++ with the cursor on the namespace definition in the source code buffer. This loads the `clojure.core` functions and vars and the required namespaces for the current namespace. 11 | 12 | Or ++comma++ ++"e"++ ++"b"++ to evaluate a source code buffer if all source code in that namespace is syntactically correct. 13 | 14 | ++comma++ ++"h"++ ++"d"++ shows the documentation for the current function or var under the cursor, or prompts for a function or var name. 15 | 16 |  17 | 18 | The documentation popup shows 19 | * the argument list of a function 20 | * meta data (version added, scope, etc) 21 | * doc-string describing the function or var 22 | * Clojure spec - argument, return specifications 23 | * Location and link to source code 24 | * Links to related functions 25 | 26 | ## Viewing the source code 27 | 28 | ++enter++ on the link to the source code will open the source in a separate buffer. 29 | 30 |  31 | 32 | 33 | ## Viewing the specification 34 | 35 | ++enter++ on the Browse Spec link will open the specification in a separate buffer. 36 | 37 |  38 | 39 | 40 | ## Clojuredocs examples 41 | 42 | [Clojuredocs](https://clojuredocs.org/){target=_blank} is a website with the documentation for the Clojure Standard Library. Each entry also contains many code examples of using each function, contributed by the Clojure community. 43 | 44 |  45 | -------------------------------------------------------------------------------- /docs/snippets/clojure-lsp/index.md: -------------------------------------------------------------------------------- 1 | # Clojure LSP Snippets 2 | 3 | ++tab++ on the name of the snippet to expand. ++tab++ to jump to additional tab stops. 4 | 5 | Clojure LSP snippets appear in the completion popup, in the same way as Clojure functions and other symbols. 6 | 7 |  8 | 9 | [Clojure LSP snippets](https://clojure-lsp.io/features/#snippets){target=_blank} are editor agnostic, usable in any editor that supports [clojure-lsp](https://clojure-lsp.io/), making them more useful that editor specific snippets. 10 | 11 | Clojure LSP snippets are defined using the EDN syntax and supports tab stops, placeholders with default values and can pull in a following form (`$current-form`). 12 | 13 | [Built-in snippets](https://clojure-lsp.io/features/#snippets){target=_blank} are defined in the [`clojure-lsp.feature.completion-snippet` namespace](https://github.com/clojure-lsp/clojure-lsp/blob/master/lib/src/clojure_lsp/feature/completion_snippet.clj){target=_blank}. 14 | 15 | [practicalli/clojure-lsp-config snippets](https://github.com/practicalli/clojure-lsp-config#custom-snippets){target=_blank .md-button} 16 | 17 | 18 | ## Checking available snippets 19 | 20 | `lsp-clojure-server-info` function prints the Clojure LSP configuration to the message buffer, 21 | 22 | The `:additional-snippets` top level key contains the user configuration. 23 | 24 | ```clojure title="clojure-lsp/config.edn" 25 | :additional-snippets 26 | [{:name "def-docstring", 27 | :detail "def with docstring", 28 | :snippet "(def \"$1\" $0)"} 29 | {:name "deftest", 30 | :detail "deftest clojure.test", 31 | :snippet 32 | "(deftest ${1:name}-test\n (testing \"${2:Context of the test assertions}\"\n (is (= ${3:assertion-values}))$4))\n $0"}] 33 | ``` 34 | 35 | `:project-settings` contain snippets defined in the project `.lsp/config.edn` file 36 | 37 | ```clojure 38 | :project-settings 39 | {:additional-snippets 40 | [{:name "def-docstring", 41 | :detail "def with docstring", 42 | :snippet "(def \"$1\" $0)"}]} 43 | ``` 44 | -------------------------------------------------------------------------------- /docs/external-repl/switching-to-repl.md: -------------------------------------------------------------------------------- 1 | # Switching to the REPL 2 | 3 | > #### Todo::re-write this section 4 | > Update for Clojure CLI tools 5 | 6 | `, s a` toggles between a Clojure code file buffer and the REPL buffer, opening the REPL buffer where required. 7 | 8 | `, s n` evaluates the namespace of the current Clojure file in the REPL, changing the REPL to be in that namespace. 9 | 10 | 11 | > ####Hint::To REPL buffer or not to REPL buffer 12 | > Many developers simply evaluate functions and expressions within the Clojure code buffer itself. 13 | > 14 | > A REPL buffer is very useful for showing larger results from evaluating code and any side effect information such as logging and debugging. 15 | 16 | 17 | ## Select the REPL namespace 18 | 19 | `SPC SPC cider-repl-set-ns` displays a pop-up buffer of all the available namespaces. 20 | 21 | A running REPL is required. 22 | 23 | 24 | > ####Hint::The `user` namespace 25 | > When starting a REPL the default namespace is called `user`. This namespace contains the `clojure.repl` library allowing you to call functions useful for development, such as `(doc ,,,)`, `(source ,,,)`, etc. 26 | > 27 | > To use the `doc` and `source` tools, you can stay in the `user` namespace and use `require` function to include your own code in the `user` namespace. For example: 28 | > 29 | ```clojure 30 | (require 'my-custom-code.core) 31 | (require '[my-custom-code-time :as time]) 32 | ``` 33 | 34 | ## Setting the default REPL namespace 35 | 36 | Set the namespace used when starting the REPL in the `project.clj` file by adding `:init-ns` to the `:repl-options` 37 | 38 | ```clojure 39 | :repl-options {:init-ns the-default.namespace} 40 | 41 | ``` 42 | 43 | 44 | ## Keybindings 45 | 46 | | Keybinding | Description | 47 | |------------|----------------------------------------------------| 48 | | `, s a` | toggle between source code and REPL buffer | 49 | | `, s o` | Switch between CLJ & CLJS REPLs in current project | 50 | 51 | 52 | ## REPL Buffer 53 | 54 | The REPL buffer contains a detailed welcome message describing how to use the basics of the REPL. 55 | 56 |  57 | -------------------------------------------------------------------------------- /docs/spacemacs-basics/evil/editing-states.md: -------------------------------------------------------------------------------- 1 | # Evil editing states 2 | 3 |  4 | 5 | Each states allows keys to have different behaviour, helping minimise the cognitive load and quickly building muscle memory for very powerful actions. 6 | 7 | | Evil state | Description | 8 | |------------|--------------------------------------------------------------------------| 9 | | **normal** | manipulating and navigating existing text (default state) | 10 | | **insert** | writing new text | 11 | | **visual** | selecting regions of text | 12 | | **iedit** | edit multiple regions simultaneously | 13 | | **lisp** | structural editing for Clojure & Lisp style languages (e.g. slurp, barf) | 14 | 15 | First get familiar with **normal**, **insert** and **visual** states. Then when you are comfortable, move on to **iedit** and **lisp** states. 16 | 17 | !!! TIP "Normal state by default" 18 | Evil normal state should be used most of the time, unless you are writing code or creating lots of text. 19 | 20 | 21 | ## Important key bindings 22 | 23 | ++"v"++ opens the visual state and allows you to selects text 24 | 25 | ++"i"++, ++"I"++, ++"a"++, ++"A"++, ++"o"++ , ++"O"++ all open insert state and allows you to type new text 26 | 27 | ++esc++ or ++"f"++ ++"d"++ returns to Normal mode for text manipulation and leader / local leader commands 28 | 29 | ++coma++ menu contains the major mode (e.g. Clojure) specific commands, organised mnemonically 30 | 31 | ++spc++ ++"s"++ ++"e"++ opens iedit and selects all matching instances of the highlighted text for editing 32 | 33 | ++spc++ ++"k"++ opens Lisp state, allowing you to do [:fontawesome-solid-book-open: structural editing](/spacemacs/structural-editing/) 34 | 35 | 36 | !!! TIP "Refactor code tools" 37 | The [:fontawesome-solid-book-open: Refactor section](/spacemacs/refactor/) has further editing techniques and Clojure specific refactoring tools. 38 | -------------------------------------------------------------------------------- /docs/database-access/using-sql.md: -------------------------------------------------------------------------------- 1 | # Using SQL from Spacemacs 2 | 3 | Once the sql layer is installed and connections are configured, connect to a database and run queries from within an Emacs buffer. 4 | 5 | 6 | ## Connect to PostgreSQL 7 | 8 | ++spc++ ++spc++ `sql-postgres` will create a database connection using the `sql-postgres-login-params` and prompt for the password. 9 | 10 | If the connection is not defined, Emacs prompts for all the server connection information. 11 | 12 | An SQLi buffer is created and associated with the current SQL buffer. 13 | 14 | 15 | ## Write and run queries 16 | 17 | Type SQL commands into the SQLi buffer to execute 18 | 19 | Compose queries in the SQL buffer. Run a query by selecting the query and run the command `SPC SPC sql-send-region` 20 | 21 | (bound to ++ctrl+c++ ++ctrl+r++ by default) to execute or sql-send-buffer (bound to ++ctrl+c++ ++ctrl+b++ by default) to execute all the buffer. 22 | 23 | 24 | ## SQL product 25 | 26 | sql-product-interactive is an autoloaded interactive Lisp function in ‘sql.el.gz’. 27 | 28 | (sql-product-interactive &optional PRODUCT NEW-NAME) 29 | 30 | Run PRODUCT interpreter as an inferior process. 31 | 32 | If buffer ‘*SQL*’ exists but no process is running, make a new process. 33 | 34 | If buffer exists and a process is running, just switch to buffer ‘*SQL*’. 35 | 36 | To specify the SQL product, prefix the call with SPC u. To set the buffer name as well, prefix the call to M-x sql-product-interactive with SPC u SPC u. 37 | 38 | (Type C-h m in the SQL buffer for a list of commands.) 39 | 40 | 41 | ## Tweaks 42 | 43 | 44 | ```lisp 45 | (add-hook 'sql-interactive-mode-hook 46 | (lambda () 47 | (toggle-truncate-lines t))) 48 | ``` 49 | 50 | 51 | toggle-truncate-lines is an interactive native compiled Lisp function in ‘simple.el’. 52 | 53 | It is bound to C-x x t. 54 | 55 | (toggle-truncate-lines &optional ARG) 56 | 57 | Toggle truncating of long lines for the current buffer. 58 | 59 | When truncating is off, long lines are folded. 60 | 61 | With prefix argument ARG, truncate long lines if ARG is positive, otherwise fold them. Note that in side-by-side windows, this command has no effect if ‘truncate-partial-width-windows’ is non-nil. 62 | -------------------------------------------------------------------------------- /docs/introduction/why-spacemacs/mnemonic-menu.md: -------------------------------------------------------------------------------- 1 | # Mnemonic Menu with Which-Key 2 | 3 | Spacemacs uses [which-key](https://github.com/justbur/emacs-which-key) to create a menus system of keybindings for the most commonly used commands. 4 | 5 | Which-key provides single chord keybindings, `SCP p f` rather than `C-x C-p C-f`. Single chord key bindings are easier to remember and therefore make Spacemacs simpler to learn and faster to use. Single chorded key bindings are also less of a strain on hands when typing. 6 | 7 | Mnemonic characters for keys are used where possible, using the first character of a command or a prominent character if a particular character is already taken. Sub-menus are added to increase the range of characters available for a menu. Spacemacs prefers a sub-menu rather than upper case or non-mnemonic characters. 8 | 9 |  10 |  11 | 12 | 13 | ## Which-key menu controls 14 | 15 | `C-h` opens the which-key command menu, allowing navigation through menus and sub-menus. 16 | 17 |  18 |  19 | 20 | `C-h n` shows the next page of commands when a menu is so large it is be spanned over several pages. `C-h p` shows the previous menu page. 21 | 22 | `C-h u` to show the parent of the current menu, useful if you navigated to an incorrect sub-menu. 23 | 24 | | Keybinding | Description | 25 | |------------|-----------------------| 26 | | `C-h` | Paging / help menu | 27 | | `n` | next page in menu | 28 | | `p` | previous page in menu | 29 | | `u` | up to parent menu | 30 | | `h` | help | 31 | | `a` | abort | 32 | -------------------------------------------------------------------------------- /docs/alternative-tooling/leiningen.md: -------------------------------------------------------------------------------- 1 | ## Leiningen 2 | 3 | [Leiningen](http://leiningen.org/) is the most commonly used build automation tool used to manage Clojure projects. Install by [saving the Leiningen install script](https://raw.githubusercontent.com/technomancy/leiningen/stable/bin/lein) and running it inside a terminal window. 4 | 5 | * [Install script for Linux & MacOSX](https://raw.githubusercontent.com/technomancy/leiningen/stable/bin/lein) 6 | * [Install script for Microsoft Windows](https://raw.githubusercontent.com/technomancy/leiningen/stable/bin/lein.bat) or use the Linux script from [GitBash](https://git-scm.com/) (recommended). 7 | 8 | Save the `lein` file to somewhere on your operating system path, eg `~/bin` 9 | 10 | ```bash 11 | chmod a+x ~/bin/lein 12 | lein 13 | ``` 14 | 15 | Now run this script on the command line 16 | 17 | ```bash 18 | lein 19 | ``` 20 | 21 | The first time you run this script it downloads a Java archive file (JAR) of the latest version of Leiningen. When you run the script again, you have a working Leiningen build tool. 22 | 23 | Running `lein` once installed will show you a list of available commands. 24 | 25 | 26 | ## Clojure 27 | 28 | If you are using Leiningen then there is no specific install for Clojure. 29 | 30 | Clojure comes as a library, a JAR file, managed by the build tool Leiningen just like any other dependency. 31 | 32 | When you create a project with Leiningen, the configuration is created in a file called `project.clj`. Inside this `project.clj` is a `dependencies` entry where the version of clojure is specified along with any other dependencies. Here is an example of a `project.clj` configuration with just Clojure as a dependency 33 | 34 | ``` 35 | (defproject project-name "0.1.0-SNAPSHOT" 36 | :description "FIXME: write description" 37 | :url "http://example.com/FIXME" 38 | :license {:name "Eclipse Public License" 39 | :url "http://www.eclipse.org/legal/epl-v10.html"} 40 | :dependencies [[org.clojure/clojure "1.11.1"]]) 41 | ``` 42 | 43 | > **Hint** The Clojure library is very small (~3.6Mb) and Leiningen caches it and all other libraries locally in the same folder structure that Maven uses, eg Clojure version 0.1.8 would be cached in `.m2/repository/org/clojure/clojure/1.11.1` 44 | -------------------------------------------------------------------------------- /docs/install-spacemacs/update.md: -------------------------------------------------------------------------------- 1 | # Update Spacemacs and Packages 2 | 3 | Updating Spacemacs comes in three sections: 4 | 5 | * Pull latest Spacemacs commits 6 | * Compare changes with `.spacemacs-template` file 7 | * Install Packages 8 | 9 |10 | 11 |
12 | 13 | 14 | ## Update Spacemacs project files 15 | 16 | Open `$XDG_CONFIG_HOME/emacs/README.md` or `$HOME/.emacs.d/README.md` 17 | 18 | ++spc++ ++"g"++ ++"s"++ opens Magit status for the Spacemacs project 19 | 20 | `F` pop-ups the pull menu, use `-r` to set rebase to `true` 21 | 22 | `u` to pull from upstream. 23 | 24 | If upstream is not set, Spacemacs will prompt you with a list of available remotes, there will be only one (the remote added when you first cloned the repository). 25 | 26 | Spacemacs should update itself using Git in a few seconds. 27 | 28 | `q` to quit Magit status buffer. 29 | 30 | 31 | ## Update the Spacemacs configuration 32 | 33 | ++spc++ ++"f"++ ++"e"++ ++d++ opens an `ediff` session, comparing your current `.spacemacs` file with the latest `.spacemacs-template`. 34 | 35 | ++n++, ++p++ navigates (down/up) between each difference in the file. ++b++ copies a change from the template to your `.spacemacs file`. Accept all the changes from the template unless you know you made a specific change to your `.spacemacs` file. 36 | 37 | ++q++ to quit the ediff session and ++spc++ ++"f"++ ++"s"++ to save the changes to the Spacemacs configuration. 38 | 39 | 40 | ## Update Packages 41 | 42 | ++spc++ ++"f"++ ++"e"++ ++u++ updates shows the list of packages that will be updated 43 | 44 | ++y++ to confirm you want to install the packages 45 | 46 | _Wait until Spacemacs prompts to restart_ 47 | 48 | ++spc++ ++"q"++ ++"r"++ to restart Spacemacs. The new versions of the packages are install when Spacemacs starts up again. 49 | 50 | _If downloading a considerable number of packages, or you see a lot of warnings, then using `SPC q r` for a second time can be useful to ensure that all new packages have been loaded correctly._ 51 | -------------------------------------------------------------------------------- /docs/reference/keybindings/vim-keybindings.md: -------------------------------------------------------------------------------- 1 | # Useful Vim key bindings 2 | 3 | ## movement 4 | 5 |
 6 | 0 - beginning of line
 7 | ^ - beginning of non-whitespace
 8 | $ - end of line
 9 | 9j - move down 9 lines
10 | w - move forward by word
11 | b - move backward by word
12 | gg - first line
13 | G - last line
14 | C-u - up half page
15 | C-d - down half page
16 | f/ - move forward to first "/" character
17 | t/ - move forward right before the first "/" character
18 | ; - repeat that command again
19 | H - head of the screen
20 | M - middle of the screen
21 | L - last of the screen
22 | } - move forward by paragraph or block
23 | { - move backwards by paragraph or block
24 | * - search for word under the cursor
25 |     n - search again forward
26 |     N - search again backwards
27 | # - search backwards for word under cursor
28 | / - search forward
29 | ? - search backward
30 | % - find matching brace, paren, etc
31 | ma - mark a line in a file with marker "a"
32 | `a - after moving around, go back to the exact position of marker "a"
33 | 'a - after moving around, go back to line of marker "a"
34 | :marks - view all the marks
35 | '' - go to the last place you were
36 | [{ - jump back to the "{" at the beginning of the current code block
37 |
38 |
39 | ## editing
40 |
41 |
42 | x - delete char under cursor
43 | X - delete char before cursor
44 | A - add to end of line
45 | I - insert at the beginning of the line
46 | dd - delete line
47 | D - delete from cursor to end of line
48 | di' - delete text inside single quotes
49 | yy - copy line
50 | Y - copy from cursor to end of line
51 | cc - change line
52 | C - change from cursor to end of line
53 | cit - change text inside html tag
54 | ci' - change text inside single quotes
55 | ci{ - change text inside curly brackets.
56 | ci... - etc
57 | p - paste after cursor
58 | P = paste before cursor
59 | o - add line below
60 | O - add line above
61 | . = repeat last comment
62 | r - replace character
63 | R - replace. (overwrite) (good for columns of text)
64 | J - join line (cursor can be anywhere on line)
65 |
66 |
67 | ## visual mode
68 |
69 | 70 | v - visual char mode 71 | V - visual line mode 72 | C-v - block visual mode 73 |74 | 75 | v - visual char mode 76 | V - visual line mode 77 | C-v - block visual mode 78 | 79 | -------------------------------------------------------------------------------- /docs/introduction/why-spacemacs/structural-editing.md: -------------------------------------------------------------------------------- 1 | # Structural Editing 2 | 3 | Structural editing is an invaluable tool when working with Lisp languages (elisp, lisp, clojure, etc) as it enables you to easily move code around without breaking the structural syntax of the language. 4 | 5 | Clojure has very precise syntax as everything is contained in a list or similar structure. It is very simple to navigate the structure of Clojure code by jumping from expression to expression. 6 | 7 | This well defined structure also makes it trivial to move expressions around, giving you a simple way to develop and refactor your code. 8 | 9 |
10 | 11 |
12 | 13 | !!! HINT "Structural Editing Section" 14 | [Structural editing section](/spacemacs/structural-editing/) provides a detailed guide to using Lisp mode, Smartparens, Paredit and Evil mode to manage your Clojure (and elsip) code. 15 | 16 | 17 | ## Smartparens For Writing Structural Text 18 | 19 | Spacemacs uses [smartparens](https://github.com/Fuco1/smartparens){target=_blank} to help you write structural code really fast and also move expressions around. Smartparens is a newer implementation of the classic _paredit_ package. 20 | 21 | !!! HINT "Evil-cleverparens" 22 | [Evil-cleverparens](https://github.com/luxbock/evil-cleverparens){target=_blank} configures Vim states to respect smartparens rules. This ensures that you do not accidentally delete parenthesis and keeps the structure of your Clojure intact. 23 | 24 | See the section on [Evil Clojure Editing](/spacemacs/install-spacemacs/evil-structural-editing.md). 25 | 26 | ## Lisp State For Manipulating Structural Text 27 | 28 | ++spc+"k"+period++ opens **lisp-state** for refactoring Lisp base languages like Clojure and eLisp. 29 | 30 | **lisp-state** allows use of the Vim normal state keys to navigate your code by its structure, ++"j"++,++"k"++,++"h"++,++"l"++. 31 | 32 | Move symbols and expressions around without breaking parenthesis and other structural characters (using `slurp`, `barf`, `wrap`, `unwrap`, etc.). 33 | -------------------------------------------------------------------------------- /docs/refactor/index.md: -------------------------------------------------------------------------------- 1 | # Refactor Clojure Code 2 | 3 | General refactor steps such as changing function names can be done with the [Evil tools](/spacemacs/spacemacs-basics/evil-tools/), `iedit`, `narrowing` and `helm-ag`. These do not require a running Clojure REPL. Examples of refactoring names: [functions](functions.md), [namespace](namespace.md) or [project](project.md). 4 | 5 | [Structural editing](/spacemacs/structural-editing/) via the `SPC k` lisp state uses `smartparens` to alter the your code whist respecting the structure, as defined by parens, `[ ] { } ( )` and even `" "`. Smartparens works for all languages, although is most useful with lisp syntax. 6 | 7 | 8 | | Refactor Approach | Usage | 9 | |-------------------------------------------------------------------------------------|--------------------------------------------------------------------| 10 | | [narrowing](/spacemacs/spacemacs-basics/evil-tools/narrowing.md) | refactor in function on region (usually with iedit) | 11 | | [iedit](/spacemacs/spacemacs-basics/evil-tools/iedit.md) | refactor in current namespace | 12 | | [helm-ag](/spacemacs/spacemacs-basics/evil-tools/replacing-text-across-projects.md) | project wide refactor (usually with iedit) | 13 | | [lisp state](/spacemacs/structural-editing/lisp-state.md) | A state for smartparens [structural editing](/structural-editing/) | 14 | | [clojure-mode](clojure-mode/) | ++comma++ ++"r"++ for clojure specific refactor commands | 15 | | [Clojure LSP](clojure-lsp/) | ++comma++ ++"r"++ for clojure specific refactor commands | 16 | 17 | 18 | ## Clojure REPL based refactoring 19 | 20 | Clojure specific refactor commands are in the clojure mode refactor menu, `, r` provided by the package `clj-refactor`. These refactor commands typically require a running Clojure REPL 21 | 22 | ++comma++ ++"e"++ ++"u"++ `(cider-undef)` when changing a name of a var (`def`, `defn`) to keep the REPL clean of stale names. 23 | -------------------------------------------------------------------------------- /docs/termux/spacemacs.md: -------------------------------------------------------------------------------- 1 | # Install Spacemacs 2 | 3 | Emacs version 28 available as current package 4 | 5 | ``` 6 | pkg install emacs 7 | ``` 8 | 9 | 10 | ## Clone Spacemacs 11 | 12 | Use your favourite git client or the following command in a terminal window to clone Spacemacs: 13 | 14 | === "Free Desktop XDG config" 15 | ``` 16 | git clone https://github.com/syl20bnr/spacemacs ~/.config/emacs 17 | ``` 18 | 19 | === "Classic config" 20 | ``` 21 | git clone https://github.com/syl20bnr/spacemacs ~/.emacs.d 22 | ``` 23 | 24 | ## Clone Practicalli Spacemacs configuration 25 | 26 | Clone [practicalli/spacemacs.d](https://github.com/practicalli/spacemacs.d) configuration or first create a fork and clone that fork 27 | 28 | 29 | === "Free Desktop XDG config" 30 | Using SSH 31 | ```shell 32 | git clone git@github.com:practicalli/spacemacs-config.git ~/.config/spacemacs 33 | ``` 34 | 35 | Using HTTPS 36 | ```shell 37 | git clone https://github.com/practicalli/spacemacs-config ~/.config/spacemacs 38 | ``` 39 | 40 | `~/.config/spacemacs/init.el` is the main configuration file, ensure `~/.spacemacs` file does not exist as that file would take precedence. 41 | 42 | Ensure `SPACEMACSDIR` environment variable is set to the Practicalli Spacemacs configuration directory in the `~/.profile` file 43 | ```bash title="SPACEMACSDIR environment variable in ~/.profile" 44 | export XDG_CONFIG_HOME=$HOME/.config 45 | export XDG_DATA_HOME=$HOME/.local/share 46 | export XDG_STATE_HOME=$HOME/.local/state 47 | export XDG_CACHE_HOME=$HOME/.cache 48 | 49 | # Set XDG location of Emacs Spacemacs configuration 50 | export SPACEMACSDIR="$XDG_CONFIG_HOME/spacemacs" 51 | ``` 52 | 53 | 54 | === "Classic config" 55 | Using SSH 56 | ```shell 57 | git clone git@github.com:practicalli/spacemacs.d.git ~/.spacemacs.d 58 | ``` 59 | 60 | Using HTTP 61 | ```shell 62 | git clone https://github.com/practicalli/spacemacs.d ~/.spacemacs.d 63 | ``` 64 | 65 | `~/.spacemacs.d/init.el` is the main configuration file, ensure `~/.spacemacs` file does not exist as that file would take precedence. 66 | 67 | 68 | 69 | ### Searching files 70 | 71 | Spacemacs uses ripgrep, a highly optimised tool for finding files on the operating system. 72 | 73 | ``` 74 | pkg install ripgrep 75 | ``` 76 | -------------------------------------------------------------------------------- /.github/workflows/megalinter.yaml: -------------------------------------------------------------------------------- 1 | --- 2 | # MegaLinter GitHub Action configuration file 3 | # More info at https://megalinter.io 4 | # All variables described in https://megalinter.io/latest/configuration/ 5 | 6 | name: MegaLinter 7 | on: 8 | workflow_dispatch: 9 | pull_request: 10 | branches: [main] 11 | push: 12 | branches: [main] 13 | 14 | # Run Linters in parallel 15 | # Cancel running job if new job is triggered 16 | concurrency: 17 | group: "${{ github.ref }}-${{ github.workflow }}" 18 | cancel-in-progress: true 19 | 20 | jobs: 21 | megalinter: 22 | name: MegaLinter 23 | runs-on: ubuntu-latest 24 | steps: 25 | - run: echo "🚀 Job automatically triggered by ${{ github.event_name }}" 26 | - run: echo "🐧 Job running on ${{ runner.os }} server" 27 | - run: echo "🐙 Using ${{ github.ref }} branch from ${{ github.repository }} repository" 28 | 29 | # Git Checkout 30 | - name: Checkout Code 31 | uses: actions/checkout@v4 32 | with: 33 | fetch-depth: 0 34 | sparse-checkout: | 35 | docs 36 | overrides 37 | .github 38 | - run: echo "🐙 Sparse Checkout of ${{ github.repository }} repository to the CI runner." 39 | 40 | # MegaLinter Configuration 41 | - name: MegaLinter Run 42 | id: ml 43 | ## latest release of major version 44 | uses: oxsecurity/megalinter/flavors/documentation@v8 45 | env: 46 | # ADD CUSTOM ENV VARIABLES OR DEFINE IN MEGALINTER_CONFIG file 47 | MEGALINTER_CONFIG: .github/config/megalinter.yaml 48 | 49 | GITHUB_TOKEN: "${{ secrets.GITHUB_TOKEN }}" # report individual linter status 50 | # Validate all source when push on main, else just the git diff with live. 51 | VALIDATE_ALL_CODEBASE: >- 52 | ${{ github.event_name == 'push' && github.ref == 'refs/heads/main'}} 53 | 54 | # Upload MegaLinter artifacts 55 | - name: Archive production artifacts 56 | if: ${{ success() }} || ${{ failure() }} 57 | uses: actions/upload-artifact@v4 58 | with: 59 | name: MegaLinter reports 60 | path: | 61 | megalinter-reports 62 | mega-linter.log 63 | 64 | # Summary and status 65 | - run: echo "🎨 MegaLinter quality checks completed" 66 | - run: echo "🍏 Job status is ${{ job.status }}." 67 | -------------------------------------------------------------------------------- /docs/termux/clojure-development.md: -------------------------------------------------------------------------------- 1 | # Clojure development environment 2 | 3 | A comprehensive development environment for Clojure, supporting a REPL workflow and static analysis of code via Clojure Language Server Protocol. 4 | 5 | 6 | ## Java host platform 7 | 8 | Install OpenJDK to host the Clojure REPL process and run packaged Clojure applications. 9 | 10 | Java 17 Long Term Support version is recommended as it is very stable, receives security updates and has the latest highly tested performance improvements. 11 | 12 | ``` 13 | pkg install openjdk-17 14 | ``` 15 | 16 | 17 | ## Install Clojure 18 | 19 | Clone practicalli/clojure-cli-config to add a wide range of community tools to the Clojure CLI 20 | 21 | ```bash 22 | git clone git@github.com:practicalli/clojure-cli-config.git ~/.config/clojure 23 | ``` 24 | 25 | 26 | Use the Linux install with a prefix path pointing to Termux equivalent of `/usr/local`. Find the path using `echo $PATH` and remove `bin` from the end. Without the prefix Clojure will not install correctly 27 | 28 | ```bash 29 | curl -O https://download.clojure.org/install/linux-install-1.11.1.1149.sh 30 | 31 | chmod +x linux-install-1.11.1.1149.sh 32 | 33 | ./linux-install-1.11.1.1149.sh --prefix /data/data/com.termux/files/usr/ 34 | ``` 35 | 36 | `clojure` binary is installed in the existing bin, lib and share directories in `/data/..../usr/`, placing that binary on the system execution path. 37 | 38 | Test by running a REPL session, for example with Rebel Readline 39 | 40 | ``` 41 | clojure -M:repl/rebel 42 | ``` 43 | 44 | > optionally install rlwrap package if using the basic repl terminal UI 45 | 46 | 47 | ## Install Clojure LSP 48 | 49 | Visit [clojure-lsp GitHub releases page](https://github.com/clojure-lsp/clojure-lsp/releases){target=_blank} and download the `clojure-lsp` file 50 | 51 | - visit the relases page in firefox and copy the link to the file. 52 | - use wget and paste the link to the file to download 53 | - make executable `chmod 755 clojure-lsp` 54 | - test locally `./clojure-lsp --version` - should print clojure-lsp version and clj-kondo version 55 | - copy or move file to path `mv clojure-lsp $PATH` 56 | 57 | Clone [practicalli/clojure-lsp-config](https://github.com/practicalli/clojure-lsp-config){target=_blank} repository to the `~/.config/clojure-lsp` directory 58 | 59 | ```shell 60 | git clone https://github.com/practicalli/clojure-lsp-config.git ~/.config/clojure-lsp 61 | ``` 62 | -------------------------------------------------------------------------------- /docs/navigating-code/code-folding.md: -------------------------------------------------------------------------------- 1 | # Code folding 2 | 3 | Code folding allows you to collapse a code block onto one line, allowing you to see more of your code in the window. A code block for Clojure includes comments, `def`, `defn` and the threading macros `->` and `-->`. 4 | 5 | !!! HINT "Overview of a namespace" 6 | ++"z"++ ++"m"++ shows just the names of all function definitions and vars in a namespace, providing a quick way to review all namespace api. 7 | 8 | ## Keybindings 9 | 10 | | Evil state | Description | 11 | |-----------------|---------------------------------------------| 12 | | ++"z"++ ++"a"++ | Toggle fold for current code block | 13 | | ++"z"++ ++"c"++ | Folds a code block | 14 | | ++"z"++ ++"m"++ | Folds all code in buffer | 15 | | ++"z"++ ++"o"++ | Opens current folded code block | 16 | | ++"z"++ ++o++ | Opens current folded code block recursively | 17 | | ++"z"++ ++"r"++ | Opens all folded code blocks in the buffer | 18 | 19 | 20 | ## Code Fold Transient State 21 | 22 | ++spc++ ++"z"++ opens a transient state for folding code, most useful when reviewing code. 23 | 24 |  25 | 26 | 27 | # Code folding methods 28 | 29 | There are two code folding methods, evil folding (the default) and [origami](https://github.com/gregsexton/origami.el){target=_blank}. Evil fold is recommended for Clojure development. 30 | 31 | Origami adds a recursive open and close and what it calls an org-mode header collapse (didn't seem to work on Clojure code). Origami seems less useful for Clojure than evil-fold, as folding seems to only work at the top level. 32 | 33 | Origami allows you to [write your own parser](https://github.com/gregsexton/origami.el#does-it-support-my-favourite-major-mode){target=_blank} to teach different ways to fold code. Origami is a great choice if you want to customise your code folding. 34 | 35 | 36 | ## Switching to origami code folding 37 | 38 | ++spc++ ++"f"++ ++"e"++ ++"d"++ to open the Spacemacs configuration file 39 | 40 | ++spc++ ++"s"++ ++"s"++ `dotspacemacs-folding-method` to find the code folding setting, ++enter++ to end the search. 41 | 42 | Change the code folding method: `dotspacemacs-folding-method 'origami` 43 | 44 | ++spc++ ++"q"++ ++"r"++ to restarting Emacs and download the origami package. 45 | -------------------------------------------------------------------------------- /docs/structural-editing/smartparens.md: -------------------------------------------------------------------------------- 1 | # Smartparens - Writing structural text 2 | 3 | Spacemacs uses [Smartparens](https://github.com/Fuco1/smartparens) to write and navigate code quickly, ensuring the structure of the code does not break (i.e. no unbalanced parens). 4 | 5 | smartparens keeps parens in balance by automatically creating a closing paren when you type an open paren, e.g () for lists, [] for vectors, {} for maps and "" for strings. 6 | 7 | ## Smartparens strict mode 8 | 9 | Enable strict mode to prevent the deletion of parens that would leave them unbalanced. For example, the characters within parens must be deleted before deleting both parens at the same time. 10 | 11 |12 | 13 |
14 | 15 | 16 | ++spc++ ++"f"++ ++"e"++ ++"d"++ to edit the Spacemacs configuration file and update `dotspacemacs-smartparens-strict-mode` to have a value of `t` 17 | 18 |  19 | 20 | !!! HINT "Smartparens supports all languages" 21 | Smartparens is a newer implementation of _paredit_ package and provides support for all languages, not just Clojure. [Paredit and smartparens](https://github.com/Fuco1/smartparens/wiki/Paredit-and-smartparens) has a comparison of these two packages. 22 | 23 | ## Jump past the end of an expression 24 | 25 | Using smart closing parenthesis, `)` jumps to the end of the current expression. 26 | 27 | `C-q` temporarily disables this feature, allowing a `)` to be entered 28 | 29 | `dotspacemacs-smart-closing-parenthesis` in `.spacemacs` controls this feature, set this to `t` to enable. 30 | 31 | ```elisp 32 | dotspacemacs-smart-closing-parenthesis t 33 | ``` 34 | 35 | 36 | ## Smartparens and symbol highlighting 37 | 38 | Spacemacs highlights the surrounding symbols, including any parents. So if you are in a nested list, `(parent code (nested code))`, then if the cursor is on the nested code, both nested & parent symbols are highlighted. 39 | 40 | A closing symbol is also highlighted when the cursor is at the opening symbol. 41 | 42 | 43 | ## References 44 | 45 | * [Animated guide to paredit](http://danmidwood.com/content/2014/11/21/animated-paredit.html) 46 | -------------------------------------------------------------------------------- /docs/improving-code/idiomatic-code-checking.md: -------------------------------------------------------------------------------- 1 | # Idiomatic code with Kibit 2 | 3 | kibit is a static code analyzer for Clojure, ClojureScript, cljx and other Clojure variants. It uses core.logic to search for patterns of code that could be rewritten with a more idiomatic function or macro. For example if kibit finds the code 4 | 5 | 6 | ```clojure 7 | (defproject project-name "0.0.1" 8 | :description "Eastwood Sample Project" 9 | :license "Eclipse Public License 1.0" 10 | :url "http://www.bradcypert.com" 11 | :dependencies [[org.clojure/Clojure "1.10.1"]] 12 | :plugins [[lein-tar "3.2.0"] 13 | [jonase/eastwood "0.2.4"] 14 | [lein-kibit "0.1.5"]]) 15 | ``` 16 | 17 | `lein kibit` in a terminal will run the analysis on your project and output recommendations 18 | 19 | ```shell 20 | At /Users/brad/Projects/podcasts/app/src/app/db/processors.clj:14: 21 | Consider using: 22 | (update-in podcast [:feed] podcast-service/parse-feed) 23 | instead of: 24 | (assoc podcast :feed (podcast-service/parse-feed (:feed podcast))) 25 | 26 | At /Users/brad/Projects/podcasts/app/src/app/db/processors.clj:30: 27 | Consider using: 28 | (when (not exists?) 29 | (doall 30 | (map 31 | (partial notifications/new-episode podcast episode) 32 | subscribed-users))) 33 | instead of: 34 | (if (not exists?) 35 | (doall 36 | (map 37 | (partial notifications/new-episode podcast episode) 38 | subscribed-users)) 39 | nil) 40 | 41 | At /Users/brad/Projects/podcasts/app/src/app/modules/auth.clj:17: 42 | Consider using: 43 | (if-not (some nil? [item source]) (hashers/check item source) false) 44 | instead of: 45 | (if (not (some nil? [item source])) (hashers/check item source) false) 46 | ``` 47 | 48 | Kibit will scan your code and check it against idiomatic code patterns (using `core.logic`) and recommend how to simplify and reduce your code complexity. 49 | 50 | The output excerpt shows two different suggestions: Simplifying an `if` to a `when` and condensing an `if` and `not` to an `if-not`. 51 | 52 | `lein kibit --replace` will fix these issues for you. 53 | 54 | `lein kibit --replace --interactive` will automatically walk you through each recommendation and ask if want to use it. 55 | 56 | 57 | 62 | -------------------------------------------------------------------------------- /docs/source-control/magit/staging-changes.md: -------------------------------------------------------------------------------- 1 | # Staging changes 2 | 3 | Regularly staging changes provides an additional safety net as you work towards a meaningful change. 4 | 5 | Magit enables very fine grain selection when staging changes. A file, a hunk or even a specific line can be staged and unstaged. This makes it very easy to create clean commits. 6 | 7 | ++"s"++ to stage the current file, hunk or selected region. Multiple files can be staged by selecting the filenames. ++s++ stages all the **untracked files** and **Unstaged changes**. 8 | 9 | ++"u"++ to unstage the current file, hunk or selected region in the **staged changes** section. ++u++ to unstage everything (from anywhere in the Magit Status buffer). 10 | 11 |  12 | 13 | ++tab++ to expand a section, eg. a file expands to git hunks, hunks expand to lines in the hunk. ++shift+tab++ to collapse a section. 14 | 15 | ++bracket-left++ to jump down from section to section, ++bracket-right++ to jump back up. 16 | 17 | ++"v"++ to visually select one or more filenames or lines to stage or unstage. 18 | 19 | !!! INFO "Visual select within hunk boundary" 20 | Selecting lines to stage or unstage only works within the Git hunk boundary. The action fails if lines are selected from more than one hunk. 21 | 22 | !!! HINT "Hiding white-space in Magit diff" 23 | `D` in the Magit Status buffer to change how diffs are rendered 24 | 25 | `-b` ignore whitespace changes 26 | 27 | `-w` to ignore all whitespace 28 | 29 | 30 | ## Renamed files 31 | 32 | ++"s"++ to stage the deleted file (previous file name) and the new file name (in untracked files). Magit status should show the file as renamed, unless the contents was significantly changed. 33 | 34 | ++"x"++ on a file name in Magit Status buffer will delete that file. A prompt will show in the mini-buffer to confirm you want to 'Trash' the file. 35 | 36 | ++"v"++ enters visual select mode, ++"j"++ and ++"k"++ can be used to select multiple files. ++"x"++ deletes all the selected files, with a mini-buffer prompt to confirm. 37 | 38 | 39 | ## Magit staging and commit basics 40 | 41 |42 | 43 |
44 | -------------------------------------------------------------------------------- /docs/source-control/magit/forge/forks.md: -------------------------------------------------------------------------------- 1 | # Create a remote repository or fork 2 | 3 | Fork of a Git project already cloned locally, e.g. to create a pull request and contribute back to an open source project. 4 | 5 | ??? WARNING "Only GitHub is supported" 6 | 7 | 8 | ## Fork a cloned repository 9 | 10 | > `SPC g c` will clone a remote repository and prompts for a name or URL 11 | 12 | `SPC g s` to open Magit Status 13 | 14 | `@ c f` to create a remote fork, 15 | 16 | Select or type in the name of the GitHub user or organisation account in which the fork of the repository should be created. 17 | 18 |  19 |  20 | 21 | Confirm the name of the alias for the forked repository (the name used as the push/pull default) 22 | 23 | ## Configure owned accounts and organisations 24 | 25 | Include the accounts owned to have the names pre-filled when selecting where to create repositories, i.e. when creating a fork. 26 | 27 | Define accounts and organisations in which a fork can be create using the `forge-owned-accounts` setting. 28 | 29 | ```emacs title="Spacemacs Configuration - dotspacemacs/user-config" 30 | (setq forge-owned-accounts '(("practicalli" "practicalli-john" ))) 31 | ``` 32 | 33 | Define accounts and organisations that should not be included, overriding matching items in the `forge-owned-accounts` setting. 34 | 35 | ```emacs title="Spacemacs Configuration - dotspacemacs/user-config" 36 | (setq forge-owned-blacklist '(("bad-hacks" "really-bad-hacks")))` 37 | ``` 38 | 39 | !!! EXAMPLE "Practicall Spacemacs Config" 40 | [practicalli/spacemacs-config](https://github.com/practicalli/spacemacs-config) repository contains these settings. 41 | ```emacs 42 | ;; GitHub user and organisation accounts owned 43 | ;; used by @ c f to create a fork 44 | (setq forge-owned-accounts 45 | '(("practicalli" "practicalli-john" 46 | "ClojureBridgeLondon" "ldnclj" 47 | "clojure-hacks"))) 48 | 49 | ;; Blacklist Forge accounts 50 | ;; - over-rides forge-owned-accounts 51 | ;; (setq forge-owned-blacklist 52 | ;; '(("bad-hacks" "really-bad-hacks"))) 53 | ``` 54 | -------------------------------------------------------------------------------- /docs/clojure-repl/clear-repl-buffer.md: -------------------------------------------------------------------------------- 1 | # Clear REPL Buffer 2 | 3 | When large results are returned from Clojure code they can eventually cause a slow-down of Emacs. Clearing the REPL buffer can restore Emacs to its usual speedy self. 4 | 5 | [Auto-trimming of the REPL buffer](https://docs.cider.mx/cider/repl/configuration.html#auto-trimming-the-repl-buffer) automatically deletes the oldest output, based on a given size. 6 | 7 | !!! HINT "Use cider-inspector and Source Code buffers" 8 | `, d v` displays values in the `cider-inspector` allowing navigation of nested data structures and paging through large data sets. [Portal data navigation tool](http://practical.li/clojure/clojure-cli/data-browsers/portal.html) is an external tool that also provides navigation and paging of data as well as other data visualisation. 9 | 10 | Evaluation in a Clojure source code buffer are limited to 100 results so avoids potential slow-down from large results. Use `, e p` menu to pretty print the results of evaluations in a temporary buffer. 11 | 12 | 13 | ## Clear the REPL buffer from any buffer 14 | 15 | ++comma++ ++"s"++ ++"l"++ to remove the output of the last evaluation from the REPL buffer, `spacemacs/cider-find-and-clear-repl-buffer`. 16 | 17 | ++comma++ ++"s"++ ++l++ clear all the output from the entire REPL session, `cider-find-and-clear-repl-output`. 18 | 19 | 20 | ## In the REPL buffer 21 | 22 | ++comma++ ++"s"++ ++"l"++ to switch to the REPL buffer 23 | 24 | In Evil Insert mode use the ++comma++ menu to call commands to clear the REPL buffer: 25 | 26 | `clear` to clear the whole buffer history 27 | 28 | `clear-output` to clear the result of the last evaluation 29 | 30 | 31 | ## Configure auto-trimming 32 | 33 | Auto-trimming is not enabled by default in CIDER, it must be set with a specific value. 34 | 35 | Add the layer variable `cider-repl-buffer-size-limit` to have all Clojure projects auto-trim the REPL 36 | 37 | ``` 38 | (clojure :variables 39 | clojure-enable-clj-refactor t 40 | clojure-enable-linters 'clj-kondo 41 | clojure-toplevel-inside-comment-form t 42 | cider-overlays-use-font-lock t 43 | cider-repl-buffer-size-limit 100) 44 | ``` 45 | 46 | Alternatively, add the `cider-repl-buffer-size-limit` to a `.dir-locals.el` to affect just one Clojure project 47 | 48 | ```elisp 49 | ((clojure-mode . ((cider-repl-buffer-size-limit . 100)))) 50 | ``` 51 | 52 | > `revert-buffer` on a Clojure project to ensure Emacs has loaded the `.dir-locals.el` 53 | -------------------------------------------------------------------------------- /docs/testing/unit-testing/configure-cider-test-runner.md: -------------------------------------------------------------------------------- 1 | # Configure CIDER test runner 2 | Configure how the CIDER test runner operates 3 | 4 | * Test reports on success 5 | * Automatically running tests 6 | * Custom test namespaces 7 | * Macros to define tests 8 | 9 | ## Display Test Report on Success 10 | By default the test report is displayed only when there are test failures and subsequent test runs. Configure `cider-test-show-report-on-success` to true to show the report buffer even if tests have never failed. 11 | 12 | In the Clojure layer config: 13 | ```elisp 14 | (clojure :variables 15 | cider-test-show-report-on-success t) 16 | ``` 17 | 18 | Or in `dotspacemacs/user-config` 19 | ```elisp 20 | (setq cider-test-show-report-on-success t) 21 | ``` 22 | 23 | ## CIDER Automatic Test Running 24 | , T t (`cider-auto-test-mode`) toggles automatic test. 25 | 26 | , e b evaluates the current buffer and automatically runs the CIDER test runner using all tests for that namespace 27 | 28 | `cider-auto-test-mode` variable configures the state of automatic testing 29 | 30 | In the Clojure layer config: 31 | ```elisp 32 | (clojure :variables 33 | cider-auto-test-mode 1) 34 | ``` 35 | 36 | 37 | Or in `dotspacemacs/user-config` 38 | ```elisp 39 | (cider-auto-test-mode 1) 40 | ``` 41 | 42 | 43 | ## Custom Test Namespaces 44 | By convention test namespaces follow that of the src namespaces, with a `-test` postfix, e.g. `practicalli.app-main` source namespace will have a matching `practicalli.app-main-test` test namespace. 45 | 46 | Configure the variable `cider-test-infer-test-ns` to call a function that takes the current namespace and returns the matching test namespace (which may be the same as the current namespace). 47 | 48 | In this example the CIDER test runner look for `practicalli.test-app-main` instead of `practicalli.app-main-test` 49 | 50 | ```elisp 51 | (defun cider-custom-test-ns-fn (ns) 52 | "For a NS, return the test namespace, which may be the argument itself. 53 | This uses the convention of prefix 'test-' to the namespace name." 54 | (when ns 55 | (let ((prefix "test-")) 56 | (if (string-prefix-p prefix ns) 57 | ns 58 | (concat prefix ns))))) 59 | 60 | (setq cider-test-infer-test-ns #'cider-custom-test-ns-fn) 61 | ``` 62 | 63 | 64 | ## Macros Used to Define Tests 65 | CIDER test runner will not recognize individual tests that are not defined by deftest or defspec, 66 | 67 | Customize the variable `cider-test-defining-forms` and add forms for CIDER to recognize as individual test definitions. 68 | -------------------------------------------------------------------------------- /docs/navigating-code/index.md: -------------------------------------------------------------------------------- 1 | # Navigating code 2 | 3 | Jumping, marks, code folding and searching are effective ways of navigating a codebase, rather than using the arrow keys to move character by character or line by line. 4 | 5 | ## General Tools 6 | 7 | Use Evil normal mode to quickly jump around your code. 8 | 9 | | Key binding | Description | 10 | |-------------------|----------------------------------------------------------------------------------------------------------------------| 11 | | `SPC j j` | Search across all windows for given character(s), type highlighted character(s) to jump to location | 12 | | `SPC j C` | Jump to first unbalanced parens | 13 | | `SPC j c` / `' '` | Jump to last change | 14 | | `m x` , `' x` | Create marker called `x`, jump to marker called `x` (use any alphabet character) (see [markers section](markers.md)) | 15 | | `#` | Symbol highlight transient state - navigate symbol names, iedit, swoop | 16 | | `SPC s s` | Search in current buffer, `C-j`/`C-k` to navigate results | 17 | | `SPC s p` | Search in project, `C-j/k` to navigate results | 18 | 19 | 20 | ## Code Folding 21 | 22 | Folding code hides away details, so you can just look at the function definitions and data structures of interest on the same screen. 23 | 24 | | Key binding | Description | 25 | |------------------|---------------------| 26 | | `z` or `SPC z .` | folding code blocks | 27 | 28 | `z` opens a menu to allow you to un/fold your code quickly. 29 | 30 | [](/images/spacemacs-vim-normal-z-menu.png) 31 | 32 | `SPC z .` is the code fold transient menu should you wish to un/fold code many times. 33 | 34 | See the [code folding](/navigating-code/code-folding.md) section for more details. 35 | 36 | 37 | ## Structural Editing 38 | 39 | `SPC k` starts [lisp state structural editing](/structural-editing/). 40 | 41 | `hjkl` to navigate the cursor across symbols and open/close parens 42 | 43 |  44 | --------------------------------------------------------------------------------