├── LICENSE
├── README.md
├── framer
└── chat-button-with-style.html
├── integration
└── github
│ ├── octo-kit-add-label
│ ├── index.ts
│ └── package.json
│ └── octo-kit-clone-repo
│ ├── main.ts
│ └── meta.json
├── snippets
└── framer
│ └── custom-framer-form-email-signup.tsx
├── utilities
└── api-call
│ ├── main.ts
│ └── meta.json
├── webflow
├── basic-api.js
└── chat-button-with-style.html
└── wordpress
├── README.md
└── buildship-chat-widget.zip
/LICENSE:
--------------------------------------------------------------------------------
1 | MIT License
2 |
3 | Copyright (c) 2023 Rowy
4 |
5 | Permission is hereby granted, free of charge, to any person obtaining a copy
6 | of this software and associated documentation files (the "Software"), to deal
7 | in the Software without restriction, including without limitation the rights
8 | to use, copy, modify, merge, publish, distribute, sublicense, and/or sell
9 | copies of the Software, and to permit persons to whom the Software is
10 | furnished to do so, subject to the following conditions:
11 |
12 | The above copyright notice and this permission notice shall be included in all
13 | copies or substantial portions of the Software.
14 |
15 | THE SOFTWARE IS PROVIDED "AS IS", WITHOUT WARRANTY OF ANY KIND, EXPRESS OR
16 | IMPLIED, INCLUDING BUT NOT LIMITED TO THE WARRANTIES OF MERCHANTABILITY,
17 | FITNESS FOR A PARTICULAR PURPOSE AND NONINFRINGEMENT. IN NO EVENT SHALL THE
18 | AUTHORS OR COPYRIGHT HOLDERS BE LIABLE FOR ANY CLAIM, DAMAGES OR OTHER
19 | LIABILITY, WHETHER IN AN ACTION OF CONTRACT, TORT OR OTHERWISE, ARISING FROM,
20 | OUT OF OR IN CONNECTION WITH THE SOFTWARE OR THE USE OR OTHER DEALINGS IN THE
21 | SOFTWARE.
22 |
--------------------------------------------------------------------------------
/README.md:
--------------------------------------------------------------------------------
1 |
2 |
3 |
4 |
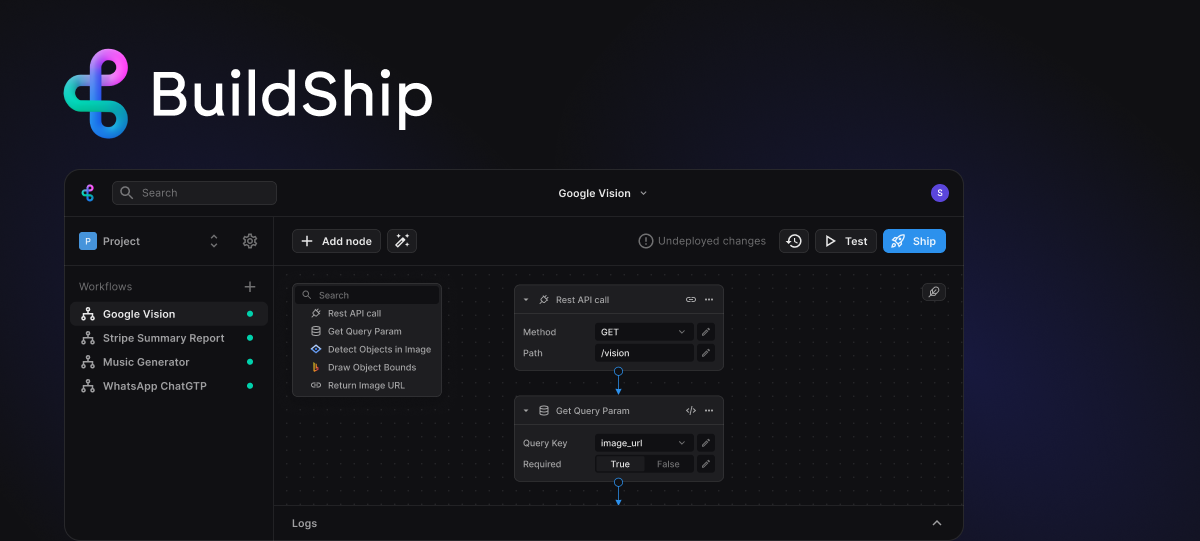
5 | Low-code Visual Backend Builder.
6 | Create APIs, scheduled jobs, and backend workflows - powered by AI ✨
7 |
8 |
9 |
10 | In this BuildShip Nodeverse repo - find all the open-source cloneable templates, nodes, and workflow examples. Also, currently work in progress - we plan to open source the backend of BuildShip which will allow you to export and deploy the workflows created on BuildShip on your own cloud if you choose to.
11 |
12 |
13 | Also, use this repo for reporting any bugs or feature requests for BuildShip.
14 |
28 |
29 | ## What is BuildShip?
30 |
31 | [BuildShip](https://www.buildship.com/) is a low-code visual backend builder, powered by AI ✨
32 |
33 | You can create and instantly ship:
34 |
35 | 🚀 APIs
36 | 🚀 Scheduled Jobs
37 | 🚀 Backend tasks
38 | 🚀 Connect with any 3rd party APIs and tools
39 | 🚀 Integrate with any AI model
40 | 🚀 WhatsApp bot, chatbots ++
41 | 🚀 Database CRUD workflows for Firestore, Supabase, Postgres ... any database
42 |
43 | Get started fast with the ease of no-code, and fully extend with the power of low-code. It's unlike any automation/workflow platform you might have seen, as you have full control and flexibility 🤝
44 |
45 | ## What is a low-code visual backend builder?
46 |
47 | For the apps you are building, with no-code app builders (FlutterFlow, Webflow, Framer, Adalo, Bubble, BravoStudio...) or frontend frameworks (Next.js, React, Vue...), you need a backend to support scalable APIs, secure workflows, automation, etc. BuildShip gives you a completely visual way to build these backend tasks scalably in an easy-to-use fully hosted experience.
48 |
49 | ✨✨ This means you don't need to wrangle or deploy things on the cloud platform, perform DevOps, etc. Just Build and Ship, instantly 🚀
50 |
51 | ## How can you get started with BuildShip?
52 |
53 | - Setup an account on [BuildShip](https://buildship.com/)
54 | - Create a project in a region of your choice.
55 | - BuildShip allows you to keep all your data and workflows in a region of your choice for GDPR compliance.
56 | - You get a single tenant GCP project dedicated to you for high performance and scalability)_
57 | - Start creating workflows
58 | - From scratch by connecting nodes
59 | - or Start fast with templates
60 | - Test your workflow, check the logs
61 | - Finally, click Ship 🚀 to deploy - that's it ✨
62 |
63 | Watch a short walkthrough video 👇
64 |
65 |
66 |
67 |
68 |
69 | ## Roadmap
70 |
71 | This open-source repo is a work-in-progress currently. We plan to open source the backend of BuildShip which will allow you to export and deploy the workflows created on BuildShip on your own cloud if you choose to. Plus this repo will be an ecosystem of all connectors and trigger nodes for others to share and contribute to.
72 |
73 | ## Contribution Guide
74 |
75 | If you would like to contribute to the nodeverse on BuildShip, then either pick an issue from existing requests or create a new issue if you want to work on a new idea. Comment on the issue that you are going to be working on it.
76 |
77 | Create the node directly on the BuildShip app and submit a PR in the correct category of the folder structure by clicking copy node and submitting as `main.js` file.
78 |
79 | ## Need help?
80 |
81 | Join BuildShip's [Discord](https://buildship.com/discord) and post under the #contribution channel what you are building/need help with.
82 |
83 | ## License
84 | By contributing to Rowy, you agree that your contributions will be licensed with the same license that is specified in the repository you are contributing to.
85 |
--------------------------------------------------------------------------------
/framer/chat-button-with-style.html:
--------------------------------------------------------------------------------
1 |
19 |
20 |
21 |
22 |
29 |
30 |
31 |
--------------------------------------------------------------------------------
/integration/github/octo-kit-add-label/index.ts:
--------------------------------------------------------------------------------
1 | import {
2 | Octokit
3 | } from '@octokit/rest';
4 | export default async function appendLabelsGithubPR({
5 | token,
6 | owner,
7 | repo,
8 | issue_number,
9 | labels
10 | }) {
11 | const octokit = new Octokit({
12 | auth: token
13 | });
14 | const issue = await octokit.rest.issues.get({
15 | owner,
16 | repo,
17 | issue_number
18 | });
19 | const currentLabels = issue.data.labels.map(label => label.name);
20 | const newLabels = [...currentLabels, ...labels];
21 | await octokit.rest.issues.update({
22 | owner,
23 | repo,
24 | issue_number,
25 | labels: newLabels
26 | });
27 | }
28 |
--------------------------------------------------------------------------------
/integration/github/octo-kit-add-label/package.json:
--------------------------------------------------------------------------------
1 | {
2 | "id": "octo-kit-add-label",
3 | "icon": {
4 | "url": "https://cdn.jsdelivr.net/gh/devicons/devicon/icons/github/github-original.svg",
5 | "type": "URL"
6 | },
7 | "description": "Appends the provided labels to a Github PR/Issue using Octokit",
8 | "name": "Add Labels to PR/Issue"
9 | }
10 |
--------------------------------------------------------------------------------
/integration/github/octo-kit-clone-repo/main.ts:
--------------------------------------------------------------------------------
1 | import { Octokit } from '@octokit/rest';
2 | import { promises as fs } from 'fs';
3 | import { join } from 'path';
4 | import unzipper from 'unzipper';
5 | import fetch from 'node-fetch';
6 |
7 | export default async function cloneRepo({ personalAccessToken, repo, branch, folderPath }) {
8 | const octokit = new Octokit({ auth: personalAccessToken });
9 | const { data } = await octokit.repos.getArchiveLink({ owner: repo.split('/')[0], repo: repo.split('/')[1], archive_format: 'zipball', ref: branch });
10 | const response = await fetch(data.url);
11 |
12 | if (response.ok) {
13 | await fs.mkdir(folderPath, { recursive: true });
14 | await response.body.pipe(unzipper.Extract({ path: process.env.BUCKET_FOLDER_PATH + folderPath }));
15 | return { success: true };
16 | } else {
17 | throw new Error(`Failed to download repo: ${response.statusText}`);
18 | }
19 | }
20 |
--------------------------------------------------------------------------------
/integration/github/octo-kit-clone-repo/meta.json:
--------------------------------------------------------------------------------
1 | {"icon":{"type":"URL","url":"https://cdn.jsdelivr.net/gh/devicons/devicon/icons/github/github-original.svg"},"name":"Clone Repository","id":"octo-kit-clone-repo","description":"Clones a GitHub repository using personal access token, repo, branch, and folder path with Octokit"}
2 |
--------------------------------------------------------------------------------
/snippets/framer/custom-framer-form-email-signup.tsx:
--------------------------------------------------------------------------------
1 | import React, { useState } from "react"
2 | import Example from "https://framer.com/m/framer/Example.js@^1.0.0"
3 |
4 | // BuildShip.com Open Source Form component for Framer
5 | export default function NewsletterSubscriptionForm(props) {
6 | // Paste your API link from BuildShip.com
7 | // Read tutorial here:
8 | // Watch tutorial video:
9 |
10 | // TODO: Update this with your BuildShip API or any external API handler
11 | const formUrl = "https://.buildship.run/"
12 |
13 | // MAYBE: If you are adding more fields to your form in addition to email update here
14 | const [email, setEmail] = useState("")
15 | const [formStatus, setFormStatus] = useState("unsubmitted")
16 |
17 | const onSubmit = async (event) => {
18 | event.preventDefault()
19 |
20 | try {
21 | const response = await fetch(formUrl, {
22 | method: "POST",
23 | body: JSON.stringify({ email }), // Construct your form data: comma seperated list
24 | headers: {
25 | "Content-type": "application/json",
26 | },
27 | })
28 |
29 | if (!response.ok) {
30 | throw new Error("Network response was not ok")
31 | }
32 |
33 | setFormStatus("submitted") // Update state to indicate successful submission
34 | } catch (error) {
35 | console.error("Error during form submission: ", error)
36 | setFormStatus("error") // Update state to indicate an error
37 | }
38 | }
39 |
40 | // Function to update email state
41 | // MAYBE: If you are adding more fields to your form in addition to email update here
42 | const handleEmailChange = (event) => {
43 | setEmail(event.target.value)
44 | }
45 |
46 | if (formStatus === "submitted") {
47 | return
 3 |
3 | 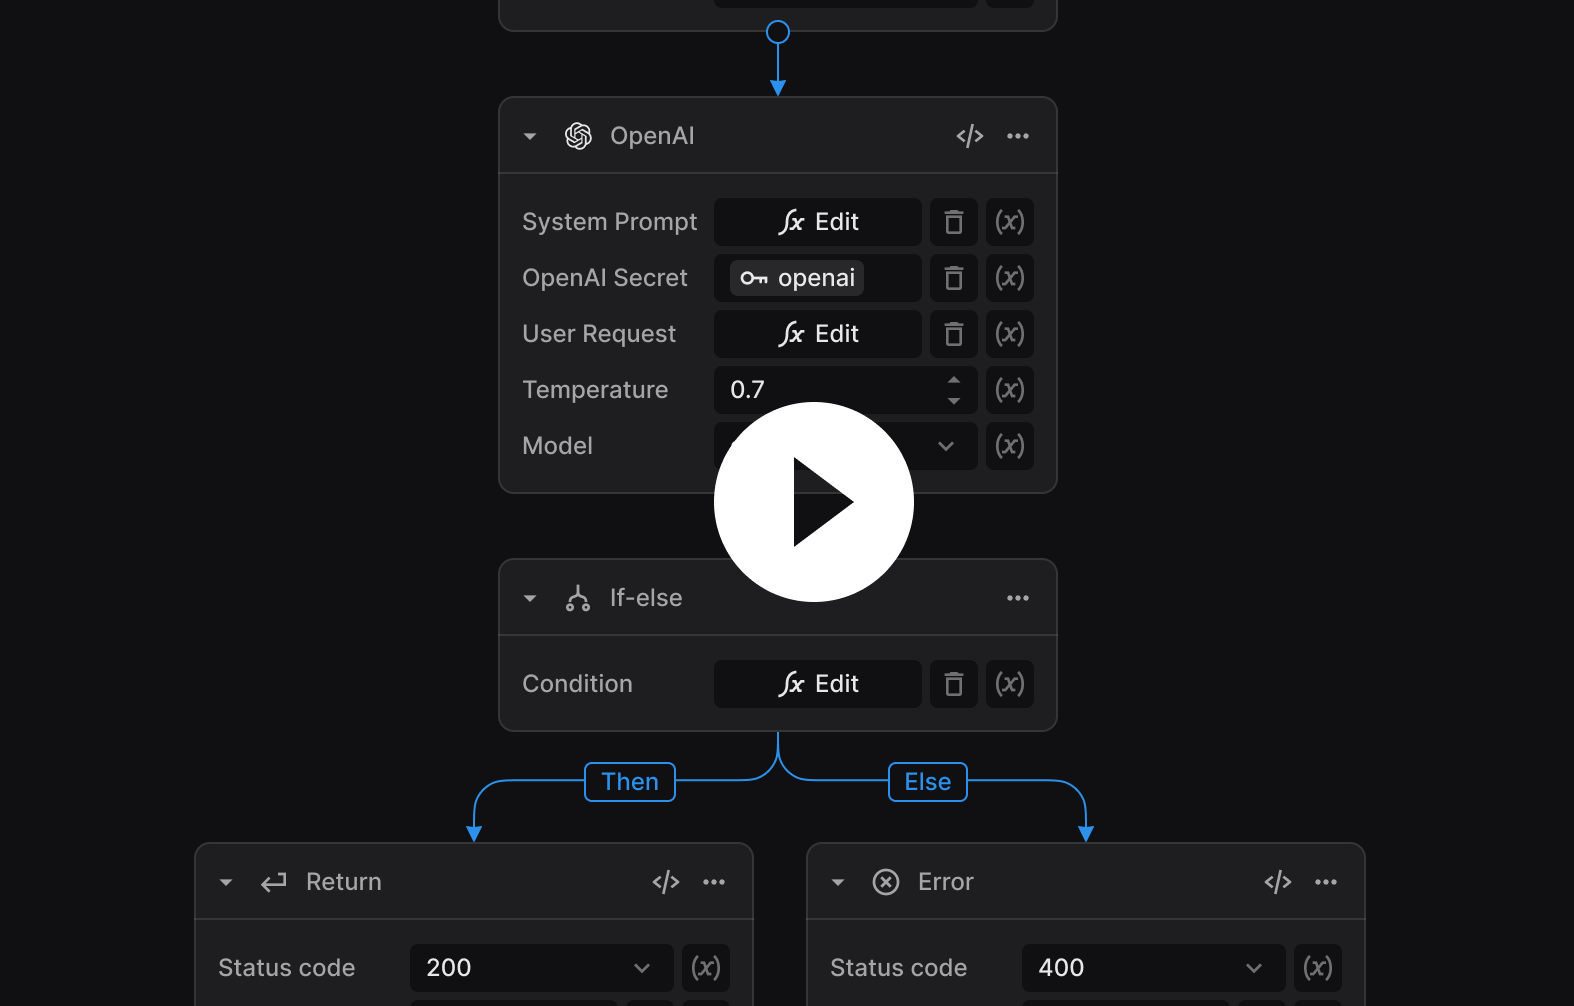 67 |
68 |
69 | ## Roadmap
70 |
71 | This open-source repo is a work-in-progress currently. We plan to open source the backend of BuildShip which will allow you to export and deploy the workflows created on BuildShip on your own cloud if you choose to. Plus this repo will be an ecosystem of all connectors and trigger nodes for others to share and contribute to.
72 |
73 | ## Contribution Guide
74 |
75 | If you would like to contribute to the nodeverse on BuildShip, then either pick an issue from existing requests or create a new issue if you want to work on a new idea. Comment on the issue that you are going to be working on it.
76 |
77 | Create the node directly on the BuildShip app and submit a PR in the correct category of the folder structure by clicking copy node and submitting as `main.js` file.
78 |
79 | ## Need help?
80 |
81 | Join BuildShip's [Discord](https://buildship.com/discord) and post under the #contribution channel what you are building/need help with.
82 |
83 | ## License
84 | By contributing to Rowy, you agree that your contributions will be licensed with the same license that is specified in the repository you are contributing to.
85 |
--------------------------------------------------------------------------------
/framer/chat-button-with-style.html:
--------------------------------------------------------------------------------
1 |
19 |
20 |
21 |
22 |
29 |
30 |
31 |
--------------------------------------------------------------------------------
/integration/github/octo-kit-add-label/index.ts:
--------------------------------------------------------------------------------
1 | import {
2 | Octokit
3 | } from '@octokit/rest';
4 | export default async function appendLabelsGithubPR({
5 | token,
6 | owner,
7 | repo,
8 | issue_number,
9 | labels
10 | }) {
11 | const octokit = new Octokit({
12 | auth: token
13 | });
14 | const issue = await octokit.rest.issues.get({
15 | owner,
16 | repo,
17 | issue_number
18 | });
19 | const currentLabels = issue.data.labels.map(label => label.name);
20 | const newLabels = [...currentLabels, ...labels];
21 | await octokit.rest.issues.update({
22 | owner,
23 | repo,
24 | issue_number,
25 | labels: newLabels
26 | });
27 | }
28 |
--------------------------------------------------------------------------------
/integration/github/octo-kit-add-label/package.json:
--------------------------------------------------------------------------------
1 | {
2 | "id": "octo-kit-add-label",
3 | "icon": {
4 | "url": "https://cdn.jsdelivr.net/gh/devicons/devicon/icons/github/github-original.svg",
5 | "type": "URL"
6 | },
7 | "description": "Appends the provided labels to a Github PR/Issue using Octokit",
8 | "name": "Add Labels to PR/Issue"
9 | }
10 |
--------------------------------------------------------------------------------
/integration/github/octo-kit-clone-repo/main.ts:
--------------------------------------------------------------------------------
1 | import { Octokit } from '@octokit/rest';
2 | import { promises as fs } from 'fs';
3 | import { join } from 'path';
4 | import unzipper from 'unzipper';
5 | import fetch from 'node-fetch';
6 |
7 | export default async function cloneRepo({ personalAccessToken, repo, branch, folderPath }) {
8 | const octokit = new Octokit({ auth: personalAccessToken });
9 | const { data } = await octokit.repos.getArchiveLink({ owner: repo.split('/')[0], repo: repo.split('/')[1], archive_format: 'zipball', ref: branch });
10 | const response = await fetch(data.url);
11 |
12 | if (response.ok) {
13 | await fs.mkdir(folderPath, { recursive: true });
14 | await response.body.pipe(unzipper.Extract({ path: process.env.BUCKET_FOLDER_PATH + folderPath }));
15 | return { success: true };
16 | } else {
17 | throw new Error(`Failed to download repo: ${response.statusText}`);
18 | }
19 | }
20 |
--------------------------------------------------------------------------------
/integration/github/octo-kit-clone-repo/meta.json:
--------------------------------------------------------------------------------
1 | {"icon":{"type":"URL","url":"https://cdn.jsdelivr.net/gh/devicons/devicon/icons/github/github-original.svg"},"name":"Clone Repository","id":"octo-kit-clone-repo","description":"Clones a GitHub repository using personal access token, repo, branch, and folder path with Octokit"}
2 |
--------------------------------------------------------------------------------
/snippets/framer/custom-framer-form-email-signup.tsx:
--------------------------------------------------------------------------------
1 | import React, { useState } from "react"
2 | import Example from "https://framer.com/m/framer/Example.js@^1.0.0"
3 |
4 | // BuildShip.com Open Source Form component for Framer
5 | export default function NewsletterSubscriptionForm(props) {
6 | // Paste your API link from BuildShip.com
7 | // Read tutorial here:
8 | // Watch tutorial video:
9 |
10 | // TODO: Update this with your BuildShip API or any external API handler
11 | const formUrl = "https://
67 |
68 |
69 | ## Roadmap
70 |
71 | This open-source repo is a work-in-progress currently. We plan to open source the backend of BuildShip which will allow you to export and deploy the workflows created on BuildShip on your own cloud if you choose to. Plus this repo will be an ecosystem of all connectors and trigger nodes for others to share and contribute to.
72 |
73 | ## Contribution Guide
74 |
75 | If you would like to contribute to the nodeverse on BuildShip, then either pick an issue from existing requests or create a new issue if you want to work on a new idea. Comment on the issue that you are going to be working on it.
76 |
77 | Create the node directly on the BuildShip app and submit a PR in the correct category of the folder structure by clicking copy node and submitting as `main.js` file.
78 |
79 | ## Need help?
80 |
81 | Join BuildShip's [Discord](https://buildship.com/discord) and post under the #contribution channel what you are building/need help with.
82 |
83 | ## License
84 | By contributing to Rowy, you agree that your contributions will be licensed with the same license that is specified in the repository you are contributing to.
85 |
--------------------------------------------------------------------------------
/framer/chat-button-with-style.html:
--------------------------------------------------------------------------------
1 |
19 |
20 |
21 |
22 |
29 |
30 |
31 |
--------------------------------------------------------------------------------
/integration/github/octo-kit-add-label/index.ts:
--------------------------------------------------------------------------------
1 | import {
2 | Octokit
3 | } from '@octokit/rest';
4 | export default async function appendLabelsGithubPR({
5 | token,
6 | owner,
7 | repo,
8 | issue_number,
9 | labels
10 | }) {
11 | const octokit = new Octokit({
12 | auth: token
13 | });
14 | const issue = await octokit.rest.issues.get({
15 | owner,
16 | repo,
17 | issue_number
18 | });
19 | const currentLabels = issue.data.labels.map(label => label.name);
20 | const newLabels = [...currentLabels, ...labels];
21 | await octokit.rest.issues.update({
22 | owner,
23 | repo,
24 | issue_number,
25 | labels: newLabels
26 | });
27 | }
28 |
--------------------------------------------------------------------------------
/integration/github/octo-kit-add-label/package.json:
--------------------------------------------------------------------------------
1 | {
2 | "id": "octo-kit-add-label",
3 | "icon": {
4 | "url": "https://cdn.jsdelivr.net/gh/devicons/devicon/icons/github/github-original.svg",
5 | "type": "URL"
6 | },
7 | "description": "Appends the provided labels to a Github PR/Issue using Octokit",
8 | "name": "Add Labels to PR/Issue"
9 | }
10 |
--------------------------------------------------------------------------------
/integration/github/octo-kit-clone-repo/main.ts:
--------------------------------------------------------------------------------
1 | import { Octokit } from '@octokit/rest';
2 | import { promises as fs } from 'fs';
3 | import { join } from 'path';
4 | import unzipper from 'unzipper';
5 | import fetch from 'node-fetch';
6 |
7 | export default async function cloneRepo({ personalAccessToken, repo, branch, folderPath }) {
8 | const octokit = new Octokit({ auth: personalAccessToken });
9 | const { data } = await octokit.repos.getArchiveLink({ owner: repo.split('/')[0], repo: repo.split('/')[1], archive_format: 'zipball', ref: branch });
10 | const response = await fetch(data.url);
11 |
12 | if (response.ok) {
13 | await fs.mkdir(folderPath, { recursive: true });
14 | await response.body.pipe(unzipper.Extract({ path: process.env.BUCKET_FOLDER_PATH + folderPath }));
15 | return { success: true };
16 | } else {
17 | throw new Error(`Failed to download repo: ${response.statusText}`);
18 | }
19 | }
20 |
--------------------------------------------------------------------------------
/integration/github/octo-kit-clone-repo/meta.json:
--------------------------------------------------------------------------------
1 | {"icon":{"type":"URL","url":"https://cdn.jsdelivr.net/gh/devicons/devicon/icons/github/github-original.svg"},"name":"Clone Repository","id":"octo-kit-clone-repo","description":"Clones a GitHub repository using personal access token, repo, branch, and folder path with Octokit"}
2 |
--------------------------------------------------------------------------------
/snippets/framer/custom-framer-form-email-signup.tsx:
--------------------------------------------------------------------------------
1 | import React, { useState } from "react"
2 | import Example from "https://framer.com/m/framer/Example.js@^1.0.0"
3 |
4 | // BuildShip.com Open Source Form component for Framer
5 | export default function NewsletterSubscriptionForm(props) {
6 | // Paste your API link from BuildShip.com
7 | // Read tutorial here:
8 | // Watch tutorial video:
9 |
10 | // TODO: Update this with your BuildShip API or any external API handler
11 | const formUrl = "https://