├── README.md
├── PDF
└── RaspiCam-Documentation.pdf
├── crtmpserver 简介.md
├── Dummy camera made smart with Raspberry Pi.md
├── Raspberry Surveillance.md
├── Streaming Raspberry Pi Camera H264 into HTML over RTMP.md
├── Raspberry PI with Camera Module and ArchLinux.md
├── 树莓派摄像头模块基础知识.md
└── RaspiCam Documentation.md
/README.md:
--------------------------------------------------------------------------------
1 | 树莓派
2 | ======
3 |
--------------------------------------------------------------------------------
/PDF/RaspiCam-Documentation.pdf:
--------------------------------------------------------------------------------
https://raw.githubusercontent.com/silianlinyi/Raspberry-Pi/HEAD/PDF/RaspiCam-Documentation.pdf
--------------------------------------------------------------------------------
/crtmpserver 简介.md:
--------------------------------------------------------------------------------
1 | # crtmpserver 简介
2 |
3 | crtmpserver(C++ RTMP Server)是高性能的流媒体服务器,支持以下协议(直播或录制):
4 |
5 | * 支持Flash(RTMP,RTMPE,RTMPS,RTMPS,RTMPT,RTMPTE)
6 | * 支持嵌入式设备:iPhone,Android
7 | * 支持监控摄像机
8 | * 支持IP-TV(MPEG-tS,RTSP/RTCP/RTP)
9 |
10 | 此外,crtmpserver可以作为高性能rendes-vous服务器,可以让你做:
11 |
12 | * 音视频会议
13 | * 在线游戏
14 | * 在线协作
15 | * 简单/复杂的聊天应用
16 |
17 | crtmpserver不同之处
18 |
19 | * 支持多种流媒体技术之间的通信(Adobe flash, Apple streaming, Silverlight, etc)
20 | * 高性能,并发几千路连接
21 | * 占用资源少
22 | * 可移植性强,只要GCC支持,crtmpserver可以运行在: IP cameras, Android, ARM or MIPS based systems, SoC, etc
23 | * 依赖少:lua, openssl
24 |
25 | 参考网址:
26 |
27 | * 内核开发者 Gavriloaie Eugen-Andrei: http://www.rtmpd.com/
28 | * 开发者论坛 https://groups.google.com/forum/?fromgroups#!forum/c-rtmp-server
29 |
30 |
31 |
32 |
33 |
34 |
35 |
--------------------------------------------------------------------------------
/Dummy camera made smart with Raspberry Pi.md:
--------------------------------------------------------------------------------
1 | # Dummy camera made smart with Raspberry Pi
2 |
3 | I'd like to share how I build my camera using Raspberry Pi. I used a dummy camera and turned into a smart camera!
4 | The total cost is about £100 / 1000 SEK / $150 =)
5 |
6 | I have also developed software to help use the Raspberry Camera for surveillance(监控). Check out these blog posts for
7 | further information.
8 |
9 | * 树莓派监控(Raspberry Surveillance)
10 | * Raspberry PI with Camera Module and ArchLinux
11 | * Owncloud 5 Server with Lighttpd, Sqlite on ArchLinux
12 |
13 | ## Camera
14 |
15 | I found these parts on Amazon.co.uk.
16 |
17 | * Raspberry PI Starter Kit - Power, SD-card, Raspberry 512MB
18 | * USB Wifi Adapter
19 | * Byron - CS11D Dummy CCTV Camera Unit
20 |
21 |
22 |
23 |
24 |
25 |
26 |
27 |
28 |
29 |
30 |
31 |
32 |
33 |
34 |
35 | ### 原文地址:http://bjurr.se/cam+dummy+made+pi+raspberry+smart
36 |
--------------------------------------------------------------------------------
/Raspberry Surveillance.md:
--------------------------------------------------------------------------------
1 | # 树莓派监控(Raspberry Surveillance)
2 |
3 | I reccently bought a Raspberry PI. The main reason was that I had an idea of making some video surveillance software.
4 | I have made 2 previous blog posts regarding the Raspberry Pi and both of them are sort of related this one. One where
5 | I wrote some notes on the initial setup of the hardware and basic software. One where I wrote about how to setup
6 | Owncloud. This post is about https://github.com/tomasbjerre/RaspberrySurveillance. It is project where I've developed,
7 | mainly, a web interface that can:
8 |
9 | * Show snapshot of camera
10 | * Setup motion triggering
11 | * Start and stop motion triggering
12 | * Save captured videos to disk
13 | * Save captured videos to Webdav (Supported by Owncloud)
14 |
15 | This means you can start and stop motion triggering from a web interface. Whenever a video is captured you can have
16 | it uploaded to Owncloud and have it automatically synced to you Windows PC.
17 |
18 |
19 |
20 | When camera triggers it will store pictures and/or vieos, it is configurable. Here is a very small example of a
21 | captured event.
22 |
23 | * Picture that detected change
24 | * Video recorded on trigger
25 | * Picture showing what was changed in picture
26 |
27 | ### 原文地址:http://bjurr.se/raspberry+surveillance
28 |
--------------------------------------------------------------------------------
/Streaming Raspberry Pi Camera H264 into HTML over RTMP.md:
--------------------------------------------------------------------------------
1 | ### Streaming Raspberry Pi Camera H264 into HTML over RTMP
2 |
3 | #### SPD Raspberry Pi Camera setup instructions for Raspbian Wheezy
4 |
5 | Requirements: Raspbian Wheezy with hard float enabled. I assume you have avahi, wifi, and have updated to the latest
6 | firmware and enabled the camera. 并且在树莓派上配置了一个Web服务器。
7 |
8 | 安装crtmpserver流媒体服务器:
9 |
10 | sudo aptitude install crtmpserver
11 |
12 | 注:aptitude 是 Debian GNU/Linux 系统中, 非常神奇的的软件包管理器,基于大名鼎鼎的 APT 机制, 整合了 dselect 和 apt-get的
13 | 所有功能, 并提供的更多特性,特别是在依赖关系处理上。
14 |
15 | 添加crtmpserver流媒体服务器日志目录
16 |
17 | sudo mkdir /var/log/crtmpserver
18 |
19 | 改变/etc/crtmpserver/applications/flvplayback.lua目录下的flvplayback.lua文件的某些值。
20 |
21 | validateHandshake=false,//验证握手
22 | keyframeSeek=false,//关键帧寻找
23 | seekGranularity=0.1
24 | clientSideBuffer=30//客户端缓存区
25 |
26 | 重启crtmpserver流媒体服务器
27 |
28 | sudo /etc/init.d/crtmpserver restart
29 |
30 | 源码方式安装ffmpeg,这一步骤是非常重要的。
31 | Install ffmpeg from source. This step is very important. It won't work with the Raspbian version of ffmpeg because the
32 | Debian version of libavcodec doesn't contain the H264 libraries needed for the flash streaming protocol.
33 |
34 | sudo aptitude remove ffmpeg
35 | cd /usr/src
36 | sudo mkdir ffmpeg
37 | sudo chown `whoami`:users ffmpeg
38 | git clone git://source.ffmpeg.org/ffmpeg.git ffmpeg
39 | cd ffmpeg
40 | ./configure
41 | make
42 | sudo make install
43 |
44 | Stream from raspberry pi camera to crtmpserver and wrap the raw video in flv metadata
45 |
46 | raspivid -t 0 -w 960 -h 540 -fps 25 -b 500000 -vf -o - | ffmpeg -i - -vcodec copy -an -f flv -metadata
47 | streamName=myStream tcp://0.0.0.0:6666
48 |
49 | Check the crtmpserver logs. You should see the incoming connection from ffmpeg show up like this:
50 |
51 |
59 |
60 | Download jwplayer from http://www.longtailvideo.com/, unzip it and place the jwplayer folder in a directory of your
61 | web server. I got jwplayer version 3359, YMMV. Then, place the following in an html file in the same directory of
62 | your web server:
63 |
64 | > index.html
65 |
66 |
67 |
68 | Raspbi Camera RTMP stream test
69 |
70 |
71 |
72 |
73 |
79 |
80 |
81 |
82 |
83 |
84 |
85 |
86 |
87 | > index.css
88 |
89 | * {
90 | margin: 0;
91 | padding: 0;
92 | }
93 | #video-jwplayer_wrapper {
94 | position: relative;
95 | display: block;
96 | width: 960px;
97 | height: 540px;
98 | }
99 | #video-jwplayer_aspect {
100 | display: none;
101 | }
102 | #video-jwplayer_jwpsrv {
103 | position: absolute;
104 | top: 0px;
105 | z-index: 10;
106 | }
107 |
108 | > app.js
109 |
110 | jwplayer('video-jwplayer').setup({
111 | flashplayer: "../jwplayer/jwplayer.flash.swf",
112 | file: "rtmp://192.168.1.124/flvplayback/flv:myStream.flv",
113 | autoStart: true,
114 | rtmp: {
115 | bufferlength: 0.1
116 | },
117 | deliveryType: "streaming",
118 | width: 960,
119 | height: 540,
120 | player: {
121 | modes: {
122 | linear: {
123 | controls: {
124 | stream: {
125 | manage: false,
126 | enabled: false
127 | }
128 | }
129 | }
130 | }
131 | },
132 | shows: {
133 | streamTimer: {
134 | enabled: true,
135 | tickRate: 100
136 | }
137 | }
138 | });
139 |
140 | You're done! Visit your html page and after a moment's buffering you should see video.
141 |
142 | NOTES
143 |
144 | I found I can have a consistent 25 fps at a bitrate of 500000 over a USB Netgear 8192CU Wi-Fi dongle with a delay of about 1s at best.
145 | Other types of h264 stream players, e.g. flowplayer, are available.
146 |
147 |
148 |
149 |
150 |
151 |
152 |
153 |
--------------------------------------------------------------------------------
/Raspberry PI with Camera Module and ArchLinux.md:
--------------------------------------------------------------------------------
1 | # Raspberry PI with Camera Module and ArchLinux
2 |
3 | I reccently bought a Raspberry PI. I am new to ArchLinux so I thought I'd make some notes of the initial setup.
4 | This is the hardware used to build the camera:
5 |
6 | * Raspberry Pi Model B 512MB RAM
7 | * Camera Module for Raspberry Pi
8 | * WiFi USB Nano
9 | * OpenBox Sky Case
10 | * 16GB SD
11 |
12 | ## 1. SD卡分区
13 |
14 | I added the ArchLinux image to a 16GB card. The images creates a 2GB parition so you need to either extend it before
15 | booting or create a new partition after boot. I choose to create a new partition after boot, and use it for /home .
16 |
17 | fdisk /dev/disk/by-id/mmc-*
18 | n add partition
19 | w save and exit
20 |
21 | 创建文件系统
22 |
23 | mkfs.ext4 /dev/mmcblk0p3
24 |
25 | Remove everything in /home . I am assuming you have nothing important here yet.
26 |
27 | rm -rf /home/*
28 |
29 | Mount the device at boot.
30 |
31 | /dev/mmcblk0p3 /home ext4 defaults 0 2
32 |
33 | ## 2. Package manager
34 |
35 | I had never heard of Pacman package manager before. But its just as easy. To search for packages do this.
36 |
37 | pacman -Ss partOfPackageName
38 |
39 | To install a package do this.
40 |
41 | pacman -S packageName
42 |
43 | Upgrade all packages.
44 |
45 | pacman -Syu
46 |
47 | Initiallly I had some problems when installing packages. I got this.
48 |
49 | "from mirror.archlinuxarm.org : The requested URL returned error: 404 Not Found"
50 |
51 | Just perform a full uppgrade and it should be resolved.
52 |
53 | ## 3. 网络设置
54 |
55 | To list available devices do.
56 |
57 | ip link
58 |
59 | To get the wireless network running I installed these.
60 |
61 | pacman -S wpa_supplicant
62 | pacman -S wpa_actiond
63 | pacman -S ifplugd
64 | pacman -S dhclient
65 | pacman -S openntpd
66 |
67 | There is a very nice setup wizard, just do this.
68 |
69 | wifi-menu -o
70 |
71 | Network configuration exists in profile files. I had some problems with the DHCP client not setting IP:s after
72 | network loss. I added DHPClient to the profiles to make it reconnect.
73 |
74 | #/etc/netctl/ethernet-dhcp
75 | Description='A basic dhcp ethernet connection'
76 | Interface=eth0
77 | Connection=ethernet
78 | IP=dhcp
79 | DHCPClient='dhclient'
80 | TimeoutDHCP=30
81 | ExecUpPost="ntpd -s &"
82 |
83 |
84 | #/etc/netctl/wlan0-tallefjantlinksys
85 | Description='Automatically generated profile by wifi-menu'
86 | Interface=wlan0
87 | Connection=wireless
88 | Security=wpa
89 | ESSID=MYNETWORKNAME
90 | IP=dhcp
91 | Key=12312312312313123132
92 | DHCPClient='dhclient'
93 | TimeoutDHCP=30
94 | ExecUpPost="ntpd -s &"
95 |
96 | To make WLAN connect when available, and Ethernet connect when plugged, do this.
97 |
98 | systemctl enable netctl-auto@wlan0.service
99 | systemctl enable netctl-ifplugd@eth00.service
100 |
101 | To make WLAN and Ethernet use DHCP at boot, do this.
102 |
103 | systemctl enable dhcpcd@eth0
104 | systemctl enable dhcpcd@wlan0
105 |
106 | I noted that the network setup was not working after the first initual upgrade with Pacman. To solve it I just
107 | disabled the enabled services and enabled them again.
108 |
109 | systemctl status --failed
110 | systemctl disable FAILEDSERVICE
111 |
112 | I had problems with DHCP timeouts so I added the TimeoutDHCP parameter and set it to 30. Default is 10 seconds.
113 | Also the ExecUpPost will set time from NTP when connected.
114 |
115 | ## 4. 时间和日期
116 |
117 | In my case, Sweden.
118 |
119 | rm /etc/timezone
120 | ln -s /usr/share/zoneinfo/Europe/Stockholm /etc/timezone
121 |
122 | Also, the Raspberry Pi has no battery. The time will be 1970 on every reboot. You can use NTP to set the date from
123 | a time server on startup.
124 |
125 | pacman -S openntpd
126 |
127 | To start ntpd when a network interface is connected, add ExecUpPost to your interface profile. Here is an example of
128 | my eth0.
129 |
130 | Description='A basic dhcp ethernet connection'
131 | Interface=eth0
132 | Connection=ethernet
133 | IP=dhcp
134 | ExecUpPost="ntpd -s &"
135 |
136 | ## 5. Raspberry Camera
137 |
138 | In ~/.bashrc I added.
139 |
140 | export PATH=$PATH:/opt/vc/bin
141 |
142 | In /boot/config.txt I added.
143 |
144 | gpu_mem=128
145 | start_file=start_x.elf
146 | fixup_file=fixup_x.dat
147 |
148 | The camera may seem slow. There is a default delay of 5 seconds before it takes the picture. You can change this
149 | with "-t 0".
150 |
151 | I've noticed the device hangs when storing larger videos. It's a good idea to record video directly to RAM, that
152 | works much better for me. By default /tmp is mounted as tmpfs.
153 |
154 | /opt/vc/bin/raspistill -t 0 -o /tmp/test.png
155 | /opt/vc/bin/raspivid -o /tmp/out.h264 -t 5000
156 | /opt/vc/bin/raspivid -o /tmp/out.h264 -t 20000
157 | /opt/vc/bin/raspivid -o /tmp/out.h264 -t 60000
158 |
--------------------------------------------------------------------------------
/树莓派摄像头模块基础知识.md:
--------------------------------------------------------------------------------
1 | # 树莓派摄像头模块(Camera)
2 |
3 | ## 如何设置摄像头硬件(How to set up the camera hardware )
4 |
5 | * Youtube地址:http://www.youtube.com/watch?feature=player_embedded&v=GImeVqHQzsE
6 |
7 | > 请注意:摄像头可能会被静电损坏。从灰色防静电袋取出摄像头之前,请确保您已经将你自己身上的静电导出。
8 |
9 | The flex cable inserts into the connector situated between the Ethernet and HDMI ports, with the silver connectors
10 | facing the HDMI port. The flex cable connector should be opened by pulling the tabs on the top of the connector
11 | upwards then towards the Ethernet port. The flex cable should be inserted firmly into the connector, with care taken
12 | not to bend the flex at too acute an angle. The top part of the connector should then be pushed towards the HDMI
13 | connector and down, while the flex cable is held in place. (Please view the video above to watch the cable being
14 | inserted.)
15 |
16 | The camera may come with a small piece of translucent blue plastic film covering the lens. This is only present to
17 | protect the lens while it is being mailed to you, and needs to be removed by gently peeling it off.
18 |
19 | ## 如何启用树莓派中的摄像头(How to enable camera support in Raspbian)
20 |
21 | Boot up the Pi and log in. The default username is pi, and the default password is raspberry.
22 | (Note: if you have changed these from the default then you will need to supply your own user/password details).
23 |
24 | 在终端中输入以下命令,让树莓派固件升级到最新版本。
25 |
26 | sudo apt-get update
27 |
28 |
29 |
30 | sudo apt-get upgrade
31 |
32 |
33 |
34 | 运行以下命令来访问树莓派配置设置:
35 |
36 | sudo raspi-config
37 |
38 | 切换到“camera”并且选择“enable”
39 |
40 |
41 |
42 |
43 |
44 | 选择“Finish”并重启
45 |
46 |
47 |
48 | ## 如何使用树莓派摄像头软件(How to use the Raspberry Pi camera software)
49 |
50 | raspivid是一个命令行应用程序,可以让你录制视频,同时raspistill应用可以让你捕捉图像。
51 |
52 | -o或者-output可以指定输出文件名字,-t或者-timeout可以指定预览时长
53 | (毫秒)。Note that this set to 5s by default and that raspistill will capture the final frame of
54 | the preview period.
55 |
56 | -d or –demo runs the demo mode that will cycle through the various image effects that are available.
57 |
58 | ## 例子
59 |
60 | 截一张jpeg格式的图片:
61 |
62 | raspistill -o image.jpg
63 |
64 | 录一段5秒钟的h264格式的视频:
65 |
66 | raspivid -o video.h264
67 |
68 | 录一段10秒钟的视频:
69 |
70 | raspivid -o video.h264 -t 10000
71 |
72 | 在演示模式下录一段10秒钟的视频:
73 |
74 | raspivid -o video.h264 -t 10000 -d
75 |
76 | To see a list of possible options for running raspivid or raspistill, you can run:
77 |
78 | raspivid | less
79 | raspistill | less
80 |
81 | 使用方向键滚动,输入q退出。
82 |
83 | 想了解更多:https://github.com/raspberrypi/userland/blob/master/host_applications/linux/apps/raspicam/RaspiCamDocs.odt
84 |
85 | 请注意:如果你使用了一个摄像头,请修改SSH密码,以防止非法访问。
86 |
87 | ## 如何通过网络将树莓派摄像头中的视频流传播出去
88 |
89 | ### 1. To view the feed on Linux
90 |
91 | 通过在终端中输入以下命令来安装依赖:
92 |
93 | sudo apt-get install mplayer netcat
94 |
95 | Find your IP address by running ifconfig. (Your IP address will be listed in the console output and will probably be
96 | of the form 192.168.1.XXX).
97 |
98 | Run the following command in a terminal to view the feed using MPlayer:
99 |
100 | nc -l -p 5001 | mplayer -fps 31 -cache 1024 -
101 |
102 | ### 2. To view the feed on Windows
103 |
104 | Install and run Linux instead.
105 |
106 | Find your IP address by running ipconfig. (Your IP address will be listed in the console output and will probably be
107 | of the form 192.168.1.XXX).
108 |
109 |
110 | Download MPlayer.
111 |
112 |
113 |
114 | Download Netcat.
115 |
116 |
117 | 请注意:你的浏览器可能会给出警告,由于这些文件是未签名的可执行文件。
118 |
119 | Press the Windows key and the ‘r’ key simultaneously to bring up the “Run” dialog. Enter cmd.exe into the dialog and
120 | press enter/return to open a DOS prompt.
121 |
122 | Enter the following command at the prompt to view the feed using MPlayer:
123 |
124 | [Path to nc.exe]\nc.exe -L -p 5001 | [Path to mplayer.exe]\mplayer.exe -fps 31 -cache 1024 -
125 |
126 | ### 3. To view the feed on OS X
127 |
128 |
129 | Download MPlayer.
130 |
131 |
132 | Alternatively, you can download mplayer using Brew,
133 | which we recommend.
134 |
135 | Find your IP address by running ifconfig. (Your IP address will be listed in the console output and will probably
136 | be of the form 192.168.1.XXX).
137 |
138 | Run the following command in Terminal to view the feed using MPlayer:
139 |
140 | nc -l -p 5001 | mplayer -fps 31 -cache 1024 -
141 |
142 | ### 4. To view the feed on a Raspberry Pi:
143 |
144 | Find your IP address by running ifconfig. (Your IP address will be listed in the console output and will probably
145 | be of the form 192.168.1.XXX).
146 |
147 | Run the following commands in a terminal on the receiving Pi:
148 |
149 | mkfifo buffer
150 |
151 | nc -p 5001 -l > buffer | /opt/vc/src/hello_pi/hello_video/hello_video.bin buffer
152 |
153 | ## To transmit the feed from the Pi with camera module attached
154 |
155 | After setting up the “receiving” machine as per the instructions above, run the following commands in a terminal on
156 | the “transmitting” Pi:
157 |
158 | raspivid -t 999999 -o - | nc [insert the IP address of the client] 5001
159 |
160 | You can then use the commands listed in the “How to use the Raspberry Pi camera software” section above to change the
161 | capture time or to add a video effect.
162 |
163 | ## How to submit bug reports or see the source code
164 |
165 | You can see
166 | the source code and submit bug reports for raspivid and raspicam here.
167 |
168 |
169 |
170 |
171 |
172 |
173 |
174 |
175 |
176 |
177 |
178 |
179 |
180 |
181 |
182 |
--------------------------------------------------------------------------------
/RaspiCam Documentation.md:
--------------------------------------------------------------------------------
1 | # RaspiCam Documentation
2 |
3 | ## July 2013
4 | This document describes the use of the three Raspberry Pi camera applications as of July 2013.
5 |
6 | 这份文档介绍了如何使用树莓派的三个摄像头应用程序。
7 |
8 | There are three applications provided: raspistill, raspivid and raspistillyuv. Both raspistill and raspistillyuv
9 | are very similar and are intended for capturing images, while raspivid is for capturing video.
10 |
11 | 树莓派提供了三个应用程序:raspistill,raspivid,raspistillyuv。其中raspistill和
12 | raspistillyuv是非常类似的,它们都被用于截图,raspivid用于录像。
13 |
14 | All the applications are command-line driven, written to take advantage of the mmal API which runs over OpenMAX. The
15 | mmal API provides an easier to use system than that presented by OpenMAX. Note that mmal is a Broadcom specific API used
16 | only on Videocore 4 systems.
17 |
18 | The applications use up to four OpenMAX(mmal) components camera, preview, encoder and null_sink. All applications
19 | use the camera component: raspistill uses the Image Encode component, raspivid uses the Video Encode component,
20 | and raspistillyuv does not use an encoder, and sends its YUV or RGB output direct from camera component to file.
21 |
22 | The preview display is optional, but can be used full screen or directed to a specific rectangular area on the display.
23 | If preview is disabled, the null_sink component is used to 'absorb' the preview frames. It is necessary for the camera
24 | to produce preview frames even if not required for display, as they are used for calculating exposure and white balance
25 | settings.
26 |
27 | In addition it is possible to omit the filename option, in which case the preview is displayed but no file is written,
28 | or to redirect all output to stdout. Command line help is available by typing just the application name in on the
29 | command line.
30 |
31 | ## Setting up the camera hardware
32 | Please note that camera modules are static-sensitive. Earth yourself prior to handling the PCB: a sink tap/faucet or
33 | similar should suffice if you don’t have an earthing strap.
34 |
35 | The camera board attaches to the Raspberry Pi via a 15-way ribbon cable. There are only two connections to make:
36 | the ribbon cable need to be attached to the camera PCB and the Raspberry Pi itself. You need to get it the right way
37 | round, or the camera will not work. On the camera PCB, the blue backing on the cable should be facing away from the PCB,
38 | and on the Raspberry Pi it should be facing towards the Ethernet connection (or where the Ethernet connector would be
39 | if you are using a model A).
40 |
41 | Although the connectors on the PCB and the Pi are different, they work in a similar way. On the Raspberry Pi, pull up
42 | the tabs on each end of the connector. It should slide up easily, and be able to pivot around slightly. Fully insert
43 | the ribbon cable into the slot, ensuring it is straight, then gently press down the tabs to clip it into place. The
44 | camera PCB itself also requires you to pull the tabs away from the board, gently insert the cable, then push the tabs
45 | back. The PCB connector is a little more awkward than the one on the Pi itself. You can watch a video showing you how
46 | to attach the connectors at www.raspberrypi.org/archives/3890 (scroll down for the video).
47 |
48 | ## Setting up the Camera software
49 |
50 | ## 通用命令行选项
51 |
52 | ### 预览窗口(Preview Window)
53 | > --preview, -p 预览窗口设置 <'x,y,w,h'>
54 |
55 | raspivid -o out.h264 -t 0 -p '0,0,400,300'
56 |
57 | Allows the user to define the size and location on the screen that the preview window will be placed. Note this will be
58 | superimposed over the top of any other windows/graphics.
59 |
60 | > --fullscreen, -f 全屏预览模式
61 |
62 | Forces the preview window to use the whole screen. Note that the aspect ratio of the incoming image will be retained,
63 | so there may be bars on some edges.
64 |
65 | > --nopreview, -n, 禁用预览窗口
66 |
67 | 完全禁用预览窗口。请注意:尽管预览窗口被禁用,摄像头还是会产生帧,所以也会耗电。
68 |
69 | > --opacity, -op 设置预览窗口透明度
70 |
71 | 设置预览窗口透明度。0 = 透明,255 = 完全不透明
72 |
73 | ### 摄像头控制选项(Camera Control Options)
74 |
75 | > --sharpness, -sh 设置图像清晰度(-100 to 100)
76 |
77 | 设置图像清晰度,默认是0.
78 |
79 | > --contrast, -co 设置图像对比度(-100 to 100)
80 |
81 | 设置图像对比度,默认是0.
82 |
83 | > --brightness, -br 设置图像亮度(0 to 100)
84 |
85 | 设置图像亮度,默认是50.0是黑的,100是白的。
86 |
87 | > --saturation, -sa 设置图像色彩饱和度(-100 to 100)
88 |
89 | 设置图像色彩饱和度,默认是0.
90 |
91 | > --ISO, -ISO Set capture ISO
92 |
93 | Sets the ISO to be used for captures. Range is 100 to 800.
94 |
95 | > --vstab, -vs 打开视频防抖
96 |
97 | 打开视频防抖,只用于视频模式下。
98 |
99 | > --ev, -ev 设置曝光补偿
100 |
101 | 设置图像曝光补偿。范围是-10到+10,默认是0.
102 |
103 | > --exposure, -ex 设置曝光模式
104 |
105 | 可选项包括:
106 |
107 | * auto 自动曝光模式
108 | * night 夜间拍摄模式
109 | * nightpreview
110 | * backlight 背光
111 | * spotlight
112 | * sports 运动Select setting for sports (fast shutter etc.)
113 | * snow Select setting optimized for snowy scenery
114 | * beach Select setting optimized for beach
115 | * verylong Select setting for long exposures
116 | * fixedfps Constrain fps to a fixed value
117 | * antishake Antishake mode
118 | * fireworks Select setting optimized for fireworks
119 |
120 | > 请注意并非所有这些设置都已实现,依赖于camera tuning
121 |
122 | > --awb, -awb 设置自动白平衡(AWB)
123 |
124 | * off Turn off white balance calculation
125 | * auto 自动模式(默认)
126 | * sun Sunny mode
127 | * cloud shade Cloudy mode
128 | * tungsten Tungsten lighting mode
129 | * fluorescent Fluorescent lighting mode
130 | * incandescent Incandescent lighting mode
131 | * flash Flash mode
132 | * horizon Horizon mode
133 |
134 | > --imxfx, -ifx 设置图像特效
135 |
136 | * none 无
137 | * negative 负片
138 | * solarise 过度曝光的图像
139 | * whiteboard Whiteboard effect
140 | * blackboard Blackboard effect
141 | * sketch 素描特效
142 | * denoise 去噪图像
143 | * emboss 浮雕特效
144 | * oilpaint 油画特效
145 | * hatch Cross-hatch sketch style
146 | * gpen 石墨素描风格
147 | * pastel 柔光特效
148 | * watercolour 水彩效果
149 | * film Grainy film effect
150 | * blur 模糊效果
151 | * saturation Colour-saturate the image
152 | * colourswap 没有完全实现
153 | * washedout 没有完全实现
154 | * posterise 没有完全实现
155 | * colourpoint 没有完全实现
156 | * colourbalance 没有完全实现
157 | * cartoon 没有完全实现
158 |
159 | > --colfx, -cfx 设置色彩效果
160 |
161 | The supplied U and V parameters (range 0 to 255) are applied to the U and Y channels of the image. For example, --colfx
162 | 128:128 should result in a monochrome image.
163 |
164 | > --metering, -mm 设置测光模式
165 |
166 | 指定测光模式用于预览和截图。
167 | * average Average the whole frame for metering
168 | * spot Spot metering
169 | * backlit Assume a backlit image
170 | * matrix Matrix metering
171 |
172 | > --rotation, -rot Set image rotation (0-359)
173 |
174 | Sets the rotation of the image in viewfinder and resulting image. This can take any value from 0 upwards, but due to
175 | hardware constraints only 0, 90, 180 and 270-degree rotations are supported.
176 |
177 | > --hflip, -hf Set horizontal flip
178 |
179 | Flips the preview and saved image horizontally.
180 |
181 | > --vflip, -vf Set vertical flip
182 |
183 | Flips the preview and saved image vertically.
184 |
185 | > --roi, -roi Set sensor region of interest
186 |
187 | Allows the specification of the area of the sensor to be used as the source for the preview and capture. This is defined
188 | as x,y for the top left corner, and a width and height, all values in normalised coordinates (0.0-1.0). So to set a ROI
189 | at half way across and down the sensor, and an width and height of a quarter of the sensor use :-roi 0.5,0.5,0.25,0.25
190 |
191 | ## 特定应用设置(Application-‐specific settings)
192 |
193 | ### raspistill
194 |
195 | --width, -w Set image width
196 | --height, -h Set image height
197 | --quality, -q Set jpeg quality <0 to 100>
198 |
199 | Quality 100几乎没有压缩,75是一个不错的选择。
200 |
201 | --raw, -r 添加raw Bayer数据到jpeg metadata中
202 |
203 | This option inserts the raw Bayer data from the camera in to the JPEG metadata.
204 |
205 | --output -o 输出文件名字
206 |
207 | 指定输出文件名字。如果没有指定,文件将不会保存。如果文件名字是'-',那么输出将会被发送到stdout。
208 |
209 | --verbose, -v 运行过程中输出详细信息。
210 |
211 | 在运行过程期间输出调试/信息消息。
212 |
213 | --timeout, -t Time before capture and shut down
214 |
215 | The program will run for this length of time, then take the capture (if output is specified). If not specified,
216 | this is set to 5 seconds.
217 |
218 | --timelapse, -tl 间隔拍摄模式
219 |
220 | The specific value is the time between shots in milliseconds. Note you should specify %04d at the point in the filename
221 | where you want a frame count number to appear. For example:
222 |
223 | -t 30000 -tl 2000 -o image%04d.jpg
224 |
225 | 上面的代码意思是,在30秒时间内,每两秒截一张图,依次命名为image1.jpg, image0002.jpg...image0015.jpg. Note that the %04d
226 | indicates a four-digit number with leading zeros added to pad to the required number of digits. So, for example,
227 | %08d would result in an eight-digit number.
228 |
229 | --thumb, -th 设置缩略图参数(x:y:quality)
230 |
231 |
232 | Allows specification of the thumbnail image inserted in to the JPEG file. If not specified, defaults are a size of
233 | 64x48 at quality 35.
234 |
235 | --demo, -d 运行演示模式
236 |
237 | This options cycles through range of camera options, and no capture is done. The demo will end at the end of the
238 | timeout period, irrespective of whether all the options have been cycled. The time between cycles should be specified
239 | as a millisecond value.
240 |
241 | --encoding, -e 设置输出文件编码
242 |
243 | 有效的选项有:JPG,BMP,GIF和PNG。需要注意的是:JPEG类型的图片保存时利用了硬件加速,所以比没有加速的图像类型
244 | (GIF,PNG,BMP)保存时间更短。另外需要注意编码成一个文件时,文件后缀是被完全忽略的。
245 |
246 | --exif, -x EXIF tag to apply to captures (format as 'key=value')
247 |
248 | Allows the insertion of specific EXIF tags into the JPEG image. You can have up to 32 EXIF tge entries. This is useful
249 | for things like adding GPS metadata. For example, to set the longitude:--exif GPS.GPSLongitude=5/1,10/1,15/100
250 |
251 | would set the longitude to 5degs, 10 minutes, 15 seconds. See EXIF documentation for more details on the range of tags
252 | available; the supported tags are as follows:
253 |
254 | --fullpreview, -fp 全屏预览模式
255 |
256 | This runs the preview windows using the full resolution capture mode. Maximum frames per second in this mode is 15fps
257 | and the preview will have the same field of view as the capture. Captures should happen more quickly as no mode change
258 | should be required. This feature is currently under development.
259 |
260 |
261 | ### raspistillyuv
262 |
263 | Many of the options for raspistillyuv are the same as those for raspistill. This section shows the differences.
264 |
265 | 不支持的选项:
266 |
267 | --exif, --encoding, --thumb, --raw, --quality
268 |
269 | 额外的选项:
270 |
271 | --rgb, -rgb Save uncompressed data as RGB888
272 |
273 | This option forces the image to be saved as RGB data with 8 bits per channel, rather than YUV420.
274 |
275 | > Note that the image buffers saved in raspistillyuv are padded to a horizontal size divisible by 16 (so there may be
276 | unused bytes at the end of each line to made the width divisible by 16). Buffers are also padded vertically to be
277 | divisible by 16, and in the YUV mode, each plane of Y,U,V is padded in this way.
278 |
279 | ### raspivid
280 |
281 | --width, -w 设置视频图像宽度
282 |
283 | 设置视频图像宽度,64~1920像素之间。
284 |
285 | --height, -h 设置视频图像高度
286 |
287 | 设置视频图像高度,64~1080像素之间。
288 |
289 | --bitrate, -b 设置比特率
290 |
291 | Use bits per second, so 10MBits/s would be -b 10000000. For H264, 1080p a high quality bitrate would be 15Mbits/s
292 | or more.
293 |
294 | --output, -o 指定输出文件名字.
295 |
296 | 指定输出文件名字。如果不指定,文件将不会保存。如果文件名字是'-',那么所有输出都会被发送到stdout中。
297 |
298 | --verbose, -v 在运行期间输出详细信息。
299 |
300 | Outputs debugging/information messages during the program run.
301 |
302 | --timeout, -t Time before capture and shut down
303 |
304 | The program will run for this length of time, then take the capture (if output is specified). If not specified,
305 | this is set to five seconds. 设置为0意味着应用将会一直运行直到用户按下Ctrl-C.
306 |
307 | --demo, -d 运行演示模式
308 |
309 | This option cycles through range of camera options, no capture is done, the demo will end at the end of the timeout
310 | period, irrespective of whether all the options have been cycled. The time between cycles should be specified as
311 | a millisecond value.
312 |
313 | --framerate, -fps Specify the frames per second to record
314 |
315 | 到目前为止,最小的帧率允许为2fps,最大的帧率为30fps。这在将来可能会改变。
316 |
317 | --penc, -e Display preview image after encoding
318 |
319 | Switch on an option to display the preview after compression. This will show any compression artefacts in the preview
320 | window. In normal operation, the preview will show the camera output prior to being compressed. This option is not
321 | guaranteed to work in future releases.
322 |
323 | --intra, -g Specify the intra refresh period (key frame rate/GoP)
324 |
325 | Sets the intra refresh period (GoP) rate for the recorded video. H.264 video uses a complete frame (I-frame) every
326 | intra refresh period from which subsequent frames are based. This options specifies the numbers of frames between
327 | each I-frame. Larger numbers here will reduce the size of the resulting video, smaller numbers make the stream more
328 | robust to error.
329 |
330 | ## 例子
331 |
332 | ### Still captures
333 |
334 | By default, captures are done at the highest resolution supported by the sensor. This can be changed using the -w and
335 | -h command line options.
336 |
337 | Taking a default capture after two seconds (note times are specified in milliseconds) on viewfinder, saving in image.jpg
338 |
339 | raspistill -t 2000 -o image.jpg
340 |
341 | Take a capture at a different resolution
342 |
343 | raspistill -t 2000 -o image.jpg -w 640 -h 480
344 |
345 | Now reduce the quality considerably to reduce file size
346 |
347 | raspistill -t 2000 -o image.jpg -q 5
348 |
349 | Force the preview to appear at coordinate 100,100, with width 300 and height 200 pixels.
350 |
351 | raspistill -t 2000 -o image.jpg -p 100,100,300,200
352 |
353 | Disable preview entirely.
354 |
355 | raspistill -t 2000 -o image.jpg -n
356 |
357 | Save the image as a png file (无损压缩,但速度比JPEG要慢). Note that the filename suffix is ignored when choosing the
358 | image encoding.
359 |
360 | raspistill -t 2000 -o image.png –e png
361 |
362 | Add some EXIF information to the JPEG. This sets the Artist tag name to Mooncake, and the GPS altitude to 123.5m.
363 | Note that if setting GPS tags you should set as a minimum GPSLatitude, GPSLatitudeRef, GPSLongitude, GPSLongitudeRef,
364 | GPSAltitude and GPSAltitudeRef.
365 |
366 | raspistill -t 2000 -o image.jpg -x IFDO.Artist=Mooncake -x GPS.GPSAltitude=1235/10
367 |
368 | 设置浮雕效果的图片。
369 |
370 | raspistill -t 2000 -o image.jpg -ifx emboss
371 |
372 | Set the U and V channels of the YUV image to specific values (128:128 产生一个灰度图片)
373 |
374 | raspistill -t 2000 -o image.jpg -cfx 128:128
375 |
376 | 运行预览2秒钟,不保存图片
377 |
378 | raspistill -t 2000
379 |
380 | Take timelapse picture, one every 10 seconds for 10 minutes (10 minutes = 600000ms), named image_number_1_today.jpg,
381 | image_number_2_today.jpg onwards.
382 |
383 | raspistill -t 600000 -tl 10000 -o image_num_%d_today.jpg
384 |
385 | 拍一张图片并且将图片数据发送到stdout
386 |
387 | raspistill -t 2000 -o -
388 |
389 | Take a picture and send image data to file
390 |
391 | raspistill -t 2000 -o - > my_file.jpg
392 |
393 | ### 视频捕捉(Video Captures)
394 |
395 | 图像大小和预览设置与stills capture类似,视频录制的默认大小是1080p (1920x1080)。
396 |
397 | 默认配置(1080p30)录一个5秒钟的视频剪辑
398 |
399 | raspivid -t 5000 -o video.h264
400 |
401 | Record a 5s clip at a specified bitrate (3.5MBits/s)
402 |
403 | raspivid -t 5000 -o video.h264 -b 3500000
404 |
405 | Record a 5s clip at a specified framerate (5fps)
406 |
407 | raspivid -t 5000 -o video.h264 -f 5
408 |
409 | Encode a 5s camera stream and send image data to stdout
410 |
411 | raspivid -t 5000 -o -
412 |
413 | Encode a 5s camera stream and send image data to file
414 |
415 | raspivid -t 5000 -o - > my_file.h264
416 |
417 |
418 |
419 |
420 |
421 |
422 |
423 |
424 |
425 |
426 |
427 |
428 |
429 |
--------------------------------------------------------------------------------
 22 |
23 |
22 |
23 |  24 |
25 |
24 |
25 |  26 |
27 |
26 |
27 |  28 |
29 |
28 |
29 |  30 |
31 |
30 |
31 |  32 |
33 |
32 |
33 |  34 |
35 | ### 原文地址:http://bjurr.se/cam+dummy+made+pi+raspberry+smart
36 |
--------------------------------------------------------------------------------
/Raspberry Surveillance.md:
--------------------------------------------------------------------------------
1 | # 树莓派监控(Raspberry Surveillance)
2 |
3 | I reccently bought a Raspberry PI. The main reason was that I had an idea of making some video surveillance software.
4 | I have made 2 previous blog posts regarding the Raspberry Pi and both of them are sort of related this one. One where
5 | I wrote some notes on the initial setup of the hardware and basic software. One where I wrote about how to setup
6 | Owncloud. This post is about https://github.com/tomasbjerre/RaspberrySurveillance. It is project where I've developed,
7 | mainly, a web interface that can:
8 |
9 | * Show snapshot of camera
10 | * Setup motion triggering
11 | * Start and stop motion triggering
12 | * Save captured videos to disk
13 | * Save captured videos to Webdav (Supported by Owncloud)
14 |
15 | This means you can start and stop motion triggering from a web interface. Whenever a video is captured you can have
16 | it uploaded to Owncloud and have it automatically synced to you Windows PC.
17 |
18 |
34 |
35 | ### 原文地址:http://bjurr.se/cam+dummy+made+pi+raspberry+smart
36 |
--------------------------------------------------------------------------------
/Raspberry Surveillance.md:
--------------------------------------------------------------------------------
1 | # 树莓派监控(Raspberry Surveillance)
2 |
3 | I reccently bought a Raspberry PI. The main reason was that I had an idea of making some video surveillance software.
4 | I have made 2 previous blog posts regarding the Raspberry Pi and both of them are sort of related this one. One where
5 | I wrote some notes on the initial setup of the hardware and basic software. One where I wrote about how to setup
6 | Owncloud. This post is about https://github.com/tomasbjerre/RaspberrySurveillance. It is project where I've developed,
7 | mainly, a web interface that can:
8 |
9 | * Show snapshot of camera
10 | * Setup motion triggering
11 | * Start and stop motion triggering
12 | * Save captured videos to disk
13 | * Save captured videos to Webdav (Supported by Owncloud)
14 |
15 | This means you can start and stop motion triggering from a web interface. Whenever a video is captured you can have
16 | it uploaded to Owncloud and have it automatically synced to you Windows PC.
17 |
18 |  19 |
20 | When camera triggers it will store pictures and/or vieos, it is configurable. Here is a very small example of a
21 | captured event.
22 |
23 | * Picture that detected change
24 | * Video recorded on trigger
25 | * Picture showing what was changed in picture
26 |
27 | ### 原文地址:http://bjurr.se/raspberry+surveillance
28 |
--------------------------------------------------------------------------------
/Streaming Raspberry Pi Camera H264 into HTML over RTMP.md:
--------------------------------------------------------------------------------
1 | ### Streaming Raspberry Pi Camera H264 into HTML over RTMP
2 |
3 | #### SPD Raspberry Pi Camera setup instructions for Raspbian Wheezy
4 |
5 | Requirements: Raspbian Wheezy with hard float enabled. I assume you have avahi, wifi, and have updated to the latest
6 | firmware and enabled the camera. 并且在树莓派上配置了一个Web服务器。
7 |
8 | 安装crtmpserver流媒体服务器:
9 |
10 | sudo aptitude install crtmpserver
11 |
12 | 注:aptitude 是 Debian GNU/Linux 系统中, 非常神奇的的软件包管理器,基于大名鼎鼎的 APT 机制, 整合了 dselect 和 apt-get的
13 | 所有功能, 并提供的更多特性,特别是在依赖关系处理上。
14 |
15 | 添加crtmpserver流媒体服务器日志目录
16 |
17 | sudo mkdir /var/log/crtmpserver
18 |
19 | 改变
19 |
20 | When camera triggers it will store pictures and/or vieos, it is configurable. Here is a very small example of a
21 | captured event.
22 |
23 | * Picture that detected change
24 | * Video recorded on trigger
25 | * Picture showing what was changed in picture
26 |
27 | ### 原文地址:http://bjurr.se/raspberry+surveillance
28 |
--------------------------------------------------------------------------------
/Streaming Raspberry Pi Camera H264 into HTML over RTMP.md:
--------------------------------------------------------------------------------
1 | ### Streaming Raspberry Pi Camera H264 into HTML over RTMP
2 |
3 | #### SPD Raspberry Pi Camera setup instructions for Raspbian Wheezy
4 |
5 | Requirements: Raspbian Wheezy with hard float enabled. I assume you have avahi, wifi, and have updated to the latest
6 | firmware and enabled the camera. 并且在树莓派上配置了一个Web服务器。
7 |
8 | 安装crtmpserver流媒体服务器:
9 |
10 | sudo aptitude install crtmpserver
11 |
12 | 注:aptitude 是 Debian GNU/Linux 系统中, 非常神奇的的软件包管理器,基于大名鼎鼎的 APT 机制, 整合了 dselect 和 apt-get的
13 | 所有功能, 并提供的更多特性,特别是在依赖关系处理上。
14 |
15 | 添加crtmpserver流媒体服务器日志目录
16 |
17 | sudo mkdir /var/log/crtmpserver
18 |
19 | 改变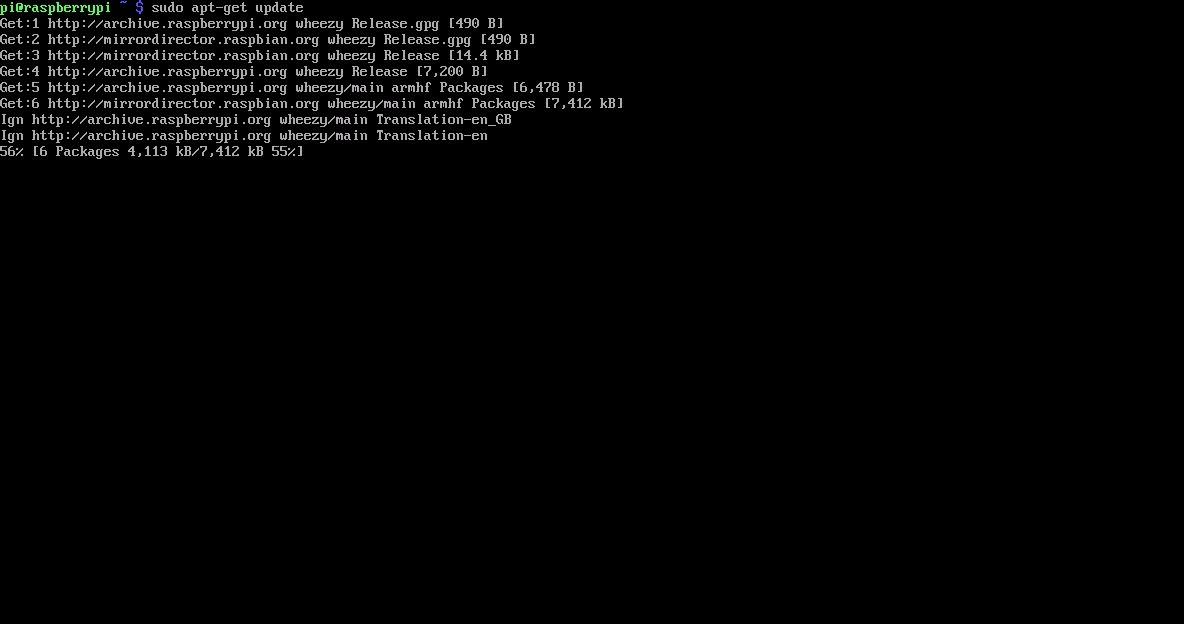 29 |
30 | sudo apt-get upgrade
31 |
32 |
29 |
30 | sudo apt-get upgrade
31 |
32 | 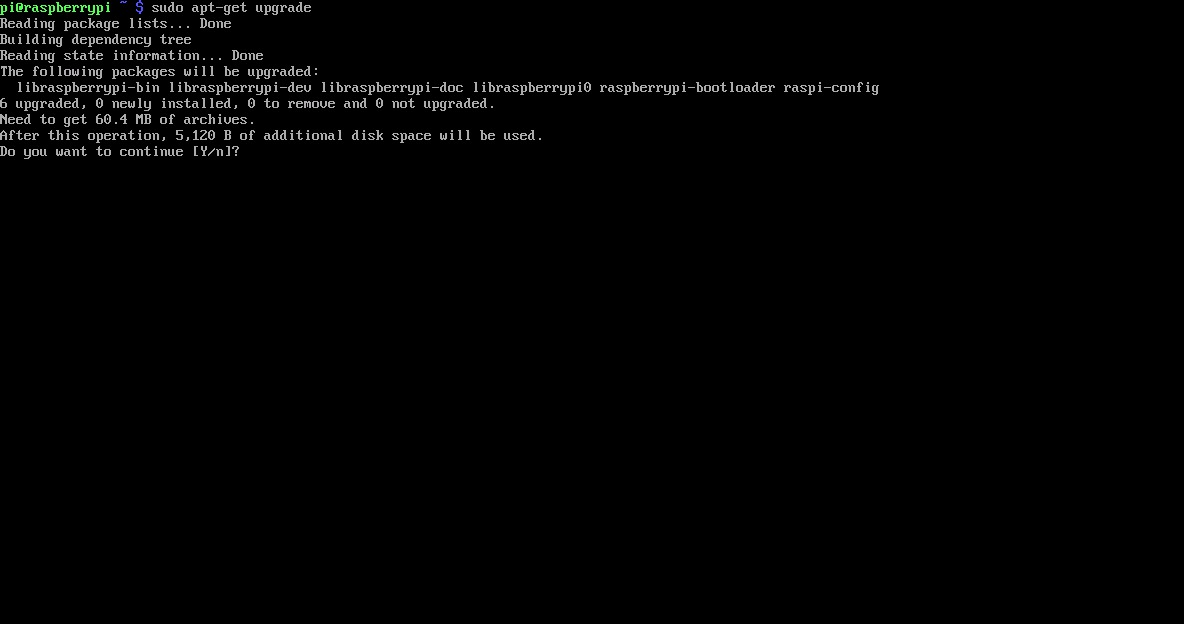 33 |
34 | 运行以下命令来访问树莓派配置设置:
35 |
36 | sudo raspi-config
37 |
38 | 切换到“camera”并且选择“enable”
39 |
40 |
33 |
34 | 运行以下命令来访问树莓派配置设置:
35 |
36 | sudo raspi-config
37 |
38 | 切换到“camera”并且选择“enable”
39 |
40 | 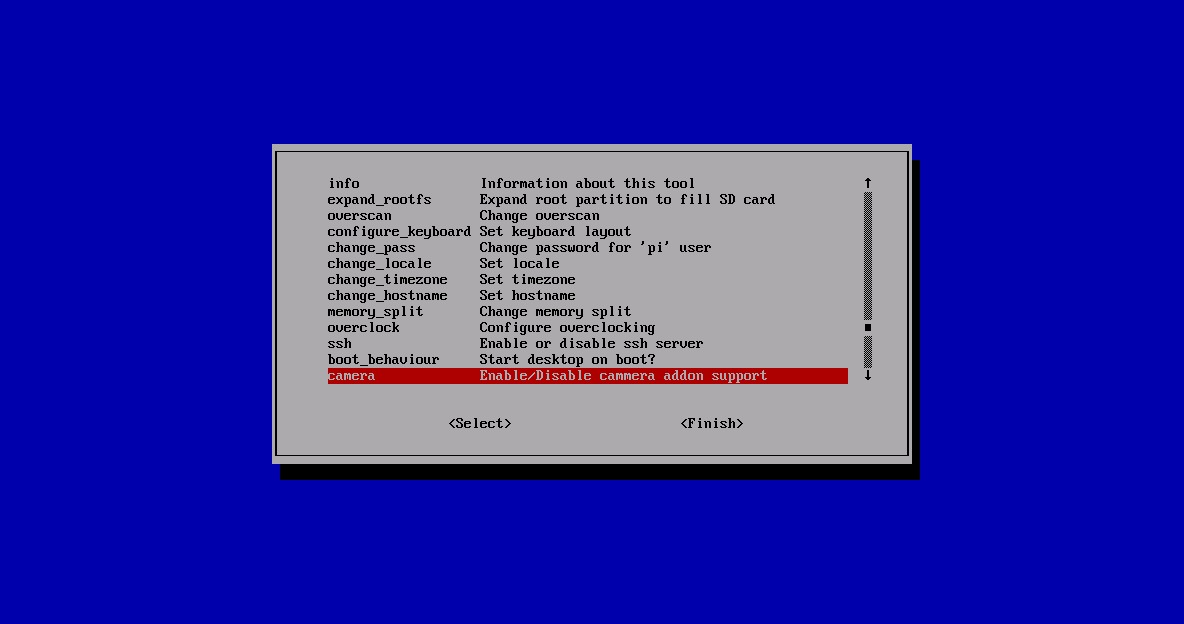 41 |
42 |
41 |
42 | 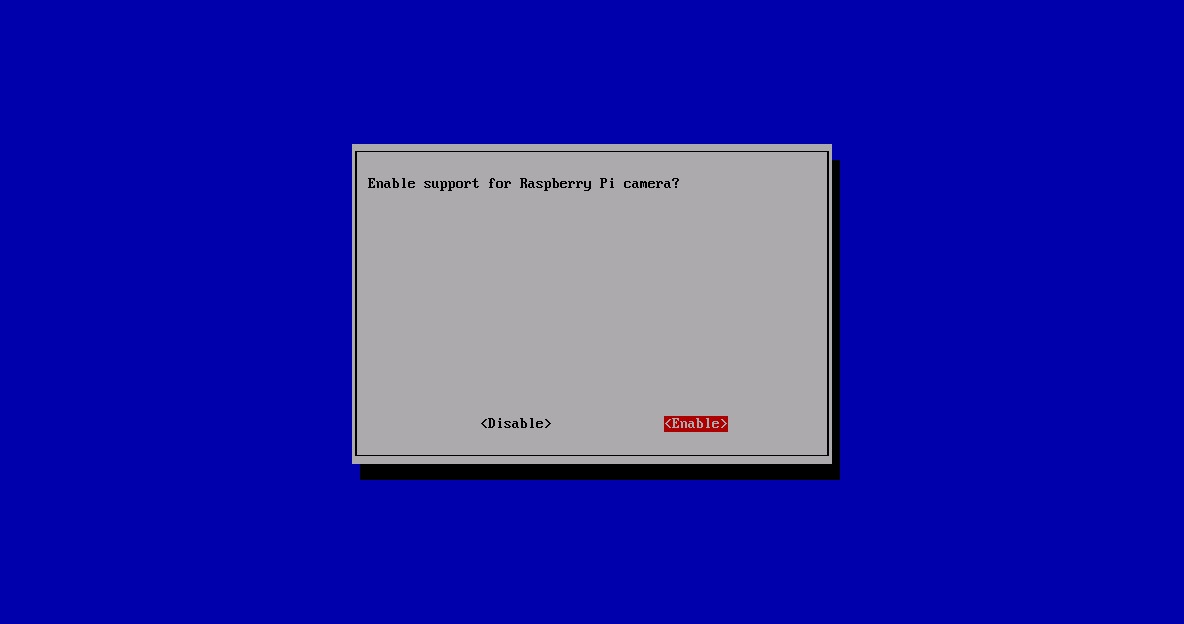 43 |
44 | 选择“Finish”并重启
45 |
46 |
43 |
44 | 选择“Finish”并重启
45 |
46 |  47 |
48 | ## 如何使用树莓派摄像头软件(How to use the Raspberry Pi camera software)
49 |
50 |
47 |
48 | ## 如何使用树莓派摄像头软件(How to use the Raspberry Pi camera software)
49 |
50 |