├── Python_Examples
├── README.md
└── MyoWare_analogRead.py
├── Documentation
├── myowarePlotter1.gif
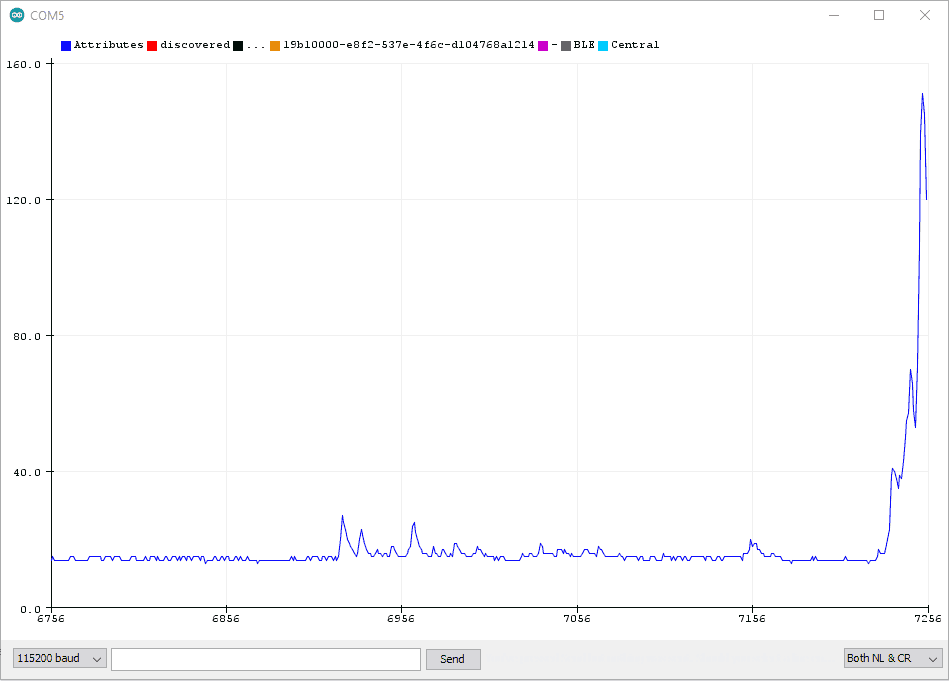
├── Serial_debug_central.png
└── Serial_debug_peripheral.png
├── Arduino_Examples
├── Example_04_BLE_Muscle_Drums
│ ├── README.md
│ └── Example_04_B_MyoWare_BLE_Central_Muscle_Drums
│ │ └── Example_04_B_MyoWare_BLE_Central_Muscle_Drums.ino
├── Example_01_analogRead_SINGLE
│ └── Example_01_analogRead_SINGLE.ino
├── Example_02_BLE_SINGLE
│ ├── Example_02_A_MyoWare_BLE_Peripheral_SINGLE
│ │ └── Example_02_A_MyoWare_BLE_Peripheral_SINGLE.ino
│ └── Example_02_B_MyoWare_BLE_Central_SINGLE
│ │ └── Example_02_B_MyoWare_BLE_Central_SINGLE.ino
└── Example_03_BLE_MULTI
│ ├── Example_03_A_MyoWare_BLE_Peripheral_MULTI
│ └── Example_03_A_MyoWare_BLE_Peripheral_MULTI.ino
│ └── Example_03_B_MyoWare_BLE_Central_MULTI
│ └── Example_03_B_MyoWare_BLE_Central_MULTI.ino
├── MakeCode_Examples
└── Example_01_Radio_SINGLE
│ └── README.md
├── LICENSE.md
└── README.md
/Python_Examples/README.md:
--------------------------------------------------------------------------------
1 | Python code examples. Tested on the SparkFun Pro Micro RP2040 using Raspberry Pi's MicroPython environment.
--------------------------------------------------------------------------------
/Documentation/myowarePlotter1.gif:
--------------------------------------------------------------------------------
https://raw.githubusercontent.com/sparkfun/SparkFun_MyoWare_Code_Examples/HEAD/Documentation/myowarePlotter1.gif
--------------------------------------------------------------------------------
/Documentation/Serial_debug_central.png:
--------------------------------------------------------------------------------
https://raw.githubusercontent.com/sparkfun/SparkFun_MyoWare_Code_Examples/HEAD/Documentation/Serial_debug_central.png
--------------------------------------------------------------------------------
/Documentation/Serial_debug_peripheral.png:
--------------------------------------------------------------------------------
https://raw.githubusercontent.com/sparkfun/SparkFun_MyoWare_Code_Examples/HEAD/Documentation/Serial_debug_peripheral.png
--------------------------------------------------------------------------------
/Arduino_Examples/Example_04_BLE_Muscle_Drums/README.md:
--------------------------------------------------------------------------------
1 | Note, there is no "Example_04_A_...".
2 |
3 | Please use this code on your peripheral device:
4 | [Example_03_A_MyoWare_BLE_Peripheral_MULTI](https://github.com/sparkfun/SparkFun_MyoWare_Arduino_Examples/tree/main/Arduino_Examples/Example_03_BLE_MULTI/Example_03_A_MyoWare_BLE_Peripheral_MULTI)
5 |
--------------------------------------------------------------------------------
/MakeCode_Examples/Example_01_Radio_SINGLE/README.md:
--------------------------------------------------------------------------------
1 | MakeCode examples. Tested on two Micro:Bits and the MakeCode environment. We found it best to use a battery to transmit the data through the radio. Only run on a laptop using its battery. Do not plug in laptop charger/dock/monitor. Do not touch your laptop trackpad or keyboard while the MyoWare sensor is powered.
2 |
3 | Drag and drop to your Micro:Bits (it will show up as an "external storage device" on your computer) to program. Or drag the .hex file into your MakeCode editor to import the example. The example code are also published through the following links.
4 |
5 | * [Example_01_A_MyoWare_Radio_SINGLE_Send](https://makecode.microbit.org/_dfyEubbF40EF)
6 | * [Example_01_B_MyoWare_Radio_SINGLE_Receive](https://makecode.microbit.org/_fvxM5VWerWKM)
7 |
--------------------------------------------------------------------------------
/LICENSE.md:
--------------------------------------------------------------------------------
1 | SparkFun License Information
2 | ============================
3 |
4 | SparkFun uses two different licenses for our files — one for hardware and one for code.
5 |
6 | Code
7 | --------
8 |
9 | **SparkFun code, firmware, and software is released under the MIT License(http://opensource.org/licenses/MIT).**
10 |
11 | The MIT License (MIT)
12 |
13 | Copyright (c) 2016 SparkFun Electronics
14 |
15 | Permission is hereby granted, free of charge, to any person obtaining a copy
16 | of this software and associated documentation files (the "Software"), to deal
17 | in the Software without restriction, including without limitation the rights
18 | to use, copy, modify, merge, publish, distribute, sublicense, and/or sell
19 | copies of the Software, and to permit persons to whom the Software is
20 | furnished to do so, subject to the following conditions:
21 |
22 | The above copyright notice and this permission notice shall be included in all
23 | copies or substantial portions of the Software.
24 |
25 | THE SOFTWARE IS PROVIDED "AS IS", WITHOUT WARRANTY OF ANY KIND, EXPRESS OR
26 | IMPLIED, INCLUDING BUT NOT LIMITED TO THE WARRANTIES OF MERCHANTABILITY,
27 | FITNESS FOR A PARTICULAR PURPOSE AND NONINFRINGEMENT. IN NO EVENT SHALL THE
28 | AUTHORS OR COPYRIGHT HOLDERS BE LIABLE FOR ANY CLAIM, DAMAGES OR OTHER
29 | LIABILITY, WHETHER IN AN ACTION OF CONTRACT, TORT OR OTHERWISE, ARISING FROM,
30 | OUT OF OR IN CONNECTION WITH THE SOFTWARE OR THE USE OR OTHER DEALINGS IN THE
31 | SOFTWARE.
32 |
--------------------------------------------------------------------------------
/Arduino_Examples/Example_01_analogRead_SINGLE/Example_01_analogRead_SINGLE.ino:
--------------------------------------------------------------------------------
1 | /*
2 | MyoWare Example_01_analogRead_SINGLE
3 | SparkFun Electronics
4 | Pete Lewis
5 | 3/24/2022
6 | License: This code is public domain but you buy me a beverage if you use this and we meet someday.
7 | This code was adapted from the MyoWare analogReadValue.ino example found here:
8 | https://github.com/AdvancerTechnologies/MyoWare_MuscleSensor
9 |
10 | This example streams the data from a single MyoWare sensor attached to ADC A0.
11 | Graphical representation is available using Serial Plotter (Tools > Serial Plotter menu).
12 |
13 | *Only run on a laptop using its battery. Do not plug in laptop charger/dock/monitor.
14 |
15 | *Do not touch your laptop trackpad or keyboard while the MyoWare sensor is powered.
16 |
17 | Hardware:
18 | SparkFun RedBoard Artemis (or Arduino of choice)
19 | USB from Artemis to Computer.
20 | Output from sensor connected to your Arduino pin A0
21 |
22 | This example code is in the public domain.
23 | */
24 |
25 | void setup()
26 | {
27 | Serial.begin(115200);
28 | while (!Serial); // optionally wait for serial terminal to open
29 | Serial.println("MyoWare Example_01_analogRead_SINGLE");
30 | }
31 |
32 | void loop()
33 | {
34 | int sensorValue = analogRead(A0); // read the input on analog pin A0
35 |
36 | Serial.println(sensorValue); // print out the value you read
37 |
38 | delay(50); // to avoid overloading the serial terminal
39 | }
--------------------------------------------------------------------------------
/README.md:
--------------------------------------------------------------------------------
1 | SparkFun MyoWare Code Examples
2 | ========================================
3 |
4 |
5 |
6 |
7 |
8 |
9 |
10 |
Arduino Bluetooth® Peripheral and Central Setup
11 |
Arduino Central Device and ENV Output
12 |
13 |
14 |
15 | Arduino, Python, and MakeCode examples to read the MyoWare 2.0 Muscle Sensors. Wired and BLE Arduino examples included.
16 |
17 | Documentation
18 | --------------
19 | * **[Arduino Reference Language: ArduinoBLE](https://www.arduino.cc/reference/en/libraries/arduinoble/)**
20 | * **[Getting Started with the MyoWare® 2.0 Muscle Sensor Ecosystem](https://learn.sparkfun.com/tutorials/1956)** - Basic hookup guide for the MyoWare 2.0 ecosystem.
21 |
22 | License Information
23 | -------------------
24 |
25 | This code is _**open source**_!
26 |
27 | Please review the LICENSE.md file for license information.
28 |
29 | If you have any questions or concerns on licensing, please contact technical support on our [SparkFun forums](https://forum.sparkfun.com/viewforum.php?f=152).
30 |
31 | Distributed as-is; no warranty is given.
32 |
33 | - Your friends at SparkFun.
34 |
35 | __
36 |
--------------------------------------------------------------------------------
/Python_Examples/MyoWare_analogRead.py:
--------------------------------------------------------------------------------
1 | # MyoWare Example analogRead SINGLE
2 | # By: Ho Yun "Bobby" Chan @ SparkFun Electronics
3 | # Date: 3/24/2022
4 | #
5 | # This code was adapted from the Raspberry Pi MicroPython example for the RP2040
6 | # and ported over from Pete Lewis' Arduino example.
7 | #
8 | # This example streams the data from a single MyoWare sensor attached to ADC A0.
9 | # Graphical representation is available using the Thonny IDE v3.3.13 Plotter (View > Plotter).
10 | # Make sure to rename this file as main.py before running the code on your RP2040!
11 | #
12 | # *Only run on a laptop using its battery. Do not plug in laptop charger/dock/monitor.
13 | #
14 | # *Do not touch your laptop trackpad or keyboard while the MyoWare sensor is powered.
15 | #
16 | # Hardware:
17 | # SparkFun RP2040 Pro Micro
18 | # USB from RP2040 Pro Micro to Computer
19 | # Output from sensor (ENV, RECT, RAW) connected to your pin A0
20 | #
21 | # ==================HARDWARE HOOKUP==================
22 | # MyoWare Muscle Sensor <=> RP2040
23 | # ===================================================
24 | # VIN <=> 3.3V
25 | # GND <=> GND
26 | # ENV, RECT, or RAW <=> A0
27 | # ===================================================
28 | # We recommend connecting the ENV pin to easily view.
29 | #
30 | # For more information, check out the reference language on the MicroPython functions.
31 | # https://docs.micropython.org/en/latest/rp2/quickref.html#adc-analog-to-digital-conversion
32 | # https://docs.micropython.org/en/v1.15/library/utime.html#utime.sleep_us
33 | #
34 | # Distributed as-is; no warranty is given
35 | # -----------------------------------------------------------------------------
36 |
37 | import machine
38 | import utime #similar to time module in Python but pared down for MicroPython
39 |
40 | #Define analog pin for RP2040. You can reference the ADC channel or the GPIO number:
41 | # ADC0 = GP26
42 | # ADC1 = GP27
43 | # ADC2 = GP28
44 | sensor_myoware = machine.ADC(0) #initialize channel 0, 12-bit ADC (default)
45 |
46 | while True:
47 |
48 | #0-65535 across voltage range 0.0v - 3.3v
49 | reading = sensor_myoware.read_u16() #Read sensor data
50 |
51 | print(reading) #output reading to serial terminal or Thonny Plotter
52 | utime.sleep_ms(50) #small delay so the serial terminal is not flooded with data
--------------------------------------------------------------------------------
/Arduino_Examples/Example_02_BLE_SINGLE/Example_02_A_MyoWare_BLE_Peripheral_SINGLE/Example_02_A_MyoWare_BLE_Peripheral_SINGLE.ino:
--------------------------------------------------------------------------------
1 | /*
2 | MyoWare Sensor BLE Peripheral SINGLE SENSOR Example
3 | SparkFun Electronics
4 | Pete Lewis
5 | 3/17/2022
6 |
7 | This example reads a single MyoWare Muscle Sensor, and then gets that data from this RedBoard Artemis
8 | (the peripheral) to a second RedBoard Artemis (the central) over BLE.
9 |
10 | This Artemis, aka the "BLE Peripheral", will read the sensor on A0.
11 | It will then update the value to the "bluetooth bulletin board."
12 |
13 | Note, in BLE, you have services, characteristics and values.
14 | Read more about it here:
15 |
16 | https://www.arduino.cc/reference/en/libraries/arduinoble/
17 |
18 | Note, before it begins reading the ADC and updating the data,
19 | It first sets up some BLE stuff:
20 | 1. sets up as a peripheral
21 | 2. sets up a service and characteristic (the data)
22 | -Note, Services and characteristics have custom 128-bit UUID,
23 | -These must match the UUIDs in the code on the central device.
24 | 3. advertises itself
25 |
26 | In order for this example to work, you will need a second Artemis, and it will
27 | need to be programmed with the provided code specific to being a central device,
28 | looking for this specific peripheral/service/characteristic.
29 |
30 | Note, both the service and the characteristic get unique UUIDs
31 | (even though they are extremely close to being the same thing in this example)
32 |
33 | The second Artemis, aka the "BLE Central," will subscribe to the first board's
34 | characteristic, and check to see if the value has been updated. When it has been
35 | updated, it will print the value to the serial terminal.
36 |
37 | Hardware:
38 | MyoWare Sensor with Link Shield snapped on top.
39 | TRS cable from Link Shield to A0 port of Arduino Shield.
40 | Arduino Shield pressed into RedBoard Artemis.
41 | USB from Artemis to Computer.
42 |
43 | ** For consistent BT connection follow these steps:
44 | ** 1. Reset Peripheral
45 | ** 2. Wait 5 seconds
46 | ** 3. Reset Central
47 | ** 4. Enjoy BT connection
48 | **
49 | ** ArduinoBLE does not support RE-connecting two devices.
50 | ** If you loose connection, you must follow this hardware reset sequence again.
51 |
52 | This example code is in the public domain.
53 | */
54 |
55 | #include
56 |
57 | BLEService sensorDataService("19b10000-e8f2-537e-4f6c-d104768a1214"); // BLE Service named "sensorDataService"
58 |
59 | // BLE Data Characteristic - custom 128-bit UUID, readable, writable and subscribable by central
60 | // Note, "BLENotify" is what makes it subscribable
61 | BLEByteCharacteristic dataCharacteristic("19b10001-e8f2-537e-4f6c-d104768a1214", BLERead | BLEWrite | BLENotify);
62 |
63 | const int ledPin = LED_BUILTIN; // pin to use for the LED
64 |
65 | void setup()
66 | {
67 | Serial.begin(115200);
68 | while (!Serial); // optionally wait for serial terminal to open, useful with micros that have native USB
69 | Serial.println("MyoWare Single Sensor Example - BLE Peripheral");
70 |
71 | pinMode(ledPin, OUTPUT); // set LED pin to output mode
72 |
73 | if (!BLE.begin()) { // begin initialization
74 | Serial.println("starting BLE failed!");
75 | while (1);
76 | }
77 | Serial.println("BLE initiallized successfully");
78 |
79 | BLE.setLocalName("MYOWARE1"); // set advertised local name
80 | BLE.setAdvertisedService(sensorDataService); // set advertised service UUID
81 | sensorDataService.addCharacteristic(dataCharacteristic); // add the characteristic to the service
82 | BLE.addService(sensorDataService); // add service
83 | dataCharacteristic.writeValue(0); // set the initial value for the characeristic
84 | BLE.advertise(); // start advertising
85 | }
86 |
87 | void loop()
88 | {
89 | BLEDevice central = BLE.central(); // listen for BLE peripherals to connect
90 |
91 | if (central) // if a central is connected to peripheral
92 | {
93 | Serial.print("Connected to central: ");
94 | Serial.println(central.address()); // print the central's MAC address
95 |
96 | Serial.println("Reading Sensor and writing BLE characteristic values now...");
97 |
98 | // while the central is still connected to peripheral:
99 | while (central.connected())
100 | {
101 | int val_int = analogRead(A0); // Read the sensor attached to Analog Pin A0
102 | byte val_byte = map(val_int, 0, 1023, 0, 255); // map the int to a byte
103 | delay(10);
104 | dataCharacteristic.writeValue(val_byte); // "post" to "BLE bulletin board"
105 | // Note, because our second Artemis in this example (the central) is subscribed to this characteristic,
106 | // it can simply call Characteristic.valueUpdated() to see if it has been updated.
107 | // valueUpdated() will return True if updated, or false if no update has happened.
108 | // If it has been updated, the central Artemis can read the latest value using Characteristic.readValue();
109 | }
110 | Serial.print(F("Disconnected from central: ")); // when the central disconnects, print it out
111 | Serial.println(central.address());
112 | }
113 | }
114 |
--------------------------------------------------------------------------------
/Arduino_Examples/Example_02_BLE_SINGLE/Example_02_B_MyoWare_BLE_Central_SINGLE/Example_02_B_MyoWare_BLE_Central_SINGLE.ino:
--------------------------------------------------------------------------------
1 | /*
2 | MyoWare Receiver BLE Central SINGLE SENSOR Example
3 | SparkFun Electronics
4 | Pete Lewis
5 | 3/17/2022
6 |
7 | This example sets up a SparkFun RedBoard Artemis as a BLE central device,
8 | Then, it connects to a second Artemis peripheral device that is reading a single MyoWare
9 | Muscle sensor. It then streams the data on the Serial Terminal.
10 |
11 | Note, in BLE, you have services, characteristics and values.
12 | Read more about it here:
13 |
14 | https://www.arduino.cc/reference/en/libraries/arduinoble/
15 |
16 | Note, before it begins checking the data and printing it,
17 | It first sets up some BLE stuff:
18 | 1. sets up as a central
19 | 2. scans for any peripherals
20 | 3. Connects to the device named "MYOWARE1"
21 | 4. Subscribes MYOWARE1's data characteristic
22 |
23 | In order for this example to work, you will need a second Artemis, and it will
24 | need to be programmed with the provided code specific to being a peripheral device,
25 | and advertising as MYOWARE1 with the specific characteristic UUID.
26 |
27 | Note, both the service and the characteristic get unique UUIDs
28 | (even though they are extremely close to being the same thing in this example)
29 |
30 | This Artemis, aka the "BLE Central," will subscribe to the peripheral board's
31 | characteristic, and check to see if the value has been updated. When it has been
32 | updated, it will print the value to the serial terminal.
33 |
34 | Hardware:
35 | SparkFun RedBoard Artemis
36 | USB from Artemis to Computer.
37 |
38 | ** For consistent BT connection follow these steps:
39 | ** 1. Reset Peripheral
40 | ** 2. Wait 5 seconds
41 | ** 3. Reset Central
42 | ** 4. Enjoy BT connection
43 | **
44 | ** ArduinoBLE does not support RE-connecting two devices.
45 | ** If you loose connection, you must follow this hardware reset sequence again.
46 |
47 | This example code is in the public domain.
48 | */
49 |
50 | #include
51 |
52 | void setup()
53 | {
54 | Serial.begin(115200);
55 | while (!Serial); // optionally wait for serial terminal to open, useful with micros that have native USB
56 | Serial.println("MyoWare Single Sensor Example - BLE Central");
57 |
58 | if (!BLE.begin()) // initialize the BLE hardware
59 | {
60 | Serial.println("starting BLE failed!");
61 | while (1);
62 | }
63 | Serial.println("BLE initiallized successfully");
64 |
65 | BLE.scanForUuid("19b10000-e8f2-537e-4f6c-d104768a1214"); // start scanning for peripherals
66 | }
67 |
68 | void loop()
69 | {
70 | BLEDevice peripheral = BLE.available(); // check if a peripheral has been discovered
71 |
72 | if (peripheral) // discovered a peripheral, print out its info
73 | {
74 | Serial.print("Found ");
75 | Serial.print(peripheral.address());
76 | Serial.print(" '");
77 | Serial.print(peripheral.localName());
78 | Serial.print("' ");
79 | Serial.print(peripheral.advertisedServiceUuid());
80 | Serial.println();
81 |
82 | if (peripheral.localName() != "MYOWARE1")
83 | {
84 | return;
85 | }
86 |
87 | BLE.stopScan();
88 |
89 | checkUpdate(peripheral);
90 |
91 | Serial.println("Starting to scan for new peripherals again...");
92 | BLE.scanForUuid("19b10000-e8f2-537e-4f6c-d104768a1214"); // peripheral disconnected, scan again
93 | Serial.println("Scan has begun...");
94 | }
95 | }
96 |
97 | // Connect to peripheral
98 | // Then continue to check if the data has been updated,
99 | // If so, print it to terminal
100 | void checkUpdate(BLEDevice peripheral)
101 | {
102 | Serial.println("Connecting ..."); // connect to the peripheral
103 |
104 | if (peripheral.connect())
105 | {
106 | Serial.println("Connected");
107 | } else {
108 | Serial.println("Failed to connect!");
109 | return;
110 | }
111 |
112 | Serial.println("Discovering attributes ..."); // discover peripheral attributes
113 | if (peripheral.discoverAttributes())
114 | {
115 | Serial.println("Attributes discovered");
116 | } else {
117 | Serial.println("Attribute discovery failed!");
118 | peripheral.disconnect();
119 | return;
120 | }
121 |
122 | // retrieve the data characteristic
123 | BLECharacteristic dataCharacteristic = peripheral.characteristic("19b10001-e8f2-537e-4f6c-d104768a1214");
124 |
125 | if (!dataCharacteristic)
126 | {
127 | Serial.println("Peripheral does not have that characteristic!");
128 | peripheral.disconnect();
129 | return;
130 | } else if (!dataCharacteristic.canWrite())
131 | {
132 | Serial.println("Peripheral does not have a writable characteristic!");
133 | peripheral.disconnect();
134 | return;
135 | } else if (!dataCharacteristic.canRead())
136 | {
137 | Serial.println("Peripheral does not have a readable characteristic!");
138 | peripheral.disconnect();
139 | return;
140 | } else if (!dataCharacteristic.canSubscribe())
141 | {
142 | Serial.println("Characteristic is not subscribable!");
143 | peripheral.disconnect();
144 | return;
145 | } else if (!dataCharacteristic.subscribe())
146 | {
147 | Serial.println("subscription failed!");
148 | peripheral.disconnect();
149 | return;
150 | }
151 |
152 | while (peripheral.connected()) // while the peripheral is connected
153 | {
154 | if (dataCharacteristic.valueUpdated()) // Check to see if the value of the characteristic has been updated
155 | {
156 | byte received_val = 0;
157 | dataCharacteristic.readValue(received_val); // note, readValue returns nothing, and needs the variable to be passed by reference
158 | Serial.println(received_val);
159 | }
160 | delay(1);
161 | }
162 | Serial.println("Peripheral disconnected");
163 | }
164 |
--------------------------------------------------------------------------------
/Arduino_Examples/Example_03_BLE_MULTI/Example_03_A_MyoWare_BLE_Peripheral_MULTI/Example_03_A_MyoWare_BLE_Peripheral_MULTI.ino:
--------------------------------------------------------------------------------
1 | /*
2 | MyoWare Sensor BLE Peripheral MULTI SENSOR example
3 | SparkFun Electronics
4 | Pete Lewis
5 | 3/23/2022
6 |
7 | This example reads 4 MyoWare Muscle Sensors, and then gets that data from this Artemis Redboard
8 | (the Peripheral) to a second Redboard Artemis (the Central) over BLE.
9 |
10 | This Artemis, aka the "BLE Peripheral", will read the sensor on A0-A3.
11 | It will then store them in a single 32-bit variable, and then
12 | update that value to the "bluetooth bulliten board".
13 |
14 | Note, in BLE, you have services, characteristics and values.
15 | Read more about it here:
16 |
17 | https://www.arduino.cc/reference/en/libraries/arduinoble/
18 |
19 | Note, before it begins reading the ADC and updating the data,
20 | It first sets up some BLE stuff:
21 | 1. sets up as a peripheral
22 | 2. sets up a service and characteristic (the data)
23 | -Note, Services and characteristics have custom 128-bit UUID,
24 | -These must match the UUIDs in the code on the central device.
25 | 3. advertises itself
26 |
27 | In order for this example to work, you will need a second Artemis, and it will
28 | need to be programmed with the provided code specific to being a central device,
29 | looking for this specific peripheral/service/characteristic.
30 |
31 | Note, both the service and the characteristic get unique UUIDs
32 | (even though they are extremely close to being the same thing in this example)
33 |
34 | The second Artemis, aka the "BLE Central", will subscribe to the first board's
35 | charactieristic, and check to see if the value has been updated. When it has been
36 | updated, it will read it, parse it into 4 separate bytes, then print the values
37 | to the serial terminal.
38 |
39 | Hardware:
40 | 4 MyoWare Sensors, each with a Link Shield snapped on top.
41 | TRS cables from Link shields to Analog ports (A0-A3) of Arduino Shield.
42 | Arduino Shield pressed into Artemis Redboard.
43 | USB from Artemis to Computer.
44 |
45 | ** For consistent BT connection follow these steps:
46 | ** 1. Reset Peripheral
47 | ** 2. Wait 5 seconds
48 | ** 3. Reset Central
49 | ** 4. Enjoy BT connection
50 | **
51 | ** ArduinoBLE does not support RE-connecting two devices.
52 | ** If you loose connection, you must follow this hardware reset sequence again.
53 |
54 | This example code is in the public domain.
55 | */
56 |
57 | #include
58 |
59 | BLEService sensorDataService("19b10000-e8f2-537e-4f6c-d104768a1214"); // BLE Service named "sensorDataService"
60 |
61 | // BLE Data Characteristic - custom 128-bit UUID, readable, writable and subscribable by central
62 | // Note, "BLENotify" is what makes it subscribable
63 | BLEUnsignedLongCharacteristic dataCharacteristic("19b10001-e8f2-537e-4f6c-d104768a1214", BLERead | BLEWrite | BLENotify);
64 |
65 | const int ledPin = LED_BUILTIN; // pin to use for the LED
66 |
67 | void setup()
68 | {
69 | Serial.begin(115200);
70 | // while (!Serial); // optionally wait for a serial terminal to open
71 | Serial.println("MyoWare Multi Sensor Example - BLE Peripheral");
72 |
73 | pinMode(ledPin, OUTPUT); // set LED pin to output mode
74 |
75 | if (!BLE.begin()) { // begin initialization
76 | Serial.println("starting BLE failed!");
77 | while (1);
78 | }
79 | Serial.println("BLE initiallized successfully");
80 |
81 | BLE.setLocalName("MYOWARE1"); // set advertised local name
82 | BLE.setAdvertisedService(sensorDataService); // set advertised service UUID
83 | sensorDataService.addCharacteristic(dataCharacteristic); // add the characteristic to the service
84 | BLE.addService(sensorDataService); // add service
85 | dataCharacteristic.writeValue(0); // set the initial value for the characeristic
86 | BLE.advertise(); // start advertising
87 | }
88 |
89 | void loop()
90 | {
91 | BLEDevice central = BLE.central(); // listen for BLE peripherals to connect
92 |
93 | if (central) // if a central is connected to peripheral
94 | {
95 | Serial.print("Connected to central: ");
96 | Serial.println(central.address()); // print the central's MAC address
97 |
98 | Serial.println("Reading Sensor and writing BLE characteristic values now...");
99 |
100 | // while the central is still connected to peripheral:
101 | while (central.connected())
102 | {
103 | uint16_t val_A0 = analogRead(A0); // Read the sensor attached to Analog Pin A0
104 | uint16_t val_A1 = analogRead(A1); // Read the sensor attached to Analog Pin A1
105 | uint16_t val_A2 = analogRead(A2); // Read the sensor attached to Analog Pin A2
106 | uint16_t val_A3 = analogRead(A3); // Read the sensor attached to Analog Pin A3
107 |
108 | uint8_t val_A0_byte = map(val_A0, 0, 1023, 0, 255); // map the int to a byte
109 | uint8_t val_A1_byte = map(val_A1, 0, 1023, 0, 255); // map the int to a byte
110 | uint8_t val_A2_byte = map(val_A2, 0, 1023, 0, 255); // map the int to a byte
111 | uint8_t val_A3_byte = map(val_A3, 0, 1023, 0, 255); // map the int to a byte
112 |
113 | uint32_t output = 0; // output value (this will contain all 4 of our data bytes)
114 |
115 | // "OR" in all of our data bytes
116 | output |= val_A0_byte; // ---- ---- ---- ---- ---- ---- XXXX XXXX
117 | output |= (val_A1_byte << 8); // ---- ---- ---- ---- XXXX XXXX ---- ----
118 | output |= (val_A2_byte << 16); // ---- ---- XXXX XXXX ---- ---- ---- ----
119 | output |= (val_A3_byte << 24); // XXXX XXXX ---- ---- ---- ---- ---- ----
120 |
121 | delay(10);
122 | dataCharacteristic.writeValue(output); // "post" to "BLE bulletin board"
123 | // Note, because our second Artemis in this example (the central) is subscribed to this characteristic,
124 | // it can simply call Characteristic.valueUpdated() to see if it has been updated.
125 | // valueUpdated() will return True if updated, or false if no update has happened.
126 | // If it has been updated, the central Artemis can read the latest value using Characteristic.readValue();
127 | }
128 | Serial.print(F("Disconnected from central: ")); // when the central disconnects, print it out
129 | Serial.println(central.address());
130 | }
131 | }
132 |
--------------------------------------------------------------------------------
/Arduino_Examples/Example_03_BLE_MULTI/Example_03_B_MyoWare_BLE_Central_MULTI/Example_03_B_MyoWare_BLE_Central_MULTI.ino:
--------------------------------------------------------------------------------
1 | /*
2 | MyoWare Receiver BLE Central MULTI SENSOR example
3 | SparkFun Electronics
4 | Pete Lewis
5 | 3/23/2022
6 |
7 | This example sets up a SparkFun Artemis Redboard as a BLE Central device,
8 | Then, it connects to a second Artemis Peripheral Device that is reading multiple MyoWare
9 | Muscle sensors. It then streams the data on the Serial Terminal.
10 |
11 | Note, in BLE, you have services, characteristics and values.
12 | Read more about it here:
13 |
14 | https://www.arduino.cc/reference/en/libraries/arduinoble/
15 |
16 | Note, before it begins checking the data and printing it,
17 | It first sets up some BLE stuff:
18 | 1. sets up as a central
19 | 2. scans for any peripherals
20 | 3. Connects to the device named "MAYOWARE1"
21 | 4. Subscribes MYOWARE1's data characteristic
22 |
23 | In order for this example to work, you will need a second Artemis, and it will
24 | need to be programmed with the provided code specific to being a peripheral device,
25 | and advertizing as MYOWARE1 with the specific characteristic UUID.
26 |
27 | Note, both the service and the characteristic get unique UUIDs
28 | (even though they are extremely close to being the same thing in this example)
29 |
30 | This Artemis, aka the "BLE Central", will subscribe to the peripheral board's
31 | charactieristic, and check to see if the value has been updated. When it has been
32 | updated, it will print the value to the serial terminal.
33 |
34 | Note, the value that this CEntral Device will read is acutally a uint32_t
35 | (aka "unsigned long" in arduino). This single variable will carry all of the
36 | sensor values, stored as 4 bytes within it.
37 |
38 | Hardware:
39 | SparkFun Artemis Redboard
40 | USB from Artemis to Computer.
41 |
42 | ** For consistent BT connection follow these steps:
43 | ** 1. Reset Peripheral
44 | ** 2. Wait 5 seconds
45 | ** 3. Reset Central
46 | ** 4. Enjoy BT connection
47 | **
48 | ** ArduinoBLE does not support RE-connecting two devices.
49 | ** If you loose connection, you must follow this hardware reset sequence again.
50 |
51 | This example code is in the public domain.
52 | */
53 |
54 | #include
55 |
56 | // global variables to store each sensor values as bytes (0-255)
57 | uint8_t val_A0_byte = 0;
58 | uint8_t val_A1_byte = 0;
59 | uint8_t val_A2_byte = 0;
60 | uint8_t val_A3_byte = 0;
61 |
62 | void setup()
63 | {
64 | Serial.begin(115200);
65 | // while (!Serial); // optionally wait for serial terminal to open
66 | Serial.println("MyoWare Multi Sensor Example - BLE Central");
67 |
68 | if (!BLE.begin()) // initialize the BLE hardware
69 | {
70 | Serial.println("starting BLE failed!");
71 | while (1);
72 | }
73 | Serial.println("BLE initiallized successfully");
74 |
75 | BLE.scanForUuid("19b10000-e8f2-537e-4f6c-d104768a1214"); // start scanning for peripherals
76 | }
77 |
78 | void loop()
79 | {
80 | BLEDevice peripheral = BLE.available(); // check if a peripheral has been discovered
81 |
82 | if (peripheral) // discovered a peripheral, print out its info
83 | {
84 | Serial.print("Found ");
85 | Serial.print(peripheral.address());
86 | Serial.print(" '");
87 | Serial.print(peripheral.localName());
88 | Serial.print("' ");
89 | Serial.print(peripheral.advertisedServiceUuid());
90 | Serial.println();
91 |
92 | if (peripheral.localName() != "MYOWARE1")
93 | {
94 | return;
95 | }
96 |
97 | BLE.stopScan();
98 |
99 | checkUpdate(peripheral);
100 |
101 | Serial.println("Starting to scan for new peripherals again...");
102 | BLE.scanForUuid("19b10000-e8f2-537e-4f6c-d104768a1214"); // peripheral disconnected, scan again
103 | Serial.println("Scan has begun...");
104 | }
105 | }
106 |
107 | // Connect to peripheral
108 | // Then continue to check if the data has been updated,
109 | // If so, print it to terminal
110 | void checkUpdate(BLEDevice peripheral)
111 | {
112 | Serial.println("Connecting ..."); // connect to the peripheral
113 |
114 | if (peripheral.connect())
115 | {
116 | Serial.println("Connected");
117 | } else {
118 | Serial.println("Failed to connect!");
119 | return;
120 | }
121 |
122 | Serial.println("Discovering attributes ..."); // discover peripheral attributes
123 | if (peripheral.discoverAttributes())
124 | {
125 | Serial.println("Attributes discovered");
126 | } else {
127 | Serial.println("Attribute discovery failed!");
128 | peripheral.disconnect();
129 | return;
130 | }
131 |
132 | // retrieve the data characteristic
133 | BLECharacteristic dataCharacteristic = peripheral.characteristic("19b10001-e8f2-537e-4f6c-d104768a1214");
134 |
135 | if (!dataCharacteristic)
136 | {
137 | Serial.println("Peripheral does not have that characteristic!");
138 | peripheral.disconnect();
139 | return;
140 | } else if (!dataCharacteristic.canWrite())
141 | {
142 | Serial.println("Peripheral does not have a writable characteristic!");
143 | peripheral.disconnect();
144 | return;
145 | } else if (!dataCharacteristic.canRead())
146 | {
147 | Serial.println("Peripheral does not have a readable characteristic!");
148 | peripheral.disconnect();
149 | return;
150 | } else if (!dataCharacteristic.canSubscribe())
151 | {
152 | Serial.println("Characteristic is not subscribable!");
153 | peripheral.disconnect();
154 | return;
155 | } else if (!dataCharacteristic.subscribe())
156 | {
157 | Serial.println("subscription failed!");
158 | peripheral.disconnect();
159 | return;
160 | }
161 |
162 | while (peripheral.connected()) // while the peripheral is connected
163 | {
164 | if (dataCharacteristic.valueUpdated()) // Check to see if the value of the characteristic has been updated
165 | {
166 | uint32_t received_val = 0;
167 | dataCharacteristic.readValue(received_val); // note, "readValue(uint32_t& value)" needs the variable to be passed by reference
168 |
169 | // parse received_val - this contains all 4 of our ADC values (as each byte)
170 | val_A0_byte = (received_val & 0x000000FF);
171 | val_A1_byte = ((received_val & 0x0000FF00) >> 8);
172 | val_A2_byte = ((received_val & 0x00FF0000) >> 16);
173 | val_A3_byte = ((received_val & 0xFF000000) >> 24);
174 |
175 | //Serial.print(received_val, HEX); // optional print of the entire uint32_t for debugging
176 | //Serial.print("\t");
177 | Serial.print(val_A0_byte);
178 | Serial.print("\t");
179 | Serial.print(val_A1_byte);
180 | Serial.print("\t");
181 | Serial.print(val_A2_byte);
182 | Serial.print("\t");
183 | Serial.println(val_A3_byte);
184 | }
185 | delay(1);
186 | }
187 | Serial.println("Peripheral disconnected");
188 | }
189 |
--------------------------------------------------------------------------------
/Arduino_Examples/Example_04_BLE_Muscle_Drums/Example_04_B_MyoWare_BLE_Central_Muscle_Drums/Example_04_B_MyoWare_BLE_Central_Muscle_Drums.ino:
--------------------------------------------------------------------------------
1 | /*
2 | MyoWare Receiver BLE Central Muscle Drums
3 | SparkFun Electronics
4 | Rob Reynolds and Pete Lewis
5 | Original creation date: March 16, 2022
6 | License: This code is public domain but you buy me a beverage if you use this and we meet someday.
7 |
8 | This example allows you to make sounds using your muscles as triggers!
9 |
10 | It requires the following hardware:
11 | 2 SparkFun Artemis Redboards (https://www.sparkfun.com/products/15444)
12 | 1 Tsunami WAV Trigger (Qwiic) (https://www.sparkfun.com/products/18159)
13 | MyoWare Arduino Shield, Sensors/link-shields, TRS cables (https://www.sparkfun.com/products/18977)
14 | Battery pack (for the Artemis/sensor on your body) (https://www.sparkfun.com/products/9835)
15 |
16 | One Artemis is on your body (or near you) and listens to 4 muscle sensors.
17 |
18 | Another Artemis is "listening" to sensor data via BLE and commanding the Tsunami to play sounds.
19 |
20 | We set up this Artemis Redboard as a BLE Central device,
21 | Then, it connects to a second Artemis Peripheral Device that is reading multiple MyoWare
22 | Muscle sensors. As you flex your muscles, the data is sent via BLE, and the Central
23 | Artemis looks at the values and plays sounds when you flex.
24 |
25 | Note, this "central artemis" also streams the data on the Serial Terminal.
26 | This is useful for watching the data output from each sensor in real time,
27 | And adjusting your thresholds as needed.
28 |
29 | Note, in BLE, you have services, characteristics and values.
30 | Read more about it here:
31 |
32 | https://www.arduino.cc/reference/en/libraries/arduinoble/
33 |
34 | Note, before it begins checking the data and printing it,
35 | It first sets up some BLE stuff:
36 | 1. sets up as a central
37 | 2. scans for any peripherals
38 | 3. Connects to the device named "MAYOWARE1"
39 | 4. Subscribes MYOWARE1's data characteristic
40 |
41 | In order for this example to work, you will need your peripheral Artemis
42 | to be programmed with the provided code specific to being a peripheral device,
43 | and advertizing as MYOWARE1 with the specific characteristic UUID. This peripheral
44 | sketch is in this github repo and named, "MyoWare_Sensor_BLE_Peripheral_MULTI_SENSOR.ino"
45 | It is located here:
46 | https://github.com/sparkfun/SparkFun_MyoWare_Arduino_Examples/tree/main/Arduino_Examples/BLE_MULTI_SENSOR/MyoWare_Sensor_BLE_Peripheral_MULTI_SENSOR
47 |
48 | Note, both the service and the characteristic get unique UUIDs
49 | (even though they are extremely close to being the same thing in this example)
50 |
51 | This Artemis, aka the "BLE Central", will subscribe to the peripheral board's
52 | charactieristic, and check to see if the value has been updated. When it has been
53 | updated, it will read the new values and play sounds.
54 |
55 | Note, the value that this Central Device will read is acutally a uint32_t
56 | (aka "unsigned long" in arduino). This single variable will carry all of the
57 | sensor values, stored as 4 bytes within it.
58 |
59 | Hardware Hookup:
60 | USB from Artemis to Computer.
61 | Qwiic cable from Artemis to Tsunami
62 | Tsunami "Output 0" (sig & GND) wired to audio amp/speaker of choice.
63 |
64 | ** For consistent BT connection follow these steps:
65 | ** 1. Reset Peripheral
66 | ** 2. Wait 5 seconds
67 | ** 3. Reset Central
68 | ** 4. Enjoy BT connection
69 | **
70 | ** ArduinoBLE does not support RE-connecting two devices.
71 | ** If you loose connection, you must follow this hardware reset sequence again.
72 |
73 | This example code is in the public domain.
74 | */
75 |
76 | #include
77 |
78 | // global variables to store each sensor values as bytes (0-255)
79 | uint8_t val_A0_byte = 0;
80 | uint8_t val_A1_byte = 0;
81 | uint8_t val_A2_byte = 0;
82 | uint8_t val_A3_byte = 0;
83 |
84 | #include //http://librarymanager/All#SparkFun_Tsunami_Super_WAV_Trigger
85 | TsunamiQwiic tsunami;
86 |
87 | // Trigger Thresholds
88 | // Global variables to store each sensor thresholds as bytes (0-255).
89 | // These will be used to trigger sounds when ADC values go above their threshold.
90 | // Note, 100 is a pretty good starting point, but you may need to adjust these.
91 | uint8_t A0_thresh = 100;
92 | uint8_t A1_thresh = 100;
93 | uint8_t A2_thresh = 100;
94 | uint8_t A3_thresh = 100;
95 |
96 | // "armed" booleans
97 | // These are used to know if the current muscle is armed for another play.
98 | // This requires that the muslce be relaxed before triggering another sound.
99 | // It prevents the same sound being triggered repeatedly too quickly.
100 | boolean A0_armed = false;
101 | boolean A1_armed = false;
102 | boolean A2_armed = false;
103 | boolean A3_armed = false;
104 |
105 | // WAVE File number defines
106 | // (these match up with the actual WAV file names on the uSD card)
107 | // These example files for drum sounds can be found here:
108 | // https://github.com/sparkfun/SparkFun_Tsunami_Super_WAV_Trigger_Qwiic/tree/main/Example_WAV_Files/MONO
109 | #define KICK 101
110 | #define SNARE 102
111 | #define HAT 103
112 | #define RIDE 104
113 |
114 | void setup()
115 | {
116 | Serial.begin(115200);
117 | //while (!Serial); // optionally wait for serial terminal to open
118 | Serial.println("MyoWare Muscle Drums Example - BLE Central");
119 |
120 | Wire.begin();
121 |
122 | // Check to see if Tsunami Qwiic is present on the bus
123 | // Note, here we are calling begin() with no arguments = defaults (address:0x13, I2C-port:Wire)
124 | if (tsunami.begin() == false)
125 | {
126 | Serial.println("Tsunami Qwiic failed to respond. Please check wiring and possibly the I2C address. Freezing...");
127 | while (1);
128 | };
129 | Serial.println("Tsunami initiallized successfully");
130 |
131 | if (!BLE.begin()) // initialize the BLE hardware
132 | {
133 | Serial.println("starting BLE failed!");
134 | while (1);
135 | }
136 | Serial.println("BLE initiallized successfully");
137 |
138 | BLE.scanForUuid("19b10000-e8f2-537e-4f6c-d104768a1214"); // start scanning for peripherals
139 | }
140 |
141 | void loop()
142 | {
143 | BLEDevice peripheral = BLE.available(); // check if a peripheral has been discovered
144 |
145 | if (peripheral) // discovered a peripheral, print out its info
146 | {
147 | Serial.print("Found ");
148 | Serial.print(peripheral.address());
149 | Serial.print(" '");
150 | Serial.print(peripheral.localName());
151 | Serial.print("' ");
152 | Serial.print(peripheral.advertisedServiceUuid());
153 | Serial.println();
154 |
155 | if (peripheral.localName() != "MYOWARE1")
156 | {
157 | return;
158 | }
159 |
160 | BLE.stopScan();
161 |
162 | checkUpdate(peripheral);
163 |
164 | Serial.println("Starting to scan for new peripherals again...");
165 | BLE.scanForUuid("19b10000-e8f2-537e-4f6c-d104768a1214"); // peripheral disconnected, scan again
166 | Serial.println("Scan has begun...");
167 | }
168 | }
169 |
170 | // Connect to peripheral
171 | // Then continue to check if the data has been updated,
172 | // If so, print it to terminal
173 | void checkUpdate(BLEDevice peripheral)
174 | {
175 | Serial.println("Connecting ..."); // connect to the peripheral
176 |
177 | if (peripheral.connect())
178 | {
179 | Serial.println("Connected");
180 | } else {
181 | Serial.println("Failed to connect!");
182 | return;
183 | }
184 |
185 | Serial.println("Discovering attributes ..."); // discover peripheral attributes
186 | if (peripheral.discoverAttributes())
187 | {
188 | Serial.println("Attributes discovered");
189 | } else {
190 | Serial.println("Attribute discovery failed!");
191 | peripheral.disconnect();
192 | return;
193 | }
194 |
195 | // retrieve the data characteristic
196 | BLECharacteristic dataCharacteristic = peripheral.characteristic("19b10001-e8f2-537e-4f6c-d104768a1214");
197 |
198 | if (!dataCharacteristic)
199 | {
200 | Serial.println("Peripheral does not have that characteristic!");
201 | peripheral.disconnect();
202 | return;
203 | } else if (!dataCharacteristic.canWrite())
204 | {
205 | Serial.println("Peripheral does not have a writable characteristic!");
206 | peripheral.disconnect();
207 | return;
208 | } else if (!dataCharacteristic.canRead())
209 | {
210 | Serial.println("Peripheral does not have a readable characteristic!");
211 | peripheral.disconnect();
212 | return;
213 | } else if (!dataCharacteristic.canSubscribe())
214 | {
215 | Serial.println("Characteristic is not subscribable!");
216 | peripheral.disconnect();
217 | return;
218 | } else if (!dataCharacteristic.subscribe())
219 | {
220 | Serial.println("subscription failed!");
221 | peripheral.disconnect();
222 | return;
223 | }
224 |
225 | while (peripheral.connected()) // while the peripheral is connected
226 | {
227 | if (dataCharacteristic.valueUpdated()) // Check to see if the value of the characteristic has been updated
228 | {
229 | uint32_t received_val = 0;
230 | dataCharacteristic.readValue(received_val); // note, "readValue(uint32_t& value)" needs the variable to be passed by reference
231 |
232 | // parse received_val - this contains all 4 of our ADC values (as each byte)
233 | val_A0_byte = (received_val & 0x000000FF);
234 | val_A1_byte = ((received_val & 0x0000FF00) >> 8);
235 | val_A2_byte = ((received_val & 0x00FF0000) >> 16);
236 | val_A3_byte = ((received_val & 0xFF000000) >> 24);
237 |
238 | //Serial.print(received_val, HEX); // optional print of the entire uint32_t for debugging
239 | //Serial.print("\t");
240 | Serial.print(val_A0_byte);
241 | Serial.print("\t");
242 | Serial.print(val_A1_byte);
243 | Serial.print("\t");
244 | Serial.print(val_A2_byte);
245 | Serial.print("\t");
246 | Serial.println(val_A3_byte);
247 |
248 | play_sounds();
249 | }
250 | delay(1);
251 | }
252 | Serial.println("Peripheral disconnected");
253 | }
254 |
255 | // play_sounds
256 | // look at global variables from sensors (that we update via BLE)
257 | // check against thresholds, then if flexed, play sounds
258 | //
259 | // Note, we also have an "armed" feature. This prevents unwanted
260 | // super-fast repeated triggering. It reuires that the signal drop back down
261 | // below the threshold in order to be "armed" again and play a sound.
262 | // *much like it only triggers on a "rising edge" of sensor data.
263 | void play_sounds()
264 | {
265 | if ((val_A0_byte > A0_thresh) && A0_armed)
266 | {
267 | tsunami.trackPlayPoly(KICK, 0); // track 1, output 0
268 | A0_armed = false;
269 | }
270 | else if (val_A0_byte < A0_thresh){
271 | A0_armed = true;
272 | }
273 | if ((val_A1_byte > A1_thresh) && A1_armed)
274 | {
275 | tsunami.trackPlayPoly(SNARE, 0);
276 | A1_armed = false;
277 | } else if (val_A1_byte < A1_thresh){
278 | A1_armed = true;
279 | }
280 | if ((val_A2_byte > A2_thresh) && A2_armed)
281 | {
282 | tsunami.trackPlayPoly(HAT, 0);
283 | A2_armed = false;
284 | }
285 | else if (val_A2_byte < A2_thresh){
286 | A2_armed = true;
287 | }
288 | if ((val_A3_byte > A3_thresh) && A3_armed)
289 | {
290 | tsunami.trackPlayPoly(RIDE, 0);
291 | A3_armed = false;
292 | }
293 | else if (val_A3_byte < A3_thresh){
294 | A3_armed = true;
295 | }
296 | }
297 |
--------------------------------------------------------------------------------