├── .gitignore
├── README.md
└── install-python.md
/.gitignore:
--------------------------------------------------------------------------------
1 | # Byte-compiled / optimized / DLL files
2 | __pycache__/
3 | *.py[cod]
4 | *$py.class
5 |
6 | # C extensions
7 | *.so
8 |
9 | # Distribution / packaging
10 | .Python
11 | build/
12 | develop-eggs/
13 | dist/
14 | downloads/
15 | eggs/
16 | .eggs/
17 | lib/
18 | lib64/
19 | parts/
20 | sdist/
21 | var/
22 | wheels/
23 | pip-wheel-metadata/
24 | share/python-wheels/
25 | *.egg-info/
26 | .installed.cfg
27 | *.egg
28 | MANIFEST
29 |
30 | # PyInstaller
31 | # Usually these files are written by a python script from a template
32 | # before PyInstaller builds the exe, so as to inject date/other infos into it.
33 | *.manifest
34 | *.spec
35 |
36 | # Installer logs
37 | pip-log.txt
38 | pip-delete-this-directory.txt
39 |
40 | # Unit test / coverage reports
41 | htmlcov/
42 | .tox/
43 | .nox/
44 | .coverage
45 | .coverage.*
46 | .cache
47 | nosetests.xml
48 | coverage.xml
49 | *.cover
50 | *.py,cover
51 | .hypothesis/
52 | .pytest_cache/
53 |
54 | # Translations
55 | *.mo
56 | *.pot
57 |
58 | # Django stuff:
59 | *.log
60 | local_settings.py
61 | db.sqlite3
62 | db.sqlite3-journal
63 |
64 | # Flask stuff:
65 | instance/
66 | .webassets-cache
67 |
68 | # Scrapy stuff:
69 | .scrapy
70 |
71 | # Sphinx documentation
72 | docs/_build/
73 |
74 | # PyBuilder
75 | target/
76 |
77 | # Jupyter Notebook
78 | .ipynb_checkpoints
79 |
80 | # IPython
81 | profile_default/
82 | ipython_config.py
83 |
84 | # pyenv
85 | .python-version
86 |
87 | # pipenv
88 | # According to pypa/pipenv#598, it is recommended to include Pipfile.lock in version control.
89 | # However, in case of collaboration, if having platform-specific dependencies or dependencies
90 | # having no cross-platform support, pipenv may install dependencies that don't work, or not
91 | # install all needed dependencies.
92 | #Pipfile.lock
93 |
94 | # PEP 582; used by e.g. github.com/David-OConnor/pyflow
95 | __pypackages__/
96 |
97 | # Celery stuff
98 | celerybeat-schedule
99 | celerybeat.pid
100 |
101 | # SageMath parsed files
102 | *.sage.py
103 |
104 | # Environments
105 | .env
106 | .venv
107 | env/
108 | venv/
109 | ENV/
110 | env.bak/
111 | venv.bak/
112 |
113 | # Spyder project settings
114 | .spyderproject
115 | .spyproject
116 |
117 | # Rope project settings
118 | .ropeproject
119 |
120 | # mkdocs documentation
121 | /site
122 |
123 | # mypy
124 | .mypy_cache/
125 | .dmypy.json
126 | dmypy.json
127 |
128 | # Pyre type checker
129 | .pyre/
130 |
--------------------------------------------------------------------------------
/README.md:
--------------------------------------------------------------------------------
1 | # Installing Python
2 |
3 | Installing Python always seems to be some complex decision tree experiment. Do you have Windows or macOS? Is Python already installed? Is it the right version? And so on.
4 |
5 | This repo is a place to allow for feedback and conversations around our **[Installing Python from Talk Python Training how-to article](https://training.talkpython.fm/installing-python)**.
6 |
7 | See the article source via [`install-python.md`](./install-python.md).
8 |
9 | Post an issue if you have a problem or comment *with the article* - note that we can't do tech support in general for you. If you have a fix, PRs are accepted if they are a good fit.
--------------------------------------------------------------------------------
/install-python.md:
--------------------------------------------------------------------------------
1 | # Installing Python 3
2 |
3 | 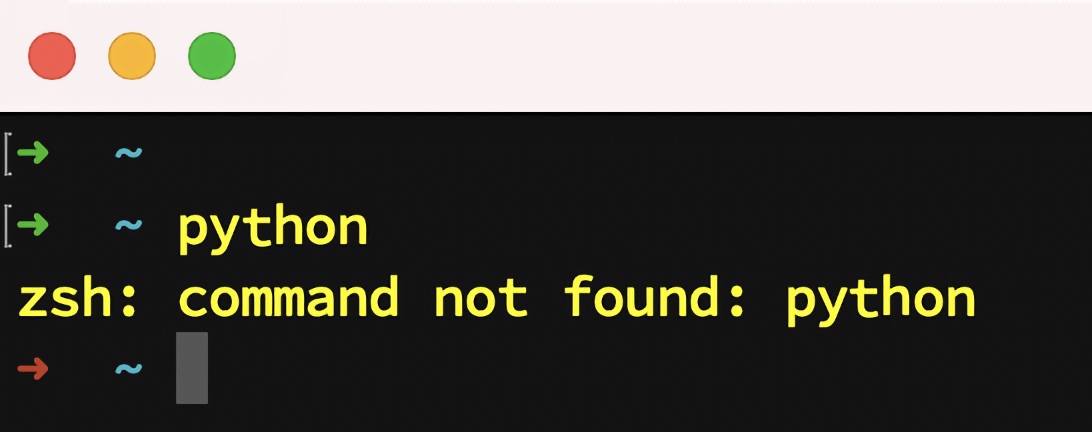 4 |
5 | Welcome soon to be Python user! Python is one of the easiest programming languages to learn and grow with. But there are a few bumps right at the beginning. **One of these bumps is to make sure you have Python installed** and that it's a sufficiently new version (generally 3.10+ is solid these days).
6 |
7 | Because how you install and verify Python varies by operating system, we've put together this short guide. It's goal is to give you exposure to the various ways on your operating system to **install and maintain Python in a concise and no-nonsense manner**. So with out further ado, let's get you setup!
8 |
9 | ## Step 1. Go To Your Operating System
10 |
11 | As mentioned above, how you verify Python and subsequently install it is specific to the operating system. So jump to:
12 |
13 | * [**Windows**](#windows)
14 | * [**macOS**](#macos)
15 | * [**Linux**](#linux)
16 |
17 |
18 | _________________________
19 |
20 | ## Windows
21 |
22 | ### Step 2. Do you have Python? Let's check
23 |
24 | To determine if you have Python installed, open the [**command prompt**](https://www.lifewire.com/how-to-open-command-prompt-2618089) or (preferred) install [**new Windows Terminal**](https://devblogs.microsoft.com/commandline/introducing-windows-terminal/) from the [**Microsoft Store**](https://www.microsoft.com/en-us/p/windows-terminal/9n0dx20hk701?activetab=pivot:overviewtab).
25 |
26 | Verify you have Python, in the command prompt / terminal, type **python -V** (capital V):
27 |
28 | ```
29 | C:\users\username\> python -V
30 | ```
31 |
32 | The output should be one of the following (*version numbers will vary*). **C:\users\username\> is not typed** - Windows displays this as part of the terminal UI.
33 |
34 | #### Success, you have Python
35 |
36 | ```
37 | C:\users\username\> python -V
38 | Python 3.12.0
39 | ```
40 |
41 | If you see this and the reported version number is sufficiently high (often 3.9 or higher), **you are good to go**.
42 |
43 | #### 2.7? Uh oh, your Python is badly outdated!
44 |
45 | ```
46 | C:\users\username\> python -V
47 | Python 2.7.18
48 | ```
49 |
50 | If you have `Python 2.*`, then you are using an outdated version of Python. [**Since 2020, Python 2 has gone entirely unsupported**](https://stackoverflow.blog/2020/04/23/the-final-python-2-release-marks-the-end-of-an-era/) and should not be used. **You will need to continue below to install Python 3**.
51 |
52 | #### Ooops, you do NOT have Python
53 |
54 | ```
55 | C:\users\username\> python -V
56 | 'python' is not recognized as a command or program.
57 | ```
58 |
59 | Looks like you do not have Python at all. **You will need to continue below to install Python 3**. Note that the error message may be slightly different for **Windows Terminal**: *The term python is not recognized as a cmdlet, function, or operable program*.
60 |
61 | #### Ooops, you still do NOT have Python
62 |
63 | ```
64 | C:\users\username\> python -V
65 | Python was not found; run without arguments to install from the Windows Store...
66 | ```
67 |
68 | Looks like you do not have Python at all. **You will need to continue below to install Python 3**. When you see this specific error message, it means that Python is not installed. What is running is a shim program meant to help you install Python 3 from the Windows Store (one option below). You can select this option by simplifying typing `python` and following along in the UI.
69 |
70 |
71 | ### Step 3. You need Python, install it on Windows
72 |
73 | So you need to install a new version of Python on your Windows machine. There are a variety of options for doing so. We'll run you through them, but **if you are uncertain which one to get, just use the official installer**. Keep in mind that no matter how you install Python, **you will likely need to close and reopen your terminal/command prompt for any changes to take effect**.
74 |
75 | - **Python Official Installer** << recommended
76 | - Windows Store
77 | - Chocolatey Package Manager for Windows
78 | - Anaconda Distribution
79 |
80 | #### << **Python Official Installer on Windows** >>
81 |
82 | The Python official installer can be found on **[python.org](http://python.org)**.
83 |
84 | **Pros**
85 |
86 | * It's the primary way the Python Software Foundation delivers Python to users
87 | * The installer is supported by core developers working at Microsoft
88 |
89 | **Cons**
90 |
91 | * You will not be notified of possible updates
92 | * There is no mechanism to have a new version automatically replace the installed version
93 |
94 | **Install steps - Windows official installer**:
95 |
96 | 1. Visit the **[downloads page for Windows at python.org](https://www.python.org/downloads/windows/)**
97 | 2. Find the section entitled **Stable Releases**
98 | 3. Download the MSI installer under the **Download Windows installer (64-bit)** link
99 | 4. Run the installer - **be sure to check the "add python to my path" option**
100 | 5. Close all terminal and command prompt windows
101 | 6. Run `python -V` in a new terminal window to verify you have Python now working
102 |
103 | #### << **Windows Store version of Python** >>
104 |
105 | The Windows Store version of Python is a good option. It's the easiest way to get Python on Windows without administrator permissions. But there are some drawbacks too.
106 |
107 | **Pros**
108 |
109 | * Easiest way to get Python on Windows **without administrator permissions**
110 | * Will keep Python up-to-date automatically within a release version (3.10 updates but not 3.10->3.11)
111 | * Maintained by the core developers who work at Microsoft
112 |
113 | **Cons**
114 |
115 | * Does have some minor permission restrictions that apply to all Windows Store apps which can affect your development options
116 |
117 | **Install steps - Microsoft Store Python**:
118 |
119 | 1. Open the Microsoft Store on Windows
120 | 2. Search for Python
121 | 3. Find the latest version of Python from Microsoft (currently lists 3.7, 3.8, 3.9, 3.10, 3.11, and [**3.12**](https://apps.microsoft.com/detail/python-3-12/9NCVDN91XZQP?hl=en-us&gl=US))
122 | 4. Install from the Microsoft Store
123 | 5. Close all terminal and command prompt windows
124 | 6. Run `python -V` in a new terminal window to verify you have Python now working
125 |
126 |
127 | #### << **Chocolatey Package Manager for Windows** >>
128 |
129 | [Chocolatey](https://chocolatey.org/) is a [package manager](https://en.wikipedia.org/wiki/Package_manager): software tools that automates the process of installing, upgrading, configuring, and removing computer programs for a computer's operating system in a consistent manner. If you're comfortable using package managers, then this is a good option for you because you can continually update and maintain Python on your system.
130 |
131 | **Pros**
132 |
133 | * Will keep Python up-to-date on your system as long as you periodically run the upgrade command
134 | * Will update across versions (e.g. 3.11 -> 3.12)
135 | * Can inform you of pending upgrade if upgrade command is run
136 |
137 | **Cons**
138 |
139 | * Complex to use
140 | * Must run as administrator
141 | * Requires separate install of chocolatey itself
142 |
143 | **Install steps - Chocolatey package manager on Windows**
144 |
145 | 1. Install Chocolatey - [**steps here**](https://docs.chocolatey.org/en-us/choco/setup)
146 | 2. Open an **[administrator command prompt](https://www.howtogeek.com/194041/how-to-open-the-command-prompt-as-administrator-in-windows-8.1/)**
147 | 3. Install the latest Python: `choco install python`
148 | 4. Periodically check for a new release: Open admin command prompt and run `choco upgrade python`
149 | 5. Close all terminal and command prompt windows and reopen one (to refresh the path)
150 | 6. Run `python -V` in a new terminal window to verify you have Python now working
151 |
152 |
153 | #### << **Anaconda distribution on Windows** >>
154 |
155 | [Anaconda is a distribution of Python](https://www.anaconda.com/products/individual) that packages many of the common data science packages pre-configured for your system. It is a good option for data scientists.
156 |
157 | **Pros**
158 |
159 | * Many packages and libraries are pre-installed
160 | * Good for data science tooling in Python
161 |
162 | **Cons**
163 |
164 | * Generally uses [conda environments](https://docs.conda.io/projects/conda/en/latest/user-guide/tasks/manage-environments.html) rather than [Python's virtual environments](https://www.geeksforgeeks.org/python-virtual-environment/) - this can lead to a mismatch in instructions when Anaconda is not the primary tool used.
165 | * Packages available here often lag behind in release schedule from PyPI / pip
166 | * Often one whole version behind on Python (e.g. 3.10 rather than 3.11)
167 |
168 | **Install steps - Anaconda distribution on Windows**
169 |
170 | 1. [Download the Windows installer](https://www.anaconda.com/products/individual#)
171 | 2. Run the installer, add Python to path if asked
172 | 3. Close all terminal and command prompt windows
173 | 4. Run `python -V` in a new terminal window to verify you have Python now working
174 |
175 |
176 |
177 |
178 |
179 | _________________________
180 |
181 | ## macOS
182 |
183 | ### Step 2. Do you have Python? Let's check
184 |
185 | To determine if you have Python installed, open the [**terminal**](https://www.makeuseof.com/open-terminal-on-mac/). Verify you have Python: In the terminal, type **python3 -V** (capital V):
186 |
187 | ```
188 | $ python3 -V
189 | ```
190 |
191 | The output should be one of the following (*version numbers will vary*). Do not type **$** - macOS displays this as part of the terminal UI.
192 |
193 | #### Success, you have Python
194 |
195 | ```
196 | $ python3 -V
197 | Python 3.12.0
198 | ```
199 |
200 | If you see this and the reported version number is sufficiently high (often 3.9 or higher), **you are good to go**.
201 |
202 | #### 2.7? Uh oh, your Python is badly outdated!
203 |
204 | If `python3` **does NOT run successfully**, but `python` (without the 3) itself does and you see the output:
205 |
206 | ```
207 | $ python -V
208 | Python 2.7.18
209 | ```
210 |
211 | If you have `Python 2.*`, then you are using an outdated version of Python. [**Since 2020, Python 2 has gone entirely unsupported**](https://stackoverflow.blog/2020/04/23/the-final-python-2-release-marks-the-end-of-an-era/) and should not be used. **You will need to continue below to install Python 3**.
212 |
213 | #### Ooops, you do NOT have Python
214 |
215 | ```
216 | $ python3 -V
217 | bash: python3: command not found
218 | ```
219 |
220 | Looks like you do not have Python 3 at all. **You will need to continue below to install Python 3**. Note that the error message is slightly different for different shells.
221 |
222 |
223 | ### Step 3. You need Python, install it on macOS
224 |
225 | - **Homebrew** << recommended
226 | - Python Official Installer
227 | - Anaconda distribution
228 |
229 |
230 | #### << **Homebrew Package Manager for macOS** >>
231 |
232 | **[Homebrew](https://brew.sh/)** is a [package manager](https://en.wikipedia.org/wiki/Package_manager): software tools that automates the process of installing, upgrading, configuring, and removing computer programs for a computer's operating system in a consistent manner. If you're comfortable using package managers, then this is a good option for you because you can continually update and maintain Python on your system.
233 |
234 | **Pros**
235 |
236 | * Will keep Python up-to-date on your system as long as you periodically run the upgrade command
237 | * Will update across versions (e.g. 3.11 -> 3.12)
238 | * Can inform you of pending upgrade if upgrade command is run
239 |
240 | **Cons**
241 |
242 | * Complex to use
243 | * Requires separate install of homebrew itself
244 |
245 | **Install steps - Homebrew package manager on macOS**
246 |
247 | 1. Install Homebrew - [**steps here**](https://brew.sh/)
248 | 2. Open a **[terminal](https://www.makeuseof.com/open-terminal-on-mac/)**
249 | 3. Install the latest Python: `brew install python`
250 | 4. Periodically check for a new release: Open terminal and run `brew update` then `brew upgrade`
251 | 5. **CAREFUL**: Take careful note of any messages shown - sometimes you must [update your path](https://coolestguidesontheplanet.com/add-shell-path-osx/) (varies by default shell: bash, zsh, etc.) for this version to be located.
252 | 5. Close all terminal windows
253 | 6. Run `python3 -V` in a new terminal window to verify you have Python now working
254 |
255 |
256 | #### << **Python Official Installer on macOS** >>
257 |
258 | The Python official installer can be found on **[python.org](http://python.org)**.
259 |
260 | **Pros**
261 |
262 | * It's the primary way the Python Software Foundation delivers Python to users
263 | * The installer is supported by core developers
264 |
265 | **Cons**
266 |
267 | * You will not be notified of possible updates
268 | * There is no mechanism to have a new version automatically replace the installed version
269 | * Requires admin permissions
270 |
271 | **Install steps - macOS official installer**:
272 |
273 | 1. Visit the **[downloads page for macOS](https://www.python.org/downloads/mac-osx/)**
274 | 2. Find the section entitled **Stable Releases**
275 | 3. Download the PKG installer under the **Download macOS 64-bit universal2 installer** link
276 | 4. Run the installer
277 | 5. Close all terminal and command prompt windows
278 | 6. Run `python3 -V` in a new terminal window to verify you have Python now working
279 |
280 |
281 | #### << **Anaconda distribution on macOS** >>
282 |
283 | [Anaconda is a distribution of Python](https://www.anaconda.com/products/individual) that packages many of the common data science packages pre-configured for your system. It is a good option for data scientists.
284 |
285 | **Pros**
286 |
287 | * Many packages and libraries are pre-installed
288 | * Good for data science tooling in Python
289 |
290 | **Cons**
291 |
292 | * Generally uses [conda environments](https://docs.conda.io/projects/conda/en/latest/user-guide/tasks/manage-environments.html) rather than [Python's virtual environments](https://www.geeksforgeeks.org/python-virtual-environment/) - this can lead to a mismatch in instructions when Anaconda is not the primary tool used.
293 | * Packages available here often lag behind in release schedule from PyPI / pip
294 | * Often one whole version behind on Python (e.g. 3.11 rather than 3.12)
295 |
296 | **Install steps - Anaconda distribution on Windows**
297 |
298 | 1. [Download the macOS installer](https://www.anaconda.com/products/individual#)
299 | 2. Run the installer, add Python to path if asked
300 | 3. Close all terminal and command prompt windows
301 | 4. Run `python3 -V` in a new terminal window to verify you have Python now working
302 |
303 |
304 |
305 |
306 |
307 |
308 |
309 | _________________________
310 |
311 | ## Linux
312 |
313 | ### Step 2. Do you have Python? Let's check
314 |
315 | To determine if you have Python installed, open the [**terminal**](https://www.howtogeek.com/140679/beginner-geek-how-to-start-using-the-linux-terminal/). Verify you have Python, in the terminal, type **python3 -V** (capital V):
316 |
317 | ```
318 | $ python3 -V
319 | ```
320 |
321 | The output should be one of the following (*version numbers will vary*). Don't type **$** - Linux displays this as part of the terminal UI.
322 |
323 | #### Success, you have Python
324 |
325 | ```
326 | $ python3 -V
327 | Python 3.12.0
328 | ```
329 |
330 | If you see this and the reported version number is sufficiently high (often 3.10 or higher), **you are good to go**.
331 |
332 | #### 2.7? Uh oh, your Python is badly outdated!
333 |
334 | If `python3` **does NOT run successfully**, but `python` (without the 3) itself does and you see the output:
335 |
336 | ```
337 | $ python -V
338 | Python 2.7.18
339 | ```
340 |
341 | If you have `Python 2.*`, then you are using an outdated version of Python. [**Since 2020, Python 2 has gone entirely unsupported**](https://stackoverflow.blog/2020/04/23/the-final-python-2-release-marks-the-end-of-an-era/) and should not be used. **You will need to continue below to install Python 3**.
342 |
343 | #### Ooops, you do NOT have Python
344 |
345 | ```
346 | $ python3 -V
347 | bash: python3: command not found
348 | ```
349 |
350 | Looks like you do not have Python 3 at all. **You will need to continue below to install Python 3**. Note that the error message is slightly different for different shells.
351 |
352 |
353 | ### Step 3. You need Python, install it on Linux
354 |
355 | - **Package manager** << recommended
356 | - Anaconda
357 | - Compiled from source
358 |
359 | Note that **these instructions are for Ubuntu**. With the many variants of Linux, you many need to adjust slightly (e.g. yum vs. apt)
360 |
361 |
362 | #### << **Built-in Package Manager for Ubuntu** >>
363 |
364 | Ubuntu manages it's installed software using **[apt](https://ubuntu.com/server/docs/package-management)**. This is a good way to install and manage Python 3 on your system.
365 |
366 | **Pros**
367 |
368 | * Will keep Python up-to-date on your system as long as you periodically run the upgrade command
369 | * Will update across versions (e.g. 3.11 -> 3.12)
370 | * Can inform you of pending upgrade if upgrade command is run
371 |
372 | **Cons**
373 |
374 | * Requires root permissions
375 | * Often lags badly behind the latest version (sometimes about 1.5 years behind)
376 |
377 | **Install steps - apt package manager on Ubuntu**
378 |
379 | 1. Open a **[terminal](https://www.howtogeek.com/140679/beginner-geek-how-to-start-using-the-linux-terminal/)**
380 | 2. Update the package sources: `sudo apt update`
381 | 3. Upgrade currently installed software: `sudo apt upgrade`
382 | 4. Install the latest Python 3: `sudo apt install build-essential libssl-dev libffi-dev python3-dev`
383 | 4. Make sure we have pip as part of our Python: `sudo apt install python3-pip`
384 | 5. Close all terminal windows
385 | 6. Run `python3 -V` in a new terminal window to verify you have Python now working
386 |
387 |
388 |
389 | #### << **Anaconda distribution on Ubuntu** >>
390 |
391 | [Anaconda is a distribution of Python](https://www.anaconda.com/products/individual) that packages many of the common data science packages pre-configured for your system. It is a good option for data scientists.
392 |
393 | **Pros**
394 |
395 | * Many packages and libraries are pre-installed
396 | * Good for data science tooling in Python
397 |
398 | **Cons**
399 |
400 | * Generally uses [conda environments](https://docs.conda.io/projects/conda/en/latest/user-guide/tasks/manage-environments.html) rather than [Python's virtual environments](https://www.geeksforgeeks.org/python-virtual-environment/) - this can lead to a mismatch in instructions when Anaconda is not the primary tool used.
401 | * Packages available here often lag behind in release schedule from PyPI / pip
402 | * Often one whole version behind on Python (e.g. 3.11 rather than 3.12)
403 |
404 | **Install steps - Anaconda distribution on Ubuntu**
405 |
406 | 1. [Download the Linux installer](https://www.anaconda.com/products/individual#)
407 | 2. Run the installer, add Python to path if asked
408 | 3. Close all terminal and command prompt windows
409 | 4. Run `python3 -V` in a new terminal window to verify you have Python now working
410 |
411 |
412 |
413 |
414 | #### << **Building python from source on Ubuntu** >>
415 |
416 | While we would not generally recommend building Python 3 from source, if you need the very latest on your system, often this is one of the few options available.
417 |
418 | **Pros**
419 |
420 | * You'll have the very latest Python you've gotten from source (potentially even pre-release versions)
421 |
422 | **Cons**
423 |
424 | * Complicated and fraught with pitfalls
425 | * Can require root permissions for additional build libraries
426 |
427 |
428 | **Install steps - Building python from source on Ubuntu**
429 |
430 | 1. Open a **[terminal](https://www.howtogeek.com/140679/beginner-geek-how-to-start-using-the-linux-terminal/)**
431 | 2. Ensure your package listings and software are up-to-date: `sudo apt-get update`
432 | 3. Install the build tools: `sudo apt-get install -y build-essential checkinstall`
433 | 4. Add additional libraries needed by Python to build: `apt-get install libreadline-gplv2-dev libncursesw5-dev libssl-dev libffi-dev libsqlite3-dev tk-dev libgdbm-dev libc6-dev libbz2-dev`
434 | 5. Change into the src directory: `cd /usr/src`
435 | 6. Get the latest source from [python.org/downloads/source](https://www.python.org/downloads/source/) and wget it locally, e.g.: `sudo wget https://www.python.org/ftp/python/3.12.0/Python-3.12.0.tgz`
436 | 7. Decompress it (varies by version): `sudo tar xzf Python-3.12.0.tgz`
437 | 8. Change into the created directory (varies by version): `cd Python-3.12.0`
438 | 9. Prepare it for compilation: `sudo ./configure --enable-optimizations`
439 | 10. Compile it without modifying system Python: `sudo make altinstall`
440 | 11. Verify this version was built (varies by version): `python3.12 --version`
441 | 12. Use `python3.12` instead of `python` or `python3` commands
442 | 13. Consider creating an [alias](https://www.howtogeek.com/73768/how-to-use-aliases-to-customize-ubuntu-commands/) of `python3.12` to `python` in your shell profile.
443 |
444 | There is a [nice write up of this procedure over here](https://towardsdatascience.com/building-python-from-source-on-ubuntu-20-04-2ed29eec152b).
445 |
446 |
447 | -------------------------------
448 |
449 | ## Corrections and improvements
450 |
451 | If you find a problem or have a suggestion to make this page better, please visit the GitHub repository here. Note that this is not intended for tech support but rather for genuine, broadly applicable improvements to the instructions:
452 |
453 | [**https://github.com/talkpython/installing-python**](https://github.com/talkpython/installing-python)
454 |
--------------------------------------------------------------------------------
4 |
5 | Welcome soon to be Python user! Python is one of the easiest programming languages to learn and grow with. But there are a few bumps right at the beginning. **One of these bumps is to make sure you have Python installed** and that it's a sufficiently new version (generally 3.10+ is solid these days).
6 |
7 | Because how you install and verify Python varies by operating system, we've put together this short guide. It's goal is to give you exposure to the various ways on your operating system to **install and maintain Python in a concise and no-nonsense manner**. So with out further ado, let's get you setup!
8 |
9 | ## Step 1. Go To Your Operating System
10 |
11 | As mentioned above, how you verify Python and subsequently install it is specific to the operating system. So jump to:
12 |
13 | * [**Windows**](#windows)
14 | * [**macOS**](#macos)
15 | * [**Linux**](#linux)
16 |
17 |
18 | _________________________
19 |
20 | ## Windows
21 |
22 | ### Step 2. Do you have Python? Let's check
23 |
24 | To determine if you have Python installed, open the [**command prompt**](https://www.lifewire.com/how-to-open-command-prompt-2618089) or (preferred) install [**new Windows Terminal**](https://devblogs.microsoft.com/commandline/introducing-windows-terminal/) from the [**Microsoft Store**](https://www.microsoft.com/en-us/p/windows-terminal/9n0dx20hk701?activetab=pivot:overviewtab).
25 |
26 | Verify you have Python, in the command prompt / terminal, type **python -V** (capital V):
27 |
28 | ```
29 | C:\users\username\> python -V
30 | ```
31 |
32 | The output should be one of the following (*version numbers will vary*). **C:\users\username\> is not typed** - Windows displays this as part of the terminal UI.
33 |
34 | #### Success, you have Python
35 |
36 | ```
37 | C:\users\username\> python -V
38 | Python 3.12.0
39 | ```
40 |
41 | If you see this and the reported version number is sufficiently high (often 3.9 or higher), **you are good to go**.
42 |
43 | #### 2.7? Uh oh, your Python is badly outdated!
44 |
45 | ```
46 | C:\users\username\> python -V
47 | Python 2.7.18
48 | ```
49 |
50 | If you have `Python 2.*`, then you are using an outdated version of Python. [**Since 2020, Python 2 has gone entirely unsupported**](https://stackoverflow.blog/2020/04/23/the-final-python-2-release-marks-the-end-of-an-era/) and should not be used. **You will need to continue below to install Python 3**.
51 |
52 | #### Ooops, you do NOT have Python
53 |
54 | ```
55 | C:\users\username\> python -V
56 | 'python' is not recognized as a command or program.
57 | ```
58 |
59 | Looks like you do not have Python at all. **You will need to continue below to install Python 3**. Note that the error message may be slightly different for **Windows Terminal**: *The term python is not recognized as a cmdlet, function, or operable program*.
60 |
61 | #### Ooops, you still do NOT have Python
62 |
63 | ```
64 | C:\users\username\> python -V
65 | Python was not found; run without arguments to install from the Windows Store...
66 | ```
67 |
68 | Looks like you do not have Python at all. **You will need to continue below to install Python 3**. When you see this specific error message, it means that Python is not installed. What is running is a shim program meant to help you install Python 3 from the Windows Store (one option below). You can select this option by simplifying typing `python` and following along in the UI.
69 |
70 |
71 | ### Step 3. You need Python, install it on Windows
72 |
73 | So you need to install a new version of Python on your Windows machine. There are a variety of options for doing so. We'll run you through them, but **if you are uncertain which one to get, just use the official installer**. Keep in mind that no matter how you install Python, **you will likely need to close and reopen your terminal/command prompt for any changes to take effect**.
74 |
75 | - **Python Official Installer** << recommended
76 | - Windows Store
77 | - Chocolatey Package Manager for Windows
78 | - Anaconda Distribution
79 |
80 | #### << **Python Official Installer on Windows** >>
81 |
82 | The Python official installer can be found on **[python.org](http://python.org)**.
83 |
84 | **Pros**
85 |
86 | * It's the primary way the Python Software Foundation delivers Python to users
87 | * The installer is supported by core developers working at Microsoft
88 |
89 | **Cons**
90 |
91 | * You will not be notified of possible updates
92 | * There is no mechanism to have a new version automatically replace the installed version
93 |
94 | **Install steps - Windows official installer**:
95 |
96 | 1. Visit the **[downloads page for Windows at python.org](https://www.python.org/downloads/windows/)**
97 | 2. Find the section entitled **Stable Releases**
98 | 3. Download the MSI installer under the **Download Windows installer (64-bit)** link
99 | 4. Run the installer - **be sure to check the "add python to my path" option**
100 | 5. Close all terminal and command prompt windows
101 | 6. Run `python -V` in a new terminal window to verify you have Python now working
102 |
103 | #### << **Windows Store version of Python** >>
104 |
105 | The Windows Store version of Python is a good option. It's the easiest way to get Python on Windows without administrator permissions. But there are some drawbacks too.
106 |
107 | **Pros**
108 |
109 | * Easiest way to get Python on Windows **without administrator permissions**
110 | * Will keep Python up-to-date automatically within a release version (3.10 updates but not 3.10->3.11)
111 | * Maintained by the core developers who work at Microsoft
112 |
113 | **Cons**
114 |
115 | * Does have some minor permission restrictions that apply to all Windows Store apps which can affect your development options
116 |
117 | **Install steps - Microsoft Store Python**:
118 |
119 | 1. Open the Microsoft Store on Windows
120 | 2. Search for Python
121 | 3. Find the latest version of Python from Microsoft (currently lists 3.7, 3.8, 3.9, 3.10, 3.11, and [**3.12**](https://apps.microsoft.com/detail/python-3-12/9NCVDN91XZQP?hl=en-us&gl=US))
122 | 4. Install from the Microsoft Store
123 | 5. Close all terminal and command prompt windows
124 | 6. Run `python -V` in a new terminal window to verify you have Python now working
125 |
126 |
127 | #### << **Chocolatey Package Manager for Windows** >>
128 |
129 | [Chocolatey](https://chocolatey.org/) is a [package manager](https://en.wikipedia.org/wiki/Package_manager): software tools that automates the process of installing, upgrading, configuring, and removing computer programs for a computer's operating system in a consistent manner. If you're comfortable using package managers, then this is a good option for you because you can continually update and maintain Python on your system.
130 |
131 | **Pros**
132 |
133 | * Will keep Python up-to-date on your system as long as you periodically run the upgrade command
134 | * Will update across versions (e.g. 3.11 -> 3.12)
135 | * Can inform you of pending upgrade if upgrade command is run
136 |
137 | **Cons**
138 |
139 | * Complex to use
140 | * Must run as administrator
141 | * Requires separate install of chocolatey itself
142 |
143 | **Install steps - Chocolatey package manager on Windows**
144 |
145 | 1. Install Chocolatey - [**steps here**](https://docs.chocolatey.org/en-us/choco/setup)
146 | 2. Open an **[administrator command prompt](https://www.howtogeek.com/194041/how-to-open-the-command-prompt-as-administrator-in-windows-8.1/)**
147 | 3. Install the latest Python: `choco install python`
148 | 4. Periodically check for a new release: Open admin command prompt and run `choco upgrade python`
149 | 5. Close all terminal and command prompt windows and reopen one (to refresh the path)
150 | 6. Run `python -V` in a new terminal window to verify you have Python now working
151 |
152 |
153 | #### << **Anaconda distribution on Windows** >>
154 |
155 | [Anaconda is a distribution of Python](https://www.anaconda.com/products/individual) that packages many of the common data science packages pre-configured for your system. It is a good option for data scientists.
156 |
157 | **Pros**
158 |
159 | * Many packages and libraries are pre-installed
160 | * Good for data science tooling in Python
161 |
162 | **Cons**
163 |
164 | * Generally uses [conda environments](https://docs.conda.io/projects/conda/en/latest/user-guide/tasks/manage-environments.html) rather than [Python's virtual environments](https://www.geeksforgeeks.org/python-virtual-environment/) - this can lead to a mismatch in instructions when Anaconda is not the primary tool used.
165 | * Packages available here often lag behind in release schedule from PyPI / pip
166 | * Often one whole version behind on Python (e.g. 3.10 rather than 3.11)
167 |
168 | **Install steps - Anaconda distribution on Windows**
169 |
170 | 1. [Download the Windows installer](https://www.anaconda.com/products/individual#)
171 | 2. Run the installer, add Python to path if asked
172 | 3. Close all terminal and command prompt windows
173 | 4. Run `python -V` in a new terminal window to verify you have Python now working
174 |
175 |
176 |
177 |
178 |
179 | _________________________
180 |
181 | ## macOS
182 |
183 | ### Step 2. Do you have Python? Let's check
184 |
185 | To determine if you have Python installed, open the [**terminal**](https://www.makeuseof.com/open-terminal-on-mac/). Verify you have Python: In the terminal, type **python3 -V** (capital V):
186 |
187 | ```
188 | $ python3 -V
189 | ```
190 |
191 | The output should be one of the following (*version numbers will vary*). Do not type **$** - macOS displays this as part of the terminal UI.
192 |
193 | #### Success, you have Python
194 |
195 | ```
196 | $ python3 -V
197 | Python 3.12.0
198 | ```
199 |
200 | If you see this and the reported version number is sufficiently high (often 3.9 or higher), **you are good to go**.
201 |
202 | #### 2.7? Uh oh, your Python is badly outdated!
203 |
204 | If `python3` **does NOT run successfully**, but `python` (without the 3) itself does and you see the output:
205 |
206 | ```
207 | $ python -V
208 | Python 2.7.18
209 | ```
210 |
211 | If you have `Python 2.*`, then you are using an outdated version of Python. [**Since 2020, Python 2 has gone entirely unsupported**](https://stackoverflow.blog/2020/04/23/the-final-python-2-release-marks-the-end-of-an-era/) and should not be used. **You will need to continue below to install Python 3**.
212 |
213 | #### Ooops, you do NOT have Python
214 |
215 | ```
216 | $ python3 -V
217 | bash: python3: command not found
218 | ```
219 |
220 | Looks like you do not have Python 3 at all. **You will need to continue below to install Python 3**. Note that the error message is slightly different for different shells.
221 |
222 |
223 | ### Step 3. You need Python, install it on macOS
224 |
225 | - **Homebrew** << recommended
226 | - Python Official Installer
227 | - Anaconda distribution
228 |
229 |
230 | #### << **Homebrew Package Manager for macOS** >>
231 |
232 | **[Homebrew](https://brew.sh/)** is a [package manager](https://en.wikipedia.org/wiki/Package_manager): software tools that automates the process of installing, upgrading, configuring, and removing computer programs for a computer's operating system in a consistent manner. If you're comfortable using package managers, then this is a good option for you because you can continually update and maintain Python on your system.
233 |
234 | **Pros**
235 |
236 | * Will keep Python up-to-date on your system as long as you periodically run the upgrade command
237 | * Will update across versions (e.g. 3.11 -> 3.12)
238 | * Can inform you of pending upgrade if upgrade command is run
239 |
240 | **Cons**
241 |
242 | * Complex to use
243 | * Requires separate install of homebrew itself
244 |
245 | **Install steps - Homebrew package manager on macOS**
246 |
247 | 1. Install Homebrew - [**steps here**](https://brew.sh/)
248 | 2. Open a **[terminal](https://www.makeuseof.com/open-terminal-on-mac/)**
249 | 3. Install the latest Python: `brew install python`
250 | 4. Periodically check for a new release: Open terminal and run `brew update` then `brew upgrade`
251 | 5. **CAREFUL**: Take careful note of any messages shown - sometimes you must [update your path](https://coolestguidesontheplanet.com/add-shell-path-osx/) (varies by default shell: bash, zsh, etc.) for this version to be located.
252 | 5. Close all terminal windows
253 | 6. Run `python3 -V` in a new terminal window to verify you have Python now working
254 |
255 |
256 | #### << **Python Official Installer on macOS** >>
257 |
258 | The Python official installer can be found on **[python.org](http://python.org)**.
259 |
260 | **Pros**
261 |
262 | * It's the primary way the Python Software Foundation delivers Python to users
263 | * The installer is supported by core developers
264 |
265 | **Cons**
266 |
267 | * You will not be notified of possible updates
268 | * There is no mechanism to have a new version automatically replace the installed version
269 | * Requires admin permissions
270 |
271 | **Install steps - macOS official installer**:
272 |
273 | 1. Visit the **[downloads page for macOS](https://www.python.org/downloads/mac-osx/)**
274 | 2. Find the section entitled **Stable Releases**
275 | 3. Download the PKG installer under the **Download macOS 64-bit universal2 installer** link
276 | 4. Run the installer
277 | 5. Close all terminal and command prompt windows
278 | 6. Run `python3 -V` in a new terminal window to verify you have Python now working
279 |
280 |
281 | #### << **Anaconda distribution on macOS** >>
282 |
283 | [Anaconda is a distribution of Python](https://www.anaconda.com/products/individual) that packages many of the common data science packages pre-configured for your system. It is a good option for data scientists.
284 |
285 | **Pros**
286 |
287 | * Many packages and libraries are pre-installed
288 | * Good for data science tooling in Python
289 |
290 | **Cons**
291 |
292 | * Generally uses [conda environments](https://docs.conda.io/projects/conda/en/latest/user-guide/tasks/manage-environments.html) rather than [Python's virtual environments](https://www.geeksforgeeks.org/python-virtual-environment/) - this can lead to a mismatch in instructions when Anaconda is not the primary tool used.
293 | * Packages available here often lag behind in release schedule from PyPI / pip
294 | * Often one whole version behind on Python (e.g. 3.11 rather than 3.12)
295 |
296 | **Install steps - Anaconda distribution on Windows**
297 |
298 | 1. [Download the macOS installer](https://www.anaconda.com/products/individual#)
299 | 2. Run the installer, add Python to path if asked
300 | 3. Close all terminal and command prompt windows
301 | 4. Run `python3 -V` in a new terminal window to verify you have Python now working
302 |
303 |
304 |
305 |
306 |
307 |
308 |
309 | _________________________
310 |
311 | ## Linux
312 |
313 | ### Step 2. Do you have Python? Let's check
314 |
315 | To determine if you have Python installed, open the [**terminal**](https://www.howtogeek.com/140679/beginner-geek-how-to-start-using-the-linux-terminal/). Verify you have Python, in the terminal, type **python3 -V** (capital V):
316 |
317 | ```
318 | $ python3 -V
319 | ```
320 |
321 | The output should be one of the following (*version numbers will vary*). Don't type **$** - Linux displays this as part of the terminal UI.
322 |
323 | #### Success, you have Python
324 |
325 | ```
326 | $ python3 -V
327 | Python 3.12.0
328 | ```
329 |
330 | If you see this and the reported version number is sufficiently high (often 3.10 or higher), **you are good to go**.
331 |
332 | #### 2.7? Uh oh, your Python is badly outdated!
333 |
334 | If `python3` **does NOT run successfully**, but `python` (without the 3) itself does and you see the output:
335 |
336 | ```
337 | $ python -V
338 | Python 2.7.18
339 | ```
340 |
341 | If you have `Python 2.*`, then you are using an outdated version of Python. [**Since 2020, Python 2 has gone entirely unsupported**](https://stackoverflow.blog/2020/04/23/the-final-python-2-release-marks-the-end-of-an-era/) and should not be used. **You will need to continue below to install Python 3**.
342 |
343 | #### Ooops, you do NOT have Python
344 |
345 | ```
346 | $ python3 -V
347 | bash: python3: command not found
348 | ```
349 |
350 | Looks like you do not have Python 3 at all. **You will need to continue below to install Python 3**. Note that the error message is slightly different for different shells.
351 |
352 |
353 | ### Step 3. You need Python, install it on Linux
354 |
355 | - **Package manager** << recommended
356 | - Anaconda
357 | - Compiled from source
358 |
359 | Note that **these instructions are for Ubuntu**. With the many variants of Linux, you many need to adjust slightly (e.g. yum vs. apt)
360 |
361 |
362 | #### << **Built-in Package Manager for Ubuntu** >>
363 |
364 | Ubuntu manages it's installed software using **[apt](https://ubuntu.com/server/docs/package-management)**. This is a good way to install and manage Python 3 on your system.
365 |
366 | **Pros**
367 |
368 | * Will keep Python up-to-date on your system as long as you periodically run the upgrade command
369 | * Will update across versions (e.g. 3.11 -> 3.12)
370 | * Can inform you of pending upgrade if upgrade command is run
371 |
372 | **Cons**
373 |
374 | * Requires root permissions
375 | * Often lags badly behind the latest version (sometimes about 1.5 years behind)
376 |
377 | **Install steps - apt package manager on Ubuntu**
378 |
379 | 1. Open a **[terminal](https://www.howtogeek.com/140679/beginner-geek-how-to-start-using-the-linux-terminal/)**
380 | 2. Update the package sources: `sudo apt update`
381 | 3. Upgrade currently installed software: `sudo apt upgrade`
382 | 4. Install the latest Python 3: `sudo apt install build-essential libssl-dev libffi-dev python3-dev`
383 | 4. Make sure we have pip as part of our Python: `sudo apt install python3-pip`
384 | 5. Close all terminal windows
385 | 6. Run `python3 -V` in a new terminal window to verify you have Python now working
386 |
387 |
388 |
389 | #### << **Anaconda distribution on Ubuntu** >>
390 |
391 | [Anaconda is a distribution of Python](https://www.anaconda.com/products/individual) that packages many of the common data science packages pre-configured for your system. It is a good option for data scientists.
392 |
393 | **Pros**
394 |
395 | * Many packages and libraries are pre-installed
396 | * Good for data science tooling in Python
397 |
398 | **Cons**
399 |
400 | * Generally uses [conda environments](https://docs.conda.io/projects/conda/en/latest/user-guide/tasks/manage-environments.html) rather than [Python's virtual environments](https://www.geeksforgeeks.org/python-virtual-environment/) - this can lead to a mismatch in instructions when Anaconda is not the primary tool used.
401 | * Packages available here often lag behind in release schedule from PyPI / pip
402 | * Often one whole version behind on Python (e.g. 3.11 rather than 3.12)
403 |
404 | **Install steps - Anaconda distribution on Ubuntu**
405 |
406 | 1. [Download the Linux installer](https://www.anaconda.com/products/individual#)
407 | 2. Run the installer, add Python to path if asked
408 | 3. Close all terminal and command prompt windows
409 | 4. Run `python3 -V` in a new terminal window to verify you have Python now working
410 |
411 |
412 |
413 |
414 | #### << **Building python from source on Ubuntu** >>
415 |
416 | While we would not generally recommend building Python 3 from source, if you need the very latest on your system, often this is one of the few options available.
417 |
418 | **Pros**
419 |
420 | * You'll have the very latest Python you've gotten from source (potentially even pre-release versions)
421 |
422 | **Cons**
423 |
424 | * Complicated and fraught with pitfalls
425 | * Can require root permissions for additional build libraries
426 |
427 |
428 | **Install steps - Building python from source on Ubuntu**
429 |
430 | 1. Open a **[terminal](https://www.howtogeek.com/140679/beginner-geek-how-to-start-using-the-linux-terminal/)**
431 | 2. Ensure your package listings and software are up-to-date: `sudo apt-get update`
432 | 3. Install the build tools: `sudo apt-get install -y build-essential checkinstall`
433 | 4. Add additional libraries needed by Python to build: `apt-get install libreadline-gplv2-dev libncursesw5-dev libssl-dev libffi-dev libsqlite3-dev tk-dev libgdbm-dev libc6-dev libbz2-dev`
434 | 5. Change into the src directory: `cd /usr/src`
435 | 6. Get the latest source from [python.org/downloads/source](https://www.python.org/downloads/source/) and wget it locally, e.g.: `sudo wget https://www.python.org/ftp/python/3.12.0/Python-3.12.0.tgz`
436 | 7. Decompress it (varies by version): `sudo tar xzf Python-3.12.0.tgz`
437 | 8. Change into the created directory (varies by version): `cd Python-3.12.0`
438 | 9. Prepare it for compilation: `sudo ./configure --enable-optimizations`
439 | 10. Compile it without modifying system Python: `sudo make altinstall`
440 | 11. Verify this version was built (varies by version): `python3.12 --version`
441 | 12. Use `python3.12` instead of `python` or `python3` commands
442 | 13. Consider creating an [alias](https://www.howtogeek.com/73768/how-to-use-aliases-to-customize-ubuntu-commands/) of `python3.12` to `python` in your shell profile.
443 |
444 | There is a [nice write up of this procedure over here](https://towardsdatascience.com/building-python-from-source-on-ubuntu-20-04-2ed29eec152b).
445 |
446 |
447 | -------------------------------
448 |
449 | ## Corrections and improvements
450 |
451 | If you find a problem or have a suggestion to make this page better, please visit the GitHub repository here. Note that this is not intended for tech support but rather for genuine, broadly applicable improvements to the instructions:
452 |
453 | [**https://github.com/talkpython/installing-python**](https://github.com/talkpython/installing-python)
454 |
--------------------------------------------------------------------------------